VaughnT
Members
-
Joined
-
Last visited
Everything posted by VaughnT
-
There's a trader that regularly posts his wares on CL. Older gent and a great guy to talk to -- always got a dozen or more anvils for sale as well as all the other smithing gear you could ask for. His prices are fair market prices, so don't expect a penny-a-pound deal. If memory serves, he's just east of Atlanta. I'll check around to see if I can find one of his listings.
-
John, I'm always up for advice so don't hold back. My skin's thick enough and I appreciate a good critique. 1) Arc length seems to be one of those things that experienced welders know, but you can't get it across in a video or text. I did what I did, but I couldn't tell you if my arc length was good, bad, mediocre, or a combination of all three. Aggravating stuff! From what I recall, I was trying to keep the fingernail of flux just lightly scraping the steel as I dragged the rod along. This fingernail kept catching on the uneven surface of the previous beads, but does that mean I was short-arcing and too close for that application? Does that mean I need to turn up my "arc force" setting to get more oomph? Or do you just need to hold the end of the rod farther away so you're not using that fingernail of flux as your guide? 2) I'd love to not leave those thumbprints. I think they look neat, but I'm going for that perfect stack of dimes. I'll try swirling next time I run a rod. 3) Please feel free to have a conversation with my welding rods. I tried my dangedest to get them to run right at the edge of the previous bead, but they just flat refuse. I have a self-darkening helmet and will play with the settings to see if I can get it set in a way that helps my eyes. My eyes have a hard time focusing through multiple layers of glass and such, so I need to weld without my spectacles (or look over the top of them) while trying to keep the bead in that sweet spot where things are visible.
-
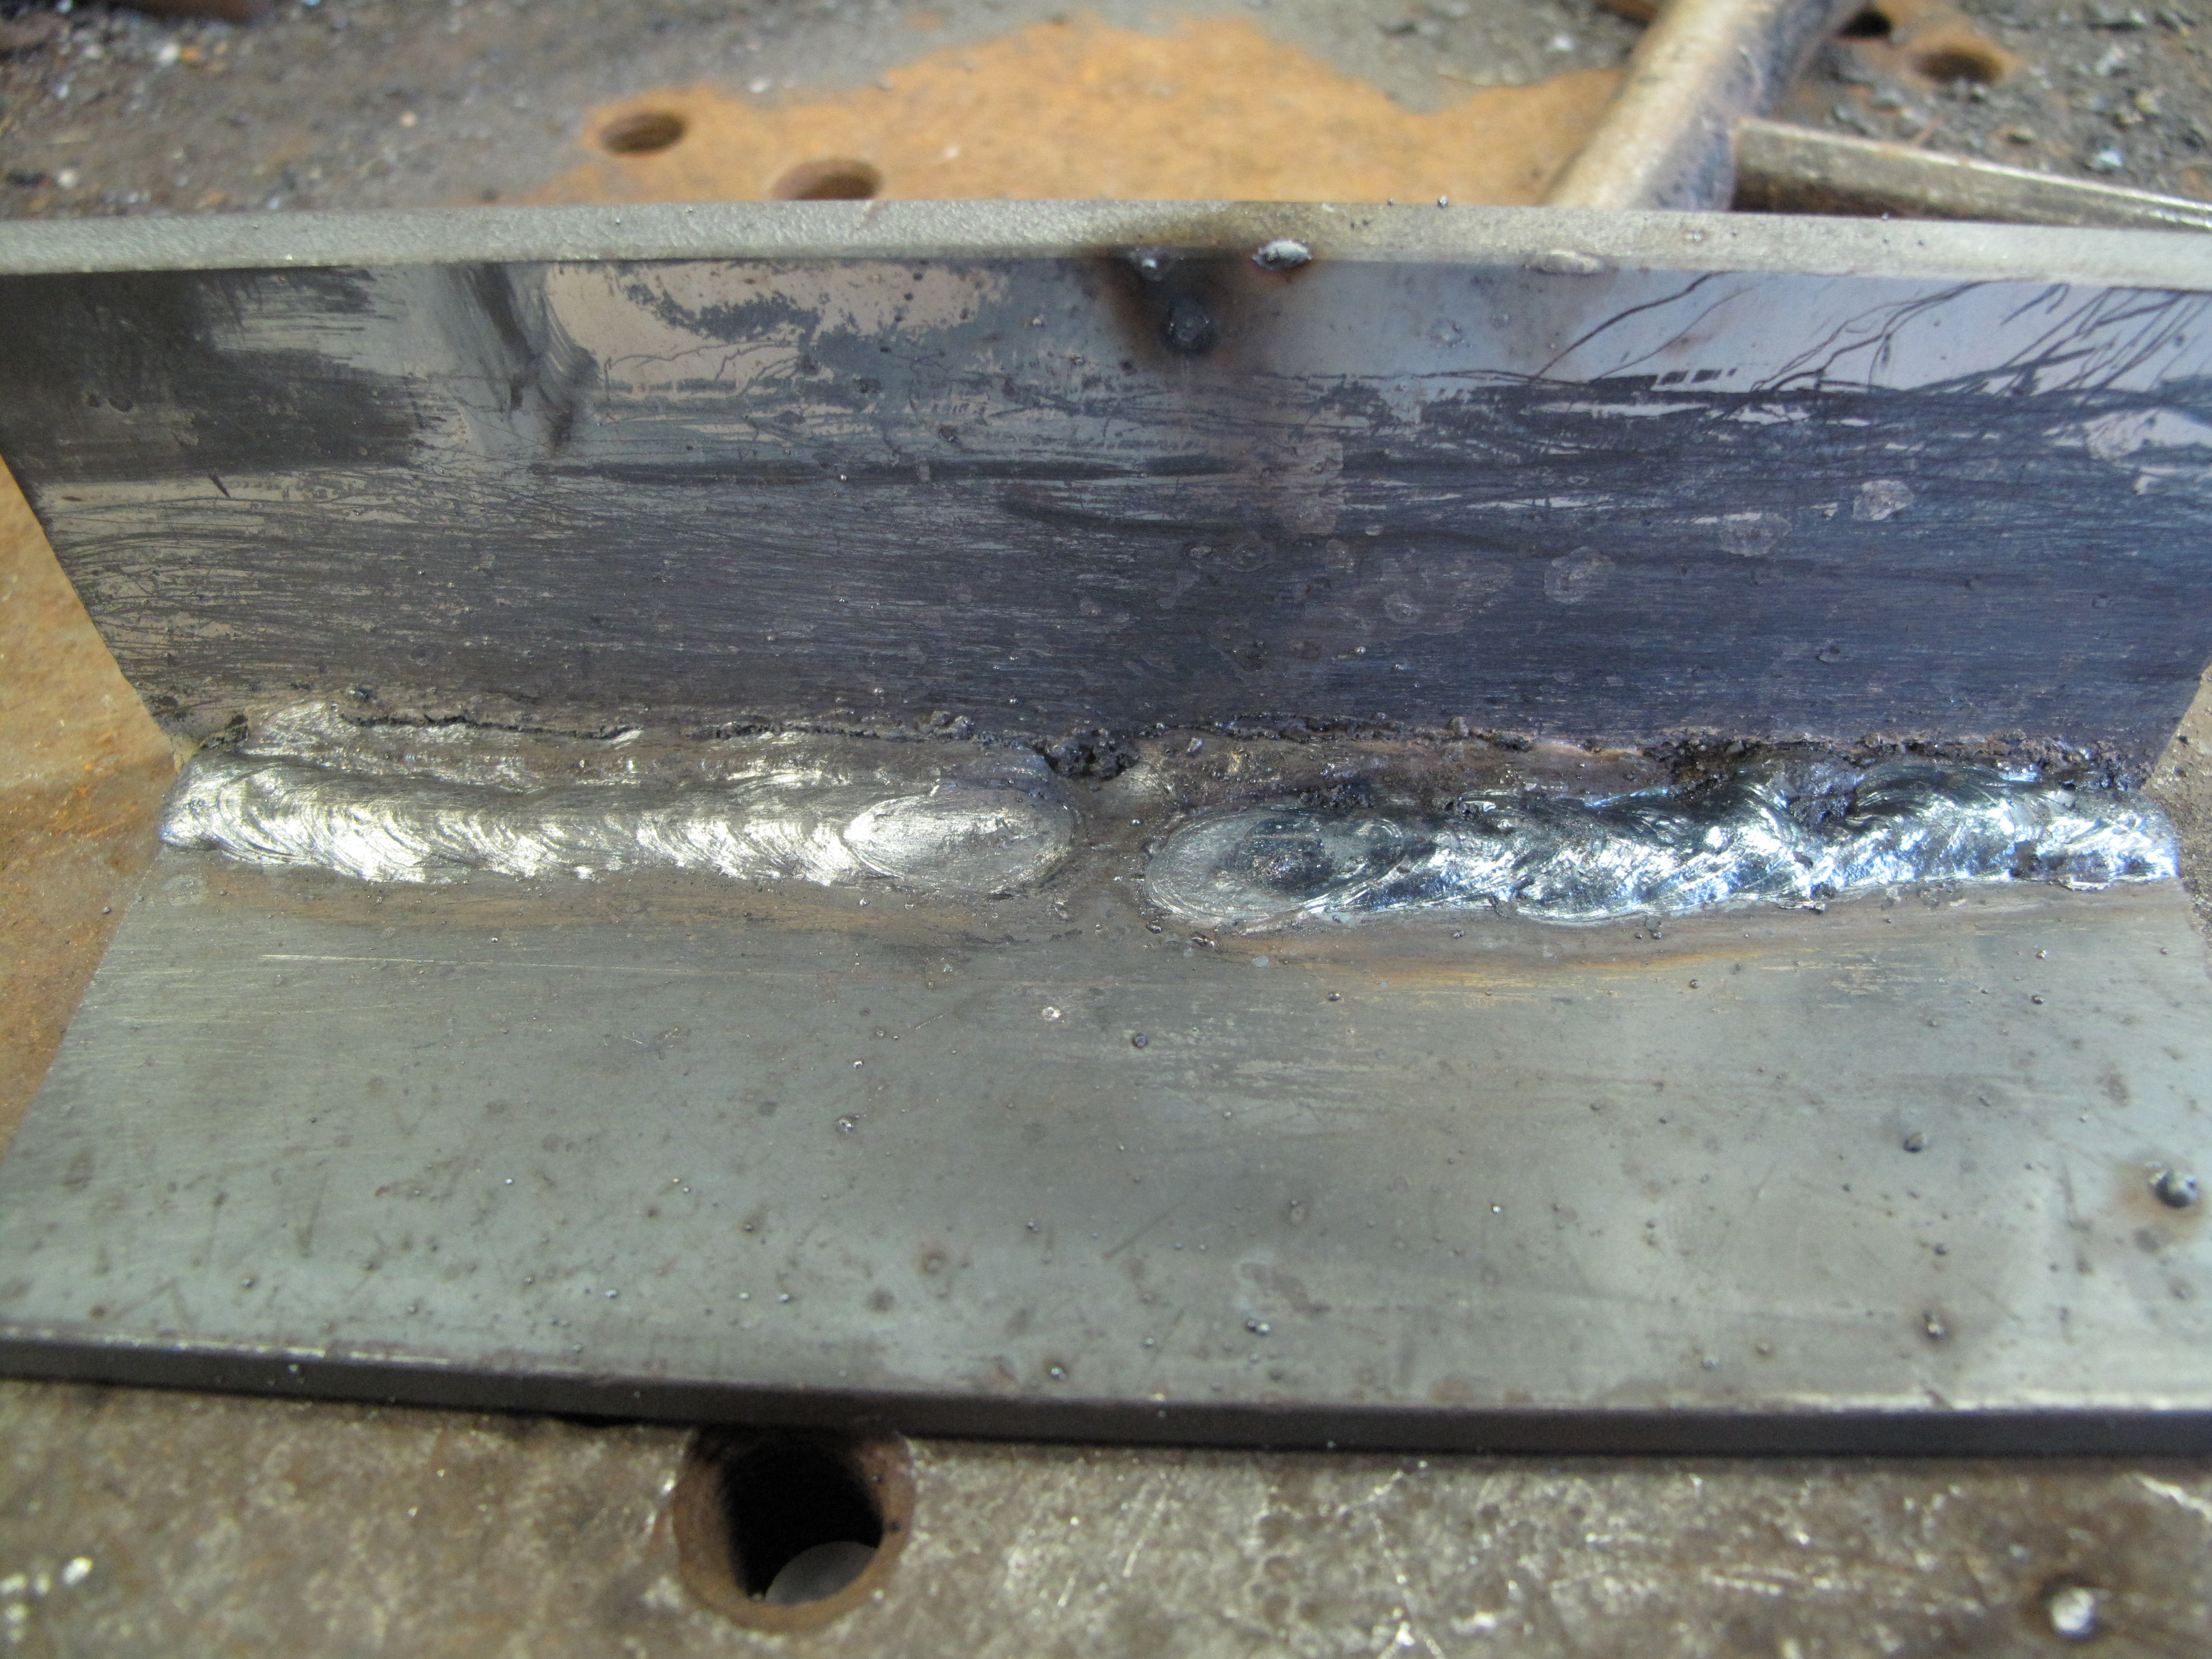
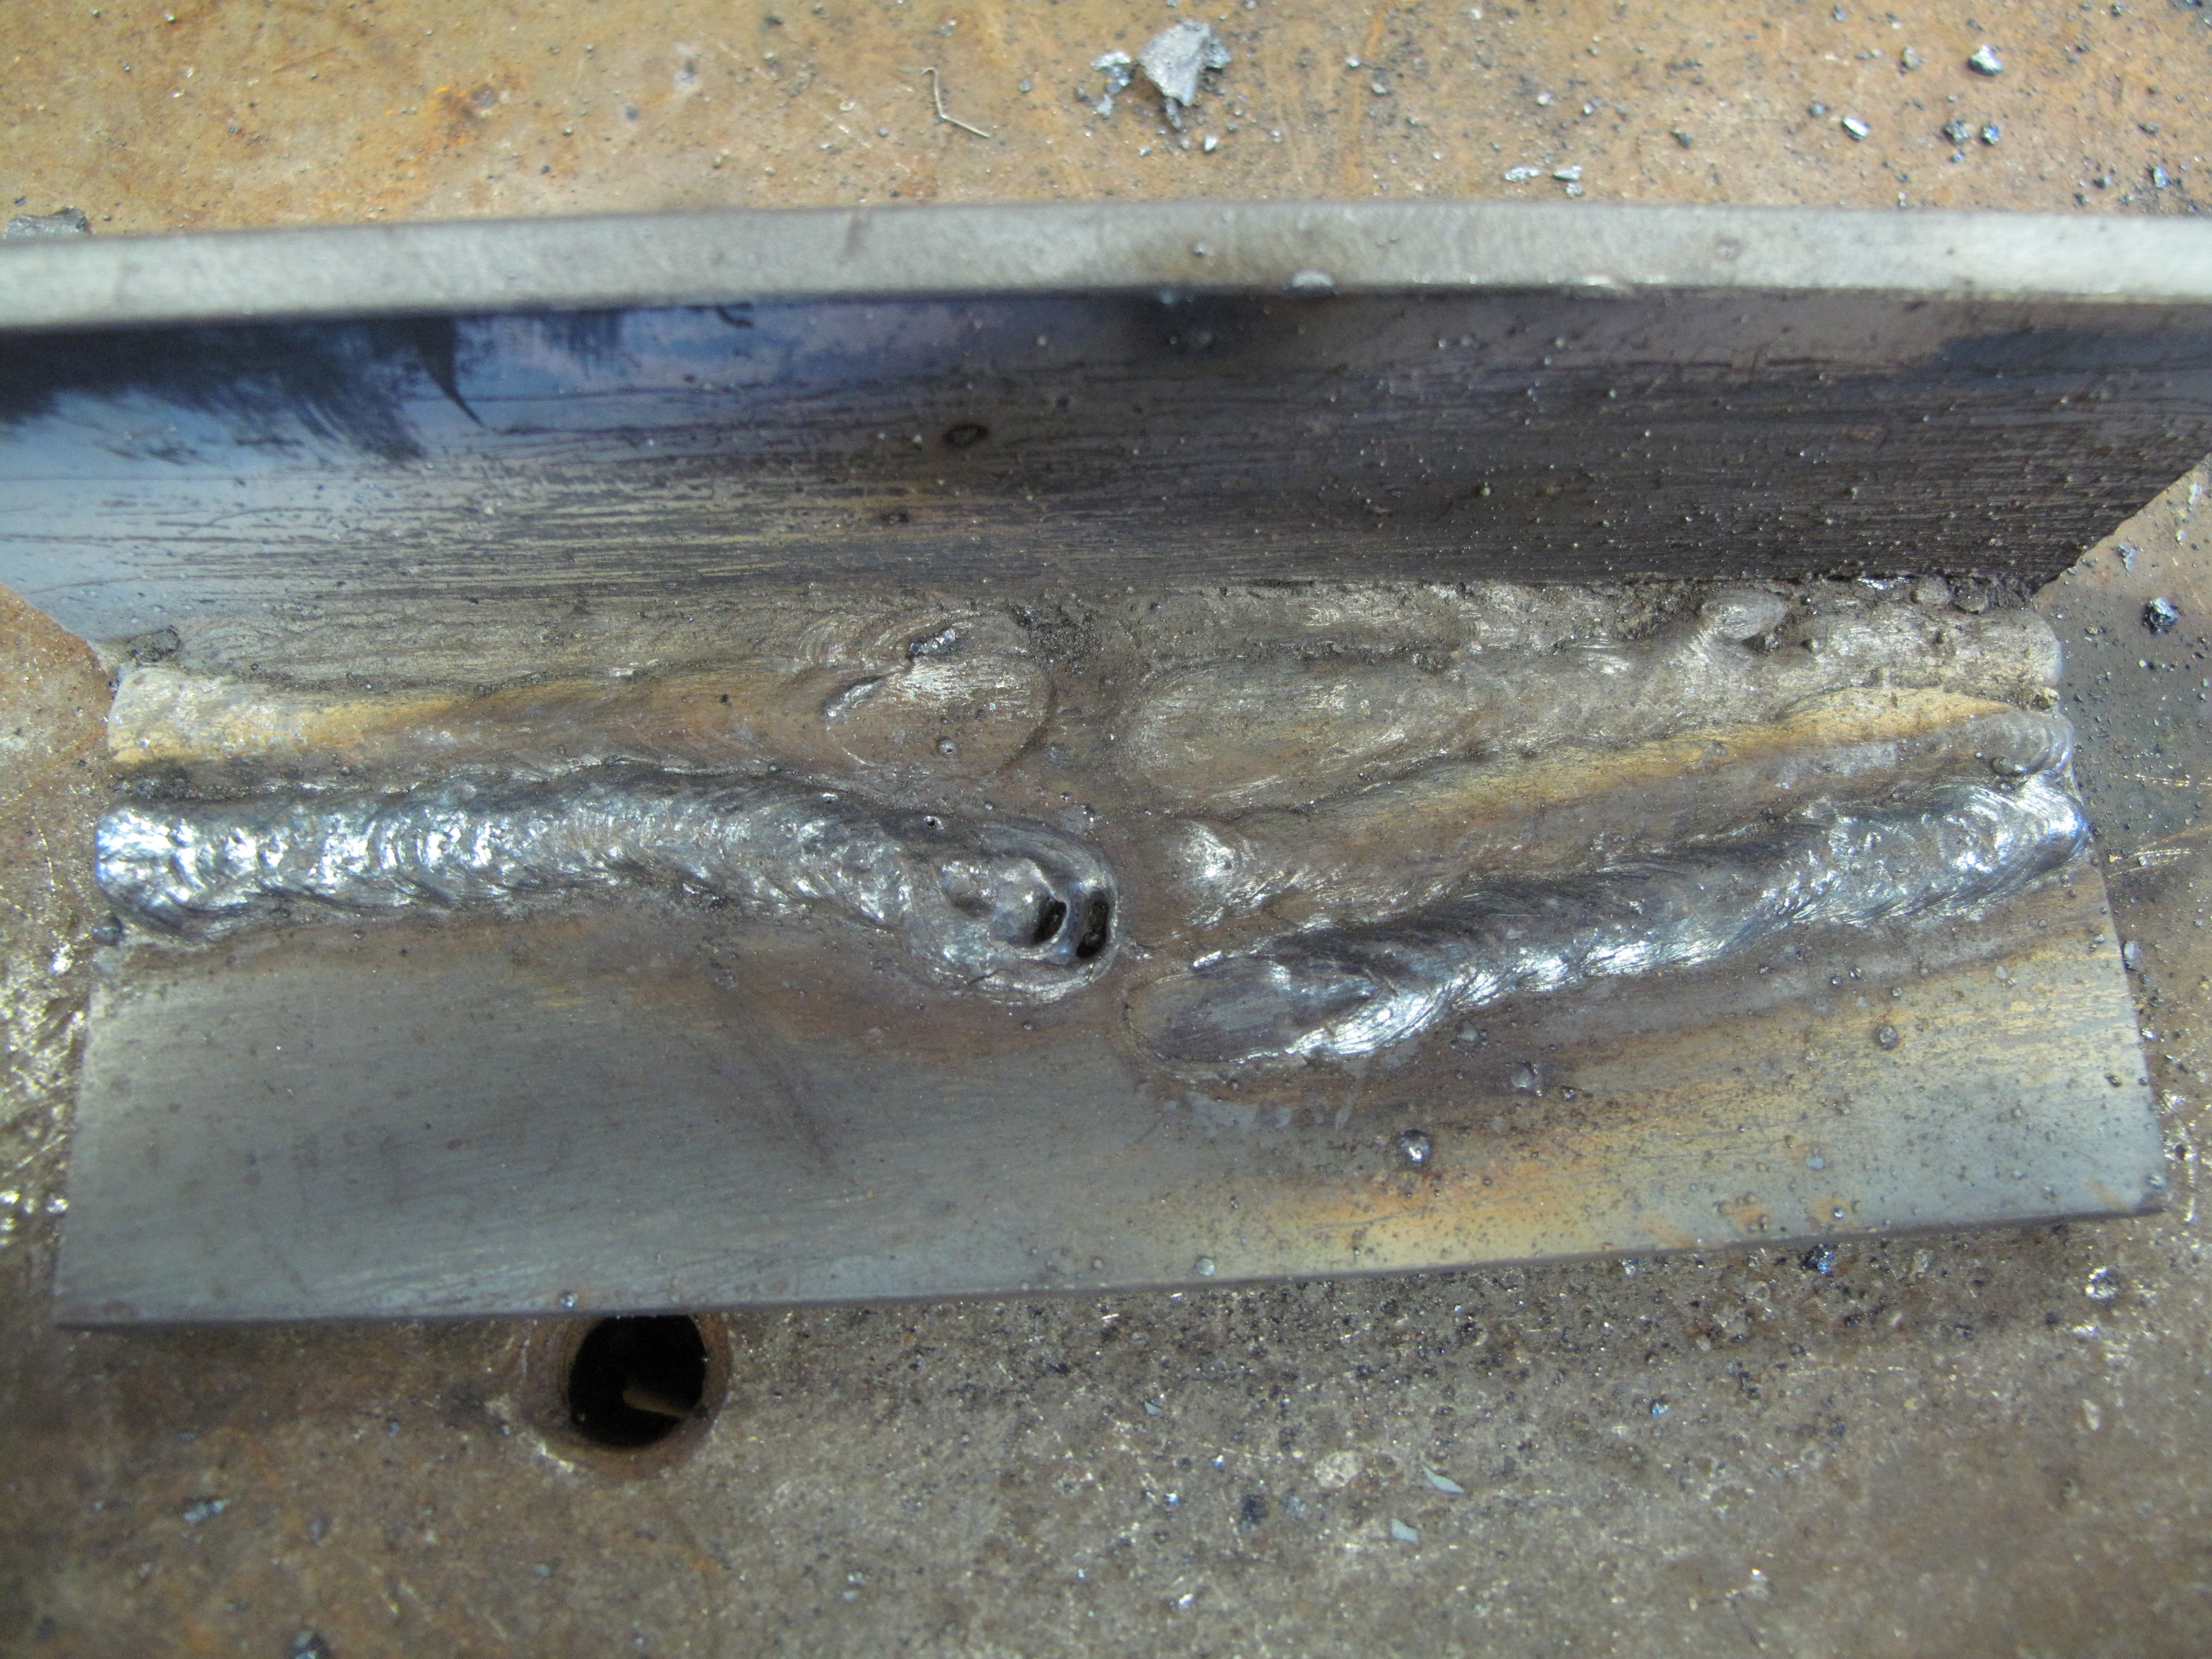
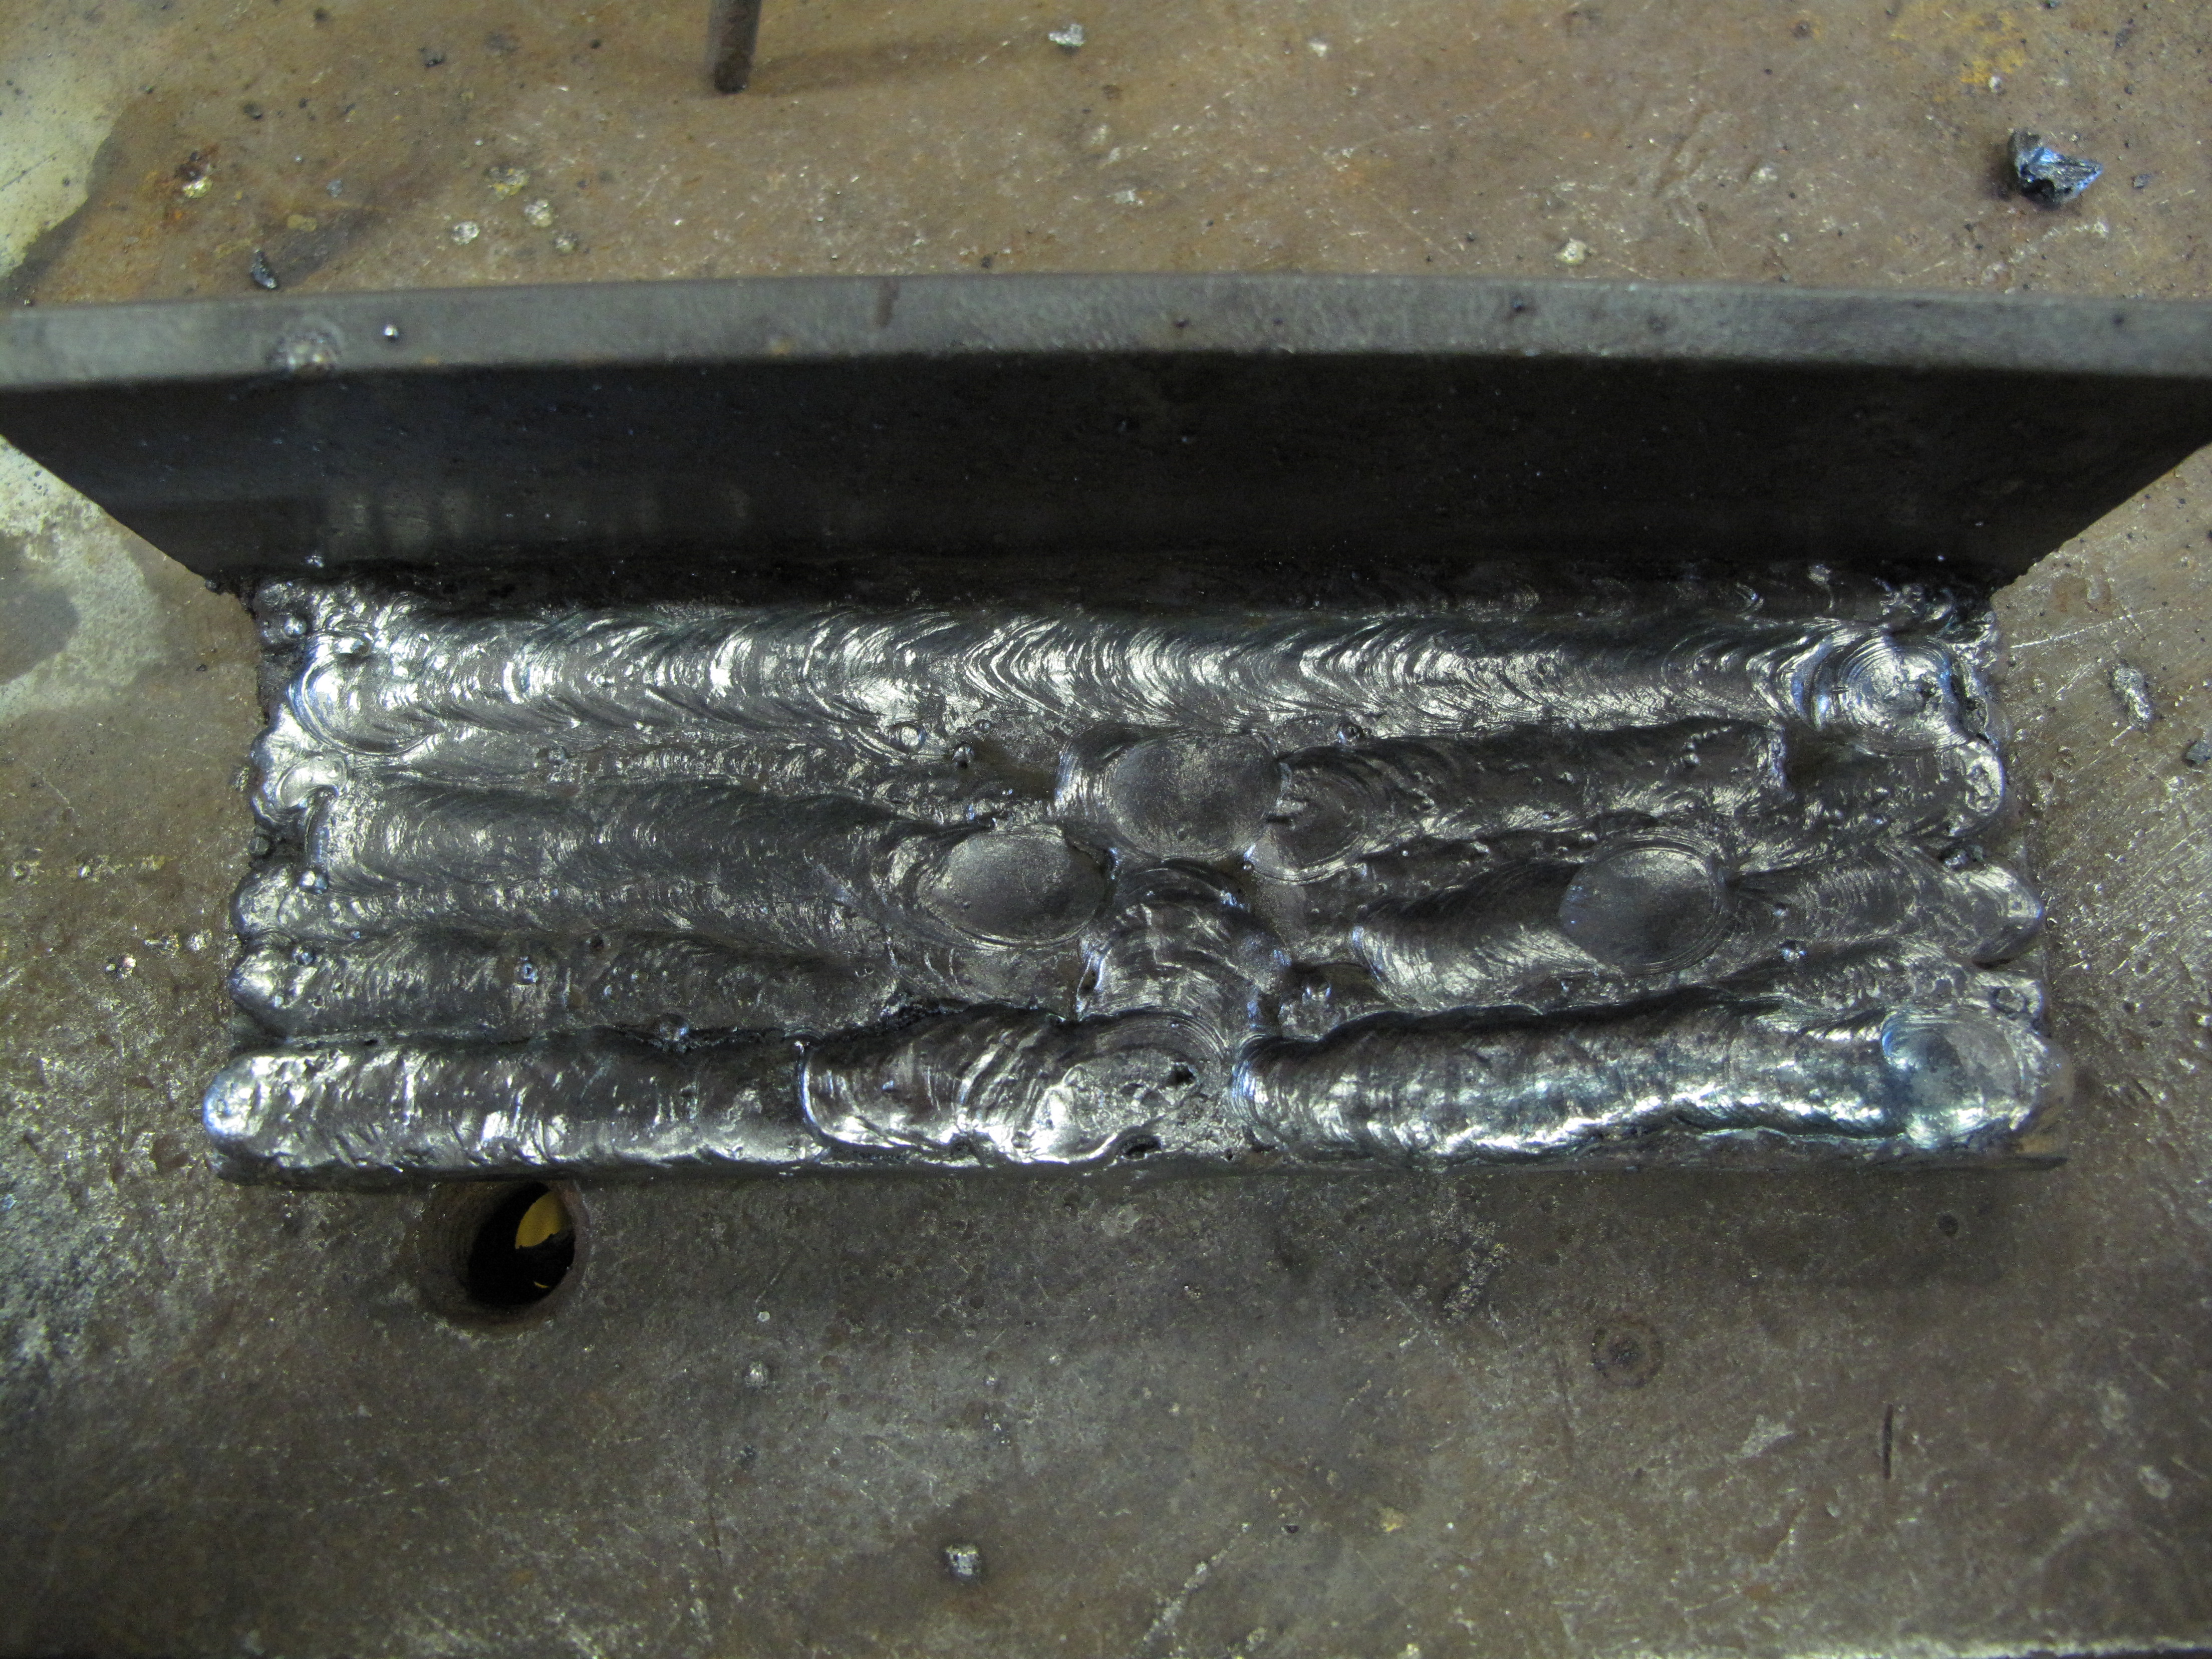
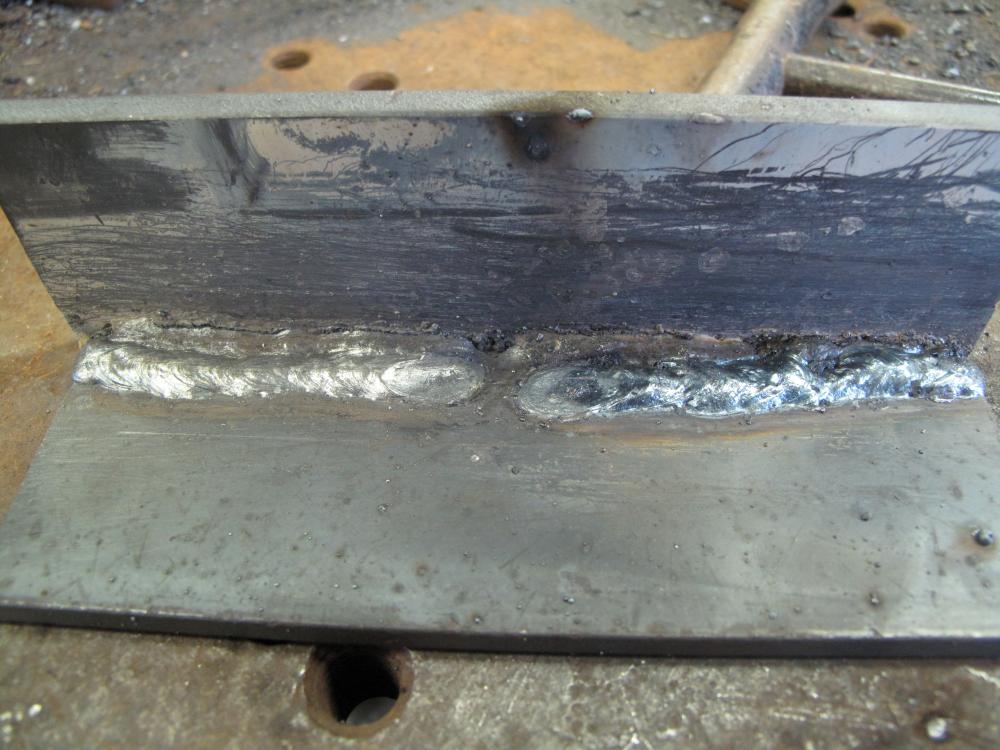
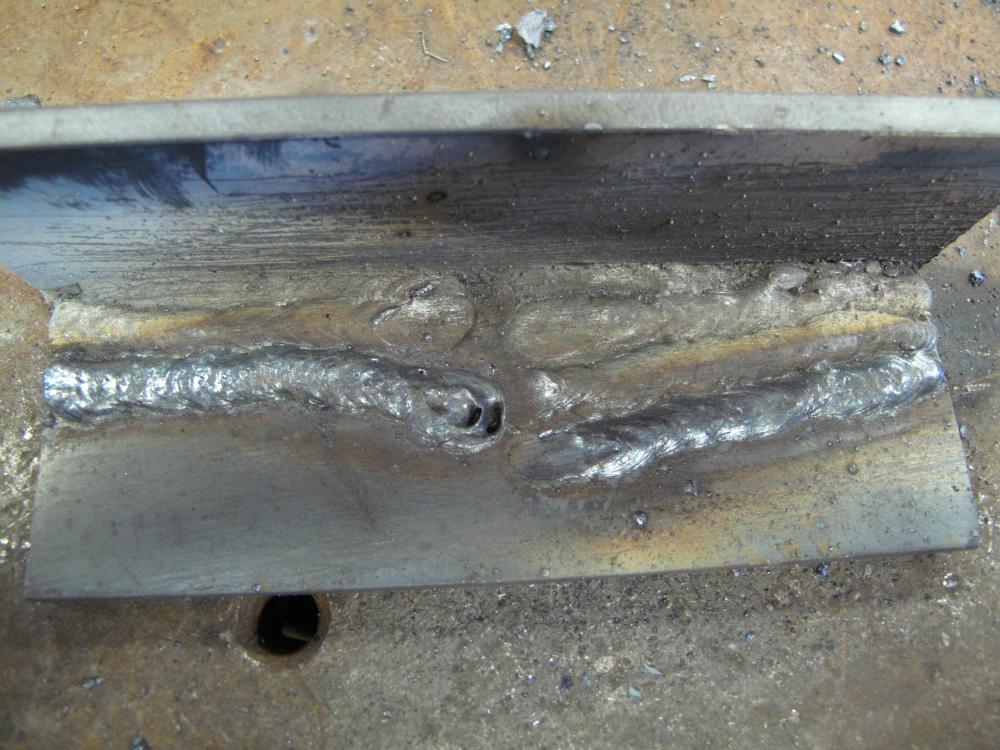
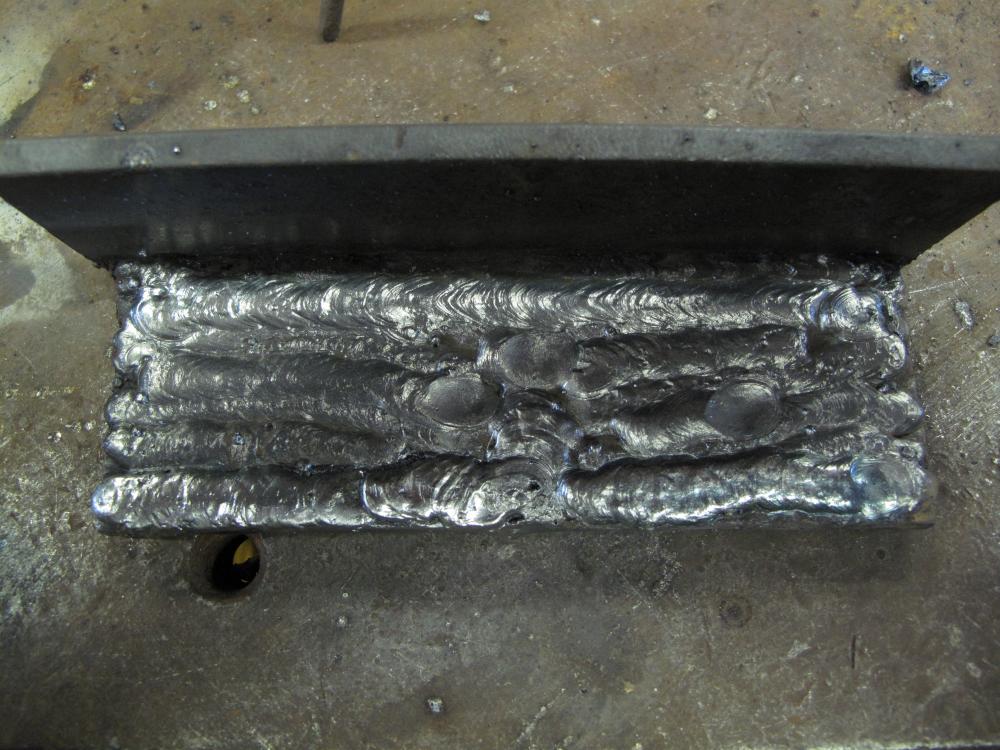
Since I'm banned from posting any more in my other thread.... I checked my rods again and they're rated for 120-145 amps +-. 1/8" 7014 from Tractor Supply because it was cheaper than the 7018 they had and I couldn't figure there'd be any difference between the two. Switching my machine over to run electrode positive made all the difference in the world. I never would have thought it would be a thing, especially since the stinking rod company said their rods were good for either polarity. Why say that if it's not true? Anyhow, I turned the arc force knob down to 2 because that was mentioned in the pdf linked in the other thread. I have no idea if this made a big difference in anything, but it sure didn't seem to hurt anything. My first run.... Looks like the first beads were undercutting the vertical coupon. Not sure exactly, but then I'm more of a grinder than a welder. Right now I'm only good for welding a few inches before the shakes set in and I loose sight of things in all the smoke and such. Bad eyes certainly don't help. So, I ran l-to-r and r-to-l, meeting in the middle. Here we can see just how bad I get. I'm still in the warm-up phase, but trying to see where I'm going is a bear. Instead of a straight drag, I have to do a zigzag so the light from the arc gives me a little illumination... and it's still not the high-beams I'd prefer! Any idea what caused the explosion at the end of the bead? I love the look when I'm doing a dragon's fang, but I'd really like to be able to do it on-demand rather than just having it happen. This is the only instance in all the rods I burned and I didn't catch notice of anything odd when I pulled away. After three layers of beads, I decided to call it quits and do some forging. All told, I'm very happy with how I ended things. I still need to work on my starts and stops, and find a way of dealing with the edges of the metal. I like the big ol' thumbprints at the end of my runs. The plan is to keep welding this sucker until it's a chock full of beads. Then I'll flip it over and start welding on the other sides. Between the 7014 and 6013 rods, I think I can weld up just about any project that comes to mind. So, I'll keep welding on this, practicing for a few rods every time I get a few minutes in the shop. Certainly can't say enough about all the help, gents. Never would have known about that arc force thing or trying E+. I should have posted my questions a long time ago and saved myself no end of frustration!
-
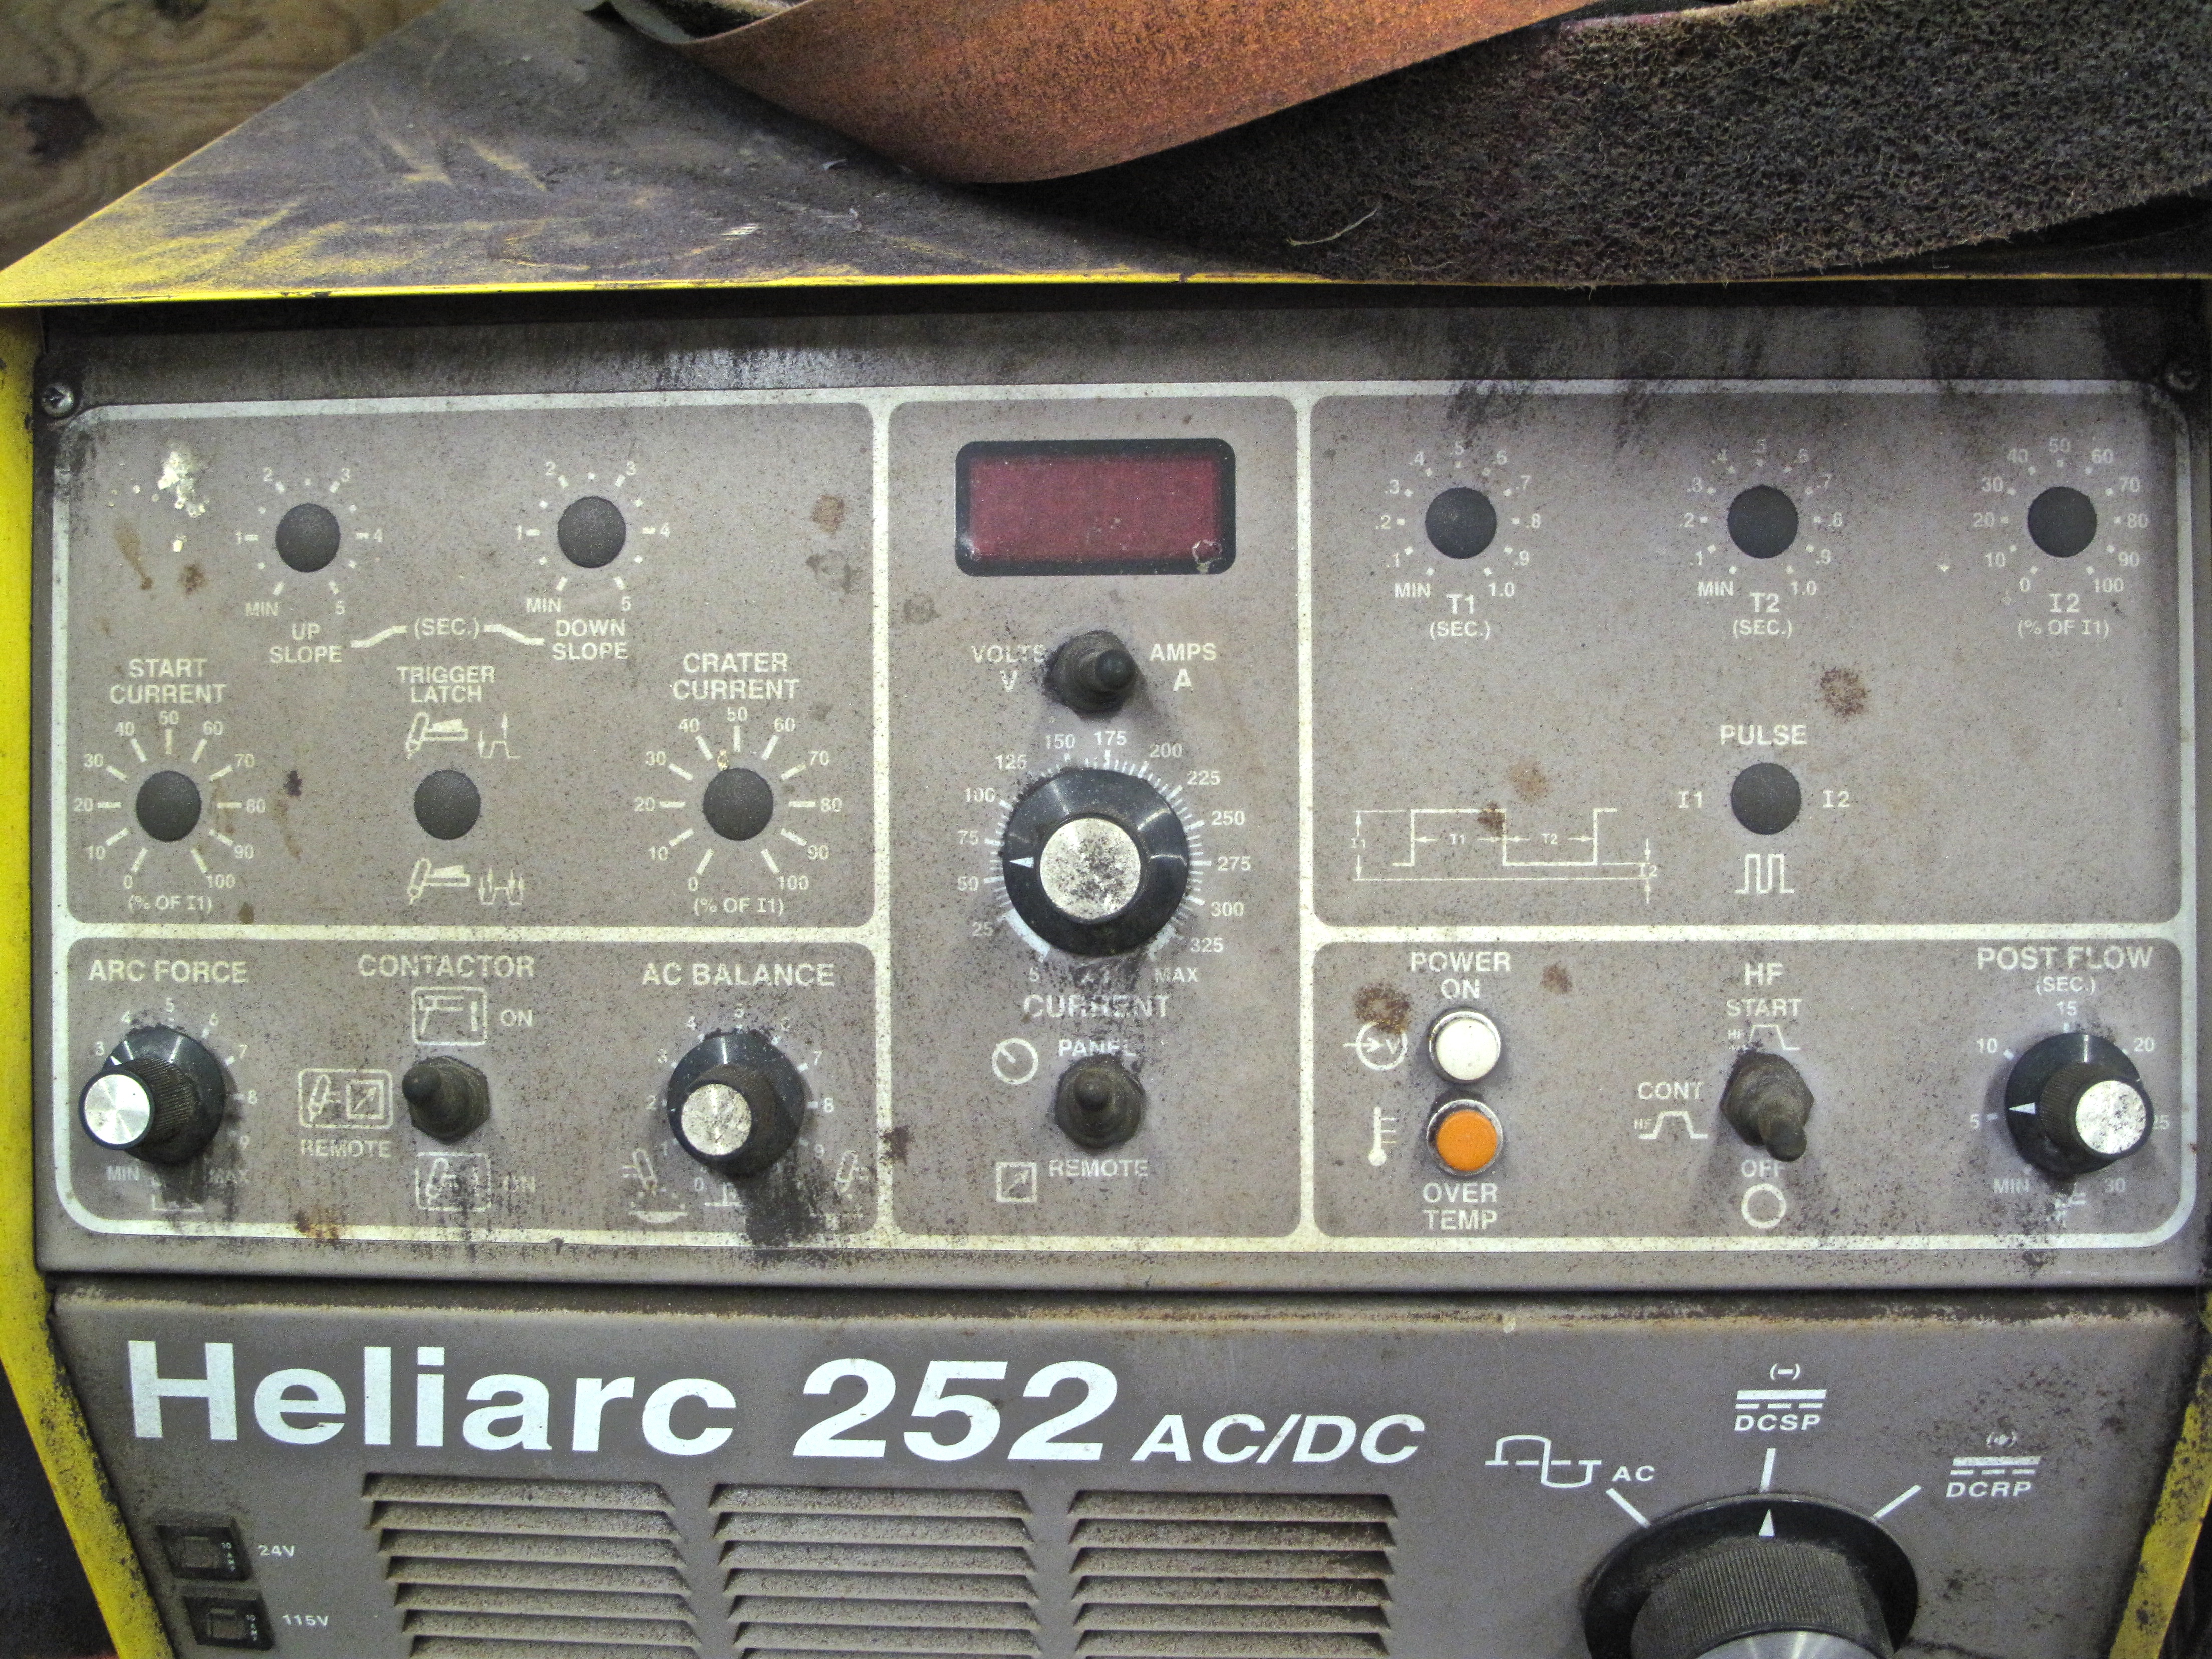
The biggest problem I've had is trying to determine what is causing a particular issue when there are so many variables. The rods say they are +-, 120 -170 amps... I mean, can't you narrow it down a bit? Why give such a huge range of possibilities? And why does every video talk about volts and amps, but not this mysterious "arc force"? It's no wonder that a good welder gets paid good money! I'll try switching it over to electrode positive and dialing down the arc force to 2-4 like the above-linked manual talked about. Got my Ultra Jig in the mail from Yesteryear Forge and have a full day of smithing/tinkering planned, so I might as well throw some weld practice in there!
-
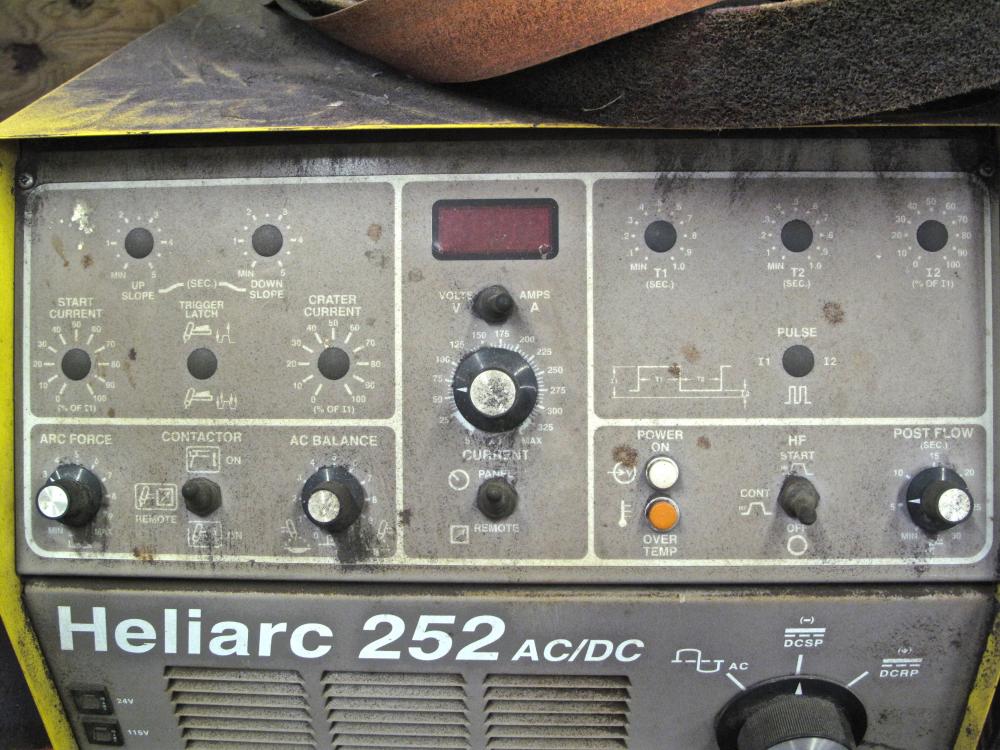
I got her used, and really like that she's flying Steeler colors. I thought that would be good mojo for a metal guy, but apparently she thinks I'm some kind of Cowboys fan. It didn't come with a manual, so I'm trying to figure things out as I can. No formal training outside of high school metal shop more years ago than I care to think about. The good news is that there's youtube nowadays and that fellow Jody over at weldingtipsandtricks.com really puts out some good videos. I've even let my machine watch a few of his videos on the telephone so she'd understand what I was wanting her to do. She doesn't listen. I ran out of 7018 rods so I picked up seem 1/8" 7014 at Tractor Supply. The box says 120-170 amps, iirc, but that produces some of the worst beads you could imagine, with BB's flying everywhere and serious gouging of the metal. It's like a blowtorch more than a welder. I toned it down to around 80 amps and set the "arc force" (whatever that is) down a good bit, and it makes a fairly decent bead for a guy like me. Living and learning, very slowly. I need to call Heliarc to see if they have a spare manual for this thing so I can decipher what all the dials mean and how they are impacting my welding. I'm sure it's the machine's fault the beads are coming out all sloppy. Anyone familiar with these machines? Do they have peccadilloes I should know about?
-
Yes. Yes, I do. You'd be surprised at how many people will buy them just to put them in the garden and never get rung! Check out the guy from "imakebells" dot com. Very impressive metalwork.
-
Turn then into gongs. Same concept as a dinner triangle bell, but bigger and cooler.
-
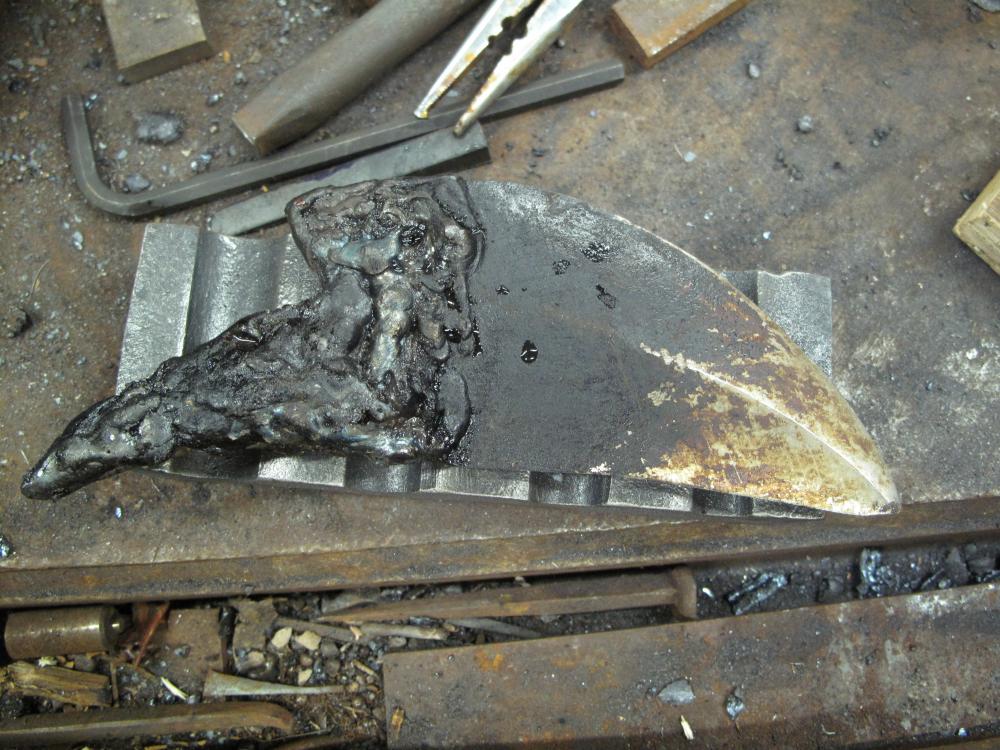
No burning, just really bad welding, doing everything wrong that you could imagine. You have to use the rod like a paint brush, going over places two or three times, to create that organic look. The substrate of the root is just little odd pieces found in the pile of stuff every shop has. A rusty bolt, a weird angle cut from a larger project, anything to take up some space and give you something to blob your beads on.
-
Everything about dragons is awkward. They are the most obstinate creatures you'll ever run across and just plain refuse to cooperate in the least.
-
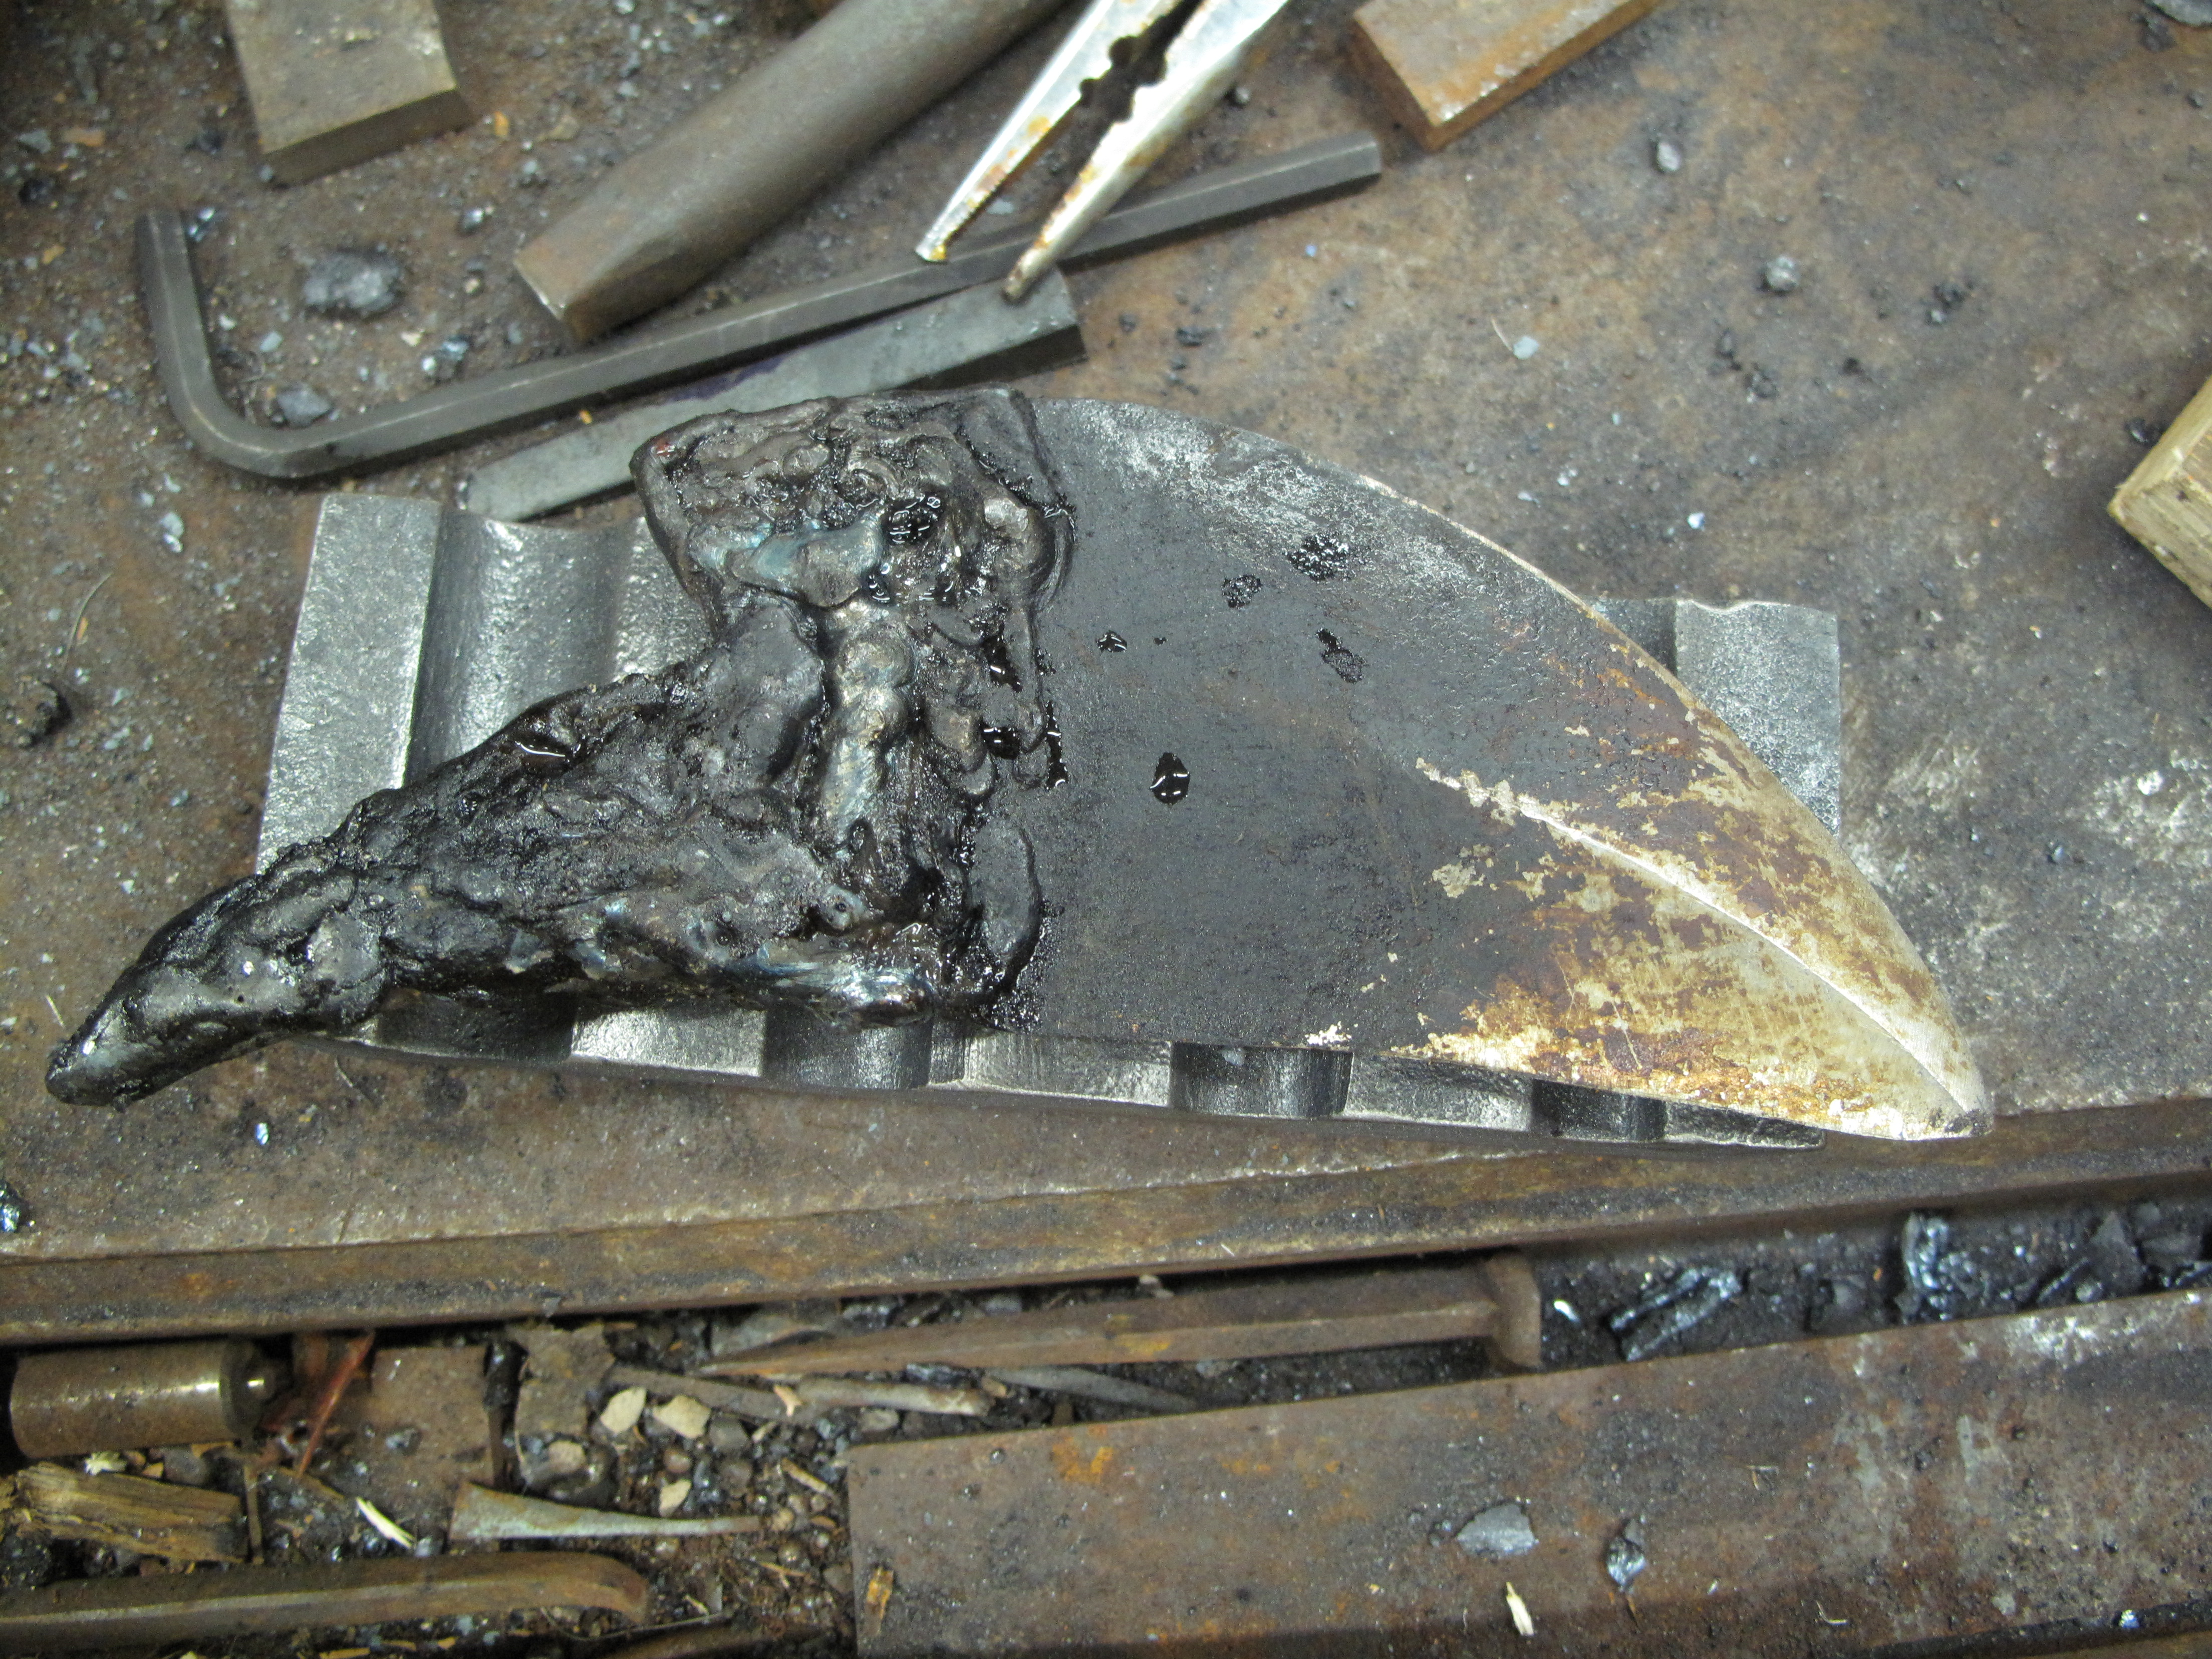
More a molar than a fang, this little girl is from the back of the lower mandible. You can see all the grunge cooked on by the hot dragon's breath. Not much smells worse than putrified dwarf baked on a dragon's tooth! Now I need to figure out a way to glue a bunch of bones together to make a nice display stand.
-
Cut 4 sections from the beam. Weld those sections between two pieces of plate (top and bottom) so you have plenty of vertical space to add other features. A nice wide base is a good thing.
-
With that nut there, I'd use it as the foundation to weld the hooks. It doesn't have any "character" so you're not losing anything by welding to it. And it would be a sure sight easier to fix hooks to it rather than the uneven surface of the main shaft. Another option would be to get a section of plain pipe that's large enough to fit over the shaft where it's tapered at. Slice the pipe in half lengthwise and you can make it into a clamshell that you can weld your hooks directly to. It can even be decorated with some punches and chisels to dress it up. Because the shaft tapers, you don't have to worry about the clamshell slipping down. One or two tack welds would keep the think from revolving and not take away from the overall look.
-
Something a little different.... A while back, I decided to play around the concept of the flint striker that folks like to use for making fires. There are a bunch out there, but I wanted to so something different and came up with what I call the cornucopia style that's sized a bit small so it can be worn as a pendant/dangle/key fob. They're small enough to not be in the way, but large enough to get a good grip on. And they have plenty of striking surface to give you a decent spark. Forged from 1080, water quenched.
-
Rune fobs, you say????? Small pendants/fobs/zipper charms about 1.25" tall, all hand carved. A high-carbon Mjolnir flint striker with a Hungarian (?) rune on both sides Mild steel with a bind rune that I thought looked rather nice. Hated to get rid of it because it was so pleasing to simply run your thumb over while thinking on something! A little chunk of mild that said it wanted to be something more....
-
A little key fob about 2" long, 1" wide. The kokopelli was carved in by hand, with a few little chisels. Here's a little something I call the Celtic Swan. It's a good warm-up exercise and uses up those little end pieces we always seem to collect.
-
That's a pretty big chunk of metal, but it's impossible to say if it's suitable as a striking anvil. It might be cast iron, like a tractor weight, and thus not good for a striking anvil. There might be a giant hole under the screw jack, hence the differing width. Just too hard to say. Though, if it is quality steel, mild or otherwise, it would certainly work as a striking anvil. Just depends on whether it's cast iron or not.
-
You've always got the best stories!
-
I like one side of the vise to be clear of any obstructions in reasonable proximity so I can spin a wrench or work on something that might have a bend in it. The distance from the jaws to the edge of the table, on one side, should be at least 8", or the length of a long wrench. Not written in stone, obviously, and I would hold off on any modifications until you've used it for awhile. You might find that you just never need anything other than what you have. No sense fixing what ain't broke.
-
-
There are a lot of idiots in the world, and the internet gives them a voice. I wouldn't pay any mind to them. As for working with modern tools..... I love it! I'm a lousy welder, but I love that I have a welder and can fasten two pieces together in a jiffy. Most customers don't want to pay for the labor as it is, they'd really have a conniption fit if you did everything like in 1875 and charged them for the hours involved!
-
I've long lamented the way industries have turned their backs on quality. Sadly, it's not just in the tools. Look at a grade-school curriculum from the early 1900's and compare it to today. Art, architecture, manufacture, thinking.... everything has been dumbed down.
-
Biggest gear I've ever seen was only 4' in diameter and the guy was using it as a stoop outside the door to his shop. I can't even imagine one 10' across! For a shop, I think it would make a fantastic attention-getter if you stood it upright somehow. I'm picturing an arm across the top with some bearings so it can spin freely if visitors want to give it a go. Kinda like that coral castle down in Florida.
-
Very nice. I think the clean simple lines only add to the overall impact. I just picked up a slew of 1x1/4 to make a bunch of brackets for the remodel of my bedroom (wall of books!) and can see this design fitting in just perfectly.
-
The cut-outs for the lugs would have been easy enough for any decent shop hand, but if there are corresponding holes for a through-bolt.... that gives me the notion that it might be Fisher OEM. I've not seen a lot of Fisher stands and don't know how common they were back in the day. I wouldn't be surprised if they offered it as an option, especially for large industrial anvils like you've got. I'd love to have been able to walk through the Bethlehem steel plant back in the day. I grew up in the Pittsburgh area and always enjoyed roaming through the closed/dilapidated factories I could (ah, to be young again!).
-
Very interesting design. I haven't seen a hammer like that before and certainly wouldn't mind more photos....