VaughnT
Members
-
Joined
-
Last visited
Everything posted by VaughnT
-
I'm the world's worst when it comes to demonstrating because I talk too much, they say. I give a srhpiel and do everything possible to get the audience involved in what's going on. Everything depends on how long the audience is going to be with you. If it's a static audience where folks sit down and watch from start to finish, that's a whole world different than an audience where folks are moving in and out. The former means you can hang out with them and go through a lengthy project. The latter means you need to use one project that has multiple facets that allows you to demonstrate different tricks of the Trade along the way. I've take over an hour to make a single hook. The key is going super slow and talking about the step your working on. You might be tapering the point, but you can talk for ages on how you taper and why tapering is important and how it can be used on other projects. Then you can talk about scrolling and turning and how that can be used elsewhere. When you get towards the end and are ready to punch the hole for a screw, you can talk all about the tools and techniques and how they're applied elsewhere. Bottom line is that it's about the show. How you look and speak is far far far more important than what you're making. Shoot me a PM if you think it'd help.
-
Great stuff, as always. I really enjoyed the video.
-
The nice thing about being poor is that you can appreciate what you have. Looks like you're well along the path to prosperity!
-
It wouldn't surprise me to see any vinegar solution weaken and break down whatever gunk has accumulated in the hardy hole, causing it to run. You've got a good looking anvil and you should be happy with it. As long as it has a solid rebound, you're good.
-
I've been following this guy on youtube and he does some really neat work. His vids are all in Russian (I'm guessing) so you can understand what he's saying, but the skills translate around the world. I particularly like seeing how he adapts the tools and materials from his region - whether it's building a tire hammer or this blown burner for his forge. https://www.youtube.com/watch?v=d0cZWforqow
-
Stretching yourself is a good thing... sometimes. If you have an order to fill, do it in the most economical way possible and save the stretching for when you're just tinkering around and don't have a deadline looming. Depending on the scale, I'd consider some heavy brass wire/rod bent into the star shape. It would look good and add a bit of flare to the steel body. Or, get some 3/16" bar and chisel out the star so it can be welded onto the main portion. I like DSW's idea of punching a round hole in the center of the star rather than opening the entire star. It cuts down on your work and the technical difficulty of the project (which is good for the customer's bottom line).
-
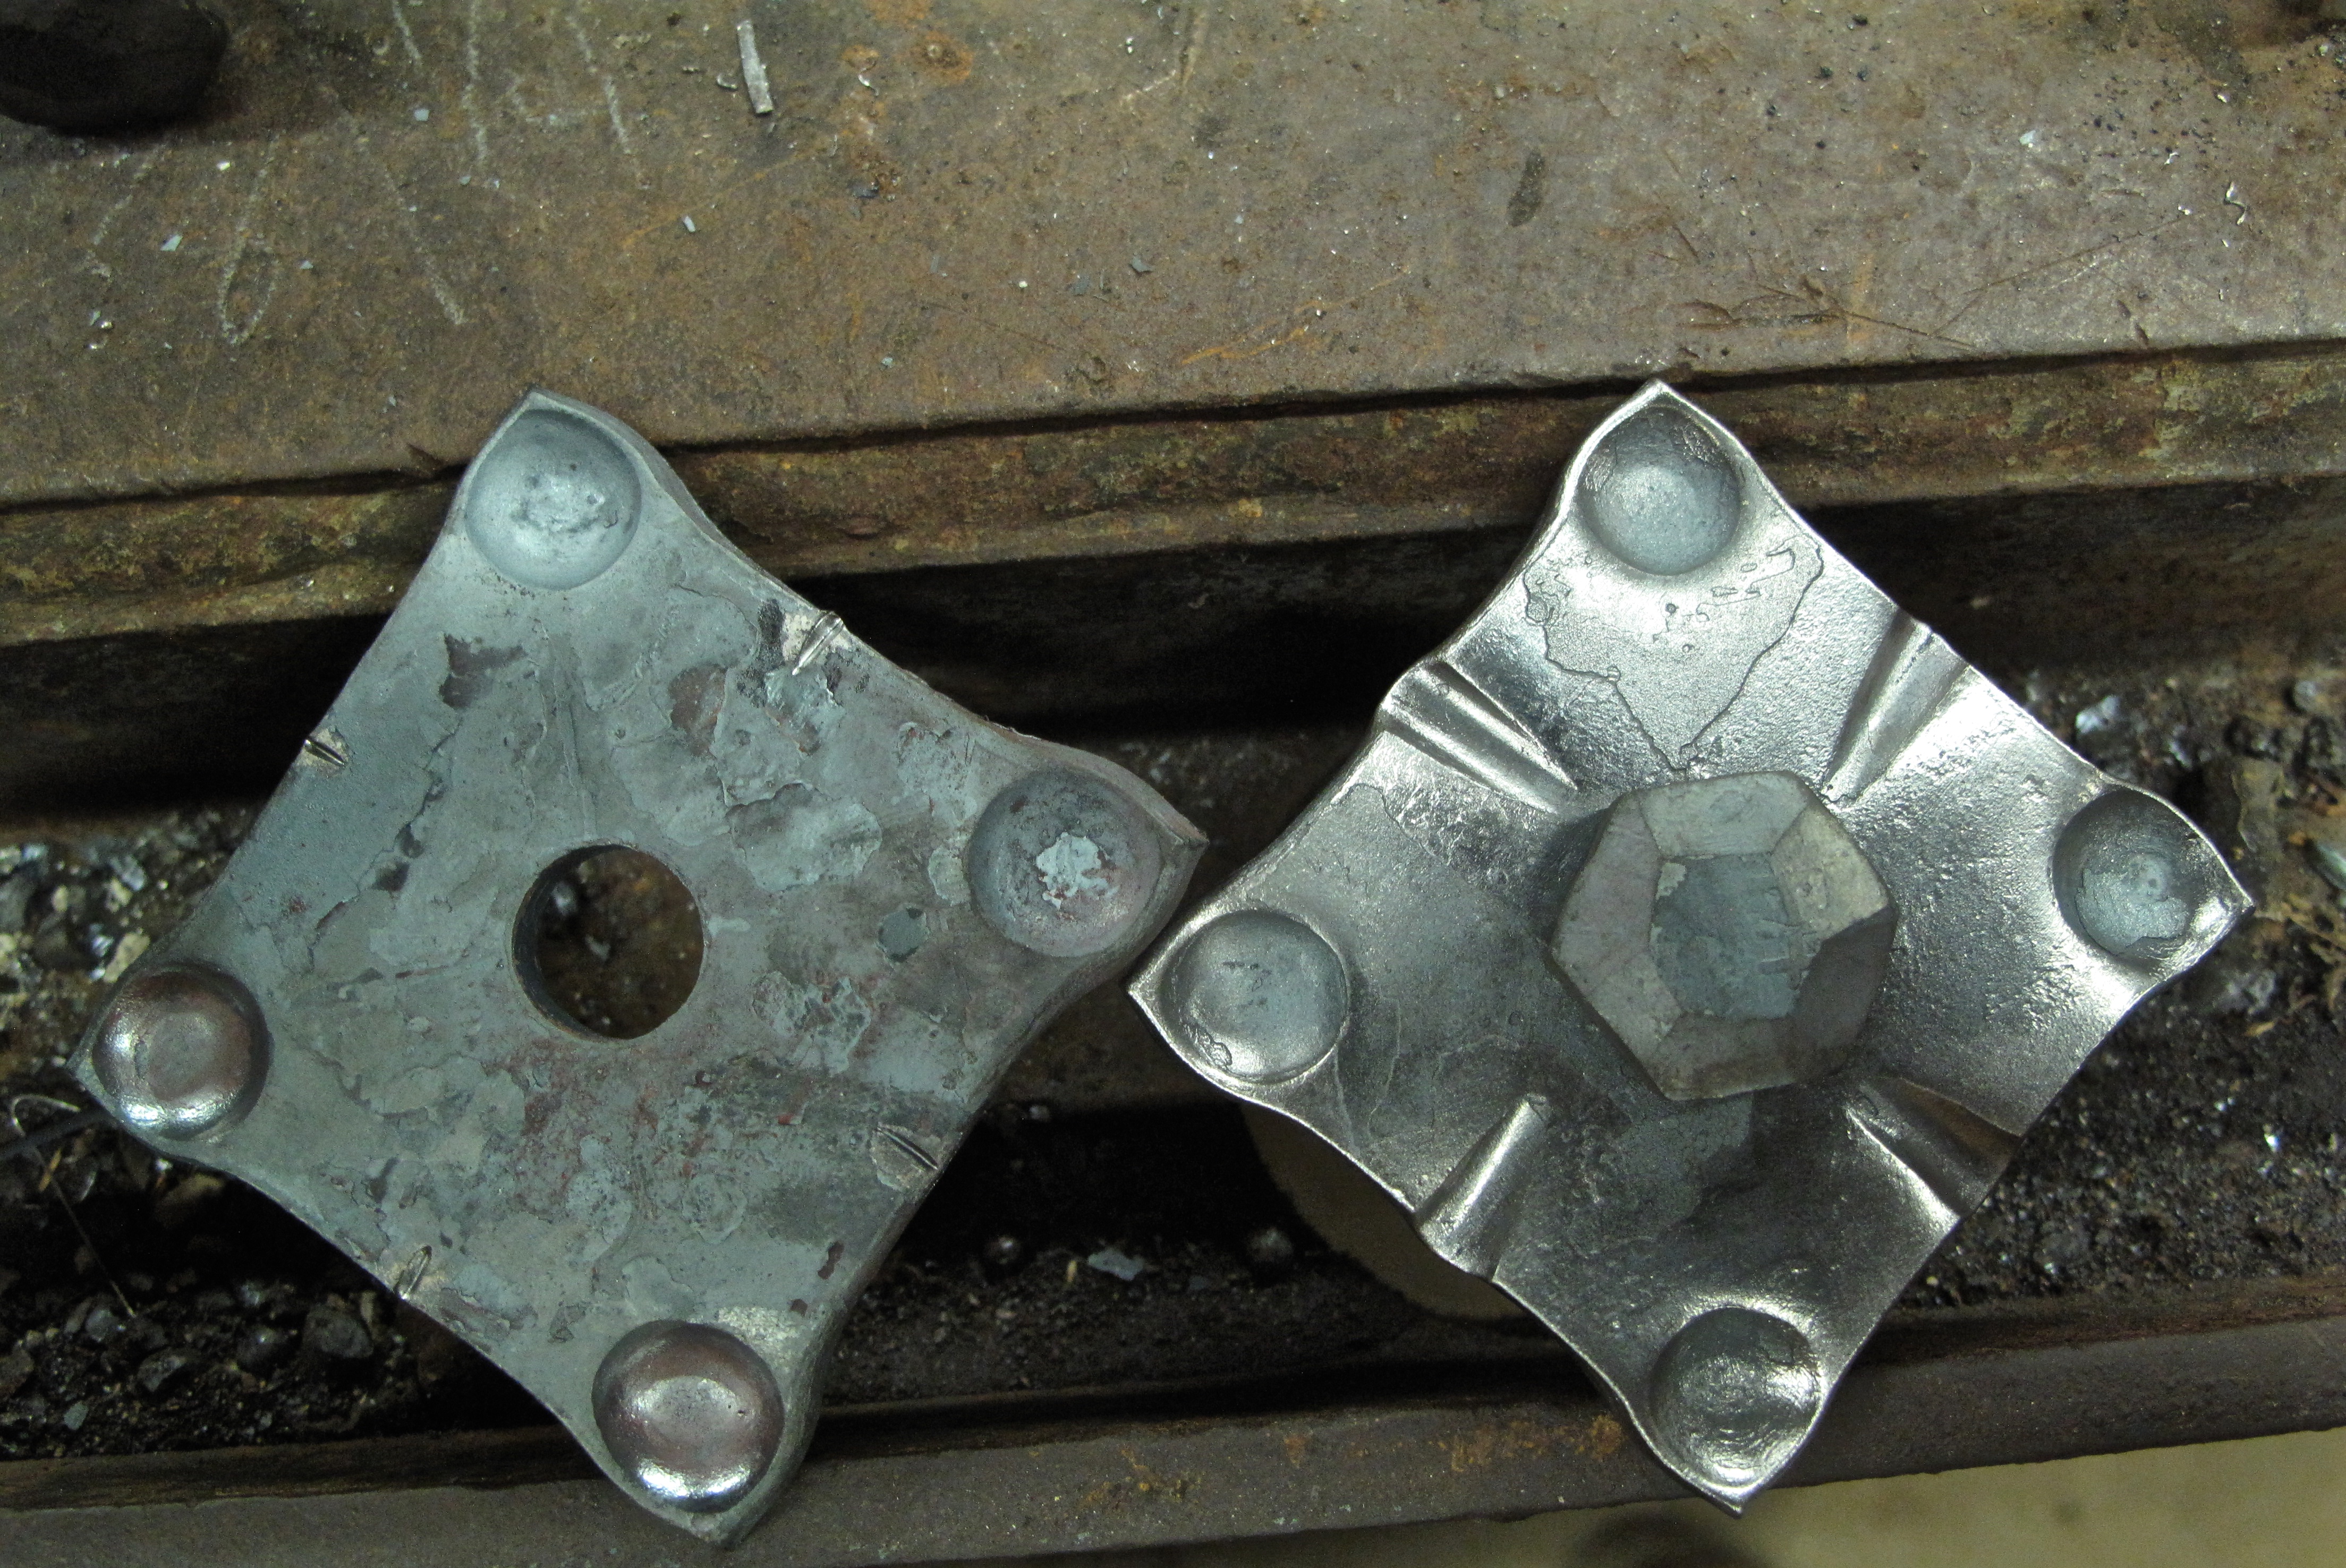
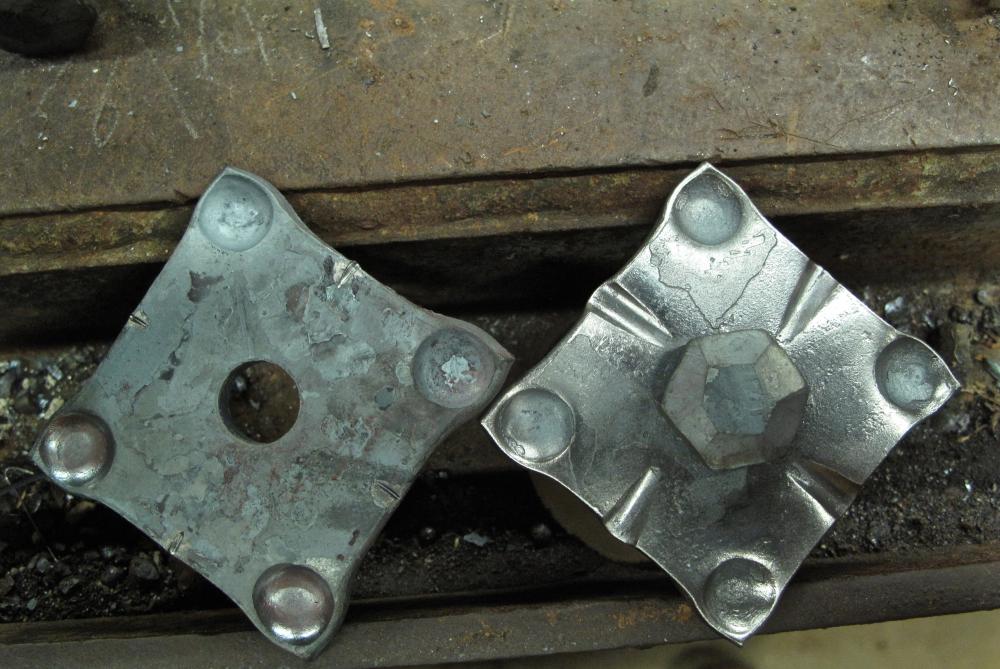
The bolt heads are just basically chamfered, but I did do up a few pretty washers to back them up. To keep things moving quickly when I bring them out of the forge, I use a cold chisel to nick the location for the top tool to hit. It might not be necessary, but it makes me feel better about keeping things aligned. Tonight's task is to make a wider top fuller so the washers can get have a bit more spread between the corner divots. You can be that tomorrow will see me in town buying some more lag bolts so I can practice making more complicated head designs!
-
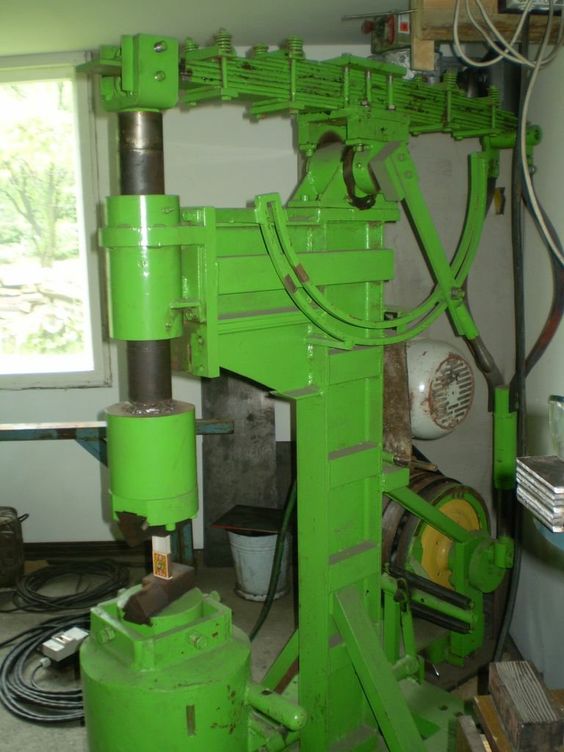
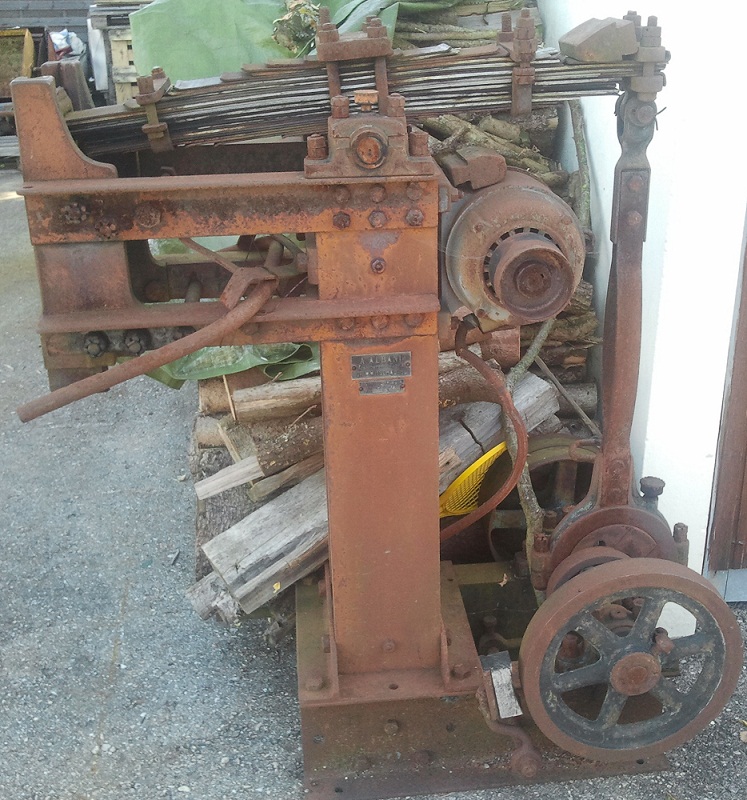
The second hammer looks pretty decent. The spring looks to have sufficient stiffness and the anvil goes all the way to the ground. The anvil still looks a little wimpy, but it's at least serviceable. On the first hammer, if you want to give it the best chance of being a winner, you'll definitely need to replace the anvil with something solid. The fact that there's a column on both sides doesn't really help because it's still a very small "anvil" and you have some significant breaks in the energy transfer -- never mind that both bars seem to be leaning a few degrees off plumb. I still recommend cutting that stuff out and replacing it with a more monolithic construction. Here's a good photo of a fellow welding up several large plates to act as the sow block for a power hammer. Because each plate goes straight to the ground, you get the maximum performance possible. Using plates makes the assembly a bit easier if you don't have access to a solid block.
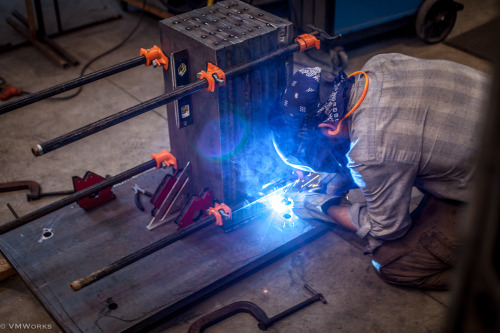
-
The real issue is the joints and spans they created. While the center column (sow block/anvil) might be a straight shot down to the ground, you can see how it's not one continuous run. Instead, the top 2' is welded/joined to the thick plate. Then that's welded/joined to the legs underneath that go down to the bottom-most plate. All of those junctions rob efficiency. When you add up the actual weight that's below the top die's impact point, it's not nearly as high as it should be if they wanted to match everything together. What I'd do if I had my druthers, is to cut everything away that's below the tup. Just go at it with an O/A rig and rip it all out. Then bring in that beast of an anvil stand and set it directly under the tup. With a 927-pound sow block, it's be small work to make some replaceable dies to fit it. A lot of the self-contained hammers use the same two-piece construction technique to make it easier to move and align things, so we know it works well. Then it'd just be a matter of cleaning up the rest of the hammer, replacing the pulleys and fixing the spring pack. To give you an idea how stiff the spring pack can be, here are some pictures I've pulled off the interwebz in preparation for my own hammer build..... I particularly like this design because it illustrates what I was saying about ripping loose the sow block you've got. Professionally made back in the day when smiths were common, it's a solid design and just need to have an anvil mounted to be put back into service. In both instances, you can see that the spring back doesn't need to have a lot of flex like you might expect. All it's supposed to do, imo, is take up the shock of the hit so it's not transferred back through the system where it can damage the more fragile components.
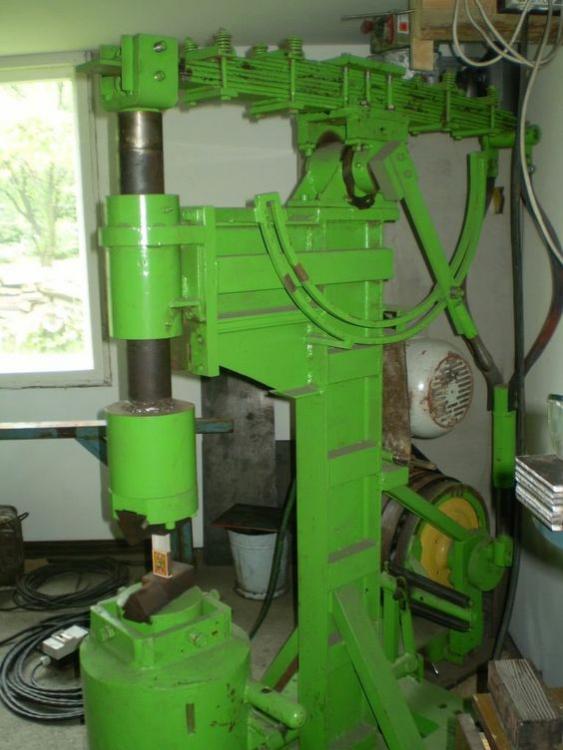
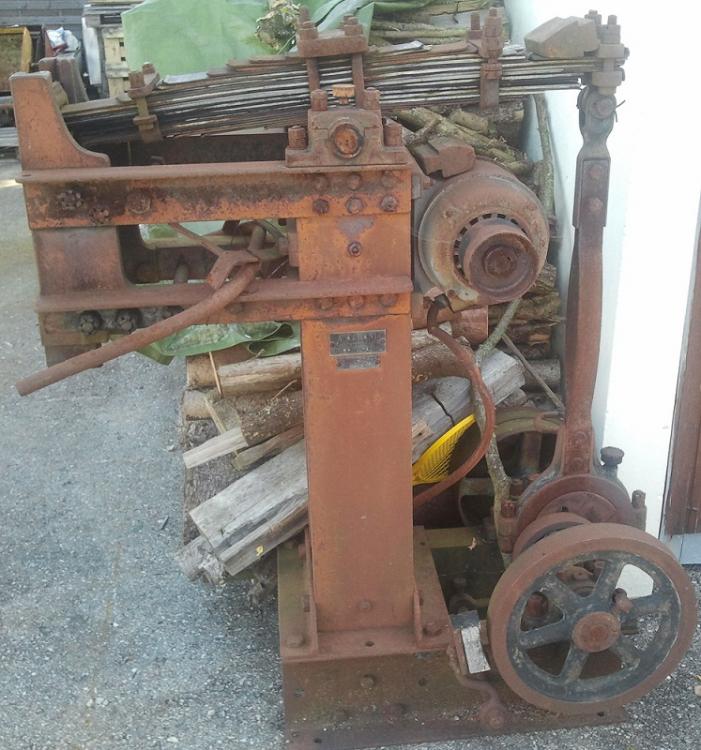
-
I think you're definitely onto something with the spring pack. Looking at the bottom spring, it appears almost 1/2" thick. If that's the case, it's way too thick for that length and isn't really springing at all. Rather, it's acting as a stiffener for the long bar which is doing all the work and not getting nearly the support it needs. One of the reasons it doesn't "hit hard" and needed the extra weight welded to the head is that the anvil sucks balls. Even if the table it's sitting on is 4" thick, there's plenty of give because there are so many joints between the anvil and the ground. It looks like the sow block is attached to the mid-plate which is attached to two legs that go down to the main plate. Ideally, you want a direct line of fire between the hammer and the earth, not all those joints and spans. Even a really thick plate will have an element of give to it. When folks say the anvil portion should weigh a lot, that means to get as much mass directly under the hammer as possible. Having a 4" thick slab a mile away doesn't benefit the hammer. Otherwise you could weld an anvil to the side of a battleship and claim it's a million-pound anvil -- and we all know that won't work. Make sense?
-
I'd love to have a cast iron table like that. I wouldn't use it for welding on simply because I'd want to keep the surface as pristine as possible. Still, It would be great for a small work desk where I could build knives and the like. Just having a nice flat surface to tape sandpaper to when I'm flattening grip scales and the like would be dreamy! A stone table.... very nice to have if you do any kind of precision work. I used to have a small one that mostly got used when I was doing a lot of leatherwork; it was the backer that allowed the leather stamps to get a really nice impression. Here's a nice little video showing how easy it is to surface a stone, but the same technique (sort of) also works for refurbishing cast iron. Surface Plate Calibration and Conditioning
-
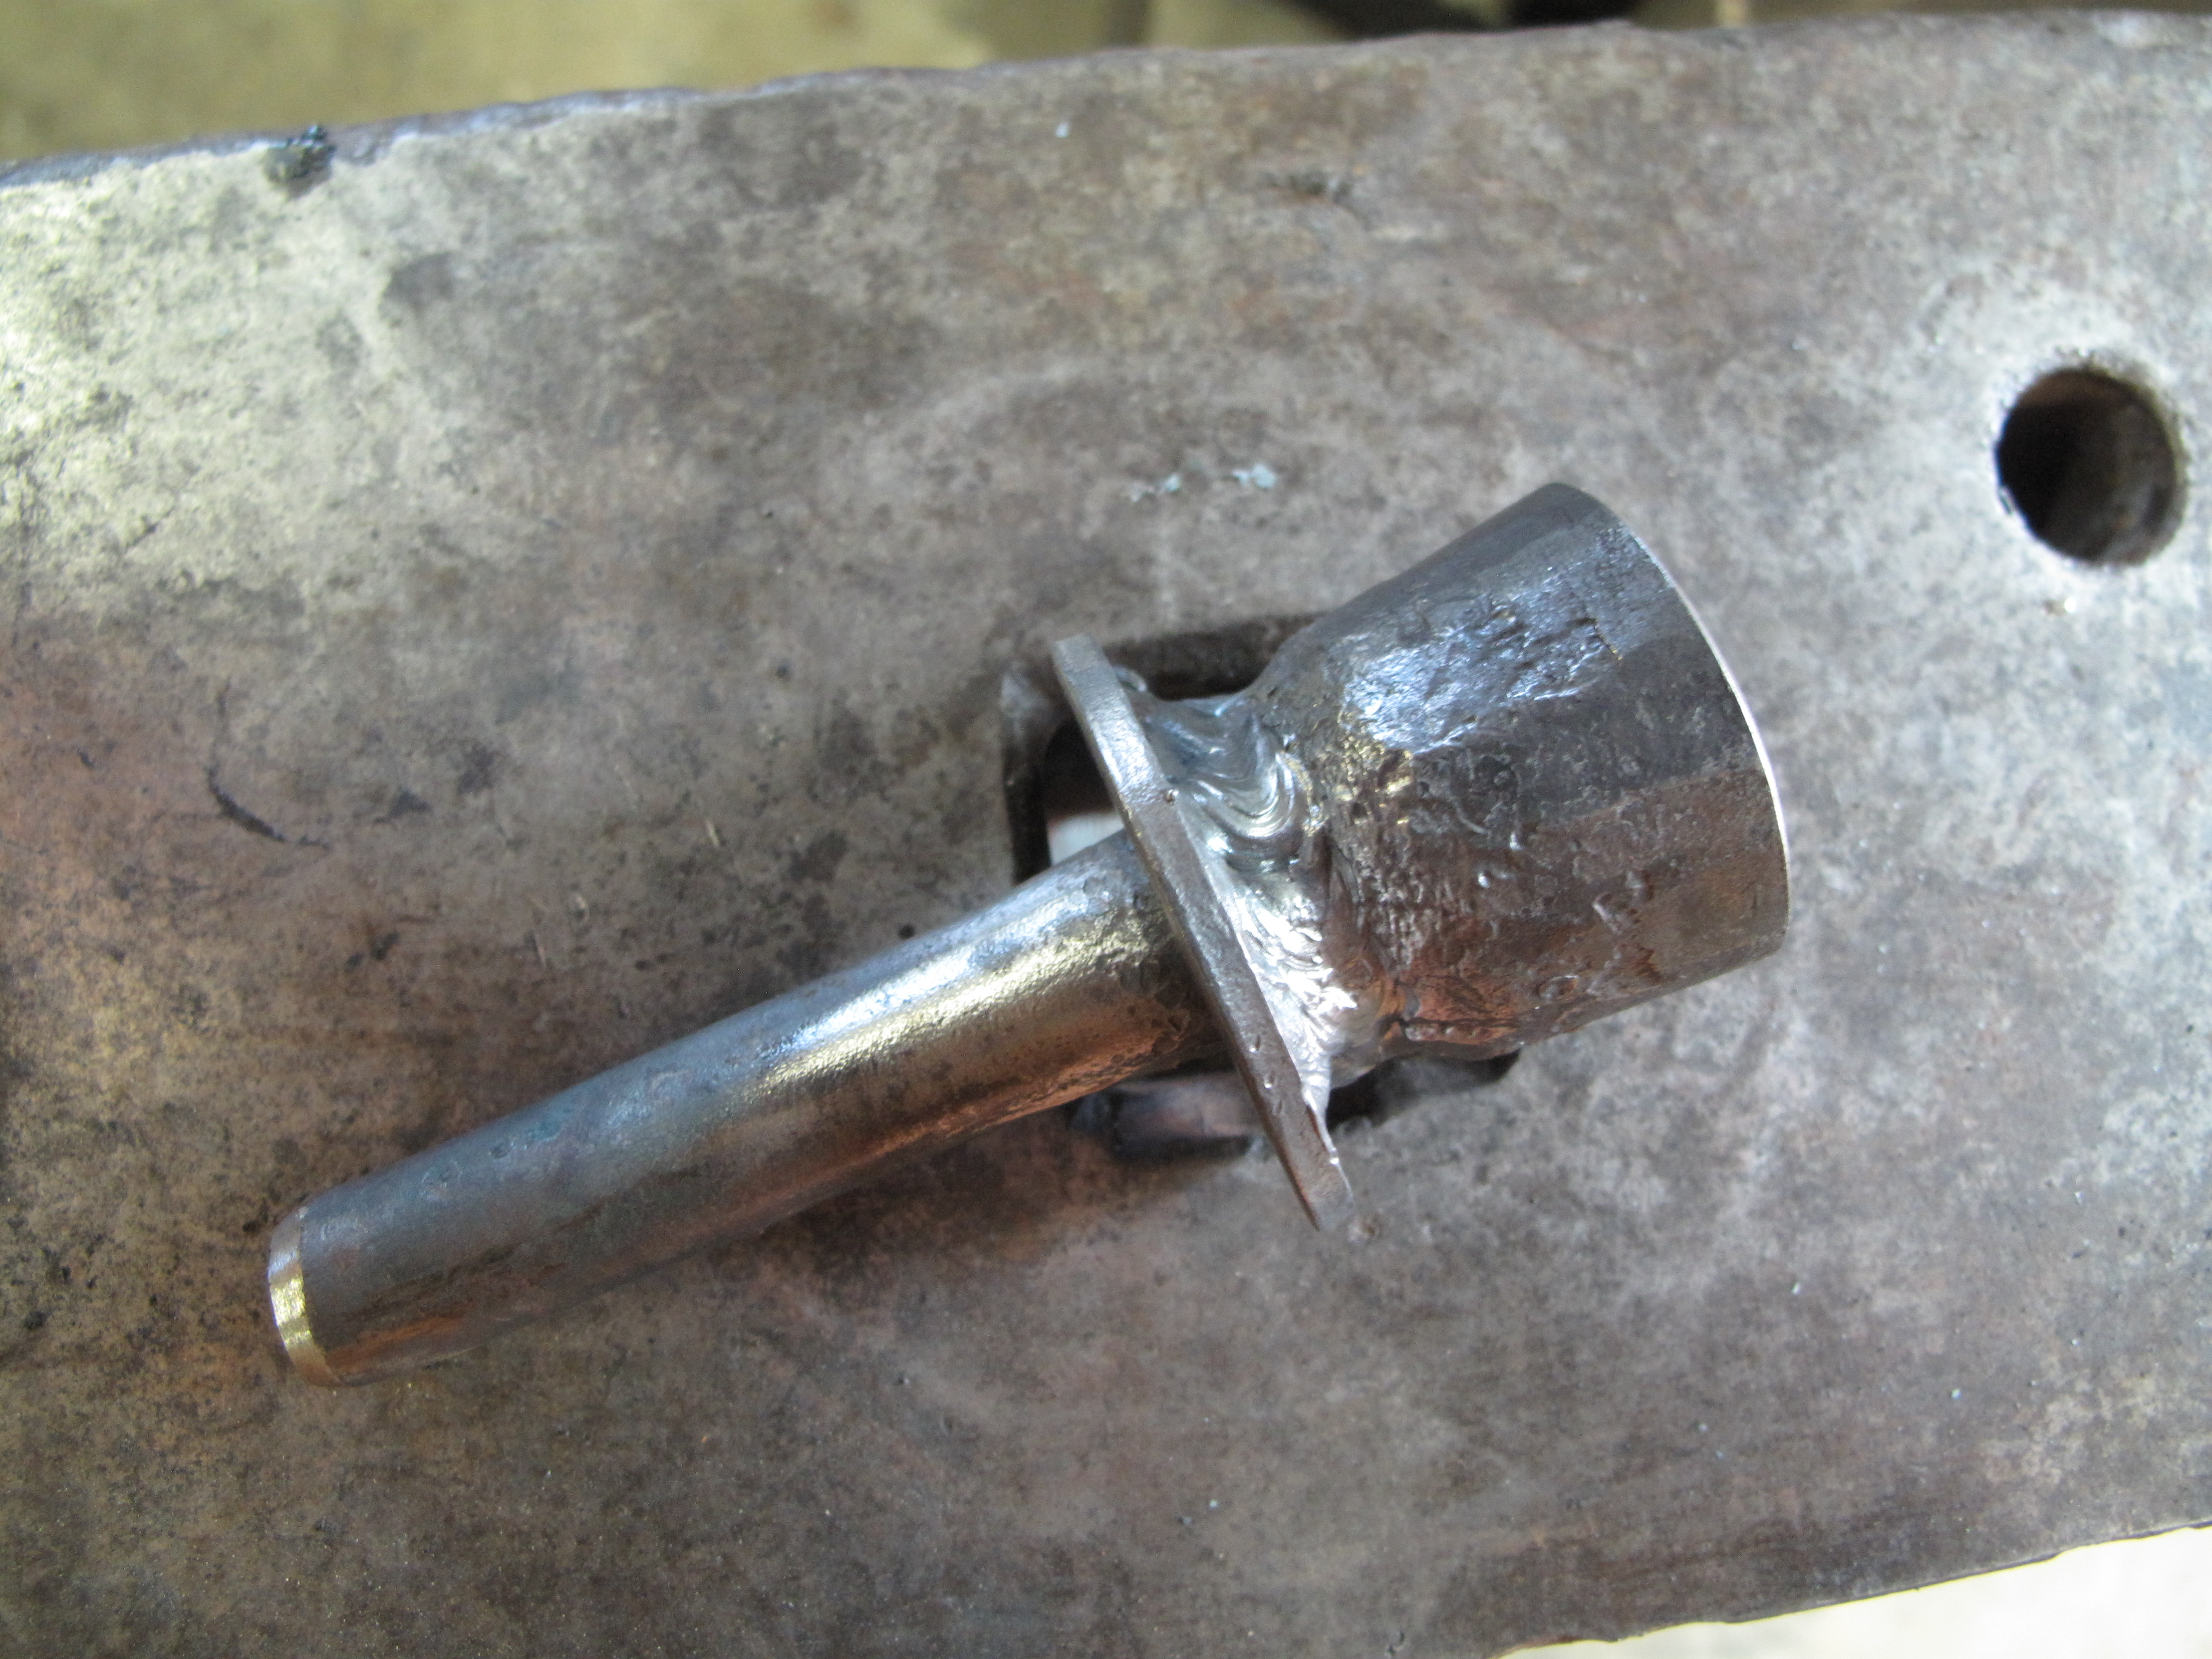
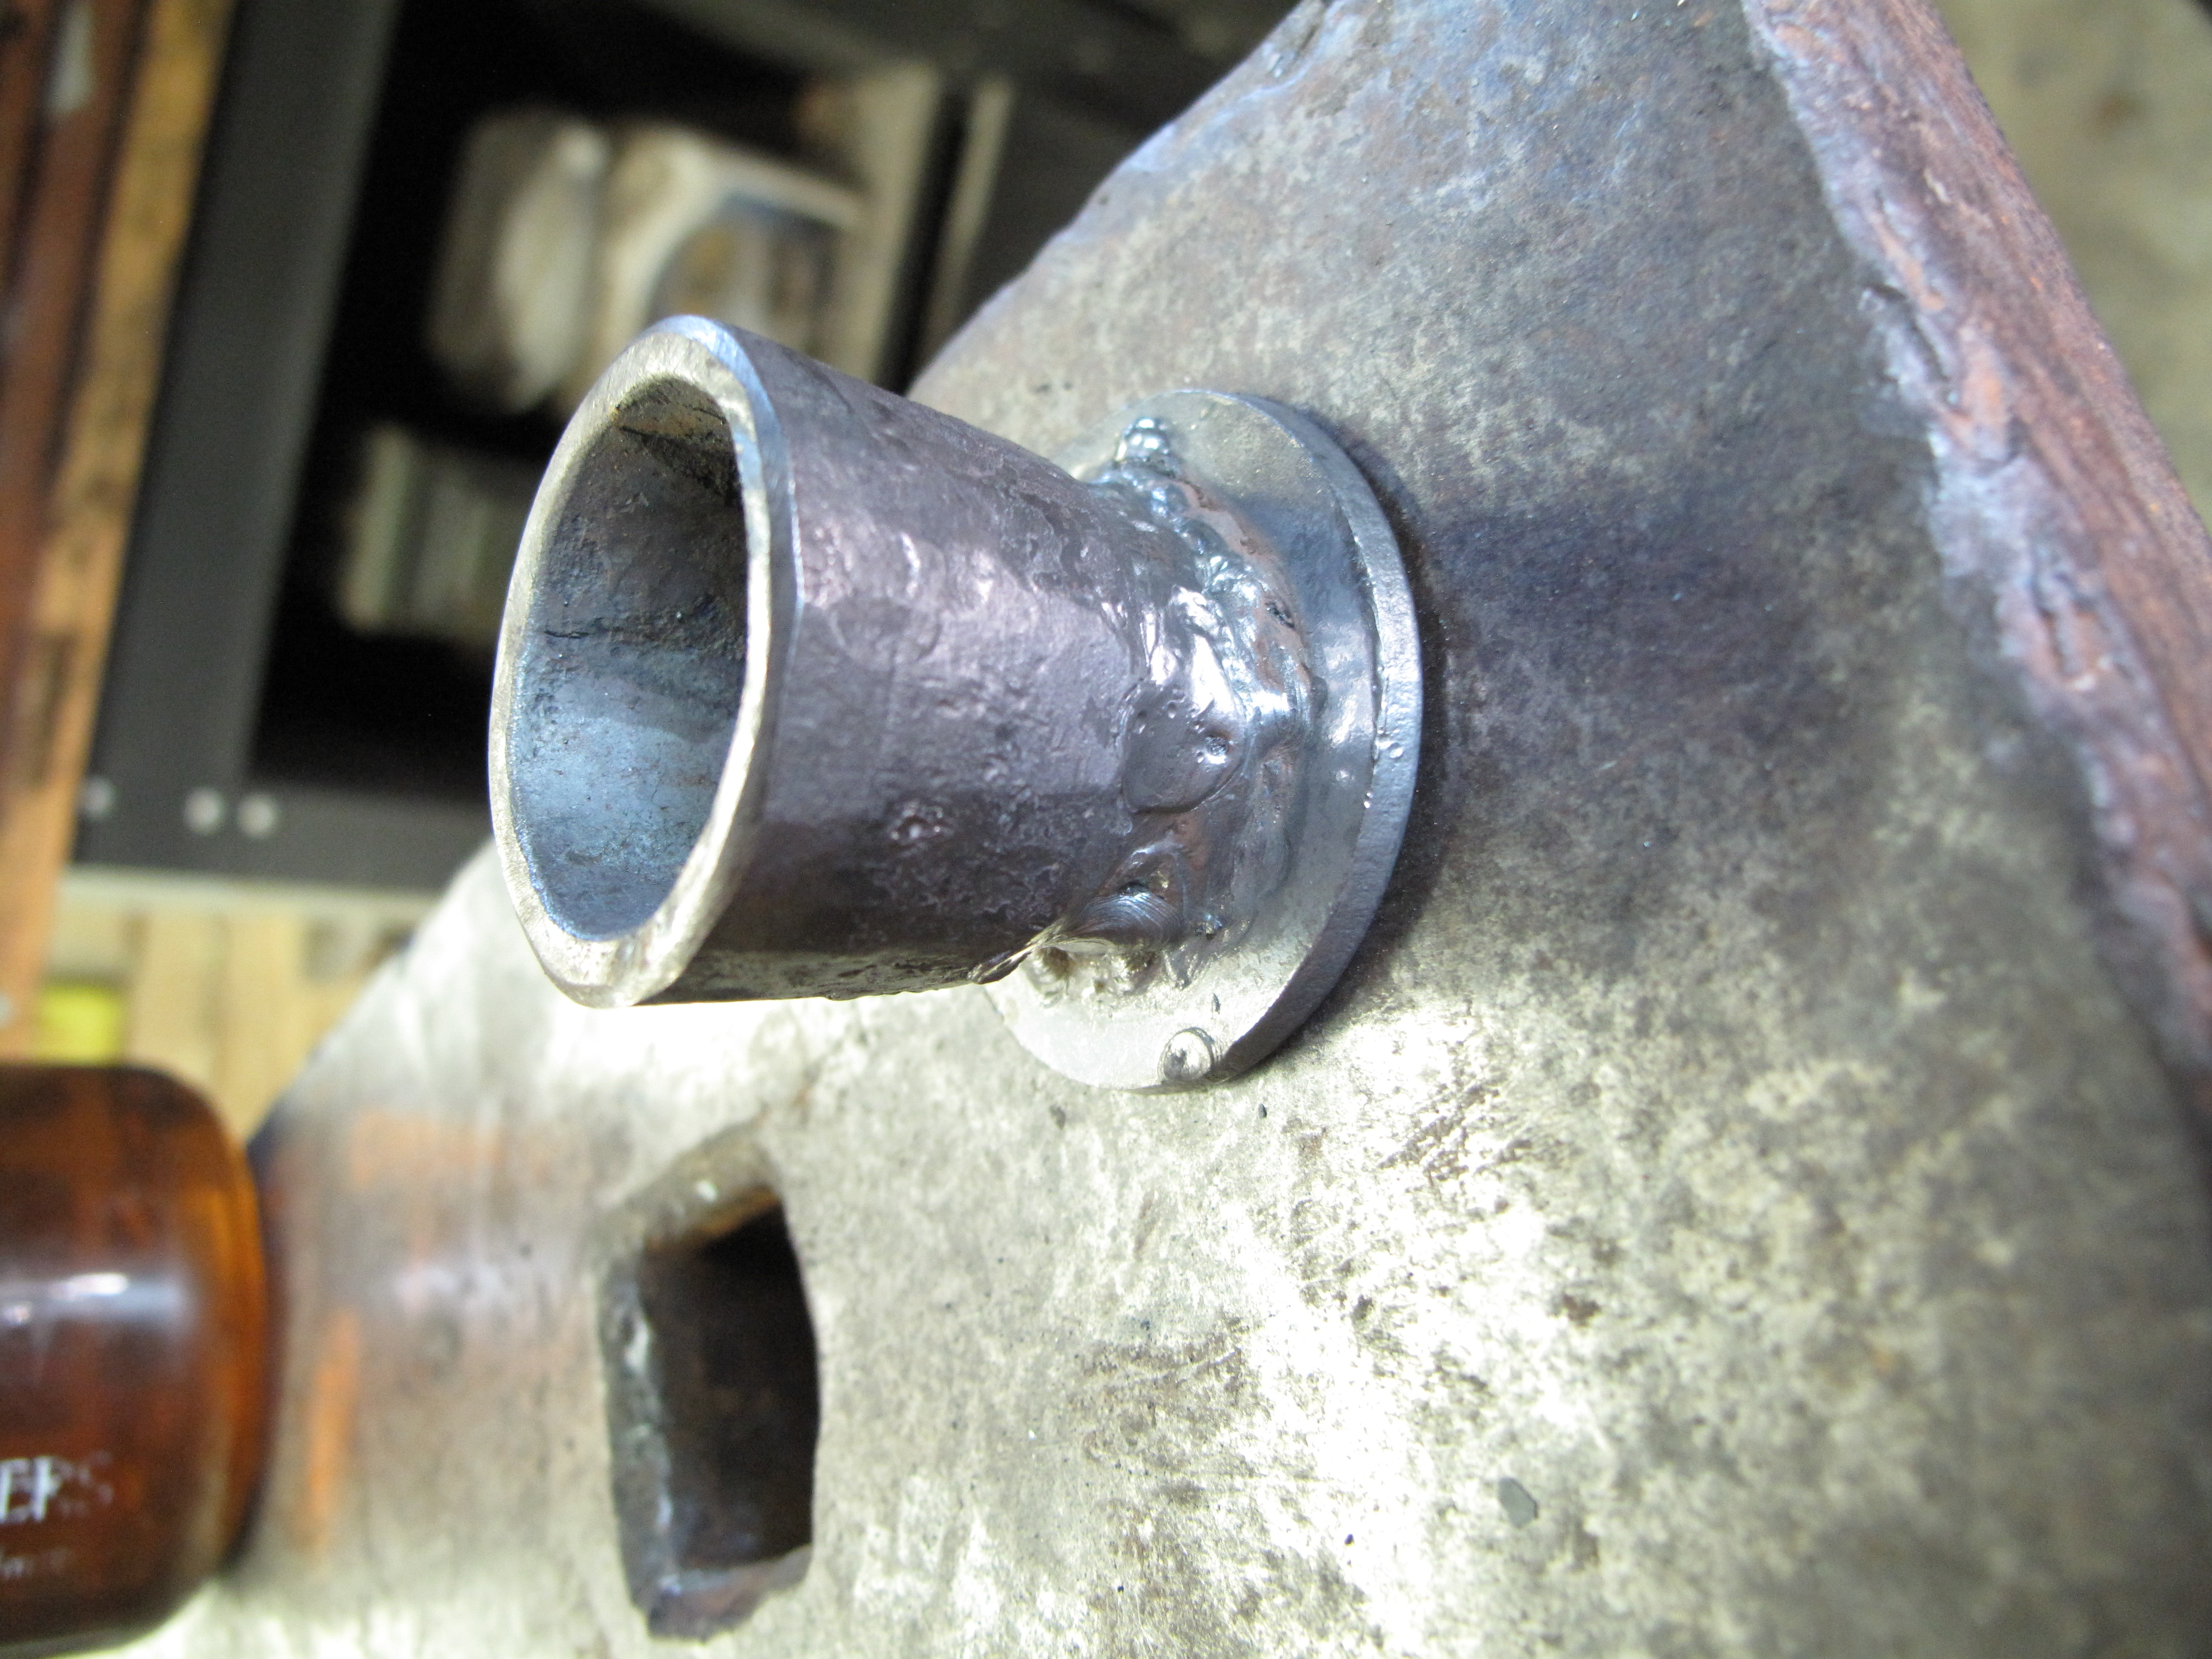
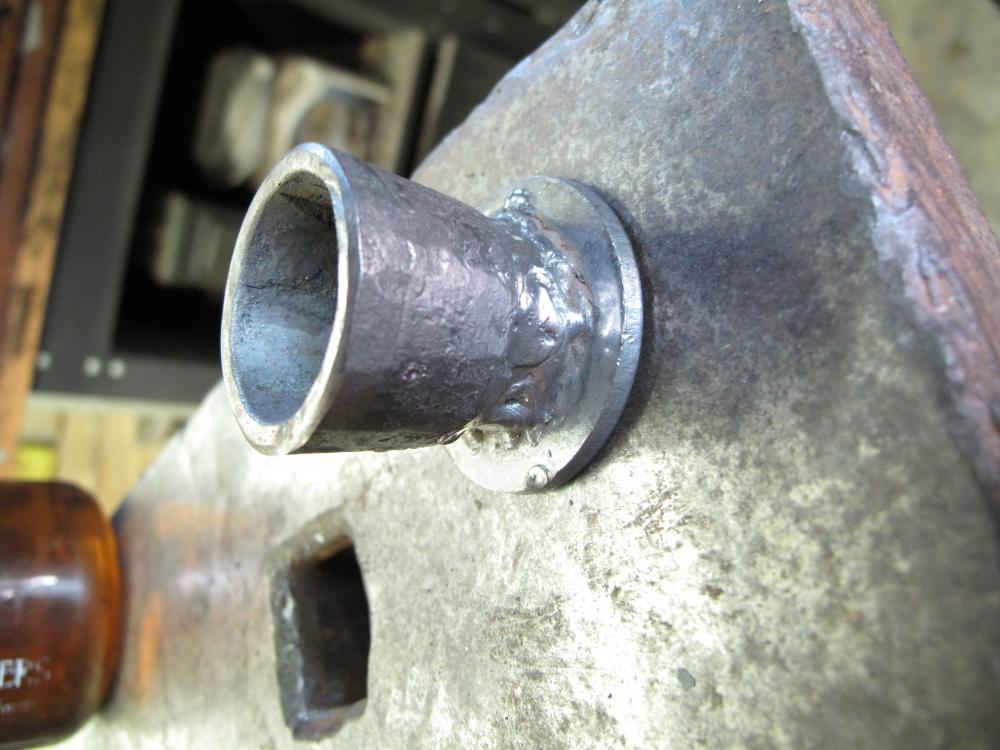
My latest attempt at welding ---- 1/8 7014 @ 110 amps. Two passes were needed since the first barely got into the tight corner formed between the washer and tire iron. The second pass looks halfway decent for about a third of the way, then turns into bubblegum just to make sure everyone knows I'm not a welder. I had everything clamped up in the bench vice to hold it, but I can't seem to figure out how to make my body bend around as I'm trying to lay down the bead. It starts off decently, but the rod angle changes real quick because I forget to bend my wrist or elbow at the right speed...... Still, it's all solidly together and will get the job done. I don't know that I'll ever use the little dishing cup, but it was fun to build.
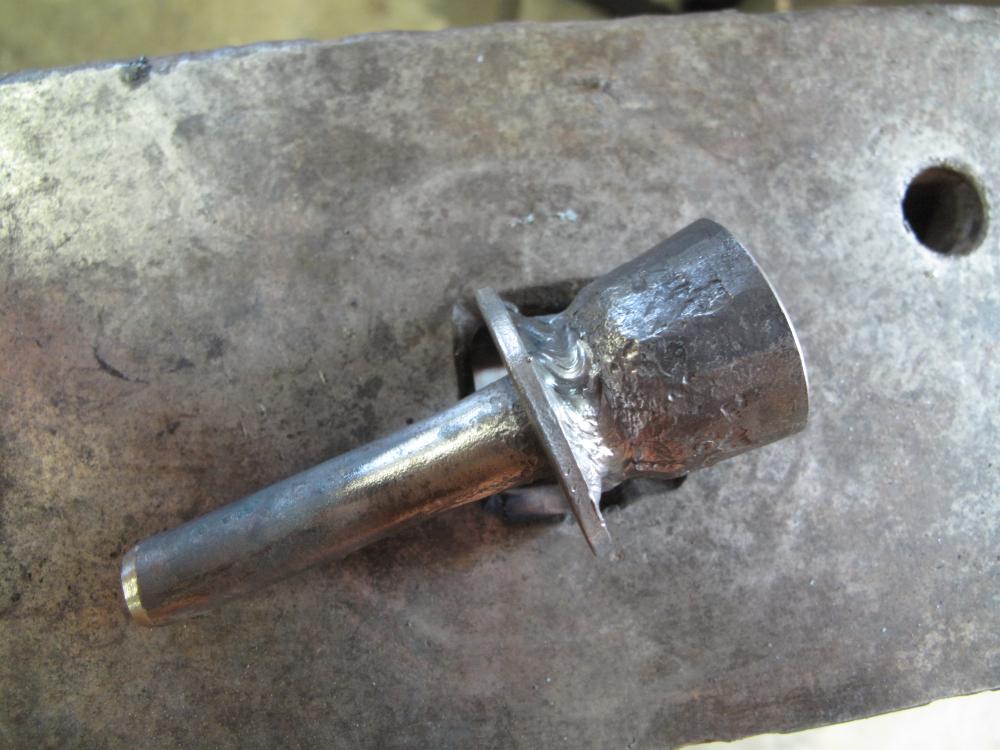
-
I can definitely recommend building something new. It might take longer, but you end up with exactly what you want and don't have to worry about a lot of the issues that come up on the vintage models. My current project is in the "collect parts" stage, but I'm planning on building a Preston hammer. While I'm not enamored with the tire hammer design simply on an aesthetic level, I can't deny how wonderful the adjustability of this thing is. Small footprint, plenty of hit, easy to adjust for thicker stock.... seems like a win for everyone. And I just might have found a 400-pound chunk of steel for the anvil! https://www.youtube.com/watch?v=_tM_8AbnKLs
-
I'd definitely recommend looking through eBay and searchtempest.com to see what antique wheels are in your area. You can usually find some really nice all-iron wheels for pretty cheap. if you're dead set on making your own, the hardest part is tying the hub to the rim. Start with the type of bearings and build out from there. You can definitely do it all on your own. Folks have been forging wheels for quite a few eons, so you shouldn't have too much issue unless you try reinventing the wheel. To roll over bumps and brambles, you need a wheel that's at lest 10" in diameter. You can go larger, but going smaller is just asking for trouble.
-
Very nice work, and good photography, too. What's the story with this glue you're doing? I'd love to hear more about the prep and application.
-
-
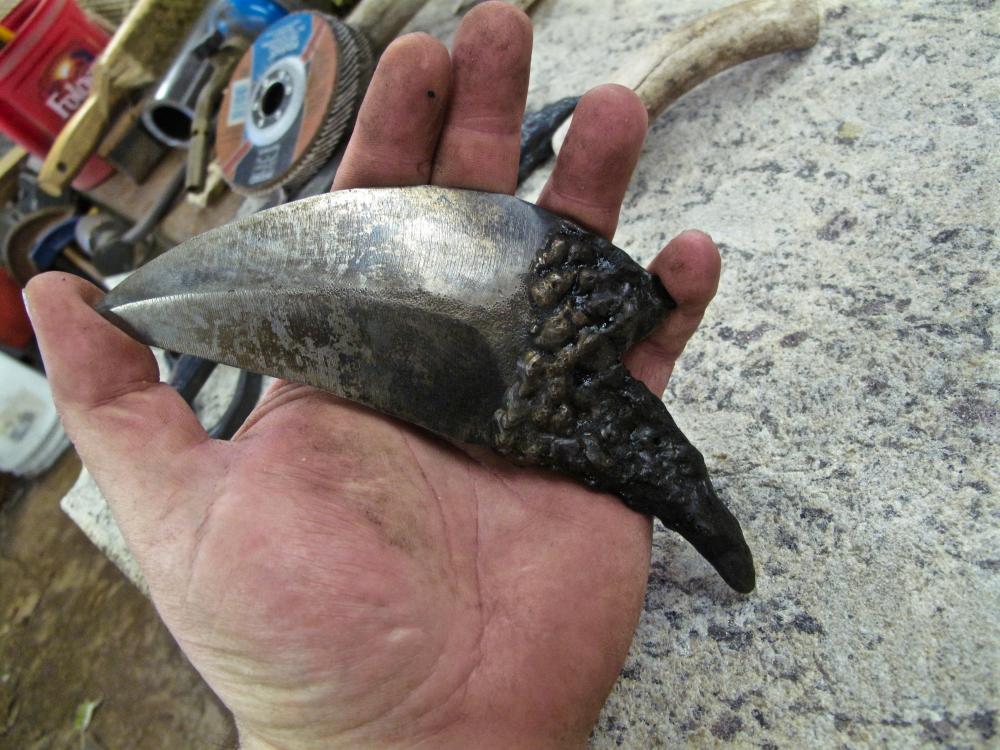
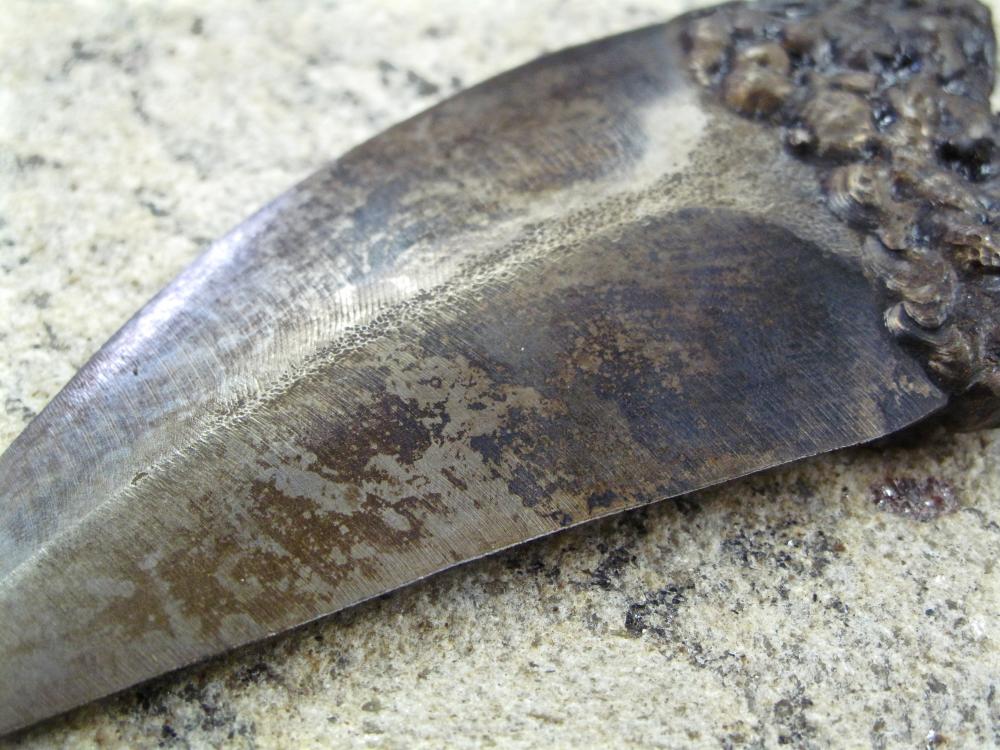
Glad you liked her. Here's a few photos of the last one all cleaned up and ready to head to a new home. I miss her dearly!
-
Glad to see you're starting to think this through. Traveling for work can be an absolute blast. My last two "real" jobs required constant travel - I was home every night, but every single day saw me in a range of new locations. I absolutely loved the work because there was something new every single day. It really makes a difference in how you perceive the daily grind and I don't regret a minute of it. If you have to spend weeks or months away from home, living out of a hotel room, that can get old after a few years. But the key thing to remember is that nothing is set in stone. You might get tired of the constant travel and no home life. Or you might not. You might decide that enough is enough and you want to start a family. Or you might meet the love of your life while spending months in some far flung country. You just never know what will happen when you get to travel. Best of all, you're not sacrificing anything by moving around in your field. You have the schooling so any field experience you can add to it only makes you more valuable to your employers. That means better pay - which translates into more funds for blacksmithing classes and equipment.
-
You can answer those questions by doing market analysis. You do research into the field to see what is and isn't selling, where it's selling, the types of customers that are buying the products, etc. You might find that the area you live in just doesn't have a large enough market for forged goods.... and that's why there isn't already a blacksmith plying his trade in the region. You picked electrical engineering on a whim without doing the research needed to understand exactly what was going to be required of you. Expect blacksmithing and running your own business to be much the same. How hard is that to understand? You have almost no practical smithing experience, having made a few key fobs and the like, but you already think it has all the cool elements that you'll like to do for a full-time job. You're seeing things through the romantic lens and not what it's really like. Any small business requires a ton of the cubicle work that you don't like. The amount of time you actually get to spend in the shop making things is a very tiny percentage. You should be worried about money because money is always an issue. Just because you drive down to some festival to show off all your stuff doesn't mean you'll get any sales while there -- the only guarantee is that you'll have to cover all the expenses of making the product to sell and traveling to and from the show. And you might do five shows a year without any tangible or appreciable returns. That's the life of the artist, though. So, why quit a lucrative job that gives you an element of financial security? It's nice that you have a school that teaches the trade. Try to take night classes or a short weekend course so you can get more experience with it and see if it's something you really, truly think you can do for a full-time job. Watch youtube videos and practice what you see there.
-
You asked if you should quit your job and go to full-time school to be a blacksmith. I said no and explained my reasoning. If you don't like the points I've made, fine. It seems to me that you are only looking for people to affirm your desire to do it. You have nearly zero experience with blacksmithing, but think you like it well enough to actually go to school for it and try to make it a career. That's not logical because you really don't have any experience with the trade. So, take on larger projects and build larger projects. There are plenty of videos on youtube that show step-by-step processes. Business is business. What you're selling isn't important. So take night classes on business. Study business in your off hours. So far, you've said that you're not aware of any fairs or festivals in your area where you could do demonstrations and get your name out there and drum up sales. You don't see a lot of people wanting hand-forged iron products around their homes. So, where are you going to get the sales you need to keep the lights on? Any business you want to start is going to need customers. If there isn't any apparent demand for the product in that area.... sales won't be there. You're assuming that you can make a go of it, and I'm telling you that you need to answer all these questions before you make a leap into a field that you cannot make a living at. You might like blacksmithing, but you need to answer the hard questions about the viability of the business. What do you know about this school? What exactly is their curriculum? Do they only teach you the basics of blacksmithing, or do they cover the business of blacksmithing? Do they have a job placement program? These are all questions you should be asking before you even think about quitting your full-time job. An educated decision is the the best decision, after all.
-
Therein lies the problem with the plan. Copying what you see other smiths doing doesn't mean you'll have any success at it. There are a thousand variables that come into play and the only thing you seem to be running on is hope. No festivals or fairs to demonstrate at? Folks you know don't seem interested in expensive bottle openers, and you can't imagine anyone paying $100 for a candle stand..... that does not sound like a good foundation to begin a blacksmithing operation in. It takes a slew of small sales every month to keep the lights on. Or, you need to find wealthy customers that will pay really big money for items. And you need to be able to do that month after month. That's why I say to not quit your job while you're learning about smithing. Stick with your job and use your off-time to learn the trade and build up your network of customers. You've got a good job that pays your bills. Over the next few years, you can use your days off to learn the basics of smithing while still building your career at work, not losing any seniority, pay raises and the like. It's not easy, but you don't want to shoot yourself in the foot. You've got a ton of questions and need to get them answered before you can make an educated decision. And if that means blacksmithing remains a hobby for awhile, so be it.
-
Keep your job and study blacksmithing in your off time. Unless you know for a fact that there's a smithing job waiting for you when you graduate from that school, you're looking at a long hard climb to reach anything approaching a reasonably comfortable lifestyle. While you might not like the work you're in right now, I've always found that it's far easier to go to work every day when you look at it with the right perspective - that job is just a means to an end, funding the hobby/trade you're trying to learn. If you quit your job to go to school, getting a part-time job to pay the bills while you study, you're losing out on all the benefits of your current employment and have no idea if you'll like blacksmithing or the part-time job you have to take to make ends meet. It's very realistic to expect that you might not like blacksmithing enough to want to make it a full-time occupation. Right now, you're seeing it from the perspective of a hobbyist that's done very little actual smithing, and then only lightweight stuff. Your impression of the trade is just a bit tinted by the neatness you've touched on, but you haven't seen the back-breaking slog that it can be. And, building your own business, any kind of business, takes a tremendous amount of skill in other fields. I spend far more time on the computer trying to drum up sales than I do actually making anything. Someone once told me that if you can spend 50% of your workweek actually in the shop forging metal, you're doing really good. What market research have you done? It's real easy to say, "I can ship tools all over Europe!" The reality is that you cannot ship a single tool anywhere unless you have customers willing to buy them. Just because you make something doesn't mean that someone else will buy it. Do you have a lot of fairs and festivals that you can demonstrate at? Are the people of your area really interested in the old stuff? Are they the types to buy a $40 bottle opener just because they think it's cool? Do you get the sense that there's a lot of interest in $100 candle stands and $20 key fobs? If you do small things that don't cost a lot of money to buy, how many sales will you need per month? If you have a lot of $20 items in your product line, you'll need at least 70 sales a month, every month. Can you reasonably expect that to happen in a timely fashion? How long will it be before you build a name for yourself and people will want to buy into your story?
-
Welcome the forum. I hope you are planning a long future of smithing ahead of you to continue the family legacy. The forge you have is a real gem. Pedestal forges are the rarest of the rare and you almost never see them available anywhere. Yours makes the third one I've heard of in my life, and the other two were only seen in photographs. You can find the four-legged forges with a cast iron body all day long, but pedestal-mounts are almost a thing of legend. I would surmise that they were expensive to make and got phased out in favor of the pipe legs which were a whole lot easier and cheaper. Of course, being rare doesn't make them too valuable unless you run into a collector that just has to have one -- or a guy like me that would really like to have one. Value might be a little north of what you see in your area for the forges-of-four-legs. It's a hard sale because if you price it too much over what other forges are going for, the buyer will usually go for the cheaper option simply because they want a forge and not a conversation piece. As for the age, figure on pre-WW2. It was only after the war that stamped-steel technology was sufficiently advanced that casting started becoming less and less common. During the war, obviously, metal was being scavenged for the war effort. That's my take on it, anyhow. Again, congratulations on the wonderful acquisition.
-
Well, it really depends on what you're making, I guess. Slitting the shaft and then spreading it out with a drift (your wedge) will certainly work to spread some of the metal out towards the sides. But then, so would upsetting the shaft in that area. Or, you could use squished tubing. Or, you could taper a bit of 1" stock and force it into the hardy, letting the hole swage the thick stock to shape...
-
5.5"x55"!! That's sure going to be a beautiful anvil. I put the face of my anvil up around wrist height so I wouldn't have to stoop over when working. It precludes gripping stock between your legs, but it's better on the back in the long run. It could probably stand to be an inch lower, but it's not a deal killer for me. Renting a good saw will make quick work out of it and leave you with a surface that's just about good enough to forge on. The alloy they use in those things is very resistant to abrasion, as you can imagine, but it will wear down if you stick with it long enough. Next thing you know, you'll have the belle of the ball all prettied up and ready to dance.