VaughnT
Members
-
Joined
-
Last visited
Everything posted by VaughnT
-
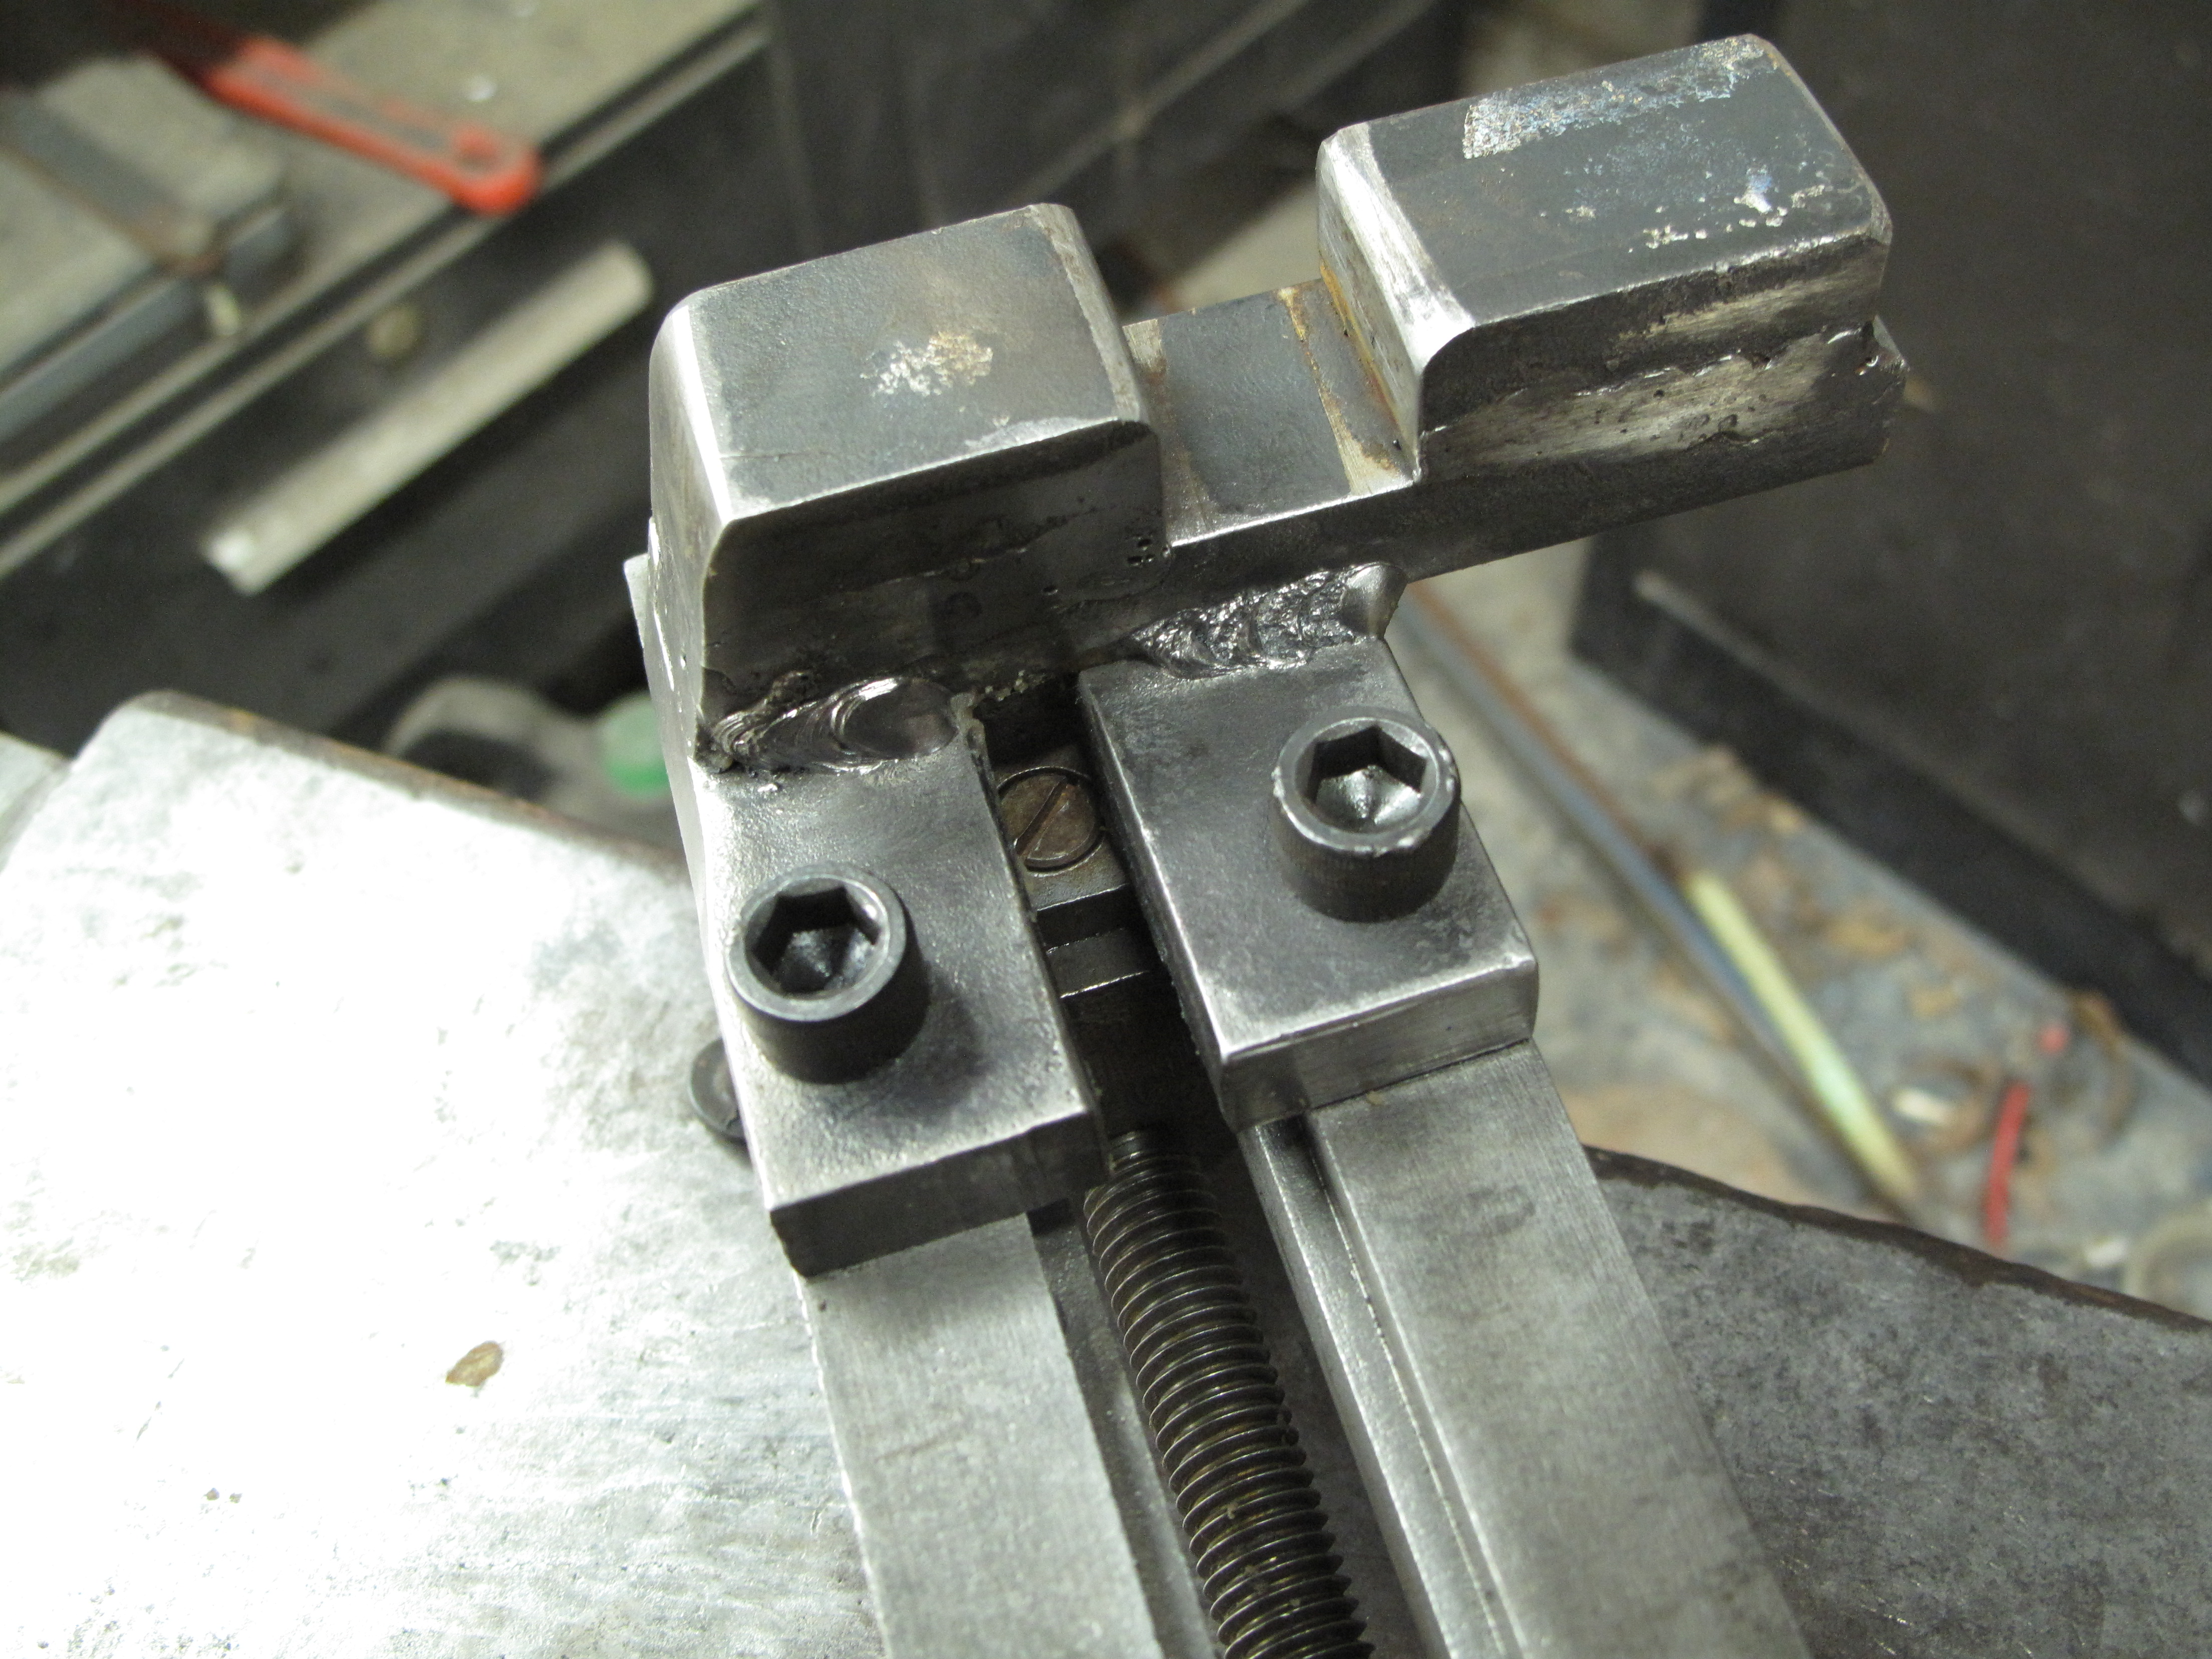
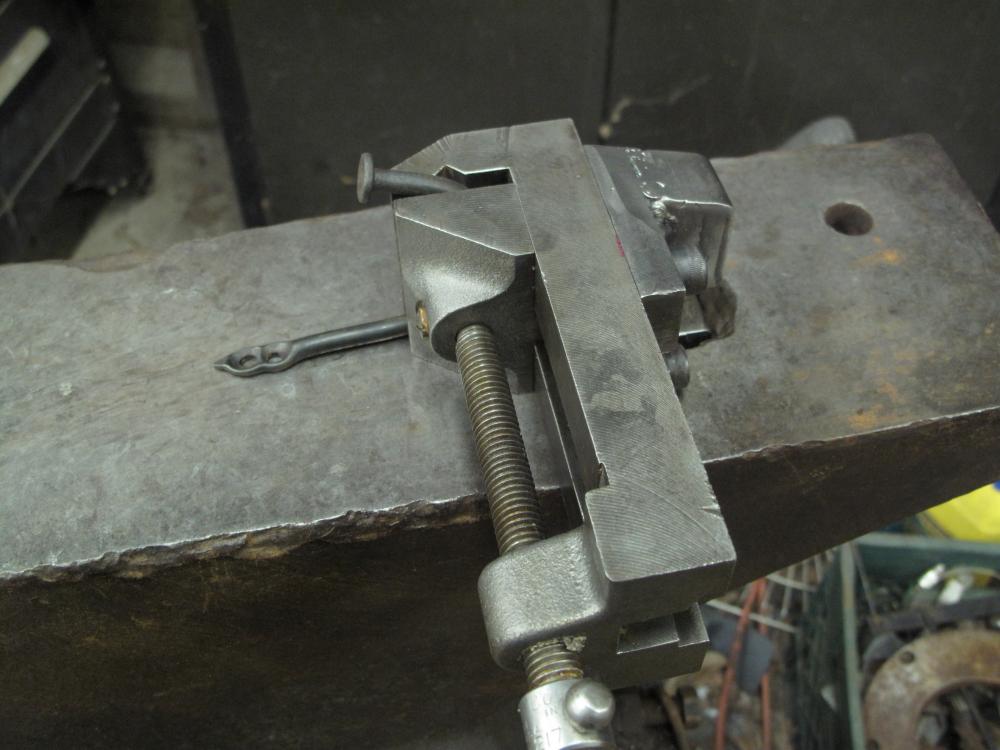
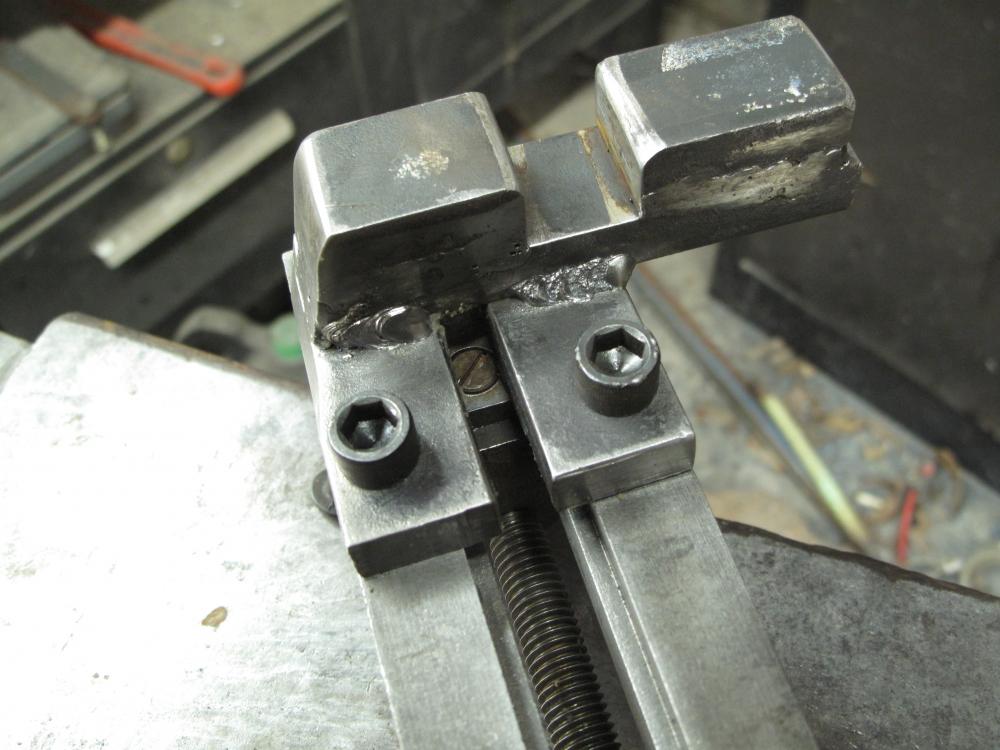
Thanks for all the tips and suggestions. I couldn't figure out a jig that would allow me to bend the nail hooks after the holes were already hammered into shape, so I used some pieces of scrap to weld up a hardy stem for a small vise. I still have to dress up the hardy stem (including grinding on those nasty beads!), and will probably put a collar around it just for kicks. The good news is that it holds the hooks in perfect orientation to the anvil face so I can hammer in the divots post-bending. It takes one heat per countersink, but the nails come out spot on the money every time. Now I just need to find a source for stainless steel nails and my world will be perfect!
-
I've saved that Williamsburg photo to my collection with the intent of building one for myself. I never seem to get around to it, but maybe one day.... That photo from the Swedish guy is actually part of a video I got to see on youtube. The smith is an absolute master at making nails. Watching him work was a real joy, just hate that I lost the link to the video.
-
Kinda figured that was the case, but I couldn't pass up the opportunity to razz you a bit.
-
Isn't it kind of counterproductive to have your treadle hammer's anvil mounted to the ceiling? I'd think the whole thing would work better if you weren't fighting gravity the whole way.
-
Neat design. I've never seen a vise quite like that.
-
That wagon would work wonderfully as a forge table. I'd put a layer of red bricks in the bottom and use a 2" pipe nipple as an extender to get the heat up and away from the thin sheet metal. My first forge was similar, though it was a cast iron body and a little bit thicker than that wagon's sure to be. Still, I never had a problem with a layer of regular red bricks (the joints will soon fill with coal dust and scale, so they don't move around on you. You just want to be sure to get the heat up to the top of the bricks so you can lay your stock horizontally through the center of the fire. As for raising it up to waist height.... no need if you don't want to. Forging from a seated position can be mighty comfortable if you have all your kit laid out right and your stool fits well. I'm partial to old tractor seats that really hug the bum and give you plenty of surface area. Lots of smiths sit down to forge, or squat, or kneel. All depends on what the body likes.
-
Beautiful anvil! I've seen a lot of that style with the depression around the hardy hole actually cast or machined in. I have no idea why they do it unless they think it would stop chipping. I've never had a problem with chipping around the hardy hole, but who can say what goes on in the mind of a machinist at an anvil factory?!? She'll be sure to produce a lot of quality work for you. Happy forging!
-
Beautiful work, hoss. Sometimes it's the littlest thing that inspires the larger design.
-
X, I think the biggest issue is doing a job in such a way that you have to go back and "fix" things at the end. On top of that, any jig that used locator pins would require that the pins be infinitely adjustable because the countersinks aren't precisely placed since the work is done by hand and eye, or to the tolerances of a worn shilling! By the time you dial in the pins to fit the hook and then tweak the hook straight... you might as well just forge the hook so it's not twisted to begin with. My plan is to find a low-priced machinist's vise that I can bolt to a hardy stem so the jaws are perpendicular to the face of the anvil. This will allow me to quickly and securely grab the hook with the shank flat on the anvil's face, in the same orientation it would be on the wall. Just got to find the right vise....
-
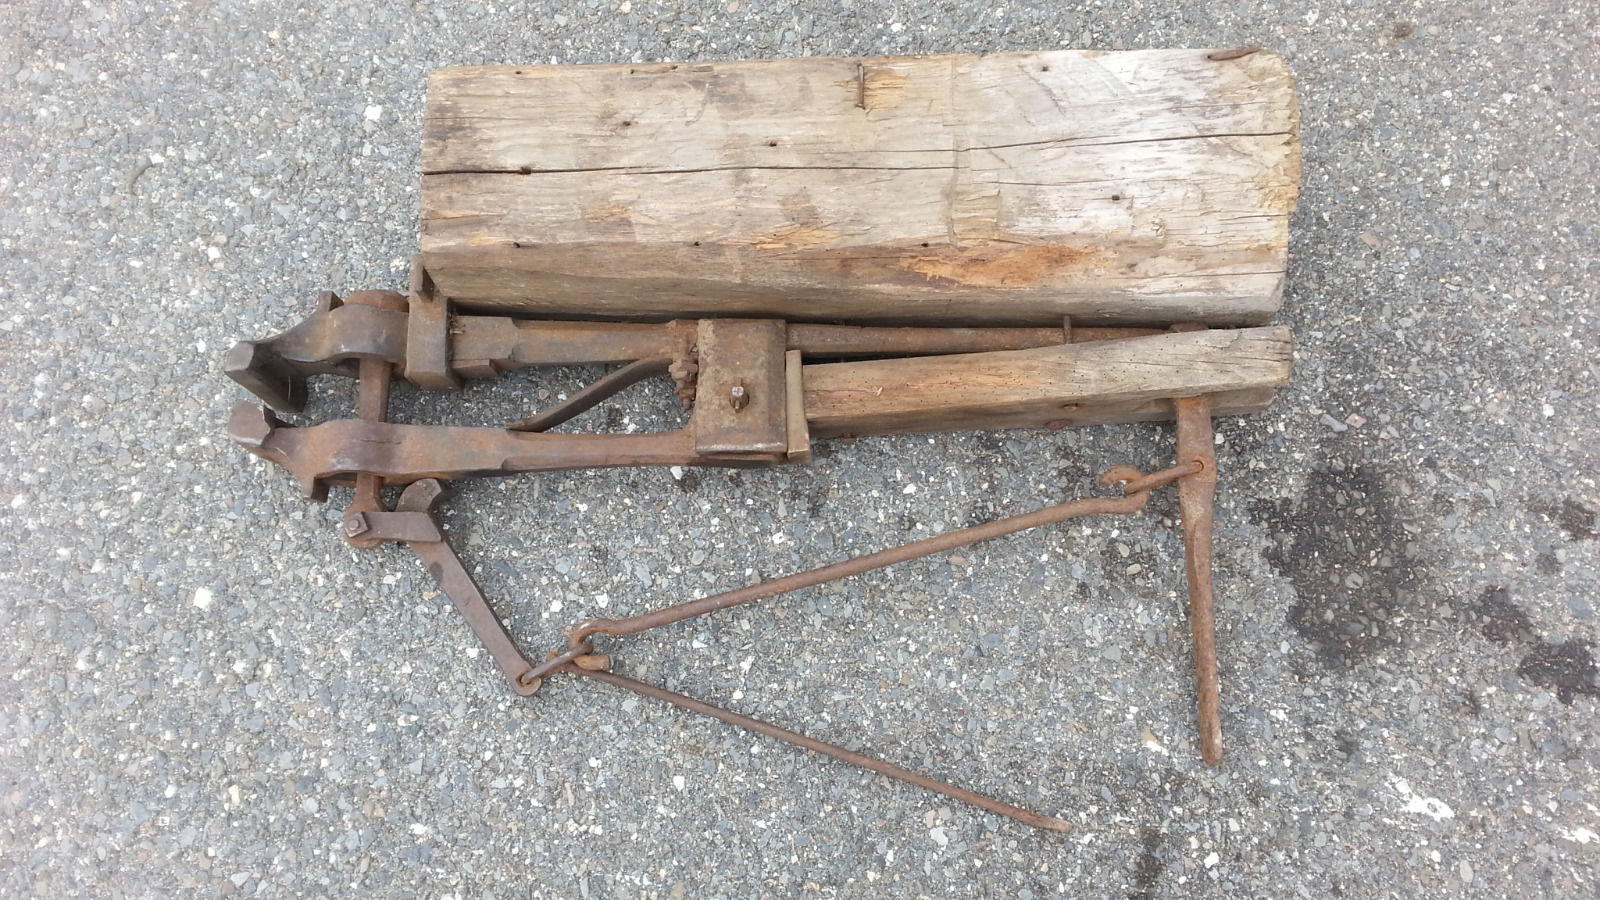
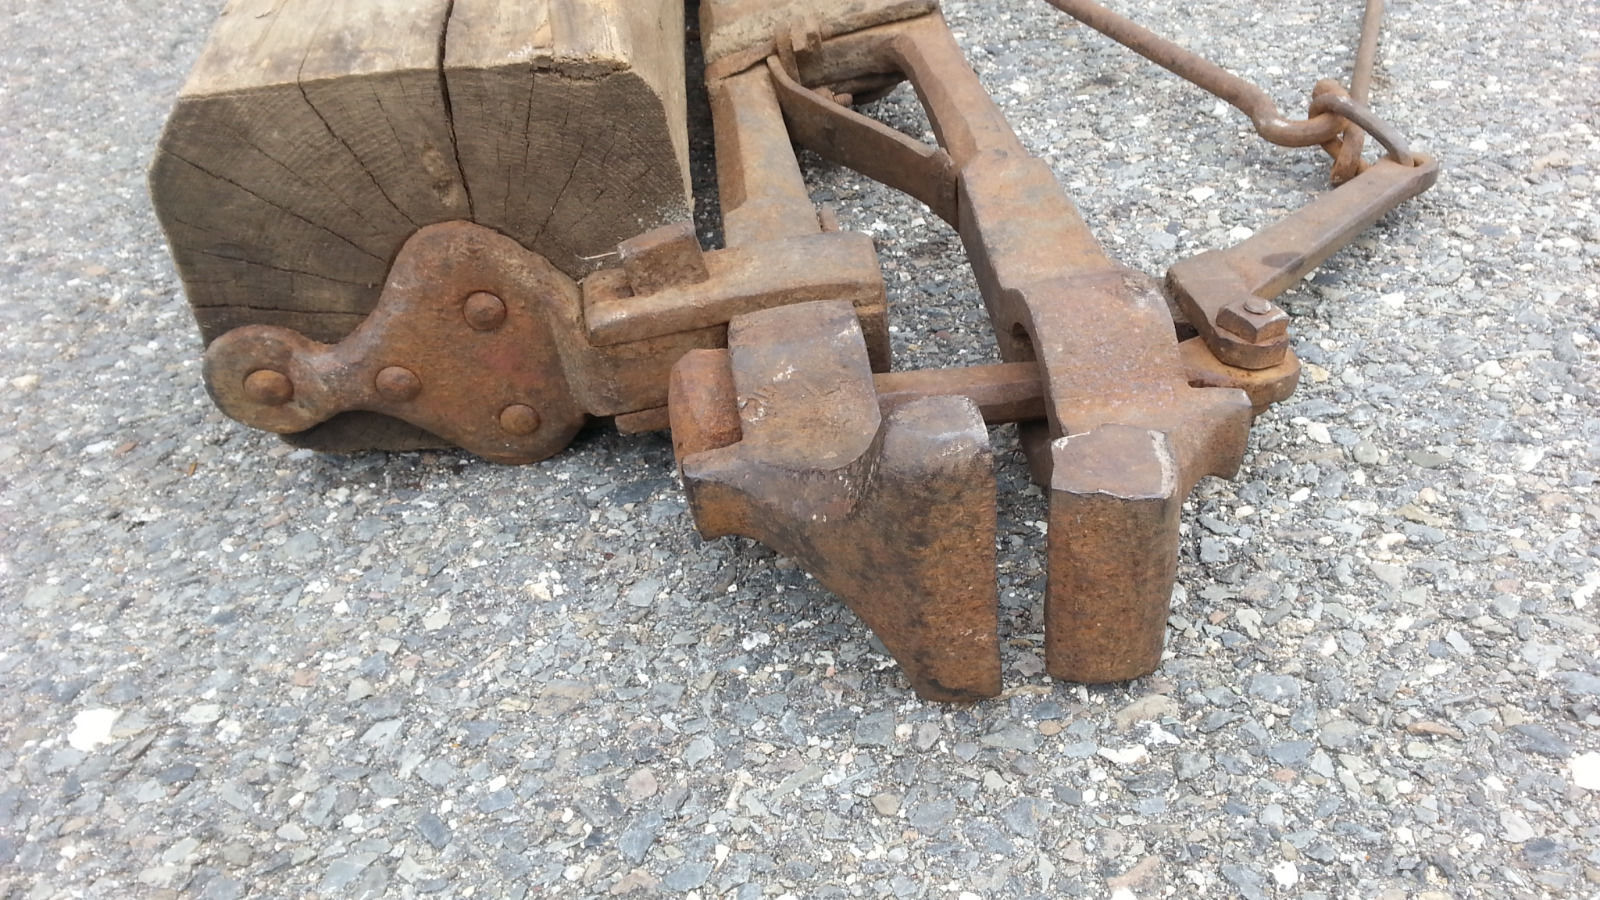
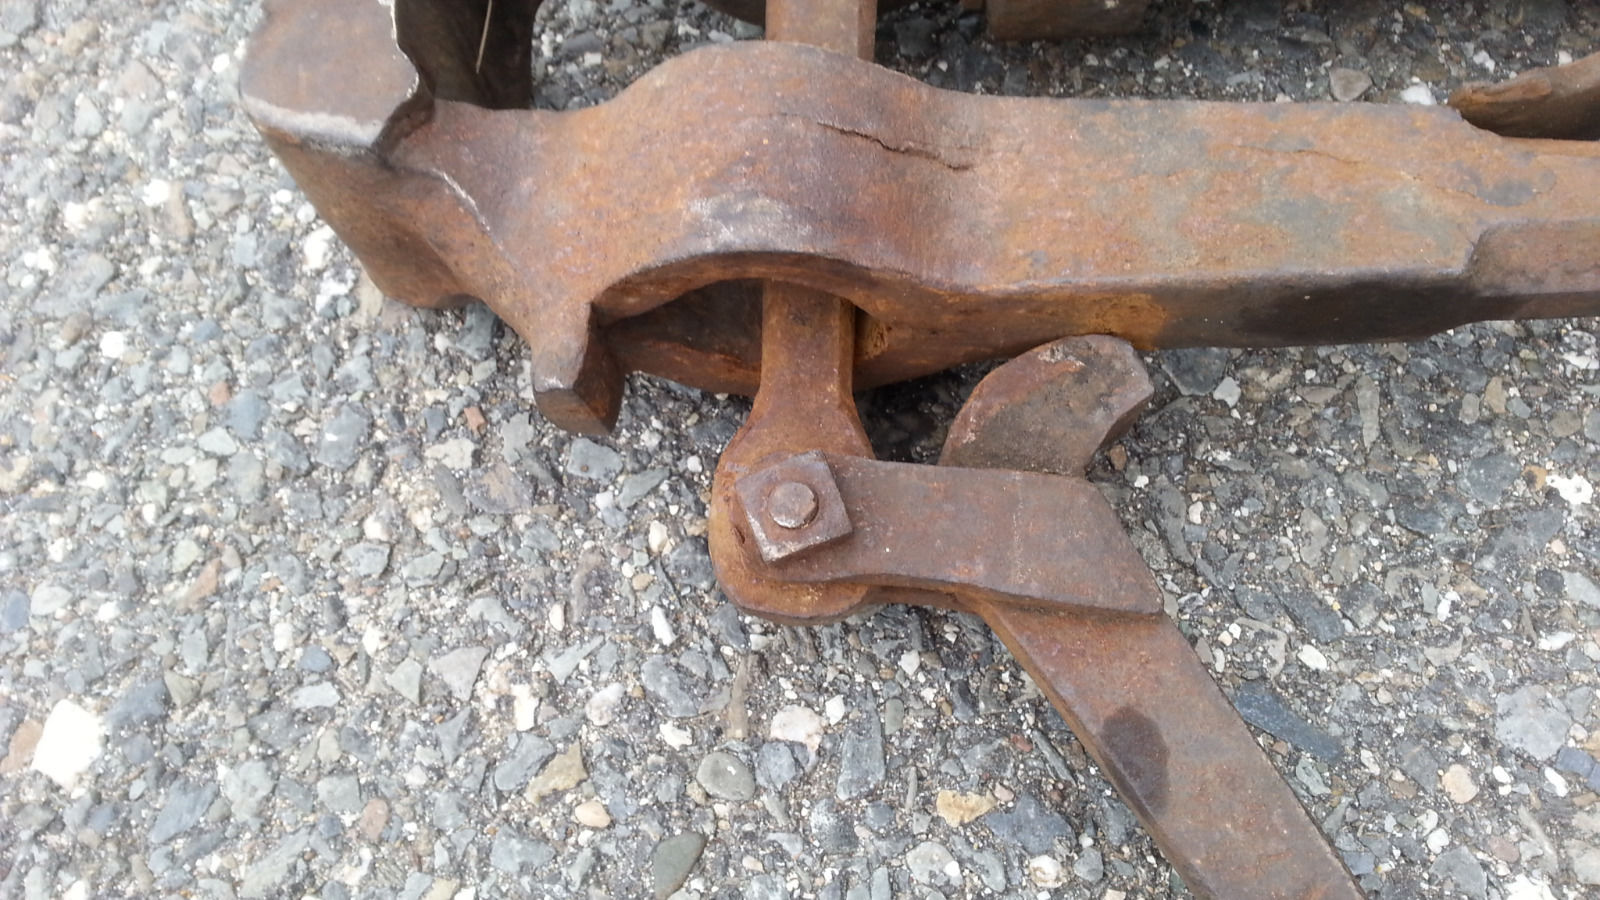
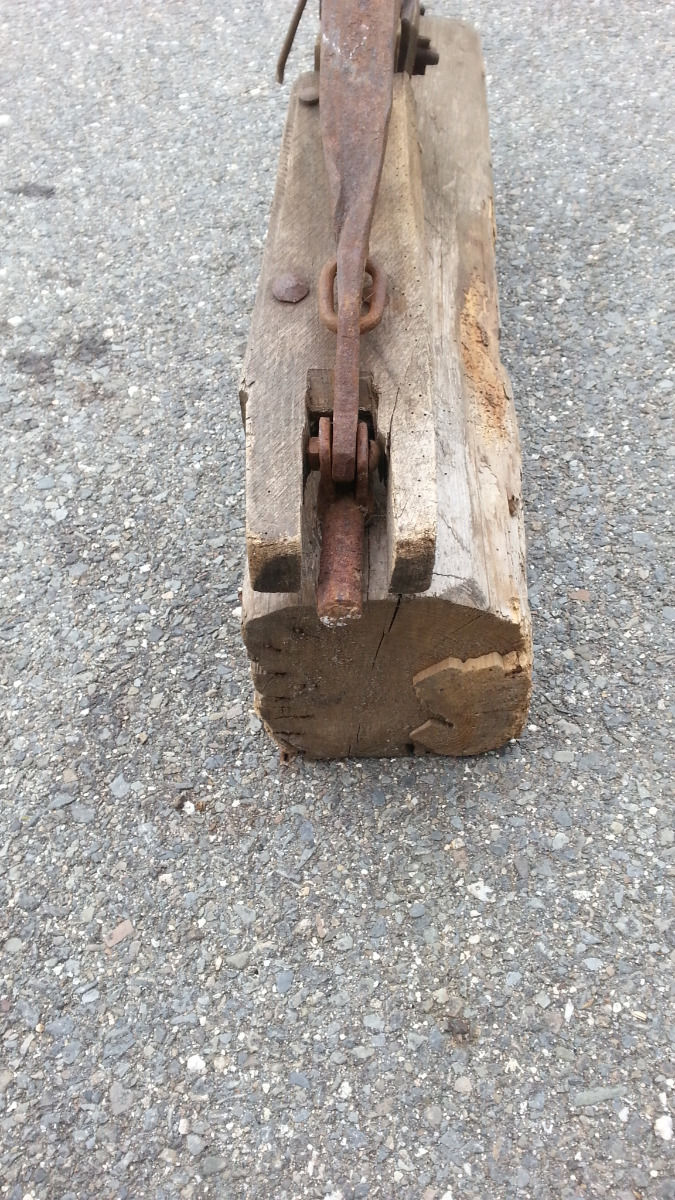
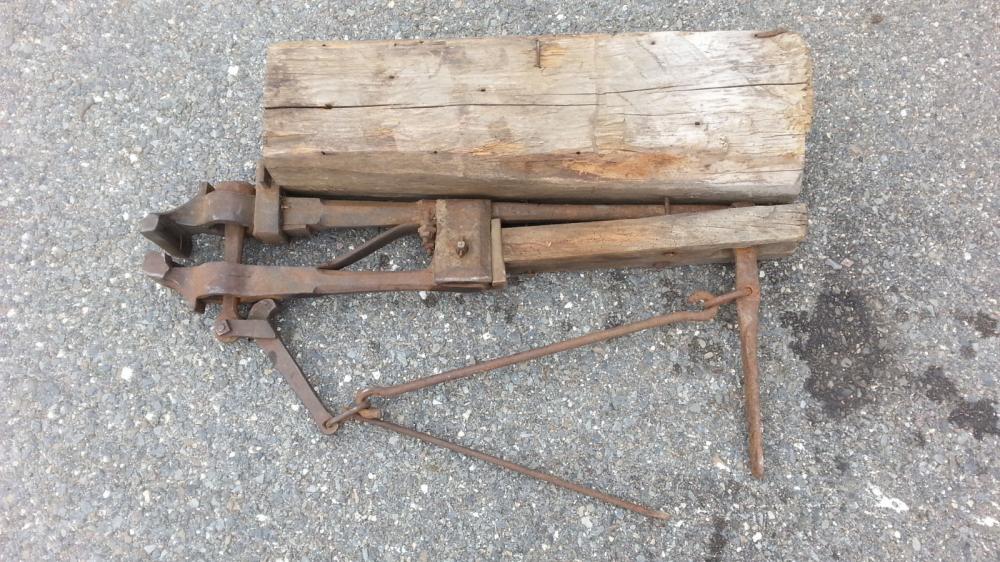
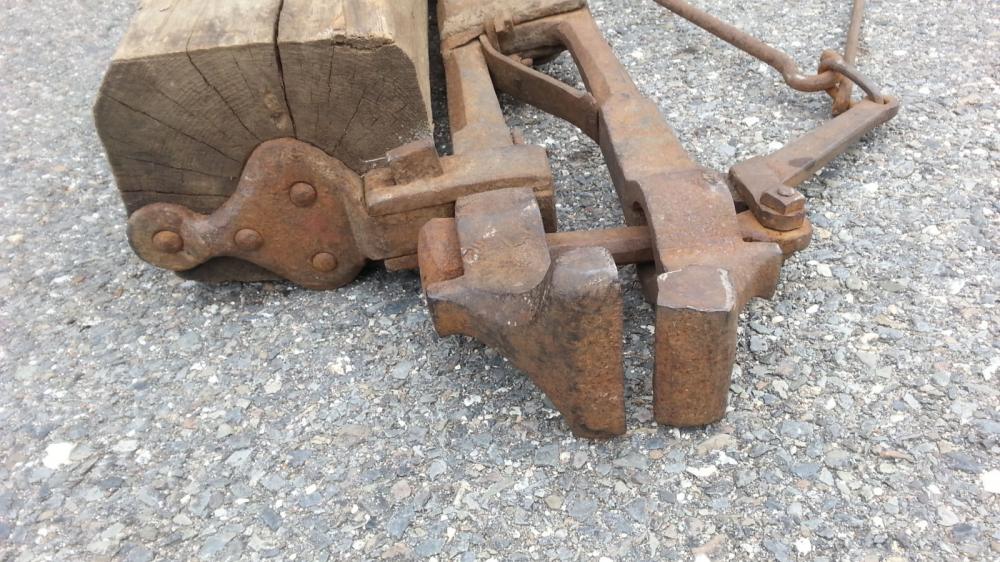
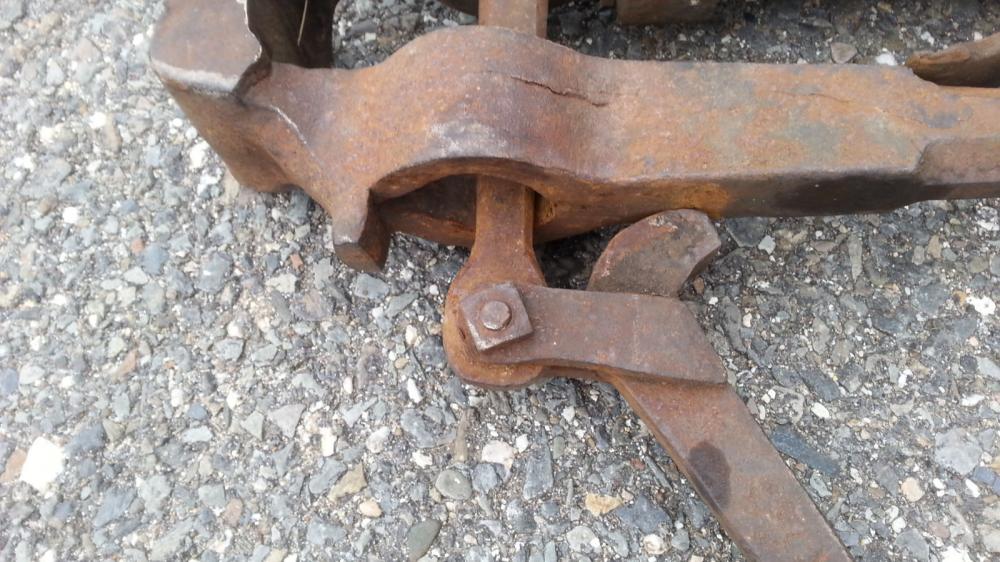
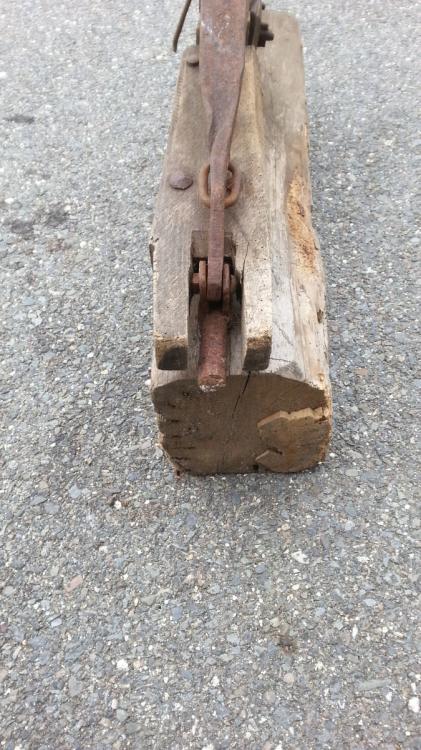
Nope, I just downloaded the photos for future reference since I'd never seen such a critter before. At first glance, I thought it was adjustable. It looks like the large blob on the back of the "screw" could be a nut of some kind. Or, at least, it could have been a nut if the smith needed a little adjustability. The cam looks like it doesn't have far to travel before popping over TDC and a little adjustability would make the vise just that much handier. Of course, if the guy was doing a lot of "just one thing", it might be perfectly set up as is. Like that wood plank over the leg, we'll just never know exactly what was going on.
-
Well, I jerry-rigged a vise/clamp gadget to use on my anvil and tried punching the countersinks after the hooks were bent. Six hooks, twelve countersinks.... and it worked out reasonably well. It's a two-heat job because you lose so much heat getting the hook into the contraption and cinched down, but the time it takes isn't as bad as the time spent tweaking the hooks like I had been doing. I'll have to come up with a better vise/clamp contraption, but this one was good enough to get the order finished and out the door. I've already got a half-dozen ideas on how to fab up something and am hunting for a small machinist's vise I can bolt to a hardy stem.... Now I just need to come up with a way to punch the holes reliably so I don't have to drill them.
-
I love seeing how folks adapt and improvise to get the job done. Whoever came up with this contraption definitely thought outside the box! I'm guessing that this was only used for one task. The little iron rod appears like it would be used to lock the vise shut, jamming against the stump, so the smith could move around and not have to keep his foot on the pedal. Not entirely clear on why he'd put that piece of wood over the leg of the vise, though. If he was worried about it moving around, he could easily have forged a few staples or straps to hold it to the stump.
-
Why'd you put your post anvil so low and back it up against the post like that? Those chunks make for great anvils, but setting it against the post will really hamper what you can do with it.
-
Nice work. If you're going to make it so you can swap the vise between stands, I would definitely save the OEM bracket for the other stand. It's easy work to make a bracket that would work for the vise and not screw into the end grain of the post you have. Then all you'd have to do is knock out the wedge and gib key and move the vise to the next stand.
-
Bates Tongs is in the UK. He makes the sexiest blacksmithing tongs you could ask for! https://www.facebook.com/jezbates.batestongs
-
Those curved ends would allow it to grip various widths of material. Could be for stone work where the individual pieces are never a uniform size. Or, it could be for carrying batteries. I've seen those before, and the short handle doesn't apply too much pressure to the sides of the battery. If you worked around cars and such back in the days before uniformity standards, you'd probably run into a lot of batteries of different lengths.
-
Don't forget that v-bit bolt tongs always hold the next size down. That means you're getting two tongs for the price of one. I use my 1/2" v-bit bolt tongs to hold 3/8" stock all the time, and they do a great job of it. As for holding flat stock, I'm a big fan of Quick-n-Dirty's box jaw tongs. I was skeptical at first, but I really like how they completely enclose the metal. Their 1/2"x1" box jaw tongs work perfectly for anything 1" wide. I just used them to work on a knife I made from some 1"x1/8" stock. Between my 1/2" bolt tongs and the 1/2"x1" box jaw tongs, I had no problem holding the metal by tip or by tang. That's two pair of tongs to securely hold 6 different sizes of steel.
-
Eddie, I tried it like that a few times, but getting the holes to line up with the shank so the hooks come off the wall at the right angle is either very tricky... or I'm missing something simple. Even a few degrees off 90 is very apparent when you put it up on the wall to test it out, and then you have to go through all the motions again. That tweaking to get it right is a huge time suck. Frosty, I'll look forward to seeing what you come up with. I need to get out into the shop today to work on a holding fixture.
-
Eddie, I tried that, but the doing anything to the holes after they've been formed really distorts them so they look atrocious. Ideally, I'd like to keep the clean circular rim around the countersink undisturbed. Try it, arftist. It takes boucoup time to get the shank lined up so the horizontal portion comes off the wall nice and square. You have to clamp the hook in the vise, tweak it a bit, pull it out and test it against a flat surface, put it back in the vise to tweak it just another hair, then pull it out to test it, then put it back in the vise to twist it two hairs back the way you just came.... Not sure what "insensitive, bend first" means, but I'd certainly like to get this down to a two-heat process with results 'to spec'! Making a punch that would create the screw hole and countersink in one movement would be nice, but everything's predicated upon doing it in such a way that the holes are lined up with the bent portion. That's the sticky wicket at the moment. That's about what my jig looks like, though cold bending doesn't work. Medium-carbon alloy and work-hardened at the factory... very tough to bend a tight radius on those babies if they're not warmed up a bit first! The good news is that I think I might have come up with a way to make a vise/jig that will hold the hook perpendicular to the anvil face so I can pound in the countersinks. I'll have to double check my scrap pile, but I'm pretty sure I saw a nice 90º fixture in there that would work perfectly as a hardy tool and just needs a stem and some kind of clamping mechanism to hold the hook. I'll report back tomorrow with my find....
-
That was my thinking, D. I can't punch the holes on these or it would mess up the bulge formed by making the divot, and drilling out the screw holes is real easy when the rest of the nail is straight. I've got an idea for a jig/vise that will hold the nail vertical on the anvil. At least, I think it will.
-
Frosty, that just might be the ticket! Just have to fabricate something that's easy to get the hook into and secured so I don't lose the heat. As I'm thinking, it would make each hook a three-heat operation, but it would also kill the tweaking phase of the operation.
-
Hmm.... The form is just a section of metal bent and welded to a hardy shank so I can bend the two 90º in one movement. I'll have to try coming up with some kind of mechanism that holds the bent hook square to the anvil's face so I can hammer in the divots after the hook has been shaped. I'll take a photo of the form next time I'm in the shop.
-
Maybe my frustration is blinding me to something obvious, but I've about reached the end of the rope and thought I'd reach out to the collective wisdom of IFI. One of my signature pieces is what I call the 'big nail wall hook', and as the name might hint, it's a hook made from a big nail. The problem I'm having is getting the leg of the nail such that it will come off the wall at 90º. My tooling is basic, no fly press or power hammer, so I'm spending an inordinate about of time with the hooks in the vise, tweaking them with the turning forks. I have a form made and can hot-bend the hooks for consistency, but getting the dimples for the screws is a horse of a different color. Right now, I punch the holes first, using my guillotine tool to hold a round-nosed punch. The real issue comes when I bend the nails around the form, trying to keep the flattened face (where the divots are) perpendicular to the bends. Nothing I've tried keeps the alignment so the end product shoots straight out from the wall. While this isn't a problem when you only have one hook on the all, when you like up several of them to make a coat rack or the like.... well, it's about as ugly as the south end of a northbound mule! Like with anything else, consistency makes a huge difference in how the product is perceived by the customers. Spending 20 minutes tweaking each hook to get it reasonably square and plumb is just not working smart. I figure there's got to be a better way and I'm just not seeing it. So, IFI, what are you thinking? What have I missed?
-
Very nice score! I've been using a Fisher for awhile and can't imagine a better anvil. I'd think I'd died and gone to heaven if I found a 400-pounder with such pristine edges!
-
I wouldn't do anything to it until you've worked on it for a year. Horns are good for making curves, but most of that work actually takes place off the side of the horn. The only time I'm hammering directly on top of the horn is when I'm trying got stretch some metal, like opening the eye of a bottle opener. The chisel marks probably won't cause a bit of distress.