VaughnT
Members
-
Joined
-
Last visited
Everything posted by VaughnT
-
I've seen a lot of those types of videos. In the third-world, labor is cheap and supplies are expensive, so they'll figure a way around things. That anvil might have been the end of a long shaft, the majority of which is buried. Saw one vid where I'd swear they were using a round from a 155 howitzer as the anvil. The ogive of the chunk of steel sure looked bullet-like, and there was some kind of groove that looked like a cannelure.
-
Just found out after seeing "deceased" under his name here. A loss for us, but a gain for heaven. I reckon God needed help fixing the Pearly Gates and called DSW to lend a hand.
-
If you go with the end grain blocks, you'll be pretty happy with the results! The slight unevenness is really comfortable on the feet, and the floor just looks "right" in a shop. You can grout with an equal mix of portland cement and sand. The cement hardens with ambient moisture and helps look the blocks in place. Might not be absolutely needed, but a small bag of the stuff is cheap enough. Keeping the floor dry is really important because you don't want moisture being trapped underneath. I've seen bad jobs done where the top looked great, but the bottoms were rotted halfway through. You couldn't tell until you stepped on one and it gave way under your foot like some kind of pressure plate in an Indiana Jones film.
-
-
From what I gather, they are trying to raise funds to complete the documentary film on the making of the hinges. The hinges are already finished, I would guess, and they don't need money to help in that regard. Maybe I misread something. Either way, I think it's definitely a worthy cause to support, and the final product is sure to be even more enjoyable than an episode of Forged in Fire or Milwaukee Blacksmith. The 'devil' they refer to is who legend says had to help make the hinges in the first place. Again, I could have misread something, but I seem to recall them mentioning that the hinges were so complex that they must have needed to outsource the work..... From the videos I've seen, it's some amazing skill, for sure.
-
Most VFD's I've known are easy to get along with. They might have regulations against such a thing, but they might also be able to schedule an exercise where you just happened to be cooking an anvil. A nice donation to the department is always appreciated! Definitely drill for your pritchel hole and hardy before welding. Or, and this might sound entirely ridiculous, do away with the tine as the top piece. Just level everything off with some 7018 (or whatever rod you decide), and then apply a couple passes with a good impact-resistant hard facing rod. I realize you've gone through a bit of work to cut down the body for the center ridge, but there's no law demanding that you continue on that path. If you backfill with common 7018 (assuming it's a good rod for wrought iron), it won't take any longer to even up the face than it will to join the tine to the body. You're going to fill that void either way. So, if that's removed from the equation, the only thing left to consider is how you're going to deal with the hardy and pritchel holes. With the tine in place, you're going to have a bear of a time drilling and filing to get a square hardy hold. If you're doing straight weld, it's very simple because all you need to do is make a dam to stop yourself from welding into the void that's going to be the hole. Very easy to do that with some fire brick. Another idea I had was to flip the whole thing upside down when you get ready to weld. Since heat rises, you could minimize the loss of temper in the face of the tine by keeping it in contact with the table. Let all the heat go up into the main body, for the most part, while keeping what will become the face of the anvil as cool as possible. On a piece as thick as that tine is, you probably won't have any issues with softening. That's my thinking, anyhow.
-
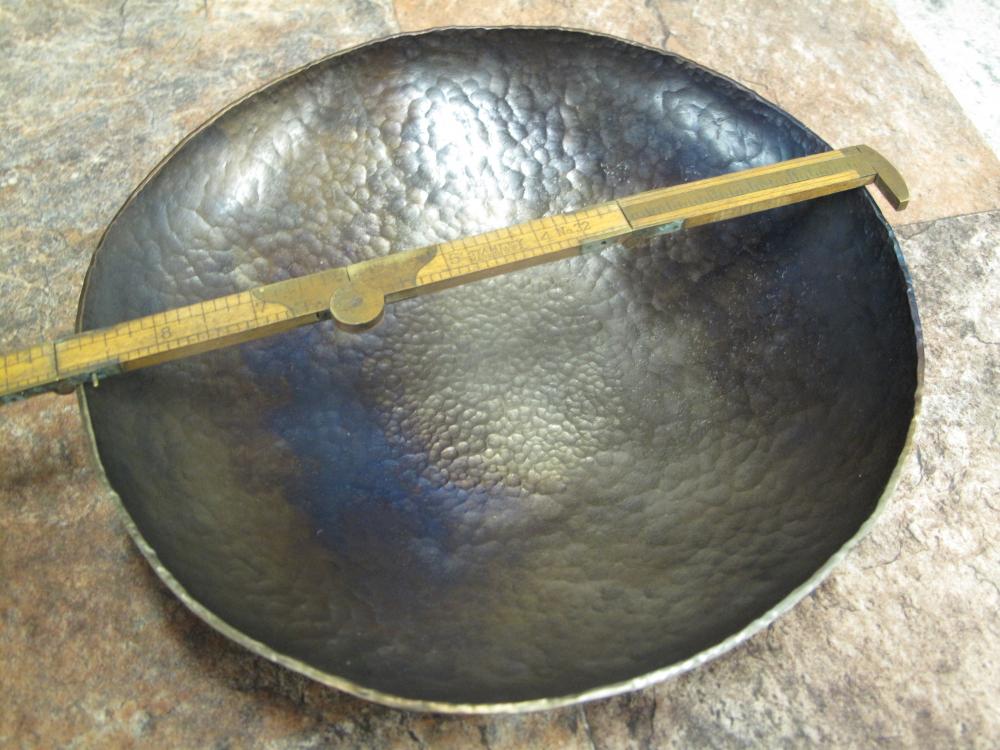
A great find! Too bad it doesn't appear you got the swage block. That would have been very handy, if just for making bowls and ladles. Still, you got quite a haul and are now set up to do just about anything you can imagine.
-
I ran across this teaser video the other day and have been following along as best I can. Like any blacksmith worth his salt, I can only stand in awe of the hinges they're recreating. The originals are absolute marvels and they seem to be right on track to duplicate them. I can't imagine the skill involved. From a practical standpoint, I'd really like to know the order of operations on something like this. I'm working on a door project right now and it's about to drive me batty. I can't even begin to imagine how to get through something as complicated and beautiful as the hinges they're making.
-
No issue to it. I don't recommend it, but since it's done I wouldn't worry about it. The worst case scenario is the weld cracks and the anvil is freed. Weld or bolt on lots of bracing to make the stand stiffer and you'll be golden.
-
Frosty, the forges are built by Majestic. I have one and wouldn't recommend them..... I remember the one testing where the maker was kinda looking a bit askance at the results. I believe they had to make a cutlass because they were on a wooden ship set. The one blade cut through a hanging rope, but failed to cut through a big ol' fish. The second blade failed to cut through the rope, but sliced the fish clean as you please. The one guy didn't much like his results, wondering aloud how you could cut through a rope and not slice through the fish. I saw the clip on the internet where they slowed the film down and you could clearly see the tester twist the blade before it hit the fish, not quite a full-flat impact, but enough drag that a complete cut wasn't in the cards. Unintentional, sure, but still something that could have potentially cost the contestant ten grand. My personal preference is when they use some kind of apparatus to hold the blade during the test. This removes any unintentional faux pas on the part of the tester and showcases what the knife can really tolerate.
-
Jeremy, that's the exact kind of repetition I'm looking for -- enough variety to let you know they aren't machine-made, yet similar enough that they look good hanging together on a display. Thanks for that link. His jig is pretty close to what I was thinking of building, though I was planning on using some angle iron and simply bending it into a triangle by cutting through one side so it bends at the "hinge". I'm not sure I'll be able to cold bend the 1/2" round stock I use, but it's worth a go. The big issue is the spacing on the thing. I start with 30" of 1/2" round and peen the ends so they have a bit of flair to them, thus shortening the bar to about 29 3/4". I've found that this makes a triangle that's "just right" in size, scale, look and ring. Another 6" makes the ringer for the bell, so the math is pretty easy to cipher when wondering how many units you can get out of a single bar. Right now, I take a heat to peen each end, then a heat for each of the bends. Then another heat or two to get things all looking as neat and tidy as possible - generally with a good bit of cussing involved. The first four heats can't be changed, but that last heat or two to clean things up need to go. A real time-burner and aggravating!
-
Ran into a bit of a kerfuffle this afternoon while making a dinner bell for a nice lady. I was running really low on fuel (doesn't that always happen), and got the thing barely finished, struggling at the end.... and it looks pretty horrible. She liked it because it's "rustic" and "looks so blacksmithed". I think it looks like a drunk chimpanzee got in the metal pile. This got me to thinking about making a jig that allowed for quick, even and consistent placing of the bends. While I like a little variation just so the things don't look like they were made by a machine, I'm seeing far too much variation between the triangles I make. When stacked up next to each other, the variation is really glaring, and I don't think it looks as good as could be. This isn't normally an issue because I don't have a big stockpile of them for customer viewing. But, if I have a handful of them lined up at a demo, I'd like them to look reasonably close to one another. So, before I head out to the shop to cut and weld stuff, I thought I'd reach out to the wise minds of the collective to see how others are handling the issue. I see a lot of folks making some really nice triangle bells - nice enough that they look almost like they were made on a machine. Question is, how is this accomplished?
-
Love that riveted band on the anvil stump! Too bad you can't buy the stuff, but at least the environment is conducive to outdoor storage and the stuff doesn't look to be in too bad a shape. Keep a keen eye on the obituaries and maybe you'll have better luck at the estate sale.
-
Looks like it was a surface plate at one time, but was misused and turned into something else. Definitely a jerry-rigged set up particular to the needs of whoever was using it last.
-
I've never seen anything like it. It's times like these that I really hate the fact that nobody seemed inclined to mark their swage blocks when they made them. The shapes for the mattock and adze would have been really handy for cleaning up the junction between the blade and eye. That can be really tricky with a striker or power hammer and working from the top. Being able to flip it over and hammer it into a mold.... really speedy I'd think.
-
Thank you. Believe me, when this project is finished I'll be more than happy to post some photos! Now I just need to make some decent door handles....
-
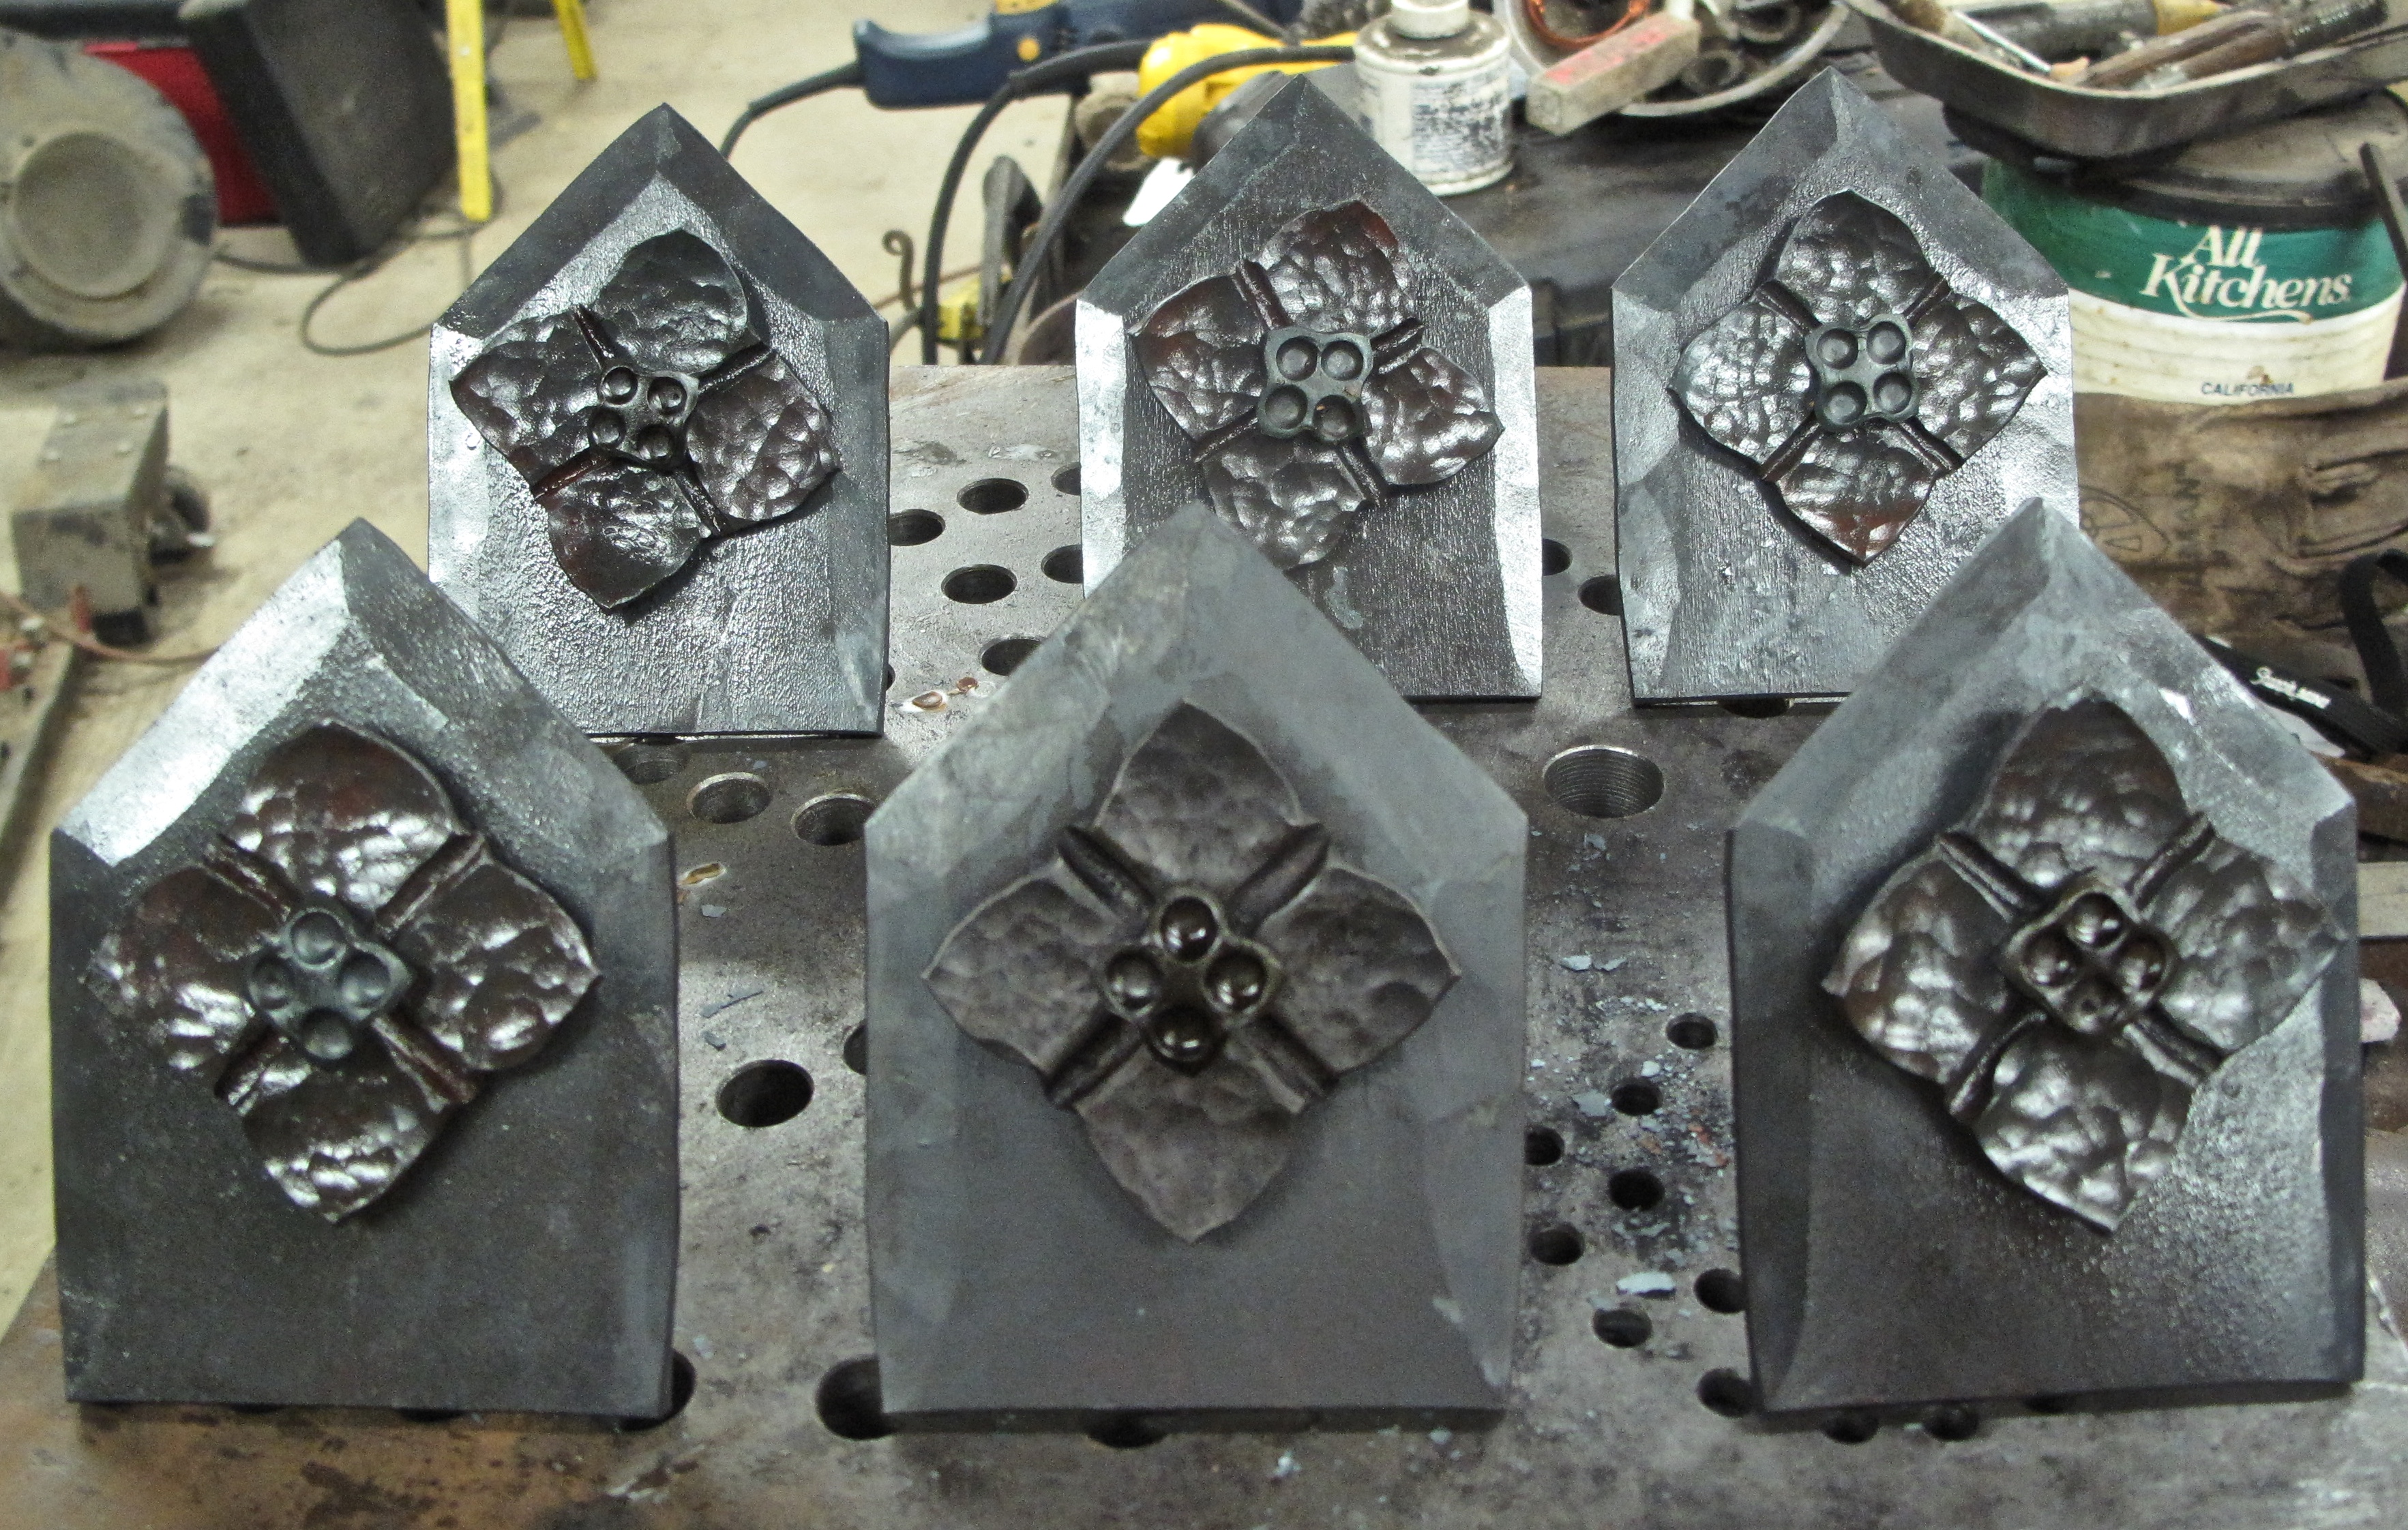
Borrowing from Mr. Coe..... I have a door project that needed dressing up, so I made some rosettes and needed some decent bolts to hold everything in place. I started with square head lag bolts this time and like how they turned out. Used just a small round-nose punch for these one. Did the punch and chisel technique on some previous tries, but thought it was too busy.

-
Collars and shackles -- and not the historical reproduction kind. Not a year goes by that someone doesn't ask me to make a set - especially after that Game of Thrones dragon lady turned her collar into an accessory to hold up her dress! I don't have a problem making the stuff, but I can't get over the notion of possible liability issues.
-
I wouldn't have any problem putting a mobile forge on the wooden deck in front of the door, and the anvil just inside. There is zero fire hazard to having a forge on your wooden deck. Even if you drop a hot coal on the wood, there isn't enough heat in the coal to set the wood on fire. Mass, surface area, ambient temperature, wind.... it all plays a part and there's no chance that a conflagration will ensue. Folks use barbecue grills on their wood decks all the time and it's not a problem. And, don't forget that you'll be right there to stomp on any coals that fall. The worst that could happen is that you put a little burn mark on the wood.... but what are the odds of that when it's so cold out? With the anvil inside, out of the wind, you can forge a goodly bit because you're only two steps away from the forge.
-
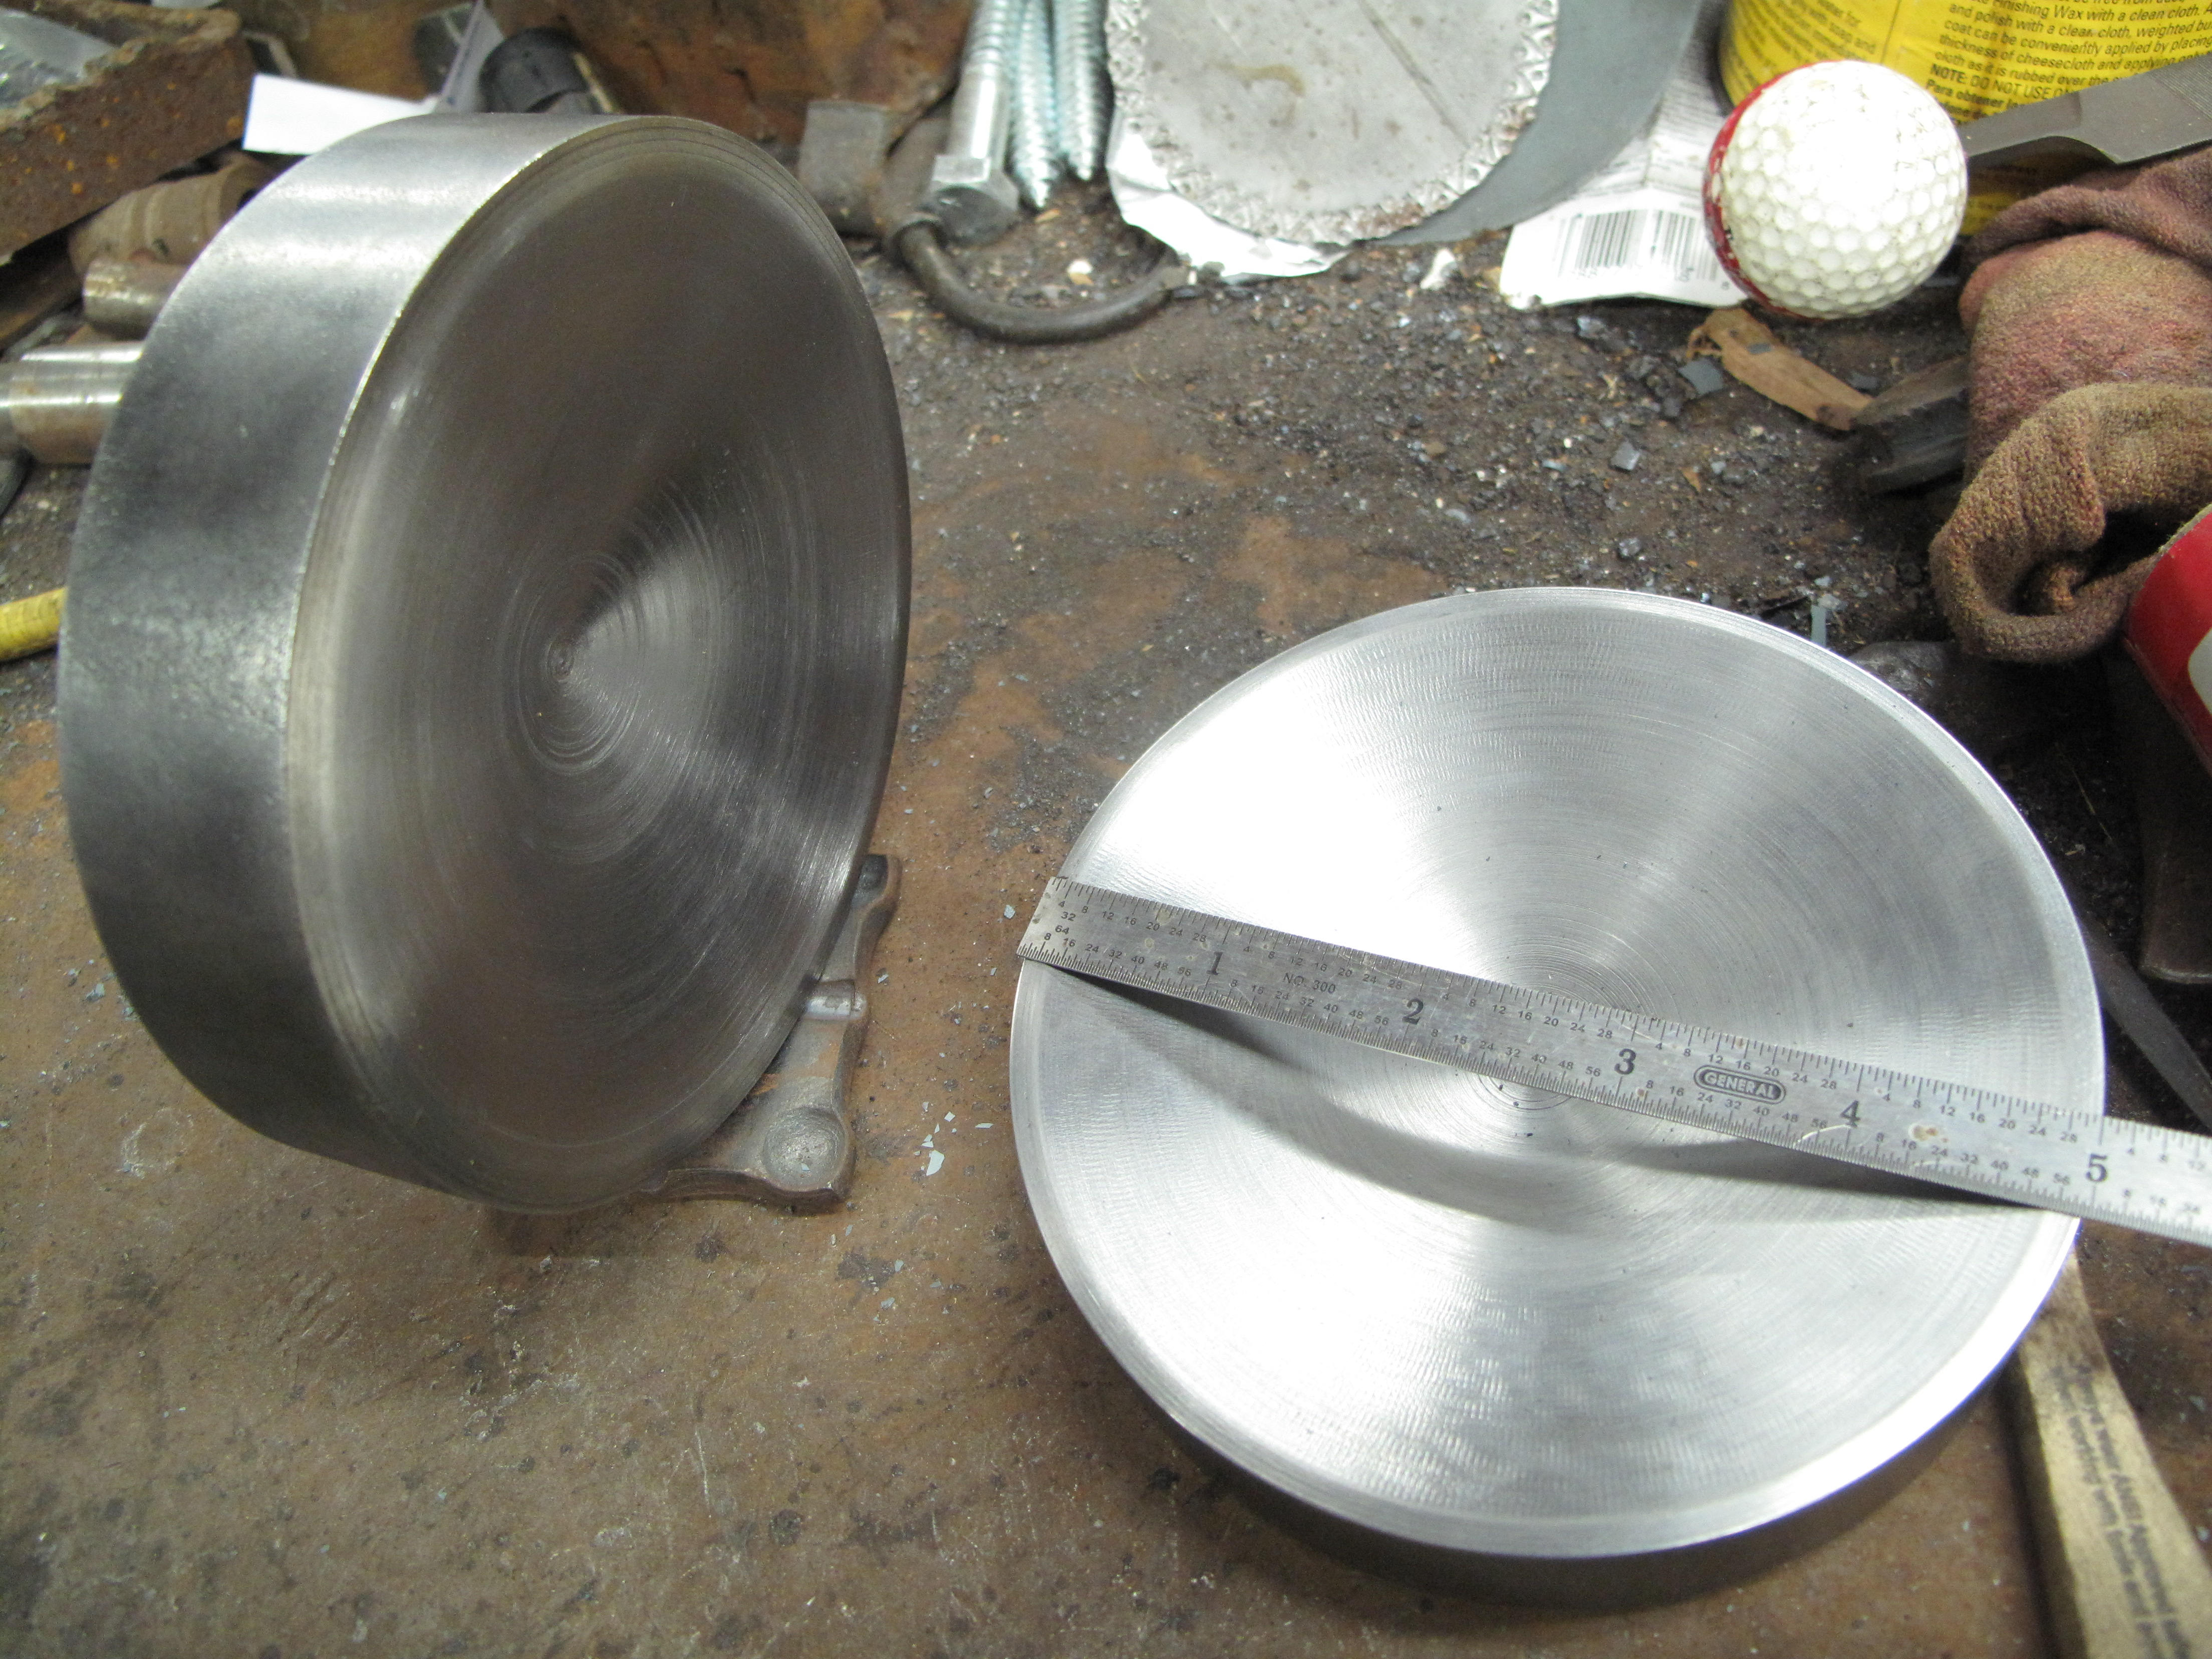
Well, I can happily say that the puck is working better for me than a ring or a tank bottom. However, if I was able to get my hands on a 'blipped' piece of steel, I'd gladly retire the puck just so I could work on a chunk of steel that was forged by high explosives! That would just be far too cool a tool to have in the shop!!
-
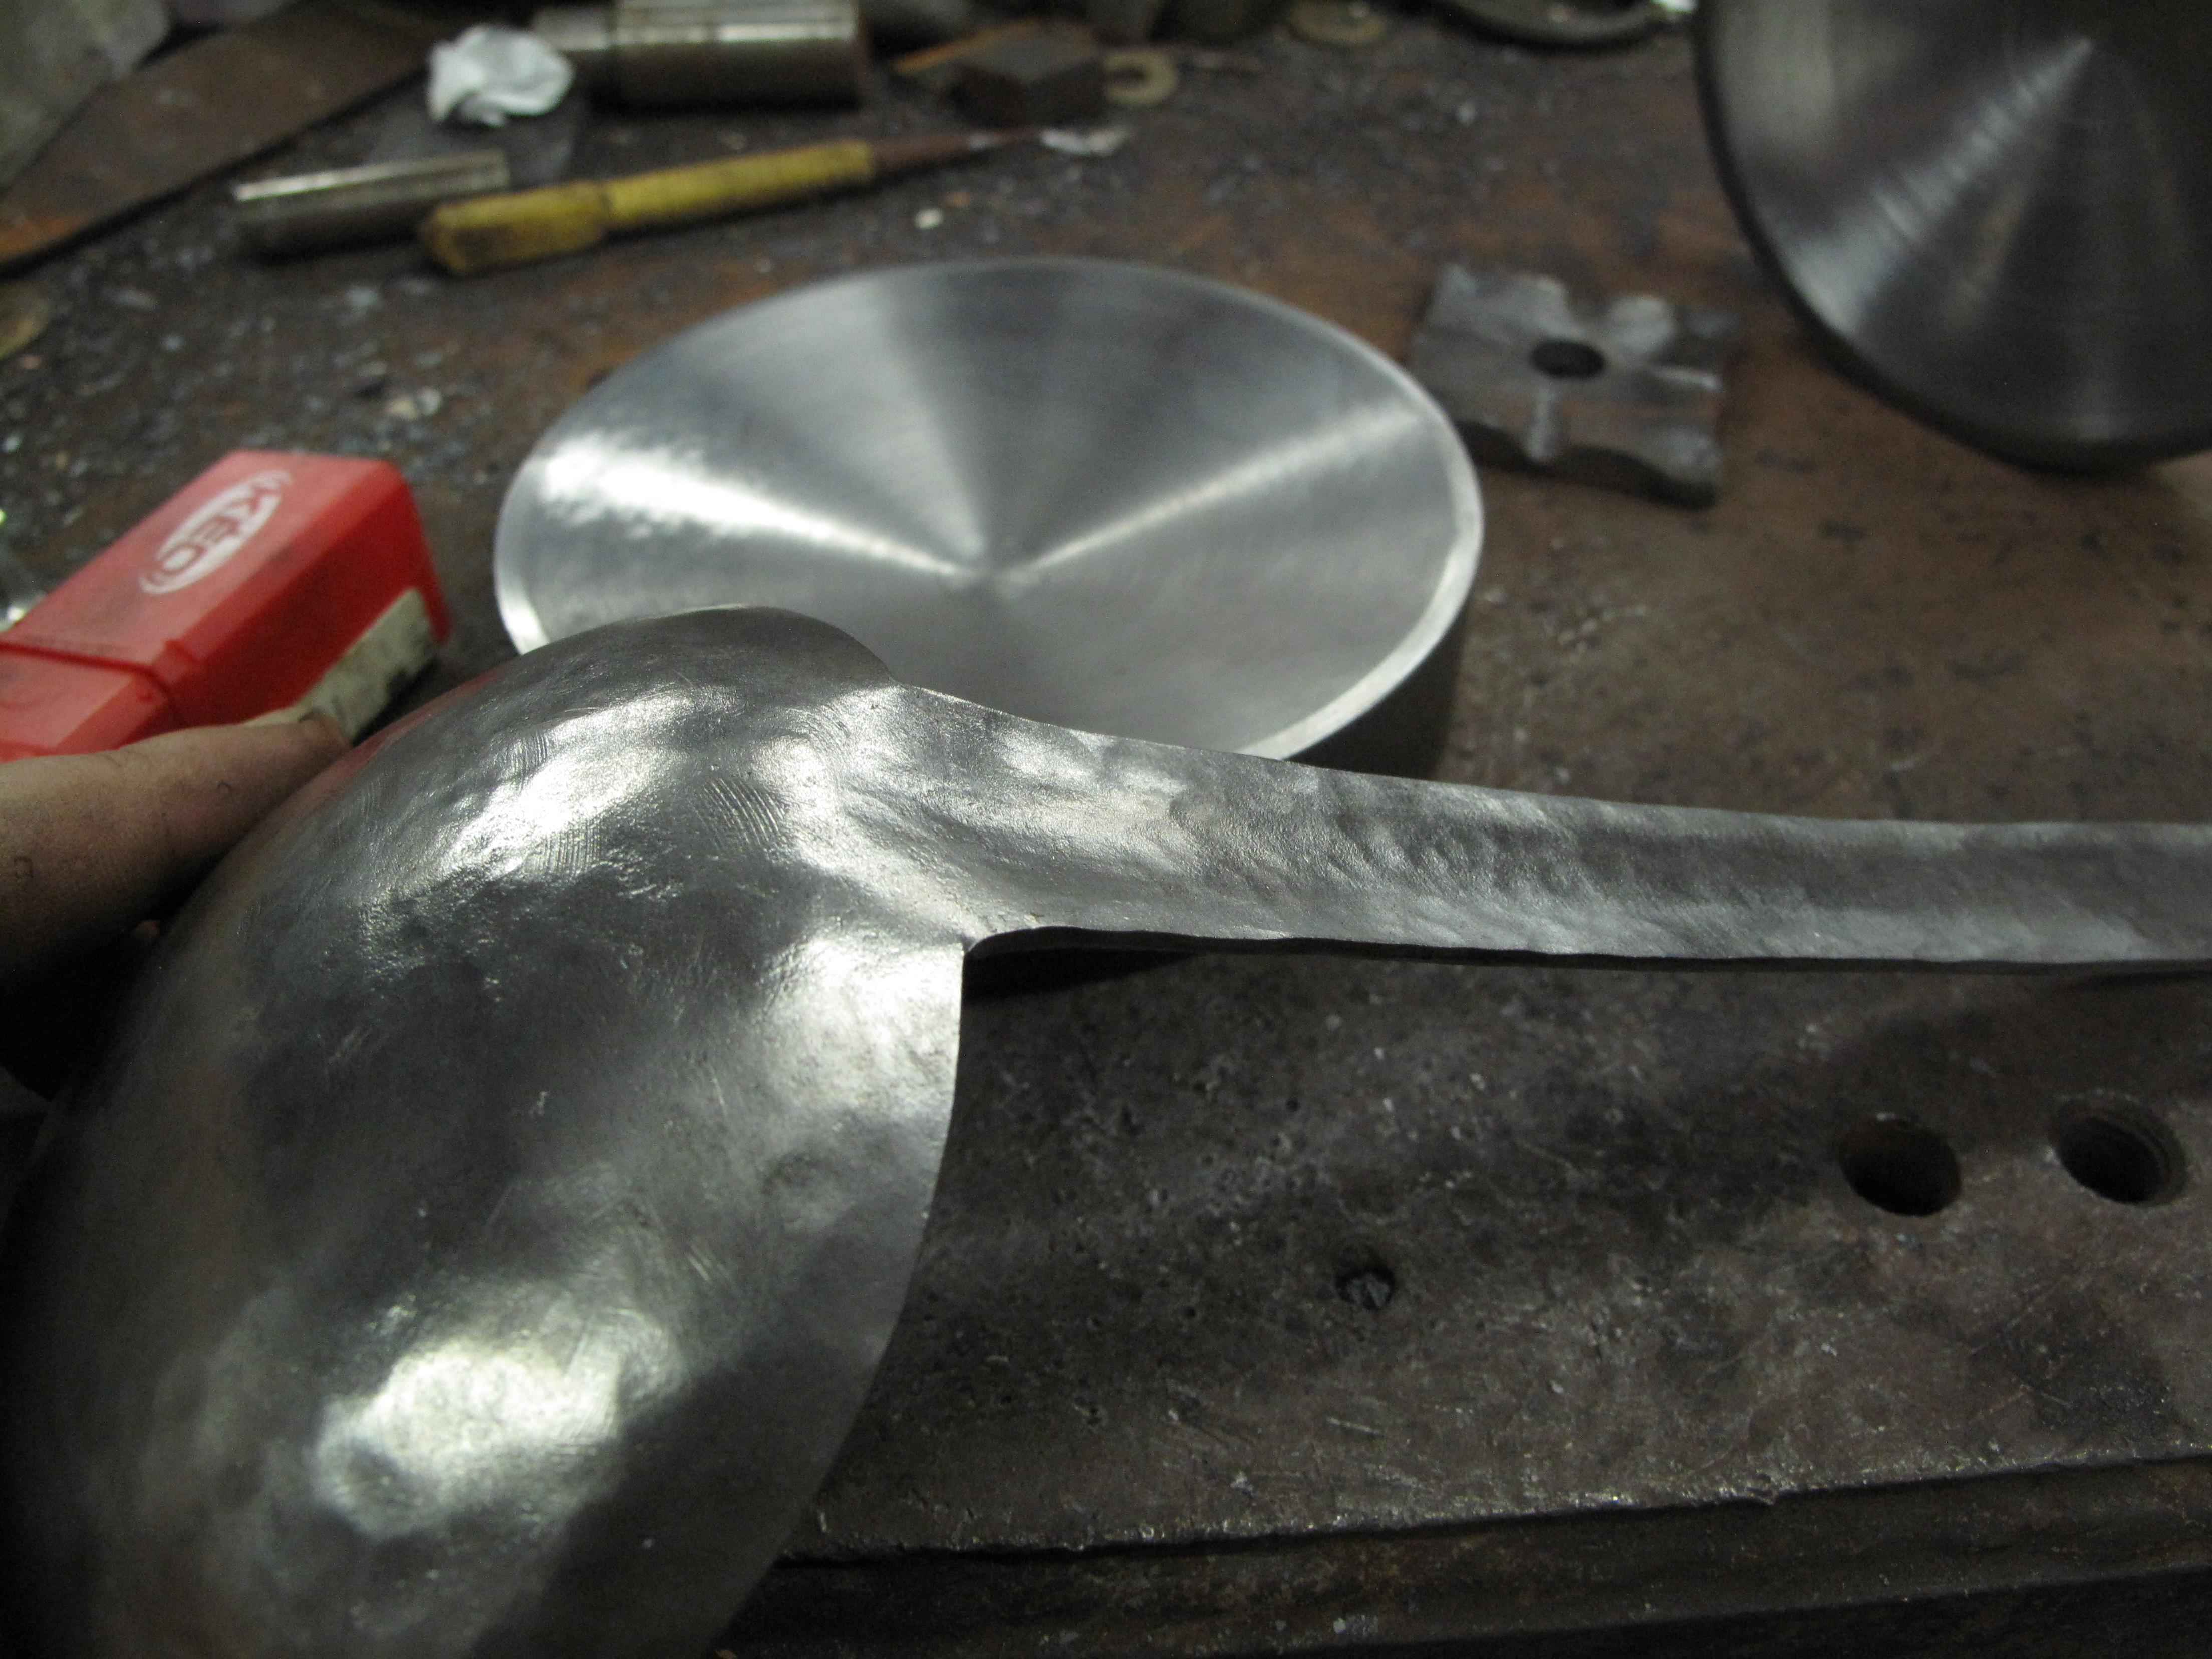
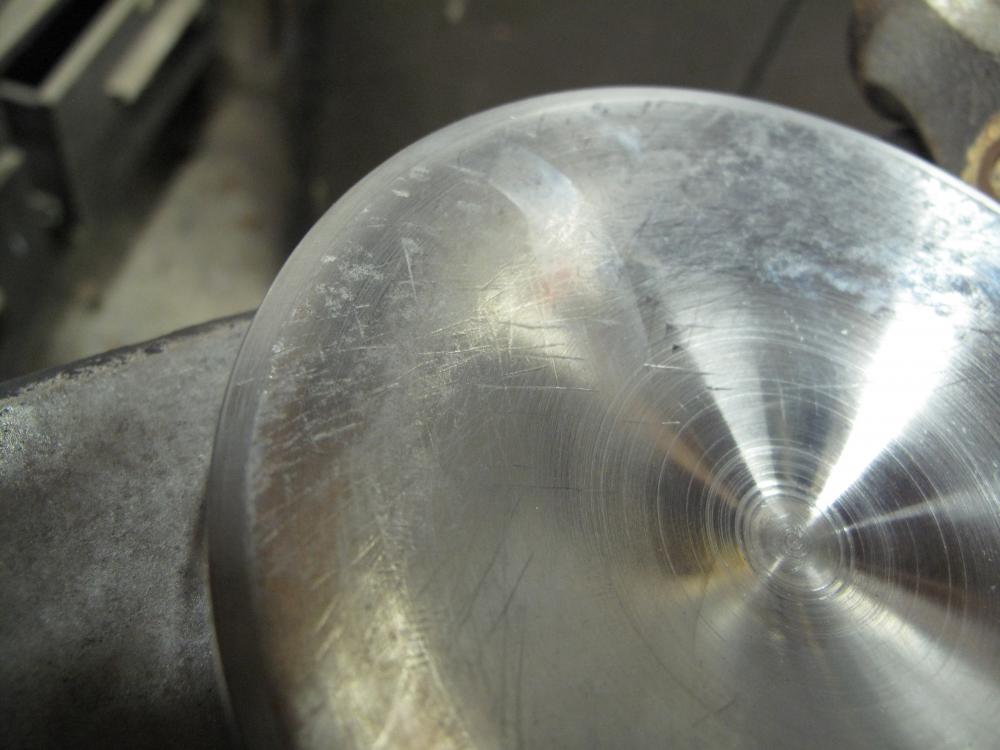
Thanks, gentlemen. Jim, a wood saddle is a good idea. The Steel Puck of Awesomeness™ does a good job of staying put on the anvil even without a hardy stem, but being able to sit down while hammering would be a nice bonus. Here's my largest bowl to-date, and the Puck certainly helped a good bit with the making of it. If I can find larger sheets to work with, it will be fun to see just how big I can go...
-
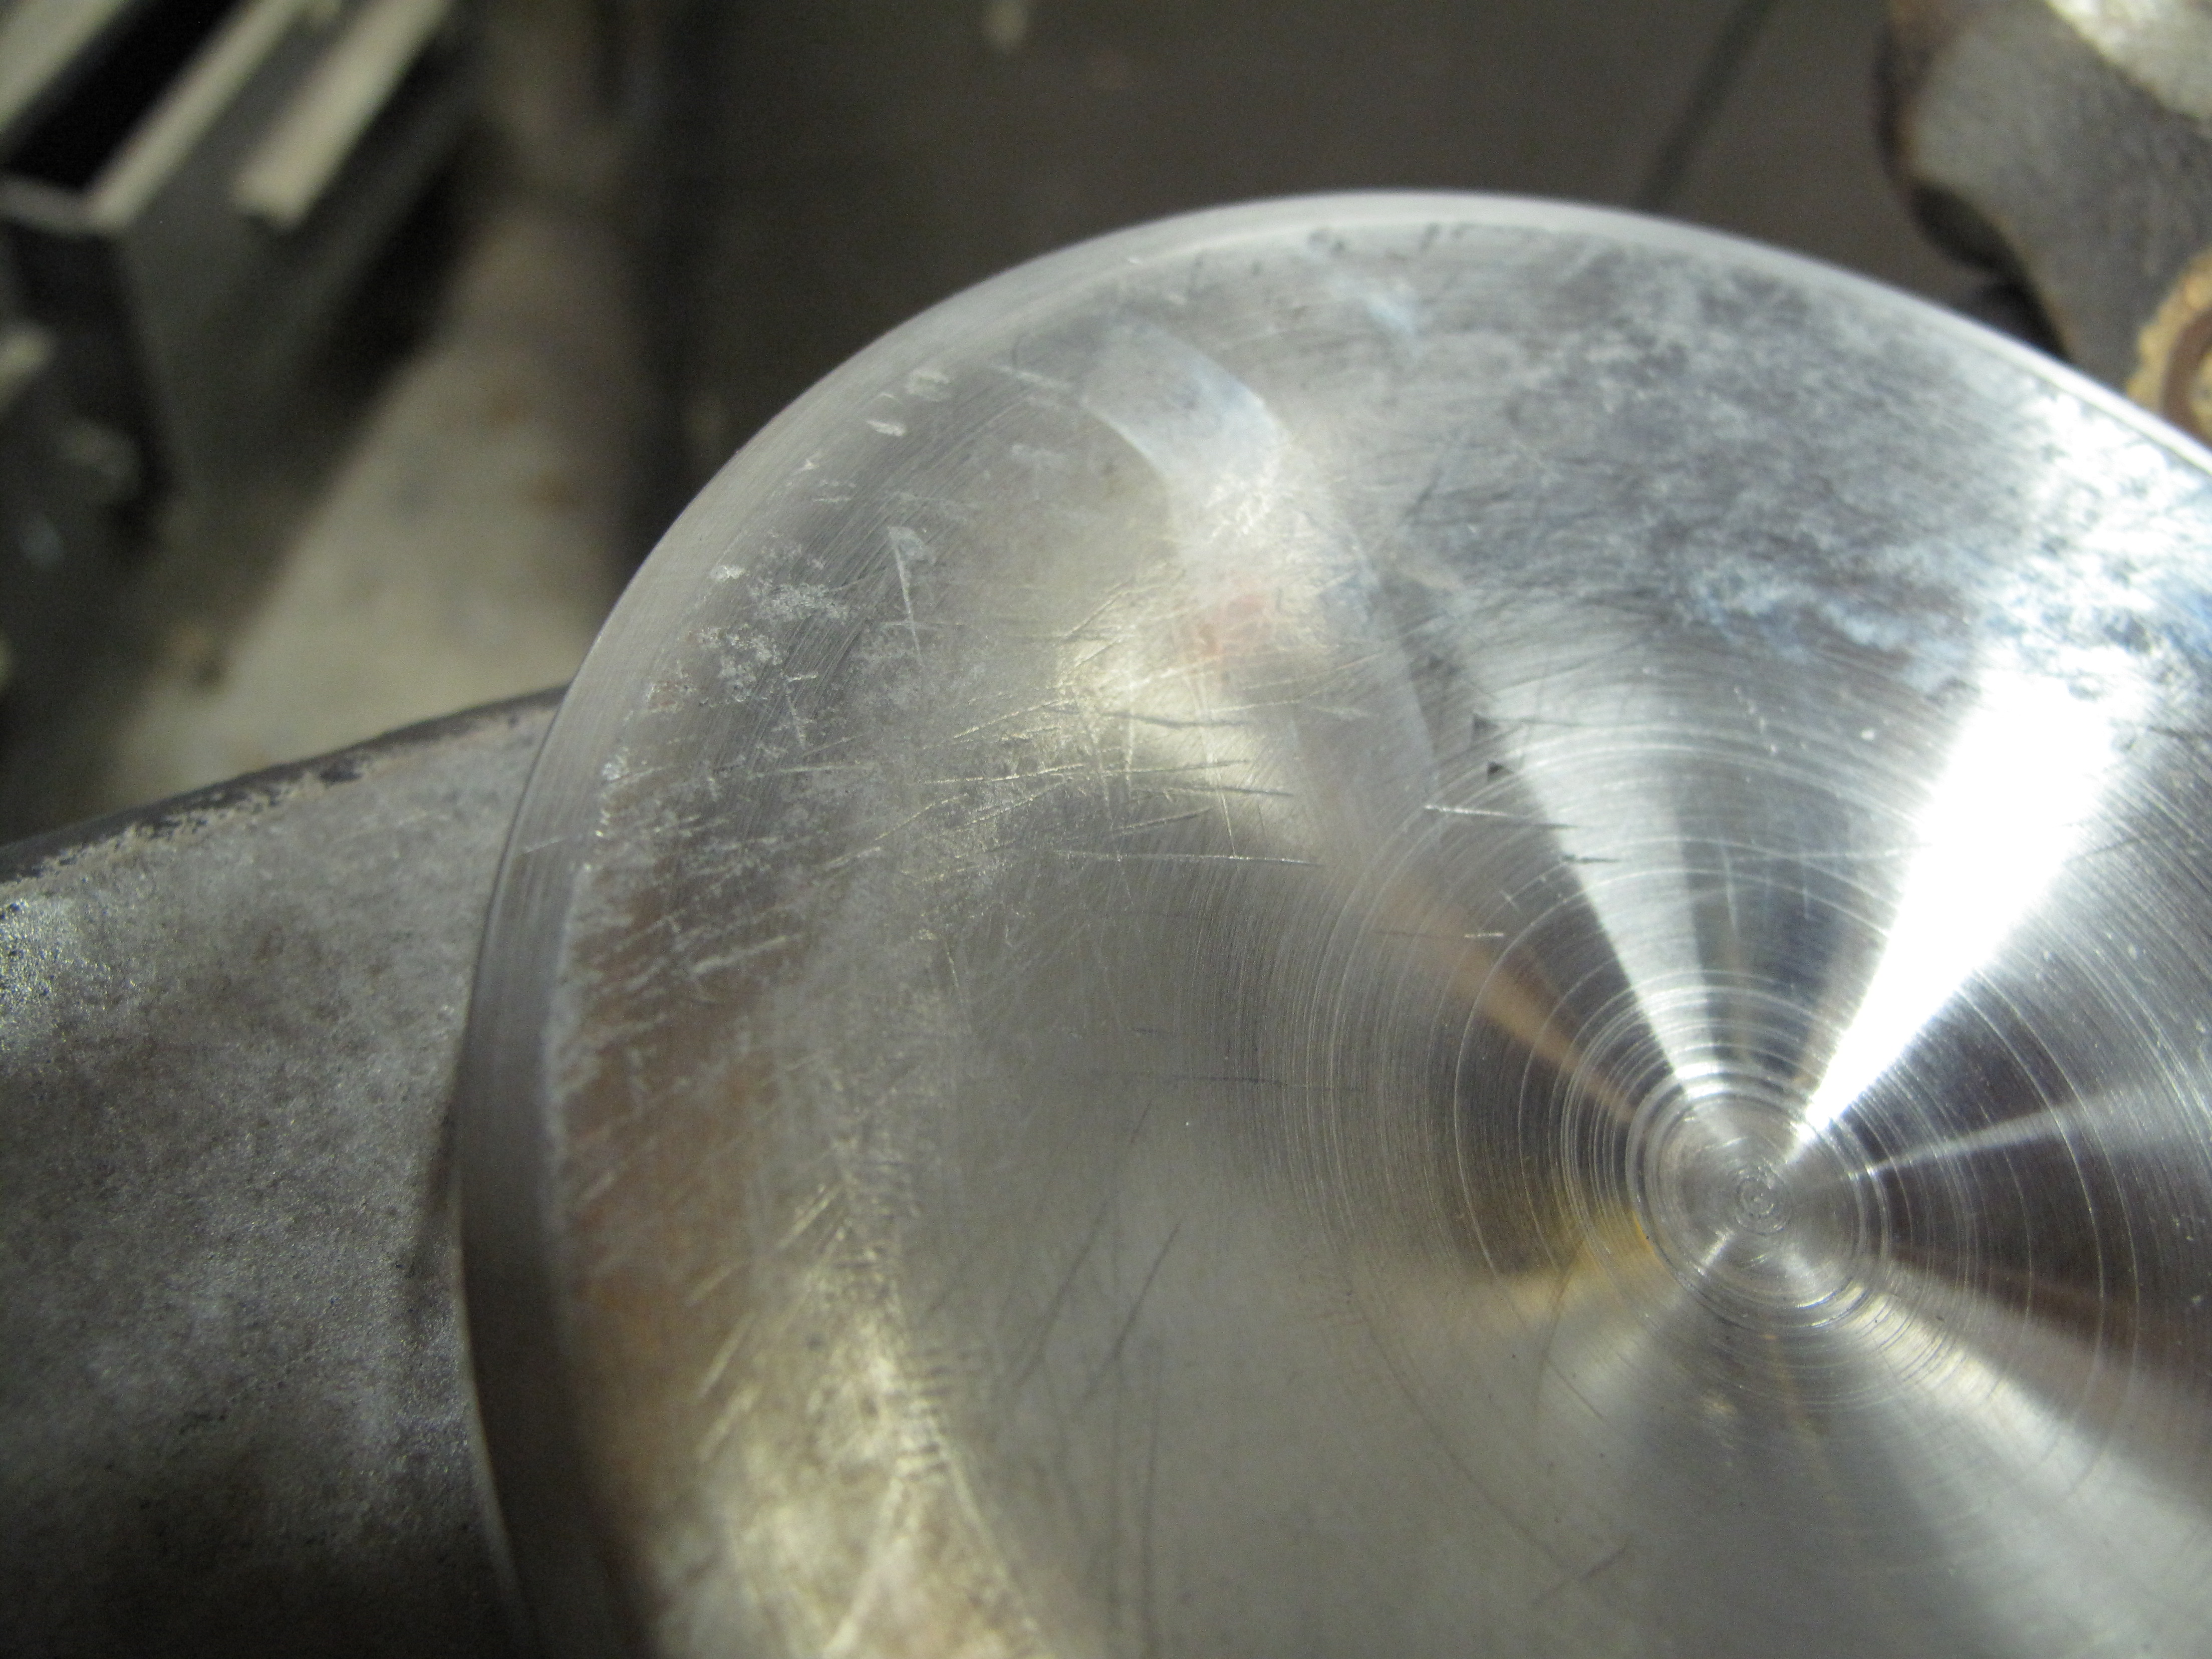
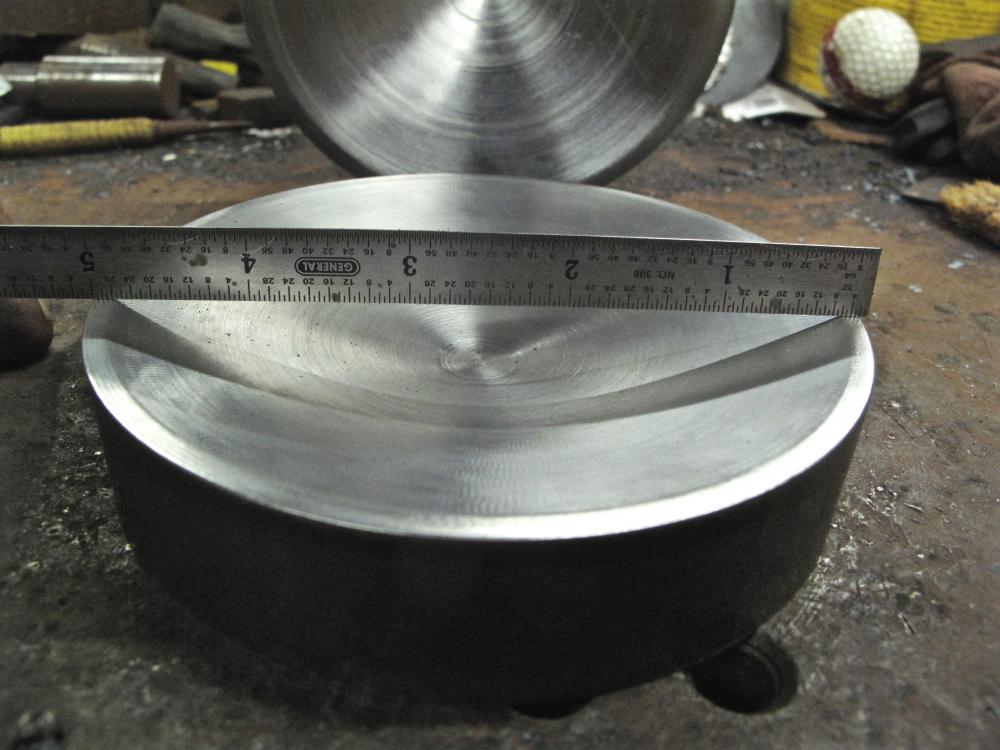
For the longest time, I've been hunting for an O2 cylinder or the like so I could scavenge the bottom for dishing metal. Never could get my hands on one, so I made a few rings, but wasn't really happy with them. Making a depression in a stump certainly worked, but the stumps always wore out or cracked... and always seemed to get in the way when I was doing something else. Talking with my dad, recent purchaser of a vintage Southbend 9x30 belt-driven lathe and just aching for an excuse to tinker with it, he said he had an idea and soon presented me with this very nice addition to the shop. I'm calling it the Steel Puck because I don't really have a better name and it does kind of look like an oversized hockey puck. Five inches across and a solid inch thick, it weighs just over five pounds. I believe Dad said the slope of the depression was 20º, but I might have misheard. For working bowls and such, I prefer a conical depression over an actual bowl shape because it seems to offer better support regardless of the size of the piece you're working. That pretty finish didn't last long! Hammering cold steel on the Steel Puck is a fun experience, but it's murder on the looks. 12-gauge steel worked entirely cold from a flat sheet. The only time heat was used was when the ladle was seasoned. Overall, I'm very very happy with these things. Dad's already talking about trying to make one with an actual radius so I can form a bowl right to it, but I'm not sure I'll like that for general work like I've been doing. The Steel Puck sits still on the anvil even without a stem for the hardy and I'm hard-pressed to think of anything I'd change. Once the cold weather sets in, I might hunt for a stump that I can insert the puck into so it's at a perfect height for hammering on while I'm sitting down. Until then, she'd doing a dandy job on the anvil and I'm looking forward to making more bowls.


-
I agree with DSW. Were it I, I'd rivet/weld a ring onto the "pommel" of the spinner and use a cheap carabiner to hook it to a belt loop. Relatively quick to make and no great loss if it did grow legs at work.
-
$4/lb isn't that bad when you consider the quality of the anvil you're getting. It looks nearly new in condition so you should be paying nearly new in price. If you went out to get a new anvil in that same weight, you'd certainly have to better than $4/lb unless you got a smoking deal on shipping, etc.
-
Looks rather like a Fisher. Is it for sale? Whatever the make, it sure is minty fresh.