Latticino
2023 Donor
-
Joined
-
Last visited
Everything posted by Latticino
-
I misread your post and thought you got the H-13 as drops for the same price as mild steel, not at the same place . $3.40 a pound isn't outrageous for H-13 (certainly less than McMaster Carr), but it is more than I would be ready to jump on until I had a specific project in mind. I agree with Fraser regarding use of the H-13. In fact that is exactly what I've used it for in the past. I have H-13 hammer and tomahawk drifts and a hammer eye punch that have held up extremely well.
-
I'd certainly start making hardy tools from 4140 before jumping to H-13 (or even A-2 or D-2). As others have stated, it is a bear to work with, particularly without a power hammer or press. Even 4140 in hardy tool size will benefit from having a friend onboard to strike. I have overheated H-13 in a coal forge and had it crumble under the hammer. Hard to tell for sure from the photo, but your grain looks massive. Did you soak the steel for a long time at high yellow? Also, if you can get usable sizes of H-13 at mild steel prices, I suggest you buy a bunch and sell it at a modest markup to the smiths here. Great way to make friends. I'd sure be happy to take some off your hands at $1/# or thereabouts.
-
-
My preference is a cast inner liner. It is a bit tough to paint it on in layers, the material really isn't made for that. Even troweling can be a challenge. I like 3/4" thickness, but each to their own. I find it pretty hard to cast anything any thinner.
-
Mike, Respectfully disagree. I see it's main function to allow acceleration of the relatively static environmental air up to closer to the velocity of the gas exiting the orifice for efficient induction and mixed flow. Any swirl or turbulence after this mixing resulting from the shape of the air inlet is a benefit, but the induction function is the critical one IMHO.
-
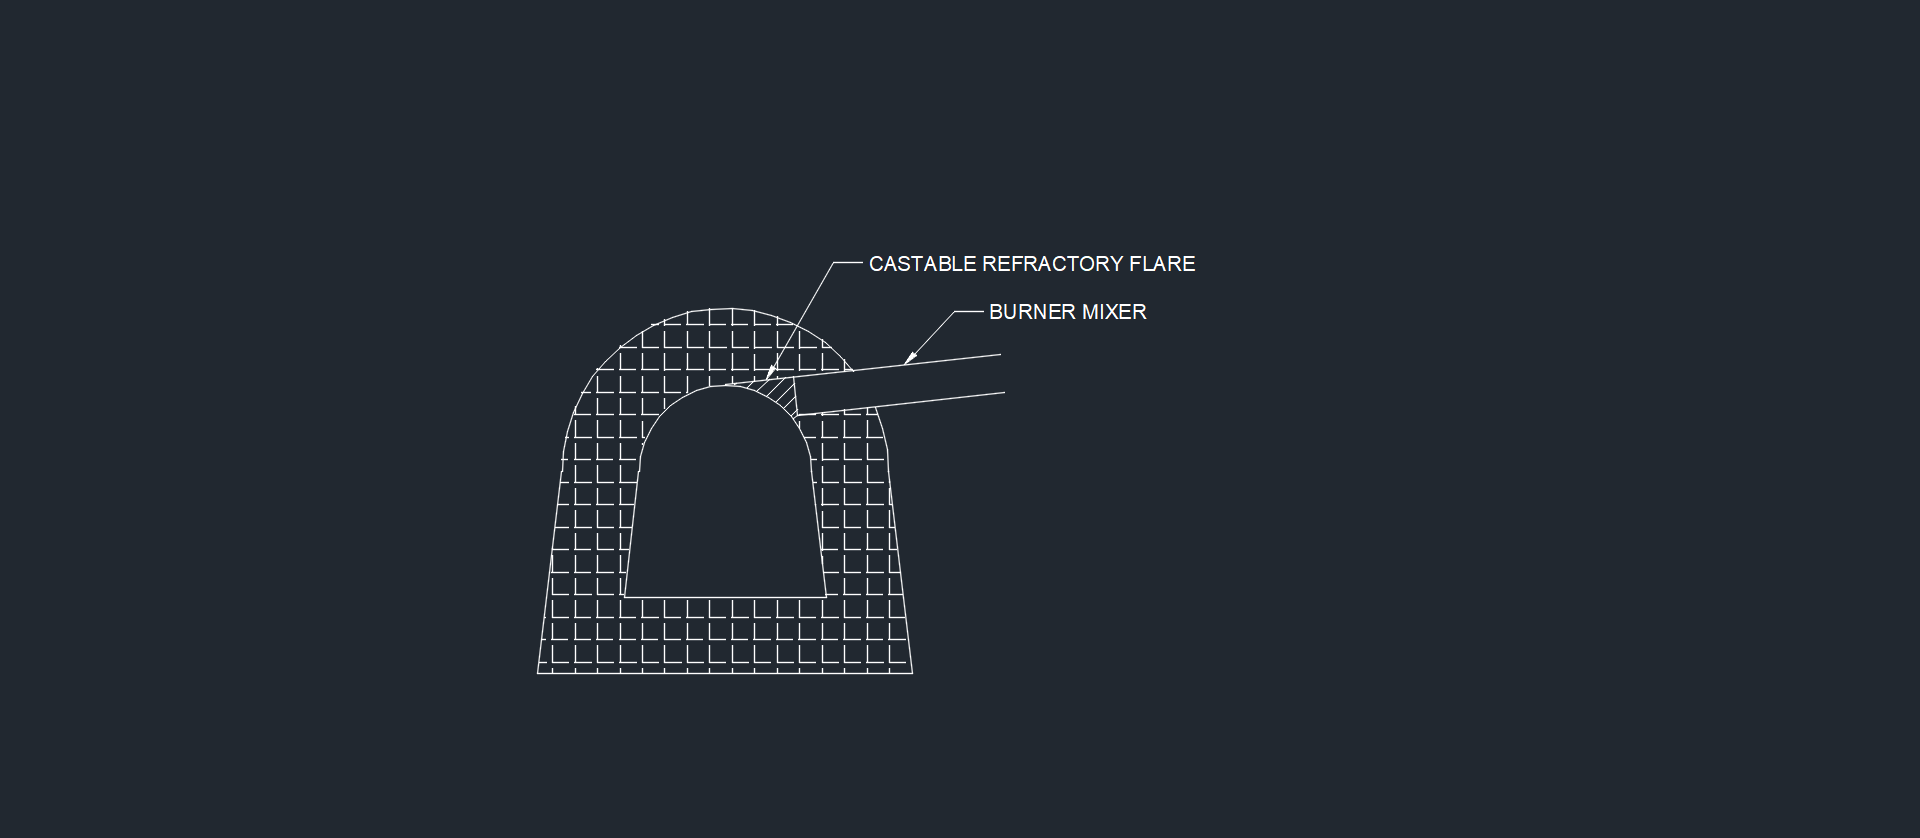
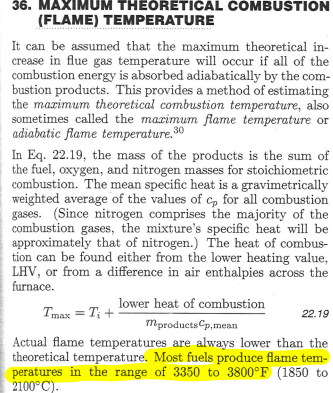
Also: Burner mixing tube is mounted too far into your forge. Edge of mixer should be in the insulation layer, not in the forge cavity. Dark circle on the floor of your forge indicates that too much of the flame is hitting the floor, and moving it back will help the flame develop more fully (and save you mixing tube from scaling away). Ideally the cast refractory inner shell protects the end of the burner and provides an integral flare. Burner orientation is not optimal. It is best to promote a swirl of flame along the wall by entering at a tangent to the inner wall rather than perpendicular. Make sure on your updated build that the gas supply tube doesn't obstruct the air inlet as much as currently (if you increase the reducer size that will likely help. Alignment of the gas orifice is critical. It should be centered and in parallel with the mixing tube for max effect. Appreciate your polite response to assistance. Goes a long way to getting additional help.Not being a religious person, or that familiar with the inner workings of hospitals, I never know what to say in these situations. All I can add to the well wishes and recommendations in the above is that I have greatly enjoyed, and learned from, Tom's contributions over the years I have participated on this forum. I almost ran into him at SOFA the one time I got out to that Ohio Hammer in, but he was too occupied with tailgating and chatting with friends for me to interject. Now I wish I had made more of an effort, though it is possible I wasn't sure who it was at the time and only learned afterwards that it was Thomas based on his iconic hat.Stuff in bucket looks like Satanite to me. Was formerly thought of as a good coating for refractory blanket, applied in multiple thin coats, but most users report that it is quite fragile, cracks and breaks down pretty quickly with use. I would substitute a 1/2-3/4" thickness of Kastolite 30 instead.I'll have to check once I get home. I was advised by the US Anyang rep to use a hydraulic fluid, I think, but would have to check to be sure. My little hammer has a visual drip indicator so I can see that the oil is flowing at an acceptable rate.+1 for the amp clamp style meter. Make sure you clamp around each hot leg individually. Have you confirmed that your hammer is getting adequate oil circulation? I know that in my shop in upstate NY I have to use a magnetic oil pan heater to preheat my oil till the hammer gets going for a while.I've successfully forged and finished two swords to date, both in week long classes at a local craft school, and prepared a handful of others for heat treatment. The latter haven't been finished due to the difficulties in setting up dedicated sword hardening and tempering equipment. The advice to date regarding use of a smaller forge for the actual forging is good. However what we used to great effect for hardening was a large (55 gallon) drum lined with 1" of refractory blanket. One port near the bottom for a 1" propane burner and two in the lid (one for the sword blank and the other for a vent that used a brick cover to selectively vent the chamber and make small adjustments to temperature. The extremely large forge volume helps to provide a relatively stable temperature for austenizing the steel, but don't let the flame directly impinge on the blank. I believe this was originally a Don Fogg design, and you may be able to reference it as such. Tempering was done in a heated bath of canola oil . This works well, but you need to be careful of the flashpoint of the oil and to ensure you take into account the volume of the steel you will be putting into the tank so you don't get an overflow. I have seen a demo where a larger size blade was heated for hardening in a long trough filled with lump charcoal and fanned with a pizza box lid. It worked, but it is a bit of an art form rather than a science (and Phil Baldwin, the experienced maker who did the demo ended up burning himself badly with the hot oil).If the flame is lifting off the burner face you have plenty of air and gas and shouldn't need more for that burner. If you can ever get the forge to heat up the flame speed will increase and you may be able to turn the burner up further (yes I am aware that is a kind of catch 22, but with doors you may be lucky). I am not familiar with the castable you used, but it looks like a high alumina refractory castable rather than a high alumina insulating castable. The former can be quite heavy and makes a great flame face, but the thermal mass will take some time to heat up and may cost you in fuel bills if you don't have an adequate overall thermal resistance in the walls. As I've stated many times, I like a 2" layer of 2600 degree ceramic blanket with a 3/4" castable insulating refractory for the forge walls, roof and floor. Check the listed k value for the refractory material you got and compare it to refractory blanket (lower numbers are better and the heat transfer quantity is directly related to the temperature difference between the inside and outside of your forge and that value). That is a pretty large forge, what is the internal volume?Even before reading your heartfelt narrative I didn't have a problem with the abstract nature of your sculpture. It reminds me of Louise Nevelson or David Smith's work, both celebrated modern sculptors, just on a smaller scale. Balance, composition and technique are all strong. Scale your piece up 10X and it wouldn't be out of place at Storm King. I think your post title mislead other reviewers, but everyone is entitled to their own aesthetic sensibilities. Art is inspired from many sources, but I believe that passion is one of the most important ones. I could digress into a long discussion of my philosophy of art (possibly even digging up my old masters thesis from my MFA), but don't want to bore everyone. You clearly are passionate, that is the key.You may just be looking at an angle. That type of chuck can have a tapered bore (maybe a #3?), and you need bits with a taper to fit tightly. Of course you can get a Jacobs chuck with that same tapered shank, and that is what I used. Of course the previous owner may also have tried to drill it out, which would make it only useful for one size of bit shank.That is what I put on mine, and it works a treat.G-Flex is the go-to epoxy for most of the knife makers I know.Mike, I pulled the following from the Lindeburg Mechanical Engineering Reference Manual, a fairly reliable source. Hope it proves helpful.
 Frosty, Your contributions are always welcome. Sorry for getting so pedantic. rls1160, Some thread drift is inevitable. I don't have a recommendation for a cheap forge blower for you. However I did once locate a perfect one at a liquidator for $25, so they are out there. If you are on a serious budget you may consider trying to find a used one from a furnace repair shop. Some of these new condensing boilers and furnaces have good ones.Ferric, even diluted, may be far too aggressive for hamons. Those who do a lot the subtle hamons that result from differential hardening (like the claying used for Japanese swords) polish up to very high grits (2,000+) before doing a very mild etch with diluted vinegar, then repolish. As I understand it the hamon should start to show up from the polish alone, though this presupposes that the careful polishing standards are followed (I believe typically this is traditionally done with stones or similar). Buffing wheels are certainly not used.Frosty, You and I differ slightly in our use of certain terms. In my engineering world an orifice is a special subset of "hole". Specifically a hole that is a reduction in crossection from the size of the main body of the fluid conveying structure (pipe, duct...). While it typically will result in an increase in flow, it isn't always used for creating a jet (per se), but may be used for things like flow monitoring. In this case I would term the gas connection to the burner mixing chamber a port or reducing TEE rather than an orifice if the OP doesn't provide a drilled orifice, as he initially planned. Please also note that any realistic blower for this system won't produce anything more than at the very maximum 4" water gauge (~0.14 PSI). I am having trouble envisioning a situation where the static pressure induced by the blower would prevent flow from the 5-30 PSI propane source.Looks even better from that angle. Nice work. Is the guard slip on from the blade edge side and pinned in place? The fitup looks very clean.Recommend a tempering pass at around 1200 deg. F (up to just barely glowing in a dark room) before attempting to drill. Let it cool to touch before drilling to avoid ruining the temper on your drill bits. If you can put in an insulated container afterwards that will help also (wood ash, vermiculite, even a gas forge that is turned off and cooling overnight - not sand)... This will soften the tang and allow easy drilling. As previously mentioned, learning how to sharpen these bits without destroying their temper makes a huge difference as well. Cheap bits lose their edge quickly.Buzzkill, 3 bar twist pattern weld. Sweet. Nice clean billet, fitup, and saber beveling. I still struggle with the last. Appears to be a "hunter" style blade (the the pronounced guard). Does your wife do a lot of hunting? Also, is it just the photo, or does the spine protrude above the top of the guard?