Latticino
2023 Donor
-
Joined
-
Last visited
Everything posted by Latticino
-
Afraid you are going to find that most reputable storage facilities will not allow you to have any sort of open flame inside their units, so you might consider how you can creatively setup somewhere else. Good luck.
-
Had my dog triumphantly bring a small possum up to the back door of the house with it hanging loosely in her mouth. Needless to say my wife totally freaked out. I went over and told the dog to drop it (the only reliable command I taught her - as a "pittbullish" mix a critical one). She dropped it, and it picked itself up, shook a bit and ran off into the night. Got a look of disappointment from my dog, but at least she got a biscuit.
-
I find in a coal forge I tend to get more clinker when I have the fire turned way up for forge welding. If you are just doing basic forgings right now you might want to consider running your fire a little cooler. Do you religiously turn down the blower to minimum every time you take the stock out of the forge?
-
-
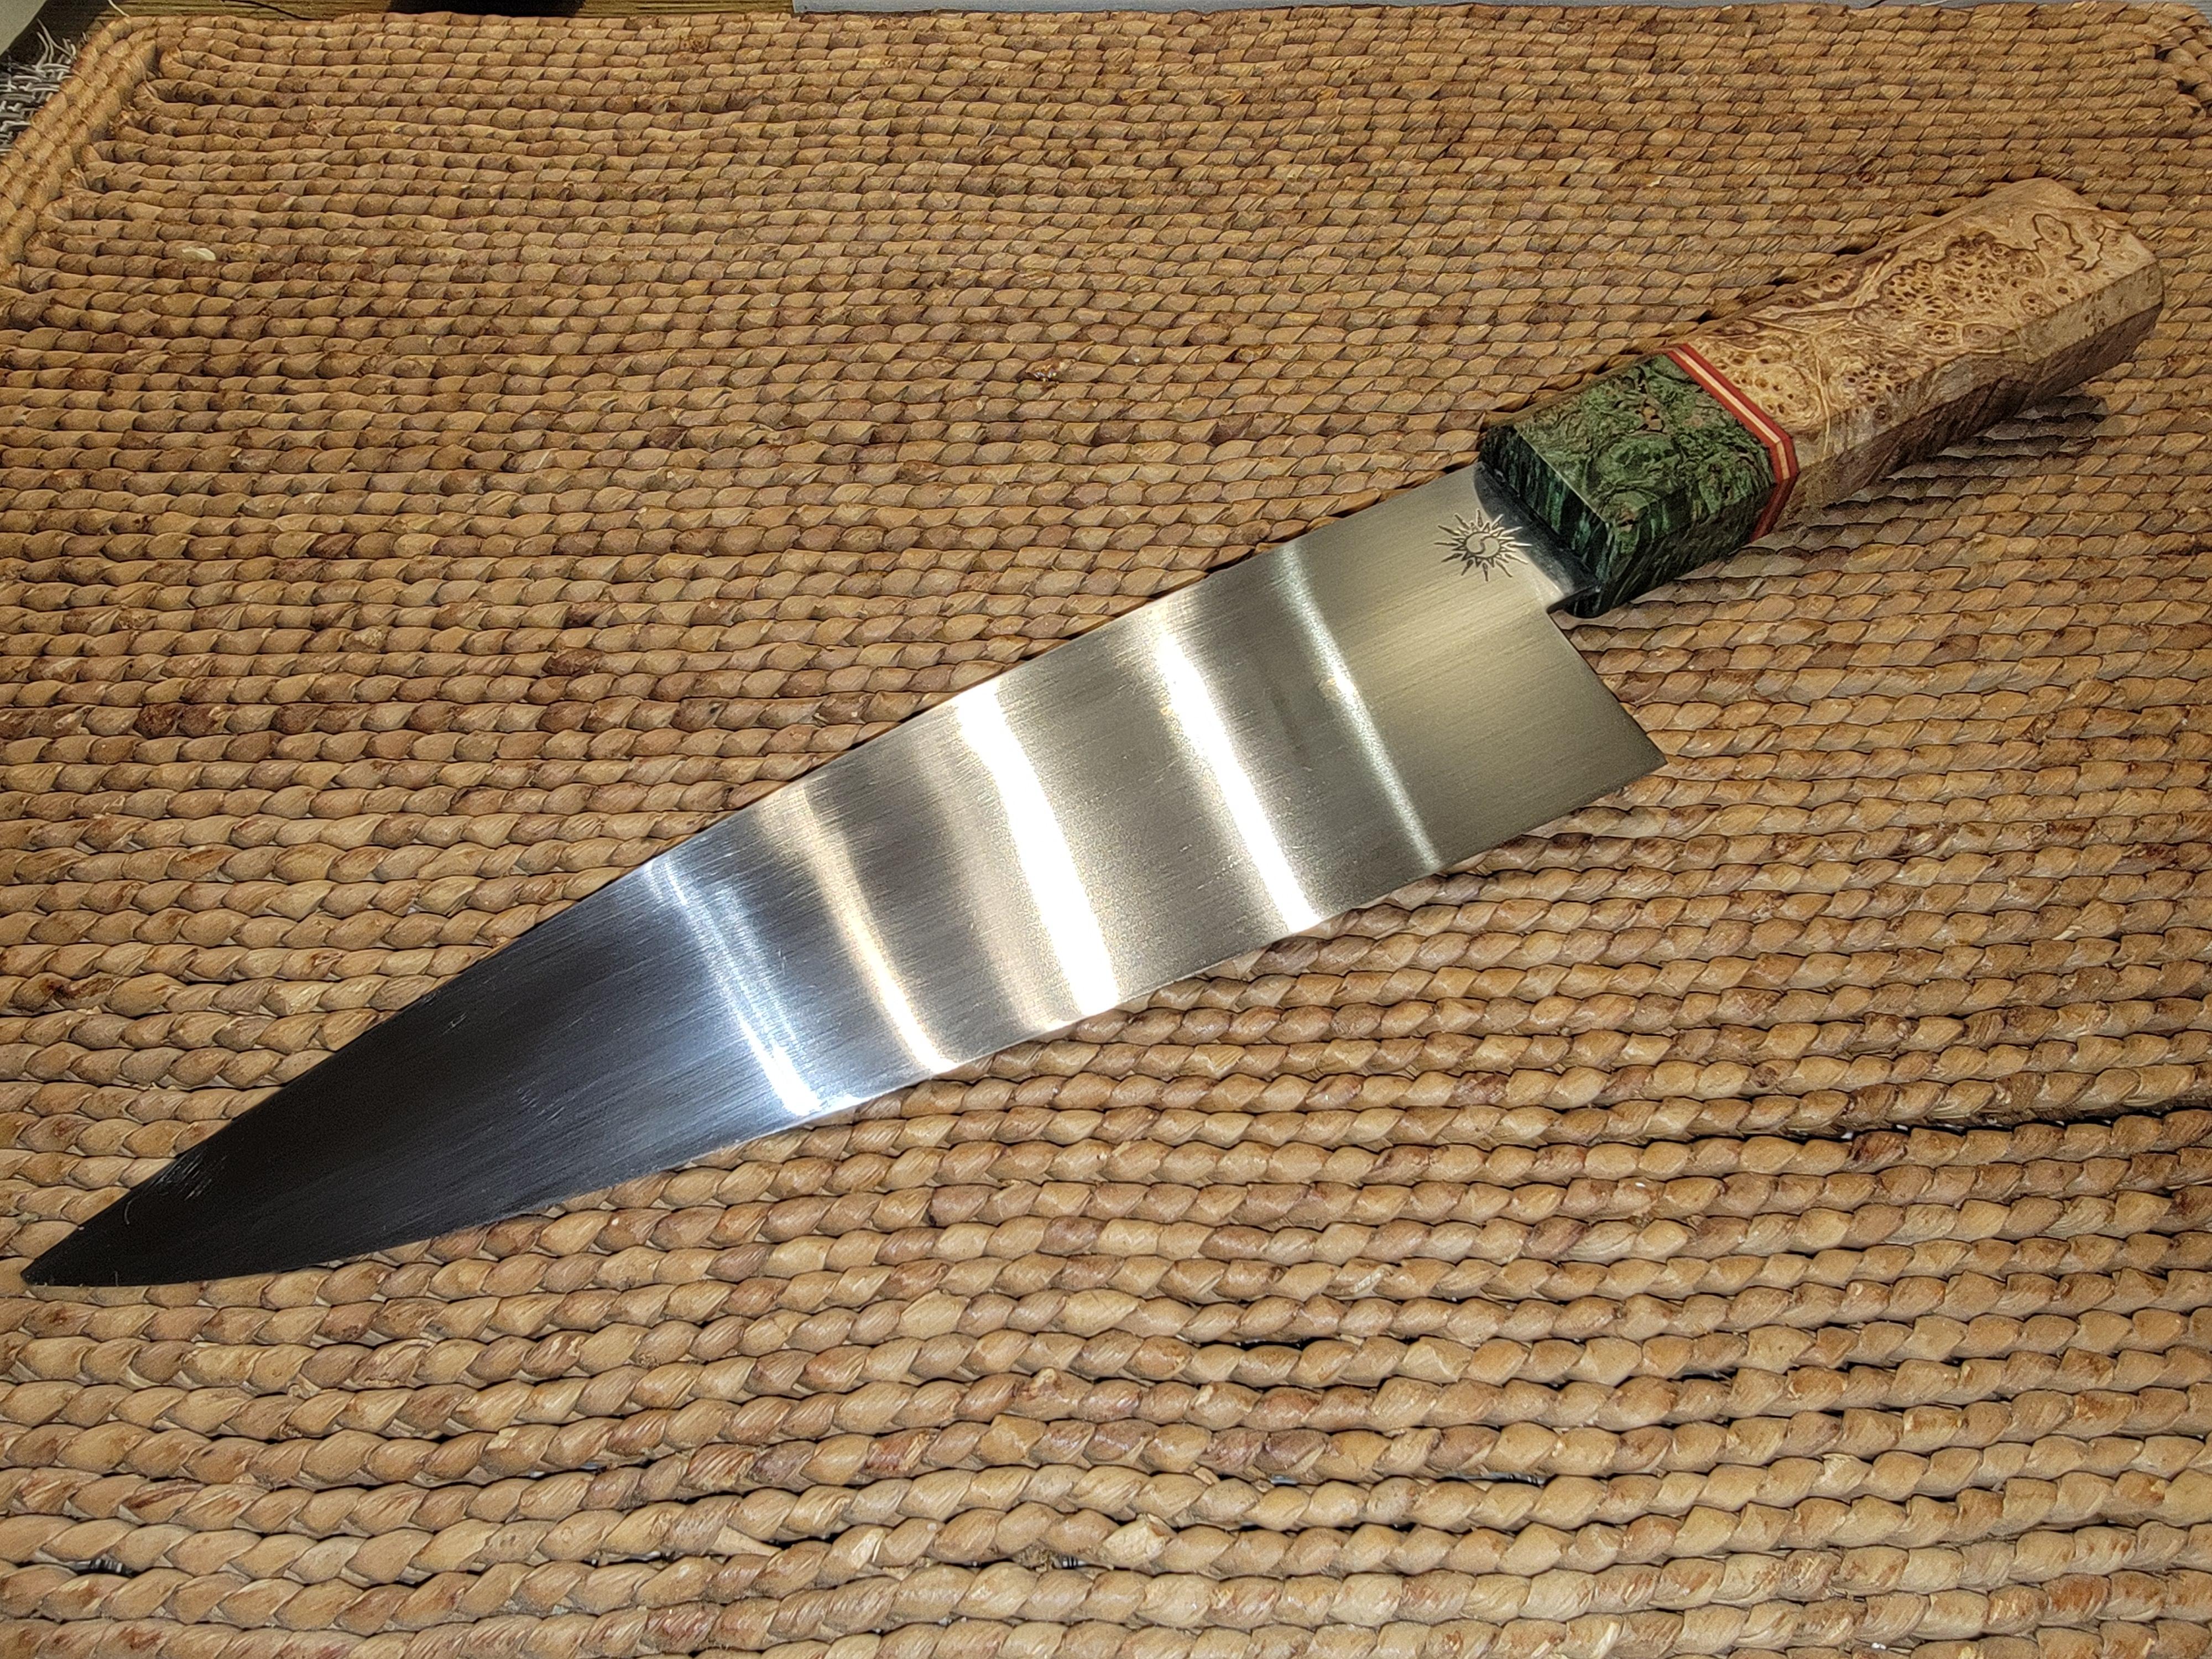
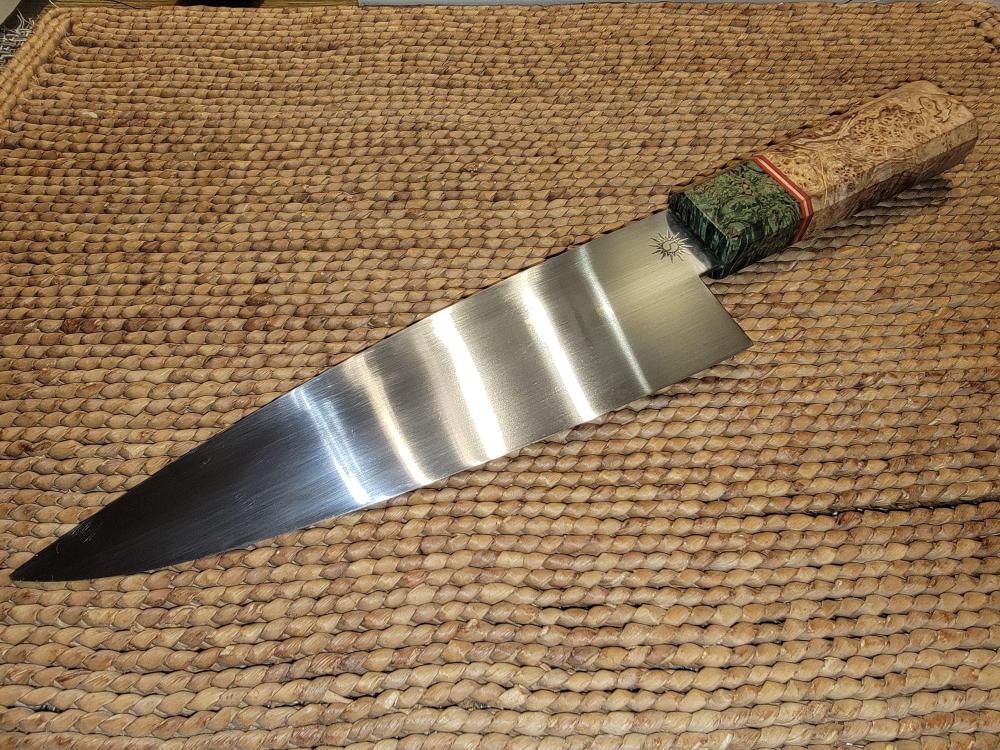
First try at a wa style handle. I know this is a bit of a mixed bag, with a Japanese style handle on a European chef's knife, but I wanted to try this kind of handle, and didn't have time to forge and finish a new blade before the deadline (wedding gift). I think it is a bit blocky, though it does fit my large hands quite well. Next one will have different proportions I think. Blade was forged from 1 1/2" x 1/4" 1084 and is now under 1/8" thick, 2 1/2" wide and 9" long. I also tried the "no-plunge" grind blending for the first time as well. It is a lot harder than it looks.
-
There are innumerable different configurations and sizes for Kukhri. My recommendation is to find one you like the image of online then sketch it to the scale you want it to be that fits your blade stock (if you are going purely stock removal). These are typically pretty thick as they are "choppers" not "slicers". Google "Himalayan Imports" for a decent crossection of what is available. If sketching it is too much work for you I'm not sure that you should take up making it in steel. As a starting point you could look at this drawing of the classic British Army issue version:
-
The yatagans I have seen online and in museums look very little like what you have in your photos (more like the below). They are long, slender with a slightly swept down point and slight belly. As far as I know these Turkish/Ottoman blades are available in a variety of lengths, from long knife up to medium size sword, and typically have a distinctive handle that includes pronounced "ears". Very little like the photos you have. Perhaps you want a different type of blade. I think your translator program may have failed a little and you are asking if a "vehicle leaf spring" can be used for blade stock. The answer is yes, with a caveat: it is best if you source unused leaf springs, which can sometimes be found from repair spring shops. As you may know the forging of a blade is only a very small part of the process, with knifemaking requiring an understanding of metallurgy, grinding/stock removal, heat treatment... If this is your first blade, I would recommend something easier and shorter. A yatagan is a fairly advanced form IMHO.
-
And now it is mine! I can say that it is even nicer in person than the photo.
-
John, That is fascinating. Thanks for sharing.
-
At this point I would use it till it does. I know that for how hard I use my post vise I'd likely bend a 1/2" square leg, but is kind of hard to tell from your photo what the proportions are. Just use it till it doesn't work the way you want it too, and fix it afterwards.
-
Offset and small crossection size of leg extension would be a concern for me. Ideally you want it to be centered and matching the existing taper at the point of connection. Best "fix" for this would be to forge weld on a leg extension, but that is a 2 person task, and each should be fairly experienced. Second best would be to find an experienced welder to add on the inline leg extension. I would suspect this may be a wrought iron vise, so that also needs to be taken into consideration.
-
JHCC and Irondragon beat me to the punch, slow typing, but I agree with their assessment. Threads and screw box are the critical things. Second I would say is free moving and relatively parallel jaws with no cracks. Finally the leg length, which can be different for different size vises. Typically the larger vises have shorter legs as they are optimized for work with a striker on larger pieces. Each of these issues can be solved with some blacksmith repair skills, but the repairs are more difficult as you move back up the list. With a shorter leg and apparently large size (Judged by jaw width, not opening. Anything over 4.5" is on the medium size, and over 6" large IMHO) this one would be quite desirable, provided the crack in the moving jaw is not too deep and you have the skills to weld it up.
-
Nice proportions and finish, particularly for your first one. Good job with the thickness and blended plunge for a kitchen knife as well.
-
Frosty, I think that is a great idea. Too bad I'm getting it too late to change everyone else's plans . Agree, it is tough living out in the back beyond. I'm sure lucky with monthly hammer-ins only a 20 minute drive away and two additional ones only 2 or 3 hours away as well (not to mention four different good quality craft schools that teach blacksmithing within a days drive also).
-
I'm bummed that I will have to miss it this year. Previously scheduled niece's engagement party out of town. Too bad they didn't announce it sooner as I would have passed on the party.
-
Possibly, that is why I recommended you draw out and fold several times to refine the billet, then just use it as a San Mai over good stock that will make your blade "monolithic". Could make for an interesting pattern. Now that I better understand the photo progression that may not be worth doing. The second photo shows some very deep cracks.
-
Agreed, particularly the tennon and rivet on the "end cap".
-
All the forges and furnaces I've made had flares or flame retention outlets shaped from cast refractory until my most recent one (which has a commercial SS flame retention outlet that I picked up out of the trash). I usually defaulted to the 12 degree angle cone for mine, starting at the forge skin and progressing to the forge interior. My take on it is that you want the air/gas mixture to be as large as possible without going overly turbulent. Larger because that slows down the mixture velocity (slower, shorter flame). I like some sort of transition between the forge interior and the mixing tube diameter as it makes it a bit easier to tune the burner (locate the flame front outside of the mixing tube). Each to their own though. Many forges operate perfectly well without a flare.
-
I'm confused regarding the progression of photos shown. Is your number 1 the top photo? If so, how did it get shorter in photo #2? Looks to me as if you were too aggressive in how far you compacted it for each heat. Smaller "bites" at that high yellow/white heat. Also I would recommend keeping the billet at welding heat, or close to it, during the initial compression you do out of the cannister (at least till the billet is down to the nominal 3/8" thickness and well compacted). I wouldn't discard your first effort. You might be able to layer it up and forge weld it again, then use the final product as San-Mai with a core of HC steel to ensure the edge is good.
-
Very well put.
-
Looking pretty good, though a little long. I made my current forge out of a similar tank, but cut around 5" of length off and wish I had removed more. Keep us posted on how it works for you.
-
No, if you don't need to fully open the gate valve for the air during full fire your pressure is fine. I have no problem with necking down the mixer outlet before introducing into the forge, however there are consequences. With a smaller outlet the air/gas mixture will be flowing faster for the same quantity flowrate (BTU output directly related to that flowrate). Faster flow means a different flame front location relative to the output for each forge interior temperature. Too fast and it will lift off the front of the tube and blow out (you also may get a "faster", longer flame which can be a problem for certain forge configurations). Too slow and it will burn back into the mixing tube and heat it up (or the air/gas mixture won't flow enough to cool the mixing tube from the radiant heat from the forge, if done once the forge is up to temperature). Remember that flame speed is also related to forge interior temperature, so it needs to be different for each, a balancing act. If your forge is only losing combustion under low fire when warming up and you try to block the doors, that is likely a product of not having enough pressure to push the products of combustion out of the forge interior (ever try to heat the interior of a can with a propane torch?). You are choking off the flame. Simple answer is to not close the doors until your forge gets up to temperature and you increase the air/gas to more usable levels. You will probably be able to block off the door part way. Door baffles are just doors that stand a little way off the door opening (parallel, but 1/2" to 1" away from the face). This addresses radiant losses, but allows relatively free flow of combustion products.
-
Your blower looks like one that is optimized for flowrate rather than pressure, so it may not be capable of putting out the required air pressure at the outlet of the burner. Not an uncommon problem for those who select a squirrel cage blower. Flame doesn't look that bad to me in the final video. I can't tell from the photos or videos whether you are inducing secondary air at the burner nozzle entry to the forge or not. This secondary air would be very subject to variations in backpressure from the closing of the forge doors. If you gradually close the doors, does the flame turn more yellow before it goes out? That would be an indication. If the blower doesn't develop enough pressure to provide the correct mixture a the temperatures you are looking for (BTU output from the air/gas mix) you will either need to get a better on (axial rather than squirrel cage) or drastically reduce the mixing tube line length and remove elbows. Is the air valve open all the way during high fire? Note: it is fairly common to have to keep a burner at a lower fire when the forge warms up. This has to do with the flame front speed vs the air/gas mixture flowrate at the outlet. The issue with blocking the door and having the flame go out is different. In my blown forge I can just about completely shut the door and make do with a 1/4" gap all the way around. However I use an axial centrifugal blower optimized for more pressure and it has a 1/2 HP motor.
-
Sorry folks, down with COVID so not as on top of things as usual. All advice here has been very good to date. I expect the original hookup was for residential pressure natural gas, which is what I run here at home as well, based on the apparent size of the gas feed. I've not converted one to high pressure propane (or wanted to as NG is so much more convenient), but it shouldn't be that hard. I would definitely keep the fan assist configuration, but you may want to neck down the gas feed to something like 1/2" with a 1/4" orifice to avoid having a flame thrower if you regulator fails for some unknown reason (not critical, but a good safety measure). Of course doors, proper rigidizing and coating with a refractory are also a good idea, as is a good quality gas regulator. The other safety recommendation I have is to install a gas rated solenoid valve on your propane feed that is connected tot he same circuit as the fan. Not quite as good as a flow or pressure switch, but if the power to the fan shuts down it will shut off the gas. The chamber size is a little small in diameter for a typical fully developed flame, but having a multi-outlet burner should help with that (shorter, well spread flame). You will have all the typical issues with multi port burners (characteristic optimal operating range and potential for preignition in the mixing chamber during turn-down), but these are more easily dealt with in a fan assisted configuration IMHO. I'd be careful with the fan speed control, as conventional ones tend to burn out synchronous motors, and I think that Dayton may have such. The blower may be a little small for the forge size in NG configuration, but could be fine with propane. As Mike and Thomas mentioned you get a different BTU output from propane than NG and the quantity of air needed is different as well. Not firing on all cylinders now, so not going to do the stoichiometric combustion calculations, but you may need to adjust the number of outlets to get a good burn at the temperatures you are looking for. Most likely fill some if you have a problem with preignition once the forge is up to temperature (all a matter of matching the flame front location to the temperature of the forge interior, as I have written about in the past). Note: if you hear ANY pop-back, close off the gas immediately, but keep the air running to cool the burner. After a minute or so you can usually turn the gas back on. Floor and burner look to me to have been cast from Mizzou or some similar refractory. Should be fine for flame and flux contact, but the floor may bleed a little heat.
-
+1 on used ceramic kilns. I see them all the time and it is pretty easy to fix one up if not functioning if the bones are there.