-
Posts
469 -
Joined
-
Last visited
Profile Information
-
Gender
Male
-
Location
kentucky
Recent Profile Visitors
8,789 profile views
-
I would tack with nickel rod in a few places. Drill and pin in a few places, then grind deep and wide channels around the break. The pins holding alignment. Preheat as much as possible and peen your weld at each pass. Weld all the way around. Wrap in refractory wool and wire it up tight when done welding- to let it cool slow ( nickel rod isn’t terribly sensitive but it doesn’t hurt)then the hard part, grind, file and scrape the sliding surfaces level. I am sure someone here will sugest something better than nickel rod, but it is what I have the most experience with on castings.
-

Beaudry power hammer
jason0012 replied to Simm367's topic in Power Hammers, Treadle Hammers, Olivers
For a 100 pound hammer a three hp is typical. Some older machines might have a smaller motor, and it really doesn’t hurt to go up to 5hp. -
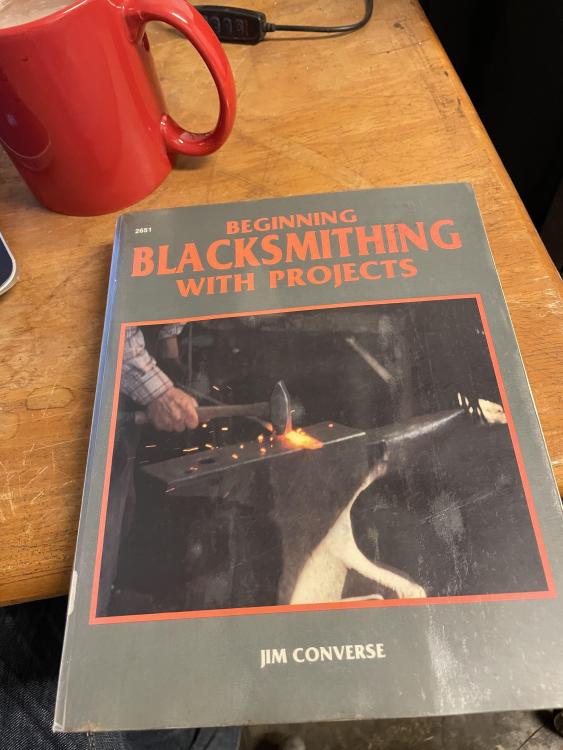
Finally found it. My memory was not the most precise it turns out. It is “beginning blacksmithing with projects” by Jim Converse. It goes into depth on chimney design, ventilation, fire maintenance, and anvil dressing.
-

Casting a Gingery Lathe
jason0012 replied to Nobody Special's topic in Smelting, Melting, Foundry, and Casting
I built a gingery lathe in high school, started the shaper, then happened upon a big commercial shaper for really cheap. I decided I needed to redo the lathe in iron, built a cupola furnace, fired it once and my parents ( and the fire marshal) shut the project down. That was more than 30 years ago so my memory is a bit iffy. I still have half the patterns ( just pulled them out last week) the big thing I recall from the lathe was what a huge pain the bed was. That takes a lot of sand, the flask is unpleasantly huge and it takes a lot of aluminum to fill. The pattern was the worst of the lot to make too. I wish I still had that one… -
Back in the 90s a lot of work I did came from interior designers and decorators. There was a year in the mid 90s where I don’t think I made much in between drapery rods and hardware. It seemed a lot different then. I have been away for a while but returning, all the folks in that field seem to be just painting homes shades of grey, filling them with cheap big box store furniture and not using any ironwork. Have things really changed that much?
-

Antique screw threading strap.
jason0012 replied to 4575wcf's topic in Gunsmithing, Muskets, Flintlocks etc
You will have to make a tap first. Might as well cut the thread on the plug the same way. While you can lay out 16 marks per inch on a 11/16 plain, wrap in string to connect the marks, scribe the string then file a thread to follow the scribed line, it is way easier and less frustrating to use a lathe… -

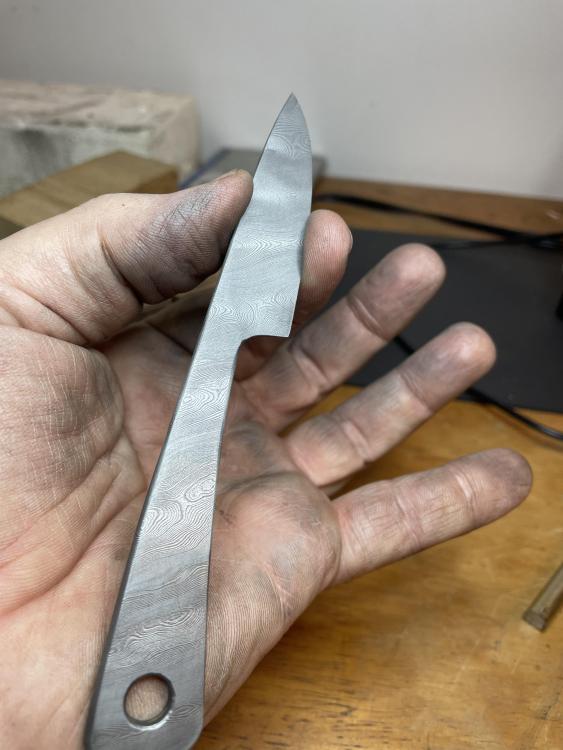
What's your latest blade look like? Post em and let us see.
jason0012 replied to HondoWalker's topic in Knife Making
-
I have been thinking about this. I would like to find some good input but haven’t heard many suggestions about size. Dust collection and air supply is a given. I have a collection of various grinders but plenty of floor space. My original plan was to use a room in the shop that is 8x14, but with 4-6 grinders I think it might get cramped. I am sure someone here has already gone down this path.
-
That looks very weld able. Keeping everything square might be tough, but Nickle rod should do the job. As mentioned though, it will likely break again. This looks like the effect of combo dies side loading the ram. Whatever your solution, work to get all the slop out. The more wobble in the guides the more those dies will impact the casting.
-
The guides can be fabricated from angle and plate. Use a thick piece of angle for the V and cut paper templates from the old guide for side pieces. Burn those from 3/8” (?) plate and hot bend to match the old guide. Clamp all three to the hammer frame and tack together. Remove the assembly and clamp well for welding. Skip around with lots of short beads to control distortion. After welding it won’t hurt to put it on a mill and skim the bolt up surfaces as well as the V.
-

old style 250 pound little giant
jason0012 replied to jason0012's topic in Power Hammers, Treadle Hammers, Olivers
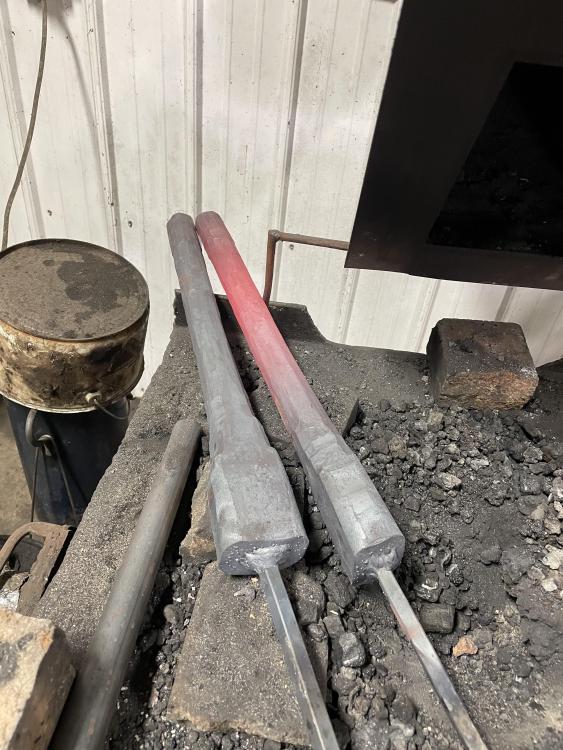
These were some heavy chunks…the 2 3/4” round knocked down to 3 1/4x1 1/2, then drawn to 1 1/2”square, rounded, straightened and cooling. Turning and threading these is going to be a trick, my small lathe isn’t up to it and I still haven’t worked out the thread gears for my 1880s lathe…but that adventure is for another day -

old style 250 pound little giant
jason0012 replied to jason0012's topic in Power Hammers, Treadle Hammers, Olivers
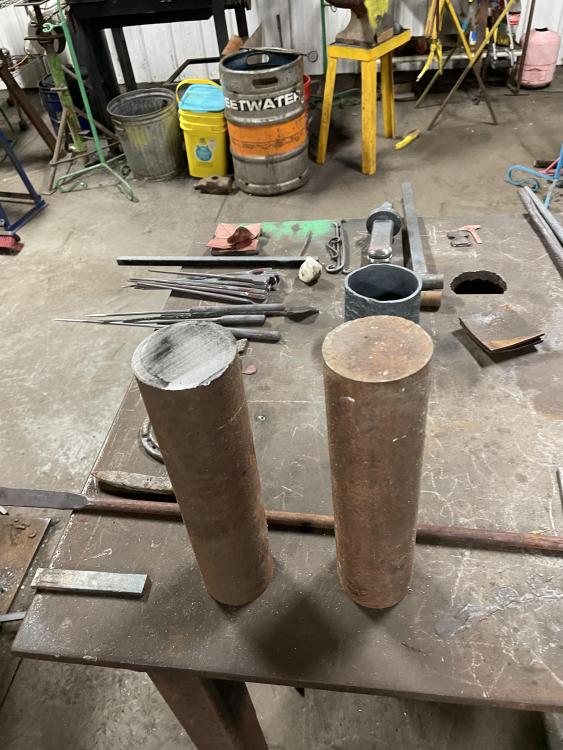
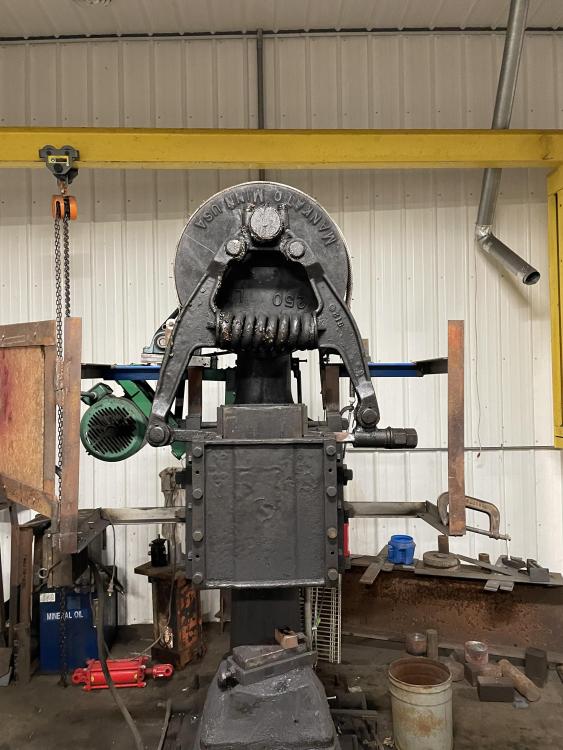
Two pieces of 8640 cut to forge new arms. The old arm straightened v’d deep into the crack into sound metal, then a bit deeper) and filled with 7018. I don’t really trust it but the 2 3/4” round will forge better under the 250 than the 100. An odd aside, I measured the spring, and compared it to factory spec. It is a full coil shorter, and 1/2” by length as well as 1/2” smaller diameter than little giant spec. Probably the original. I ought to replace that as well… I wish I could find my notes on Clifton’s springs. He went oversize on his and had a place that custom wound them for him. Anybody have that info?


