-
Posts
2,161 -
Joined
-
Last visited
Content Type
Profiles
Forums
Articles
Gallery
Downloads
Events
Everything posted by Latticino
-
Frosty, Yeah, on my phone to answer and conflated locker room showers and residential restrooms.... It is exhaust duct either way. We typically don't call it "ventilation" exhaust.
-
In my opinion flexible aluminum duct is not appropriate for either kitchen hood exhaust or forge flues. It is just barely acceptable for laundry dryer or bathroom shower exhaust.
-

Designing a bamboo Forge
Latticino replied to DarkMamba's topic in Solid Fuels: Coal, Coke, Charcoal, Wood, etc
More importantly it might be worth investigating what you want to use the forge for to see if there are more economical alternatives, or if the whole undertaking is impractical. For example if you are only going to bend or twist 3/8" rod, you can likely do it cold with the right leverage. If you plan to make knives, the fuel cost is only a small fraction of what can be required for abrasives to finish the work. Certainly not discouraging you from getting into smithing, but if sourcing a 55 gallon drum is going to break the bank, forging may not be a reasonable path. I see preowned, reconditioned drums around here for around $20 -$30. -

Blacksmith songs and music
Latticino replied to George N. M.'s topic in Blacksmithing, General Discussion
Back in the 70's her album "Recollections" was one of my favorites. I think I still know most of the lyrics by heart. -

Blacksmith songs and music
Latticino replied to George N. M.'s topic in Blacksmithing, General Discussion
Also loved her in the Silly Sister's group. Look them up if you don't know them. Actually also saw Judy a year ago. She certainly still has the charisma, but that polished voice from the 70's isn't quite there. -

Blacksmith songs and music
Latticino replied to George N. M.'s topic in Blacksmithing, General Discussion
I'm a big fan of Steeleye Span as well. Of course, the traditional song/jig "The Blacksmith" that they do has been recorded by a great many artists (it's a fairly popular Irish music staple), but I heard it from them first. There are a couple of other blacksmith themed instrumental Irish tunes as well including: "The Merry Blacksmith" and "The Blacksmith/Blacksmith's/Blacksmith's Daughter", both reels. I also don't usually care for lyric screaming, but each to their own. -
As far as value goes, things are pretty variable. Would cost you around $400 to replace it with a new one, but there aren't all that many being manufactured today. I've seen post vises in that condition sell for anything from $45 (yes I bought that one myself...) to $175. They do sometimes get posted for outrageous numbers, but rarely sell at them. Needless to say, if you want a reasonably quick sale you will want to be closer to the $75-$125 range. The New England Blacksmith group in your area is quite active. Perhaps someone from that group can help you out.
-
Many folks use spiral duct for their forge flues. You are correct that typically this duct has a galvanized coating and, if overheated, can be a problem. In my experience an old school overhead hood entrains enough shop air to cool down the flue gasses to a point where it is not a problem, but the super sucker style is so effective that the flue can get overheated, particularly if you are building a larger forge fire. You can probably go with spiral duct if you have some kind of black steel or stainless connector between the super sucker hood and the following duct. I would use a piece that is at least 3' long for this purpose. Please note that most of the snap together duct with the snap together longitudinal seams that others have been advocating are also typically made using galvanized sheet metal as well. IMHO spiral duct is a significantly better option than snap seam duct, but usually a lot more expensive and only available from a sheet metal duct manufacturer (snap seam duct is available here in hardware stores).
-
Also get the hood opening closer to your fireball if possible and be sure to start the stack drawing fumes by burning something inside the "barrel".
-
To allow the turndown ratio you will want for heat treatment (it is really nice to have the capability to turn down to around 1250 deg. F for a subcritical stress relief pass) I would recommend considering making one of your burners rather small and the other large. The small burner gets tuned for the lowest temperature you want to run the forge at, and the larger one cycles with setpoint. This way the smaller one acts as a safety pilot (if aimed correctly) and you only need one set of controls. I like a thicker castable refractory layer than 1/4", but only if you are using the correct material. A lightweight, castable, high alumina refractory like Kastolite 30 works extremely well, but I like to see it at least 1/2" thick (if not 3/4") for real structural stability. Of course you do have a bit more time to heat up, but there is a thermal mass benefit as well.
-
One of the first steps in forging a hammer head for me is to make the tooling necessary to forge it efficiently. For me, at minimum, this is a hammer eye punch and a hammer eye drift. There are a bunch of different designs for each, but the one recommendation I have is that you size your hammer eye drift with a crossection and taper than matches standard commercial heads. If you then use it from both ends, you will get an hourglass shape that will fit securely on a handle and be able to be wedged. There are also some tricks to keeping the eye punch correctly centered in the billet: Some folks predrill two holes all the way through the billet at either end of the eye before any hot work. Essentially then you use a large slitting punch to remove the web between the holes. Some folks just drill a single hole at the center of the eye that works as a guide for a hammer eye punch that has a center finding face (see the Brazeal style hammer eye punches). This avoids the offset from each side of the eye that can make punching the eye a challenge. Some put a deep centerpunch on each side of the eye to act as a locator (see above). Make sure you look for the center of the "swell" when you flip the billet and start to work the other side as one of the punches will get a bit washed out while you are punching the original side. If you have a coal forge and can selectively heat one side of the eye, you can try to correct a thinner side by heating the thick one when you go to drift the eye. That can even the eye out, but may twist the face orientation a little (easily corrected either hot or cold). Make sure you rotate the billet 180 degrees every couple of strikes to help you punch perpendicular to the face of the eye in both longitudinal and latitudinal orientations. Unless you are using a hydraulic press to punch the eye, ergonomics work against you in punching truly perpendicular. What you have made looks more like a handled top fuller than a hammer to me. However, correctly heat treated, it will likely work for either role.
-
My current gas forge has a 14" long interior, and 90% of the time I wish it were shorter. You are much better off with a 6-8" long interior and doors that can be opened at both ends. This actually works better for forging sword lengths, as you can only hand hammer about that long a section at a time. For heat treating a dedicated vertical 55 gallon drum lined with 1" of refractory blanket (properly rigidized) and a 1" burner works better than any long multi-burner forge I've ever seen used.
-
That's a lot of forge and will be a bit of a gas pig. Depending on how hot you need to get, I would go with (3) nominal 3/4" burners provided you are thinking of standard NA propane burners.
-

Beaudry power hammer
Latticino replied to Simm367's topic in Power Hammers, Treadle Hammers, Olivers
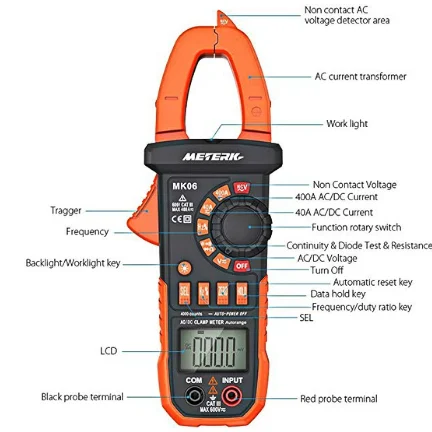
If your motor is up and running (photo shows it already powered), you can put to work and measure the amp draw at each of the hot legs using a strap around (clamp on) ammeter. This will give you a direct measure of the brake horsepower currently required by the motor in question. -
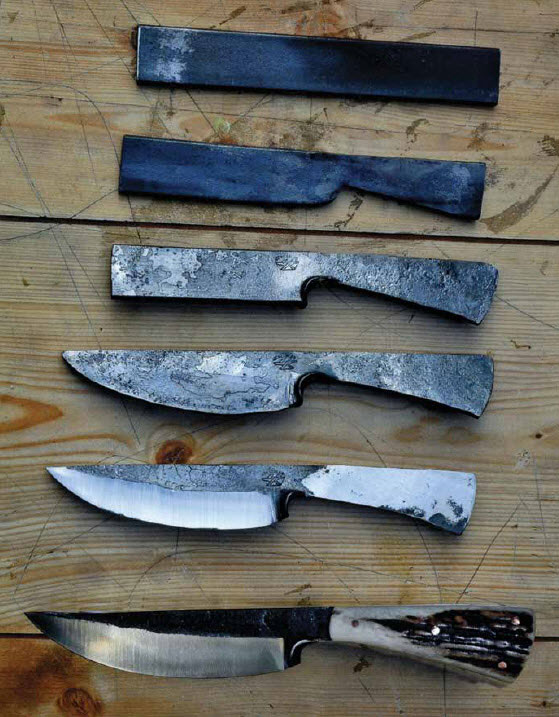
A hand filing jig like that one can certainly work, but will be a bit slow and needing some tweaking compared to a 2 x 72 belt grinder with accessories. You will also need your stock to be fully annealed to effectively use the file without destroying it. I'm not sure the band clamps and eyebolt you are using will provide the accuracy you want in a file guide, but it is a start. Regarding holding your blade flat: You should have forged in a riccasso that is flat and parallel on both sides. This is what gets clamped down to your board. You may have to shim the tip of the knife a bit to keep the rest of it level , particularly when you switch sides. I have used tongue depressors, available in bulk in most hobby shops, to work as a shim. If you are including a Joe Keesler style integral finger guard, you will need to notch the board to miss that. Here is a great image of Keesler's forging progression for making these knives. He certainly uses a 2 x 72 with a contact wheel to grind that hollow grind bevel, though I have made them with flat grinds as well. I am a big fan of Joe Keesler's work. When I saw him demo these I believe that he freehand grinds, though he may use a rest. Of course he has been making them for decades...
-
Basically what I used on my temperature controlled furnace, except I used an independent pilot at low output and a solenoid main burner. Works well, but you will burn your type K thermocouples out pretty quickly if your forge stays up at welding temperatures for long. I used to use a high alumina thermowell to protect mine, though they don't always like to thermocycle.
-
Nice job punching and drifting the eye. Took me a lot longer before I was brave enough to work that large. Make sure you draw back the eye after heat treating. You want that fairly soft.
-
I found a bunch of options just googling "modulating propane control valve". However, this is a pretty sophisticated setup for someone who has never played with a PID controller. Make sure you get one with autotune and that your gas valve fails in the closed position (spring return). I worked something like this with a solenoid gas valve on my main gas supply and a pilot burner to keep things running when the main burner cycled. Worked pretty well for me, but thermal masses of the furnace I was controlling were much higher, which can help stability. Good luck and be safe.
-

I recommend repairing a roof with a DIY metal roof
Latticino replied to angiolino's topic in Problem Solving
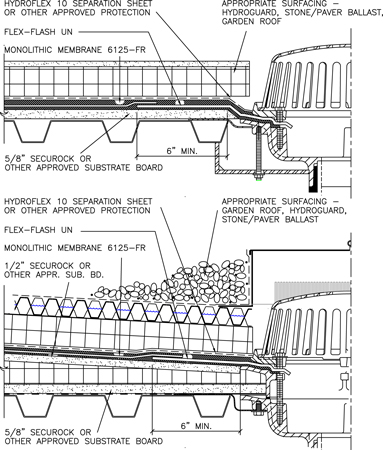
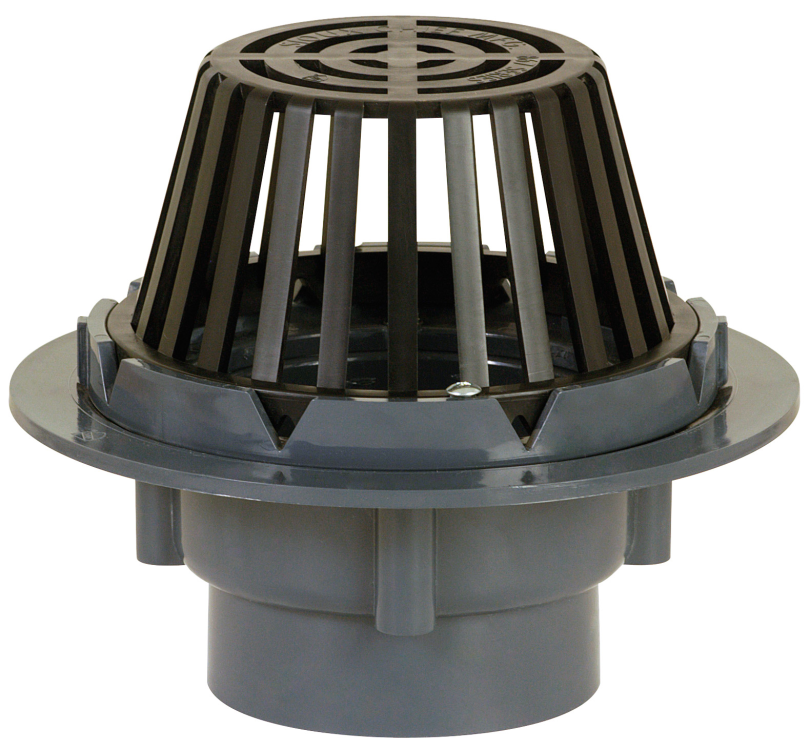
Are you currently experiencing ponding on the roof (significant amounts of standing water)? If so a better system of storm drainage piping might be very helpful. Still, there are no quick and easy solutions to this problem. Please be careful to monitor the condition of the structure and roof. Water damage like this can be life threatening if it goes too far. An EPDM rubber membrane roof typically does not require ballasting. Between that, the most likely required tapered insulation, and new storm drainage piping, this is not a project for a novice contractor. It also is a significant undertaking, so you will likely need a construction permit, which could mean needing engineering drawings. I suspect you will not even be able to afford those. Perhaps you can look into getting a grant? I think an asphalt roof can be retroactively ballasted once it has been made watertight. This should help with your wind issue. If you can get the existing asphalt membrane sealed correctly and then ballast it, it should go a long way towards addressing your problem. This is also a fairly easy DIY solution, though hard work transporting and spreading the ballast. Of course if you currently have ponding, that won't solve all your problems. If you can identify the locations of the ponding, you could also put in some new roof drains and pipe them to your storm system. Seems like a pretty sizable building. Aren't there other tenants that pay rent? The building should have some intrinsic value. Maybe discussing this with the other heirs would be worthwhile. -

I recommend repairing a roof with a DIY metal roof
Latticino replied to angiolino's topic in Problem Solving
This is certainly a better look at what you want, but you do realize that it needs to cover the entire flat roof, right? If you just think you are going to cover a small section (as I suspect you intend), unless you are very clever with channeling water and lucky with the existing roof slope, you will not remove the weather infiltration problem. You have already indicated that you can't repair the existing roof, so you will likely have trouble flashing in any new penetrations. If the perimeter of your new structure rests on the existing roof surface, and that seam leaks when your roof fills up with water, you are going to get water into the same gaps you had before. If you make new holes through the existing roof membrane to attach your structure to the building framing you will have new and potentially larger penetrations that water can come in. Of course if you are absolutely certain that your asphalt membrane would be weather tight if you could only solve the uplift of the material during high winds (and if you do have high winds, you best consider that in your design and in particular the method of attachment tot he existing structure) there may be easier alternatives. I can likely look up installation instructions for you if you don't have detailed ones for asphalt roofs. I'm a mechanical engineer so I don't really have this at my fingertips, but have you ever heard of a ballasted roof? Look it up. I still don't understand why you are personally responsible for repairs if you don't own the building. Unfortunately I don't read Italian, so I am not certain whether the photos are of framing systems the OP has built, or just examples from the internet of frames he likes. They all seem sturdy and well constructed, but the critical connection points to the existing structure are not shown. It is a lot easier to set such frames down at ground level than it is 30' up in the air without a crane or an experienced crew. -

I recommend repairing a roof with a DIY metal roof
Latticino replied to angiolino's topic in Problem Solving
Hard to tell with the translator if you are being sarcastic. I have tried to be straightforward and answer your question to the best of my ability. The firm I work for designs many roof upgrades and repairs, and the architects I discussed your "solution" with were uniformly appalled. Around here you would certainly need a building permit to put up the kind of structure you are contemplating, the cost would most likely far exceed the roofing update with EPDM, and you would need professionally stamped drawings certifying that the design met code requirements (which you would be very unlikely to get since the concept is flawed). I suspect it is the same for Italy. -
An improved ash dump and side sucker hood would be the only changes I would make to this initially. Eventually you might want to reform the refractory casting around the bottom air outlet or put in a metal firepot to help in localizing your fireball (I have even used hard firebrick for this, but it should work as shown for general forging duties.
-

I recommend repairing a roof with a DIY metal roof
Latticino replied to angiolino's topic in Problem Solving
Sorry for your troubles, but I still don't see how the EPDM roof (ideally with correct tapered insulation and updated roof drain solution) will cost substantially less than the structural work you are contemplating. I appreciate that you like to build things yourself, but hopefully you understand that some things are not appropriate or cost effective to DIY (Did you ever fabricate your exercise equipment?). It sounds like you may own the building (my condolences). Please note the following: EPDM ($4.25–$12 per square foot): This is the rubber roofing material with the longest track record, and EPDM rubber roofing is also the most cost-effective. It has a life span of at least 20 years, but under the right conditions can last up to 60 years. I don't know what the building itself is worth, but if you don't get that roof fixed, the value will certainly drop. If you have other tenants you may end up being liable for damage to their property or person. -

I recommend repairing a roof with a DIY metal roof
Latticino replied to angiolino's topic in Problem Solving
Best regards right back to you. Listen, I'm a professional engineer and I'm giving you some free engineering advice. You can take it or leave it as you like. If whatever translator you are using made my earlier response to complicated I'll simplify: Cutting into an existing roof to put on an addition is a job for a professional contractor, architect and structural engineer. If you take a shortcut and DIY the work, who takes on the liability if there is a failure? I have a friend who got a substantial settlement when a contractor's ladder blew off a roof, fell and broke their leg as they were walking next to the shopping center where the construction was going on. What will you do if a section of your metal roof gets blown off and kills someone? How will you rig the, likely, 4" x 4" tubular steel columns and beams up to the roof (and in place once you get them there)? Will you be renting a crane? Will it be welded or bolted construction (if the former, how will you power the welder on the roof, if the latter how will you certify the bolts will be correctly torqued and hold)? Do you have insurance for the additional workers you will need for this? Actually there are too many potential construction issues to cover... Do you have any idea the implications of "cutting the reinforcing bars"? Got to assume they are there for a reason. Your strategy of putting a pitched roof above the flat roof will not work unless you can either cover the entire flat area with a pitched roof cover, or can build walls from your new roof to the existing one and bond them well enough so there will be no leaks. You have already established you don't know how to waterproof the existing system, so how will that change? I see two paths here: If you own the building, take out a loan and get a proper, new flat roof installed. As previously noted I would recommend a monolithic EPDM membrane. If you don't own the building, and the landlord refuses to make it weather-tight, move somewhere else.


