Joel OF
Members
-
Joined
-
Last visited
Everything posted by Joel OF
-
A very steady and experienced hand would negate the need for drilled or punched holes @Daswulf but sometimes a defined stopping point (i.e a hole) can help to keep things even when you're cutting up to a certain point. Personally I don't really see the need to slavishly use traditional methods when the end result either doesn't give you a better product (functionally or aesthetically) than the quicker modern alternative. If you've got to file off off the tapered ragged edge from a hot cut section so you can forge it down cleanlg without it cold shutting you're ultimately removing mass, which is just the same as cutting the stock with 1mm disc or horizontal bandsaw blade. Personally I'd rather get better at forging than filing but I'm no purist so take my opinion with as big a pinch of salt as suits your tastes @BlasterJoe
-
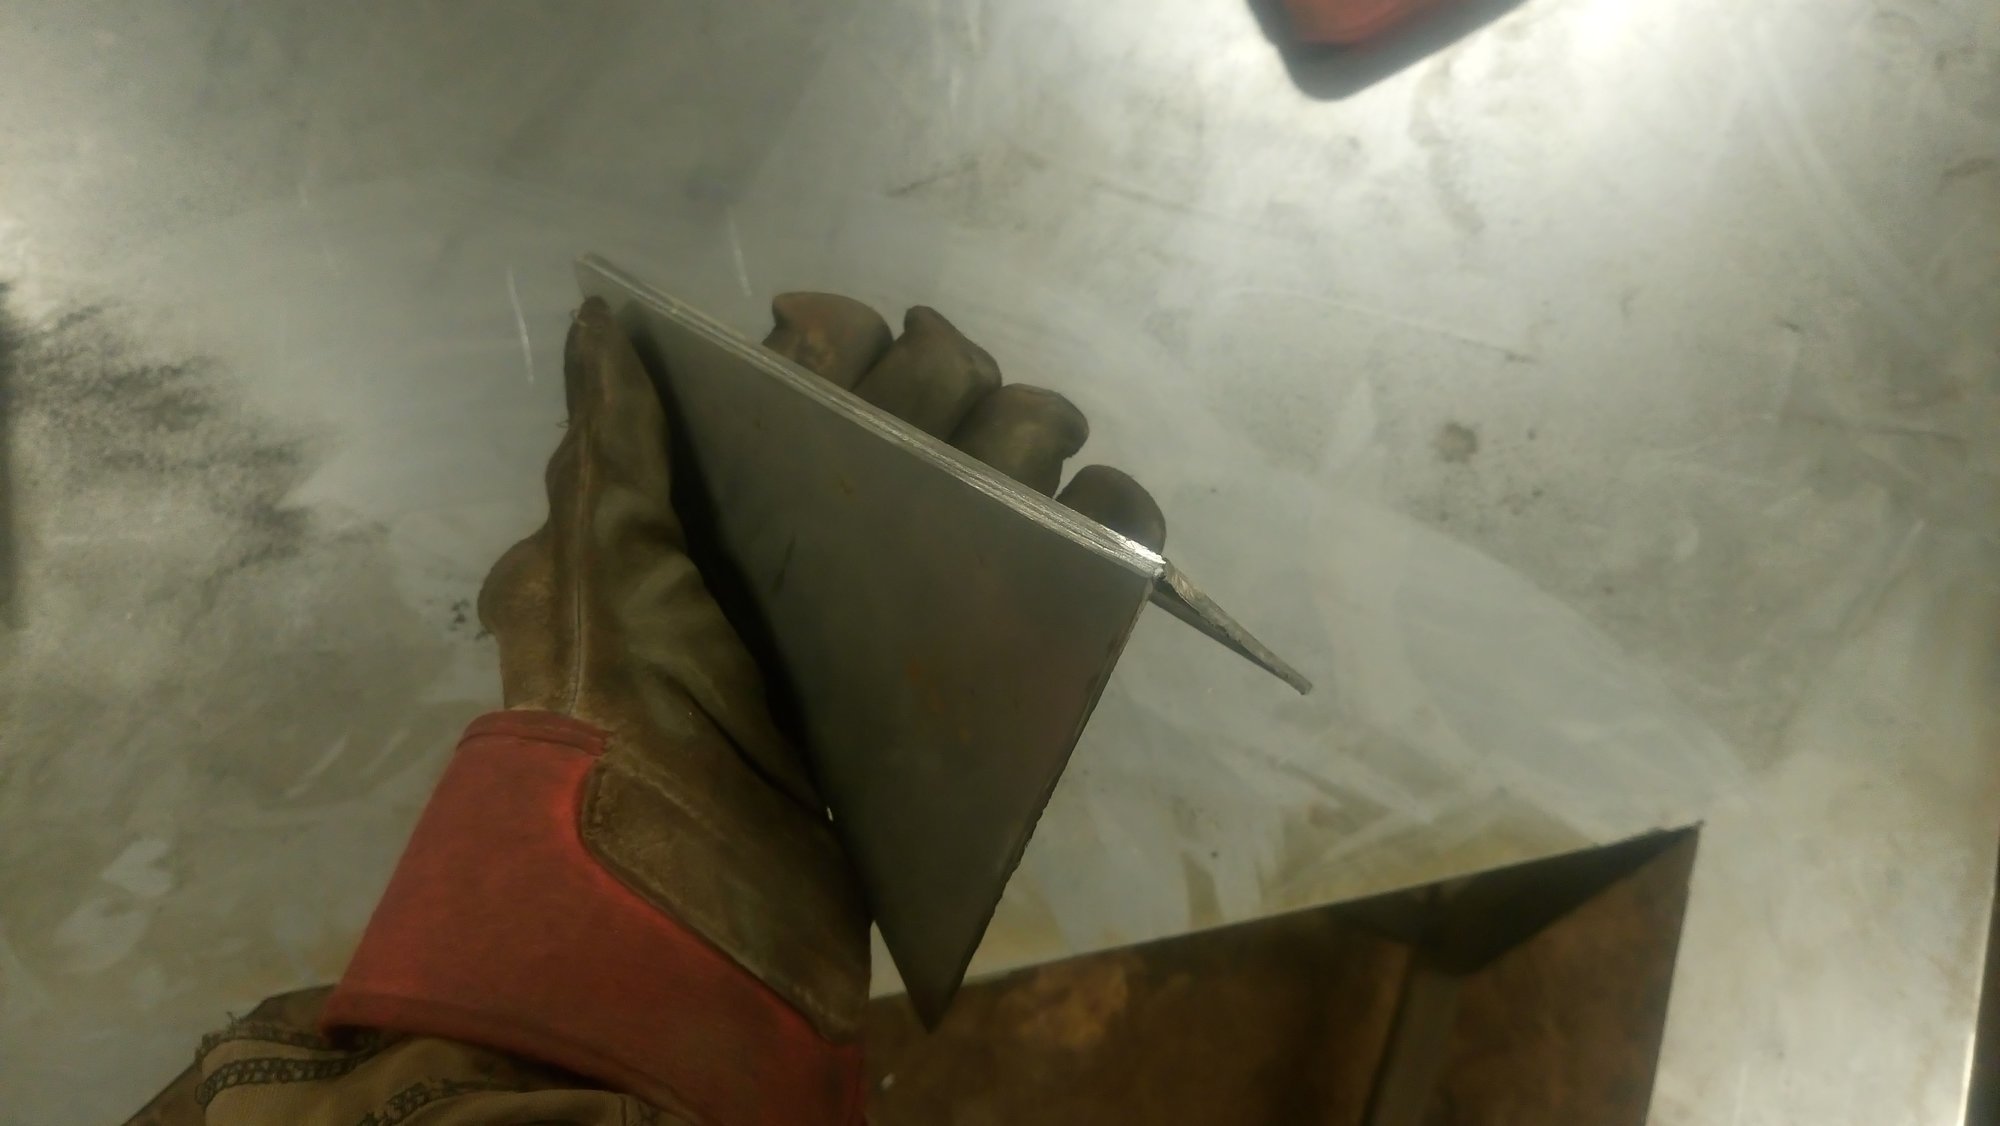
If you embrace arc welding rather than resist you may find your range of design possibilities becomes much more interesting and rewarding. Even the smallest dot of weld can provide sufficient strength for a decorative piece & your insecurities Re: structural welding may prove themselves to be disproved. (Real word?)
-
Hi, I started a thread on this a while ago when I finally figured out how to avoid this problem. I posted step by step pictures in it and you might find it's what you're after.
-
"easier" isn't always a good choice of word when it comes to blacksmithing & can lead to contentious opinions. Drilling 3 holes then slitting up to them with a 1mm disc then forging the tines down is easier than whatever you feel the "traditional" method is.
-
Glad you enjoyed it for what it is.
-
The light gauge railway I use is various ages according to when it was laid & pulled up for replacement so I don't think there's a guarenteed constant in steel type. The stuff I used for these is the newer track with a larger profile. It's strange stuff because it drills very easily with a cordless hand drill, as easily as mild steel, but seems to hold an edge on cutters.
-
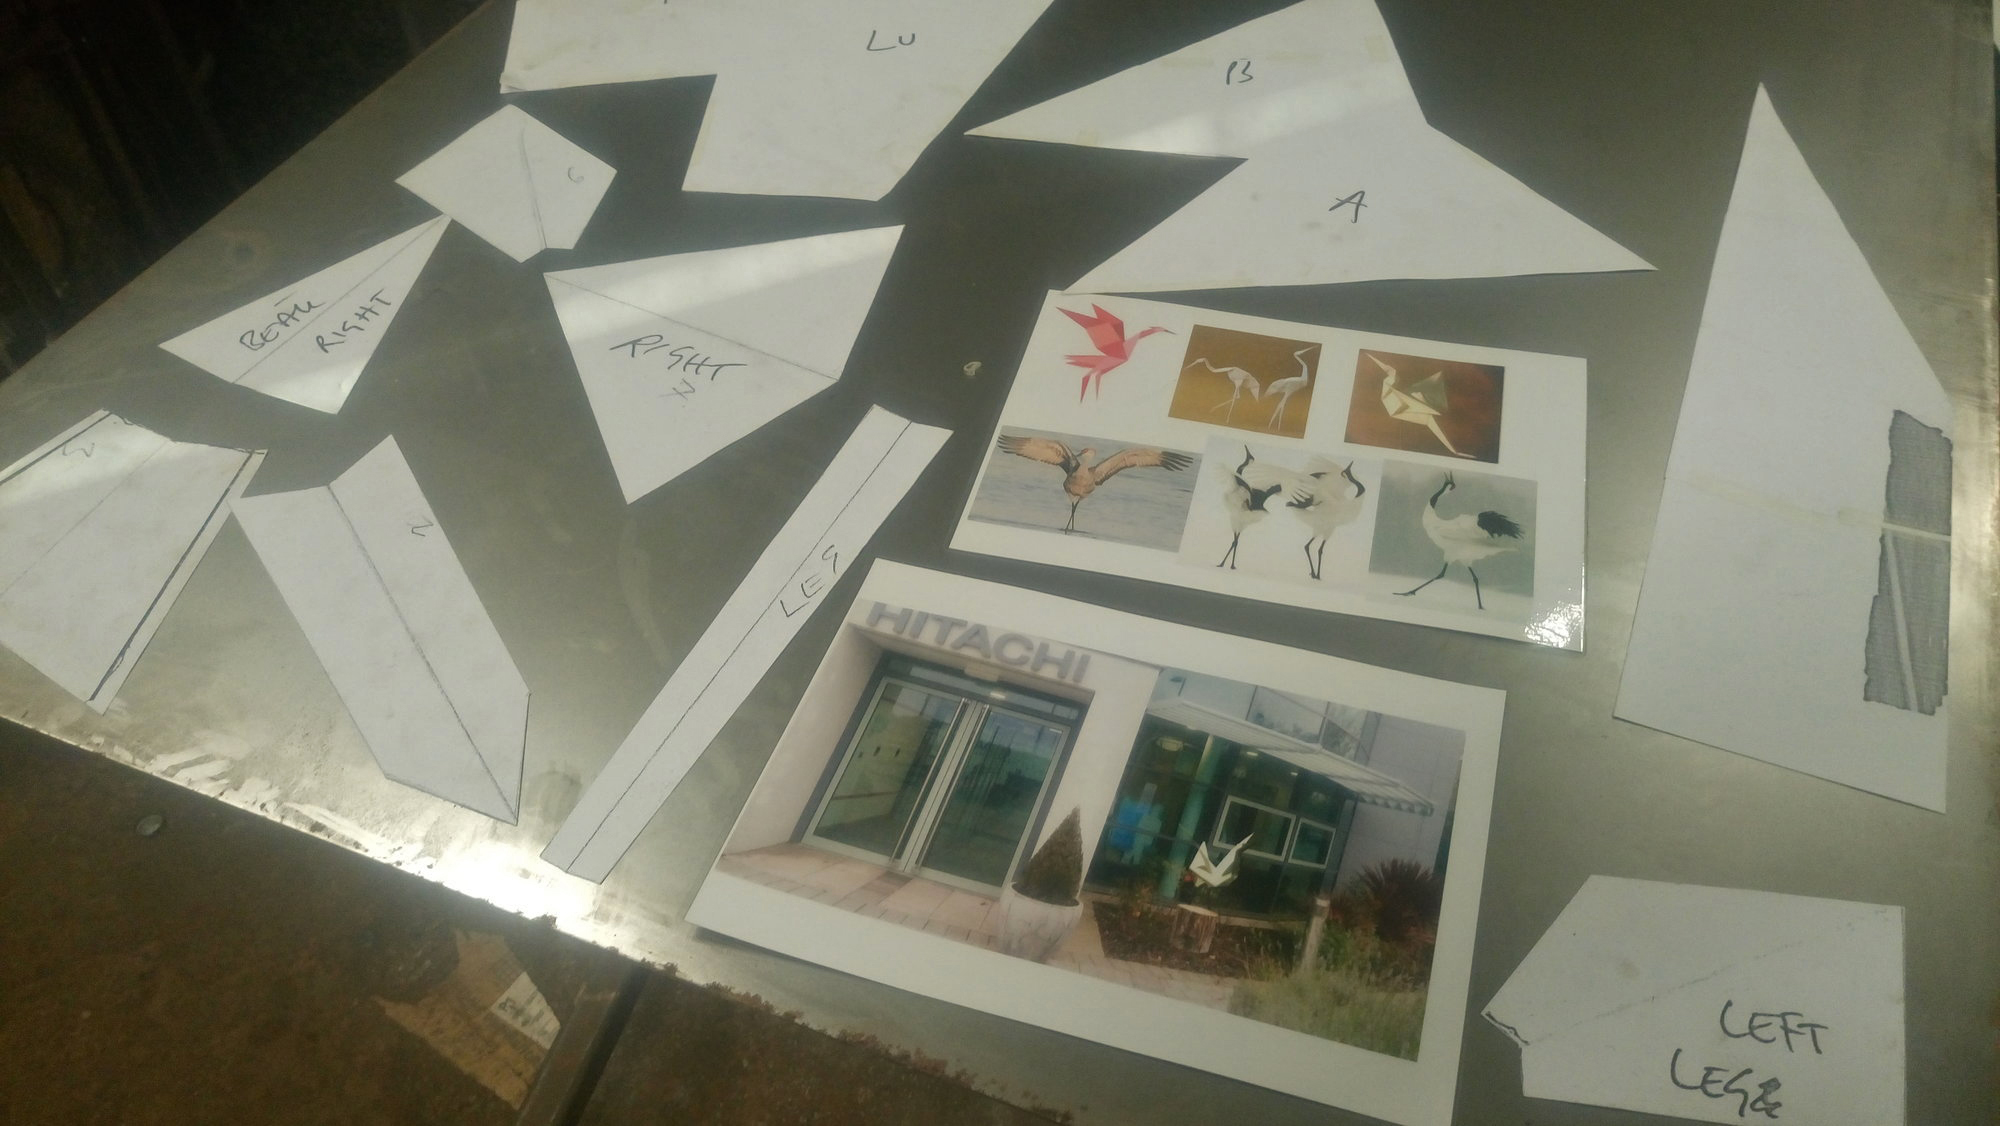
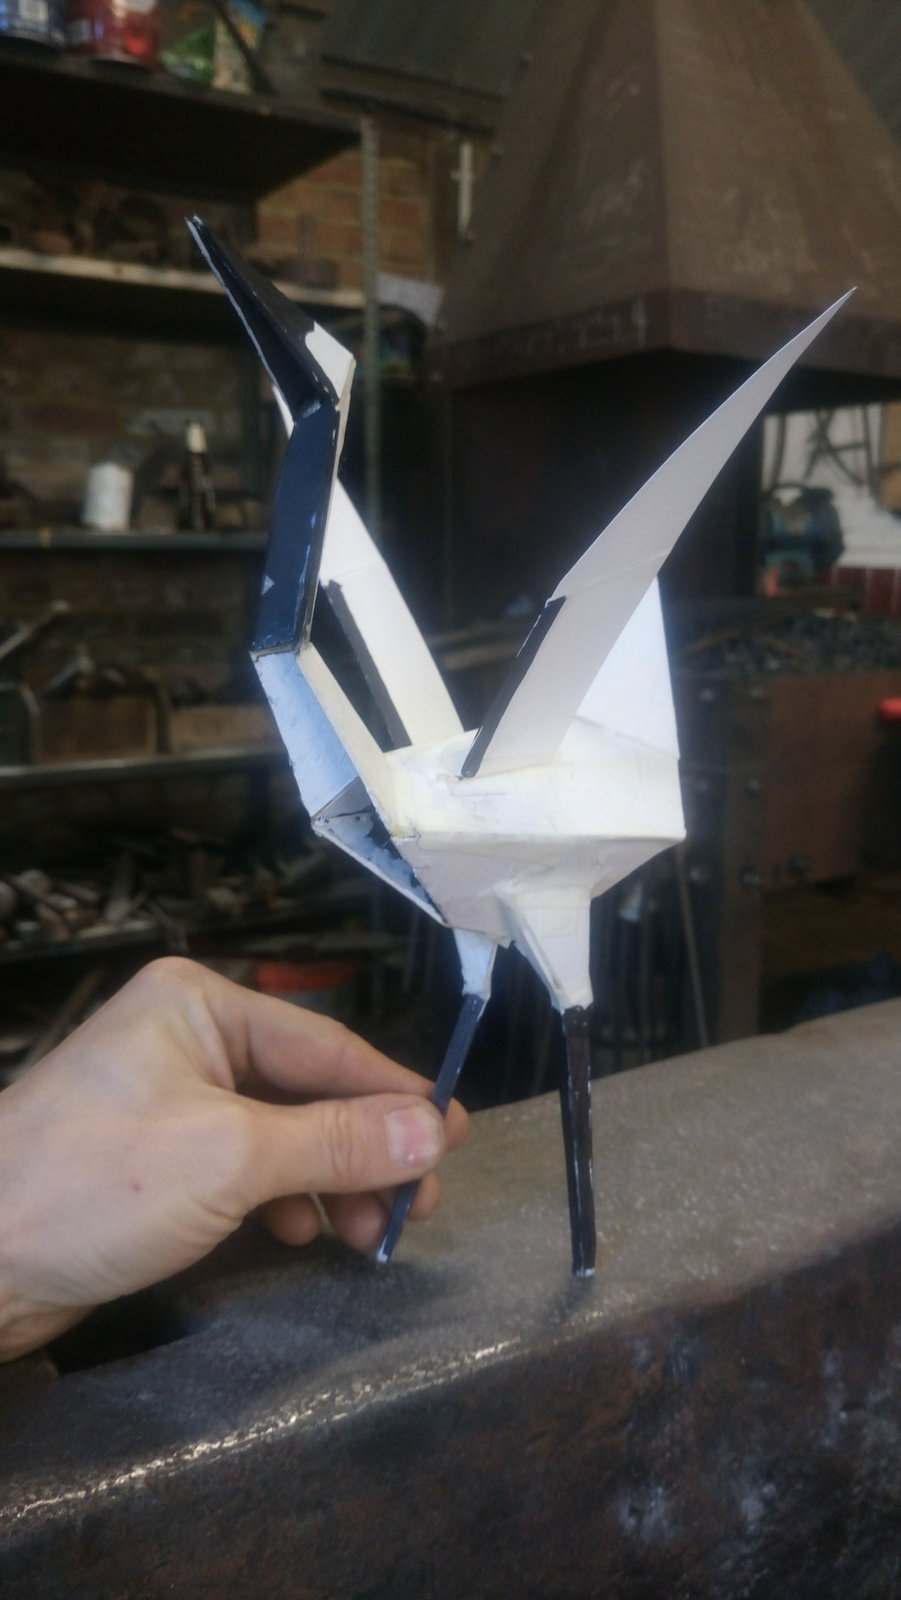
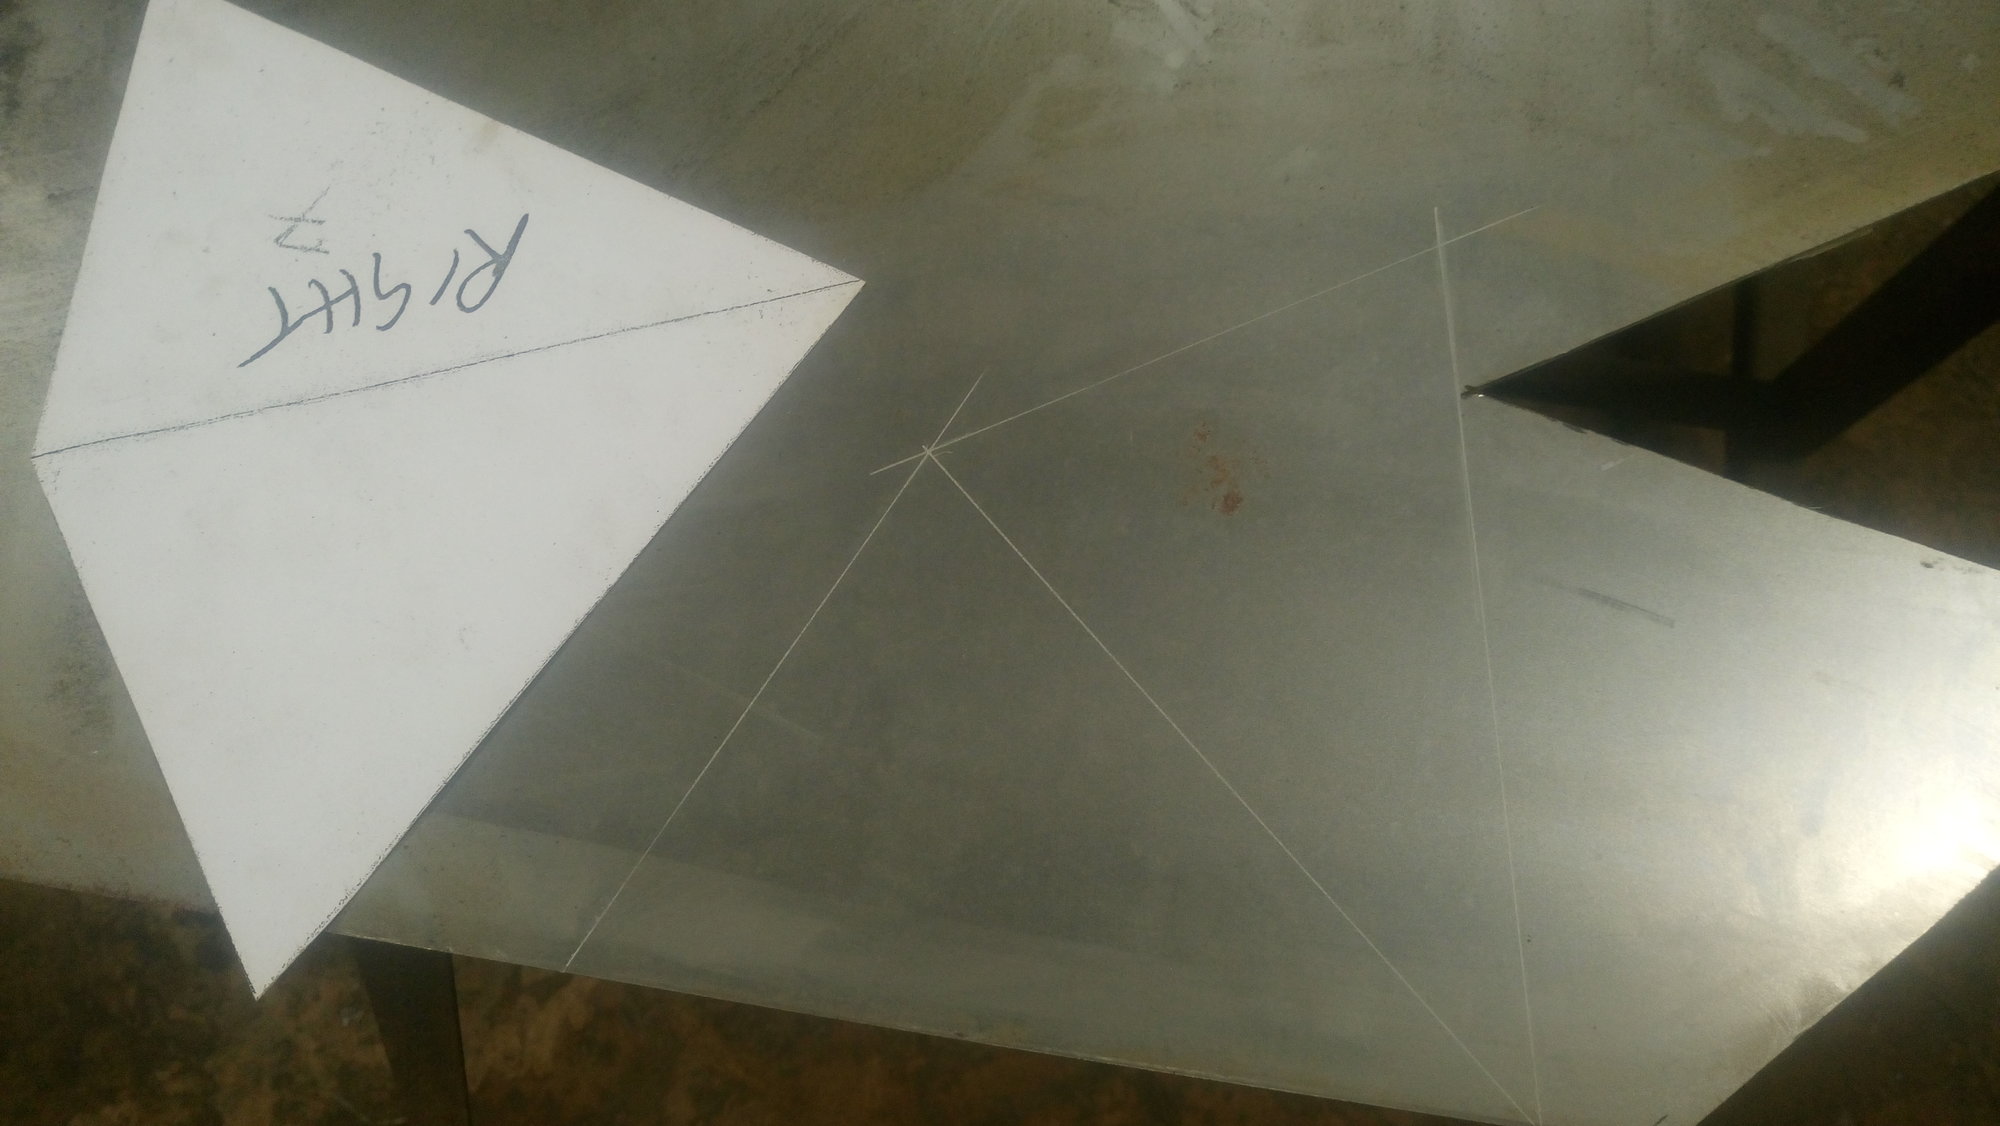
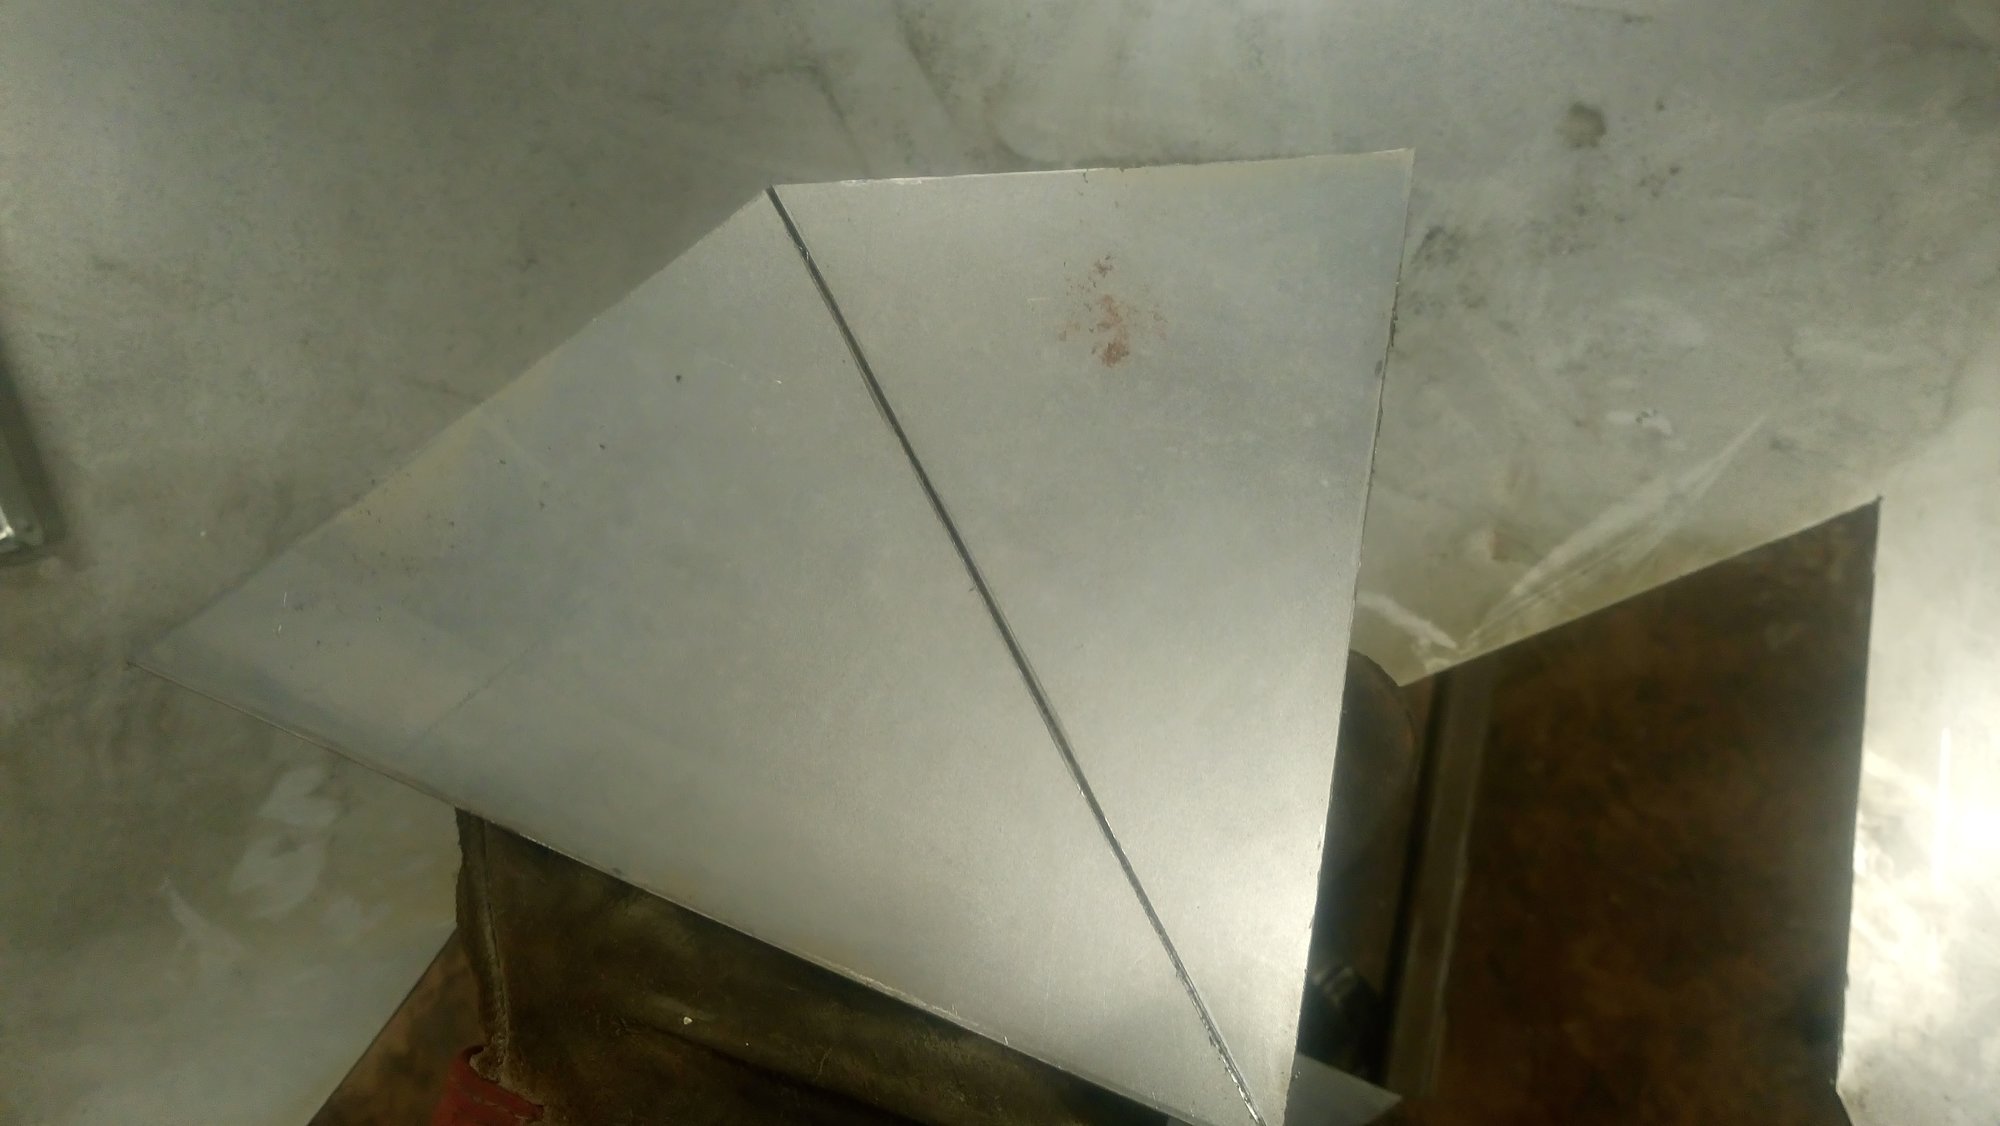
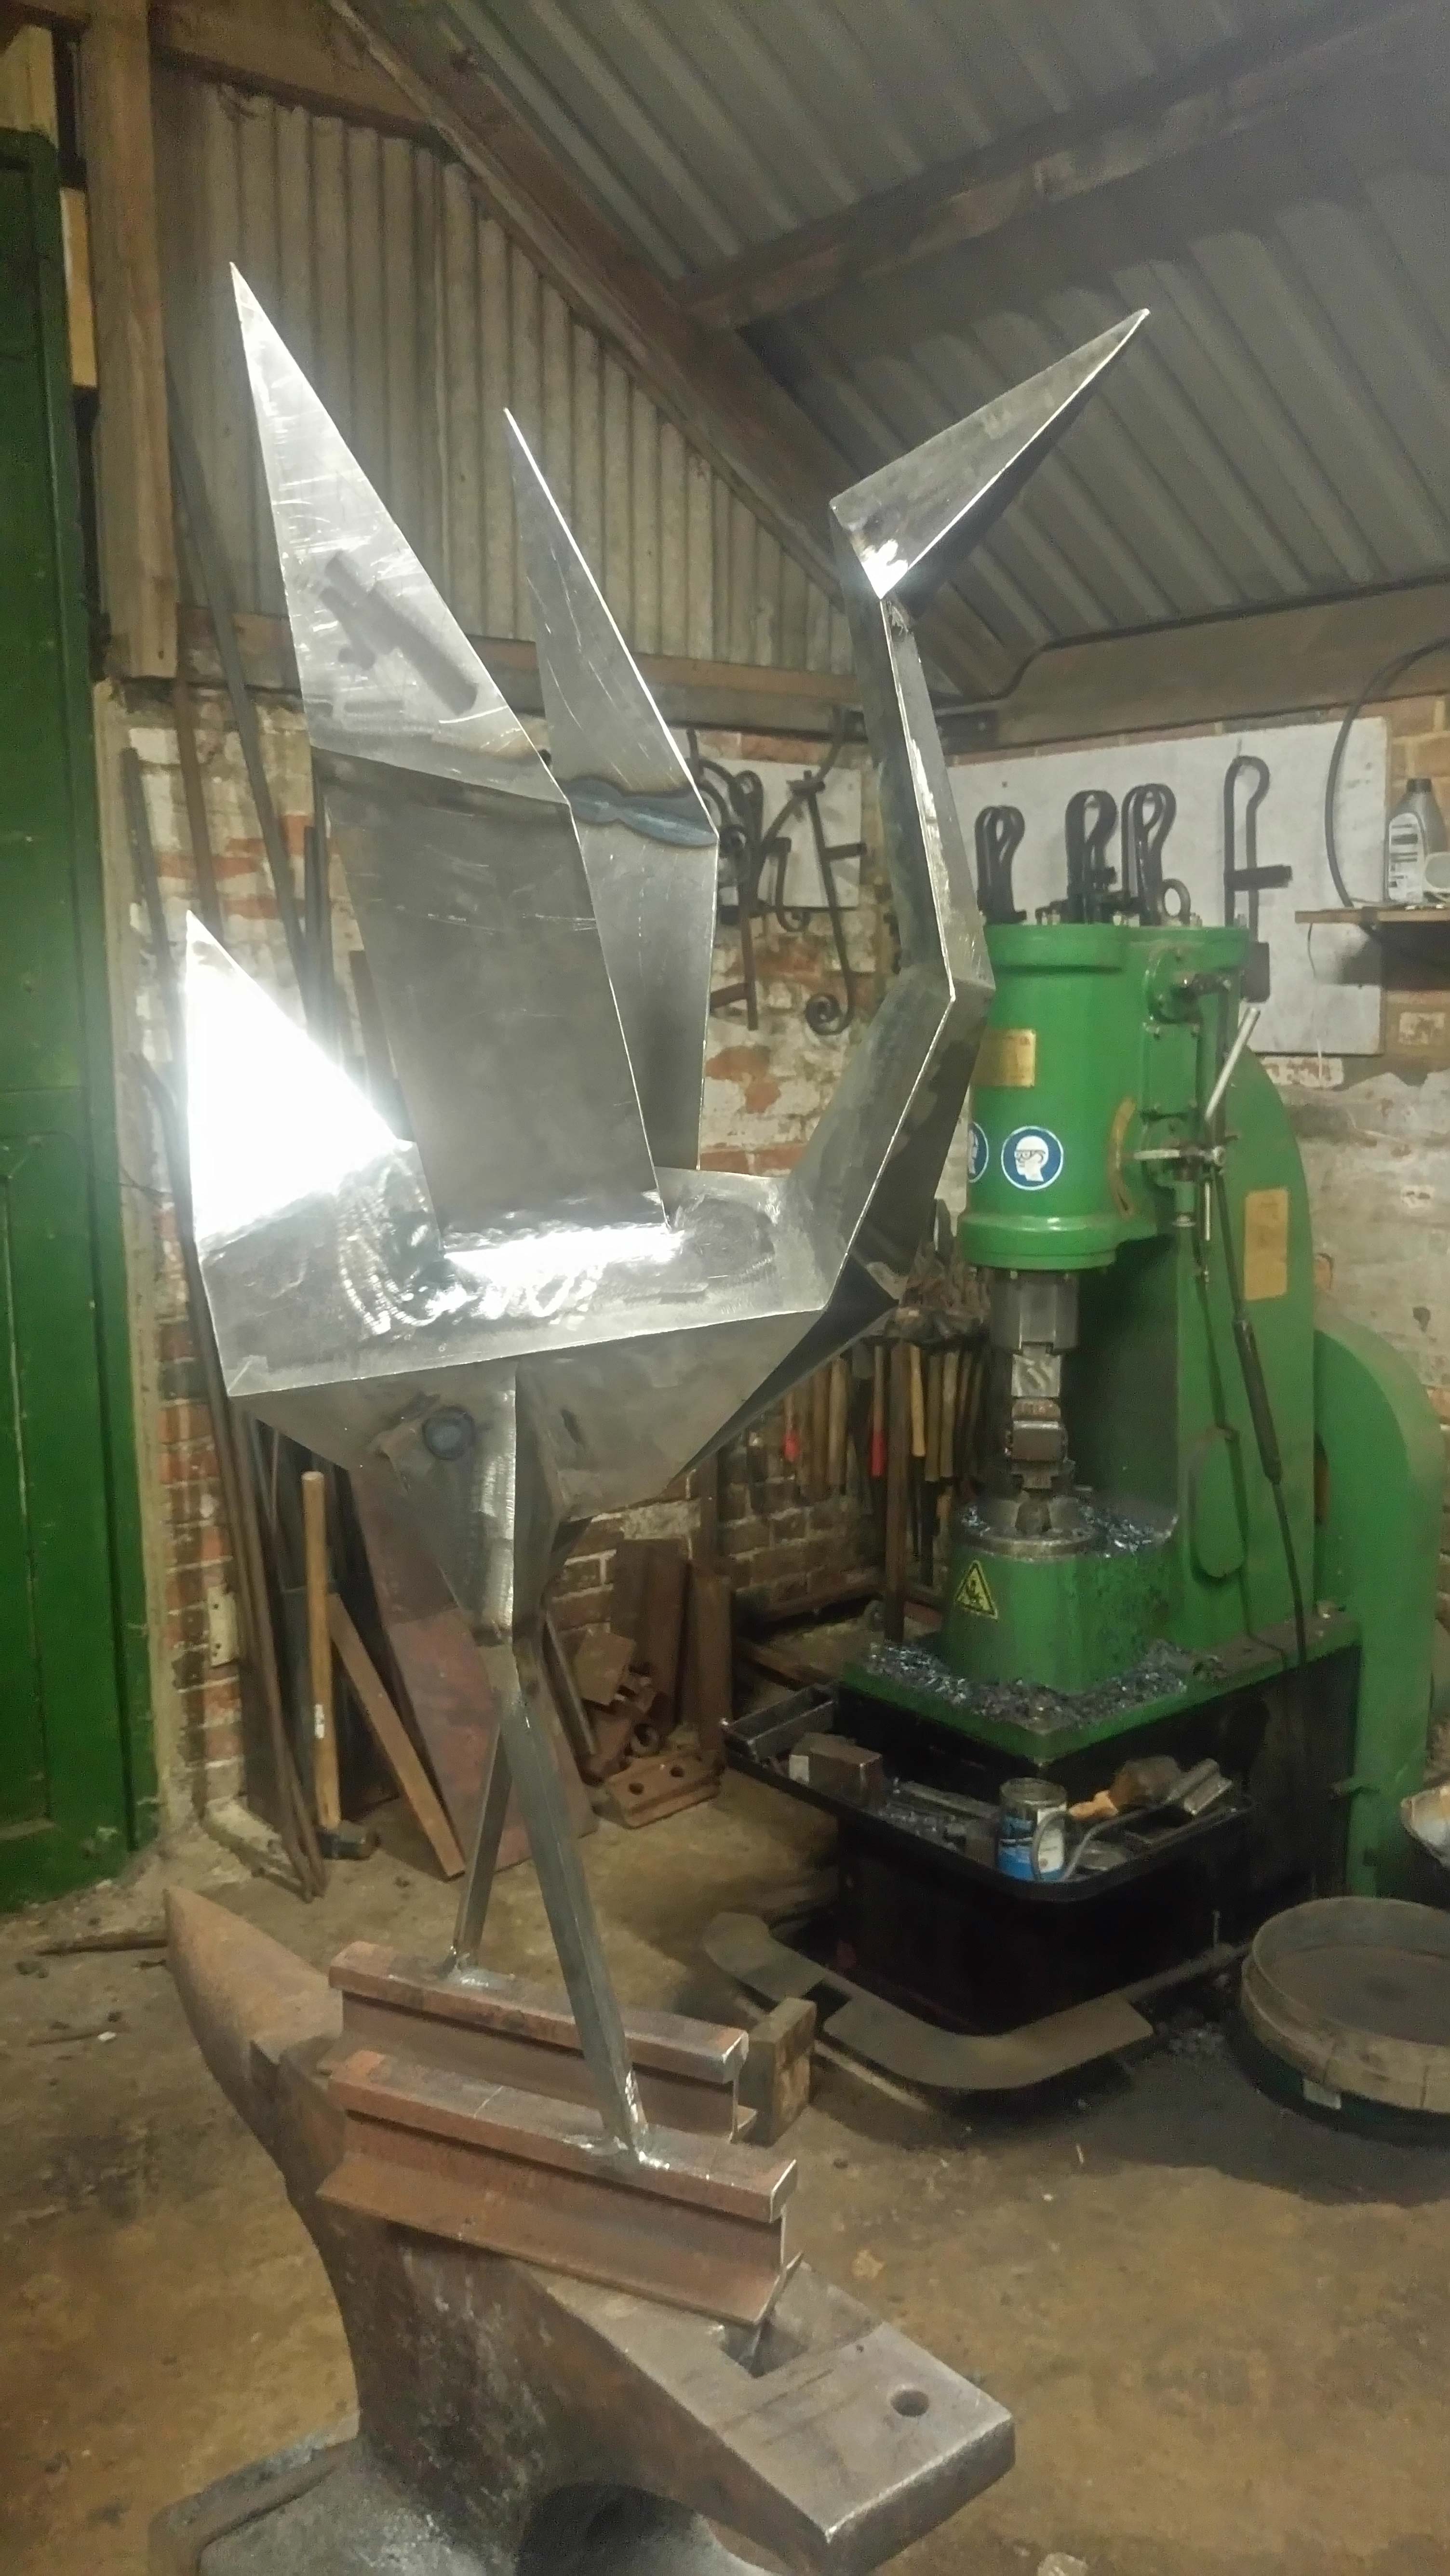
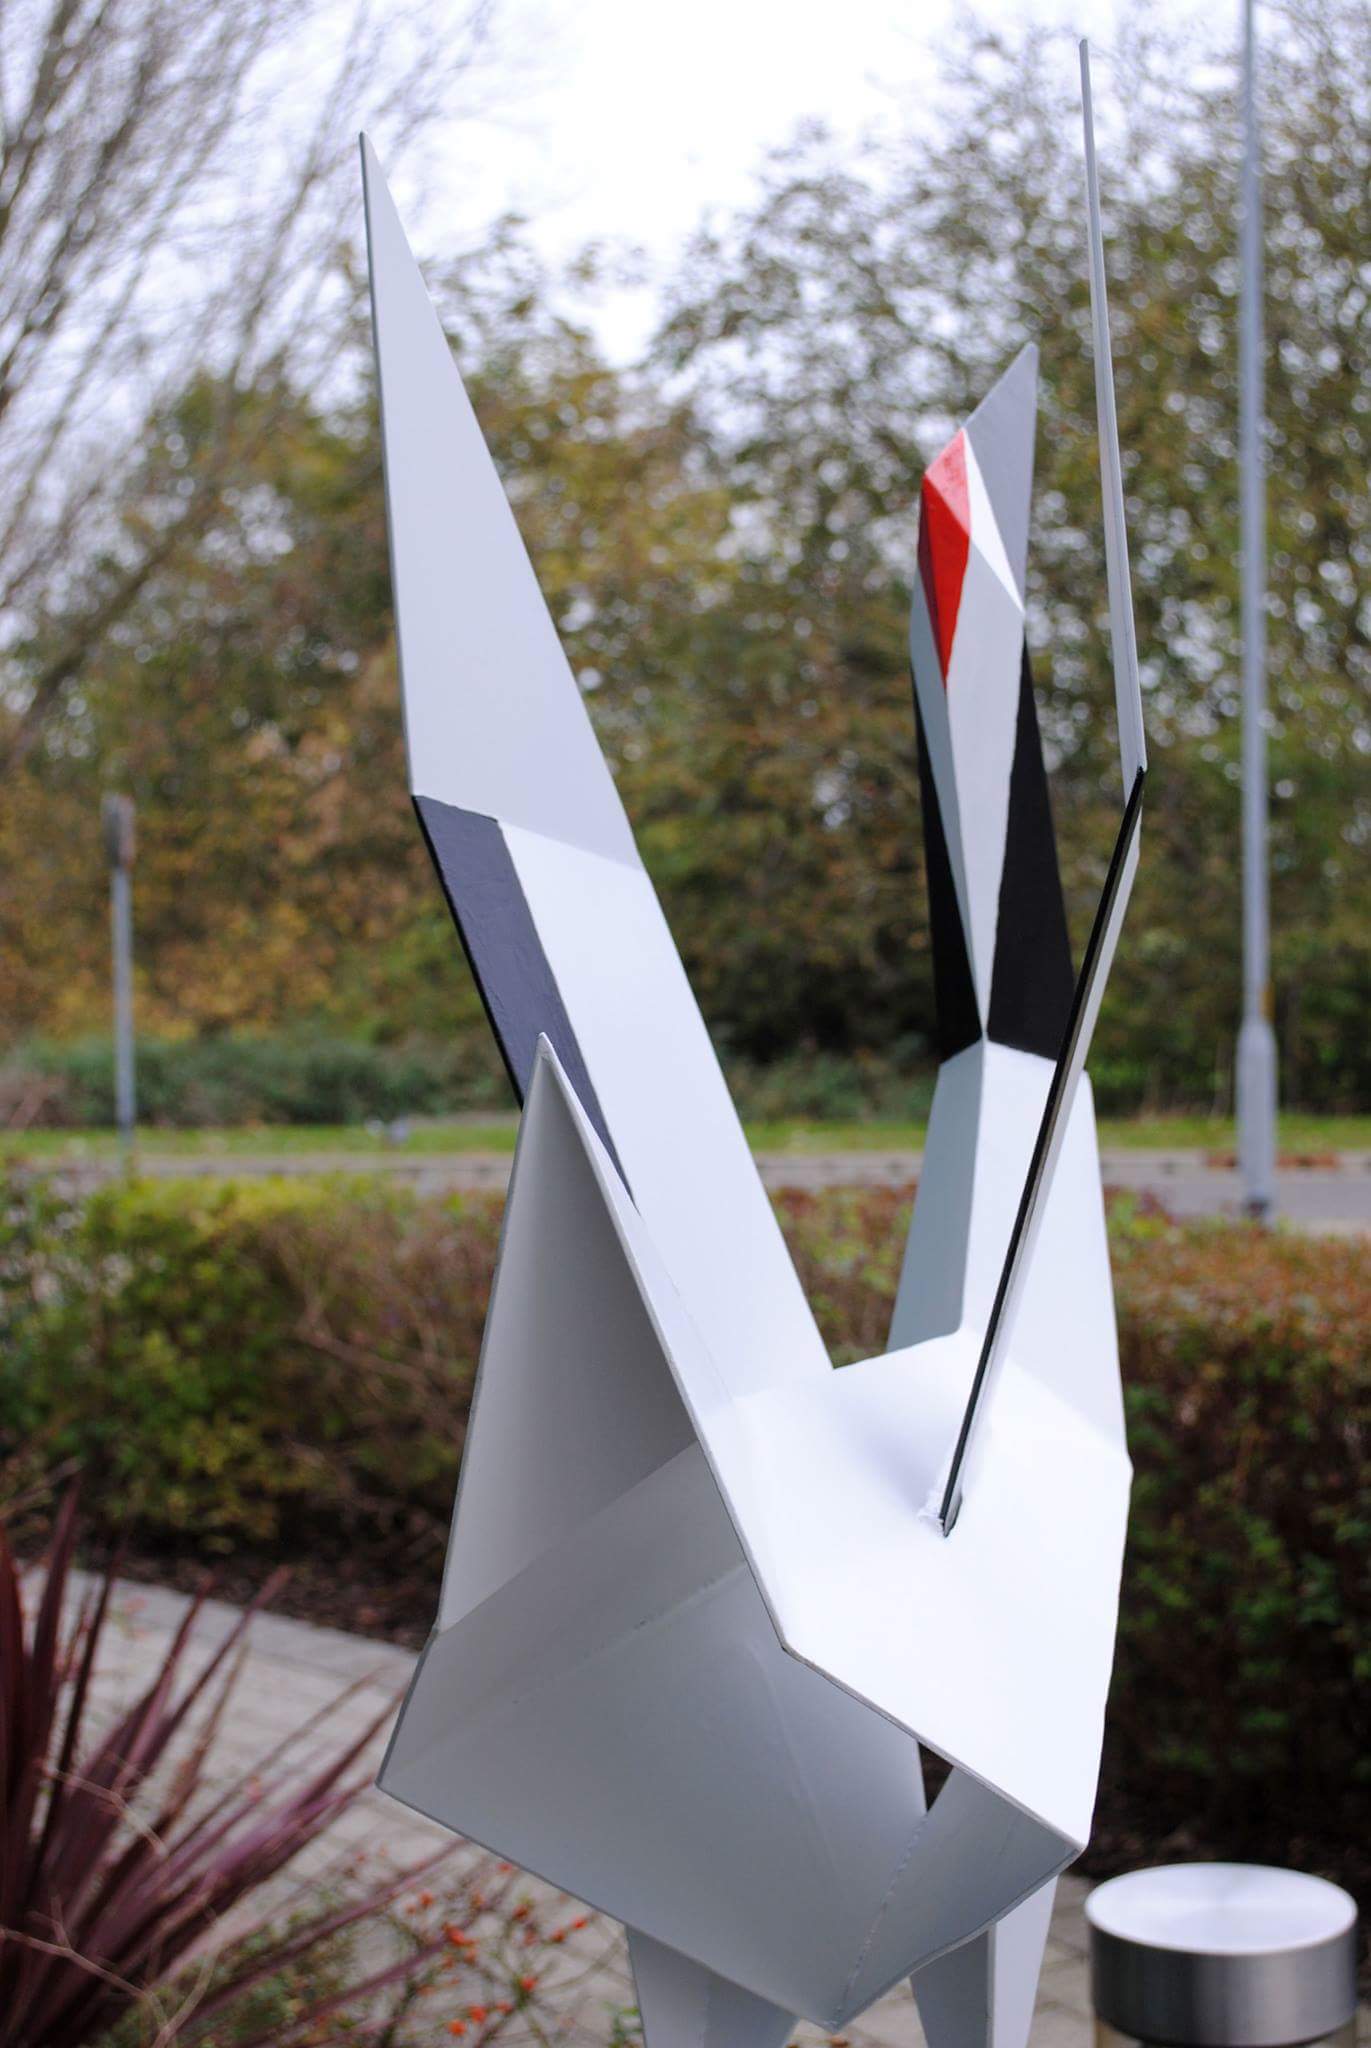
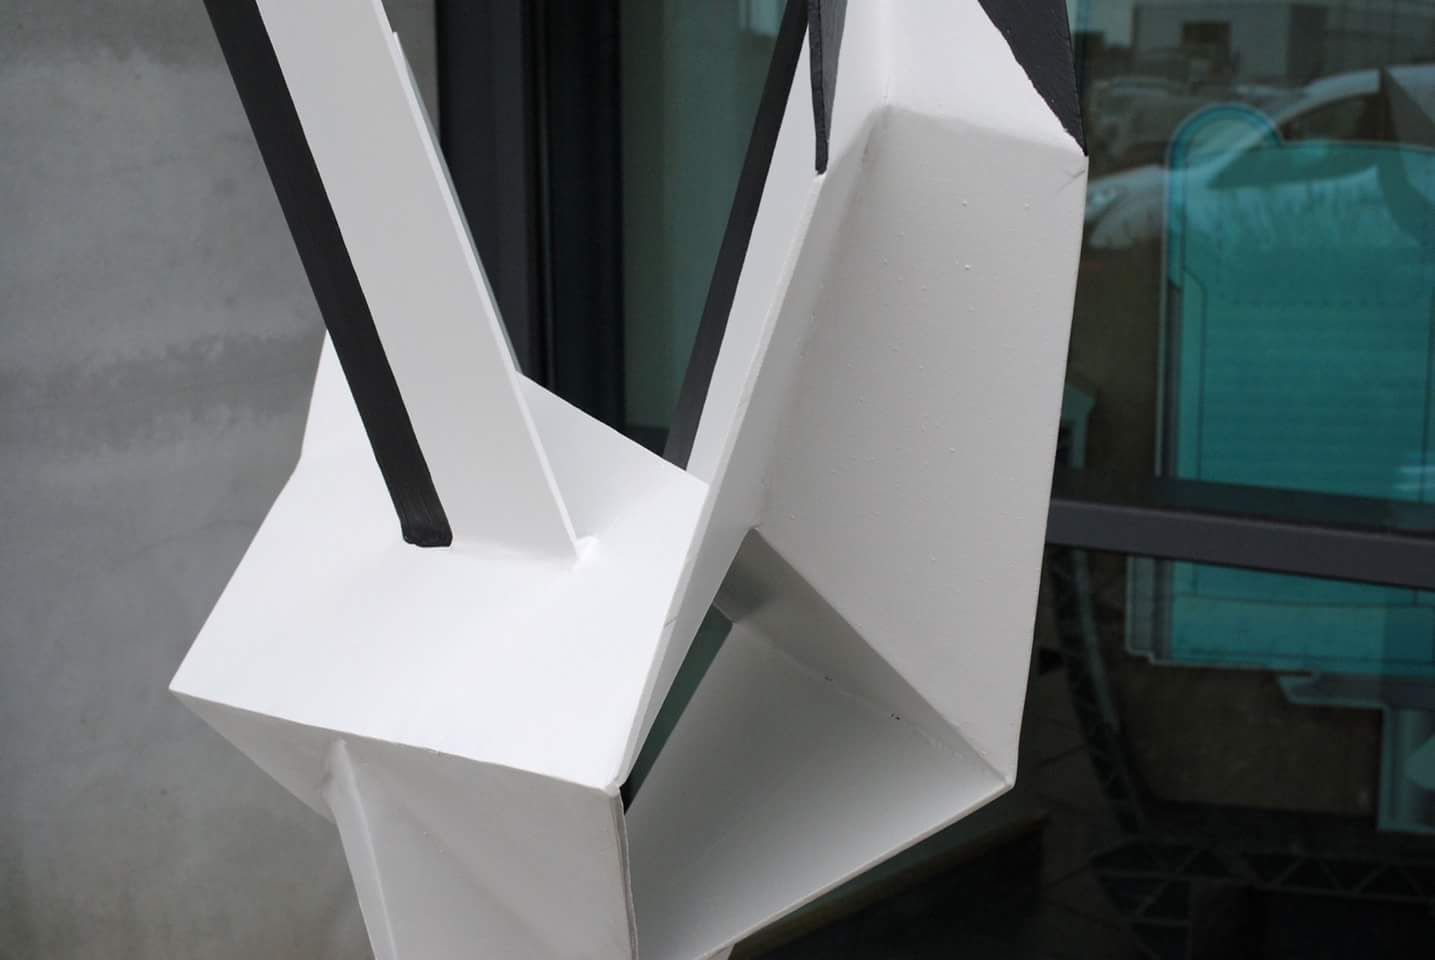
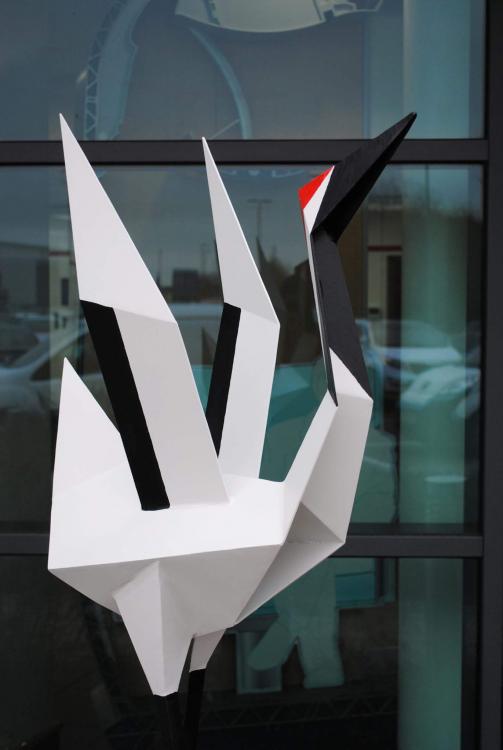
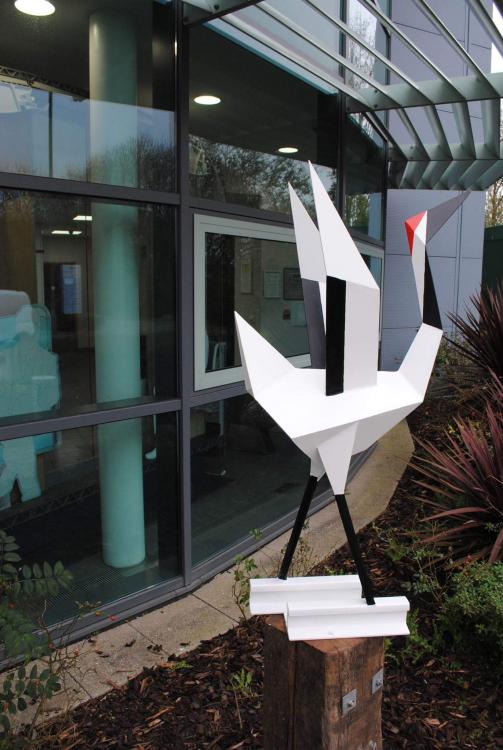
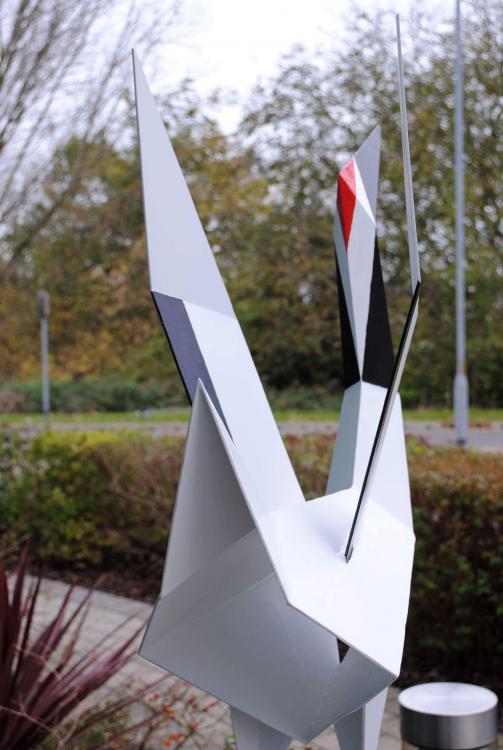
Thanks gents. Though as discussed in another thread you mean RR "dogs", Frosty Pretty simple stuff really; make scale model from card, (complete fluke that it ended up 25cm and the brief was for a 1m tall bird) disassemble, photocopy & enlarge, trace around, cut out, half cut/score the fold lines, bend cold, fill with weld, grind to suit. Blasted zinc sprayed and white vinyl spray painted at the finishers, black and red added at the workshop by hand. Pegged down with square head coach screws. Completely private & secure area so no chance of theft or vandalism.


-
No forge work in this but an enjoyable job anyhow. Hitachi maintain the local high speed trains & got in touch to commission an origami style red crested crane for their 10 year anniversary of providing the service. Pretty tricky as it goes to make an anatomically accurate & interesting origami style animal from sheet steel, but chuffed with how it turned out. Very tight deadline so designed, fabricated, weatherproofed & installed within 14 days. Featured on local news last night & supposedly I got a mention as they had a filmed press unveiling, but I missed it.


-
What look does oil give it? Does oil not just wear off leaving it to go back to the T wash look on it's own?
-
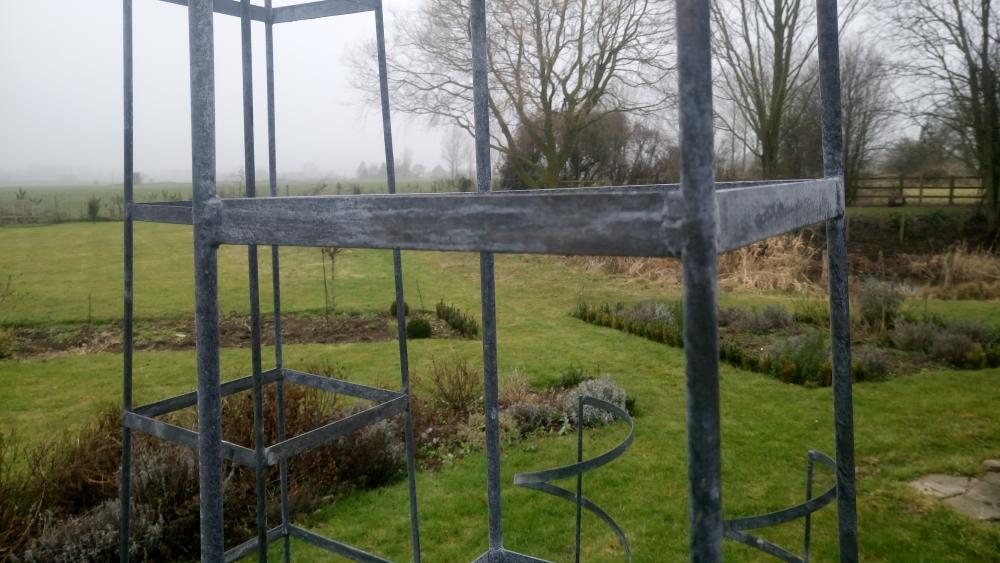
Does anyone know if T wash gives the same visual results on zinc sprayed surfaces as it does on galv surfaces? So far I haven't applied T wash myself and have only had the galv firm do it. Close up snap attached of a plant support with galv + T wash combo. It's a popular look with customers on garden products and I have something that I want that finish on, but don't trust the heavy handed galvers with.
-
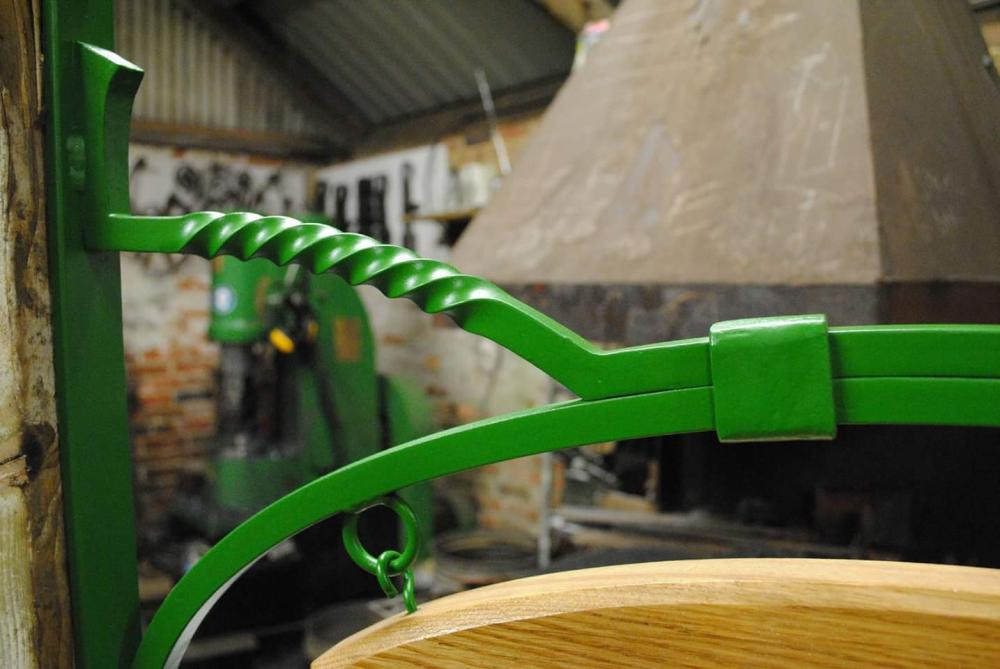
My hope for this thread is that folks will post pictures of their ironwork that has a colourful paint finish, (not black) with specific paint colour codes or paint name information. Please only post pictures of colourful work if you know the colour information. Folks will have to bare in mind that cameras & computers all have different colour biases, so this is a thread for folks to simply get inspiration for colours that they may want to investigate further & use on their own work. I'll get the ball rolling; this is RAL 6002 "Leaf Green" on a sign bracket I'm waiting to install.
-
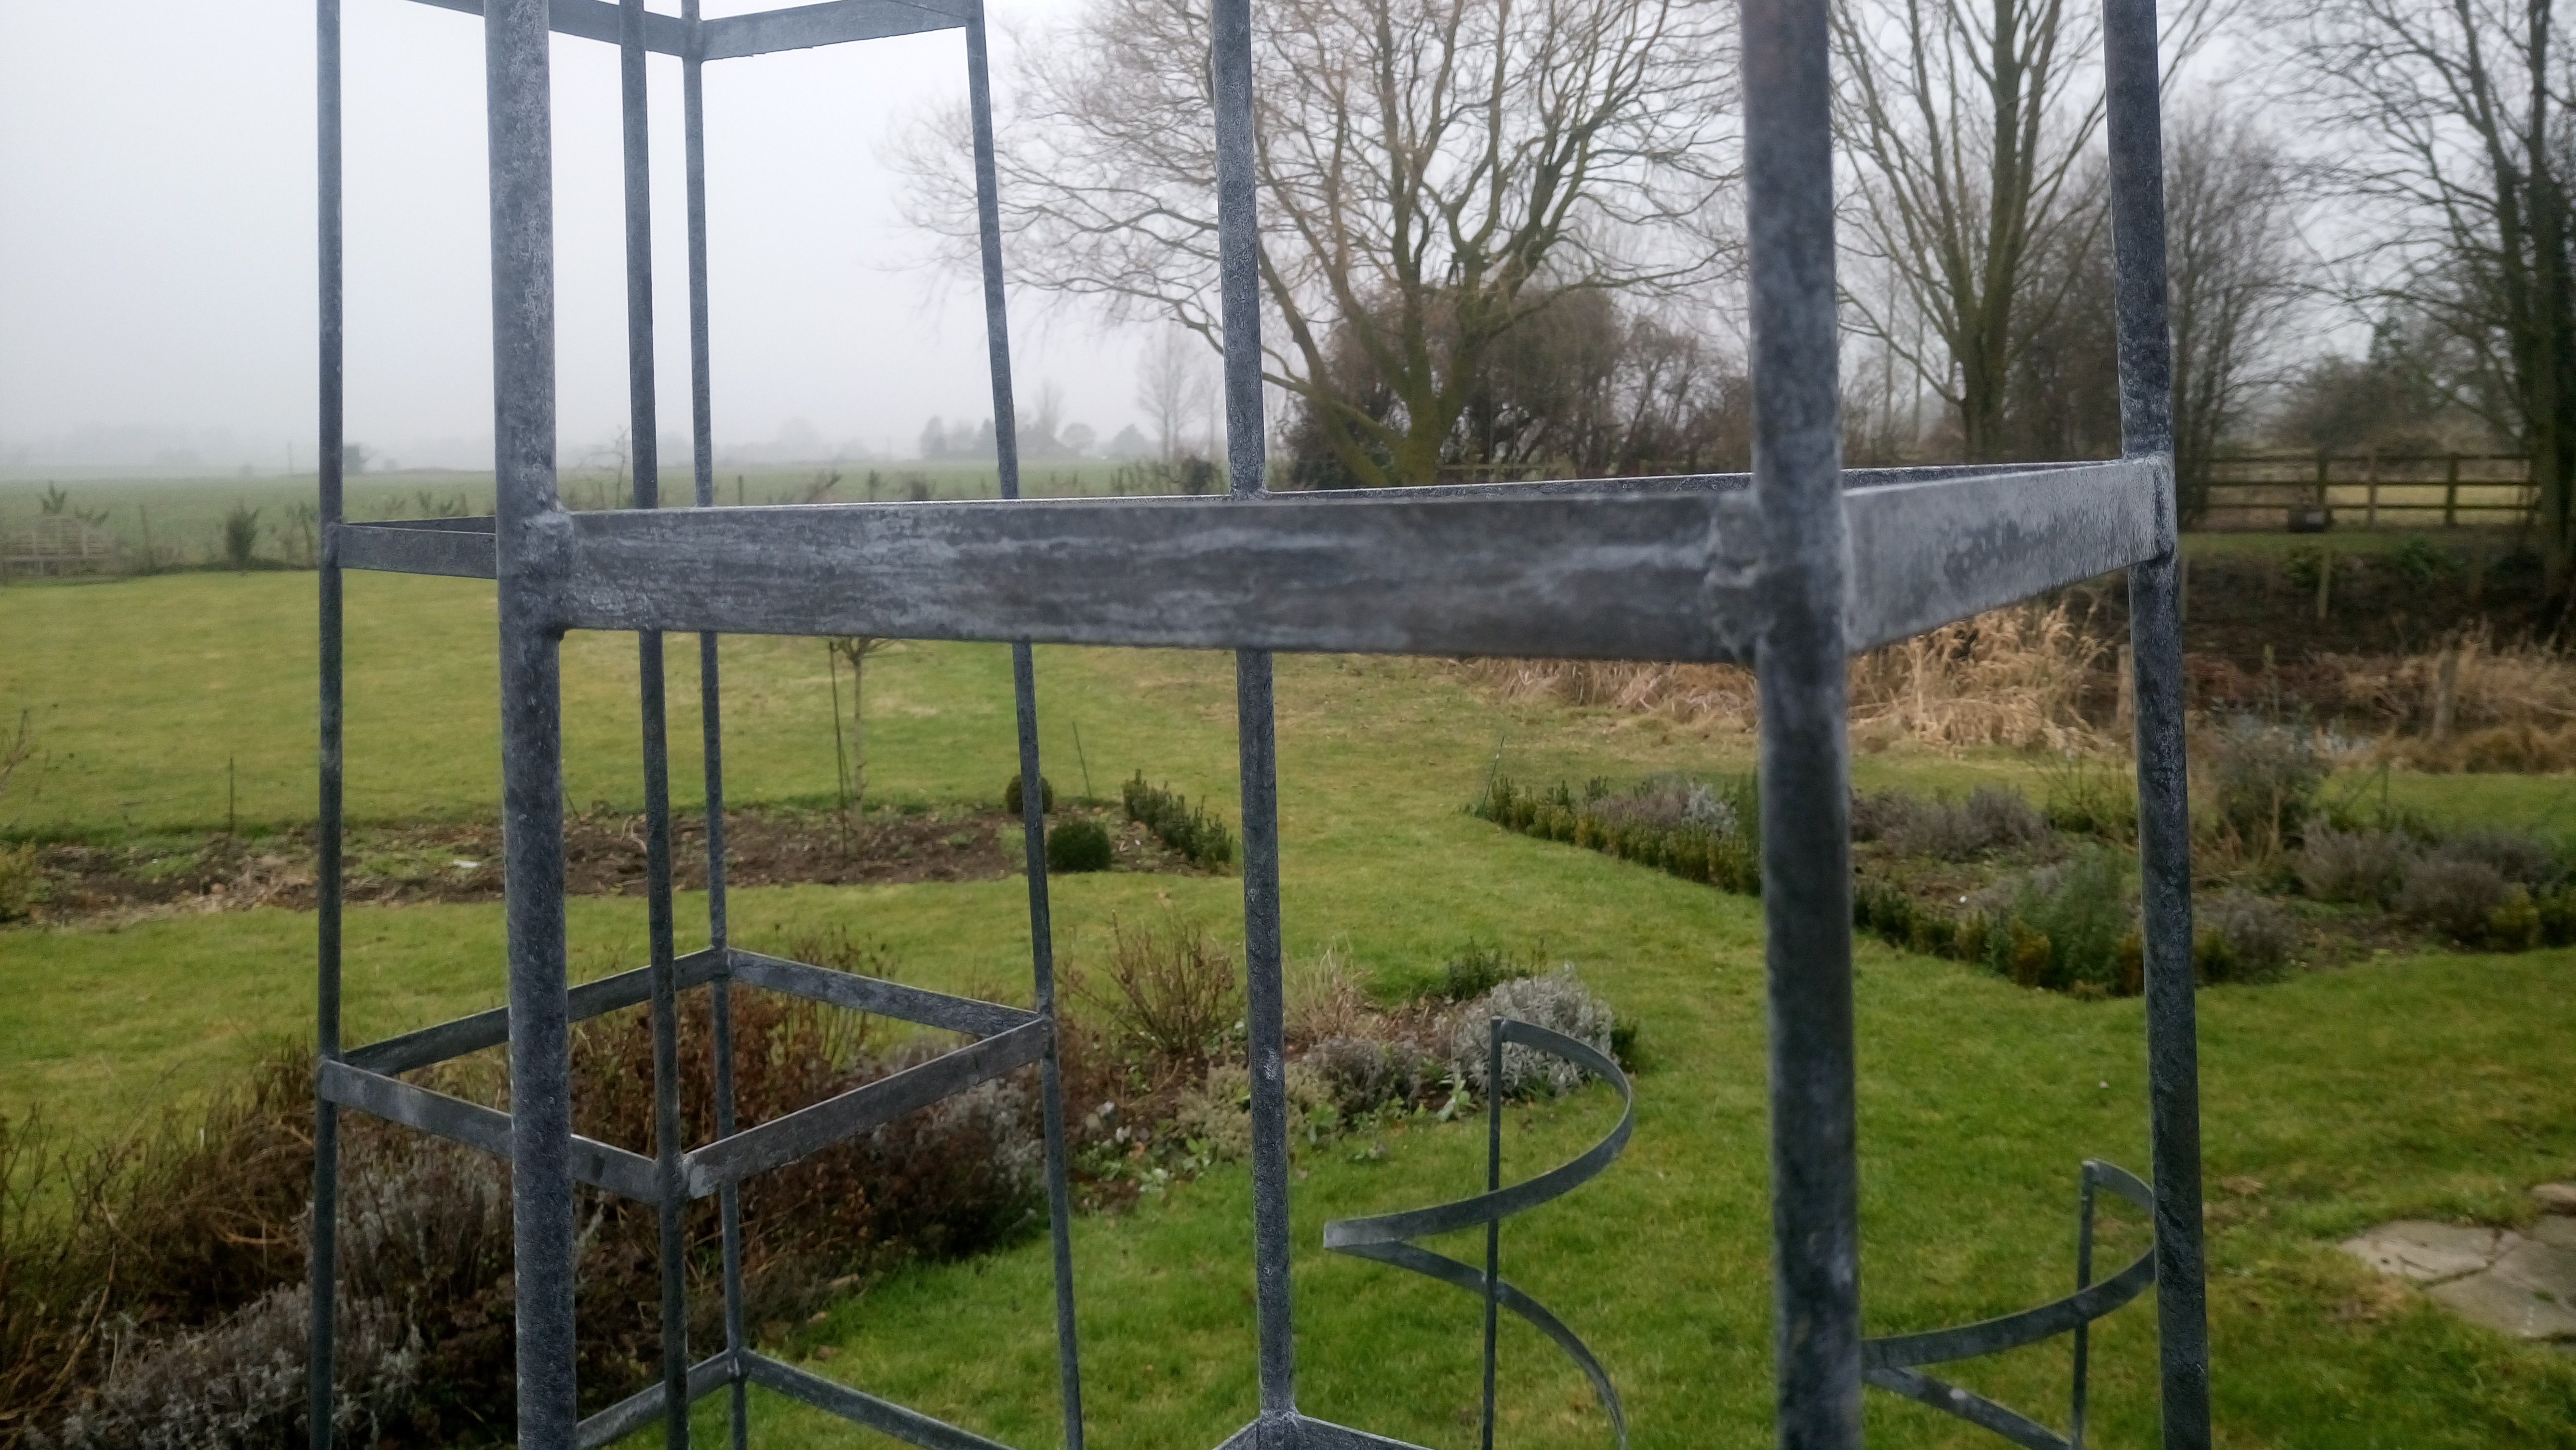
I was thinking about this again earlier and in a sense I don't think there is such a thing as an intermediate project. I think once you understand how steel moves you've pretty much got the knowledge of how to tackle any skill level job, just scale up your ambitions - tools and facilities pending though. Fair enough that's a bit of a sweeping statement not intended to be taken completely literally, but is it such a leap from forging a hook to forging a heel tenon in a gate? It's the same material, just a bit chunkier, reacts the same with a bit more of a whack.
-
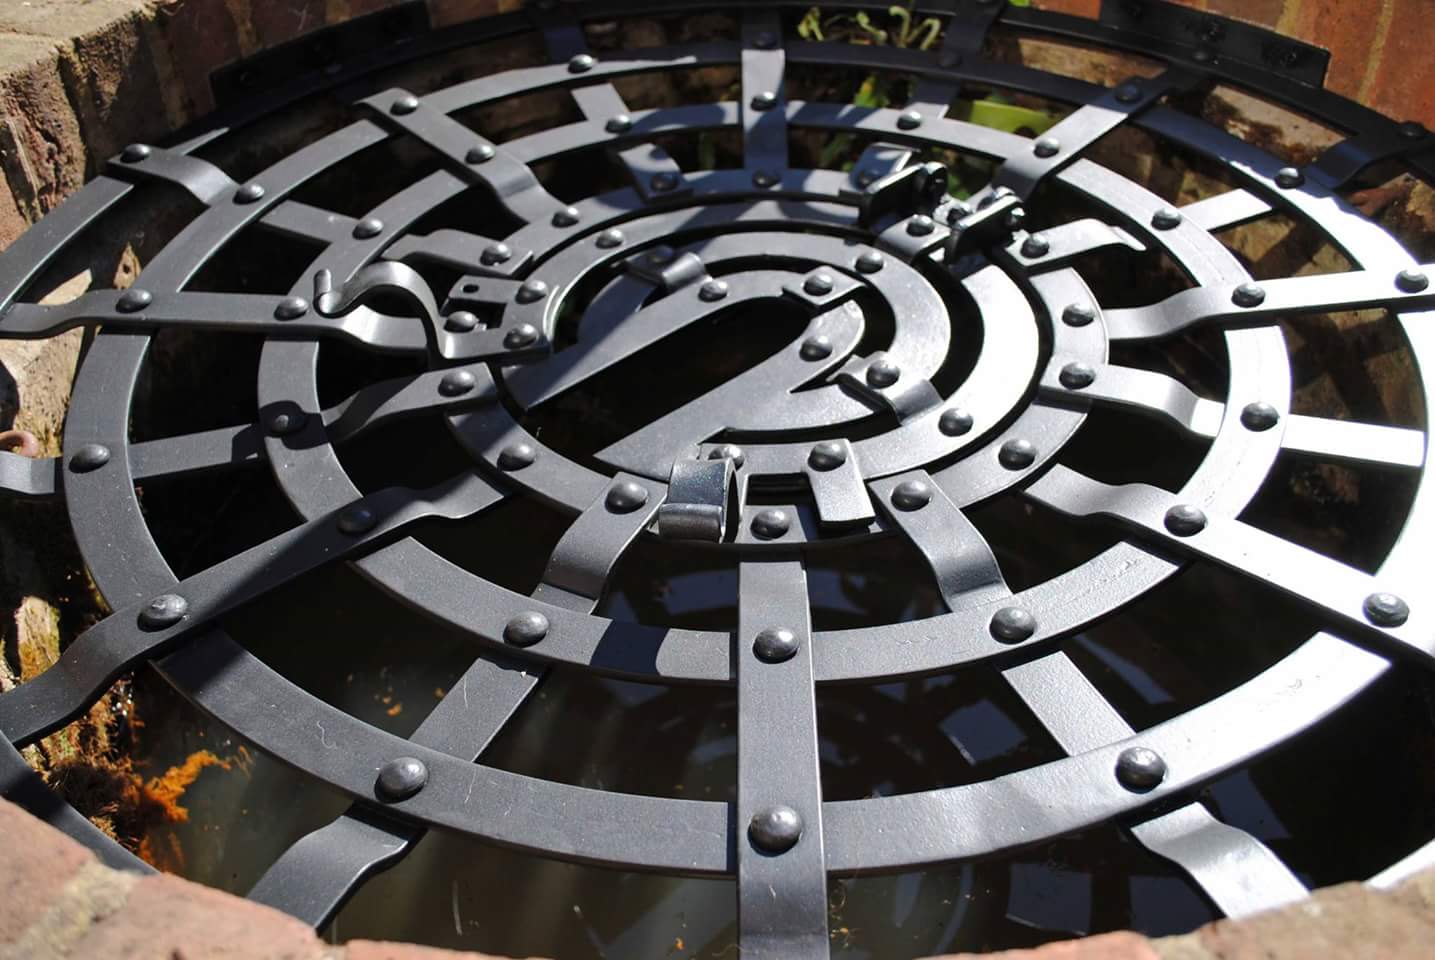
That's what I made it to be, but I've used it for MANY other jobs like...straightening bars, putting gentle curves in bars, bending flar on edge (under fly press) making flat bar blades of grass wrap around round bar flower stems, cold pressing flat bar joggle overlapping joints. It's as useful as you're imagination, especially when used with custom dies in a flypress. Here's the video link showing pressing the joggle bars for the well cover in attached pic. I hadn't yet welded on the "wings" to my flypress version of the tool in this video. https://youtu.be/1ED2sG6JENM

-
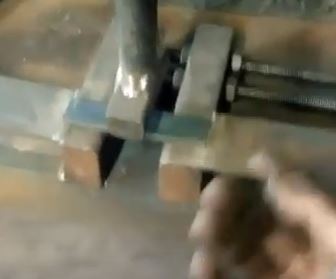
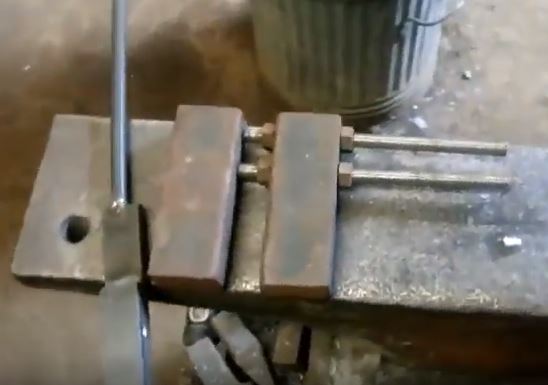
Yeah that's why I did 'em flat, I didn't want to have to turn my wrist 45 degrees all the time & all the dogs are exactly the same so I though I might as well make a bespoke pair. Pretty useless though if each dog is different!
-
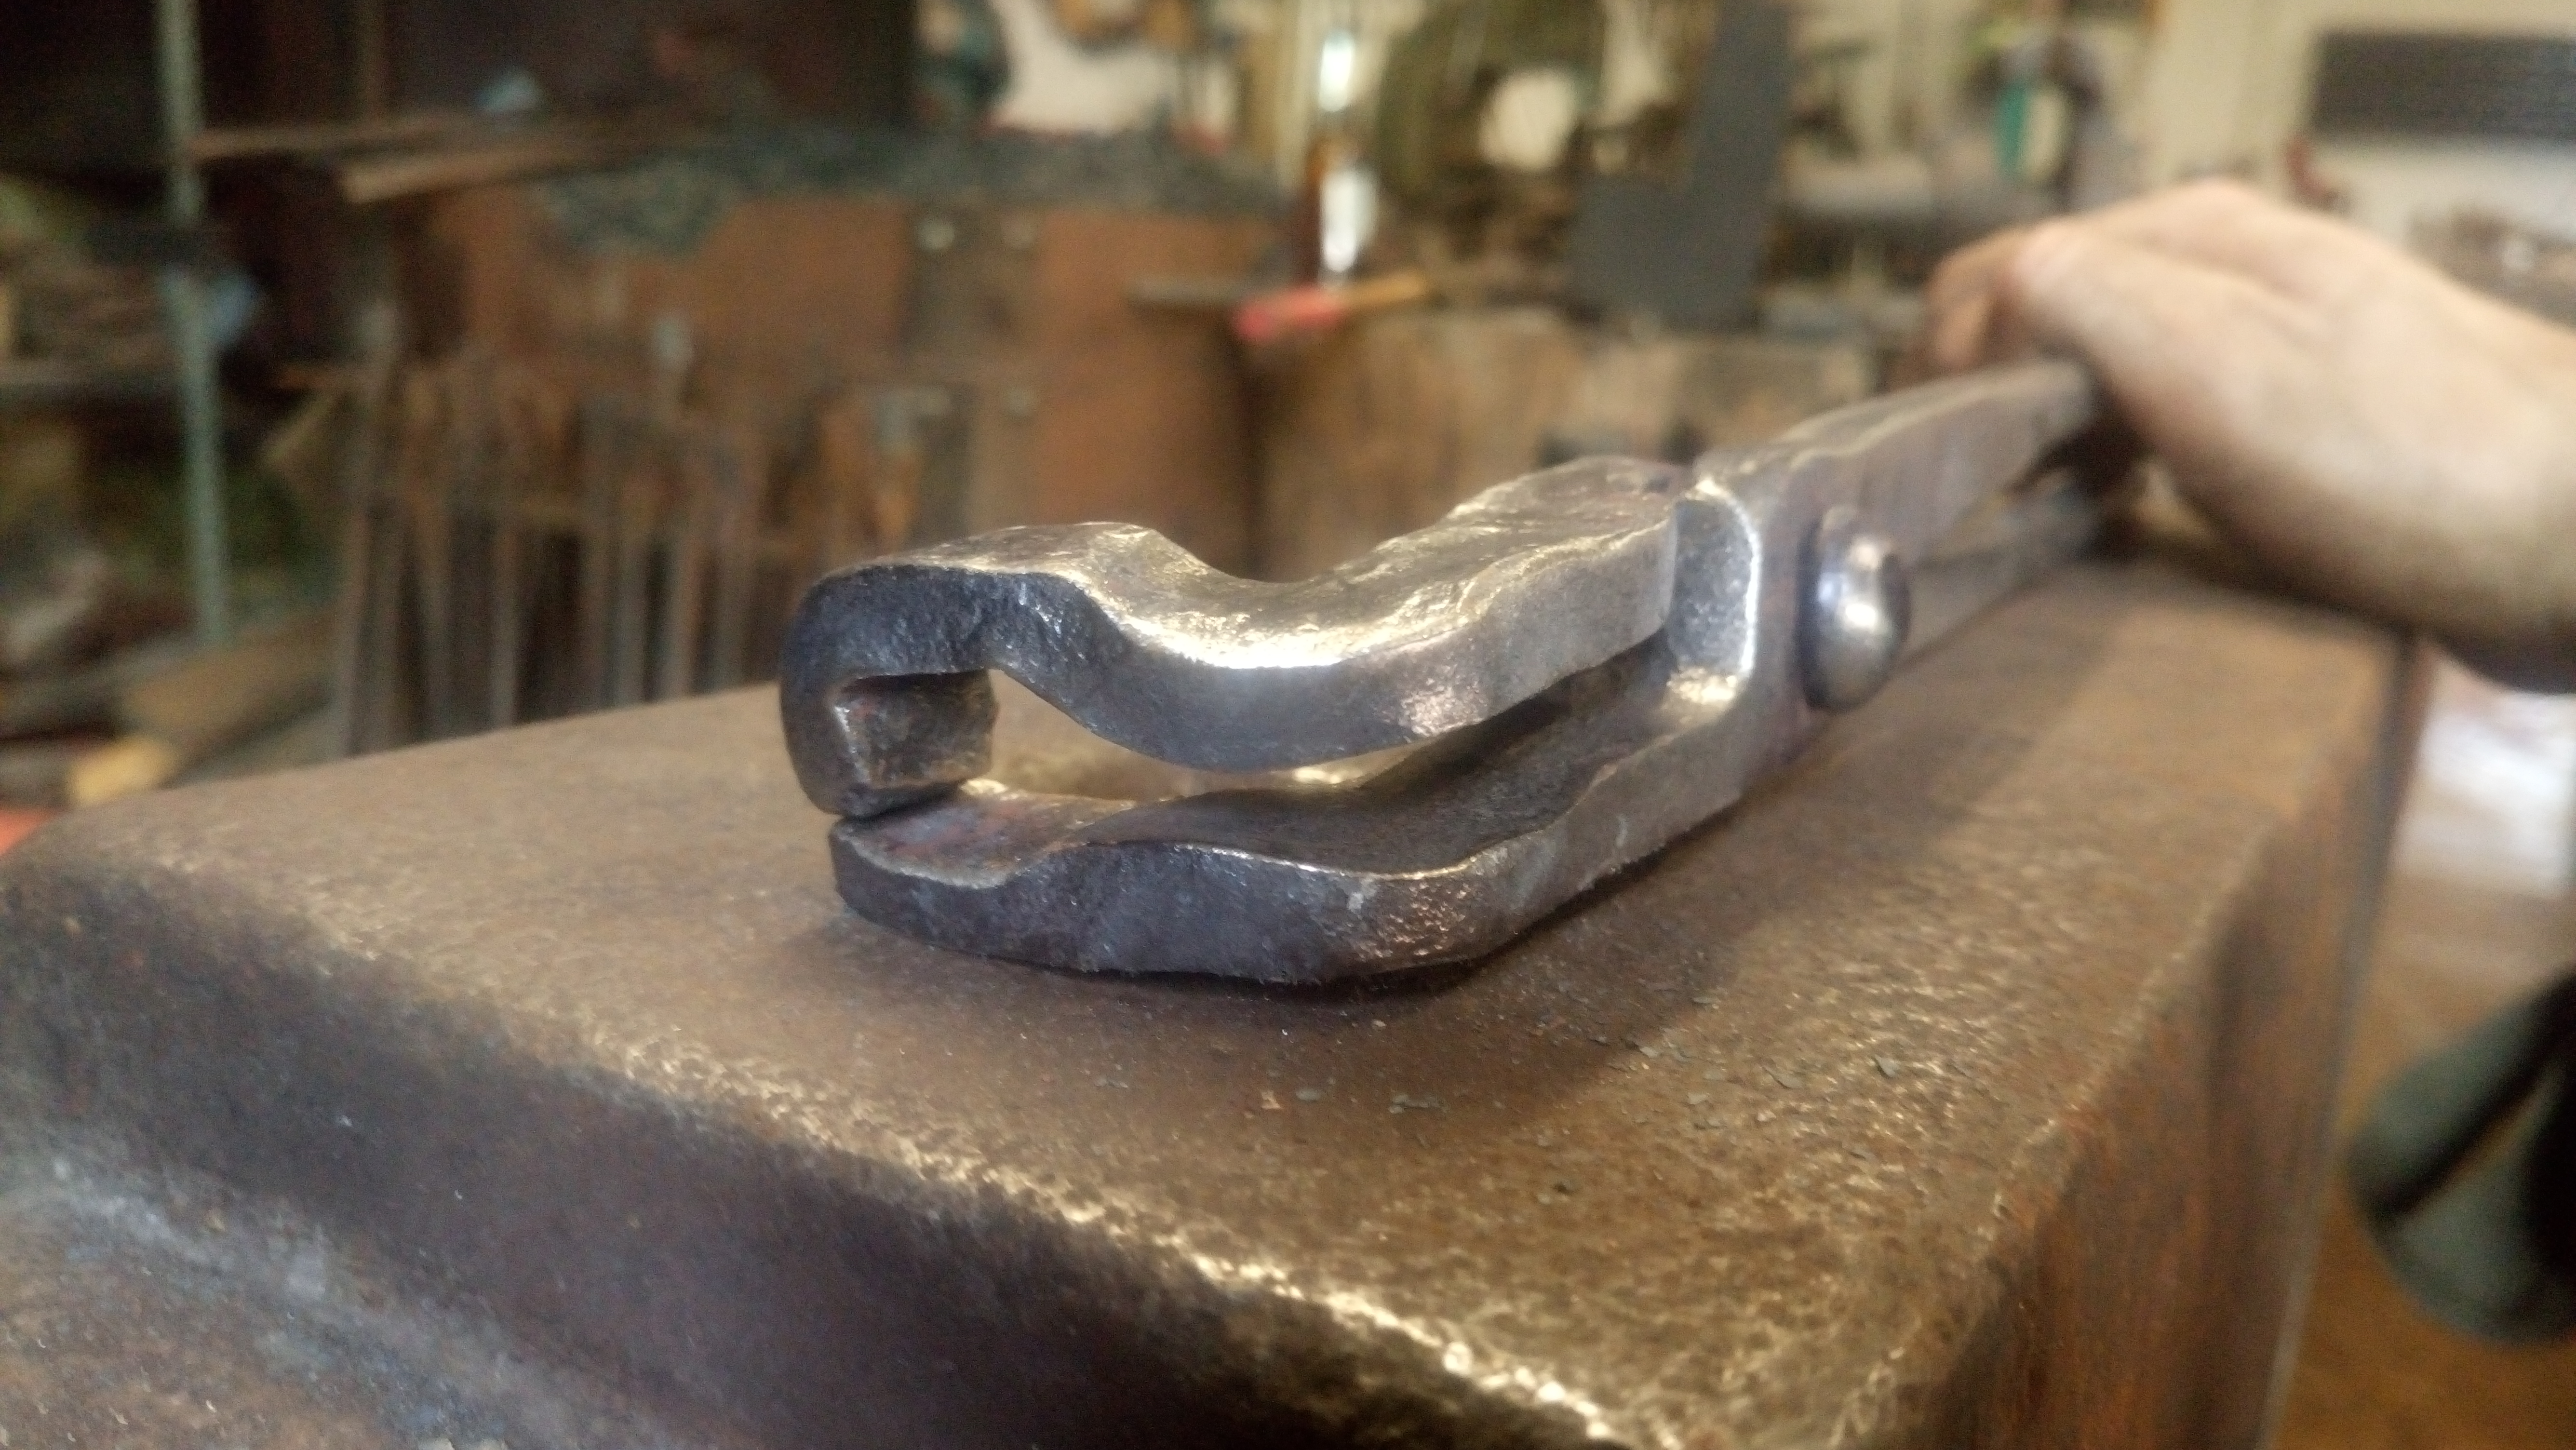
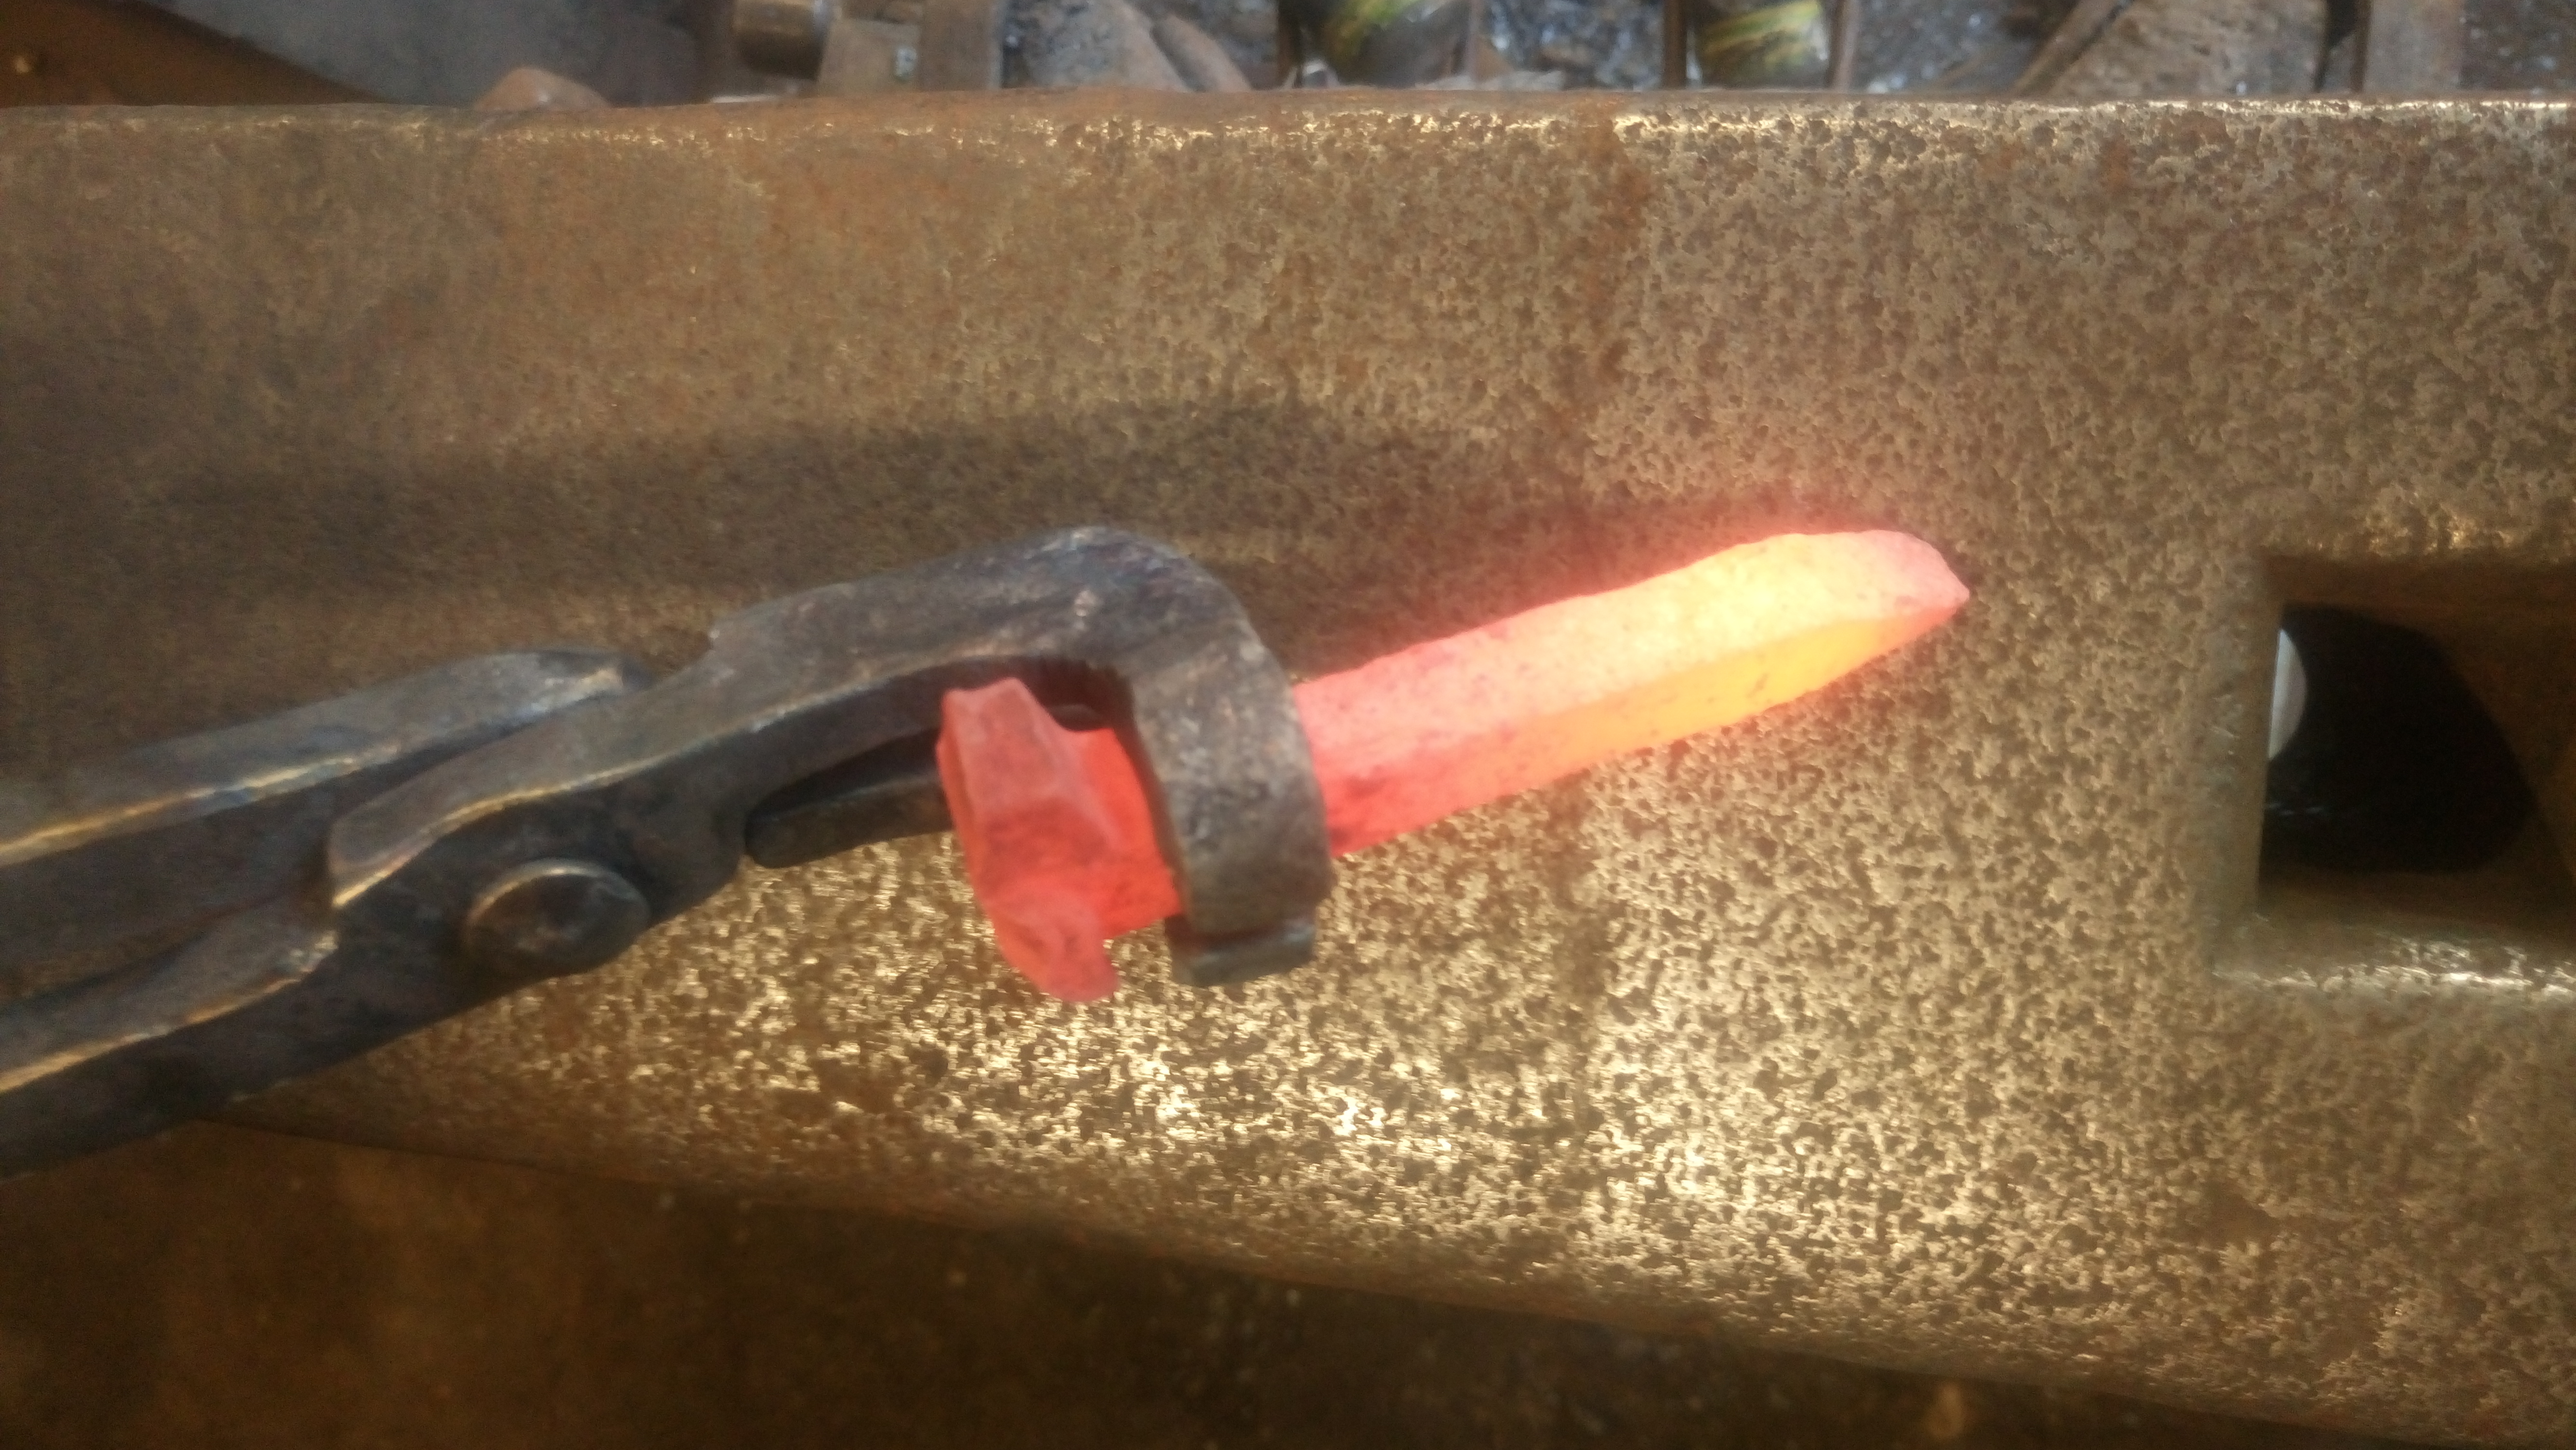
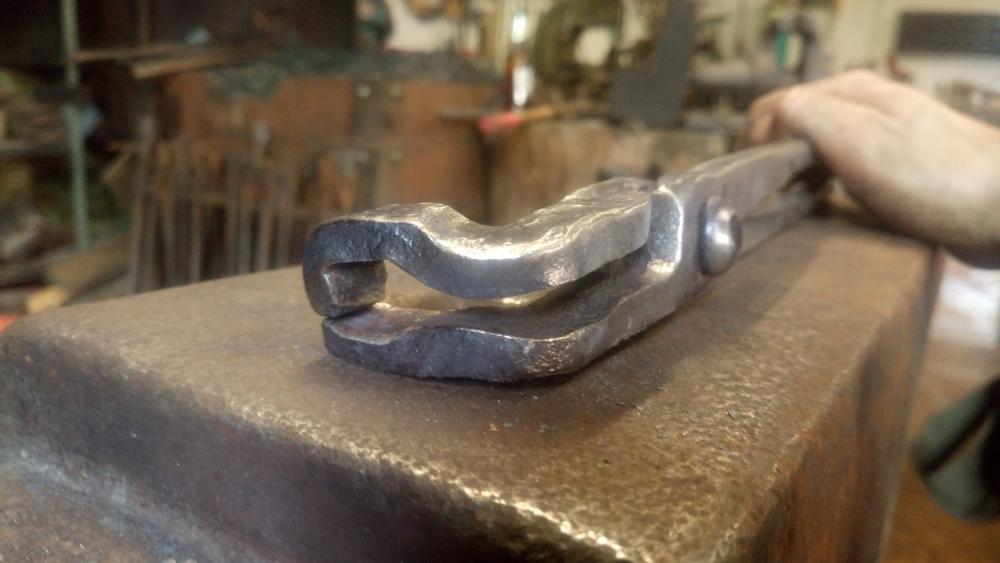
I have a large number of minature railway dogs from a local light gauge railway & I've finally got round to using them. By no means my prettiest pair of tongs but I thought I'd share nonetheless as I know in the states they're a common source of steel for projects & these can be scaled up to suit normal size dogs. I decided to knock these up quickly after a "hot dog" flew up past my face from poorly gripping tongs. Copy and/or improve upon as you see fit.


-
Forget the legs & make it flat bottomed from one long piece like the curled up bases of beginner tea light holders, or a variation of something similar? I made this tip video a cple years ago...
-
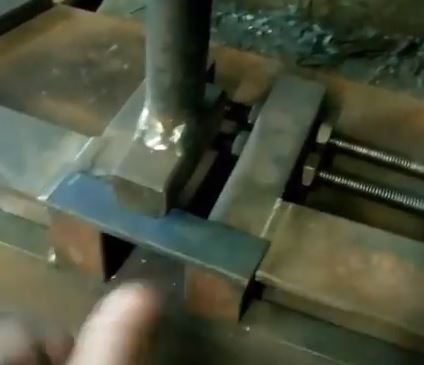
This little gadget I came up with a while ago has been worth it's weight in gold and got me out of a lot of pickles. https://youtu.be/YB58AsEy224 This is the anvil version.

-
I think Thomas' points about brand variation & the sliding scale hits the nail on the head in technical terms. In practice missed blows are inevitable, especially when holding something awkward & working on your own. I'd "prefer" to have a missed blow hit the anvil face than the corner, so if you are forging something tricky and it needs to be forged on a corner, you could always make a mild steel hardy block to forge it on. That way with a missed bloe you'd either just dull the block's corner, or miss and hit the anvil face. In practical terms it's a sliding scale too. I'd prefer to have a missed blow with a 1.5lb hammer working on the anvil face than a missed blow with 7lb sledge working on the corner.
-
Just read that per chance whilst watching the DVD of Misery. (Kathy Bates, James Caan film). Gives your comment another meaning.
-
Needless to say I'm not going to make a HUGE gas forge that'll heat the full length of each bar just by throwing them in there & closing the doors, so how long a gas forge do you think I'd need to be able to heat the full length of the 48" long bars by pushing/pulling them through the forge a few times to stretch out the heat? Allowing for clinker clear out time as well, in the coke forge we were doing 6 an hour, so it was about 8 mins heat time + 1 min bend time per slat. One at a time.
-
Thanks for the thoughts. Annoying thing is this isn't the most time consuming part of the job, but is probably the only part of the job where I may be able to scrape some time off. My girlfriend gave me a hand bending these the other day & after I figured out the best method of stretching the heat out on the bar so the heat ran the full length we were smashing these out in 1 heat, in under a minute each. That was doing it in the coke forge so the only way I can currently see the times all making sense is to either buy/make a big gas forge, or put additions onto my existing jigs to increase their angles. I had a go at packing additions infront of my jigs and bending against them, then taking them out to see if the slat sprung back correctly, but without more forethought I don't think that'll work in a hurry because that attempt came out rubbish.
-
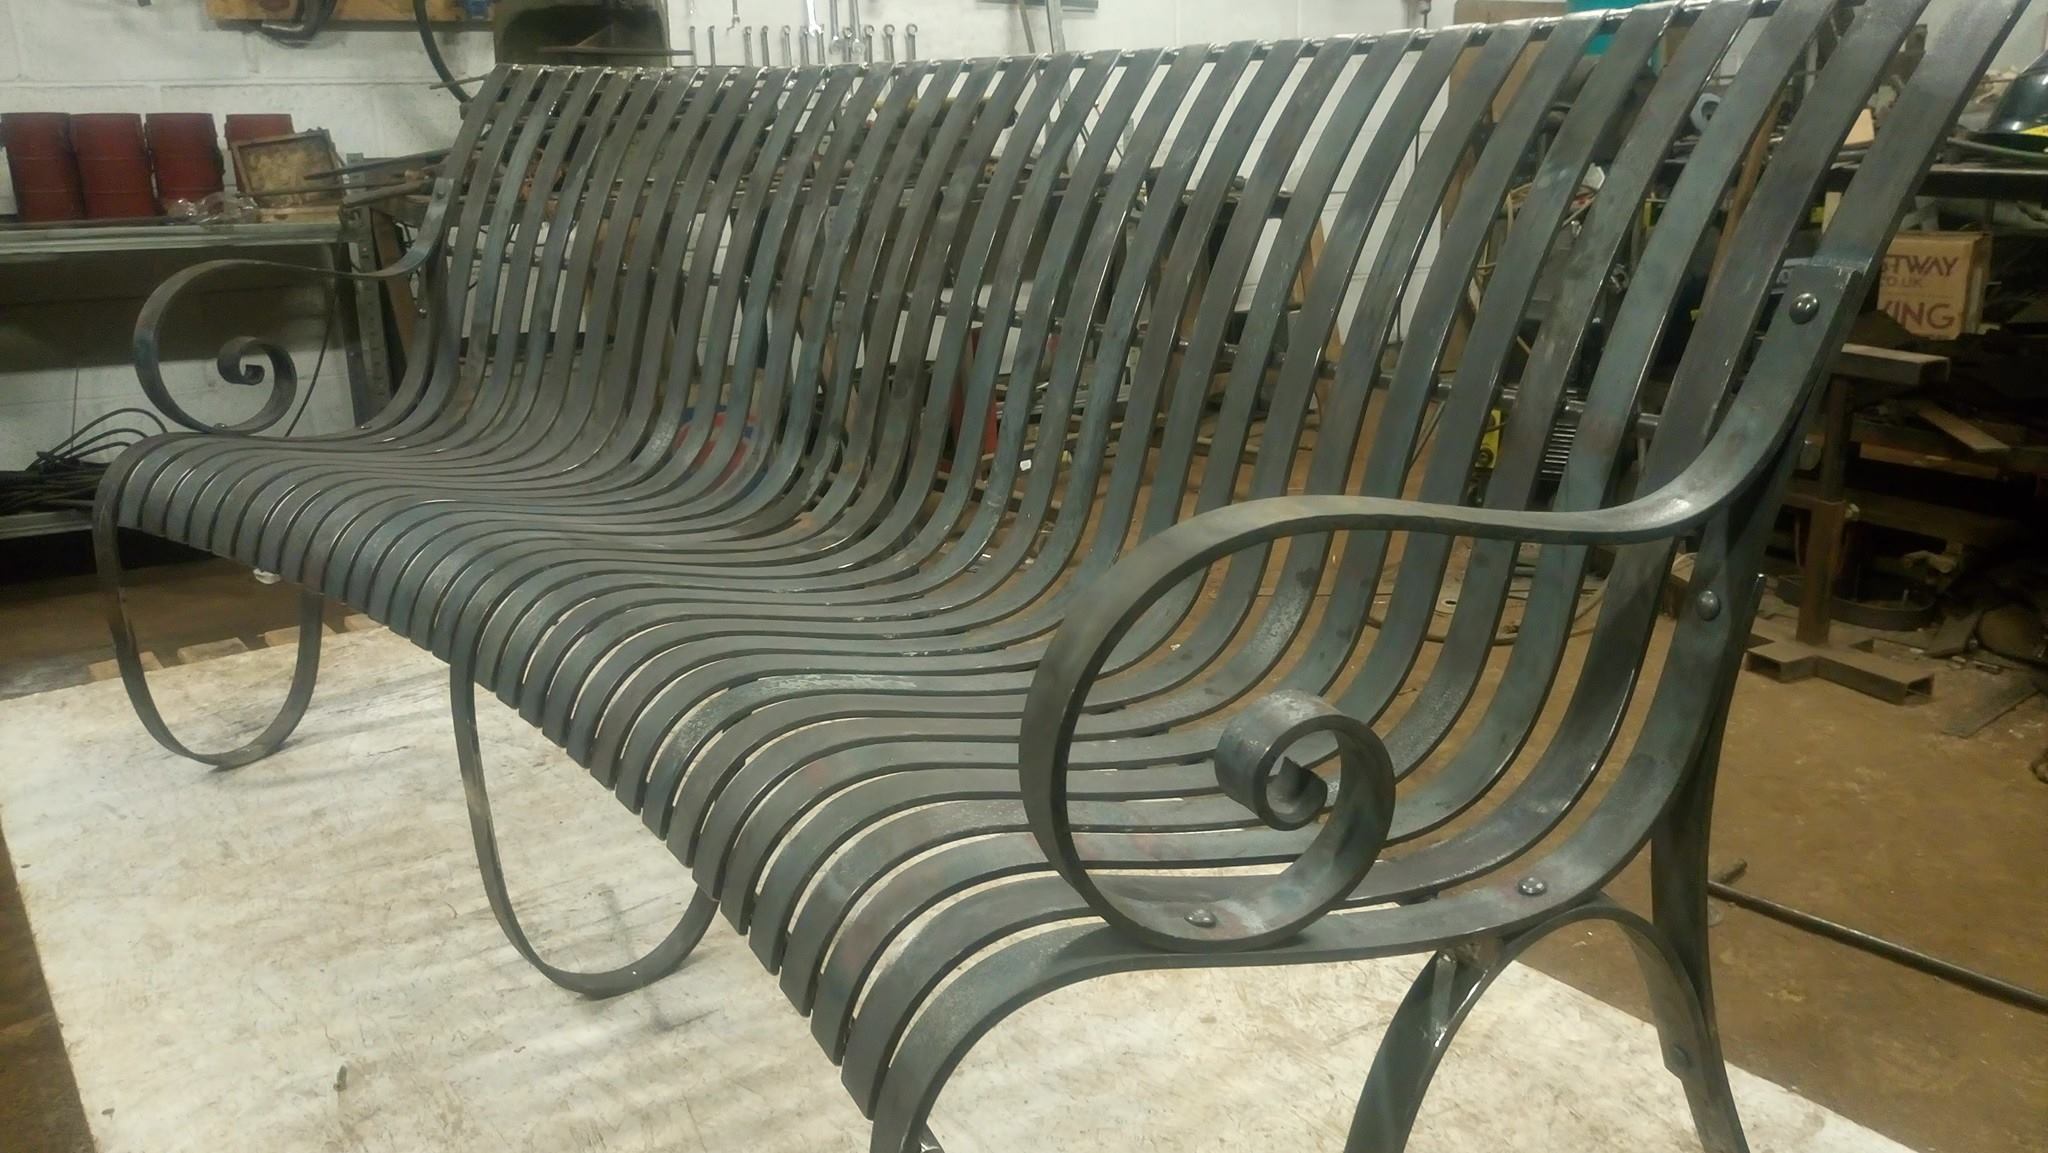
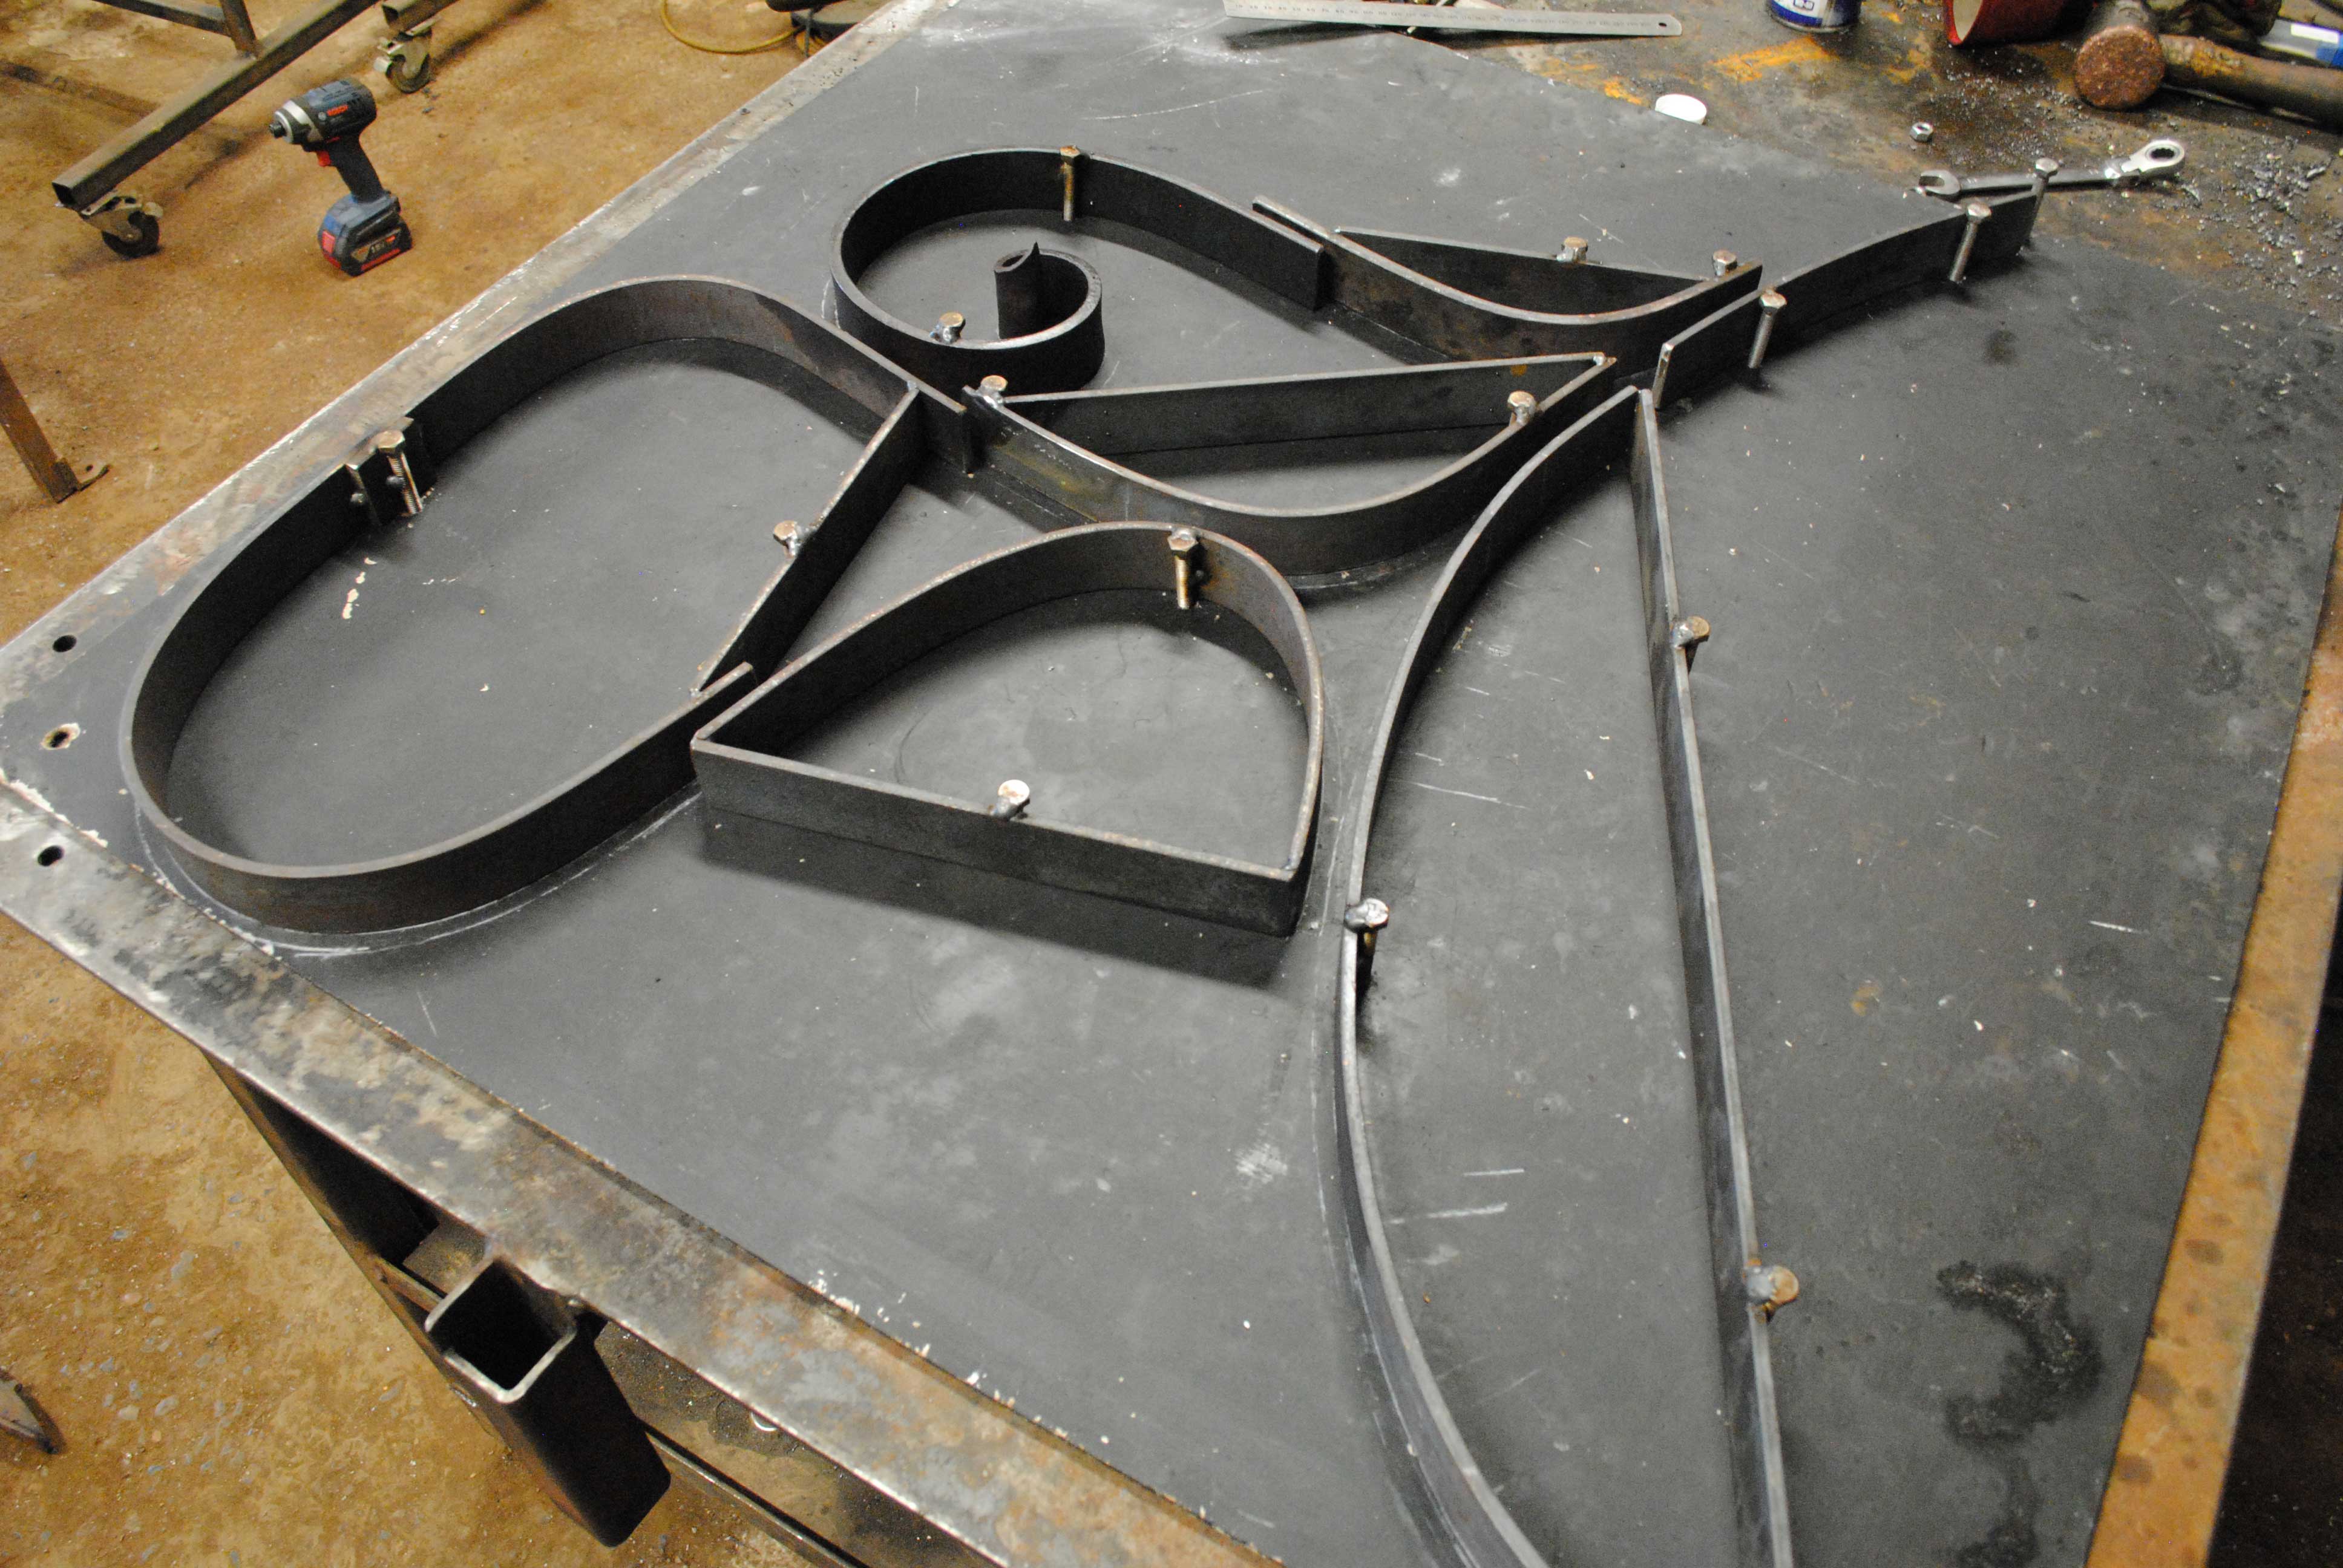
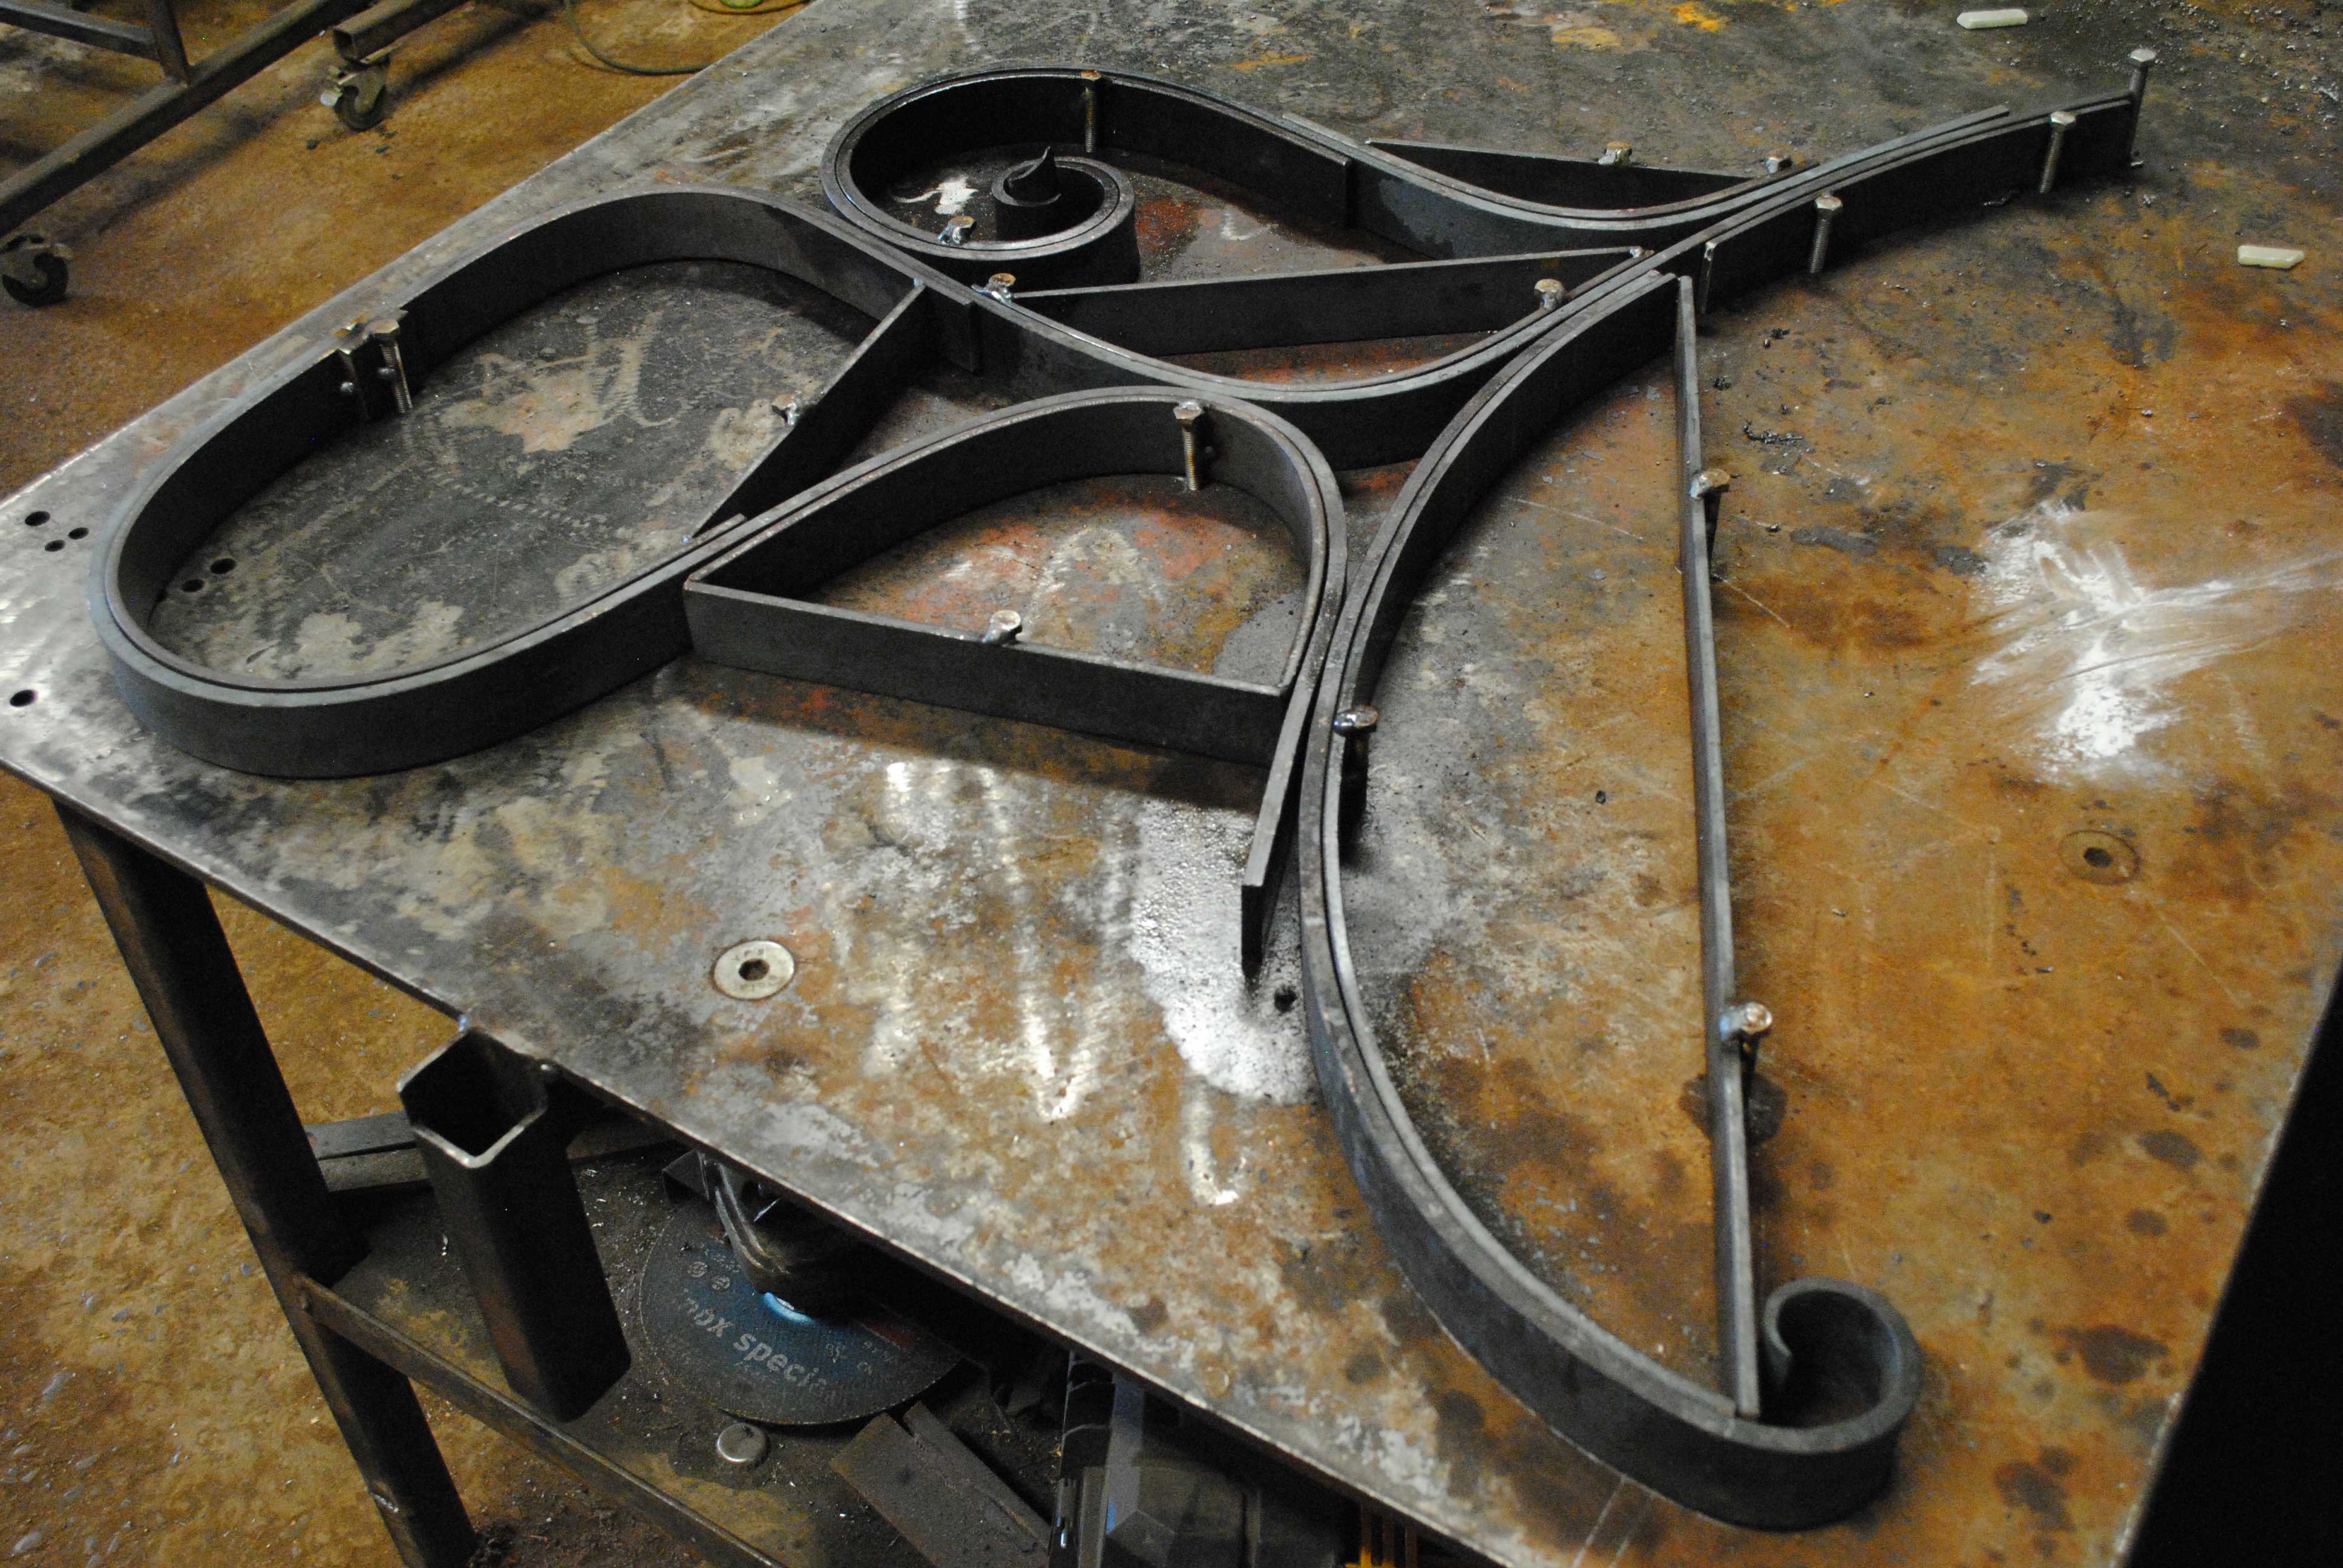
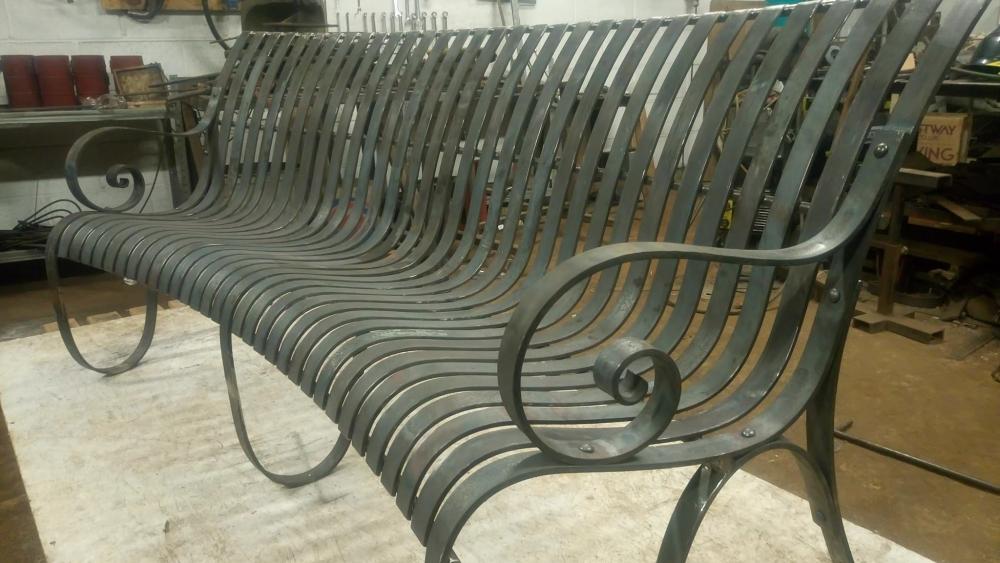
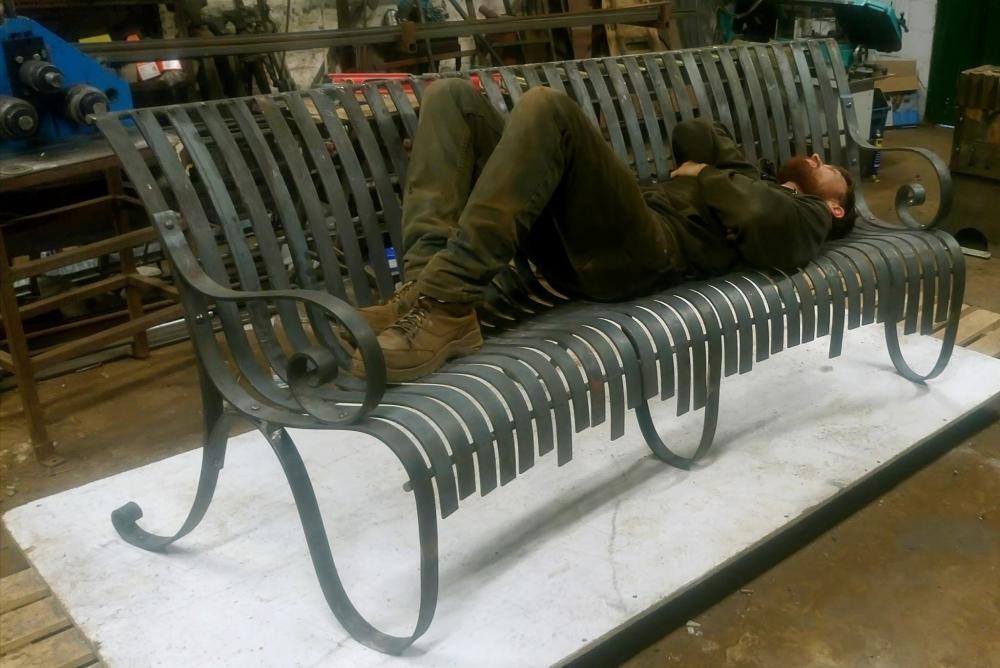
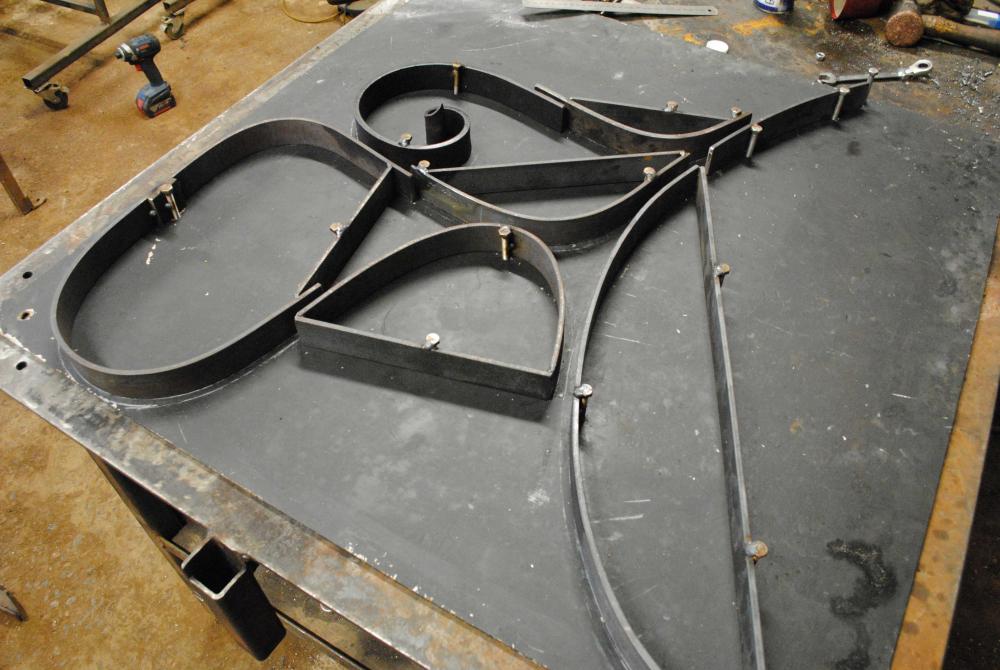
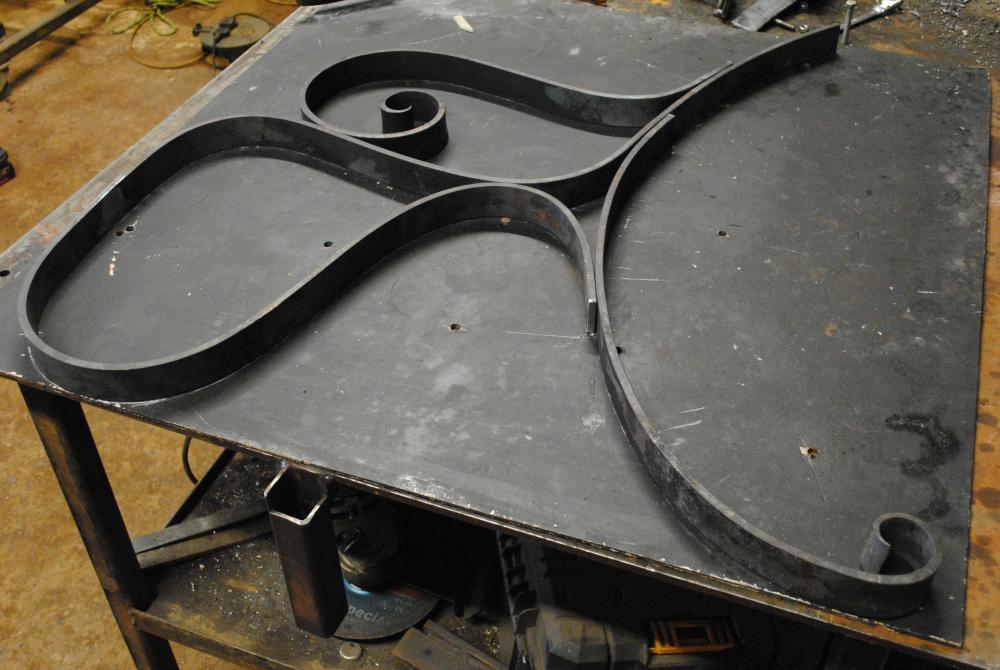
To cut a long story short I've got a job on to make 6 curved benches, so far I've made the first one as a prototype. I've been hot forging/bending all the parts around jigs I made to bolt to my bench. The arms/legs are made from 40 x 8mm and the seat slats are 40 x 6mm. I need to speed up the process to stay on budget. 40 x 6mm will bend cold, but if I want it to bend to the right shape I need to make a new jig that's "over curved" to allow for the spring back. Avoiding trial and error, is there are any way of calculating how much extra curves I need to put into the jigs that'll allow for the cold steel spring back?

-
I'd be tempted to keep it simple and just JB, or at most J Blades.
-
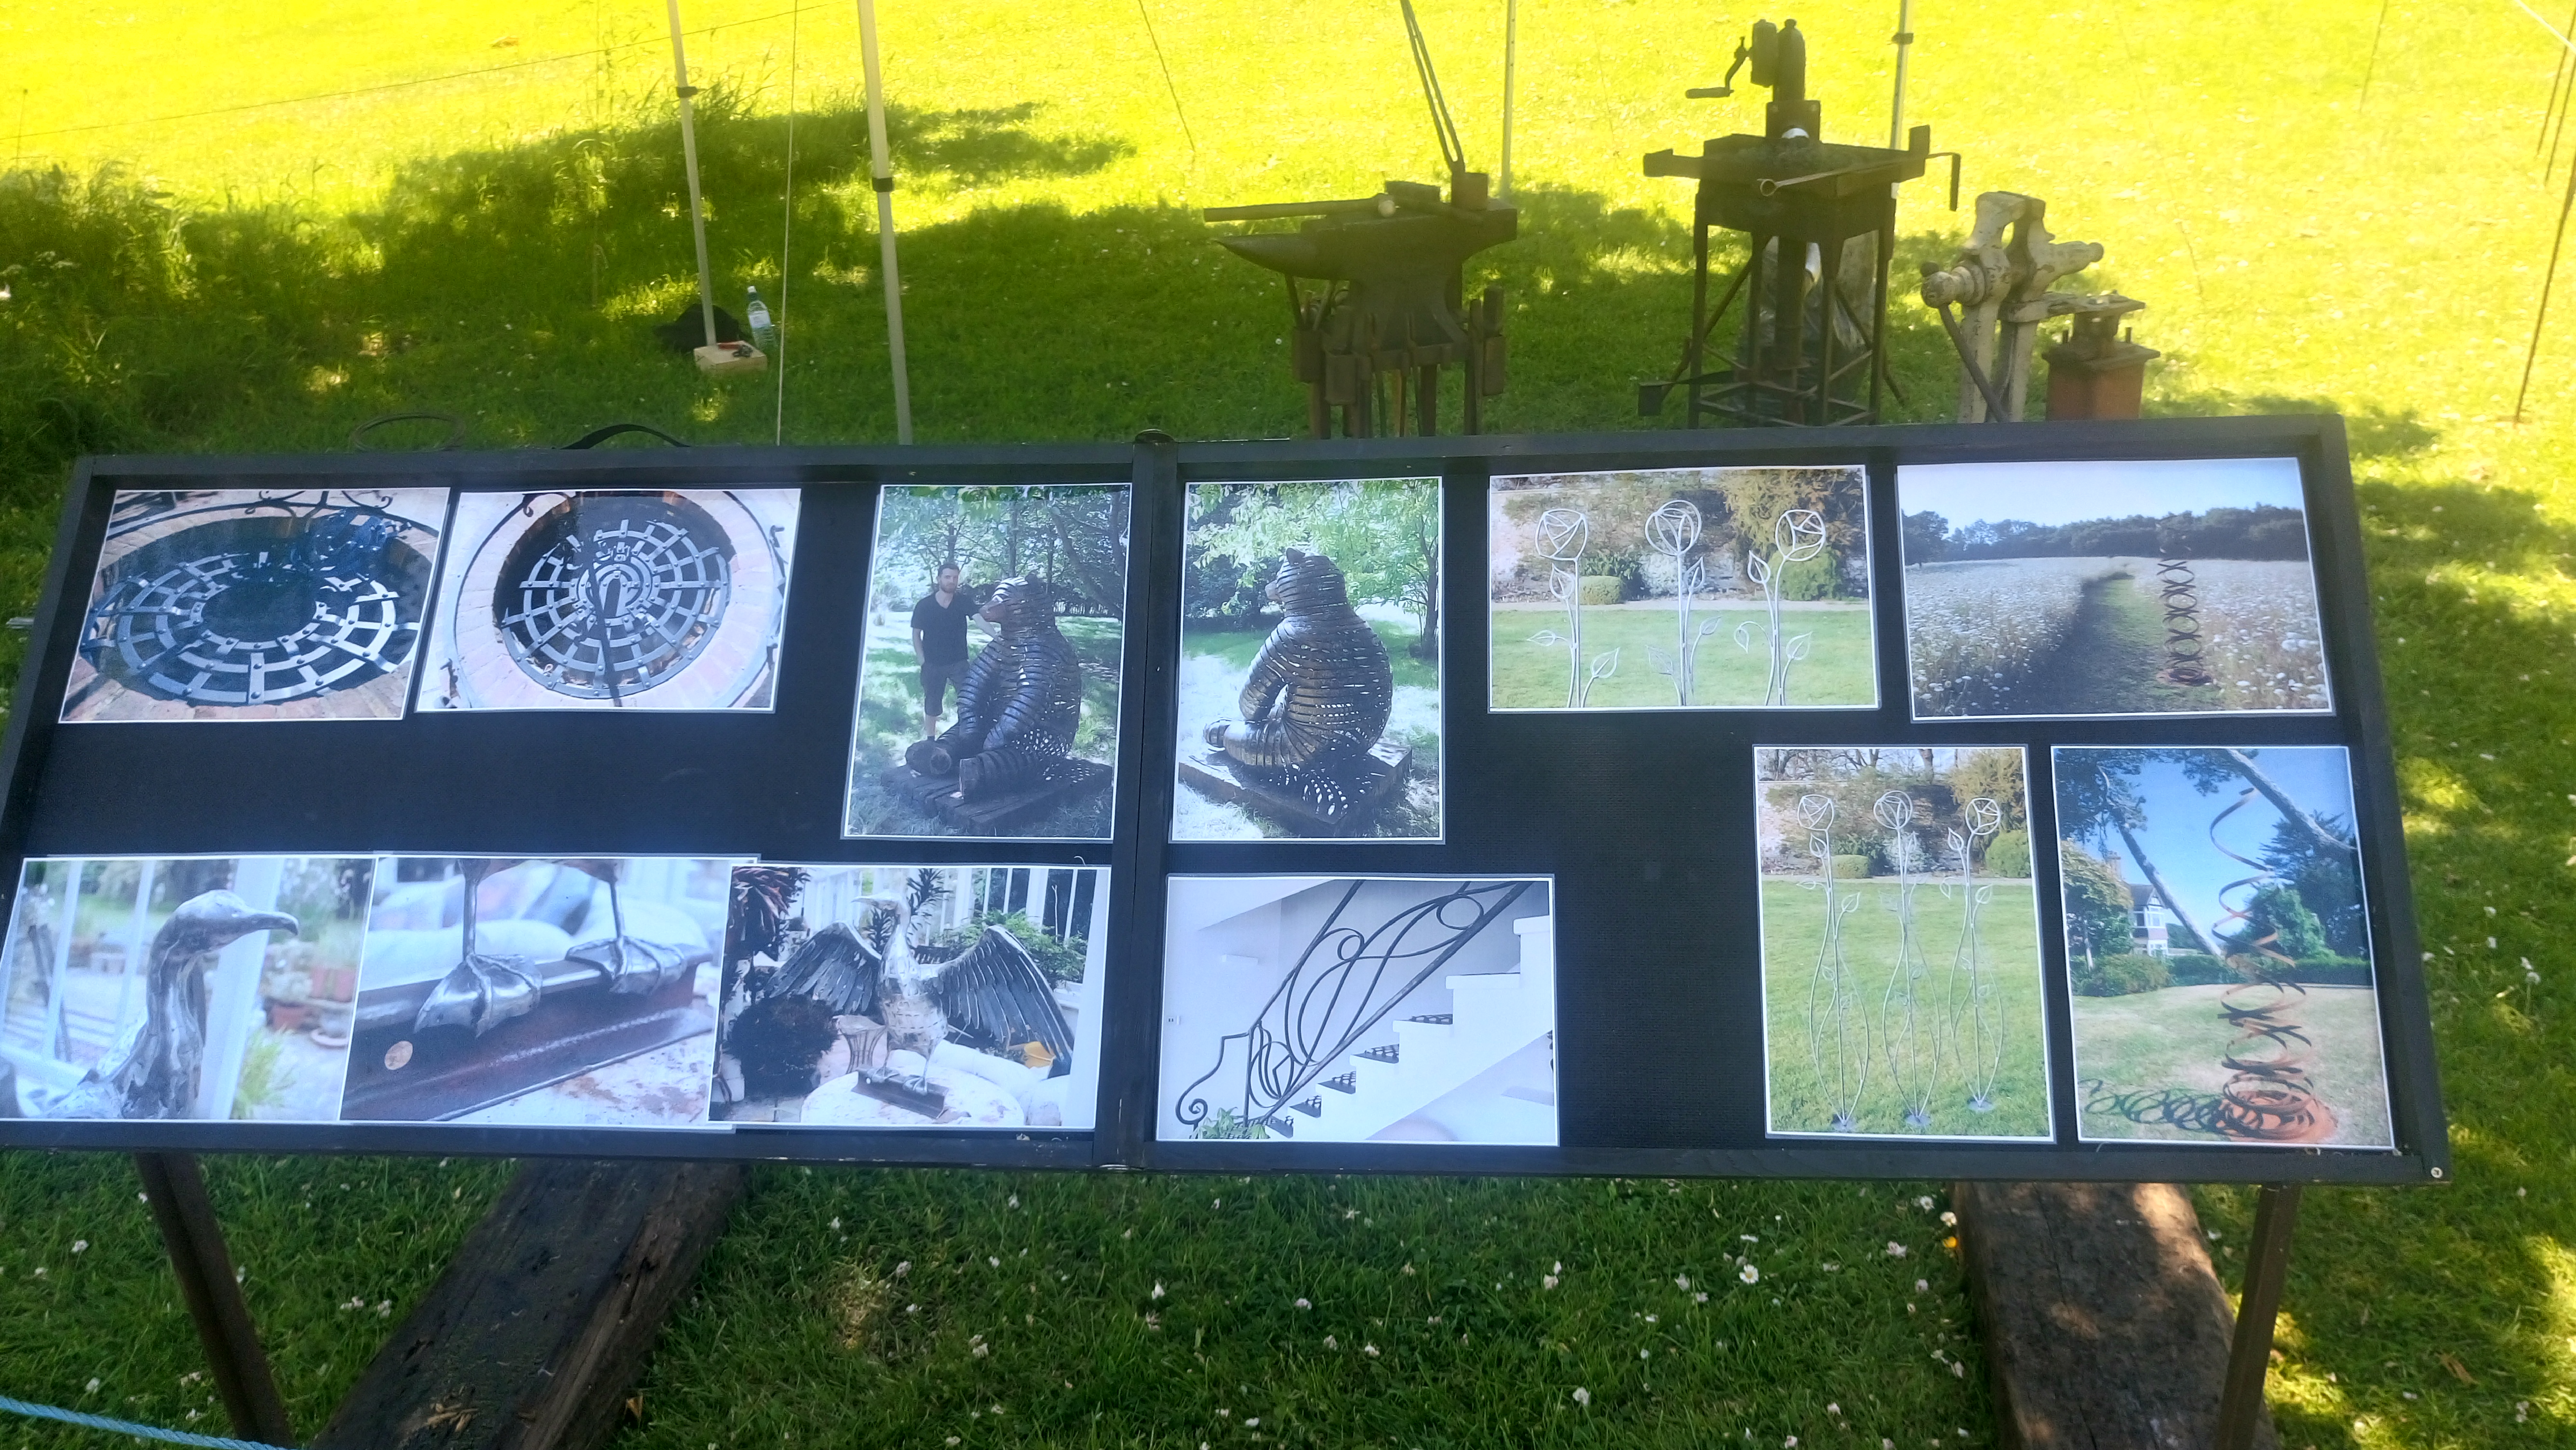
I'd say it depends on whether you're a commission or product based blacksmith. If you're commission based then photos of previous work may be more important than displaying stock. For when I do demos I've made a couple photo gallery boards from foldable decorators tables that I fasten to bits of old railway sleeper. Off to the side will be a small amount of stock & business cards on a small table. The attached photo was a board I made for a local sculpture show where I demonstrated, so the emphasis is on decorative work. I help my girlfriend with her markets a lot (she's a baker) and I've noticed that the most common stall shape is an L Using a L shape means your stock can go across the front with a bit of space to the side/back for other bits and pieces that you want visible, but not for sale. Eg you may want to take a sketch book incase it's quiet and you get bored, or you may want to take a couple framed pictures of previous work that you're proud of but don't produce as a stock item, but it could be made to order. Your stall shape depends a lot on the size, volume & price of work you produce, but for my money it's always better to produce a small number of well presented items that are of a theme. Choice confuses people and I've definitely lost sales due to people's indecision.

-
Objects with moving parts always seem to demand more forethought, but not necessaily more forging skill, so may be a convenient way to step up a difficulty level. Even a very simple gate latch takes a fair amount of attention to make it counterbalance, ride and fall correctly.