Joel OF
Members
-
Joined
-
Last visited
Everything posted by Joel OF
-
Next on my tool list is a hydraulic press but I know diddly squat about them and it'd be helpful to see one or two in action. Does anyone in the Kent/E.Sussex/London area have one or know someone that's got one and who might let me come take a nosey? I can guess who's got one locally but it'd be nice to have an 'in' or be invited rather than just ringing up people I haven't met before and inviting myself along to their workshops to get in their way for an hour. Beer and/or chocolate Hobnobs will be provided in gratitude.
-
Not sure why I've written the word "my" before reference pics. Maybe a mod could delete that out? It's quite misleading.
-
Hmm, that's quite interesting because in my head I was only really asking a structural question (I didn't make it obvious that I moreso meant the frame more than the infill) but you've hit on something I've had in the back of my mind, which is to start pitching designs to my own tastes (with the hope that clients will bite and then I can add those pictures of finished commissions to my porfolio so future clients will approach me with an increased sence of what I can offer and come to me wanting what I do) rather than being completely led by what the client wants. I've had some situations where you're so client led because of my reference pics supplied from Pinterest, Instagram etc, you think anyone could do this, you don't need ME, you just need a bloke with a gas torch, there's nothing I can to bring to the table. I've learned the hard way that it's easy to have misguided pretentious artistic visions about what it is you want to make, when in reality to put food on the table you have to get your hands dirty make whatever the person in front of you wants to pay for...but there comes a point where you have to start saying/offering up via designs and a portfolio - this is what I do, if you want me then you want this sort of thing you want. If you want delicate leaves and folksy stuff for your pretty garden gate, ask someone who does that, if you want chunky ironwork with solid joinery and rivets, ask me. Coming back to gates - I've always had a preference for flat bar beacause it's shape changes as your perspective to it changes. As gates open and close your perspective on them always change - they're not a static image. To my eye square bar and round bar never really look that different regardless of the angle you look at them - a square bar twist looks the same whichever way you look at it, but rotate a flat bar twist through 90 degrees and you get a different image all togther. I may be wrong but I also get the feeling that in term of weight you get more bang for your buck with flat bar at resisting impact flex than you do with square. E.g if you had a rectangle (a gate frame without infill) made from 40 x 10mm flat bar (1,1/2" x 3/8") with the 10mm (3/8") face on and you kicked it, it would wobble about less than the same rectangle made from 20mm solid square bar (13/16") but they weigh nearly exactly the same. Gates that flex as they close always feel disappointing to me.
-
Obviously steels are chosen to work with a design but generally speaking do you have preferred steel sizes for domestic gates? I'm thinking more along the size lines of garden gates than big double driveway gates, but all input would be interesting.
-
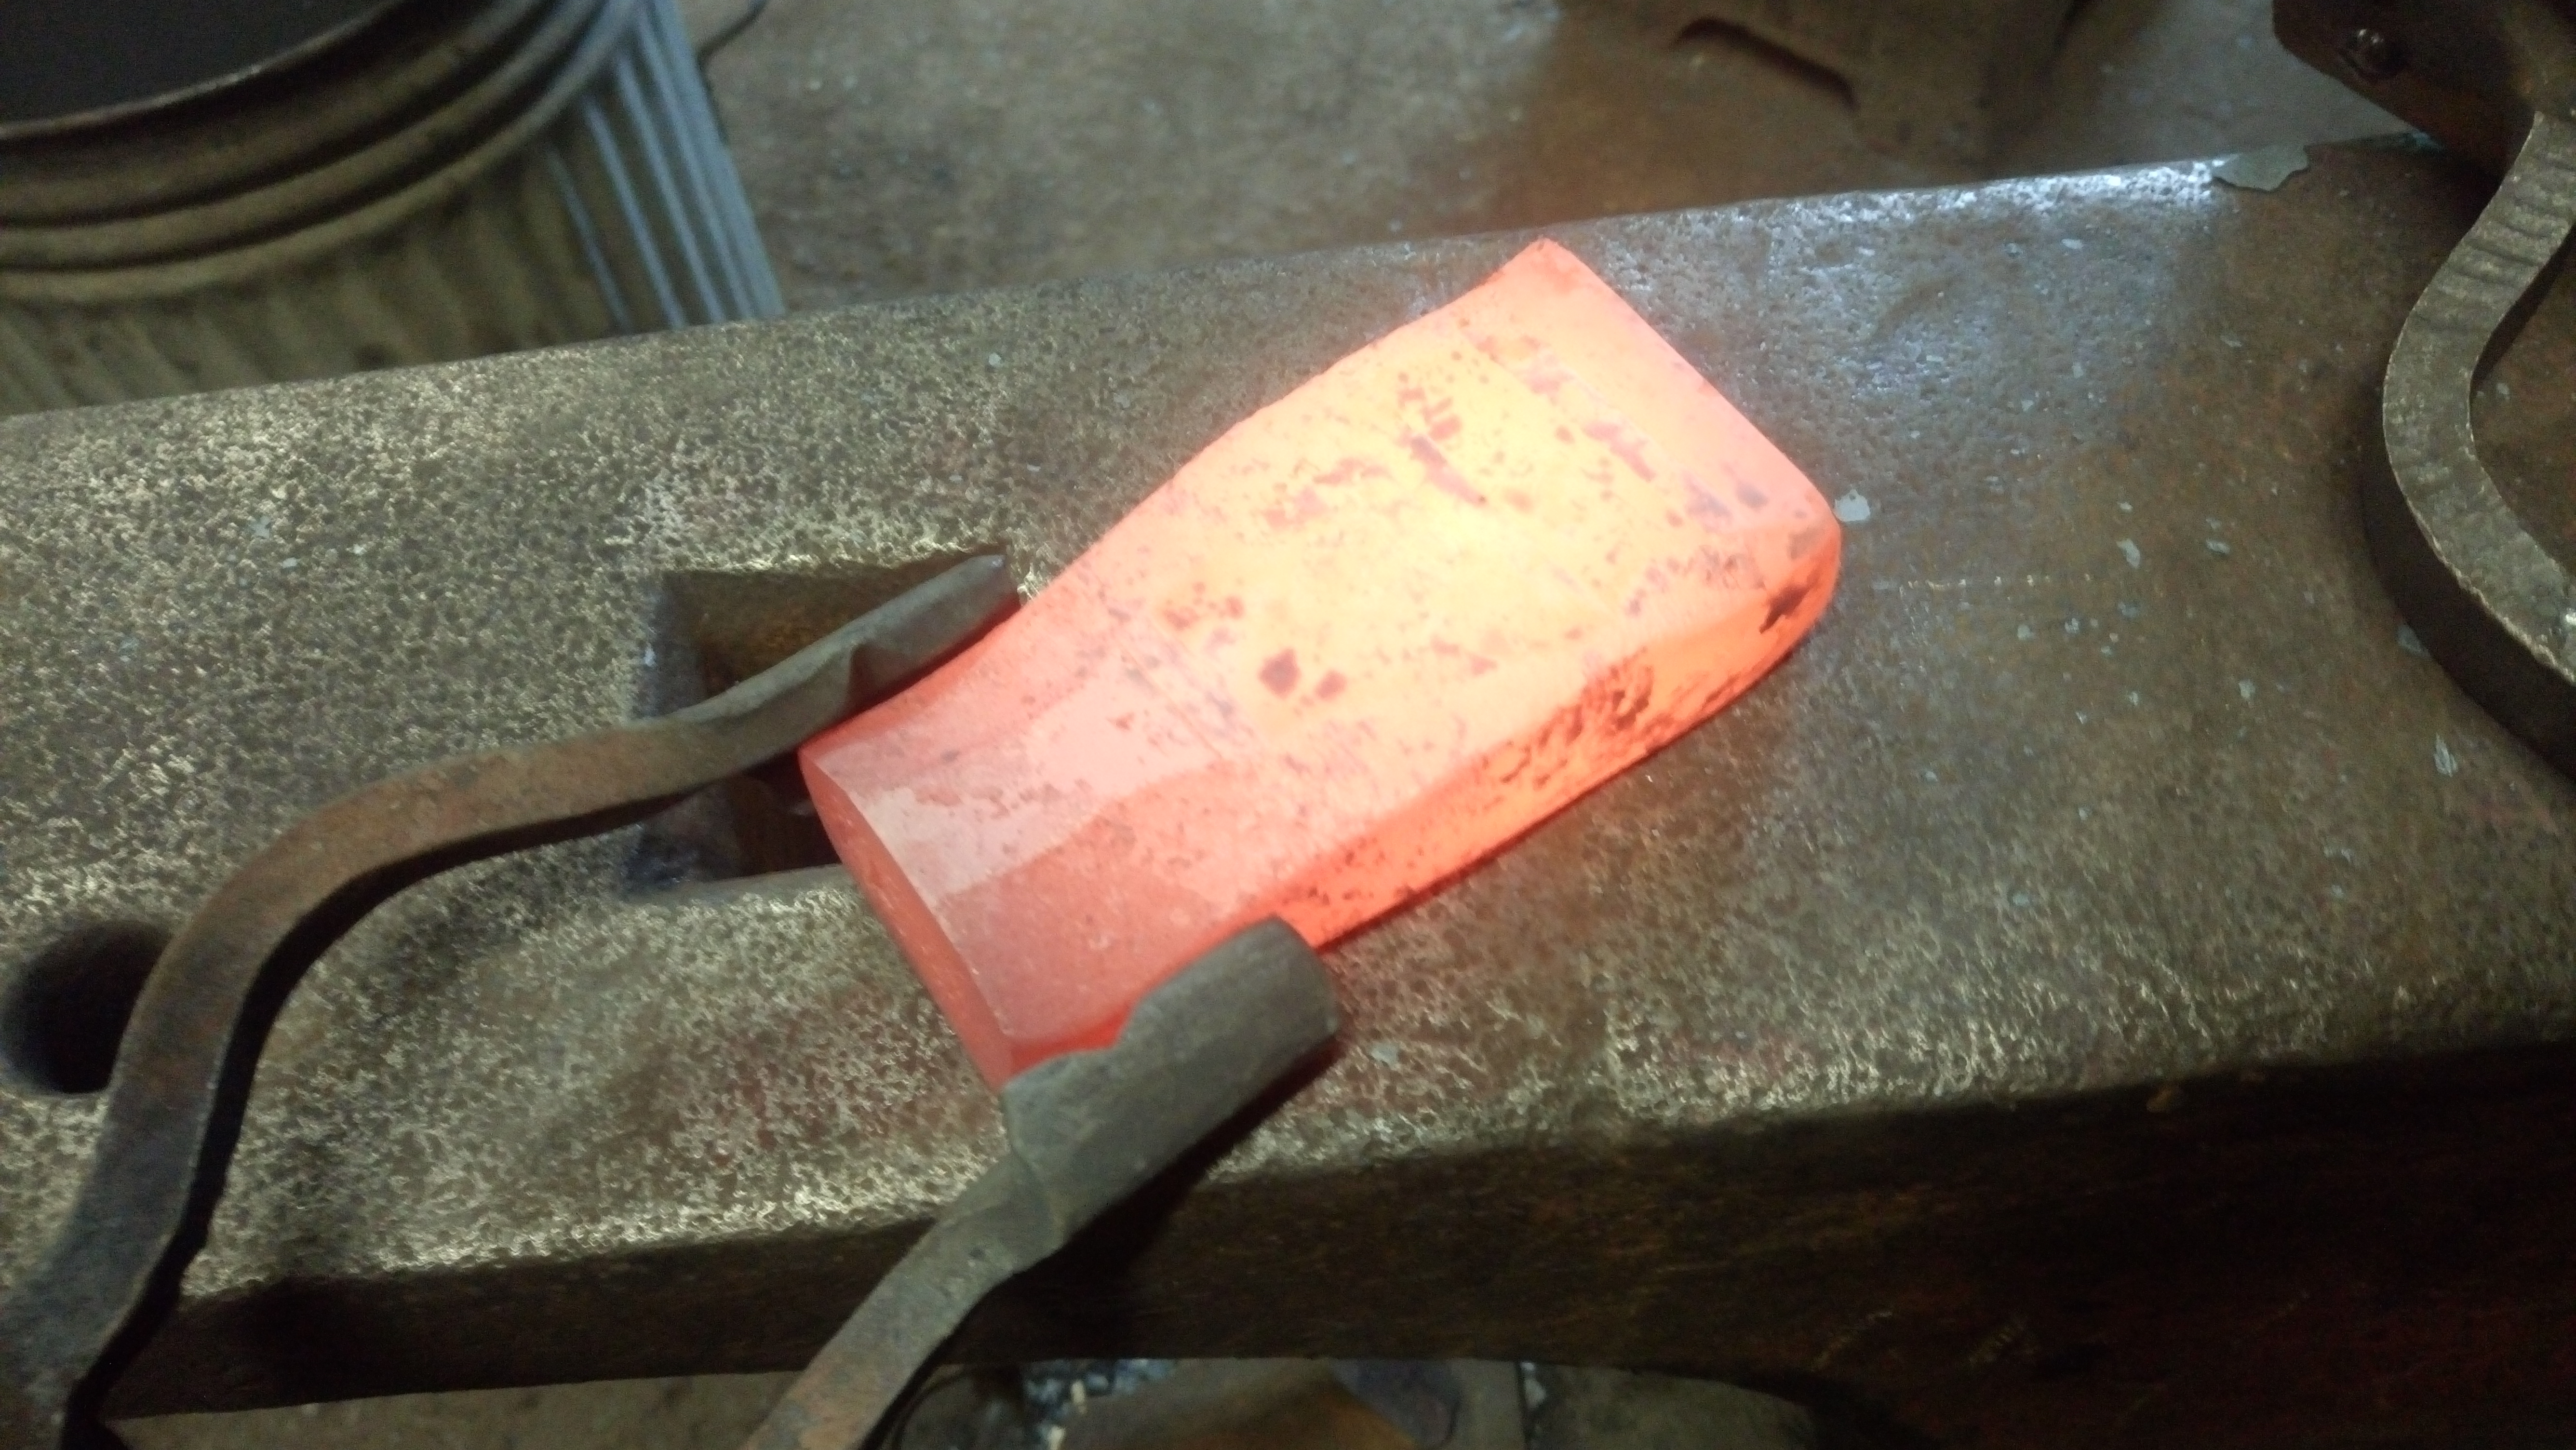
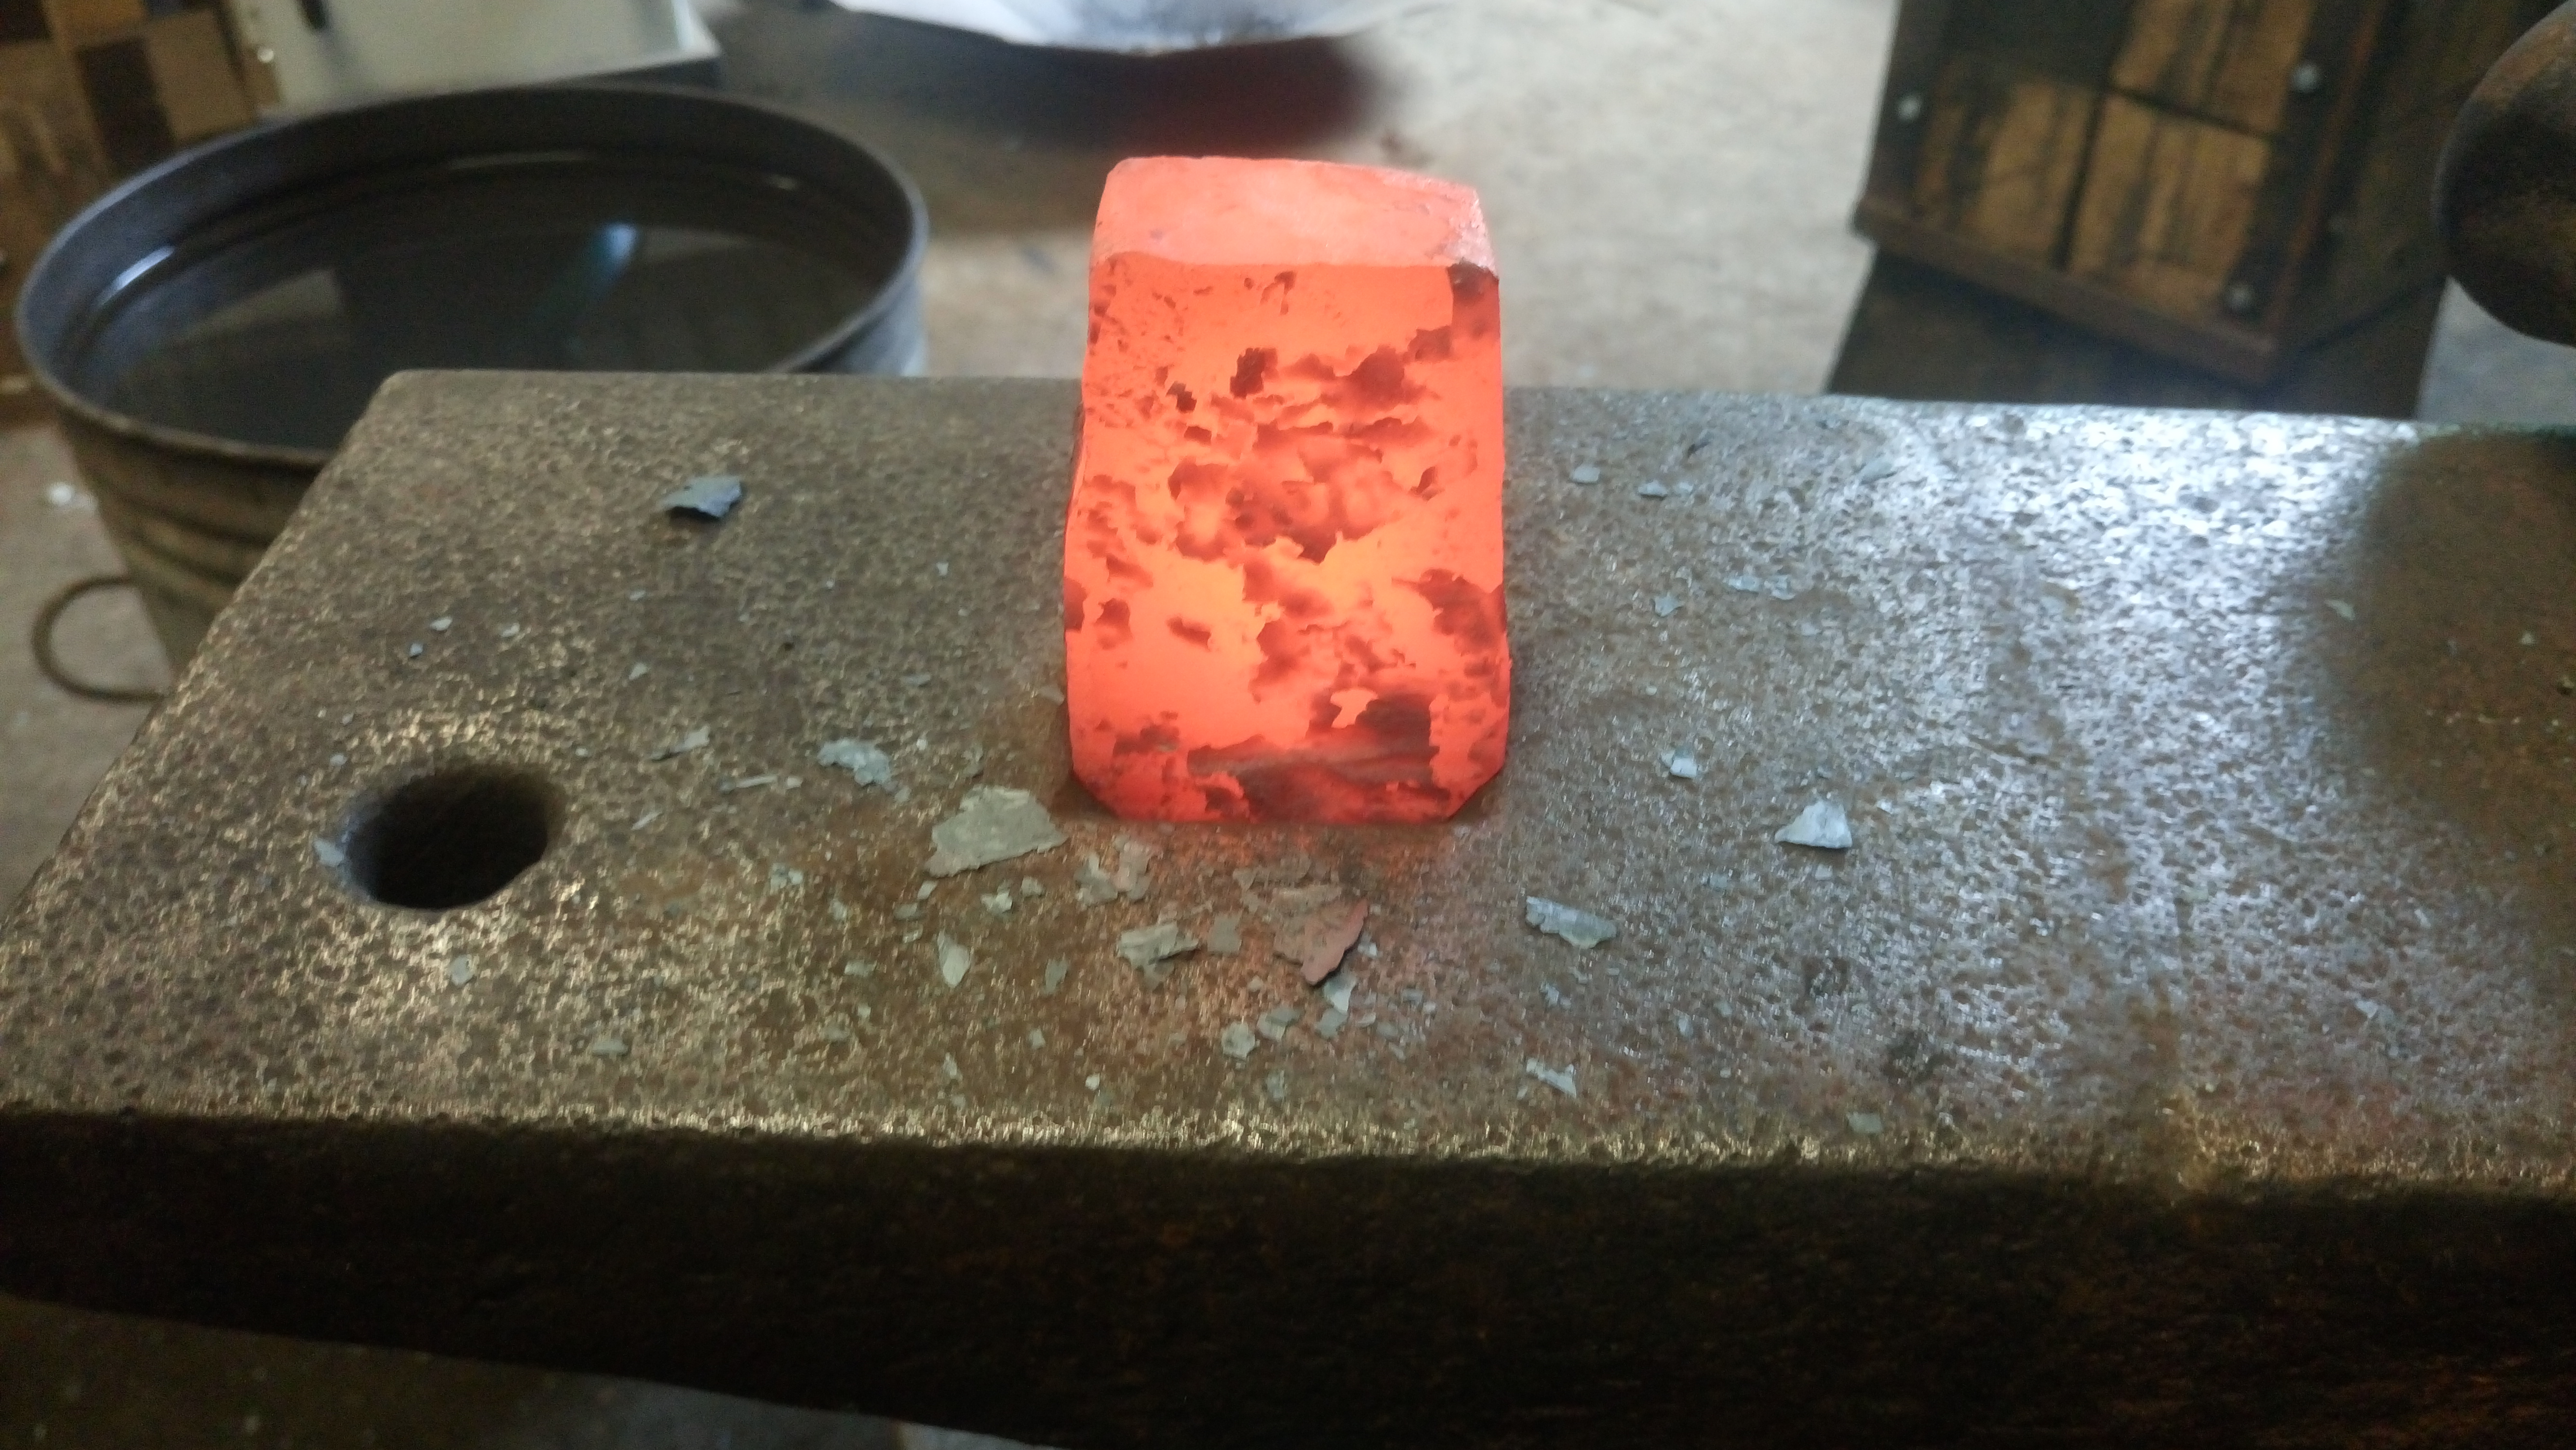
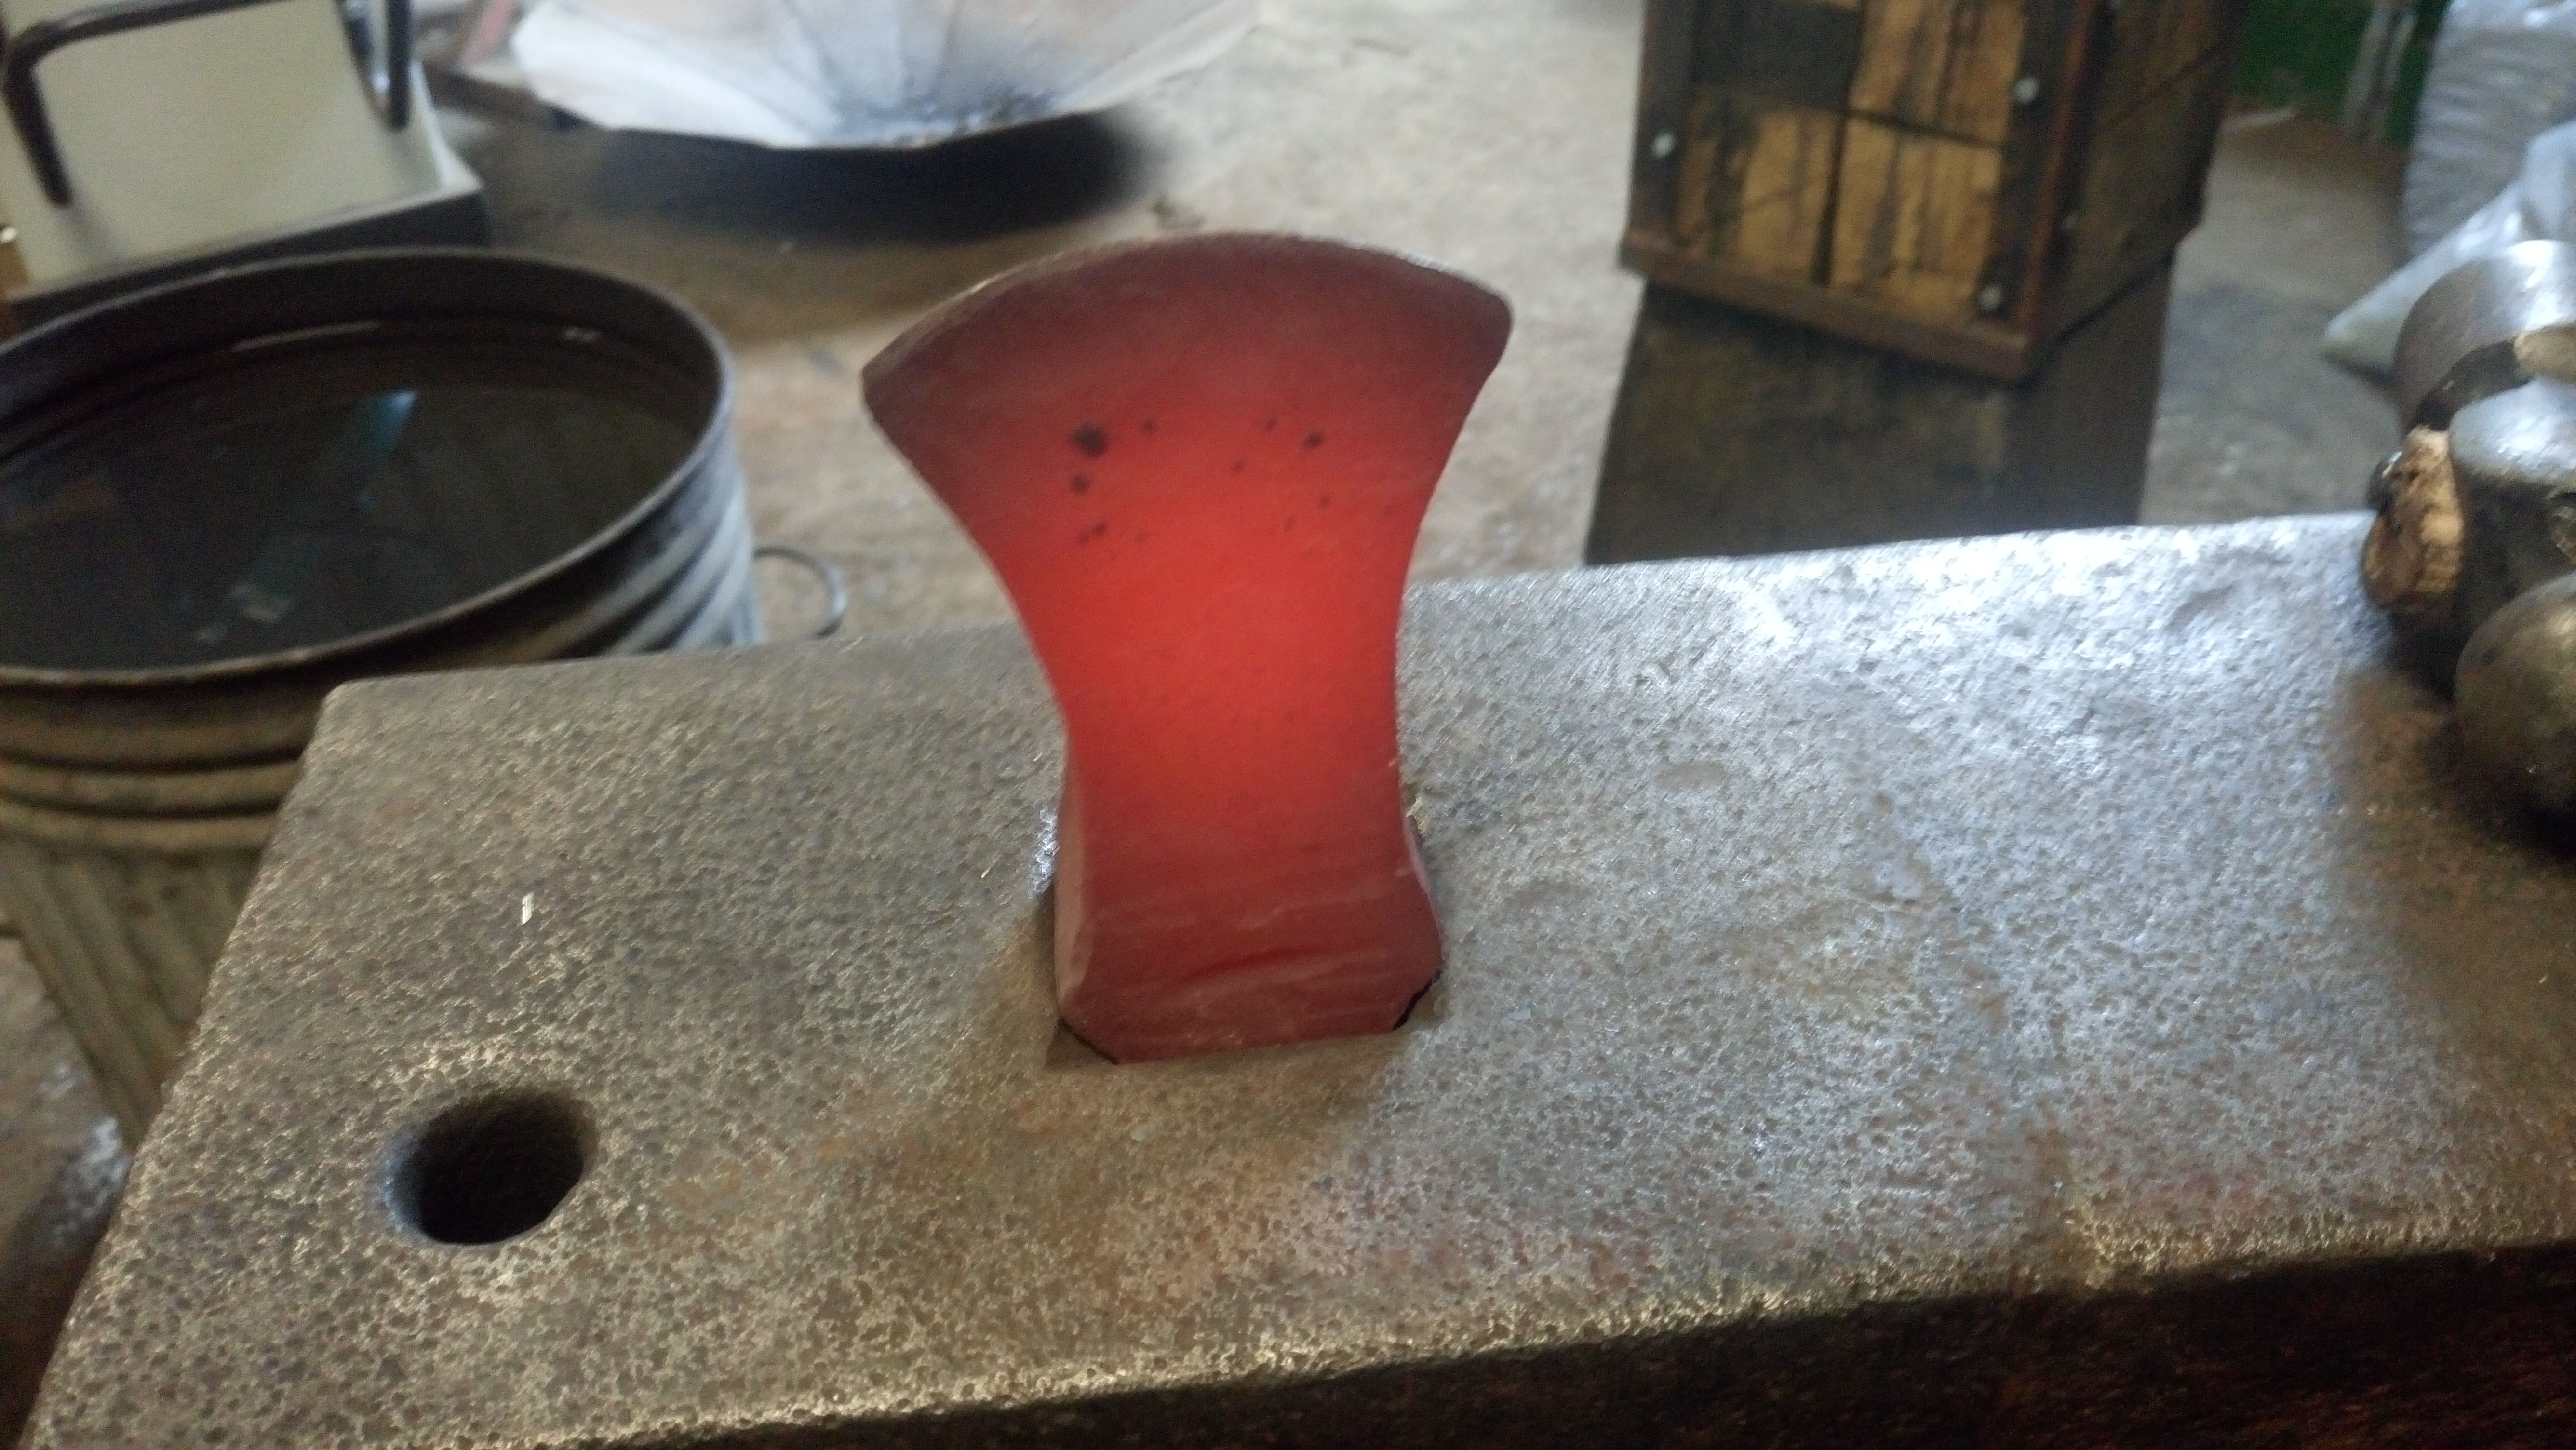
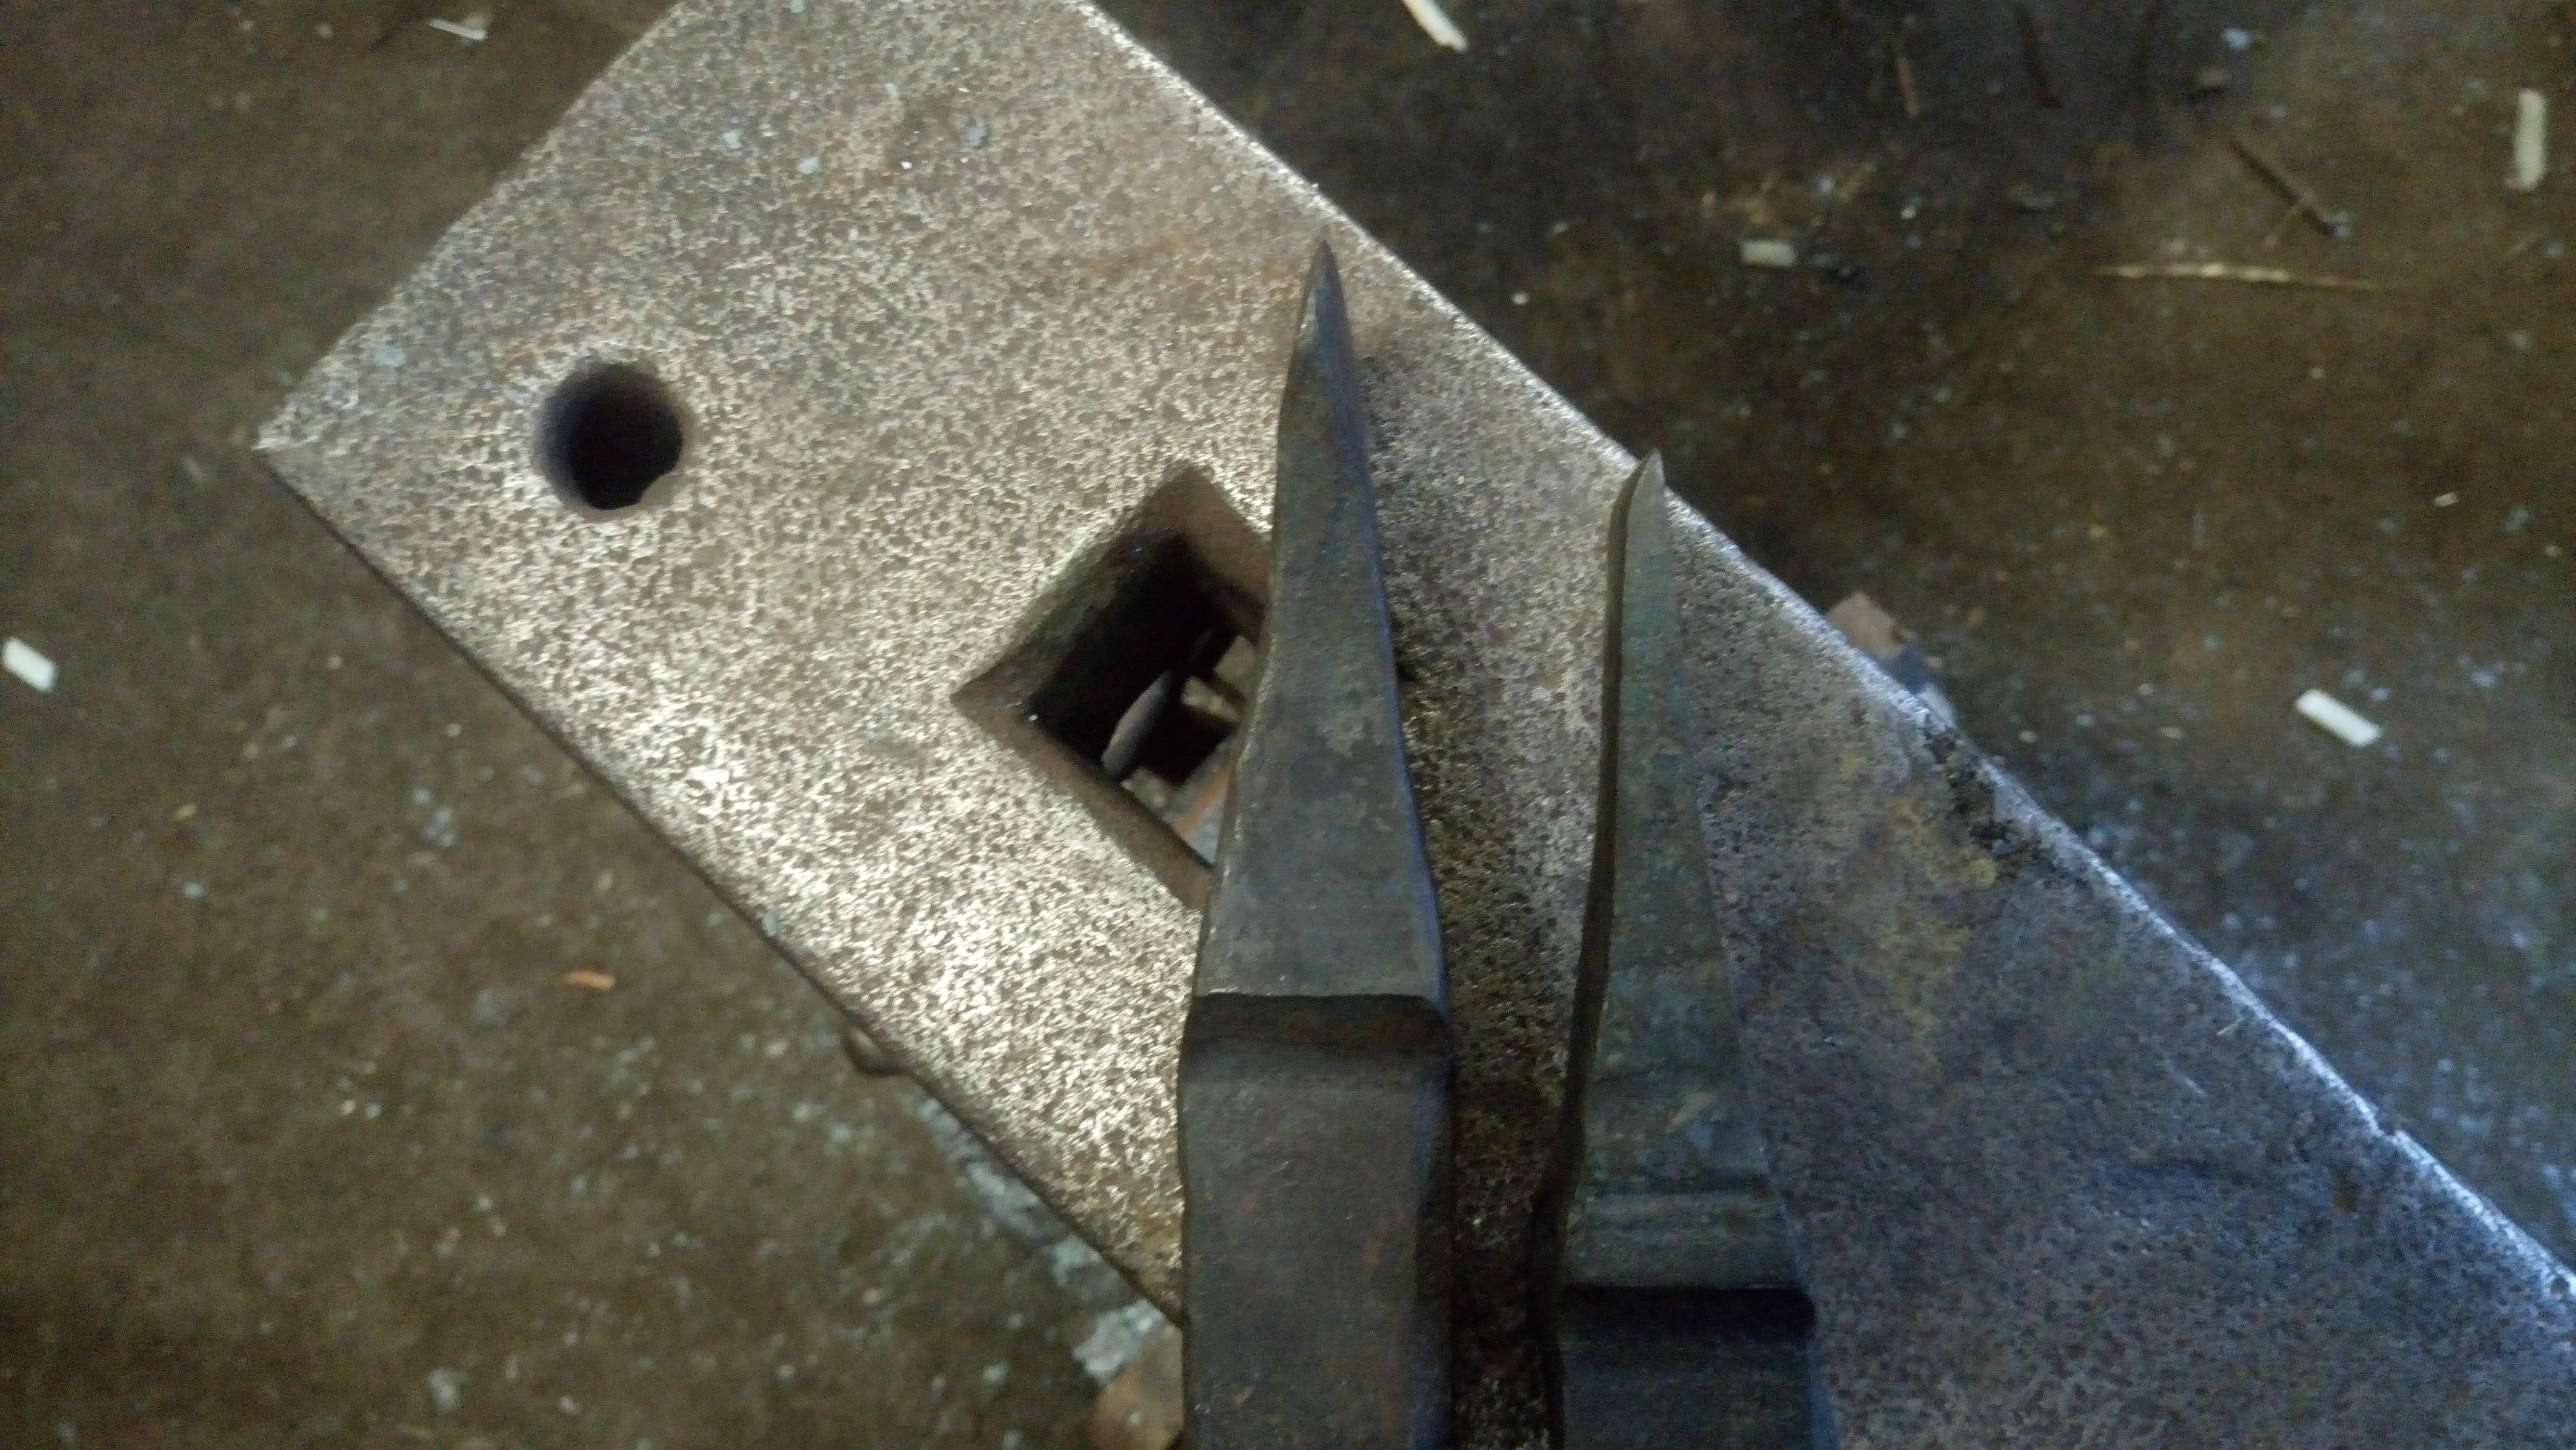
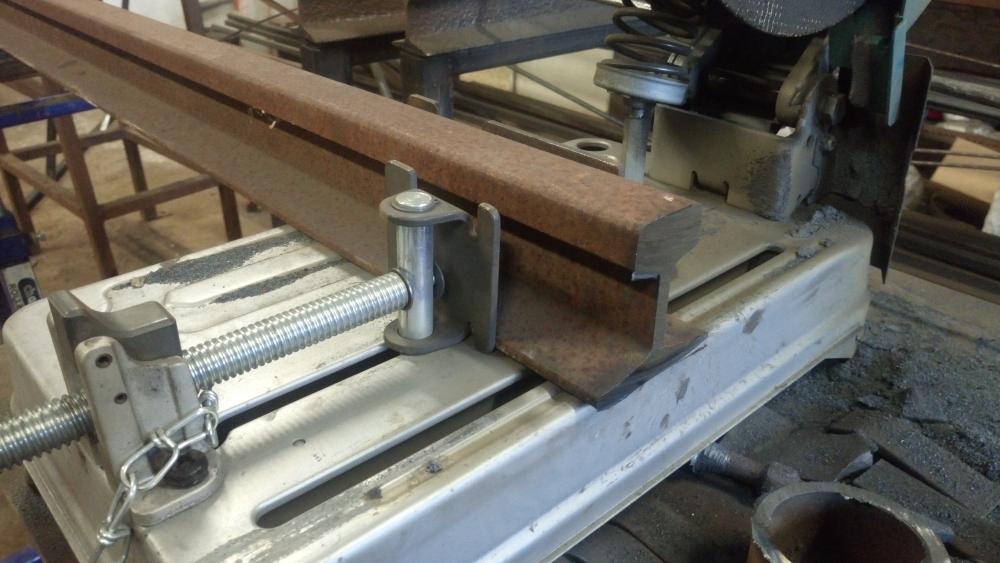
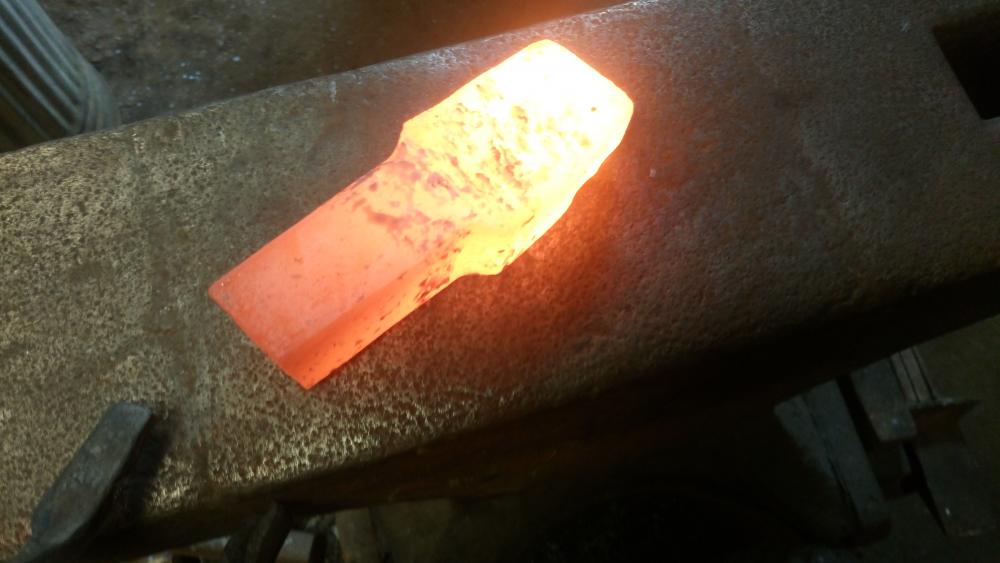
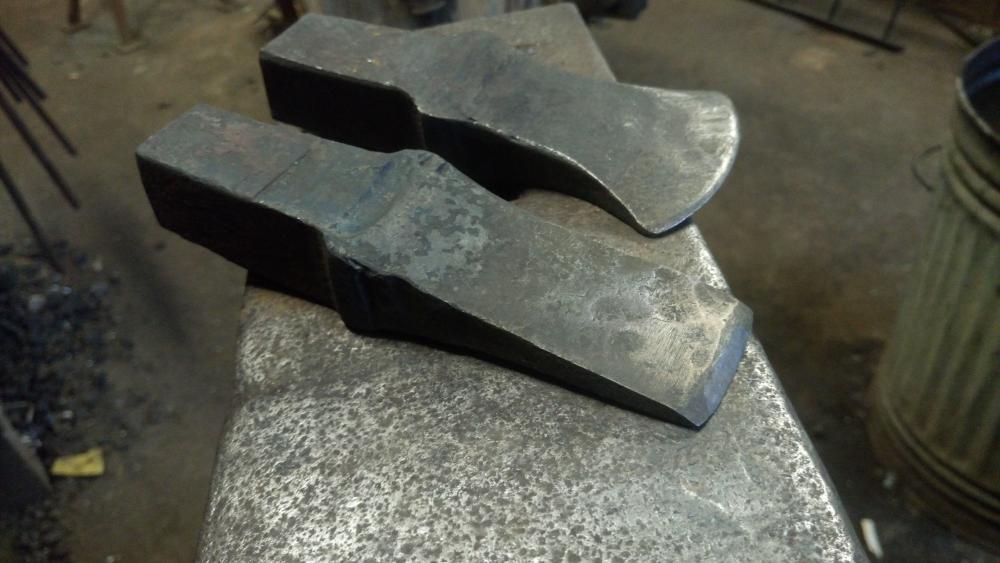
I thought folks might enjoy pics of these two hot cuts I made from two 7" long pieces of light gauge railway. Jumping them up under the power hammer to fatten it up & square it was probably the hardest bit. I'm not really the sort of person to get out the calculator & start working out mass & where to neck in for the hardy shank so I'm pleased to say that in both cutters my guestimations were bang on & the shanks' lengths are exactly the depth of my hardy. Non tapered shanks, made to fit my hardy which is a hair under 40mm square. No grinding, just a tickle with a file.


-
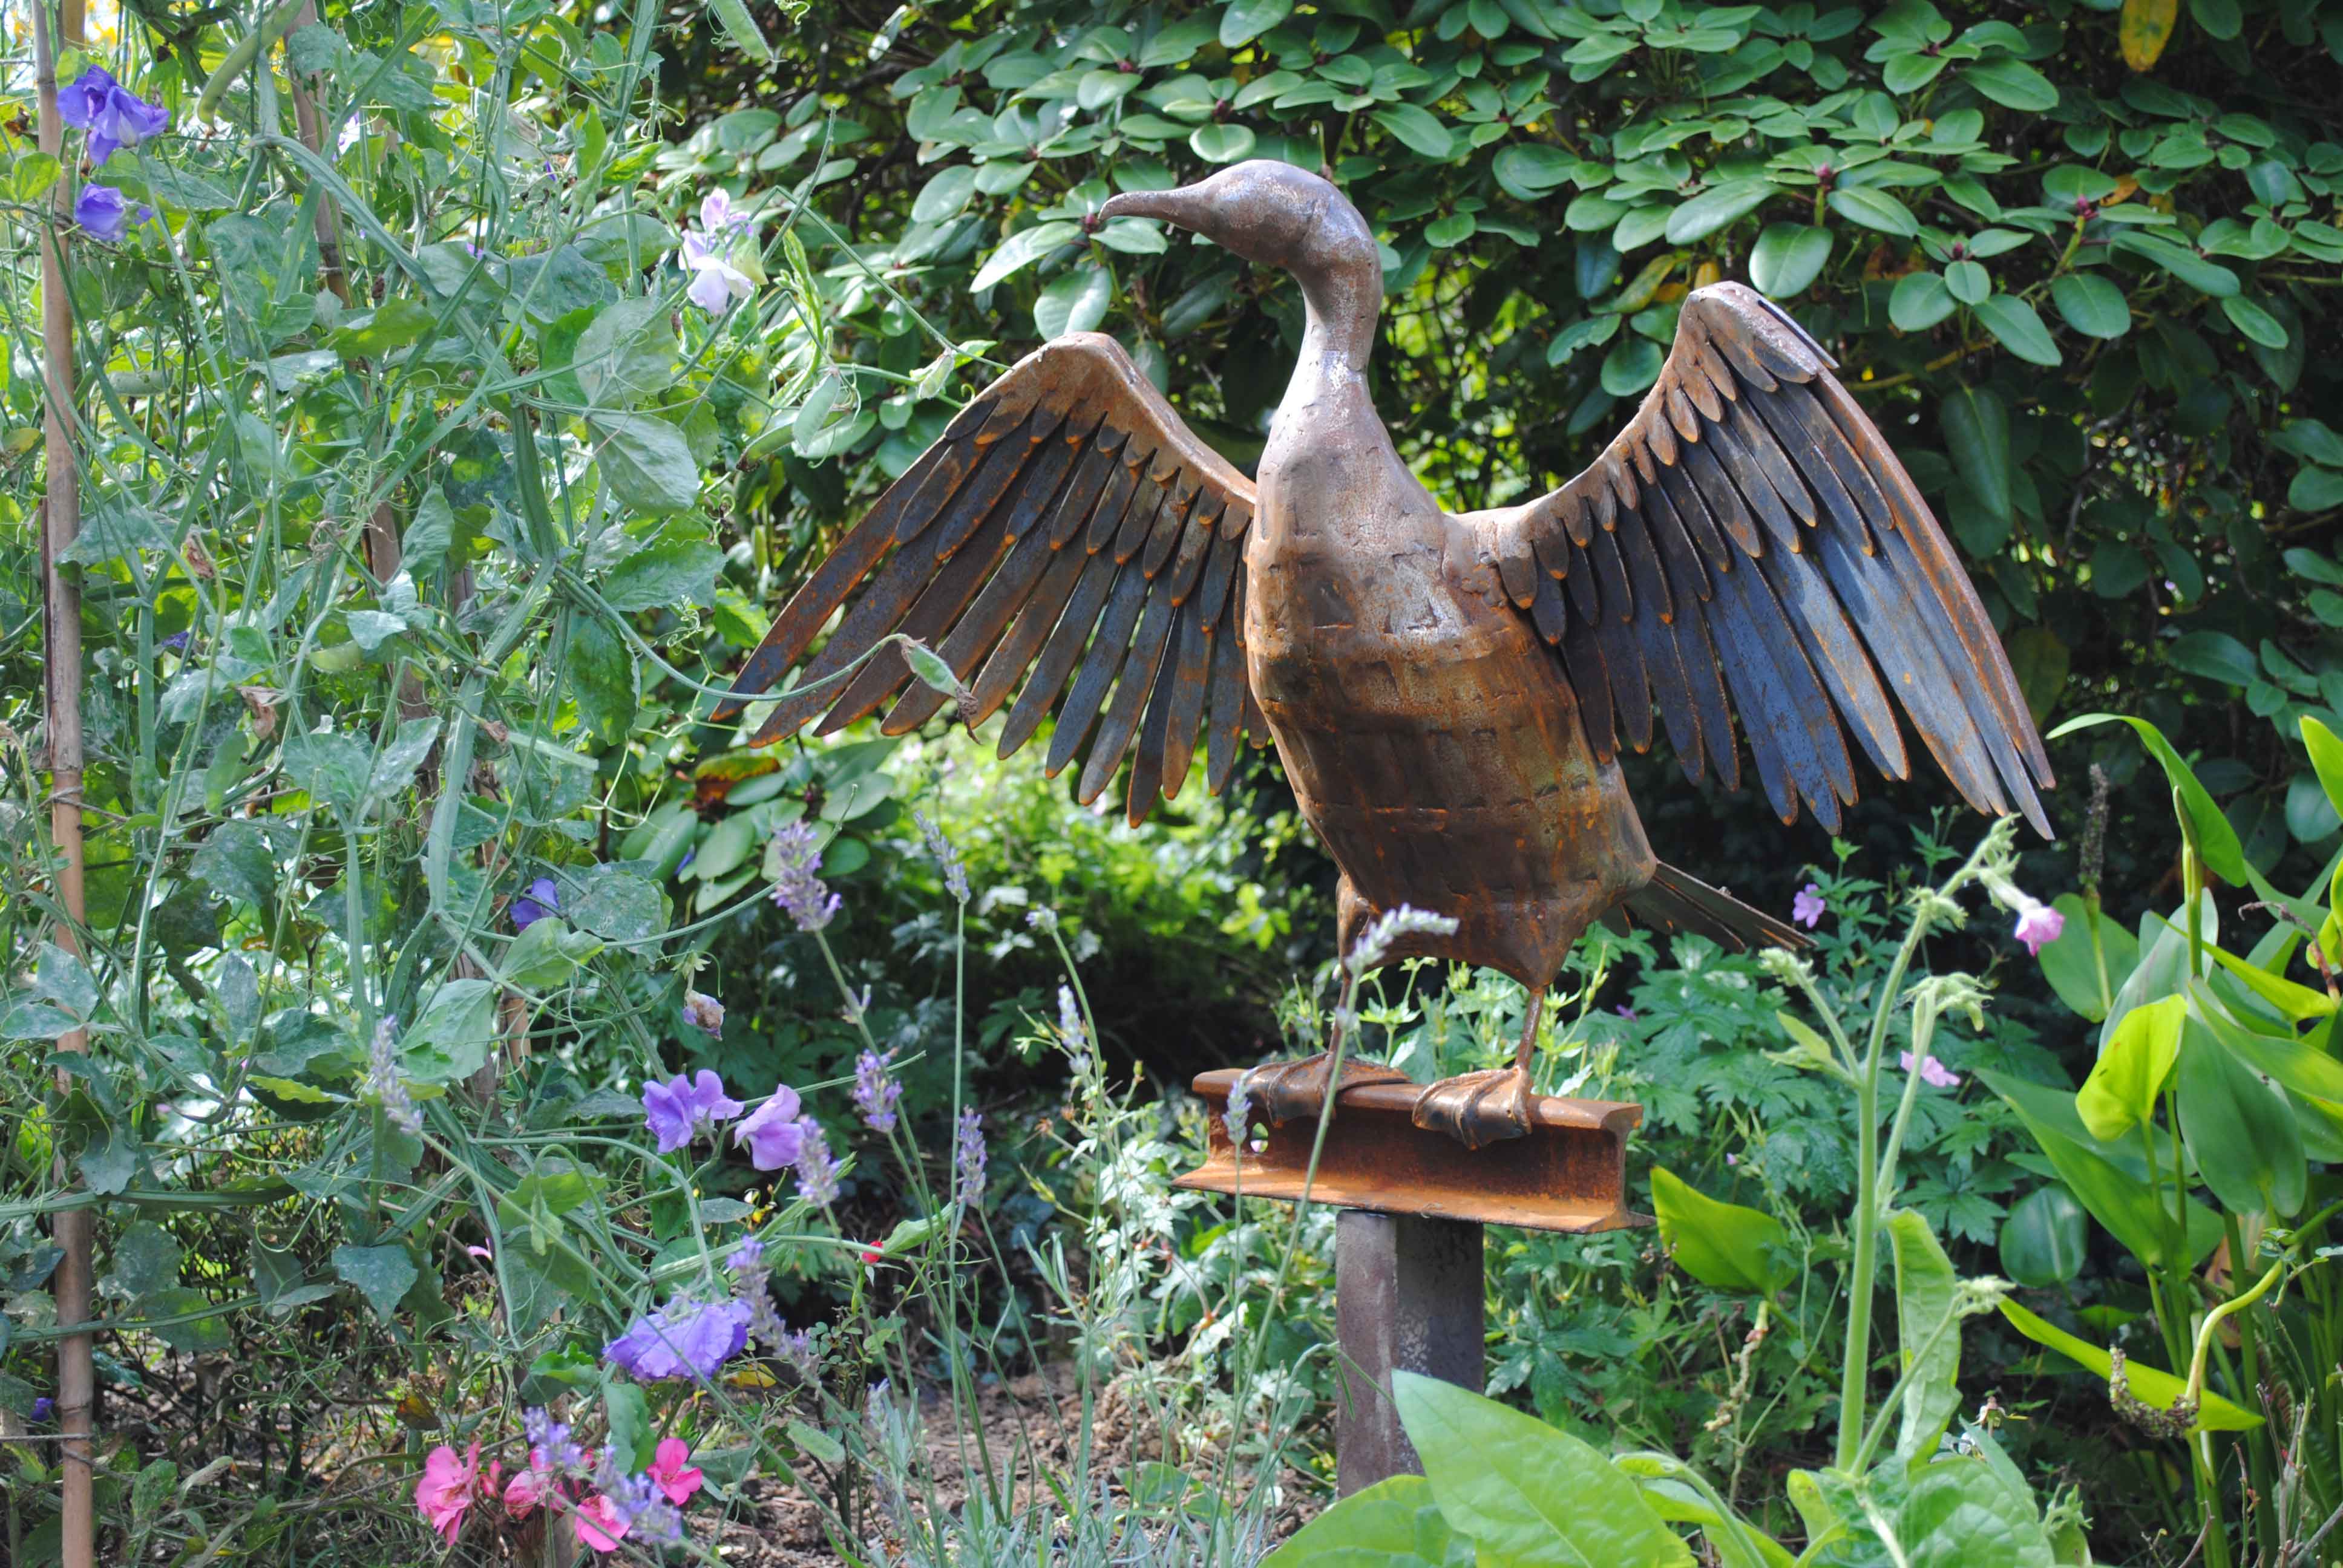
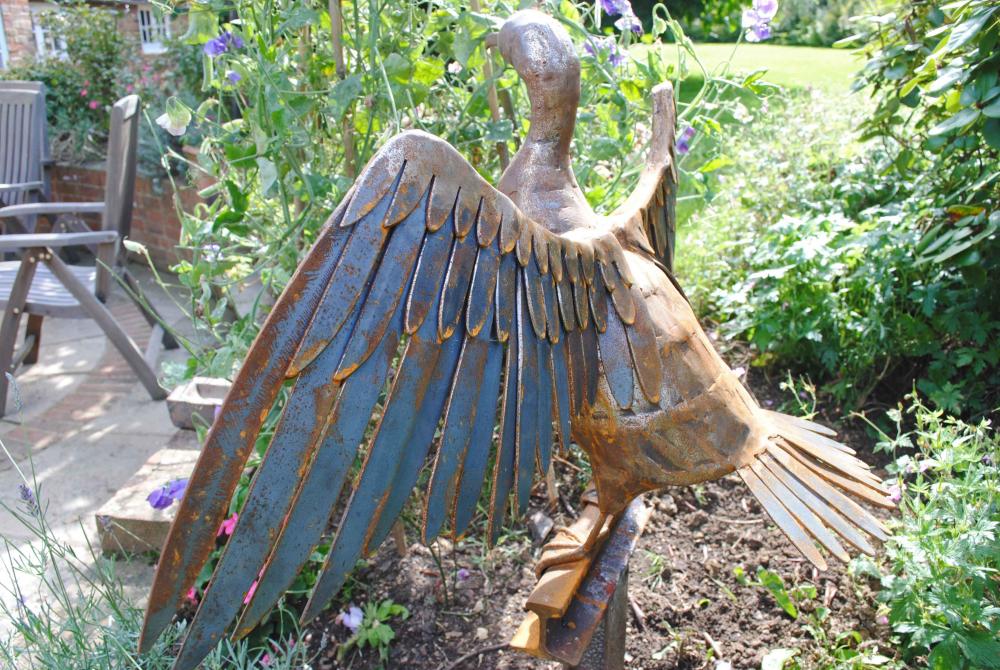
Thanks folks. Well funnily enough the plan had always been to make eyes, but the client came round just before that stage and said she didn't think it needed any. I had planned to drill into it's head and recess some small ball bearings which I'd then weld in and then drill countersunk dimples into for pupils. But all I ended up doing was lightly drilling small dimples into the head to suggest eyes (in the shiney pics), then I filled them back up with weld and ground back flush for the client as I showed her those pics and she preferred without eyes.
-
I mean when they're standing at a distance in conjuction with being stood completely upright they haven't got a hope at hitting accurately at the far edge of the anvil. It's when they're almost hammering with an extended arm their accuracy is completely sloppy. Ultimately I'm trying to describe something to the effect of being tense VS relaxed.
-
All the lessons I've given have been to total beginners. Get them standing correctly, stop them from pushing the hammer with their forearm and/or choking it after striking & get them with their body weight forward so they're not striking at a distance/totally upright etc, it'll speed up the lesson/their progress no end. If needs be stand in front of the anvil properly and draw around your feet (like a crime scene) then get them to stand in your feet marks.
-
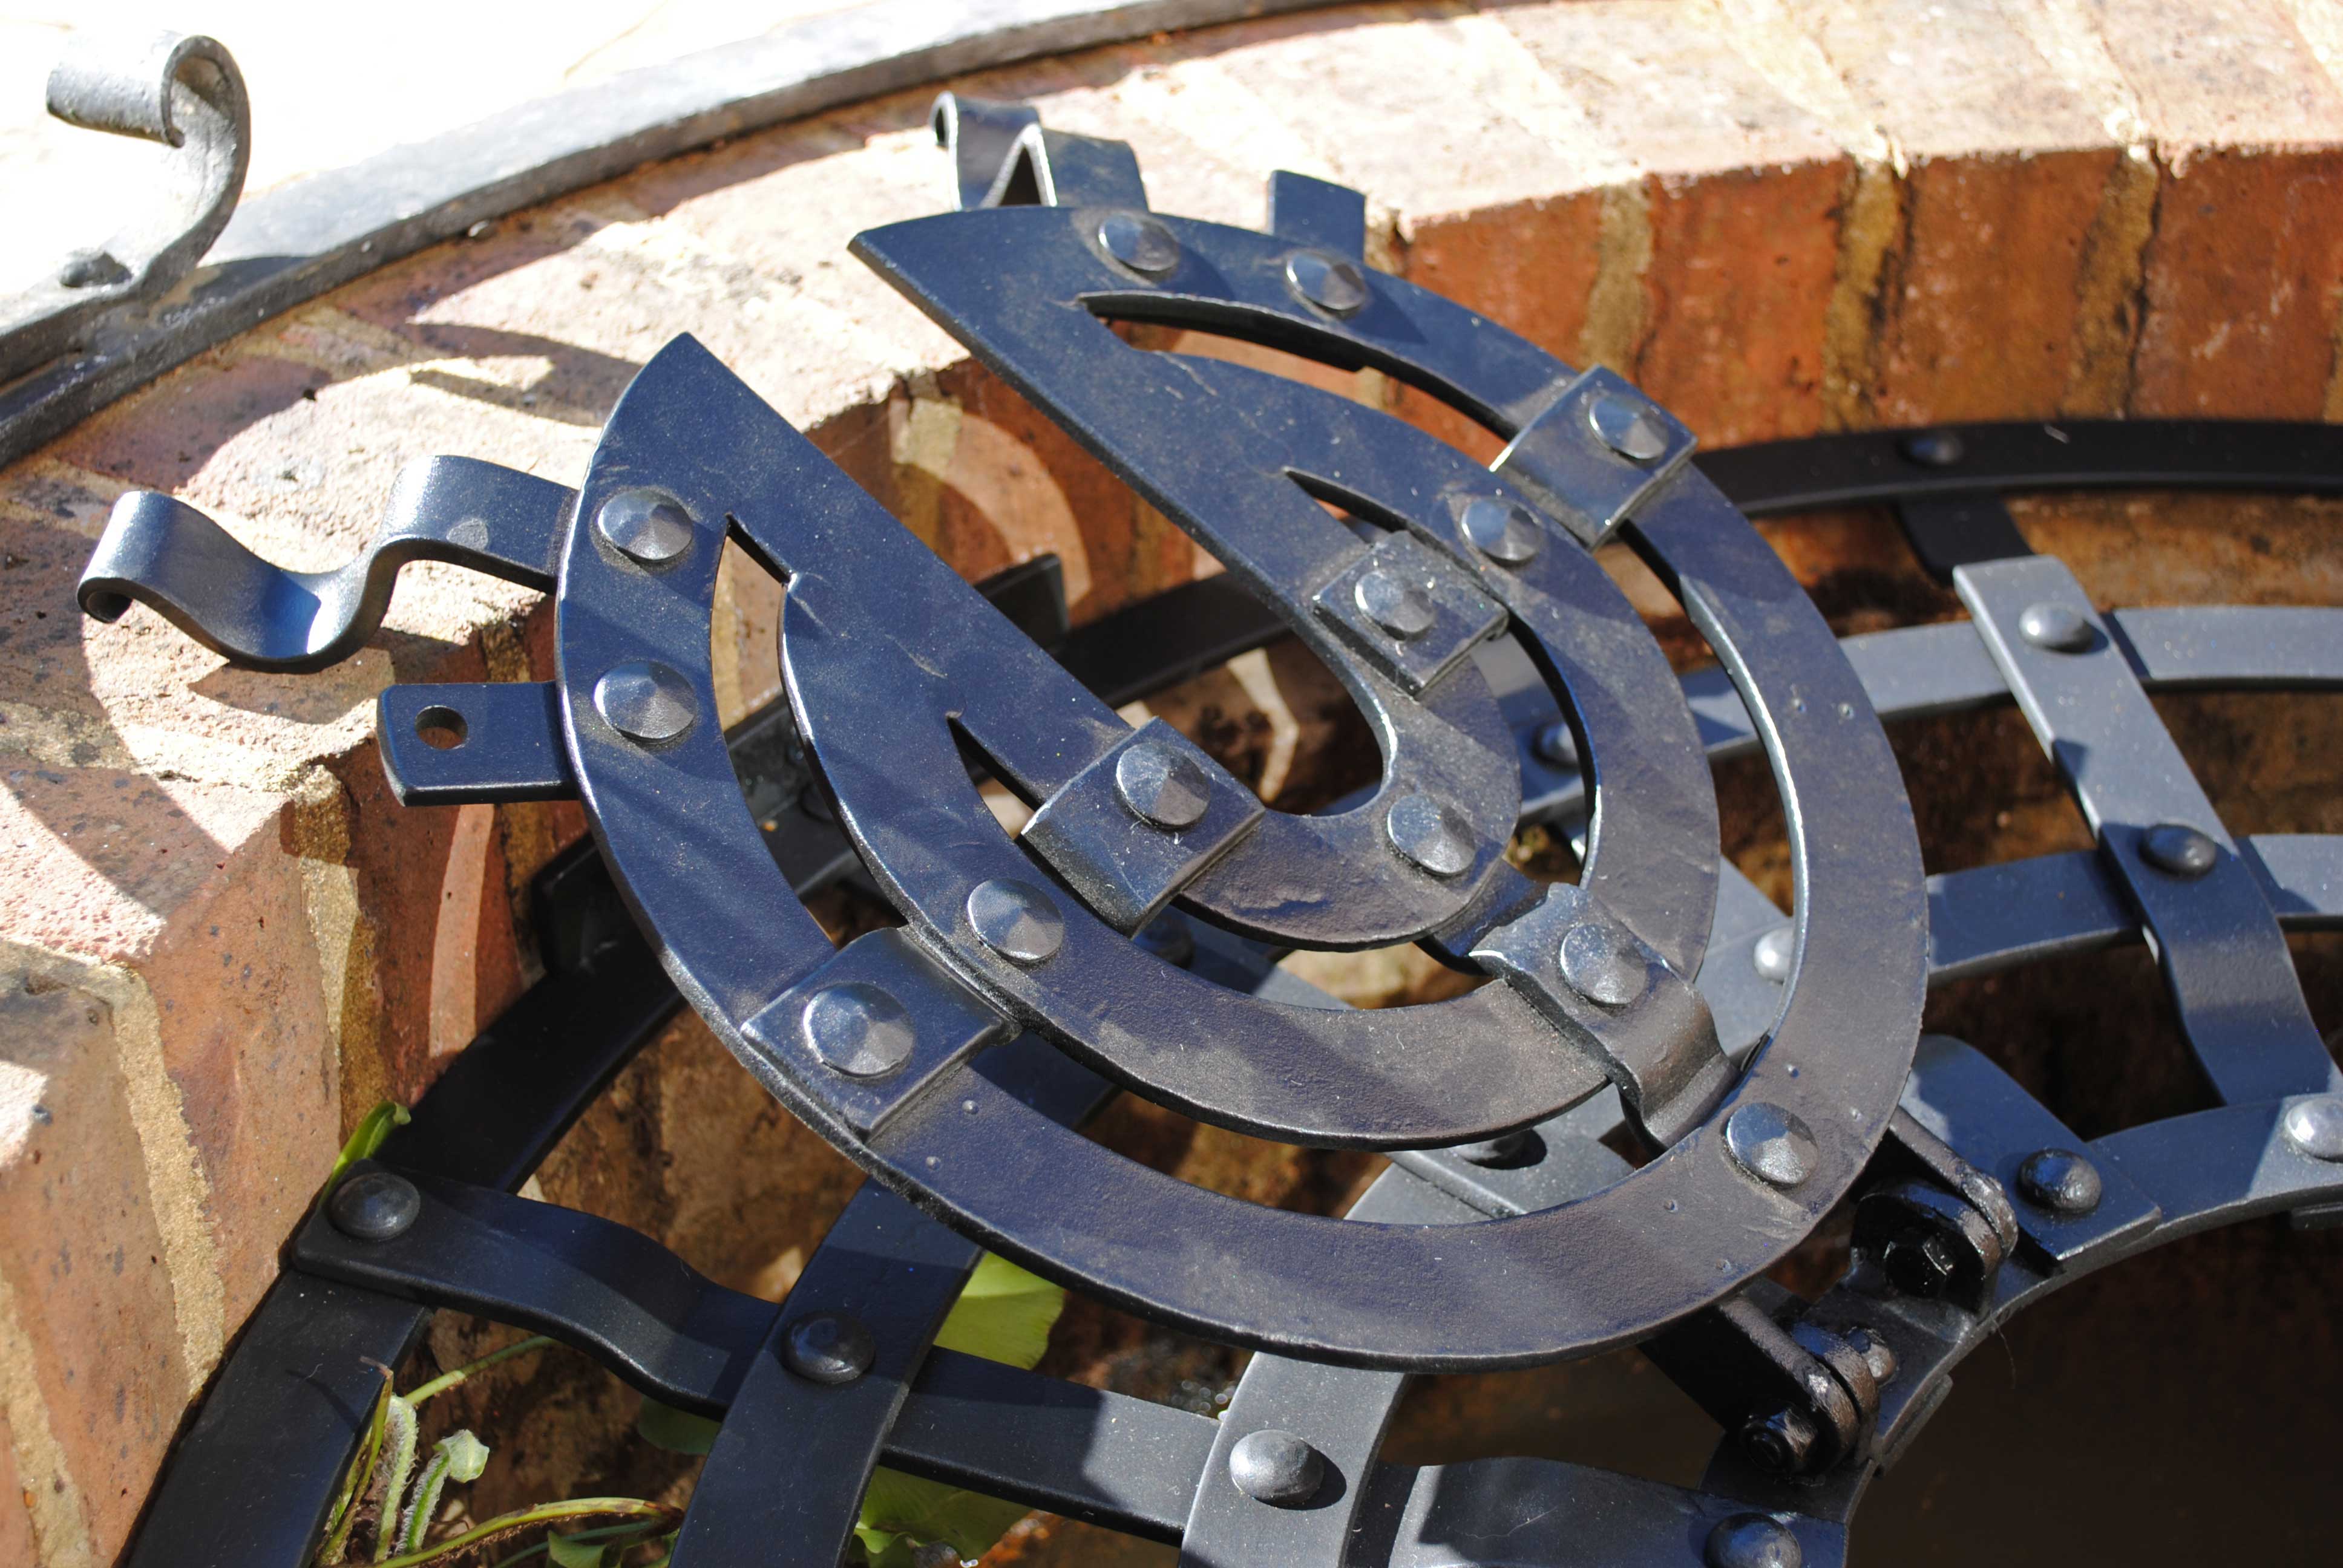
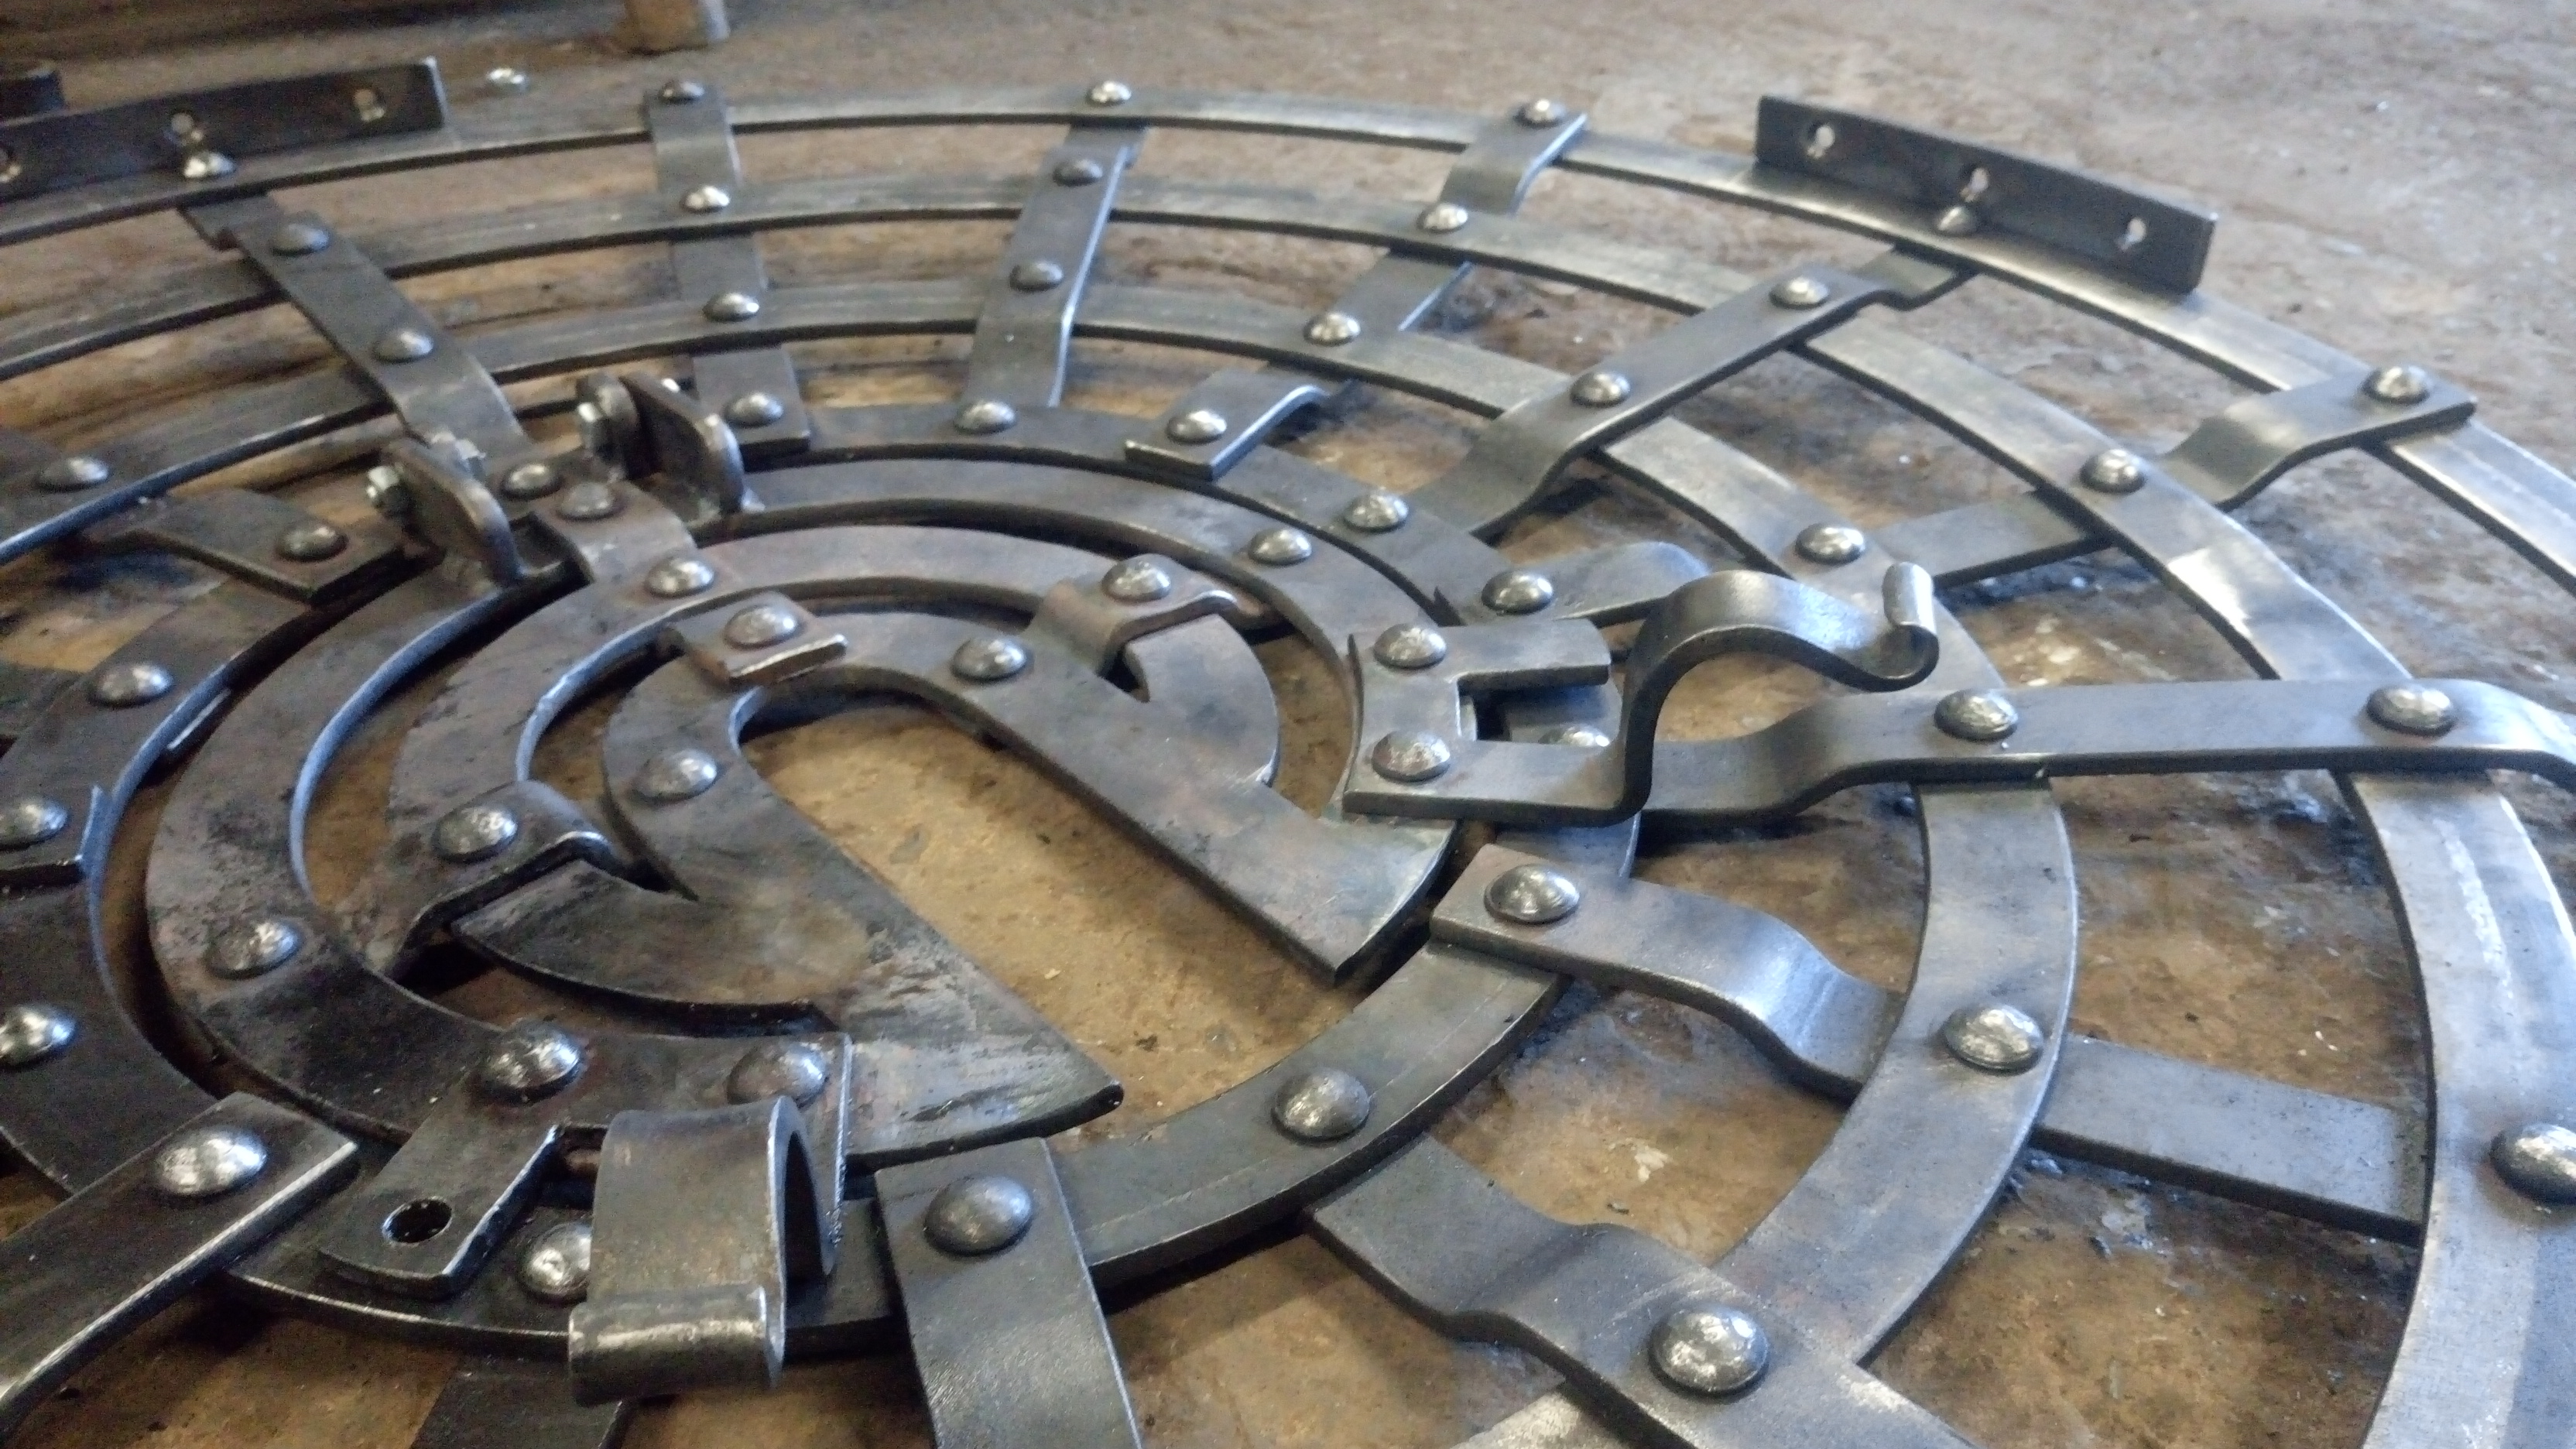
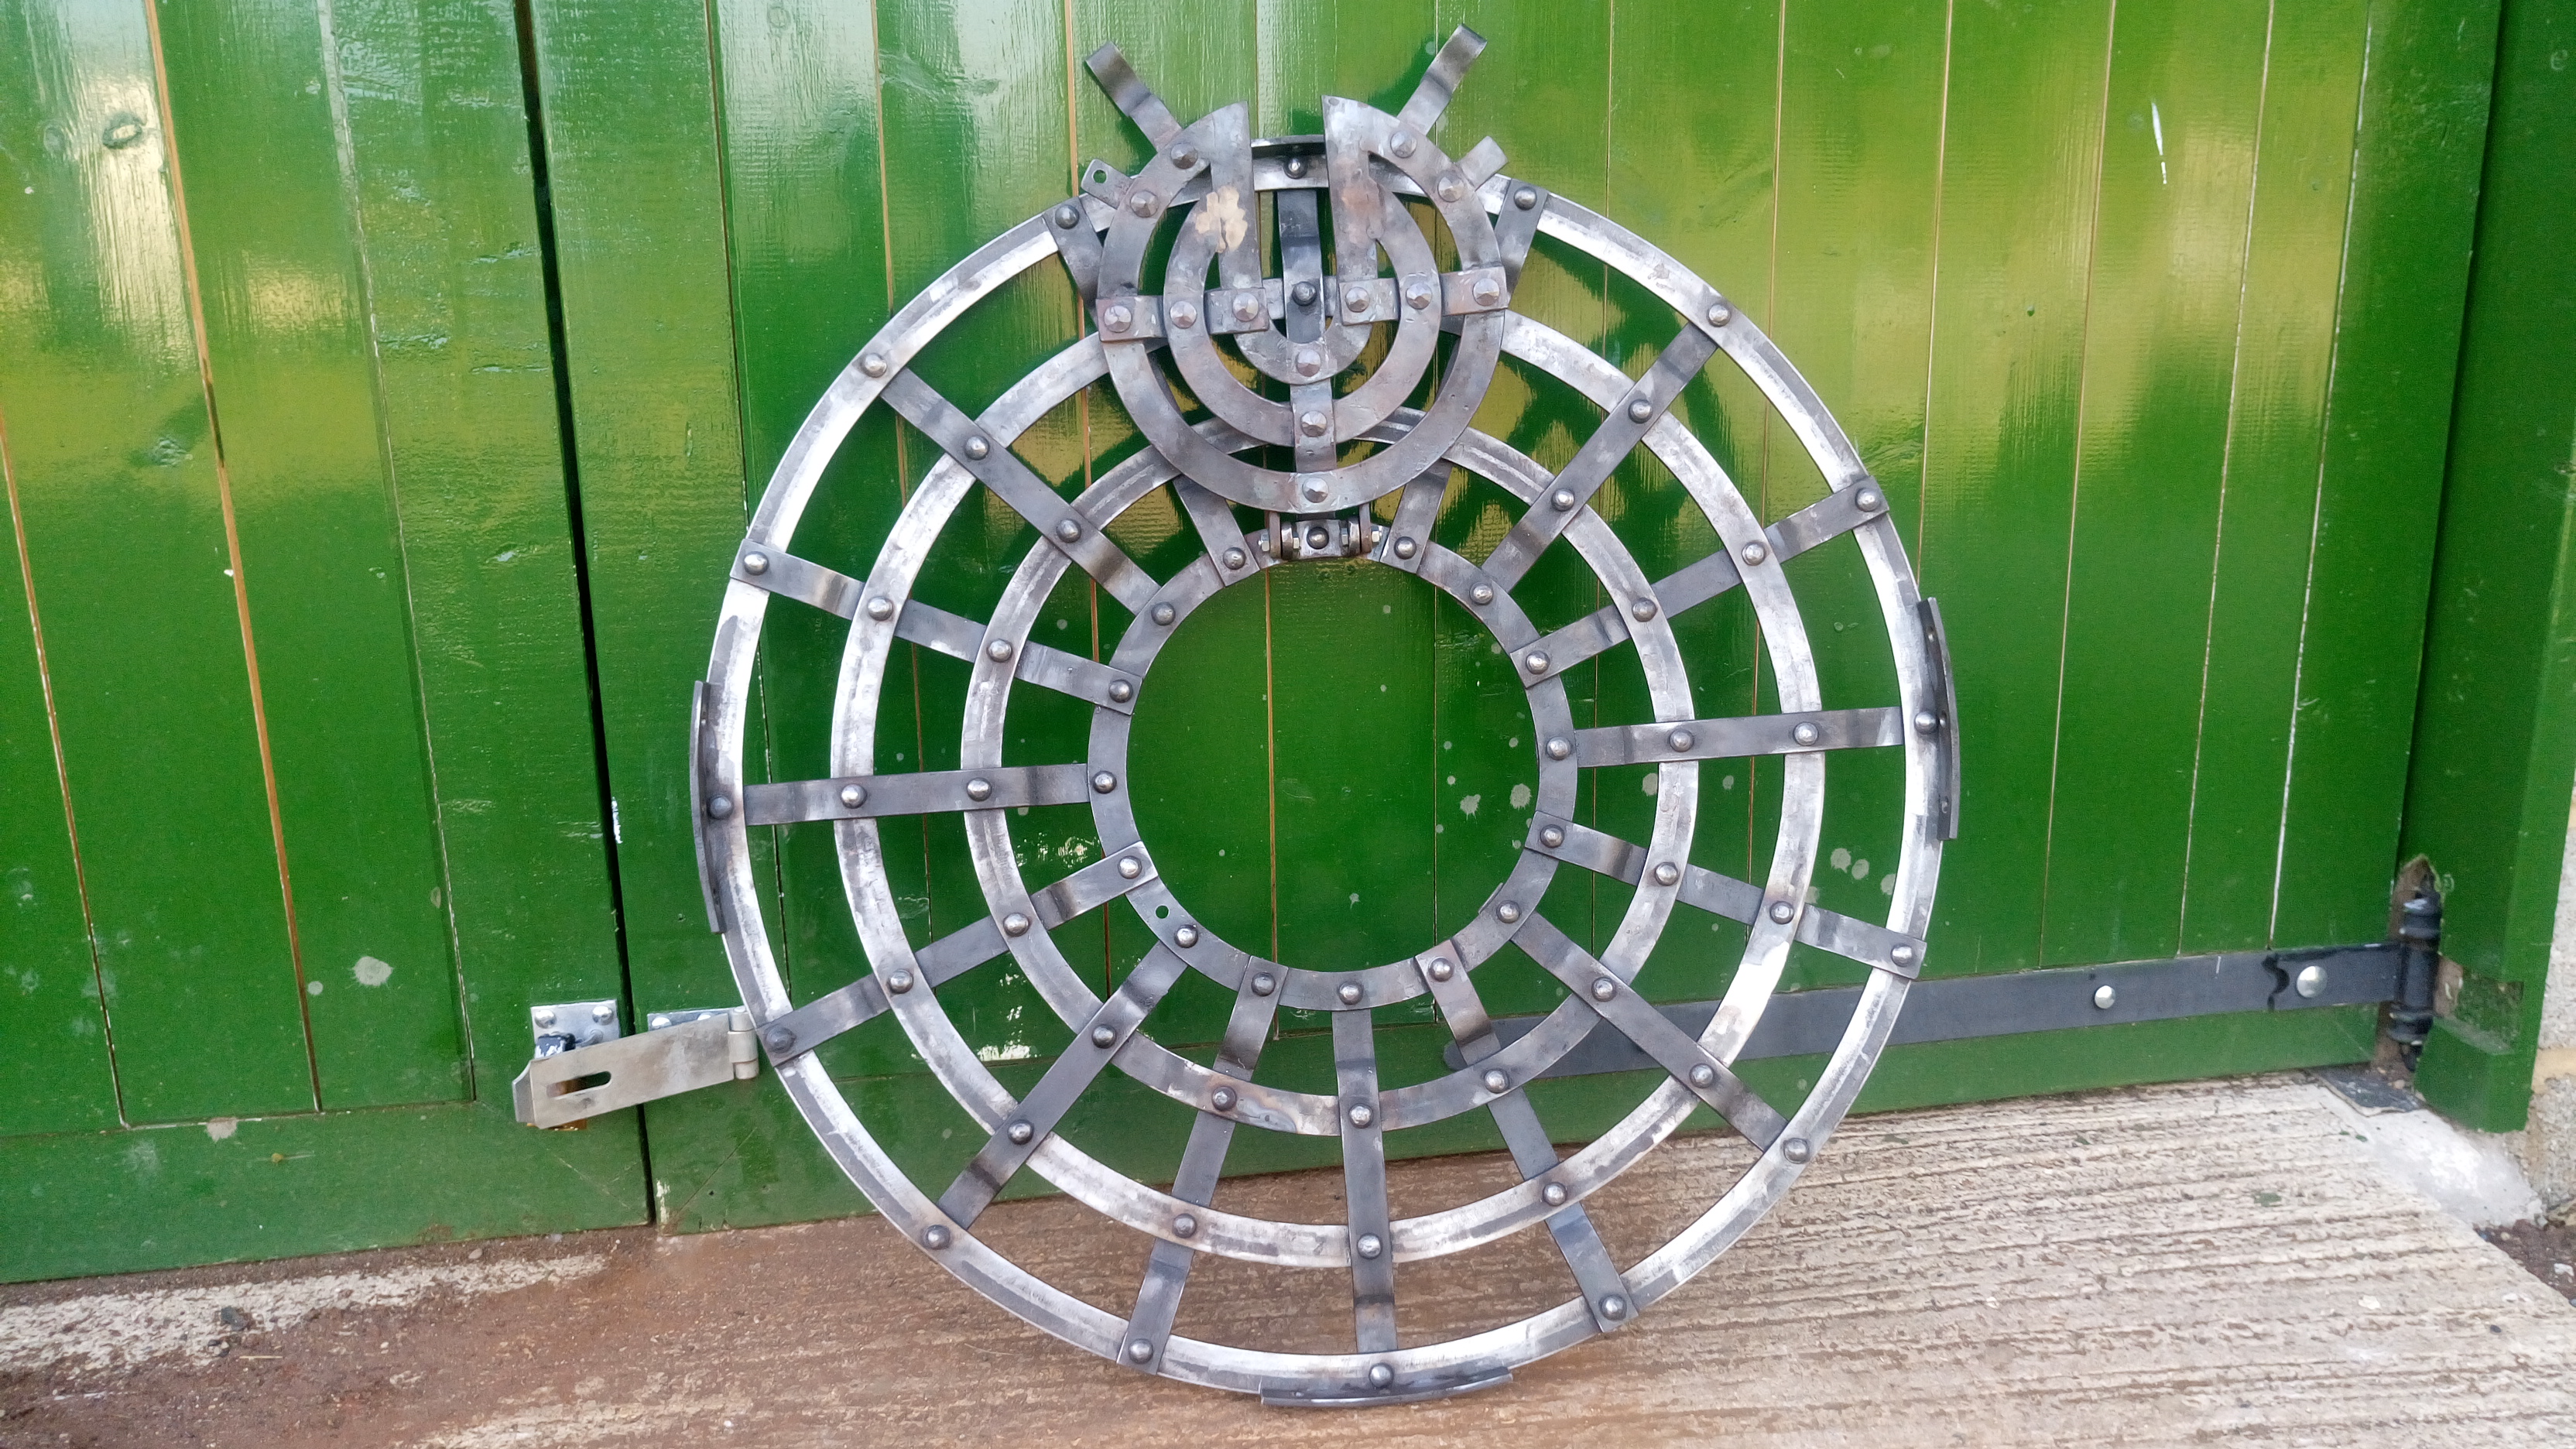
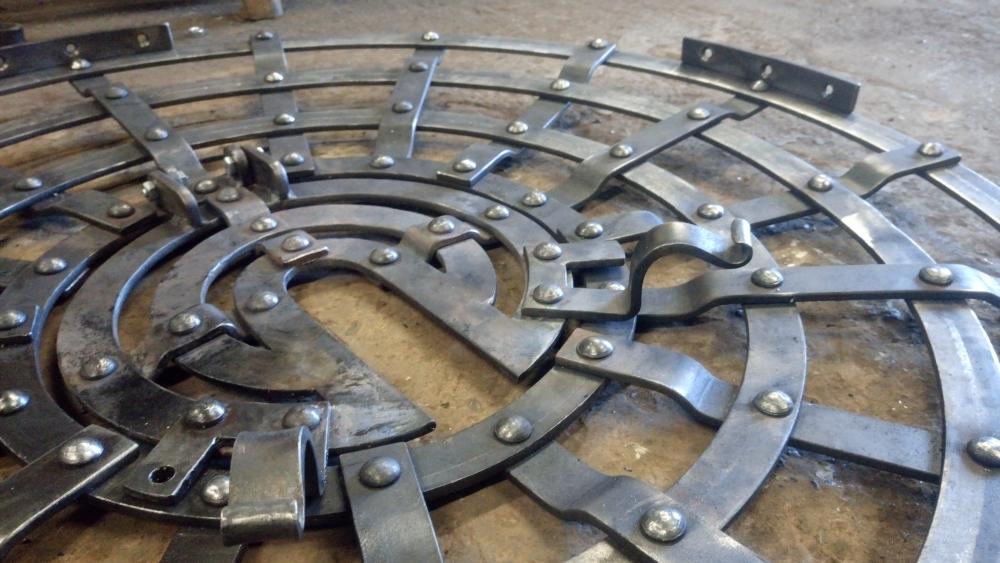
Thanks. A series of 1sts for me; my first gates, my first well cover & first bird sculpture.
-
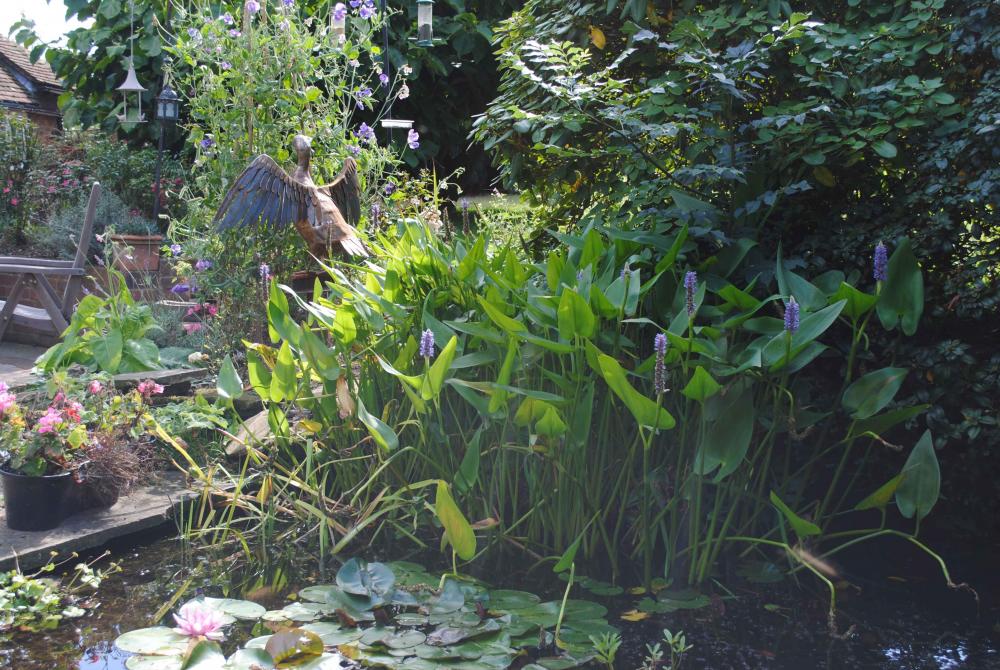
In it's final home. If interested in seeing it next to the 2 other commssions I have completed for these clients YouTube search "Joel Blacksmith repeat clients". I attempted a link but it failed.


-
-
Dear oh dear oh dear. Tut, tut, tut.
-
Are you getting the names mixed up? Quoting you from the "South west coal distrobution" thread... "There are three grades/sizes most smiths seem to prefer the smaller(sold as a domestic use fuel as Gloda)nuts or large nuts but not the cobbles." I've been buying a few wheel barrows full of the middle size nuts from a local steam railway to test it out, in the last batch I bought off them was a noticeable amount of the small nuts (Gloda), which I found to be more useful as they're quicker to coke down and sit tighter together. You're swimming in blacksmiths in that part of the UK. (My theory being that folks go to Hereford to do the degree course then like the area so much they stay there). Ring a few of them up saying you're a free spare pair of hands on the odd day, they'll snap you up. You'll wait a year asking around on internet forums about local suppliers etc when a local smith can tell you what you want to know in 5 mins...and you'll be learning.
-
Well if I'm ever in your neck of the woods I'll gladly take it off your hands and love it! Mine's old with chipped edges galore. I might have used mine once for punching/drifting but I've used mine stood up many times - forging hinge eyes around pins, forging V bit tongs, turning round bar into half round...I found a quick method for offsetting upsets onto bar ends for forging heel tenons too by upsetting at an degree angle into one of the V shapes in the block. Mine's conveniently the same height as my anvil so it also get's used as support stand (that won't fall over) for large objects.
-
Cheers. Well in this country everything rusts instantly unless it's got a decent weatherproofing, and of the outsourced finishing methods, zinc flame spray & vinyl top coat seems to be the best. There's probably finishes I could do in the workshop that I'd prefer aesthetically, but they wouldn't last as long & it's cheaper for the client to have the better long lasting zinc + vinyl than my shorter lifespan less rust protecting attempts as whatever I do will take me longer. The firm I use for finishing a.t.m do the blasting, zinc & top coat so it's ideal for me too!
-
-
Your swage block? Really?
-
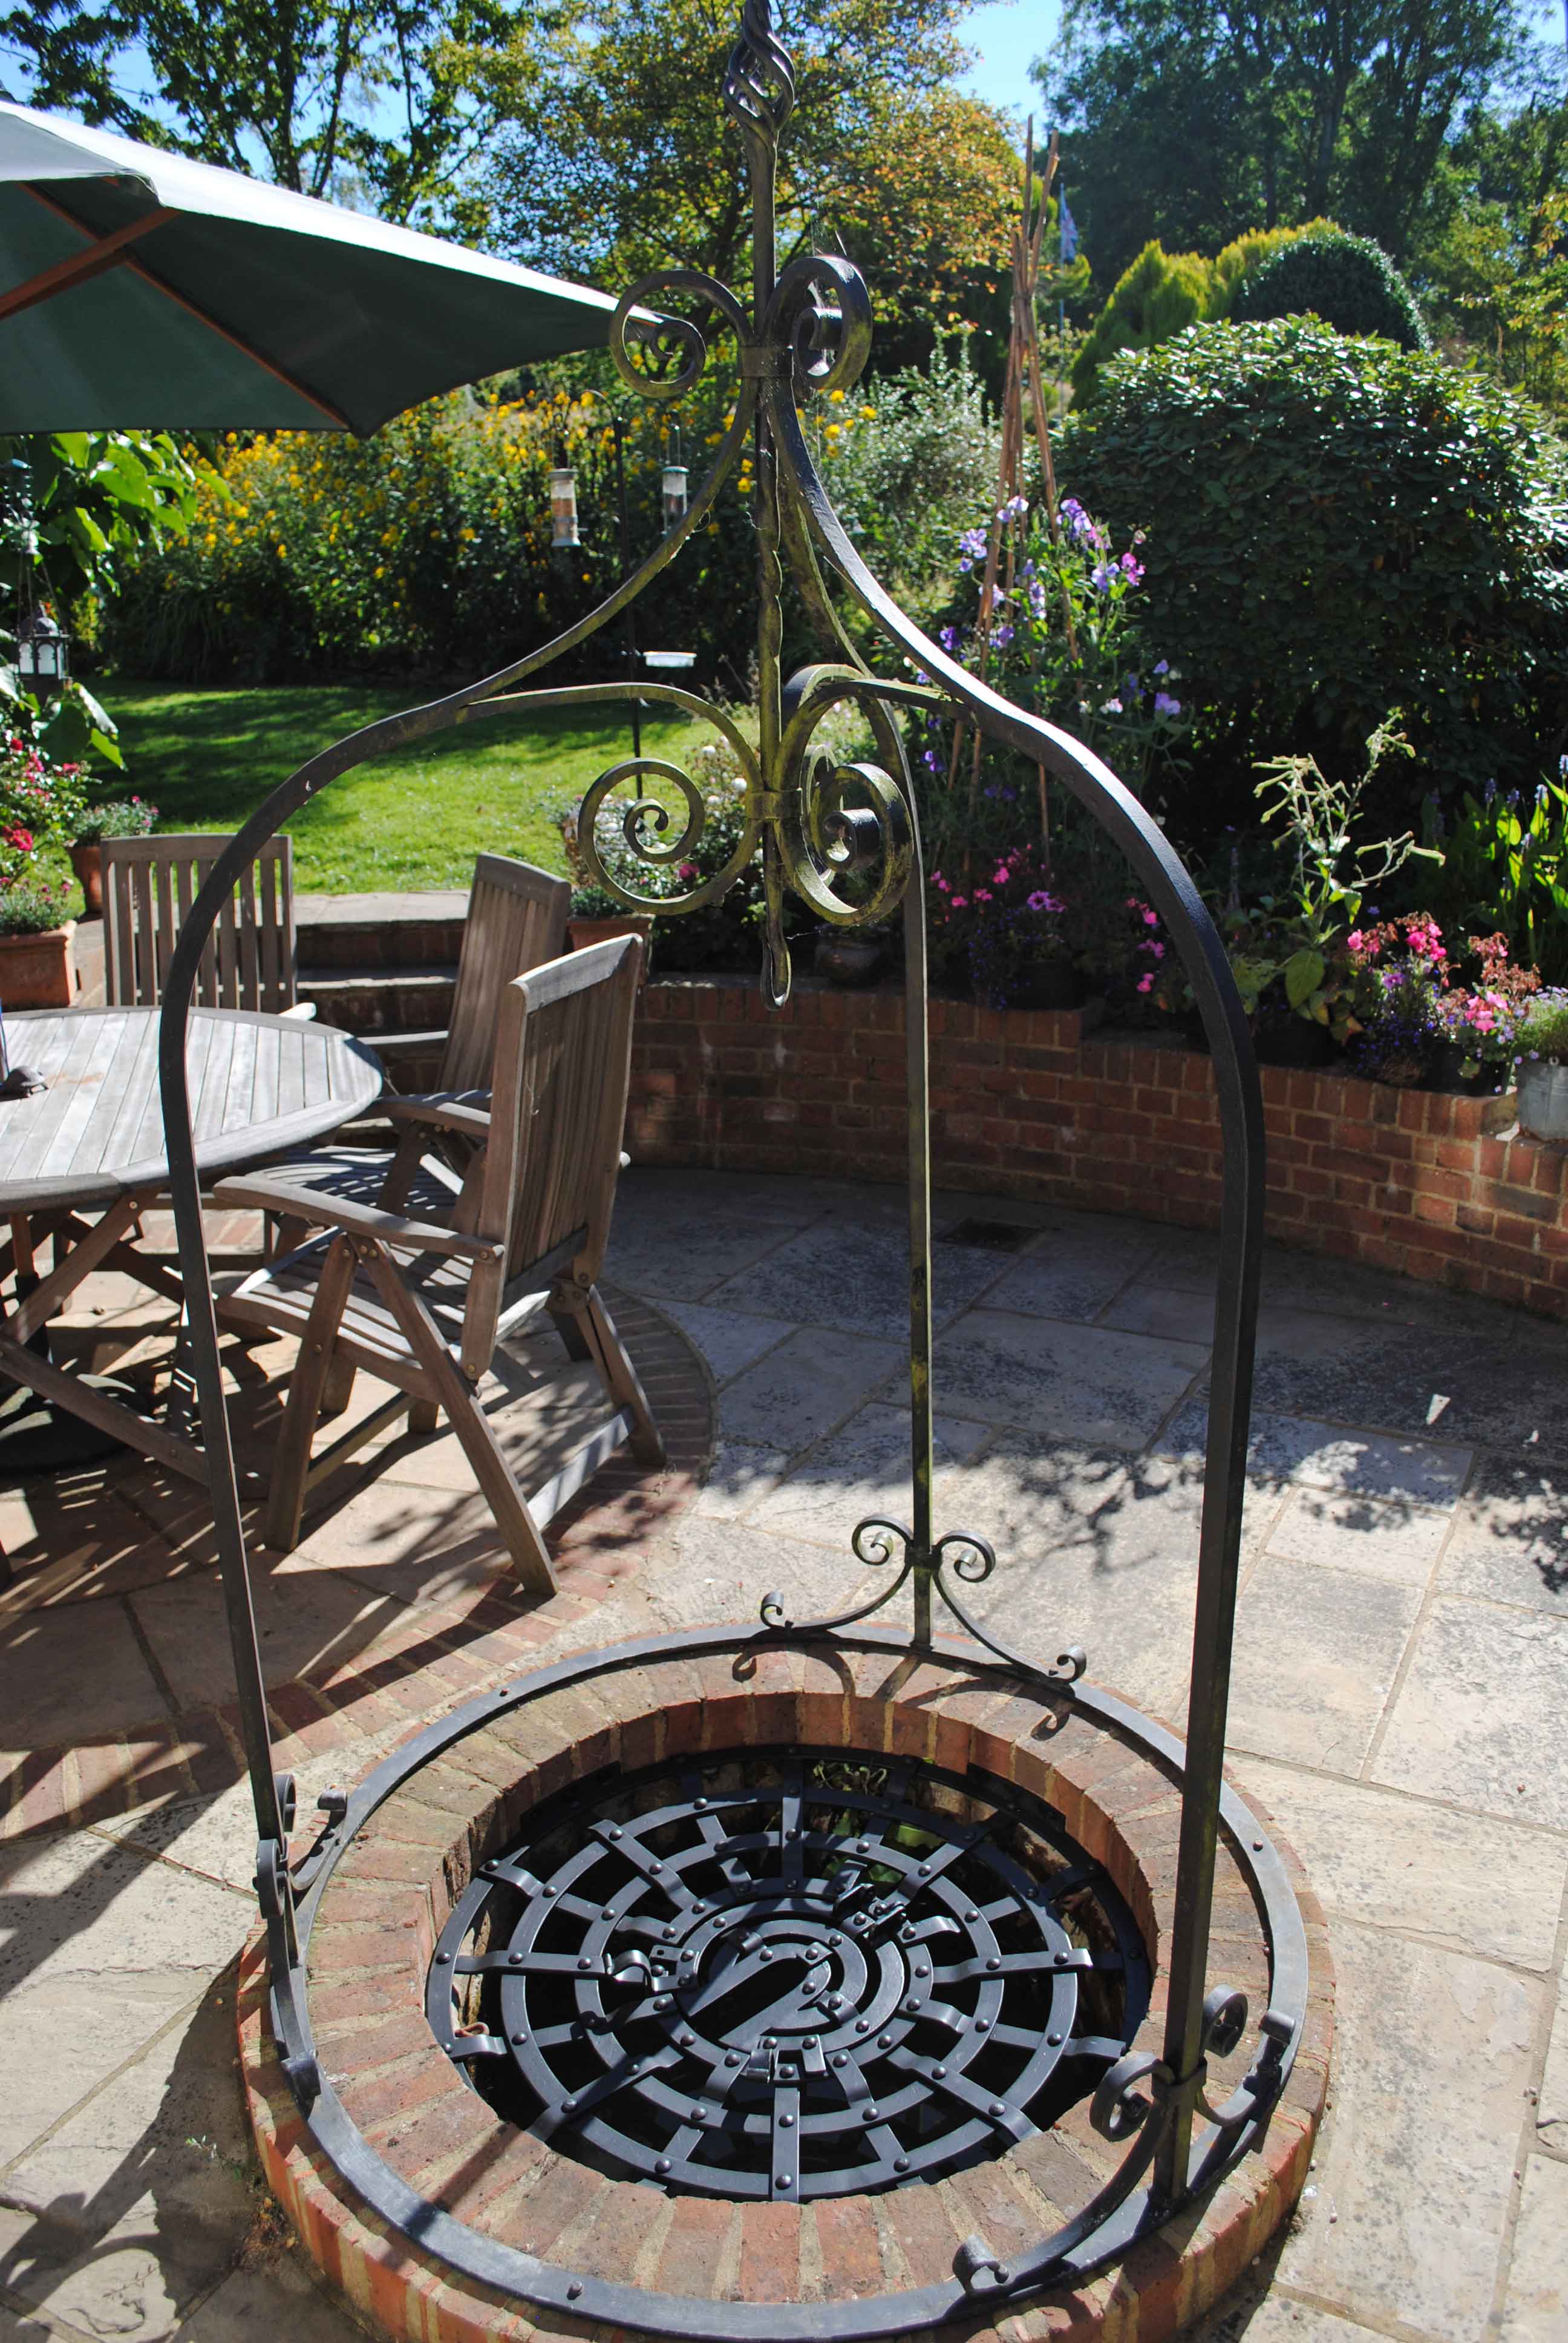
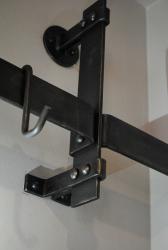
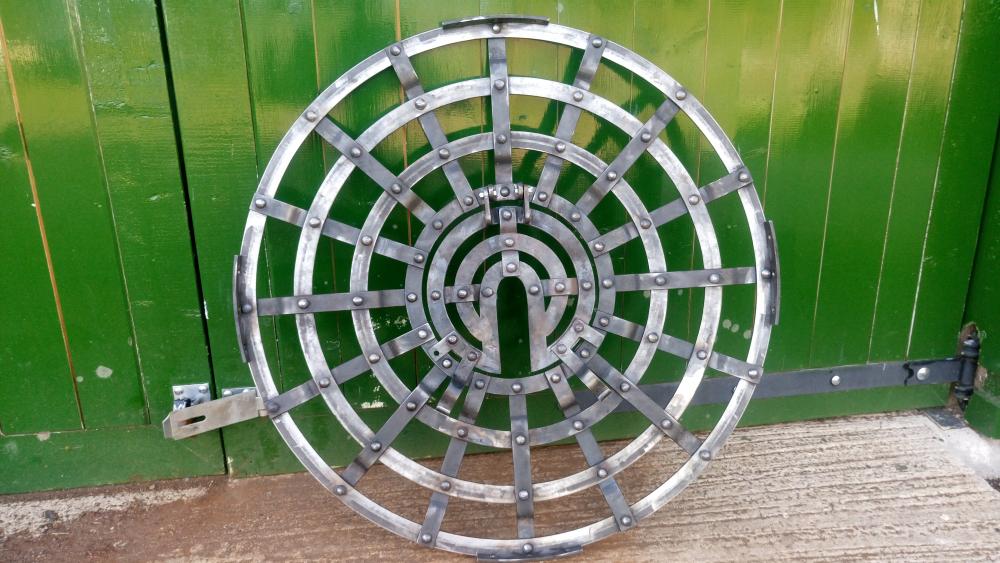
Dummy run install to sort fixing points went well. Off for blasting, zinc spraying & vinyl top coat now & hopefully ready for final fit next week.
-
Thanks for the replies folks, that's helpful stuff cheers. I realize now that in the back of my mind I was concerned about pupils progressing at different rates but can now see that it might not be a bad thing & could lead to some good banter etc. Do you change what you teach according to the numbers of pupils? With 1 to 1 lessons there a couple items I get folks to make that have round bar tapers in but with 2 person lessons I'm wondering if it'll be fairer/simpler/more enjoyable for pupils to stick to square bar tapering/projects? Just because some people struggle with round bar tapering.
-
I was wondering if anyone had any pointers on giving a lesson to two people at once? I've been giving 1 to 1 lessons for a while now and they're easy enough and pupils go away over the moon, but I've had so many people ask if I do 2 person lessons that I think I've got to really as there's obviously money in it. The lessons I give are moreso "experience days" than educational lessons for aspiring smiths. I've been giving lessons using my coke forge and introducing pupils to the basics - tapering, scrolling, twisting, heat control and gearing the lessons so they go away with a good handful of things they've made in the day - nails, hooks, garden products, fire pokers etc It's the logistics of teaching two at once that I'm curious about. E.g if they're making a hook with a scrolled finial and a twist in it, is it better for one person to make theirs start to finish, then the next person go, or does it work best if they alternate so one person does the taper then the next person does the taper, or does it work best if they're working on separate anvils and sharing the fire. I'm self taught so can't think back to what it was like at college/my apprenticeship as I didn't go down that route. I'm just trying to balance up what's going to be the practical and safe way for me to teach 2 people VS the best way to keep the momentum going so one person's not stood around getting bored waiting for the other person to finish. I have 2 vises and 2 anvils so I'm not lacking in gear. I do also have a gas forge which so I guess one person could use the coke forge and one person use the gas, but that's going to get expensive in fuel. I definitely don't want to work solely off the gas forge, pupils like the coke forge. Any pointers would be great, cheers.
-
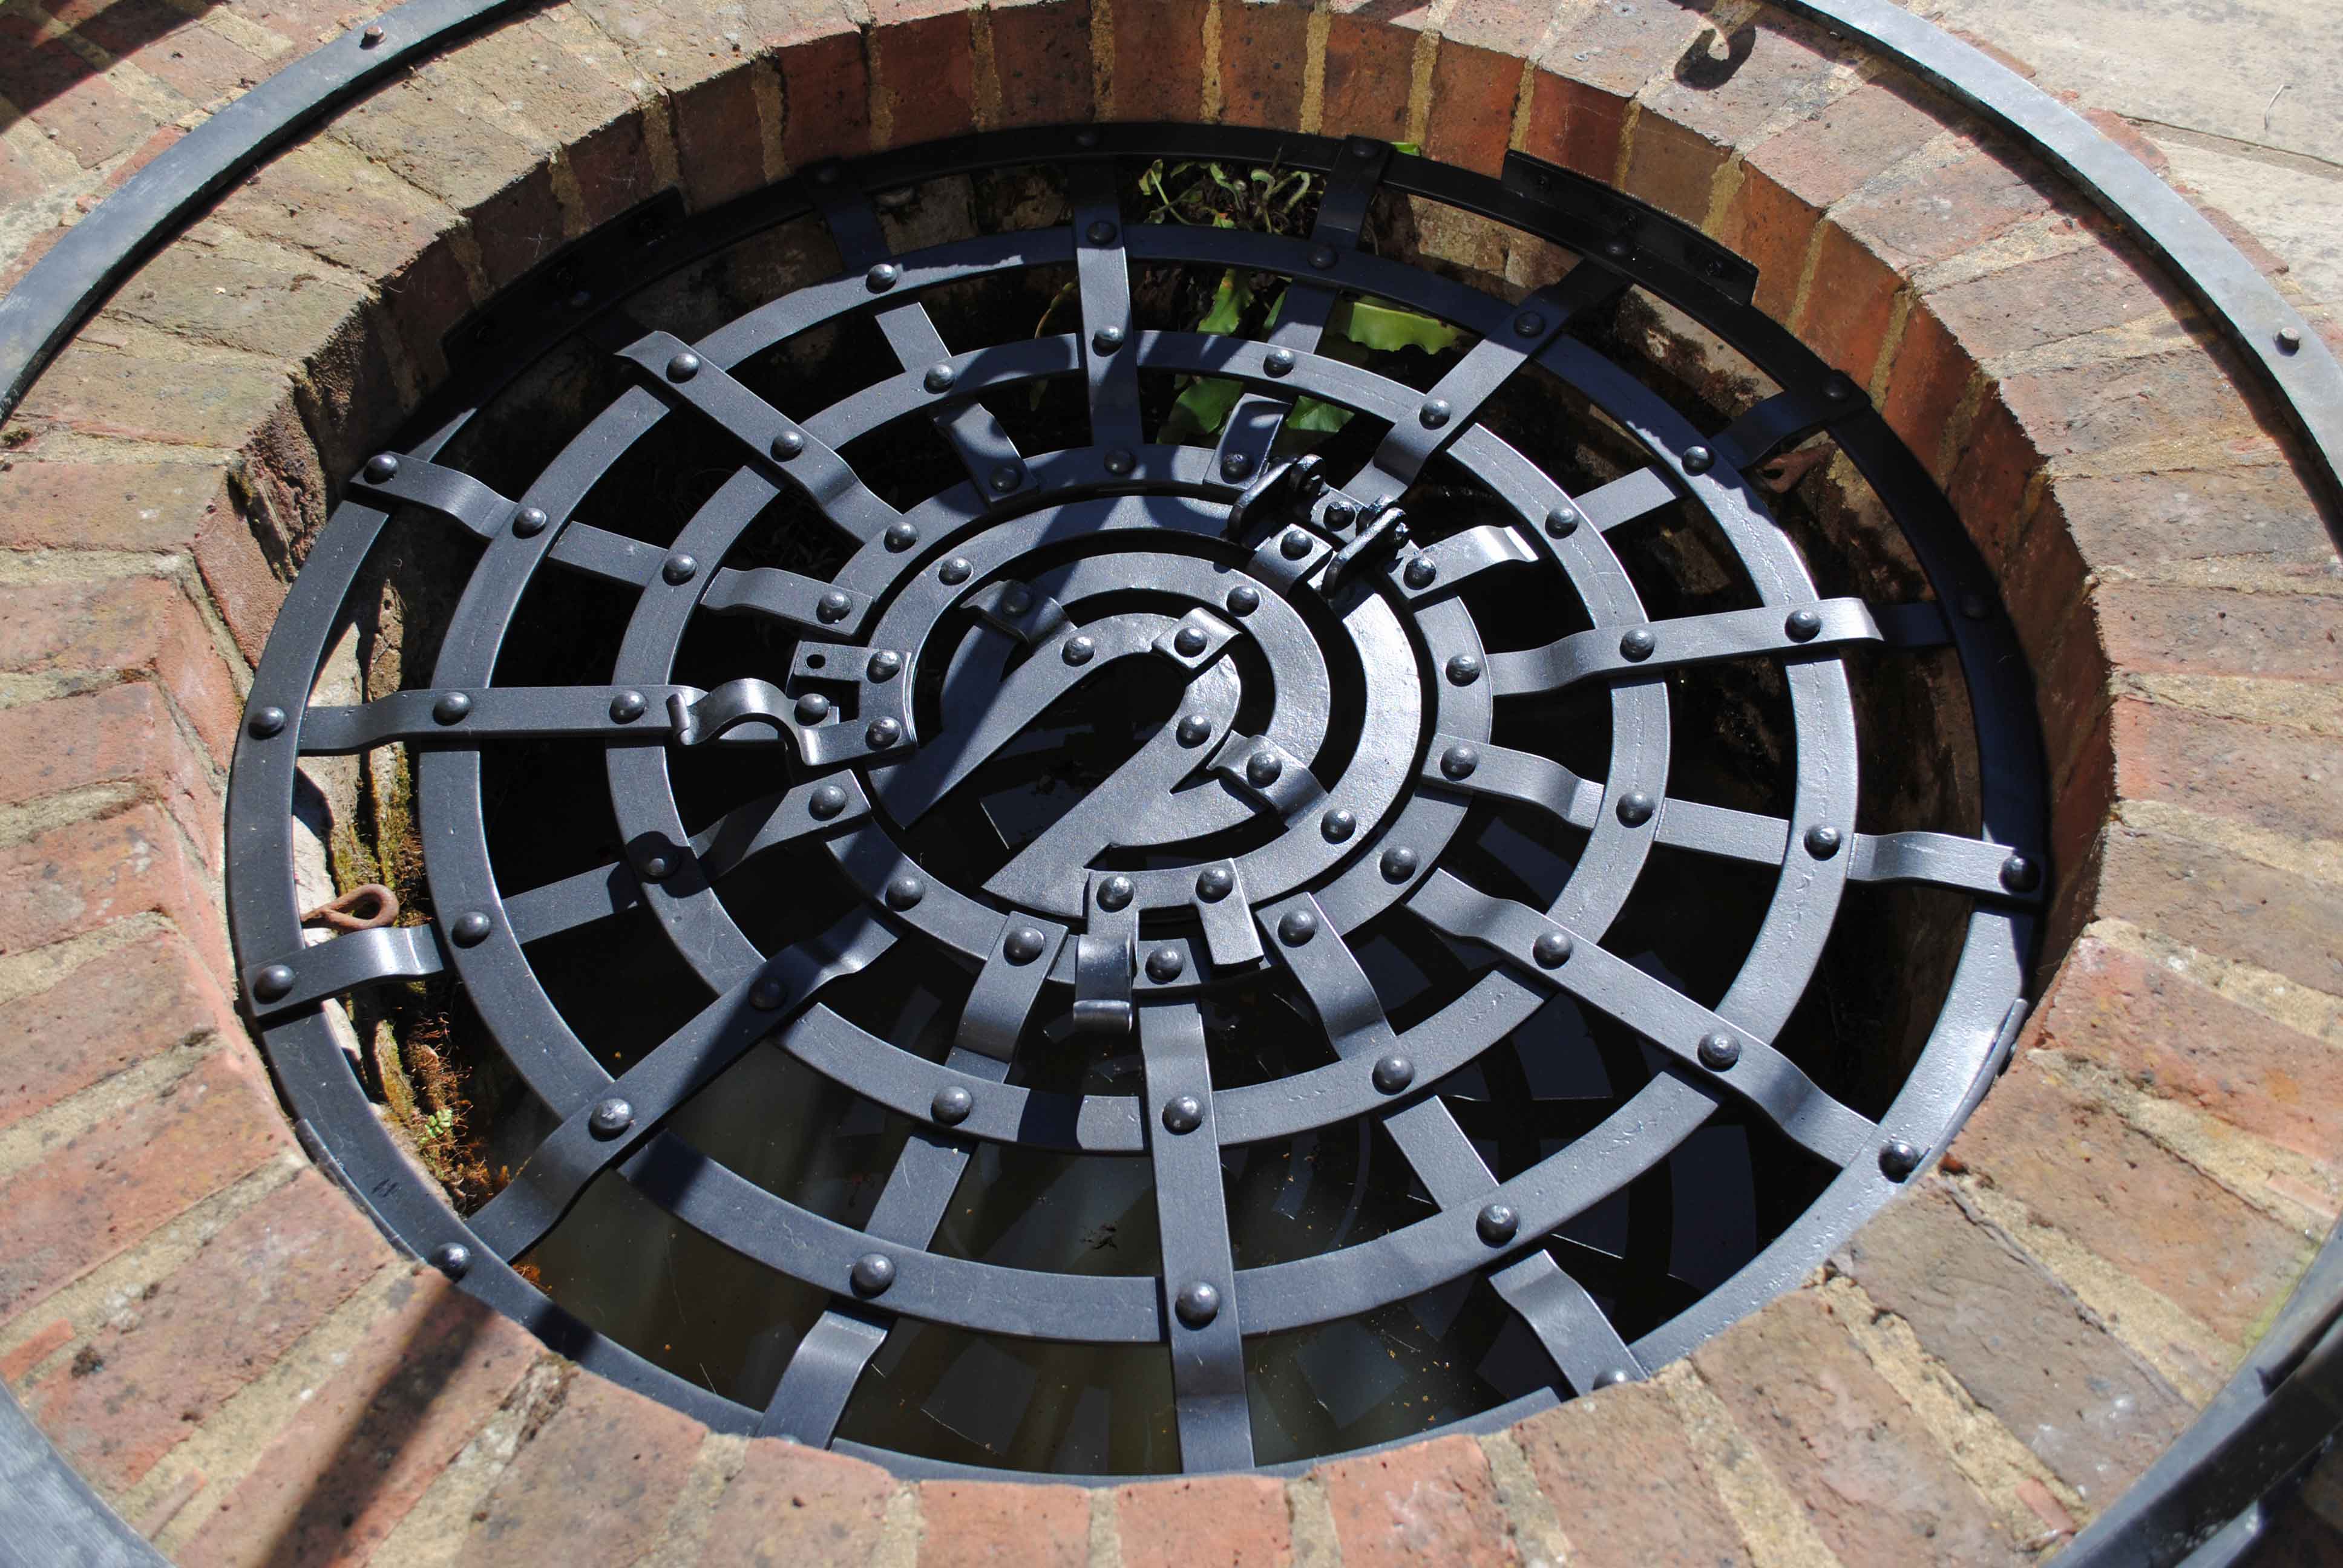
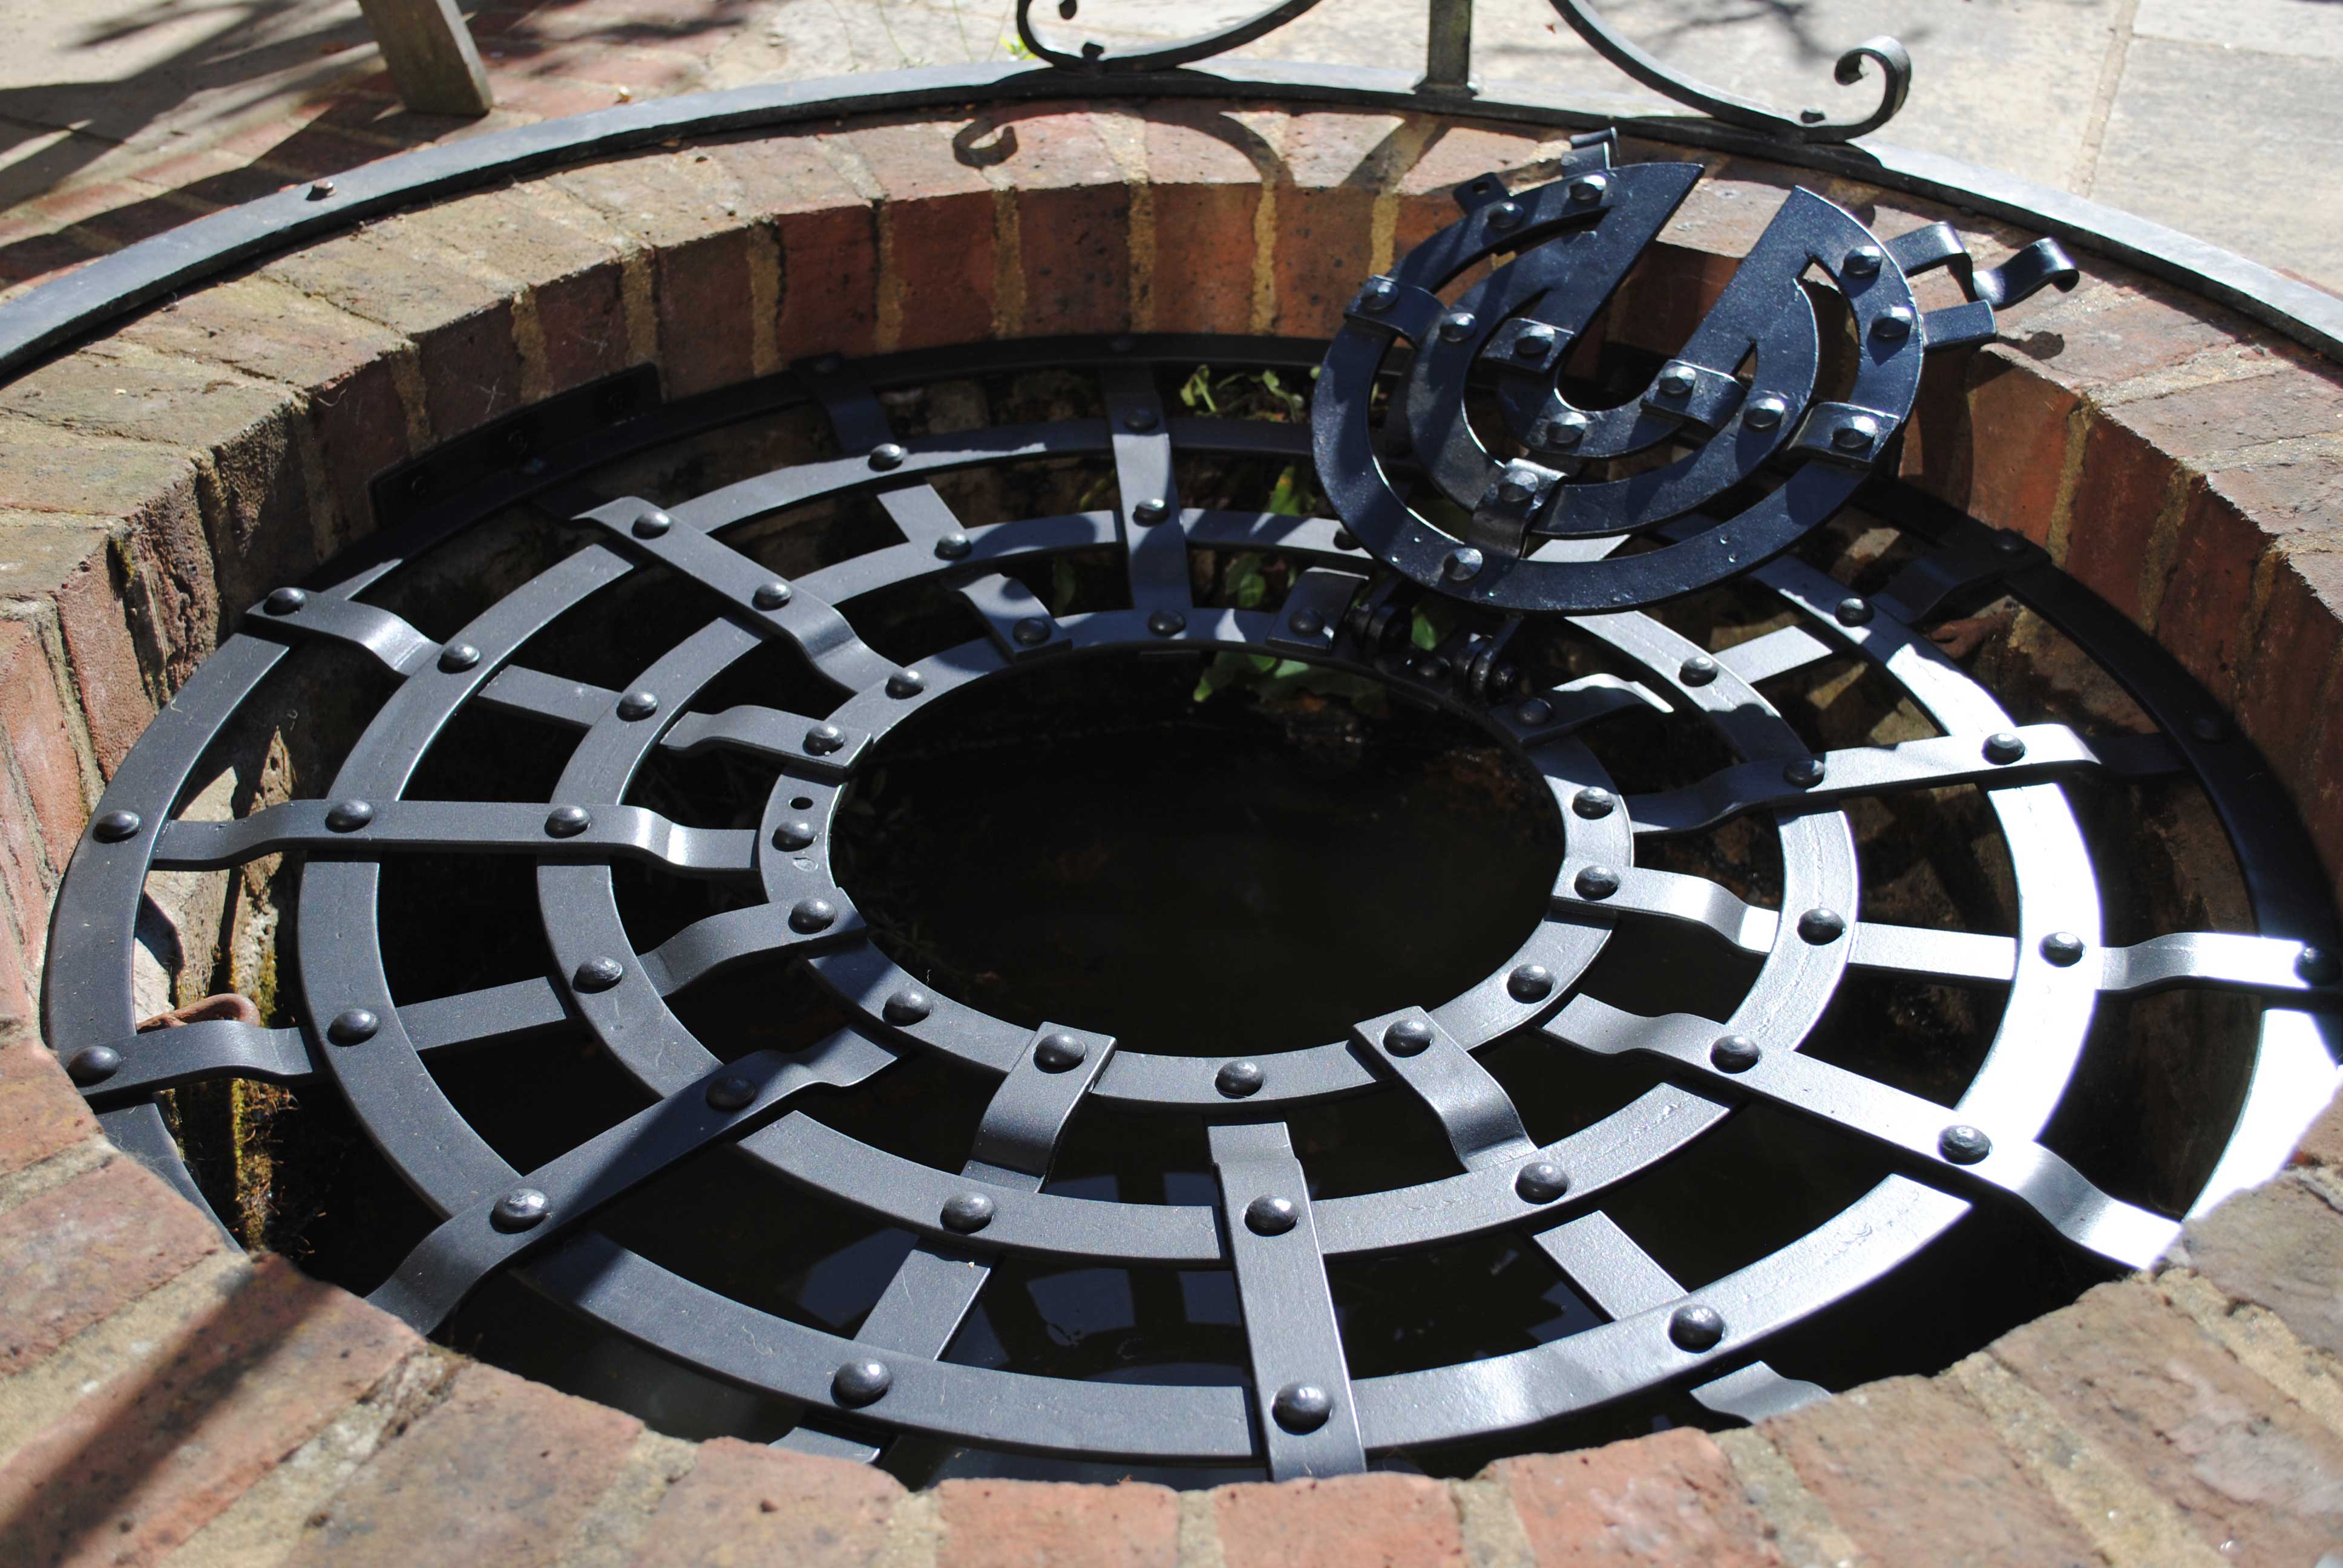
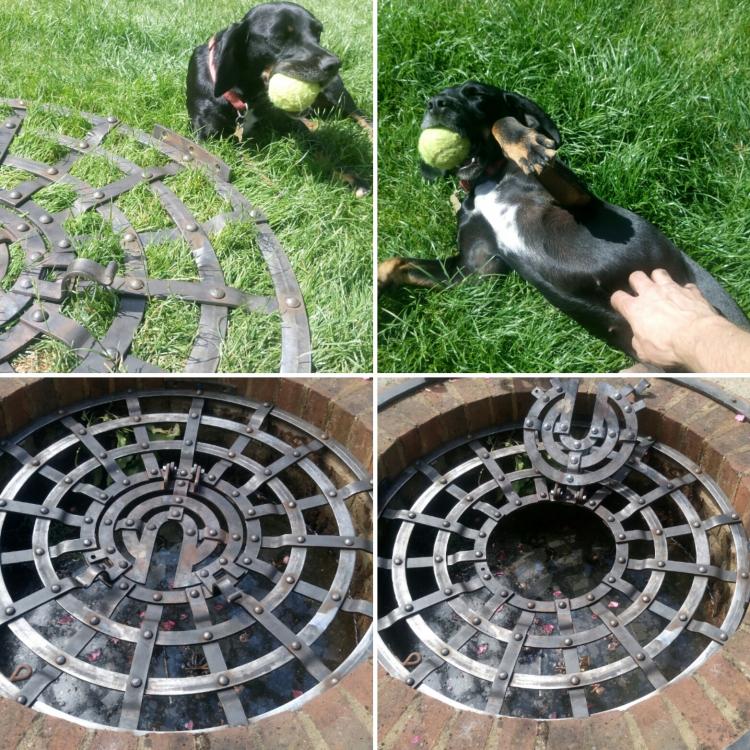
Cheers. Handles to lift the hatch: The hole in the left hand handle is so they can padlock it down if they want. The tabs at the sides are the fixing points as it's going to be fixed within the well, not on top. I would have just continued some of the weaves out & up to fix through them, but too many line up badly to the brick courses so I deemed this to be a method that would give a better guarentee of safe fixing as for each "corner" I have a choice of 3 fixing points & will probably use 2 per "corner".
-
YouTube video showing it working vanishes so pics instead...

-
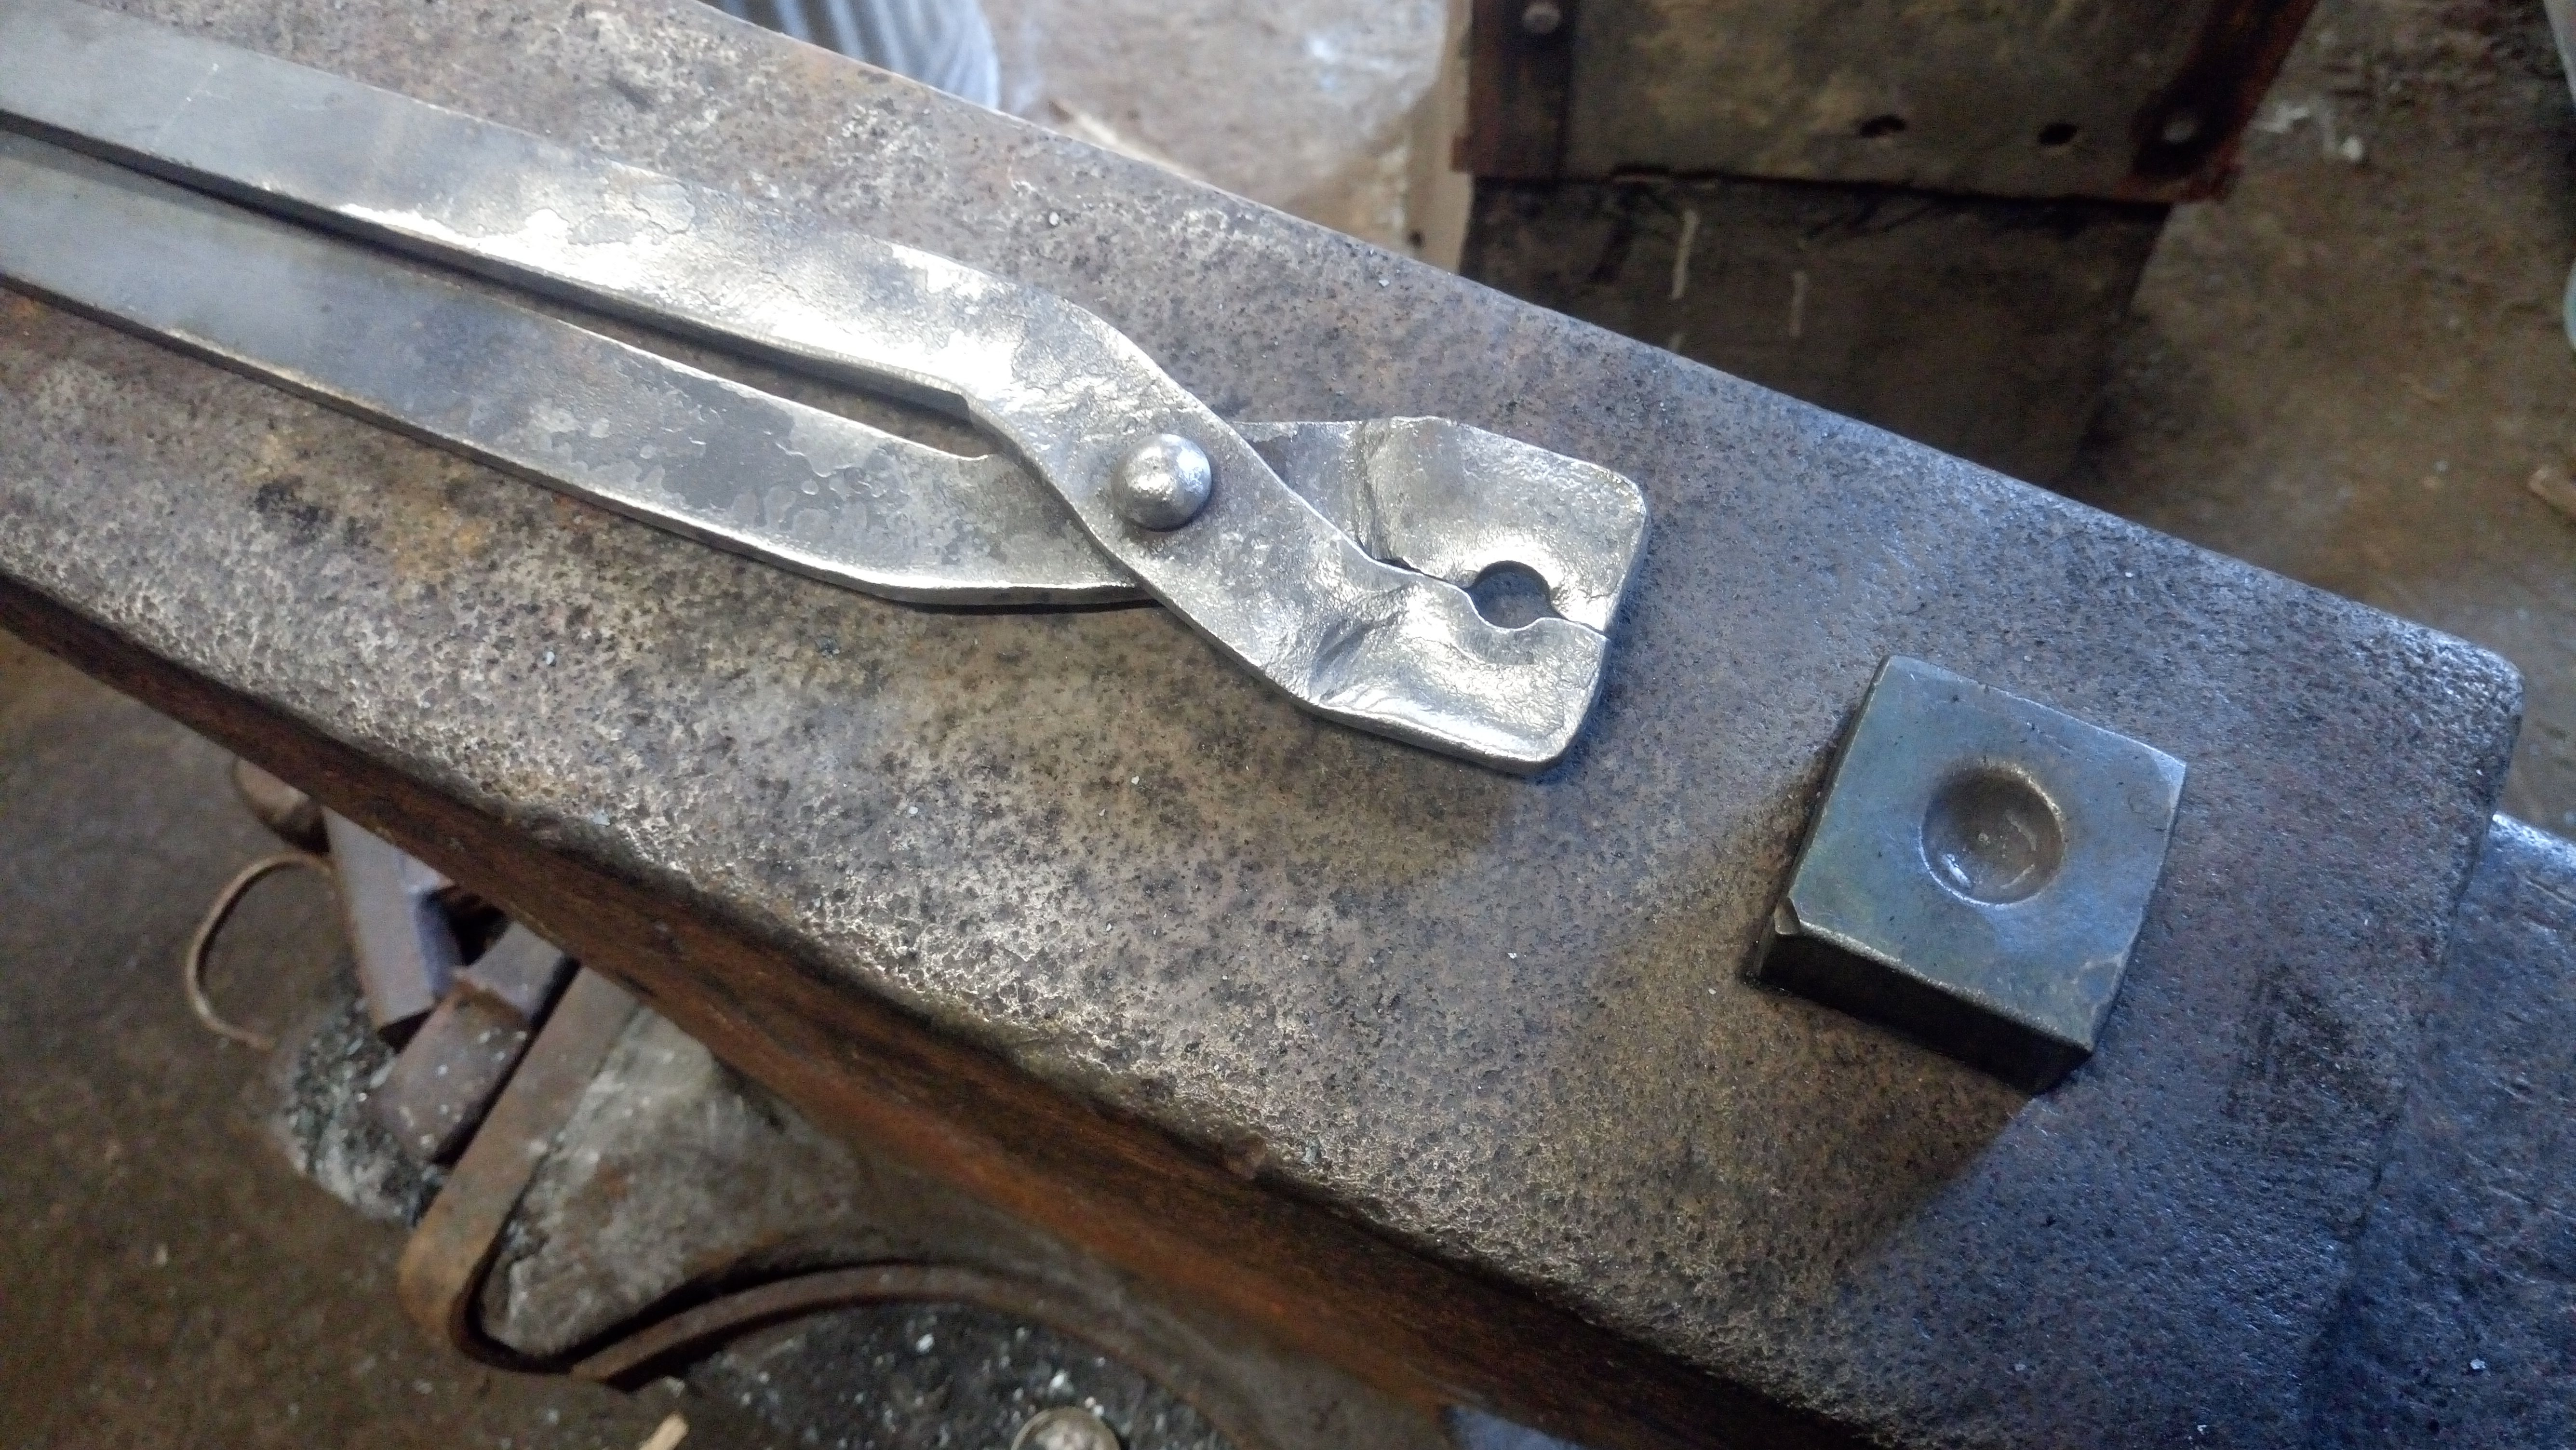
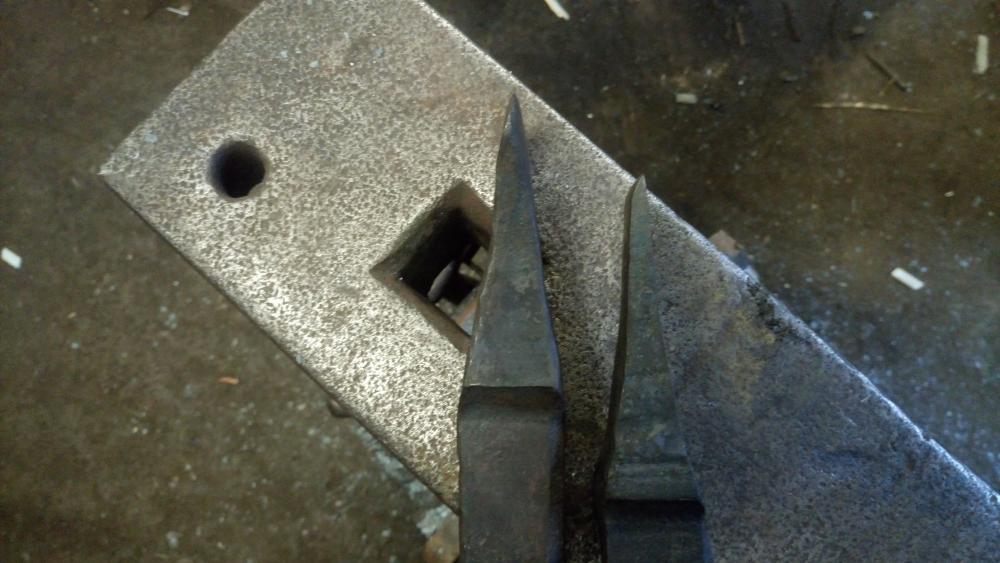
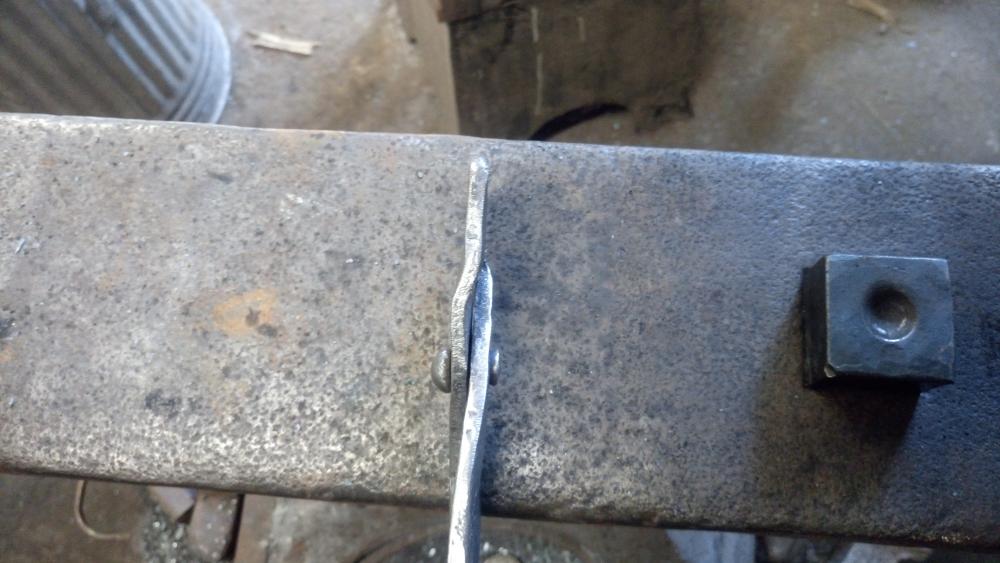
The quick and dirty tongs as mentioned. Designed to have as little surface contact area (to reduce heat sink) as poss.

-
In the past I have put a hardy shank on the bottom of a engineer's bench vise for sake of 1 day demos when it's not worth killing yourself lugging around a tonne of gear. Dropped it in the hardy as & when it was needed.
-
Posted riveting video links but have since vanished. For rolling on edge videos & riveting videos go via previous YouTube link.