Joel OF
Members
-
Joined
-
Last visited
Everything posted by Joel OF
-
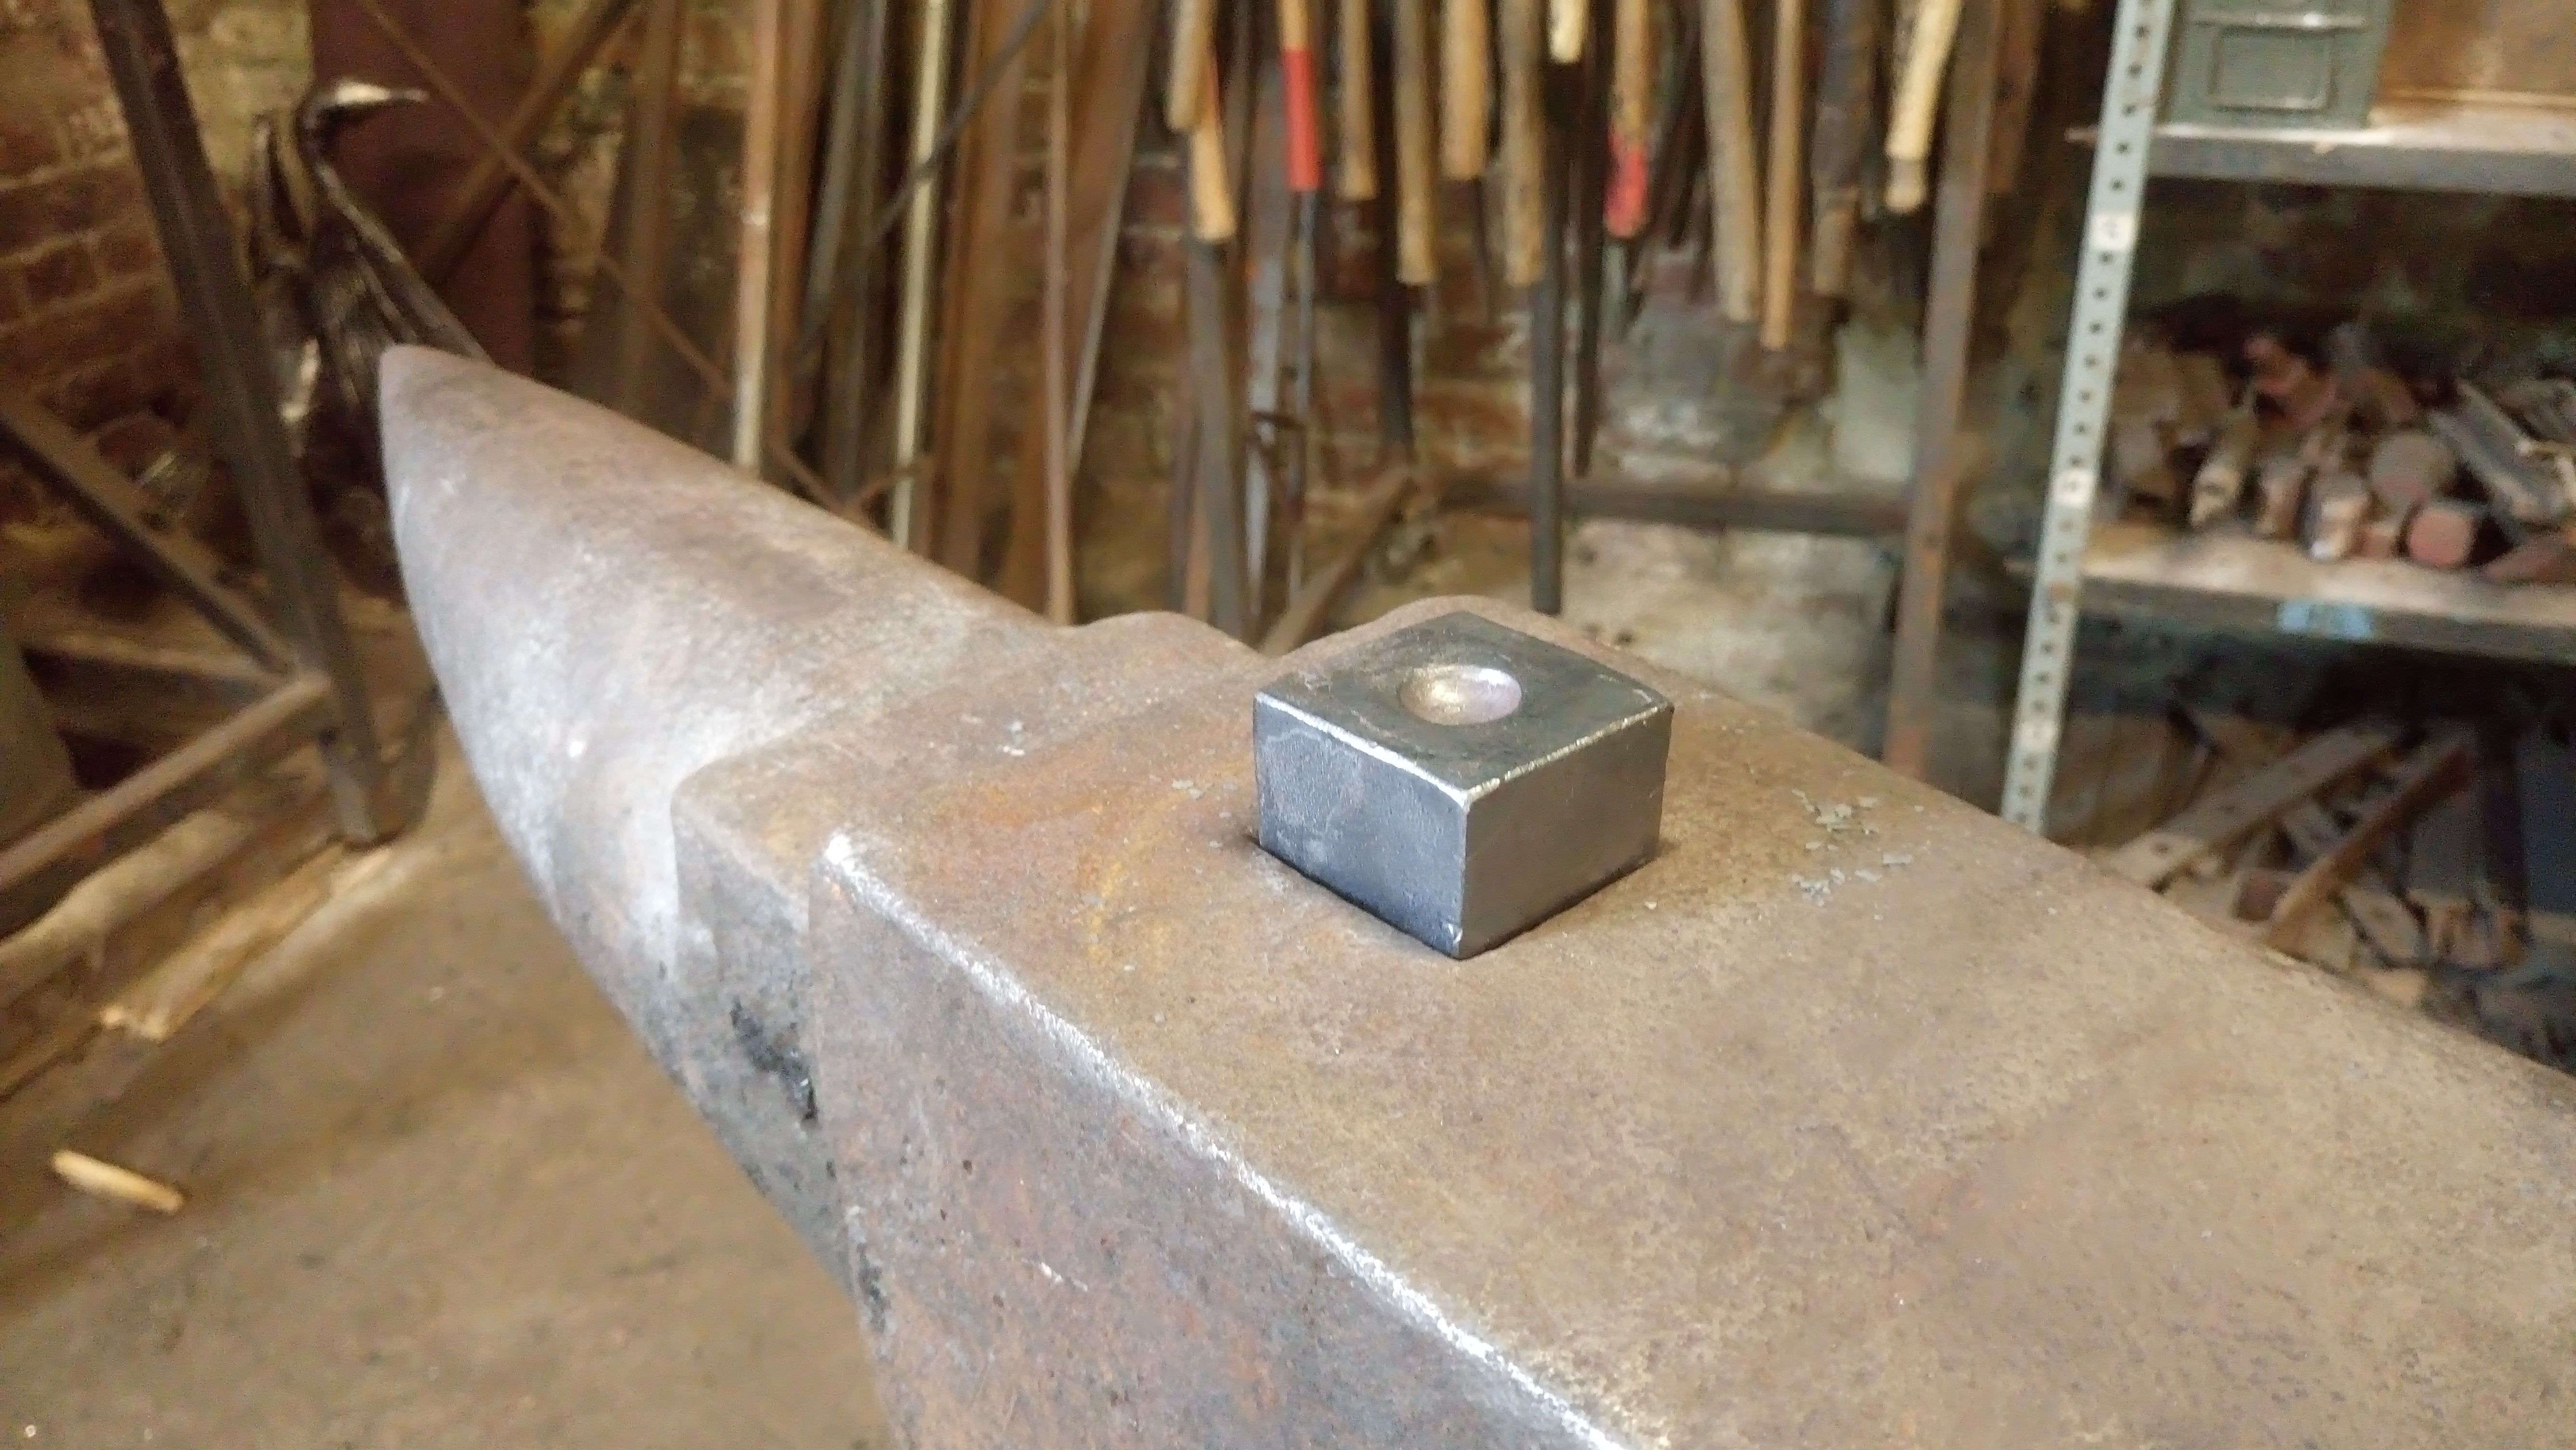
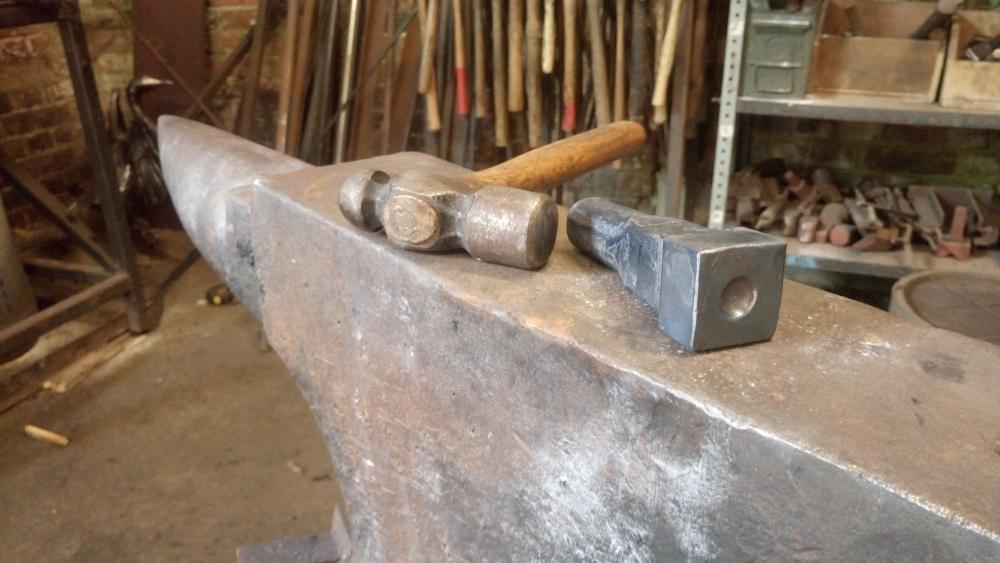
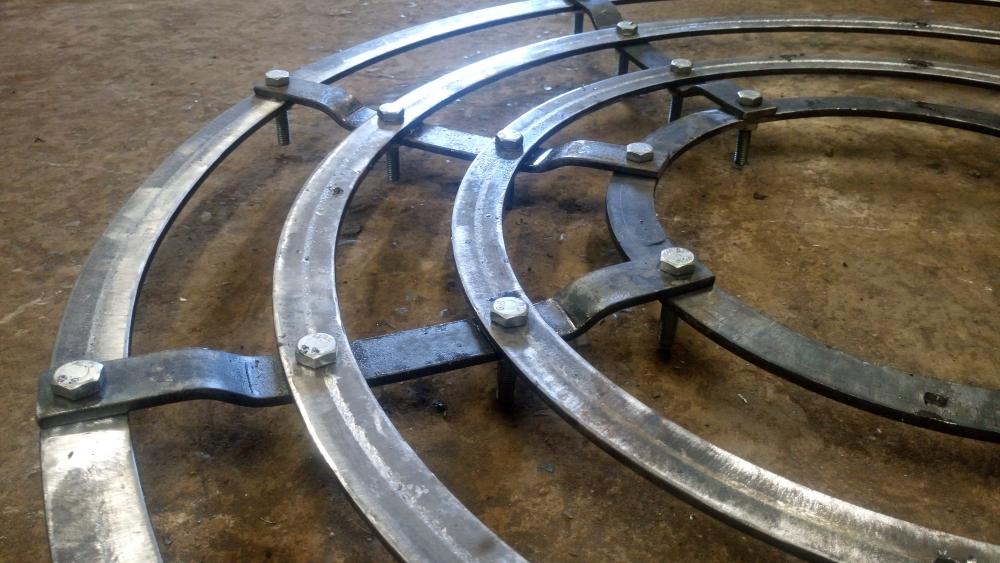
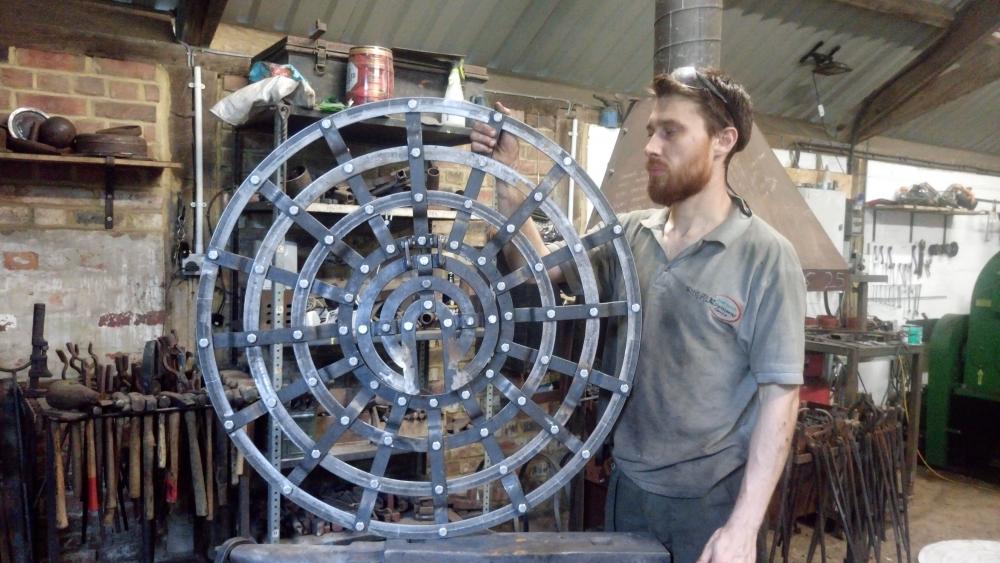
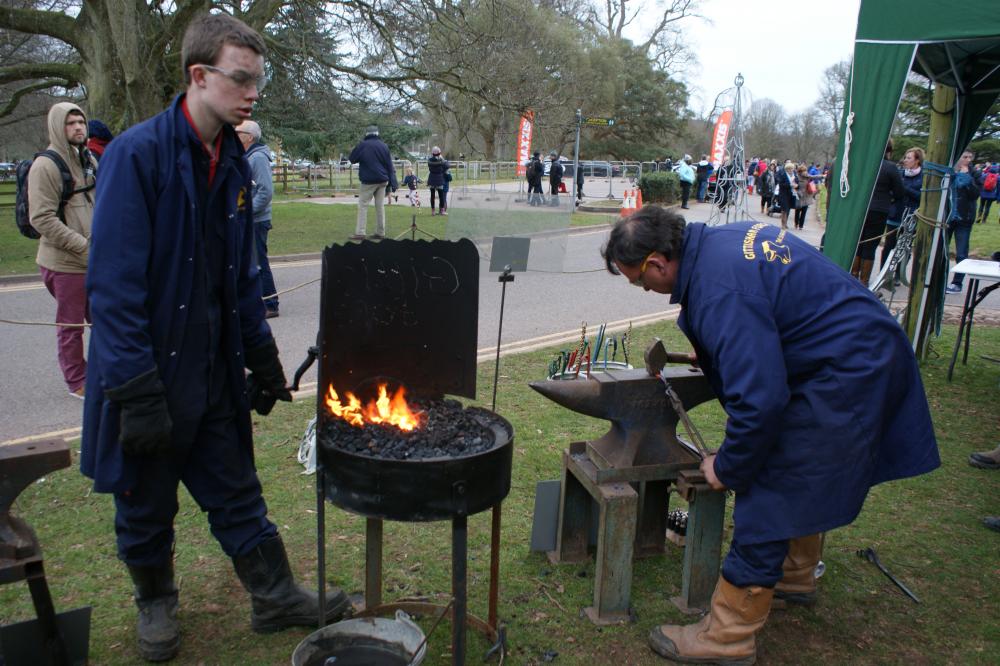
I forgot to take pics of the simple flat bar tongs I forged for pinching the rivet shank just below the head but I took a couple pics of the hardy tool I made for resting the rivet head in. (I have 2 hardy holes in my big Peter Wright anvil & the one nearer the bick tapers from square into round). I've got a young chap with me at the minute working as my "apprentice" before he goes off to blacksmithing college in September - today we did all the 64 outer rivets in 2 hours. I recorded some video which I'll upload to YouTube later.


-
Friends of mine who pretty much have a rust finish on all their work use brick cleaner to make things rust quickly. In hours in some cases.
-
Haha, compared to rolling the flat bar on edge the riveting will be a walk in the park. I buy snap head rivets with 1 head pre formed so you just rivet the tail. Given that the vast majority of them won't ever be seen I won't bother rounding the heads to match the pre formed size, I'll just whack them down till they hold. I'll round up the ones in the underside of the hatch as they'll be seen when it folds back.
-
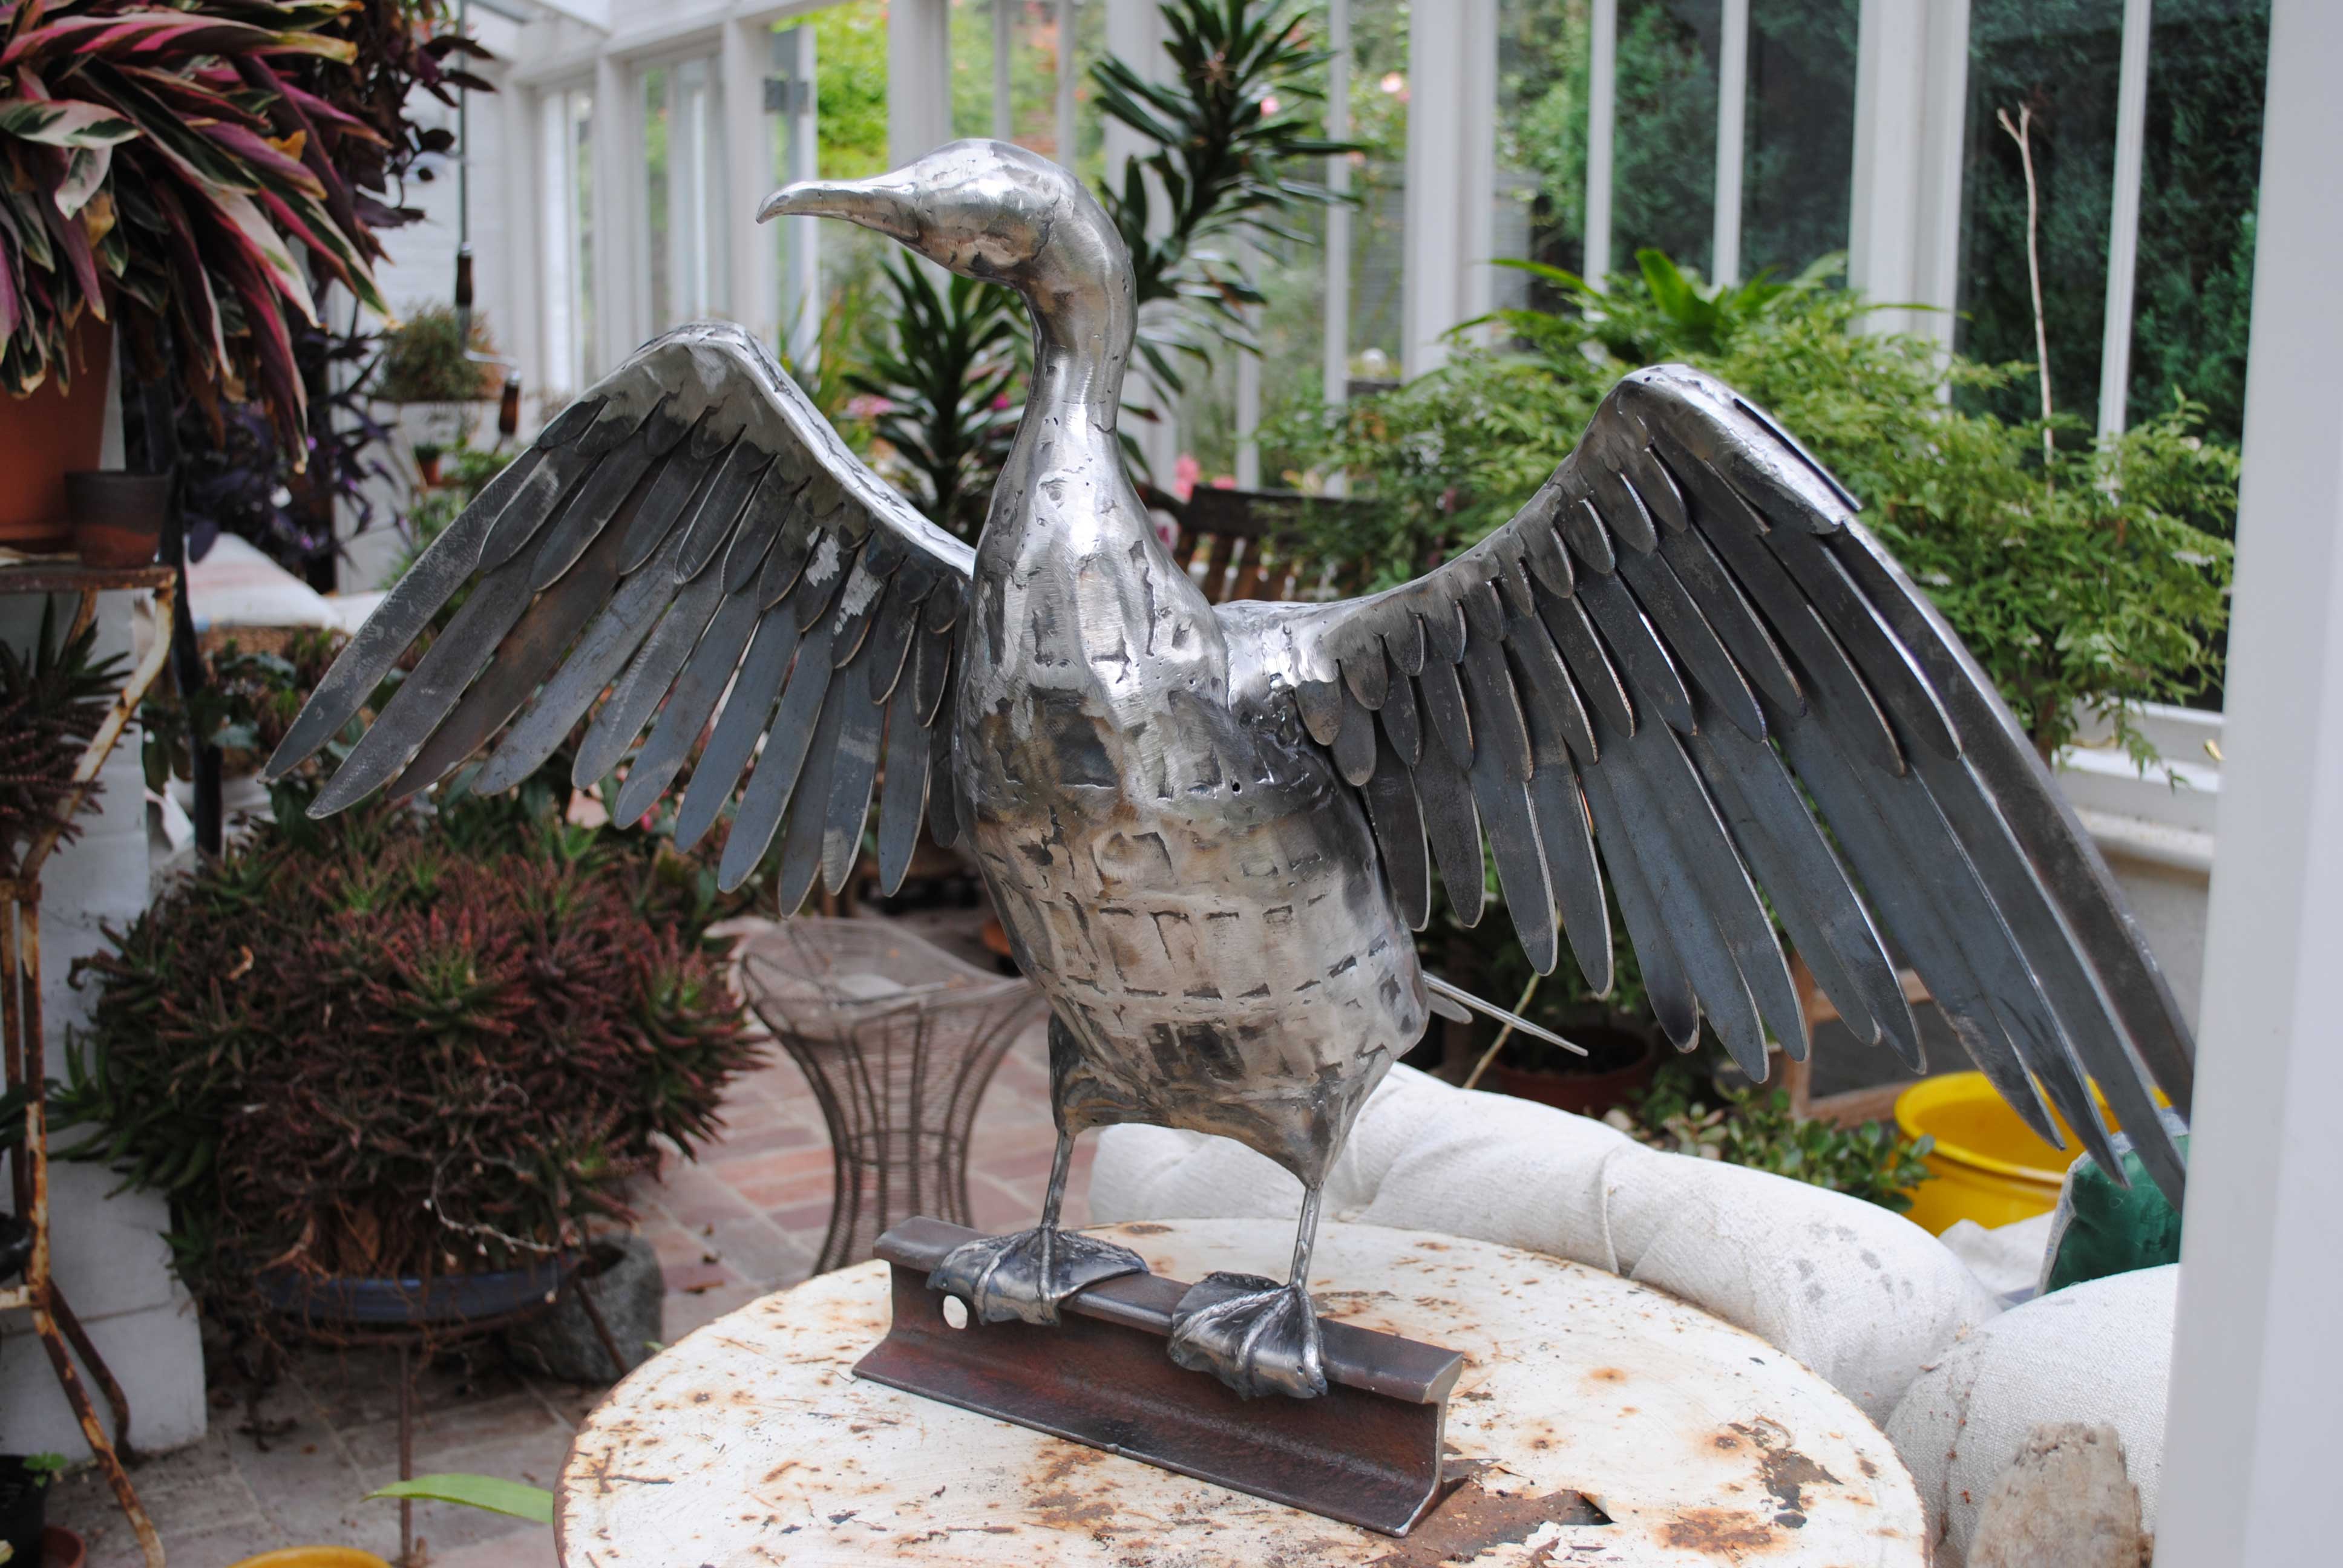
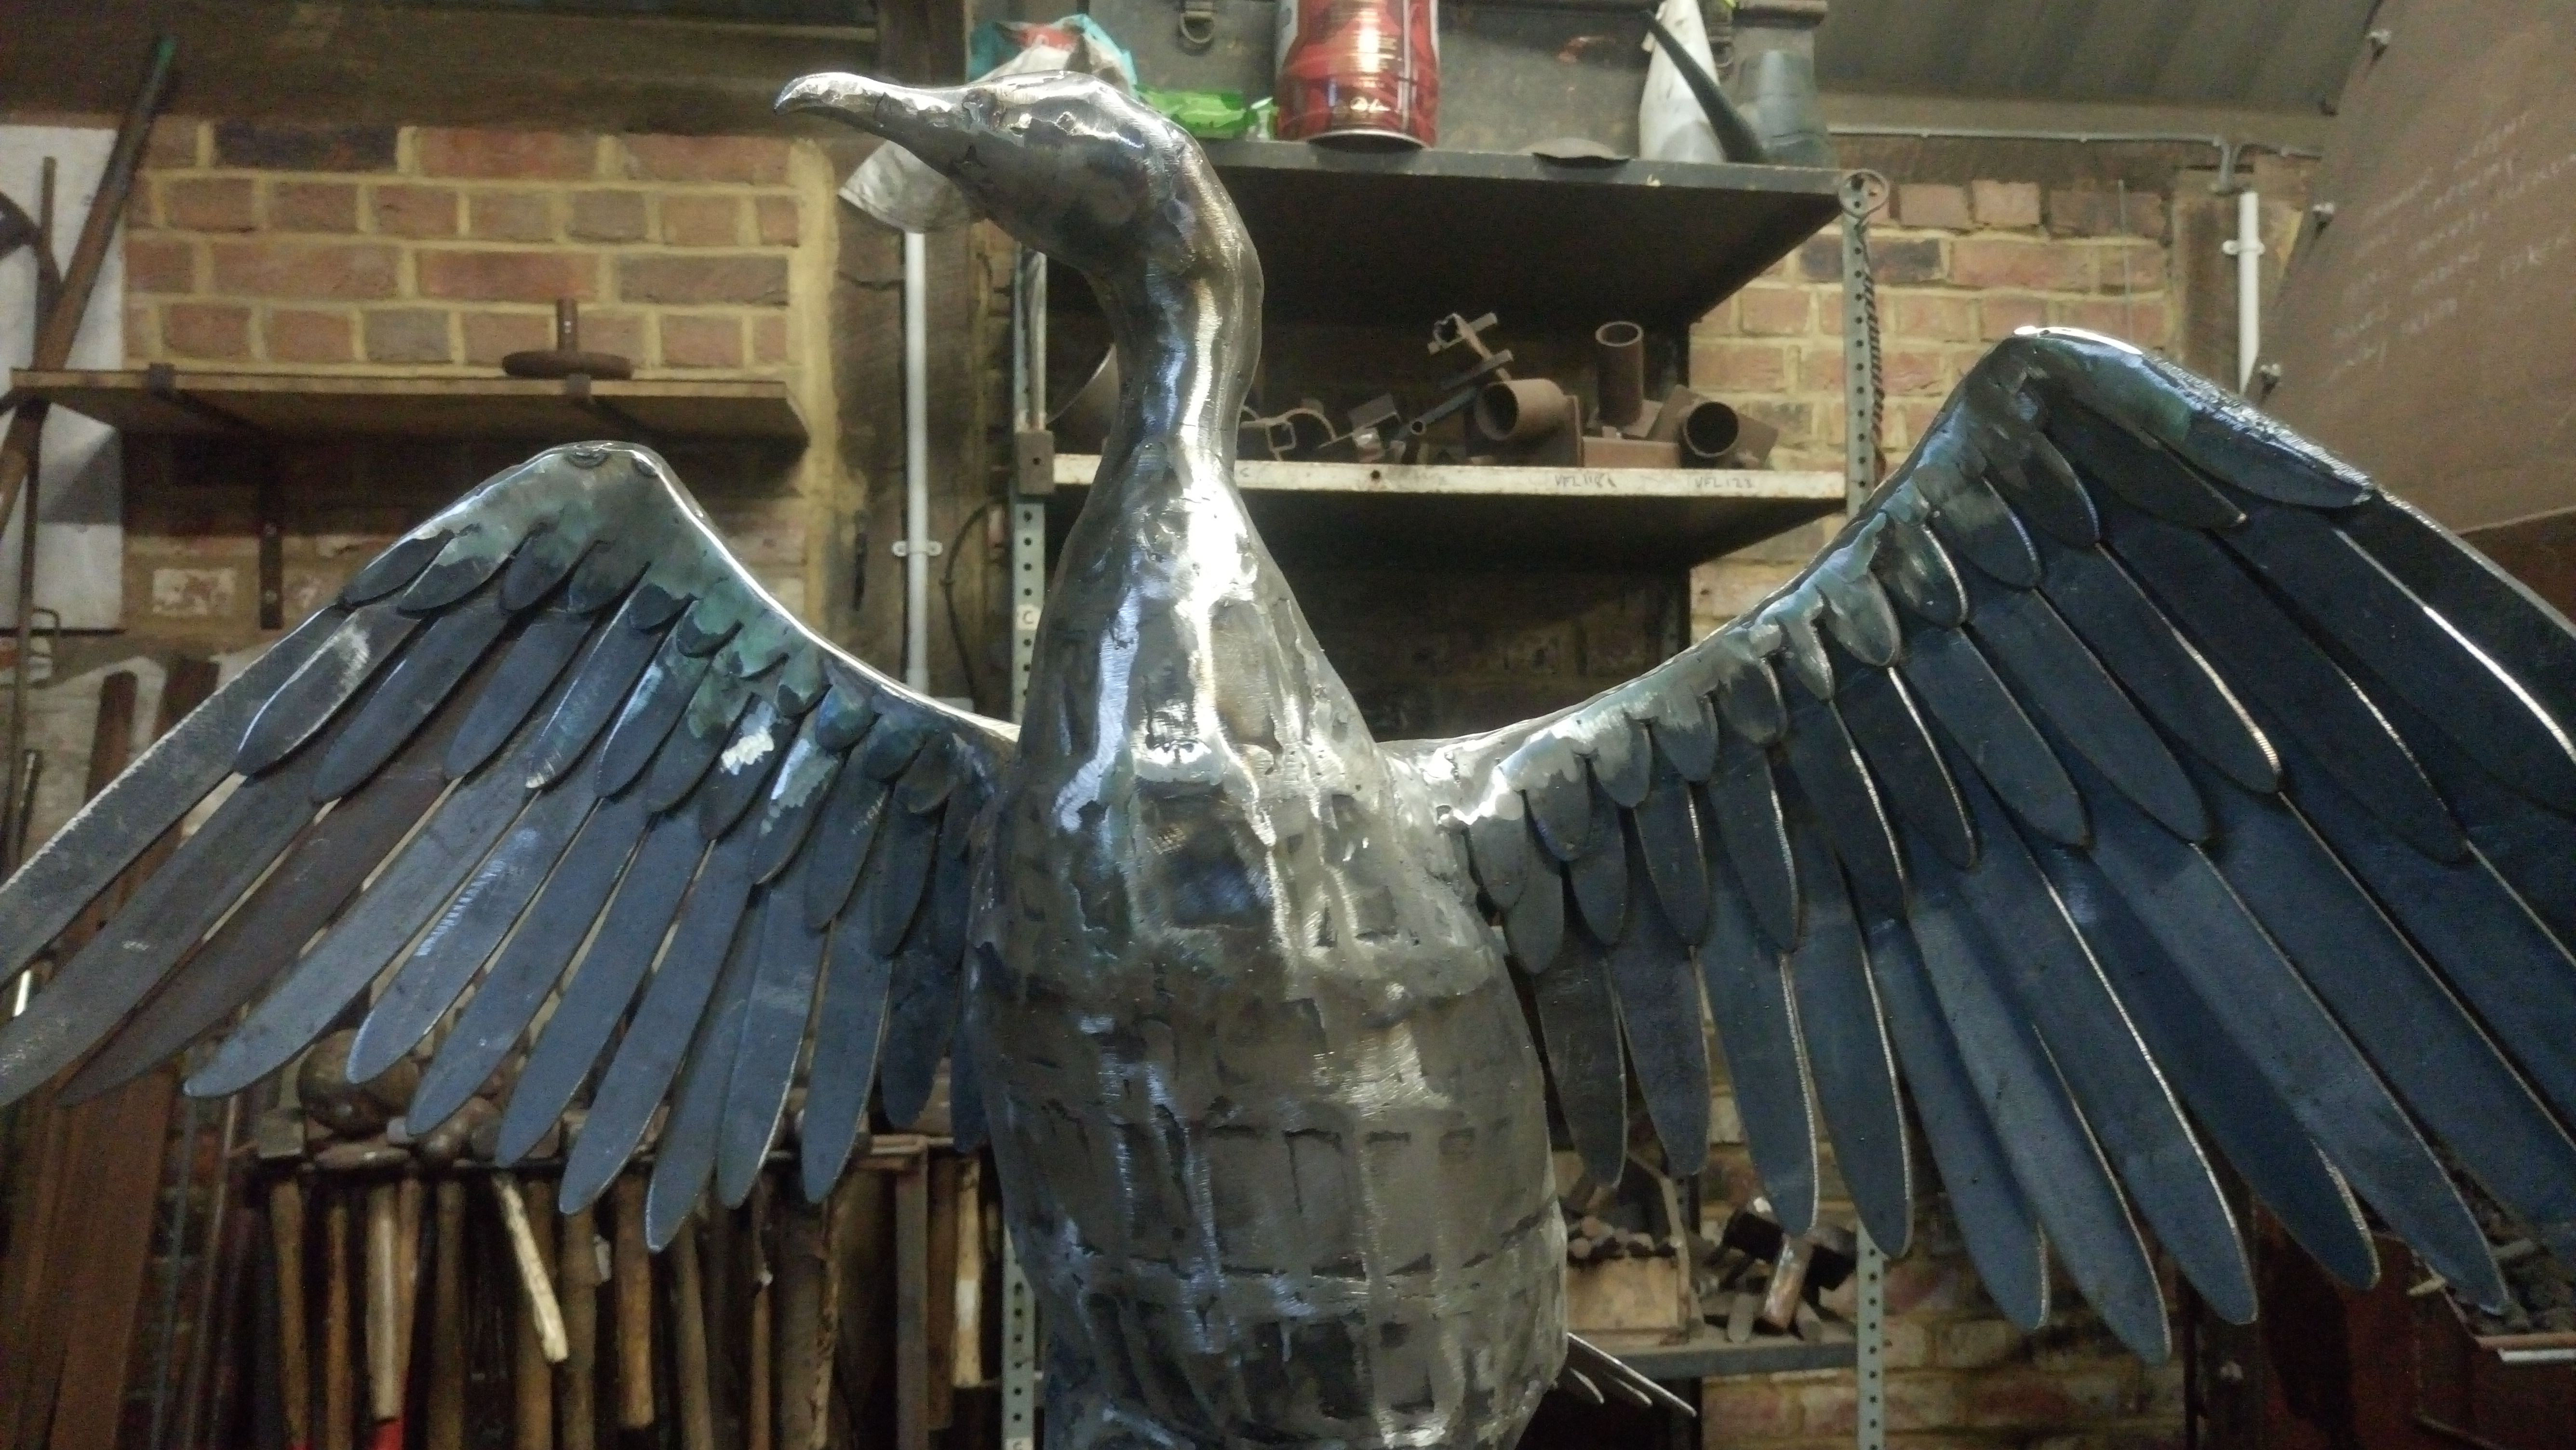
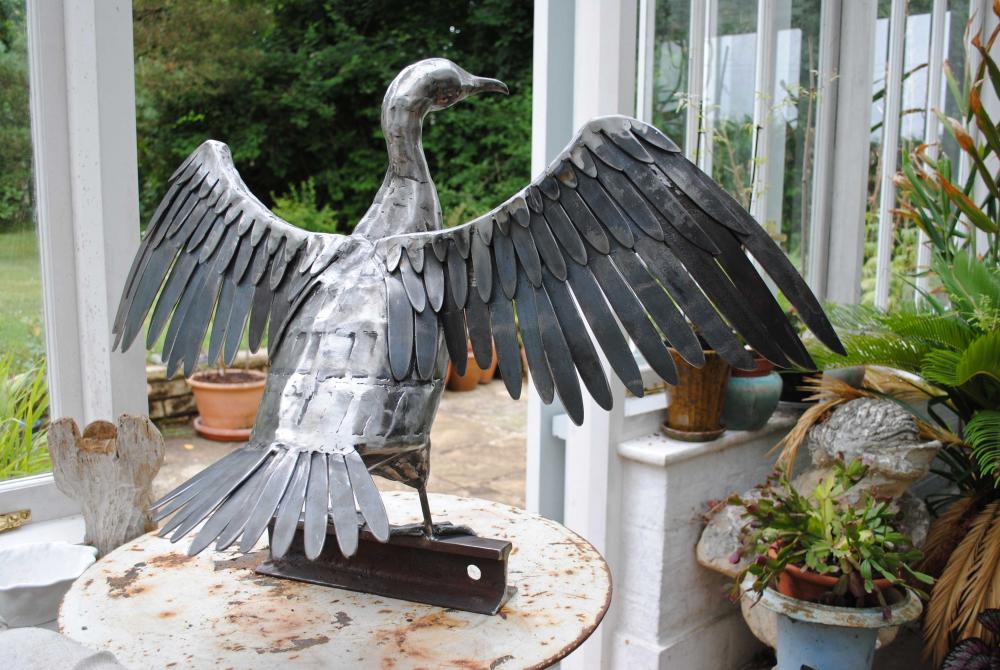
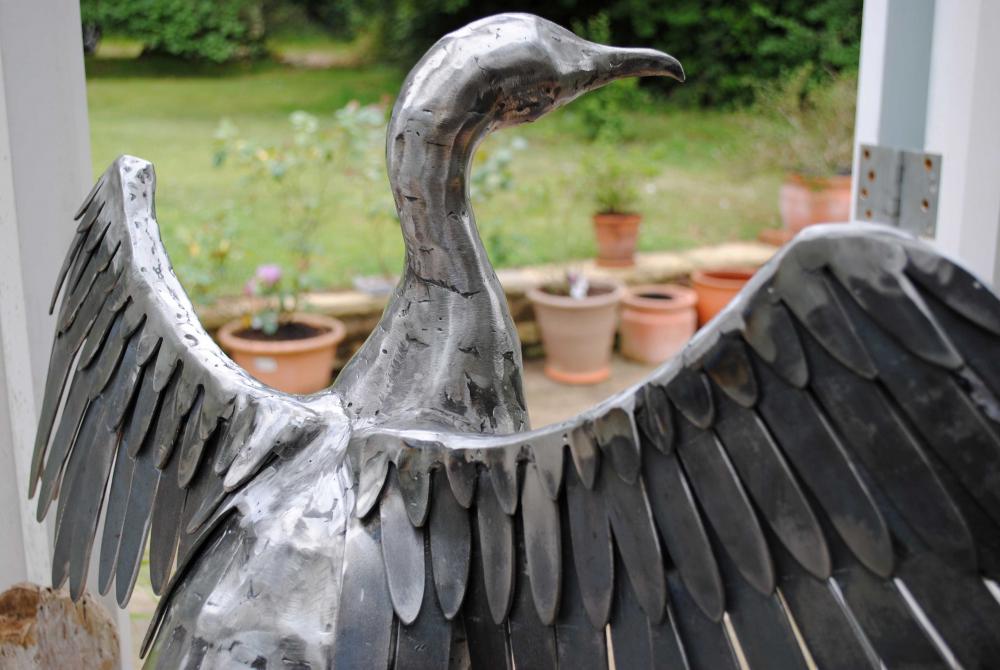
These pics don't really show anything different, just show it in a nicer light. I wanted some shots of it before it rusted in my client's garden so I ran it over to my folk's conservatory for some quick snaps. I also wanted some pics of it with eyes as my client doesn't want it to have eyes, so I will be filling in the small drilled indentations to meet their wishes. Without eyes I feel it looks blind.


-
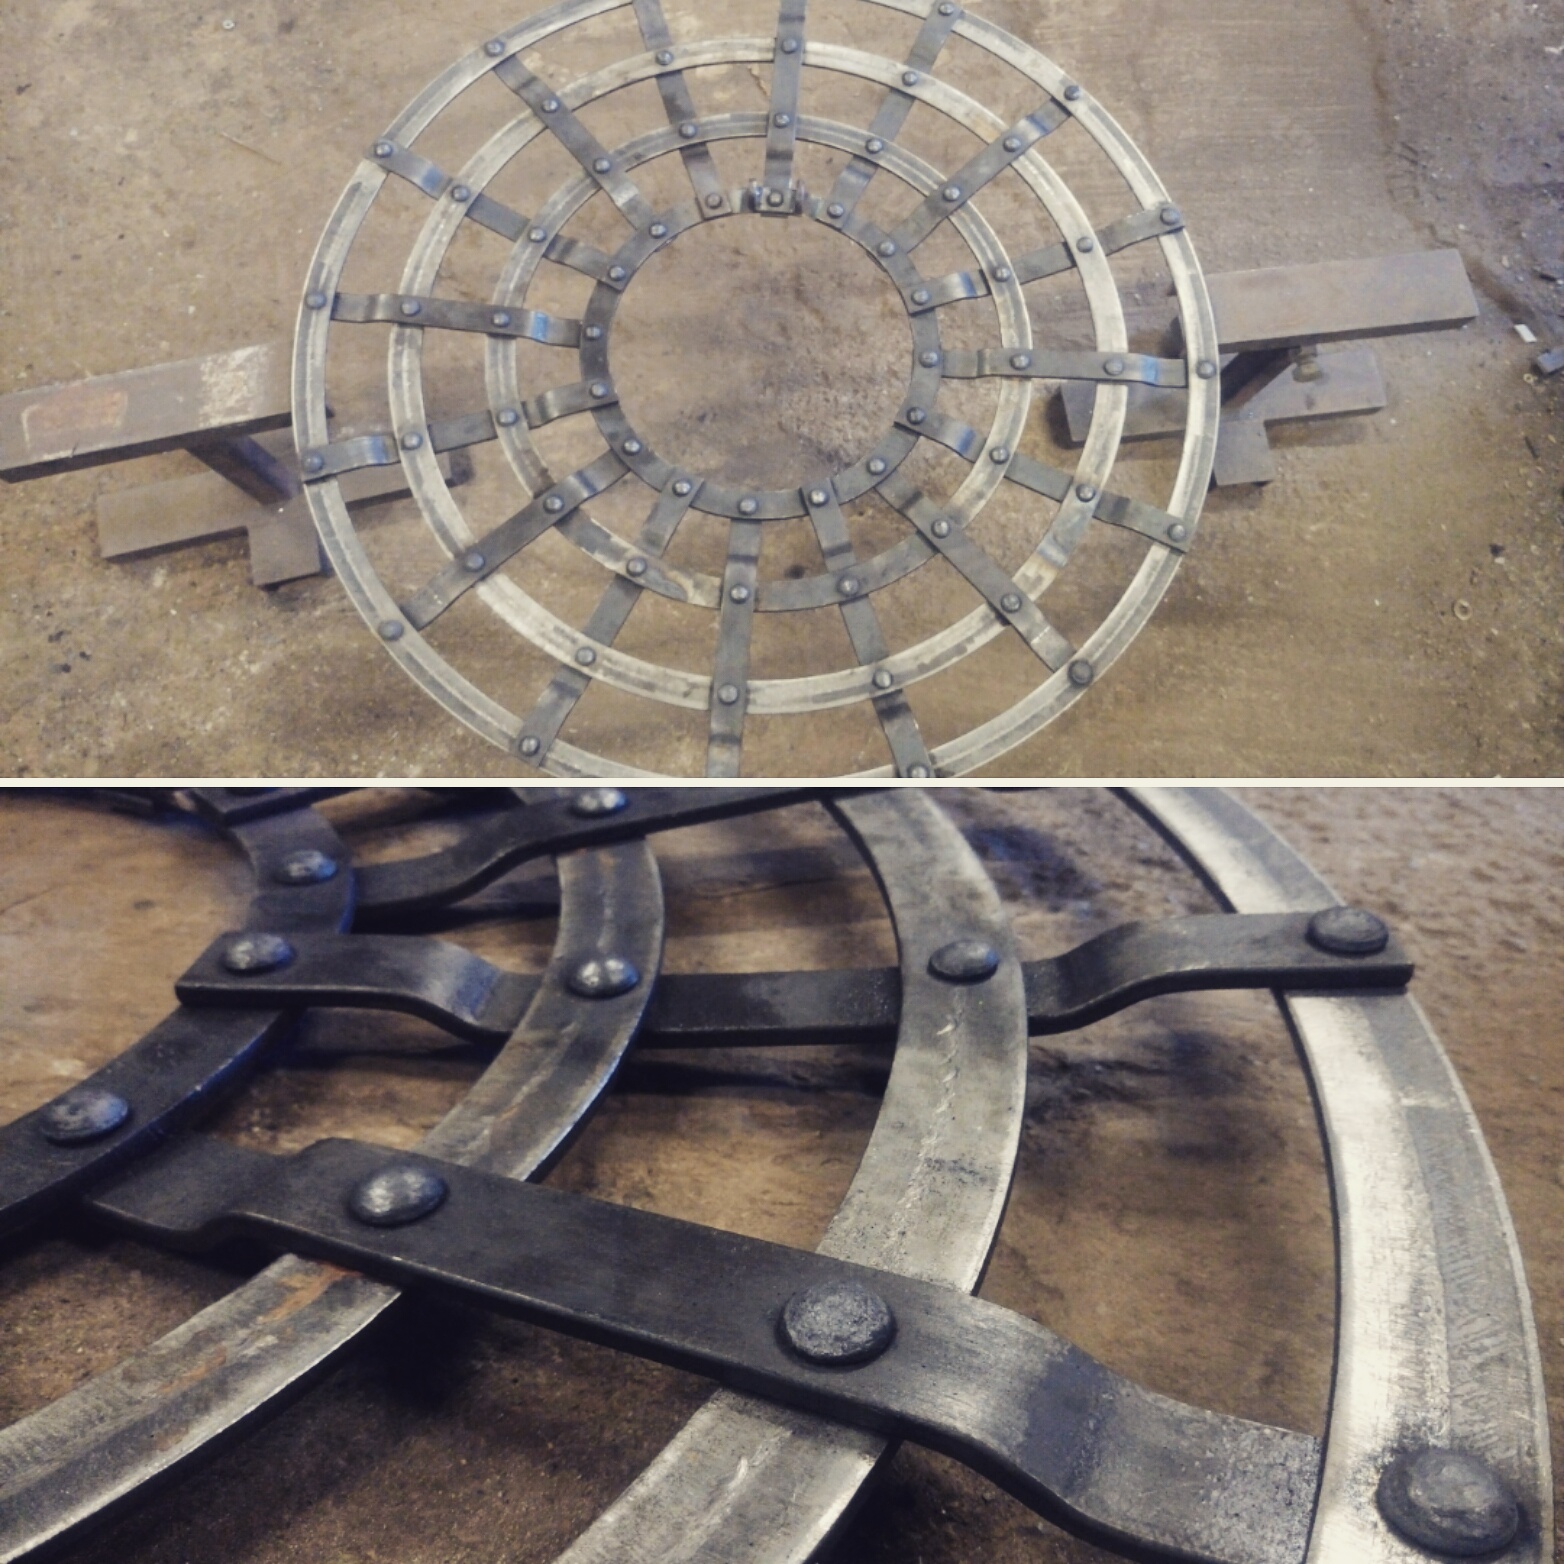
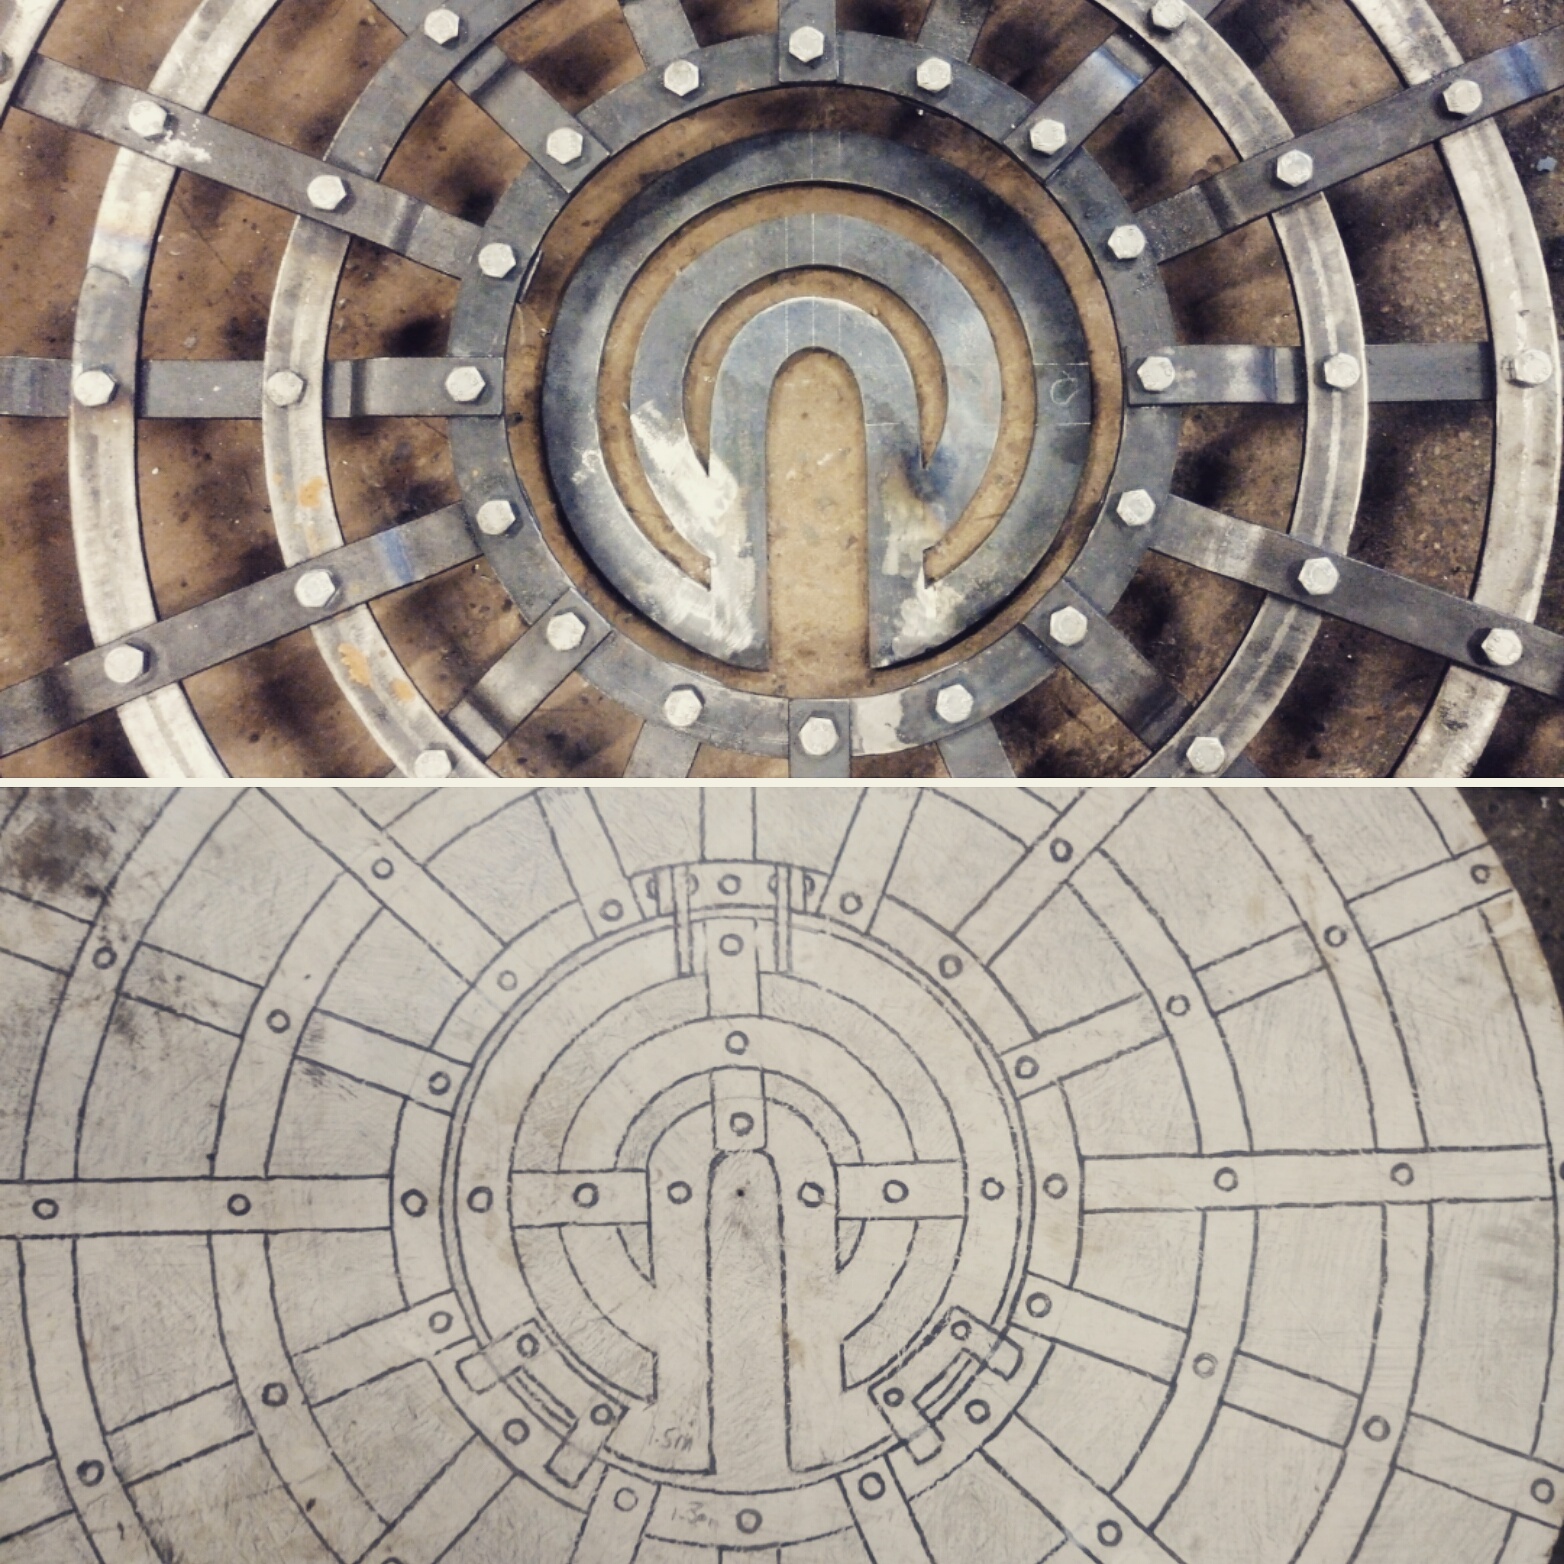
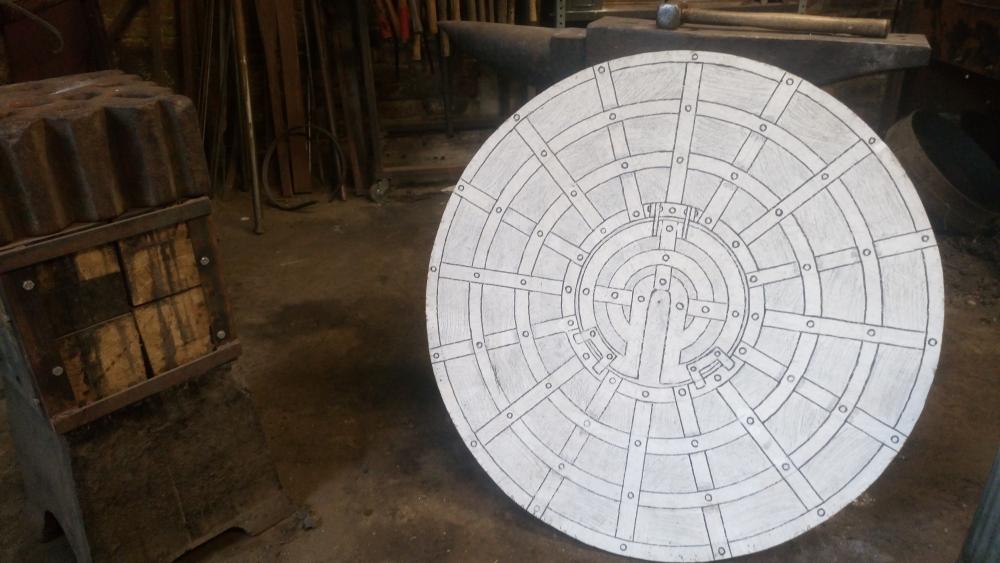
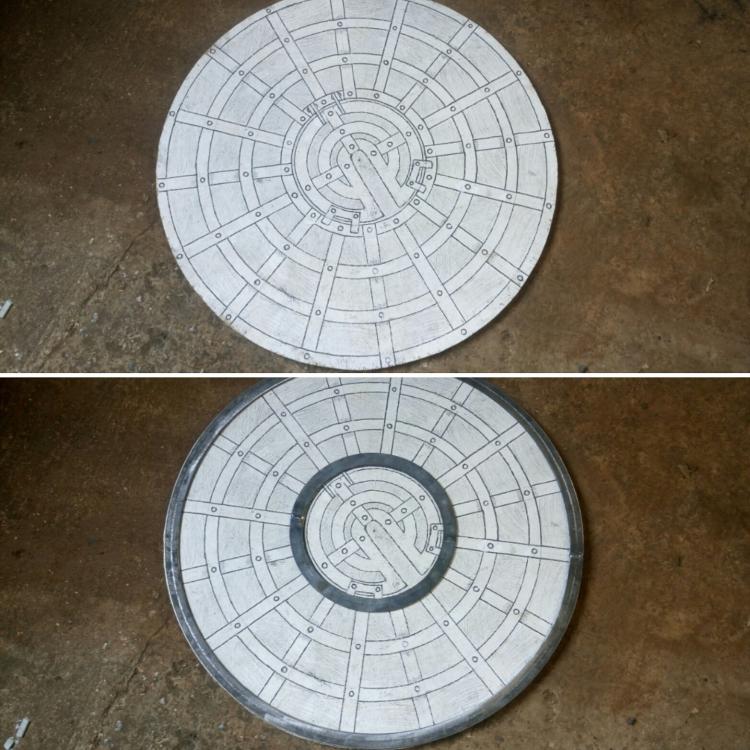
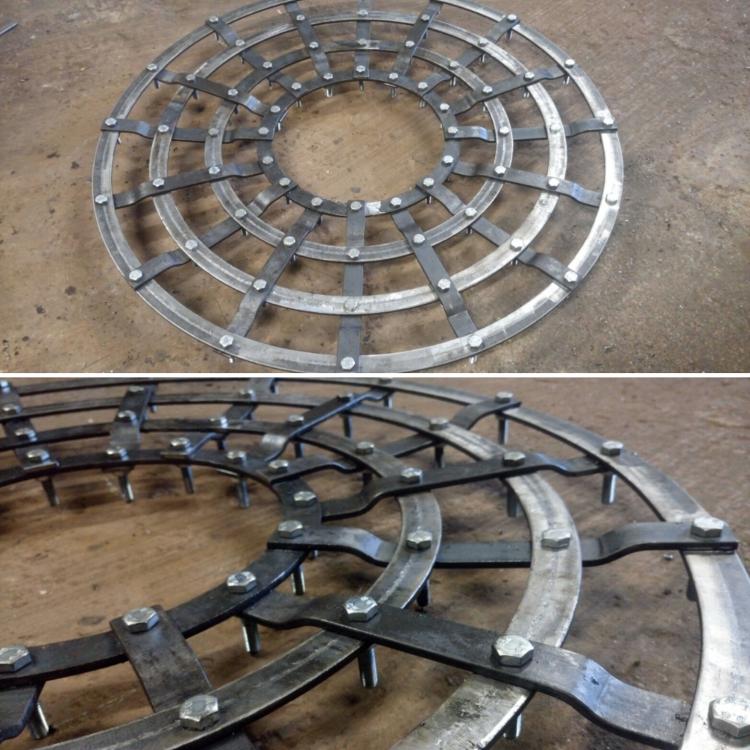
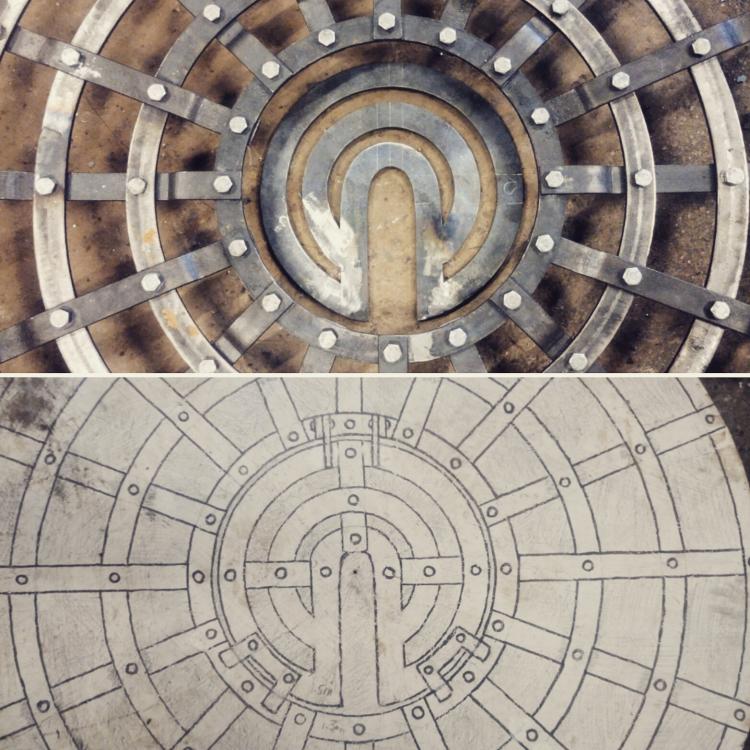
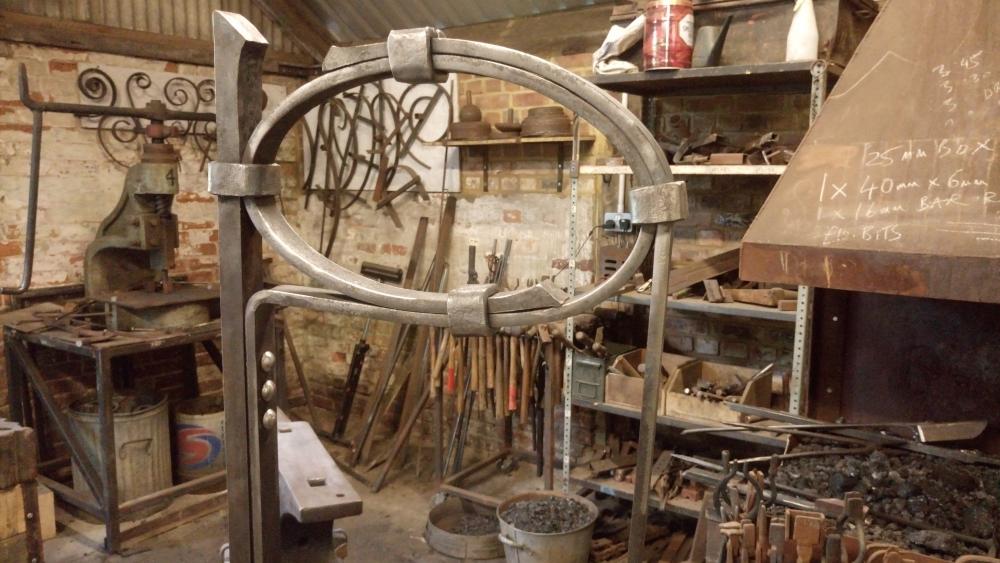
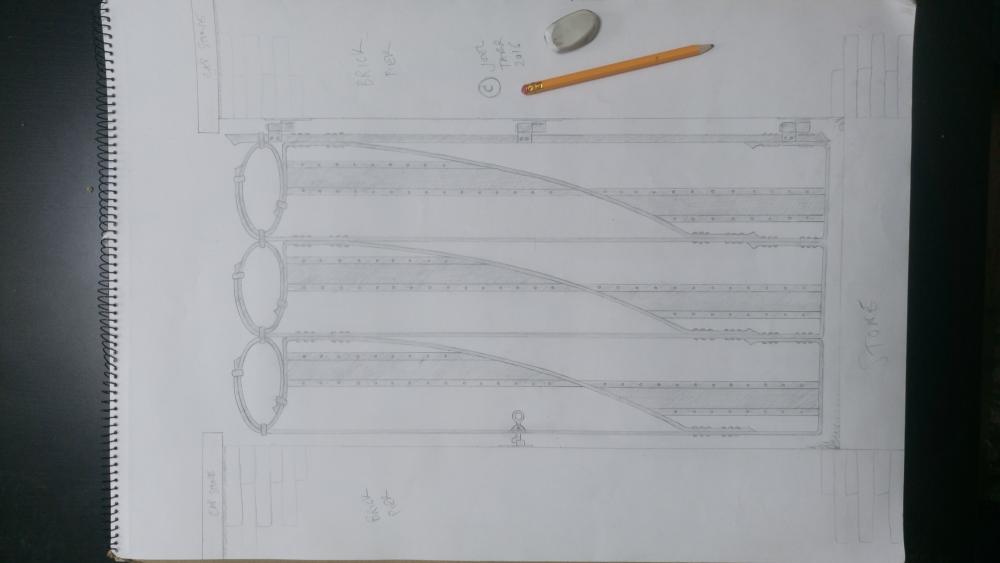
I'm working on a well cover at the minute & because of the construction method (riveted steels that sort of weave) & because it's made from 30 x 6mm flat bar rolled on edge (manually by me) I thought it might be of interest to some. I'm a fair way through it but still got to do a few bits and bobs, including removing all the bolts to replace with rivets. I've been putting the odd video of the making on YouTube & taking production progress snaps. The idea of the hatch design is so that my clients can lower in their well pump & close the hatch back down without the hatch pinching on the pump hose. It was mutually designed, I started the ball rolling with a few ideas & we went from there. The flat bar in the hatch was bent hot & the smallest diameter hoop of the 4 outside hoops was rolled nearly all the way, then finished off hot.
-
Doh. Oh yeah, they're in a sub folder of "Cormorant", in "Making". The "In Situ" folder is to come. I even number images 001, 002, 003...ex media studies student with film editing ambitions before illness struck. Old habbits.
-
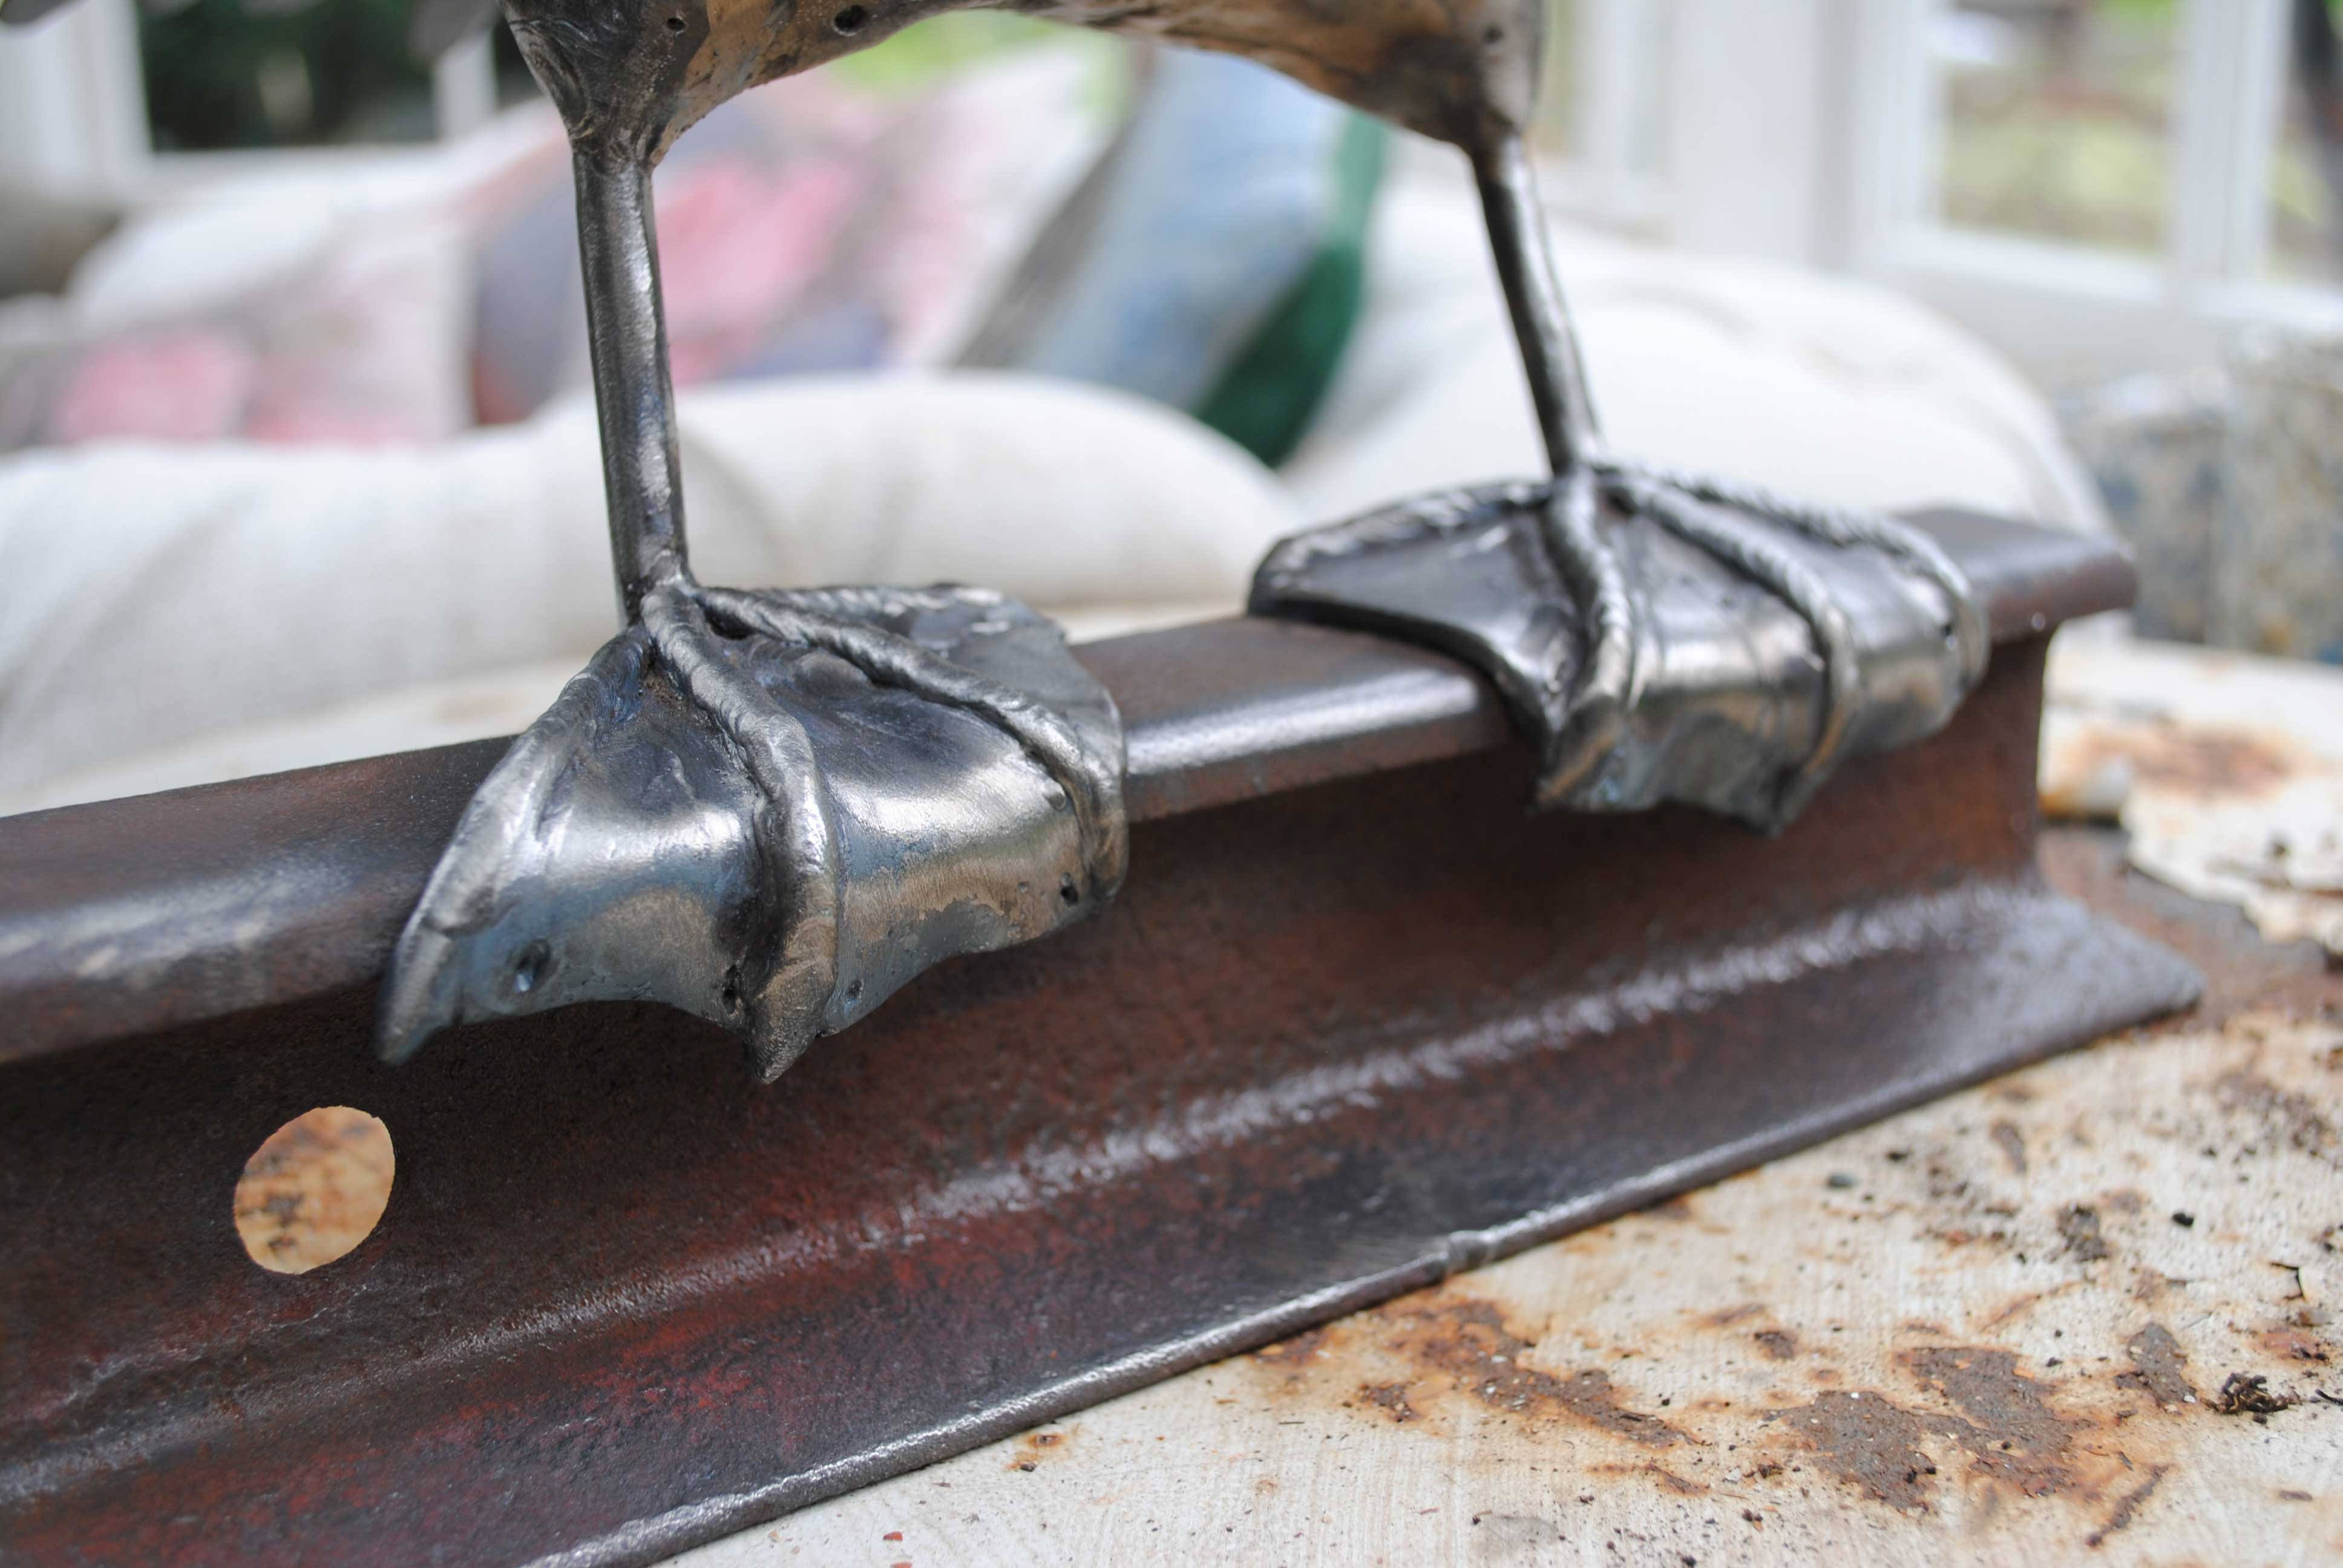
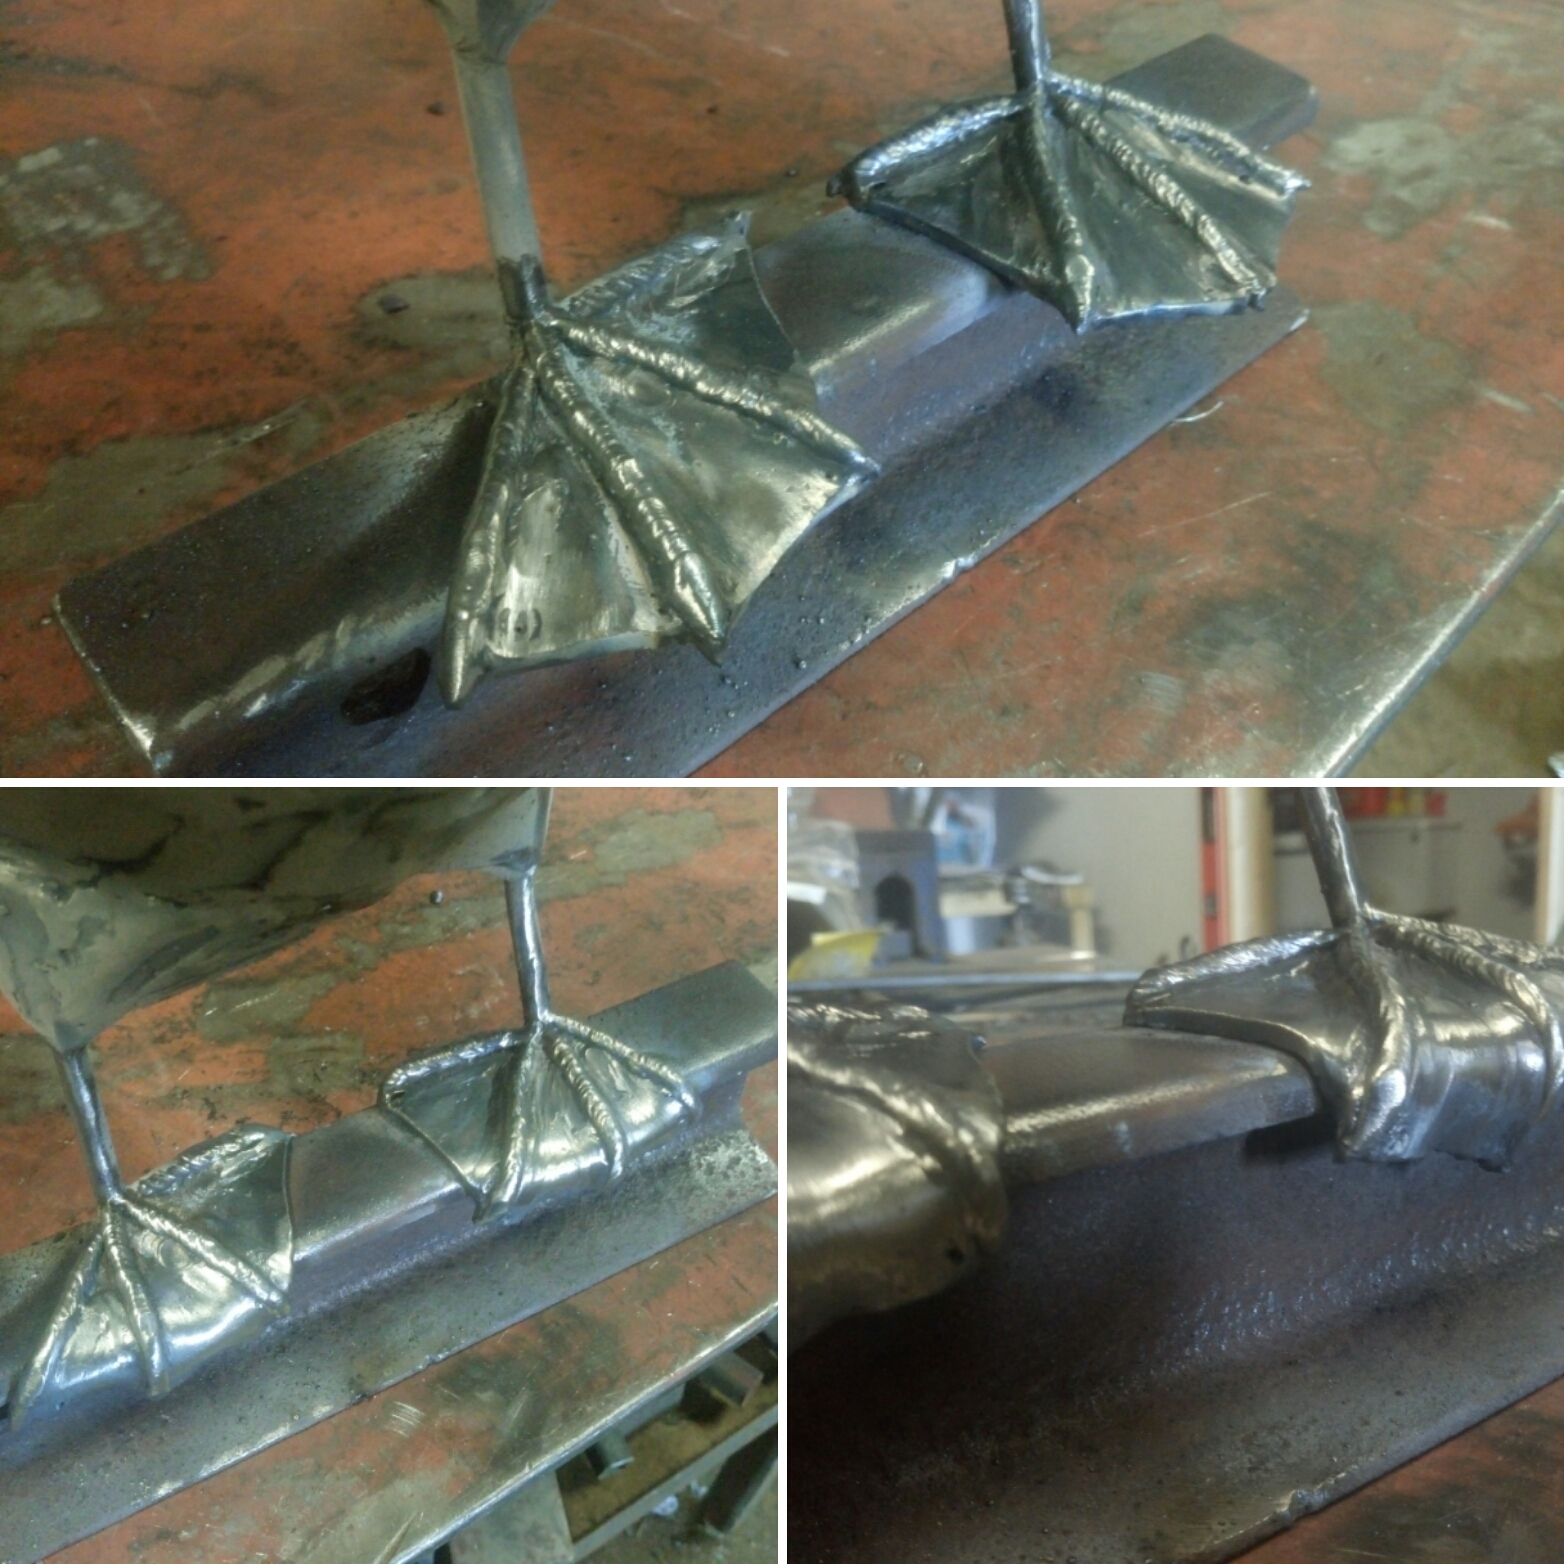
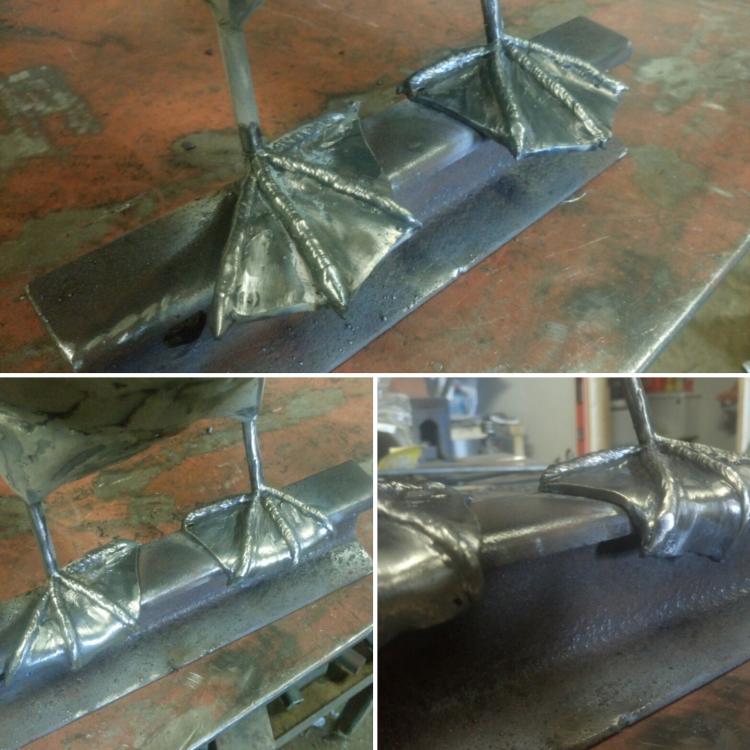
Cheers. No the feet were rods of 8mm (5/16th?) round bar which got kinda lost so I ran some weld beads over the top & it worked out well. A fluke I'm happy to take. Especially as it's all stick welded as i haven't yet got my MIG up and running so the whole job was a pain in the genitals. By armature do you mean my sample piece? She wanted so keep that but I said no because I keep all my sample pieces for my "stock room" so that I can snare future clients by saying "it'll look like this..." I have been known to tactfully leave nice sample pieces positioned around the workshop so when clients come to collect commissions they spot them and their idea juices get flowing again...
-
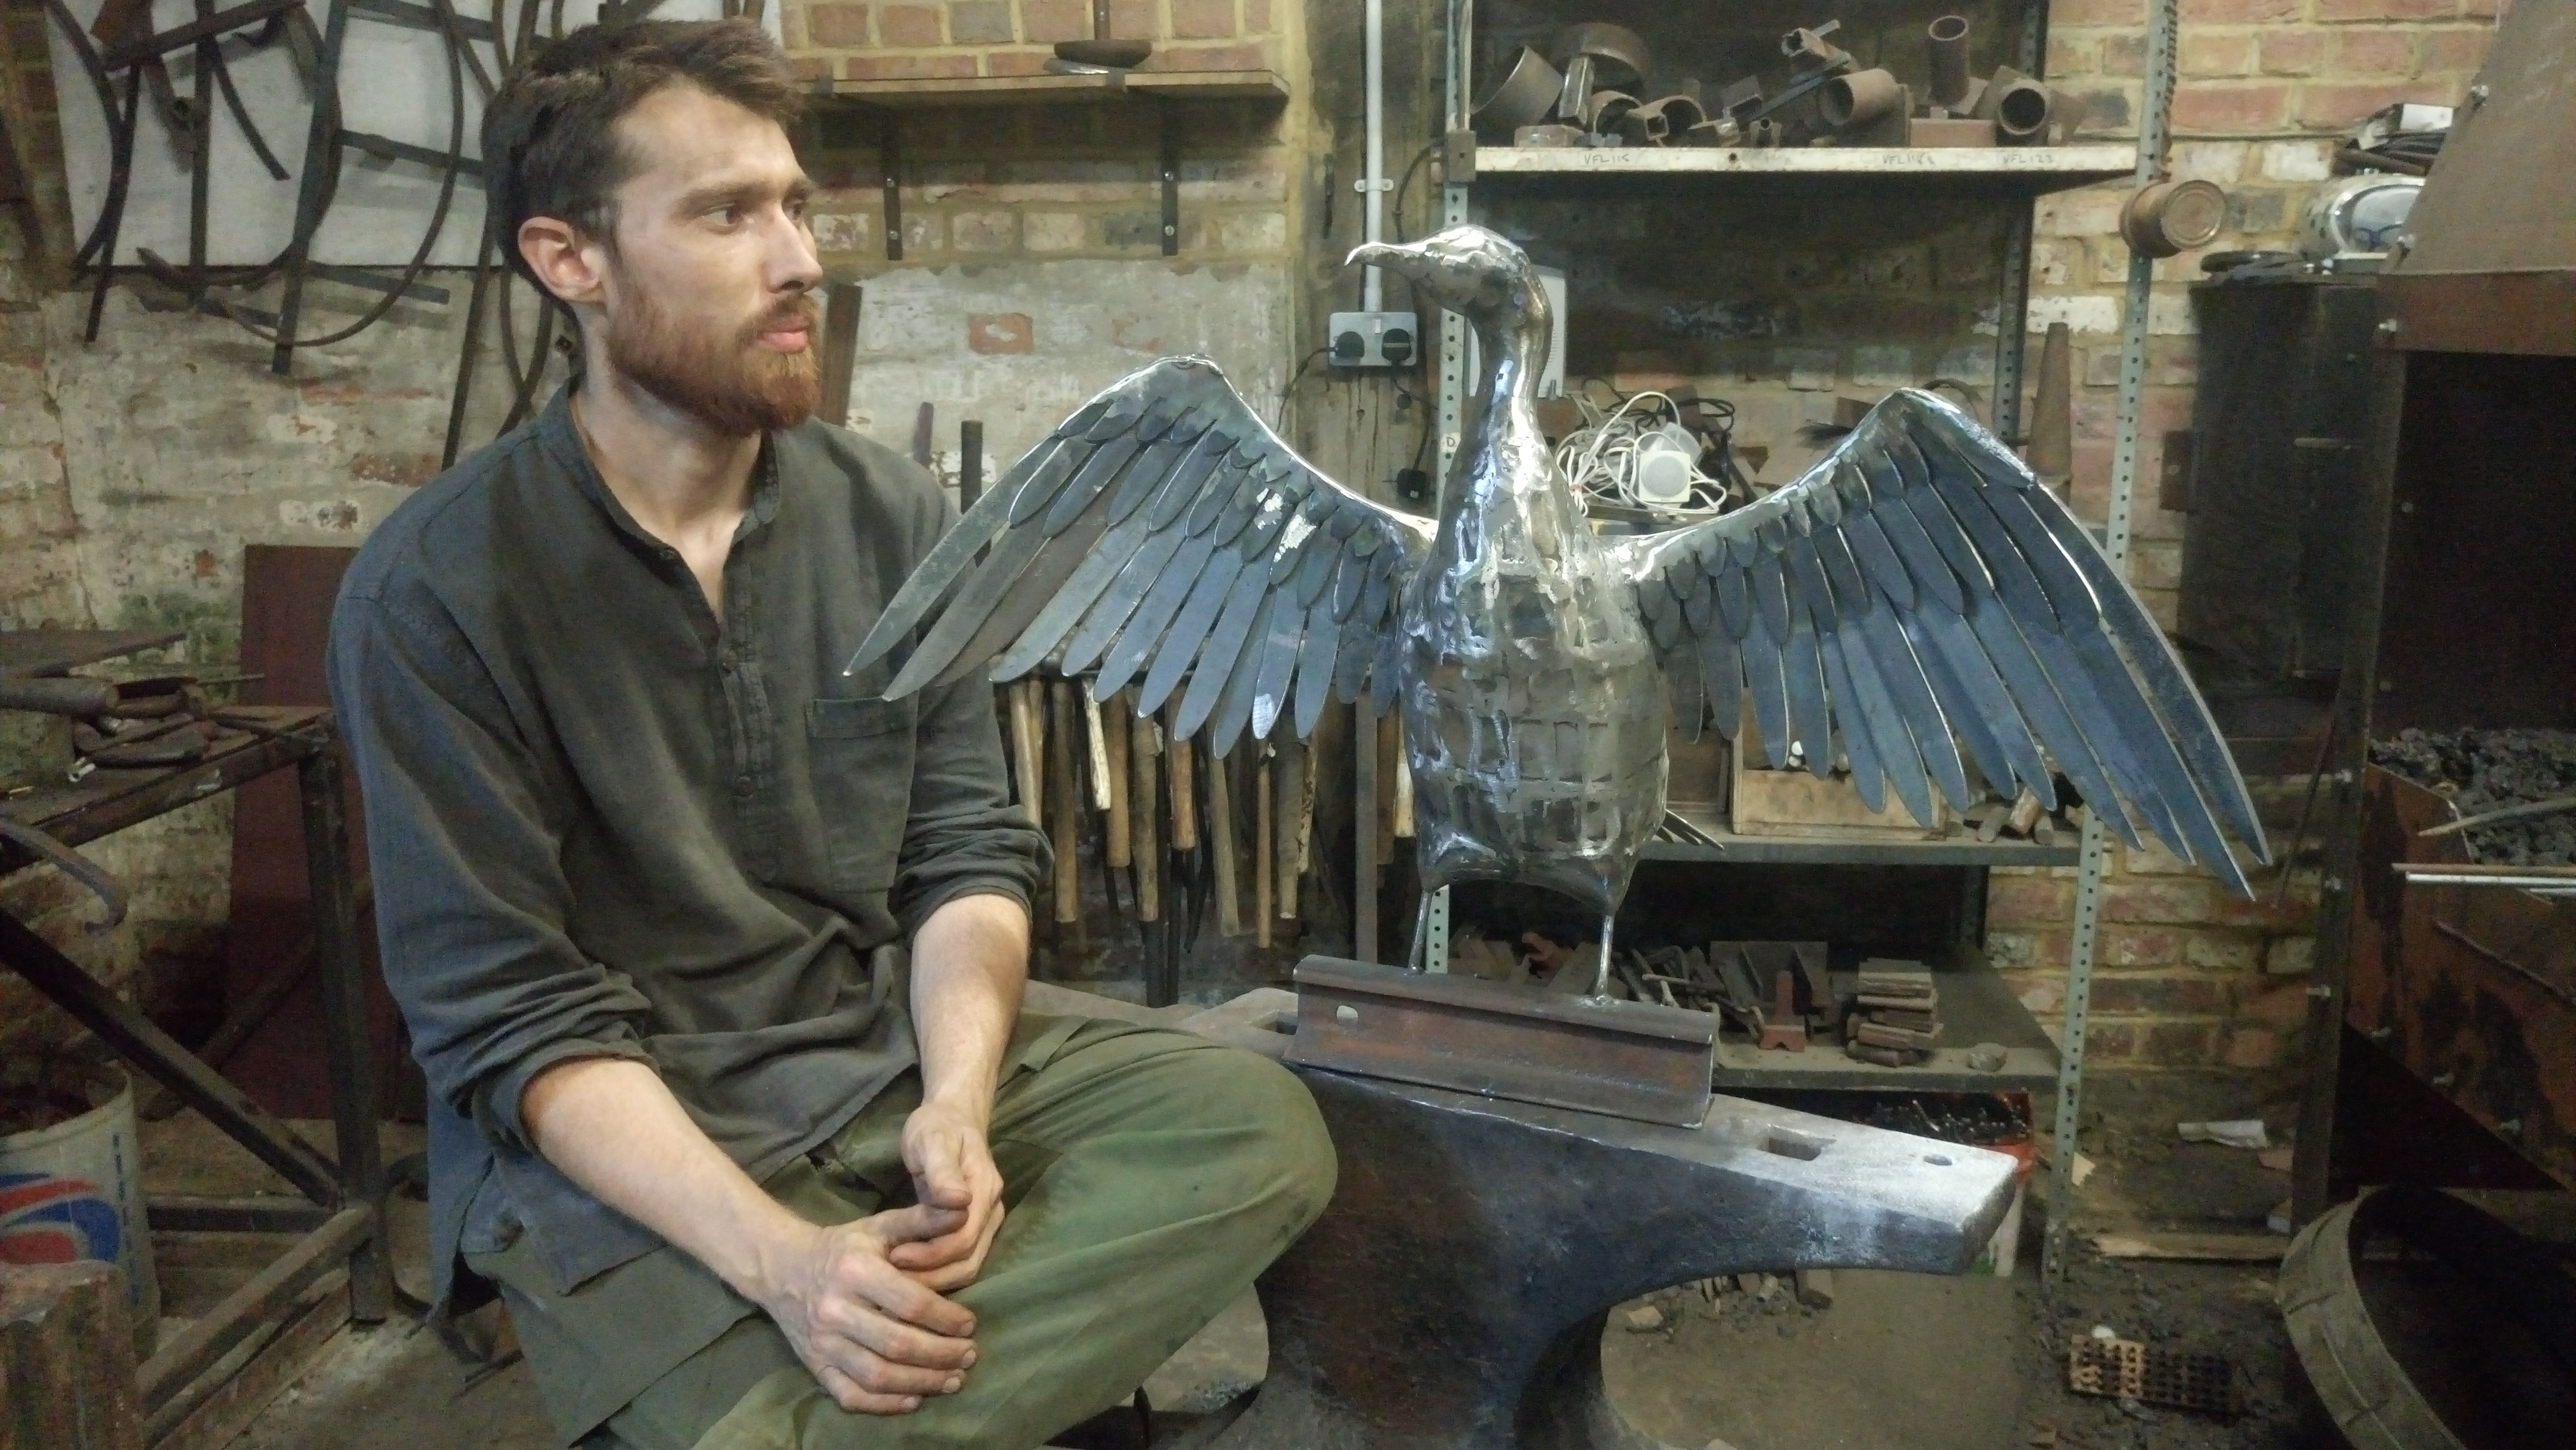
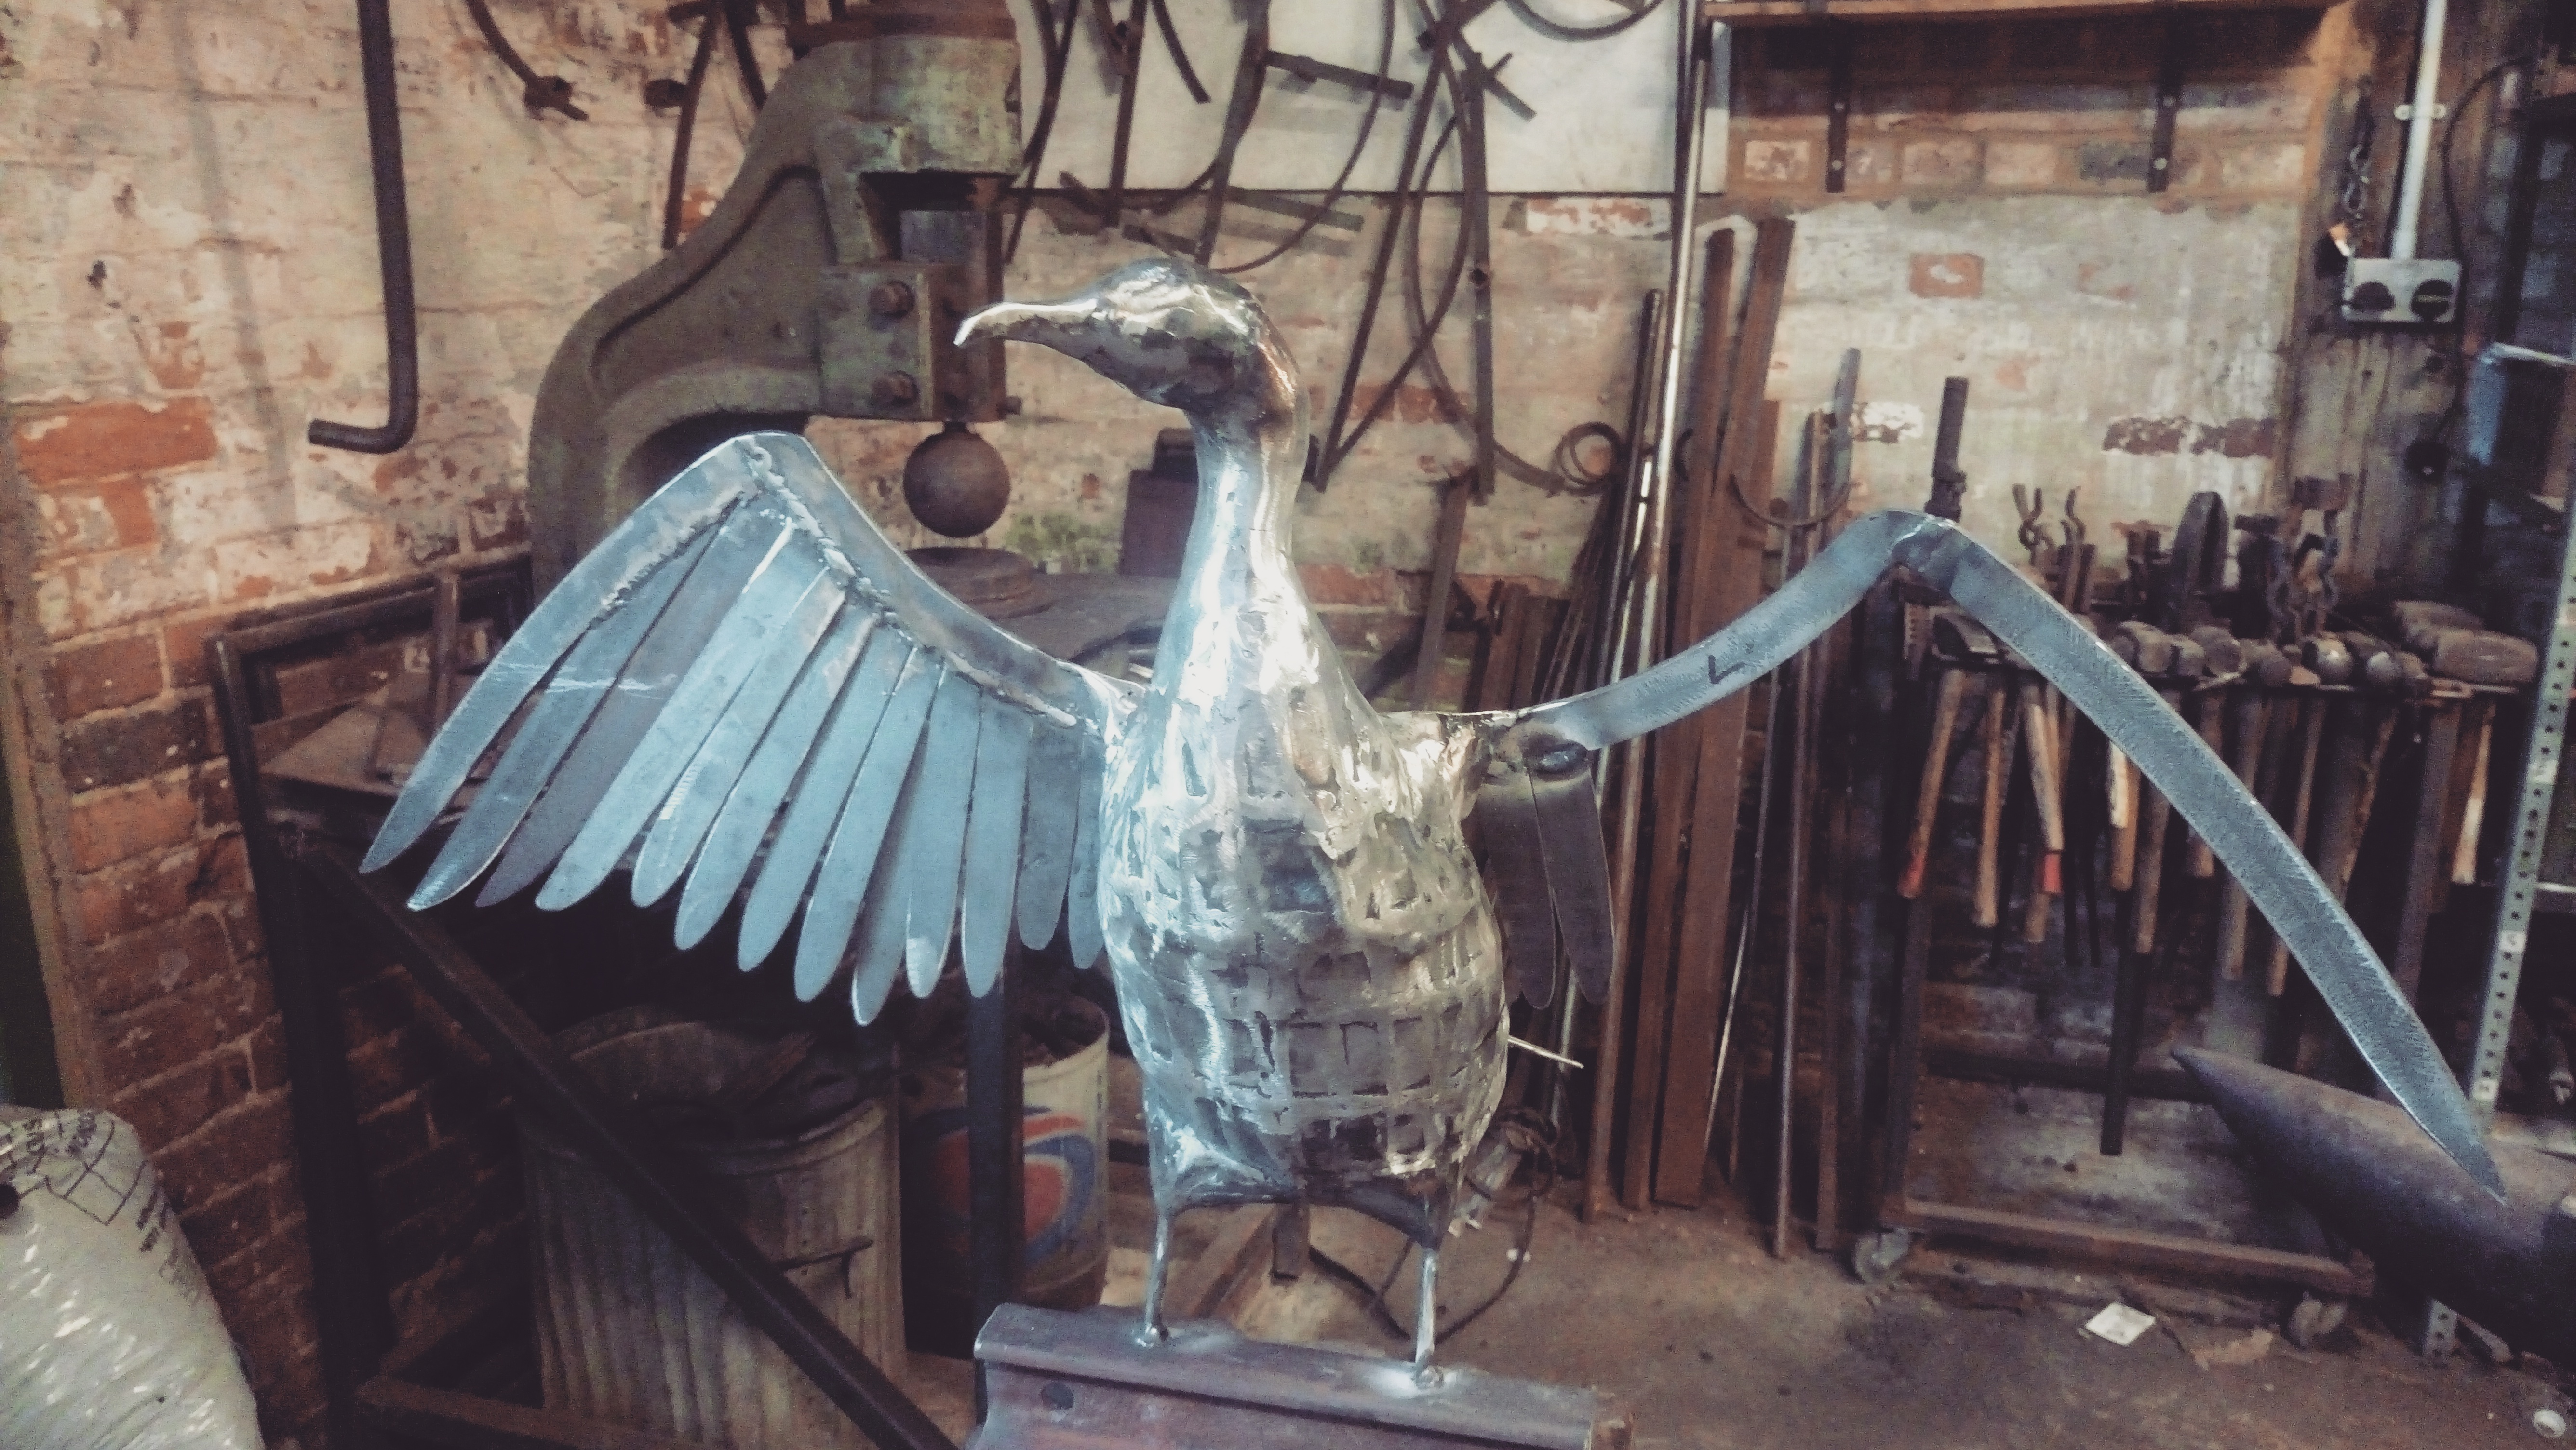
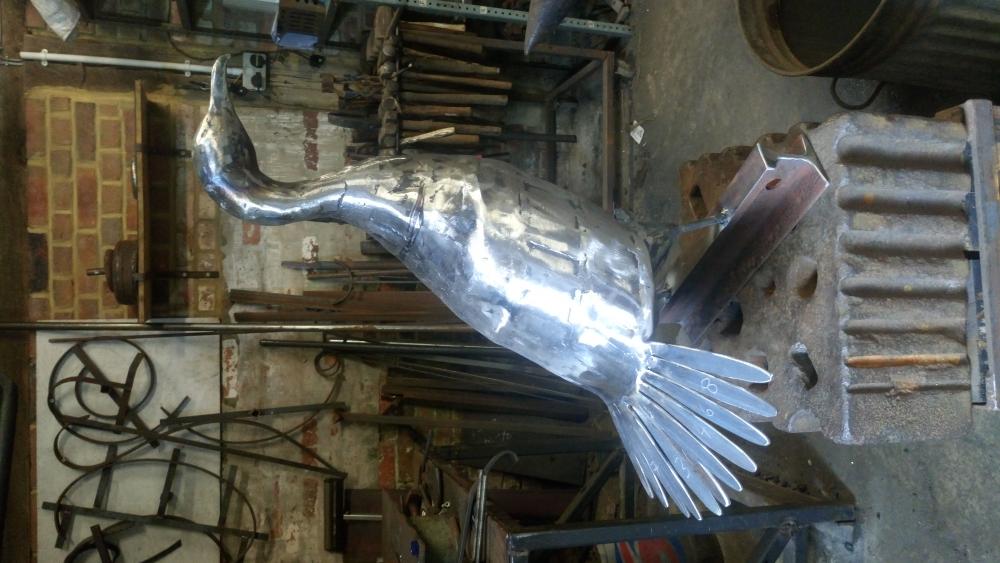
She loves it. It's a wedding anniversary present to her husband - the Iron year. When drawing it up we joked that the front on view looked a bit like the Wallace and Gromit penguin & she was worried it could look a bit 3 Reich eagle like...but all those fears have completely gone now she's seen it.
-
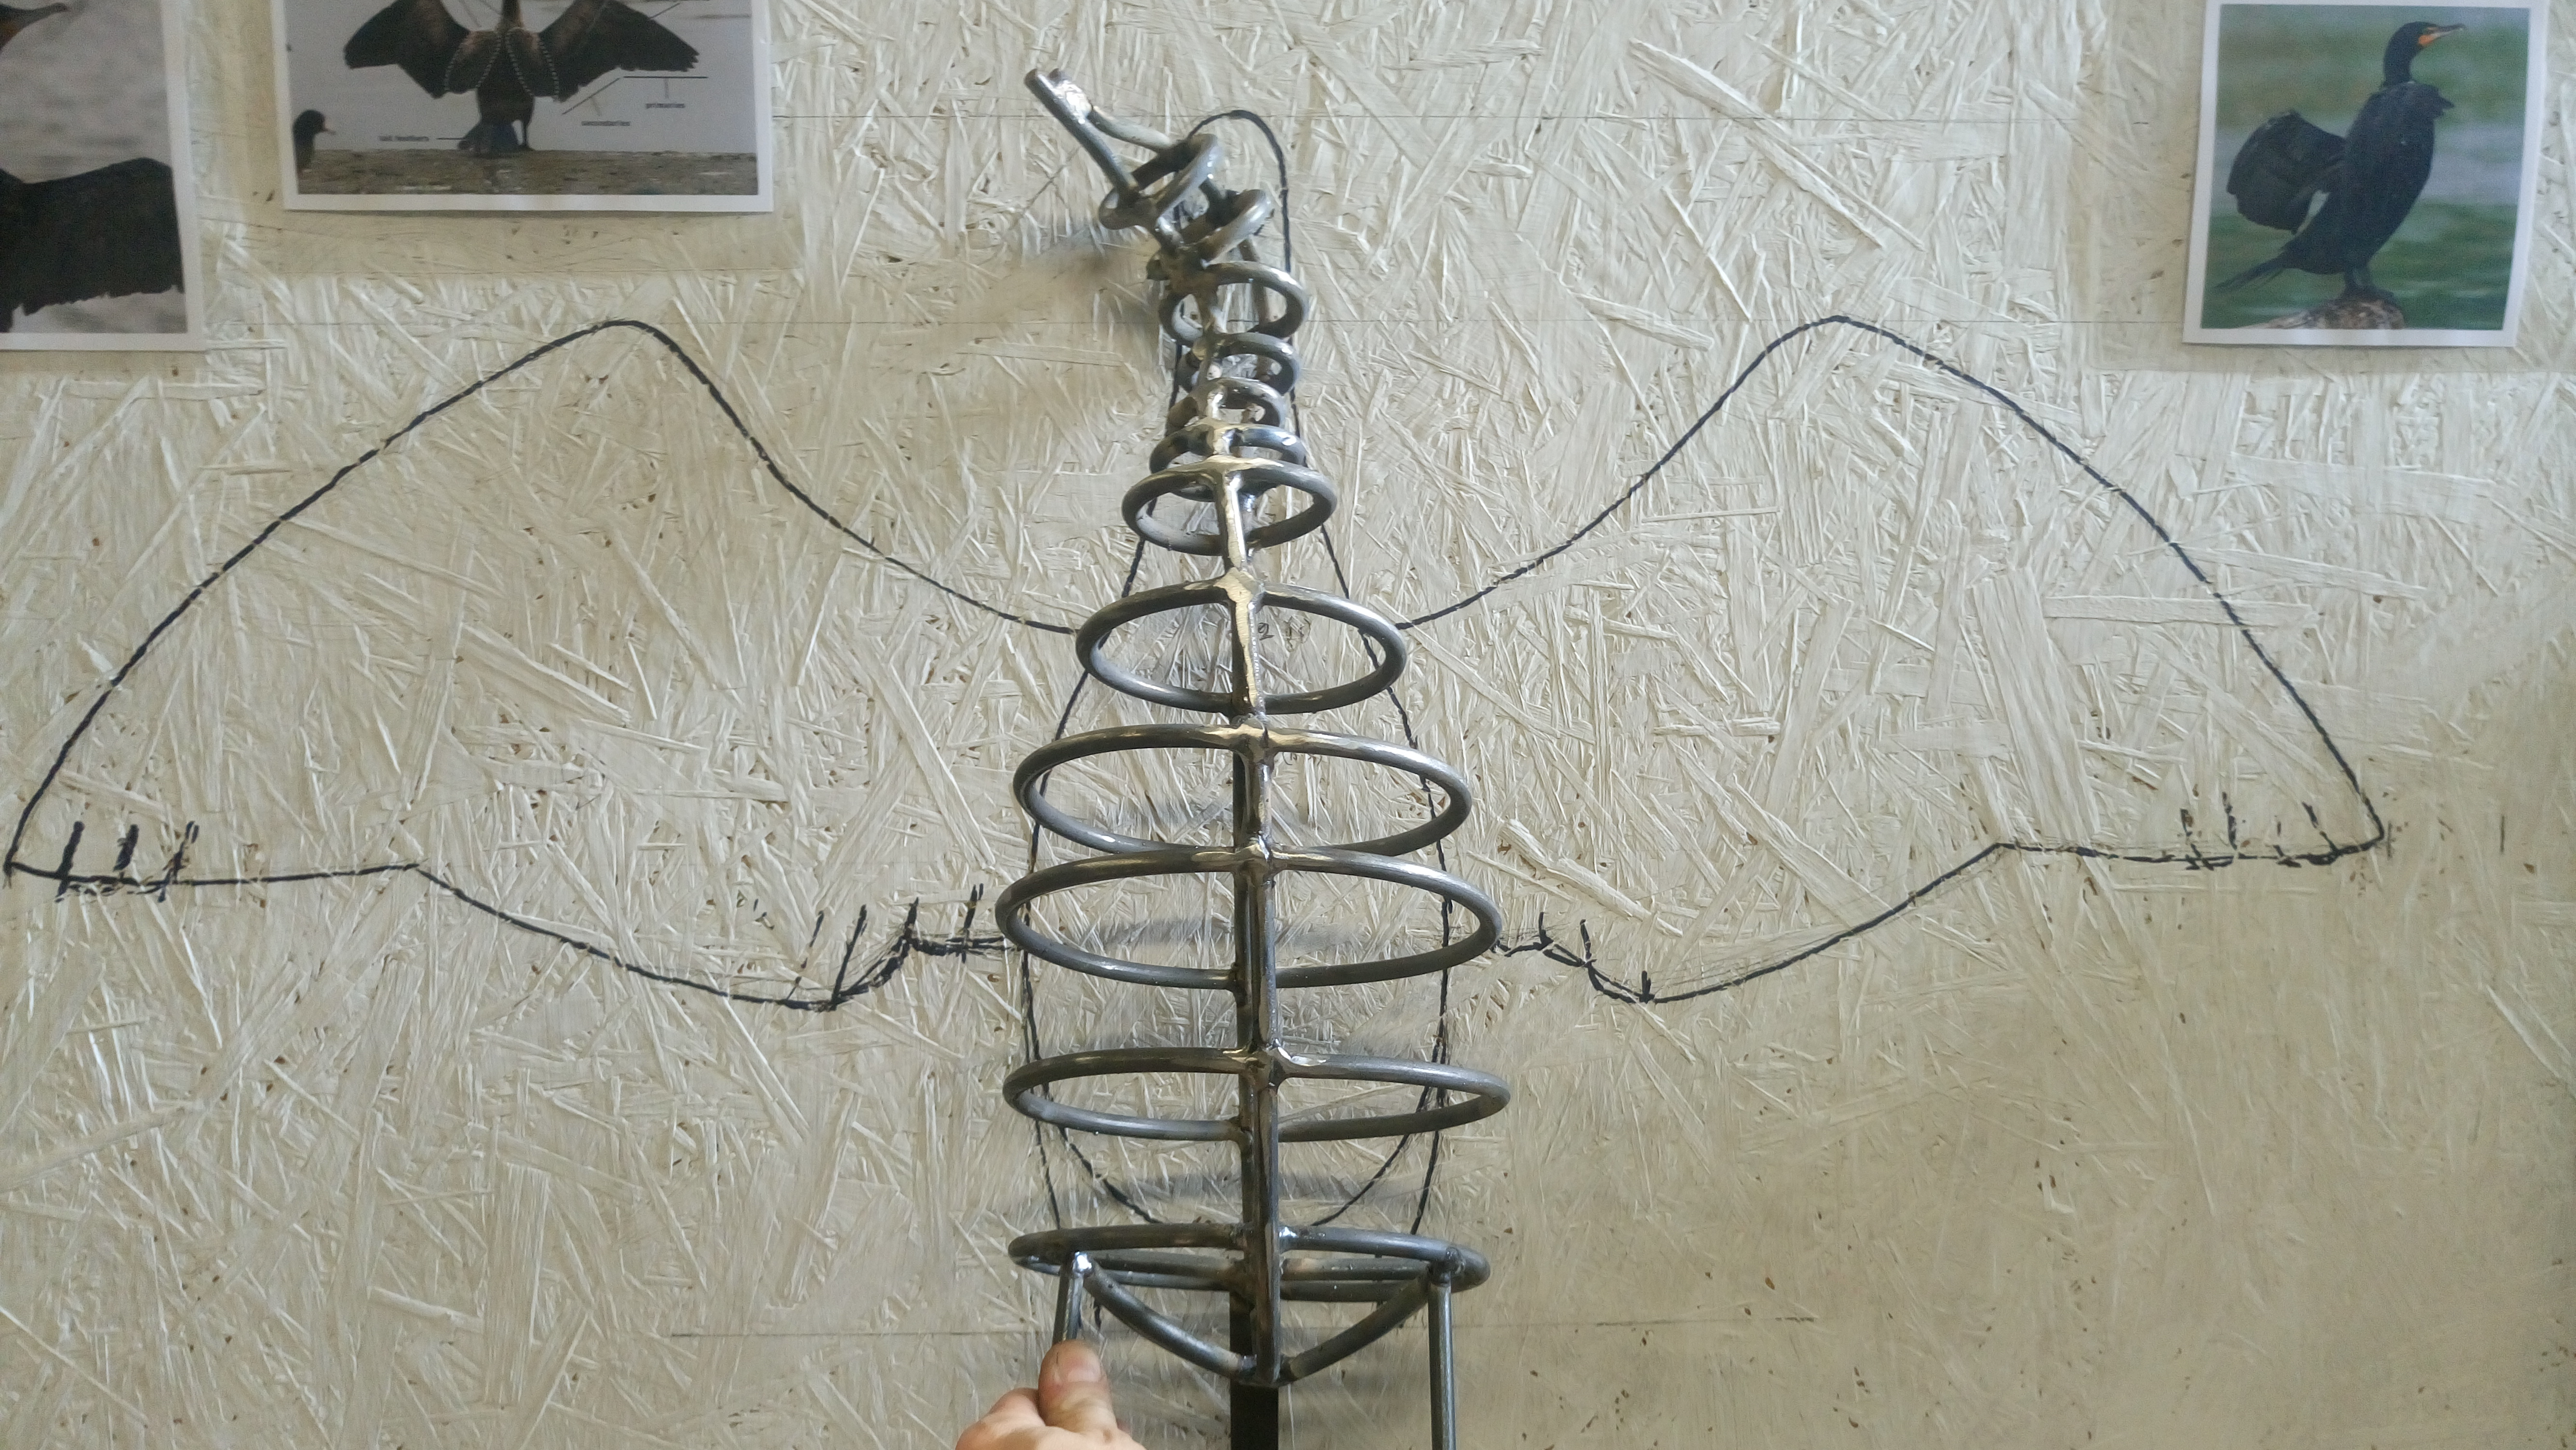
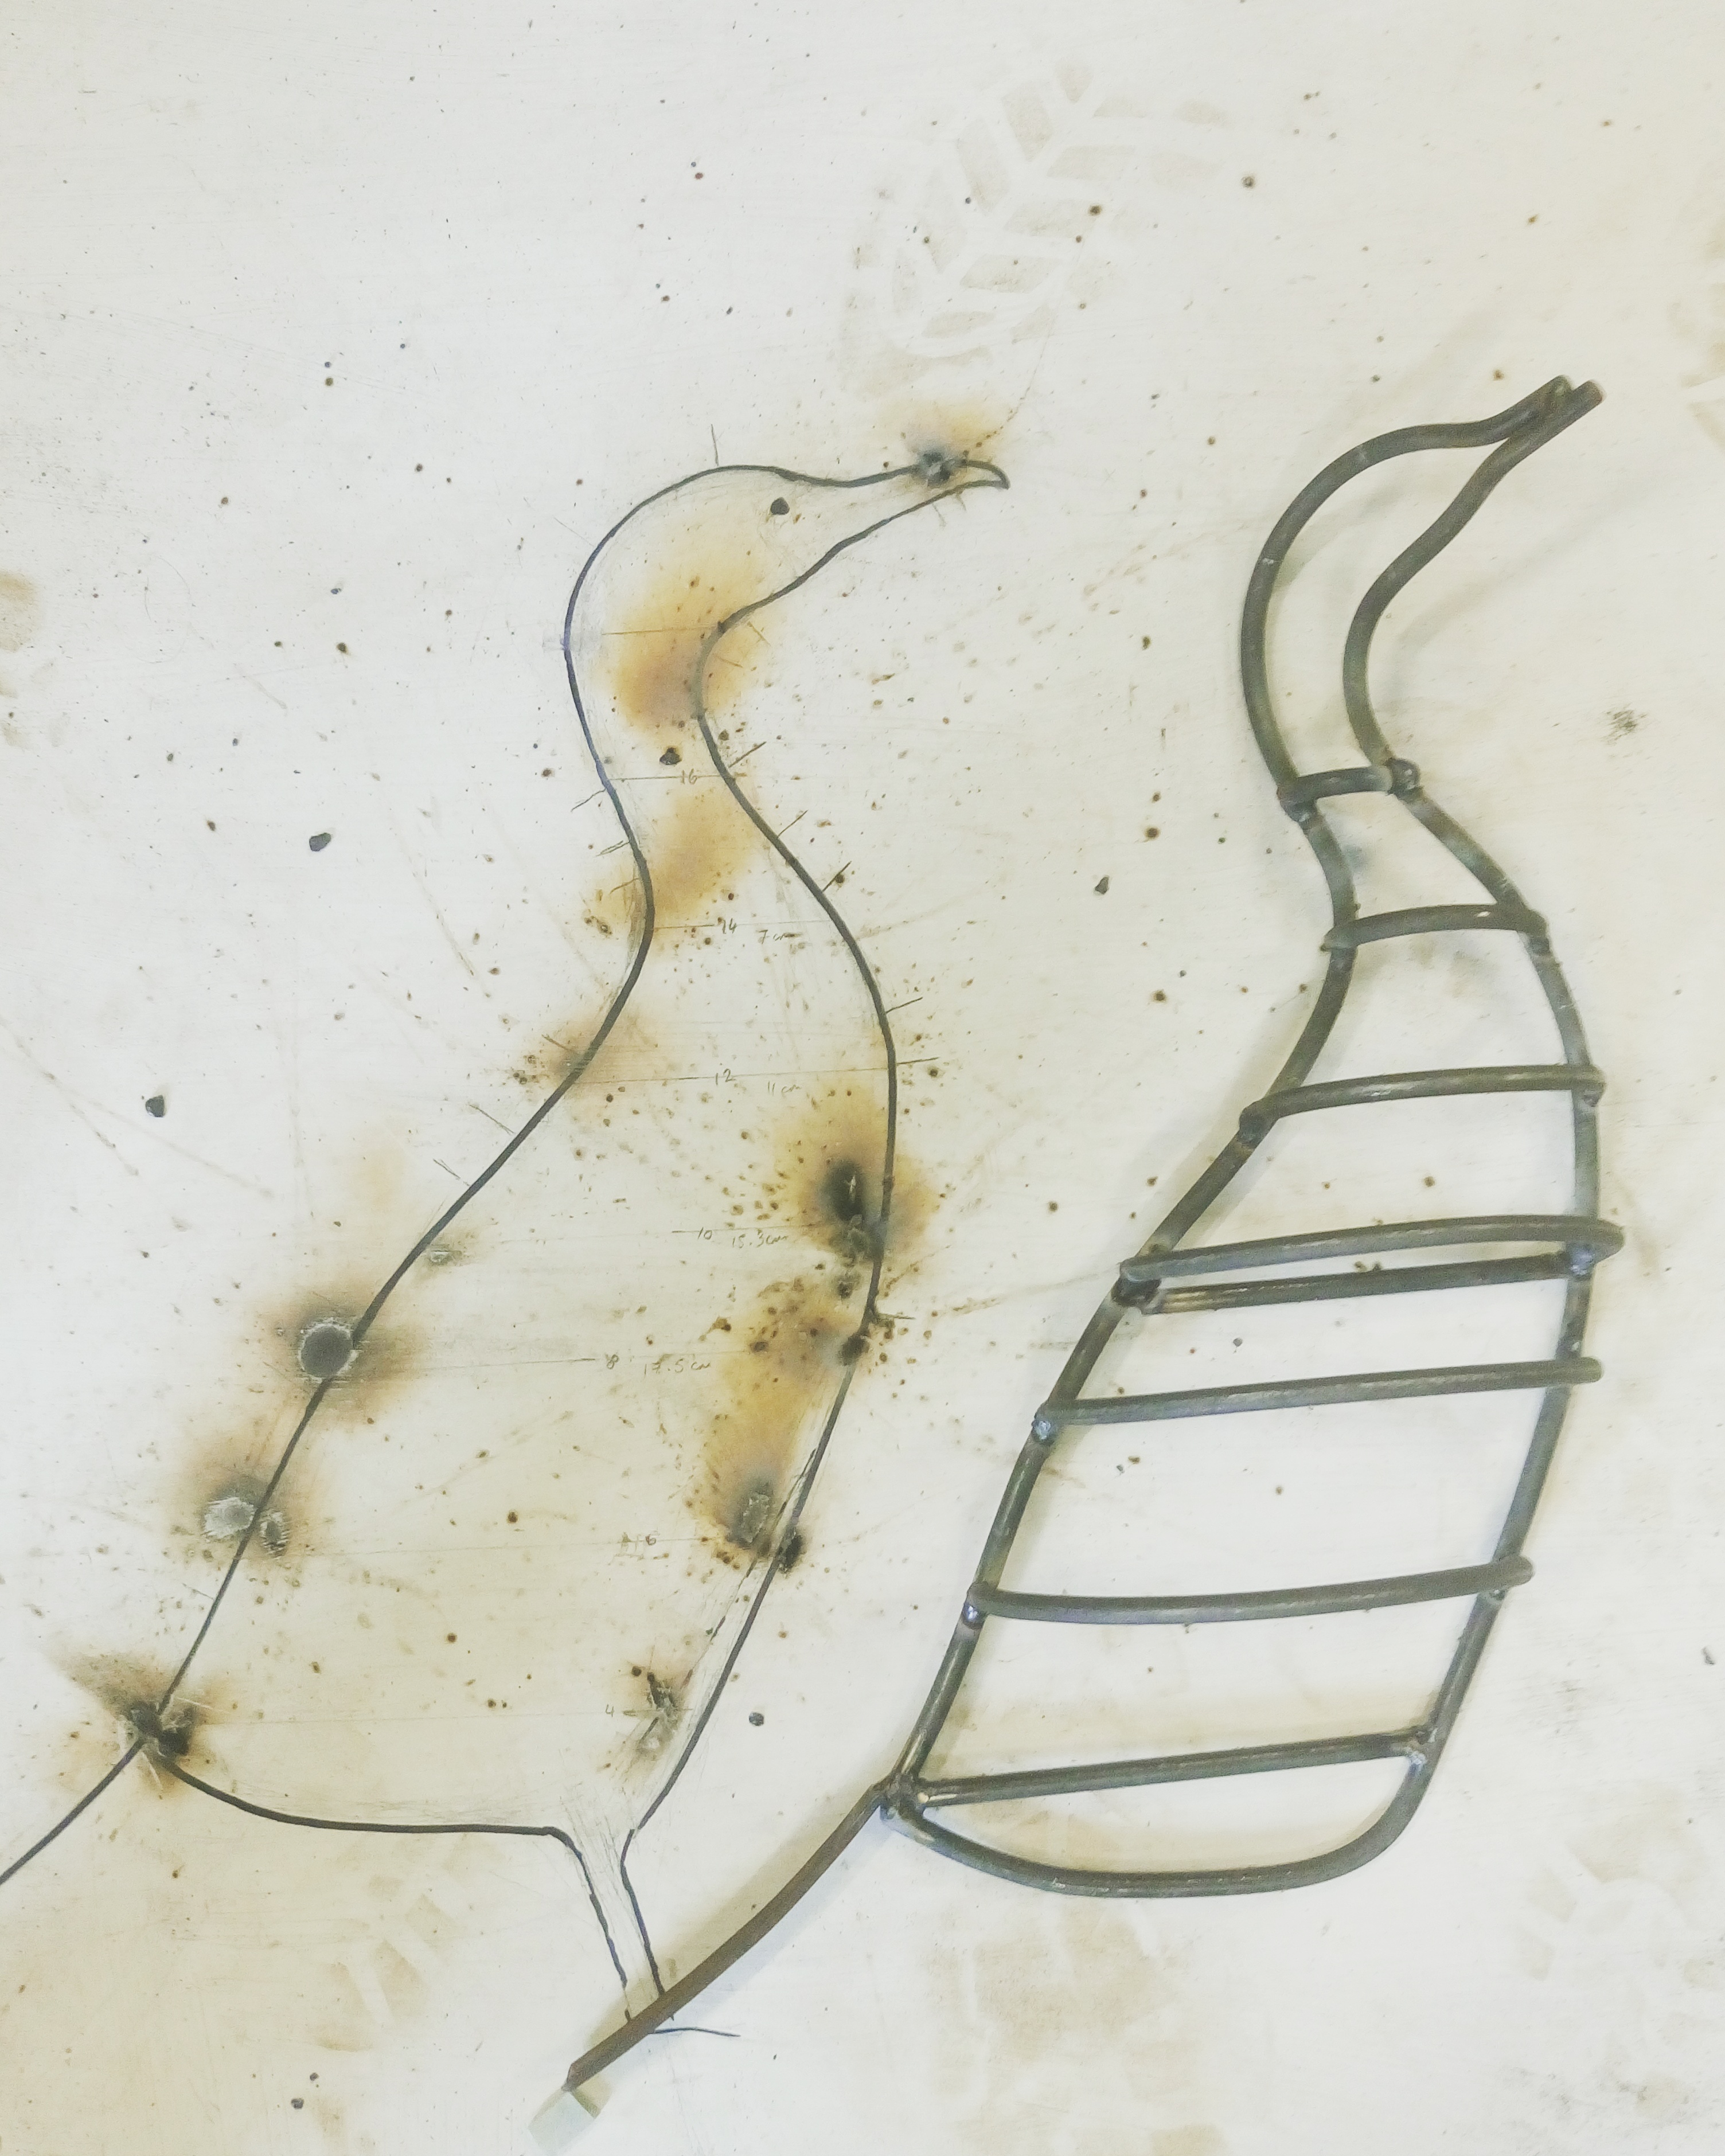
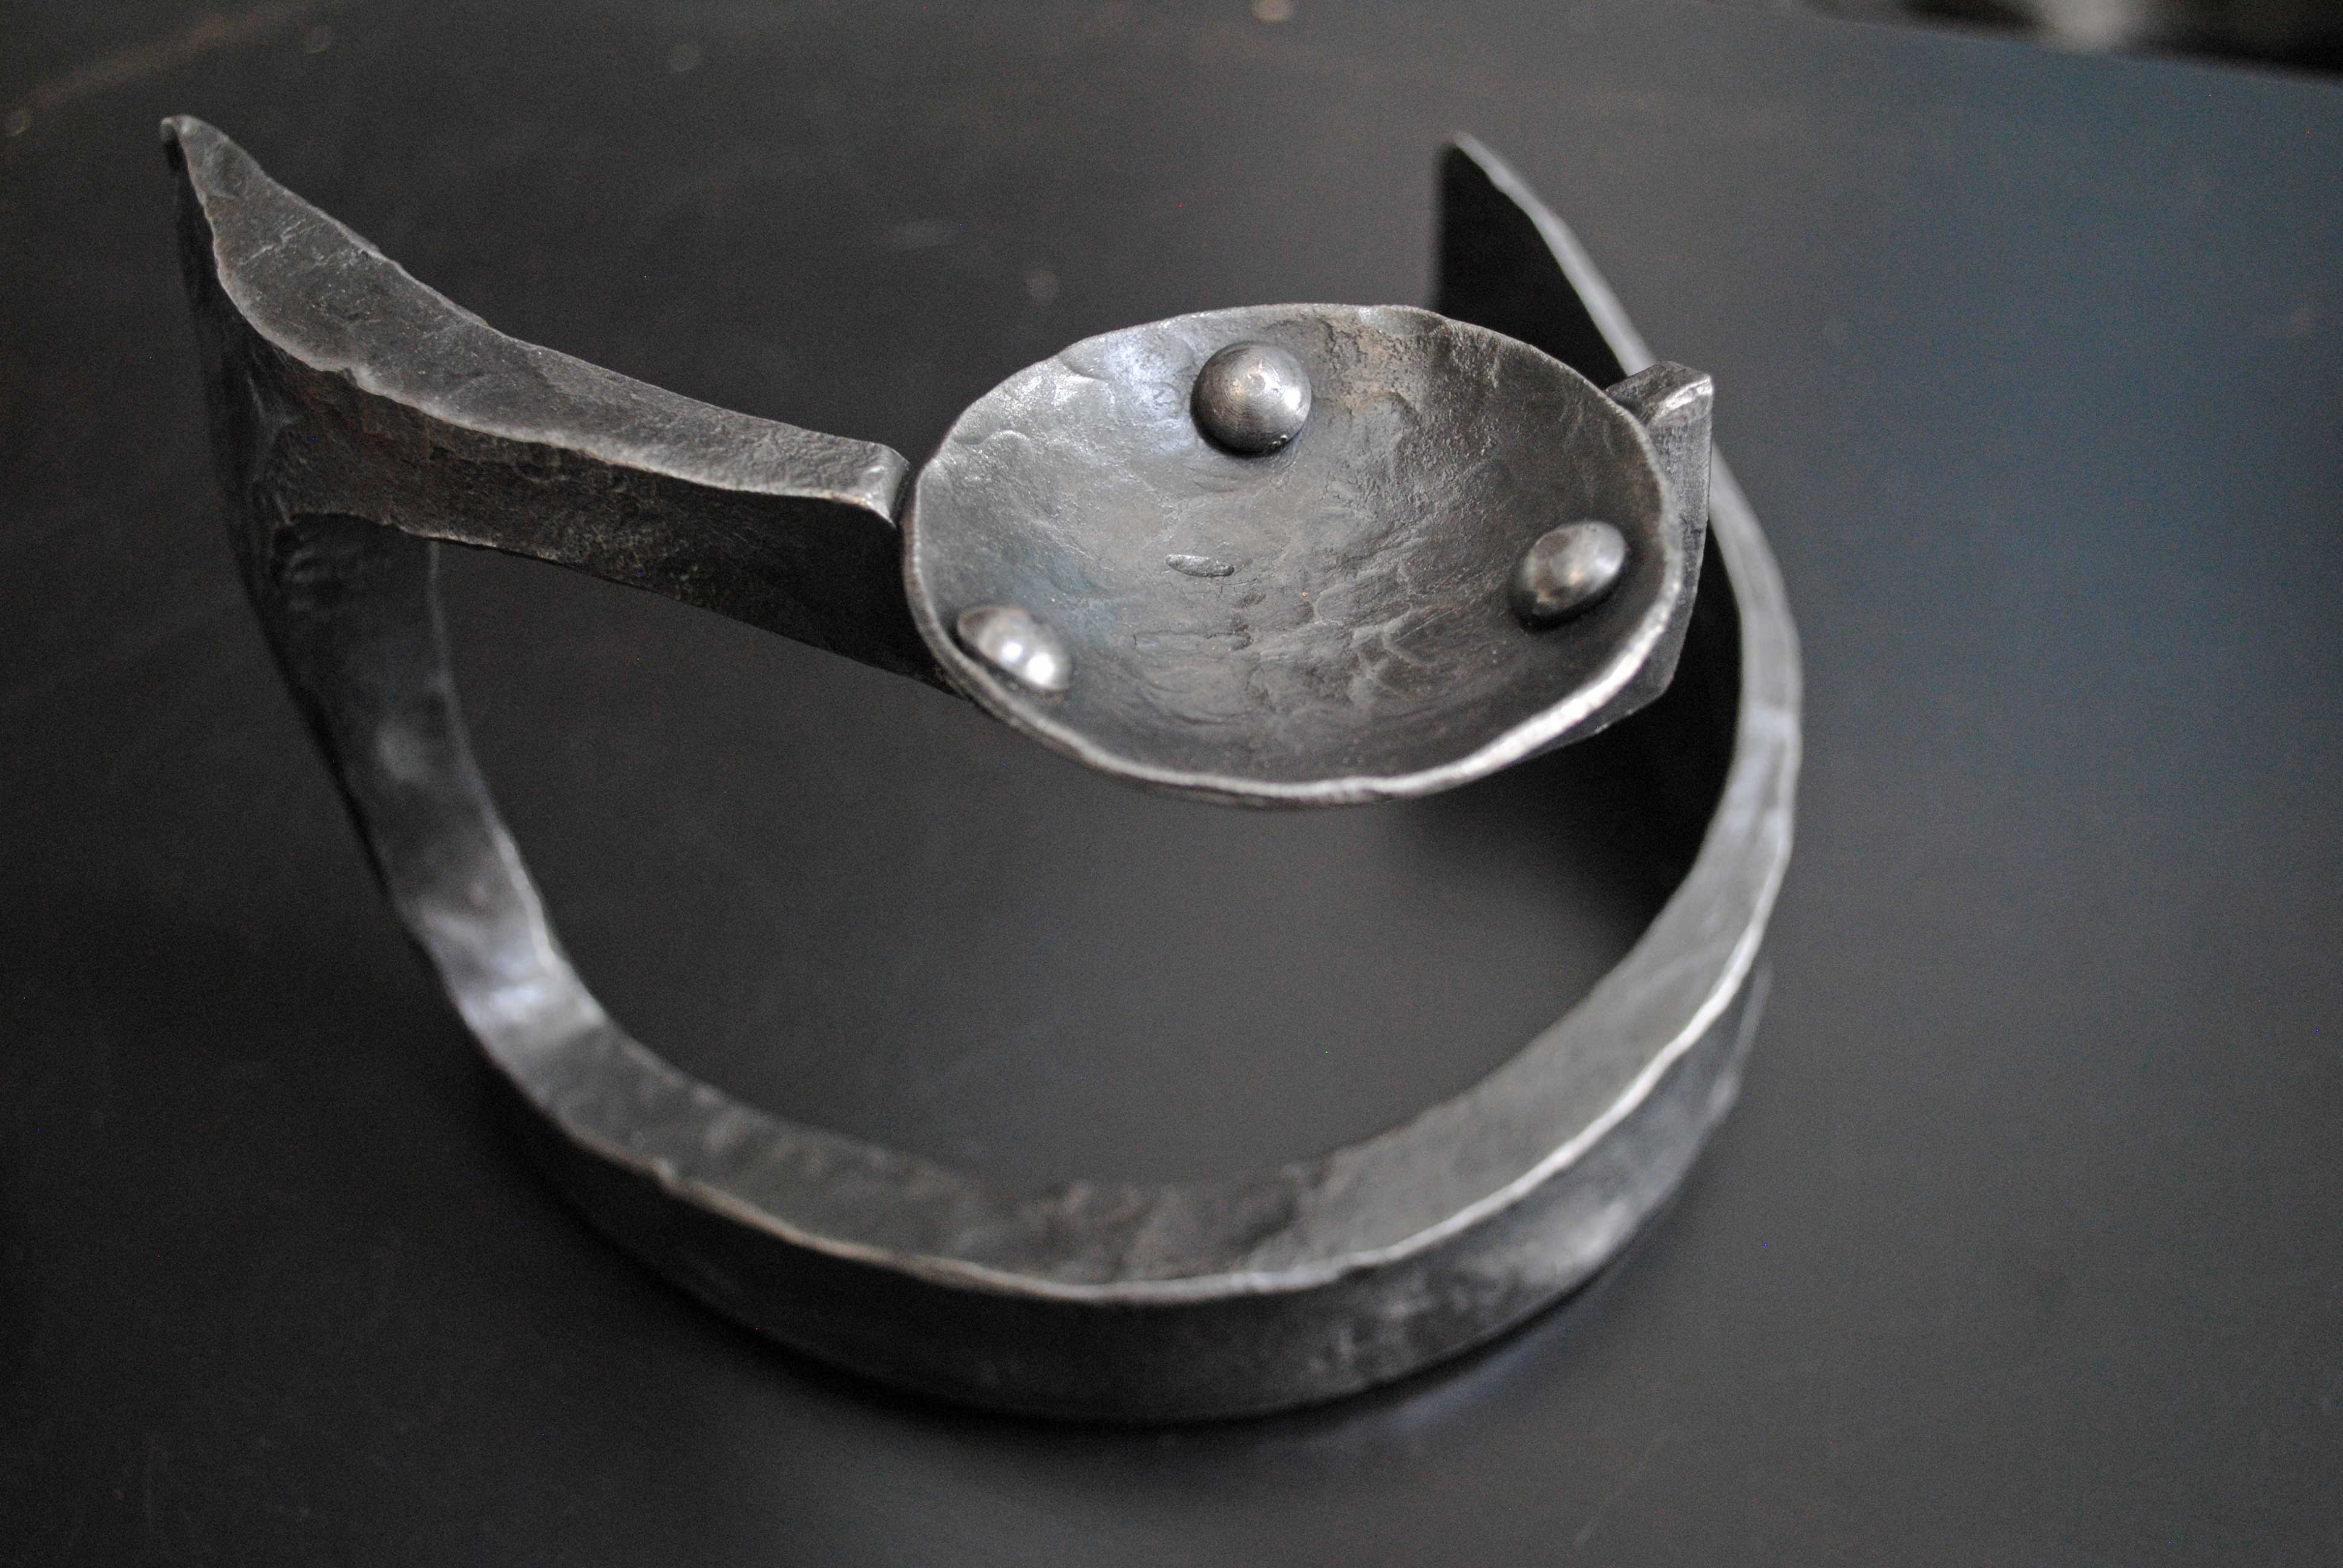
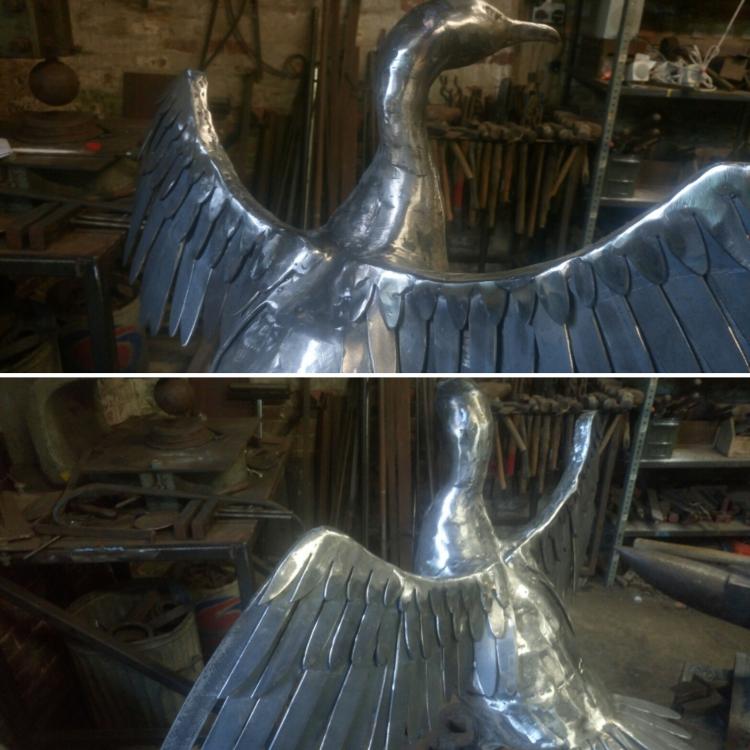
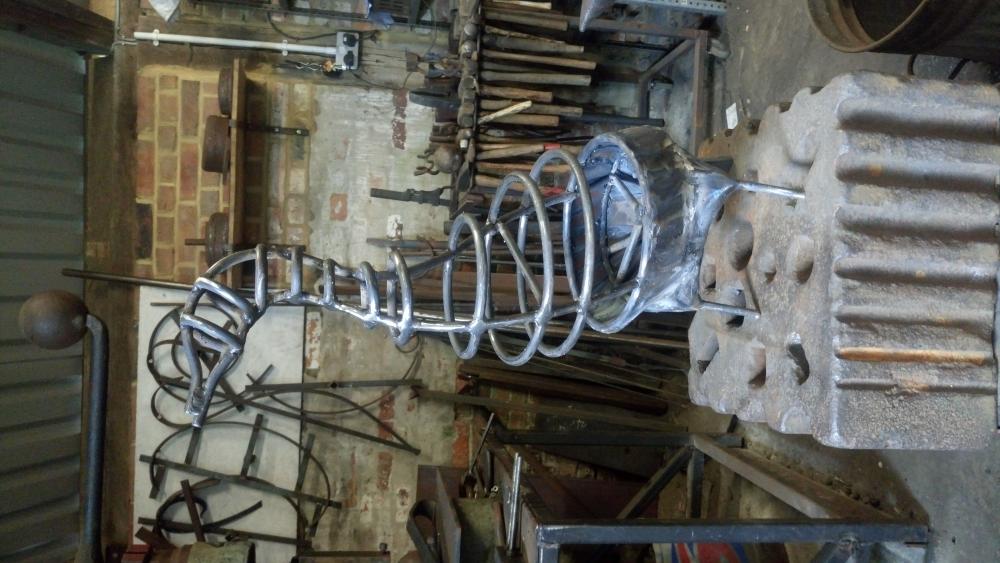
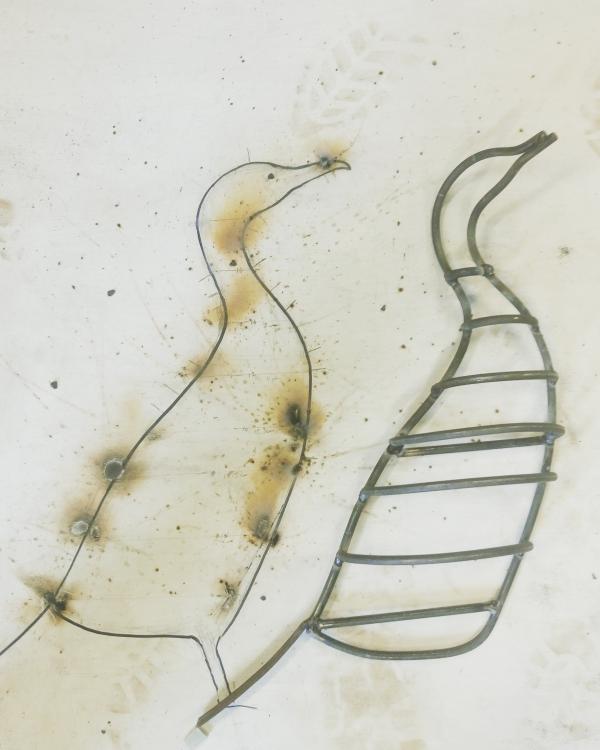
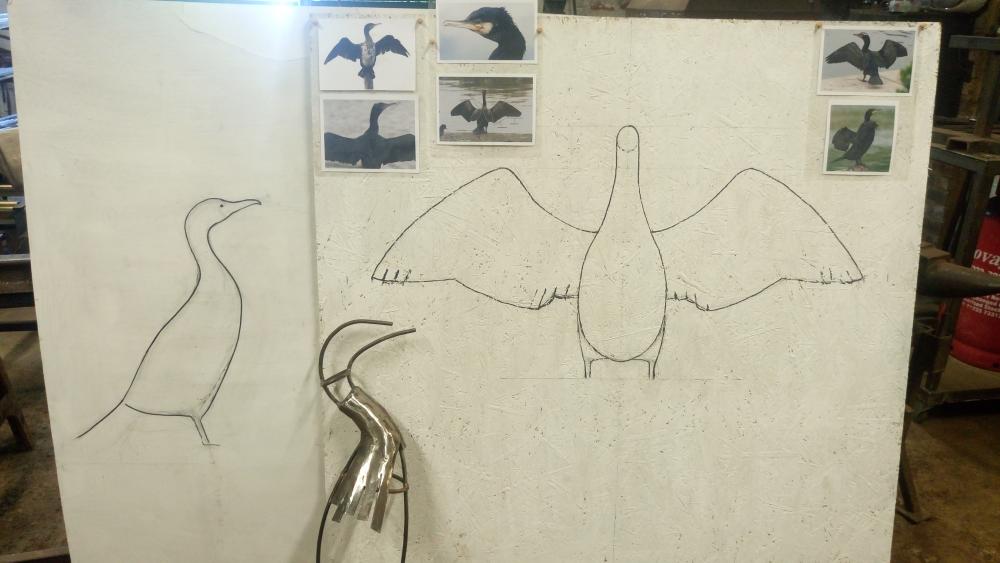
I've 99% finished my 2nd sculpture commission, a spread wing cormorant. I drew up the outline shape with my client so I knew they'd be happy with the proportions & posture. (In the pic of the drawings is a sample piece I whipped up for them). It's head was always going to be turned but I'm not that good at drawing. They've seen it now & are very happy. They just want it to rust so no weatherproofing. The small section of light gauge railway it's on will be welded to a verical post of light gauge railway so it can be stood up in their garden.


-
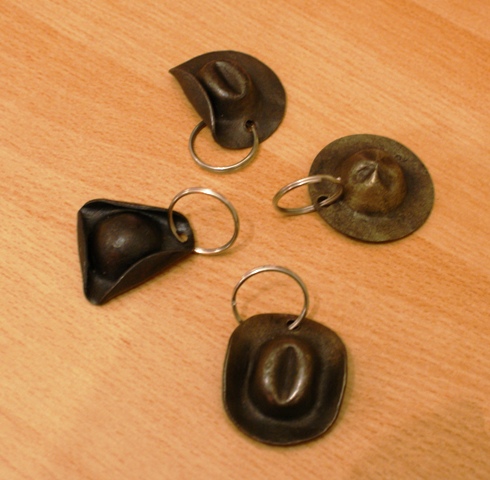
I went and took some pics today of these items on display in the shop I've taken them to...

-
Probably all at once from being put next to some kind of nonsensical modern art installation. If memory serves correct the woman in the shop I got the Stovax from said Zeebrite was discontinued because it had lead in it.
-
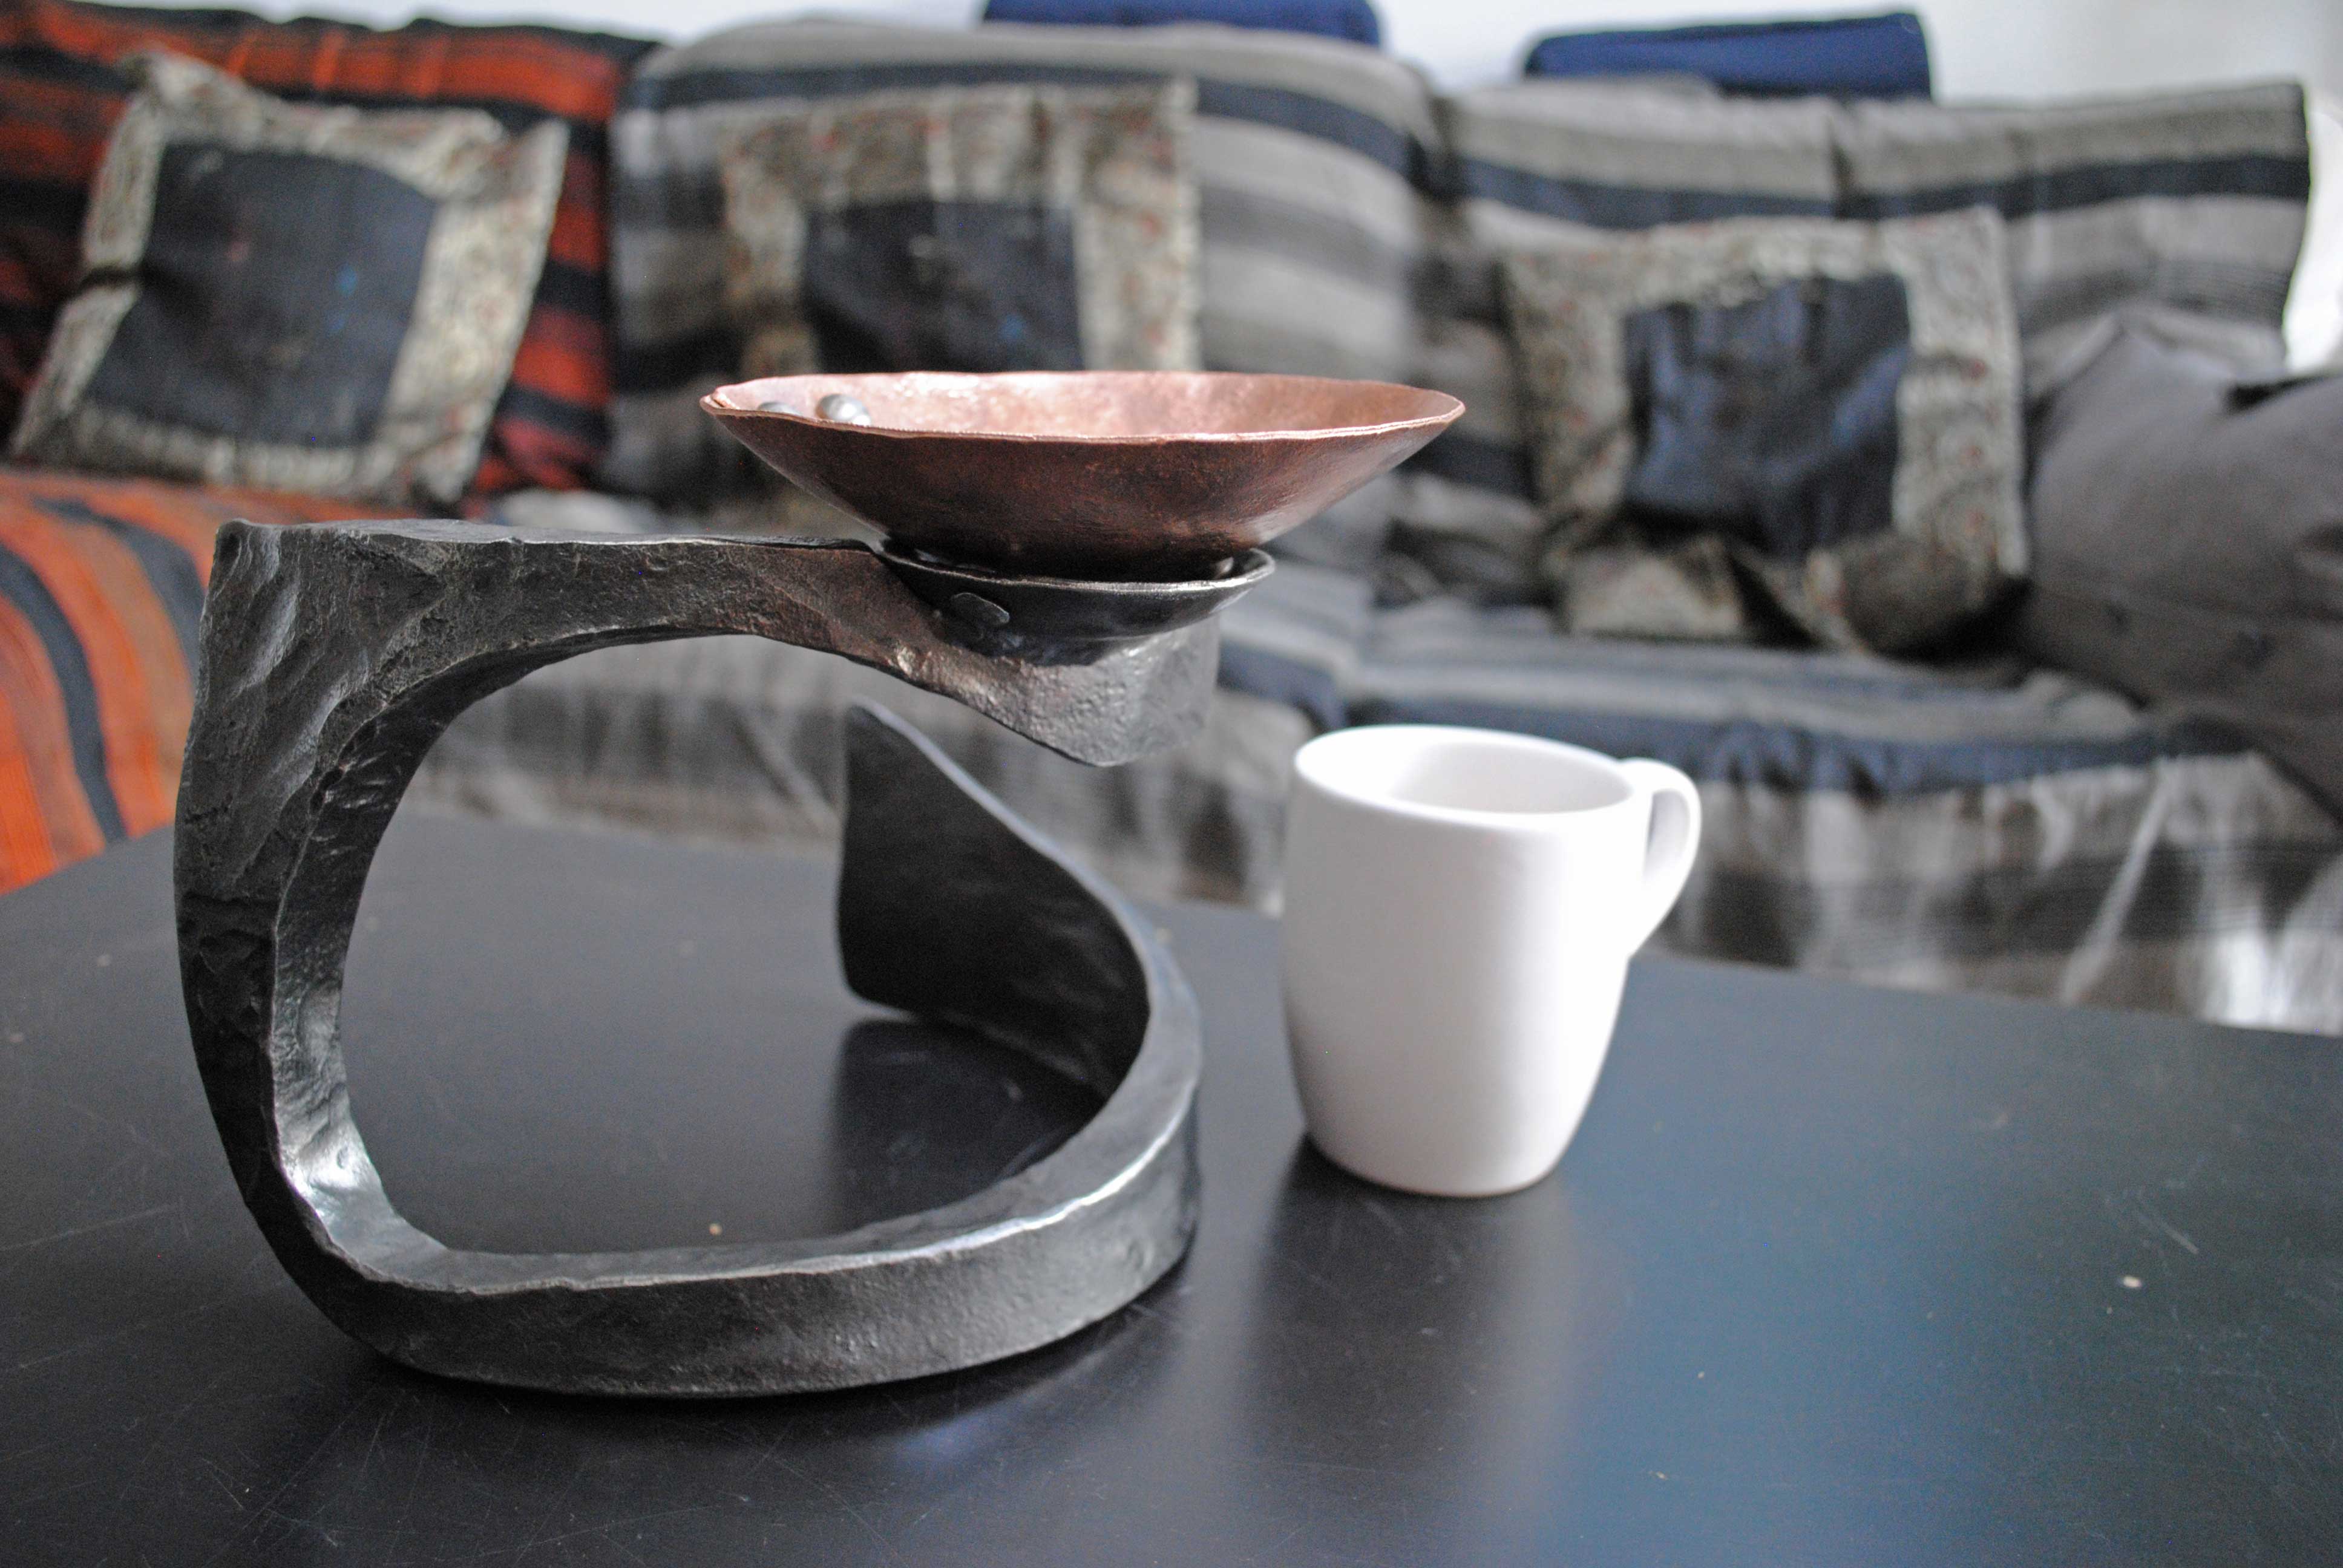
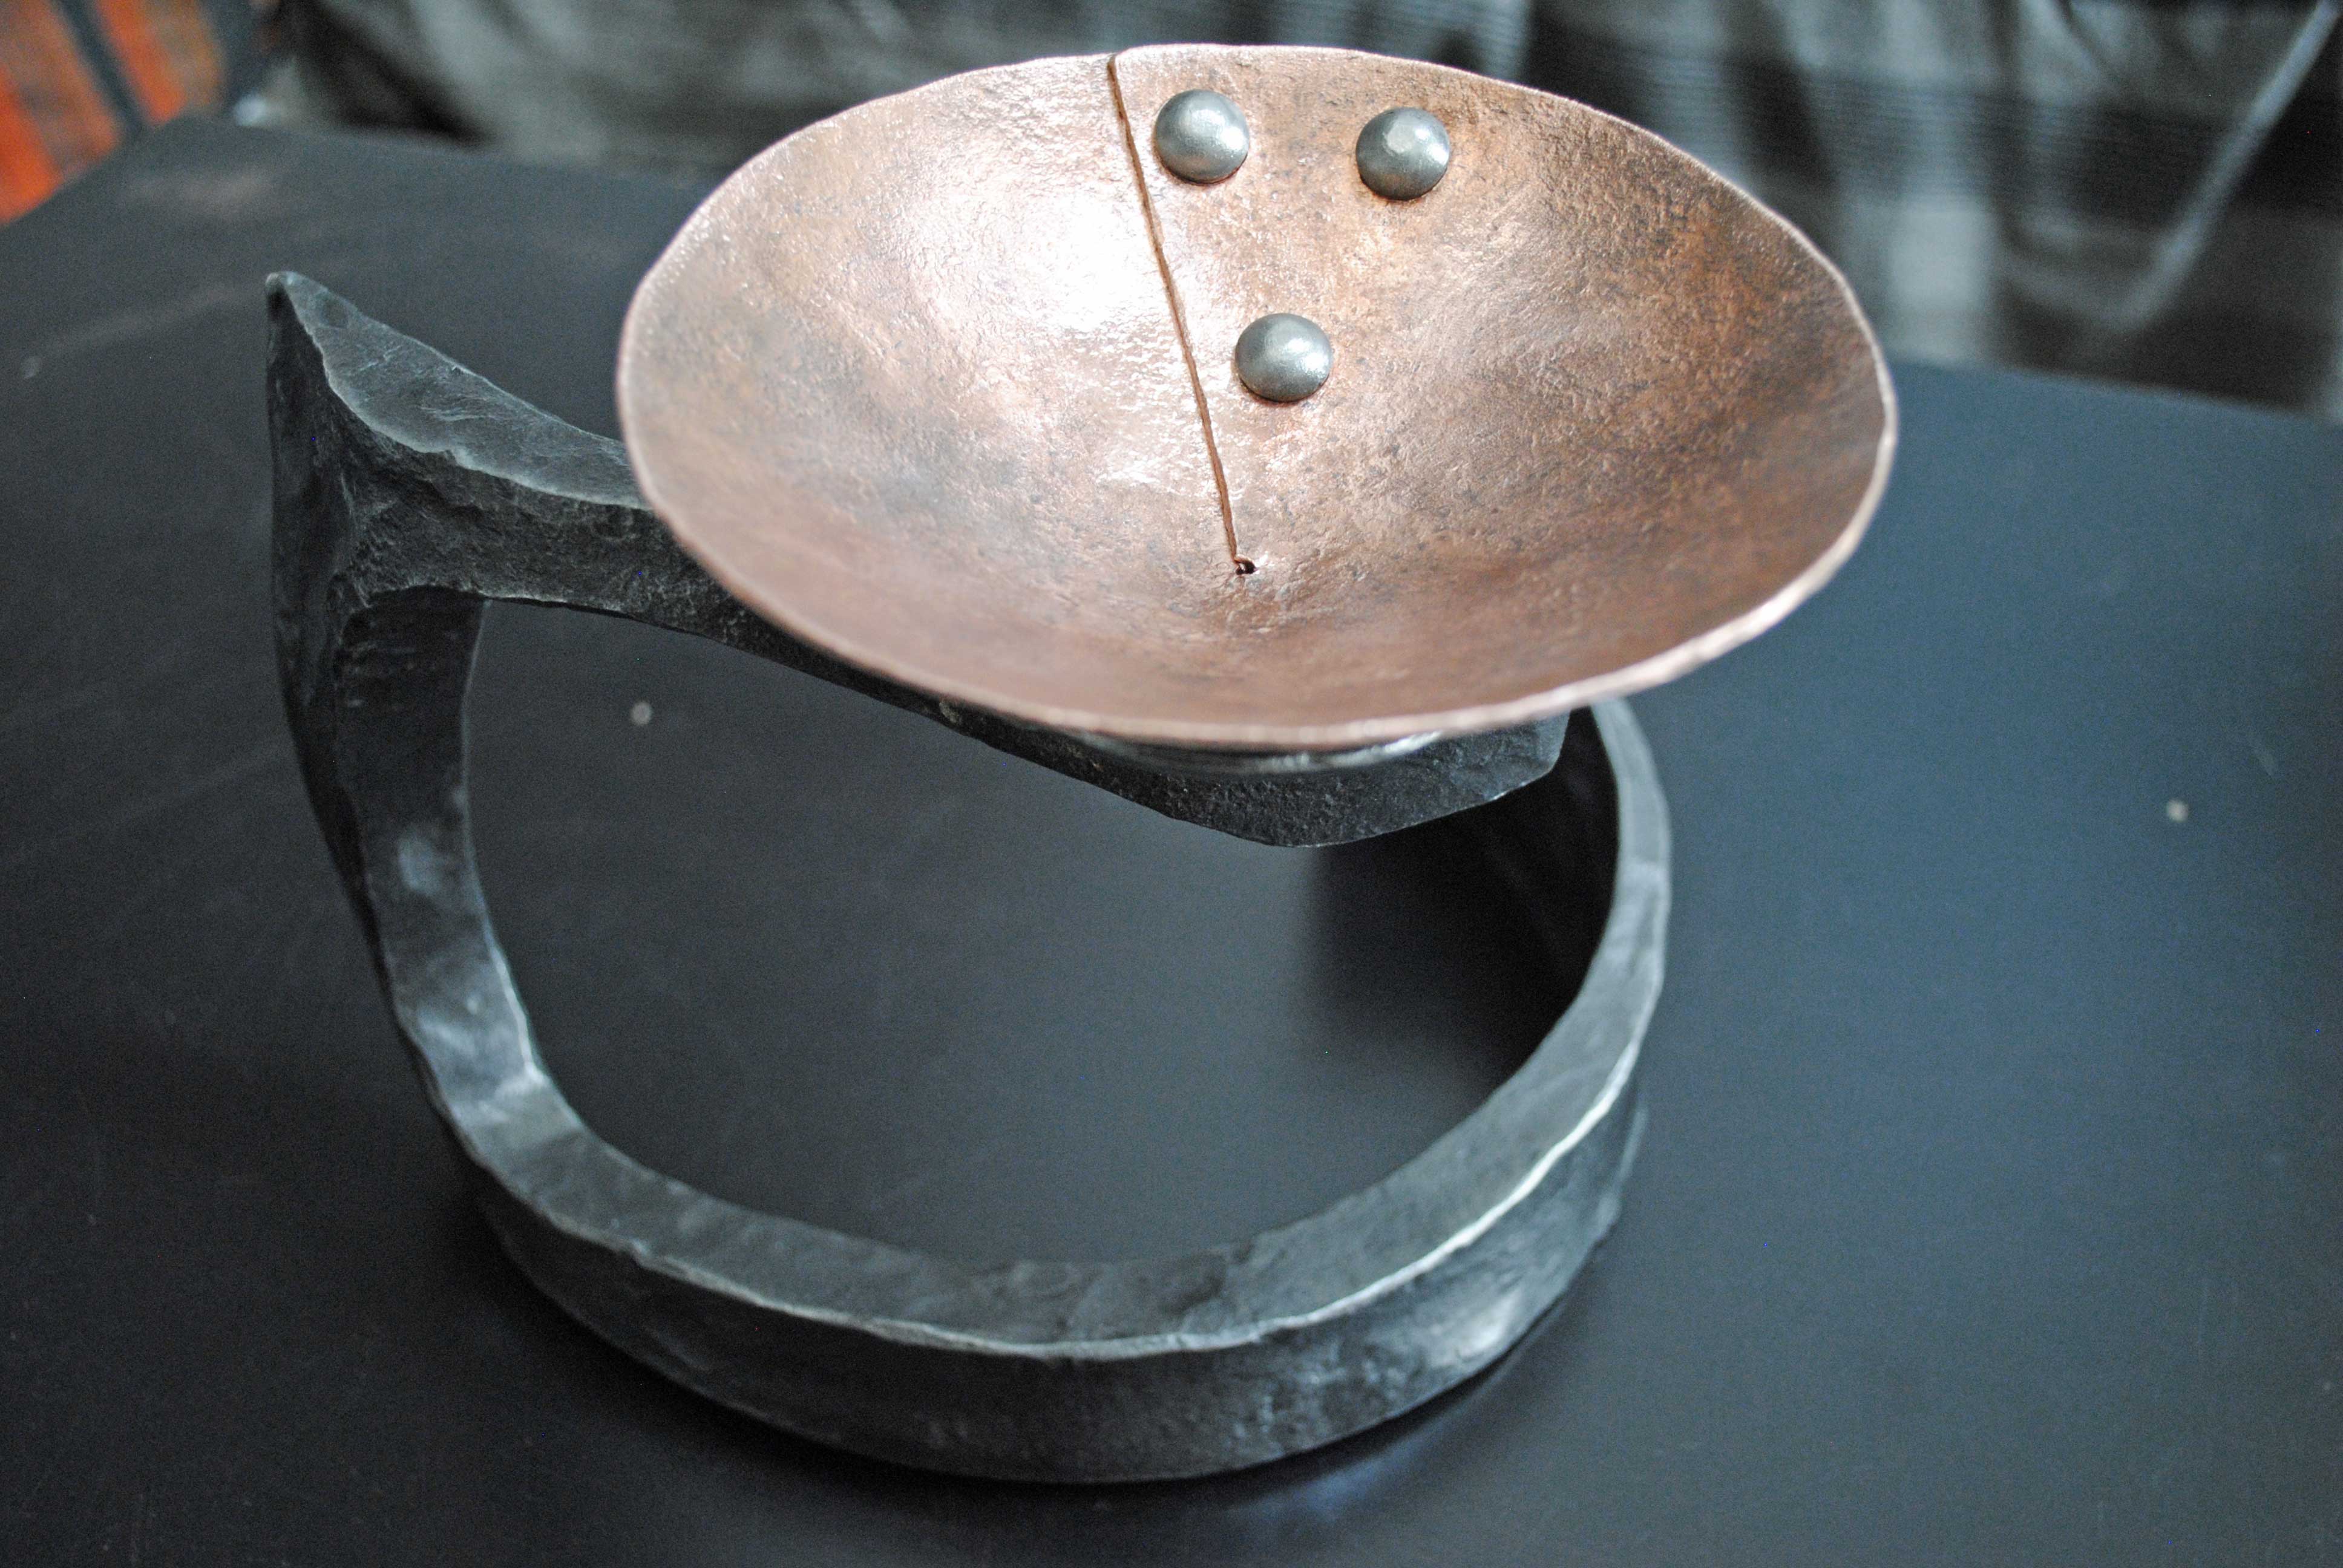
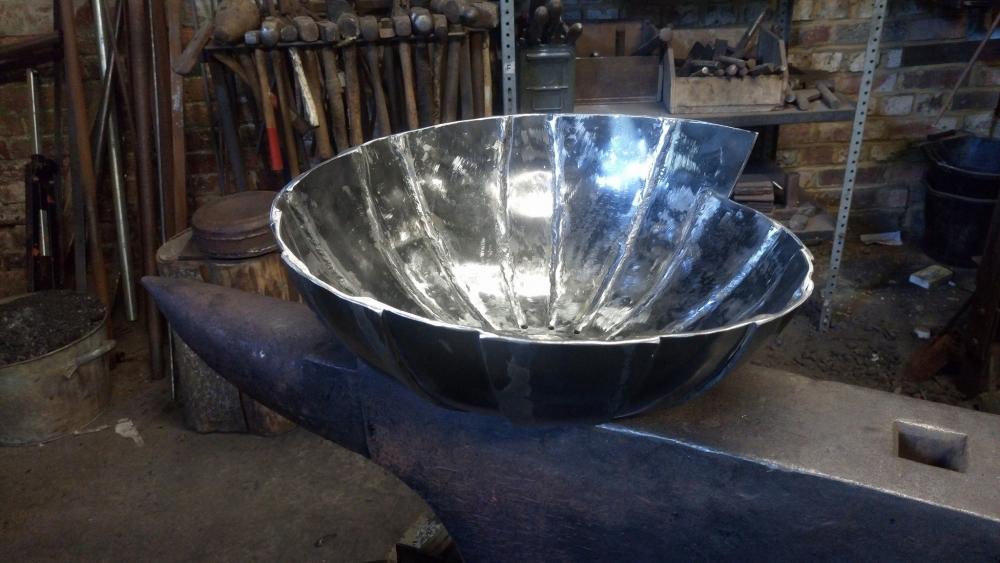
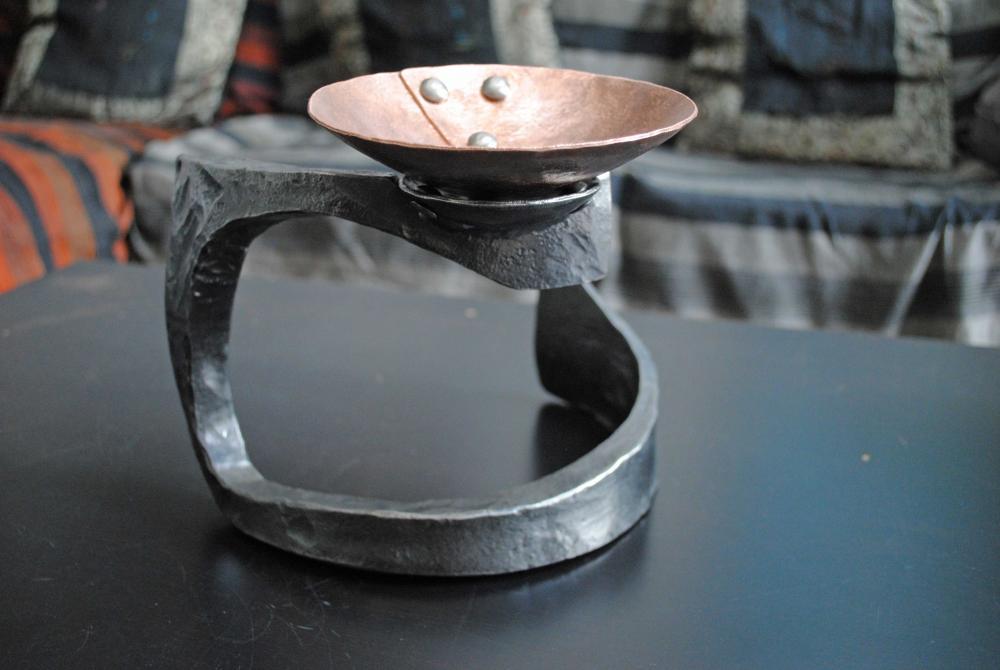
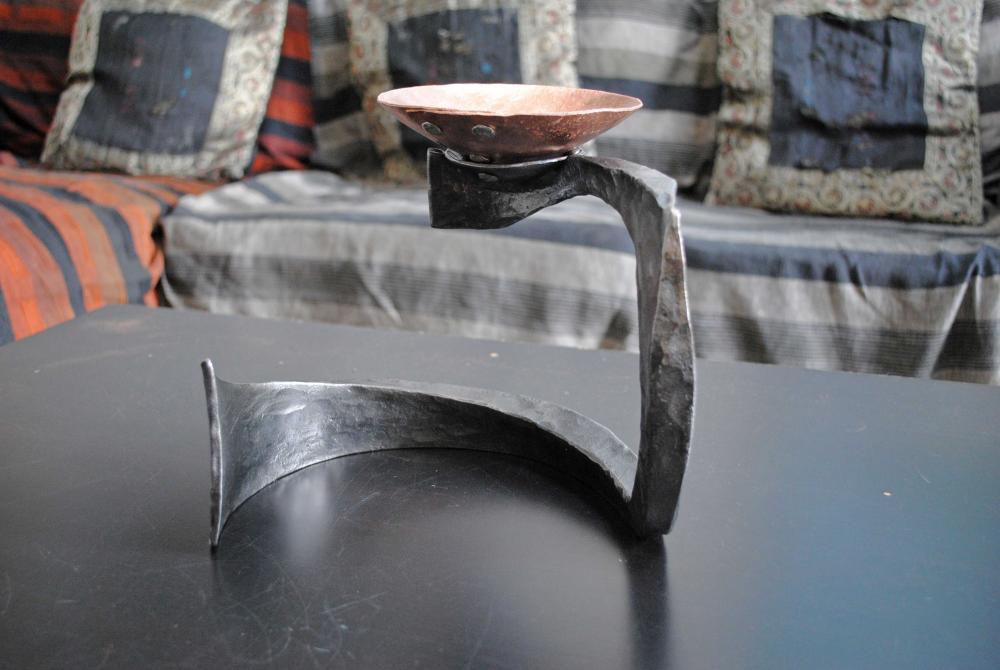
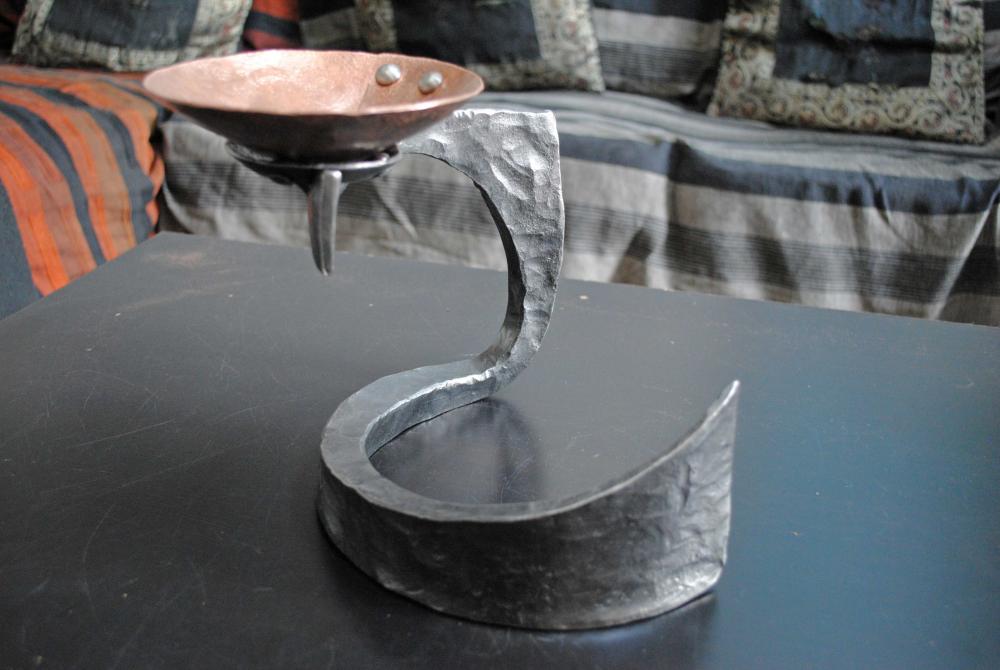
Yeah Liberon Iron Paste is the main one I'd been using. I did also pick up a tube of Stovax(?) (yellow and black tube from memory) but wasn't so keen as it was black like boot polish and didn't seem to have that same grey lustre. And it was water based. Nope no lubricants. Well I took 3 items to a gallery (including the bowl below) and left them there for a long weekend for them to have a think if they were right for the gallery, things didn't work out so I collected them after about 4 or 5 days, and that's when I noticed some small rust spots developing. All the rust spots were on the bare steel surfaces where there was absolutely no mill or forge scale, (e.g on the lip of the bowl) so I just came away thinking that the wax can't "key" onto the bare steel surfaces so well. I just don't understand it T.B.H and have tried to put it down to freak bad luck because folks like you and Peter have been using it without incident.
-
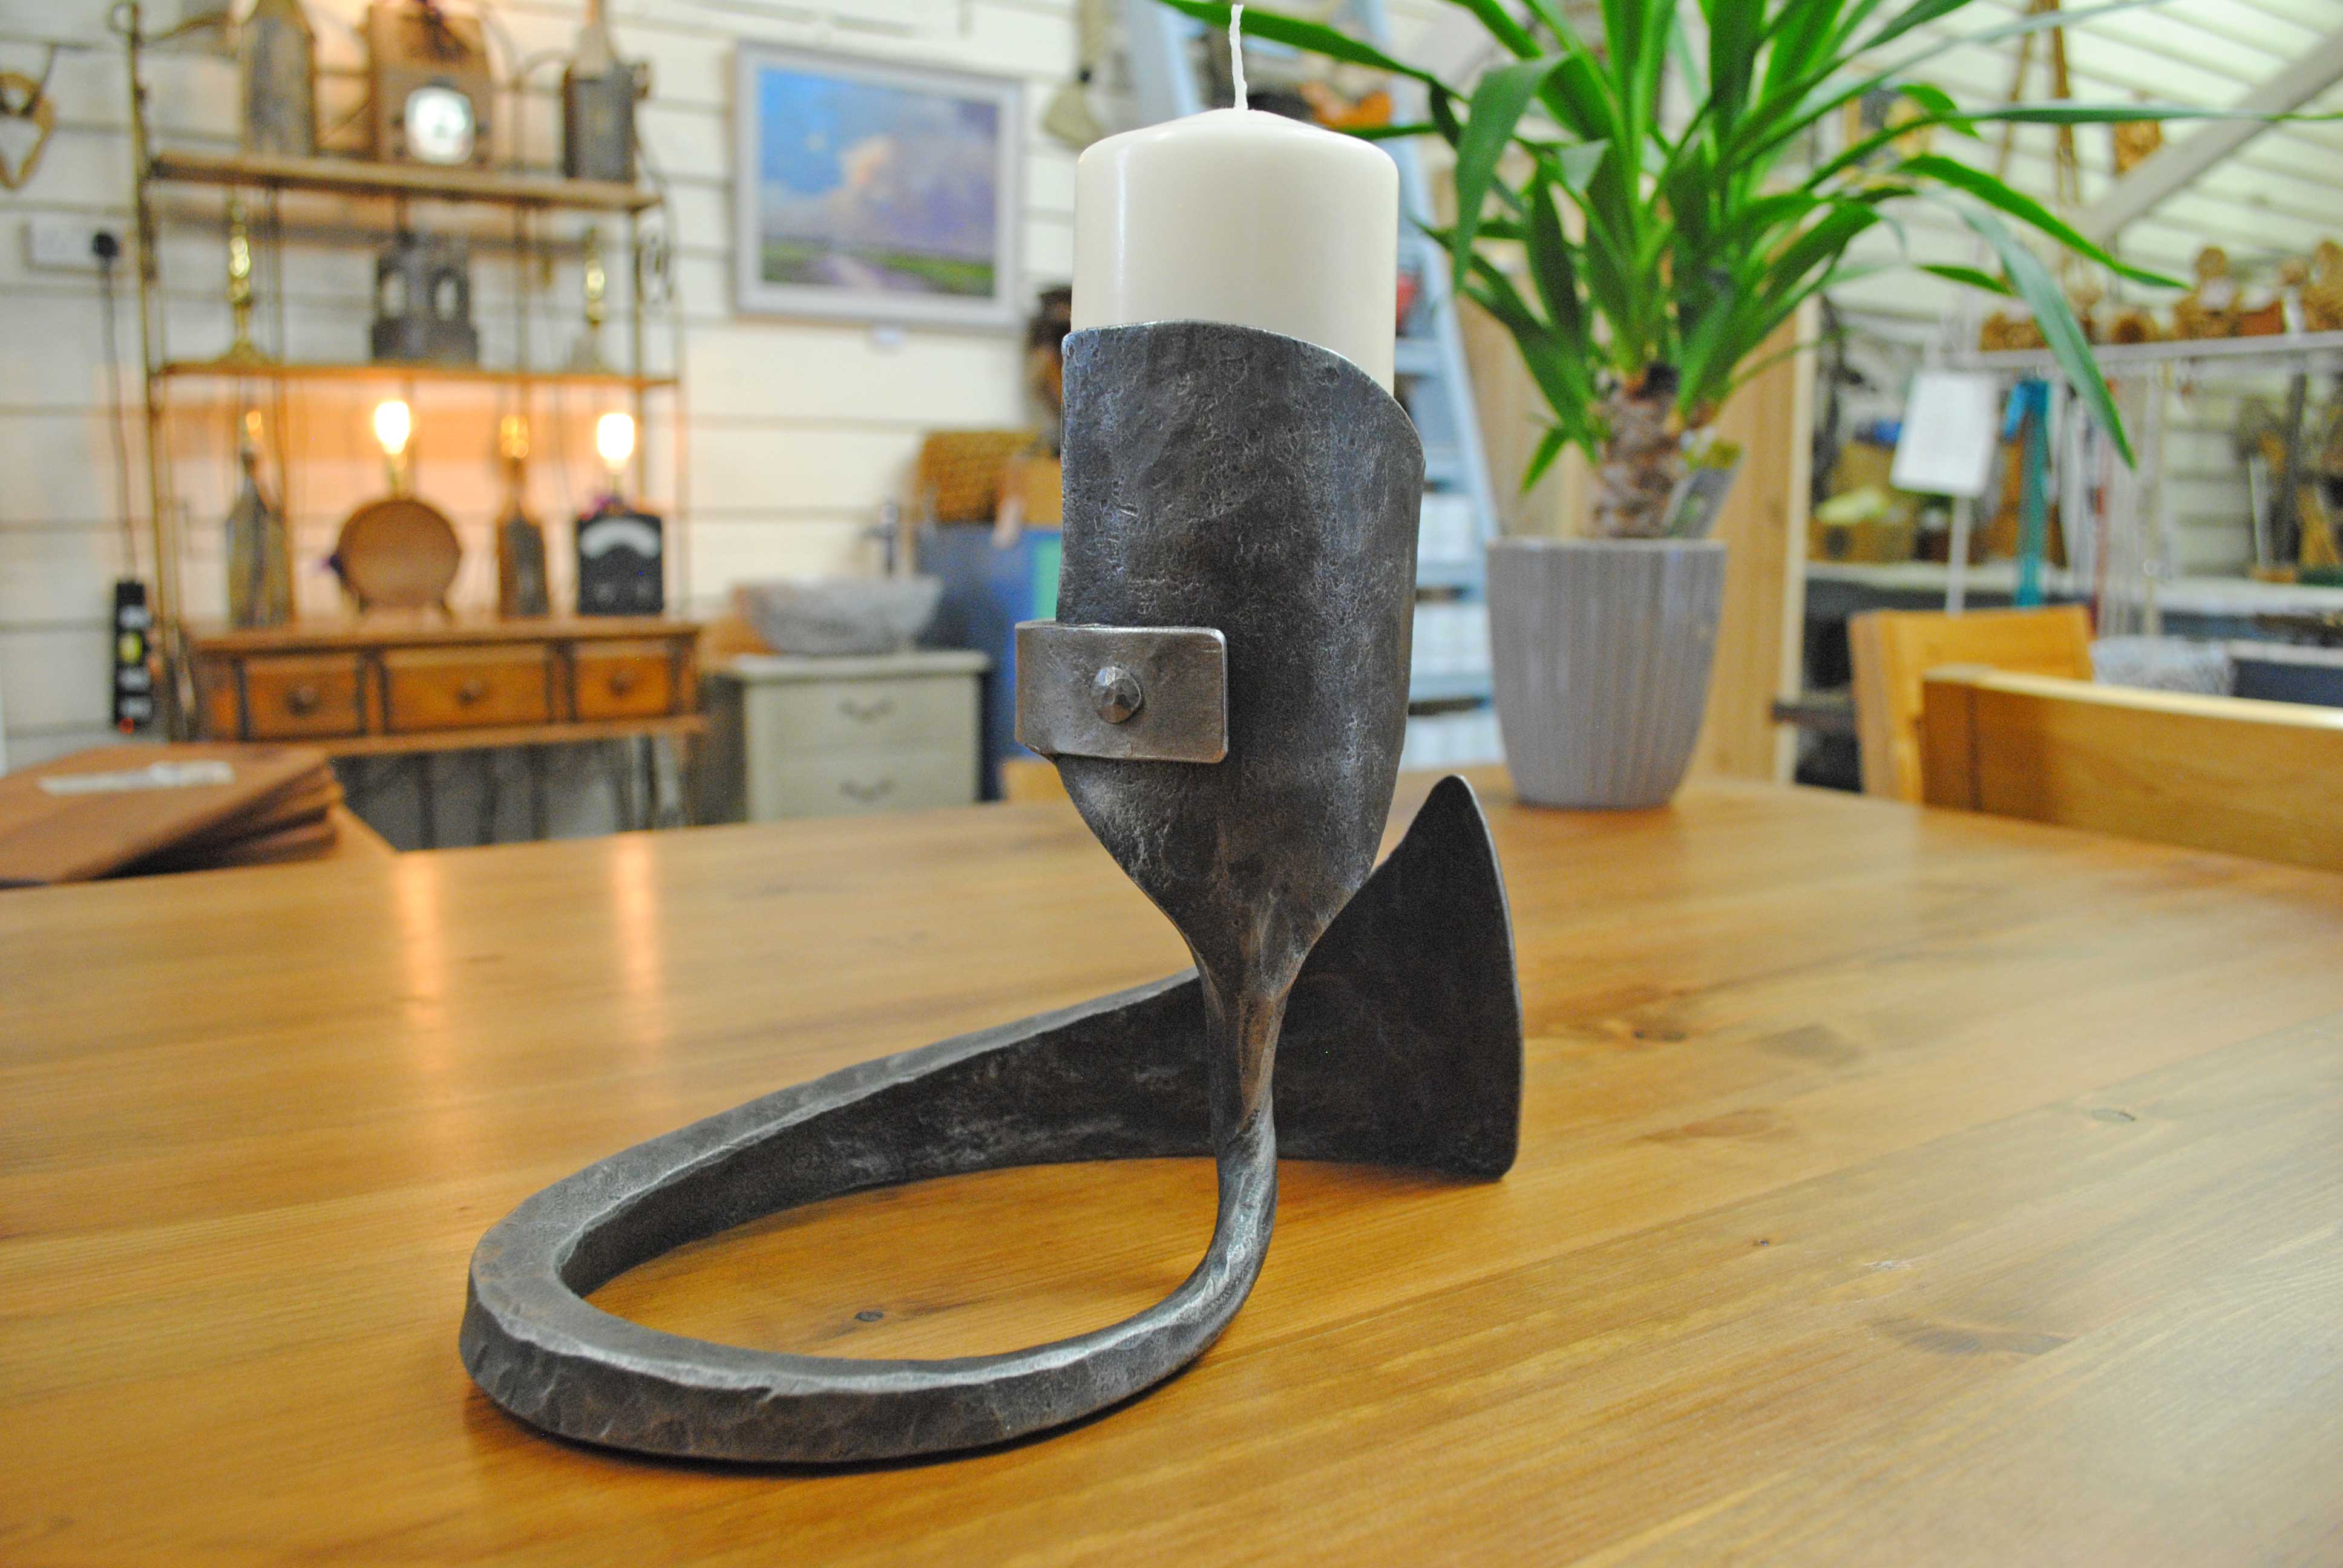
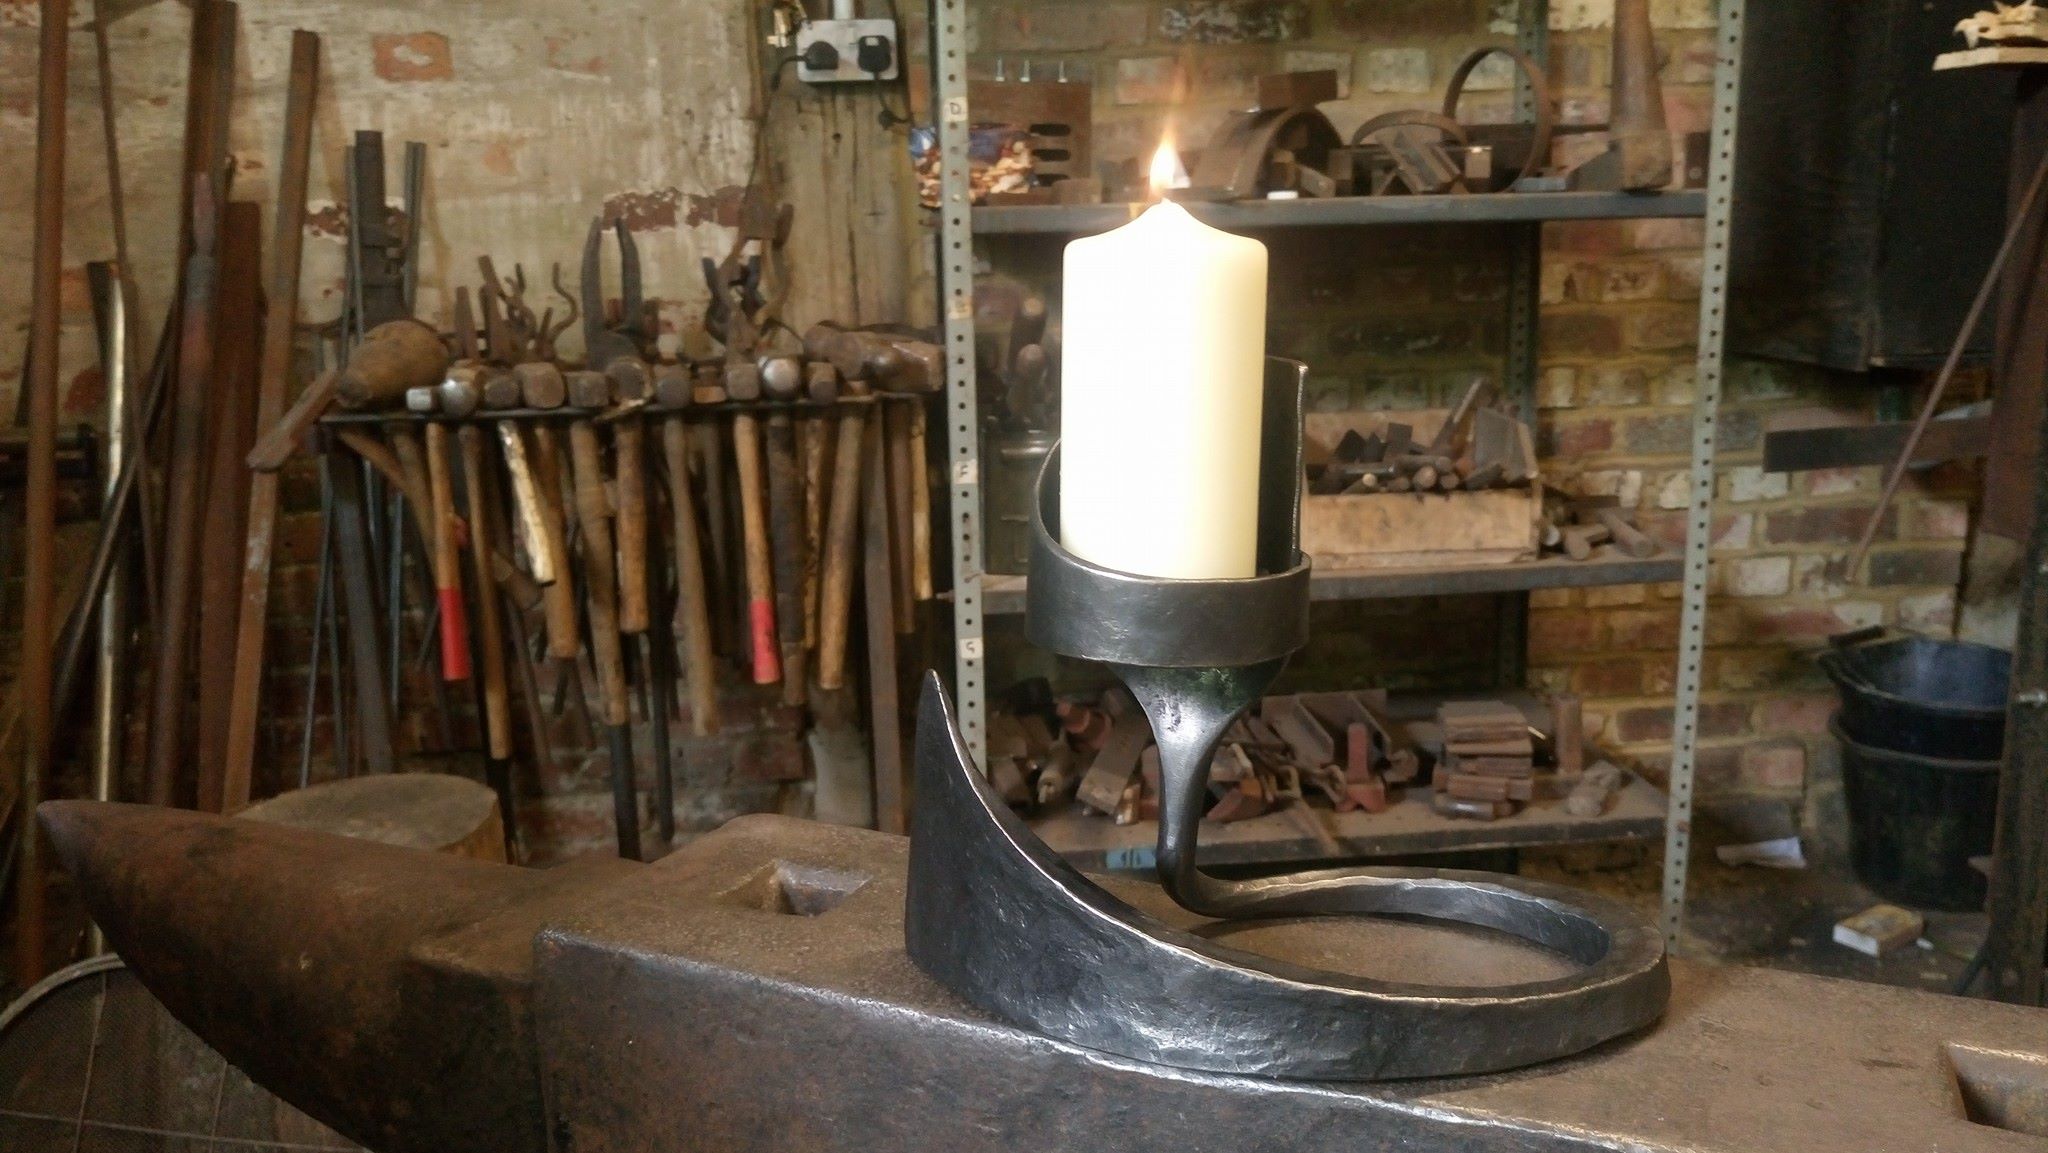
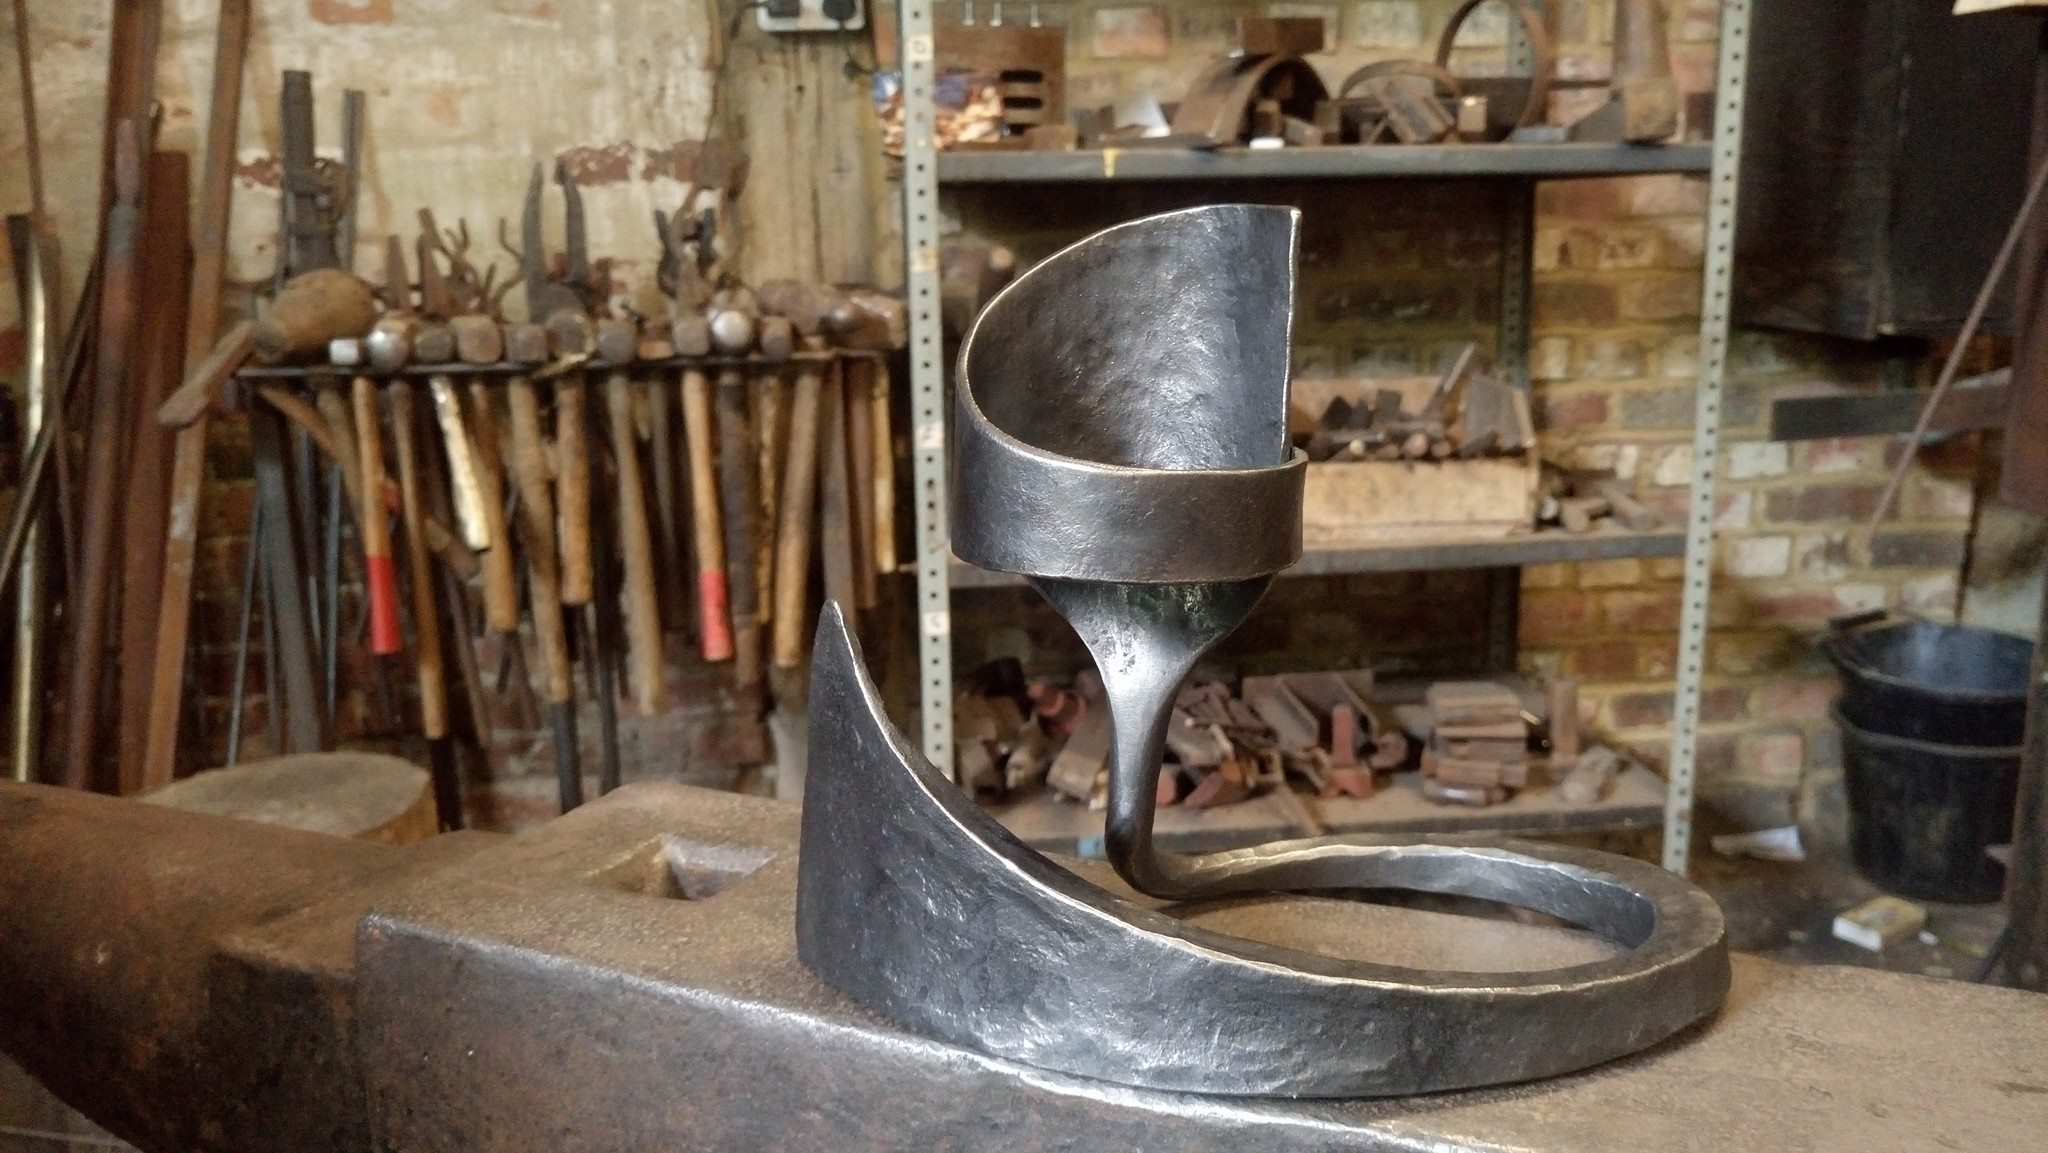
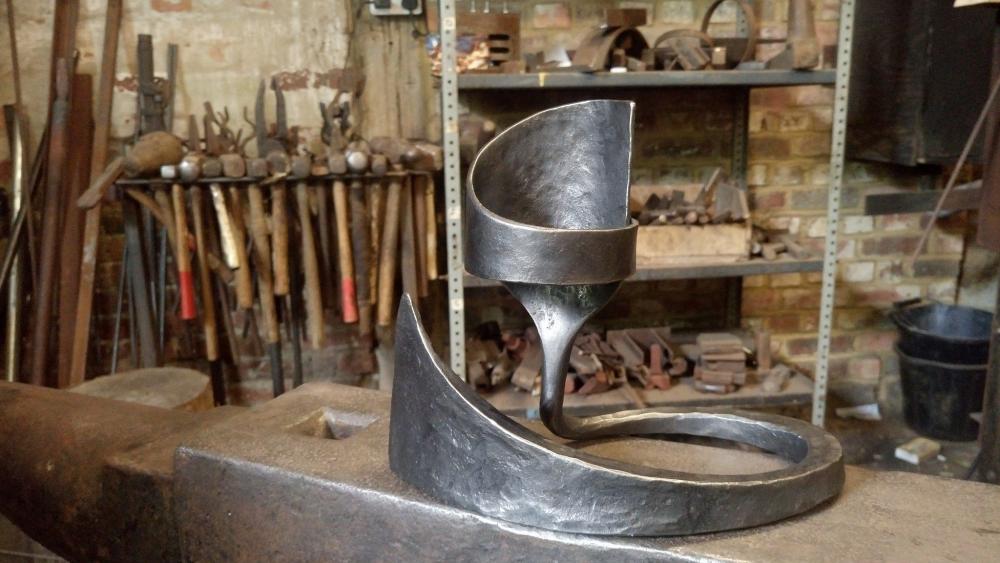
Sorry for the delayed reply, I didn't see the notification that you had replied. The humidity in my workshop is fine. After burnishing my work I immediately clean it with meths to get any residual gunk off, then wipe it down to dry/clean that off, then immediately put the graphite on. Top coat wax goes on immediately after burnishing. I'm conscious/cautious of leaving bare steel open to the elements, and even put on latex gloves so my sweat doesn't get on the item. I cheekily emailed Peter Parkinson to ask him some more detail on his pickeling - graphite - Renaissance Wax process mentioned in his books/old BABA issue and he recommended two coats of R'Wax, also mentioning that it's what armour musuems do, but like you I also thought that the white spirit in the 2nd coat would eat through the first. Any advice I could find on R'Wax said to burnish immediately after putting it on, but that to mee seemed a bit too soon so I was leaving it about 20 seconds for it to dry up a bit, then burnish it. Does that sound too soon? To be honest I've found graphite paste to be such a pain in the backside with continuously coming off when burnished, (even if only a thin coat was applied), that I'm tempted not to use it anymore. I found that watered down Rustins Satin Black paint for wood and metal gives exactly the same look as burnished graphite paste if you paint it on then "burnish" it whilst it's still wet to get off the excess and dry it up. Not ideal as it's water based but I bought my most macho of tools for the workshop the other day...a hair dryer...so I can dry it immediately 100%. (Or I could just find a non water based satin black that looks good). Then you can put a coat of wax over the top of that and it comes out to my eye looking exactly the same. Then you haven't got to wait ages for the graphite to dry. Thanks. No I don't I'm afriad. the back of that tail thing on the candle cup was a flat straight end that didn't taper down any further than what you can see. It finished a small distance further on that the rivet. The bottom of the cup is a disc placed carefully in to line up with the bottom edge of the wrap around bit, then I welded it in position all around the circumferance.
-
Cheers. Pics of power hammer forging No.2 attached, both of them I just made up as I went along really. Both forged from 20 x 30mm flat, just wanted to test the cross pein dies it came with really. Yep happy with the hammer though haven't had much time to play on it unfortunately. Attempting to tag Mr Evans who might know the answer to my question... @Alan Evans Finished these with thinned down graphite paste, burnished them up then 2 coats of Renaissance wax but found some small rust spots after a few days?!?!?!?! Haven't been handled with wet hands. Completely baffled. Any ideas?


-
Do you put a clear coat over another finish?
-
When finishing interior household items that will be handled from time to time or possibly brushed past with light coloured clothing, what's your method for determining that it's clean/dry enough to not mark/stain skin or fabrics and is ready go to the client?
-
Having recently purchased a small 25kg Anyang I'm curious to see what adaptations others have made to their dies. For example the largest of my bottom dies (rectangular and flat with unshaped edges) has a 10mm round hole set to one far side face of the die, with a threaded hole on the side of the die - both to allow for seating of custom gadgetry. What creations have folks come up with?
-
Cheers. The pics seem to make the edges look more aggressive/sharper than they are in real life. I did my typical thing of softening the corners with a twisted wire wheel on my 4 1/2" grinder so there's no nasties. One of my scarier experiences with a grinder as somehow a towel that was on the bench about 2 feet away managed to get sucked in to the grinder and get tied up in the wire wheel. That kicked the grinder out of my hand, hit my arm then fell on the floor still spinning tieing up the power cable and towel, all in the space of a split second. I have a love/hate relationship with wire wheels - evil tools but really useful. Arm and grinder still functioning.
-
I very recently got a 25kg Anyang power hammer and plan to pursure my sculptural interests more now that my ideas are actually feasible. This is the first proper thing I've made under it using solely V tapered cross pein dies which were most effective at spreading. Forged from 1 piece of 30mm x 20mm flat bar, I deliberately didn't planish the hammer marks. The pictures don't really give a good sense of proportions but hey ho. Finished in a graphite based polish then burnished to highlight. Completely new to power hammers so looking forward to getting better at using it & making some tooling/dies to go with it.


-
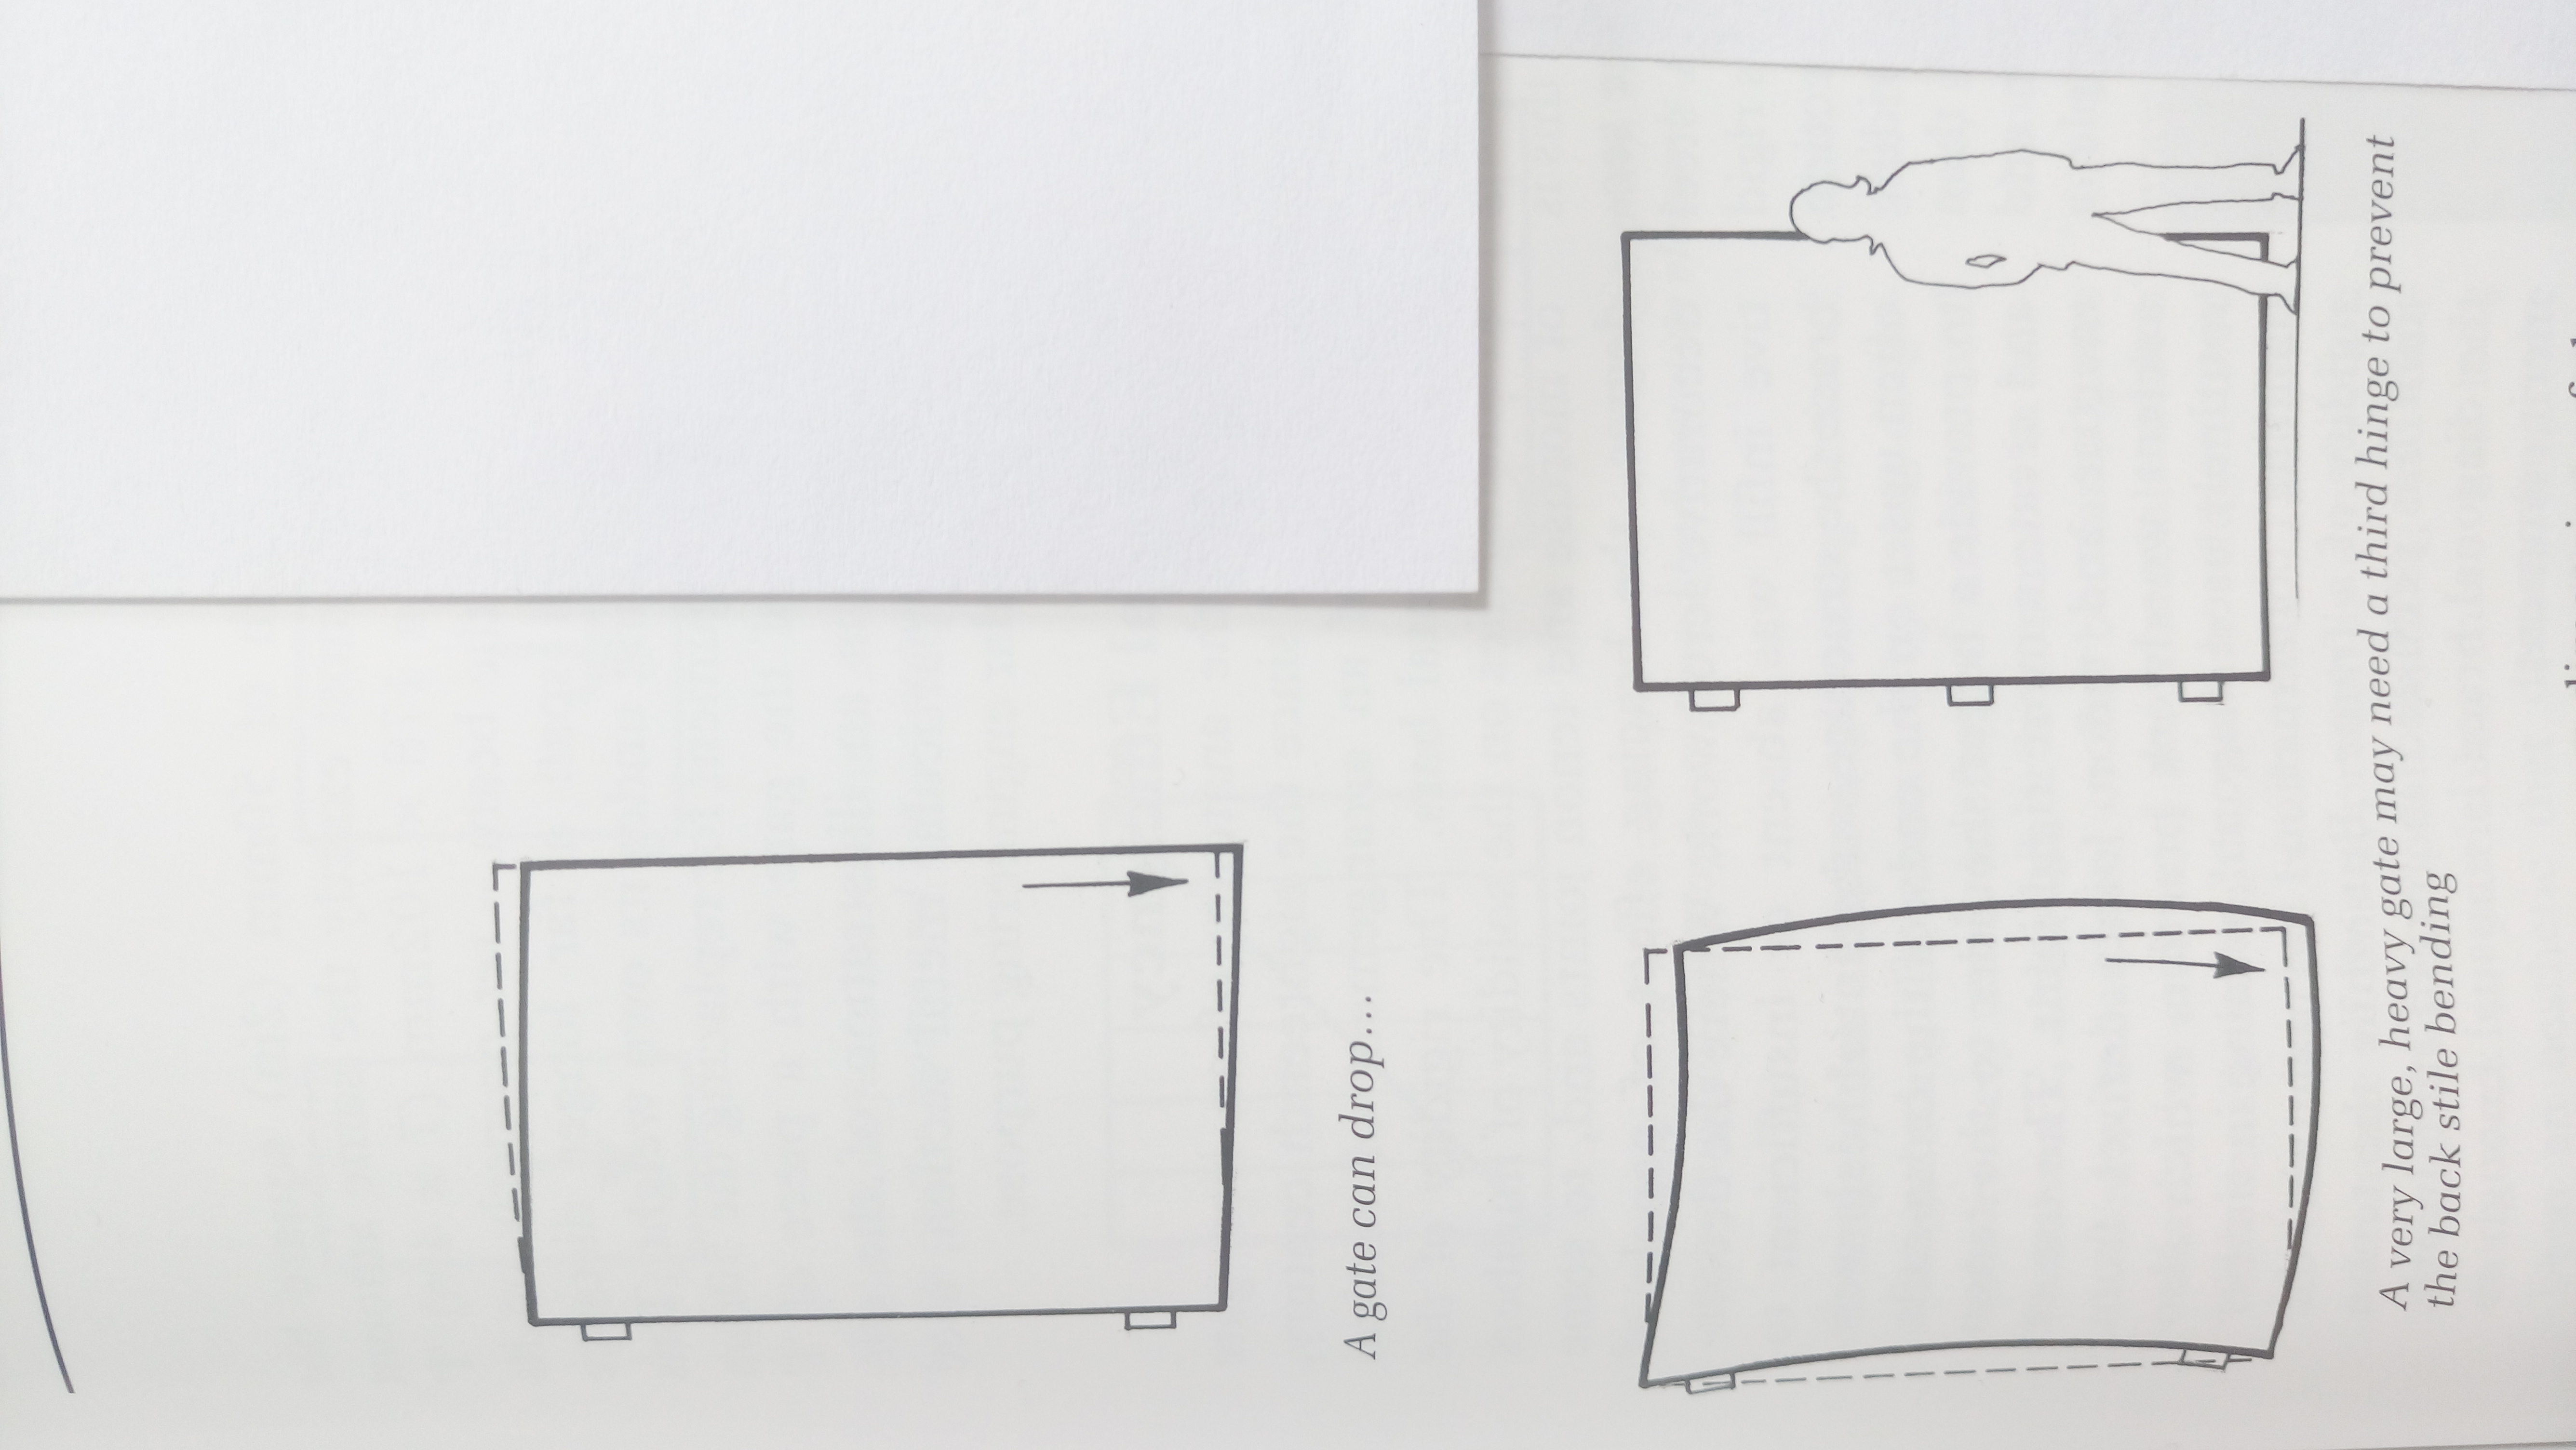
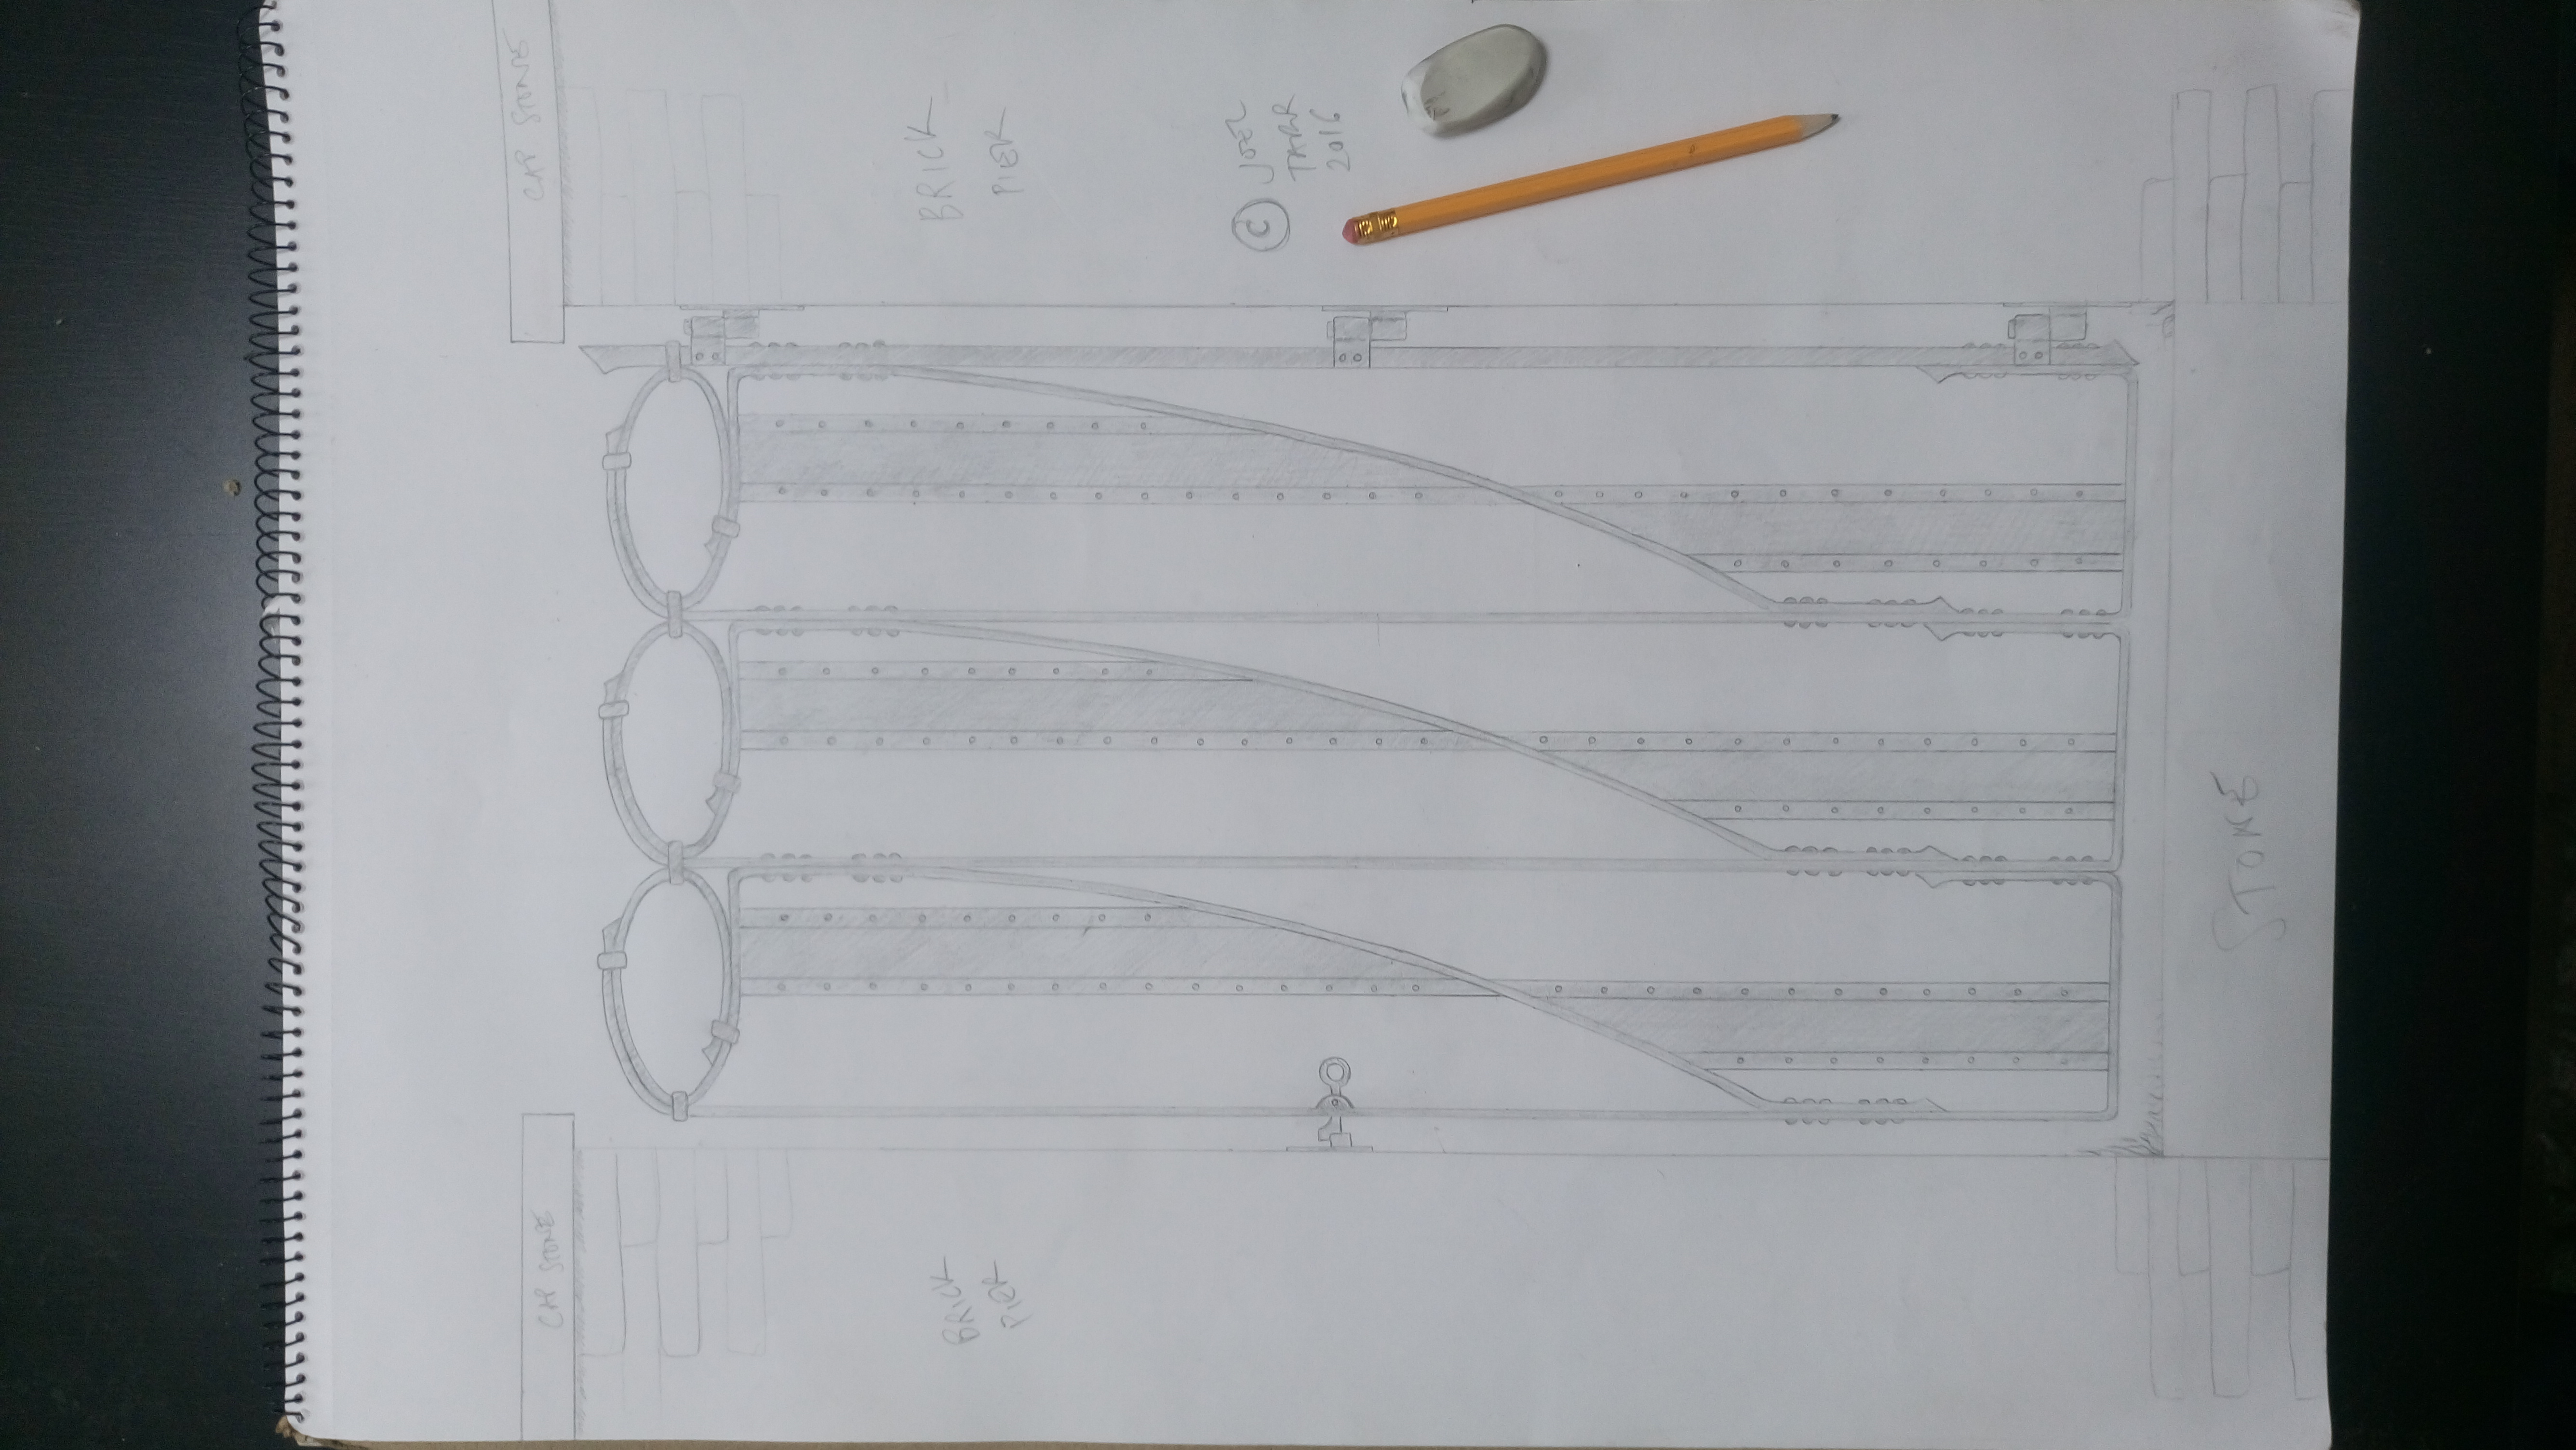
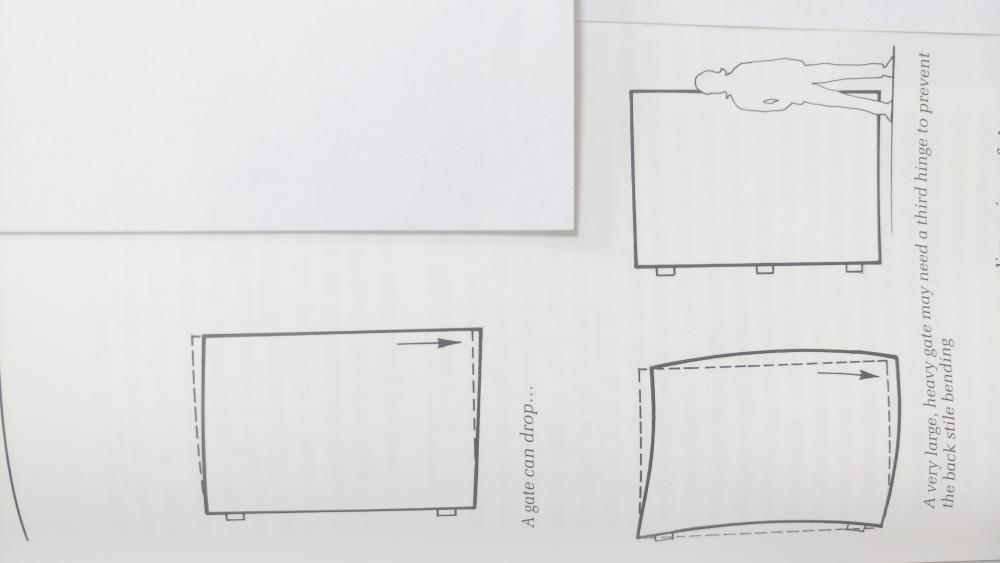
Not sure if that was aimed at me or Arftist but the gate is my design, not an architects. The 3rd hinge discussion came about because the client was at one point concerned about the weight on the brick pier. He's satisfied it's not a problem now & would be happy with 2 hinges, but I had drawn in 3 hinges for the sake of the gate & keeping the back stile from bowing in the middle. The consensus seems to be that 2 is enough & 3 causes grief so I'll probably just run with 2. Cheers
-
Thanks very much for the comprehensive reply. I'll read it again a few times later when this hangover has worn off. I always set both hinge pintles facing up so the weight of the gate is spread across both hinges. I put a security pin through the bottom him pintle so the gate can't be lifted off. The chance of a 3rd hinge binding had crossed my mind. To be clear my concerns about the back stile bowing are as per the bottom 2 images, not the top. Pic taken from Peter Parkinson's brilliant book on Forged Architectural Metalwork. I'd really recommend his books to everyone, full of great info.
-
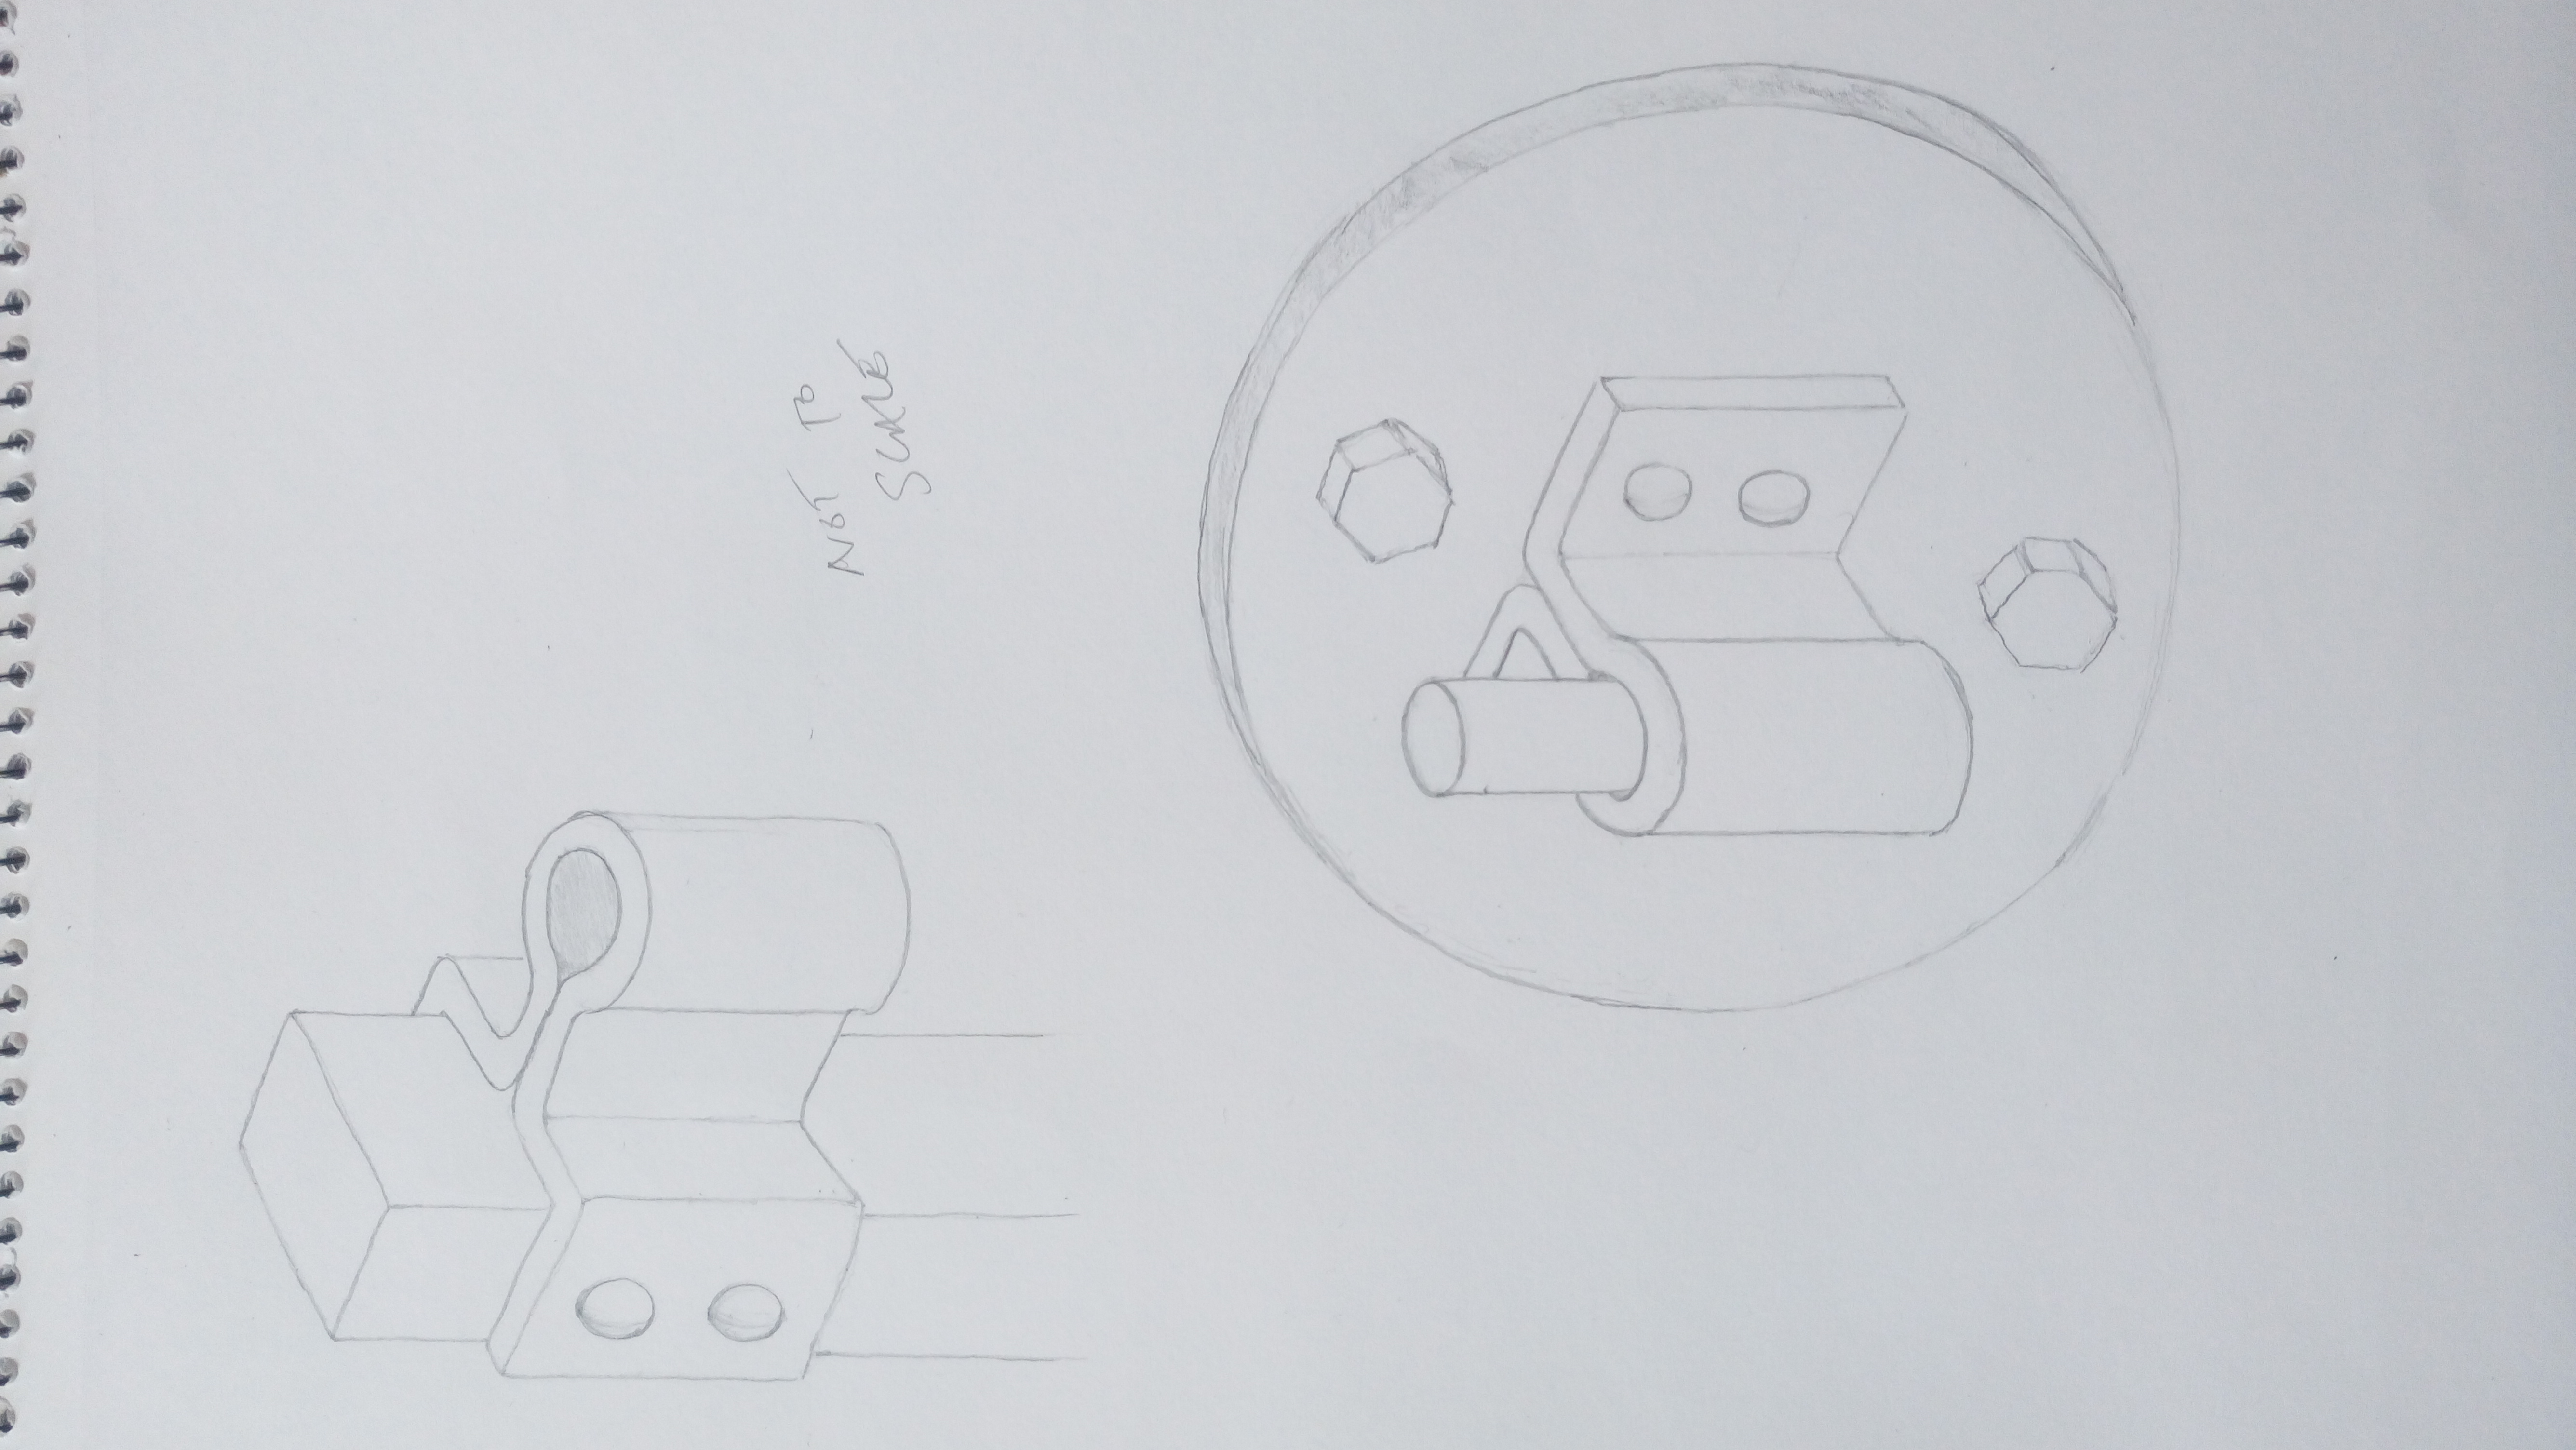
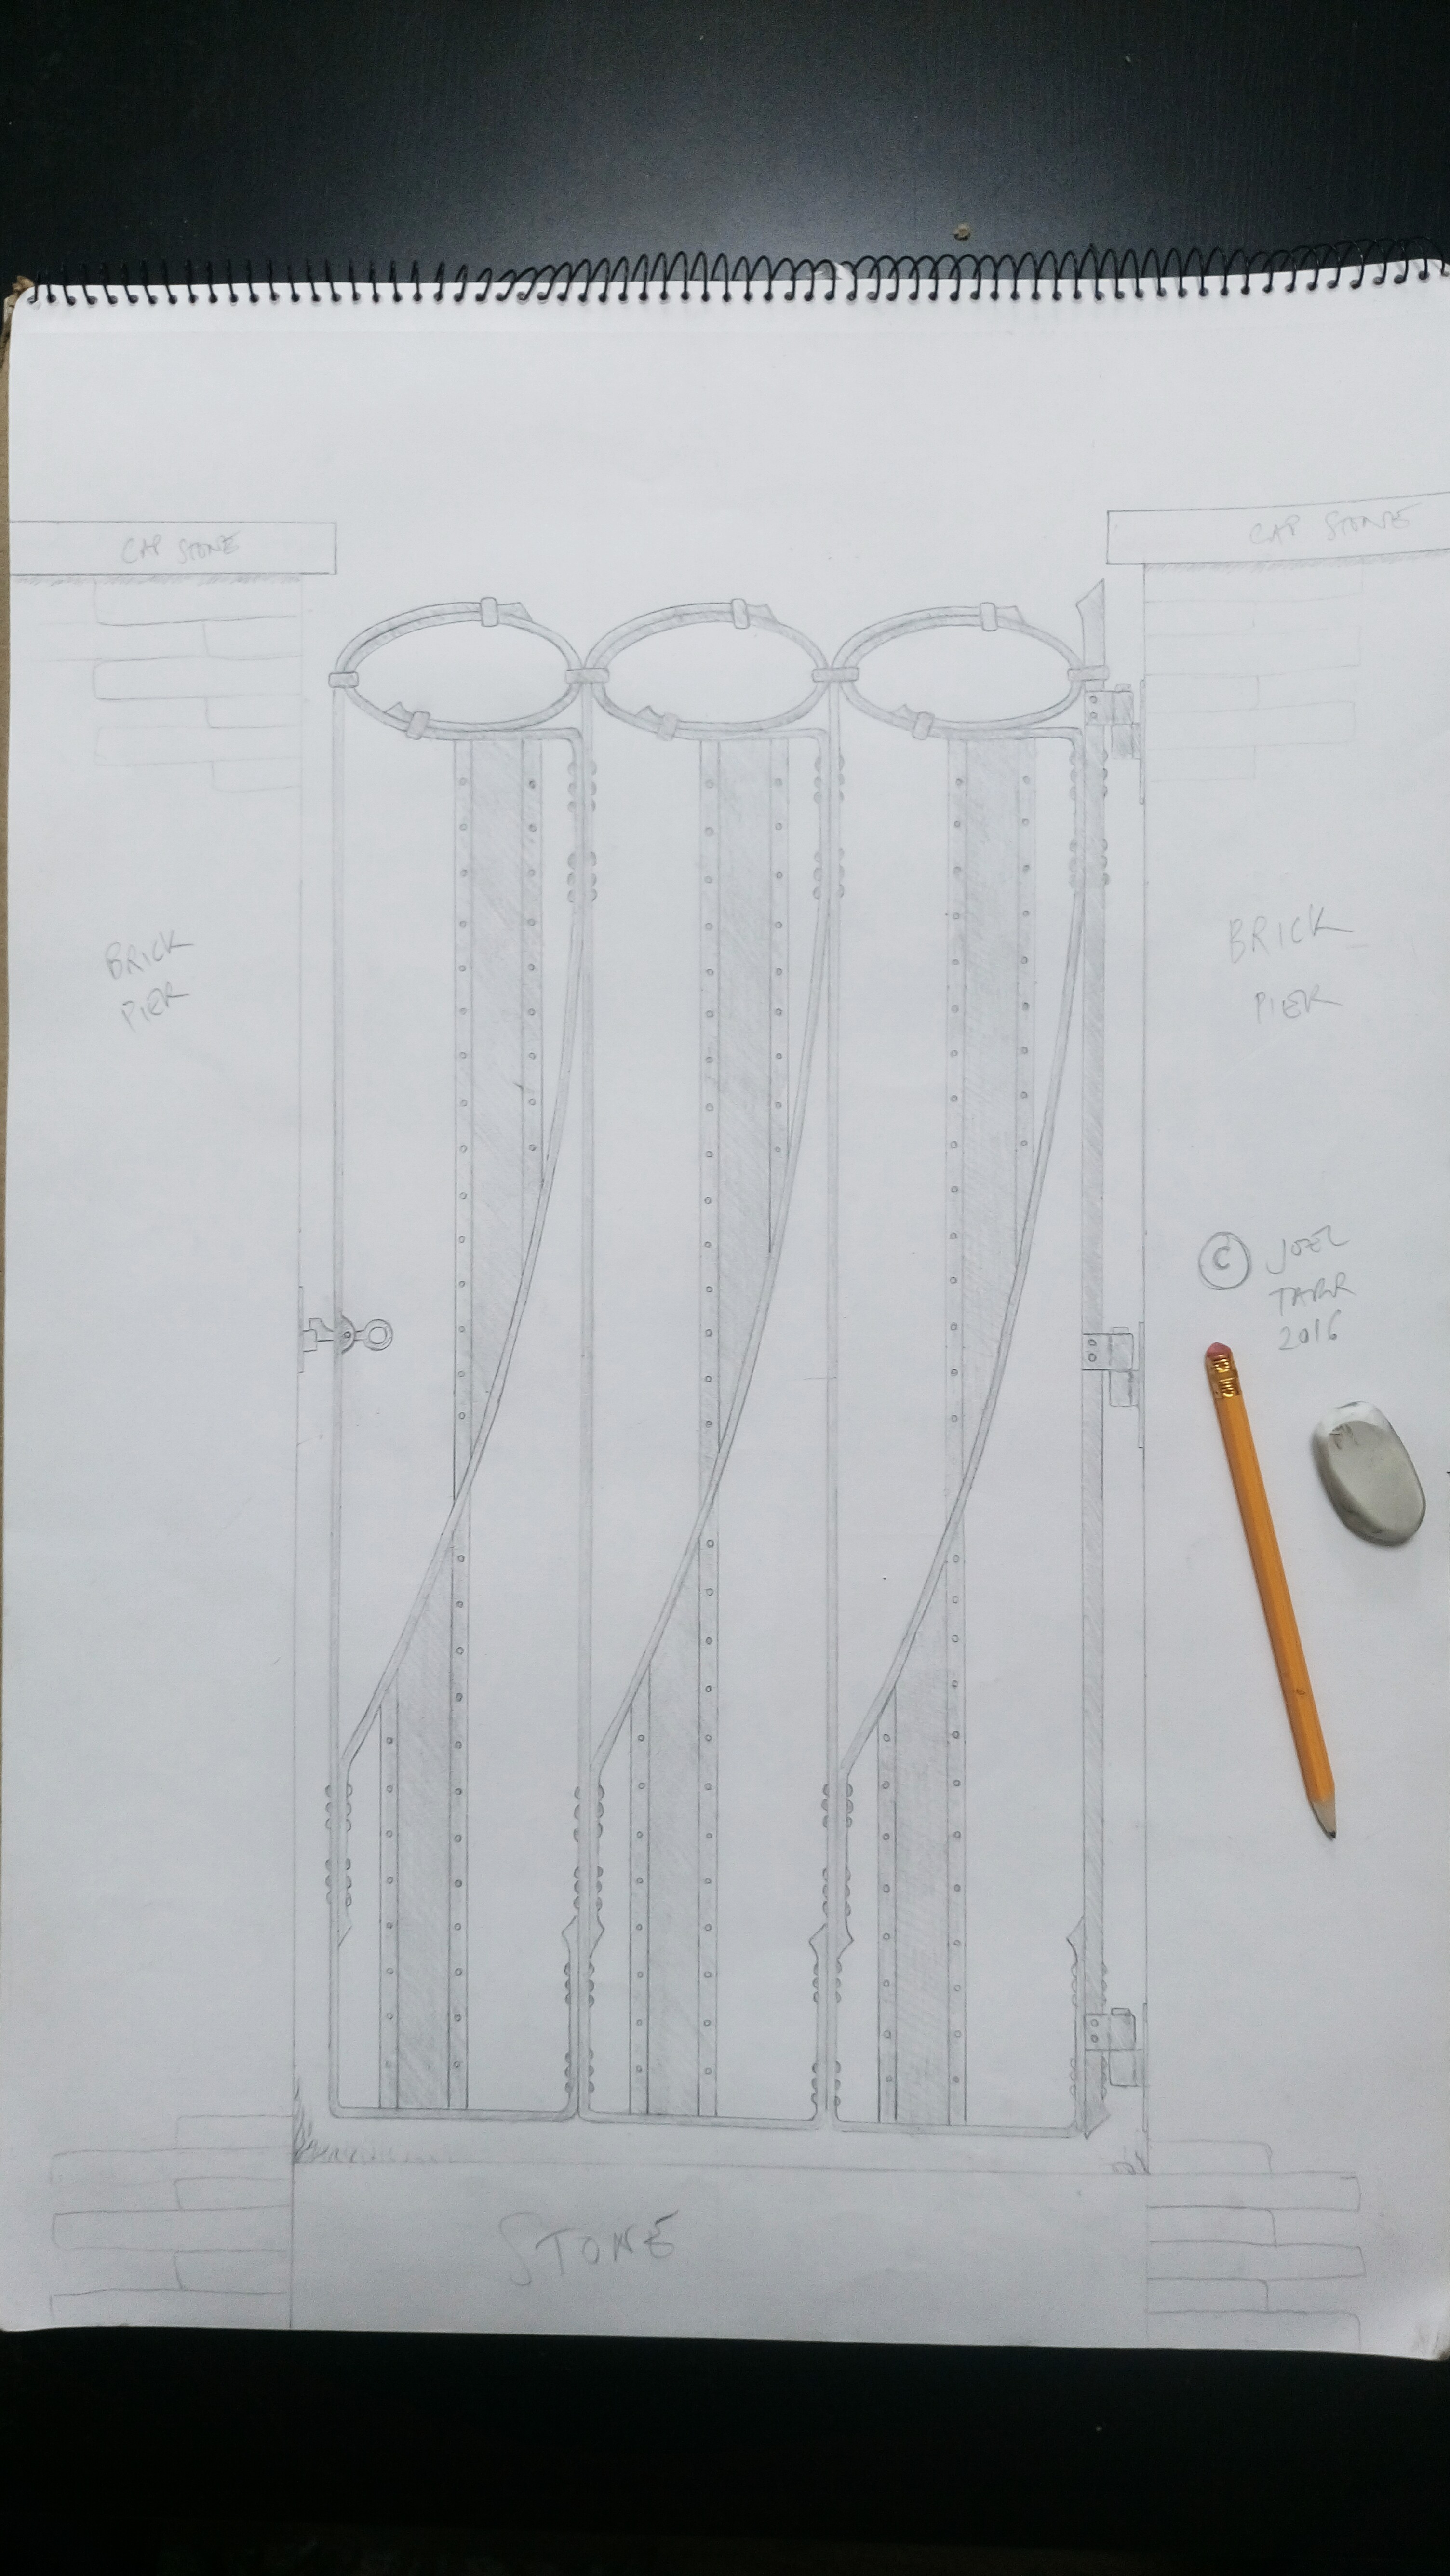
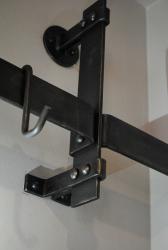
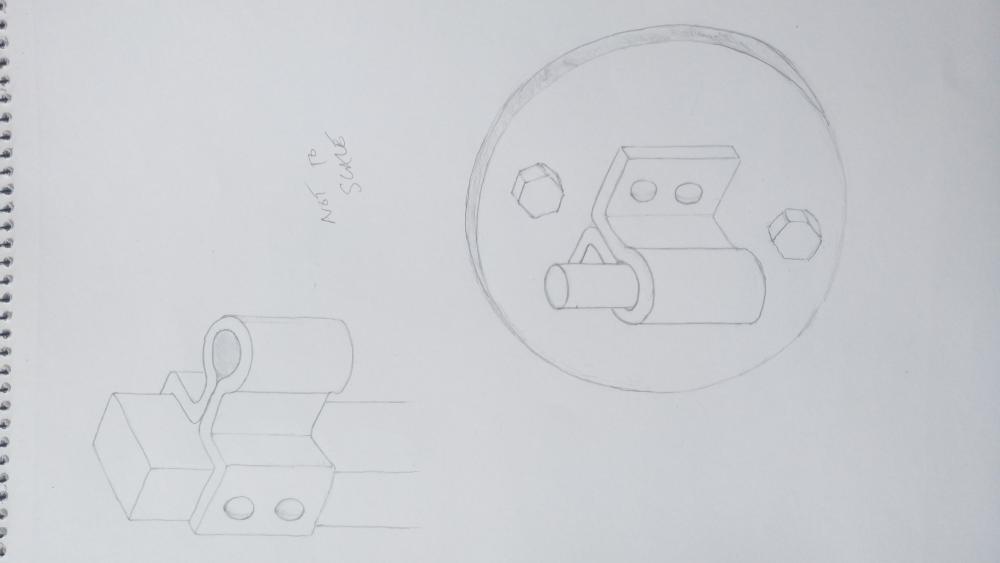
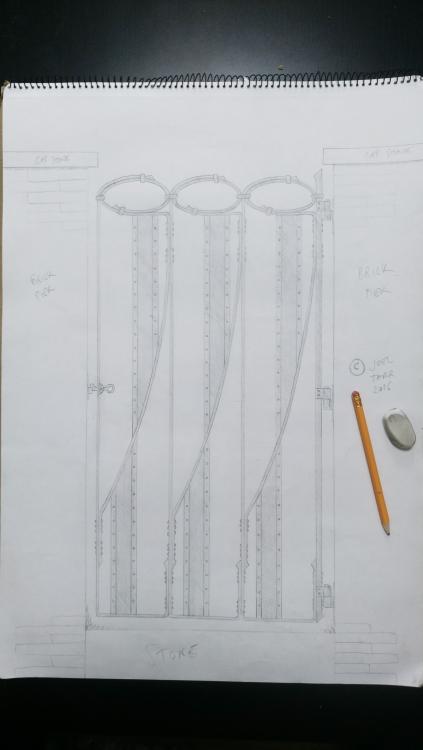
I have just been given the thumbs up from my client for a gate design, 3rd hinge discussion ongoing. Picure of sample piece & designs attached. (Hex head bolts to be re-forged to square & more fixing points on round hinge plates). Steels to be used: 30 x 20mm back stile, 30 x 10mm curves, 2mm sheet panels, 20 x 3mm riveted edge softening strips. Total weight approx 75kg. Back stile weight approx 10kg, remaining gate weight approx 65kg. Think the 3rd central hinge is needed to prevent the back stile bowing? No young children, infrequent grandchildren visits to use it as a swing.

-
Joel OF replied to blackleafforge's topic in Blacksmiths and Metalworkers Association of the South West UKSorry to hear that. Can't help with the regs but on a practical side note - to keep you going without a chinney for the time being could you beg/borrow/steal a gas forge off a local farrier?
-
I've got to the stage where I need a spare pair of hands from time to time. If I'm getting stock ready for a fair that could mean someone to do a bit of drilling/ring rolling/weld spatter cleaning/polishing etc. I imagine if I've got a larger commission then jobs would vary a lot more & possibly be a bit more hands on to include help with lifting/help with riveting/help prevent hot bars from bending in unwanted areas etc. The setup would be travel expenses + beer tokens (or token beers) in exchange for the experience/watching/learning. Not quite media industry levels of exploitation of apprentices but not far off. I'm pitching this gate design today & depending on the outcome I might need help with this as it's going to be quite heavy. (Sample piece to aid pitch & drawing attached). I would be looking for someone 21+ years old, male or female, experienced with power tools, competent & can follow exact instructions. I'm in Ashford in Kent, please PM me if you're interested. Cheers
-
Joel OF replied to blackleafforge's topic in Blacksmiths and Metalworkers Association of the South West UKHow does this Ffos-y-fran stuff measure up against coke in terms of cost over a period of time? I nipped down to the local steam railway & they did me 7 buckets for £7.50 (over filled a black plastic bin I took down which must be 70+ litres) & offered to sort me out a better rate if I bought in volume. So far I've only had about 3 hours of forging time with it but I was very pleased with it.