Joel OF
Members
-
Joined
-
Last visited
Everything posted by Joel OF
-
Thanks. This is more of a symbolic project than about making a strong useable chain.
-
Thanks Thomas. That style of chain was what I was thinking would be suited but I thought I'd seek a second opinion.
-
I'm looking to host an evening forge-in of sorts for a network of folks I've recently met, (non blacksmiths), more of a social event rather than a lesson, but I'd definitely still be watching over to guide. I think I could handle 6 folks at a time working in pairs so folks are helping each other out and not working alone. Each "forge=in" would probably last 3 hours, followed by a BBQ. My initial thought is I should get everyone making very slightly decorative chain links, (something just a little more interesting than a standard link, NOT forge welded), then as each working pair's pile grows, we start to link them up into a symbolic chain. The next class of 6 folks on another day can do the same and slowly the chain grows... Has anyone done any similar events? Has anyone got any picture references they think are relevant or got any other suggestions for items the groups could make? Cheers in advance.
-
A guillotine tool because it's the most versatile. By changing the dies you could butcher the shoulders with 1 set, draw the tenon out on another set, (or at the anvil), then round up the tenon on a final set. You'd still need a monkey tool though to dress the shoulders back, though. If your dies were wide enough & you had a specific size of tenon you were repeatedly making you could just use 1 set of dies for butchering the shoulders & rounding up the tenon by fabricating the dies to do both jobs. You'd need to draw the tenon out at the anvil though.
-
You're always going to have to make tools and jigs to suit one off jobs, there's no way around that unless you only make a certain range of items. Although it's a slightly different answer to what you may have been hoping to hear and is possibly a little way down the road for you yet...fly presses are very versatile tools. You can in theory use them for riveting, making collars, punching, forging tenons...
-
Elegant stuff. When the customer has finished their first bottle and reaches for the second when their hand eye co-ordination is a tad off, could they catch their hand on the sharp looking scroll ends?
-
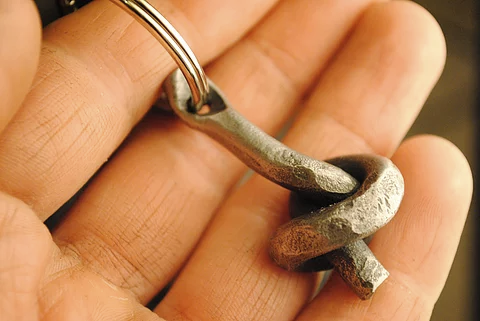
Everyone seems to get a kick out of knots, no precise forging techniques needed, just bending some metal. This is a video I made a few years ago in my old workshop of making a knot from 6mm (1/4") round bar and attached is a picture of how I used to turn them into keyrings. Enjoyable for kids.
-
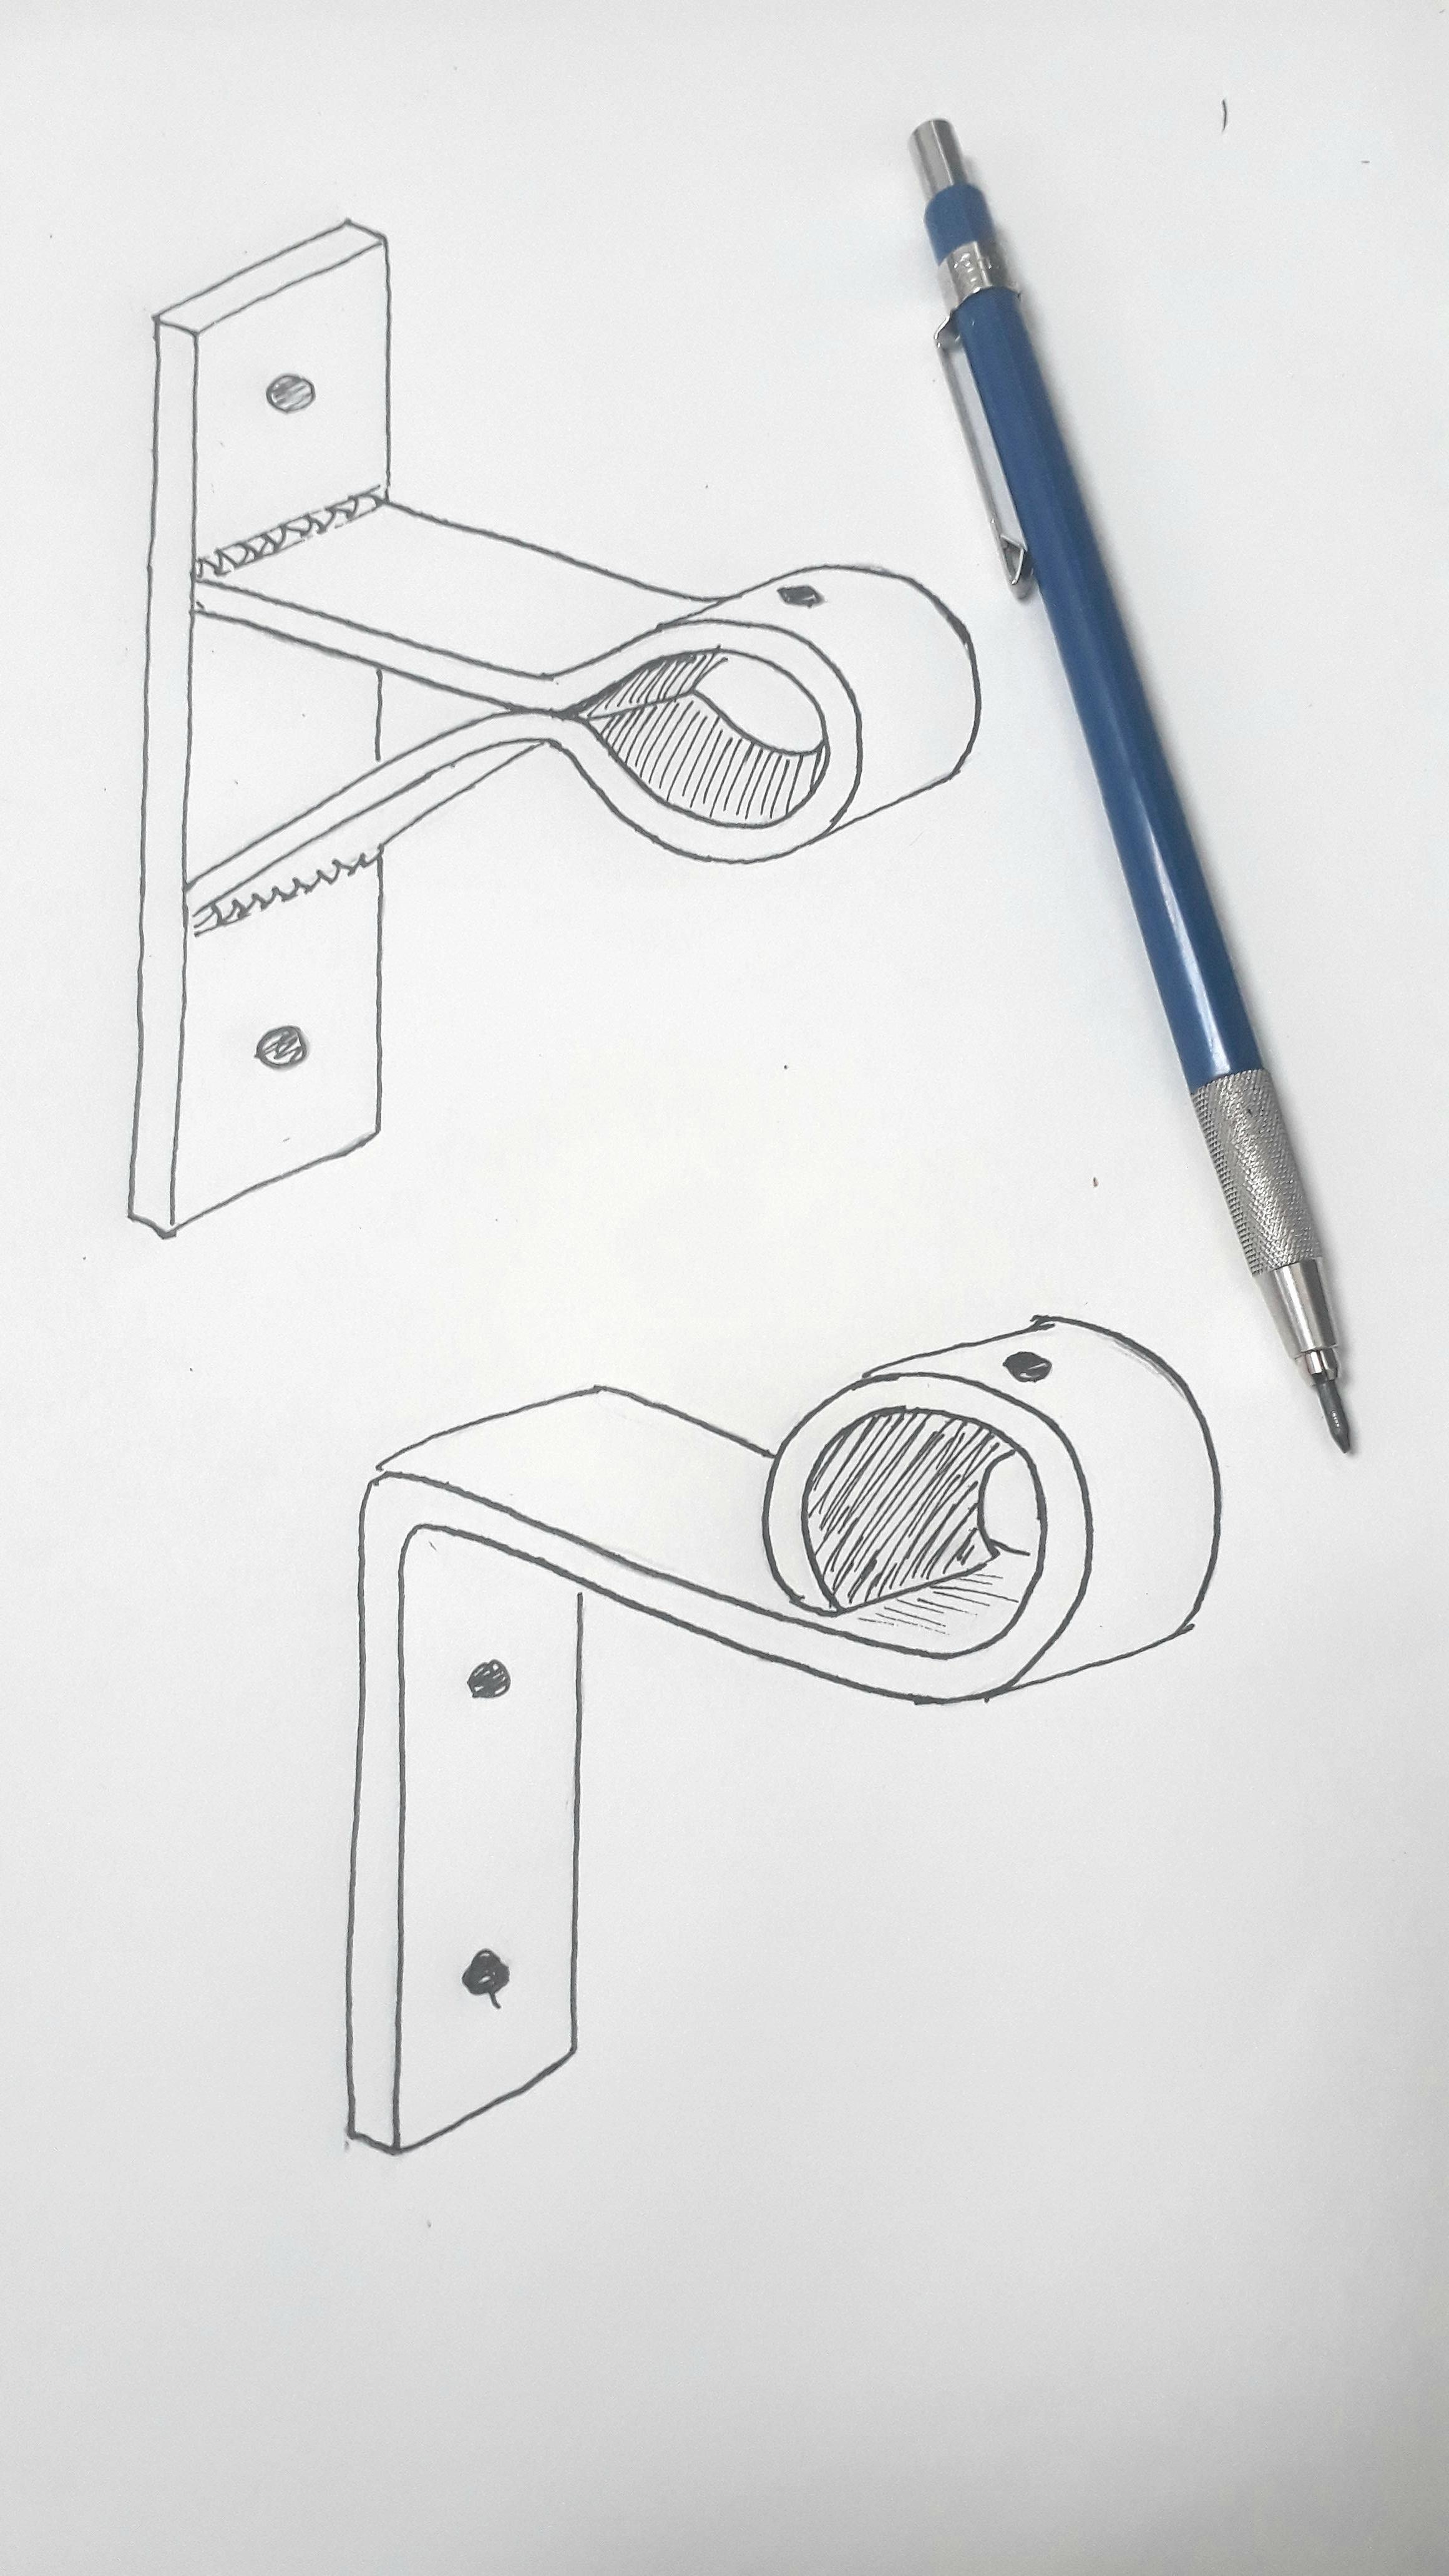
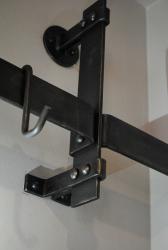
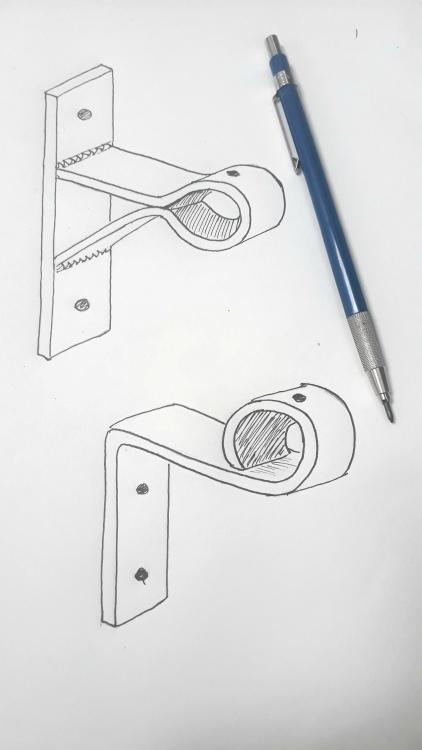
As mentioned by Thomas, with hollow poles my preferred method is to forge a tenon on the finial so the shoulder sits hard up against the end of the pole for as seamless transition as possible. Drill and thread a hole in the pole to accept a grub screw that will stop the finial from rotating but allows the finials to be removed if the clients to add/remove curtain rings. I've attached an old sketch of how I make the brackets. (Ignore the bottom sketch). The black circle on the top is another threaded hole to take a grub screw which prevents the pole from rotating or moving side to side.
-
Collars are typically closed around the items they are going to hold together whilst the collar is hot, the reason being that as they cool they shrink & grip tight. The collar material length is also usually pre-calculated so there is no overlap when folded around, or exessive gap between the butting up seam lines. Sometimes the ends of the collar material stock are tapered so if the material does overlap a little, the overlap isn't visible & the collar maintains the same thickness above the items being collared. In your video you seem to have forged it cold and have a large overlap, both will prevent a tight fit. It also seems like the central bar is thicker material, which creates a high point and gap under the collar & arguably doesn't help your cause. I have posted this video elsewhere on the forum in the past but it might help you as it contains theory as well as tooling ideas. A "bad language alert" seems to be the done thing around here to prepare the youthful and/or more sensitive souls.
-
From memory the thing that grabbed my attention about the Vulcan painting was the very clean white pot above the fire. They must have had non-dirtying ceramics back then.
-
I found mine the other day. Not looking it's best as it seems to have been under a bench collecting dust and dirt for about a year but you get the idea all the same.
-
Ye olde battery grinder is the newest addition to my site installation and demo checklist.
-
It wasn't strictly metal-origami but it was origami inspired... Essentially just half cutting through sheet to create a weak line to bend easily along, fold, fill with weld & grind back.
-
Thanks all. To be honest @BIGGUNDOCTOR I think I'm in the vast minority over here too getting work zinc sprayed. Dipping is a lot cheaper, and a lot of folks are favouring dipped then T Washed for that stoney grey-white look. @Lou L my coke forge isn't very big at all T.B.H. It's certainly not a big cast iron beast, the long heat is just a result of me stretching out the heat by feeding the bar backwards and forwards, pausing at certain point for 3 - 5 seconds at a time so I know I'm putting the same amount of heat into the bar along its length.
-
Haha to be honest I've never looked at the back of the container. It's £7 for 5L of Cementone Brick and Patio Cleaner. No idea how that rates in comparison to the stronger acids, but the appeal for me of this stuff is I can just stop on my way to work at a tool shop and pick some up. I read somewhere for the stronger types you need to buy at specialist places and prove you reasons for use? Possibly a load of rubbish but lingered in my mind anyway. I use it so infrequently I think in 2 years I've only used about a litre.
-
And a video from when I was doing the slats in coke fire, before I switched to using my gas forge.
-
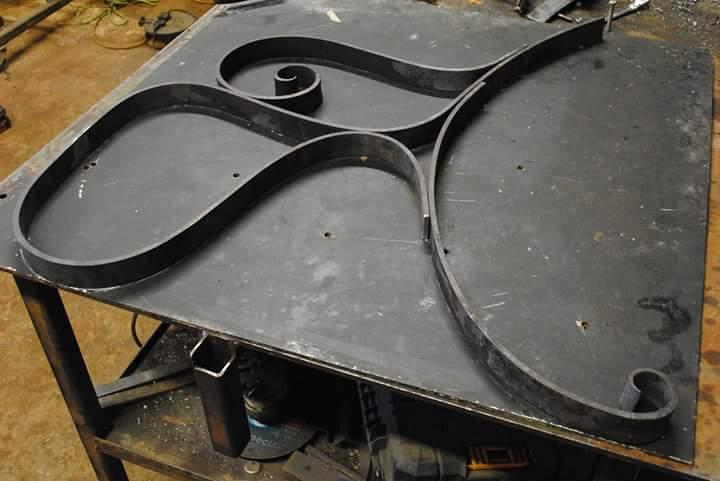
Thanks folks. I thought I'd uploaded pictures of the jigs to IFI but I guess I never did. I did put them on the Mig Welding Forum and can link to that if it's not against forum rules? The jigs were quite intricate. The complicating factor with the gates and rails that due to rules on public work near roads there wasn't any gaps greater than 99mm allowed. I.e every gap must be less than 4" so a child can't get stuck in them.
-
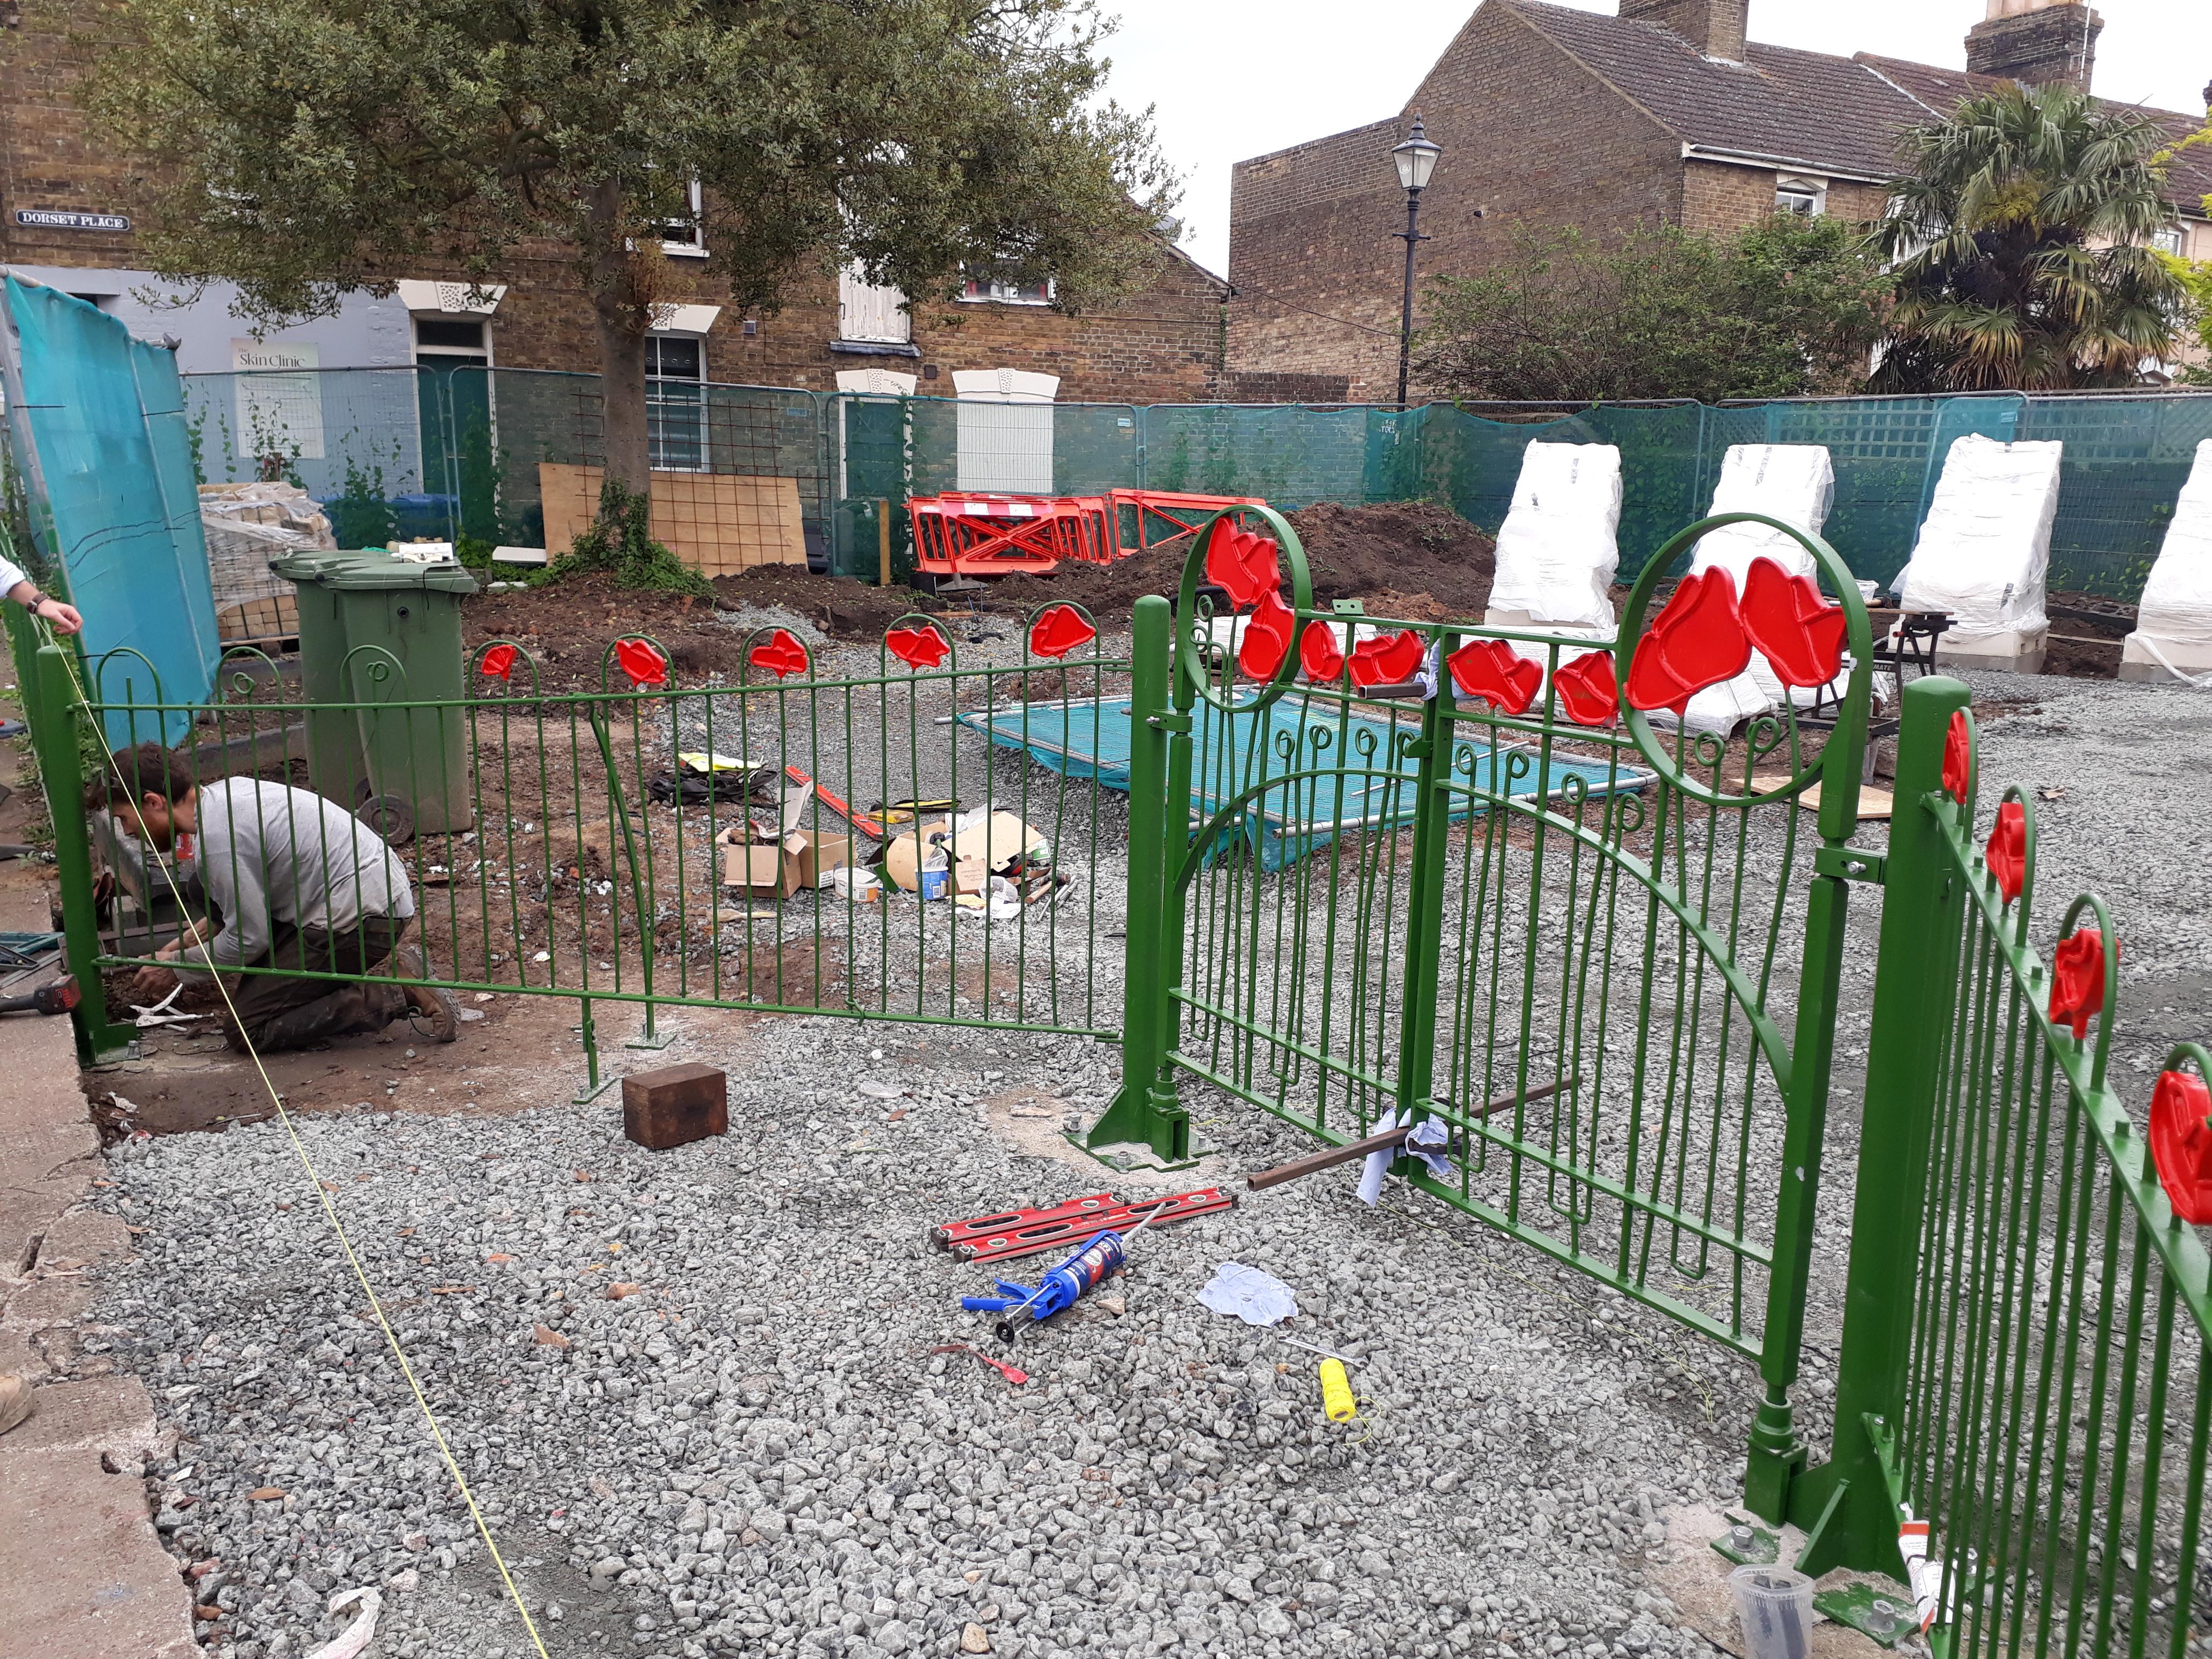
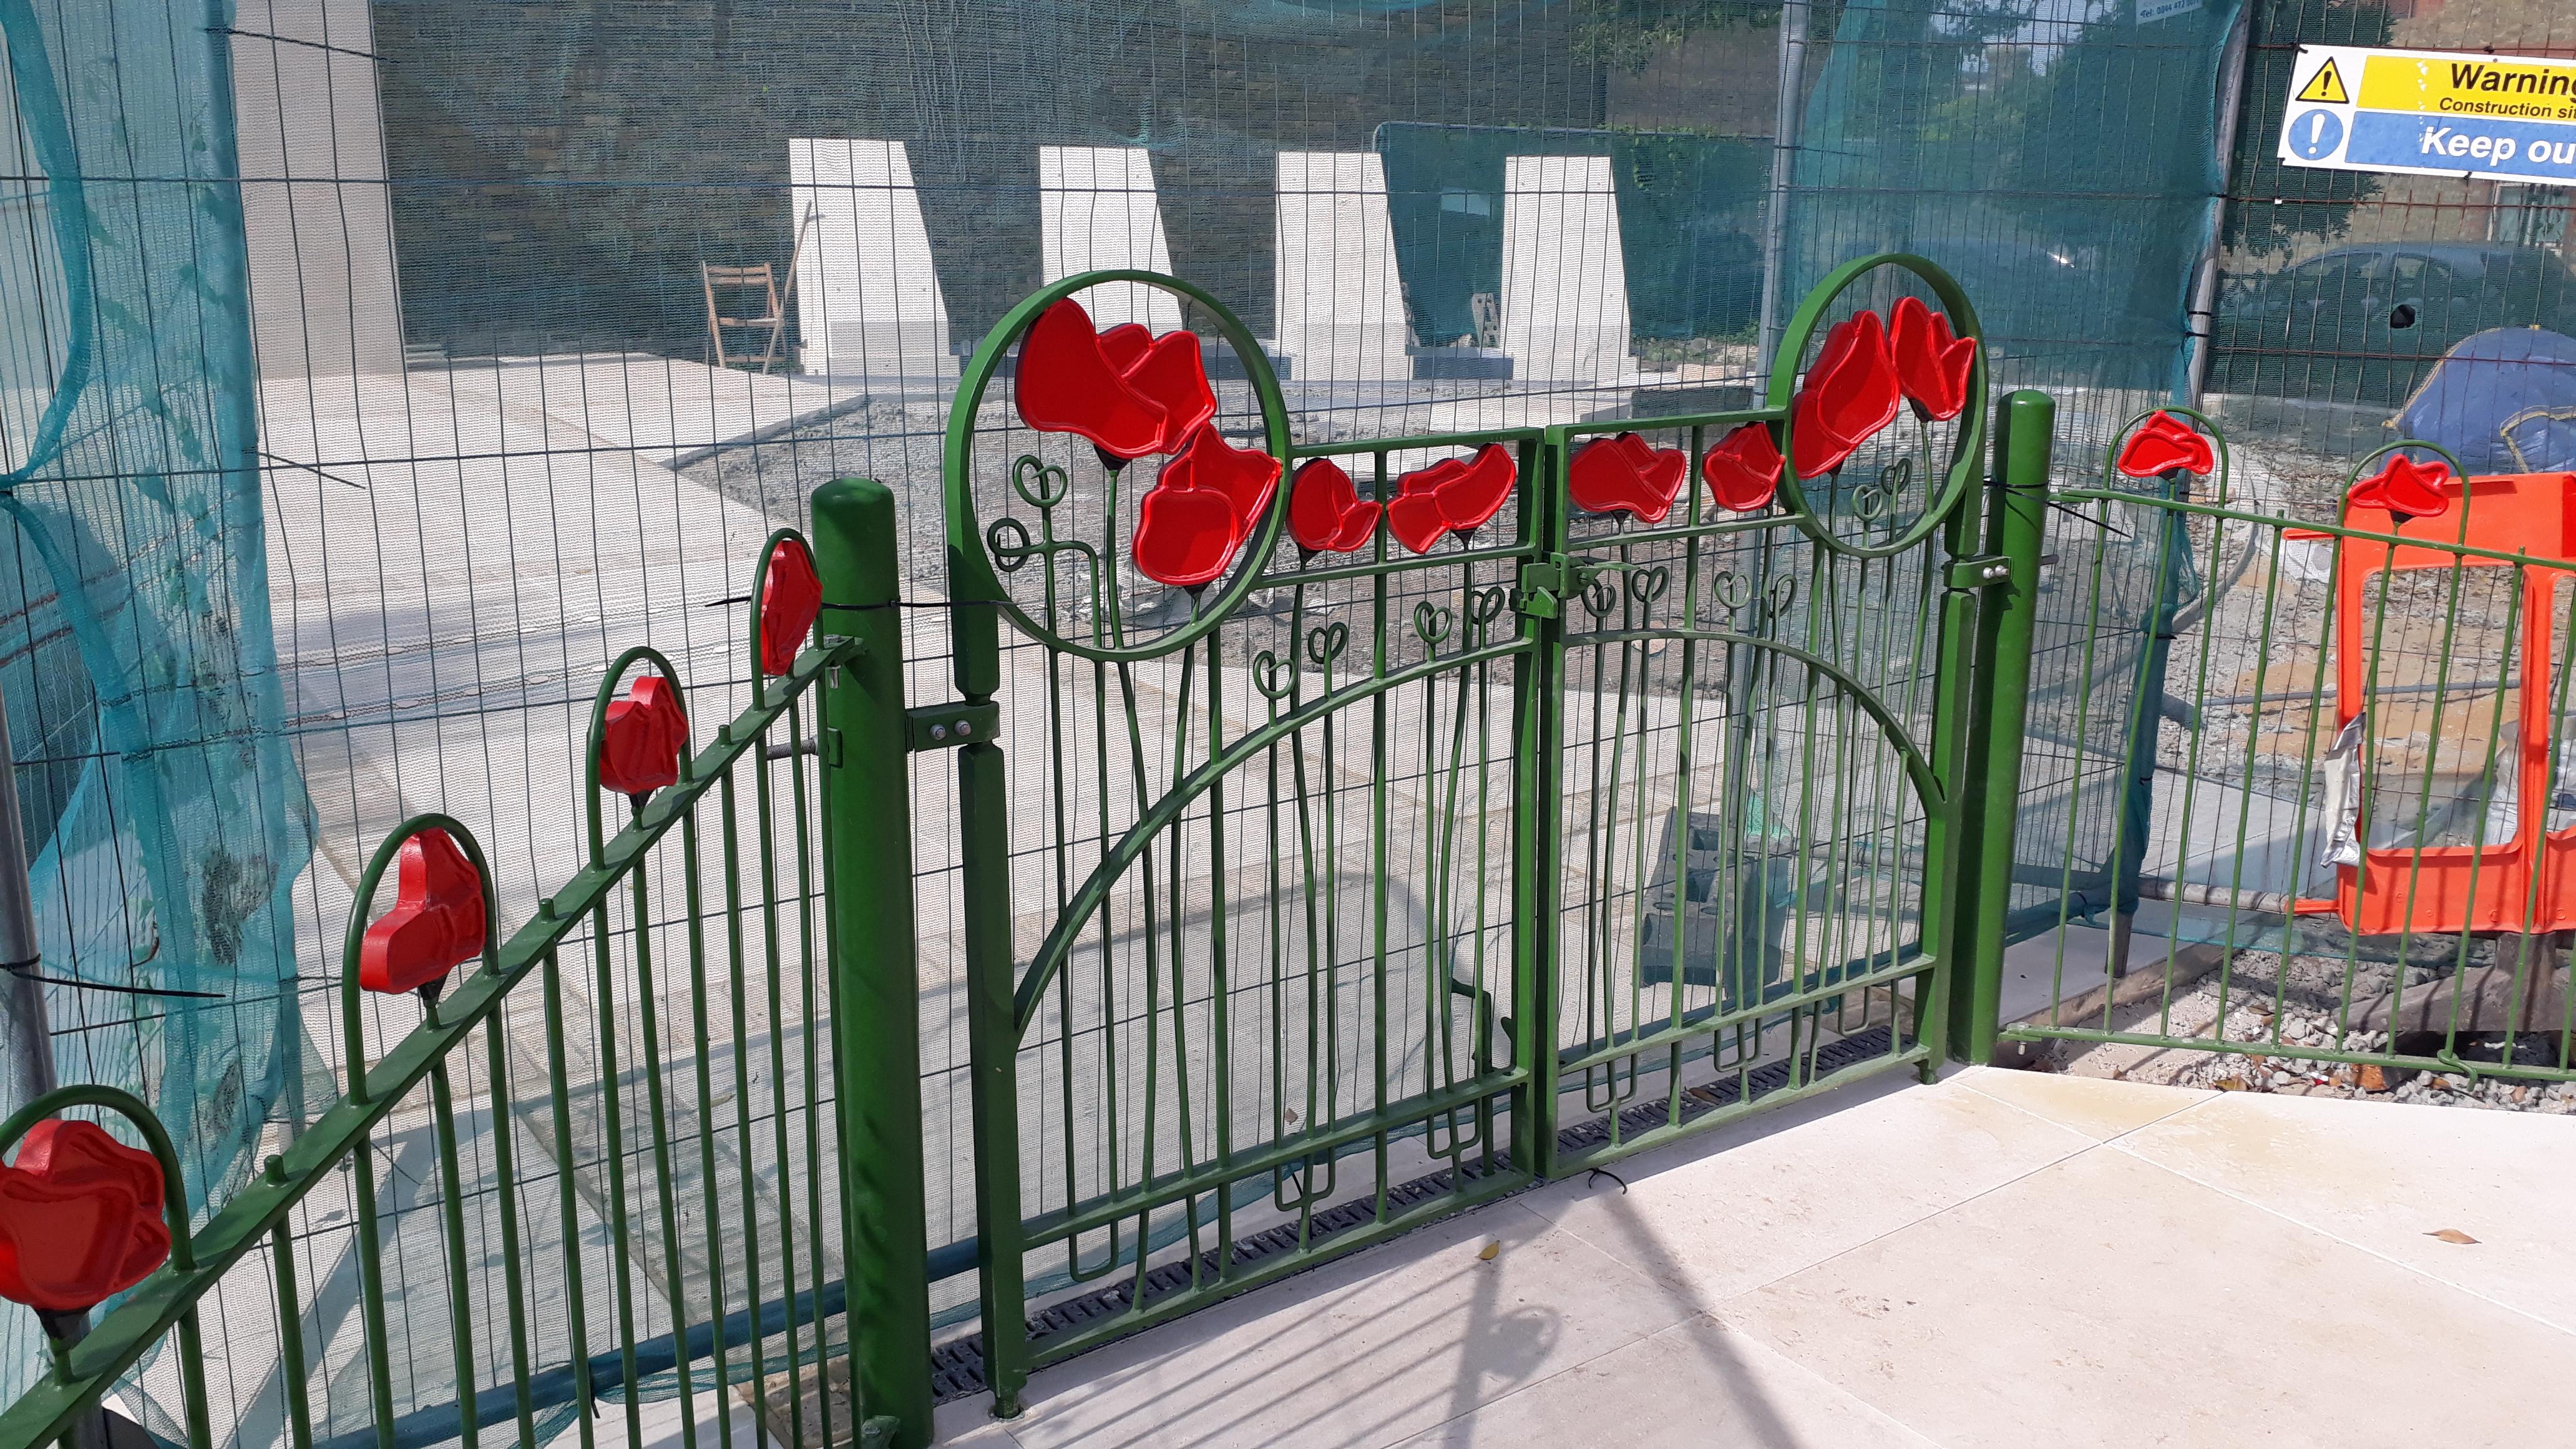
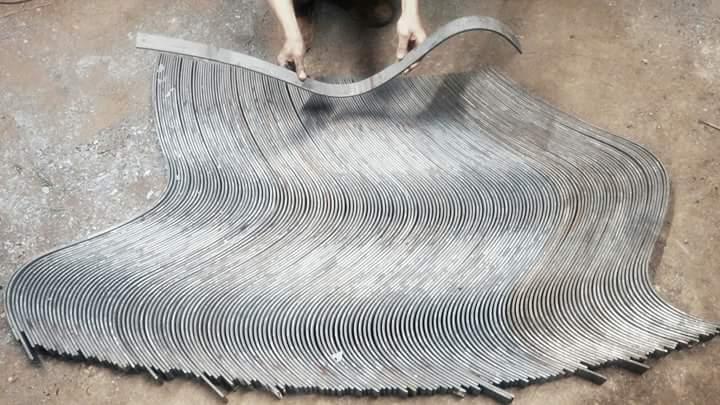
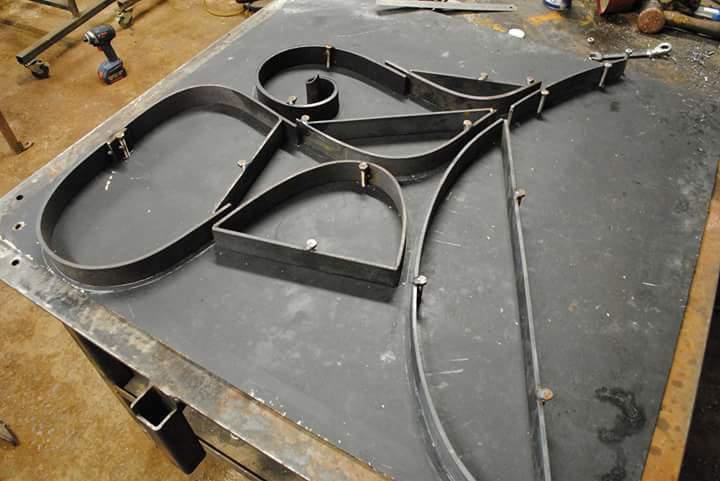
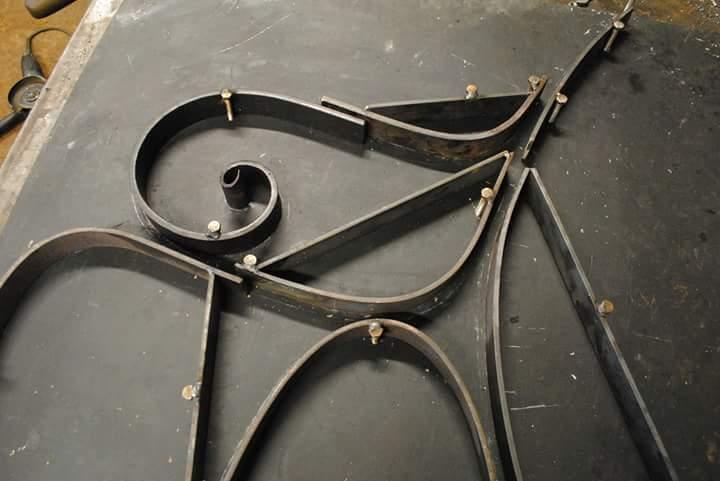
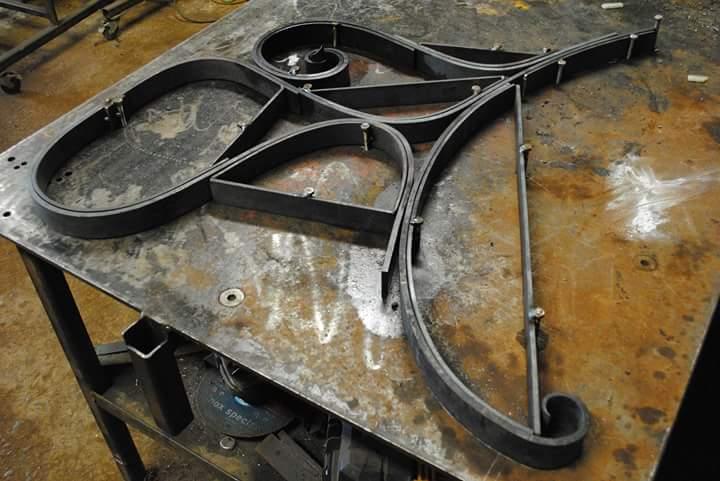
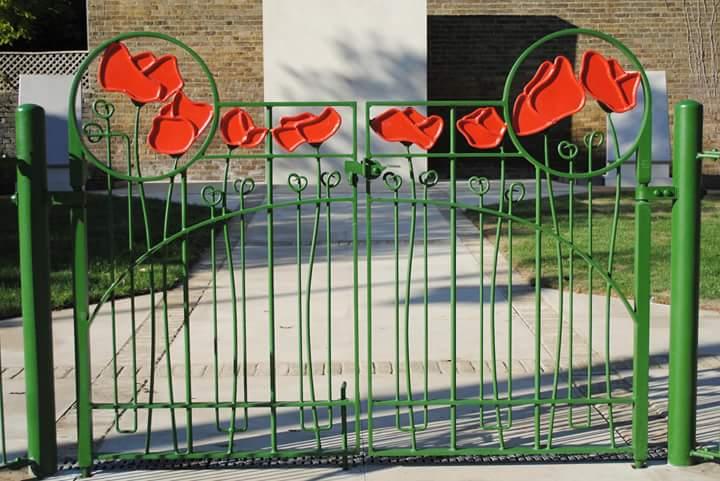
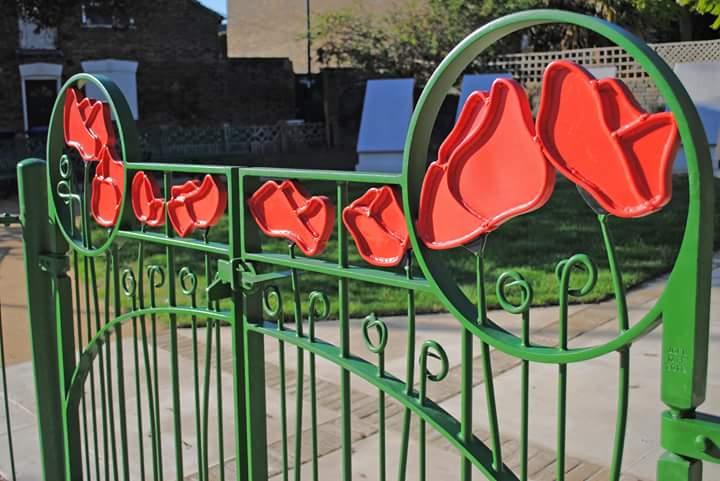
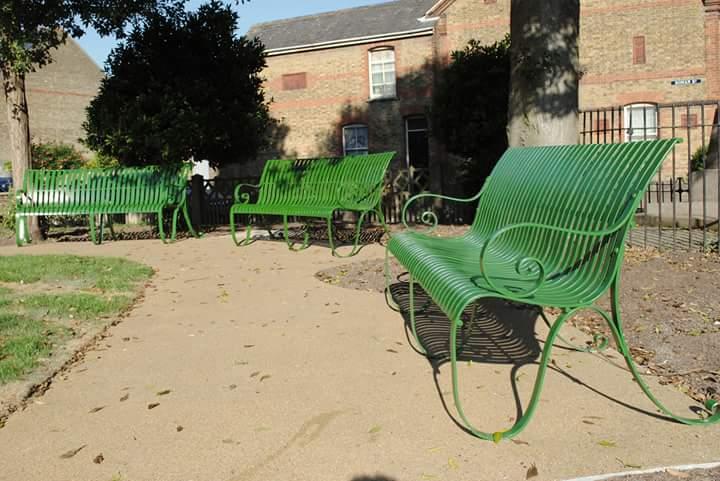
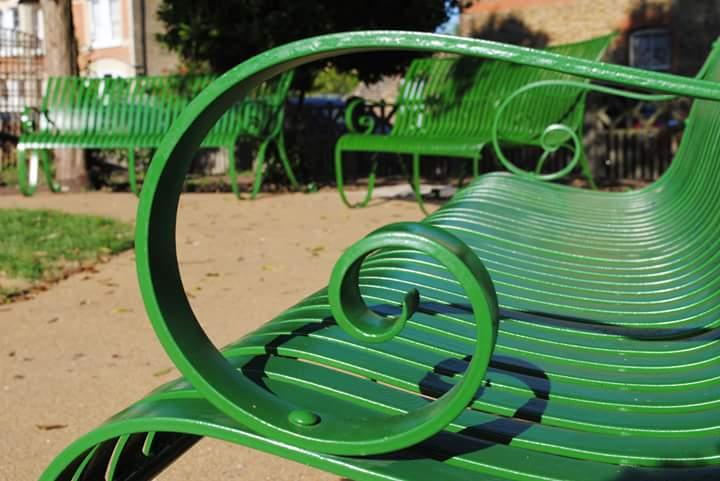
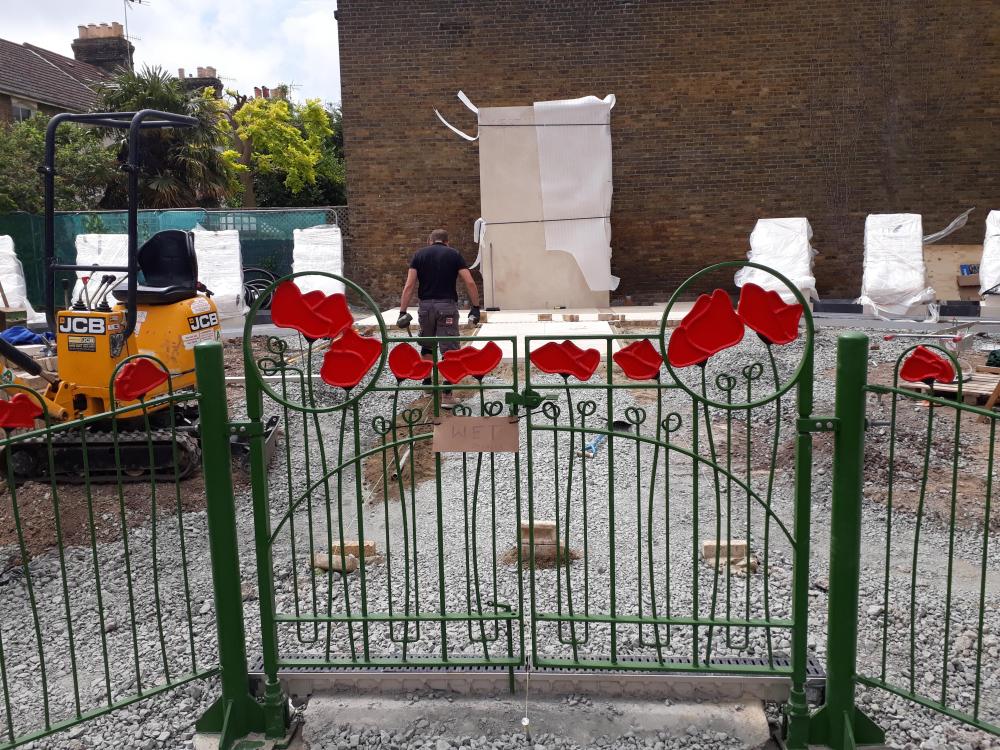
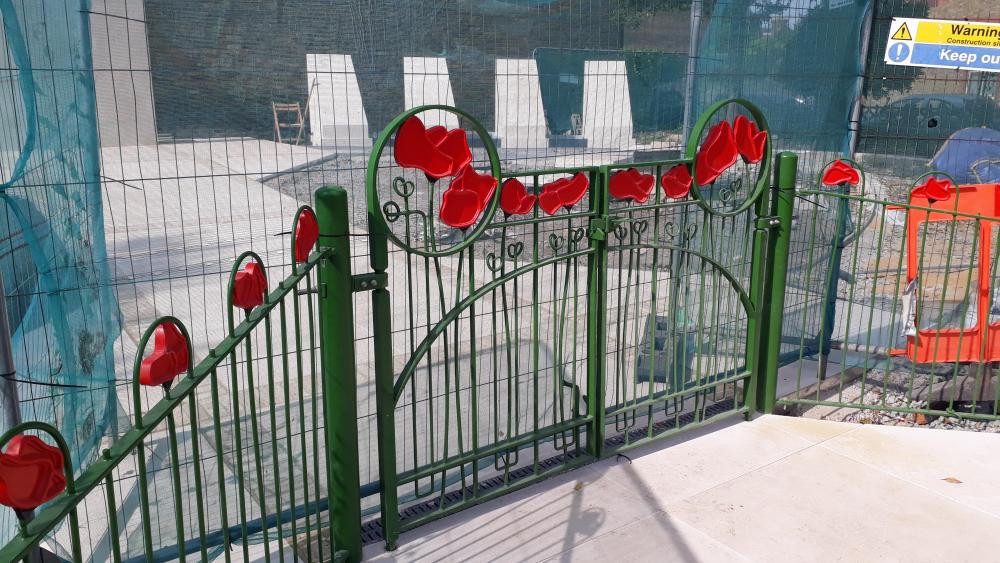
Given the amount of advice I've had from forum members over the years, and the conincidental fact that day 1 of installing this work landed 5 years to the day since @John B talked me through how to forge a taper via a PM on this site, I thought I'd post some images of recently installed work. Poppy themed gates & railings and 6 benches; 4 curved ones and 2 straight for a local war memorial which is being rejuvenated. Looking forward to seeing the garden once the flowers are planted, especially the rosemary bushes that are due to go behind the railings. Nature has a way of making your work look nicer! Gates & rails blasted, zinc flame sprayed, vinyl top coats. Benches blasted, zinc flame sprayed, primed, 2 pack top coat. Thanks for the continuing advice.


-
I recorded a short clip the other day of making bare steel rust quickly by using diluted brick cleaner, followed by water. I let it run in real time so folks can see how quickly it works. I have used diluted vinegar in a similar way before but it makes your work stink and attracts every wasp within a mile. Rust is a popular finish with folks in this neck of the woods and as I had to deliver some sculptures to a show that afternoon I needed them rust quickly.
-
Isn't just a case of... Putting a bit of wood on your bench, put the bowl on that face down & clamp it to the wood/bench so the convex side is face up (and you're not damaging the corners with steel on steel), get the hole saw, offer it up & draw around it, find the centre, drill a pilot hole the same size as whatever size bit goes in the holesaw, put the hole saw on a cordless drill along with the pilot bit/replacement pilot rod in the centre...and drill.
-
That's the trick in a nutshell. I don't think gas torches are the only way of making them really flow though. You can easily do it in a forge by spot quenching, you just need to stop your quench a little short of the mark to give yourself time to get to the vise & get the wrench on as the heat will continue to drain out slowly.
-
-
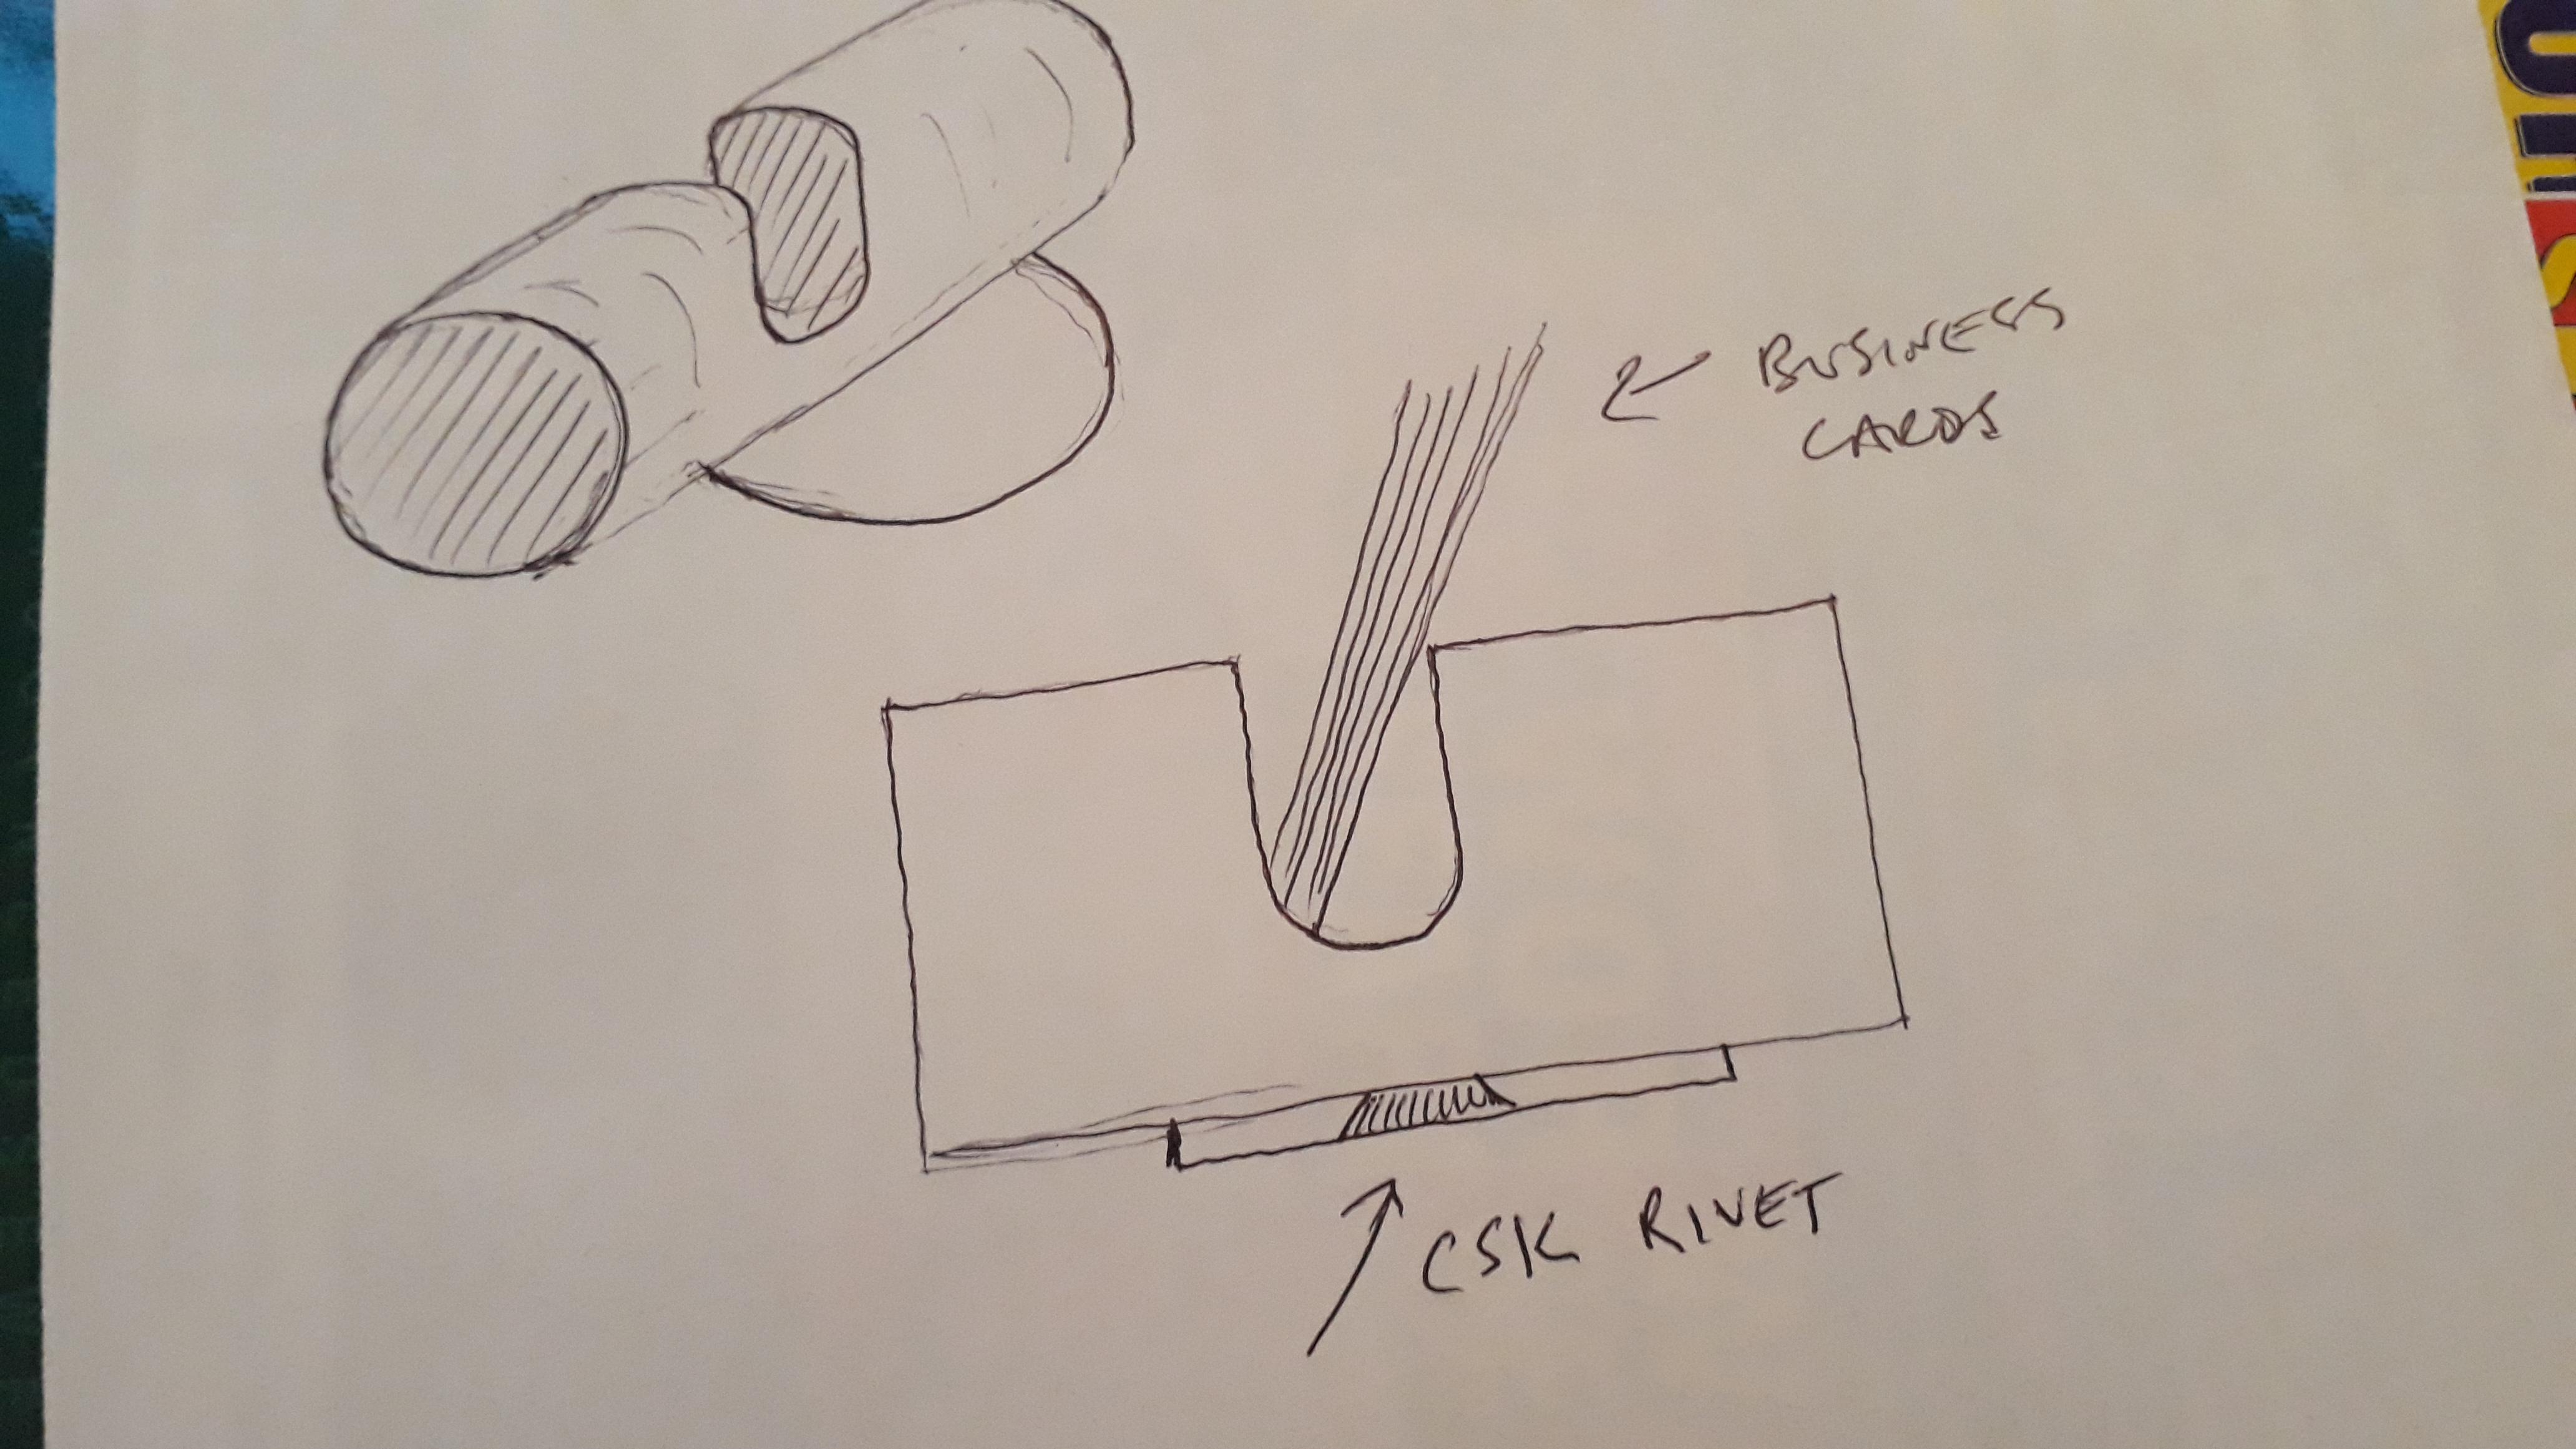
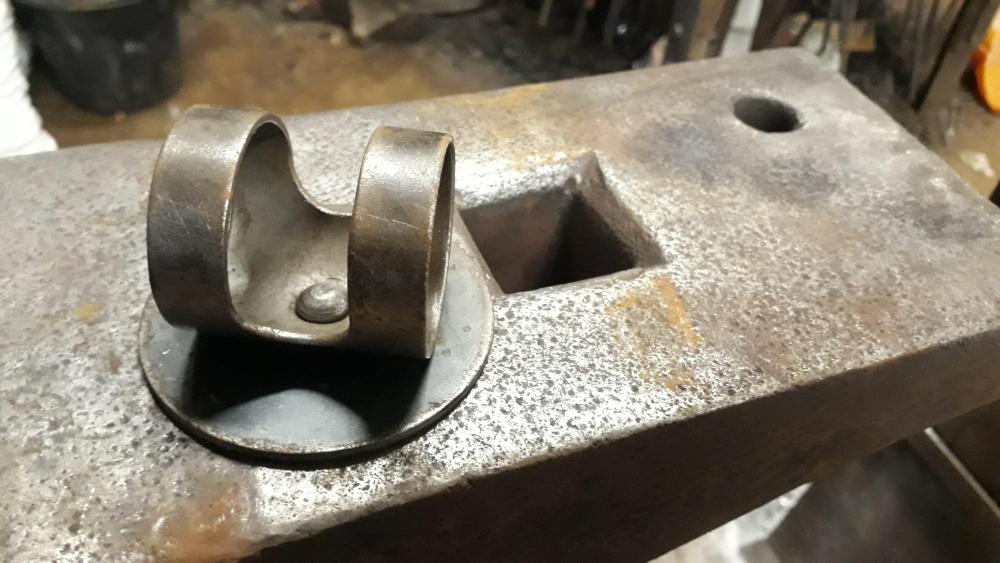
I haven't got a picture to hand but the way I made mine was by getting about a 50mm (2") long piece of tube that was about 40mm (1,1/2") diameter, drilling a 16mm (5/8") hole through the centre on both sides, cutting out the top section down to the bottom of the drill hole, then riveting that to a little round disc. Doodle doesn't really do it justice but helps with the description anyhow. They work well and are nice and simple. Have been asked a few times for a price on making them.

-
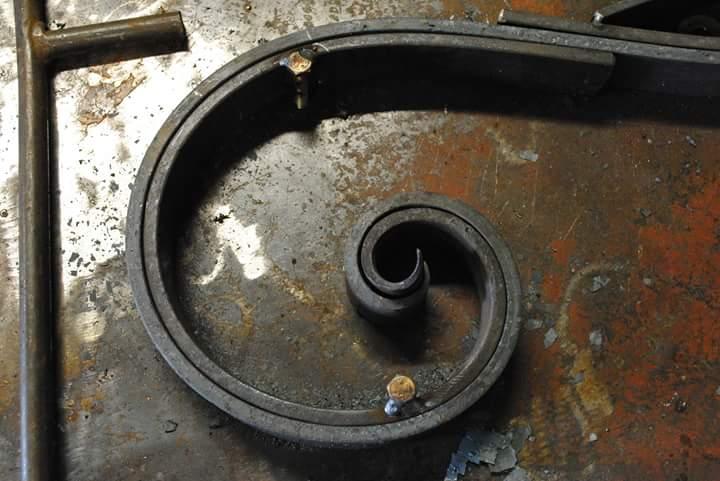
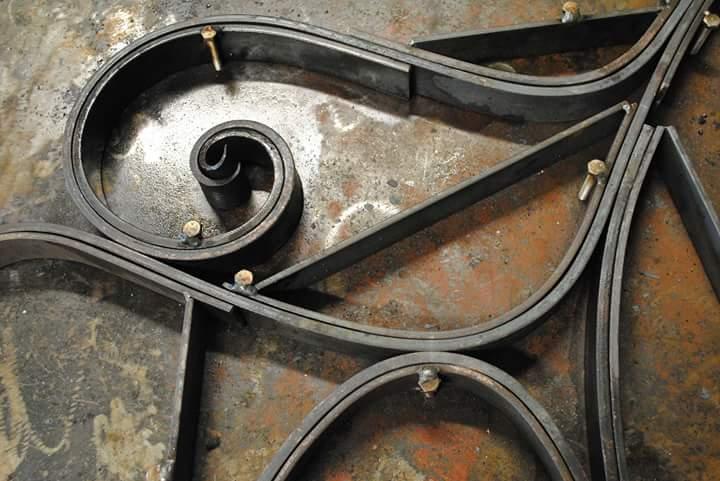
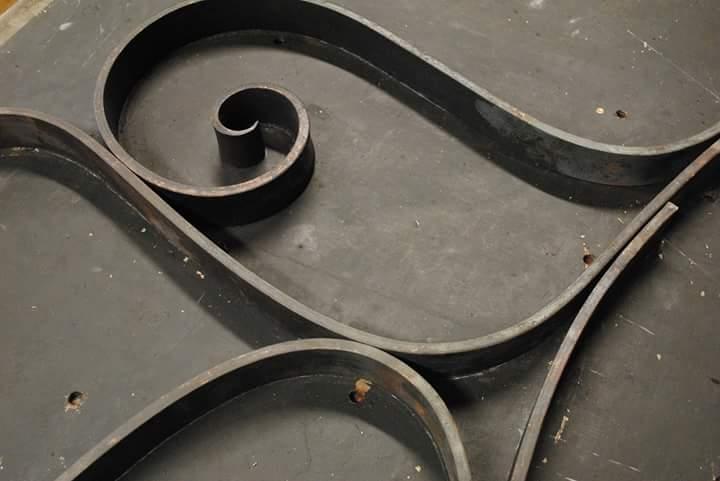
I'll look forward to seeing that programme when it comes out, I'm a big fan of the Arts and Crafts and Art Nouveau movements. I might send them an email for curiosity's sake, though I've been an extra in a few period films before and I've got horrible memories of high waisted itchy trousers, so the thought of forging in that isn't very appealing. Some poppy themed gates and rails I've been making in an Arts and Crafts / Nouveau style, nearly finished installing as part of a memorial garden rejouvenation.

-
You'll be fine.