Michael
-
Posts
1,061 -
Joined
-
Last visited
Content Type
Profiles
Forums
Articles
Gallery
Downloads
Events
Everything posted by Michael
-
I bought Jerry's book a while back. Great projects in there but its not step by step, More like a guideline, There's plenty of room for figuring stuff out as you work thru the projects.
-
I was only kidding about using it for a forge firepot. I did the car brake drum forge for years and have since moved onto a nice centaur forge firepot and table.
-
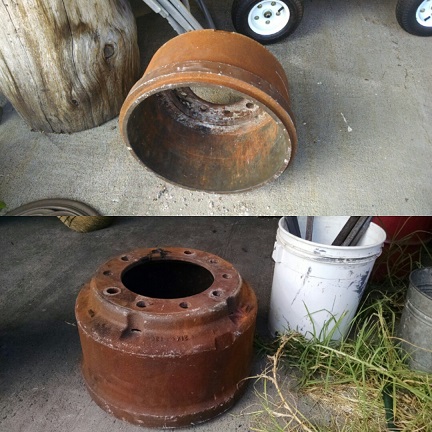
Found on the way home from work 140 lbs of truck brake drum 17 inches across and a foot deep (Can I Make a FirePot out of this?!?!) just kidding. It was being used as an outdoor firepit, someone had bolted rubber casters thru the holes and they'd melted. Rolled it up the board I keep in the back of the station wagon for just such an opportunity. Angle ground off the fire seized bolts to remove the wheels. It'll still get used as a backyard firepit, and who knows, maybe in a decade it might get turned into a base for a post vise or a swage block. It's not likely to wear out before then.
-
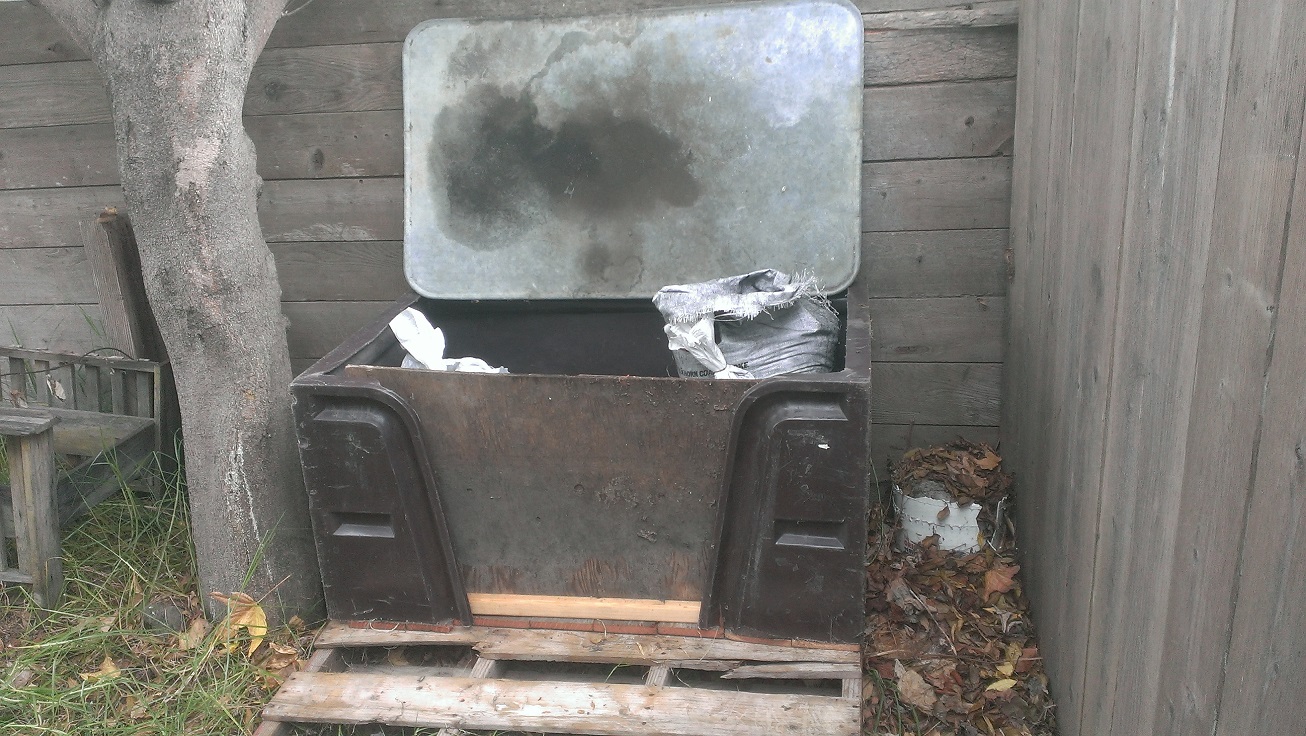
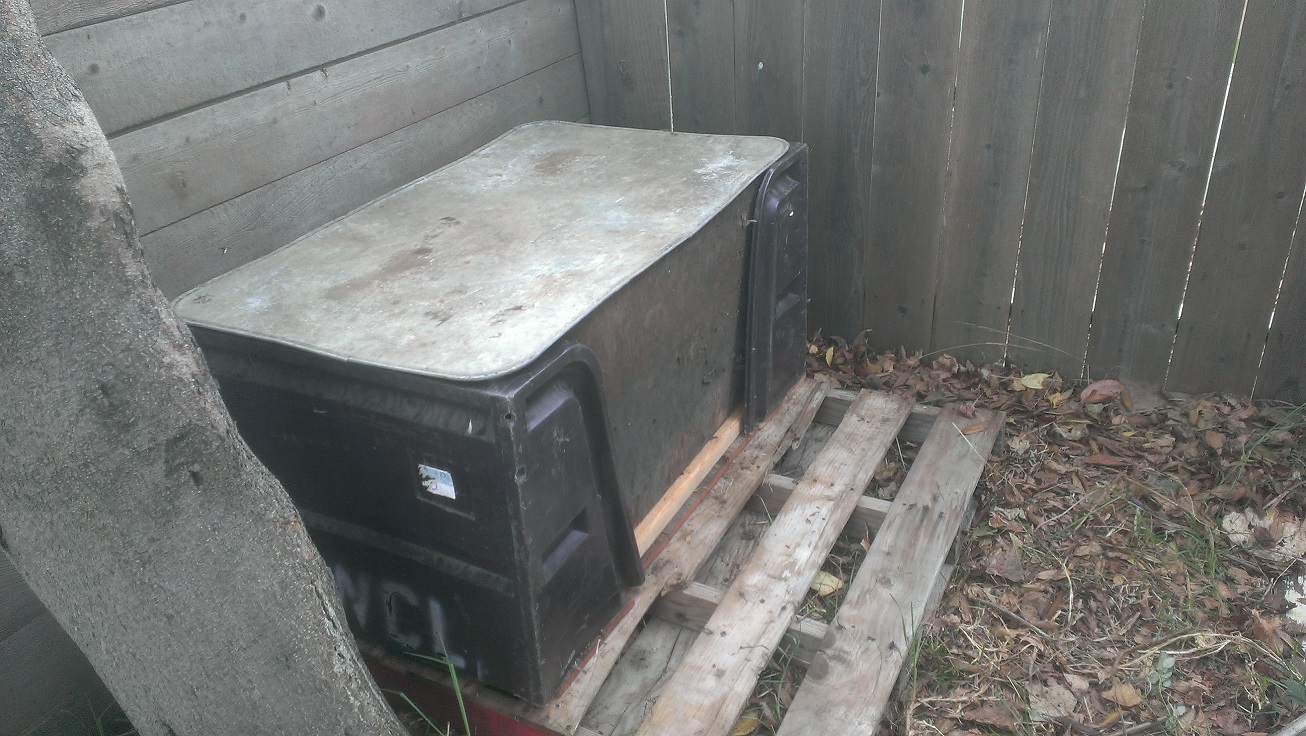
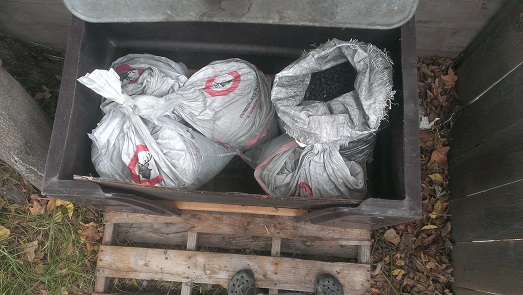
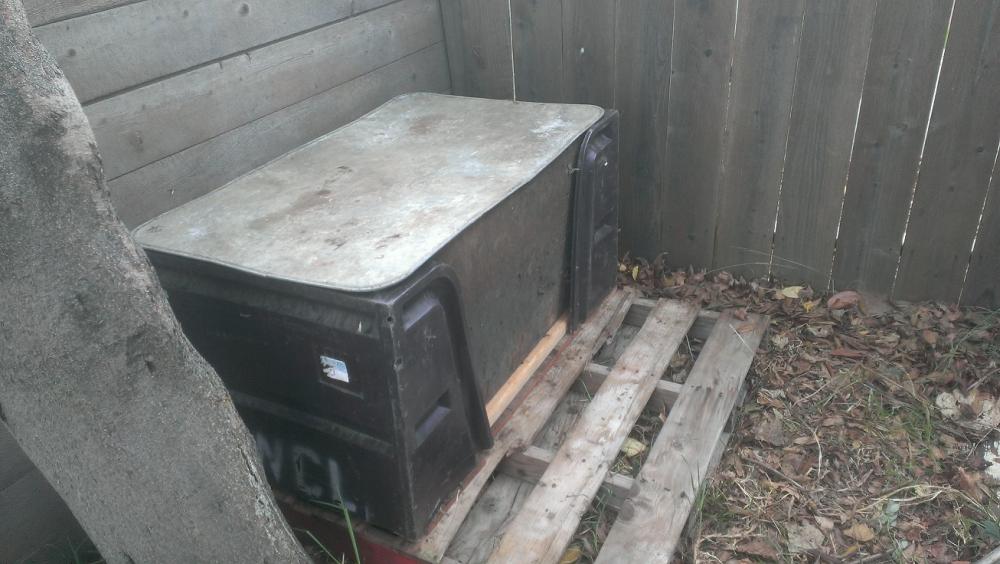
Coal Bins, how do you store your coal?
Michael replied to Glenn's topic in Solid Fuels: Coal, Coke, Charcoal, Wood, etc
I found the plastic bags the coal and coke come in are UV deteriorating, they come apart if left in the sun too long, Fine if you know where you want your coal pile, not so much in the middle of the smithy. I set up a pallet in the back corner of the yard, scrounged the top of a storage bin from the Goodwill, closed up the bottom and front cutout with plywood and covered it with an oil drip pan (Love those, good for covering a lot, including the forge table) I just bang on it with the shovel before opening, in case any critters have taken up residence.
-
Question for thoes who use coal.
Michael replied to barndor's topic in Solid Fuels: Coal, Coke, Charcoal, Wood, etc
The learning curve on coal isn't steep, but it'll take you a little while to get the hang of it. Buy a bag of coal, start your fire with charcoal and add coal a bit at a time. Keep the outside of the coal wet and keep punching a hole in the top of the pile to get some flame that will burn off the smoke. It won't be long before you have leftover coke, converted from the coal at the end of every fire. I also started out with charcoal in a suburban neighborhood and did a charcoal/coal mix for a while to both get a feel for the new fuel while working with the old fuel I knew how to use. Much less firetending with coal. You also use less water wetting down the fire with coal. Coke is great, but can be hard to light and keep lit. My SOP now is to fill half a BBQ chimney with charcoal, get that lit and burning, Dump it in the firepot, add a shovel full of coke, mound coal around that and wet it down. The coke lights off the charcoal and the wet coal around the coke starts converting to the lighter, smokeless coke. Hand crank blower as well. Working on days when the neighbors have their windows closed helps, as does working mid week when most neighbors are at work. -
That's a great find! These are often not marked, Usually they have more holes in the body of the block. My guess would be its either a one off, with a solid middle section for some specific purpose or its an error, where some apprentice went to lunch and didn't finish adding the cores for the remaining holes in the pattern. Either way, a nice block to have on the West Coast, Especially SoCal, not exactly the magnetic anomaly you get in the midwest.
-
I've got an old Miller Thunderbolt I picked up for $50......10 years ago now. Built like a tank.
-
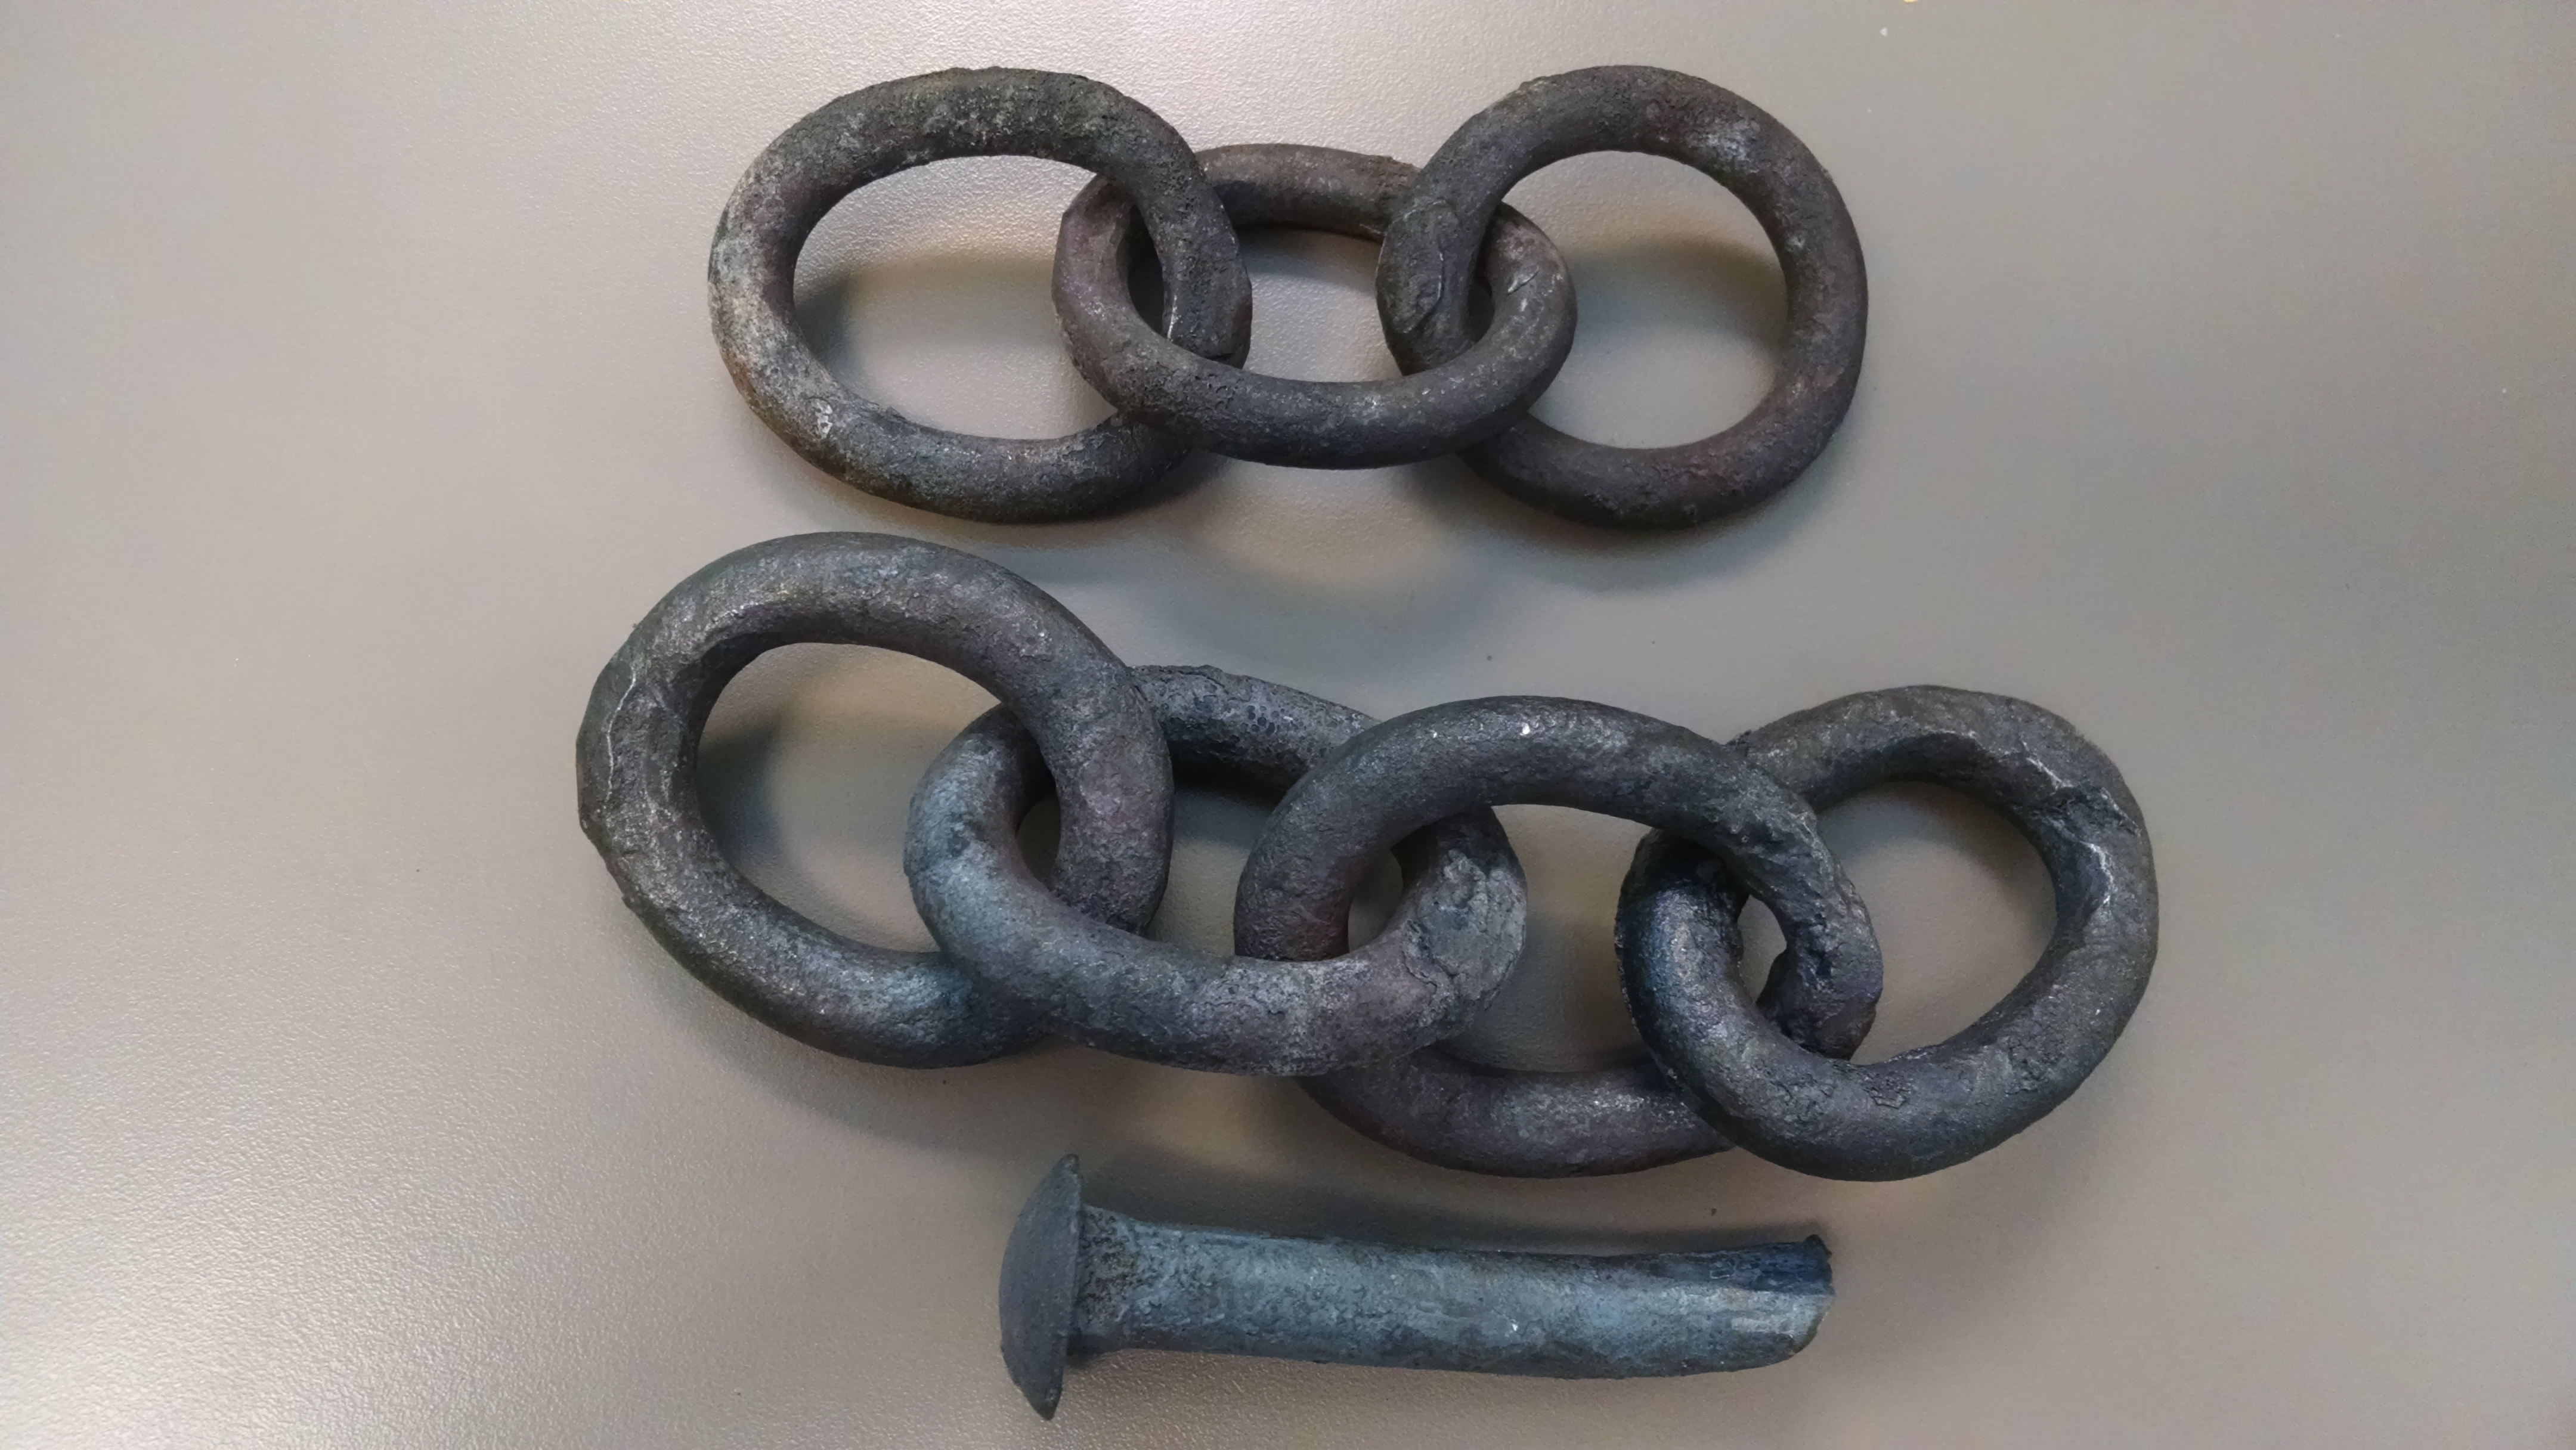
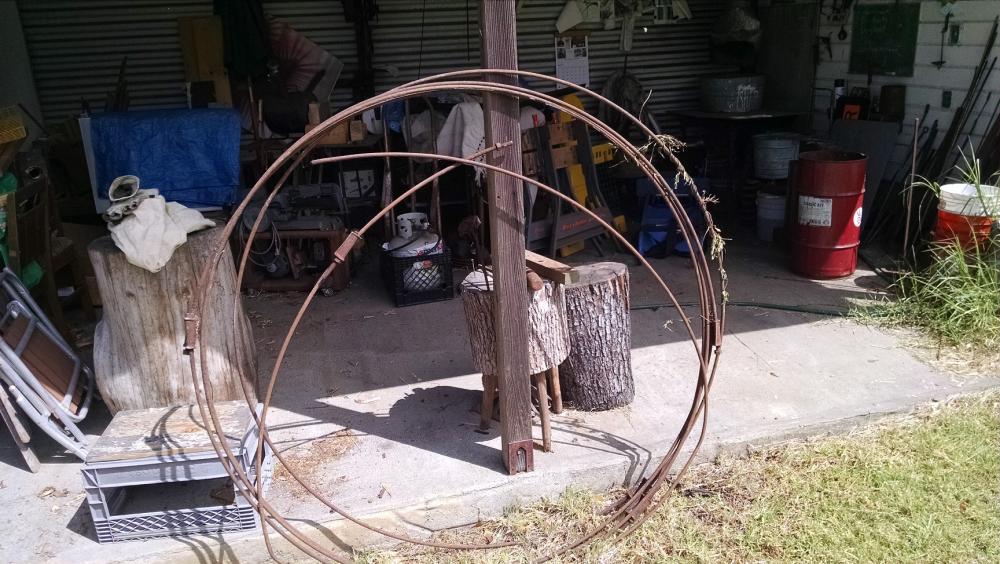
Was out walking the dogs early for Independence Day, before they were scared under the couch. Came across 60 feet of 3/8 inch round stock at the curb a few blocks from home. Came back with the car, the lady of the house came out to tell me "won't fit in a car, you need a truck, that's how I got it home". She was right, the rings were 5 feet in diameter, not fitting in the Volvo. Back home for the wagon and some clamps. It was only about 6 blocks so a little drag wasn't a problem. She said it was "hi carbon steel, oh yeah, from around an old wooden hot tub". Well, it cuts and welds like mild steel, Made a handle for my forge shovel and some chain links from it. interesting , offset nuts on the ends of the 16 foot lengths, can't think of what to use them for but they look useful. Love burning coal in the suburbs on the Fourth of July!


-
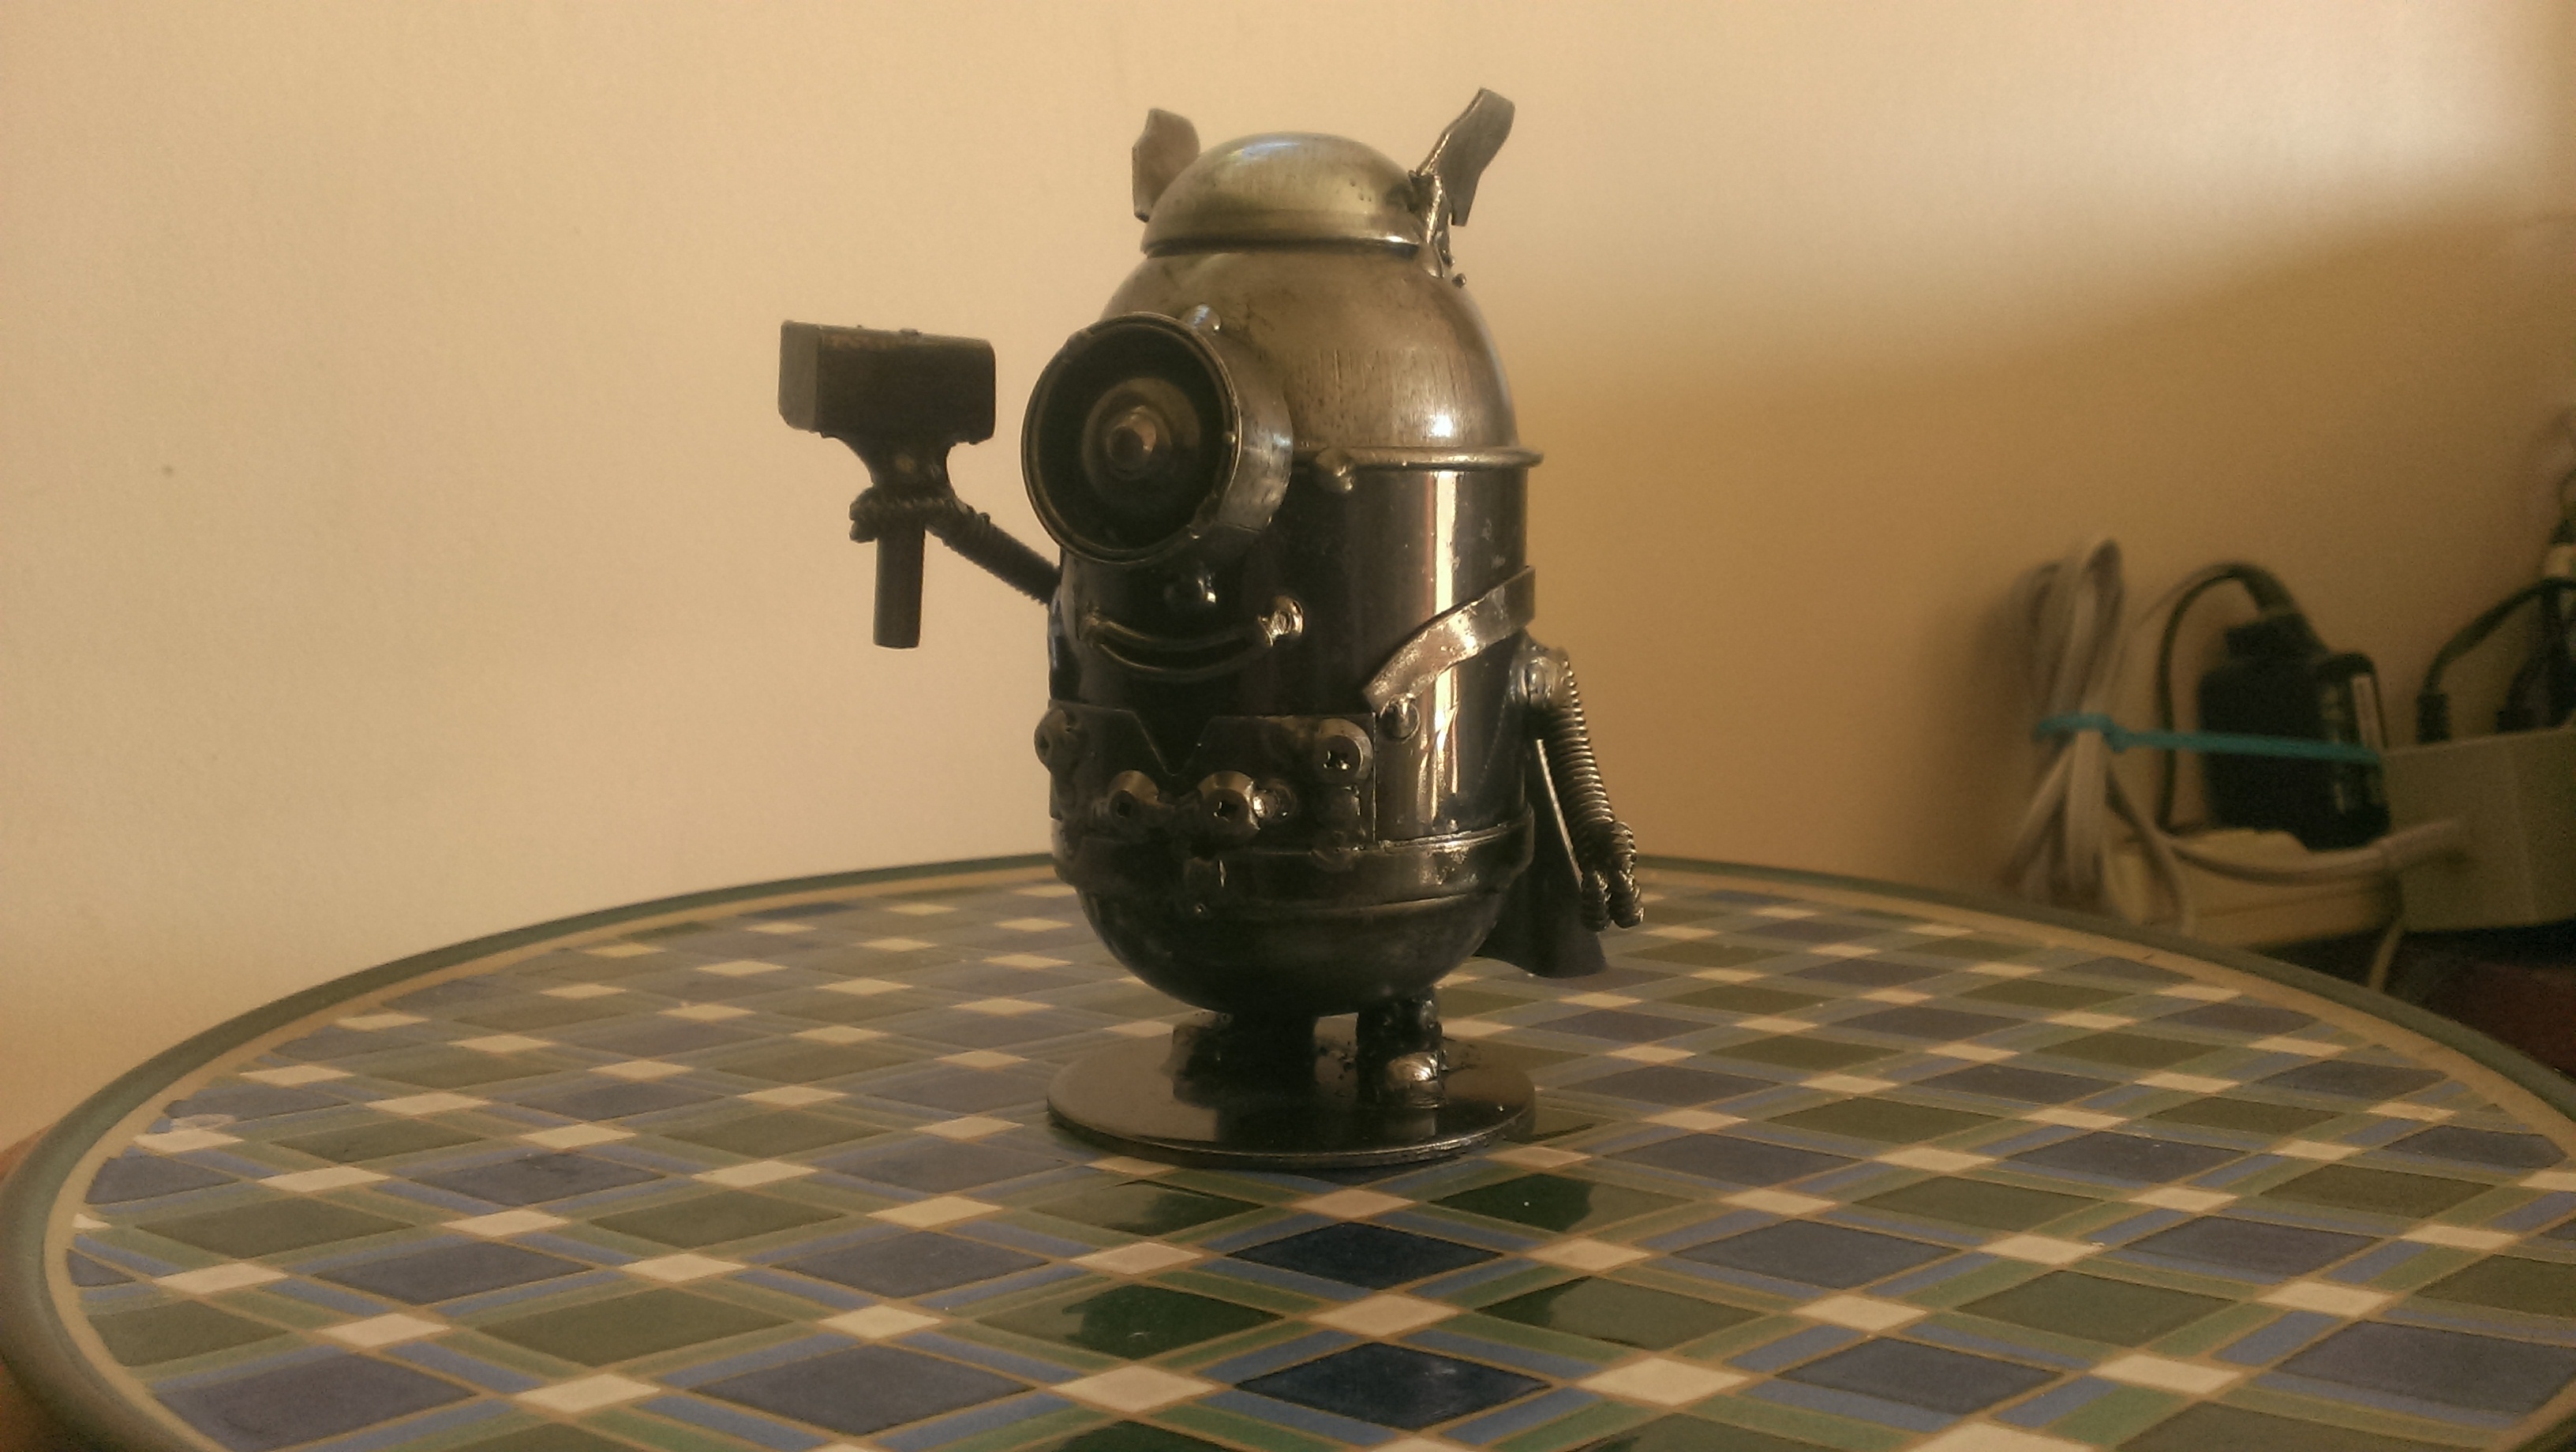
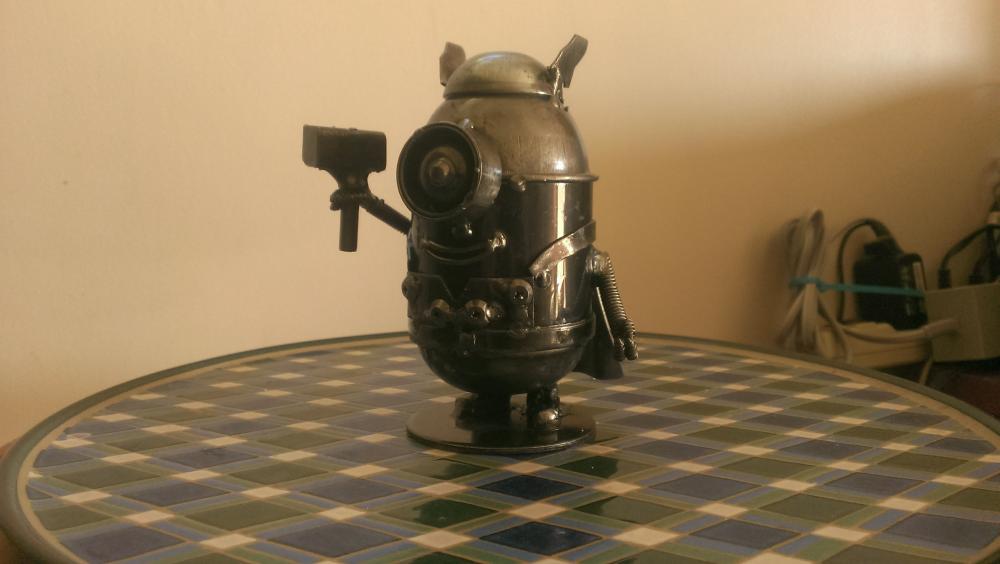
I didn't make this one, but my youngest got it for me for Christmas a few years ago. about 4 inches high, looks like it was tig welded from scrap, Dressed as the Norse god Thor. I think its hilarious, Put a rare earth magnet on the bottom and it stays out at the forge, watching over my stuff when I'm not working.
-
Show me your first blacksmithing project
Michael replied to Glenn's topic in Blacksmithing, General Discussion
Tried to make a snake out of a RR spike, and bend a drawknife into a scorp.
-
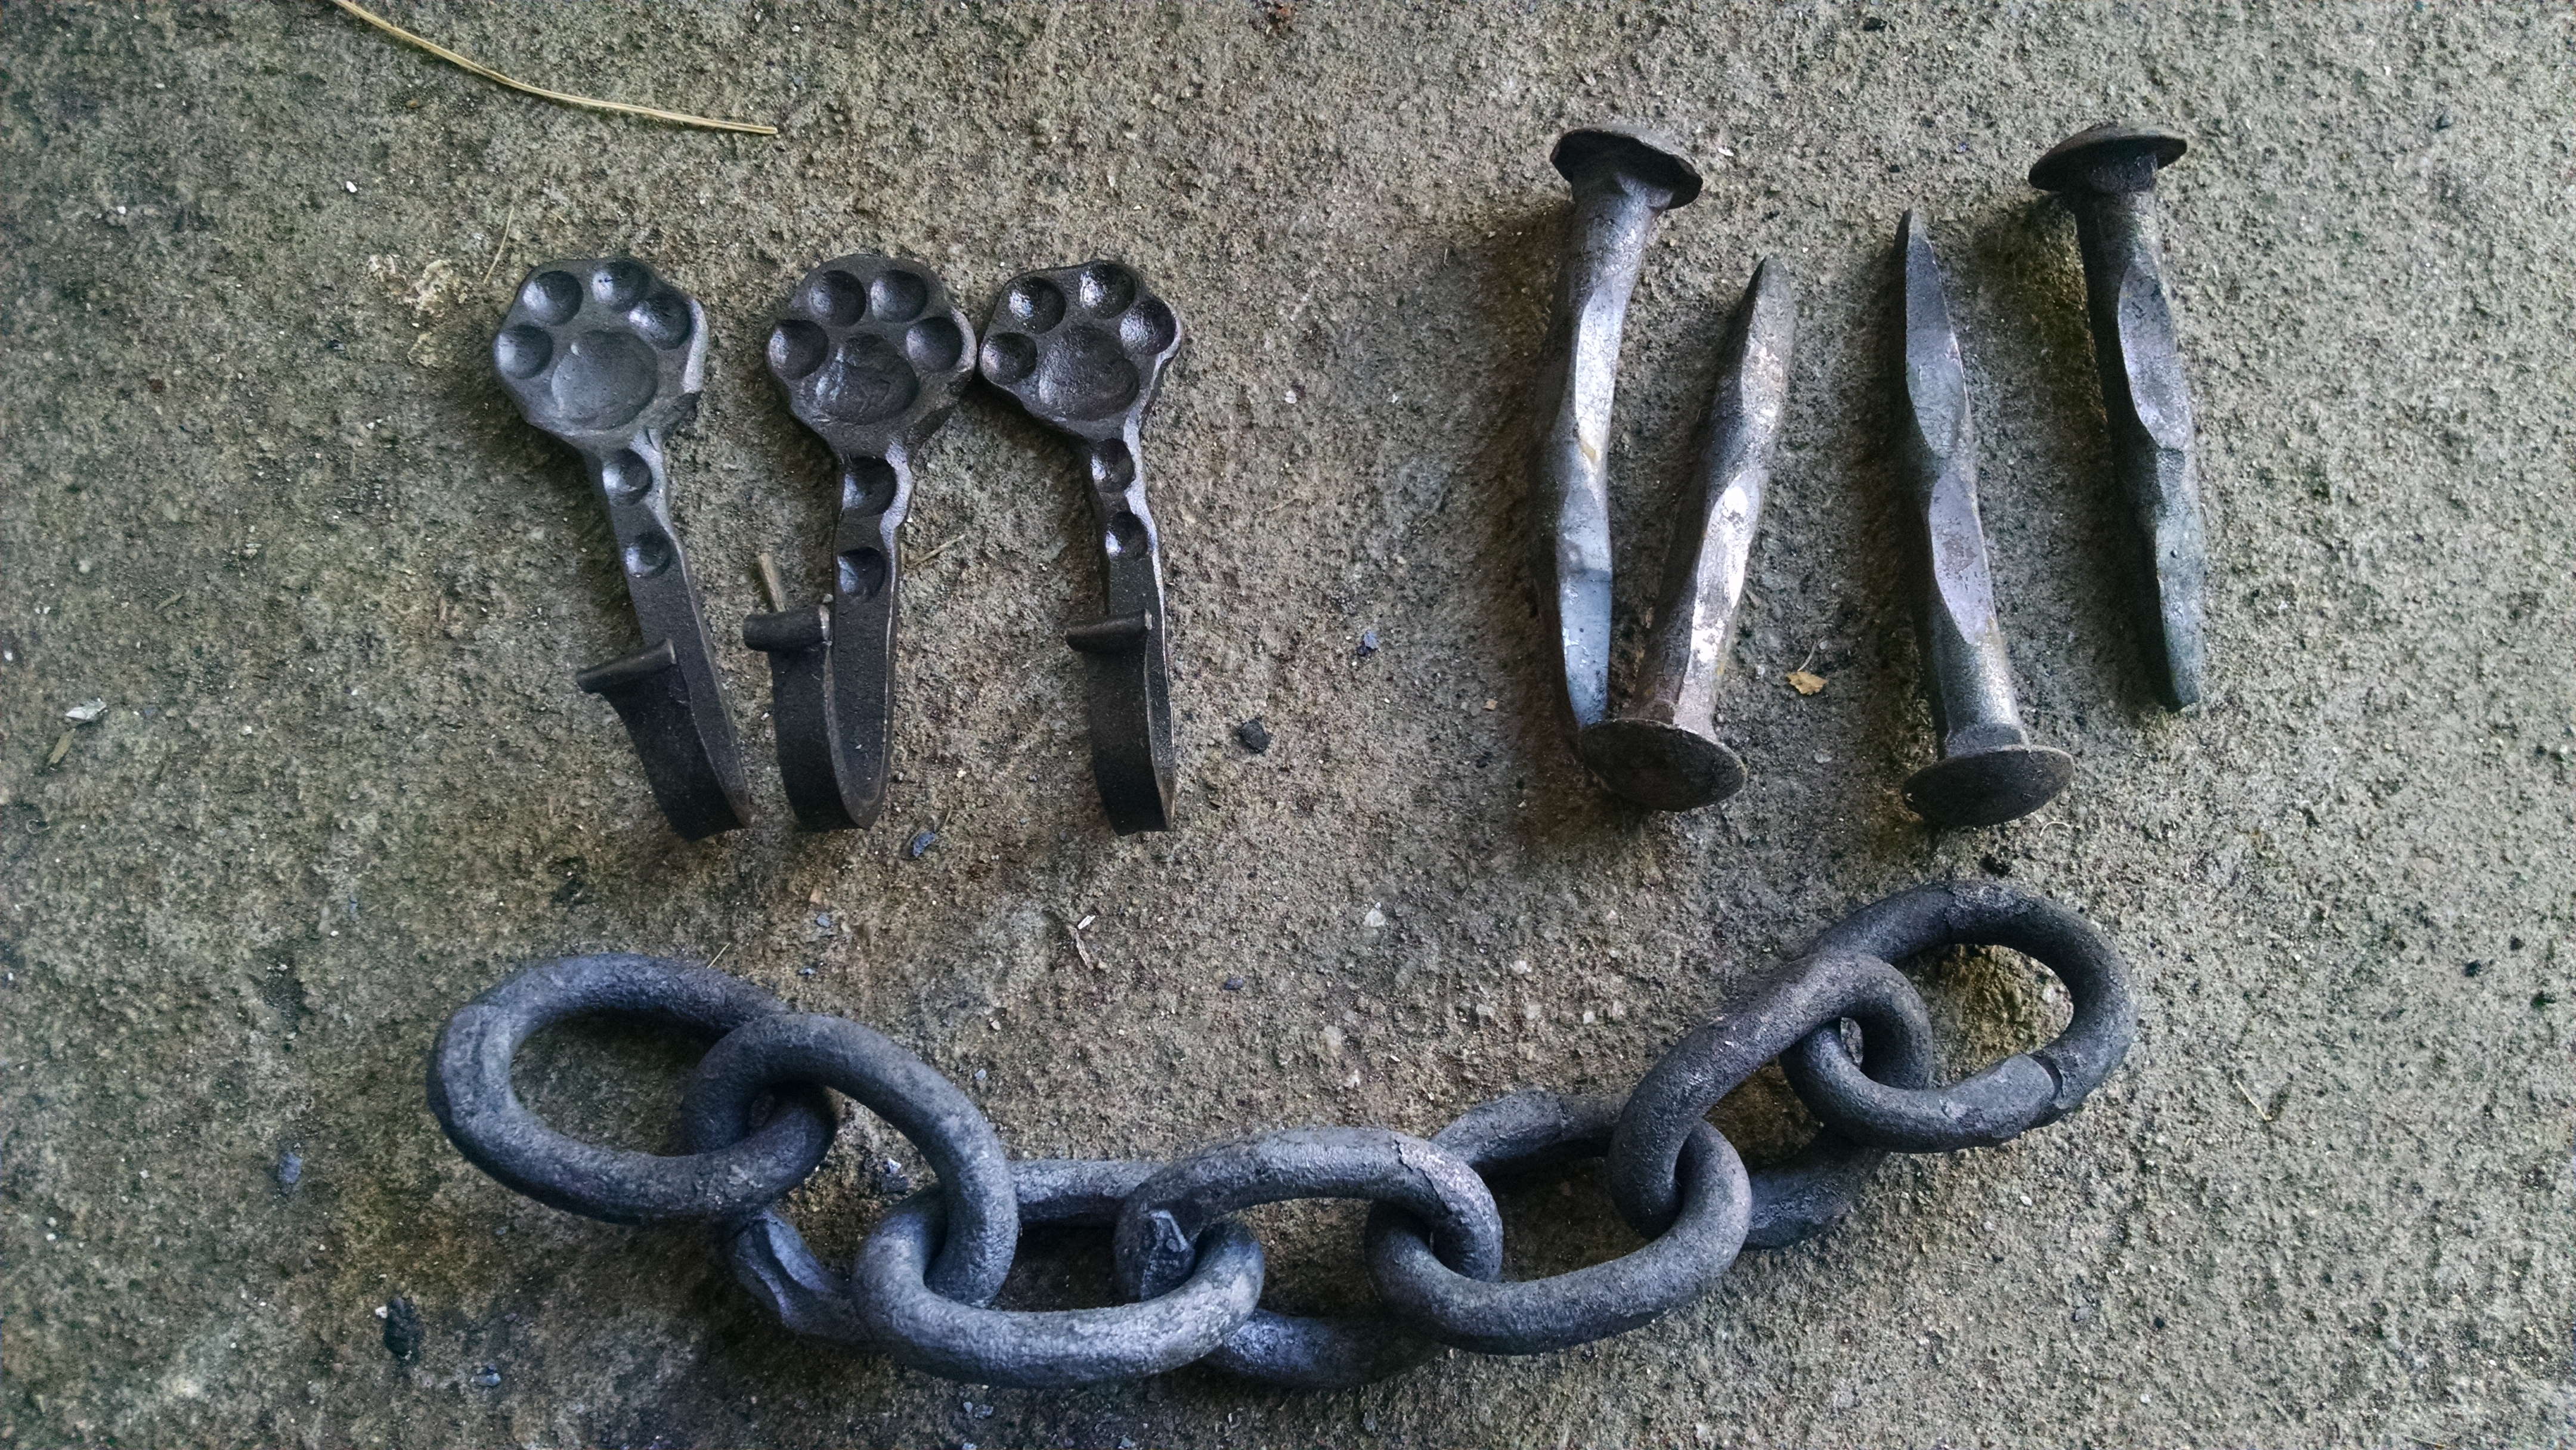
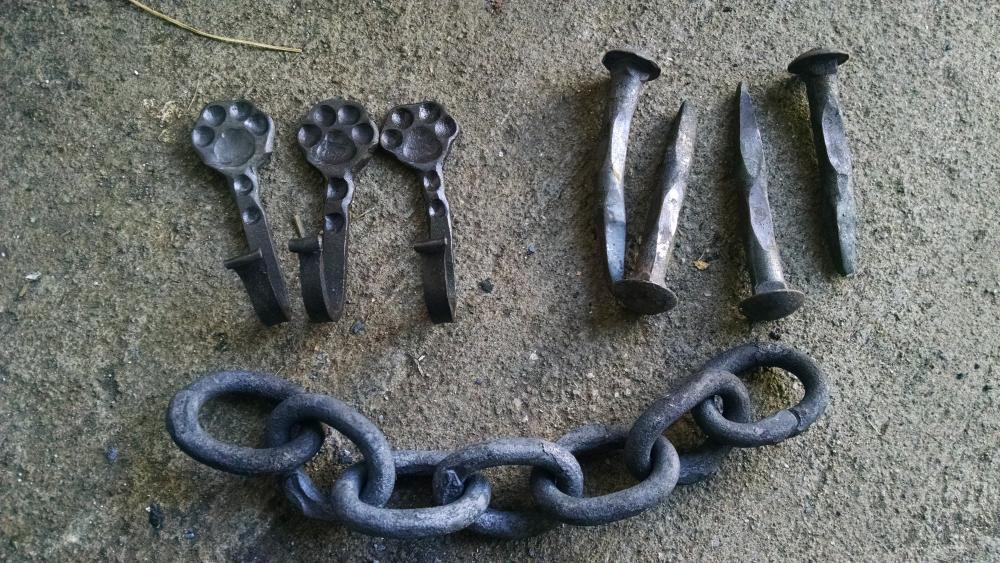
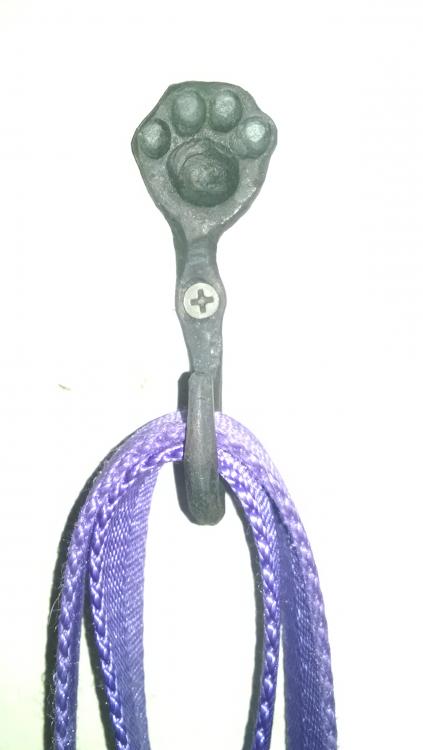
littleblacksmith, I start out with 1/2 inch square stock, then I isolate a little more than a cube of material at the end, forging a couple of tapers below that to make the hook from. Then I squash the bit-more-than-a-cube on the diamond and forge it into a thick disk, maybe 3/16ths thick, (same thickness as the hook stock) and perhaps 3/4 inch in diameter. The paw print is forged with round nosed bull punches, driving the perimeter of the disk out past that 3/4 diameter. The center pad is a larger bull punch, but I should make a specific, rounded corner triangular bull punch for this part, since in end up walking the punch around the center of the paw to make the vaguely triangular shape. Never had so many people interested in getting these paw hooks, All the dog people in the family have orders in. Glenn, those two indents under the paw but above the hook, Holes drilled for two screws, so the hook doesn't rotate. With about a dozen more of these to make, I'll probably end up punching the screw holes before too long.
-
Got a whole saturday with the family out and about. Built on the chain forging success from the conference. 2, 3 link chains joined to make 7. Also a handful of dog leash hooks for the guy who came up with the idea
-
CBA Sping Conference in Ferndale, CA last month. Showed up late for chain making, but got some good coaching at the welds. Bam, Bam, Bam and there's 3 links in 3/8 mild steel. At the open forges Saturday afternoon, I pulled out some long carriage bolts I'd tossed in the toolbag. Didn't realize the bolts were hi carbon till I tried to cut them for chain links. Same old guy ( it was the Old Guys Conference after all) from the chain making class helped me with that first, sparkling hot weld and then the next 3 welds went like clockwork. One link got a little burnt, lots more scale coming off the steel as I dressed the welds round on the horn. A buddy's chain tongs were a huge help too. They sound different rattling than the mild steel chain. Great fun!


-
Nice, spring and bracket too. Is this for a pernanent mount or portable?
-
Could you do a closer picture, or better yet a scan of both sides of the package. Great advertising images from back in the day.
-
Show me your anvil stands
Michael replied to pkrankow's topic in Stands for Anvils, Swage Blocks, etc
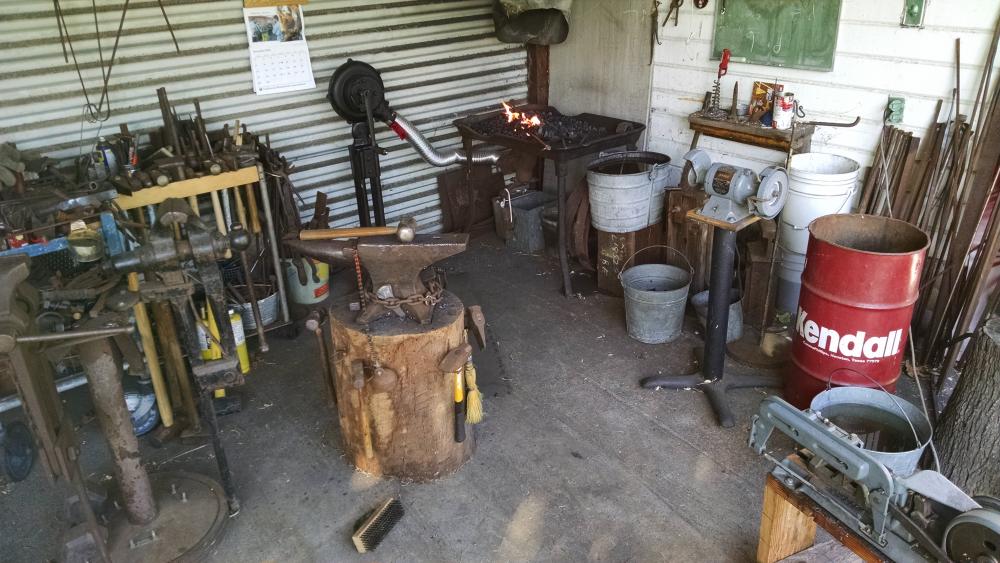
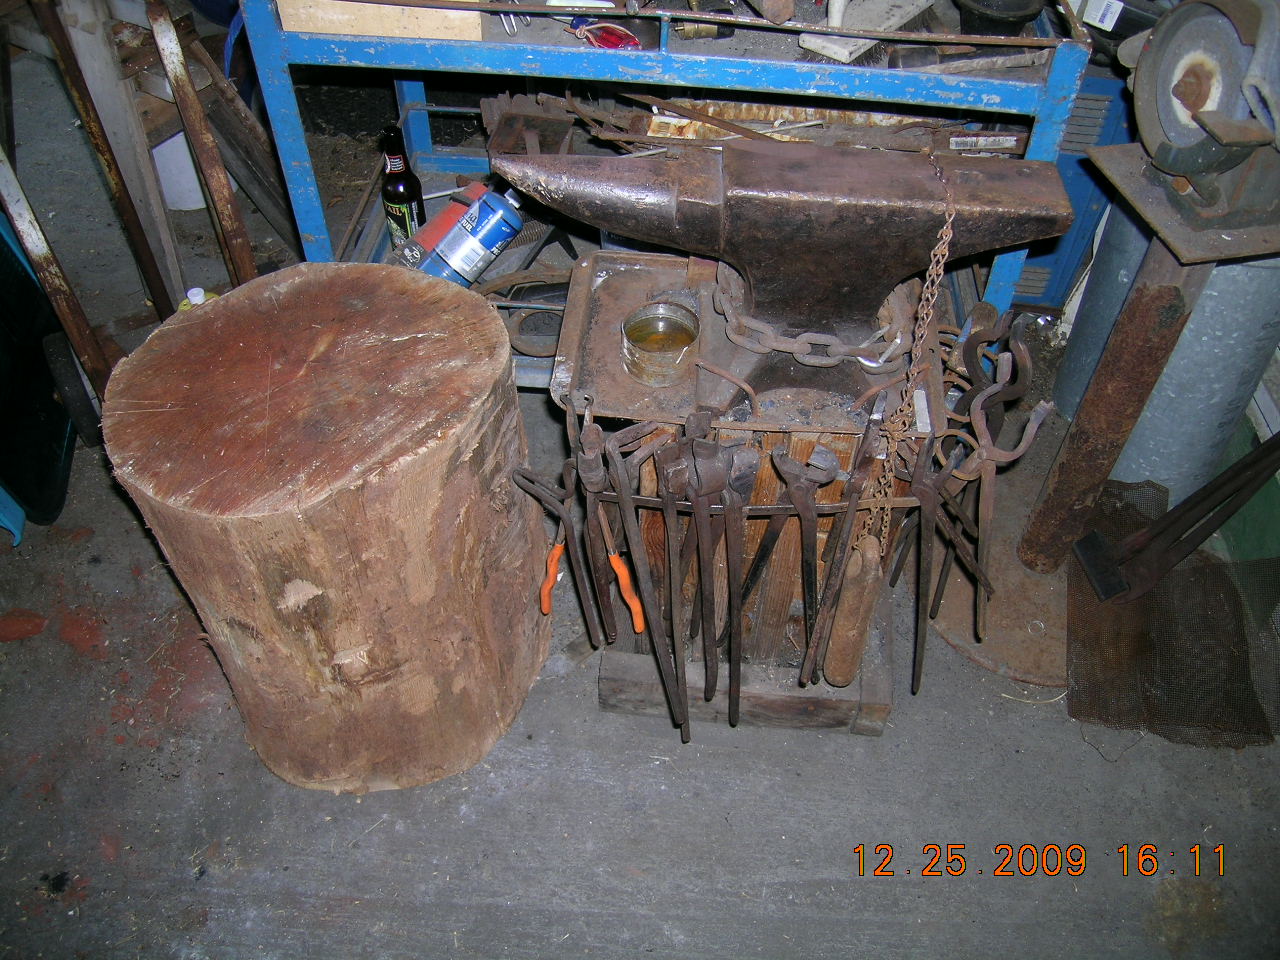
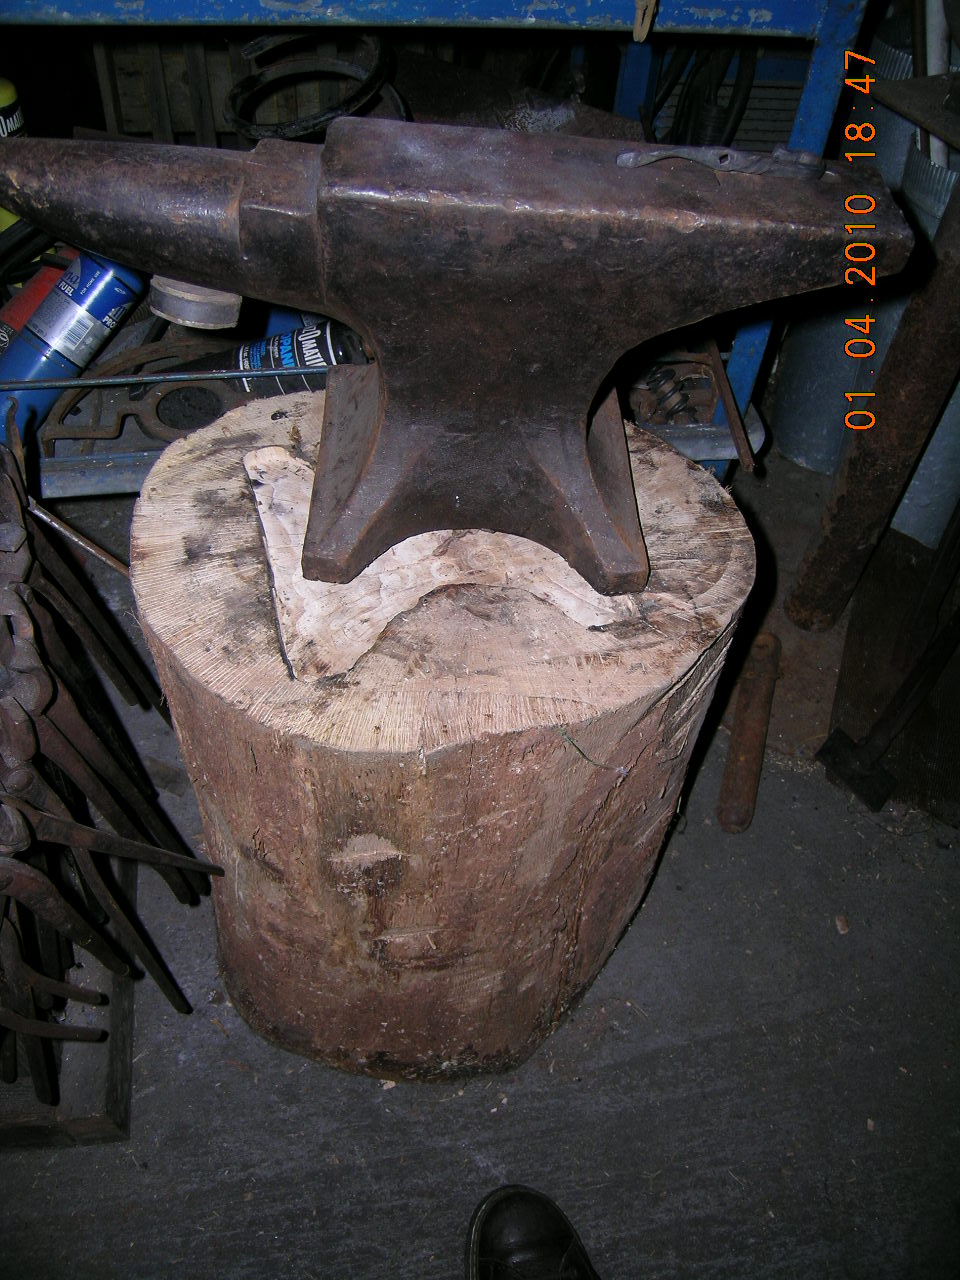
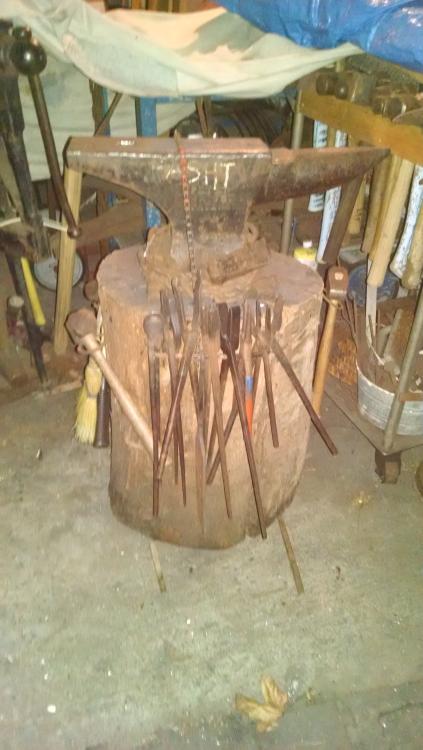
Here's mine, a black oak stump under my 104 lb Peter Wright. Bark drawknifed off, recess for the anvil routed in the top. I routed 3 "feet" on the bottom so its a sort of tripod. rings for hammers, a rack in front for the tongs in use. Bike chain stapled to the front with a weight on the other end as a hold down. the stand before that, 2x10's held together with all thread, the boards staggered to make pockets for hardy tools and tong. Ended up putting a cookie sheet from the Goodwill under the anvil as a tray, just drove the anvil staples thru the sheet metal, that was useful. Swage block is on that stand now.

-
Hey, that's me on the right! Didn't know anyone was taking pictures at Hollister, I would have smiled (was probably grinning anyway)
-
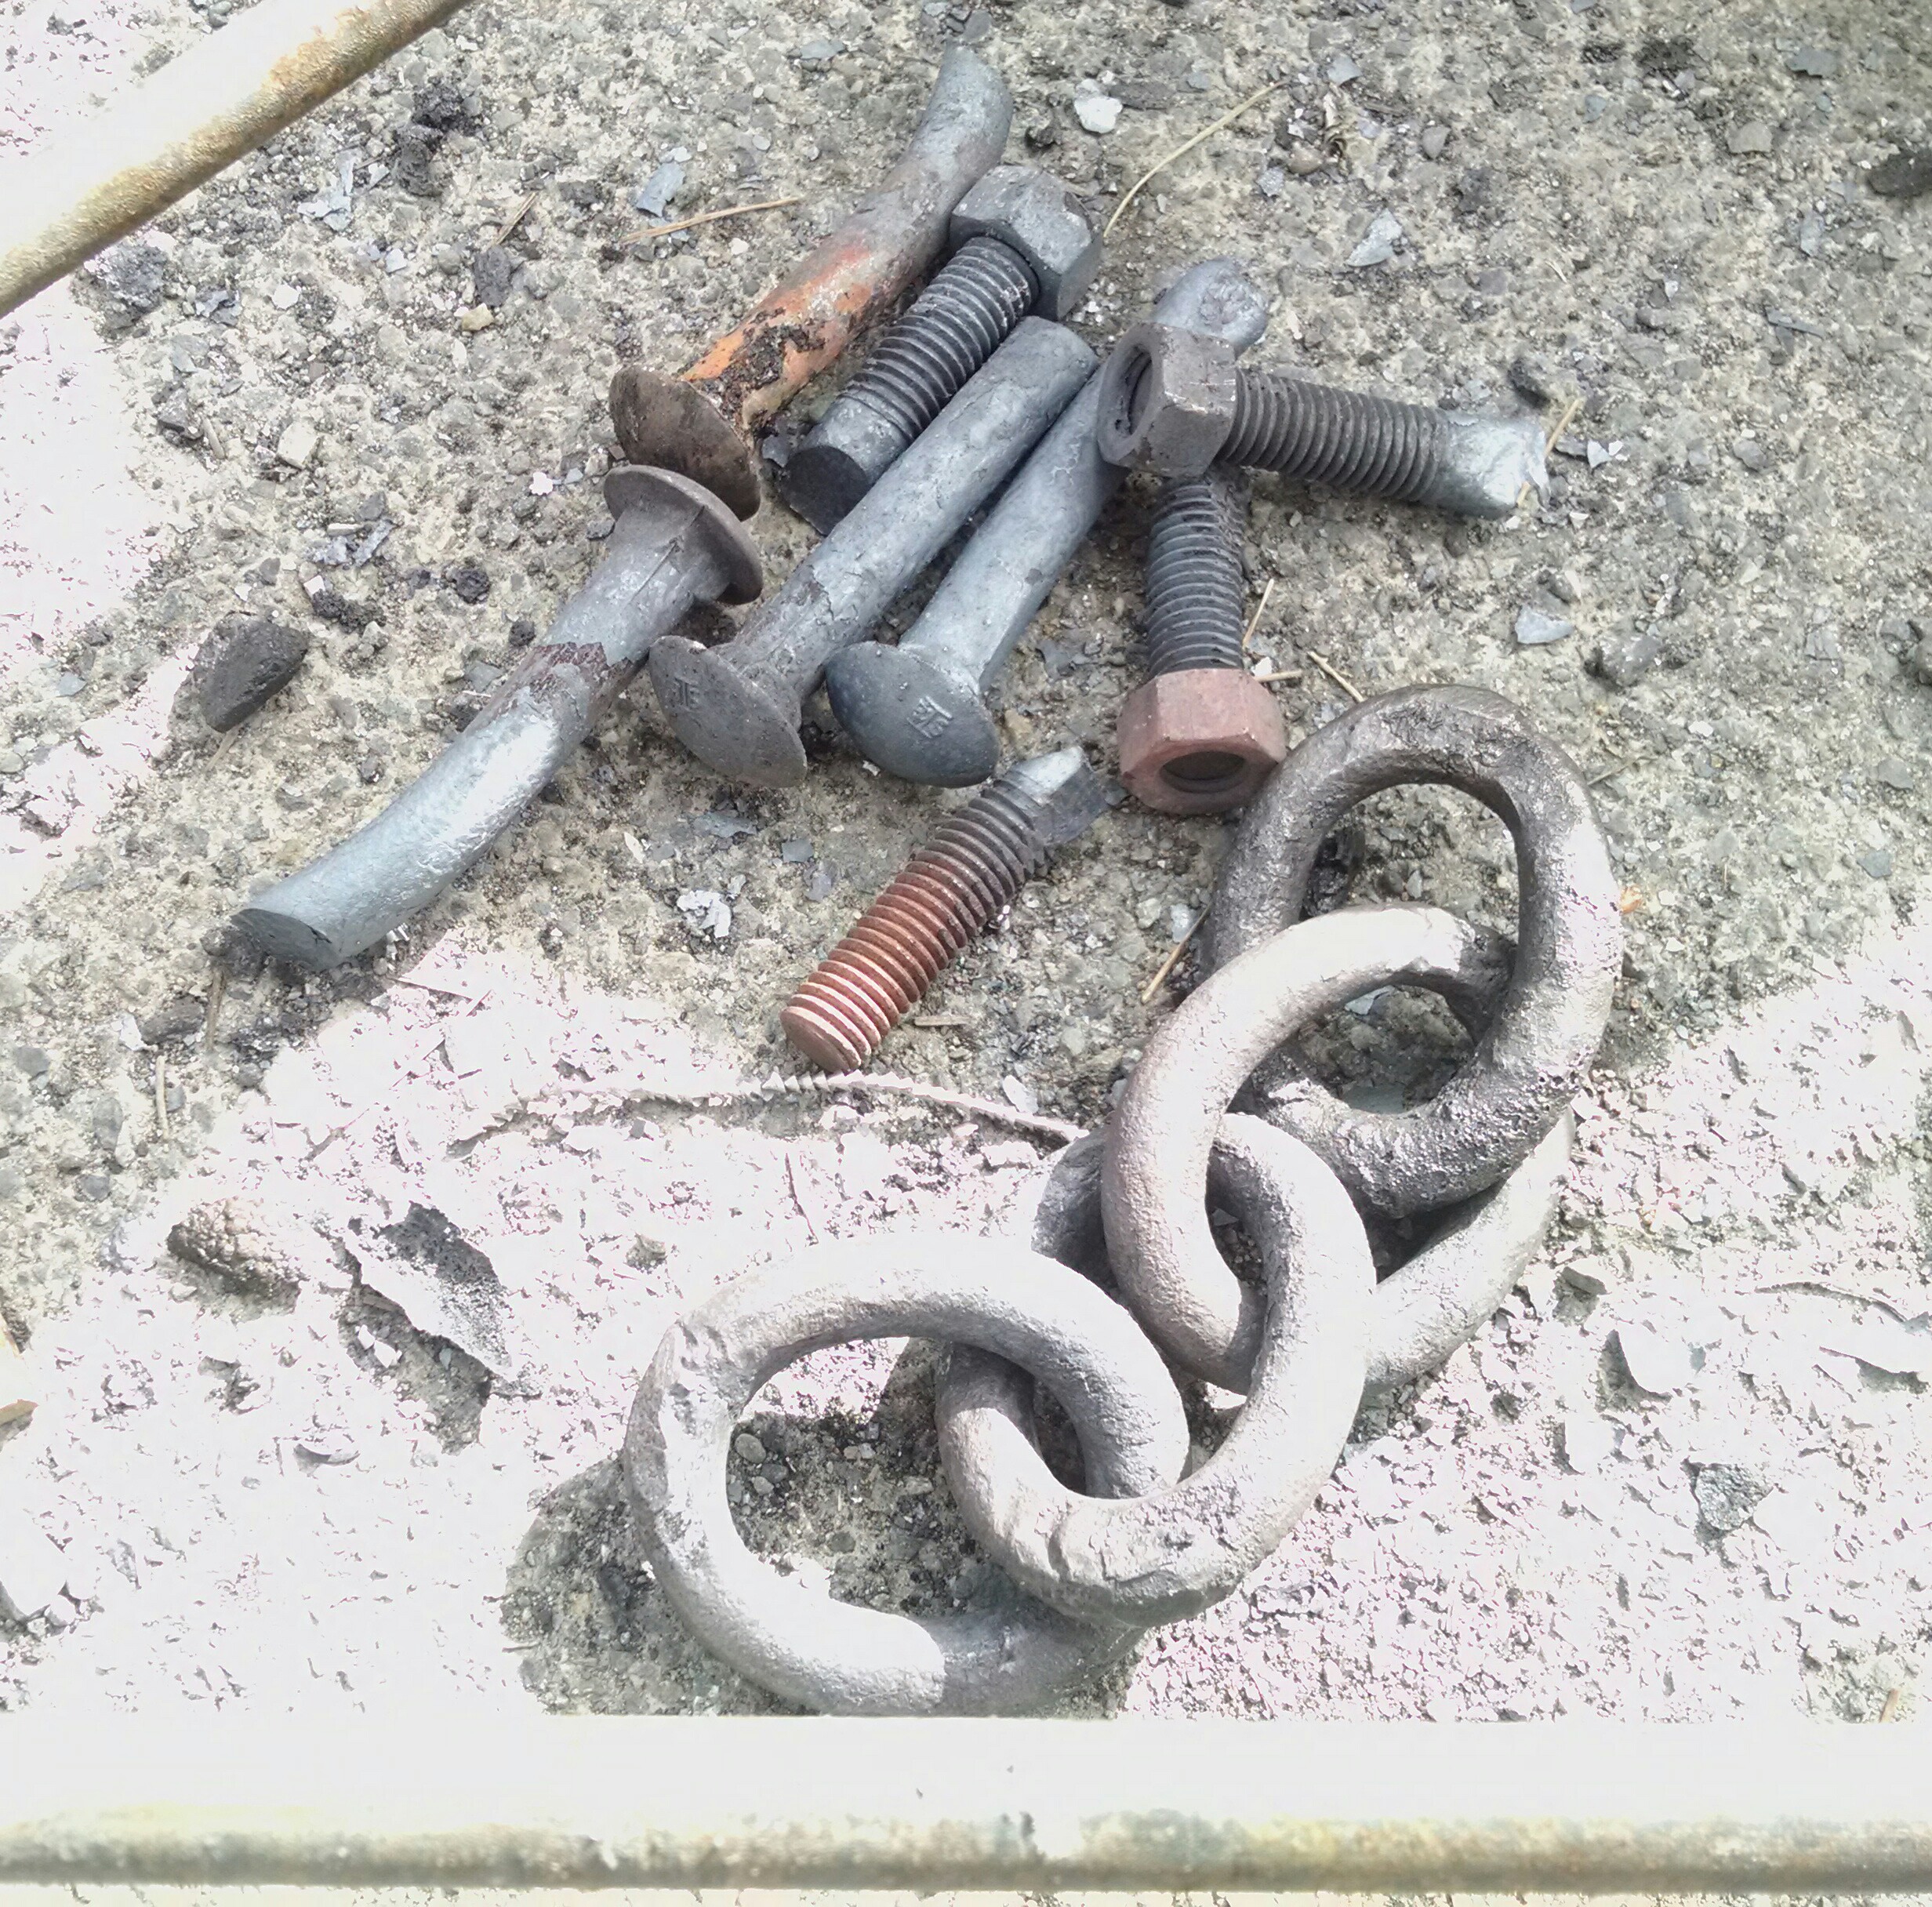
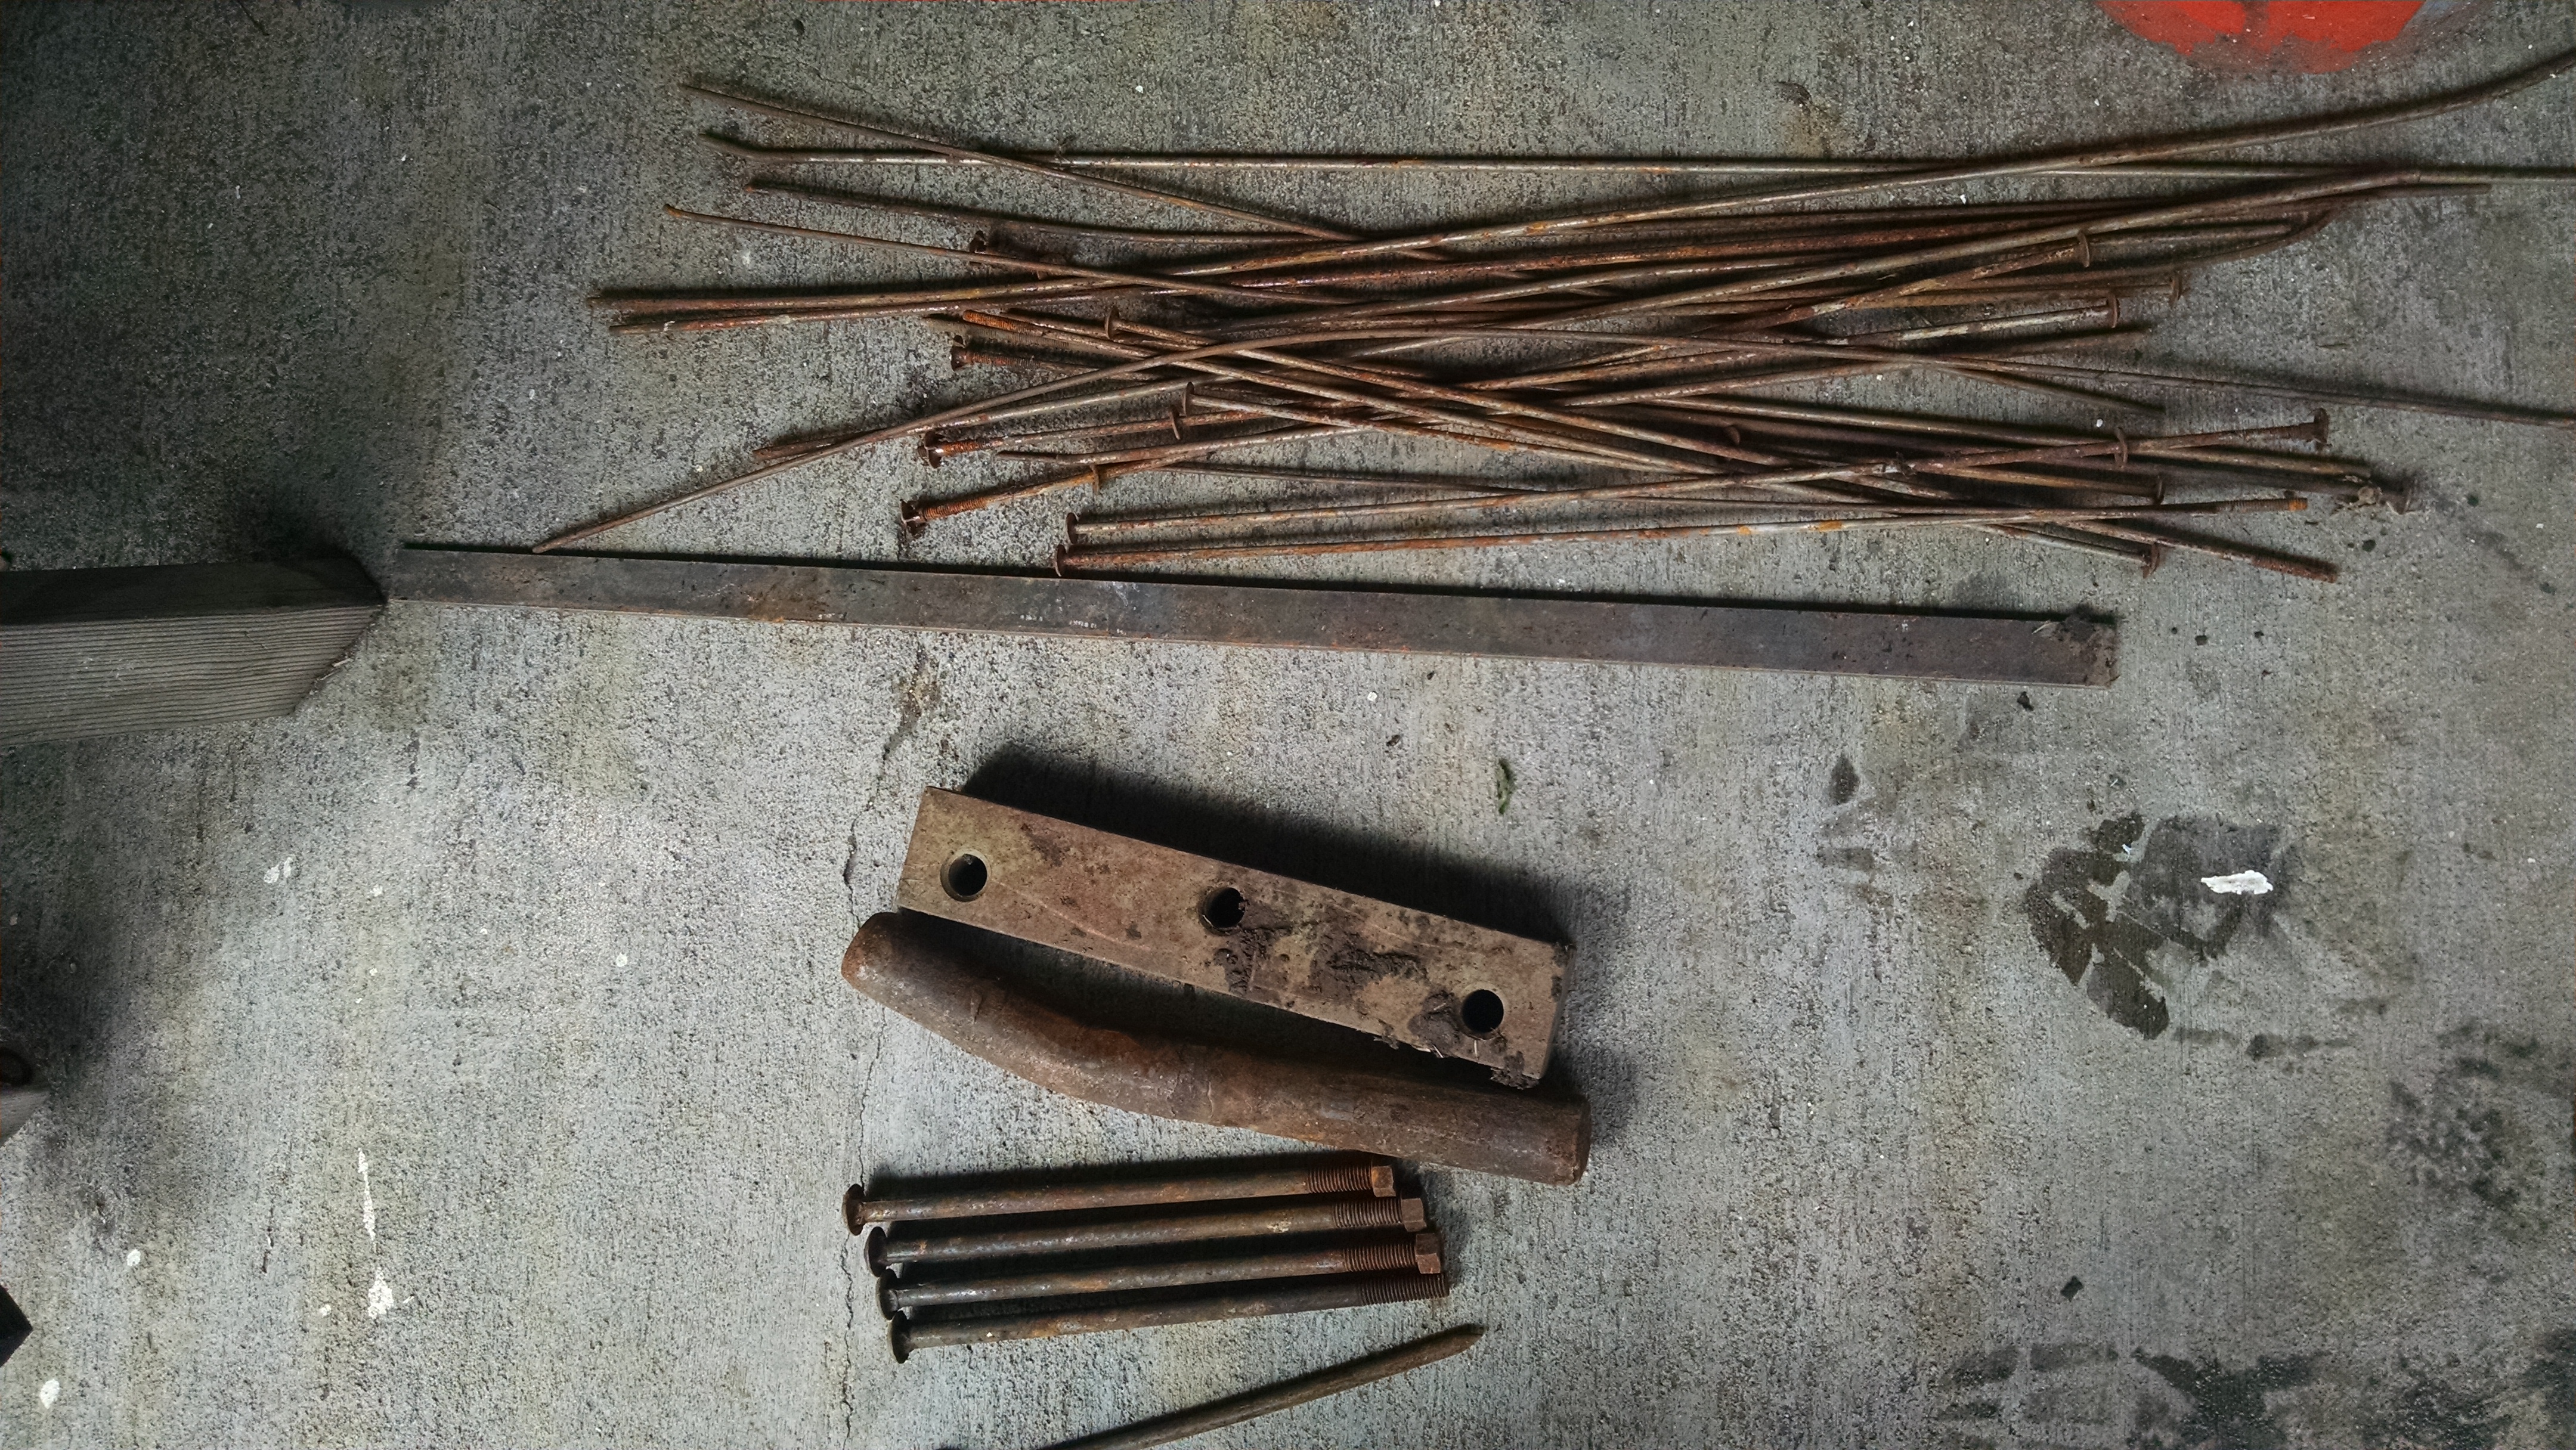
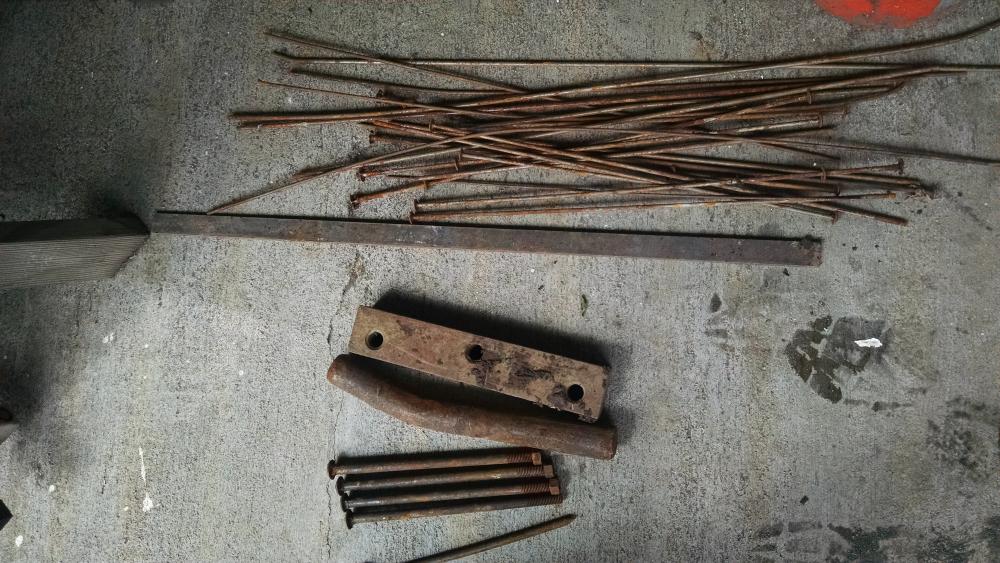
Walking the dogs past a neighbor's house, a lot of metal scrap in the recycling bin. He was happy to get rid of it. 3/8 by 1 inch flat bar, some long carriage bolts, section of what looks like axle that might make hammers or top tools. Not sure what the rectangular block with the threaded holes is for, but any heavy piece of steel is worth having. It think all the thin round stock might be braces for concrete forms? And all for free!!
-
Raised center vein in leaf????
Michael replied to Burnttoast's topic in Blacksmithing, General Discussion
I do mine length wise along the horn. With the center vein over the curve of the horn and drawing half the leaf over the top of the horn -
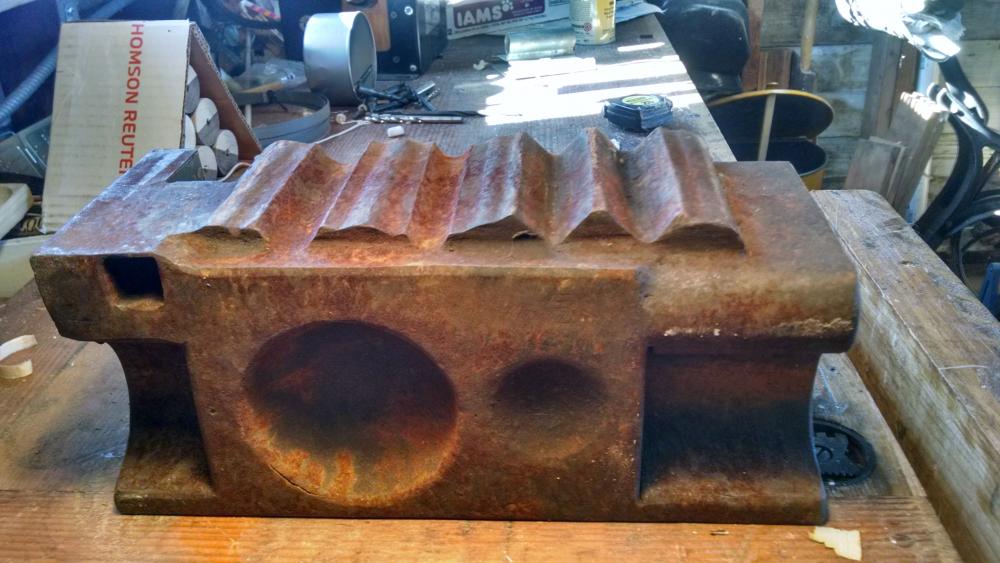
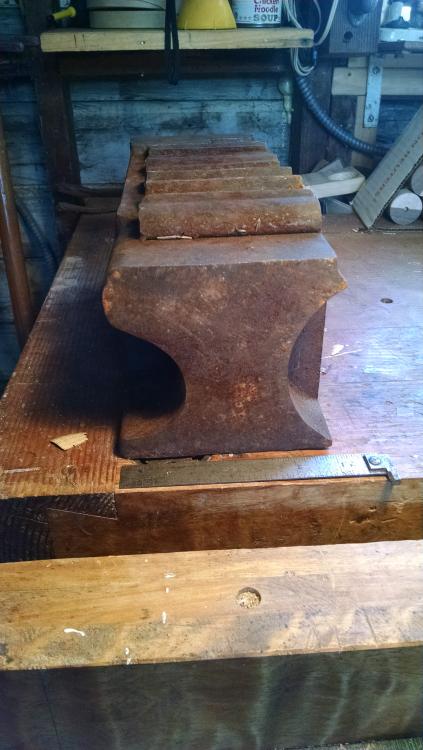
Here's the swage block, though I didn't make it, Got it when a a friend was moving her shop, don't know if she made it either. I think it started as a section of RR track with a lot of welding and grinding, but I could be wrong, About a foot long and a little under 6 inches square. Not sure of the weight. I find the bowls and curves on the side facing the camera in the first pic the most useful. Freon tank gas forge, before I cut down the burner tube as per Frosty. 1 inch of kaowool, ITC 100 and kiln shelving for the floor and back door. I close up the front with firebricks. Very important to make the floor of the forge and the opening one fire brick high, so you can stack bricks in front to make a porch the work can rest on. I followed Ron Reil's instructions to the letter and the 3/4 burner worked great first time I fired it up. I've not had to mess with it since except to cut it shorter. I did all the bolting of the legs, handle, back door brackets and burner holder thru the narrow opening cut in the Freon tank, then once it was standing, measured with a firebrick and cut the front door opening. The kiln shelf floor rests on the ends of the bolts holding the legs on, the whole space under the shelf filled with kaowool.

-
Show Me Your Candle Holders
Michael replied to Forging Carver's topic in Blacksmithing, General Discussion
Made this a few years ago and just found the picture. Should make some more of these, I think they are called a sash light?
-
Great wings!
-
Rwolfe, Leaf end is a nice touch on a drive hook.
-
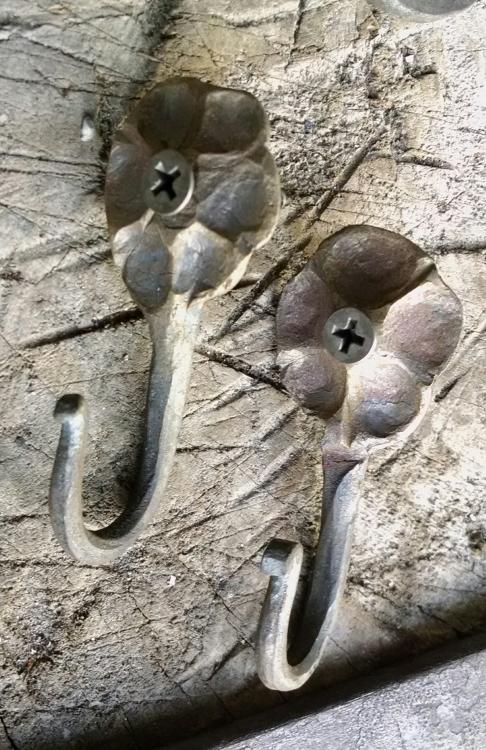
Leash hook, kitchen hooks for trivets
-
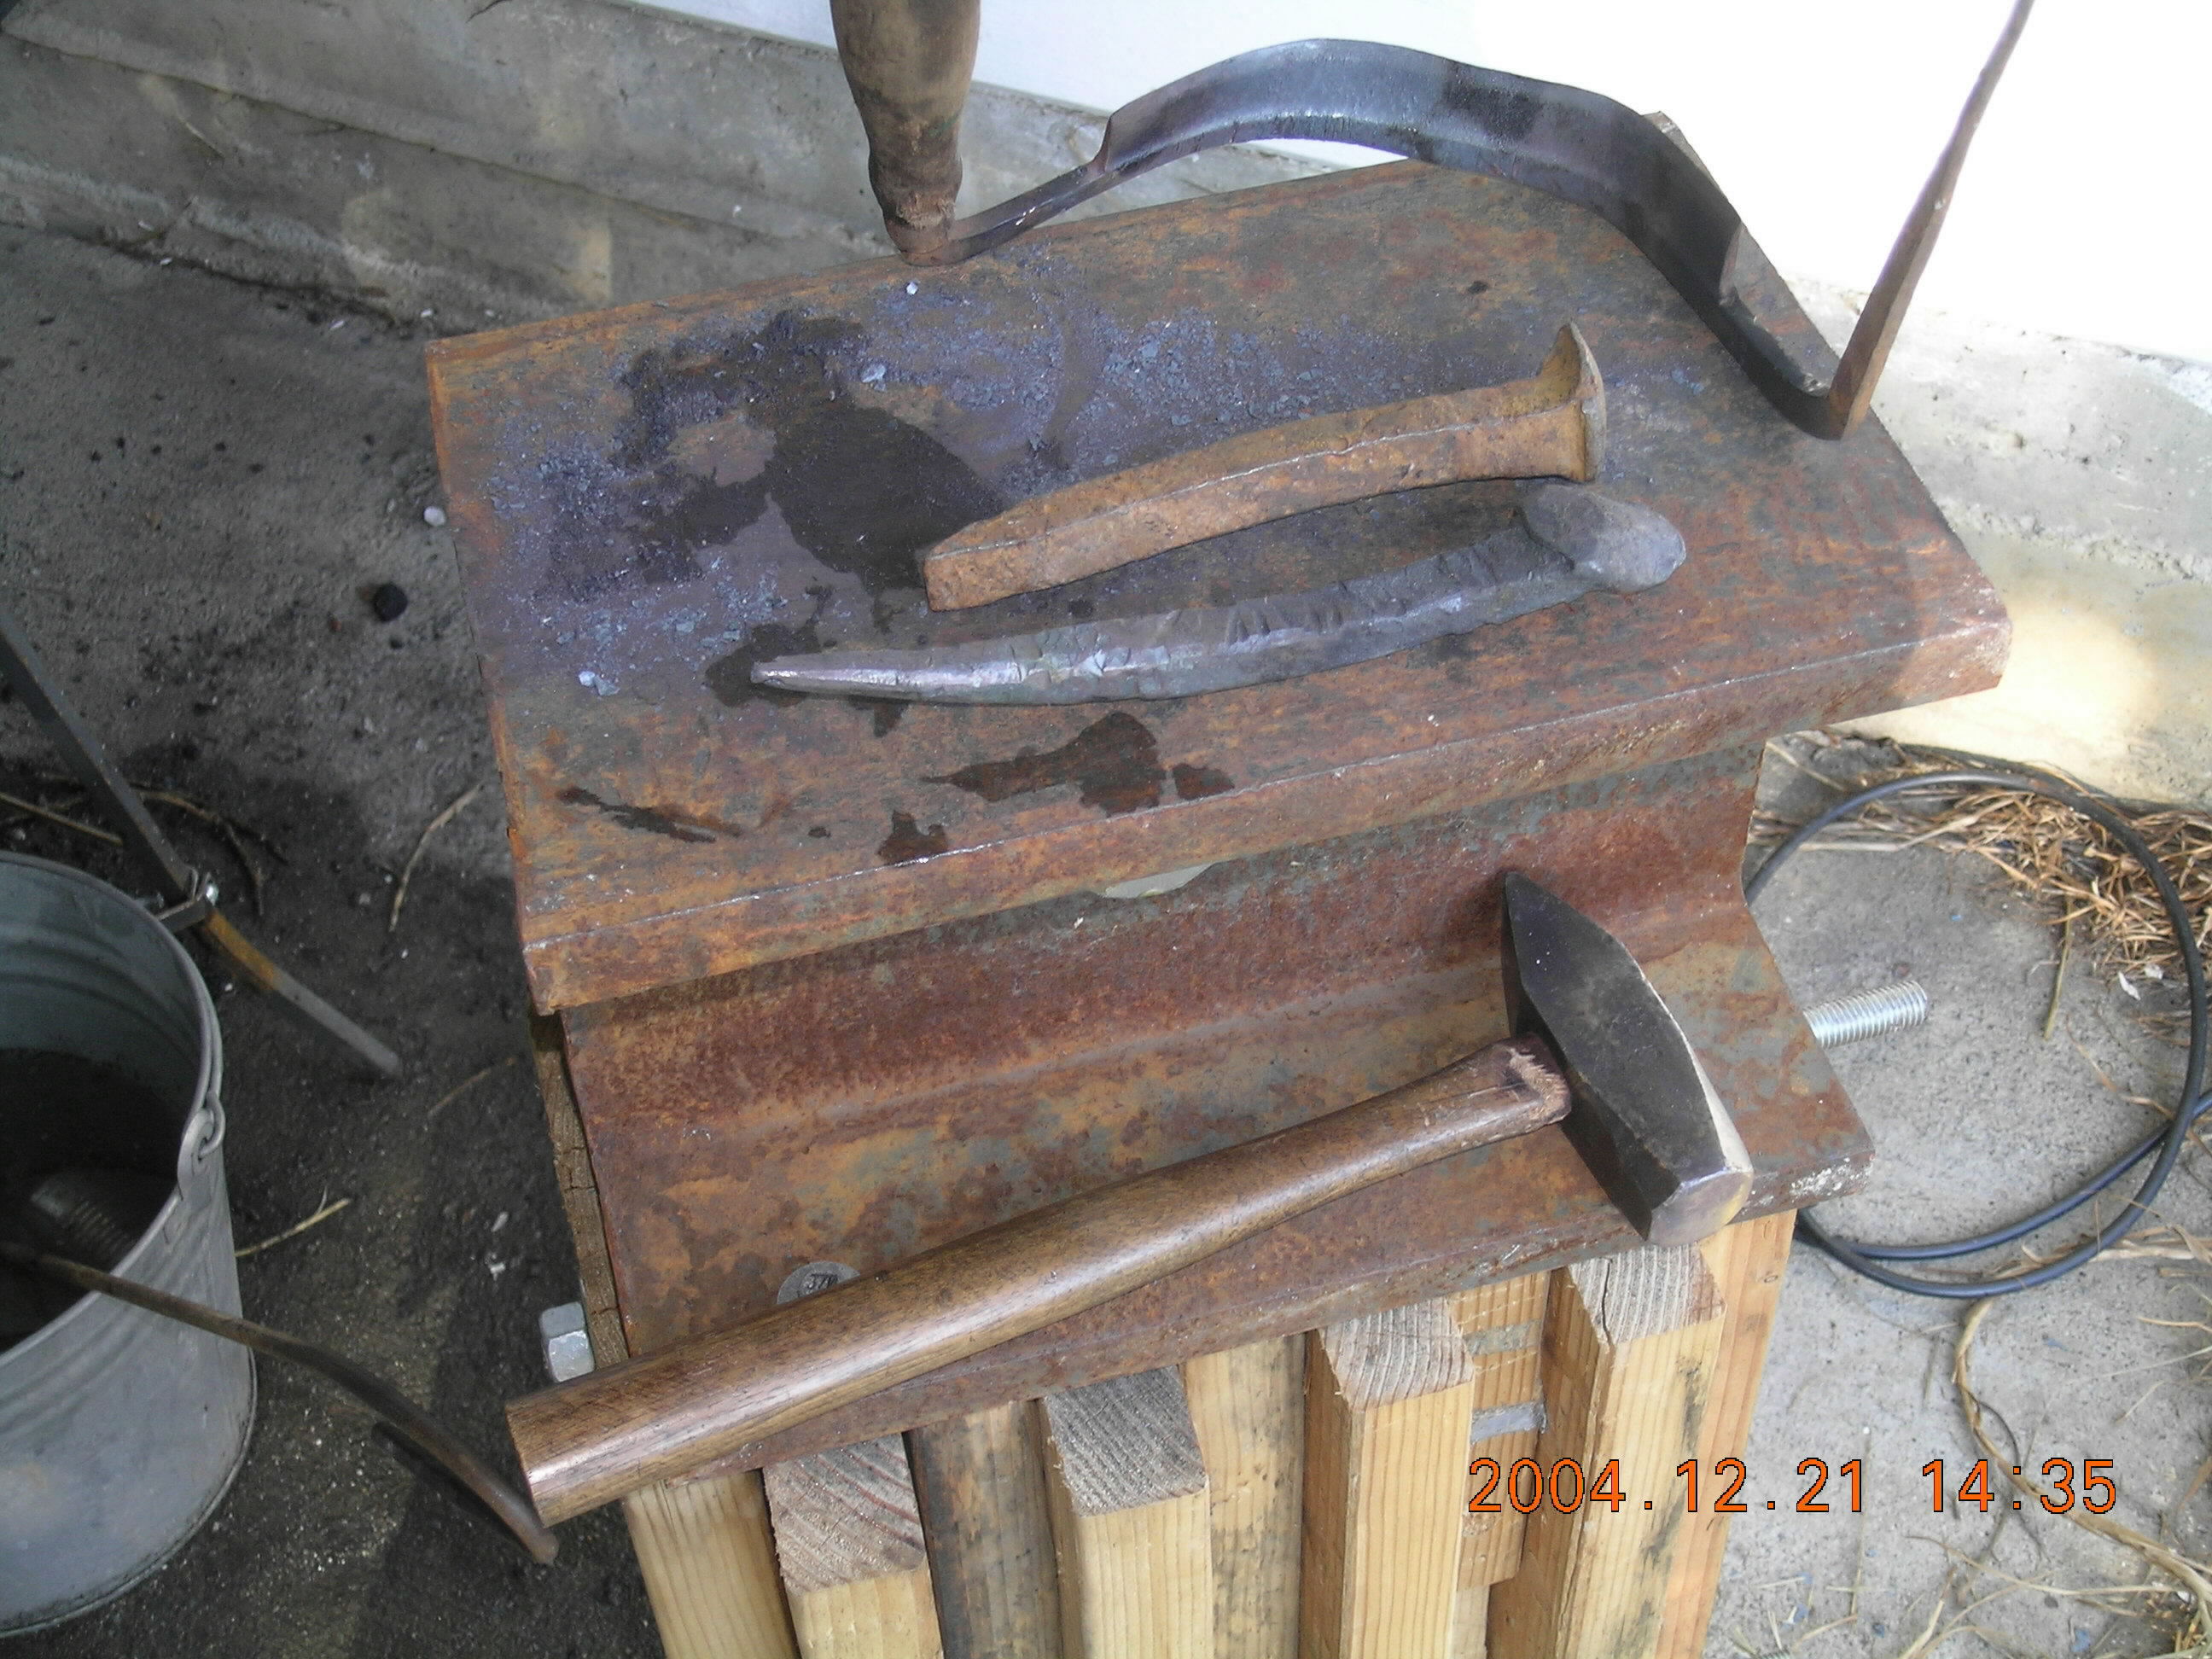
I'd replied to this about 5 yesrs ago. Pic ssems lost but here's my corner of the patio setup. 104 # PW, pair of vises on stand, tool table, Tiger blower, forge table, grinder/wirewheel and power hacksaw. Not seen are a homemade swage block and the freon tank propane forge.