Michael
-
Posts
1,061 -
Joined
-
Last visited
Content Type
Profiles
Forums
Articles
Gallery
Downloads
Events
Everything posted by Michael
-
I have one of these little HF 110 Flux Core welders and I love it! As long as the washing machine isn't running, the breaker doesn't trip and I've yet to run up against the duty cycle yet (which is more about my stop and start welding than the welder!) Great for small jigs and fixtures that I'd previously bolted together. Buy an extra 1 pound spool of wire and plan on burning thru a whole roll to get the hang of these little guys. I've stuck 1/4 inch plate together with it. Took a couple of passes, grinding the welds between and the flux core is almost as messy as stick welding, a can of anti spatter is your friend. The best part is not having to stop a project, gather everything up and get to a "real" welder
-
Homebuild Treadle grinder questions
Michael replied to james austin's topic in Grinders, Sanders, etc
I think so, and a freewheel sprocket from a bike so it only engages the gear on a downstroke. I think hardest part would be a arbor the grinding wheel rides on and the tire presses against. Again, I never got around to building this, the scrounging gene in an urban area meant powered grinders found me before this got built. -
Homebuild Treadle grinder questions
Michael replied to james austin's topic in Grinders, Sanders, etc
It seems you have some definite ideas about the treadle grinder you're planning on building. I had also toyed with the idea of casting a concrete/square holed grinding wheel but never got much past the design phase. The design attached has been sitting in my 'projects to do' folder for a long while now, but might help a bit in your design process.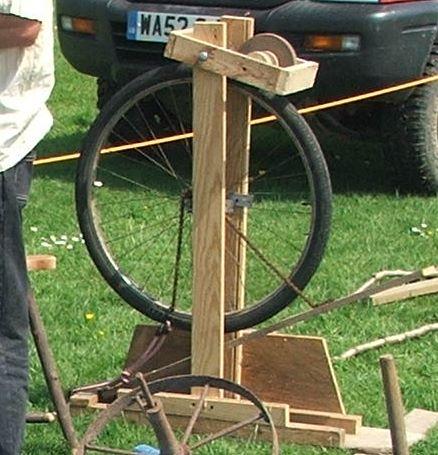
-
What did you do in the shop today?
Michael replied to Mark Ling's topic in Blacksmithing, General Discussion
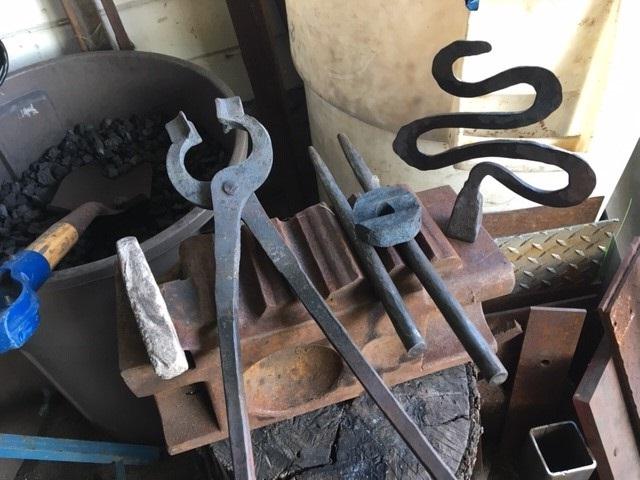
took a day off yesterday to take the car and the dog and my teeth into their respective maintenance appointments. Got the forge lit about 11 AM, nothing like mid week coal burning in the suburbs (gas forge for weekend forging) . Made some pass thru joinery tooling, punch and drift from coil spring, bolster from some axle steel, the end of a hammer attempt that went wonky punching the hole. Finished a set of Ken's Iron tongs, took a while to figure out the bends to make them offset tongs. finally hammered out a 150mm Challenge piece, started at 6 inches (150mm) of 3/4 square. 3/4 is about the limit of what I can move wiht just a hand hammer. Happy how it came out.
-
Looks like the last anvil stand you're ever going to have to make! Love the plywood Anvil mockup!
-
Being in often tinder dry California, I have hardware cloth screens screwed in to both the top and bottom of my forge chimney. Not that the coal/coke fire produces a lot of sparks, but you can never be too safe and the effort was not a big deal. I have neighbors on 4 sides, and there are times in the fall when I'll when hose down the grass in the yard, before firing up the forge. It doesn't take much smoke to bring the fire department nowadays. A friend up north in the grass lands would fan exhaust his forge hood horizontally onto a section of the yard with a sprinkler going on it.
-
Need some help from someone familiar with solid fuel forges
Michael replied to Binesman's topic in Solid Fuel Forges
I have to agree. There's not much of a need for refractory in a solid fuel forge. When forging with charcoal (before figuring out my neighbors don't care AND i've got the wind on my side) I'd sometimes put a plate of 1/4 inch steel over the forge to try and reflect heat back to get to a welding heat, but that reflection just heated the charcoal into ash before I could get the heat needed for a forge weld. Piling up a huge pile of charcoal was the solution. Now with coke/coal, welding heats are easy, burning heats are even easier! -
What did you do in the shop today?
Michael replied to Mark Ling's topic in Blacksmithing, General Discussion
thank you! the lovely wife made a similar comment, which I take as a hint to remake the thing in 1/4 stock like the other feeders have.. Honestly, I started with the first ungalvanized lag bolt in the pile and was striving for a particular length specified by said lovely wife and didn't pay much attention to the starting stock. -
What did you do in the shop today?
Michael replied to Mark Ling's topic in Blacksmithing, General Discussion
Last week I welded up some channel and bar stock as a forge door frame. Got a deal on some kiln shelving to replace the disintegrating firebricks. The lever action handle concept closes well, and opens well enough to get tongs in there. Next gasser I’ll weld channel directly to the forge shell. This forge is 8 years old and cleaning off the rust might not leave enough metal to weld to! forged out some blanks for flower hooks, and made a new hanger for one of the hummingbird feeders. FullSizeRender.mov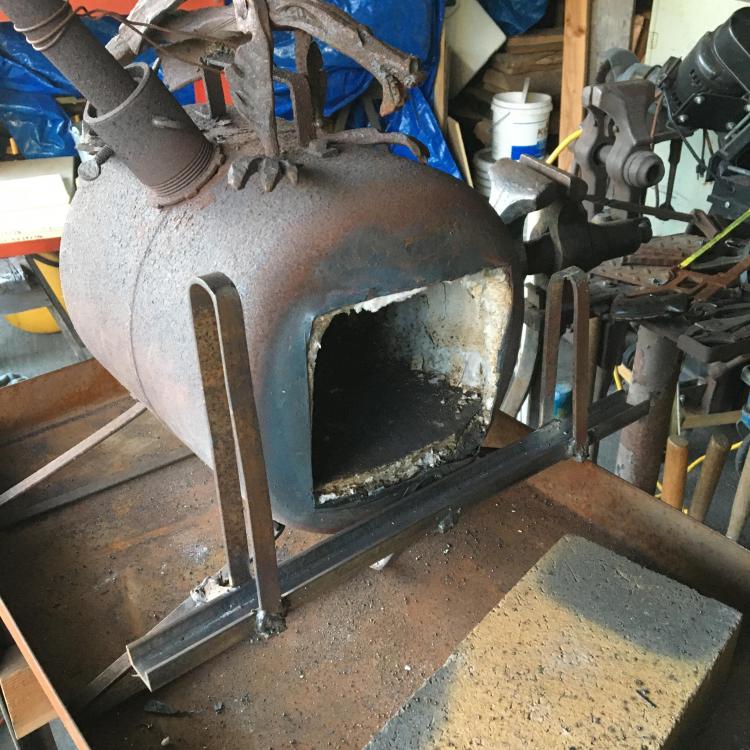

-
Nice Get!! I'd stand it on end and box that end up in wood. You would not need much of a stump to bring the whole thing up to a nice working height.
-
tried coal for first time...
Michael replied to bluerooster's topic in Solid Fuels: Coal, Coke, Charcoal, Wood, etc
I'm set up in a residential neighborhood and when lighting up a coal fire, I try to keep a good bright flame burning to keep the green/yellow smoke at bay. Not much heating of metal going on at first, but a good 10 or 15 minutes managing the fire, opening the top to keep a tall, wide flame going and eat up all the coal smoke goes a long way towards keeping the fire department at bay. Once a nice double handful of coal has coked down to be reasonably smoke free, I can pile green coal around the perimeter of the fire, wet it down and if the smoke gets to be a problem, open the top of the fire again to burn it off. At least in my neighborhood, a plume of smoke will get the neighbor s to call the fire department. This is exactly why I buy a bag of coke whenever I'm at a blacksmith event or hammer in. -
What did you do in the shop today?
Michael replied to Mark Ling's topic in Blacksmithing, General Discussion
Workshop about 90 minutes away on Saturday to make tools for the CBA Education trailer. Got to strike and direct making bottom swage, and break in a nice old 8 pound sledge, recently found and re handled.. Then on Sunday the local scrap place had beer kegs again! After burning a hole in the bottom of the quench bucket, I've been looking for a small keg to use. A pleasant hour with an angle grinder cut the top off. Local brewery that I have to try, they have a red ale that looks promising.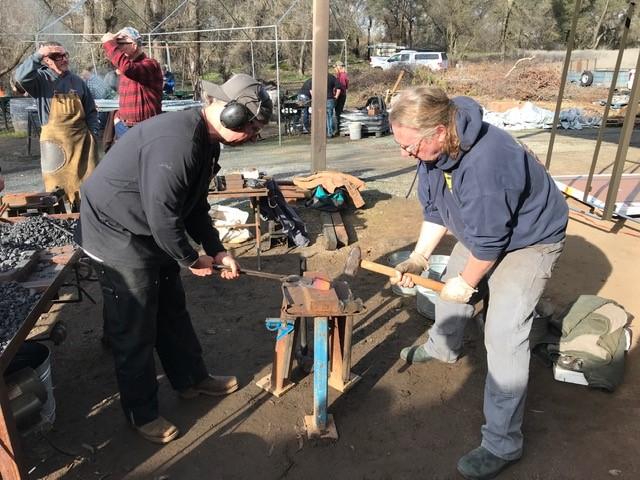

-
What did you do in the shop today?
Michael replied to Mark Ling's topic in Blacksmithing, General Discussion
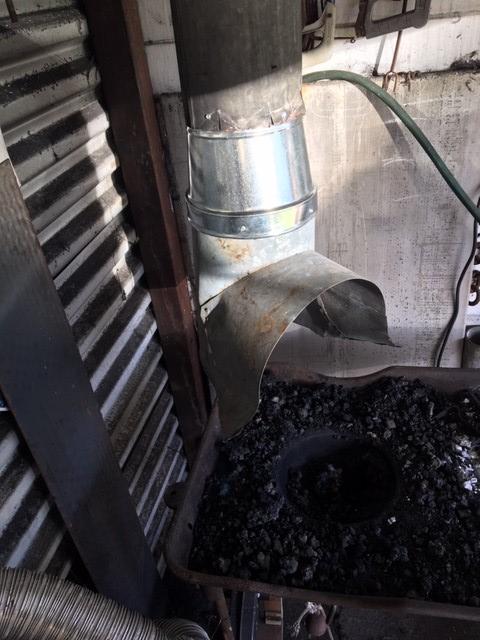
After taking down the holiday lights and tree, had a little bit of time to redo the hood over the coal forge. Original was some 8 inch ducting, poked thru the leaky part of the patio roof, ('honey, I'm only enlarging a hole that's already there") when the first brake drum/furnace blower/charcoal forge was set up back in 2004. The "hood" was some floor register duct with some flashing screwed to it. Most of the smoke goes up it, and there's hardware cloth screwed into the duct at top and bottom to act as spark/ember stops. I recently banged the "hood" with a long bar and the rust gave way, leaving bits of it hanging down into the forge. Now the scrap pile has a section of ducting bits and bobs that might come in handy someday. There's square duct that will one day make a Hofi style chimney, a turbine top, some restaurant hood parts etc. One part of 10 inch duct I thought looked kind of like a forge hood, and after months of searching scrap dealers for a 10 to 8 inch transition without any luck, found one at the local big box retailer. Some trimming, (Beverly shear) some bending (Pexto sheet metal pliers) and some hammering and sheet metal screws and there's new Ugly Ducting! The airflow is good enough that it never gets too hot to touch so I don't worry about the galvanized. Honestly, working with coke, there's not much smoke save for when the forge is first fired up, but the scrap pile was reduced some, which is always good to point out to the spouse.
-
Nice anvil, great stand on that blower! Cream Separators are the top of the line for reuse as bases for other equipment. As long as it still blows when you put it back together, you're golden. Now put a forge together and get to hammering! Charcoal is a usable fuel if you can't find coal or coke nearby. You are off to a great start!
-
What did you do in the shop today?
Michael replied to Mark Ling's topic in Blacksmithing, General Discussion
This was a commissioned project for a buddy's aquatic themed woodworking bench. A "Leafy Sea Dragon" bracket that will hold a swing out shelf with an oil wick (wood plane lube) and a beeswax block. Learned the Sea Horse scale technique from another smith friend who teaches, added a dragon head and, after months of futzing around trying to make the 'leafy" bits from forged bar stock, I pulled out the Beverly shear and cut them from I guess 20 gauge mild steel sheet? A little shaping in the mini gas forge and some nails for rivets and its done. All the leafy bits took a day once I stopped trying to hard. Swings on the bracketed post that the workbench maker helped to punch the holes in. He's going to weld a plate for the shelf onto the back of the dragon.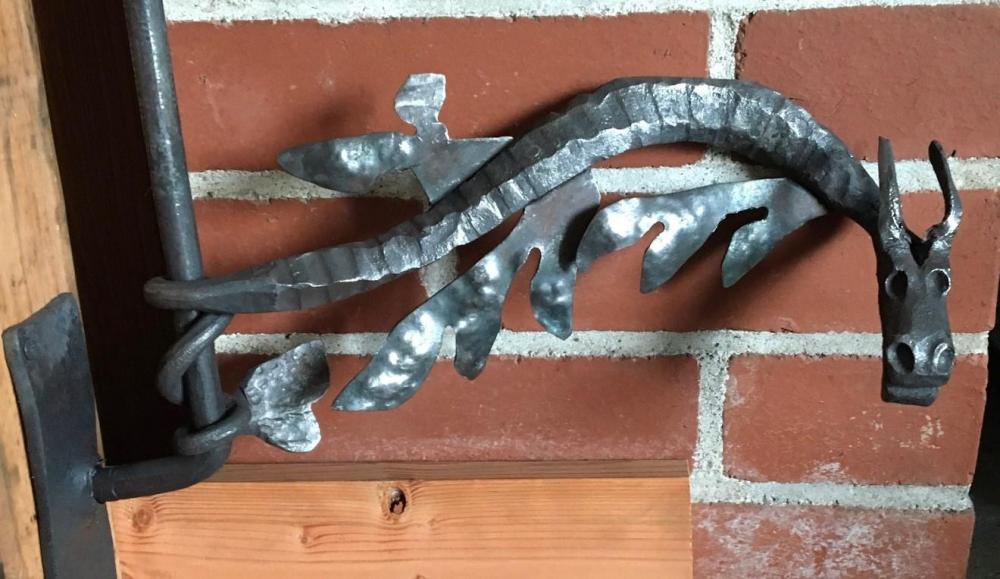
-
Fixing up a post vise as a gift for my blacksmith FIL
Michael replied to Orglethopter's topic in Vises
Sounds like a wonderful gift! Your FIL will be thrilled I'm sure. Not many precision surfaces on blacksmithing gear, the vise jaws will NOT be paralel, anvils are not flat references surfaces. The vise was likely pieced together from wrought iron by a highly skilled team of workers going for a rough size based on experience, and it was weighed after finishing and sold by the pound. Nice chamfers on that vise. -
What did you do in the shop today?
Michael replied to Mark Ling's topic in Blacksmithing, General Discussion
Speaking of leaks, what I did in the shop was miss the 'dragon poop" bucket after pulling out a big clinker from the fire, dropped in in the metal slack bucket by mistake. 'OK, fine, it can cool off in there and I'll fish it out in a minute". in a minute I see the slow spread of water around the slack bucket, that clinker held enough heat to burn a few pinholes in the bottom. I liked that slack, oval mop bucket. Hunting for a new one. -
What did you do in the shop today?
Michael replied to Mark Ling's topic in Blacksmithing, General Discussion
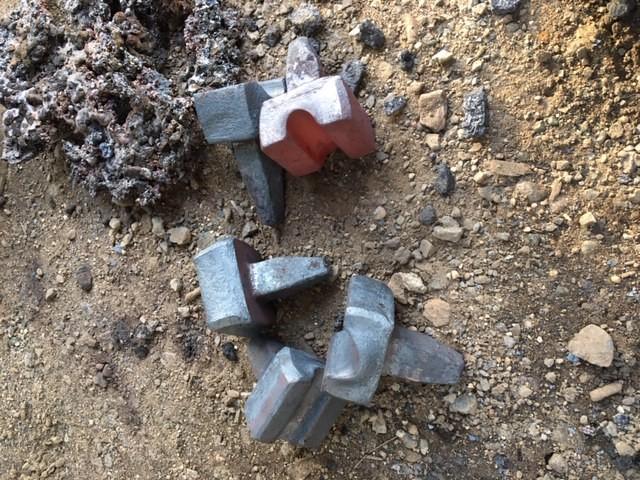
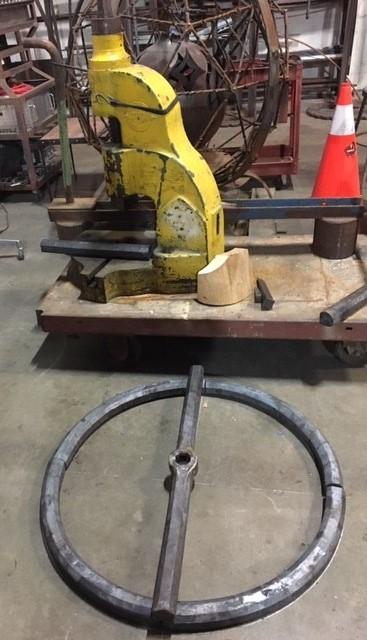
I asked the shop foreman, the architect of this project what the fly press tonnage was and he wasn't sure, thought it 'might be an 8?' and thought the flywheel might be part of the calculation of the tonnage. Fly presses are not that common on the Left Coast of the USA. Here's the wheel laid out next to its press, still needs to be welded up, and should be about 200 lbs when its done should have measured it across but I think its a little over 2 feet in diameter. Flypress still needs a sturdy stand built for it. The tapered octagonal hole was punched and drifted to fit the tapered stub on the top of the press screw.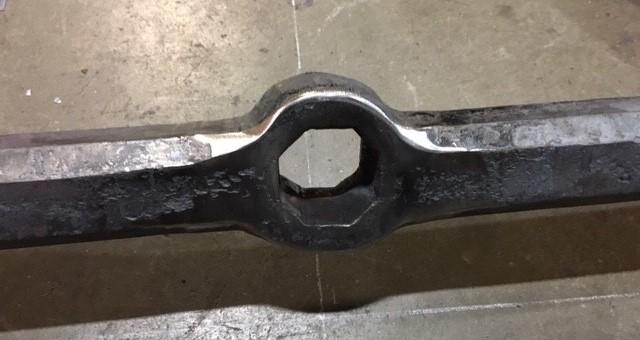
-
What did you do in the shop today?
Michael replied to Mark Ling's topic in Blacksmithing, General Discussion
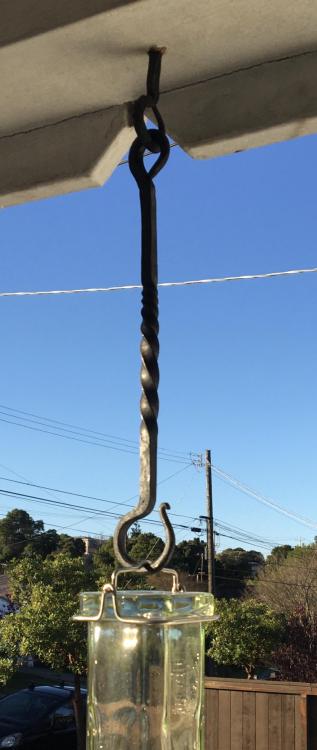
It's hard to sneak smithery into an office environment! I make these little cubicle hooks (on the right) that fit over the top of the little maze walls at work, which are thankfully the same thickness as a standard 2x4! Hook on the left a dog paw hook for the pooches leash. Made a LOT of these once all the dog people saw them.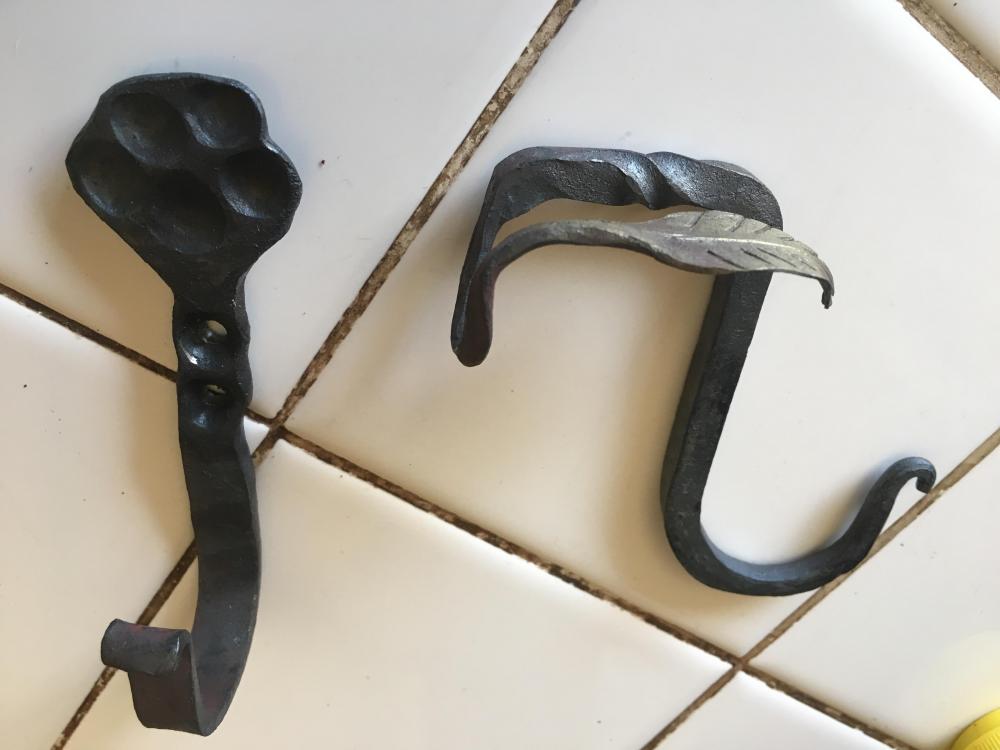
-
What did you do in the shop today?
Michael replied to Mark Ling's topic in Blacksmithing, General Discussion
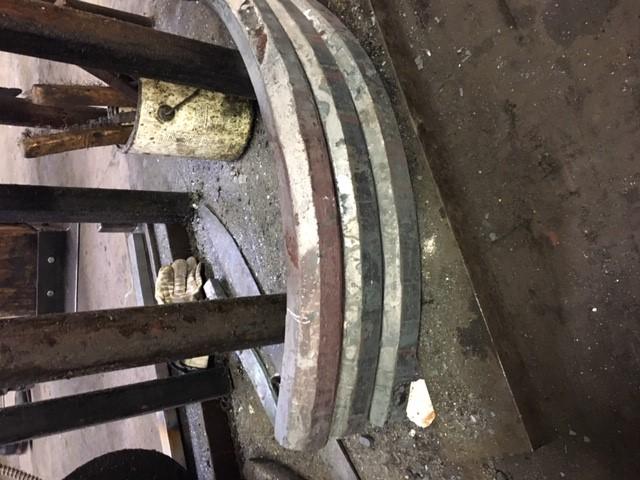
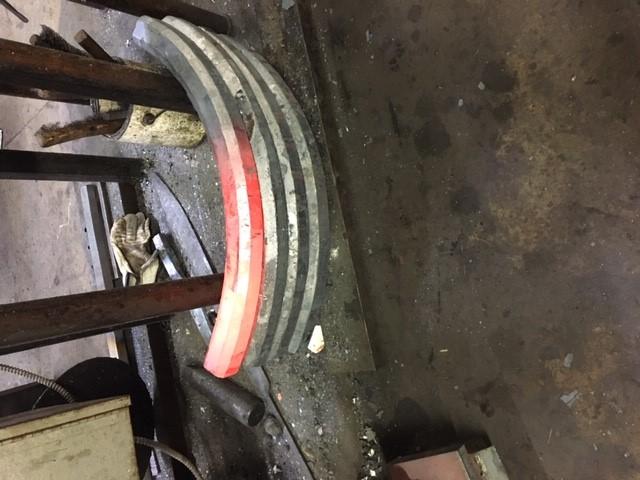
Not in MY shop, but at the industrial arts non profit where I volunteer once a week, bent up some 2 inch square that had been octagon'd on the Nazel. Backstory, the teaching arm of the shop has run into issues of smaller people, kids, etc having problems either swinging a big enough hammer or being strong enough to control stock under the power hammer (a Nazel, and couple of Anyang's and a 100 lb LG). The solution, Fly Presses! The shop foreman got a deal on 3 of fly presses as they are missing the top bar and weights. Rather than reconstruct the OEM head knockers, the plan is to fabricate flywheels to mount on the top of the screw. We punched and drifted the octagonal socket in the middle cross bar and last night bent 4 sections of the outer rim of the first flywheel on a 50 ton "air over hydraulic" Dake Press. I was mostly hauling the sections out of the forge and holding the tongs as the foreman ran the press and I moved the stock across the bending block. The parts will all be welded up into the flywheel that will weigh about 200 pounds and the chain hoist and jib crane will lift it onto the top of the screw, once the stands for the presses are built and bolted down. This was the fun volunteer part after a couple hours busting up coke for this weekends forgewelding class.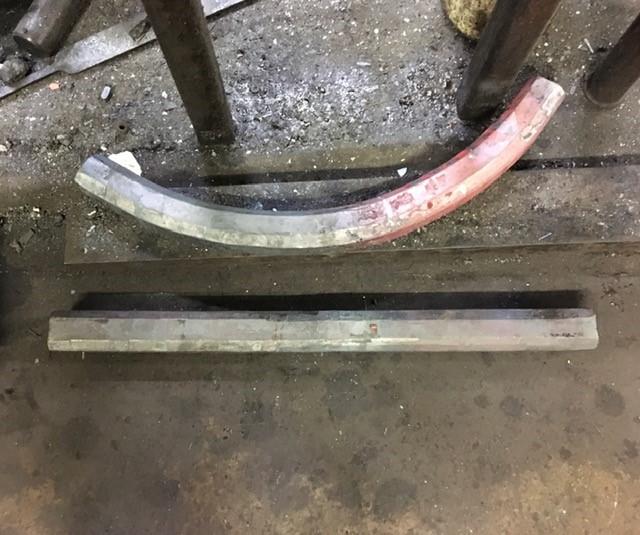

-
Nice, Bracket an everything! Didn't do the back seat any worse I see. Good get!
-
I've been really happy with my little Horror Fright flux core welder that runs off of 110. Also not a welder but with the occasional need to lay down a bead. Works great for up to 1/4 inch steel and I've only once bumped up against the duty cycle. and at less than $100 delivered it's proven its worth
-
What did you do in the shop today?
Michael replied to Mark Ling's topic in Blacksmithing, General Discussion
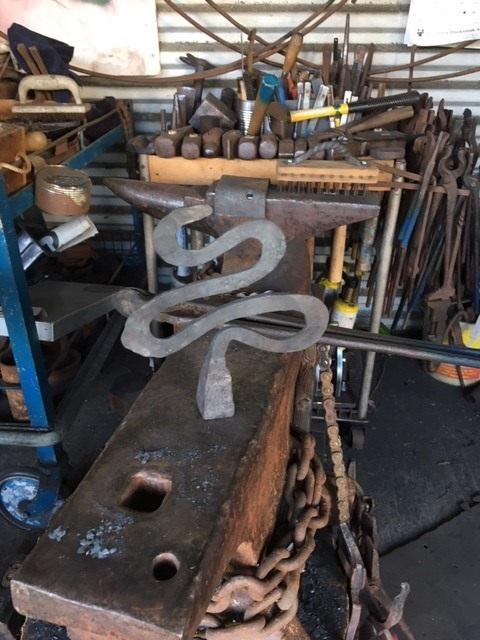
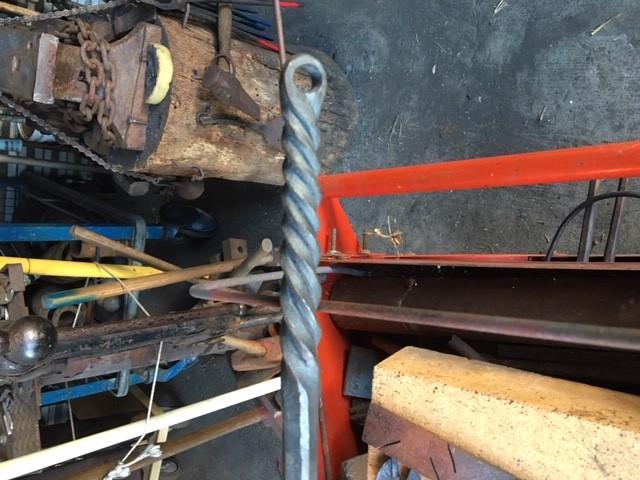
Finished up a firepit poker for a dear old friend who moved to a place you can have a firepit! 5/8 stock to start, tapered on an Anyang at an industrial space I volunteer at. Incised twist for the handle, way too many cold shuts in the first hook so cut off, drill and drift for a hang hole. cheated some and sawed the split for the working end of the poker, after the hook errors on the other end. Left a bit of the Octagon to round section square for a final twist, to line up the tines with the hang hole it lays flat when hung. Just under 3 feet long. a lot less clunky than the verision I made for the house fireplace (on the right) about a decade ago.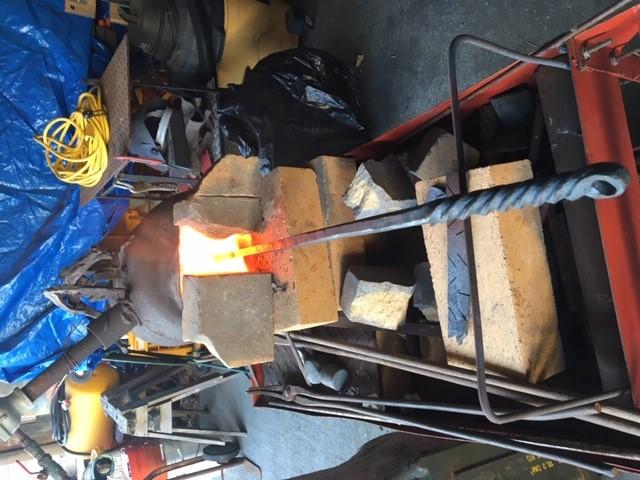

-
That's very well done! Love the little wings! That dragon twist is a lot of fun. Next one I'll use a narrow jawed crescent wrench rather than the huge Coe's monkey wrench that is my go to twisting tool.
-
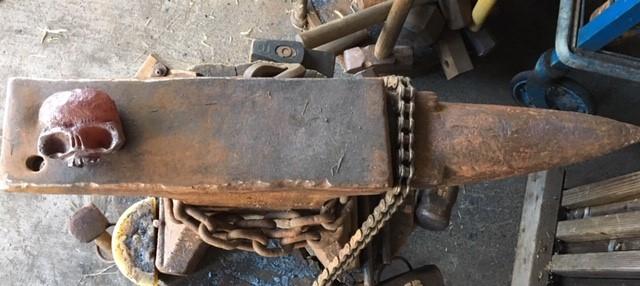
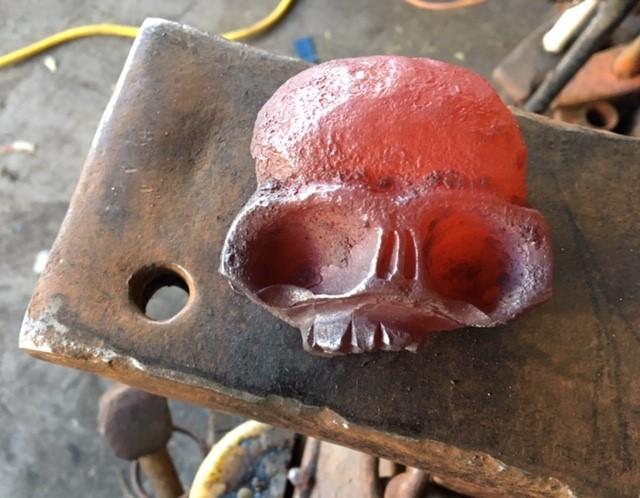
What did you do in the shop today?
Michael replied to Mark Ling's topic in Blacksmithing, General Discussion
This weekend (birthday weekend!) played with the new anvil after setting it up and then finished the Hammer In Demo project taught by Logan Hirsch and Andy Dohner, skulls out of 2 inch square. Reforged a small cold chisel into a punch to make the nose slits, used a butcher to push the teeth round under the skull and cut the teeth. Logan was saying these techniques work down as small as 1.25 inch square and he usually does skulls like this in 3 inch material.