BeaverNZ
-
Posts
352 -
Joined
-
Last visited
Content Type
Profiles
Forums
Articles
Gallery
Downloads
Events
Everything posted by BeaverNZ
-
It looks ok to me If you find its too slow in the future just replace the motor and pump with a higher pressure and flow unit, That frame looks like a good ridgid unit so the bones are good 2HP will probably be slow but it may generate a high tonnage Just remember to get speed and power req HP Cheers Beaver
-
Fitting new keys in a 25lb little giant/Murco
BeaverNZ replied to Fatfudd's topic in Power Hammers, Treadle Hammers, Olivers
I havent tried heat though it may work as described it may have to be made a bit of a shallower taper so the far away end contacts first and a good coating of graphite or antiseize and it maybe abit like pushing string up a straw, but i made one for my power hammer and it was quite wide (about 50mm or 2" and 150 or 6" long) on the platten of my linsher using eyechrometer and bearing blue and over length and cut to the correct length when finished I was suprised how quick it came up Cheers Beaver -
Thats a good tip for using the citric acid thanks Up till now if I needed to pasivate SS I used a comercial paste and it is nitric and hydrofloric acid both of which are nasty nasty stuff. The hydrofloric acid if you get it on your skin can actually damage your bones and the fumes over a long period damage teeth to so Ive been told. Actually on the subject of Hydrofloric acid I have read somewhere that Viton rubber if over heated partly breaks down into hydrofloric acid and Viton is found in alot of things in automotive and engineering related items. Cheers Beaver
-
Dead blow treadle hammer
BeaverNZ replied to JHCC's topic in Power Hammers, Treadle Hammers, Olivers
I would of thought a dead blow hammer would be less efficent than a solid normal hammer as when you hit a hot piece of steel the energy is usually absorbed with little rebound anyway, I would think it would be less efficent for forging as we all go to great lengths to have an anvil with a good rebound to aid in moving metal so i would think a dead blow hammer would be the same.I can apreciate thinking outside the box though Cheers Beaver PS I dont know why the joy police have such a problem with lead wheel weights anyway I have always managed to fight the temptation to lick them -
So you think YOUR anvil's broken. ...
BeaverNZ replied to D.C.'s topic in Anvils, Swage Blocks, and Mandrels
Hi there That anvil is in good condiion and worth fixing, you could bolt the two pieces thogether and the break would key the whole thing locked together the center of the anvil probably wont be hard and use a coarse thread like UNC, whitworth or metric coarse. you could even put a small amount of weld prep after bolting and weld as well if you felt the need though welding is not always the answer Cheers Beaver
-
X20 4lb lump hammers way over hardened (best use)
BeaverNZ replied to Diablo77's topic in Heat Treating, general discussion
I started to make post anvils from large hydraulic ram shafts that I got from a local hydraulic repair/ service place i have a bit to do with and for a box of beer i got a piece 2000 long and 120mm dia out of the scrap bin it had a scratch in the chrome I just cut it in half and heated one end up to non magnetic and quenched in water to make a post anvil. It was chromed though so heat it outside or gring the chrome off where it will be heated as chrome makes toxic fumes if heated to that extent Cheers Beaver -
Heat treating an cast anvil face
BeaverNZ replied to CheschireCat's topic in Heat Treating, general discussion
Hi there Without trying to be critical and trying to help you along maybe you need to change the working hight to reduce the edge hits from your hammer try putting a thin piece of wooden ply on the face of the anvil and practice and /or change the hight until you get nice round coin hits on the ply. hitting on the edge like that onto a hard surface can spall pieces off your hammer at a great rate of notts and would put marks in your workpiece that are hard to remove Cheers Beaver -
Need advice on HT a home made anvil
BeaverNZ replied to Beatsy' s Forge's topic in Heat Treating, general discussion
Lol I grew up in a small community and it was amazing what could be achieved by barter or a box of beer- the universal currency. I had a thought I hadnt explained how the surface treatment worked, the torch is held very close to the workpiece with a high flame setting and the water turned on and the torch is moved flame first so there is a quick heat/cooling and its done. Of course this only works with a high carbon and hardenable alloy steels Cheers Beaver -
Need advice on HT a home made anvil
BeaverNZ replied to Beatsy' s Forge's topic in Heat Treating, general discussion
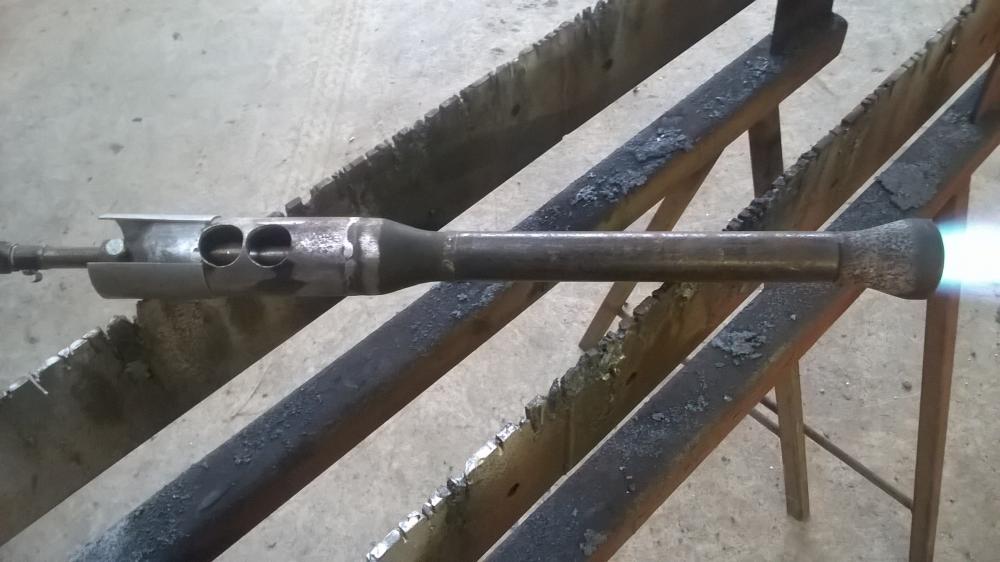
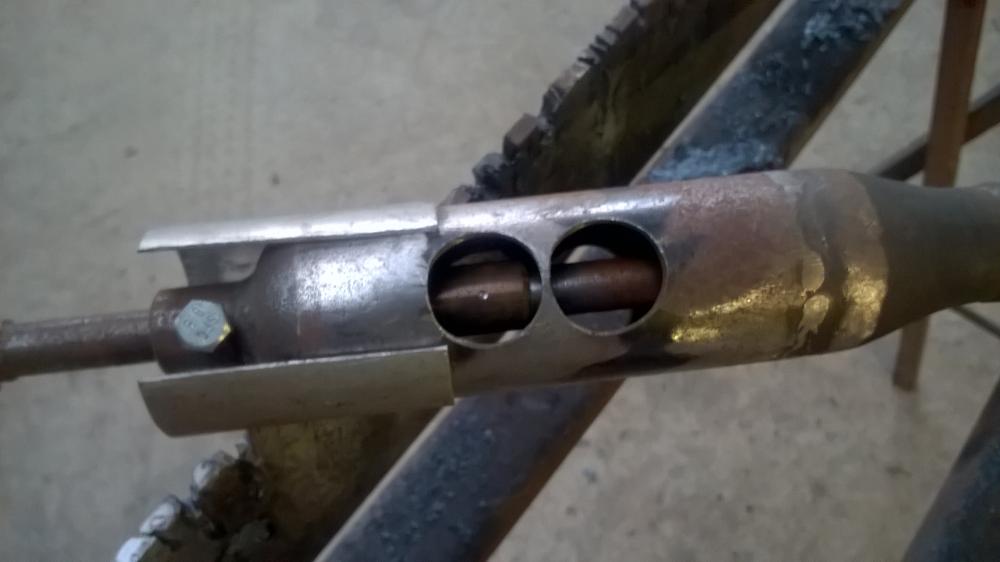
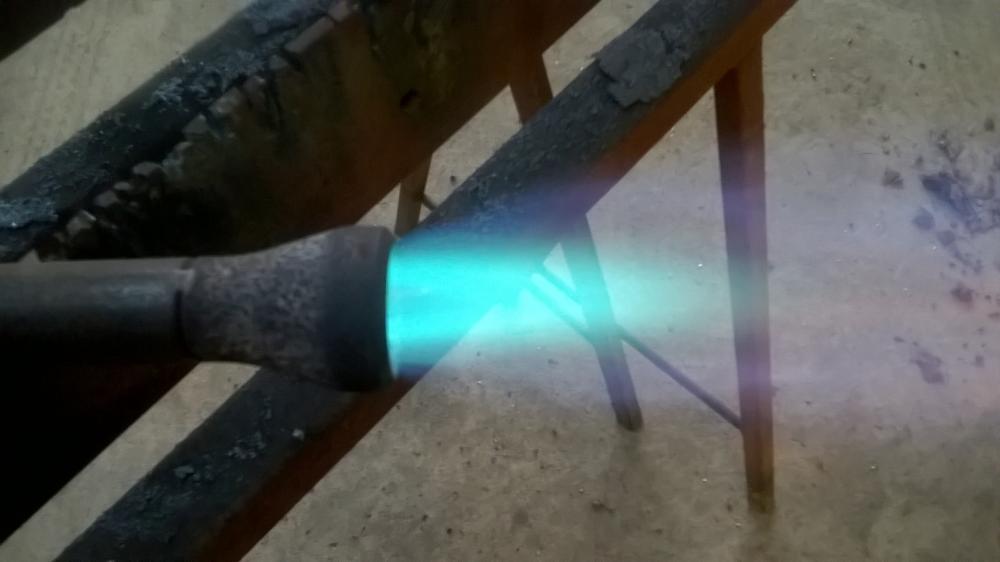
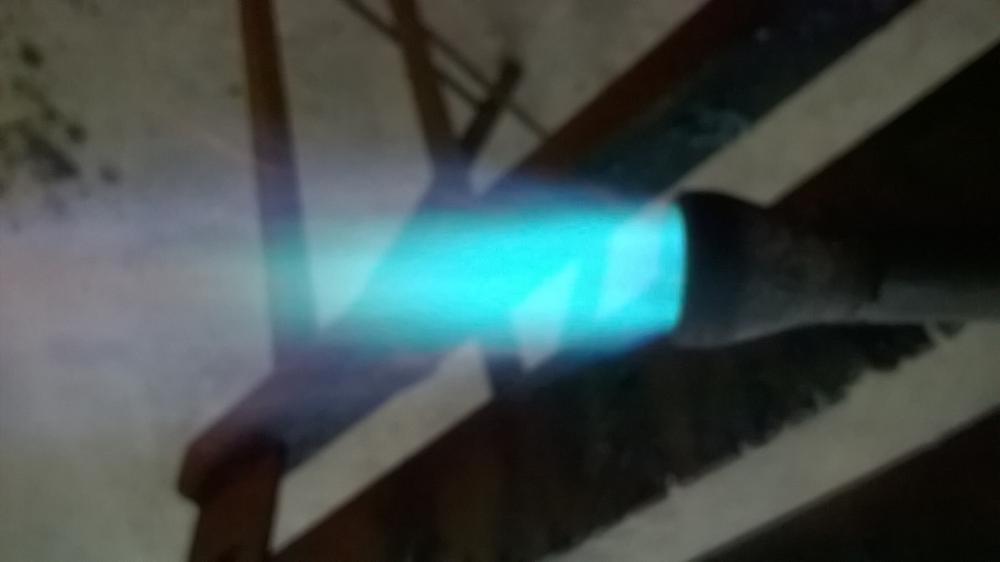
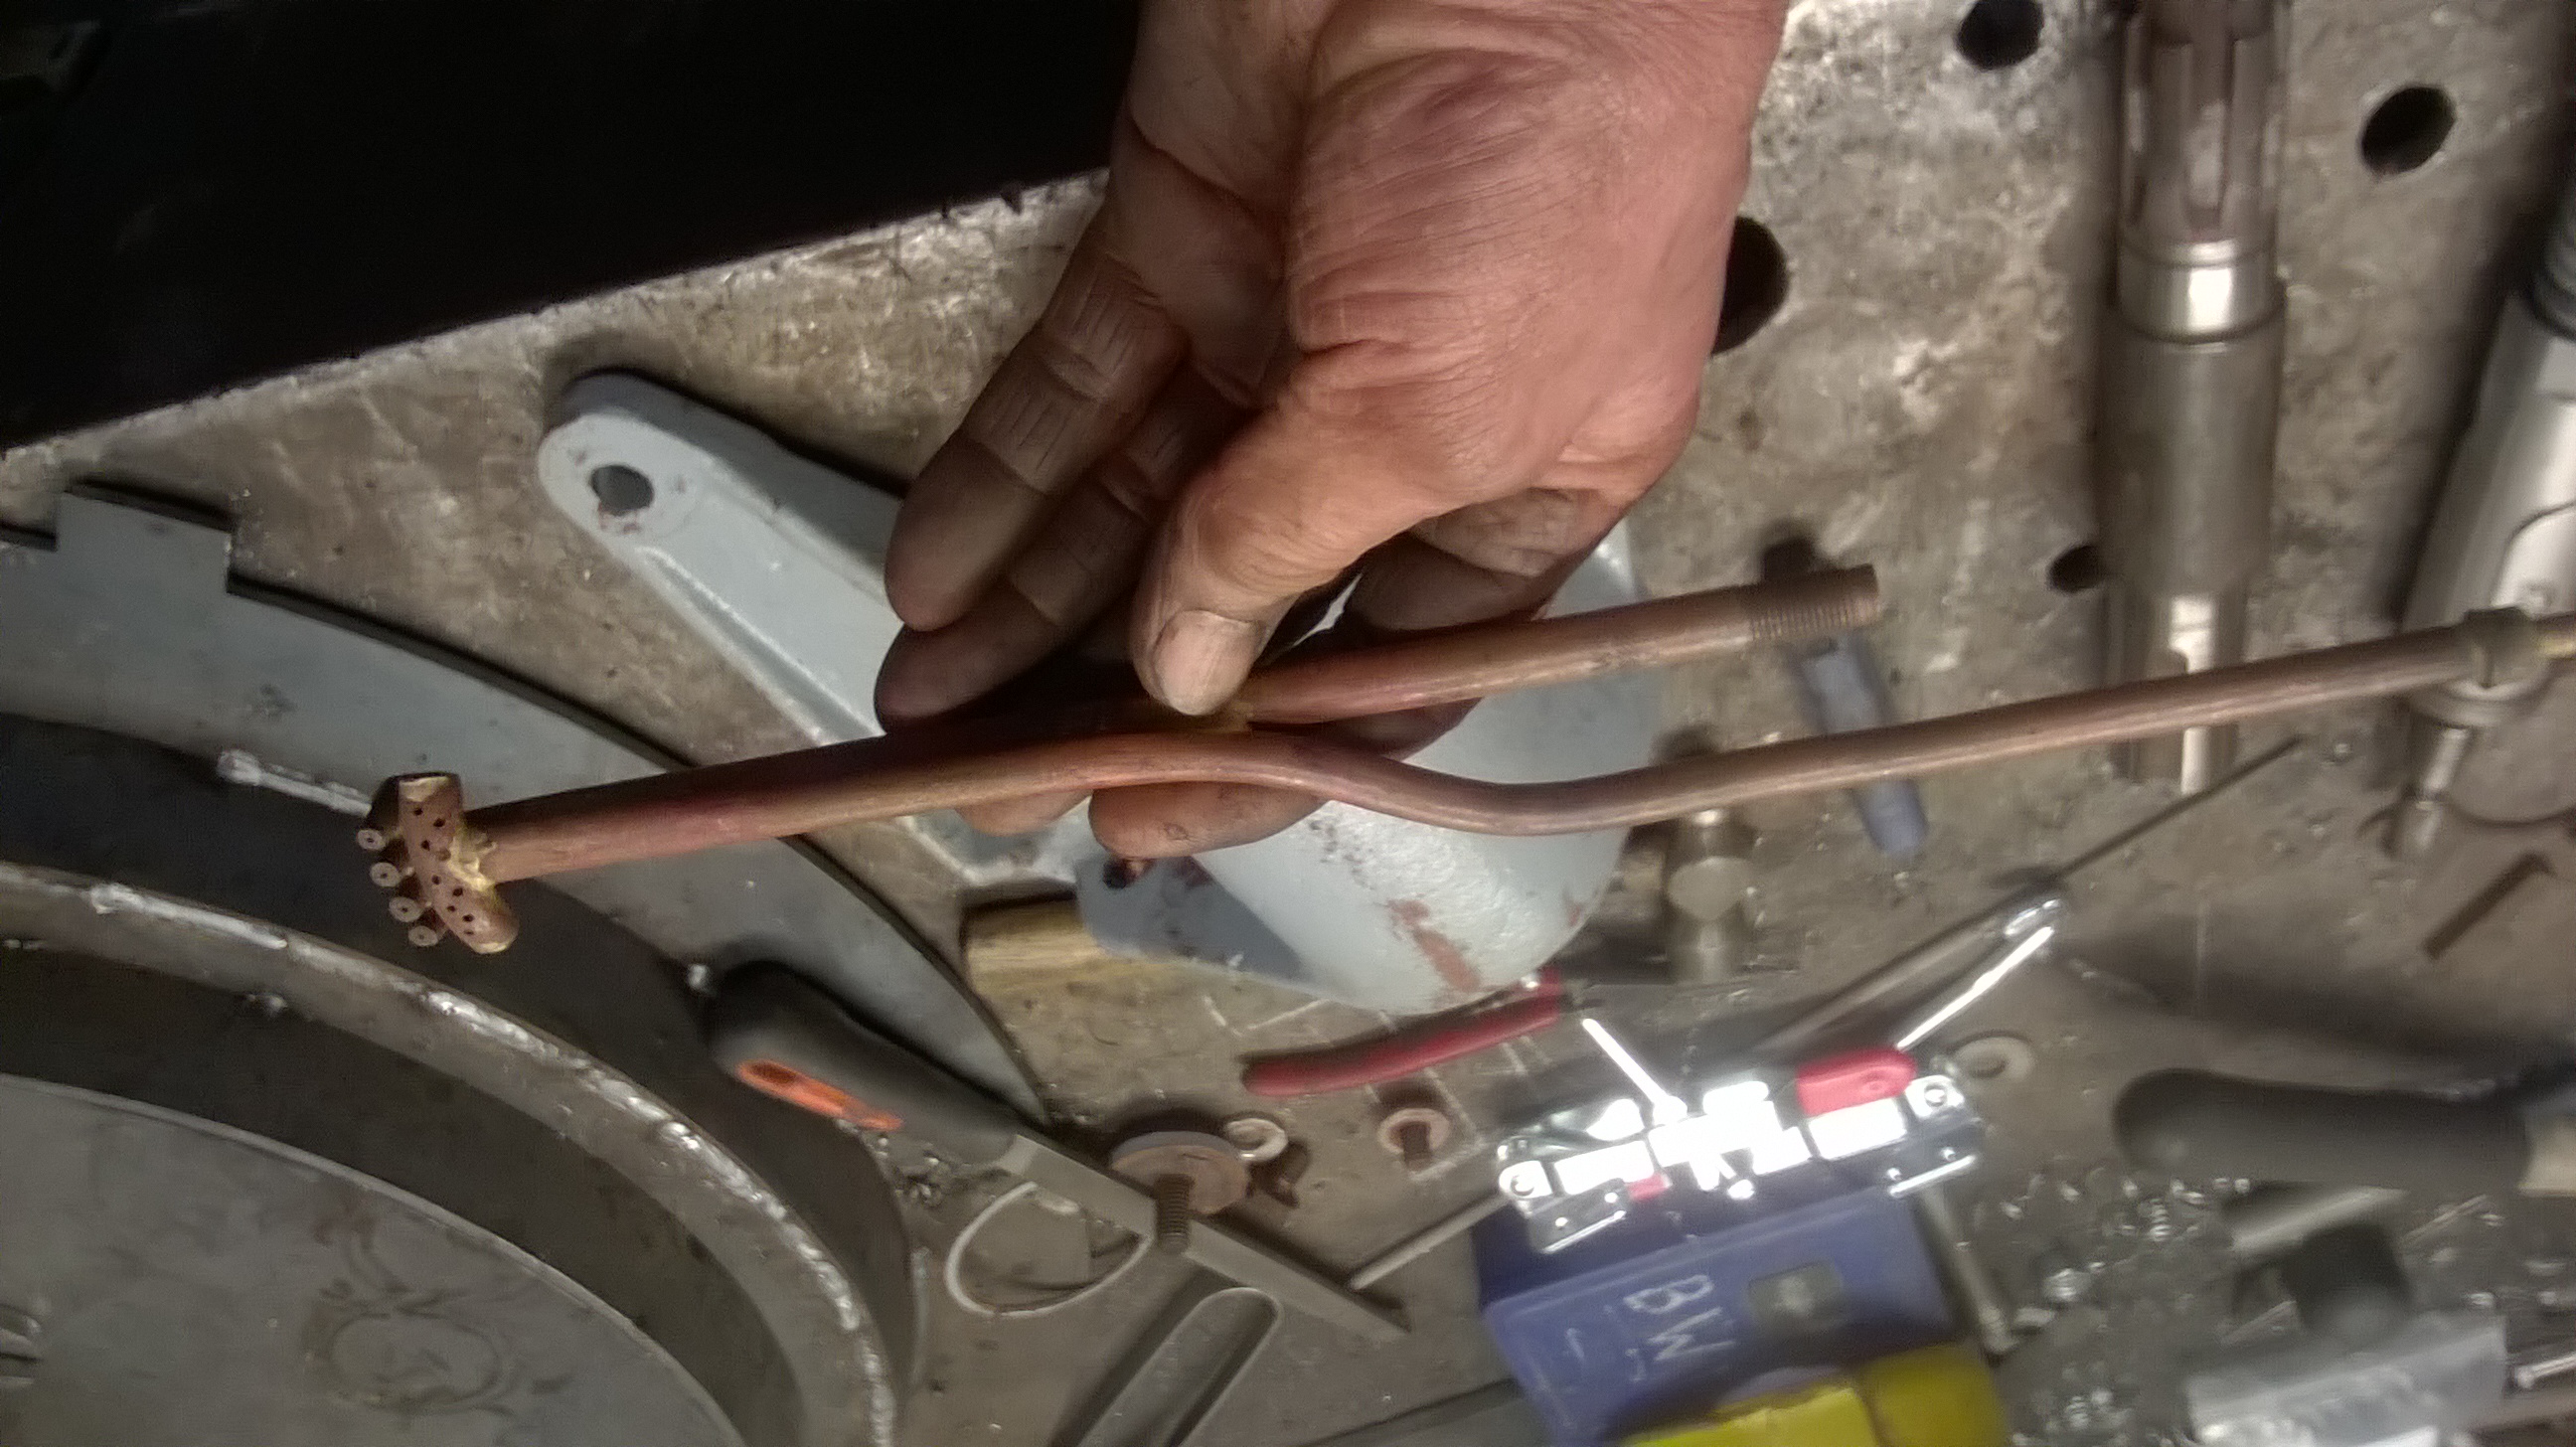
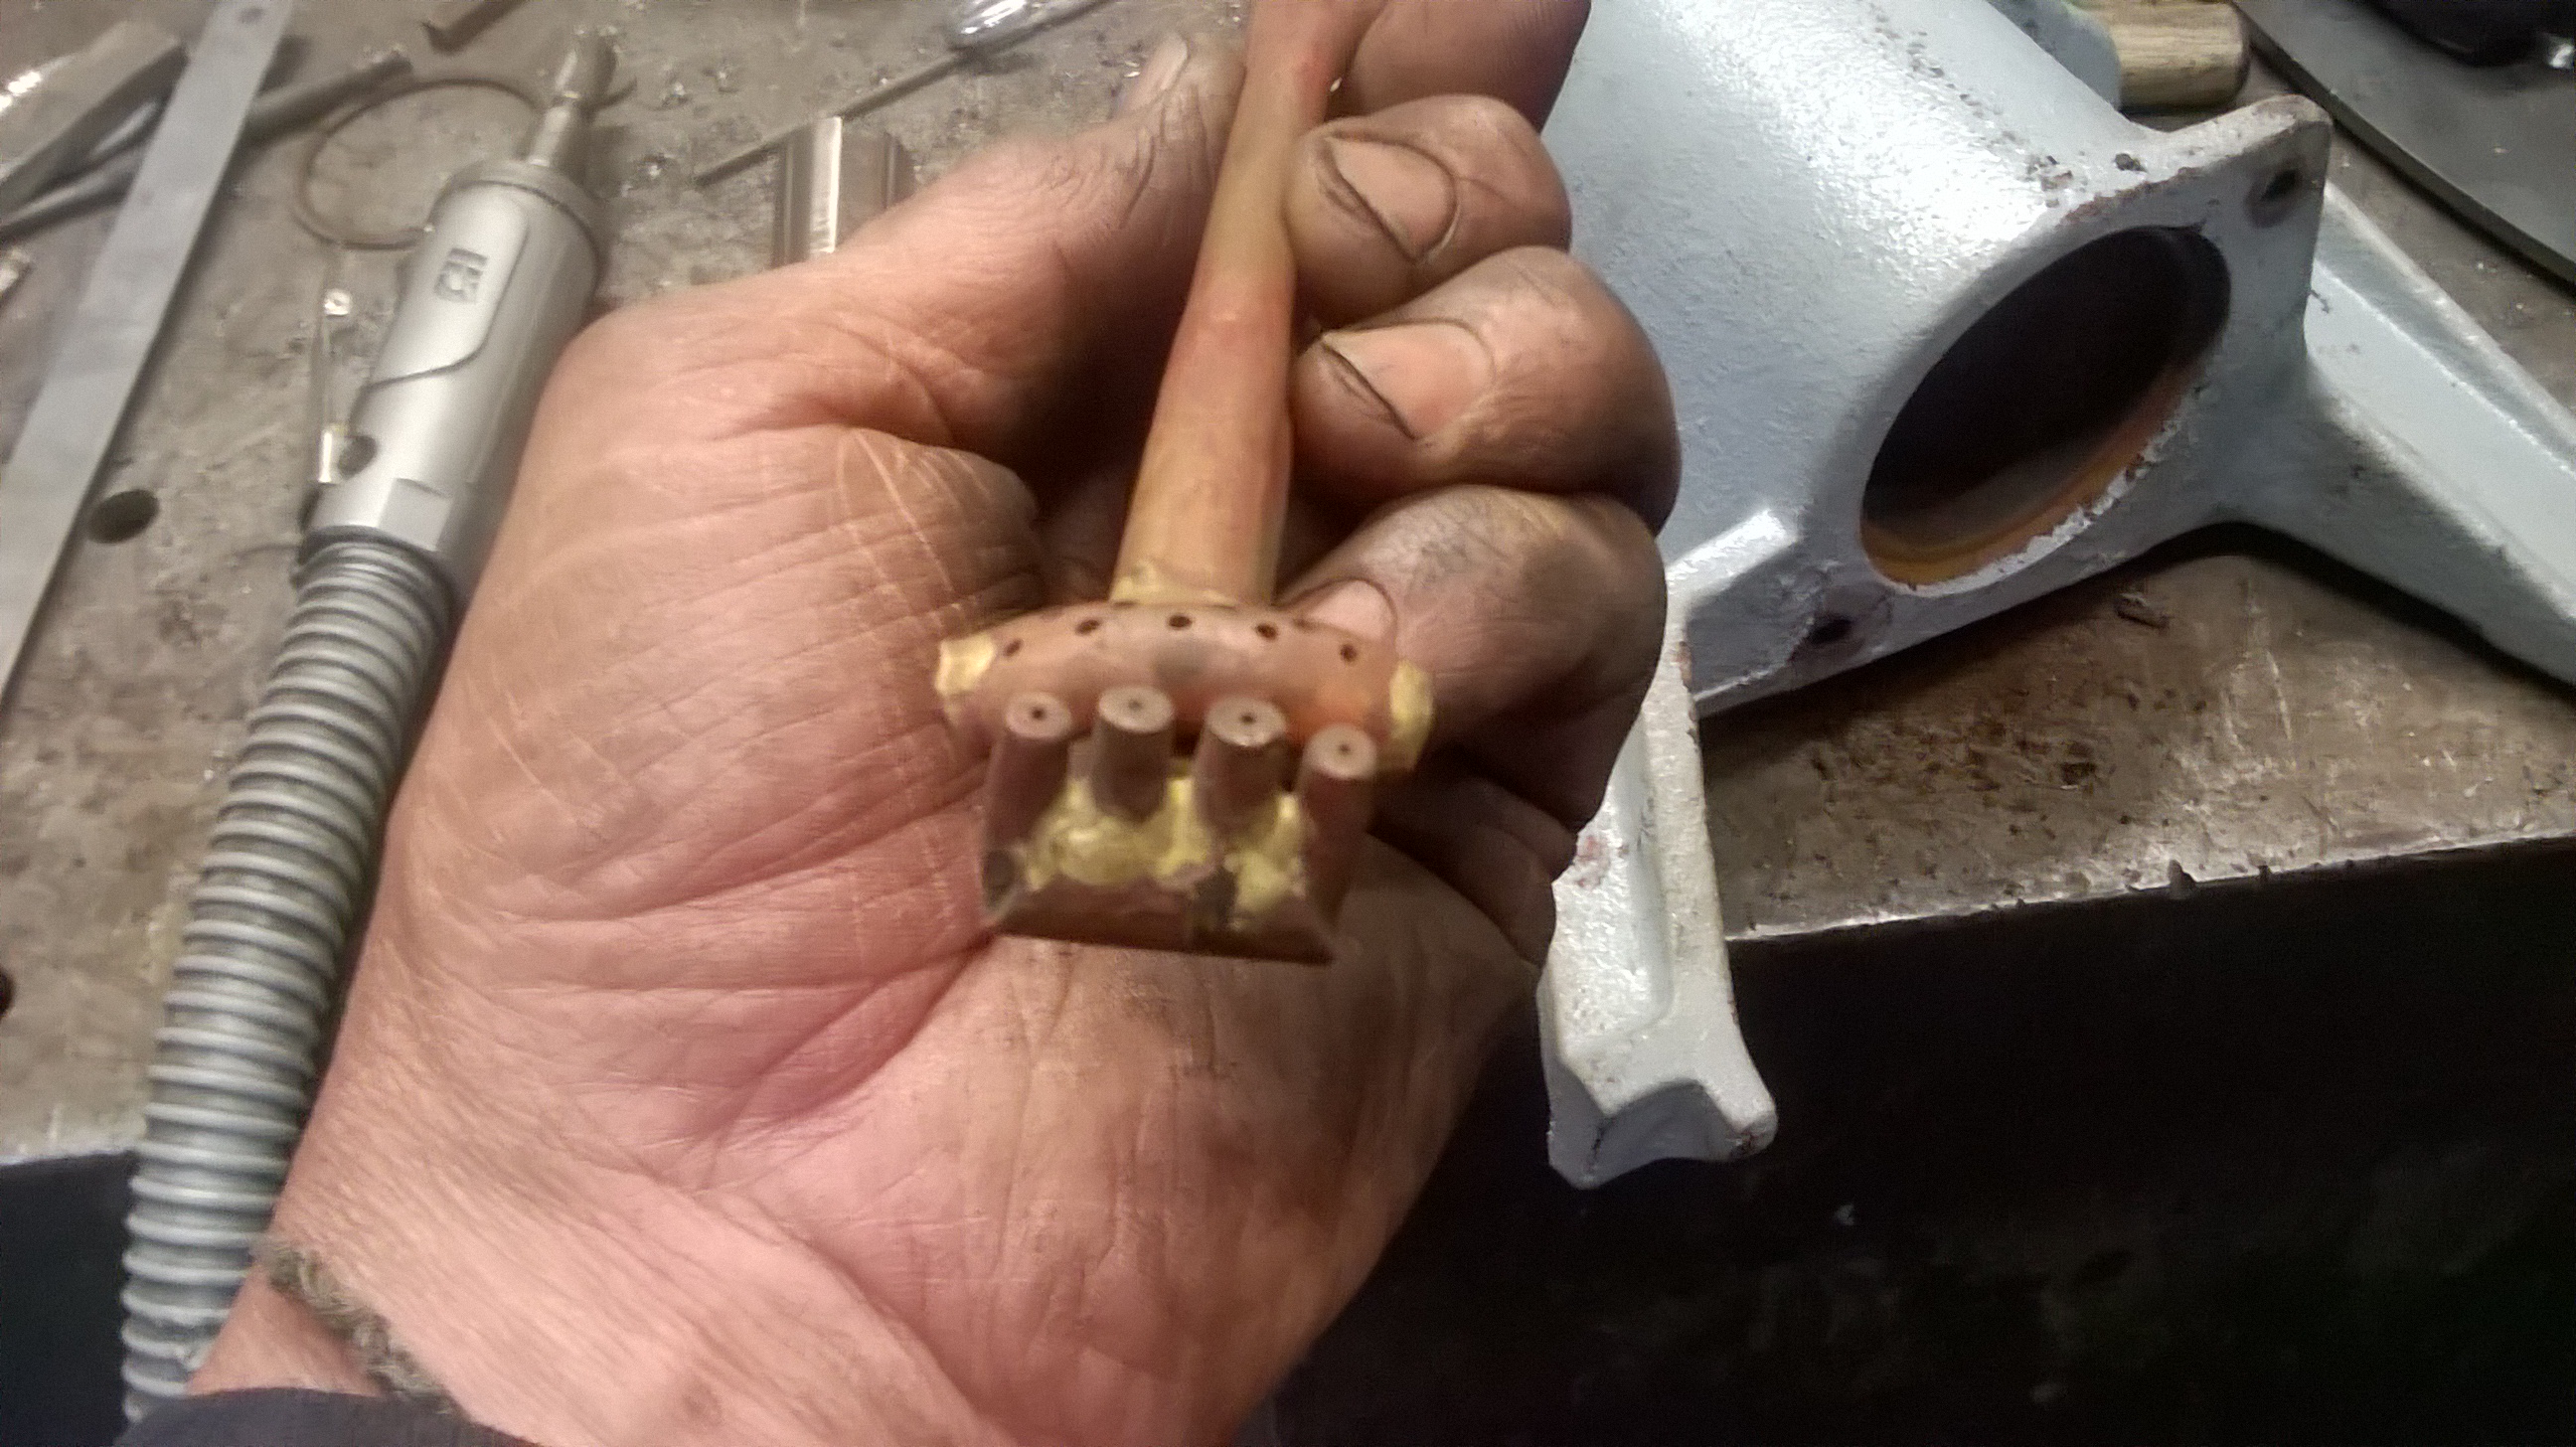
Hi There Have you though of just doing a surface heat treatment, This is where you just heat and quench just the first few mm of thickness by using a moving heating tip or tips followed by water jets and also using the heat sink of the object you are heating to also absorb the heat. The pictures below are of surface hardening setup I made years ago to heat treat the inside of the cylinder rod or trunk guide of my model traction engine. You can see the four heating tips and the multiple water jets it worked very well though I did get quite wet you could make a bigger version. You need acetylene flame though as it has the required pinpoint heat just off the end of the primary envelope of the flame Im not sure if propane would do the job but time may tell Cheers Beaver

-
Wow what a beauty, like frosty said I hope you have lots of photos congrats Cheers Beaver PS he who dies leaving the biggest toys for kids to shift wins and so far its you
-
Lou Camshafts are usually cast iron so you could use it for metal to melt ?
-
I thought for a moment it was wench storage, I have always found they get grumpy if not stored correctly Beaver
-
Fantastic bit of work I love getting into jobs like this making old stuff go again You are doing a well thought out and executed job there. Just a thought on those rollers, Sometimes a soft item gets harder particles imbedded in the surface and actually wears something much harder that I bears against I think I would have them hardened Cheers Beaver
-
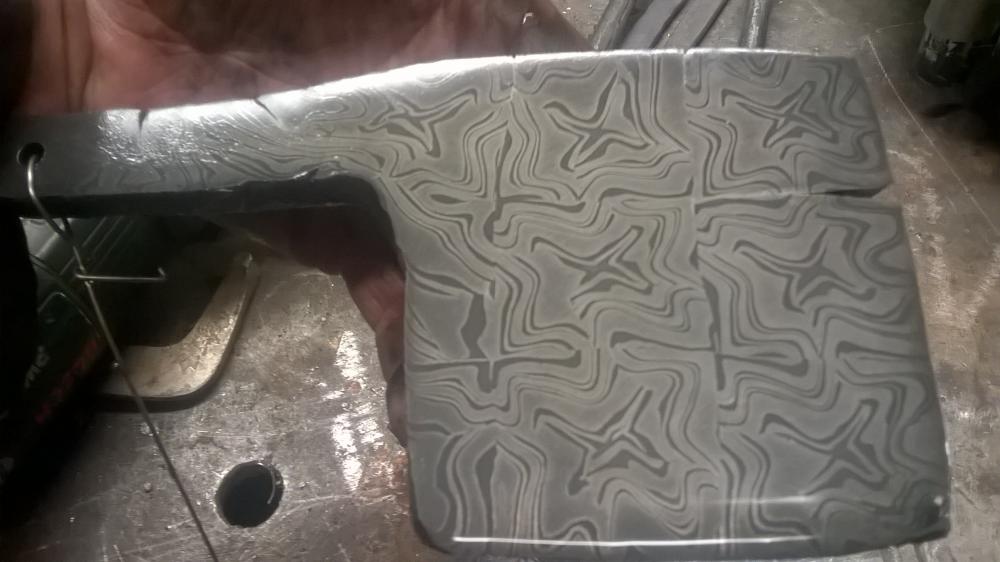
I think if I remove all the faults I will still have a usable billet to make a knife out of, The idea of arc welding the handle cracks where they wouldnt be seen has crossed my mind but I still think i will just cut it off thebillet is still about 10mm or 3/8ish thick
-
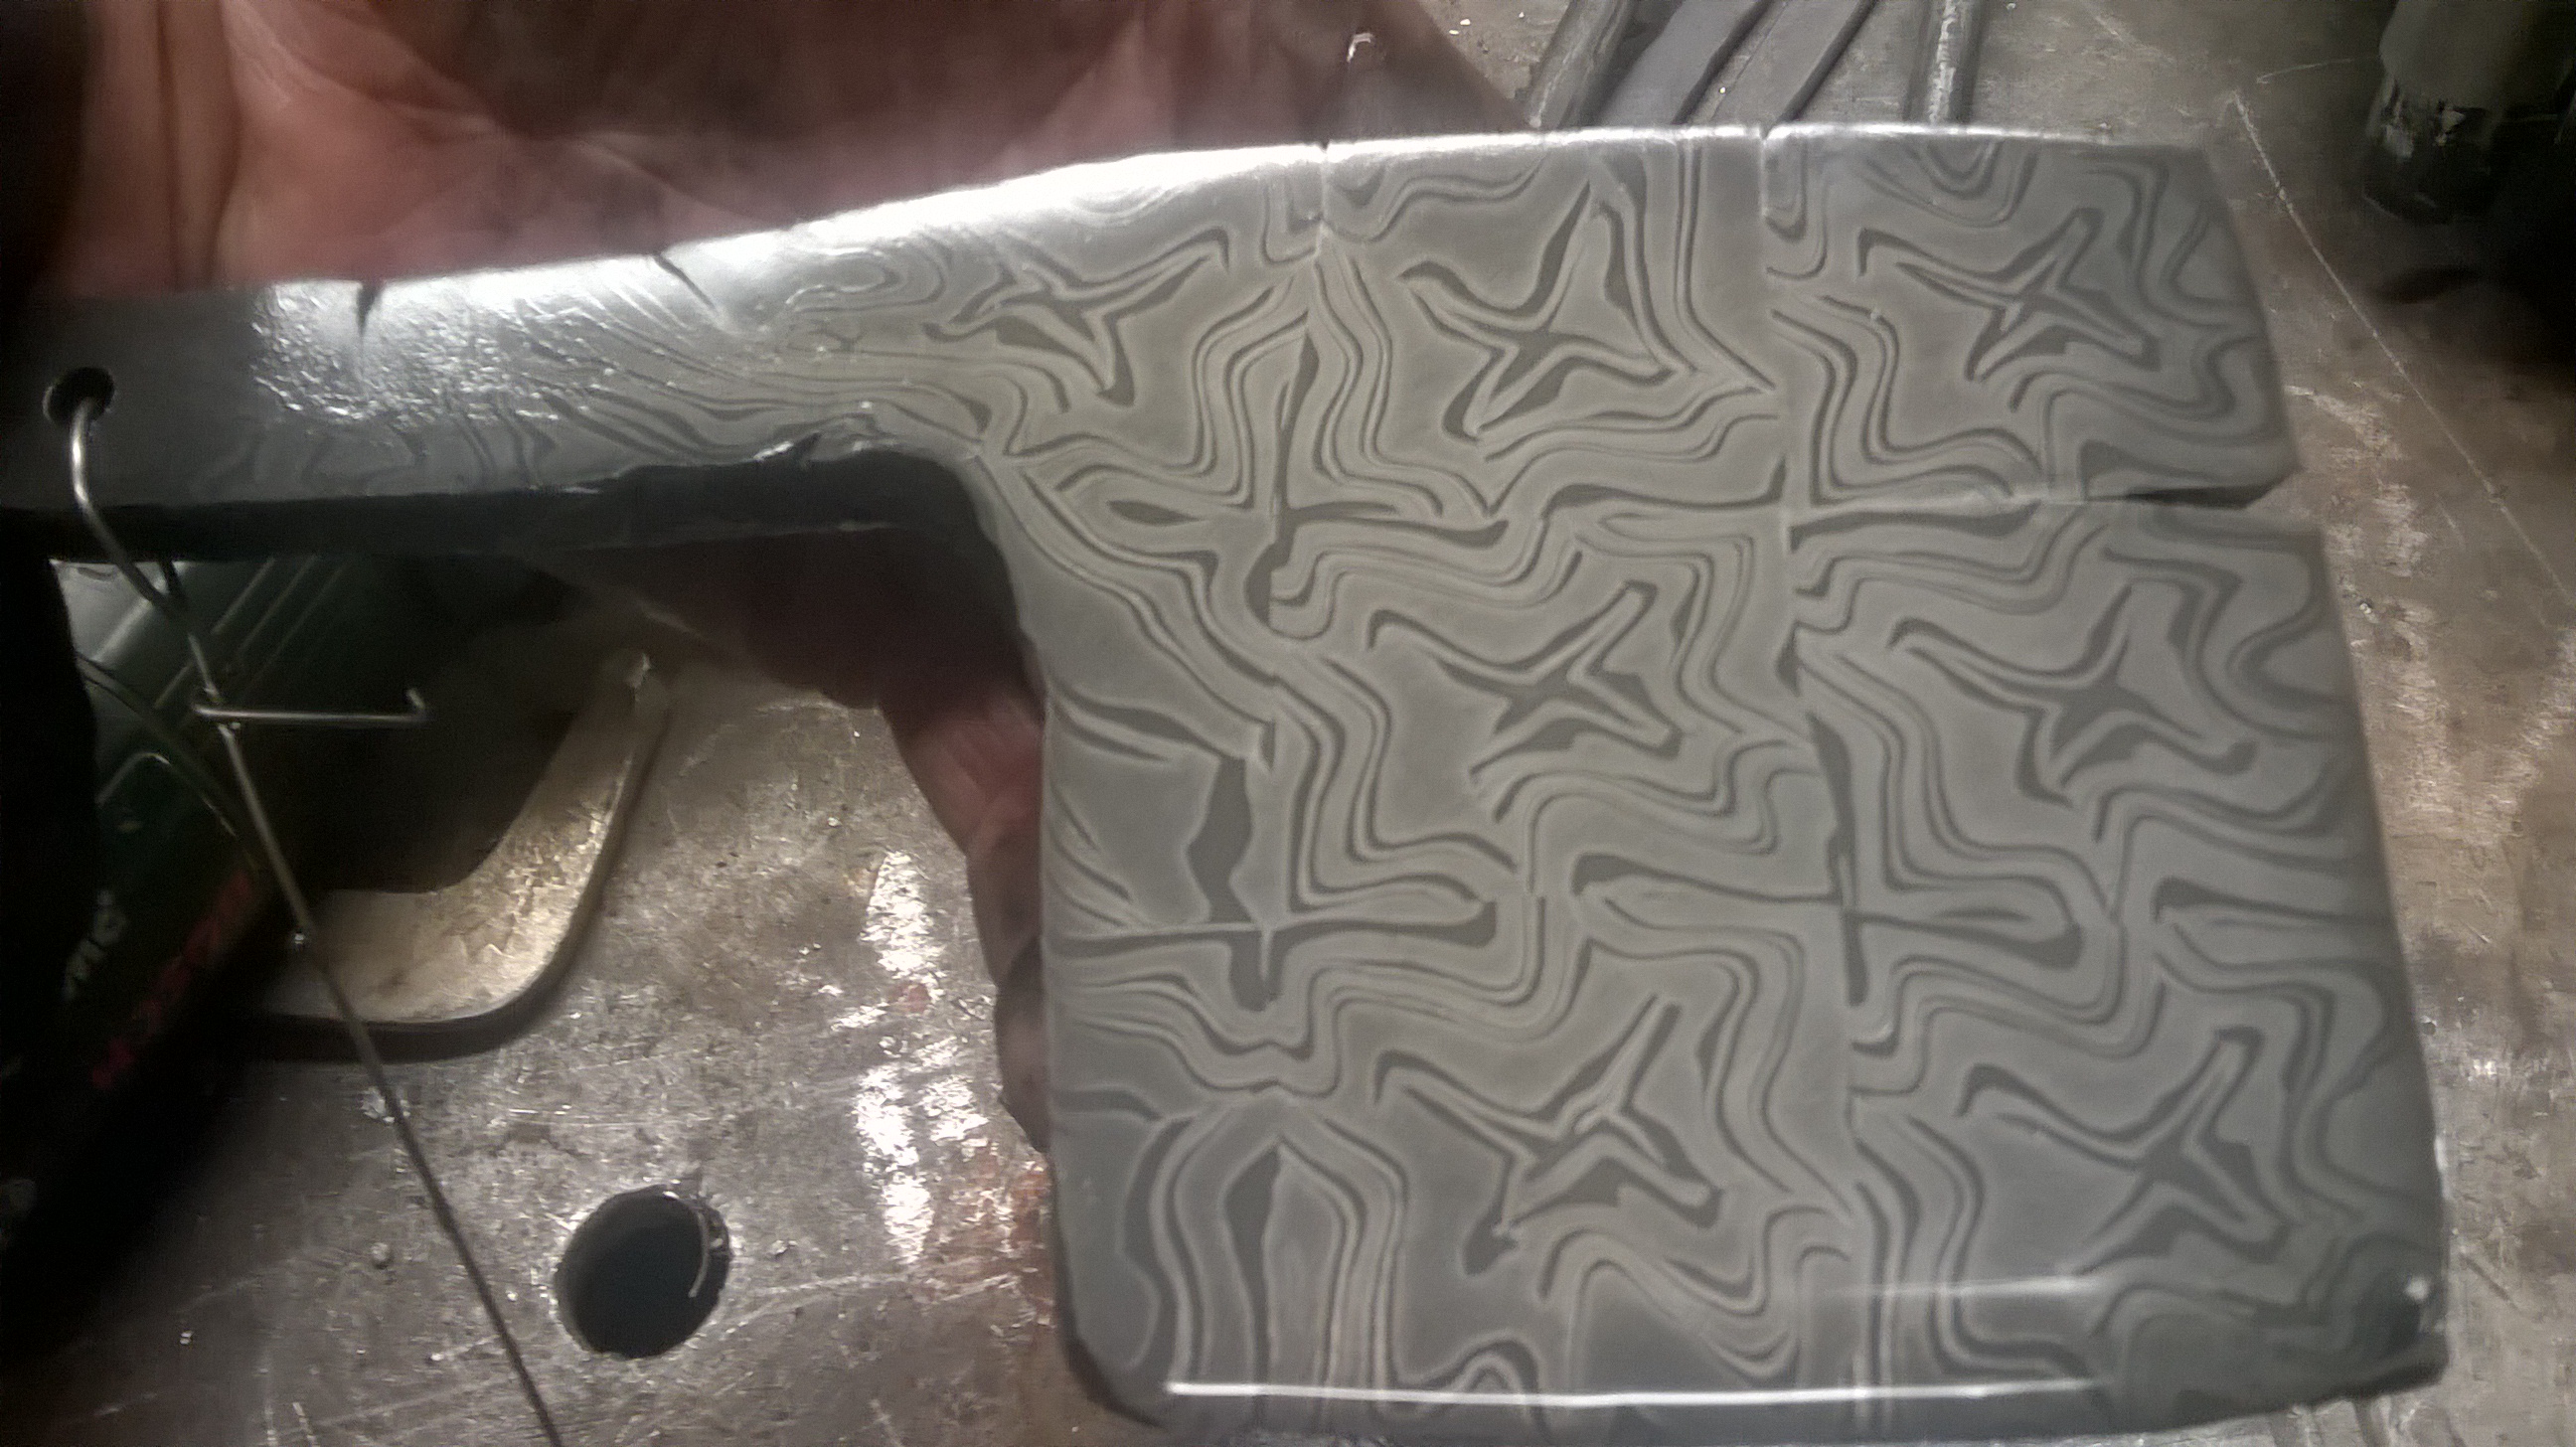
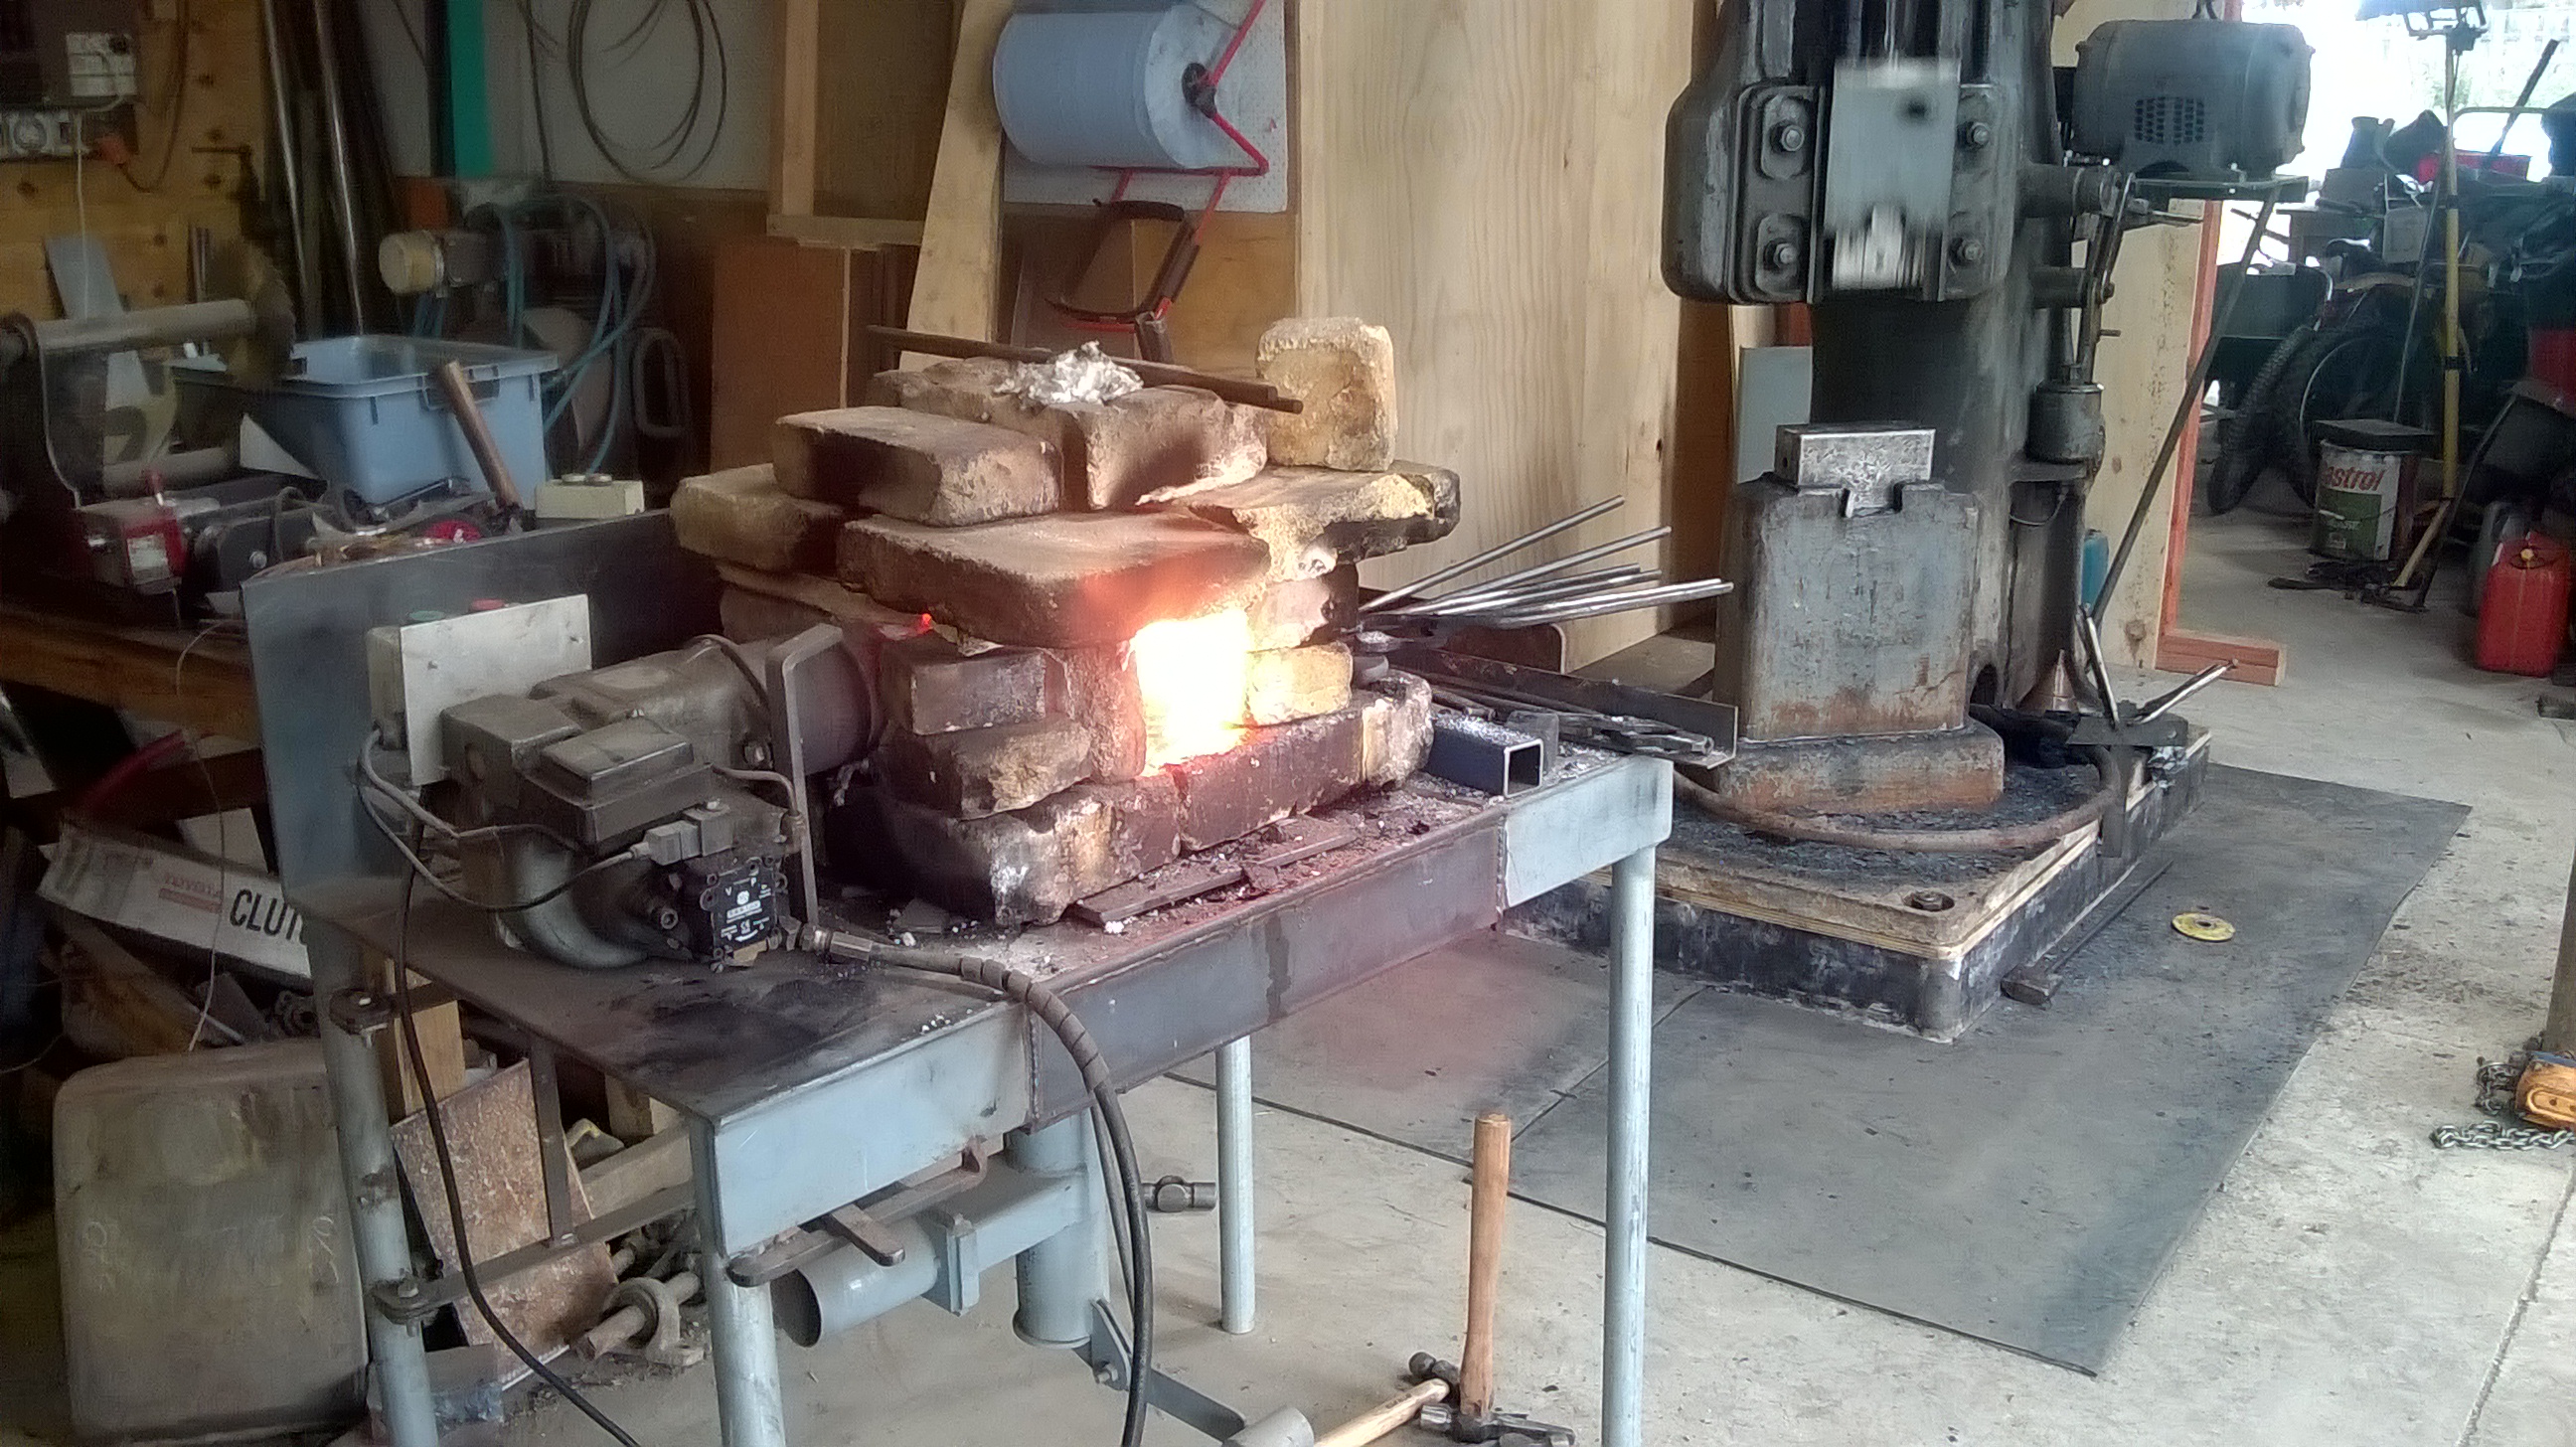
I tried to complete my nine star pattern welded cleaver today and had a weld failure, I think its time to bite the bullet and make up my gas forge. I have been having some problems with the flame chemistry making alot of scale and maybe i didnt have the billet hot enough. This is made from crane rail track and bandsaw blade I am very pleased with the way the pattern was developing
-
Principles of Estimating
BeaverNZ replied to rockstar.esq's topic in The Business Side of Blacksmithing
This is really good stuff Thankyou I have always kept all my job sheets for the last 16 odd years of working for myself and find them handy at times, The part of the job I always struggle with is the amount of labour to include in a job. I am fortunate to have established clients who trust me to provide the best outcome for a job they ask me to do alot of the work I do are one offs and the job often evolves as I think of a better way of doing the job as It goes. I am not all that interested in dealing with Joe public wanting stuff done right now for no money Cheers Beaver -
Being a self employed engineer its a great source of frustration how people complain about how much things cost and yet are completely happy to pay for clothes etc that have 300% markup on them, Part of the problem where i am is there is back yard industry where someone with a welder does things very cheap and so makes no money but it suppresses the prices so nobody else makes anything either. I was also venting my spleen to the manager of one of the largest engineering shops in Invercargill who I do contract work for when they need extra or specailist labour and i was talking about margins on steel/materails and i said I always try to get 40% margin and he said he was happy with 10% which makes me wonder why they bother when doing nothing but investing in a bank they would get 4% or more and do nothing. I am not interested in dealing with Joe public and my pet hate is people wanting old car trailers right now but dont want it to cost much i am usually very blunt
-
Making a striking anvil from a plow?
BeaverNZ replied to Xavier F-C's topic in Anvils, Swage Blocks, and Mandrels
I have been told by some one who used to work at a local plow manufacturer that old plow frames are often made from 1080 steel while more modern plow frames are usually made from Bissalloy 80 which is a high tensile lower carbon alloy steel. He said the old plow frames could be identified by rounded edges from the steel mill. I have yet to prove this to myself so may stand to be corrected Cheers Beaver -
I believe that Lanolin also makes a good protective film and I have also used a beeswax floor polish successfully too, When using boiled Linseed oil be very carful not to leave the rags lying around as its very good at spontainious combustion and burning your workshop down Cheers Beaver
-
Alldays hammer base
BeaverNZ replied to Ethan the blacksmith's topic in Power Hammers, Treadle Hammers, Olivers
Hi Ethan While Im far from an expert when it comes to power hammers and foundations I did an install for my 2 CWT massey and while it may be abit over the top being a two piece foundation I made my inertia block the recomended size and while it works just fine its only just enough so i would er on the side of more rather than less mass. My install is back in Jan or Feb Cheers Beaver -
Make it your front door bell button
-
compressor help....rebuild or buy new?
BeaverNZ replied to FieryFurnace's topic in Machinery General Discussions
In the past I have observed that a Hydrovane compressor is very good at or near its rated output and they do very big hours between rebuilds 25000 Hrs plus. They must be kept cool or they cook the oil and quickly wear out. If they are not used at close to their rated output they are very good at using lots of power to make heat as the way they are choked by their throttling control and their efficentcy drops. A piston compressor is not as efficent as a correctly used screw or vane but is often cheaper to buy I have a very old but good 2 cyl Broom wade 50Cu/ft piston comp and it works just fine for what I do Cheers Beaver -
Residential furnace oil burner?
BeaverNZ replied to JHCC's topic in Induction Heating, Oil forges, etc
I have been using a diesel home heating burner and found that I had to use a conical reducer to concentrate thw fuel and air into a smaller stream as not all of the air got mixed through the flame and that unused oxygen caused problems with burning the steel. I used a 4"to3" mild steel one at the start but it burnt away after some use so I have changed it for a 304 stainless one I think the nozzle could be a bit smaller yet in the outlet, I still find the work a bit prone to scale and the flame is tricky to get the chemistry right but it has lots of heat and mine uses about one and a half litres an hour so its cheap to run and its just push the button simple start. I found the radiated heat from the forge interior cooks the auto restart sensor so remove that, my set up is very crude and takes ages to heat up to welding temp (about an hour) and I am currently improving my forge to a gas one
-
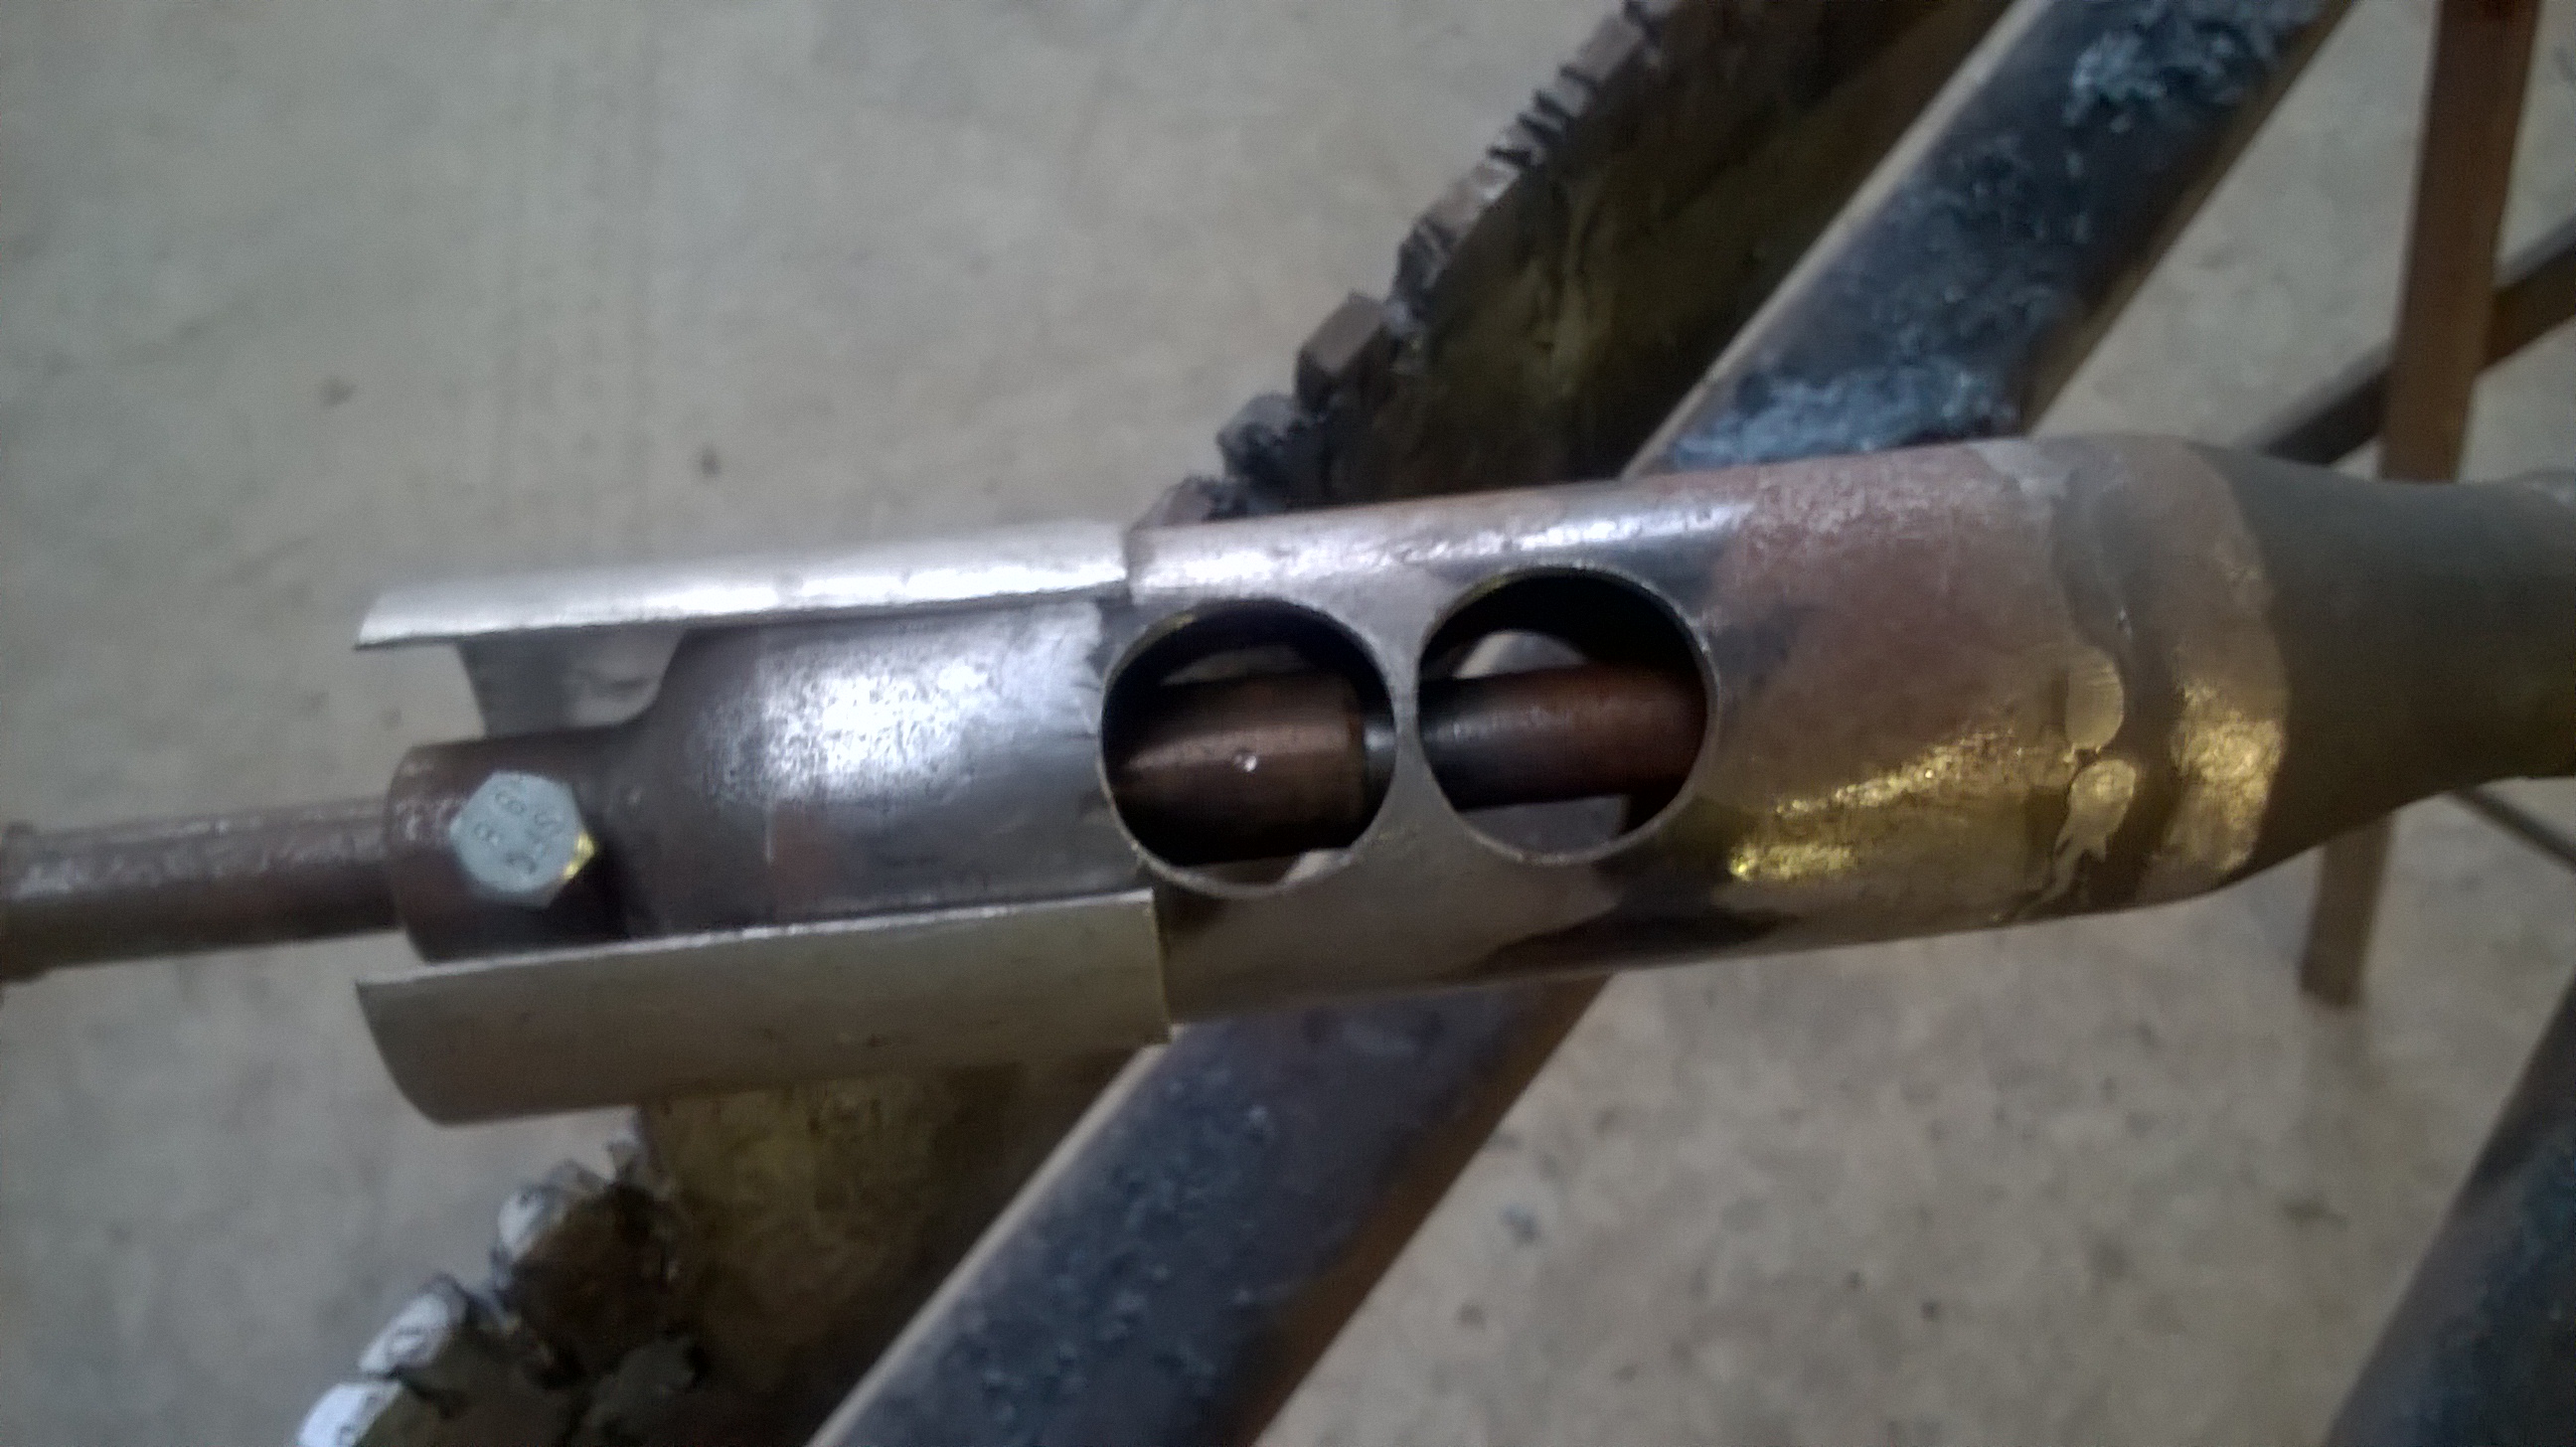
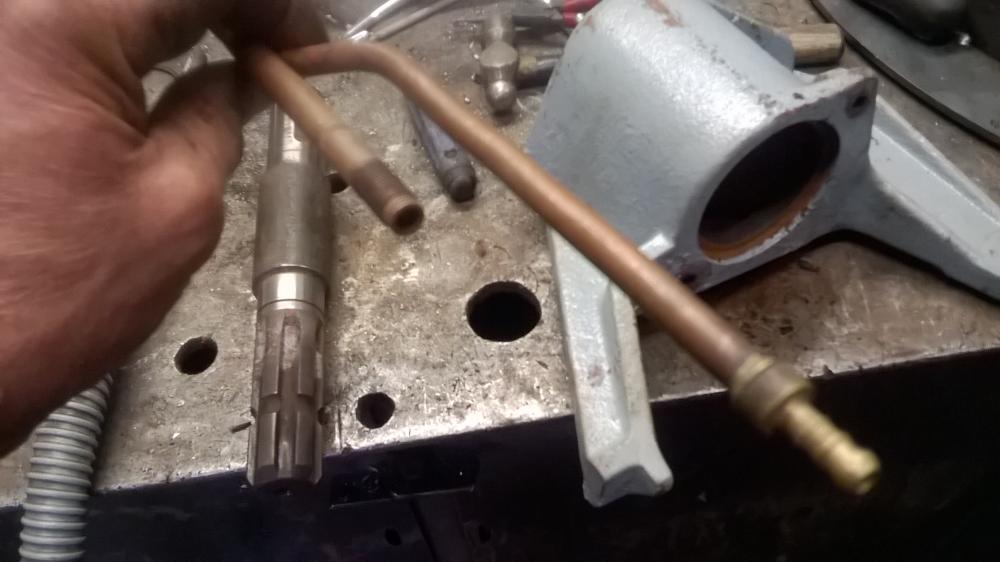
Latticino thanks for the comment I thought it looked OK but I havent had alot to do with burners, Yes I need to get my forge built to see for sure but thought I would try to get this bit as good as I could before going to the trouble. You are correct about the bottom reducer not being fully welded I have been meaning to change it for a 304 stainless one for abit more oxidation resistance. Just took a photo of where the contact tip is positioned in the venturi and realised its a lincolin contact tip, The burner is quiet when running and only gets loud when taken up to or over 20 psi I just need to make another now though I see frosty is now got a good ribbon burner working and it seems to have alot of good points so Im starting to change my mind about the direction of my design maybe I should finish this first I went for the large change in section reducer to slow the flame gases down for a soft flame for more hang time in the forge. Cheers Beaver
-
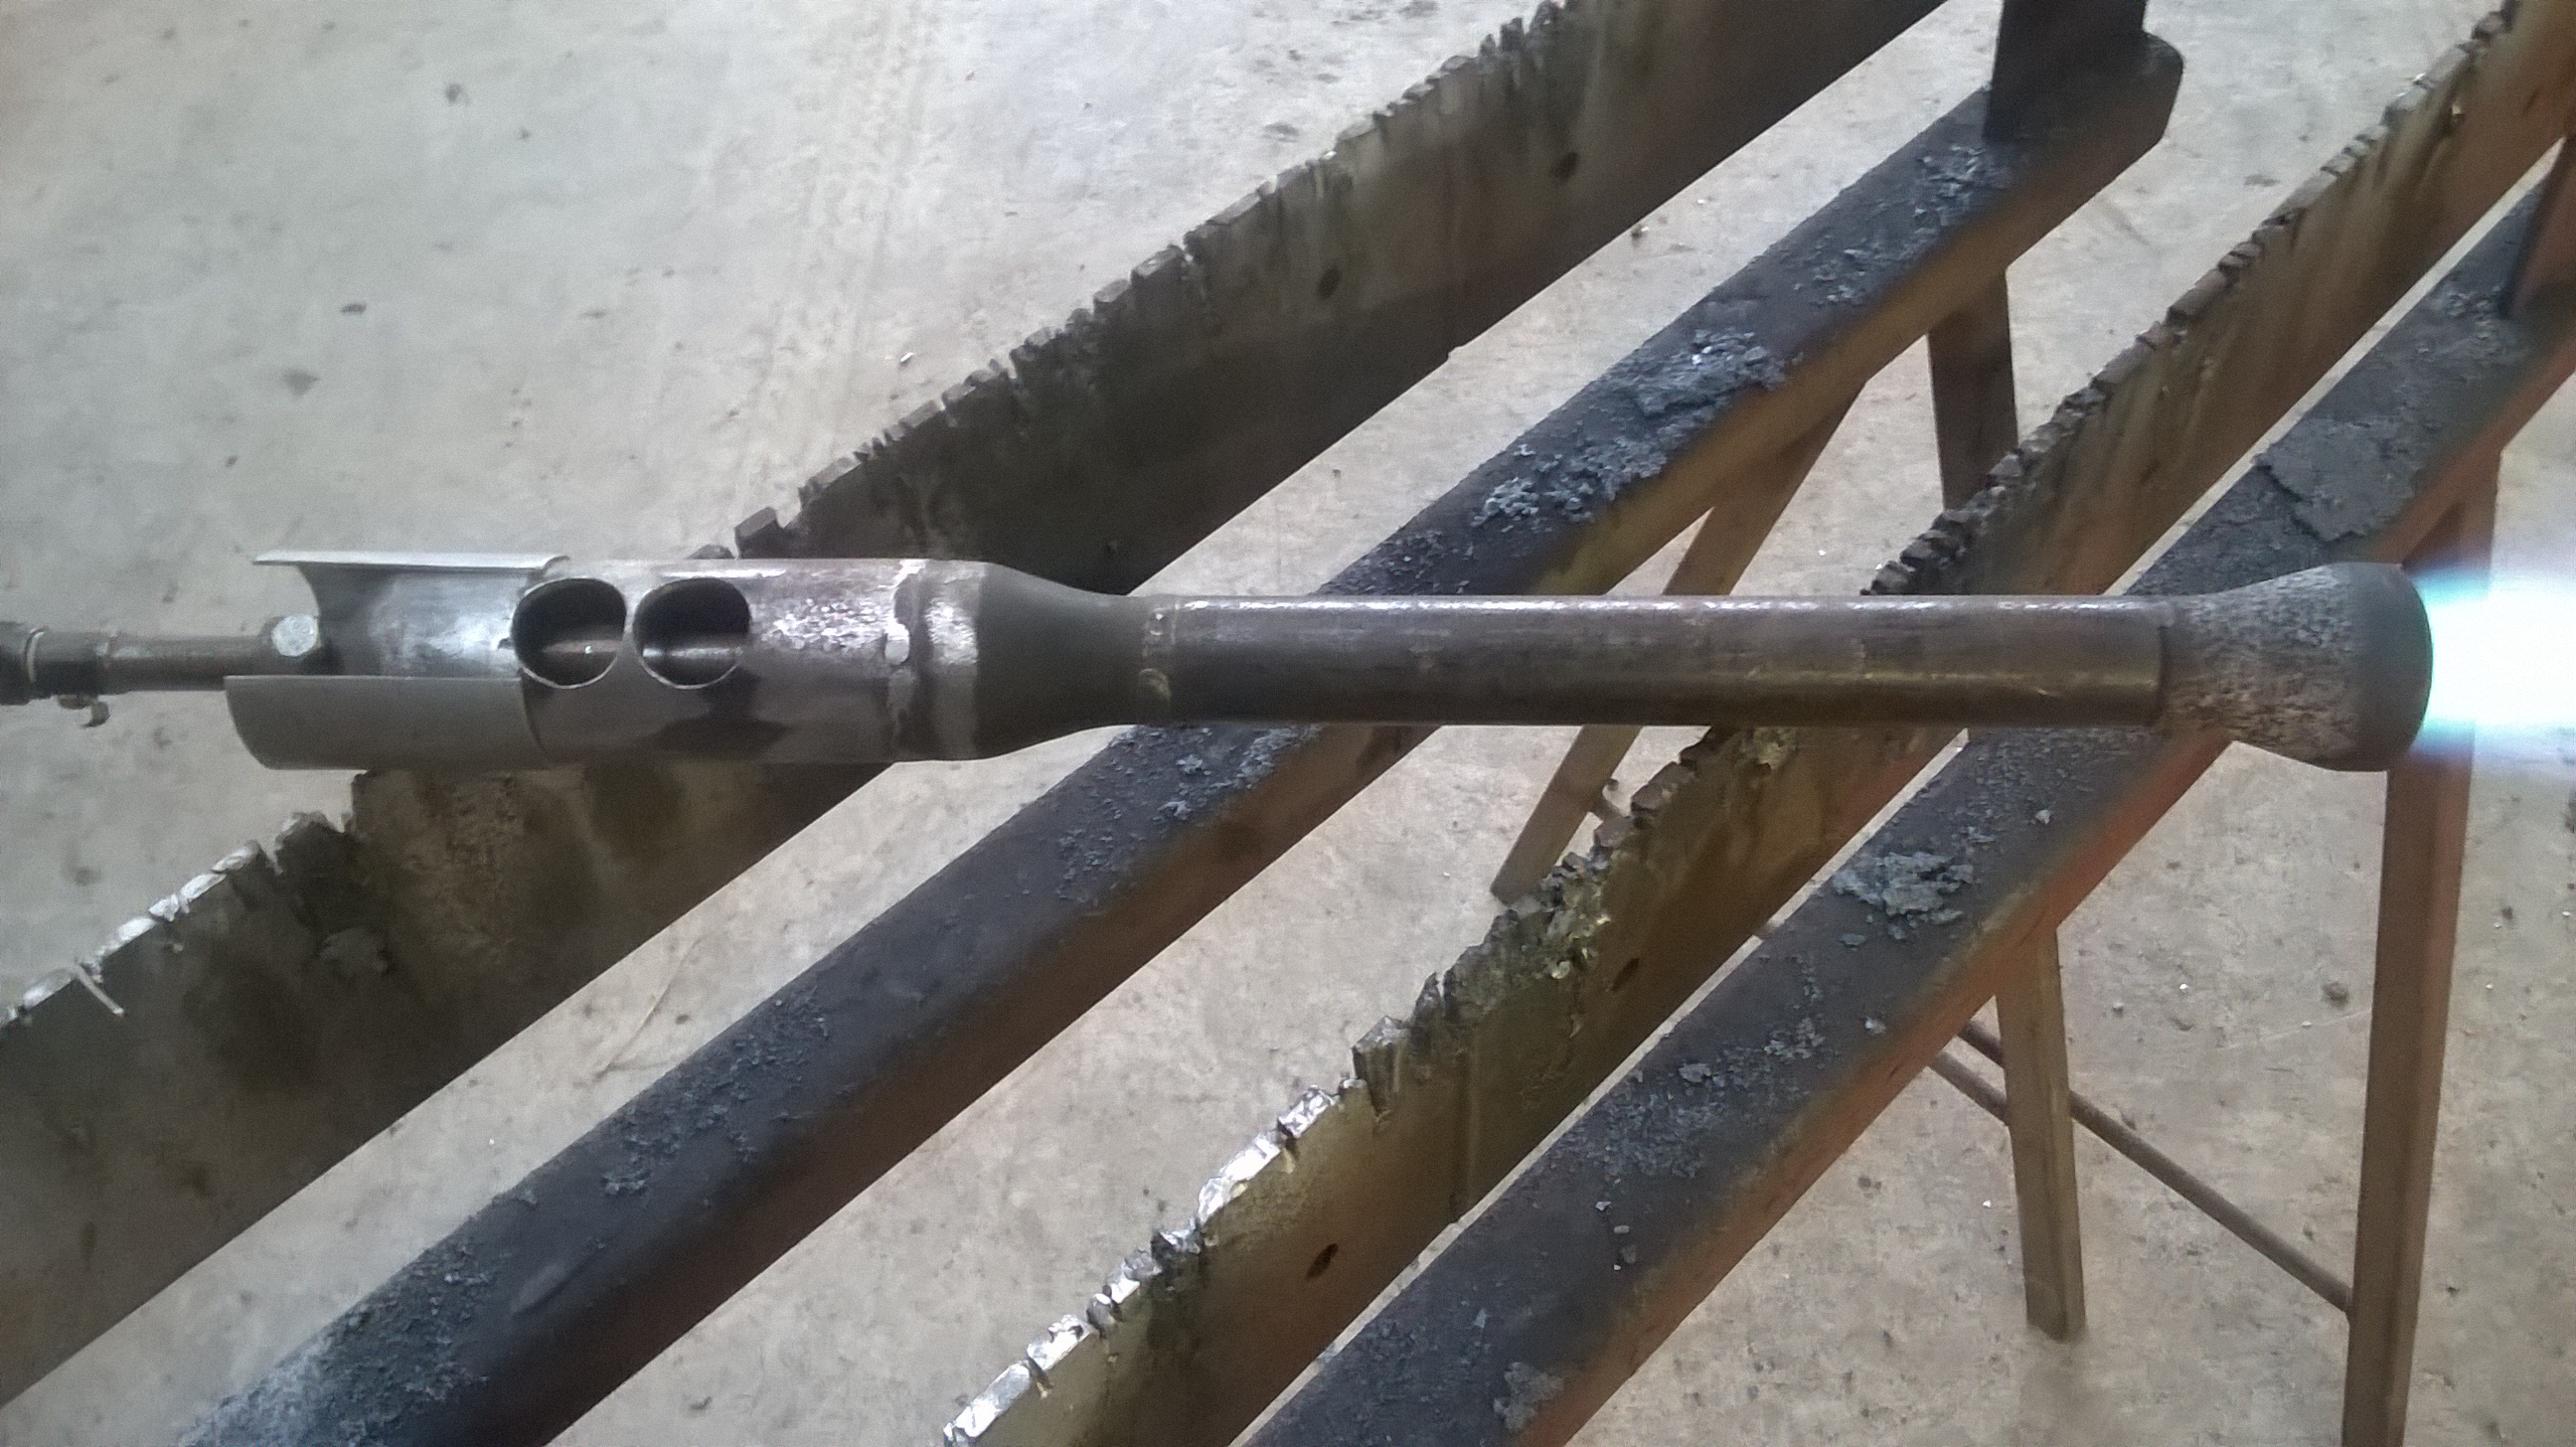
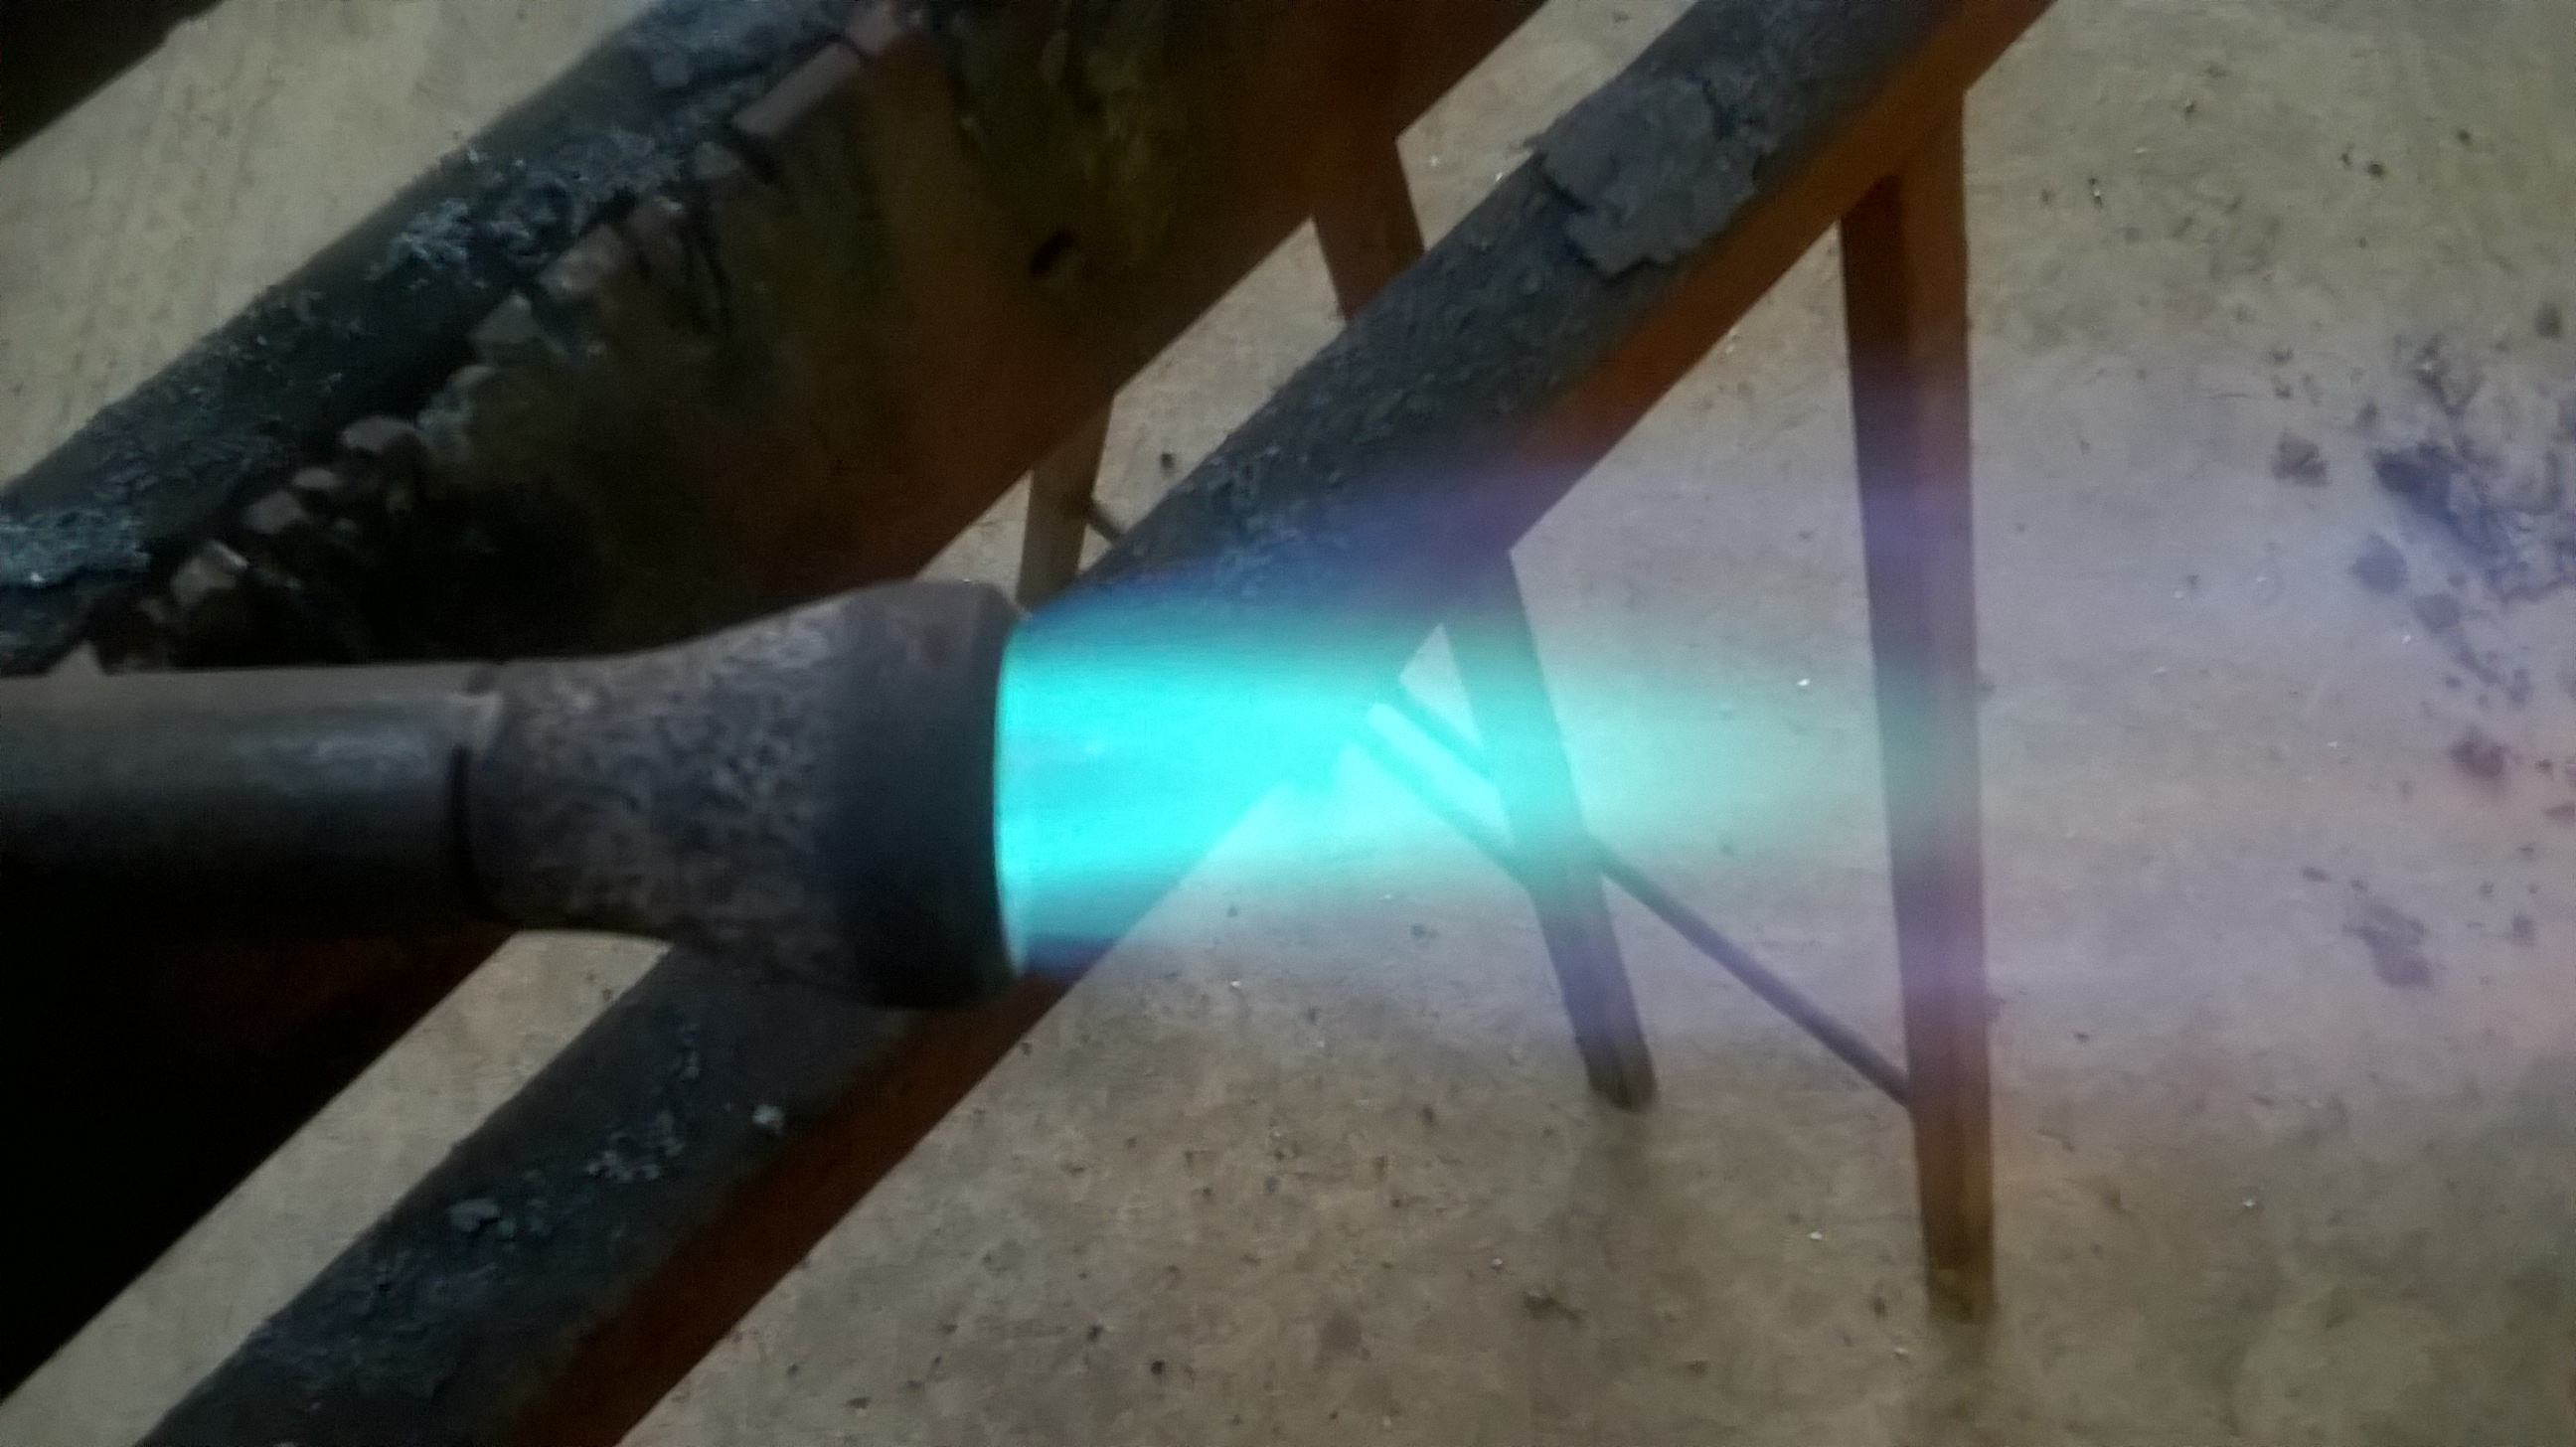
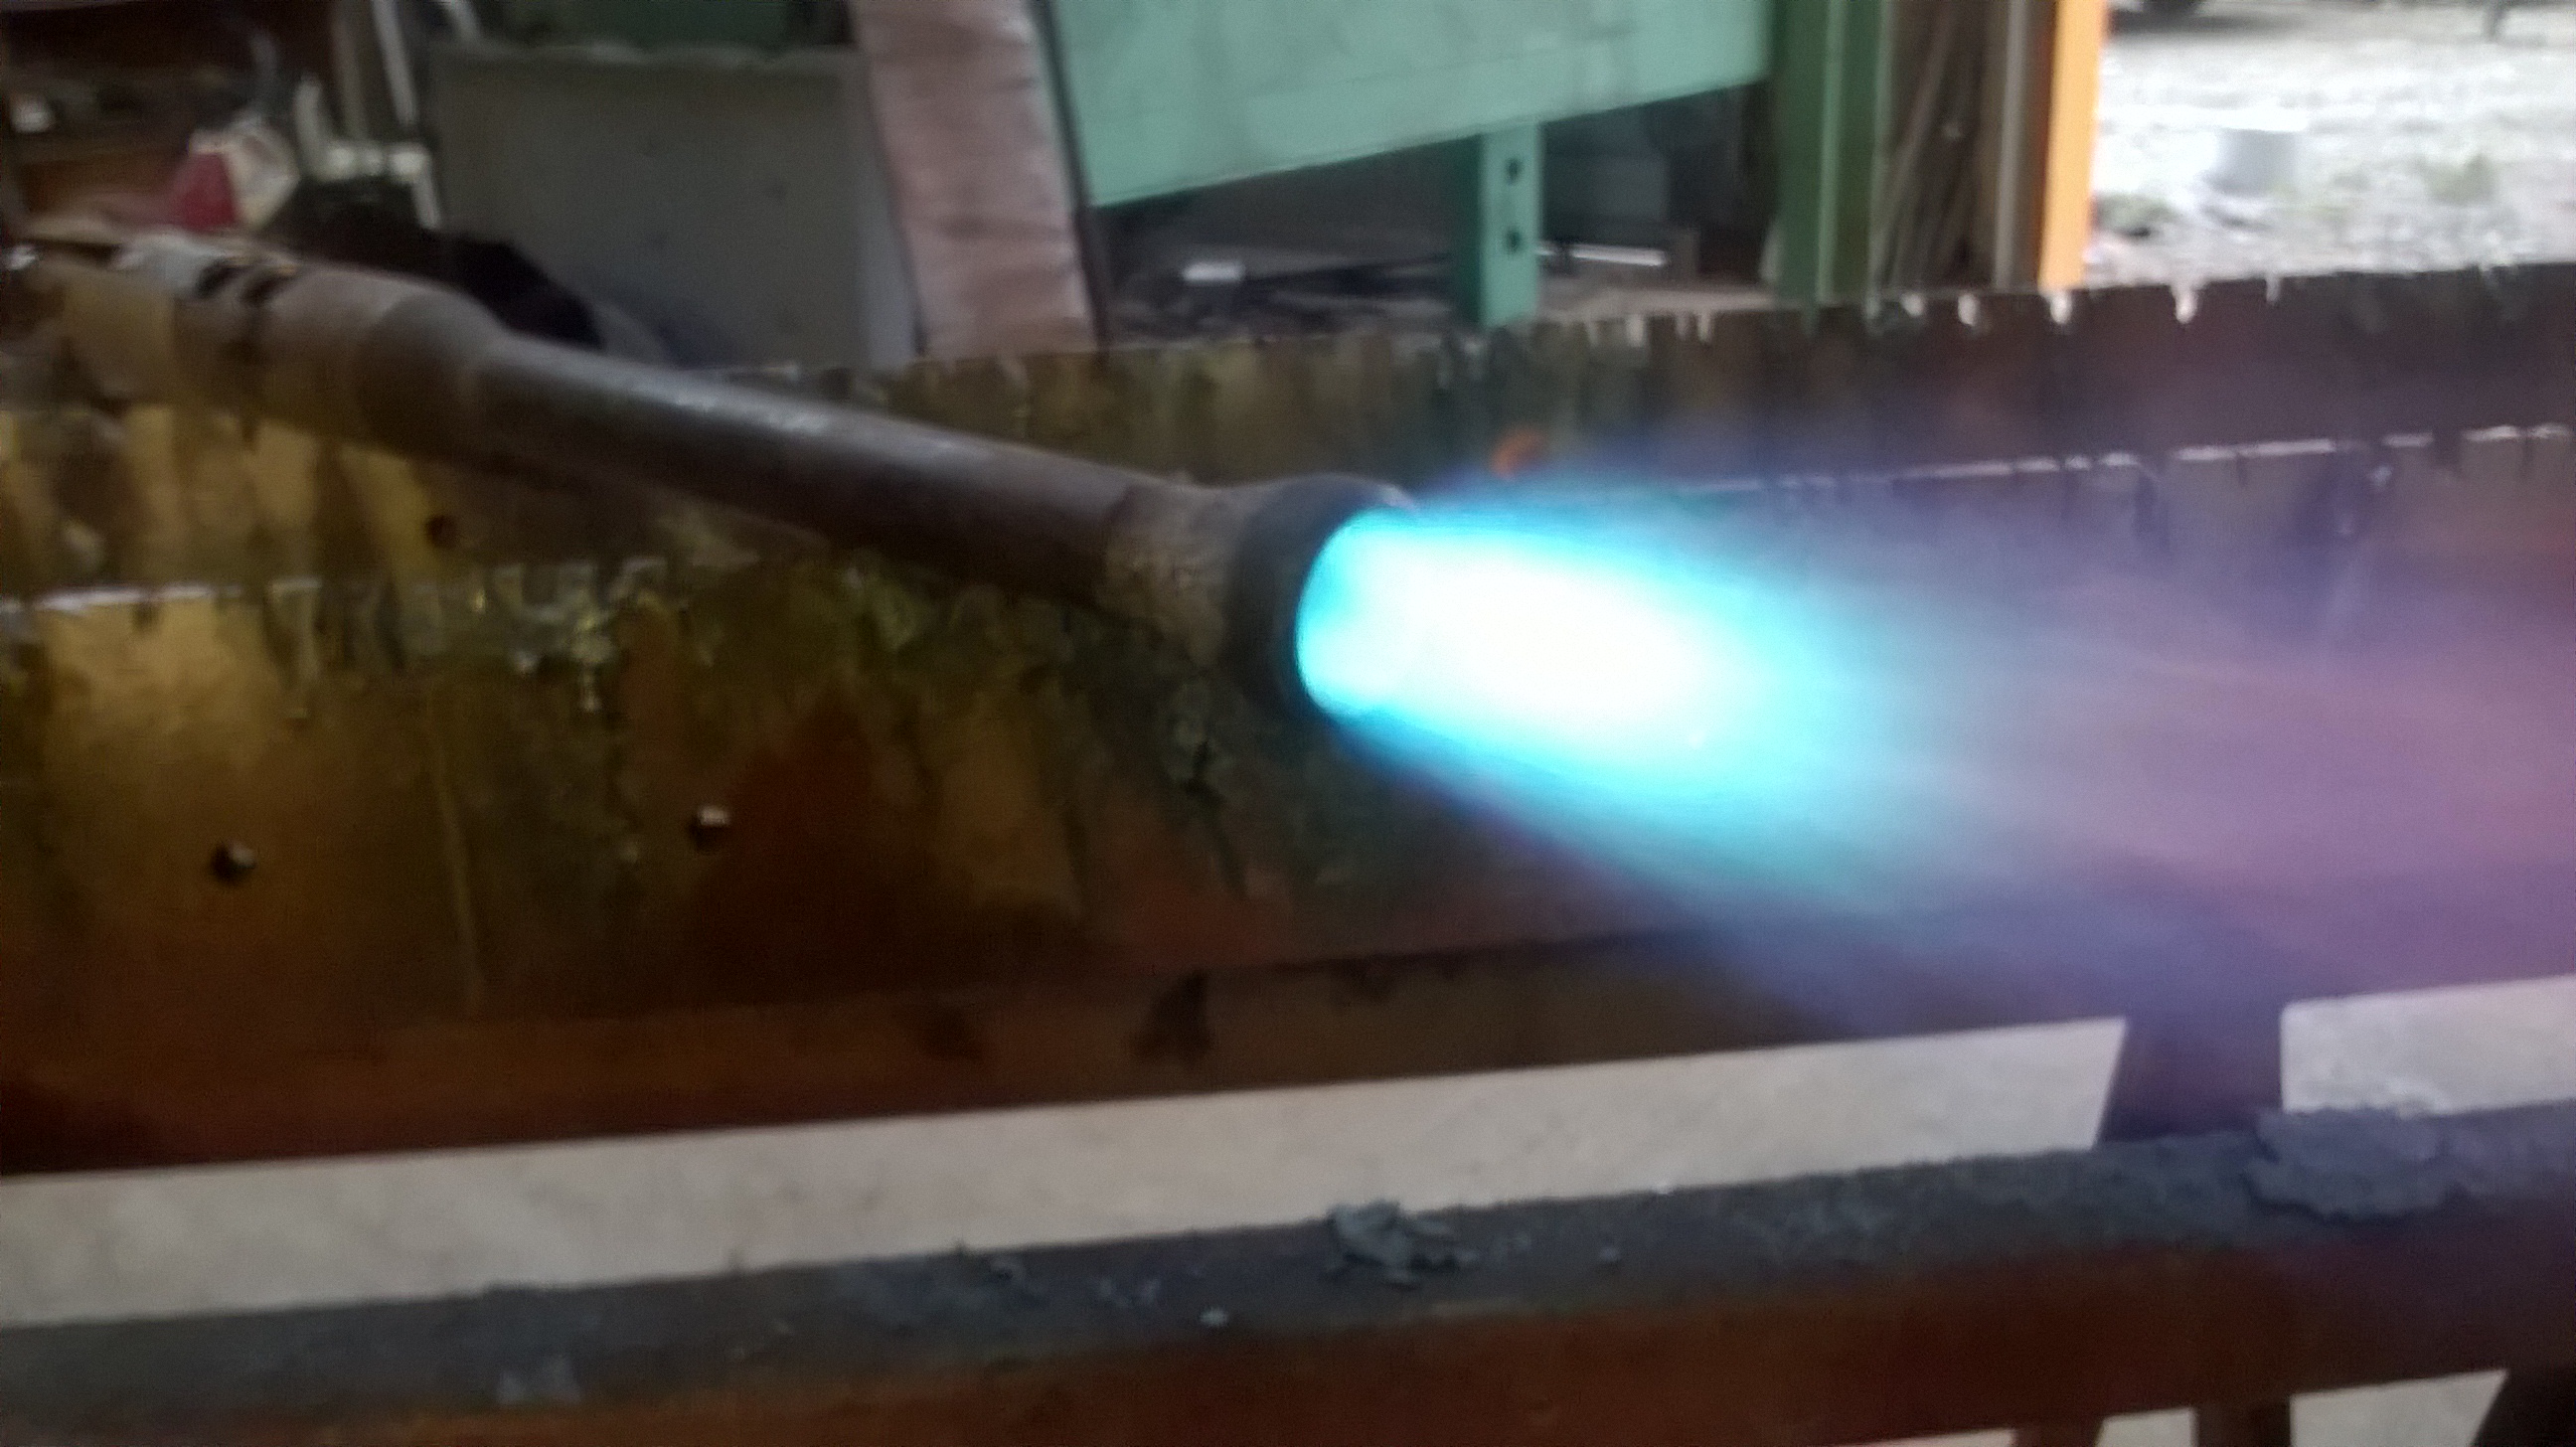
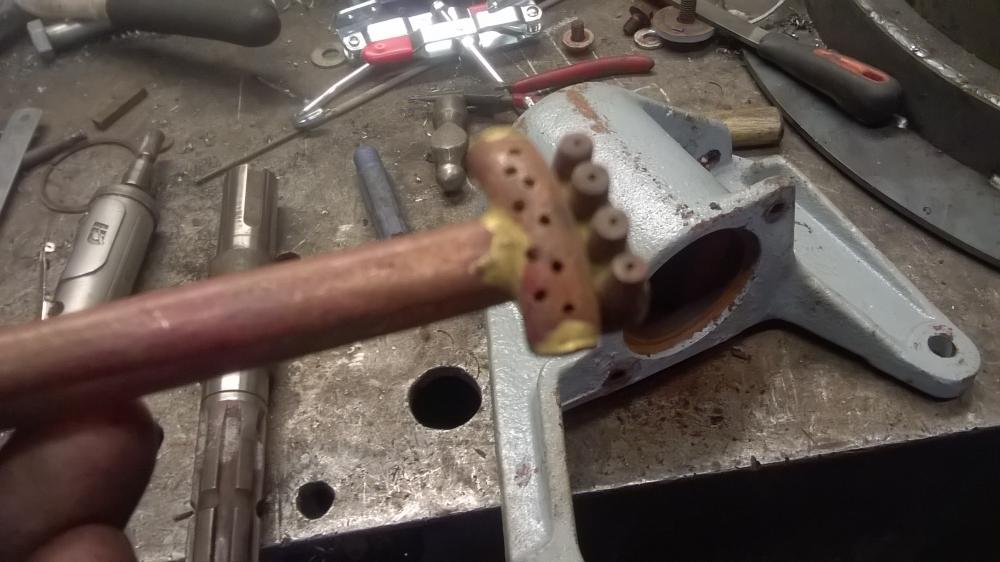
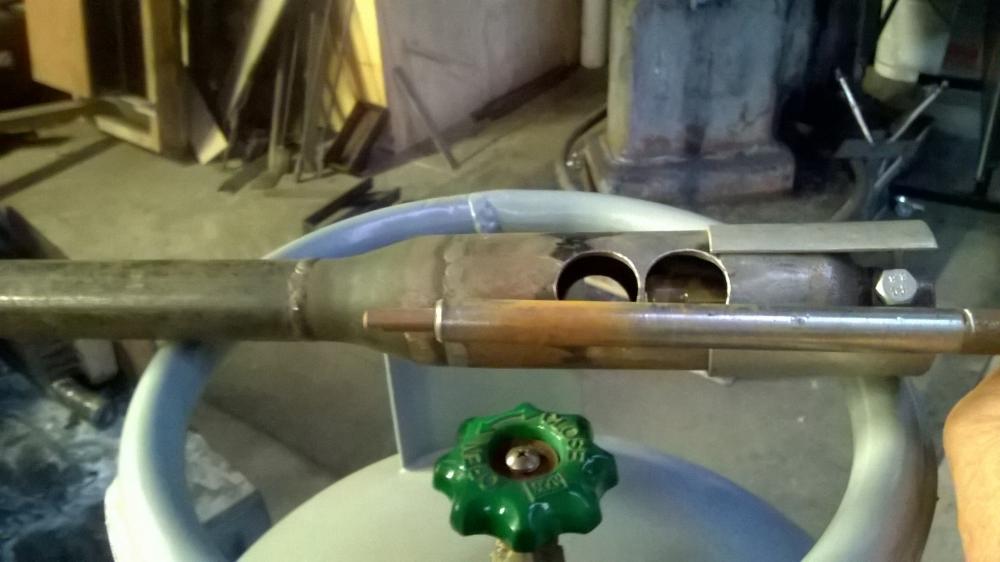
Hi Guys I am gingerly raising my head above the parapet I am experimenting with some pipe fittings that looked like they may work as burner parts what do you think I have used a tweco mig tip 0.35" and 1 1/4 to 3/4 conical reducers for the venturi and the flare I havnt used it in a proper forge enclosure yet and the flame chemistry may not be dead right This is using LPG which in New Zealand is mostly butane with some propane in it.the first flame picture is at 5 psi and the second is at 15. Comments?