BeaverNZ
Members-
Posts
351 -
Joined
-
Last visited
Profile Information
-
Gender
Male
-
Location
Invercargill New Zealand
-
Interests
Dirt bikes, Engineering, Hot rods, Knife making, Steam powered items Mainly traction engines, fixing old machinery, Making anything out of metal
Recent Profile Visitors
-
Part of what I do in my business is cast iron welding, In my experiance the best way to repair a casting is metal spraying for the most reliable repair but it is expensive as most of the nickle rich processes are like stick welding and metal spray. I would set up the broken pieces as best I can with the smaller part being slightly proud into the bearing surface and set it up so it can be held in position probably by bolting, Then I would take it apart and do a weld prep that allows plenty of acess to the weld area. Then i would use a nickel bronze rod and using a cast iron tinning flux tin or coat the smaller part first to see if it will take a coat of the bronze and do the entire face of the repair. Then reassemble the pices and heat the whole casting up using LPG or a diesel burner after wrapping the whole thing with Koawool or simmilar and heat it up to 4-500 deg cent and tin the second area. Once this has been done then its just fill up the weld prep. When doing the tinning coat if the bronze does not freely flow then the area is not clean enough, not hot enough or not enough flux and any repair where this does not happen you are wasting your time and money proceding. with one of my repairs in the past the cast iron just would not take a tinning coat so I tried a coat using the metal spraying torch then continued with the bronze on that and it was succesful. Their is always more than one way to do a repair and I enjoy the challange of doing repairs no one else will try. after the reair has cooled overnight then the protruding smaller part of the repair could be machined or filed or some by other means back to where it needs to be.
-
I am buliding an electric heat treatment oven
BeaverNZ replied to BeaverNZ's topic in Heat Treating, general discussion
Well thats interesting, I shifted the probe location to the center top of the oven and while it appeared to heat faster it went from reading 30 deg cold at 300 deg cent to reading 25 deg hot. it must of been getting radiatded heat from the elements the sweet spot seems to be 125mm foward from the back up against the roof and its ony 2-3 deg different from what is set so thats a win and its ready for use. -
Hydraulic cylinder for air hammer
BeaverNZ replied to rowdyripley's topic in Power Hammers, Treadle Hammers, Olivers
Before I stumbled apon my Massey I was thinking of making my own self contained power hammer. I had found the shematic of an Inslides patent 707246 aug 1902 and patent number 1524195 Jan 25 1925 and I had a really simple valving system from anvilfire.com by Patric Pelgroms of Belgium. Its amazing what I still have stashed in my filing cabinet, no wonder its so full of paper. -
I am buliding an electric heat treatment oven
BeaverNZ replied to BeaverNZ's topic in Heat Treating, general discussion
I have sourced the correct plug and wires and tested it today and I had a piece of RHS in the oven to shot with my lazer thermometer and also had another thermocouple that I remembered I had with a multimeter and it stil reads 10% low to the actual temp even after allowing a long soak time. What I think my problem is now is the prob is right at the back top corner and it must be a dead area as far as curculation goes, I did wonder about putting it there but it is the best place to not get damaged but I will relocate it to the more central place at the top of the oven. Both the Lazer and the multimeter read the same temp so they are probably correct. -
Hydraulic cylinder for air hammer
BeaverNZ replied to rowdyripley's topic in Power Hammers, Treadle Hammers, Olivers
The hyd cylindersare certainly more robust but you may have to reseal it as the seals used with hydrualics will probably have to much stiction or drag and you may loose alot of power/speed -
Just an update with my bottle freezing or pressure drop due to the bottles getting very cold I have found so far I havent needed to use the fish tank heaters though the bottles do get alot of condensation showing where the gas level is when the level is high enough. the extra surface area outside the water tank and the better heat transfer of the water to the bottle is working well. another plus for putting the bottles in the liquid is if you have the water level at 330mm deep with these bottles they float at that level so the felt weight of the bottles is the remaining amount of gas.
-
I am buliding an electric heat treatment oven
BeaverNZ replied to BeaverNZ's topic in Heat Treating, general discussion
Oh and I forgot to say it takes 40 mins to go from 11 to 580 deg cent but I allowed a good long soak time before taking my temp measurement -
I am buliding an electric heat treatment oven
BeaverNZ replied to BeaverNZ's topic in Heat Treating, general discussion
Hi Tim Yes you are correct, the acutual temp is about 50 Deg cent high at 520 setting. I put a piece of RHS in and heated that up and meassured it and its the amount out so will have to get it setup they way you said with the right wires etc. I will see if I can source the plug with the wires factory attached cheers for the advice Beaver PS I have found with things in the past if shiney or light coloured dont give the correct temp reading when shot with my laser temp probe. -
I am buliding an electric heat treatment oven
BeaverNZ replied to BeaverNZ's topic in Heat Treating, general discussion
The mill is a recent thingand is something I have wanted for many years and I can finally stop all the dodgy settups in the lathe, The tooling is costing me just as much as the mill though. He who dies with the most toys wins -
I am buliding an electric heat treatment oven
BeaverNZ replied to BeaverNZ's topic in Heat Treating, general discussion
Hi Tim I was aware how a thermocouple works but was interesting to read what you had written, I will have to find out more about the plugs etc. I thought the dissimmilar metals just had to be at the hot and cold ends, It does seem to read correctly as I have checked it with my laser temp measuring thingus and there was only a deg or two different at 600 deg cent. Im only a dumb old welder but have always listened to people who know more than I so thanks Cheers -
I am buliding an electric heat treatment oven
BeaverNZ replied to BeaverNZ's topic in Heat Treating, general discussion
The Thermocouple is from a supplier of refractory and related things for a local alumium smelter and its what they supply them, The cable is just instrument cable supplied by the sparky -
I am buliding an electric heat treatment oven
BeaverNZ replied to BeaverNZ's topic in Heat Treating, general discussion
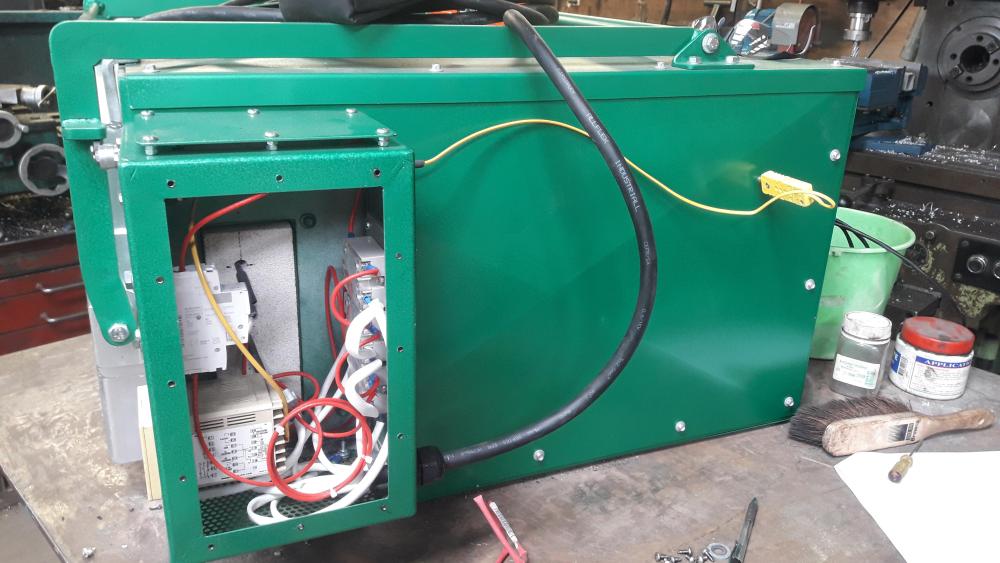
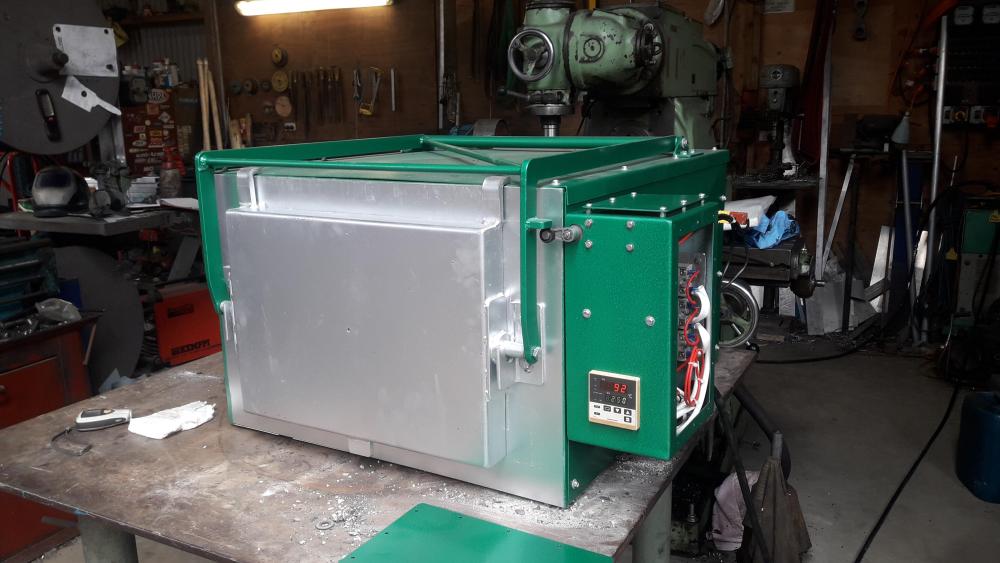
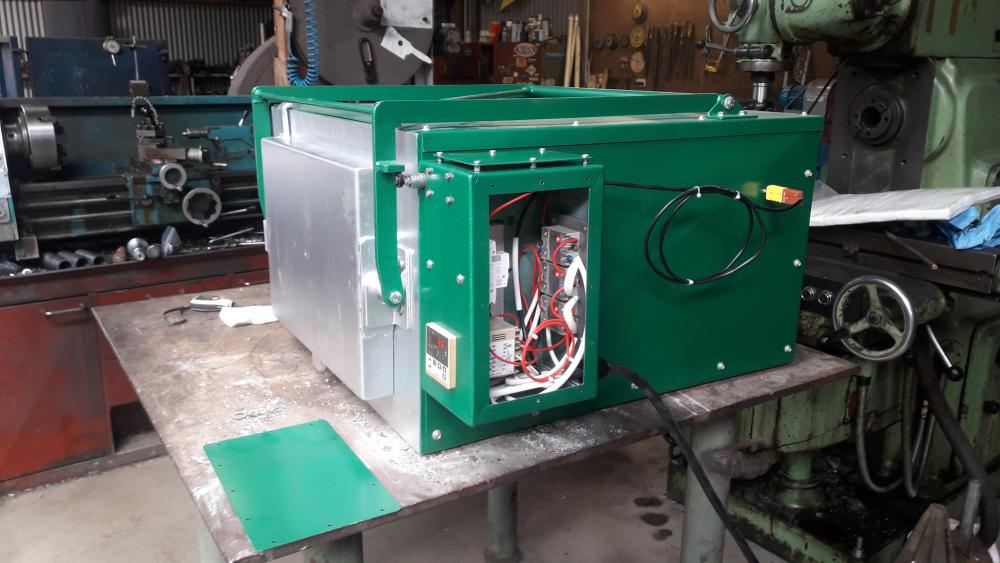
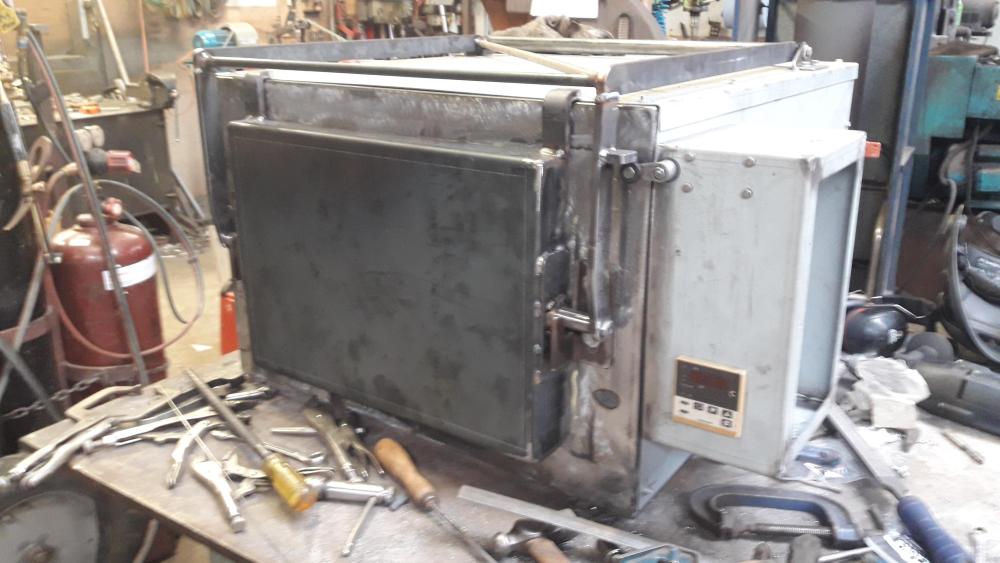
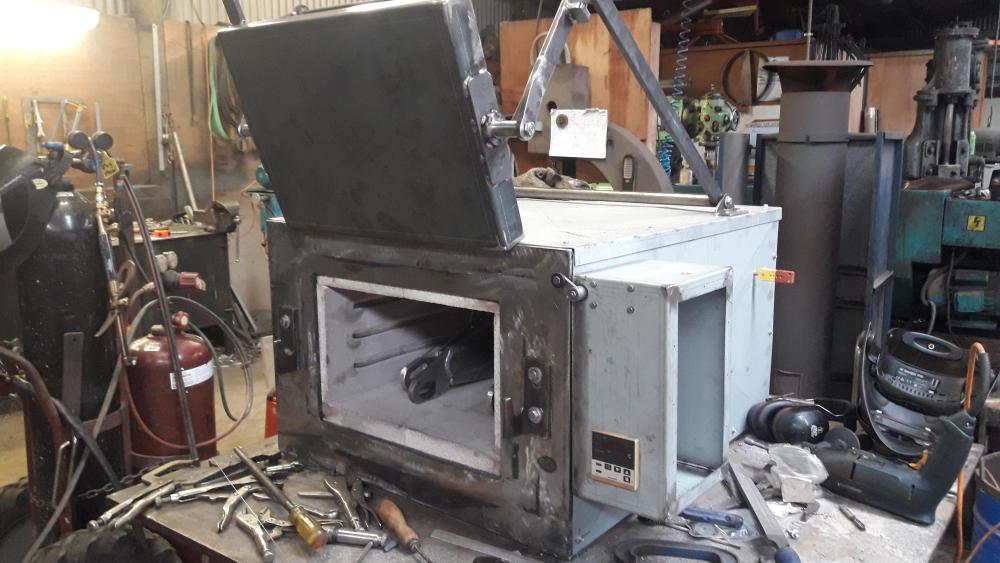
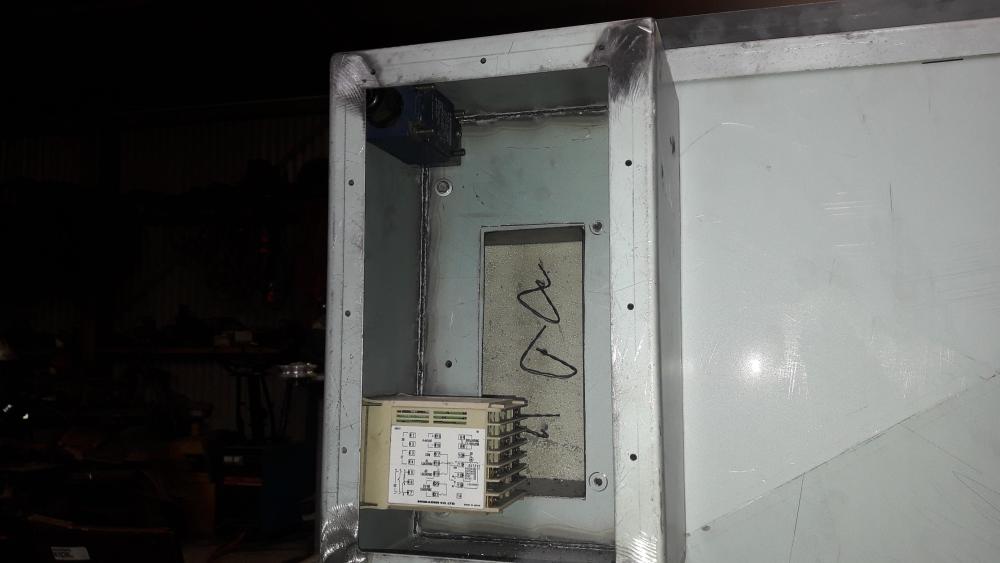
I have got the kiln all finished and have had the electrican come and connect up the sparks and smoke. It seems to run well heating up about 1 deg every two seconds and it doesnt have more than about 5 Deg of overshoot when coming up to temp. the cover is of the control cabinet just to make sure there is no melty bits going on inside. I need to put some handles on the door which I ment to do before I painted it. It seems to be very well insulated so far and not even warm on the outside -
Alternatives for quenching oil - Hydraulic Oils
BeaverNZ replied to ron2k_1's topic in Heat Treating, general discussion
Thanks guys I enjoyed the multiple subjects, Came for the quench and stayed for the ramble -
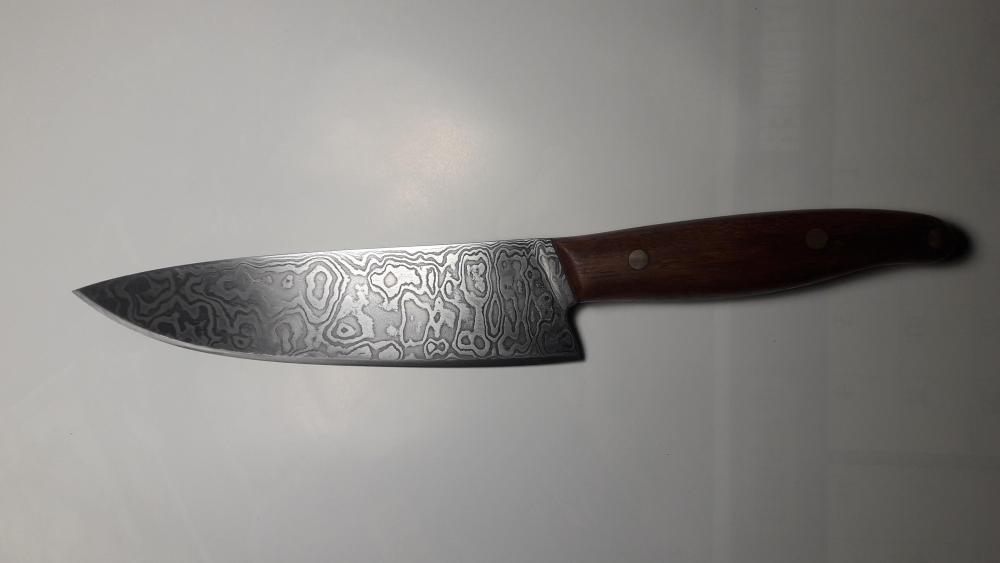
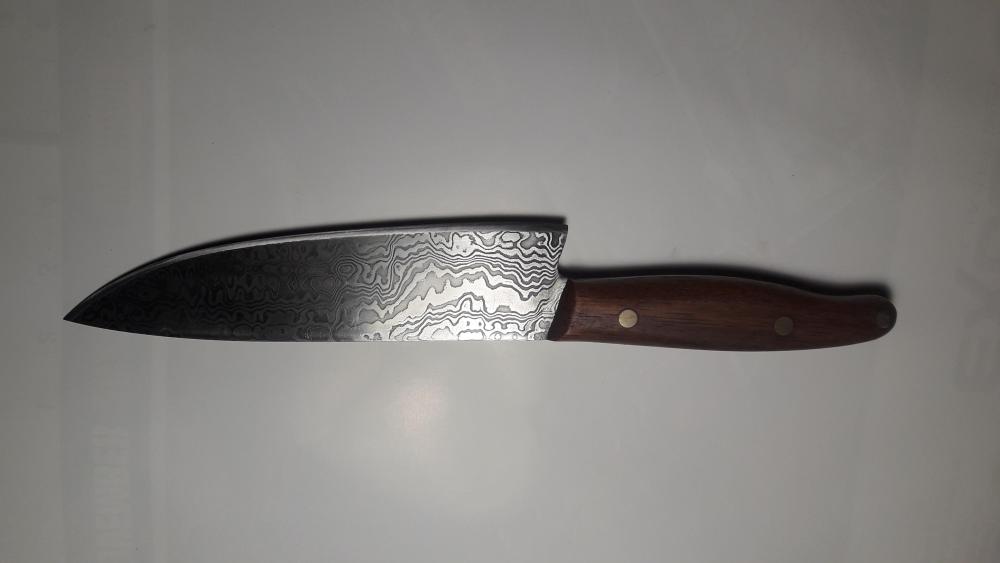
I have completed my latest blade as a gift to my mother and starting on four more today for rest of the female relations, sisters and mother in law. I think this one is my best yet and has a Jara wooden handle with danish oil to seal it.
-
I am buliding an electric heat treatment oven
BeaverNZ replied to BeaverNZ's topic in Heat Treating, general discussion
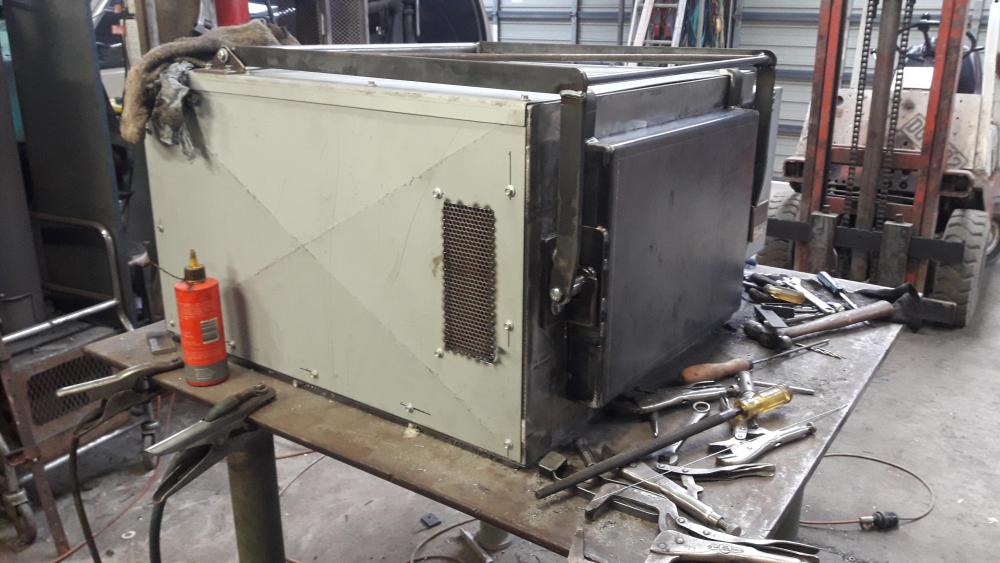
I have almost got the oven completed so I can take it to the sparky to be wired up, I havent taken any pics of the frame of the oven but it has an angle iron frame that the clading is Tec screwed to and under that there is 50mm of Koawool insulation so it should be well insulated. The door will have Koawool insulation that i am going to retain with stainless steell cotter pins for the first 25mm layer then that will be held/joined with sodium silicate and there will aslo be a high temp rope seal around the door. The control box will have venting pannels at the top and bottom to allow lots of ventilation.

