BeaverNZ
-
Posts
351 -
Joined
-
Last visited
Content Type
Profiles
Forums
Articles
Gallery
Downloads
Events
Everything posted by BeaverNZ
-
I have just PM,d you the warning signs i have on my press. i wouldnt be able to put them on here as they are plain and blunt language Lol use or delete as you wish
-
Looking good My only critique would be the ram sprear eye looks like its a close fit in the moving table and unless there is very little movement or tipping side ways you will either bend the ram spear or break the eye off the spear as the ram spear is not that big in dia. If i was making a press like this I would use a table with much longer guides and a spear bigger in dia, All you need to do with yours is give it a bit more clearance around the spear eye other than that its a well built press Cheers Beaver
-
2 CWT Massey power hammer foundations started
BeaverNZ replied to BeaverNZ's topic in Power Hammers, Treadle Hammers, Olivers
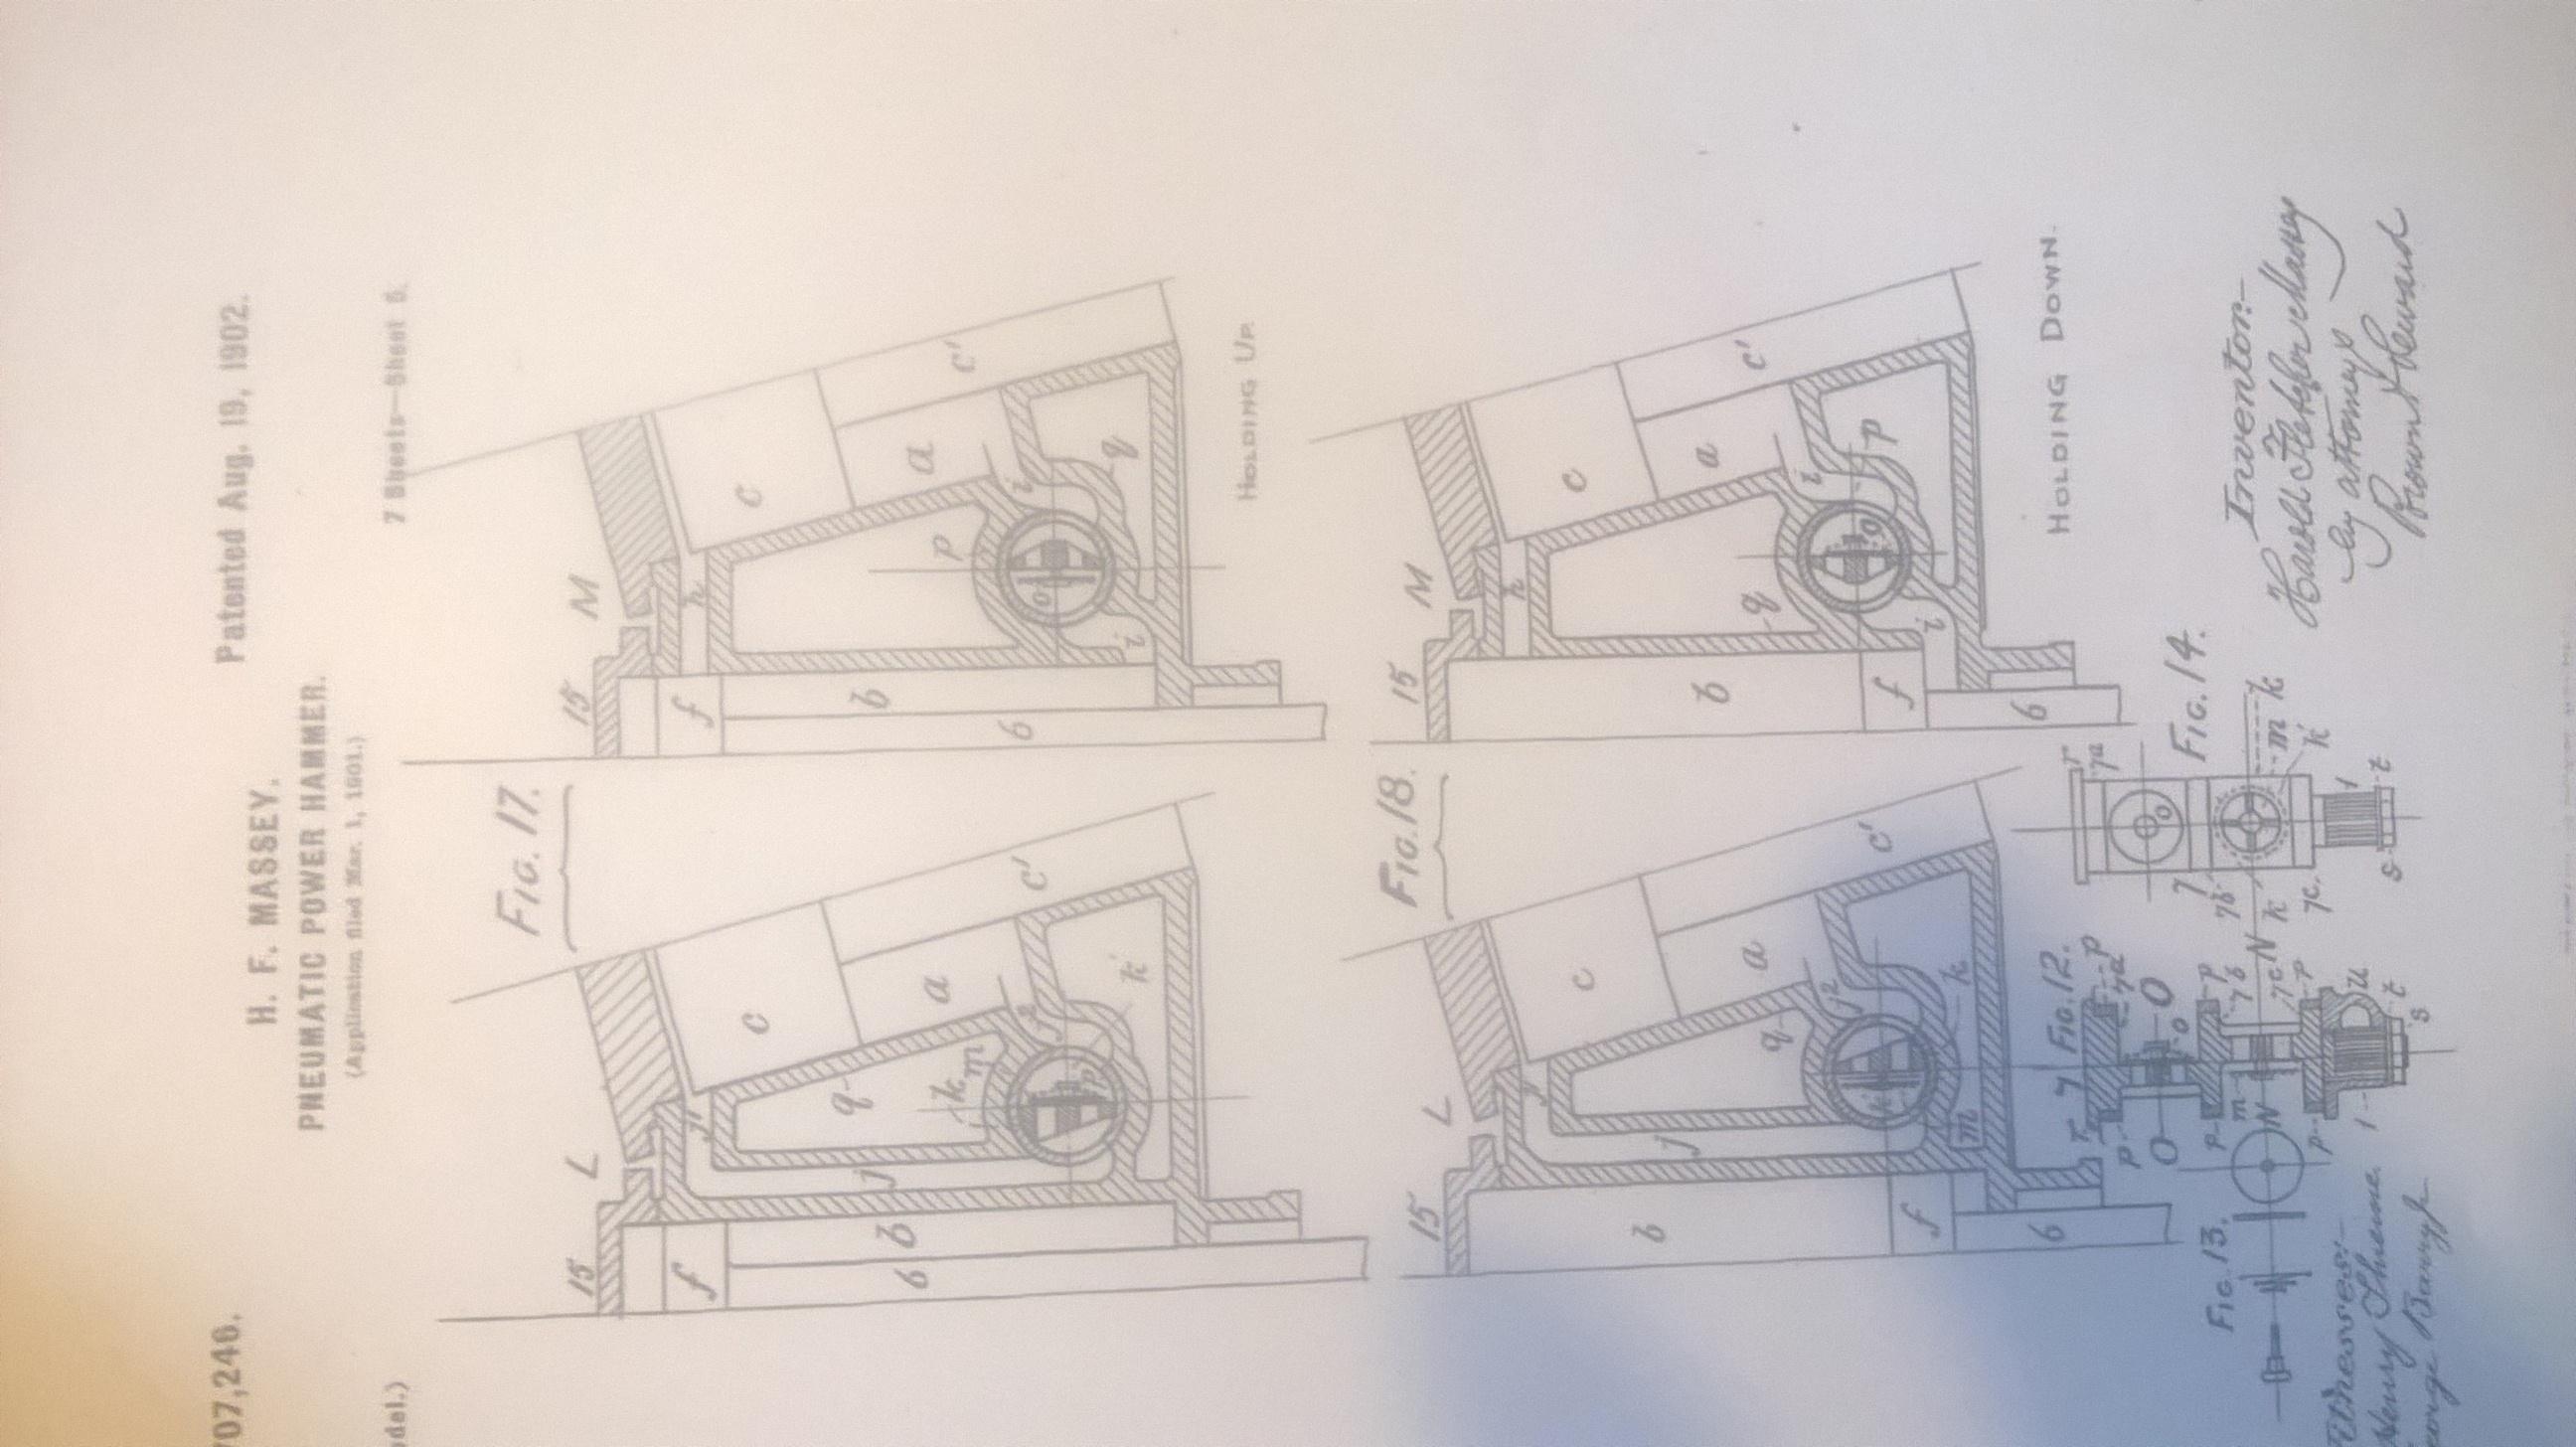
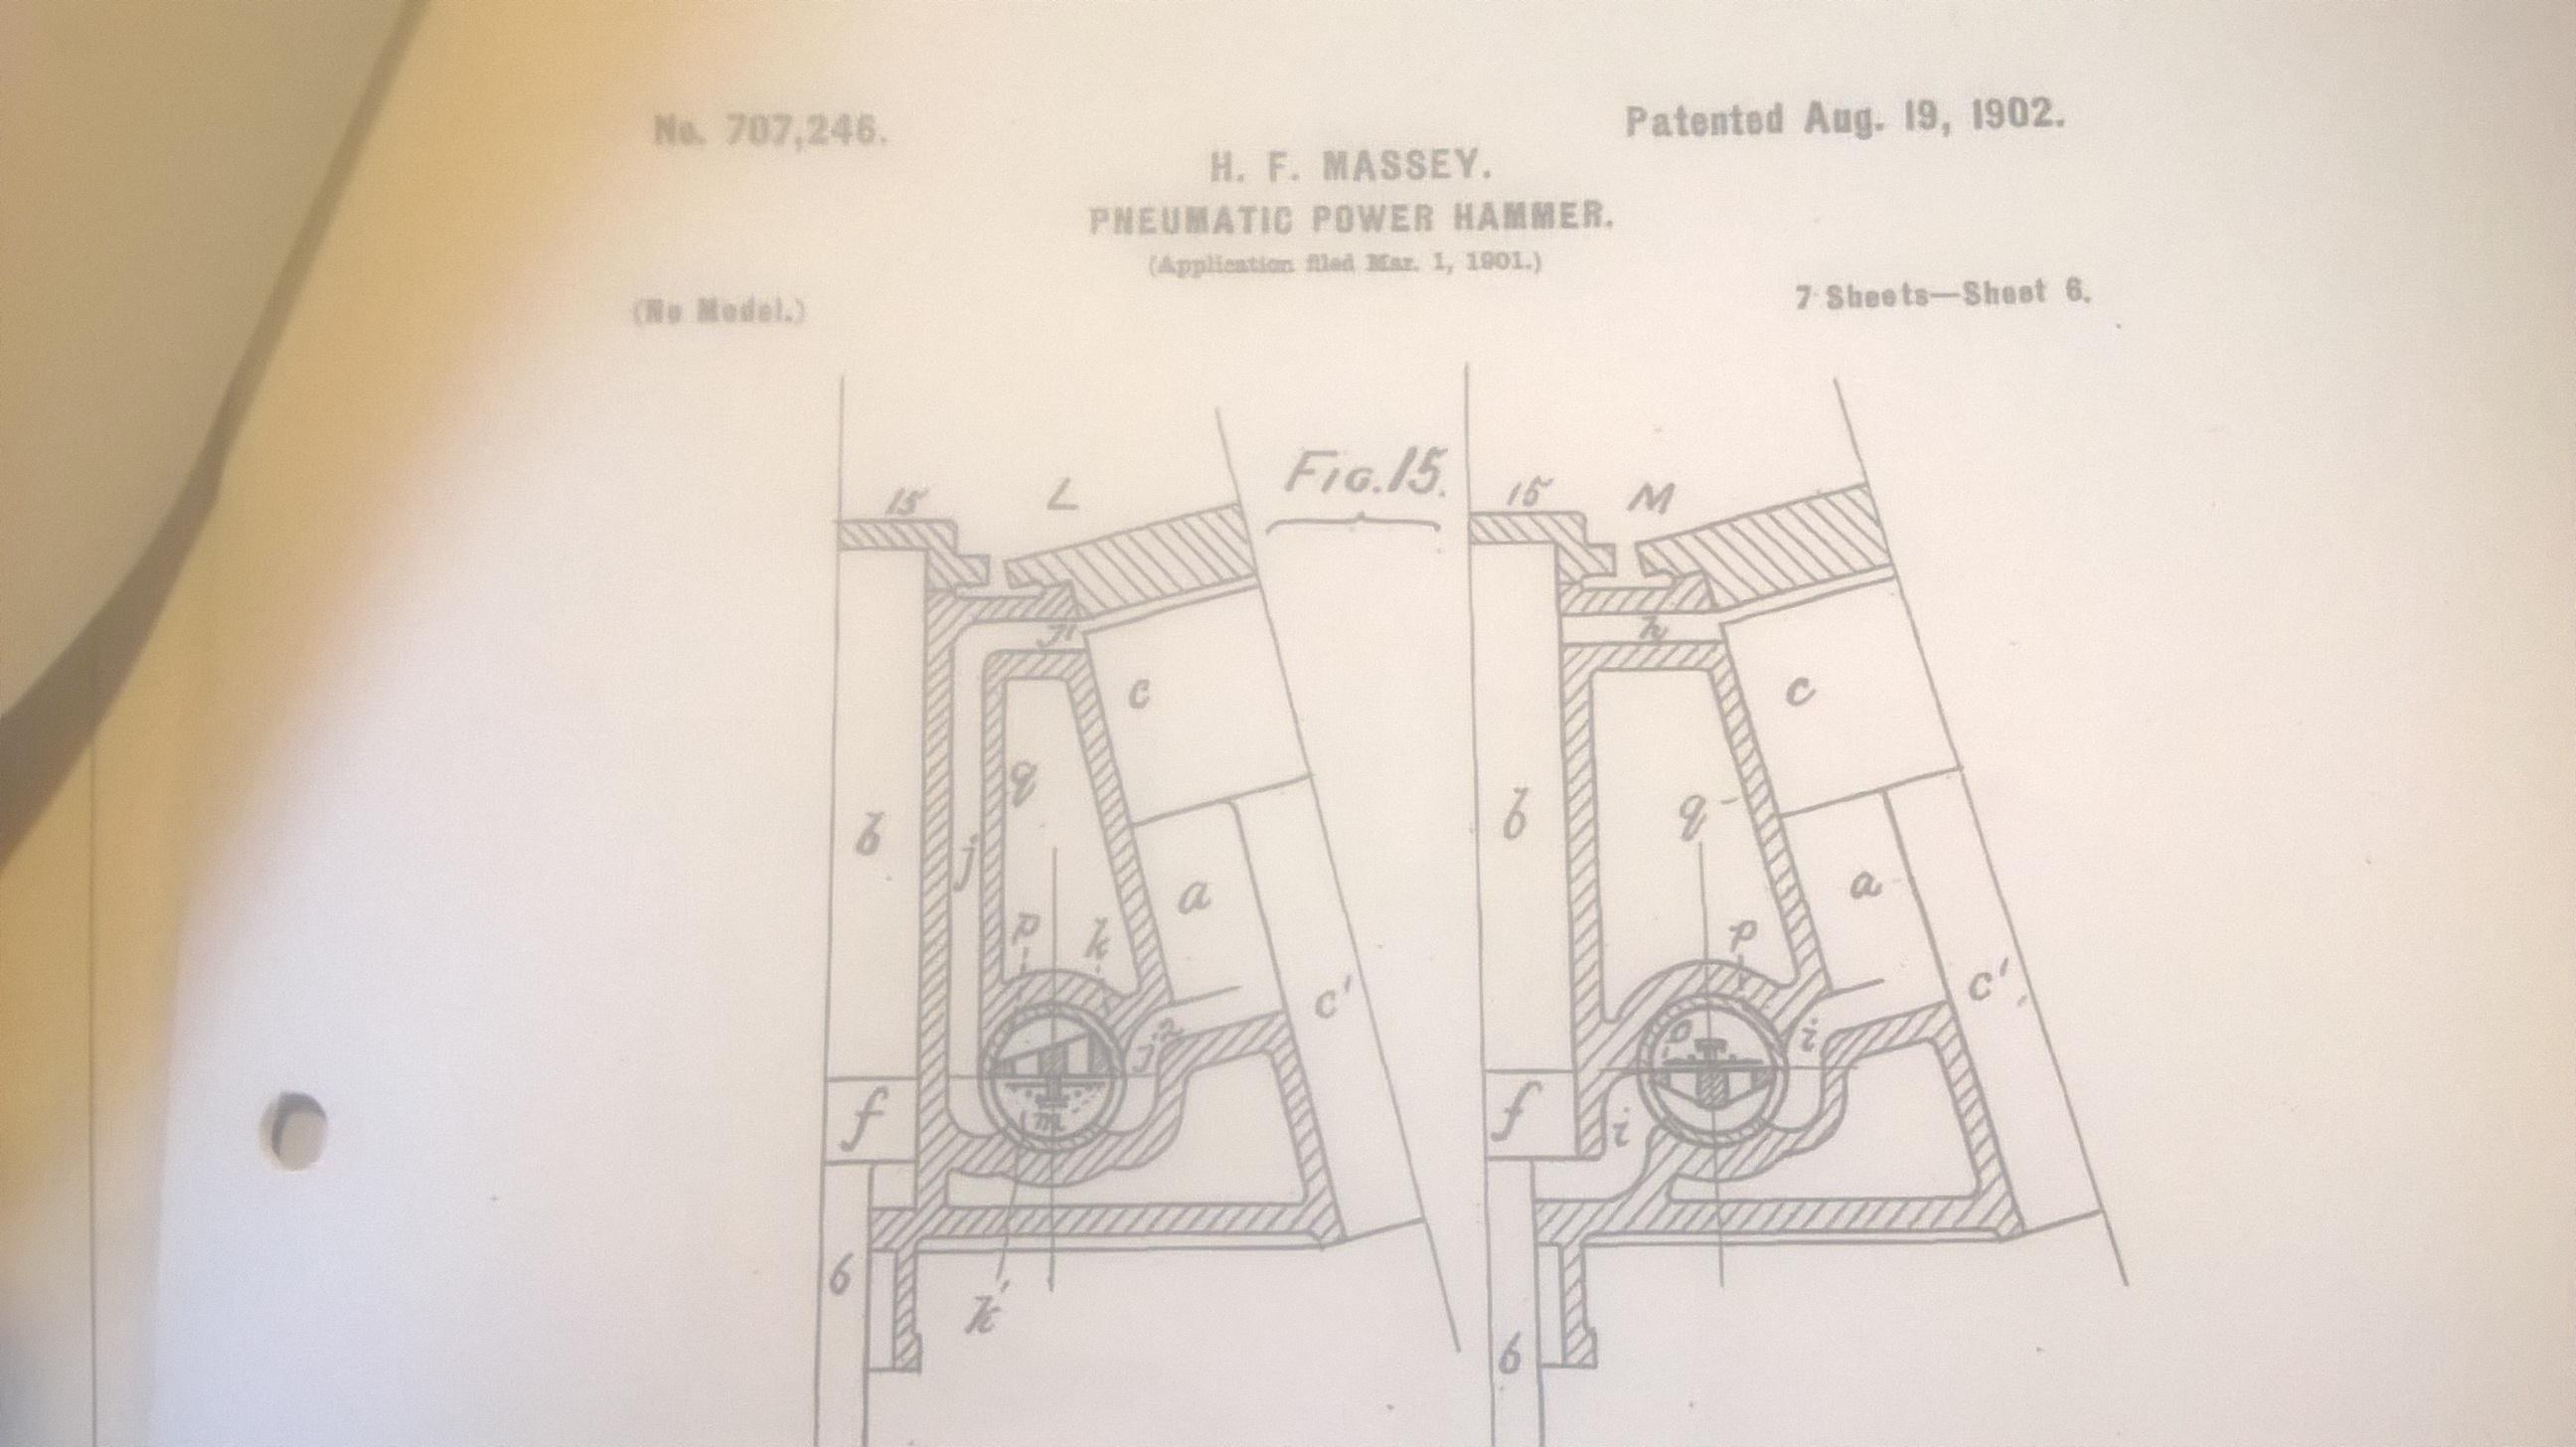
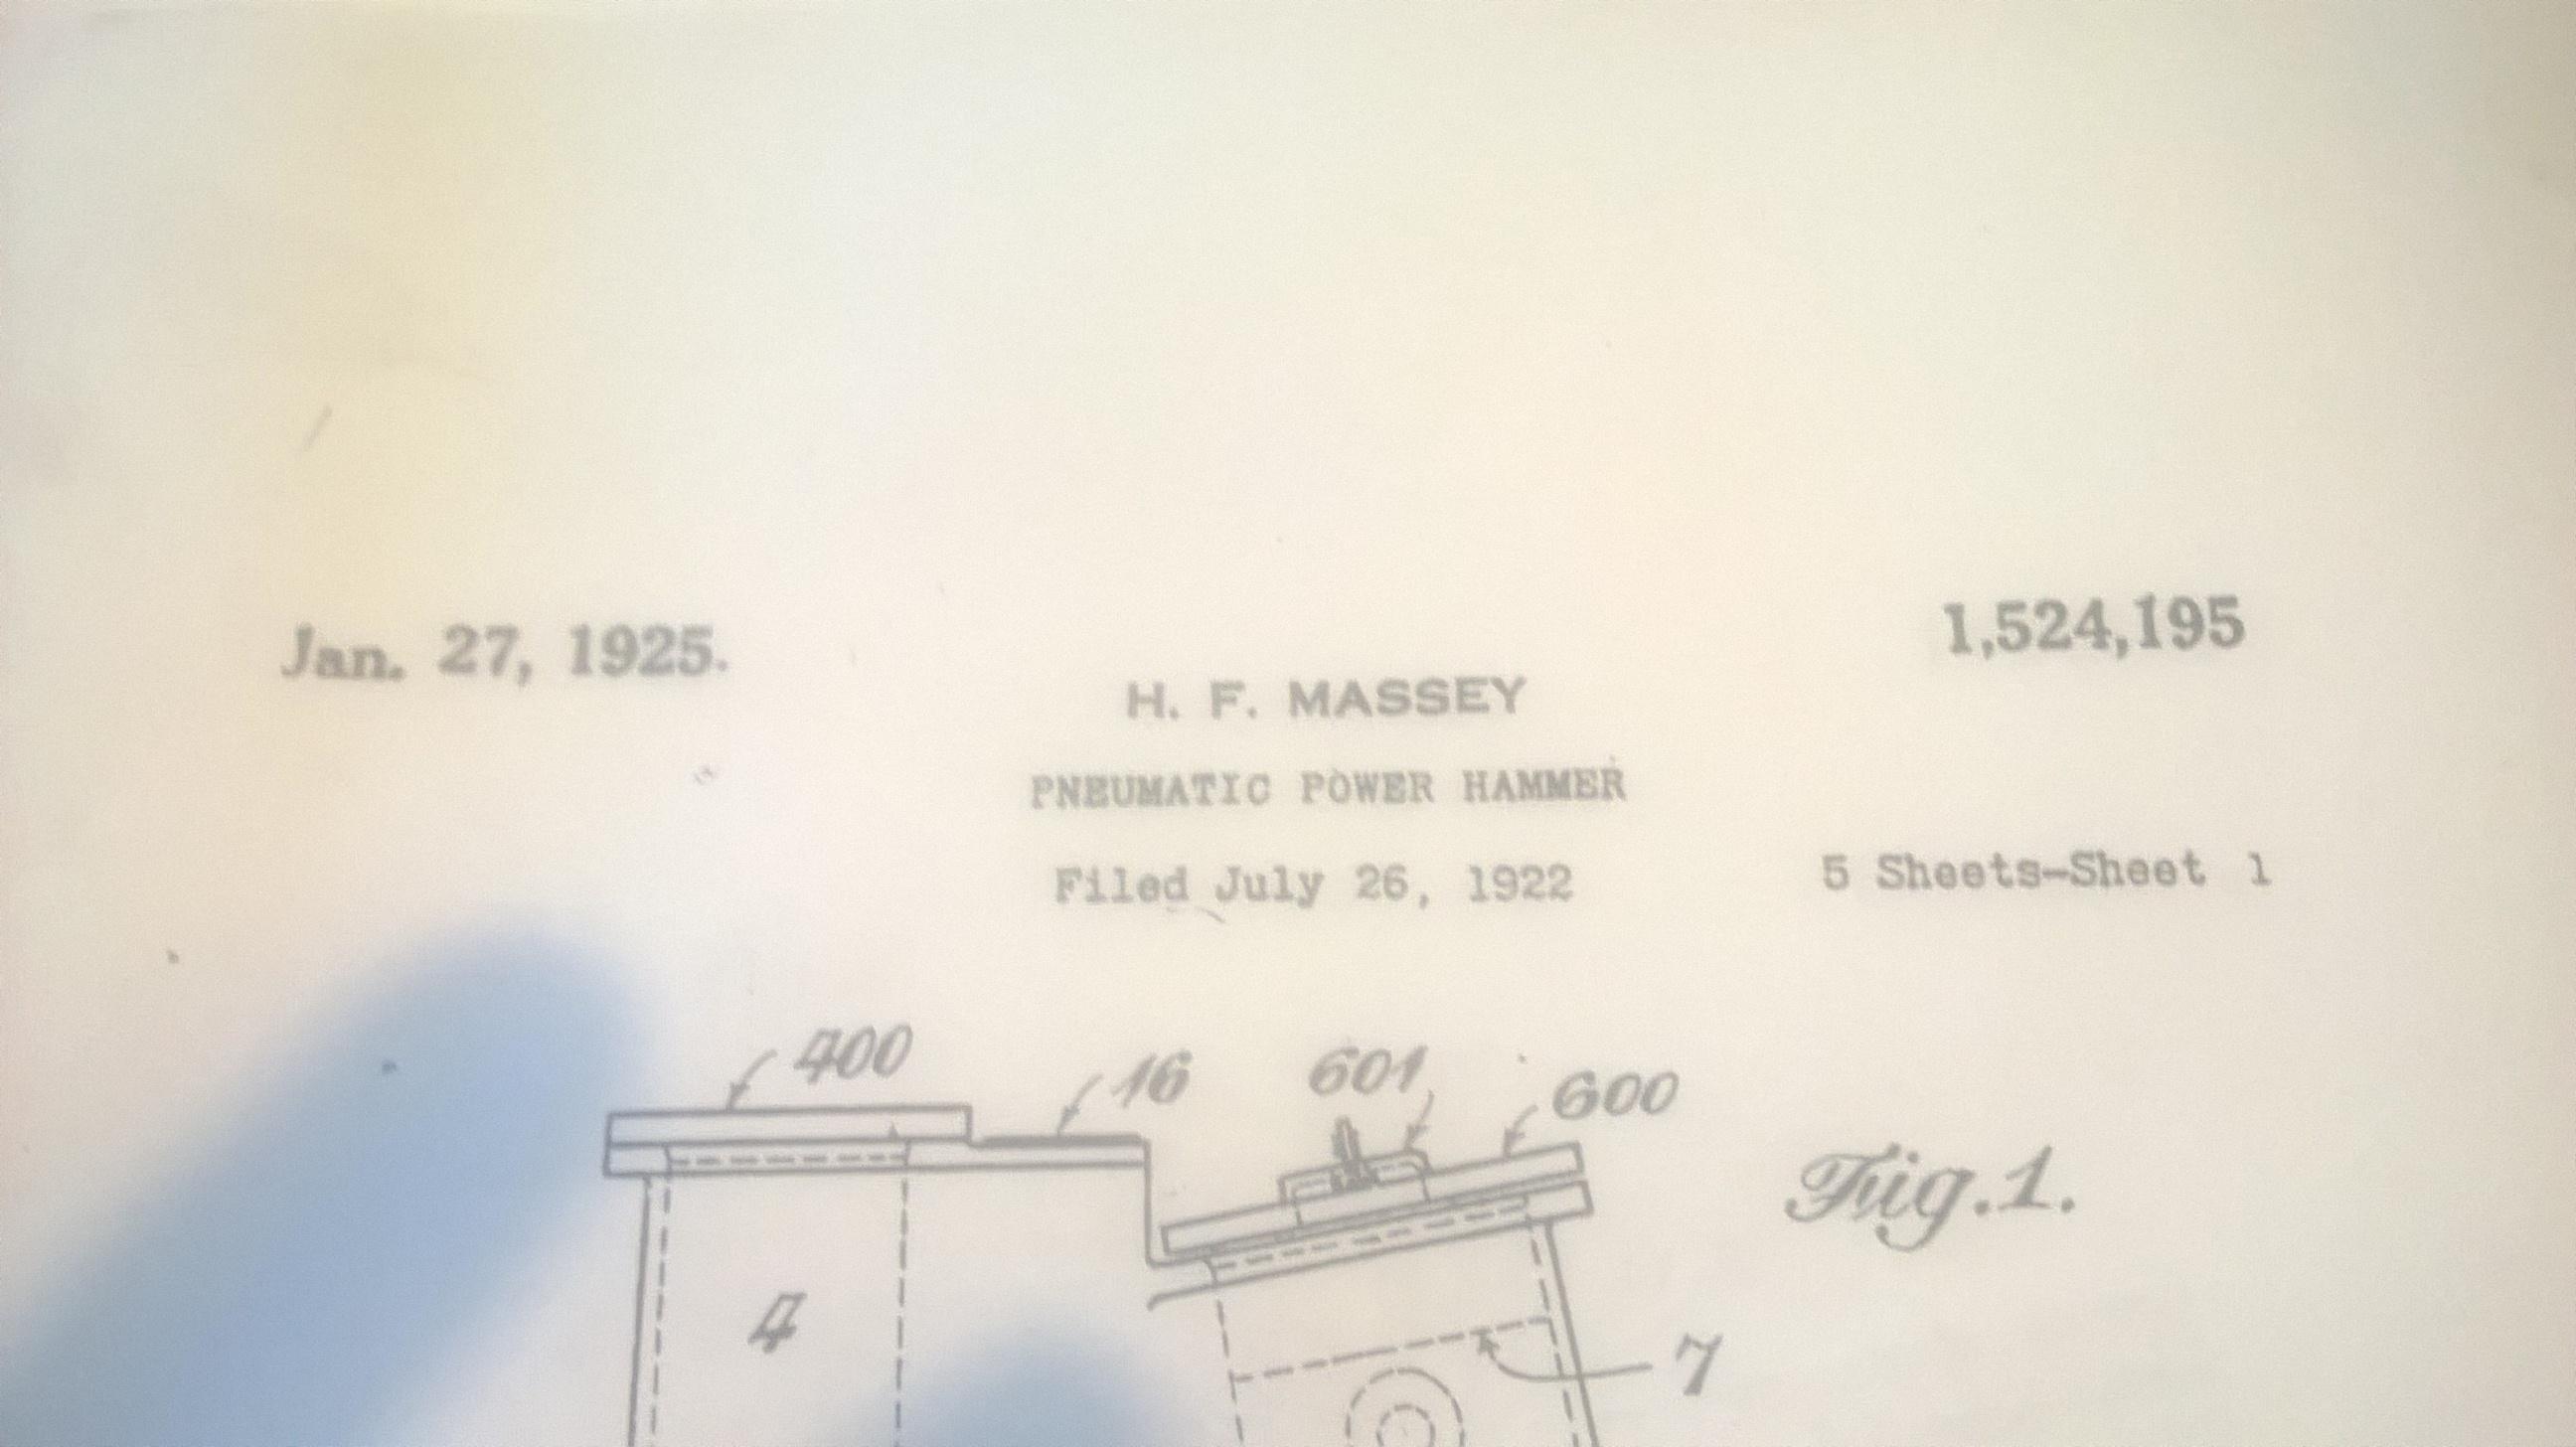
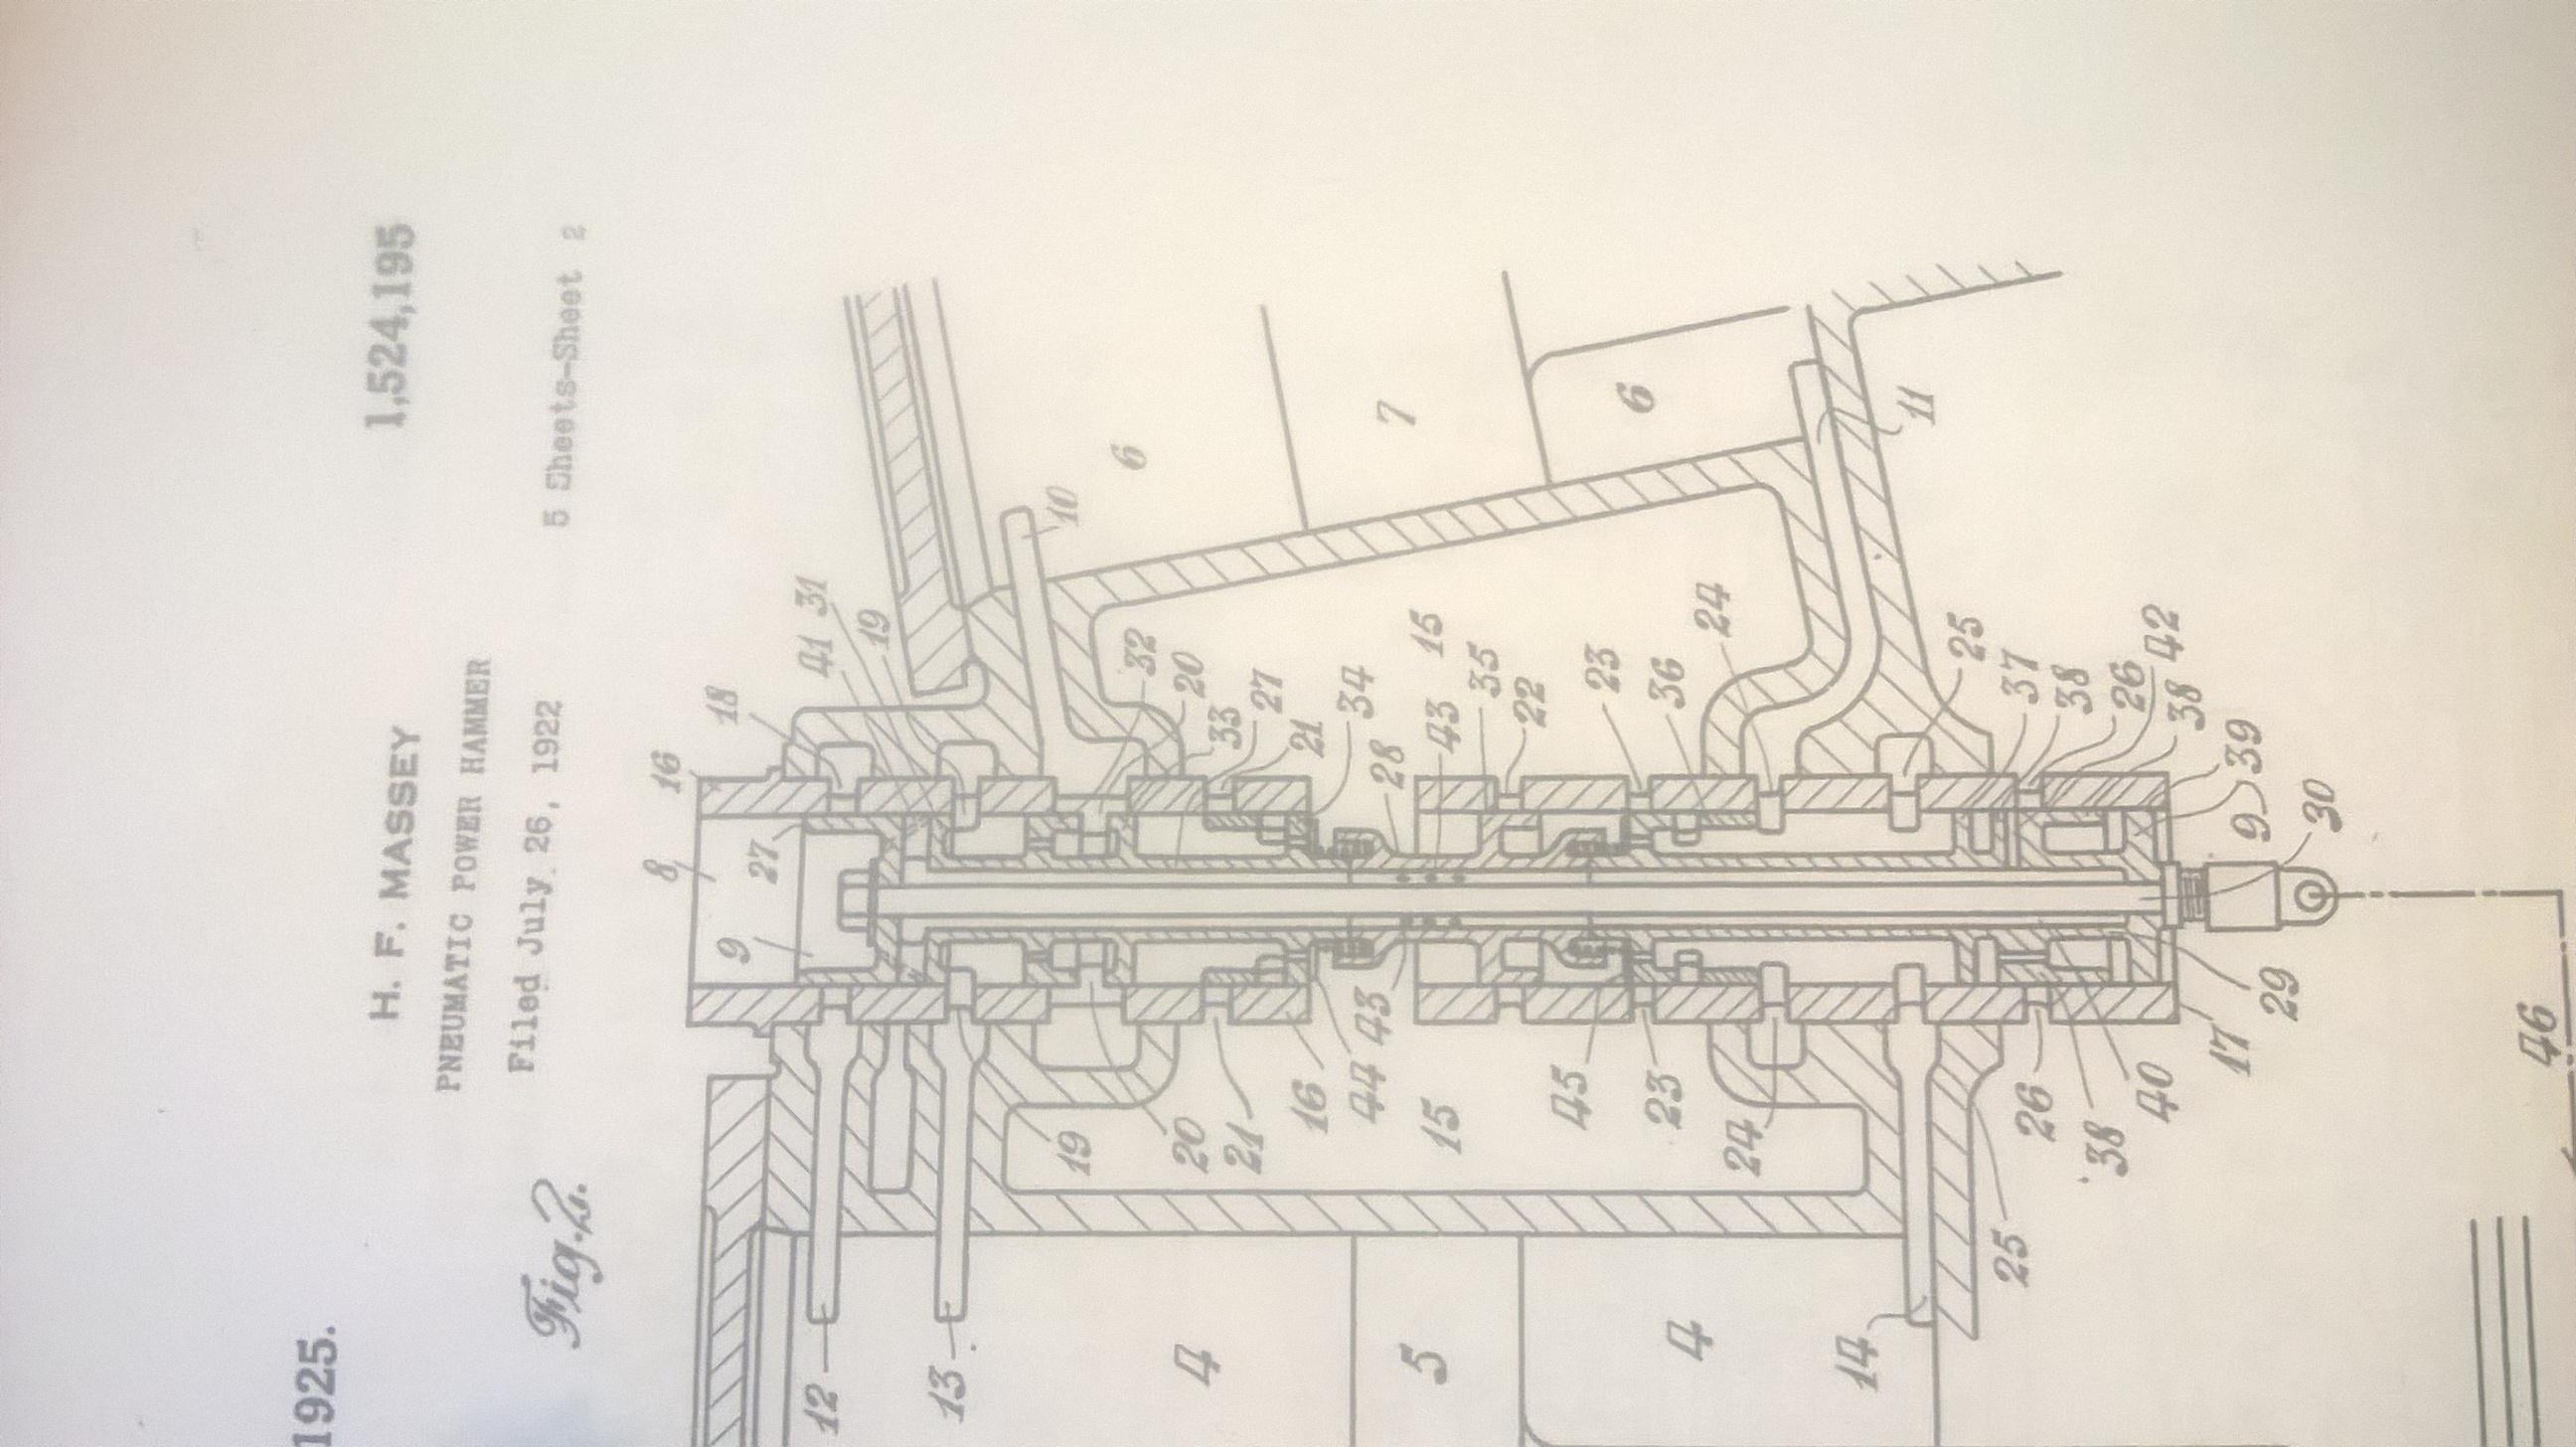
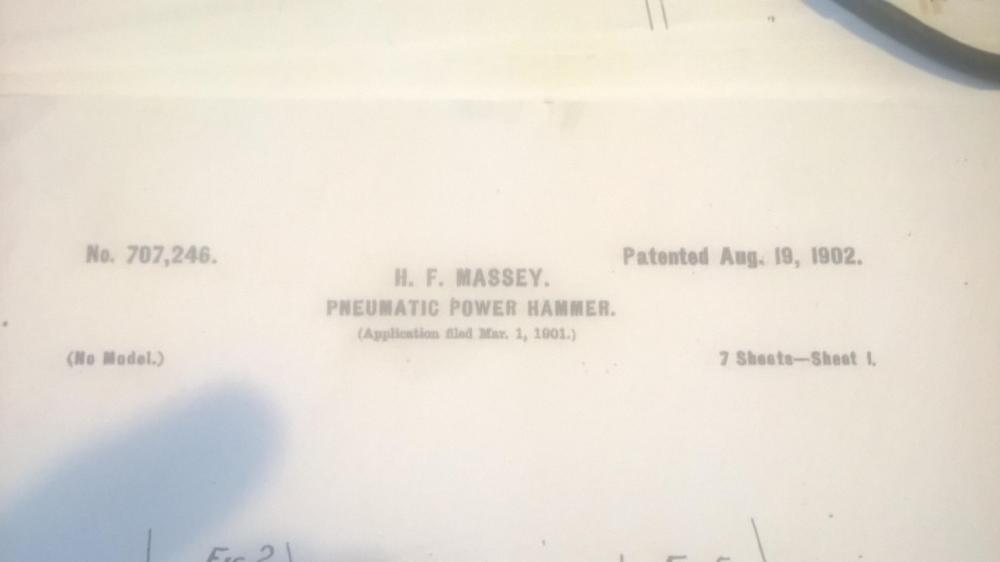
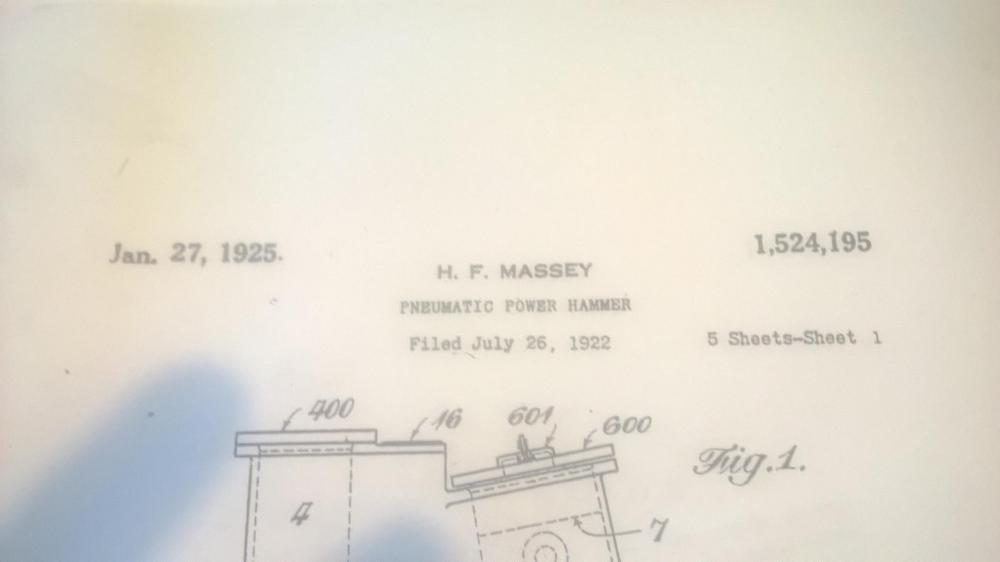
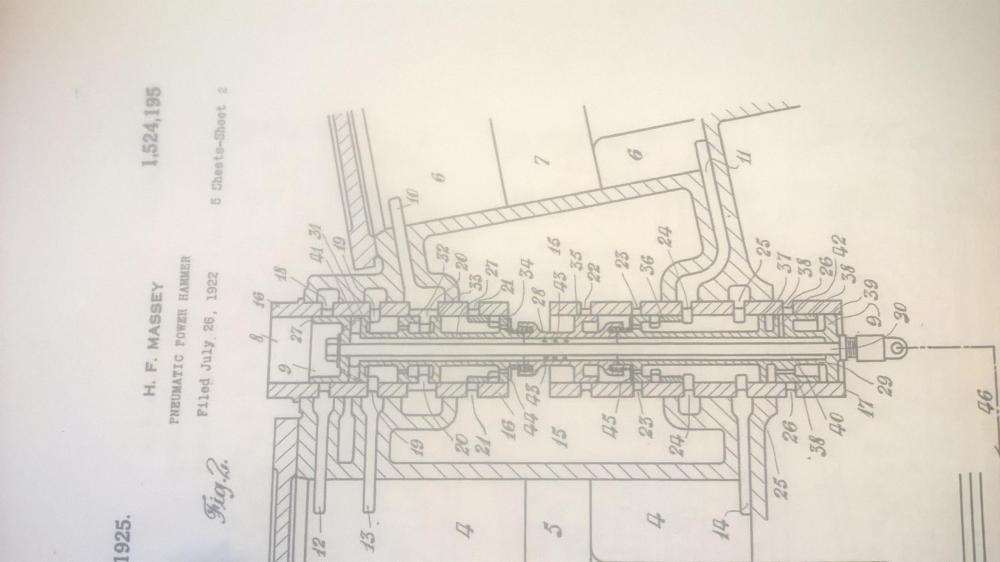
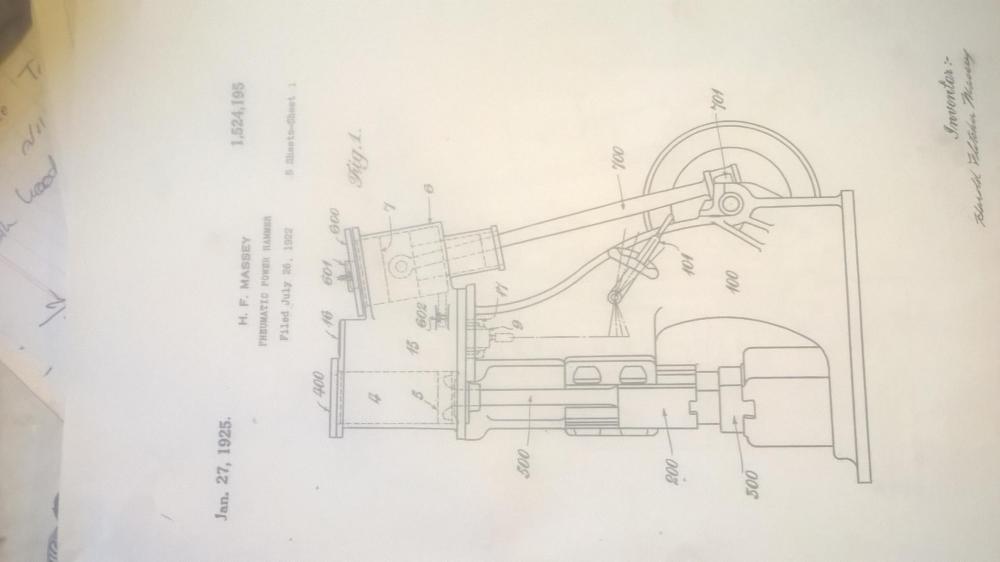
I have just had a rummage in my filing cabnet and it seems that the inslides are made for operations that need more guidence and they even offered hammers with over length guides for use when forging balls. I would imagine that using tappered faces attached to the tupp or anvil face would put a heavy tipping or turning action that may be controlled better by the slides. Maybe someone who knows more than me guessing might shed some light. oh and that hammer in the picture seems to have the much earlier model control valving which i think was a type of rotatary valve where one like mine has a large spool type. I have just added some pictures that I found from the patent office showing the different types of valve layouts, The documents should be able to be found as i have got pics of the patent numbers though the lense of my phone camera is not good as its all scratched and its all wrtten by lawers explaining how it works and you will need cafeen intraveinously to not fall asleep reading it Enjoy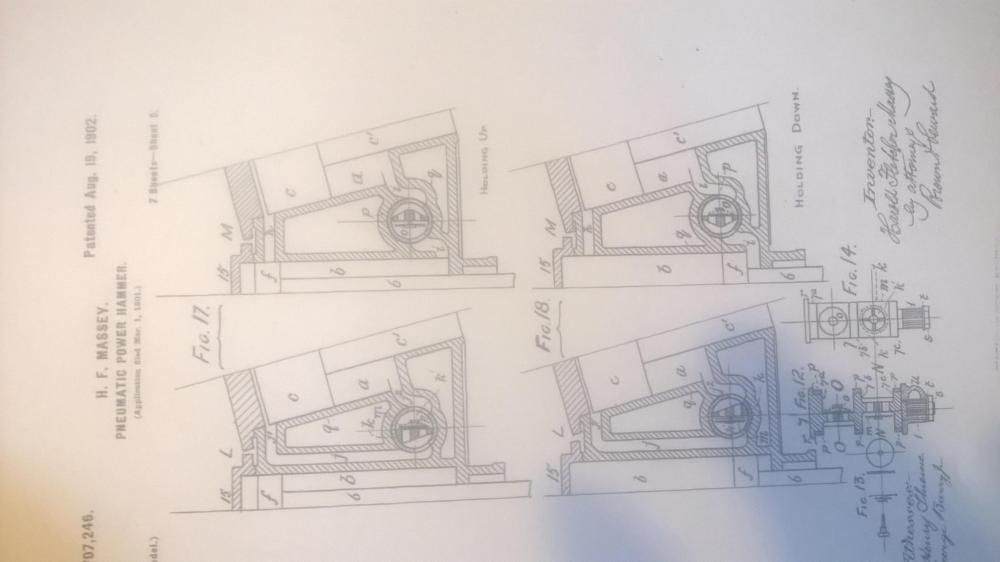

-
2 CWT Massey power hammer foundations started
BeaverNZ replied to BeaverNZ's topic in Power Hammers, Treadle Hammers, Olivers
Hi yes I will undertake to send you the plans 550 lb is 250 ish Kg which is about 2 1/2 times bigger than mine so I would guess thats a 5 CWT massey. The cylinder type rams I am guessing would be a clear space hammer and apparently they hit harder for the same tupp weight than an in slides but i have no experiance with them Give me a few days to send the plans Cheers Beaver PS if you are looking at another hammer, My hammer complete with anvil and nothing else was 3800 Kg so keep that in mind for transport -
2 CWT Massey power hammer foundations started
BeaverNZ replied to BeaverNZ's topic in Power Hammers, Treadle Hammers, Olivers
Hey there Peter hey no worries if you want to have a look or have a go with it, just PM me and we will go from there. When I saw Omakau in your title I thought Gee that looks like a NZ place name and it is Churr Beaver -
I have used Bees wax floor polish on my anvil and havent retouched it in 3-4 years and it gets lots of condensation on it during the winter when i have the heater going in the workshop and still no surface rust
-
Type of steel for geologist tools (hammer and chisel)
BeaverNZ replied to Chrigneous's topic in Hand Hammers
While I dont know what type of steel Jack hammer bits are made from they are easy to get from hire places here they hold up well from teir intended use, i have been told by others on this site that they are often just 1040ish steel though I have seen in several advisory web sites about possible scrap steel types they may be S7 I have quite a few and have forged several into blades successfully so who knows -
2 CWT Massey power hammer foundations started
BeaverNZ replied to BeaverNZ's topic in Power Hammers, Treadle Hammers, Olivers
The anvil has a materail that looks like Teco mat under it, I didnt supply this as it was already on the underside and I just removed it carefully cleaned the surfaces and reglued it back on with Ados contact glue. The ineria block face that it sits on didnt come up as smooth as i had hoped when I cast it because of air bubles getting trapped so I chisselled some away and made sure the block was level and poured self leveling grout into the recess to the required height. I think the wood you are talking about can be used if it is not a two piece or isolated ineria block like what I have, I have some basic plans that I was sent by Anvil antics and he got them from Alan Evans I can copy those for you if you like Cheers Beaver PS I have just had a look at the archive that you have put up Jarntagforge Wow 716 pages I have saved myself a copy to puruse at my leisure -
Tooling for power hammer to forge a conrod
BeaverNZ replied to BeaverNZ's topic in Power Hammers, Treadle Hammers, Olivers
For the correct grain flow or I believe micro inclustion direction I have a piece of the bar stock of the materail i am using that is 2" or 50mm and I will draw this out and down to size in the long direction of the rod -
I made a set of Wood turning parting tools for my stepson yesterday they could of been finished better but they had to be finished last night. The plain one is made from 1080 crane rail track and is 6mm thick and the birds eye one is crane rail and band saw blade and is 3mm thick


-
The tonage developed by a hyd ram is directly related to piston area and the pressure deleveloped, If you use two 4 inch rams at the same pressure as one then you will double the force developed but you will half the speed they will travel at. For the same tonnage at the same speed with two 4 inch rams you need half the pressure but you need to pump twice as much oil so a larger pump but not nessesarilly bigger motor req and the down side to this can be you need bigger hoses and valves to cope with the incressed flow
-
Tooling for power hammer to forge a conrod
BeaverNZ replied to BeaverNZ's topic in Power Hammers, Treadle Hammers, Olivers
Hi Anvilantics Yes what you described is what I am thinking too, I am going to use the dies as finishing tools an I am going to use EN39B steel for the rods and I have got the forging temp written down somewhere 970 deg C or something. This has been an interesting journey so far and have found out alot of info to do with conrod related things, did you know that the reason most single piece conrods are copper plated? It is used as a masking agent for case hardening to stop the carbon from being absorbed where you dont want surface hardening. This gives a hard bearing surface and tough everywhere else. I had the dies CNC machined locally and I have finished them by hand radiusing some areas and removing the tooling marks. I am really quite excited about this part of the operations hopfully I can get the metal to move under my probably border line too small hammer I can get axcess to a 3 and 500 ton pressbrakes while they are quick for a pressbrake the lack of real speed would pull the heat out of the billet. Have you had some experiance in work like this I am all ears. Cheers Beaver The finished die with the radiuses all done, I am thinking of removing the flashing as it happens as this will use up energy from the hammer for no reason that is what the cutout around the impression is for and I have allowed 3mm clearance for the flashing gap. The small end will have a spigot for me to hold onto the forging as I work it. At the big end I have got a hole to be tapped with a 16mm thread to hold a button to help extrude the metal outwards radially but I will have to experiment with the size required and the materail will be drawn out length wise as well for grain in the req direction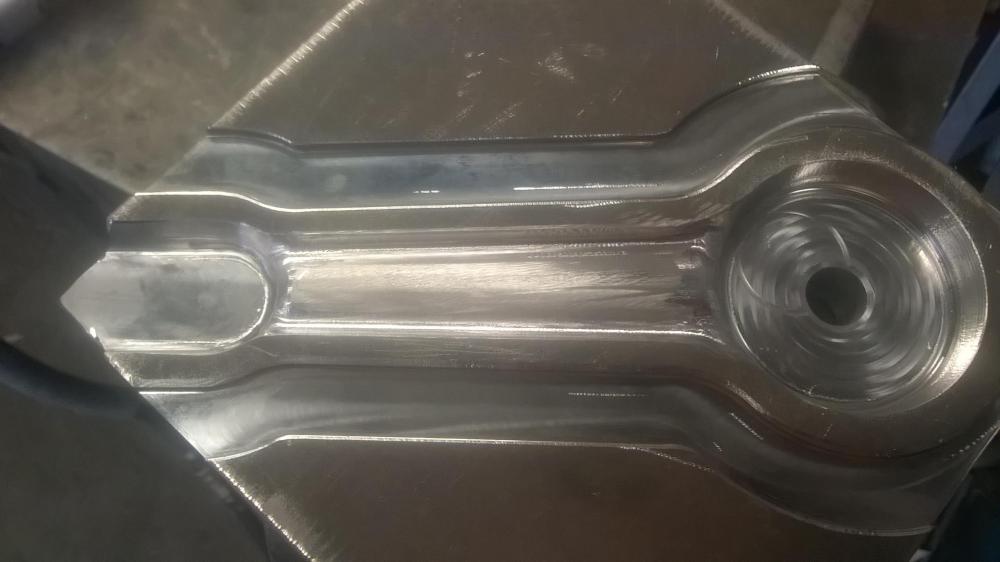
-
Champion No. 0 back to work
BeaverNZ replied to BryanL's topic in Power Hammers, Treadle Hammers, Olivers
If you are going to make your own pulleys the taper is around 1 deg on each side so turn your pulley parallel then turn each side until the cut comes close to the centre leaving a small parallel strip in the middle. Only one of each running pair needs a camber on it, the cambered pulley is not a must have but makes the belt run much better -
Tooling for power hammer to forge a conrod
BeaverNZ replied to BeaverNZ's topic in Power Hammers, Treadle Hammers, Olivers
I have finally got the tooling for forging a conrod for my project motor bike. This has been a very round about journey and during researching this rekindled my interest in knife making and these things are the reason that I aquired my Massey power hammer. There is a lightening storm happening here at the moment and seems to be making internet play up in down loading pictures or the wife is on facebook or both (sigh) but anyway I am copying a conrod of an old KTM I used to have and just changing the centres I am going to use EN39B steel which is a case hardening steel and high tensile. Very excited about this part of the project of the much modified engine and just maybe in the future may turn into something I can sell -
Mosquitos must be in the same family as politians exept they talk through the same area as well
-
I have been talking to one of the gas suppliers and he is looking into a vaporizer for me, if i have more than 100Kg onsite i have have a permit at a couple of hundred dollars a year, between bottle rentals and permits this must be a racket run my some under world outfit. The bottle rental thing is something that if i think about it too much i start talking through clenched teeth and muttering swear words that cant be repeated in gentle company like this.
-
Well I went and got a cup of tea and some buscuits and read the pinned post and I still havent got an answer to my question as I really need to have my bottles outside if I have more than one, I wish there was the big propane tanks here like I saw in Merica while I was there years ago but they dont seem to be available here and I dont wish to have a giant bank of bottles if I can avoid it. i have done most of the heating tricks that were talked about well the less dodgy ones. cheers Beaver
-
Yes there is sorry though i did the google search using Iforgeiron etc, Guess I didnt see the obivous and I put it down to industrail blindness thats my story and im sticking to it LOL Cheers
-
I have been using one of my LPG burners over the last few days to reduce the scale forming on blanks for rivets and my 45 Kg LPG bottle pressure kept on taking a dive, Without going to the trouble of running water over the bottle to try to maintain temp how do others deal with this problem. In the future I wish to run two of these burners (3/4 inch body) which are not big off two bottles in tandem which I though should cover the req drawoff, Has anyone tried a Vaporizer that you supply with liquid gas from the bottle which would remove the problem. This is done in large instalations but what about smaller scale?
-
I have lots of spring steel around 45mm dia from digger track tensioning springs and have made punches and drifts with it and have found with mine if you just let it air cool is good for punches But I dont know what steel it is but probably 5160ish
-
Just my 2cents worth but why not keep it simple and use dirt or better still clay? it wouldnt blow around and when dry and fired it wouldnt be dug into as easily and its dirt cheap as well Just like the JABOD
-
I have given them both away to a couple of guys who have done a great deal of vollentary work with cubs and scouts just as a random thankyou for your work
-
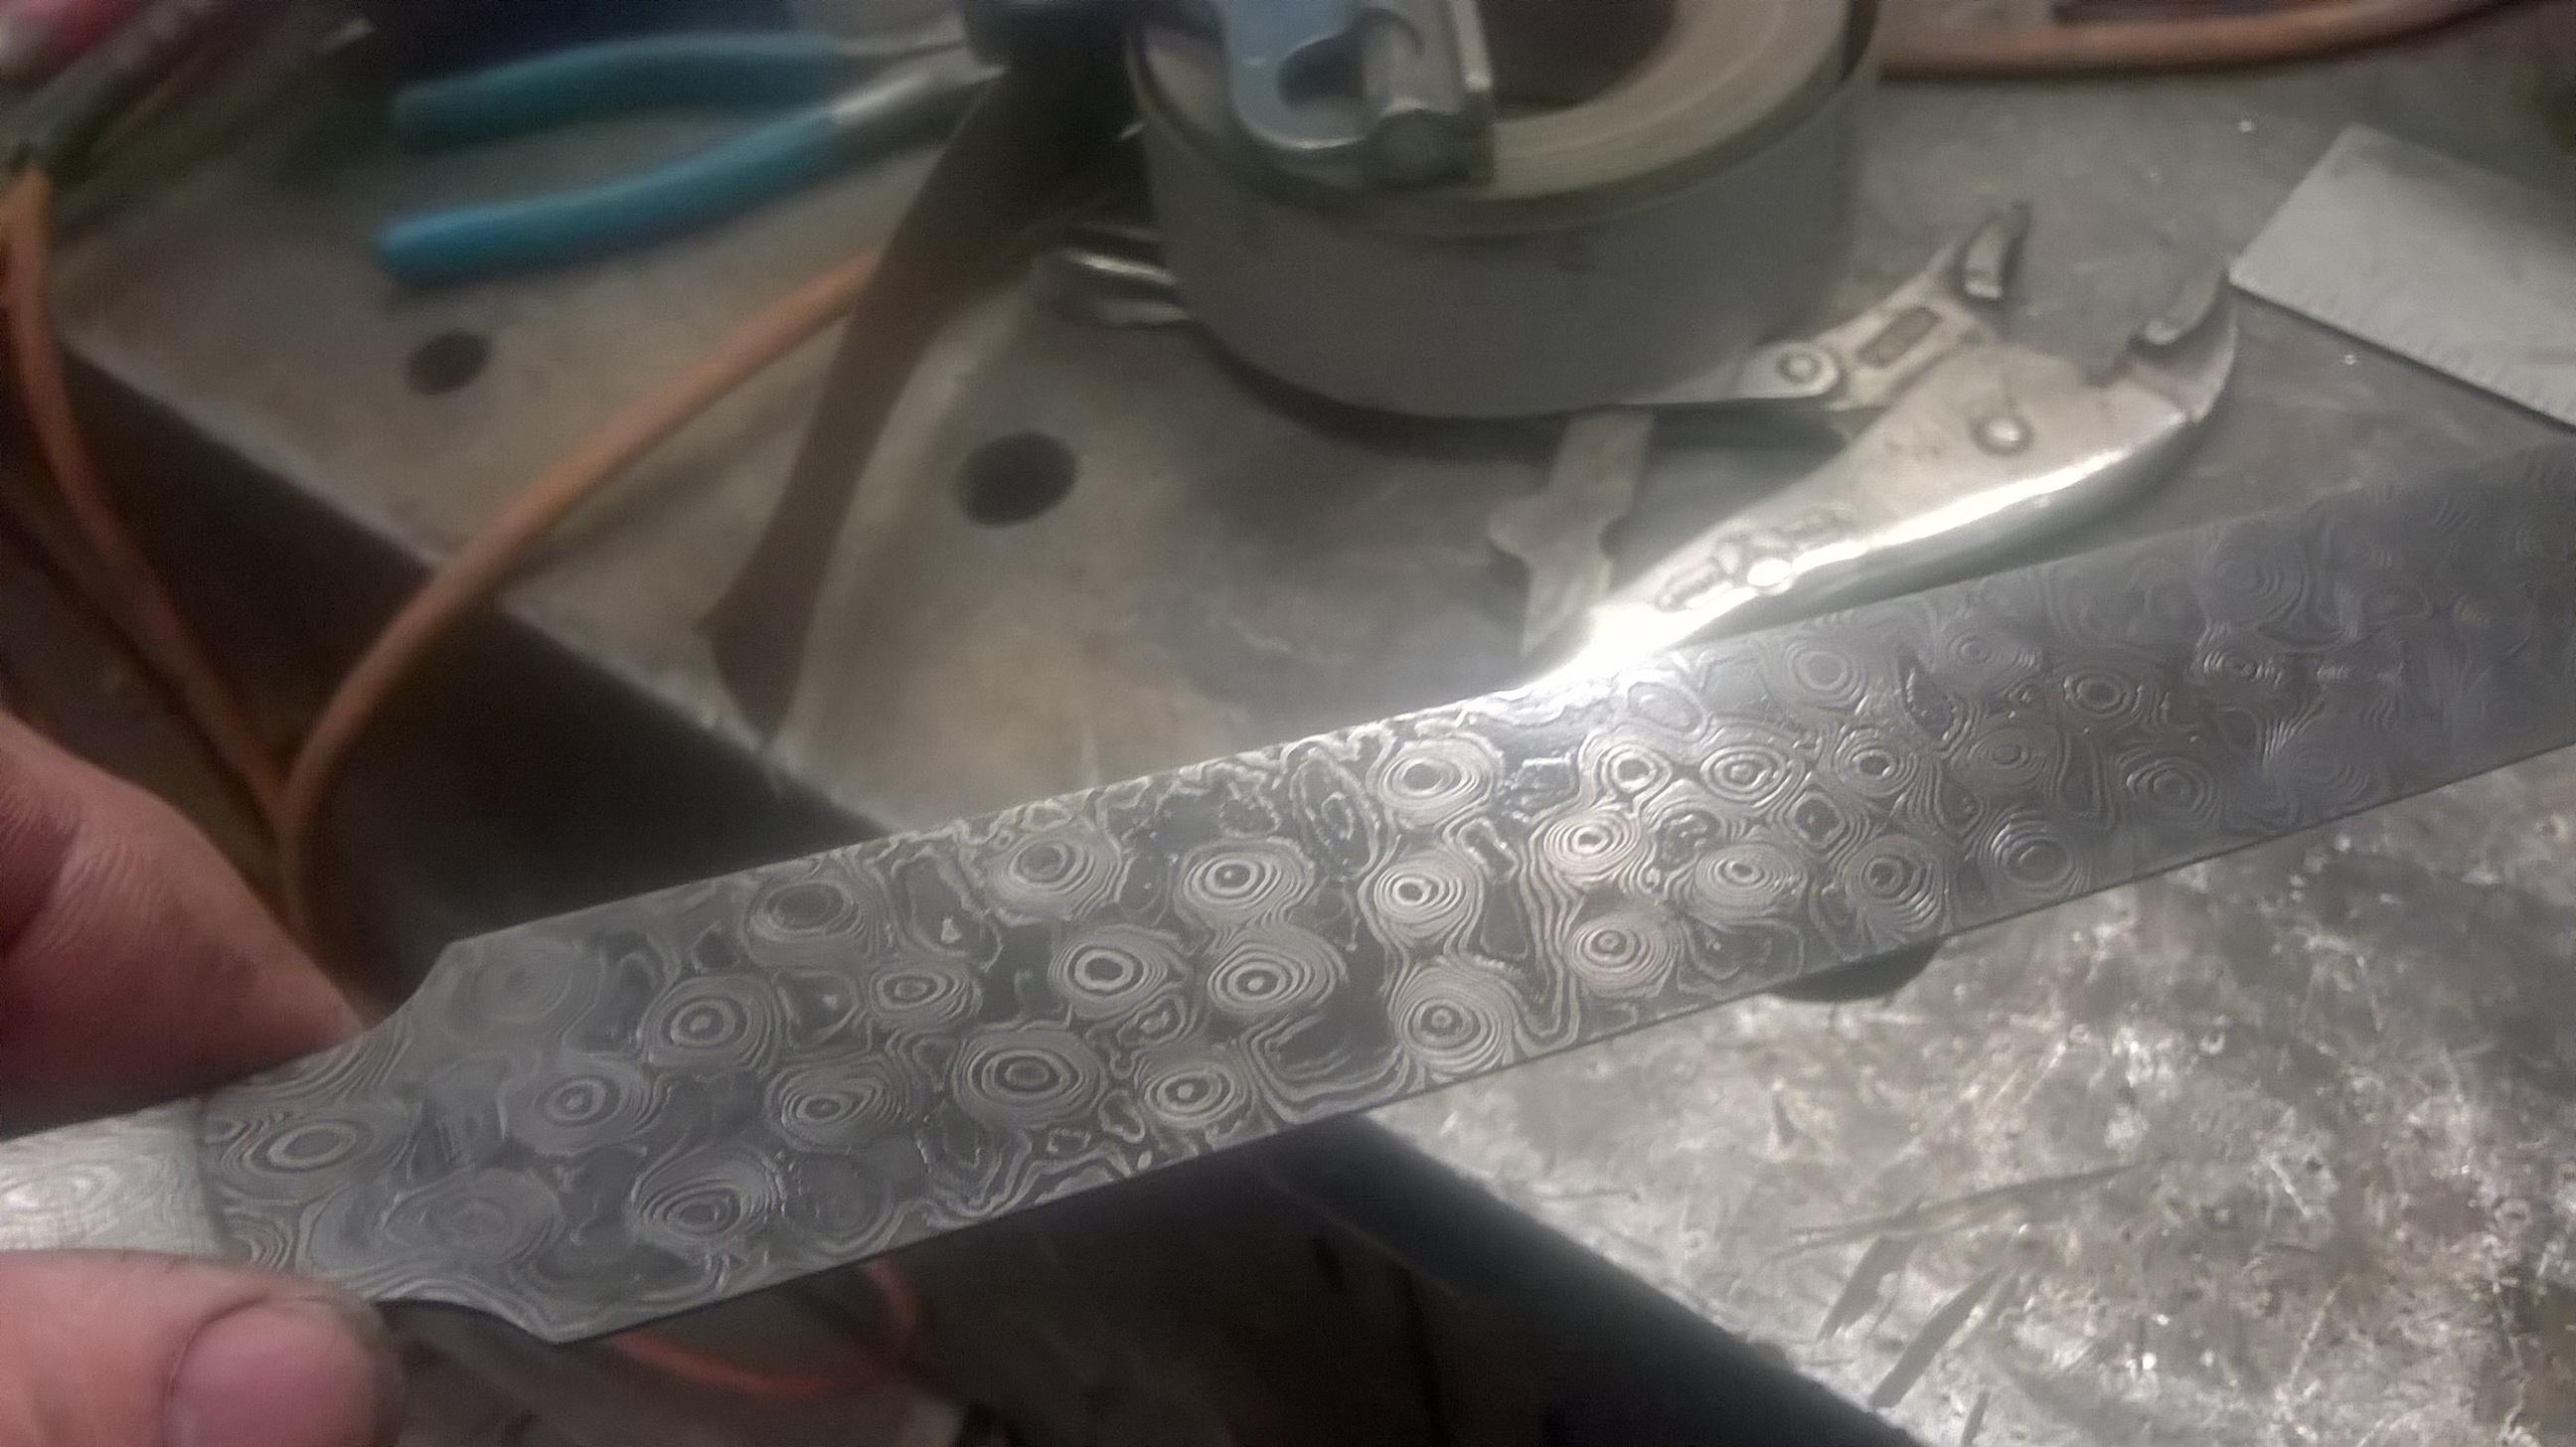
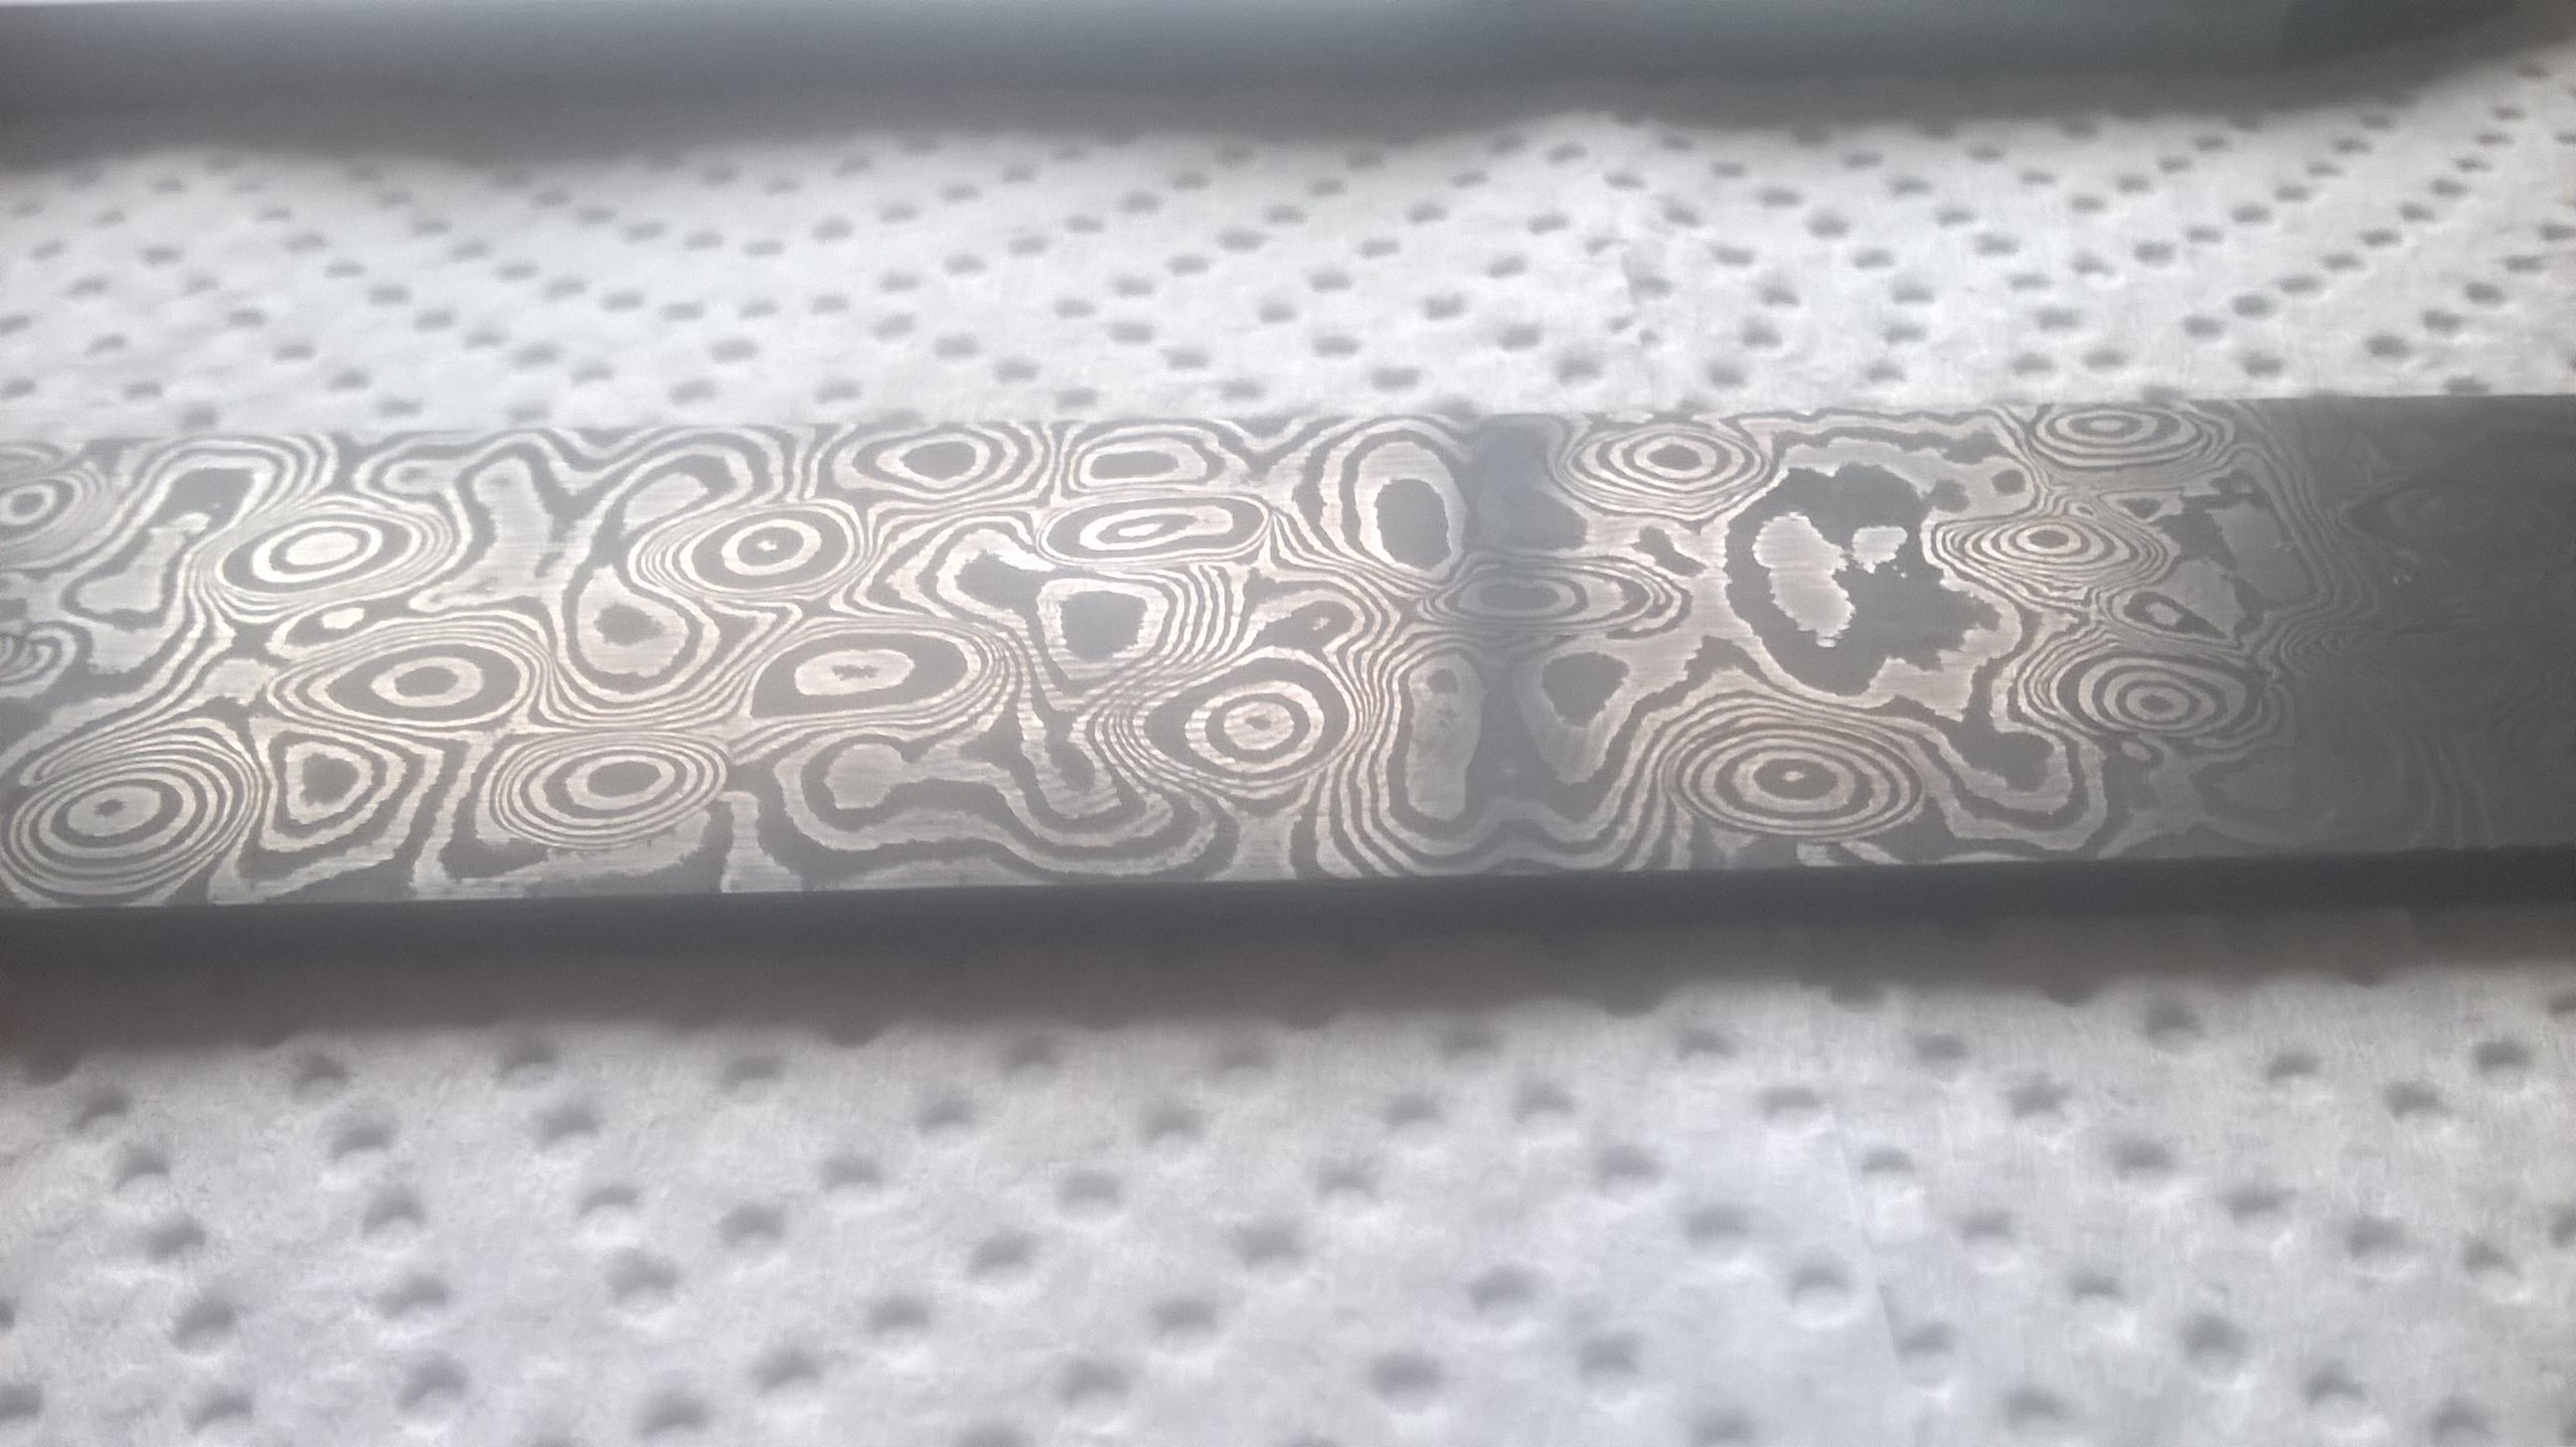
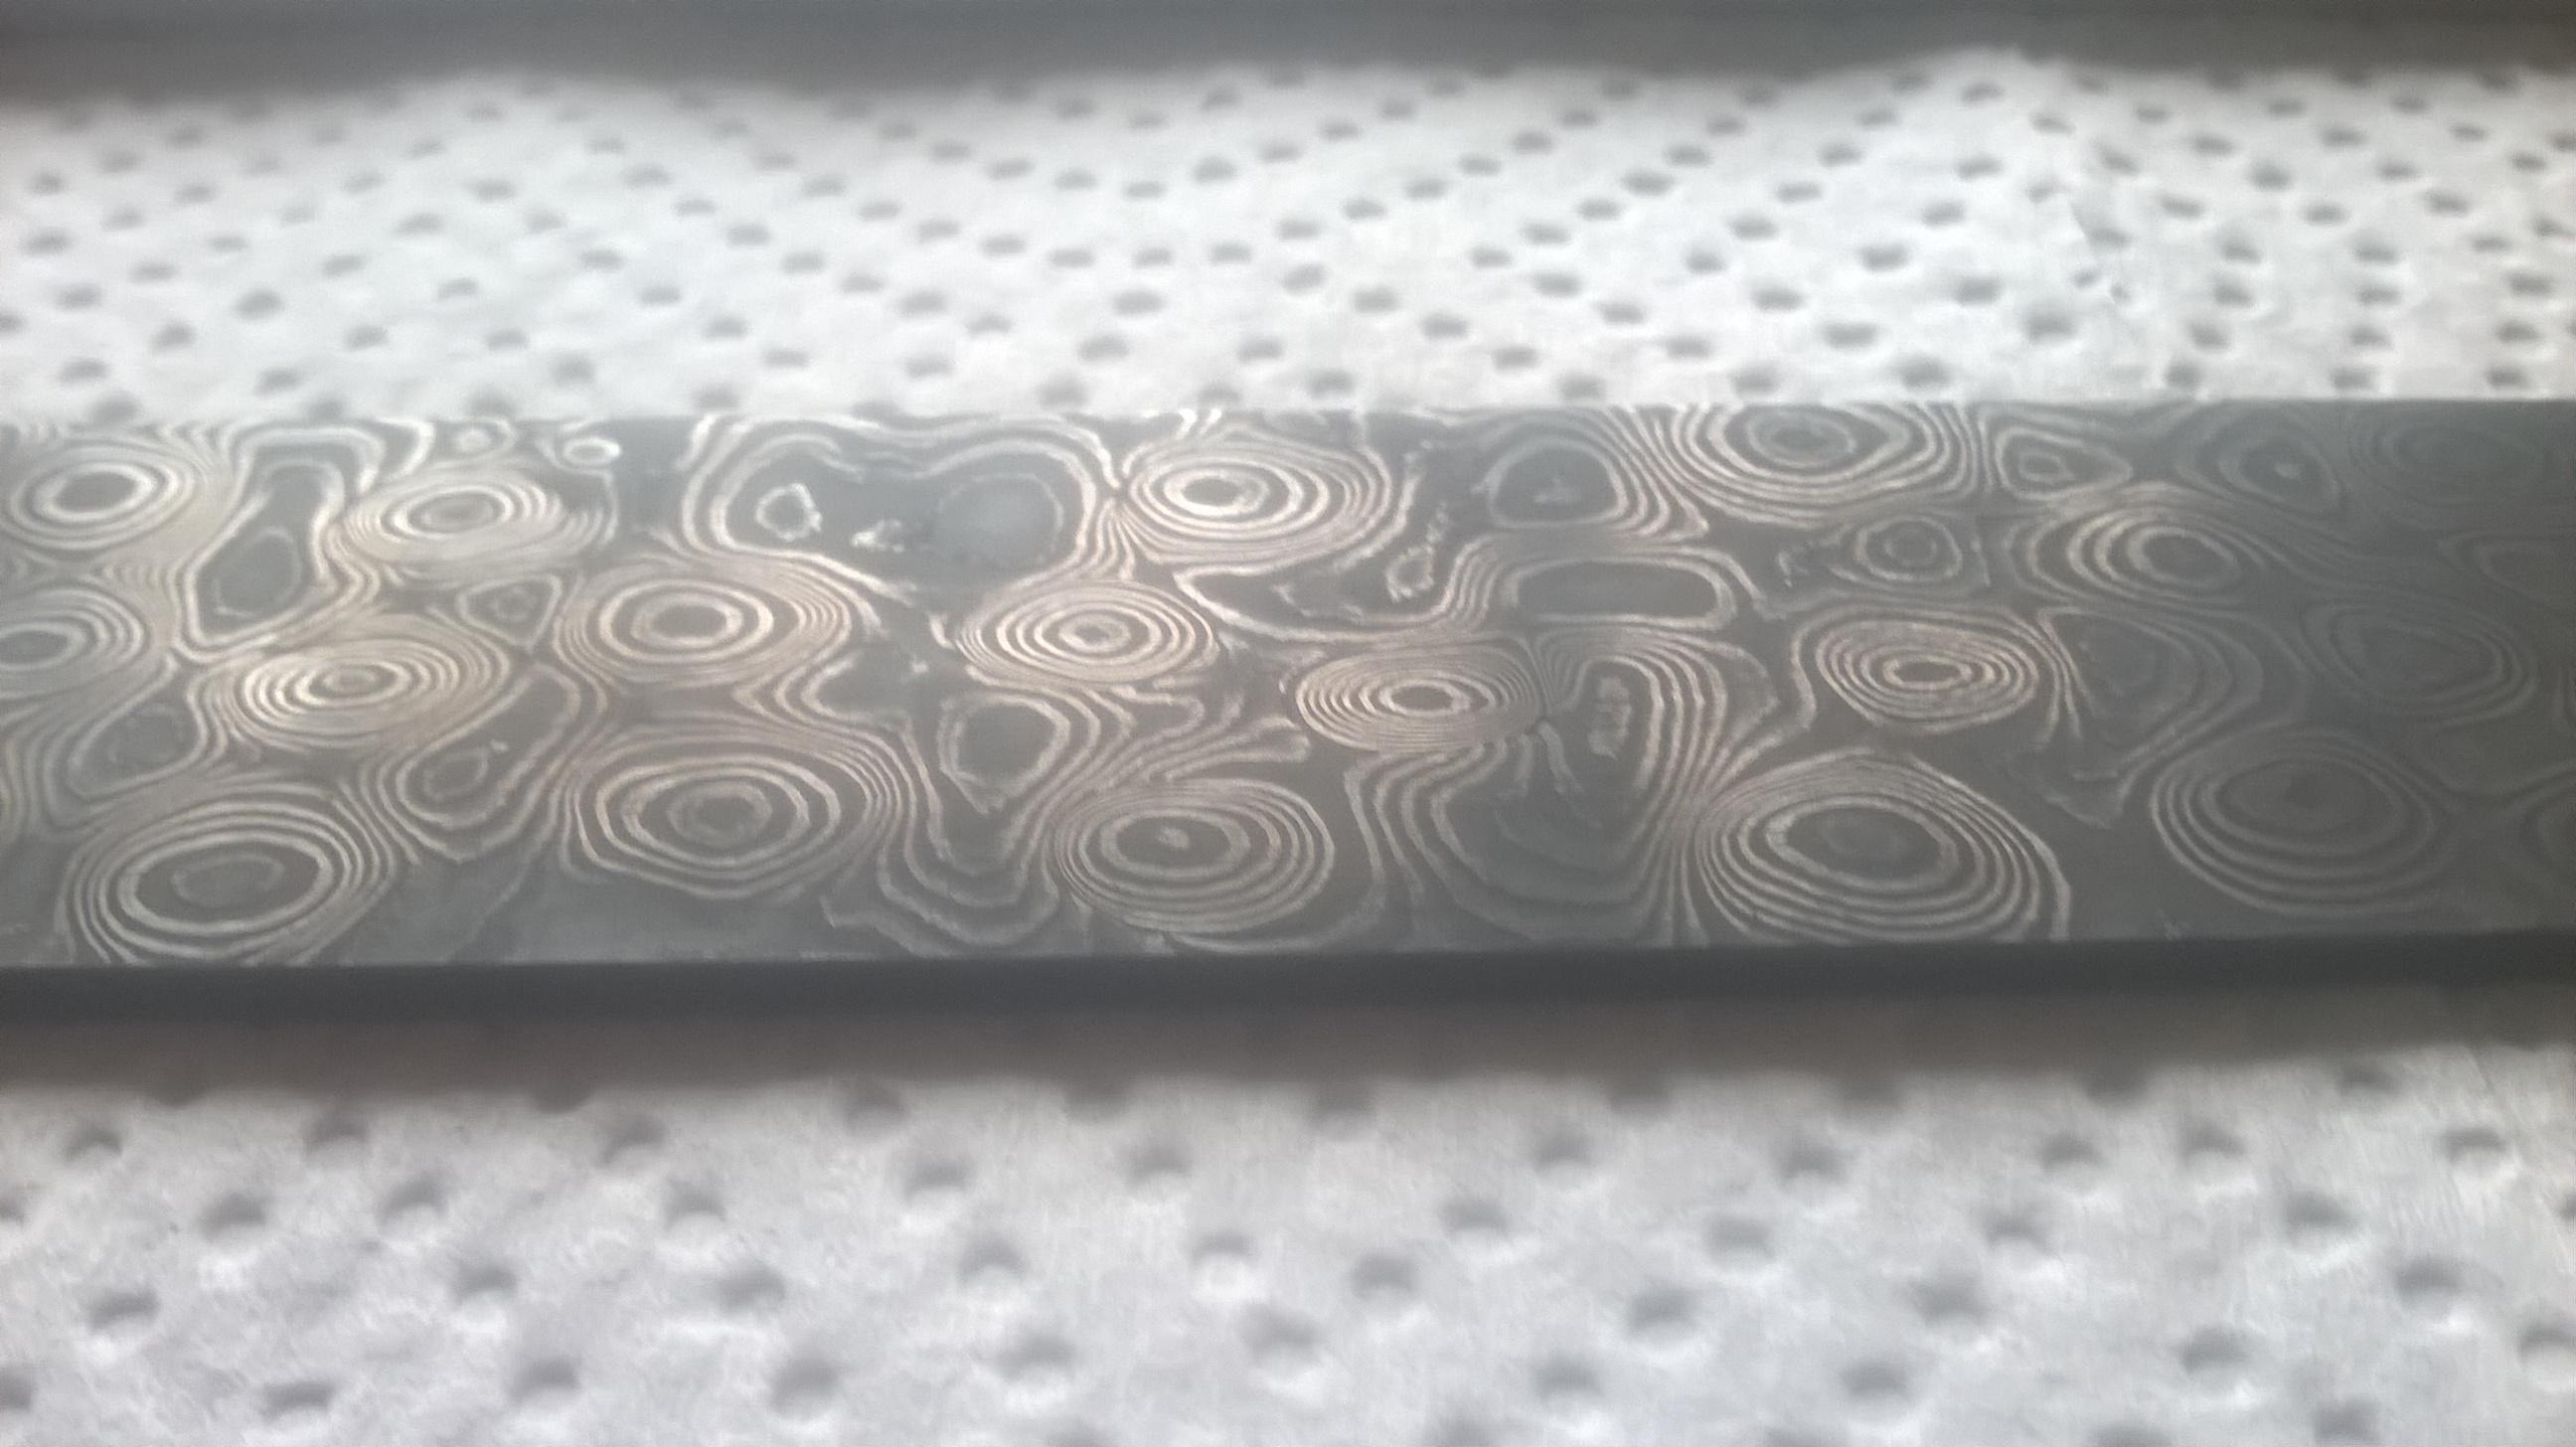
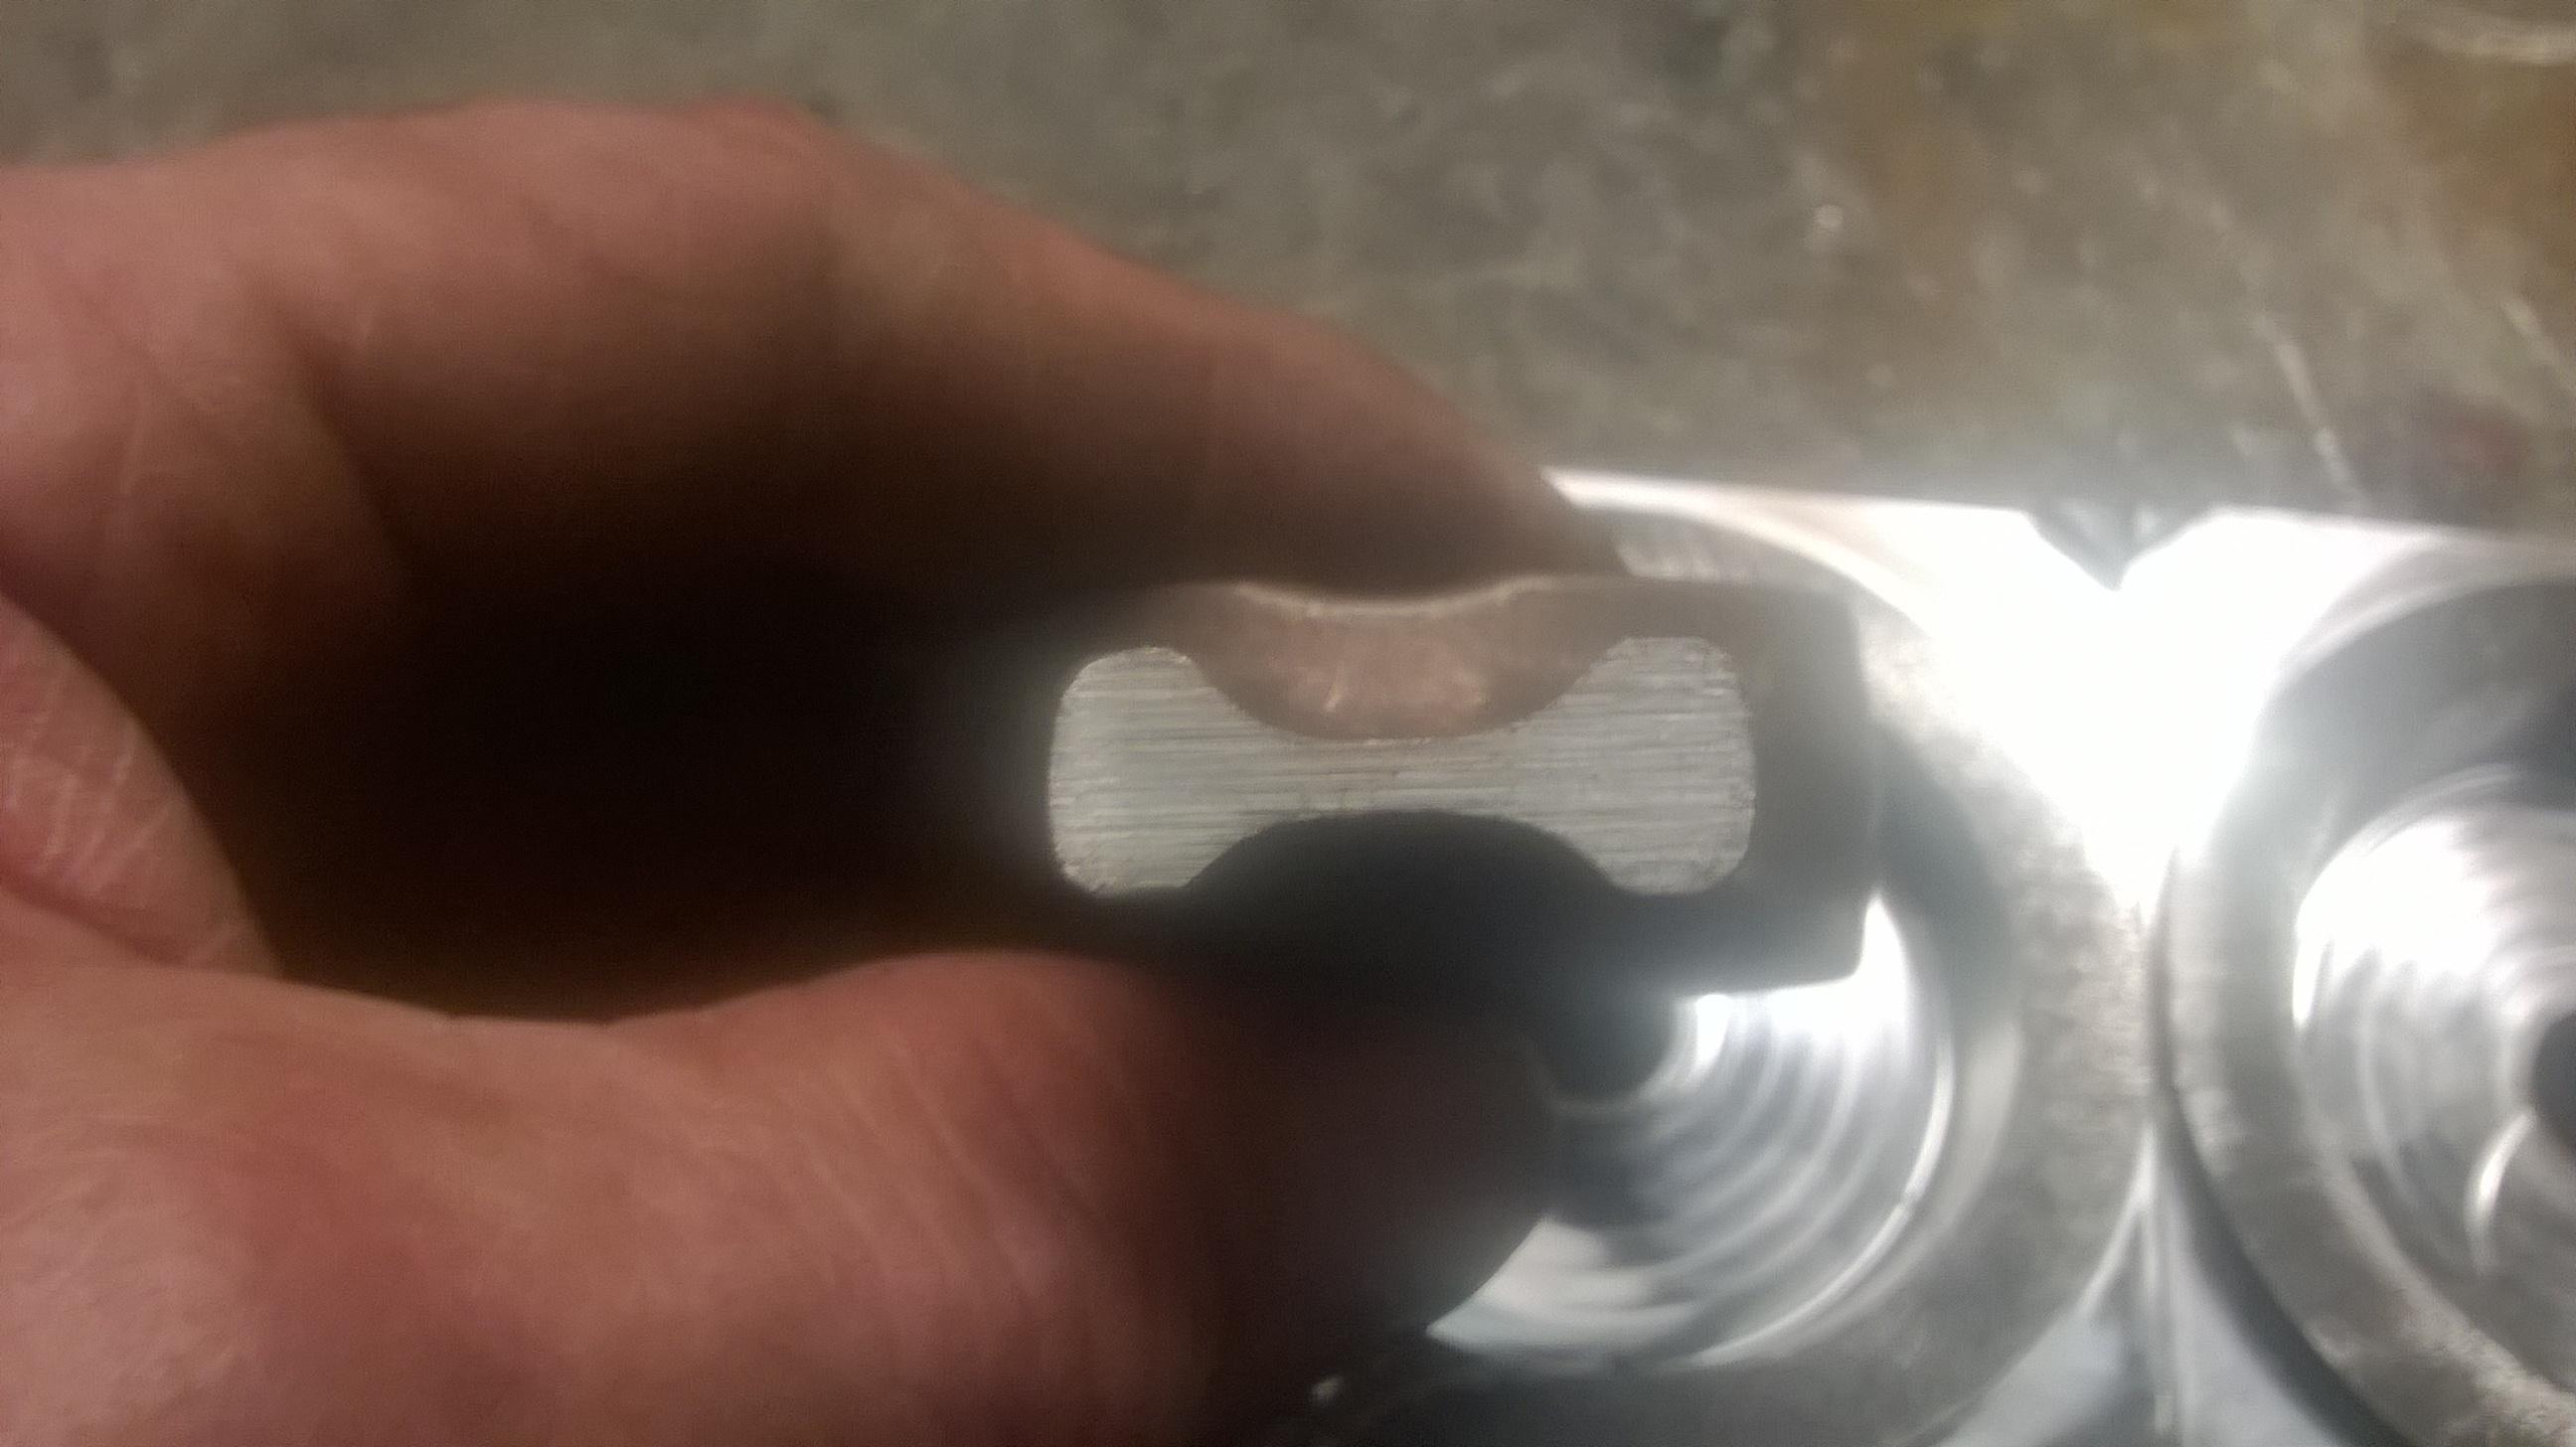
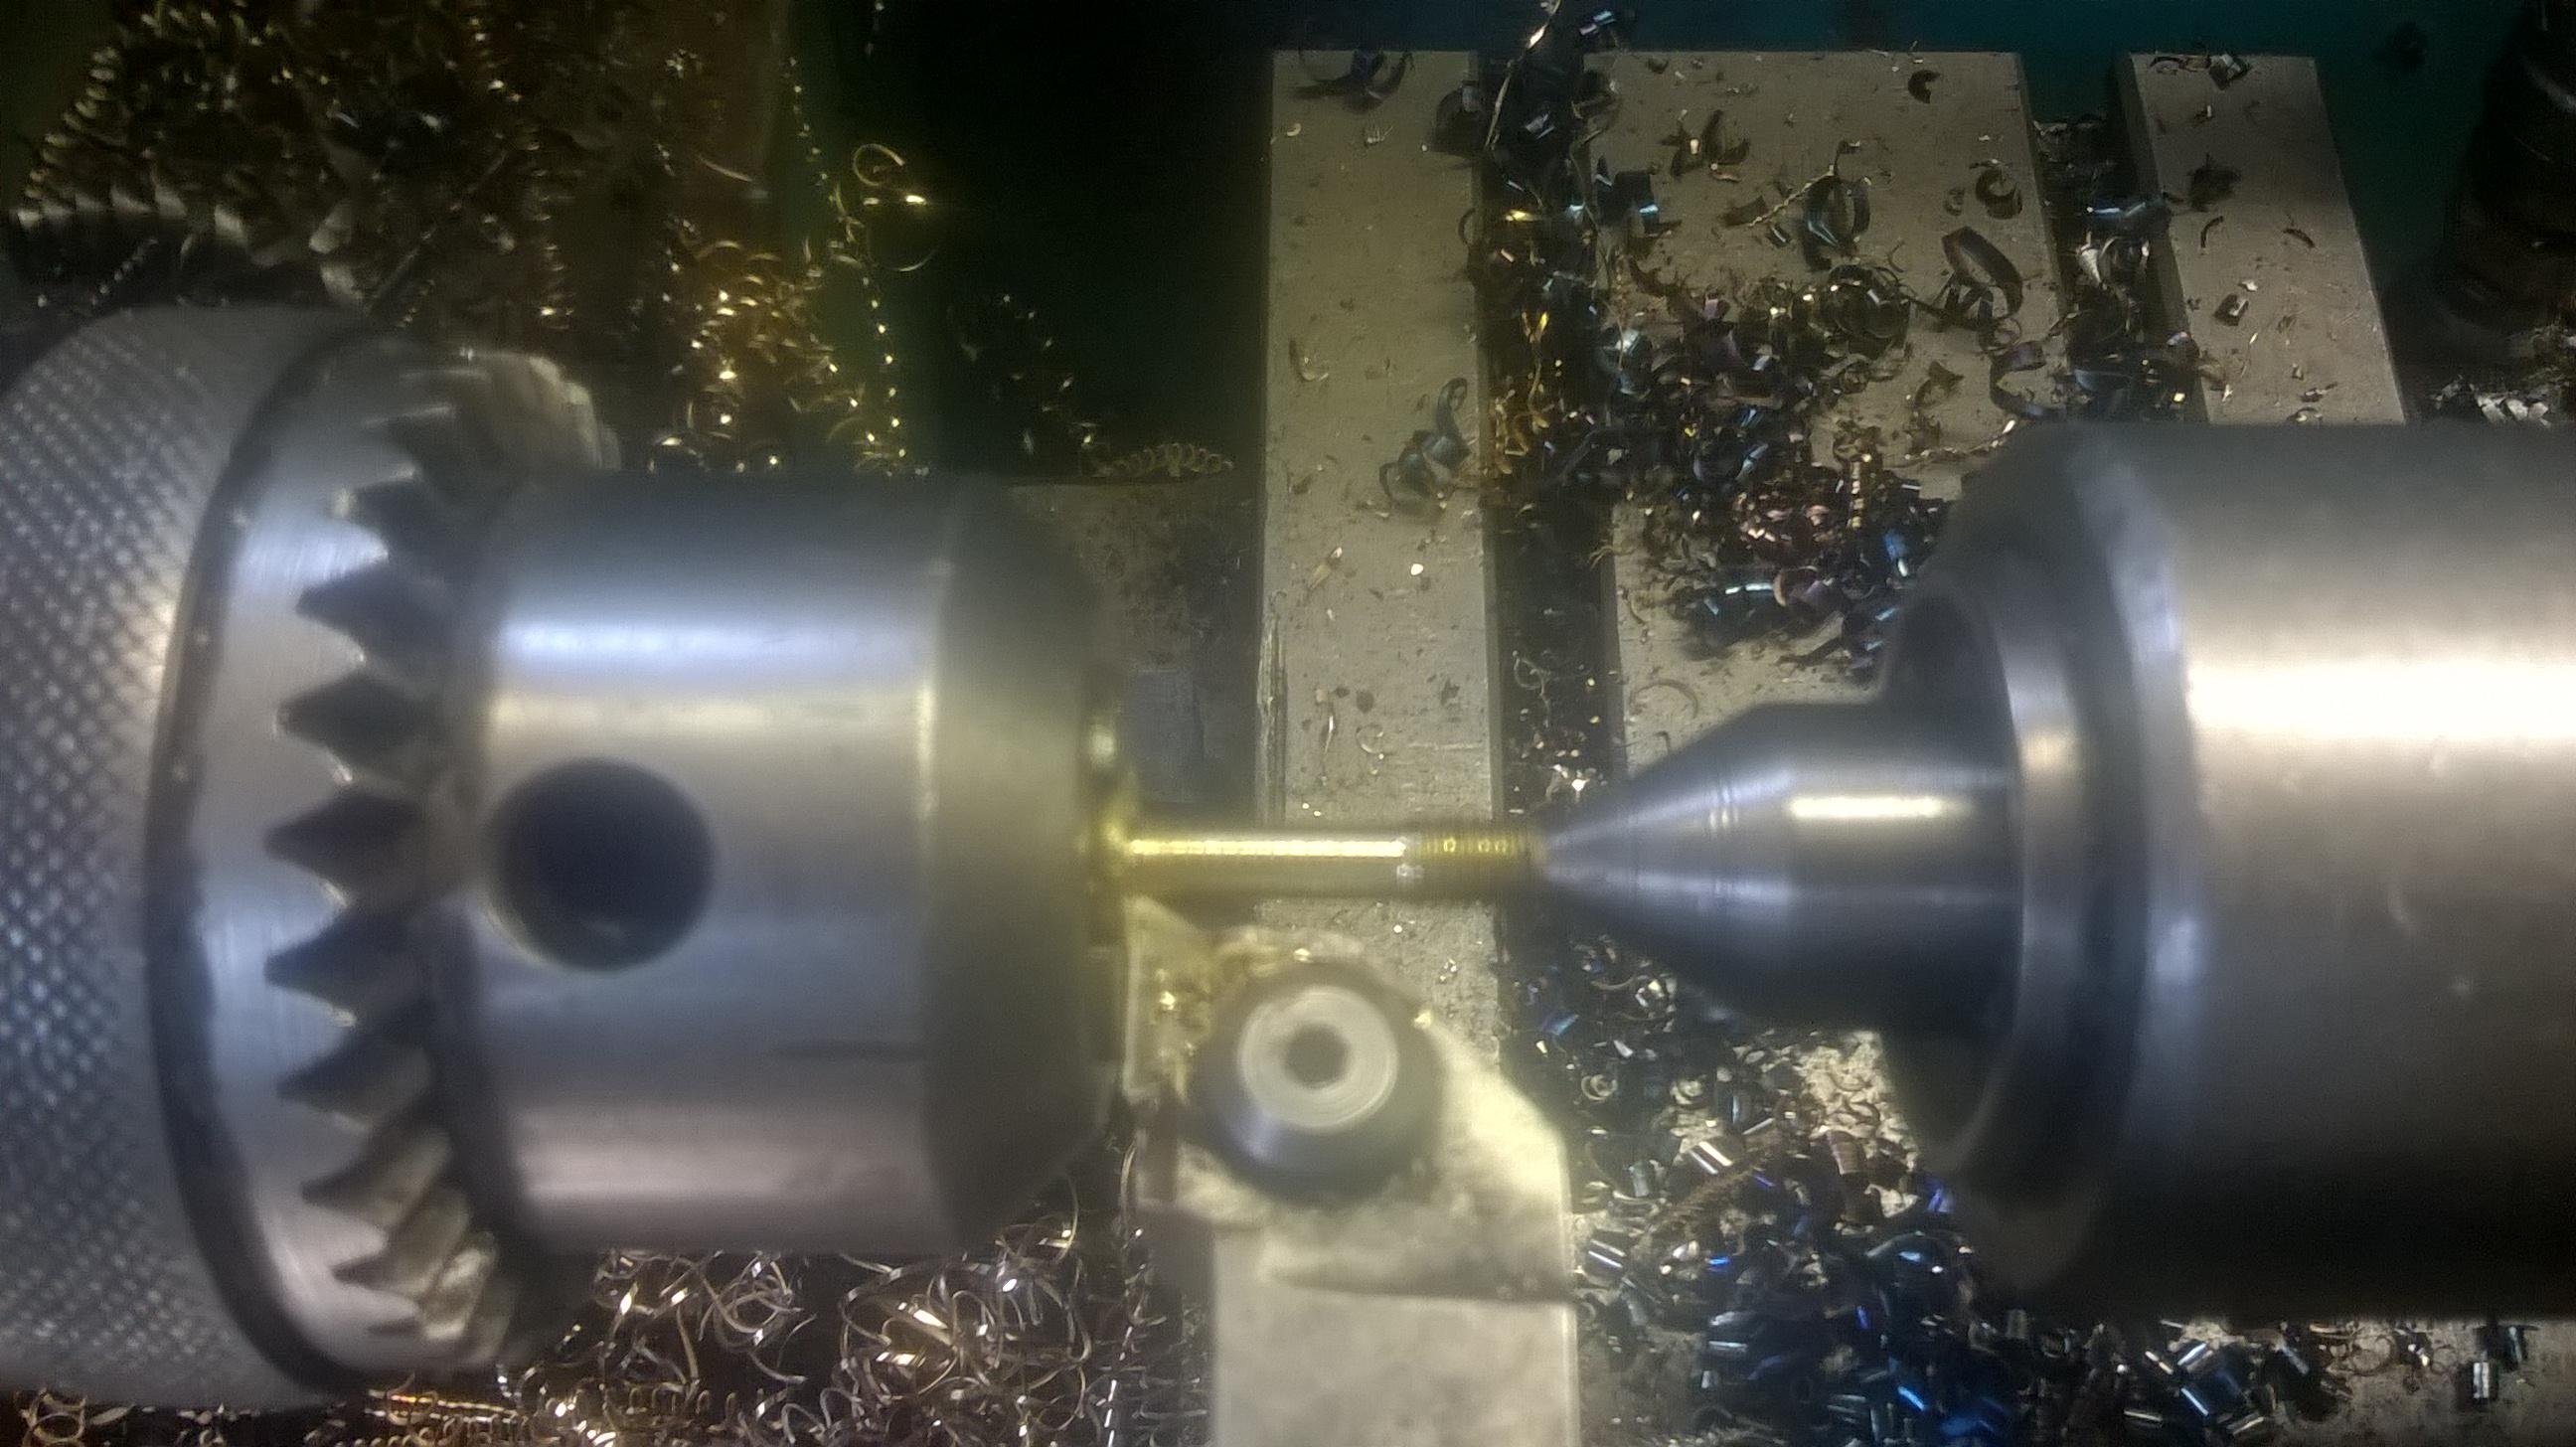
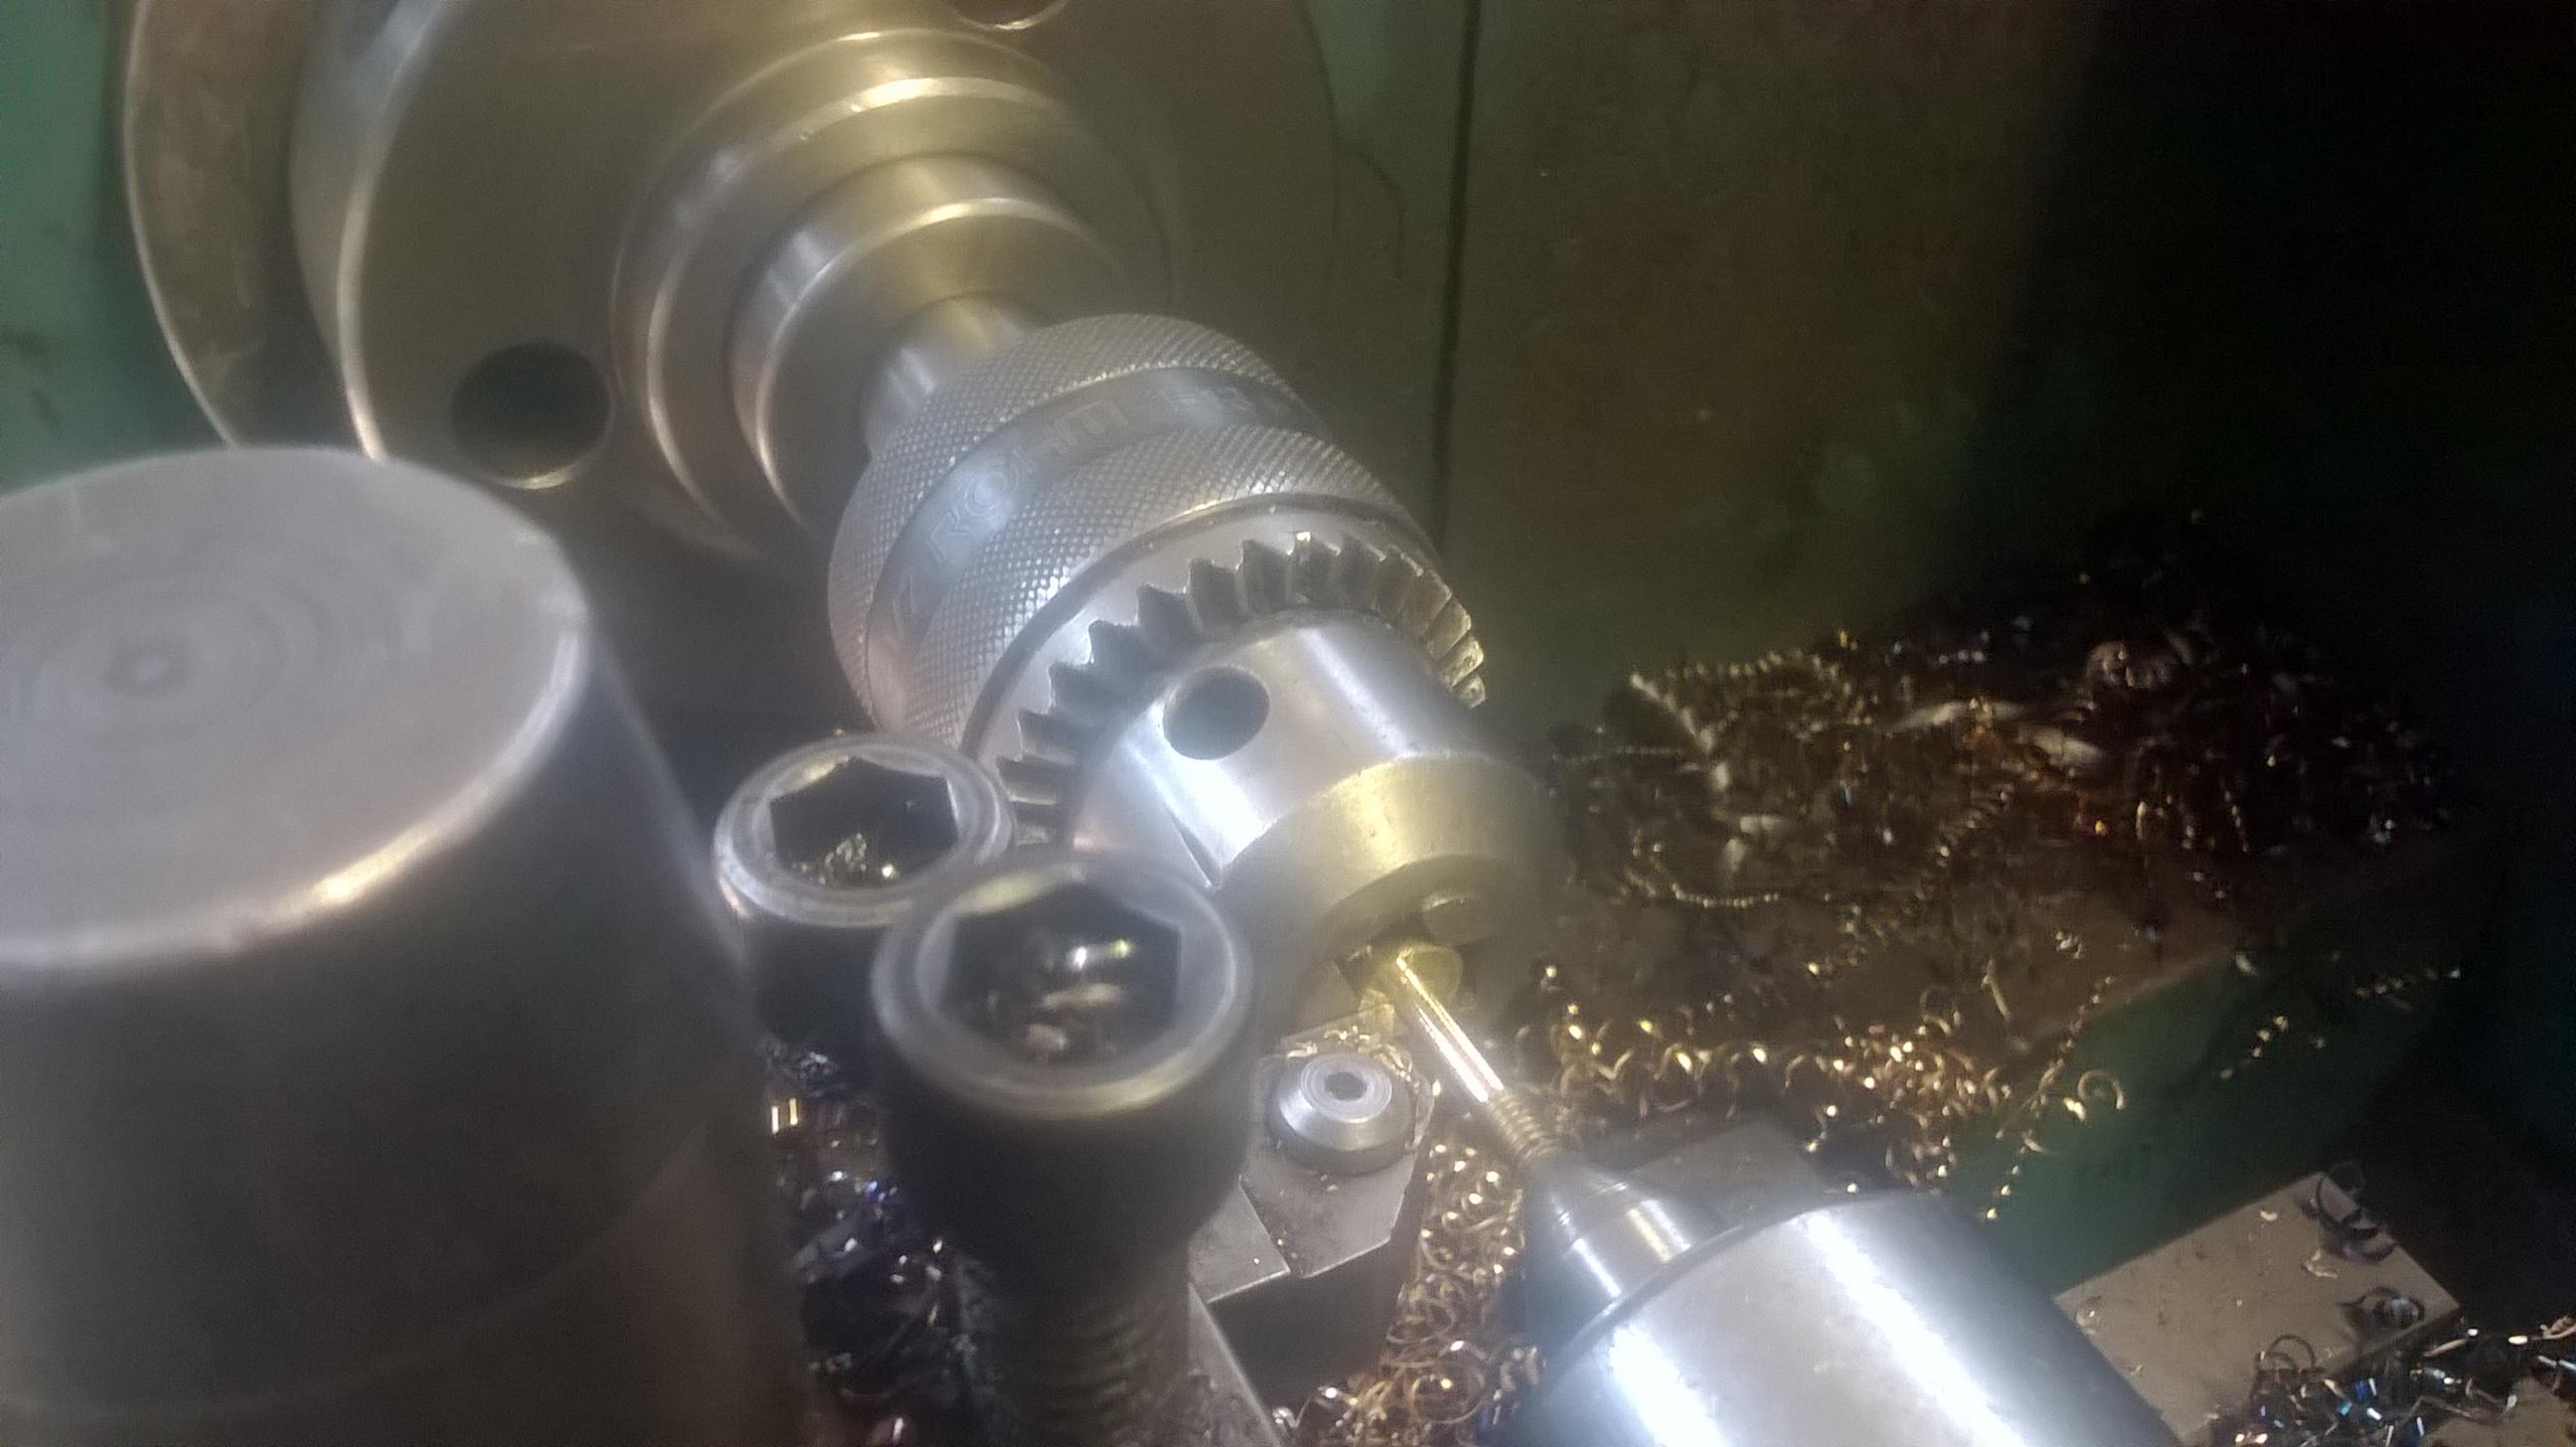
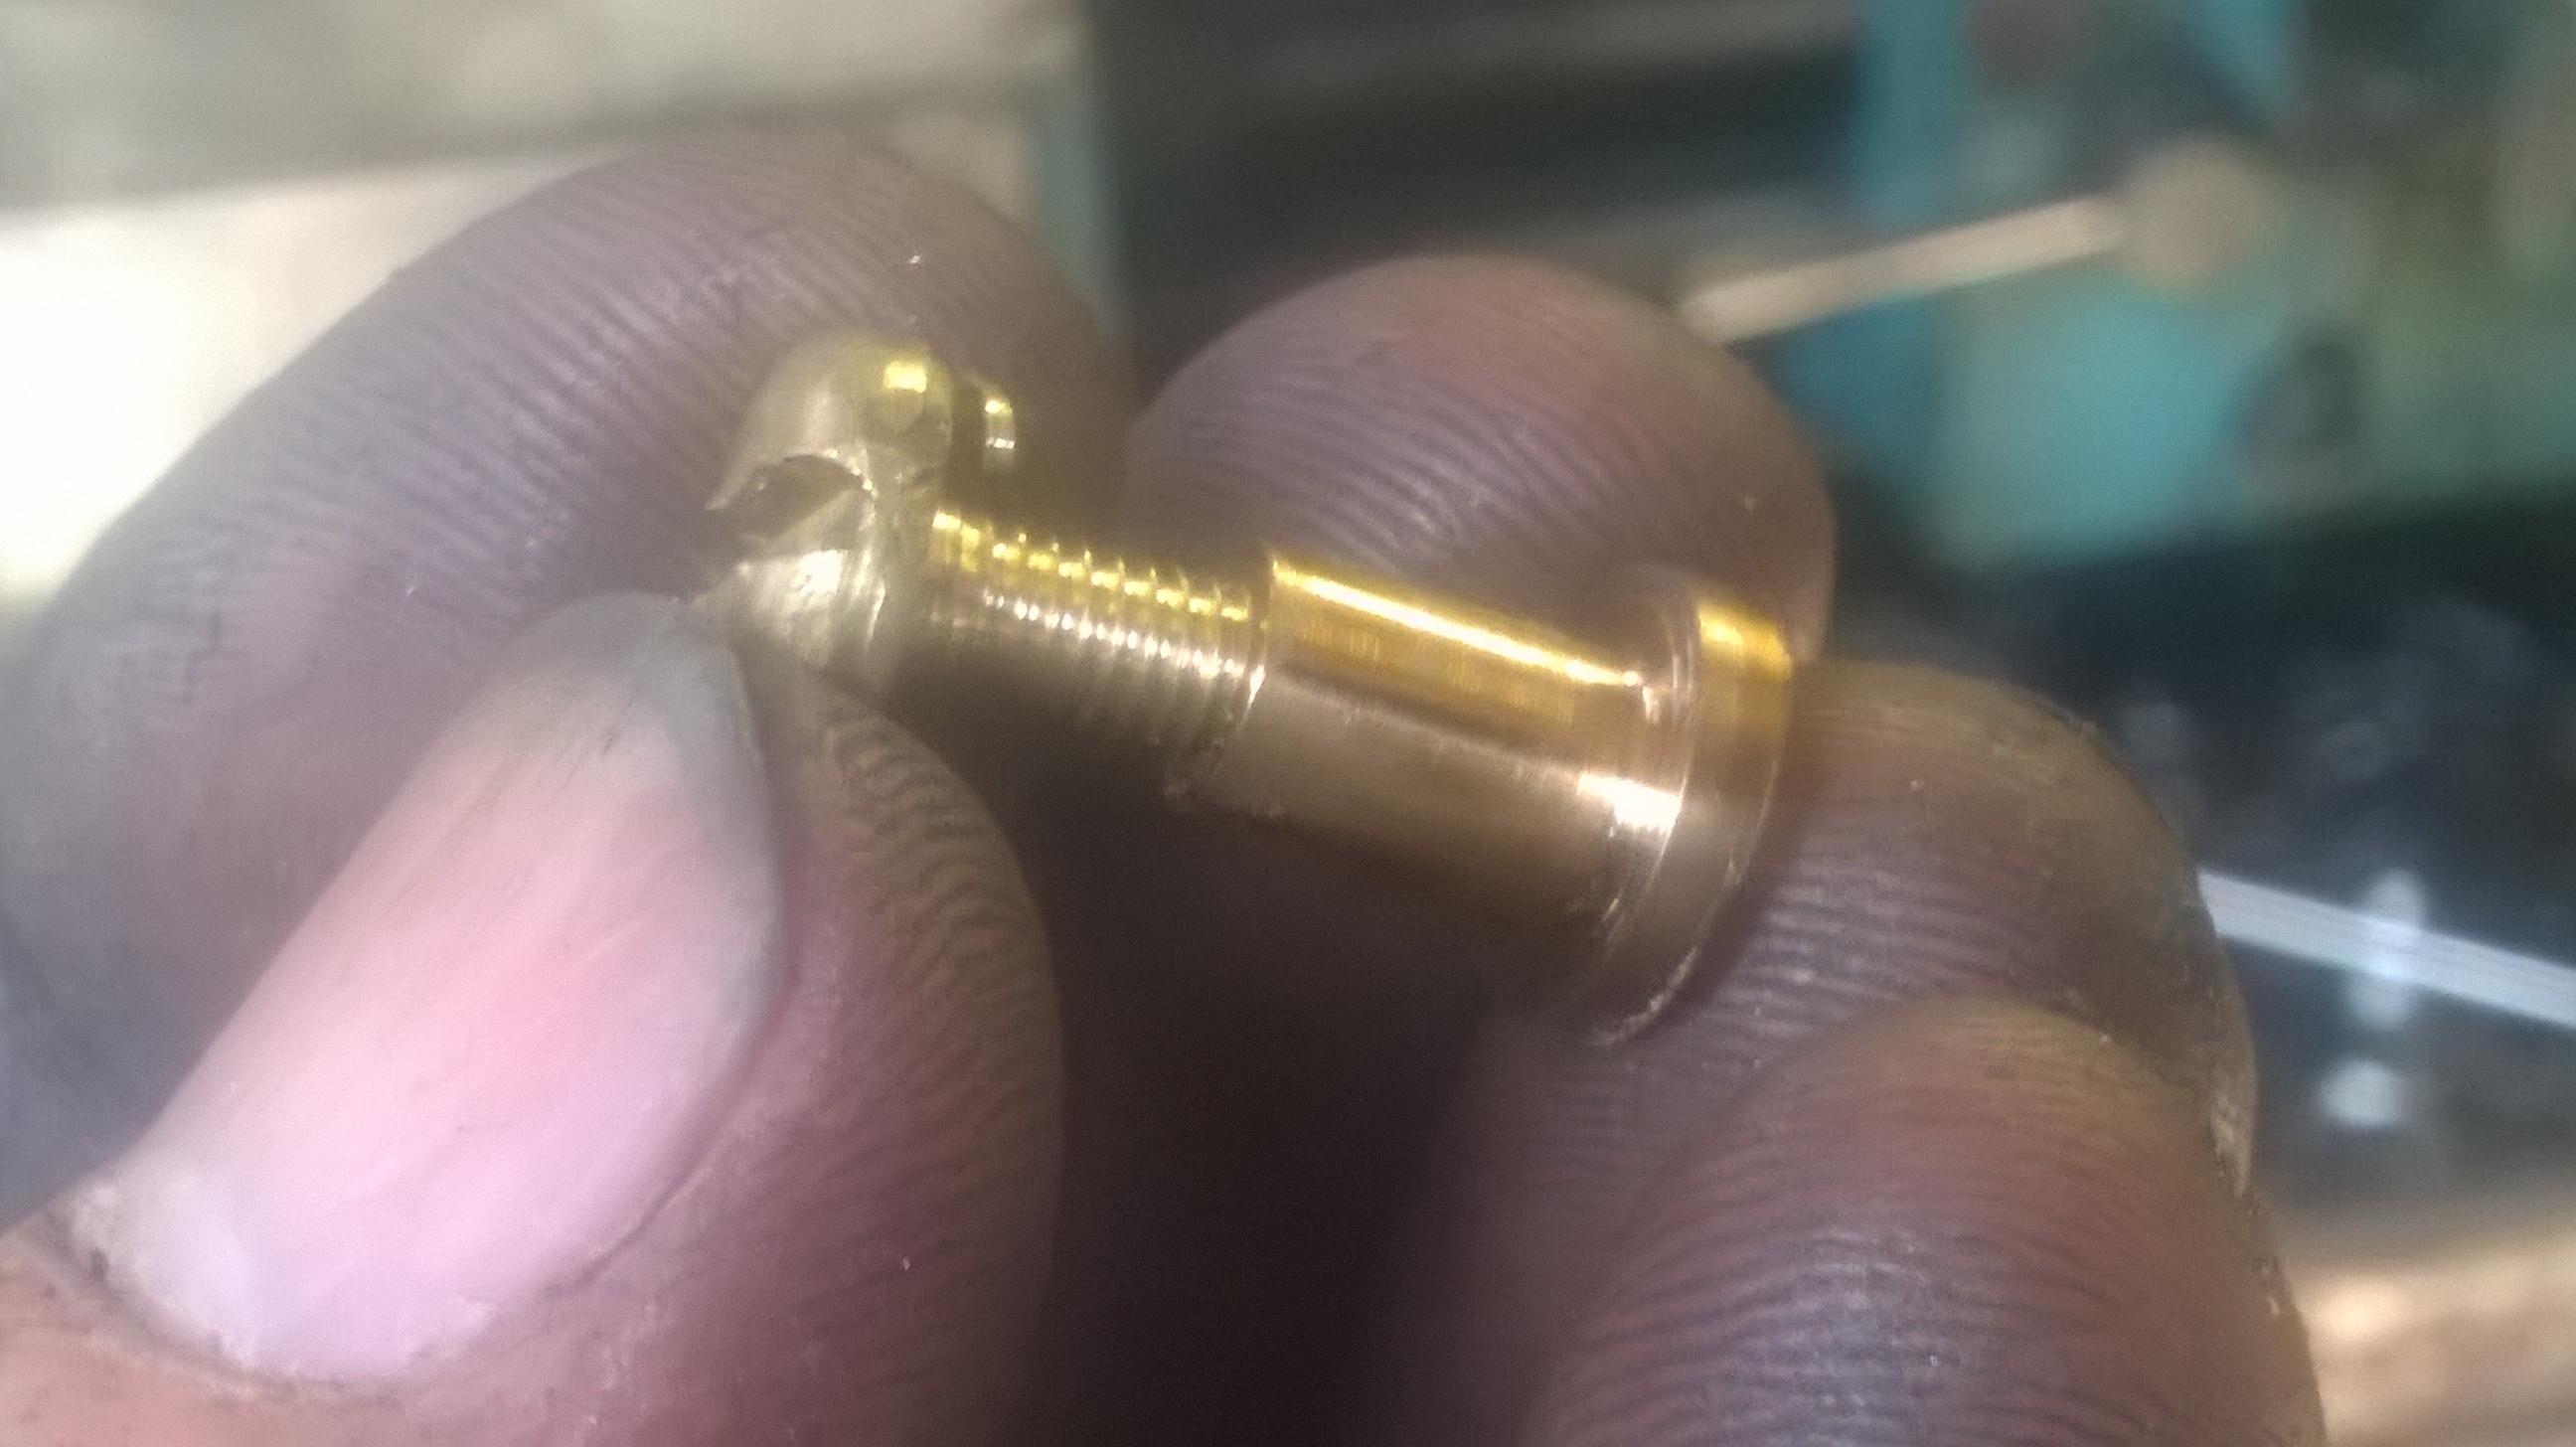
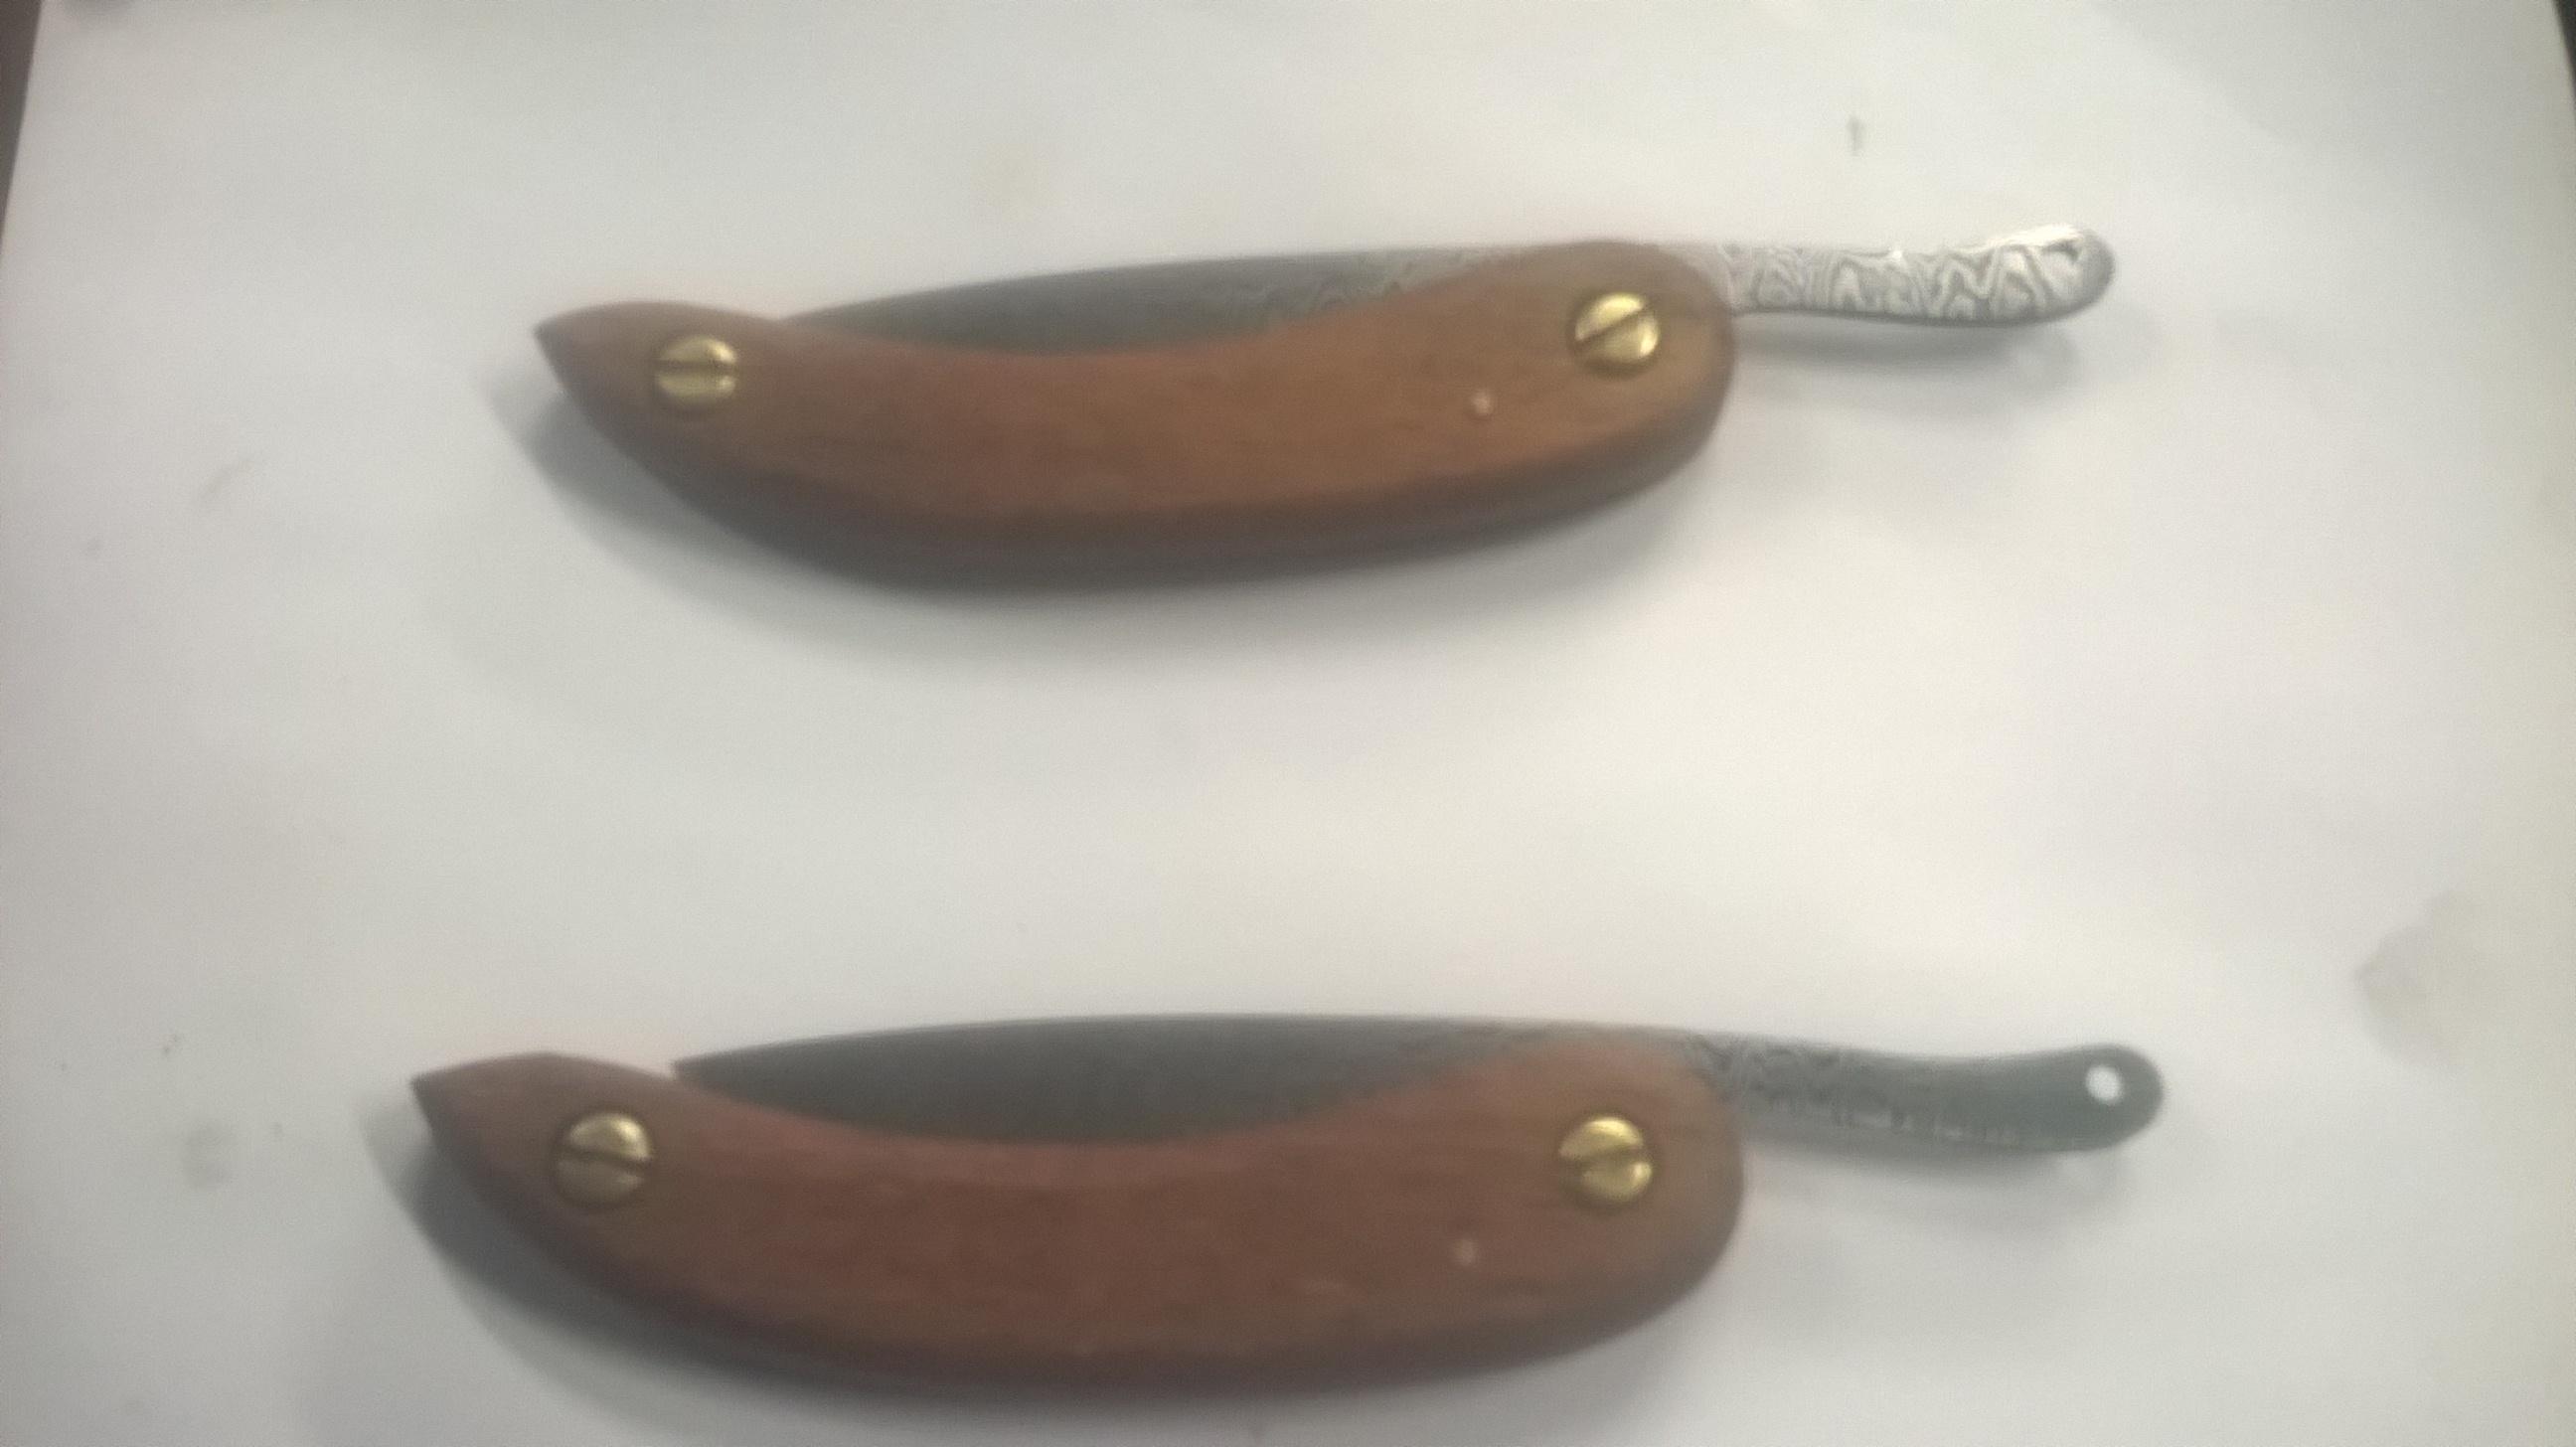
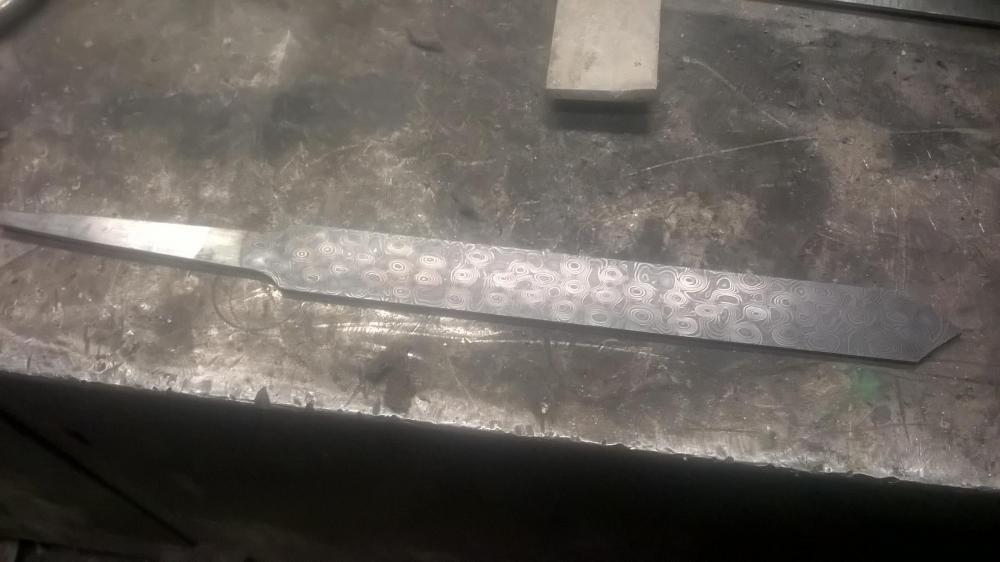
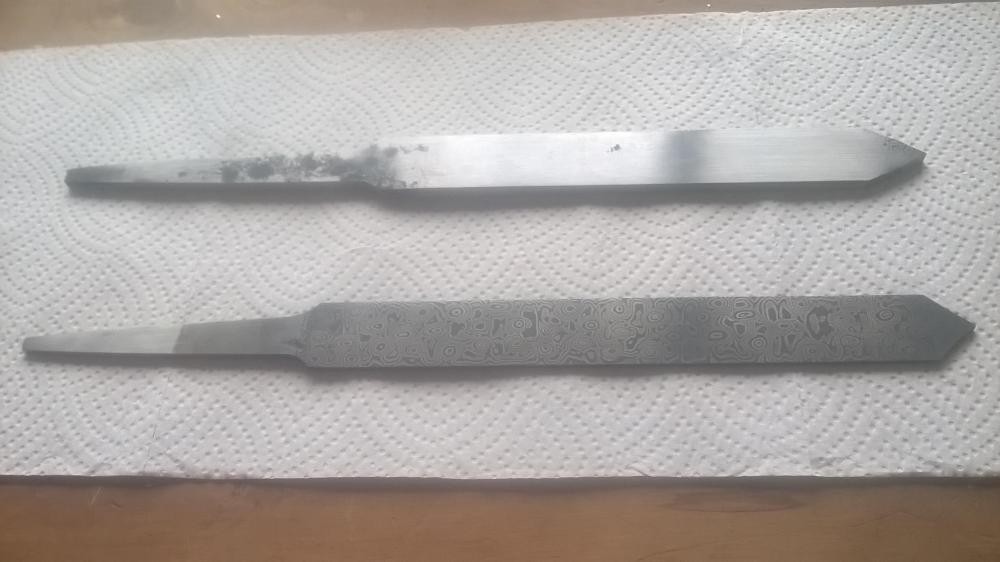
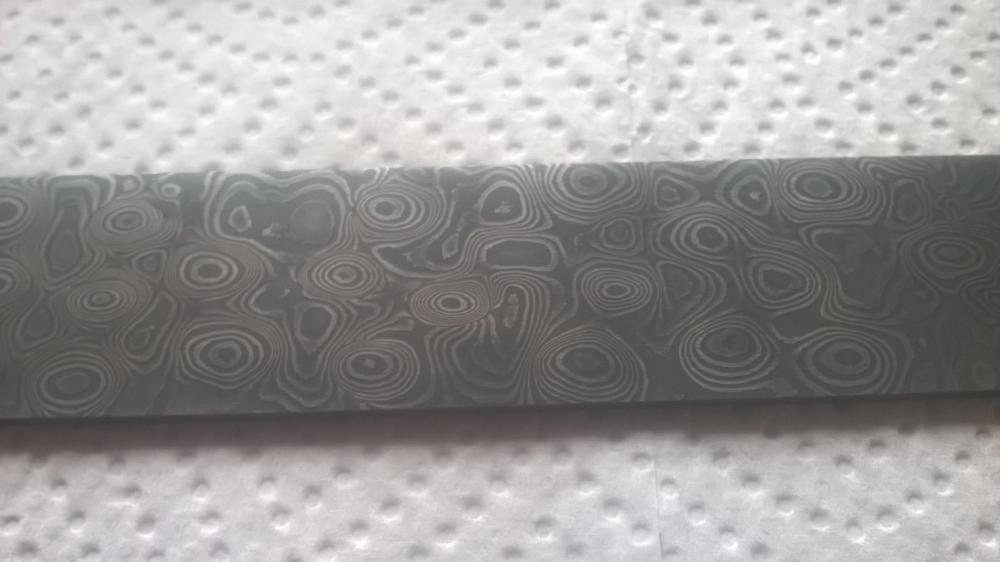
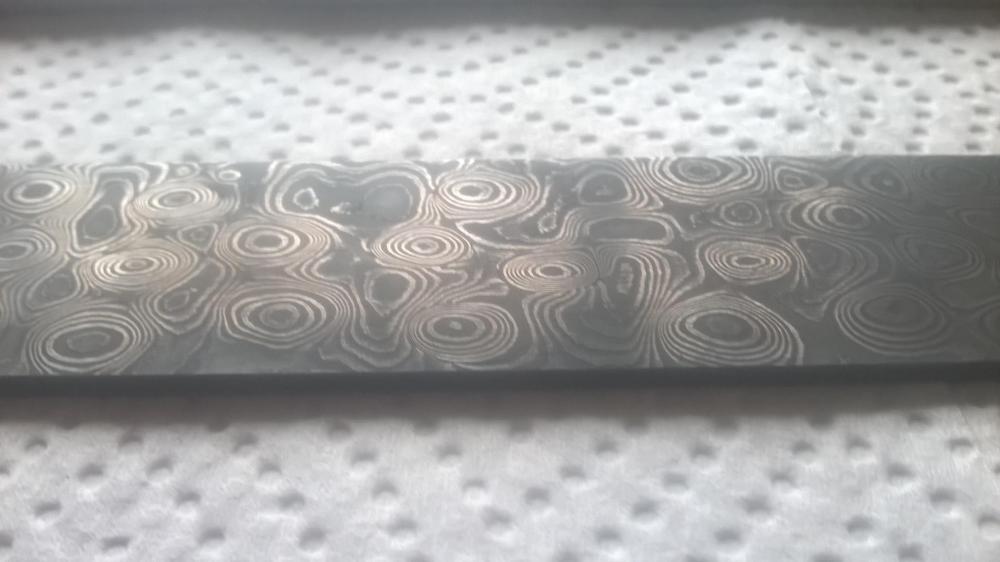
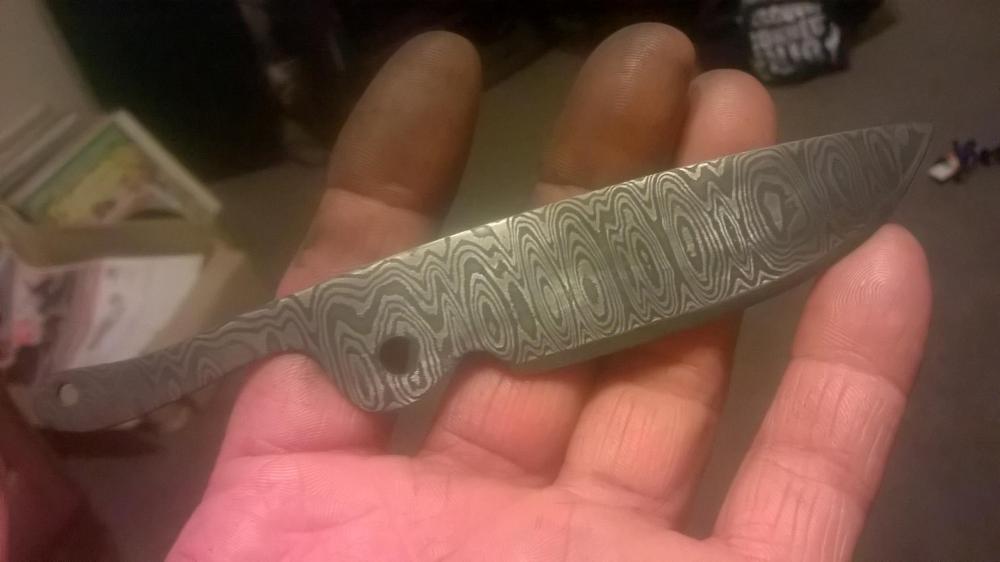
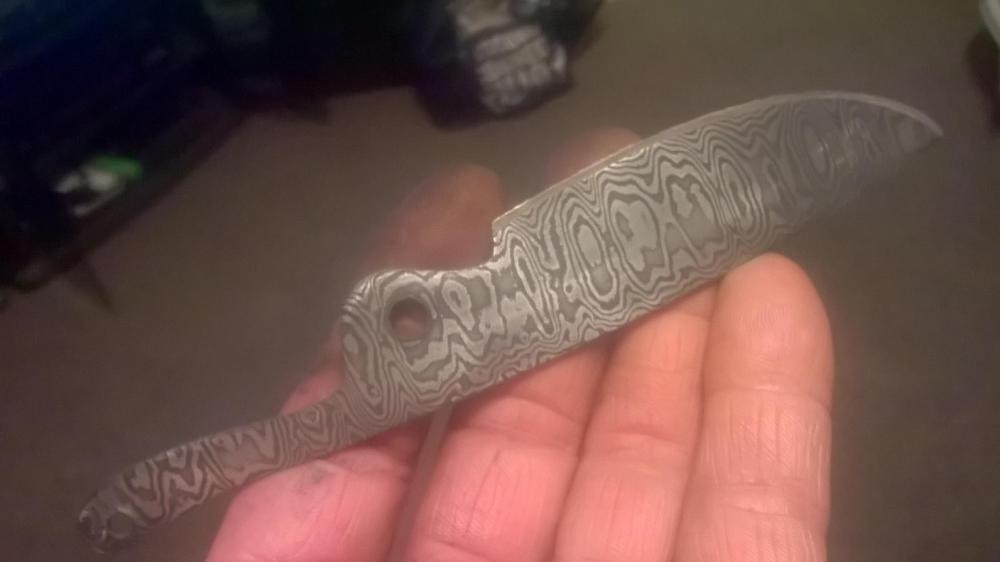
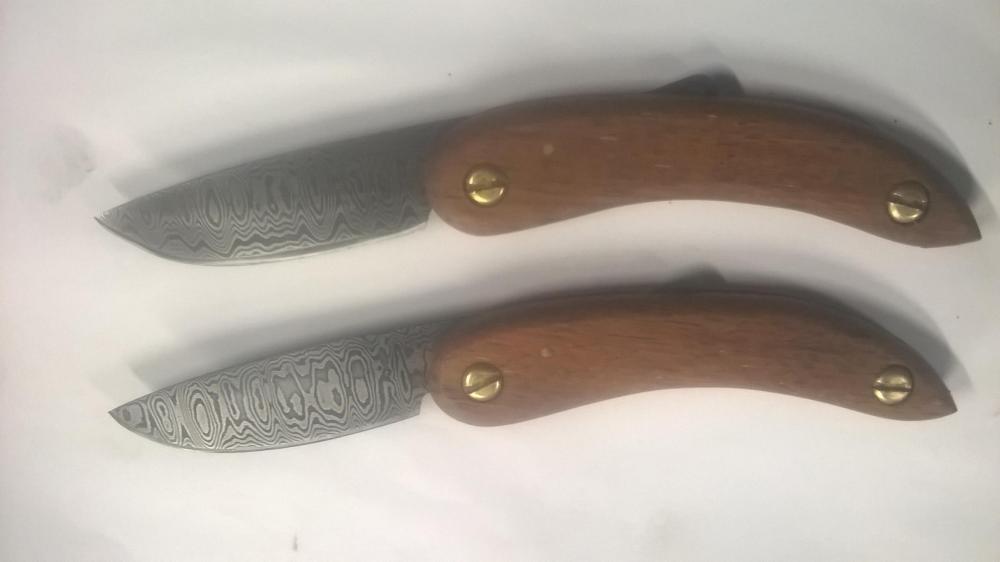
Its all done and I have used a coffee etch which did improve the contrast and using 2000 grit sand paper really helded as well, I had to make 6mm screws into 4mm screws which was a bit fiddley and the barrel was turned from a bronze bolt. I think I will make some more of this style of blade


-
TwistedCustoms yes I have copied one of those but didnt want to sayso dirrectly unless someone got upset Good spotting Cheers