

JME1149
-
Posts
381 -
Joined
-
Last visited
Content Type
Profiles
Forums
Articles
Gallery
Downloads
Events
Everything posted by JME1149
-
Very nice, in fact I'd have to say you NAILED it! Would like to see a detail of the file work along the spine if you have a photo.
-
Just add a little tray underneath to put the propane tank on and you're good to go. I like it.
-
Looks like it will do the job, nice work. What's the purpose of the little dog-leg bracket? Is there a tapped hole in the blower flange? (Might have to pull the duct tape off mine to see.)
-
Very nice. I especially like the way you did the mane.
-
I've been thinking about Spanky on and off all day, hoping the surgery went well and a speedy recovery to follow.
-
Das, your mind must be a wonderful place. To go from your terminator skull to this whimsical creation is amazing. I love the work, keep it coming. Hopefully I'll get a chance to se it in person one of these days.
-
If the overhang on the jaw ends bothers you enough, you could also just grind the sides flush with each other. Your tools, your rules.
-
That's a beauty all the way around.
-
My thoughts and prayers are with you for a speedy recovery.
-
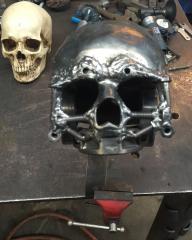 Looks like you're building your own terminator.
 -
My New Anvil - did I do any good?
JME1149 replied to AmericanBlacksmith's topic in Anvils, Swage Blocks, and Mandrels
Welcome to the club. Update your profile to include a location, you might be surprised how many smiths are close by. As for the anvil, the close-up picture of the side appears to show something, might be an Arm & Hammer?? Don't put too much faith in how loudly it rings, some of the best anvils barely make any sound at all, while other great anvils will cause hearing loss from their ring. It all depends on how they were created. A better test is the rebound of the top surface. Drop a large ball bearing from a fixed height and measure how high it bounces back, higher is better. Don't grind the top, flap wheel is OK to clean it up somewhat, but the best way is to start using it. Pull up a comfy chair, grab a drink and snack, and start reading through the many thousands of threads here, you will probably have most of your questions answered before you can think to ask them. -
"Like " doesn't begin to say how much I appreciate it. That is one beautiful set. I'd love to see more close-ups of the blade.
-
I would think form the ends, then form the arch, then slit/drift the holes, then rivet the mounts. I would think trying to bend the arch after the holes were punched would just be asking for trouble with collapsing the holes or kinking them. However you did it, I like the way it turned out.
-
Another option I actually prefer is to trace around the outline of the anvil base, get a router and cut a pocket 1/4" deep or so the exact shape of the anvil. This keeps the anvil from moving around while still being easy to remove for transport. Route a little deeper if you want to put a bed of silicone under it. A piece of flat bar with a couple lag bolts should hold well enough if you really want to secure it. I also second the chain wrap for damping down the ring.
-
Very attractive hammer, looks like it will move metal well. You need to put your touchmark on those babies.
-
Setting up your shop on the cheap (real time)
JME1149 replied to Crazy Ivan's topic in Building, Designing a Shop
I certainly hope you're using one of your own bottle openers there, don't see one on the table. Thanks for keeping this thread going Pete, very entertaining. -
I always like it when people take the time and effort to make their tools attractive as well as functional, and you certainly have done so here. Only one question, why didn't you finish it? Looks like you forgot the little nib for the bottle opener.
-
Finally got to forge again.
JME1149 replied to MrDarkNebulah's topic in Blacksmithing, General Discussion
I'd be concerned about the copper pipe giving way if it gets too hot. Also might want to consider changing the plumbing underneath to include an ash dump (install a tee where the elbow is now). Congrats on getting it up an running. -
Stuart, you better do something extra nice for a wife like that. Congrats on the new toys
-
Pixar made a movie a few years back called Up. This guy reminds me of Kevin from that movie, must be a cousin.

-
I like the concept of these. I can't quite make out from the photos but am assuming the spiral wrap piece is separate from the base and welded to it. If so, you might want to move the handle part to the bottom of the candle. As for the feet, maybe a small spiral instead of just the right angle bend. Very nice prototypes.
-
Nicely done, that red makes it look fast. Might want to highlite the "No 400" on the front cover, I did on mine and it really makes it pop. Is that a gasket between the fan cover halves?
-
Amazing and inspiring as always. Also love the army of lizards lined up on the workbench.
-
Rather than grind the top surface to restore big corner radii, you could just make up a block with a stem that fits the hardie. Grind a different radius on each of the four sides of the block and you have more options than just re-doing the anvil. If you insist on grinding the anvil, why not dress the sides rather than the top? You'll make the face a bit narrower, but not noticeably so. If you absolutely insist on grinding the face, make sure your buddy flips her upside down first and dresses the base (feet) to make them parallel to the existing face, the flip it back upright and kiss the face. This will remove the least amount of stock from the hardened face, but could still be enough to ruin the anvil. Ultimately, it's your equipment and you can do whatever you want to it, we all just hate to see a century old piece of history get destroyed for future generations.
-
striking anvil
JME1149 replied to Ethan the blacksmith's topic in Anvils, Swage Blocks, and Mandrels
Broaching is a cutting method where a shaped bit, square in this case, is pushed through a hole creating the shape. Think like a punch but it shaves the metal off. Usually has many steps of slightly increasing size per step, each step taking off just a bit more metal. EDM is electrical discharge machining, could be plunge type where a square electrode is pushed thru the block, electrically burning away the shape, or wire edm where a small diameter wire is charged and travels thru the part cutting out the shape in it's path.