VaughnT
Members
-
Joined
-
Last visited
Everything posted by VaughnT
-
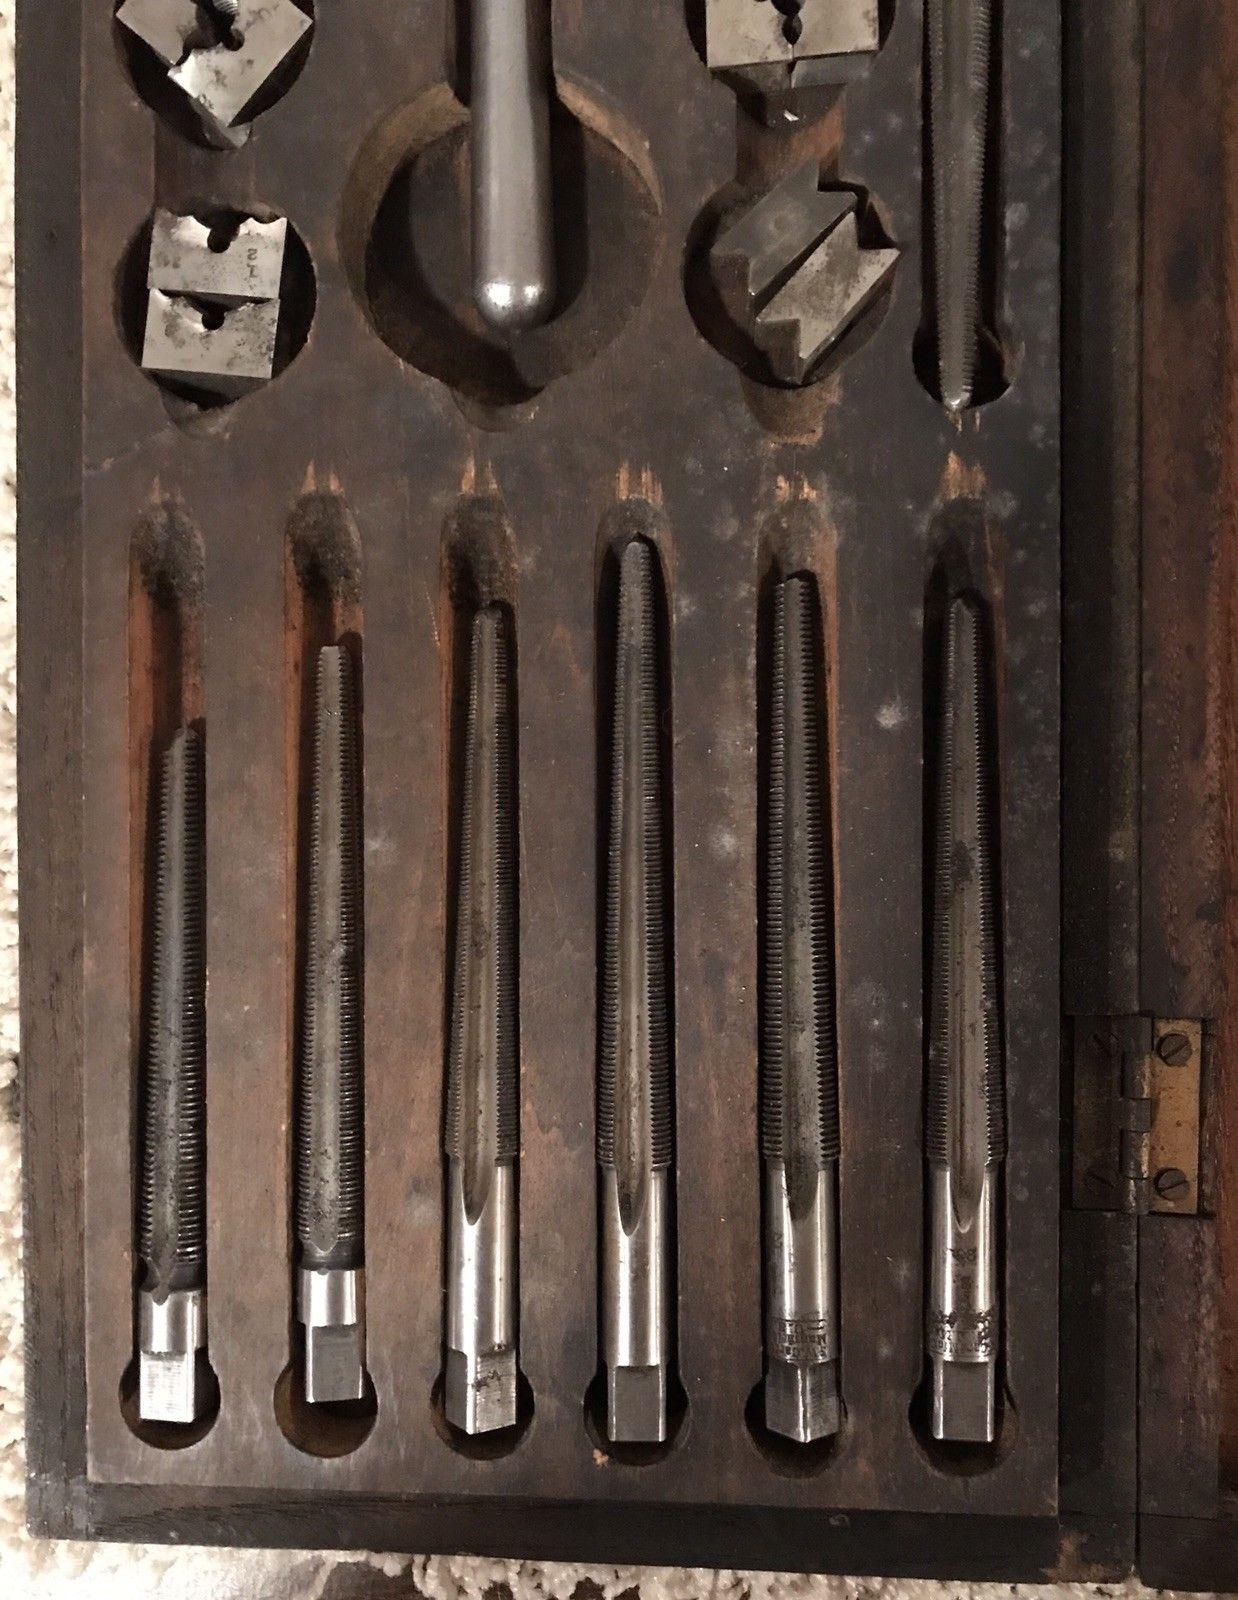
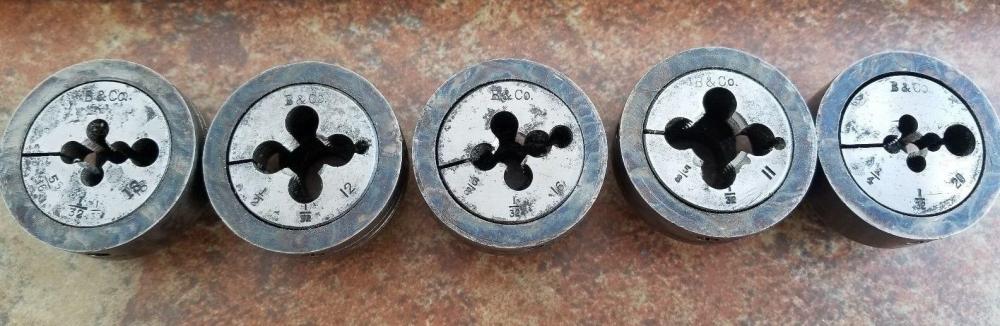
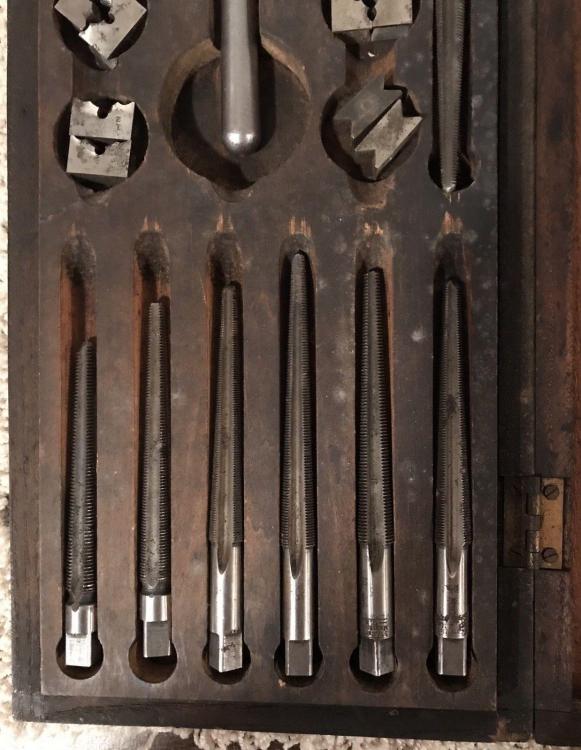
I've lately gotten on a threading kick. Of course, I've never needed much in the way of threading gear since I could likely find a bolt and nut, or use a rivet instead. As such, my collection of taps, dies and wrenches is lacking. Watching a vid from Adam Booth, he noted that round dies are for creating new threads while the octagonal dies are only supposed to be used for chasing existing threads to clean up damaged areas. I had never heard of this before and it got me wondering about what else I might not know. On the vintage set that I just picked up, all the dies are stampled "1/32" in addition to the expected numbers. Why? What is this denoting? One set that I passed on was interesting because I recall Peter Ross using something similar in a video. These tapered taps are supposedly for blacksmiths because it allowed you to thread a nut even though the whole might not have been punched perfectly to size. You thread down from one side, then flip the blank over and thread in from the other side. I don't totally understand what's happening, but it did get me wondering. Were tapered taps commonly used back in the day? How rare were drills that punching the hole was the best option... yet they could make such nice tapered taps? Or were the tapered taps used for something else entirely? Whether I'd ever use something like this or not, I love the designs of the old kit. The inlet wood, soaked through with ages of oil, grease and grime... the sweeping lines on the tap handles, often with color case hardening still swirling around them.... it's hard trying to NOT collect the blasted things! So where do you stand on taps and dies? What sizes do you find most practical? Got a favorite thread pitch? For most of what I do, 1/4-20 and 3/8-16 will cover me just fine. I don't see a lot of need for the larger sizes, but there have been a few instance where I wished I had a 1/2" or 5/8" die.
-
Got a nail made. Not every day someone asks you to forge something under the light of a full moon! Seriously, they wanted to be sure I forged it at night while Luna was strong in the night sky. No problem since I was already planning to work through the night, and now the nail is imbued with all kinds of magical energy.
-
Very nice work, Peppie. I don't think that's a 30-minute opener, but if you can do that level of work in just half an hour..... that's impressive! I managed to finally get the rifle rack together for a fella wanting to display his old flintlock. I'm looking forward to seeing the smoke pole in place.
-
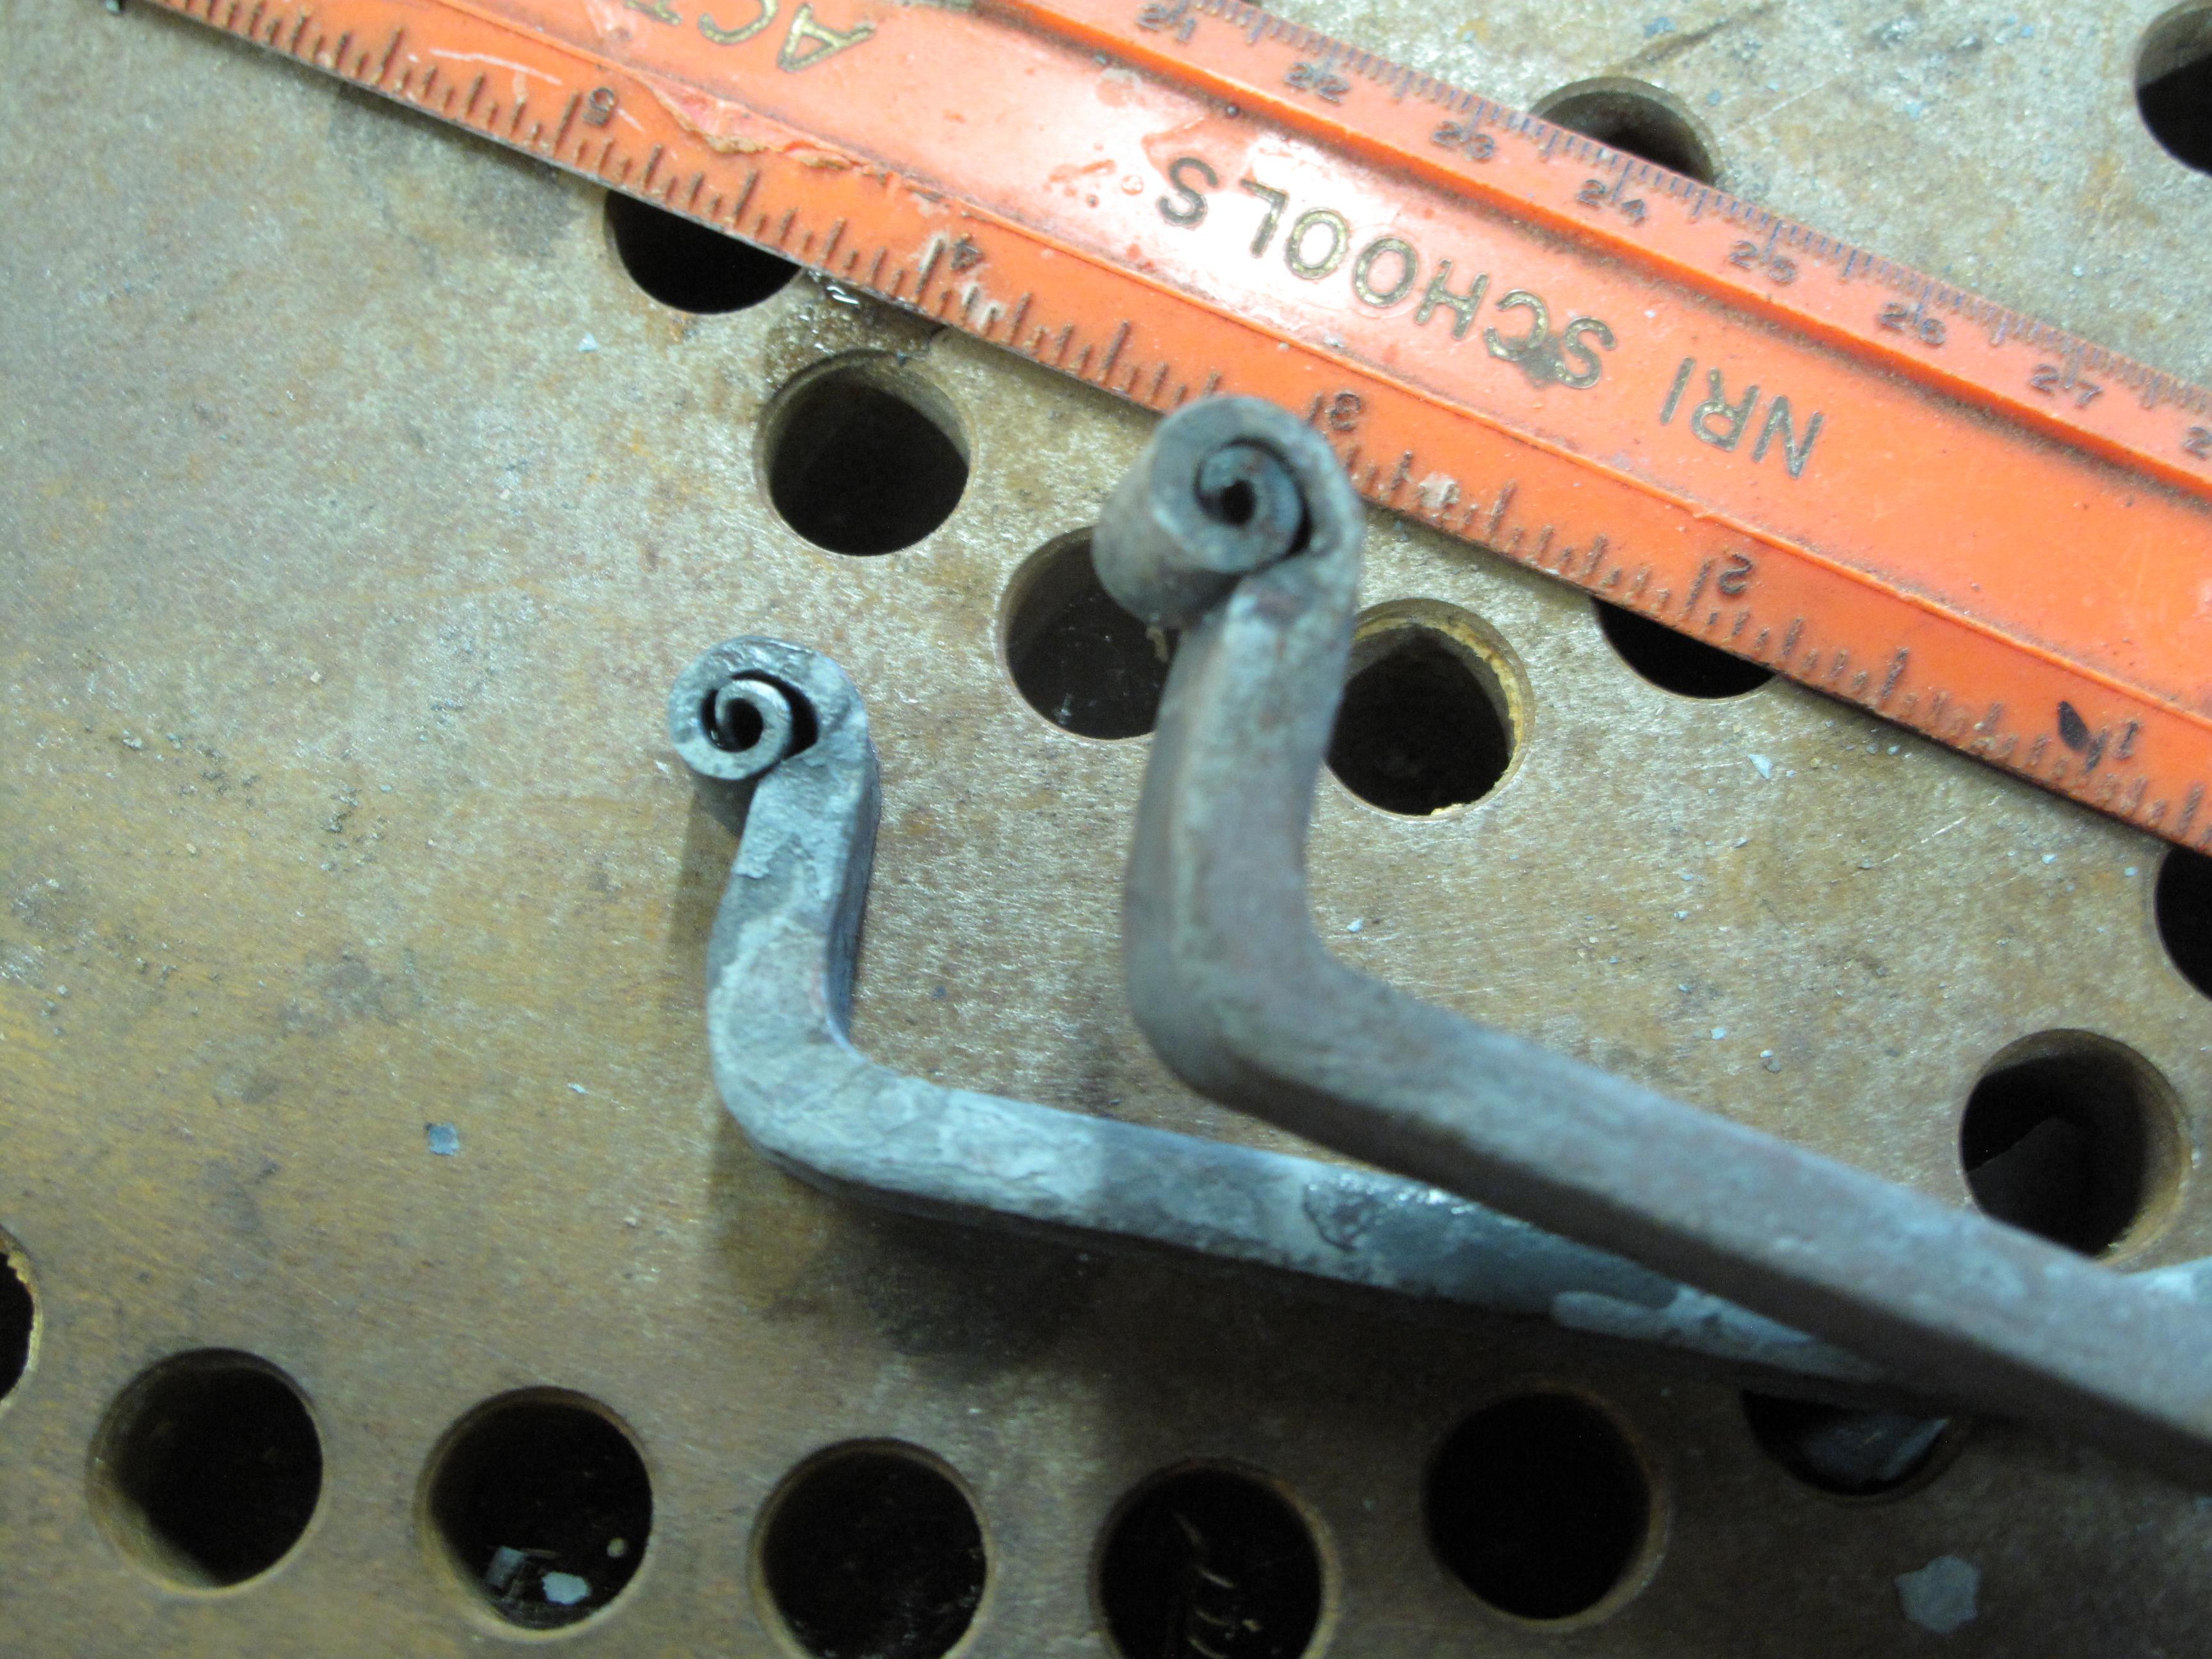
If it's a spring, it'll make a good blade. At that size, it's almost perfect for those little knives woodworker's like to use to mark their cuts. I'd cut off a few 2.4" sections and make flint striker pendants for folks. Dress the ends so they don't look so "saw cut" and drill a hole for a lanyard. Boom, instant entry-level striker that folks can use as a zipper pull or necklace pendant.
-
Flea markets can be fun, but I haven't been to one in ages. The nearest to me is a joke, and the better one is an hour's drive away.
-
Never seen a coil spring like that! Really neat, and I'd be loathe to cut them up. Maybe use them for something like table legs where the turns can be appreciated in full??
-
Very nice, Colorado.
-
Height should definitely be something that's comfortable as well as getting the wheel/handle/weights up above where you're likely to bash yourself as you walk by. Nothing worse than turning around and having that weight run down the threads and smack you in the noggin. No reason to have the table down low where you need to stoop down to see what's going on in there. Think about how your kitchen counters hit you. Is it comfortable to stand there chopping vegetables or would you like the counter a few inches lower so you can stoop down, bend over and wreck your back? All it takes is a small pad of heavy timbers to raise the nice cast-iron base up a few inches. Just make sure everything is bolted solidly to the floor so the press doesn't walk across the shop. As for the finish, I'm a big fan of the industrial look and would simply give the whole thing a good cleaning and an oil finish. Paint can be nice, but I like seeing the bare iron with a nice oil to protect it against rust. Paint can chip and scratch, or melt when you hit it with some hot iron. A good coat of oil, though, is easy to touch up and you're going to be oiling the screw and ways anyhow. Gorgeous bit of kit. I've been looking for just such a press but haven't had any luck so far. I wish you all the best in your adventures.
-
Worked on another sample finial for my collection. Another dozen or so and I'll be able to fit up a nice display board. Tonight will see me working on a few more. I have them all drawn out and ready to go.... so it's just a matter of getting up the gumption. All starting as 6" of 1"x1/4" bar. I'm saving the "final look" for when I get them all finished. Then, I can lay them out on the board and might decide to draw out some tapers a bit more or cut the pieces shorter. No telling until I get them all together and see how they fit best.

-
Very nice photography. I only have a Canon G10 now that I've moved away from the SLR's. I like that it's small enough to tote around, though I also use that "portability" as my excuse for the bad pictures I take with it. The pros that recommend the G10 series all remark about how wonderful it is and how they prefer it as their traveling camera because it'll do every bit as good as the big bag of bodies and lenses they would normally have to carry with them. In my hands..... ugh! My latest pic, trying to mimic that warm lighting you showcase so effortlessly. Ended up getting a nice warmth, I think, but the detail is off. You can see the scratches in the wax finish from where I rubbed it with a cloth, the glare from the overhead light washes out a lot of details while seeming to highlight the unwanted details like those scratches in the wax. So frustrating!
-
Nice leaf, but I'm enjoying the quality of the photographs a lot more! Good pictures are a work of art, and you've really got it nailed down. The clarity, depth of focus, lighting.... everything is spot on the money!
-
You can get new balls right down the road from you. Not sure if the cost of them would be such that you save by making your own. I'd think, though, that you'd burn up a lot of time and fuel to make your own..... and it just might be better all around to buy them.
-
Sweet work, Mud. I've been wanting to make a small hole punch like that for awhile but keep putting it off. Might have to play catch up now that you're breaking in that fine new anvil! Today's project was a trial to figure out how someone did it before me. I'm calling it the "Nested Scroll" because the scroll is supposed to fit snuggly into a matched shoulder. I didn't get it exactly, but I learned a good bit and the next attempt will be a lot better.

-
Excellent. Knocking out all those tapers so perfectly must have been a chore! Whatever you're selling them for, double it! It's definitely worth the cost!
-
Wish I'd have seen this before. I've been running a Majestic 3-burner for awhile and it's been fairly lousy as far as forges go. The insulation doesn't insulate nearly as well as you'd think, so you lose a ton of heat through it. That makes it a gas hog. I'd highly recommend blocking off the open side with some soft fire bricks or make a door with a steel frame and kaowool. That much open space.... well, you might as well just be heating your metal with an oxy-acetylene torch. You're burning a ton of fuel to heat up the shop through that open wall.
-
Very nice work, Mud. That's a nice anvil, and I appreciate the extra work you went through to make forged hold downs and angles for the set up. It looks very professional.
-
I've been following along on his journey for awhile, and it's impressive! Lessons learned? Try it. Just shut up and try it. You might not think it'll make a decent hook, but what else do you have to burn your time with? Gonna make yet another s-hook? Really? That's the best you can come up with? You learn a lot more than how to make a hook if you'll get off your duff and just give it a try. Good Photographs go a lot further than you'd think. Matt's photos are wonderful, and his use of interesting objects and background just makes them all the better. But he makes sure to keep them within the same relative them and color scheme so there's a sense of continuity. You don't get much better in the ways of marketing than the Great Hook Campaign. I'm sure it's being talked about in business schools around the world. Brilliant, but simple. A smith trying to make something new and different documents his efforts and posts them on social media. It pretty much takes off like a scalded dog and is the talk of the town. Consistent theme, regular updates, minimal frivolity or excess.... it's a winning combination. I really need to take some art or drawing classes so I can figure out how to "see" the designs in the steel. There are so many things I would just never have considered doing!
-
As JLP noted, time is a factor and you're most always better off going to your local steel supply store to get full 20' lengths of bar. My local Dillon's will sell me any 1018 I could want and it's very nice to forge. The stuff you get from the big box stores is three times the price, so there's no sense buying there unless you need some stock late at night after the steel supplier is closed. 1/4" round and square. 5/16" square bar is great for making steak flippers and other projects where the 1/4" stock looks a bit too small. I really like using rectangular stock for a lot of hooks and keep 1/4x1/2, 3/16x1/2 and 3/16x3/4 on hand all the time. 1/2" round and square is one of the mainstays, too. For larger hooks, dinner triangle bells, plant stands and such, it's a good thing to have and you can burn through a few sticks in no time flat when you're making something like a table.
-
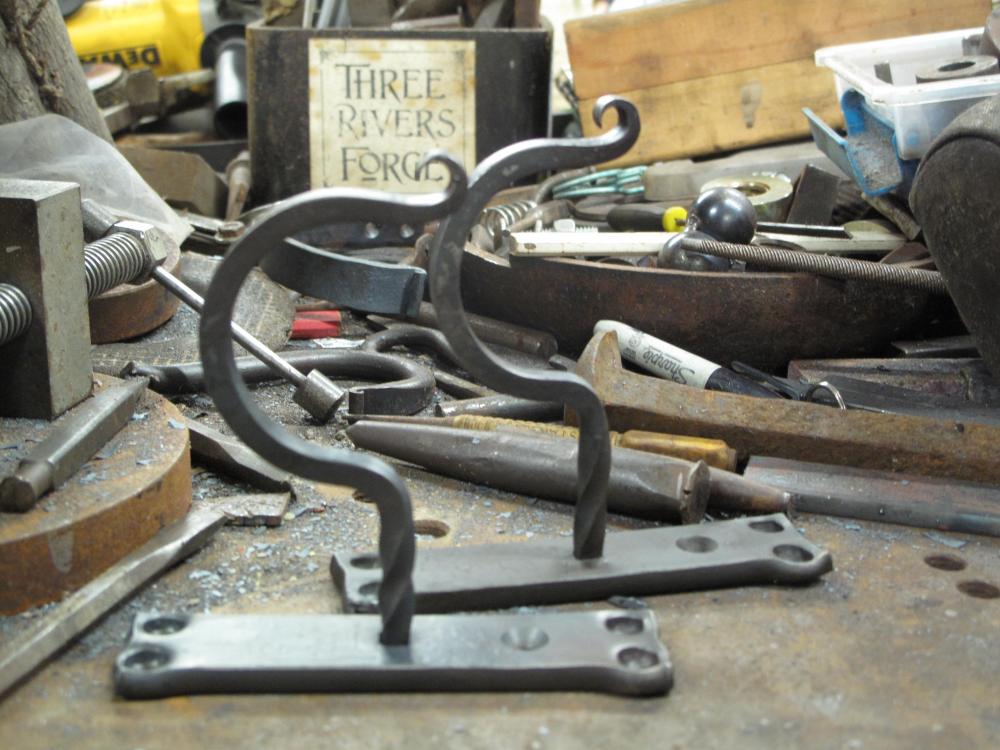
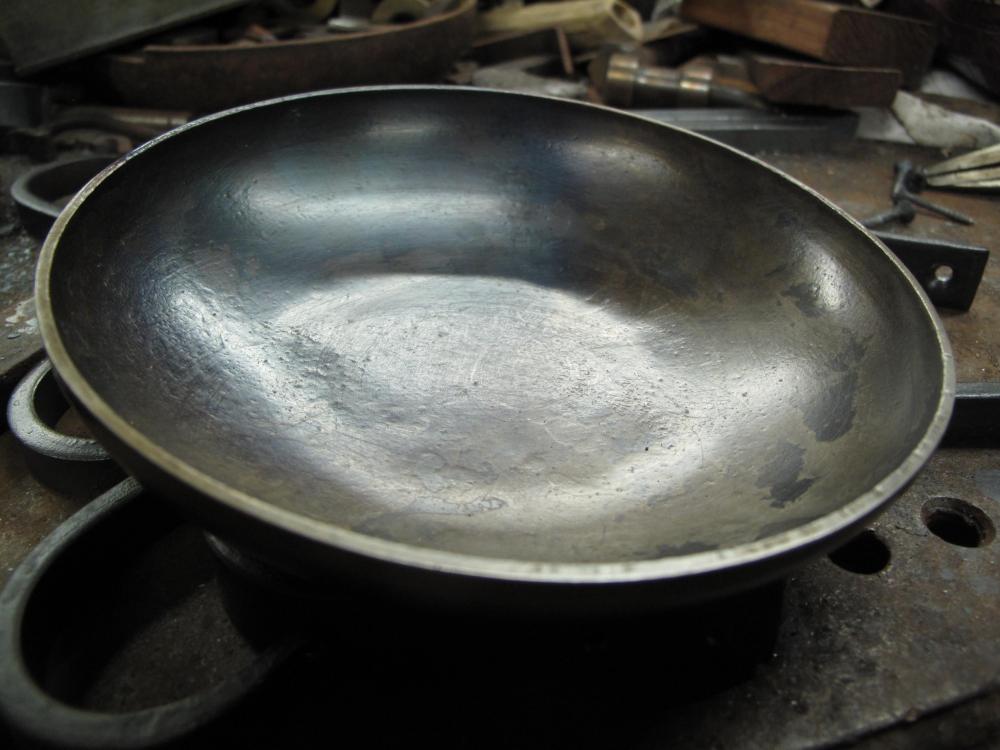
Good work, OC. It's nice and uniform, and that's the important part. I managed to get twelve hooks and a small dish made. I was rushing like a long-tailed cat in a room full of rocking chairs so I could get the stuff made and to the post office in time. It feels good to rush some times. It forces you to pay attention to every strike of the hammer and keep things as streamlined as possible. Now I'm tired!
-
Weld up plates? No. Not worth the time and material to do it. Can't find an anvil in your price range? Really? There are scrap yards all over Louisiana where you can find large chunks of steel. Or, are you wanting a london-pattern anvil because you think that's what you need to be a blacksmith? To give you an idea what anvils look like, here are a couple from GS Tongs on youtube. He makes them and uses them, and never seems to have a problem forging some really nice stuff. And because they're relatively light, he can flip them and use different faces as needed. They are most definitely not "london pattern" anvils. Surely you can find a similar chunk of solid steel around the junk yards. Even if it's mild steel, a few minutes with some hard-facing rod or wire would turn the face into something rather resistant to impact.
-
One of the best leveling techniques I've run into is to drive 5-7 1" lag screws into the bottom of the stump, as close to the edge as you can. You wouldn't think it'd make much difference, but getting little legs under there takes a lot of the guesswork out, keeps moisture from wicking up the end grain and prevents wear from the concrete floor. The bolt heads aren't so thick that it raises the anvil enough to bother, but they're thick enough to last for ages against rust and abrasion.
-
I've done it and haven't had a problem. It's a good way to use found roller bearings that are too short for hot work and can be ground to a nice shape. I'll often chuck a 1/2" bearing into the drill and then hold it against the bench grinder to make round-nose punches that are every bit as nice as could be turned in a lathe. Add some 1" mild steel and a handle.... and you've got a neat little tool that'll last for ages.
-
Thank you. They've proven quite popular with folks and I'm happy to make them. Chasing in the design takes the most time, but it's worth doing it by hand rather than relying on a stamp that gives you the same impression from one pendant to the next.
-
-
There's a good bit of demand for those vintage machines if you can get it back into halfway decent condition. There are tons of glassworkers out there who really get a kick out of using something that's a century old. They don't necessarily have the skills to refurbish the drill, but they'll certainly buy it. And the base could always be turned into a small welding table or tong/hammer cart. Whenever I see a nicely made base in the junk pile, I try to think how much it would cost me to make the same thing. Usually, there's no way I could make it for as little as it costs. Of course, the big question is whether you have the time and energy to take the drill home and bring it back to life. In order to sell it, you'd have to reach out to folks who work in other crafts, but I'm sure it'd sell. If nothing else, some interior decorator would probably snatch it up so they could put it in a bar or cigar "shoppe".