VaughnT
Members
-
Joined
-
Last visited
Everything posted by VaughnT
-
Definitely get the black one if it's got good edges and rings solid. Number of holes isn't critical because you can drill a pritchel if you absolutely have to have one, or create a bolster plate for punching through at the hardy. While the other anvil looks nice, having that tapered square heel like the black one does will make it very practical for a lot of things. I've wanted a "double horn" anvil like that for quite some time, but they just don't pop up around here when I have money to burn. It's one of those features that's really handy when it's really handy. Not having it means you have to make hardy blocks and the like.
-
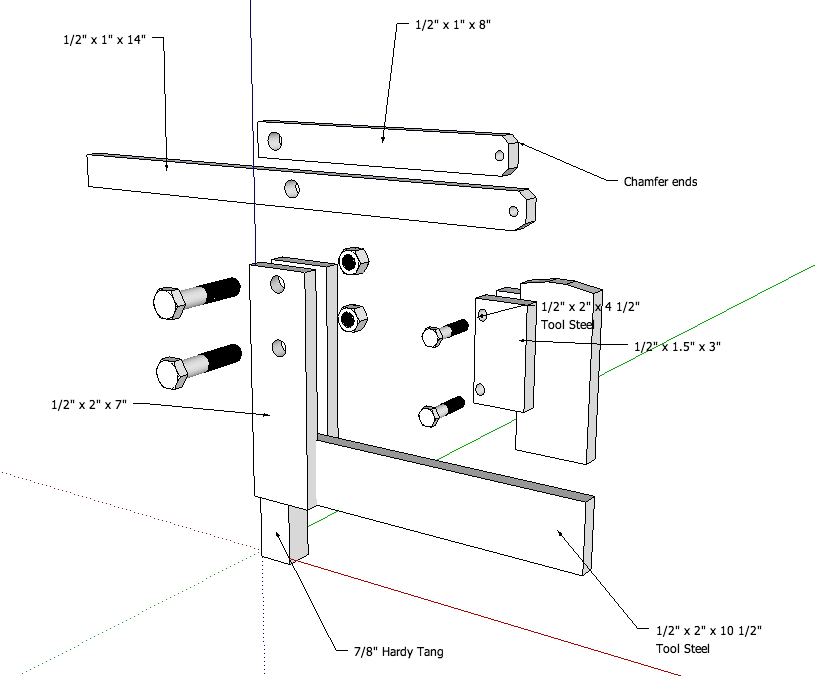
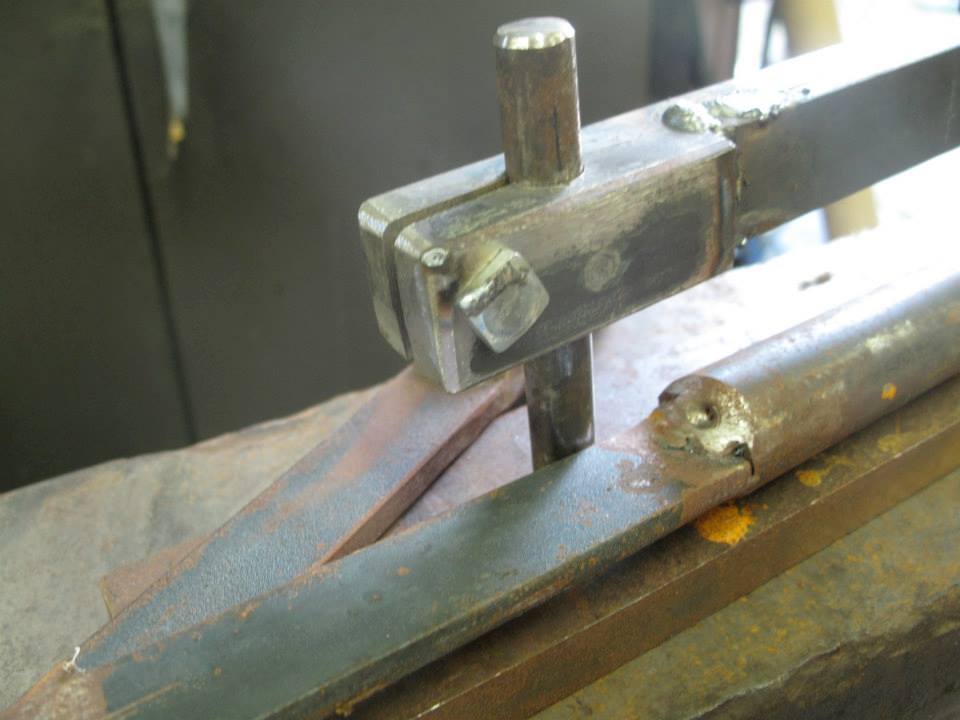
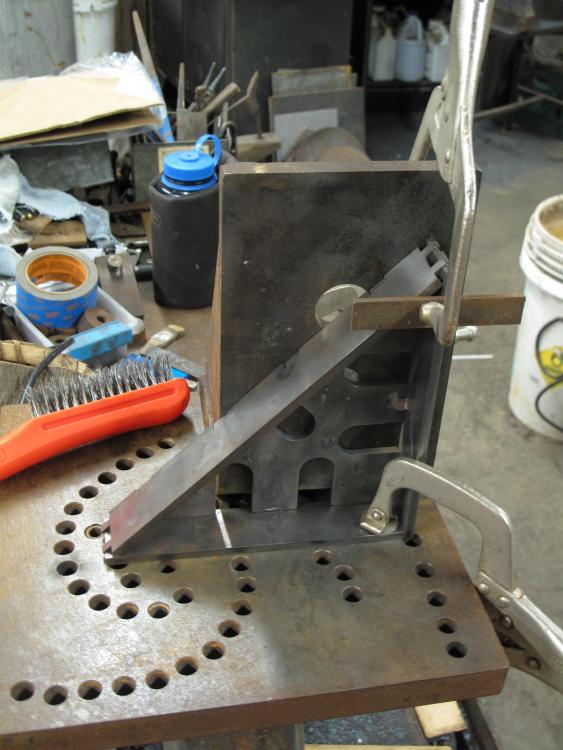
Love the v-notches you put in. That would have made my piece a lot more convenient! No idea why I didn't think of that!! When I made mine, it was with the idea that I'd use 1/2" roller bearings that I had, so I drilled a .5" hole with a cut to it. Thought I could clamp down on the punch with the bolt, but..... nope. Or, it didn't do it well enough that there still wasn't a lot of slippage. And, I was locked into using 1/2" stock. Your v-notches make things so much more awesome, imo! Here's a design that I snagged off the world wide web. I like that the tool remains vertical through the line of travel, but I haven't found a way to adapt it to using tooling made from coil springs and such.
-
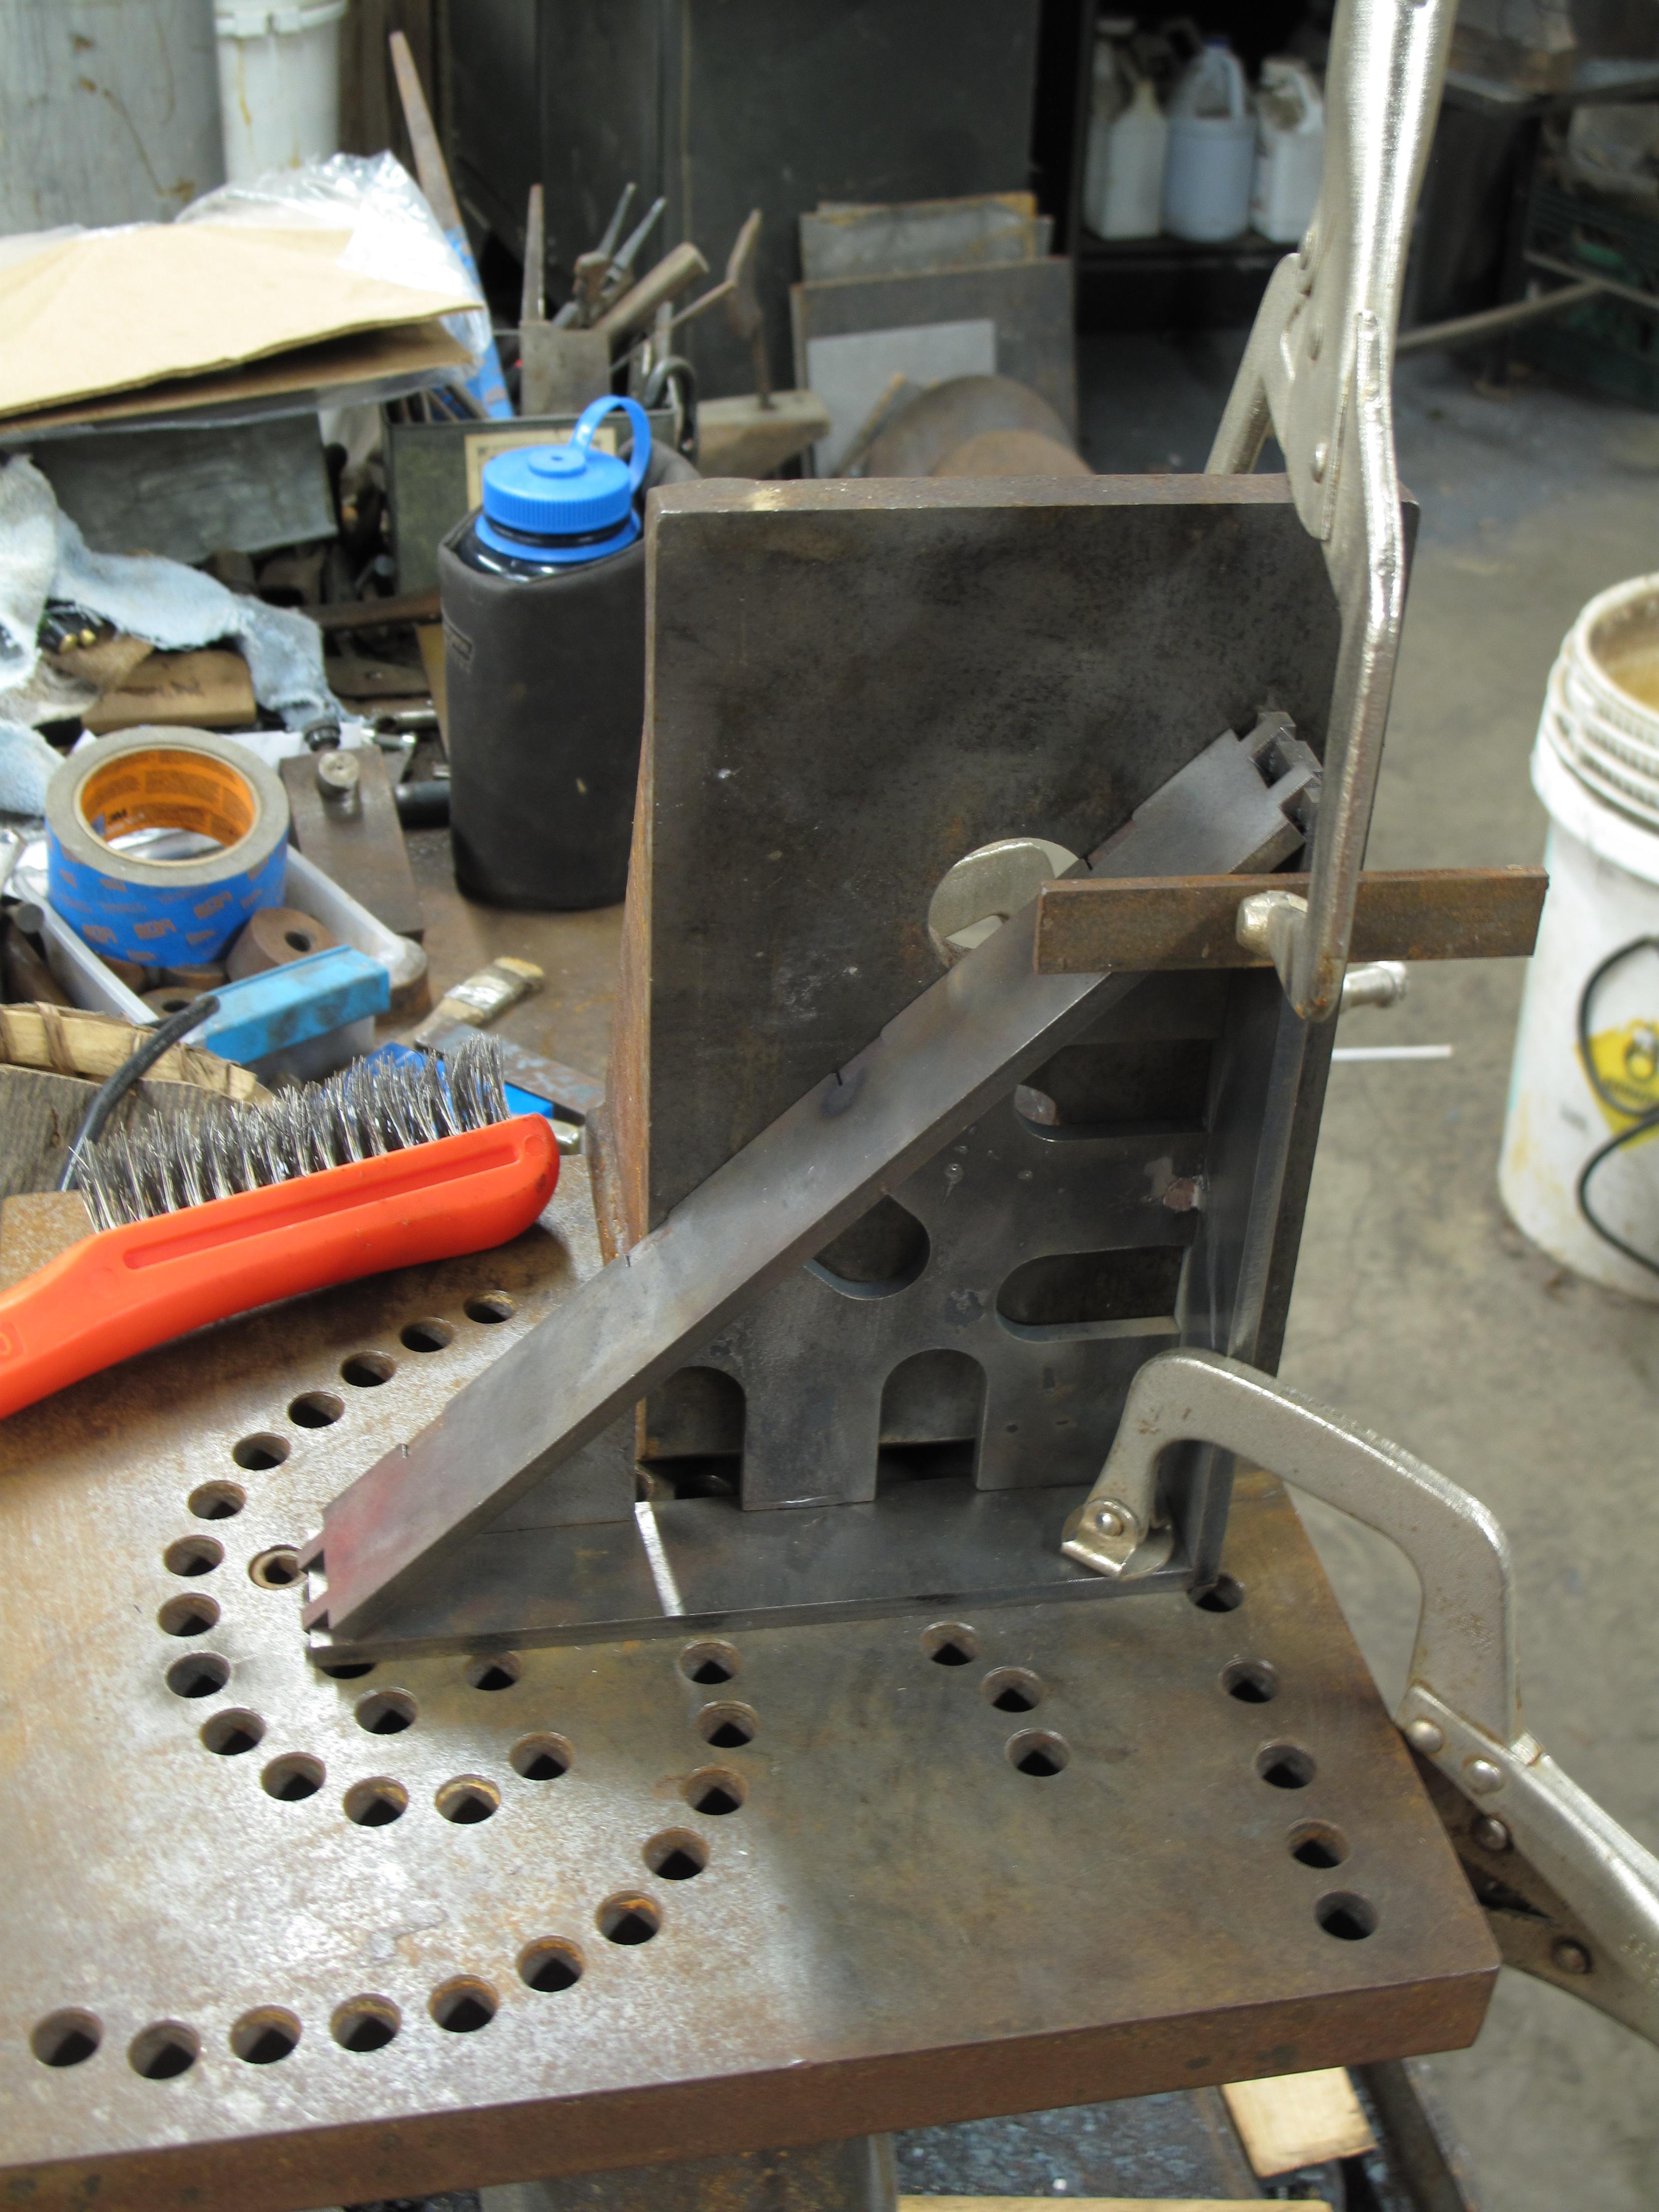
Very similar to one I made some time back. The problems I had were pretty basic once I'd made it and used it a little, and wondered why in the world I didn't foresee the problems in the first place. One of those face-palm moments to be sure! It will work, but you'll run into issues with the chisel moving in the arm, rotating and traveling up/down as hit it. Also, I found the narrow upright allowed for a ton of flex in the holding arm, and switched out to a piece that was 2" wide, or wider if you have it. The extra width keeps the arms tracking properly when they want to move back and forth. I couldn't find a way to hold the chisel firmly in place and was always having to stop and readjust it. Even with a really tight clamp on the chisel, Newton's Laws continue to apply!
-
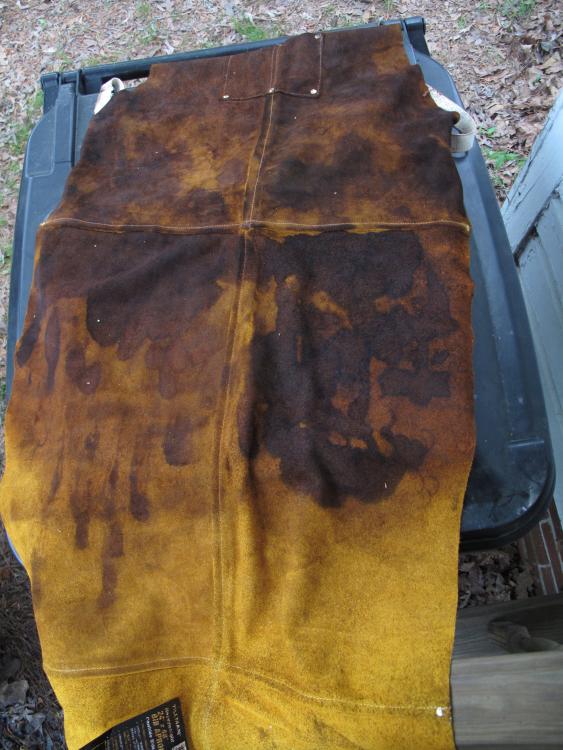
Yea, that's one way of describing it!! Got the second coat of dye on and she looks much better, though still very splotchy. Might try a third bottle of the stuff before I call it a day, but I want to figure out what I'm doing about the straps and whatnot before worrying about that. Fun times, right?
-
The apron adventure continues! I really liked the Tillman 48" I've been using for the last couple of years. If it hadn't dried out and ripped, I'd still be using it. As such, I thought I'd try modifying another of their aprons to make it infinitely better than the OEM stuff. First step -- dying the apron so stains don't show up quiet so brilliantly! After the first bottle of dye didn't do nearly as well as I would have hoped, a second bottle was called for. Probably going to need a third bottle.... ugh! Seems that for some reason the dye want to evaporate off rather than staining the leather. It'll stain some places, and get all the way through the hide. Other places, it looks like no dye was used even though I know the spray bottle covered every inch of the skin! No worries, though. Next step is to research into reinforcing the areas around where the straps tie into the body. This is where the leather failed before, and I think reinforcing it will be a good idea. Rivets? Probably. Glue? Don't know if that'll survive any oiling I might do to the hide. Overall, it's been a fun learning experience.
-
I like watching videos from people who are new to making videos just because it's interesting to see them advance in making better and better videos. But the quality of the content has to be there. I'm not interested in the least by "entertainment" videos because they aren't generally anywhere as entertaining as the maker thinks they are. Subject knowledge is the primary thing, but quality camerawork is also very important. I don't need snazzy soundtracks and tons of jumping around. Good clean camera angles that allow me to see what's being done -- that's the important thing. You honestly don't even have to say a word throughout the entire video. Let the pictures do the talking for you, and I'll sit through an hour-long video without complaint as long as the lighting and camera lets me see what's going on.
-
I like how streamlined it is! Nothing more than you need, and exactly what you need. My design..... not so much!
-
I have a bad back, too. If yours gets to hurting when you're at the anvil, your anvil is too low. Despite the common notion of the anvil coming up to your knuckles, that's a bit low for some folks. I put mine about where my wrist is, and I don't have to stoop one bit.... and my back doesn't hurt any more than normal after a day of forging. A table makes a lousy anvil. My main bench has a 1.25" solid steel top, but doesn't perform nearly as well as my 300# anvil even though it weighs at least triple what the anvil does. The reason is simply the amount of mass under where the hammer strikes. Those old cast iron layout tables are worth a pretty penny. Even if it's worn a bit, it can usually still be brought back to life by someone that knows what they're doing. Try pricing a new one and you'll see why the old ones are so well cared for! I'd be way more inclined to sell that table and buy the materials to make a bigger table more suited to doing non-precision fab/layout work. Also, once you've drilled through the cast iron, you're upsetting its structural integrity. That hardy hole might serve as a stress focus and any light hammering on the table could lead to cracking. Not only will the hole destroy the value of the table for what it was designed for, but you're risking really damaging it if the hardy hole decides to send a crack across the whole thing. I'm with the others that caution against the notion. You can raise your anvil another inch or two if you want to alleviate back pain while working at it, or you can make a portable hole that attaches to the leg of the table, etc. Lots of ways to go that I think would be better ways to go.
-
You could be me! Wise words, friend, very wise. I get approached at least once a month by someone saying they can help boost my sales through the internet if I'll just follow their simple plan. When I ask them for data on how they can boost my business, they'll show me tons of charts displaying their past performance... but it never covers actual sales. They talk all day long about the number of visits or views, but nothing about actually increasing my sales. The only thing that's for certain is that these people get their $10/month or whatever the fee is. Honestly, I can't fault them. Their business is about getting people to buy their product, not producing a product that produces results for the clients. Big difference there, and a lot of unhappy customers in their wake. I don't pay for any advertising. I figure if I spend some time on the various social media platforms and work to spread the name around, that'll have to be good enough.
-
Nice harvest! I love finding things like that, and wondering what their story might be. Those tongs are really nice and you have to think long and hard about what the local smiths might have been making with 3" flat bar. Throw them in the forge, get them cherry hot. That'll bust up all the rust and loosen the rivet if it can be loosened. Weld on a new rein and put the old girl to work.
-
Do it! There's nothing more enjoyable than working on a quiet anvil, and nothing more annoying than working on something that rings like a church bell! When I needed to break my Wilkinson loose from the stump it was caulked to, I just tipped the whole thing over and let gravity to the work for me. She popped free right quick! The joint is pretty dang solid. I didn't do anything to the bottom of the anvil other than wire brush off the heavy rust. Used a whole tube of caulk, too. After the caulk set, it went from church bell to oak plank. What an absolute dream! Not as quiet as a proper Fisher anvil, but the next best thing, for sure. You won't be sorry if you caulk your anvil to the stump. Best invention in the history of blacksmithing, in my opinion.
-
Wonderful job. The only thing I'd do is to pull out the lag screws one at a time, square up the heads in your forge, on that nice new anvil stand, and then reinstall them. That way you get the old-timey look and a nice forging session. Overall two thumbs up for design and execution.
-
The first pair of tongs hold the work off the side of the reins, already off balance, and you have to adapt for that. The piece between the rivet and jaw aren't parallel - one is angled so it can line up with the lower jaw at the working bit. In that instance, flat stock cut out from a sheet will get the job done plenty fine. With the lower pic, the tongs are designed to hold the bar in line with the reins so you have good alignment and are able to rotate the hot steel with a simple turn of the wrist. In order to achieve that alignment, you have to offset the jaws so the work remains in line with the handles. Most people that I've met don't like using off-set tongs unless they have to, myself included. They can be handy, but aren't preferred.
-
If it's legal, there's sure to be people interested in getting some from you. Whether or not it's worth your time, however, is another matter. The spikes could likely be Wrought Iron, which is nice to have and forge into stuff. That you have it in convenient sizes is also very nice. However, there are already companies out there doing reclamation work who make the wrought iron available to the public. You'd have to match their prices or lose customers to them. Also, the quality of the spikes is important. If they're corroded heavily, or almost in two, that's a whole different thing than a bar that shows only light rust and is sound for the entire length. I'd certainly be happy to take a few off your hands just so I can say I have some iron spikes from Colorado. I don't know that I'd ever do anything with them, but they'd be a neat thing to have in the shop.
-
Those things are incredibly stout and make good anvils or swages. The job they have to do in a crusher is extremely abusive, so they're made from alloys that'll take both abrasion and impact. While they wear down and need replacing, the remnants are solid anvils if you want to use them for such. There was another member here on IFI that did up an anvil from a similar crusher/breaker bit. I saved a picture he posted as I thought it made for a very neat anvil, especially for smaller work that you might do at a public demo.
-
A great accomplishment! I'm really happy to see her come into the world and looking forward to seeing what you come up with next.
-
There used to be somebody offering gauges like this, but I think they closed up shop. I like the idea, certainly better than using wrenches. Finding a large-ish comb with the sizes already stamped in.... that'd be dreamy. I have thought about making one, but have enough irons in the fire as is. I'll keep my eyes peeled for a commercial variant.
-
Ninja blacksmith! That shackle thing is neat. Makes me wonder what the order of operations was to get the nice 90º corners inside and out on the main body.
-
If you want to really trick it out, make it so the opener part folds flat against the mounting part. That way you have clearance for the door and an extra bit of "bling" for the thing. Extra points if you can work up a spring and detent system so it locks in the open and closed positions!
-
John's spot on the money. You can get away with reversing the order of operations if the work is large enough and the carved lines are deep enough into the field, but that's a rare combo to find. Generally speaking, the piece doesn't look right if you reverse things because the carved lines are never a consistent distance from the edge. Or, you spend a gob of time filing the perimeter to try and get things spaced right so they look right. Reminds me, I need to make up a new set of chisels. The 1070 alloy was pretty easy to work with, but this 1095 I'm using now is really wearing things down quickly!
-
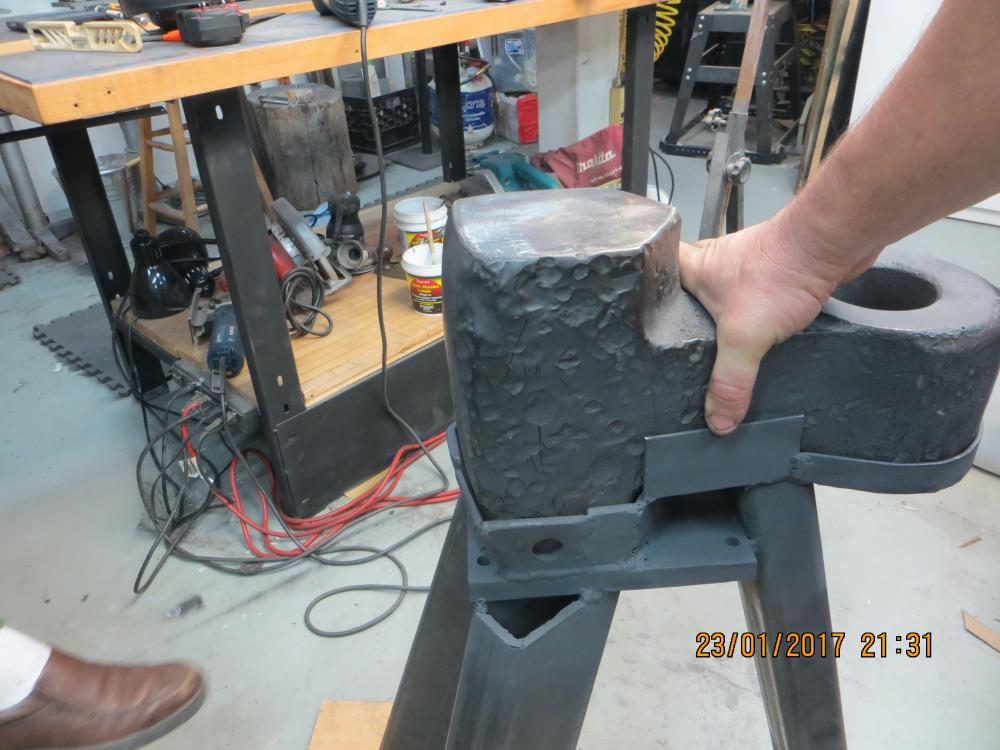
The super stump is working like a dream. I still need to find a large plate to mount it to since it seems to like rocking around a lot when you're hammering on it. And, oddly, I haven't had to weld up the big stamp mark at the bottom of the depression. I thought it would get in the way of using the depression, but I haven't had to go down that deep, yet. I also discovered that it makes a nice "catch basin" for all the scale that falls off the steel I'm hammering. Haven't used the Stump too much, but it's nice to have on hand when I need to bend some steel bar. Oh, and I welded up another of those Fireball Tool kits. It's amazing see how precise these things are cut. Makes me wish I had the laser machine they must be using! Quick and simple, even when a less than ideal set up to insure everything was square and plumb. Not I just need to wait for the paint to dry and I can put her into service.
-
Gorgeous anvil! Fisher's are the best out there, bar none. I wouldn't do anything to it. The face is excellent, and those few chips won't get in your way. Use it for a few years. Enjoy it. Love it. That's all she needs!
-
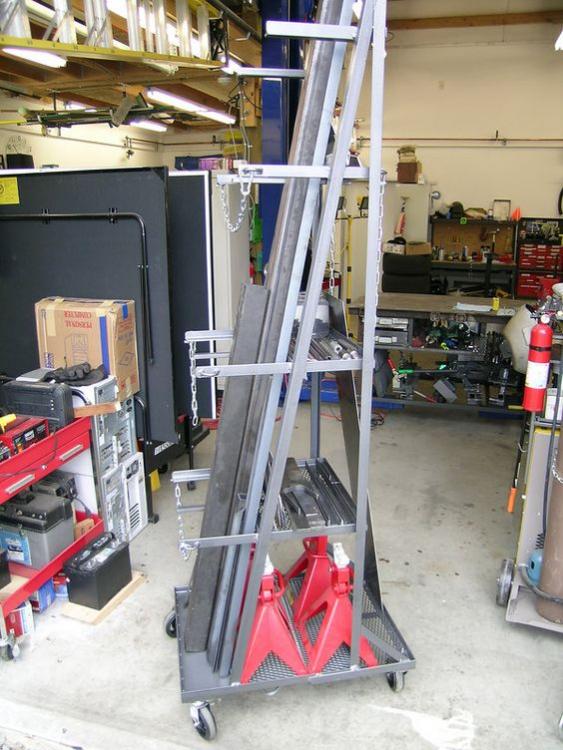
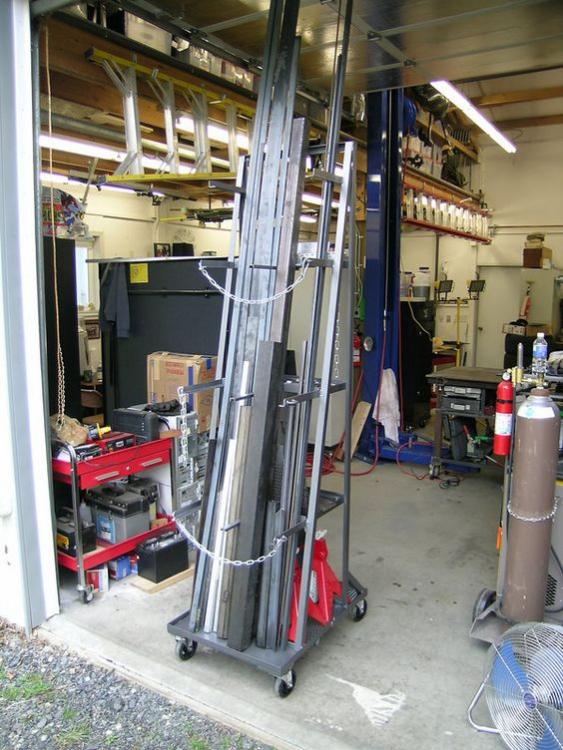
Found this online and keep thinking about making one for myself. I like that it's on wheels and handles those shorter pieces I always end up with.
-
Looks good. Don't get too wound up about the look of things, rather realize that this is an organic development process that takes a year or three to happen. You're on the right path, but expect things to change as your skills grow or new materials come to hand. Big and small, the way you use the space available will make a tremendous difference in how both the students and prospective customers see you. Keep your apron relatively clean. Your shirt should be a nice one, not one filled with holes and stains. No rust should be evident anywhere. If it something a customer might handle, wipe the piece down and give it a clear coat so the customer doesn't get grime on their fingers. And watch out for "walk offs". More than a few times I've looked at racks you've made only to find one hole empty. Did someone steal it? Did it fall out along the way? No telling, really, and it happens all the time! Best to use some epoxy and fix the things in permanently. There are a ton of ways you can go with your display boards, and they'll all work. Tall and skinny boards are great for catching the eye while also funneling folks in towards you. Smaller stands like you've made are great for filling up the table and getting people to think about how your work might be used on a project they have in mind. Keep working at it and you'll have a stellar operation in no time flat.
-