VaughnT
Members
-
Joined
-
Last visited
Everything posted by VaughnT
-
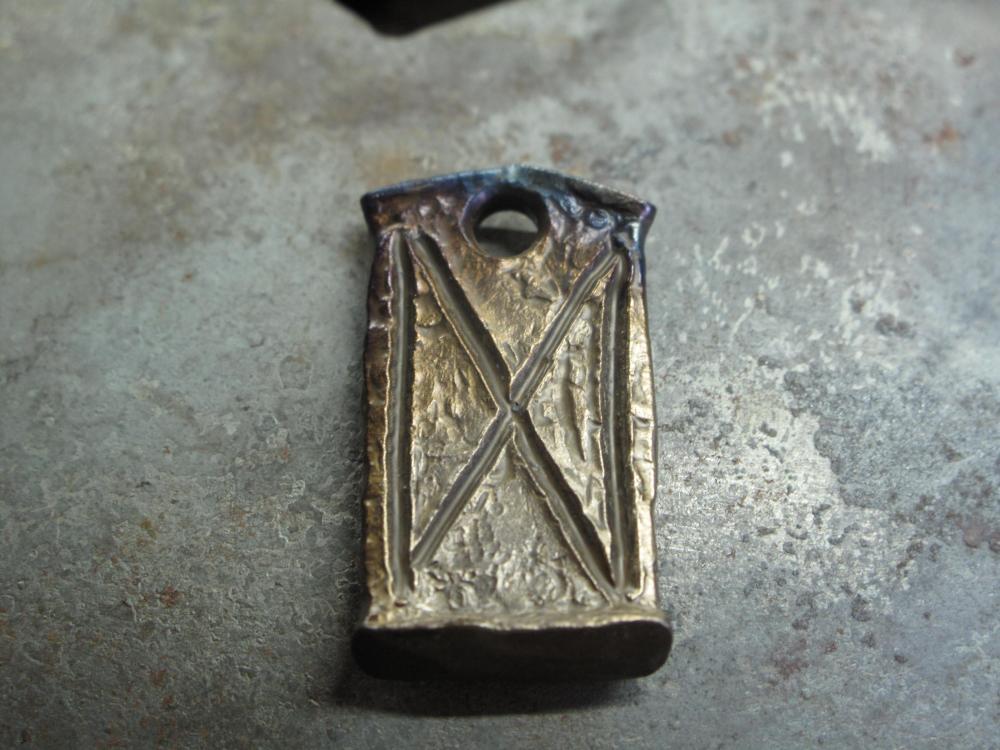
Got a fresh bar textured and made a pendant for a fellow. He names all his rides after runes and likes for me to make a pendant to go with each of them. Great guy! I also managed to get a few hooks made and two bars cut for a special project I'm going to try. I don't know if that super-secret special project will be worth broadcasting on the internet, so pictures will have to wait until I'm at least partially successful!
-
Good job, Jen. I can't wait for your coffee table book on making New England hardware!
-
Honestly, that looks like a ready-made window grille for keeping the burglars out. Even with keeping the spikes in place, it wouldn't take much to forge some mounting brackets and have something that folks could buy for the home.
-
If you can get it for free, grab it up! If you can get it for something like $10/ft, grab it up! Don't let it be scrapped!! However, don't think about forging it into something. That fence has been around for a hundred years, you have no experience smithing, and all you'll do is bugger up a ton of good fence. Instead, use the fence as fence. It's gorgeous fence that would cost you at least $100/ft to have made today. Why would you want to chop it up and make bottle openers? If you're dying to forge some genuine wrought iron, you can buy bars of the stuff online for very little money. It's salvaged iron and just bar stock, so buy what you think you can use and be done with it. Chopping up a perfectly good fence because you want to tinker with wrought iron, destroying a fence that can't be reasonably duplicated? Ugh! Even if you can't use the fence for fence, you can clean it up, repair what you can..... and sell it for very good money. Someone out there will appreciate that beautiful ironwork and want it for their home.
-
Pipe like that is rare enough around here that I'd be hesitant to cut it up or hammer on it. Still, no harm in cutting off a small length and making a cupping tool with it. The thick wall would make it plenty strong enough to do cold work, too, and that's always a nice way to make dishes.
-
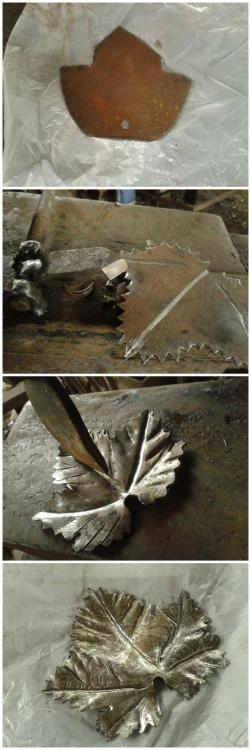
Forging the corners out isn't the goal. I could make a simple cut down the center and then draw the ends to a point like you and others have suggested, but that's now how you get this look. It's a valid way of decorating an end, but it's not the way I'm going with this particular style. By notching the bar, all you have to do is knock the tips over the far edge of your anvil and you get that little "something extra" in the design without a ton of added time involved. What I think I might have come up with is something akin to this leaf notcher I found online. Looks like it'll do the job in theory, but I'm not sure if the principle can be scaled up to something that'll go through 3/14" or 1/4" stock when struck with a 4# hammer.
-
Thank you all for your thoughts. Oddly enough, I never even considered a corner chisel even though I just forged one a couple weeks ago.
-
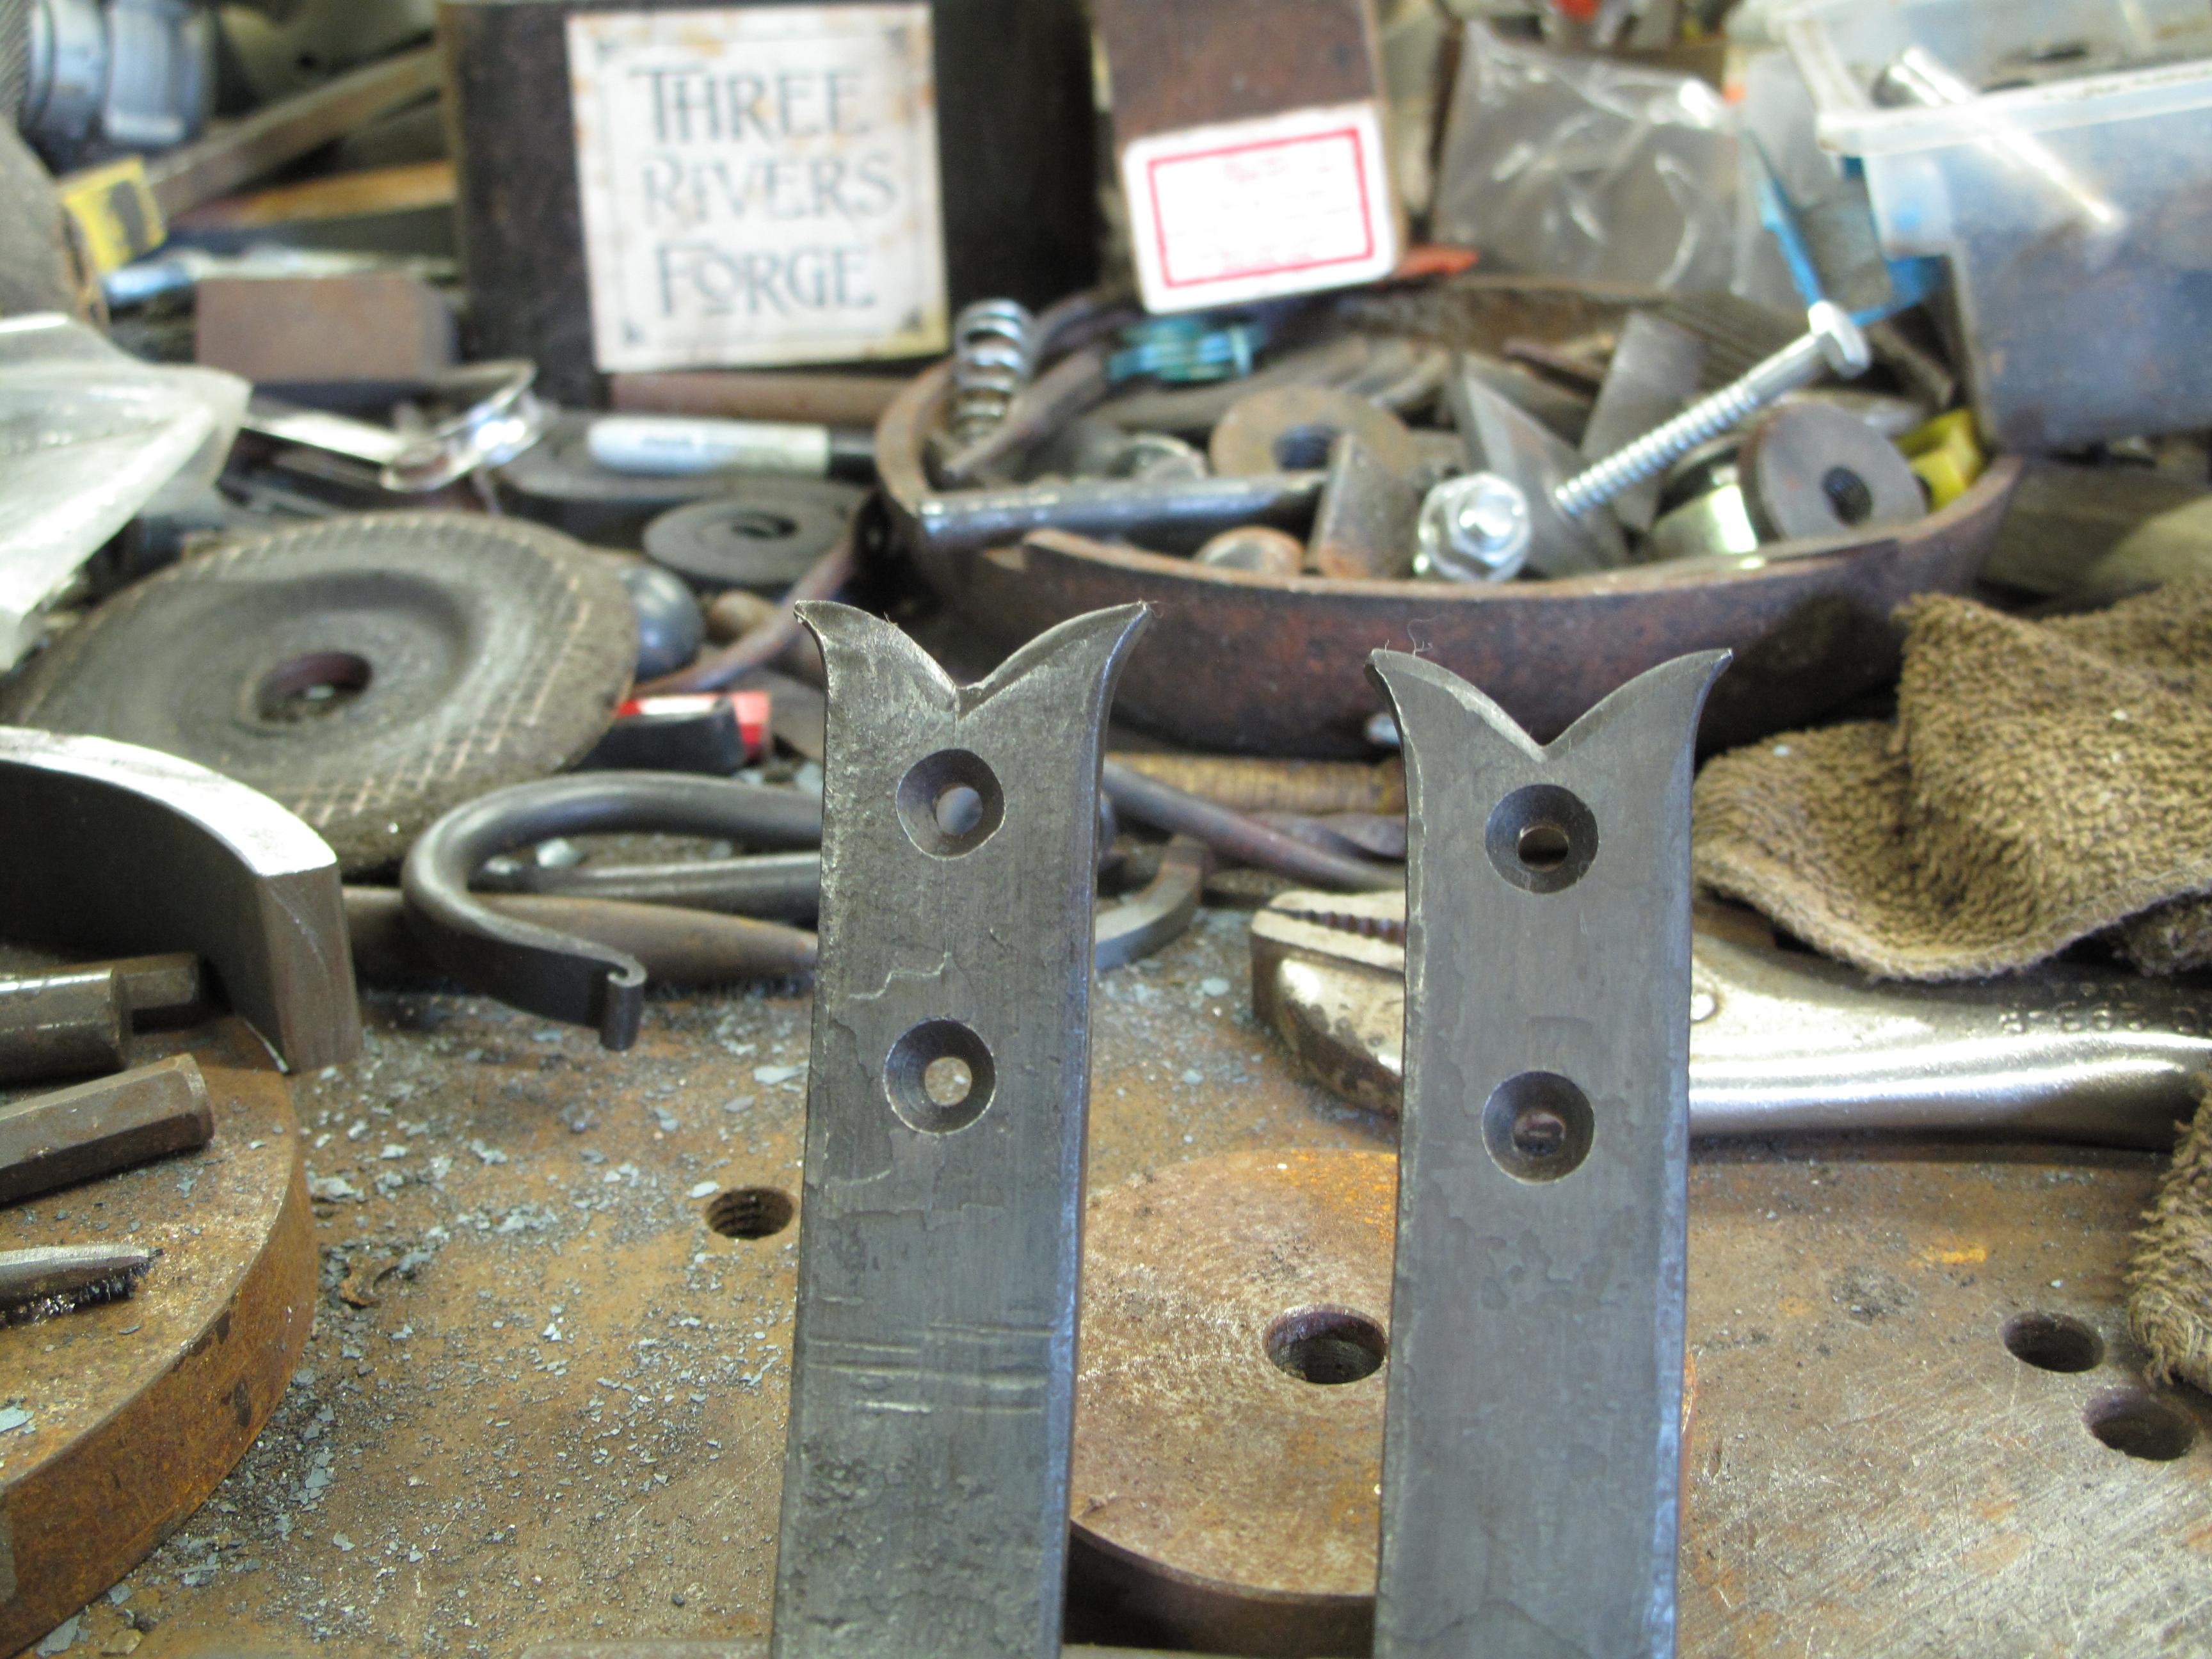
The other day, I made a pair of hooks for a customer. He liked the look. I liked the look. Sounds like a good deal all around. For a single pair of hooks, layout and cutting for the splayed end is easy enough, but it got me to thinking about how one might streamline the process. If you have an order for 20 hooks, that's a lot of finagling! If I had an Ironworker that could simply nip out the 90º notch on the end of the bar, that'd be fantastic. If I had a vertical bandsaw, I could cobble together some fence or the like. Having neither.... that's problematic. Right now, I'm scribing the lines and cutting the notch with an angle grinder. It doesn't take a lot of time, but every minute adds up. Honestly, it's probably just the aggravation making it seem like it's taking forever. So, I had the idea to make up a nipper that'd sit on the anvil. A top die of H13, maybe. Something that'd go through the hot steel but not easily lose its cutting edge. Not sure if it'll work since that's a lot of surface area for a man-powered tool to sheer through. Anyone make up a nipper of their own? Surely, I can't be the only one to consider it, so I'm thinking it's probably a bad idea or else we'd see them talked about more often.

-
Gorgeous casting, and I love how you got it so clean. Everyone I've see from other suppliers has a parting line right down the middle of the block that needs grinding away. No idea how you pulled it off, but it's impressive! It's on my list. Are you going to start offering cones as well? Might as well go for the Trifecta, right? Steve's notion of trying to copy the Fisher technique of casting a steel face plate onto a cast iron body is awesome. I don't know if that's legally possible since the rights are owned by someone else, I'm sure. Still, it'd be neat to try and figure out how it's done. I know I'd certainly want one in my shop, and I already have an awesome Fisher.
-
No need to wait on a chainsaw. Lumber makes a great "stump" and 4x4's are available at any lumber yard. Cut them to the right height/length, stand them up, screw them together...... boom, instant stump that you don't have to worry about attracting bugs or splitting as it dries out. And you can decorate them with iron banding and hand-forged nails as your skills improve. Between the cart and the stump, you've got two wonderful canvases to decorate with your ironwork, and you can always replace things as your skill level grows. That's half the fun. Keep rocking on. Every day is another chance to excel!
-
Very nice forge. I had one similar to that many years ago, and still miss it. To beef up the table and isolate the fire pot, I used regular red bricks and never had a problem. Plus, they just looked "right" once they'd been covered with coal dust and all that other stuff. Grouted the cracks wonderfully and I never had an issue with the bricks cracking or such. One thing, though, is that your cart is out of compliance with a half-dozen smithing codes. While it's bolted at the corners, those bolts have a tendency to loosen and the whole thing gets wobbly. As a blacksmith, your first order of business should be to forge some nice corner brackets that can be attached with self-tapping screws or the nut/bolt combo. Not only will it look good, but it's a good practical skill and will stiffen up the design. With a hammer/tong rack wrapping around the narrow end opposite the fire pot and some nice bracketry, you'll the the belle of the ball.
-
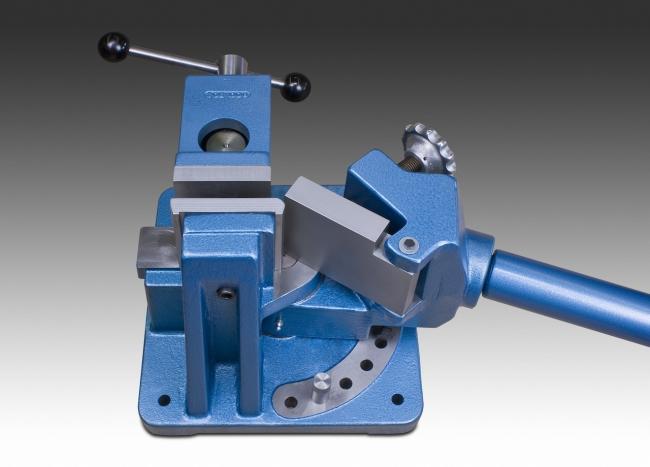
I think that describes my every day! I keep saying I'm going to fab up a bender that mimics the Goliath. It's certainly robust and won't flex like the Hossfeld even if it won't turn a circle. You can find the antique versions (or at least "vintage"), but they're rare as hen's teeth. New ones will set you back more than a grand.
-
Love those shoes and hearts, hoss. You should do a tutorial on how you're making them.
-
Never seen a Hossfeld style that was heavy-duty and "non-aggravating". Gary Huston showcased his "Miracle Bender" in one of his videos. It was only good for sharp bends up to 90º, but it was definitely a sweet piece of kit.
-
It completely does away with the need for shims. As you note, that's a huge aggravation any time, so doing away with it is a real joy. Just back from the shop where I did some testing. The BD1BC as I made it will securely hold from 1/8" all the way up to 2" square tube I had. I didn't try anything larger since I didn't have any small pieces to try, but I don't foresee any problems as long as the arc of the BD1BC is sufficient to clear the piece being cut. Where I goofed was only cutting my BD1BC from a 1" slice of the pipe. This means I can hold square and flat stock of any reasonable size.... but I can't hold round stock that's more than 1.5" in diameter. Going too large on the diameter means my 1" BD1BC tops out below the centerline of the round stock. If I'd cut my original slice 2" or 3" long, like in Terry's handled versions above, I'd be able to reach the centerline on any round stock I'd likely ever encounter in my shop. Not a huge problem as it stands, but something to think about if you work with a lot of tubing or bar.
-
Ol' Terry over on the welding forum liked the BD1 so much, he made up a selection and welded some handles on them. Gotta love a good idea! Never thought about using them on such thin stock, but I'm always keen for a way to do thin stock better!
-
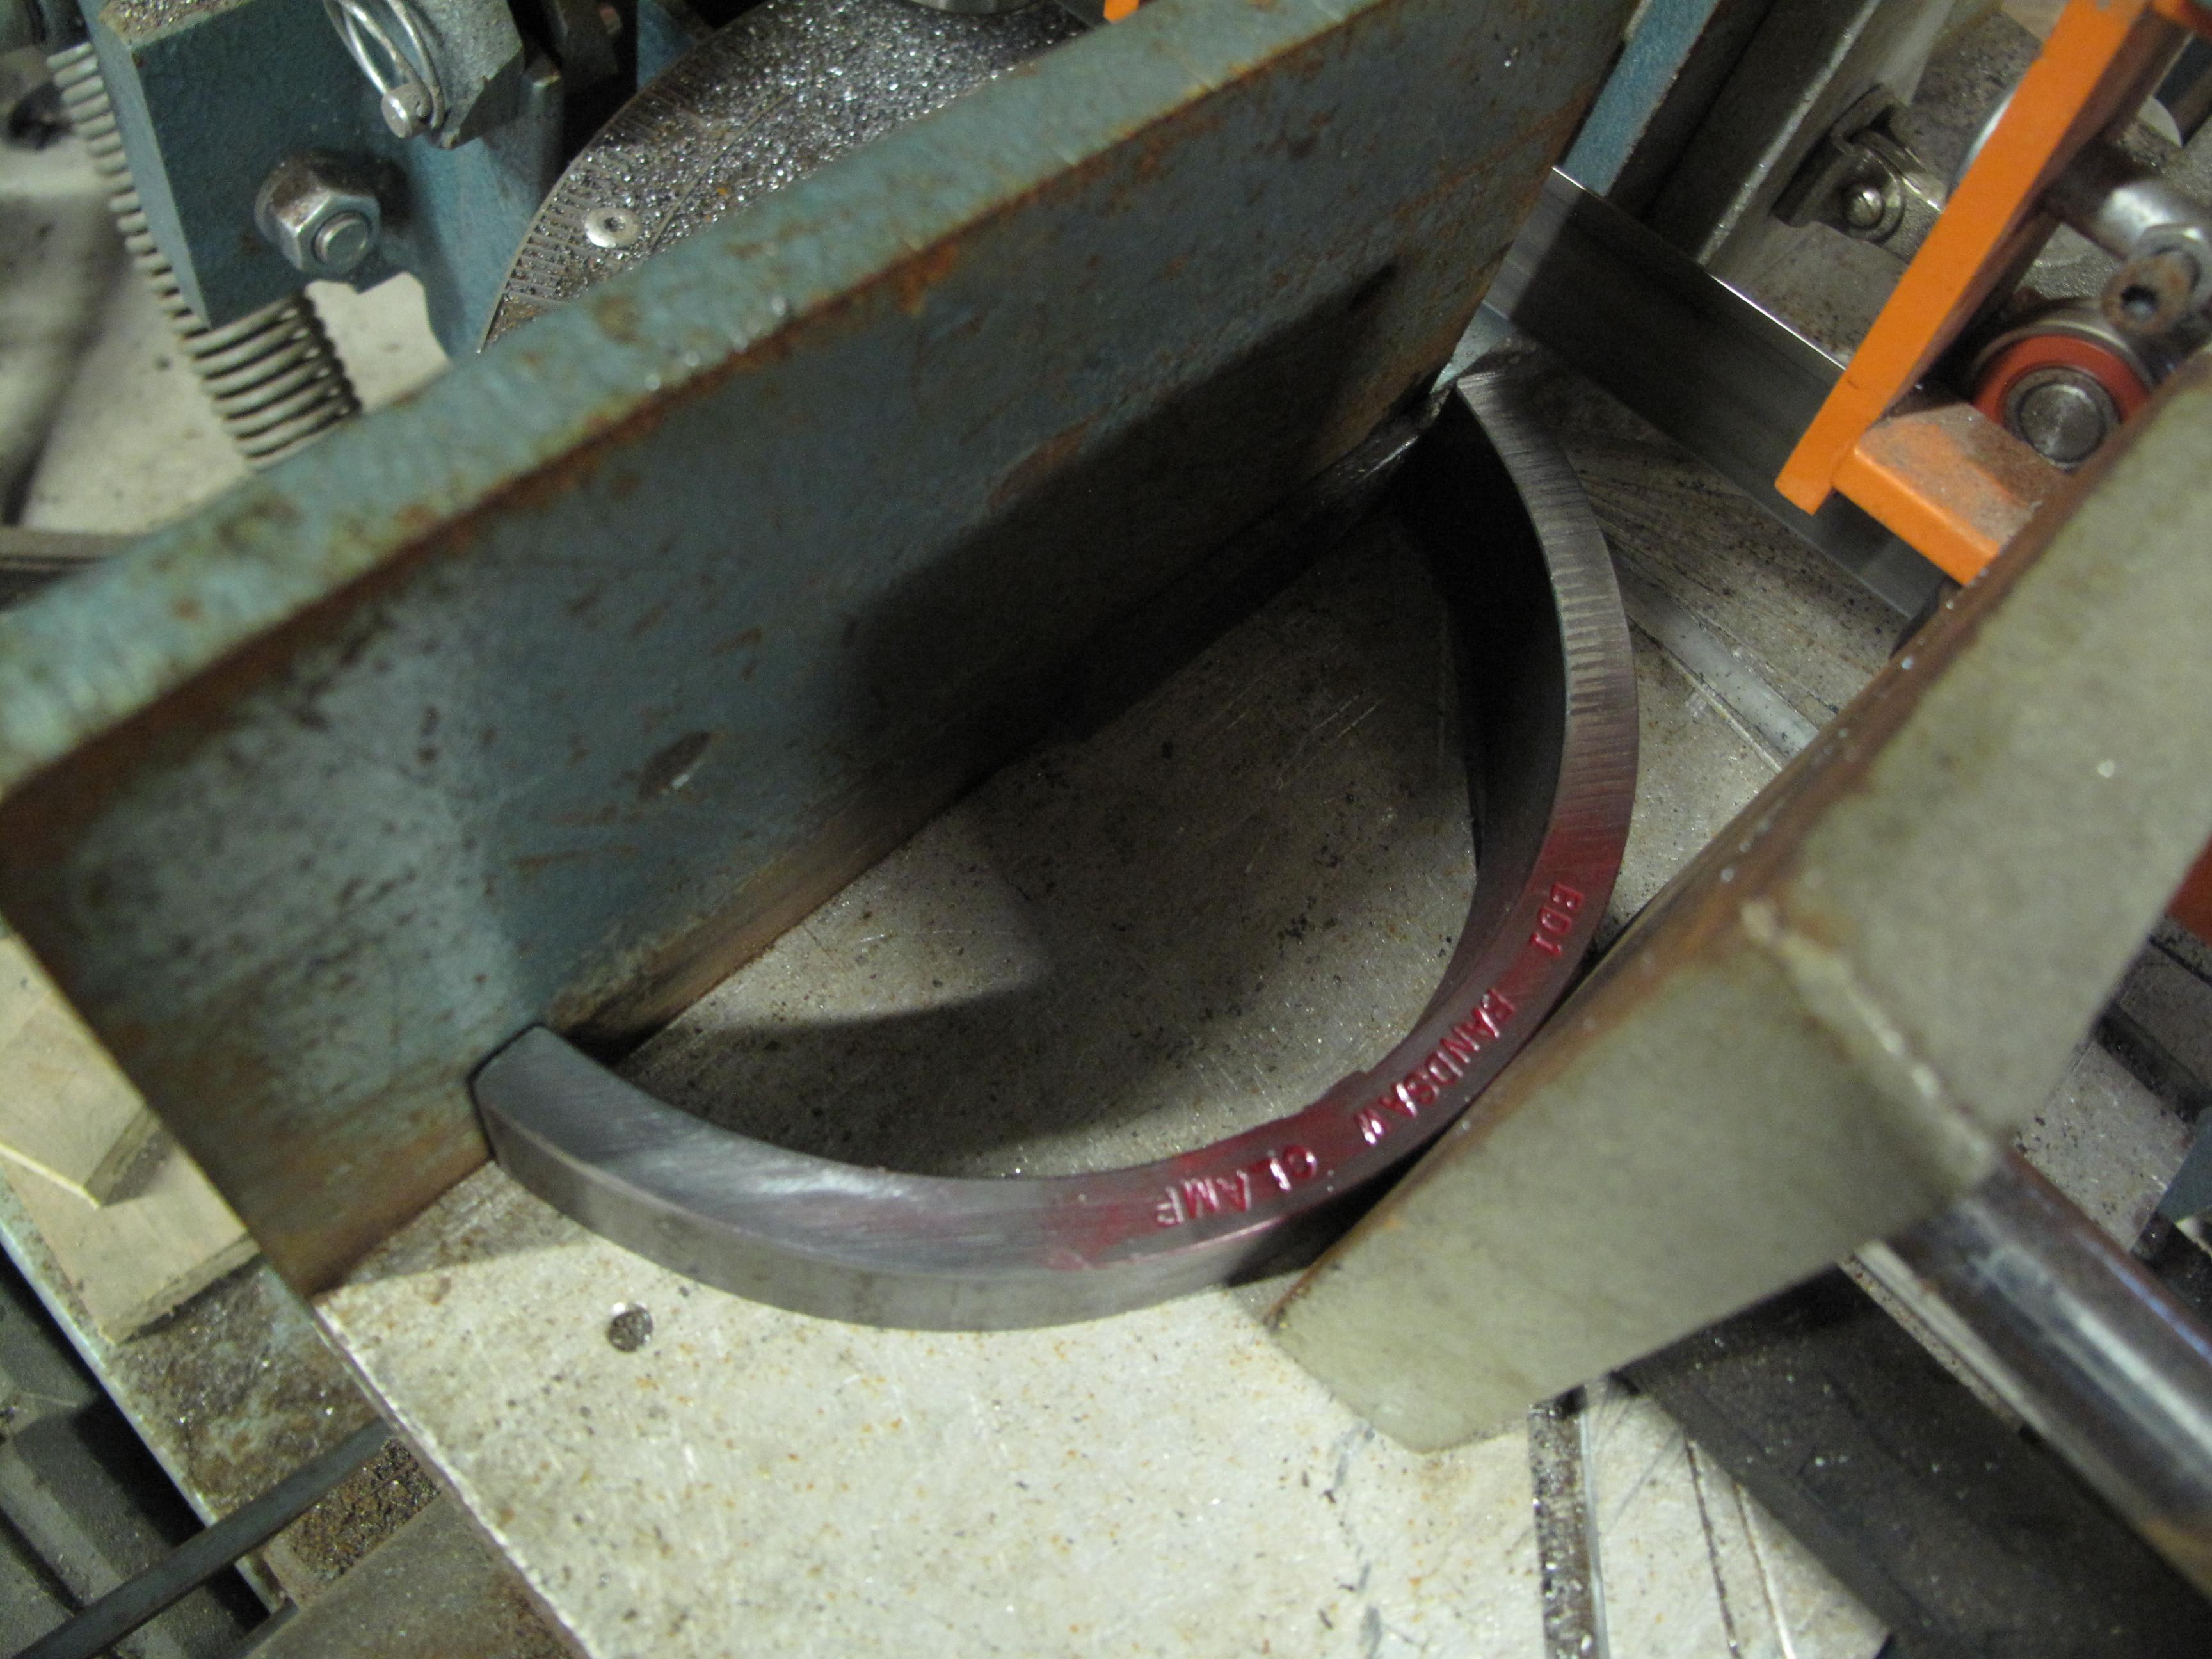
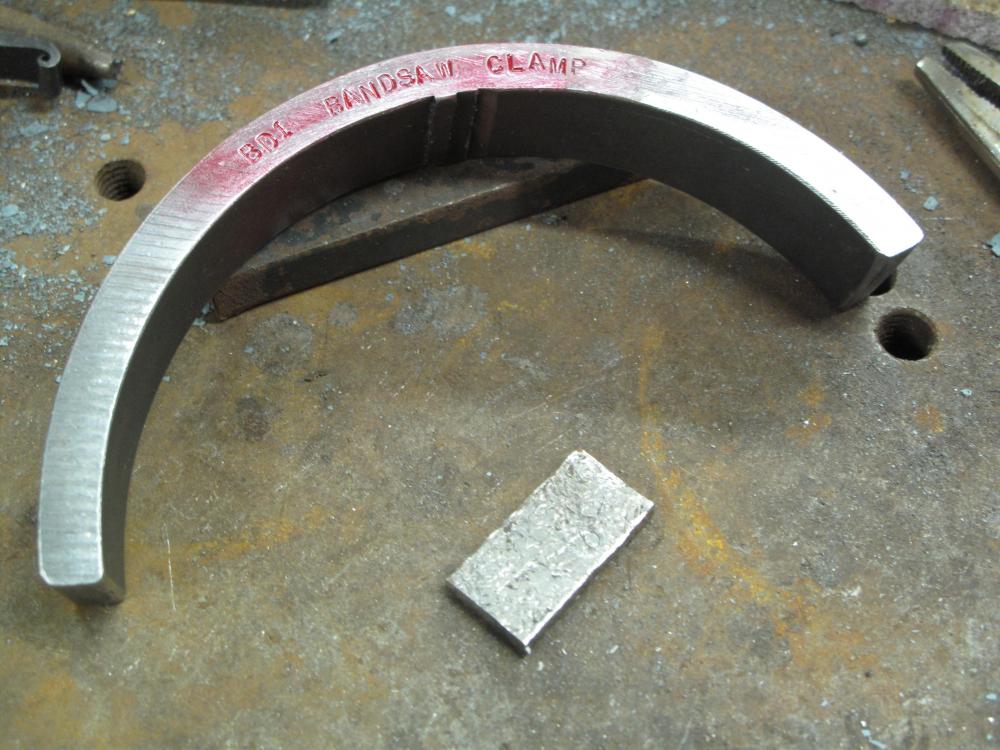
The flat block requires that you have a section of similar stock to fill the void. As you note, you have to "pack the other end with the same stock size". The curve of the BD1 Bandsaw Clamp does away with the need for any filler packing. It reaches from the fence to the end of the piece, right before the gap where the blade passes through, and fits any size stock you have. In this case, I was cutting 3/16"x3/4" bar, but the one clamp would work on anything from 1/16" up to, well, whatever size the curvature will accommodate. No filler packing needed, so you don't have to hunt down a piece the right size for what you're needing to cut. Not being a screw vise, there's only so much pressure the bandsaw's vise can apply. While my BD1 did deform a bit when I threw the lever on the vise, it bounced right back when I let off the pressure. At 3/8"x1", it's pretty stout and I don't think it'd be a problem to forge it back to shape if it ever took a permanent set. Frosty, here's a better picture -- the original BD1 Bandsaw Clamp in action! As you can see, the piece being cut is far too short for the OEM vise to grab solidly. With the arc of the BD1 clamp, though, the vise can apply pressure right up to the edge of the gap in the fence. Because the pressure of the clamp is distributed over those two little points of contact, it's a very strong grip and you don't have to worry about slippage.
-
Probably would. Won't know until you give it a go!
-
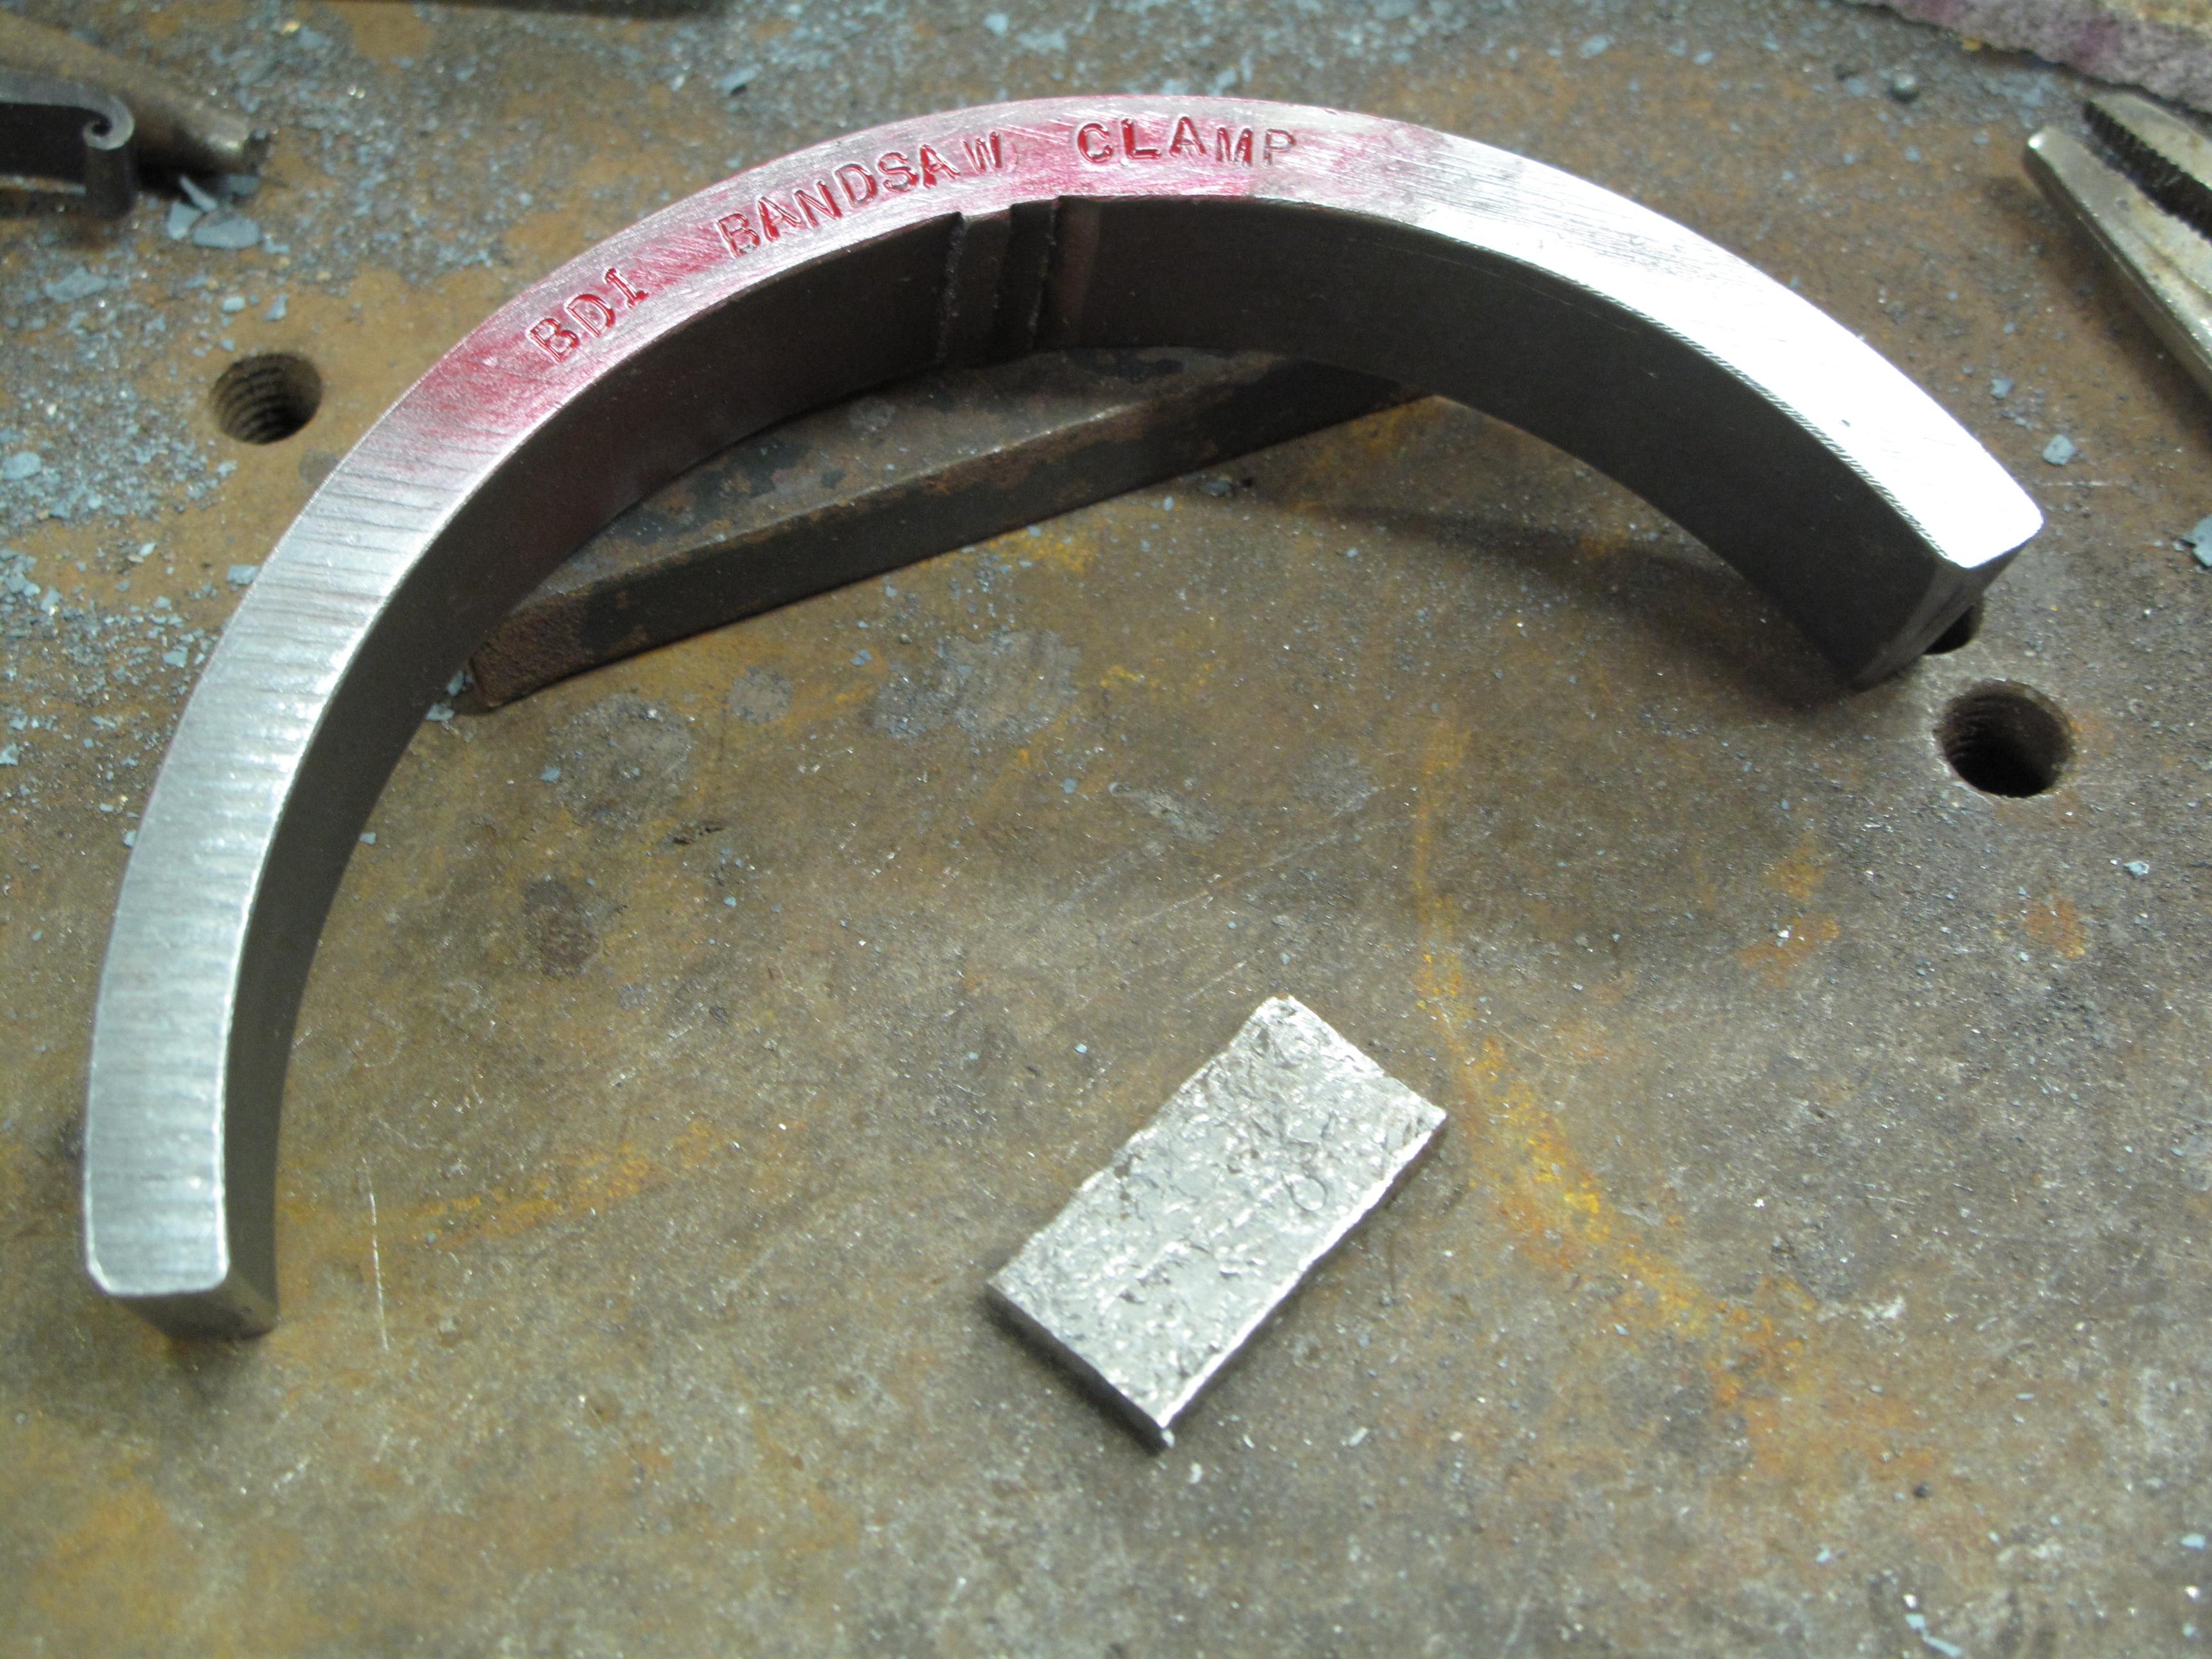
BD1 is the fellow over on the welding forum that turned me on to this neat little trick, so I thought it only right that he be immortalized for his efforts. The clamp is just a 1" slice taken off some heavy-wall pipe I had. In this case, 3/8", but you could use anything you might have. I was thinking you could even forge a flat bar into a curve and use it rather than wait to find a piece of pipe the right size. The clamp bridges the gap, so to speak, so you can cut a short piece from a short piece. If the OEM table clamp on your bandsaw doesn't reach, or the piece is too short to get a good grab, the BD1BC comes in really handy! I needed to make up a rune pendant for a nice lady, but didn't have a long bar of the weathered metal handy. Rather than forge some new bar, I opted to make a BD1BC first thing this morning and give it a go. Worked like a champ allowing me to cut 1-3/8" off a 5" bar. Action shot! After Action, with the cut piece. Not much to the "construction" of these things. I didn't use a full half-circle, opting to leave the rest of the tube for a circle jig that'll look good hanging on the wall. Just cut a slice, ease the edges with a file, and you're done. I do recommend you stamp in the name like I did just so you don't accidentally throw this thing away. I'll likely end up painting the whole thing red just so I can find it easily and don't think it's scrap for the scrap yard!

-
How does the split chuck assembly work? Looks like you've well and truly wrapped the aluminum around the ball, and you've got to get the ball out of there....
-
How's it working out? When ya gonna finish it? I'm curious!!
-
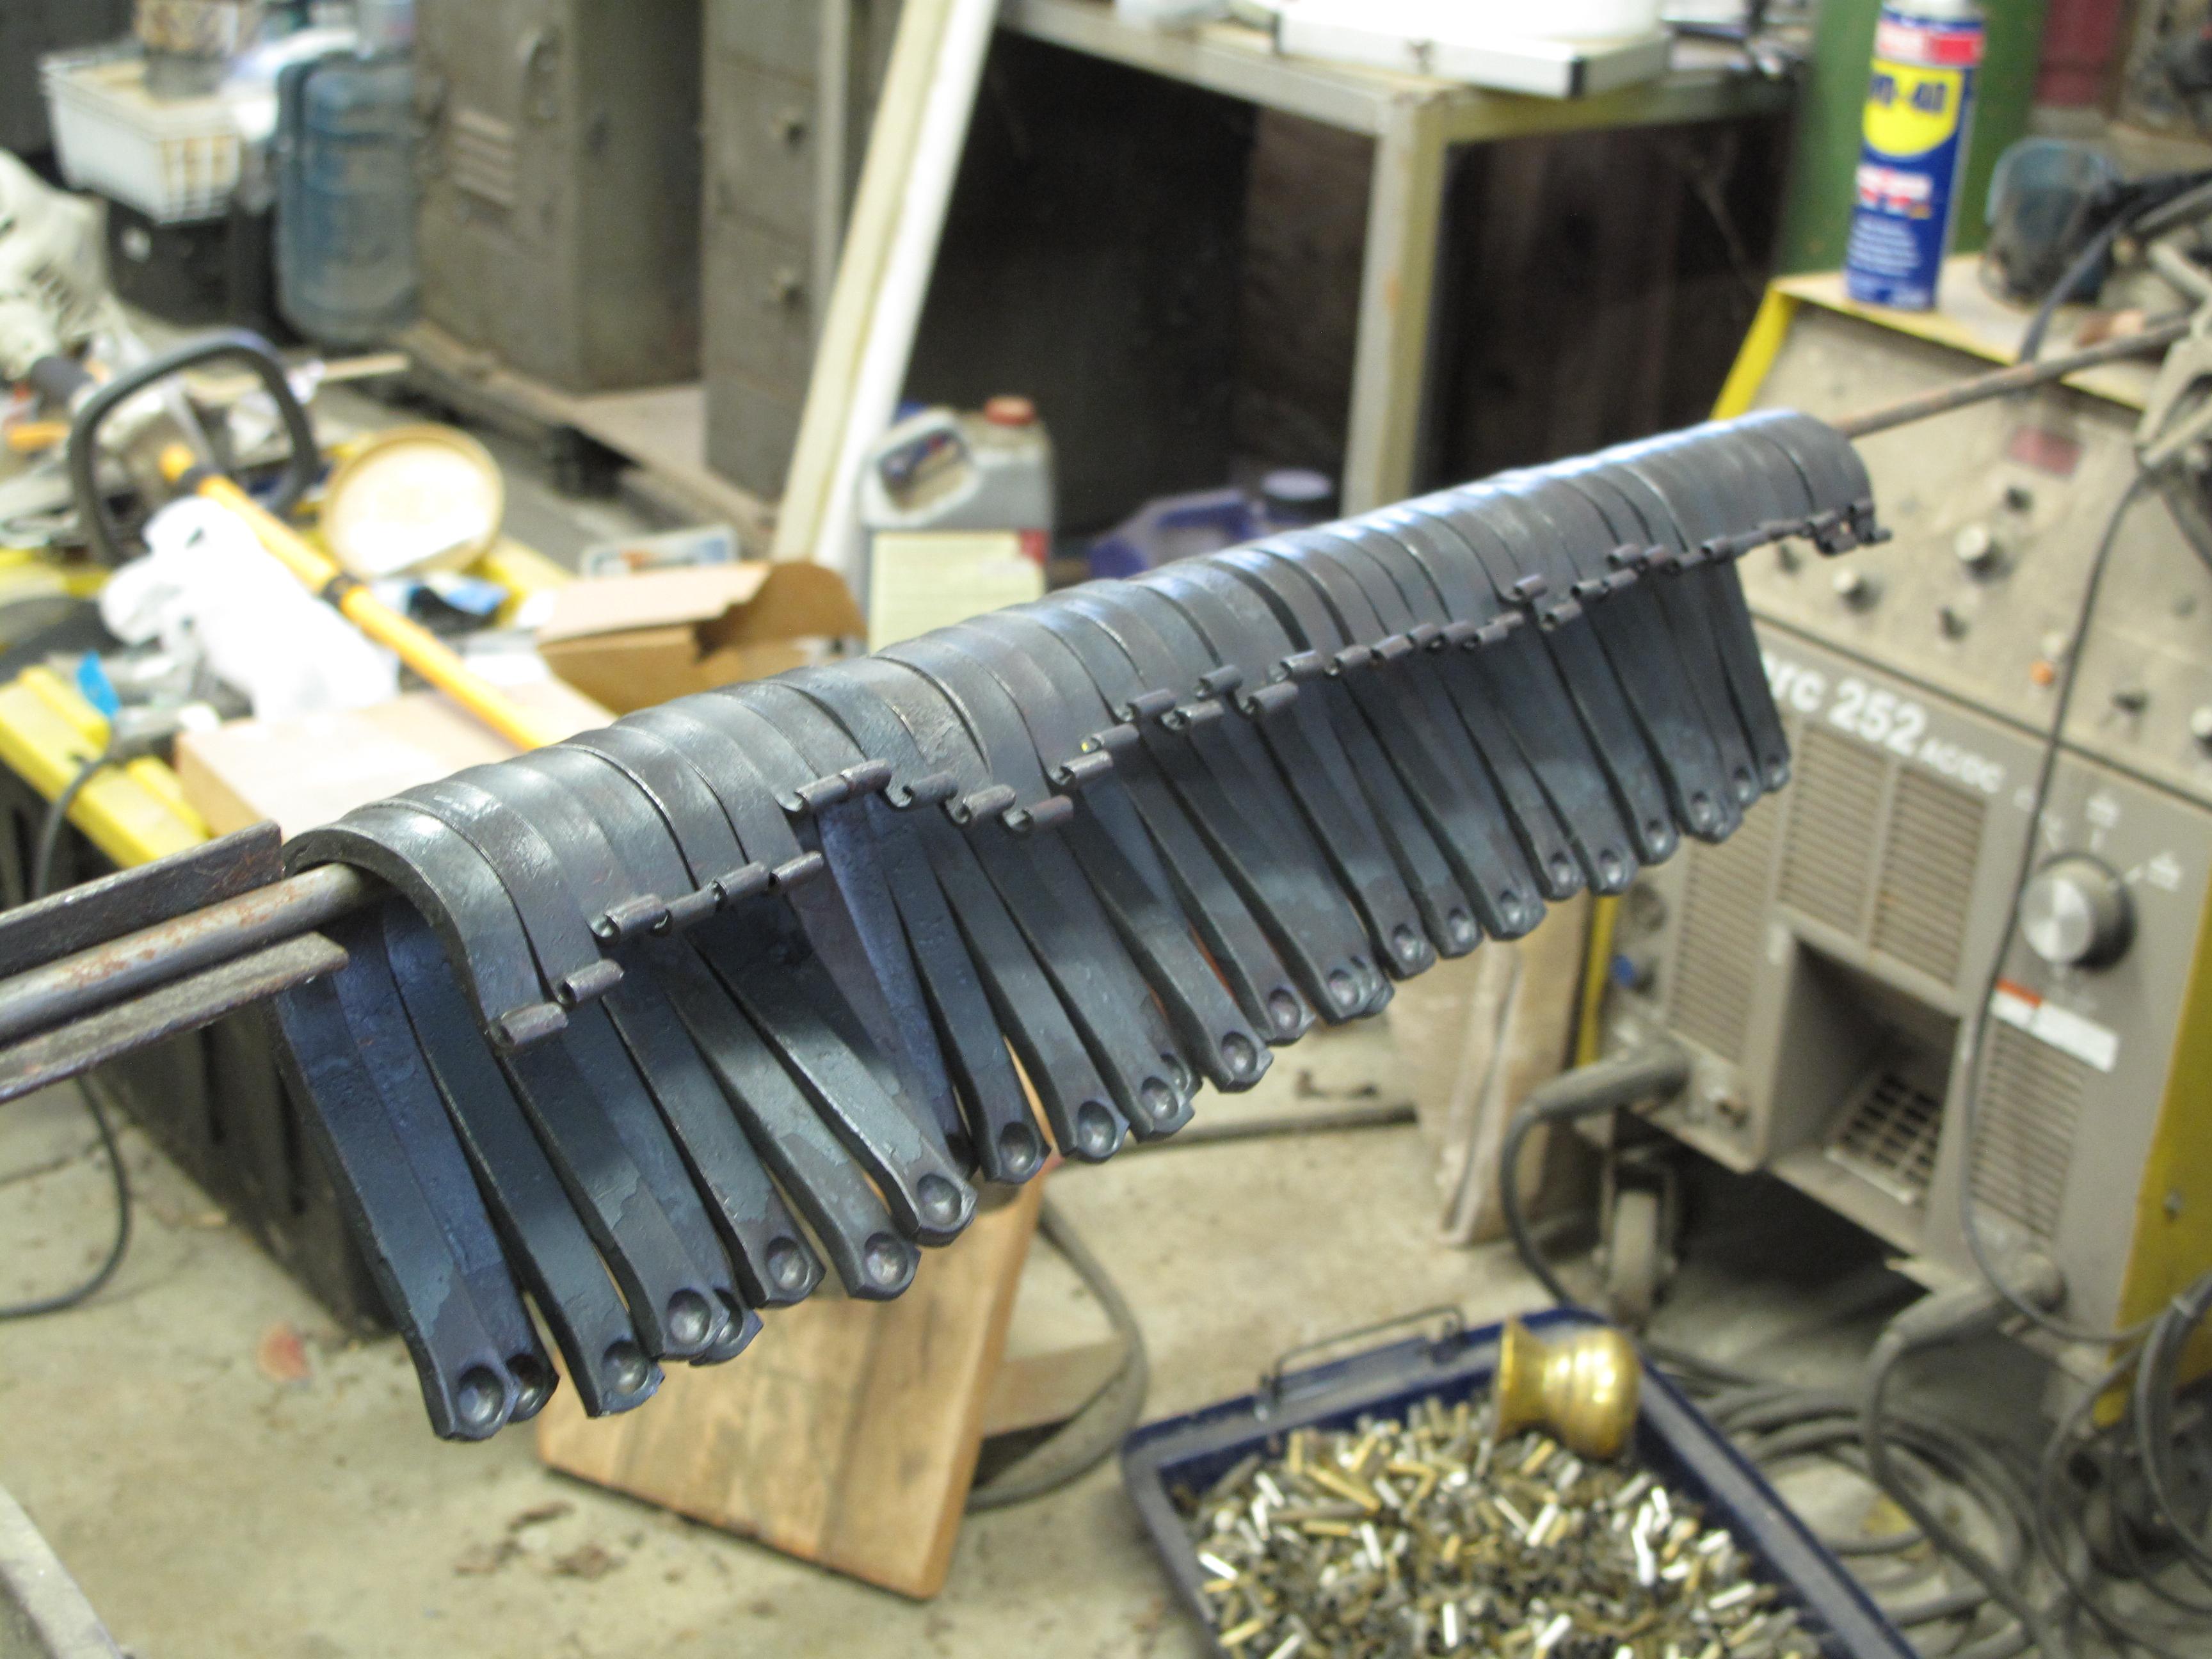
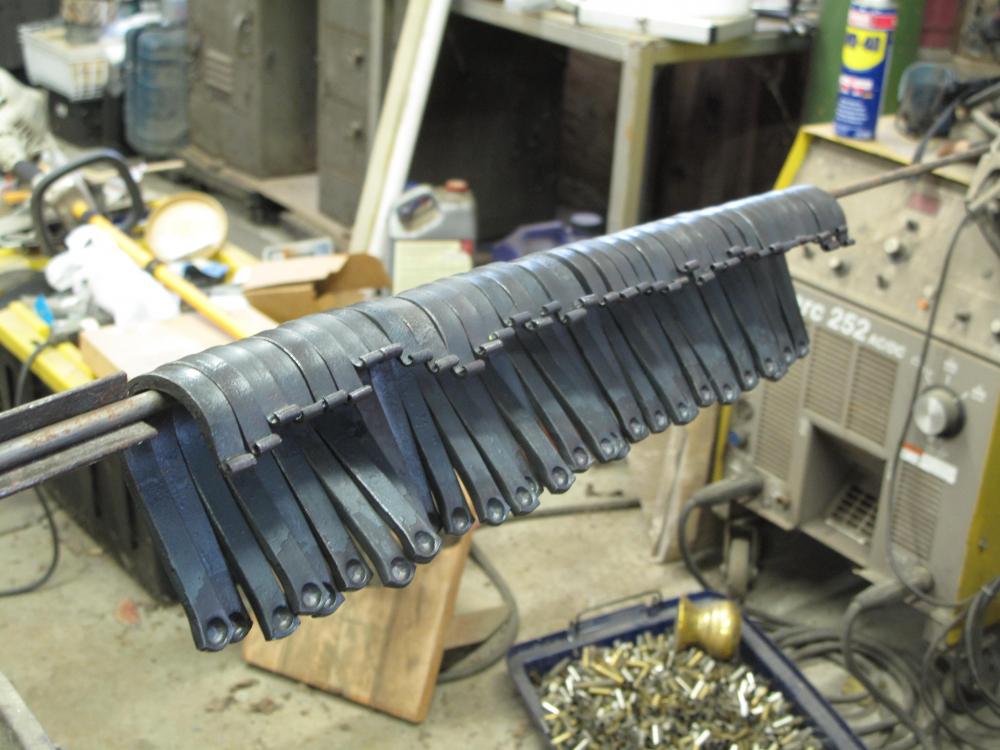
Forty hooks, start to finish. Even after making a few hundred of these things, I can't get them to come out "perfectly" even. Tolerance stacking/collision, I guess, when there's so much variable in the length of taper and the size of the curl. It doesn't seem like much, but it adds up when you bend them around the form to get a consistent gap size. Still, it's a fun thing to sink your teeth into. Now, I'm off to make a dish for a lady that needs some iron in her life....
-
400g for the blade, wet sanded. Similar for the handle. I want knives I can use and not feel bad about scratching up. You can get a very nice finish if you use a vibrating palm sander because it gives you almost a bead-blasted look to the blade. Anything finer than 400 grit is wasted on me, but some folks do want that mirror shine and glass-smooth handle. The latter is only important if the wood is really nice and you want to show off the grain.
-
No pics, but I made a whole bunch of hooks! Next big project is going to be a hook-bending jig with a handle and everything. It's going to allow me to bend cold, which is far better than bending hot, in my opinion. I'll probably design it at the same time I design the big bender I have in mind.
-
Very nice. If you ever decide to make another, let me know. i've been meaning to get a vertical cone for awhile but keep forgetting.....