VaughnT
Members
-
Joined
-
Last visited
Everything posted by VaughnT
-
Looks like he just uploaded another video. With all that huge iron, I don't doubt the wagons weighed close to 4 tons empty - even the brake arm is built stout!! https://www.youtube.com/watch?v=QOVc7Pbc8vo As for HP v. DP v. HP/DP, you can't forget to take into account slippage where the rubber meets the road, so to speak. All the power and torque in the world doesn't amount to a hill of beans if you can't get traction. Has anyone done a study on the various coefficients of grabbiness of different shoe styles and materials? Aluminum would obviously provide plenty of traction due to its deform around rocks and the like, but wear rates would be abysmal. Wrought iron would have been commonplace at the time, but did they prefer gnarly wrought like knife makers of today, or did the better teams opt for triple-refined wrought?
-
Cut offs from the local constructions sites is a great idea. Back when I was a utilities locator, I could regularly fill my truck with good lengths of wood, including tons of pressure-treated stuff left over from building decks and the like. If it's in the dumpster on the curb, it's free to you and the construction companies don't mind a bit because they have to pay to have that stuff removed. I once picked up twenty feet of 6x6, pressure treated and in 30" lengths. Still have a bunch of them and have used them to make one anvil stand. Some of the others will become the base for a grinder stand. It doesn't take much lumber to make a stand that's stable. The key is that it doesn't wobble. You need just enough timber to match the size of the anvil's base. Then around the bottom you can layer more timbers to create a wide base that doesn't flop around on you. The important part is having a straight line from the anvil to the ground. Once you've got that column established, what you do around the base to make the thing more stable is open to your imagination. You could even set the whole thing in a wide form and fill it with concrete. Those spools might work if you take them apart and use the straight pieces from the middle where the wire is spooled up. Screw and nail the into a block, then screw/nail several blocks together so the end grain is pointing up. Next thing you know, you've got a stump! Or, use the center portion as a form so you can backfill it with sand and put a plank on top. Lots of people use steel tubing filled with sand because it deadens some of the ring and makes for easy transport if they ever move.
-
Likely the crack was always there, just very fine and hidden under the rust. When you cut the section free from the rest of the disk, you relieved tension on it. Putting it in the fire relieved even more and the crack opened up to the point that you can't miss it. Just one of the wonderful things that happens when you use 'free' metal.
-
My main heavy hitter, four pounds if iron glory. I bought the head off a guy on the internet and have only ever seen two other hammers with similar design characteristics. The round nose punch was purchased from a museum that was clearing out their storage area. No telling where she came from or was designed for, but she does a great job at dimpling things.
-
The bolt holes in the base were used by Fisher Norris on a lot of their anvils. One or two other makers did something similar, but Fisher Norris was better known for it. Combine that with the thick heel of the anvil, also an FN characteristic, and I'd suggest that they might have been the maker. However, I've not seen a Fisher in that good a shape that didn't have their Eagle/Anchor logo on the side. I'm sure Josh will chime in with his thoughts.
-
Glad I could help, Frosty. If it makes you feel better, you're not alone. I watched the horn and bumper video and couldn't stop myself from watching the rest. It's amazing to see all that heavy wood and iron come together to make the front end of a wagon. That's some very stout construction!
-
That's some big iron he's working! forge welding horn & bumper
-
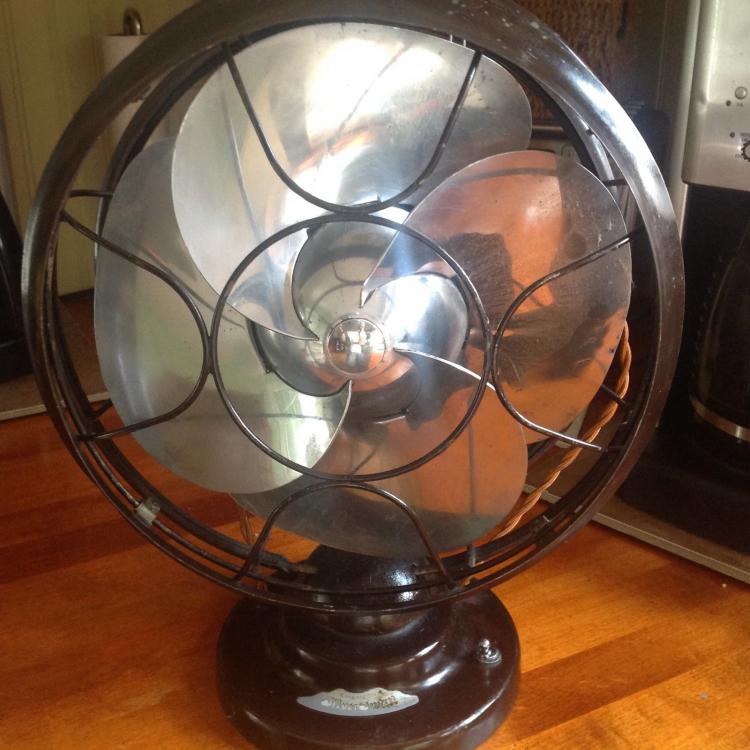
Thanks gents. I've only recently been introduced to antique fans and I've become quite a fan of them. There's nothing quite like picking up the thing to move it and feeling the weight of all that cast iron. These things are not light and there's nothing about them that smacks of cheapness. After the umpteenth time I had a modern store-bought fan crap out on me, I decided to try an "antique" Emerson 77xxx series. Built post-1950, it is a tank of a fan and one of the biggest selling points is the fact that you can unscrew or unbolt everything about it to work on the things. These old fans are quite similar to cars in that they are made to be worked on and require regular oiling. Anyhow, I was blown away by the quietness of the 77xxx series and how much air it moved. Being a 16" cage, the thing puts out far too much air to make it a comfortable bedroom fan even when it's on the lowest setting and she's now been relegated to use in the main hallway to help circulate air through the house. It definitely moves air!! If you get the least bit interested in quality fans for the home, antiques are definitely the way to go. They might seem a bit pricey because they sell on the used market for $100 and up, but they're infinitely worth it. The Silver Swan is the pinnacle of fan design, someone referring to it as the Aristocrat of fans. I couldn't agree more and am very happy to have snagged this one. Even with it not working, it uplifts the spirit just to look at it. Now I just need to get it working again!
-
If I had an electric repair shop nearby......
-
Generally speaking, garage door springs make good flint strikers. However, you never really know what the alloy is and how it will take to being forged. It sounds to me like you're possibly working the steel too much, not overheating the metal as much as heating it back up too often. Some alloys don't like being forged except in a very narrow range of temperature, and anything outside that zone causes issues. It might be 'bright orange' but that color you're seeing is several hundred degrees on the wrong side of the forging temperature for that alloy. Also, if the metal is scaling up on you and you drive that scale into the surface of the steel when you're hammering, you can get what looks like cracks but really isn't. It's just texturing caused by the scale. Overall, hard to say exactly what's going on. I've had some mystery metal really give me fits for no apparent reason. Could be cheap chinese steel. Could be something else entirely.
-
Good to see you back, Stamp Man. I've been meaning to drop you a line regarding a stamp, but am having difficulty with the artwork. Soon, though....
-
I'd be curious to know, too. I've been on the lookout for one, but I don't need to to be some high-dollar antique.
-
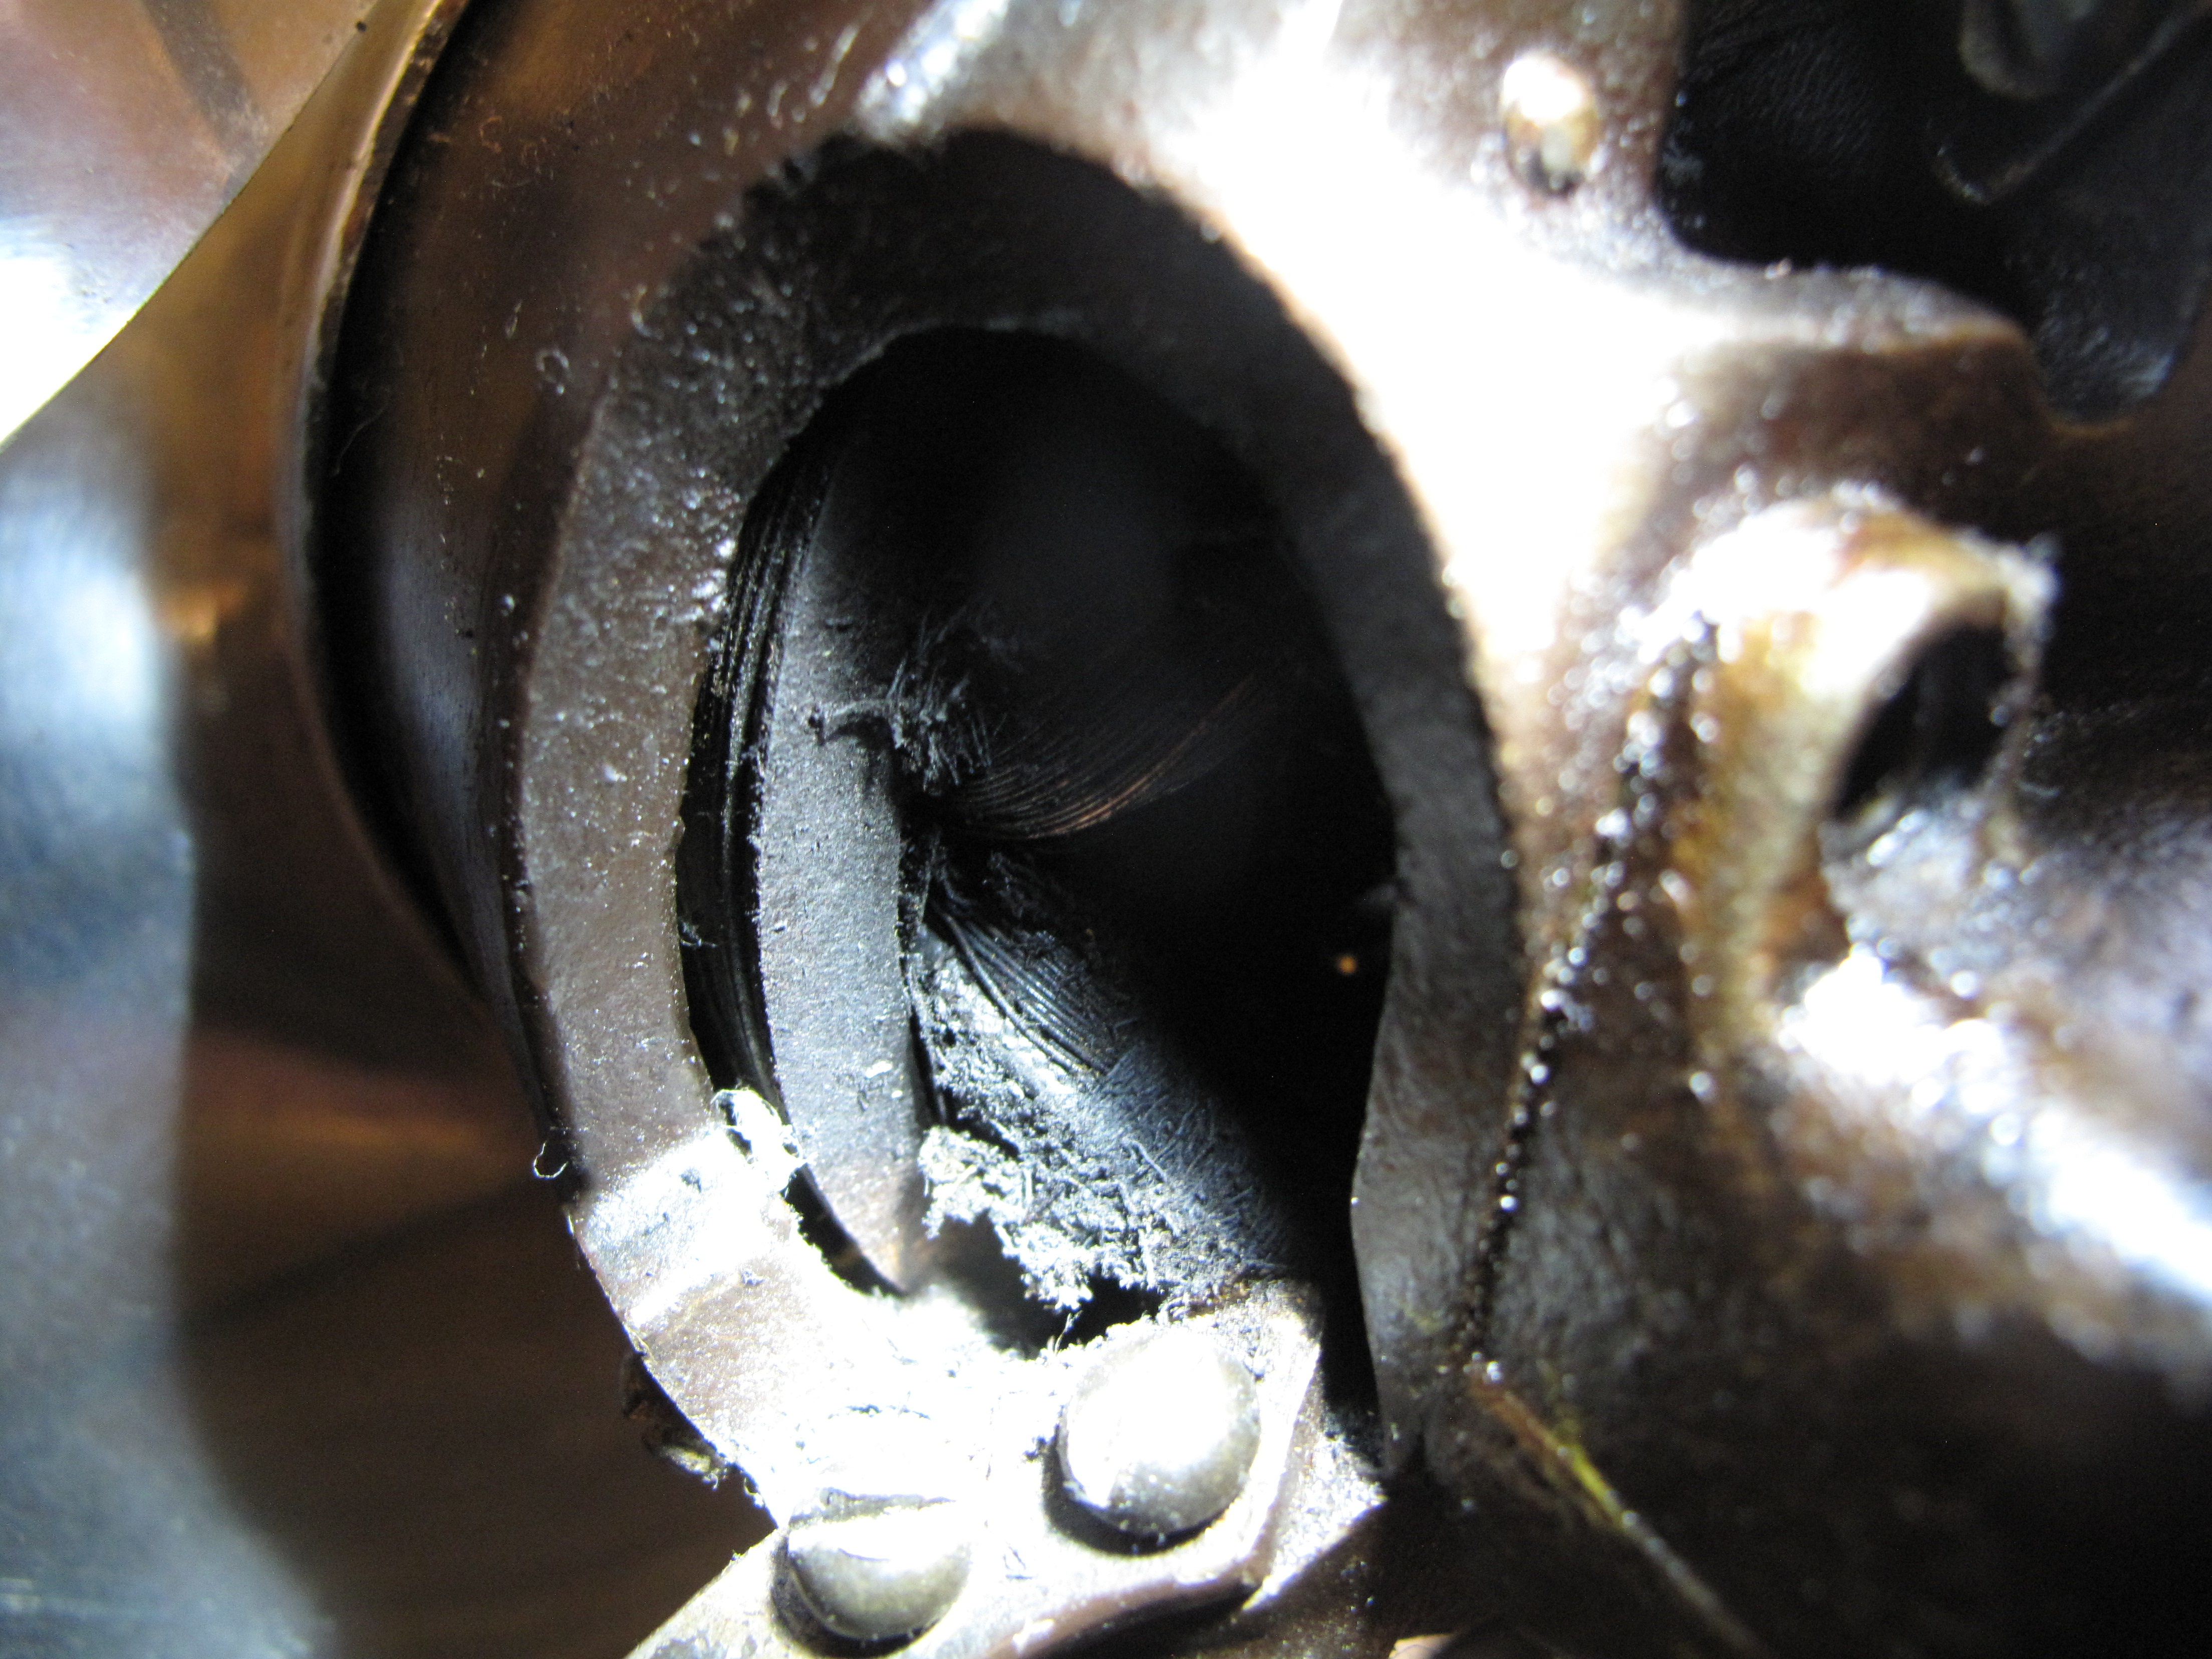
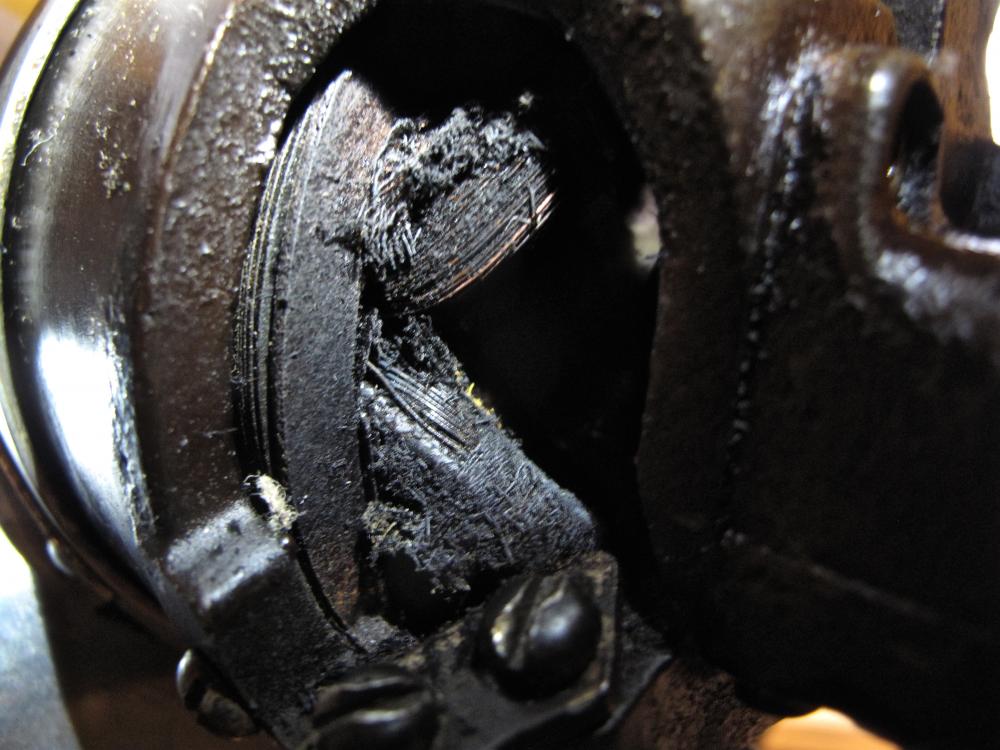
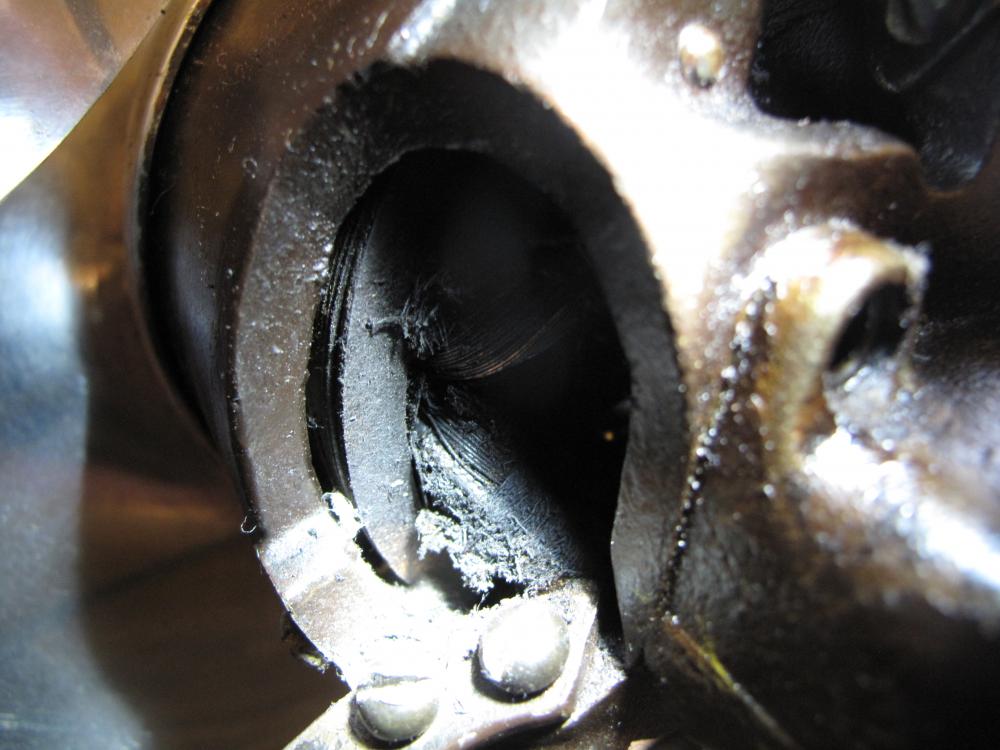
I'm the lucky new owner of a classic Emerson Silver Swan fan.... and it doesn't work. I knew it didn't work when I bought it, but I had to have it. It's an Emerson Silver Swan! Now, the question is... what do I do with it? I'm not an electrical guy so I'm a bit out of my depths here. The previous owner said that it was working, then it slowed down and finally stopped. You can tell that someone somewhere has redone the wiring on it; the head wire and plug are all new stuff. Only the switch, rotor and stator are original to the fan. Looking in the gear box for the oscillator mechanism, there's no side of congealed grease or the like that might have bogged it down. When you plug it in, there's no hum like the motor is trying to turn but is jammed by something. I've got most of the parts removed and have noted that the cloth covering on the stator appears to have been charred and blackened. There's no sign of fire damage to the finish on the motor housing, though, and no odd smells. Not being an electrical guy, I'm taking this to mean that whoever did the rewire on it screwed something up and the motor is now toast. Is this a fair assessment? Did I waste a lot of money? Can the thing be rewound? Who do you talk to about that? What kind of price range are we looking at? Because this is a single-speed fan, I'm assuming that there should only be two leads coming off of the stator. There are only two wires from the plug going to the switch and from the switch up to the stator, but I haven't pulled the stator out of the body to examine the connection because, to be honest, I'm a bit scared of what I might find. I have my eye on a real clunker of a Silver Swan that I might be able to get for parts, but I'd like to consider repairing what I've got before I add to the mess that is my shop with even more stuff. Any thoughts?
-
With a chunk that large, I'd be really curious about the cost to have a local shop water-jet it into a swage block. One of our members here did similarly just because it made it super easy for him to use the thing to make bottle openers. Using it as an anvil wouldn't hurt since you'll only be using the edge. I wouldn't want that long tapered radius since it doesn't really add anything to the functionality and the taper can bungle things up real quick just like it does on a london-pattern anvil's horn. Better, in my view, to have known radii like you do with bottom tools so you know exactly what you're getting and can swap out as needed depending on what you're doing.
-
That's a really really good idea. I like that it covers all the bases but also builds on very simply things to end up with something that they can use for the rest of their lives. It's not too hard and it's very practical. One of the things I usually get new people to make is a simple hook from a store-bought nail. Smaller nails can also be used. Combine several on a plank and you have a nice rack for the hallway or kitchen without much fuss or preamble. It's not much, admittedly, but it's something everyone can use in their home, even if it's relegated to the garage or garden shed. The key point is that it shows the student some basic stuff like bending and punching but isn't too technically difficult -- and it opens their eyes to the possibilities in found objects. I've had students that have never swung a hammer in their entire lives, so I always assume the worst when it comes to their technical abilities and like to have something like these hooks for them.
-
Seems like you've answered the question of the day right there! Fisher's are genuinely great anvils, but the thick heel on the Blacker version can be something of an issue depending on what you're trying to do. If you have the opportunity to buy a similarly sized anvil from another maker, and the owner of the Fisher isn't being real courteous, buy one of the others. A narrow/thin heel comes in quite handy when you're making forks and the like. While Fisher's are top-of-the-line in my opinion, I could get by quite adequately with another maker. It might not be a Fisher, but they'll certainly get the job done! And I never mind saving money. If you can get another anvil and a nice stand for half the money, go for it. The key thing is the quality of the face and edges on the anvil. The more chipped and dinged they are, the less value, in my opinion. The Blacker in the photo looks to be almost-new and would demand almost-new pricing. Anything less than almost-new would be a good purchase as long as the price is commensurate.
-
JT, don't fret. Like BGD says, folks can get busy with all kinds of things. My main anvil is a 300# Fisher and I've never been happier. While anvils of that size do present some problems when you're doing different things, they are an absolute dream 99% of the time. You'll never want for a bigger or better anvil, that's for sure. I'd love it just for the stand. I've been keeping my eyes open for some thick plate or an old cast iron stand to go with my Fisher, but haven't had any luck. The only caveat I'd add to all that is to consider what you're planning and what you hope to accomplish. You certainly don't need an anvil that size, so if mobility is more important you could easily make do with a smaller Hay Budden or the like. They're not as awesome as Fisher anvils, but being smaller, lighter, easier to move and easier on the wallet isn't necessarily a bad thing.
-
-
-
With no good source for coal locally, you're gonna have to burn charcoal or wood. No big deal. A propane forge is great (if you get a good one), but they also limit what you can do. I've been running propane exclusively for the last few years because good coal isn't available locally (2hr round trip for mediocre stuff). The size and shape of the openings in the forge will really limit what you can make and how you make it. If you get to keep what you buy with the $600, I wouldn't necessarily invest in a propane forge because you can build one that best suits your needs and do it for less than six bills. I'd buy a quality burner (rather than cobble one together from plumbing parts) and build around it. Any money left over would get spent on tongs, fuel and raw materials. Tongs because they are a critical element in the process and you're always better off buying rather than making. Fuel - 'cause you're always seeming to run out of the stuff. Finding raw materials isn't hard if you have scrap yards, but I prefer to buy most of my stuff new so I get exactly what I want and know that it's mild steel or X alloy. It saves you a tremendous amount of time and fuel if you buy 1"x1/4" mild steel bar rather than hammer down a larger piece to make it 1x1/4".
-
Some brain tan whitetail hides I tanned some time back. I used to love tanning hides, but haven't tanned in ages. Ya can't tan hides without doing stuff with those hides, so I made a pouch for holding all my bow-drilll fire making stuff.
-
Selling on etsy is hit-n-miss. Some shops do great. Others do poorly. From my experience, researching through the various smithing shops there, you absolutely must produce something that's as nice as what others are producing. Photos are critically important and bad photos can make a good product look like trash. Can you make money on those sites? Only if you go into it with a solid reputation and customer base to begin with. If you're hoping it will open some doors and make you a ton of sales..... you can accomplish that after several years of hard Public Relations work, getting out on all the various forums to let people know you have stuff for sale on that site. If you simply list things and hope shoppers will see it, you're in for some serious disappointment.
-
-
I definitely recommend trying your hand at the ABANA grille. It's not complex, really, but it will certainly take you a lot of time. And because the two halves mirror each other, you really only need to do one side if time is running out on you.
-
I've taken to using artist's pencils in grey for a lot of my drawing because it will take a sharp point for better precision. It's pretty soft stuff, but it's not as soft as soapstone or chalk, and holds up to heat pretty good. For a drawing board, I have one on the drawing board..... My idea was to take a page from the angled draftsman's table. Hinge a piece of sheet metal at the top so it can fasten to the wall, and put some legs on the bottom so you can pull it to whatever angle you find comfortable. When not in use, it lays flat against the wall. I even thought to include some angle iron across the bottom for stiffness and to create a lip. This catches anything that might fall and allows you to do basic assembly of the parts. With enough magnets, you could assemble the entire piece on the angled table, but I don't know that that would be advisable to try.