March 25, 201610 yr 8 hours ago, olfart said: If you want shadowless, highly-detailed images of small items, a light tent is a good way. Just create a cone from a translucent material, leaving the top of the cone open just enough for the lens of the camera. Place the cone over the object on a sheet of white paper, and light one or more sides of the cone. Thanks for the tip
March 26, 201610 yr One of my latest works, just got this piece of wood from an antique store in order to repurpose it. here is the result. Yoav
March 26, 201610 yr Very nice indeed. The riveted hooks look good. Perhaps black forged square head screws would make better mounting screws.
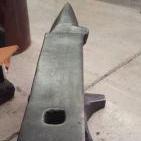
March 28, 201610 yr I knocked these out last evening. I needed them for some ski gear. They started as 5/8 round textured bar. These are 4" tall, about 3/8" thick and 3/4" wide. Forged under the power hammer and cleaned up on the anvil. Hot waxed with Gilders Paste Wax.
March 28, 201610 yr ohhh, something new to try. I have some Gilders Paste but have never tried to use it hot. Thanks for the tip
March 30, 201610 yr Here is a couple of coat hooks I made recently. Sorry about the crappy pic of the second one. Really like the texturing hardie set (beammeupscotty)
March 30, 201610 yr On March 28, 2016 at 8:20 AM, Double Y said: They started as 5/8 round textured bar. Is that code for 5/8 rebar? Lol
March 30, 201610 yr 2 hours ago, Michael Cochran said: Is that code for 5/8 rebar? Lol Actually no - though it would be a good code for that! This was some stuff which had been textured to look like tree bark. It was some stuff I fell into free.
April 24, 201610 yr On March 26, 2016 at 5:51 AM, Jozi said: One of my latest works, just got this piece of wood from an antique store in order to repurpose it. here is the result. Yoav Is that coat rack for your kids. Hang your coat up or I will beat you with this beating stick. looks nice
June 16, 201610 yr In the "totally utilitarian" department, this is a hook I banged out as part of a bungee cord to repair a broken carpet cleaner.
September 7, 20169 yr Made these the last 2 days. I've made 3 of the heart hooks, the longhorn definitely took the longest. Drawing his horns out took forever cuz I kept losing my heat, even bringing the head out orange didn't seem to keep it in longer. It's my first try at an animal of any kind, I'm going to do it again, but id like to give him a meaner look next time, and I think I'll use paste wax to finish him up instead of beeswax, it made him a bit darker than I thought it would.
September 7, 20169 yr Nice work. I like the burnishing on the longhorn. I make the whole head and horns brassed. You can make them look a bit meaner by flaring the nostrils a little and just tapping the circular eyes down on the top. And you can lower the bottom lip a bit too.
September 9, 20169 yr Made this ?coat rack? today, saw something like it on Google. It's 24" long, made from 1/2" round, and the hooks started as 6" of 3/8" round stock. They are all about 4" long now. For my first time around on it I like it, but I think aesthetically it be a little more appealing if I had made the piece that goes around the 1/2" round, instead of setting it down and drawing it out flat like I did
September 9, 20169 yr My theory is; after I learn to make all the hooks available I will be too old to swing a hammer.
September 9, 20169 yr 4 hours ago, Donniev said: For my first time around on it I like it, but I think aesthetically it be a little more appealing if I had made the piece that goes around the 1/2" round, instead of setting it down and drawing it out flat like I did I disagree. I think it looks very good. (all of it) I would get the feeling that a round "eye" would tend to wobble sideways and try to "avoid" the coat. The feeling might be wrong but it is the visual impression I would get and the perceived usefulness is a part of the estetics of any item that is intended to be used.
September 9, 20169 yr I agree with gote. The flat 'eye' would add some lateral stability and I think it ties in nicely with the flat end of the hook. Nice how you got the twists even. A piece to be proud of IMO.
September 9, 20169 yr On 2016-09-07 at 9:22 AM, Donniev said: Made these the last 2 days. I've made 3 of the heart hooks, the longhorn definitely took the longest. Drawing his horns out took forever cuz I kept losing my heat, How did you make the horns? I would split the end of the stock and then fold over to form the head. They then start out fairly thick. If you do not draw them out thin it is not so much of a problem. Most blacksmithing animal heads have thicker horns. However if you want to have them as thin as these they will loose heat quickly.
September 9, 20169 yr 3 hours ago, gote said: I disagree. I think it looks very good. (all of it) I would get the feeling that a round "eye" would tend to wobble sideways and try to "avoid" the coat. The feeling might be wrong but it is the visual impression I would get and the perceived usefulness is a part of the estetics of any item that is intended to be used. So compromise and make a half round, flat on the inside edge where it wraps around the bar, but keep the round shape where you see it. Best of both worlds.
September 9, 20169 yr 8 hours ago, gote said: How did you make the horns? I would split the end of the stock and then fold over to form the head. They then start out fairly thick. If you do not draw them out thin it is not so much of a problem. Most blacksmithing animal heads have thicker horns. However if you want to have them as thin as these they will loose heat quickly. Was thinking this is how I will do it next time around. For this I made a set down and left about 2 1/2" untouched on the end of the bar. Took a grinder and cut into the untouched material to make the horns. Hope the drawing illustrates it to make sense.
September 9, 20169 yr No,no,no, split out and rough forge the horns FIRST, then fold over for the head. don't forge them thin but rough them out enough that when you get the head folded and forged close to finished you can then spread the horns and forge them thin and pretty. You don't want to forge the horns to final size before doing the heavy sections or you're much more likely to burn them off. However it's so much easier to forge a shoulder, draw down and split an inch on the end of a bar than it is to try cutting, spreading the fold as you illustrated, (I started to write "drawn" and realized that could be confusing the issue) THEN, drawing down splitting and finishing horns. Rough the horns first and save the fine details for the final steps before brushing and finishing. An eye punch and small curved chisel for nostrils improves the appearance too. Frosty The Lucky.
September 9, 20169 yr Frosty is describing better than I do but his way is what I mean. In case you want a thinner neck it is easier to fuller that down before you bend the head. I do it this way starting with stock twice as wide as thick. There are good descriptions with picks on the net but I cannot find the URLs #1 Split the stock at the end approximately the intended horn length but do not start drawing out. (They will become longer but i is easier to cut than to lengthen). #2; Fuller the neck to square section. The distance from the split about 2,5 times the length of the intended head #3: Bend 180°in the middle between the split and the neck and forge weld. #4: Shape the head, put in nostrils and mouth and make a slight step in front of the horns for the eyes (or do not). Put in eyes. For a dragon's head one can set up the mouth end and/or fuller a little between nostrils and eyes and create a forehead for the eyes by making the step. #5: Bend the neck after shaping the head. It is easier to fix it in the vise (or on the anvil) and put in eyes etc before bending the neck #6: Separate the horns (which are now free), draw out and shape them. Doing them last this way decreases the risk of burning. They are also thicker at the base so some heat comes fom the head. #7 Finishing touches.
September 10, 20169 yr Frosty and gote, thanks, doing it as you guys described sounds much easier than the long process I went through. You are right that spreading the horns and then drawing them out was difficult, what I did was just what I came up with in a spur of the moment "I'll try making a longhorn". I'll probably try another in the next few weeks, thanks for the advice.
December 11, 20169 yr This is a towel hook I knocked out today, not quite as square as I wish it was but I quit before it was done. Should work well enough and I'm going to be the only one to see it
Join the conversation
You can post now and register later. If you have an account, sign in now to post with your account.