Double Y
Members
-
Joined
-
Last visited
Everything posted by Double Y
-
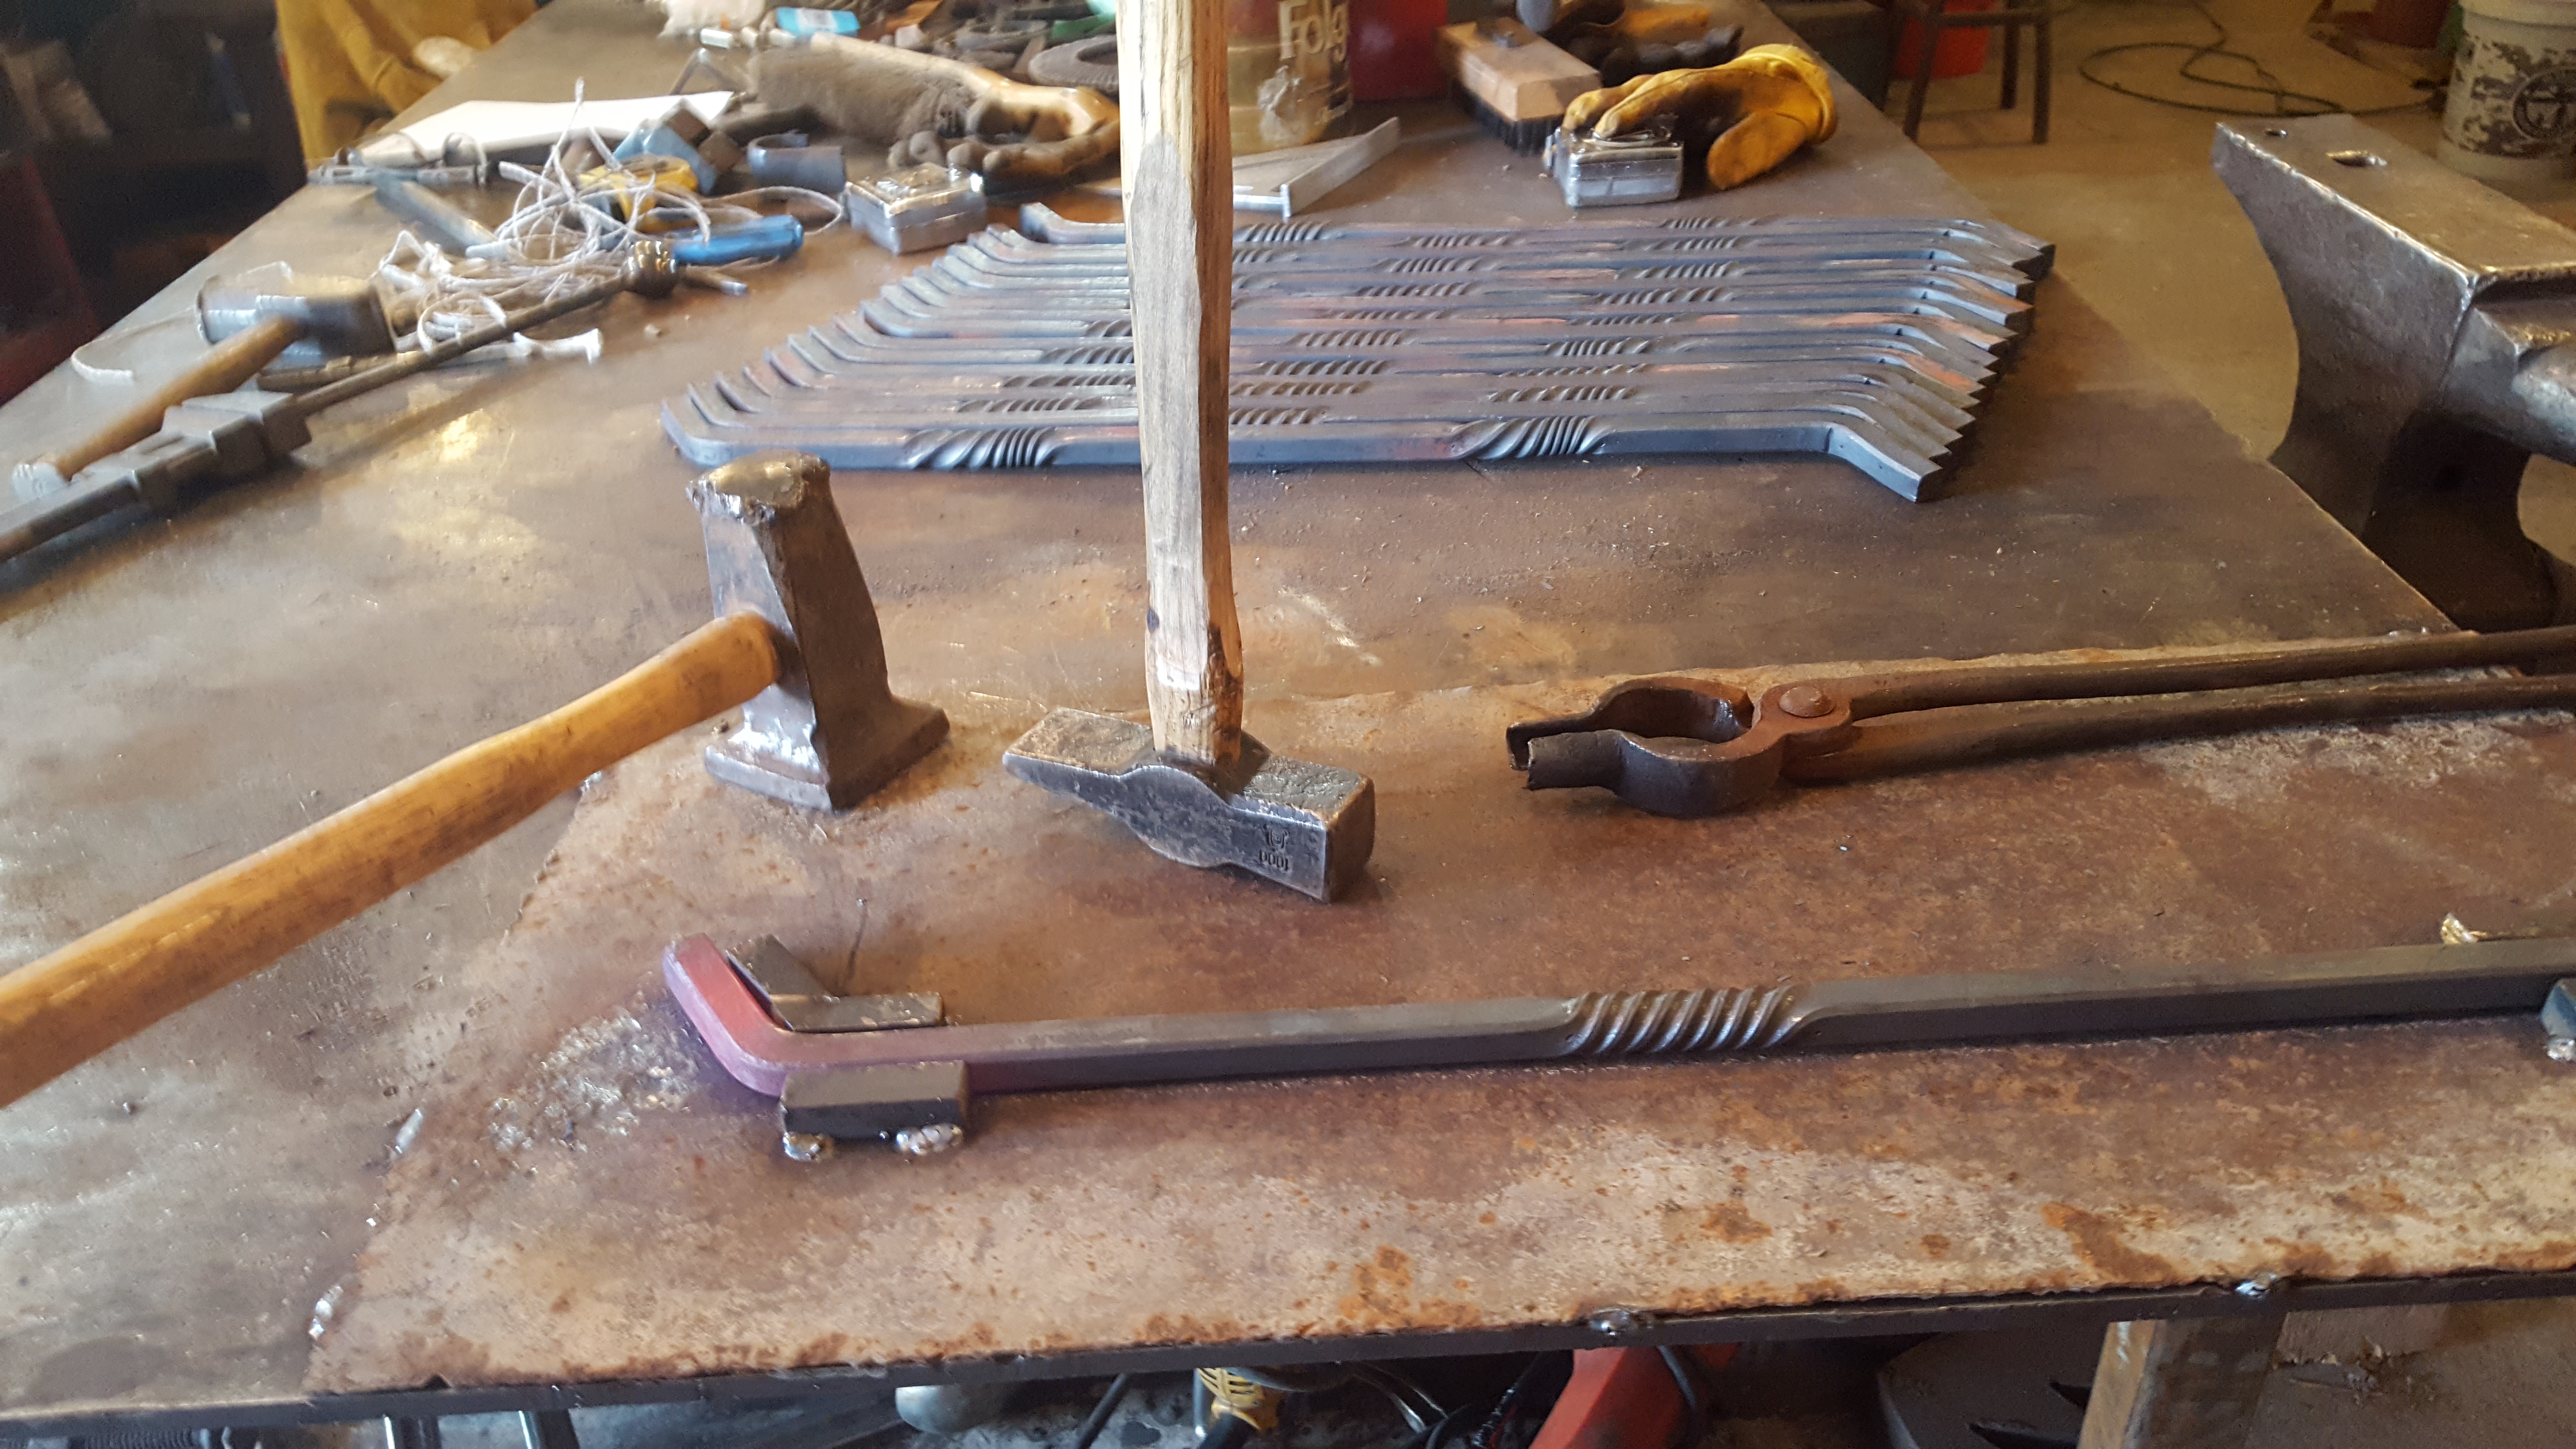
http://www.alaforge.org/files/Tire_Hammer_Tools_small.pdf This is an extensive PDF of tooling Clay Spencer put together. I printed a copy for reference.
-
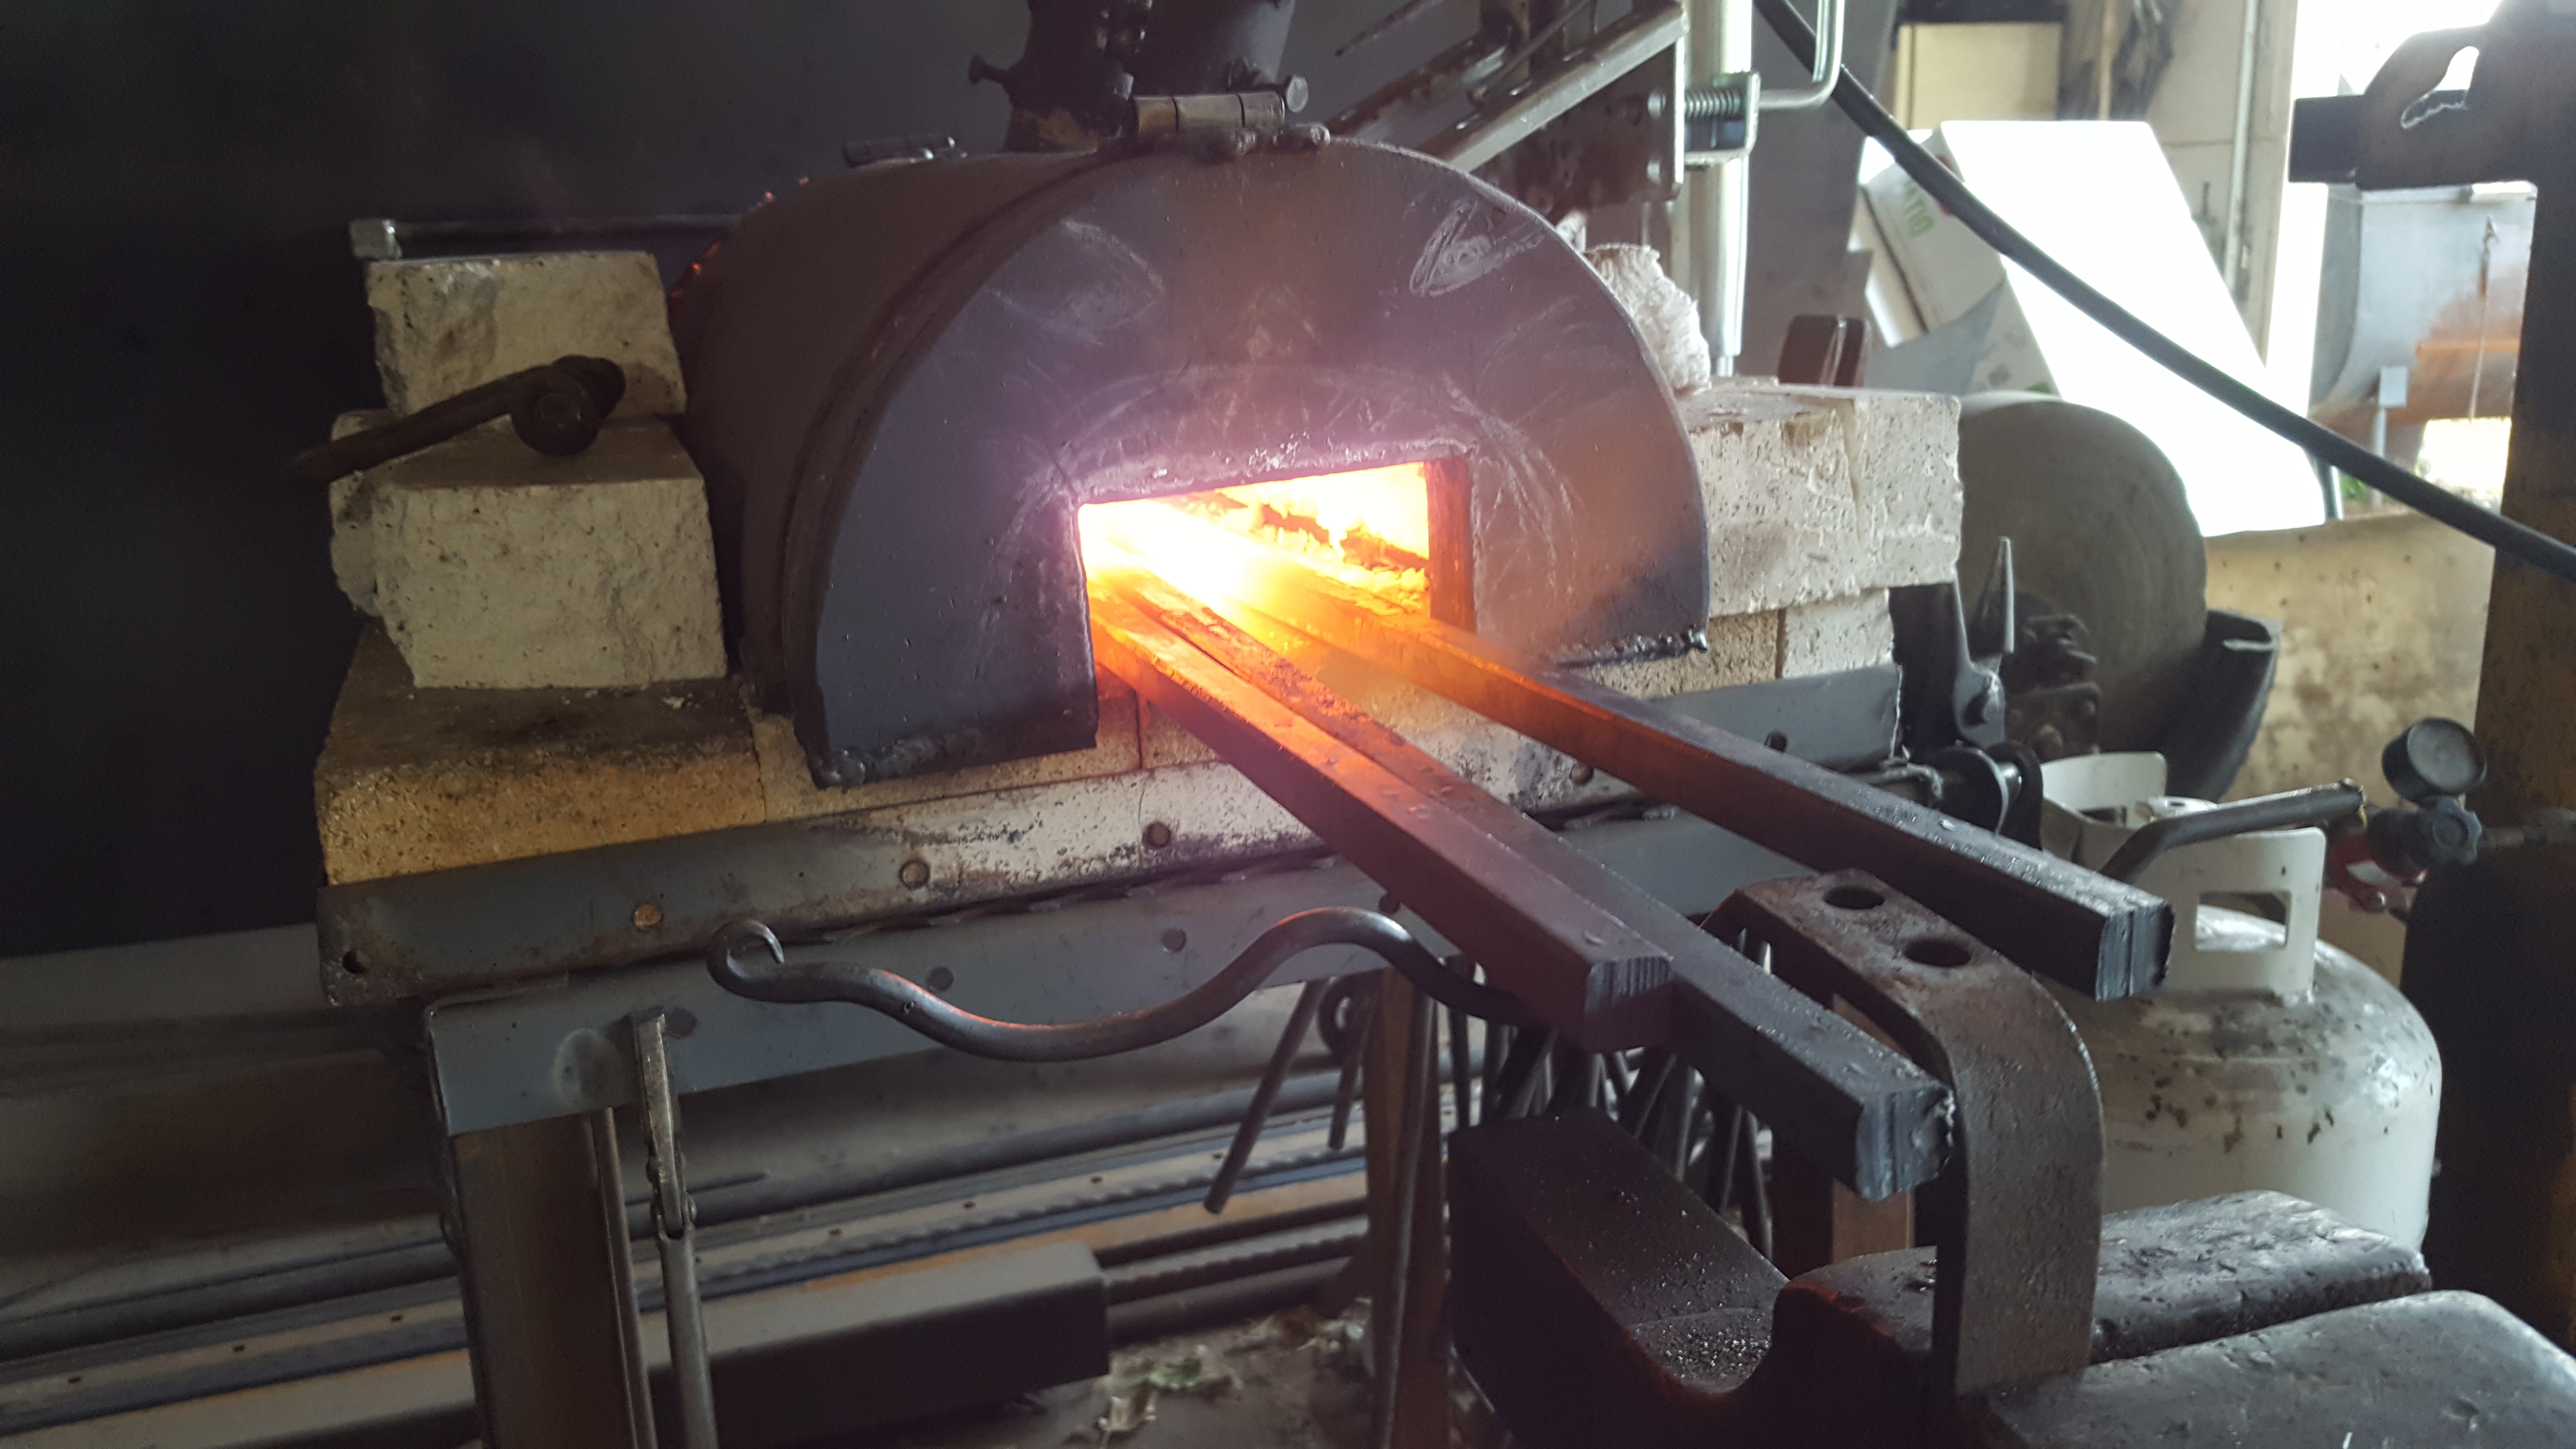
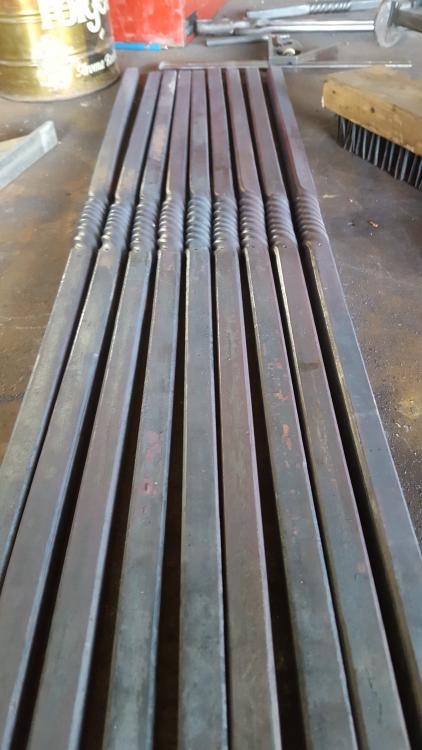
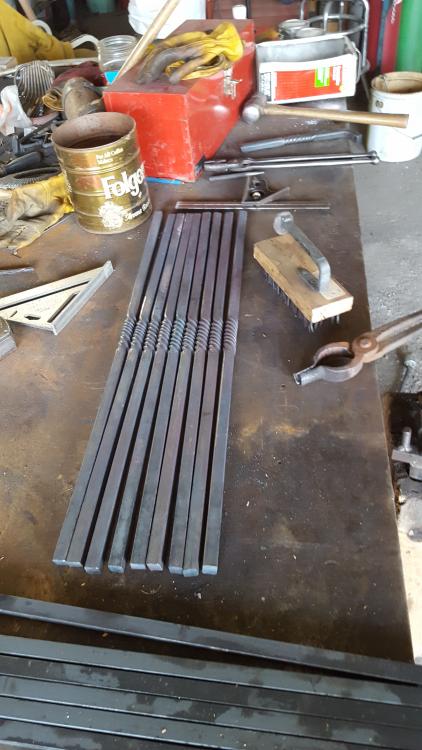
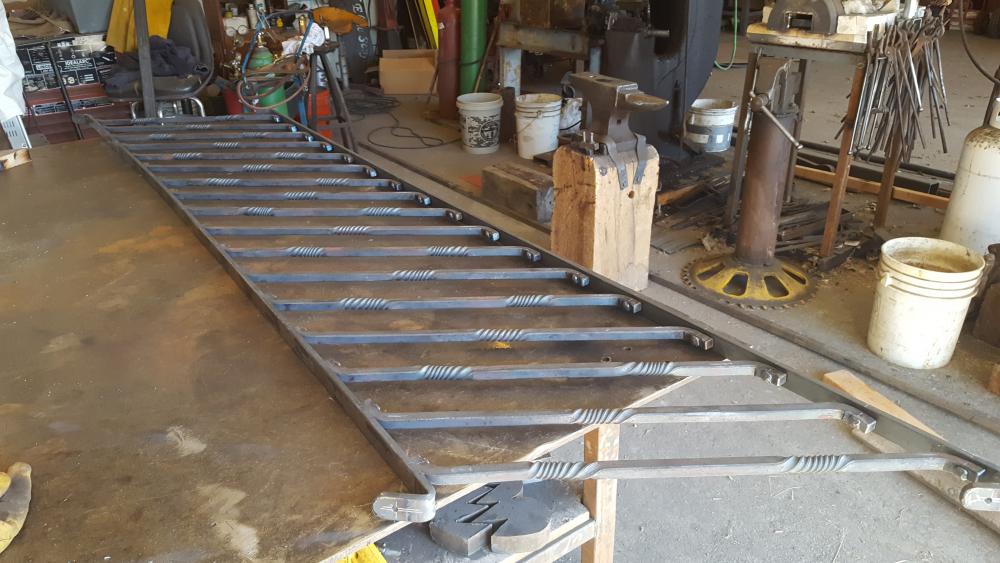
I pretty much had the shop math worked out on the layout table and went straight to the jig. It wasn't horribly complicated, just had to figure out what I needed the whole works to be. I had a pile of supplies ready to roll. I cut the pickets as I needed them. Time per section is a bit harder to calculate. Pretty much an hour of cutting, fitting and welding for the pickets. The scrolls took longer of course, as they had to be individually fit.
-
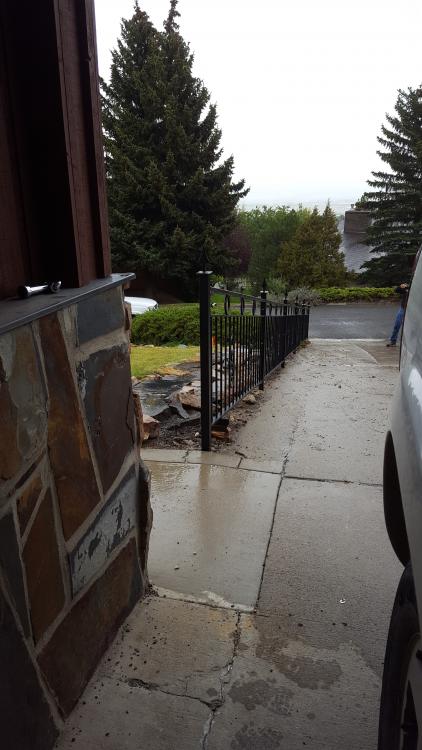
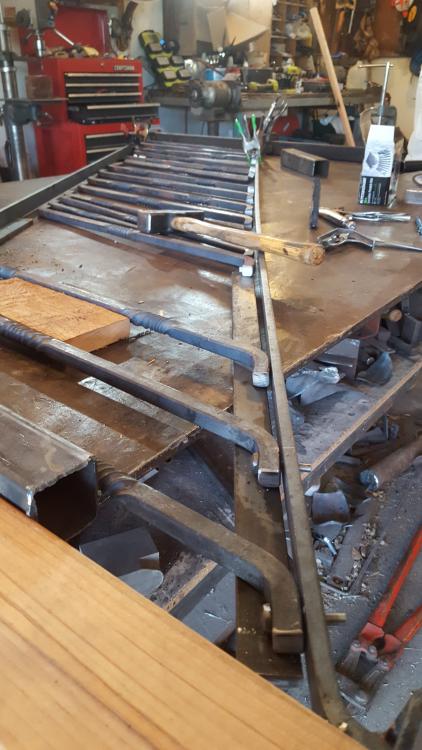
I set up a jig for the slope so they were exactly the same. The bottom rail is prepunched channel. The holes had to be enlarged to compensate for the racking as well. The sections are bolted to the posts with self tapping screws.
-
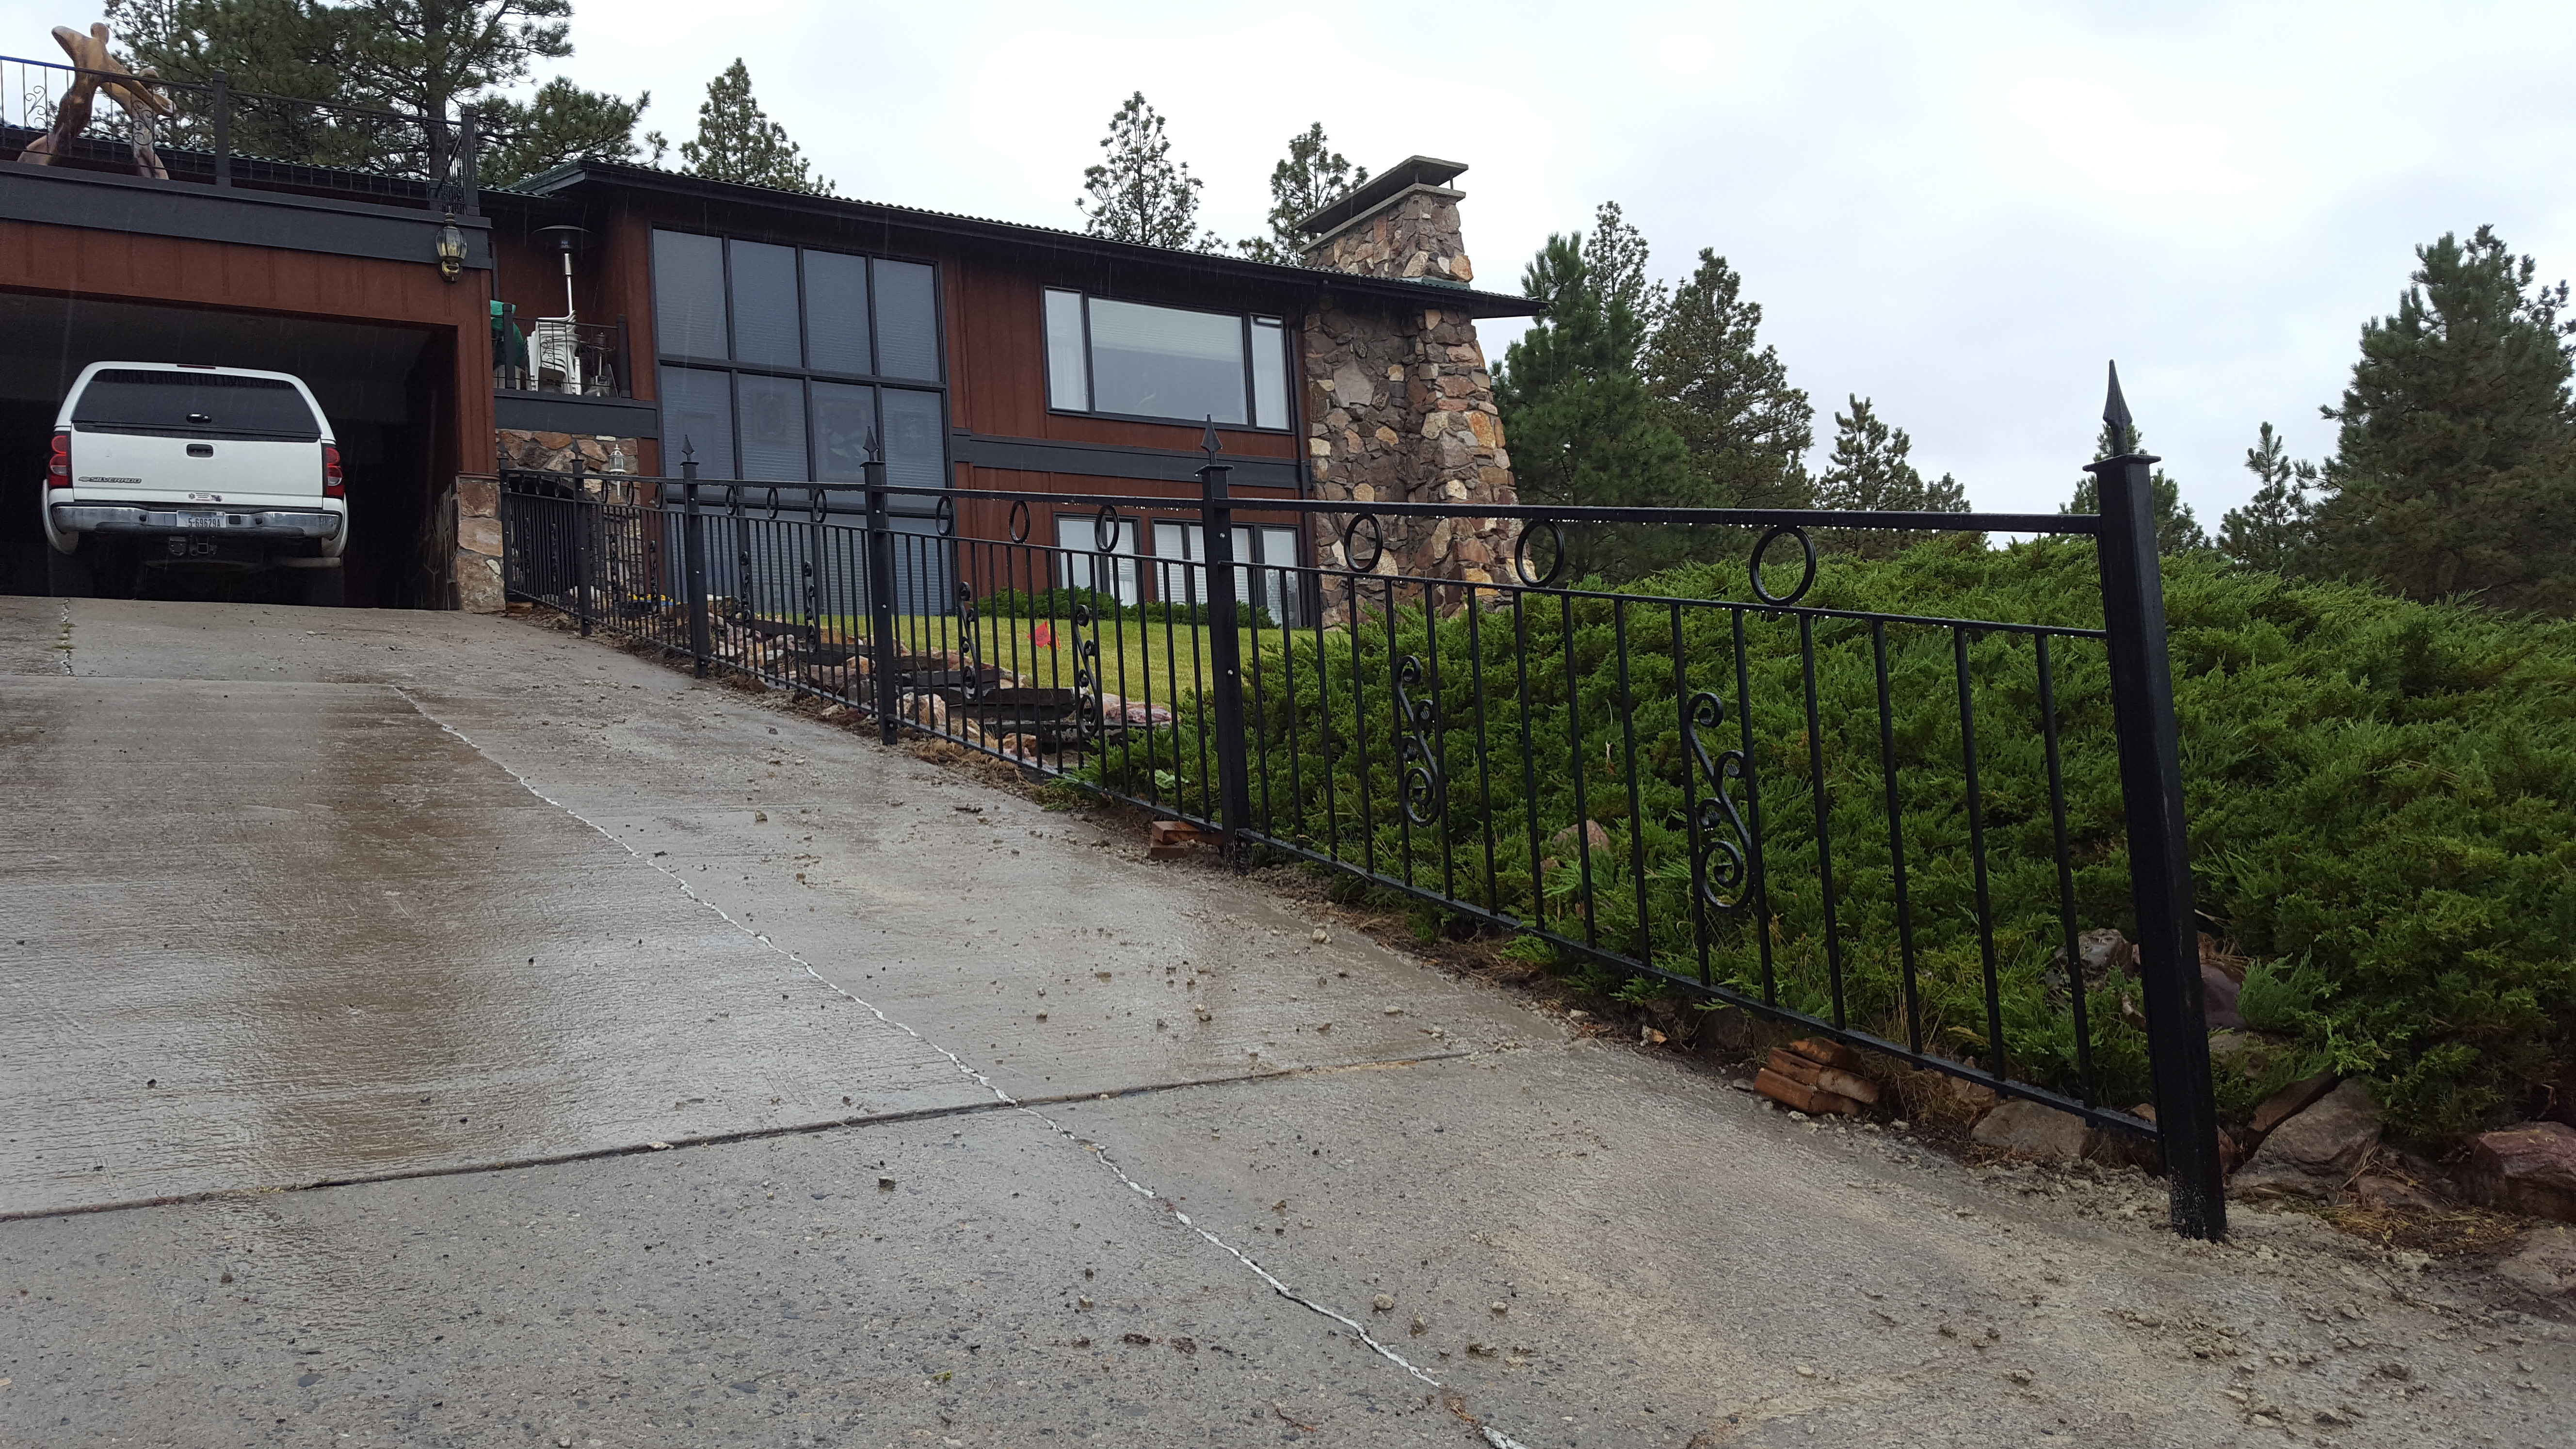
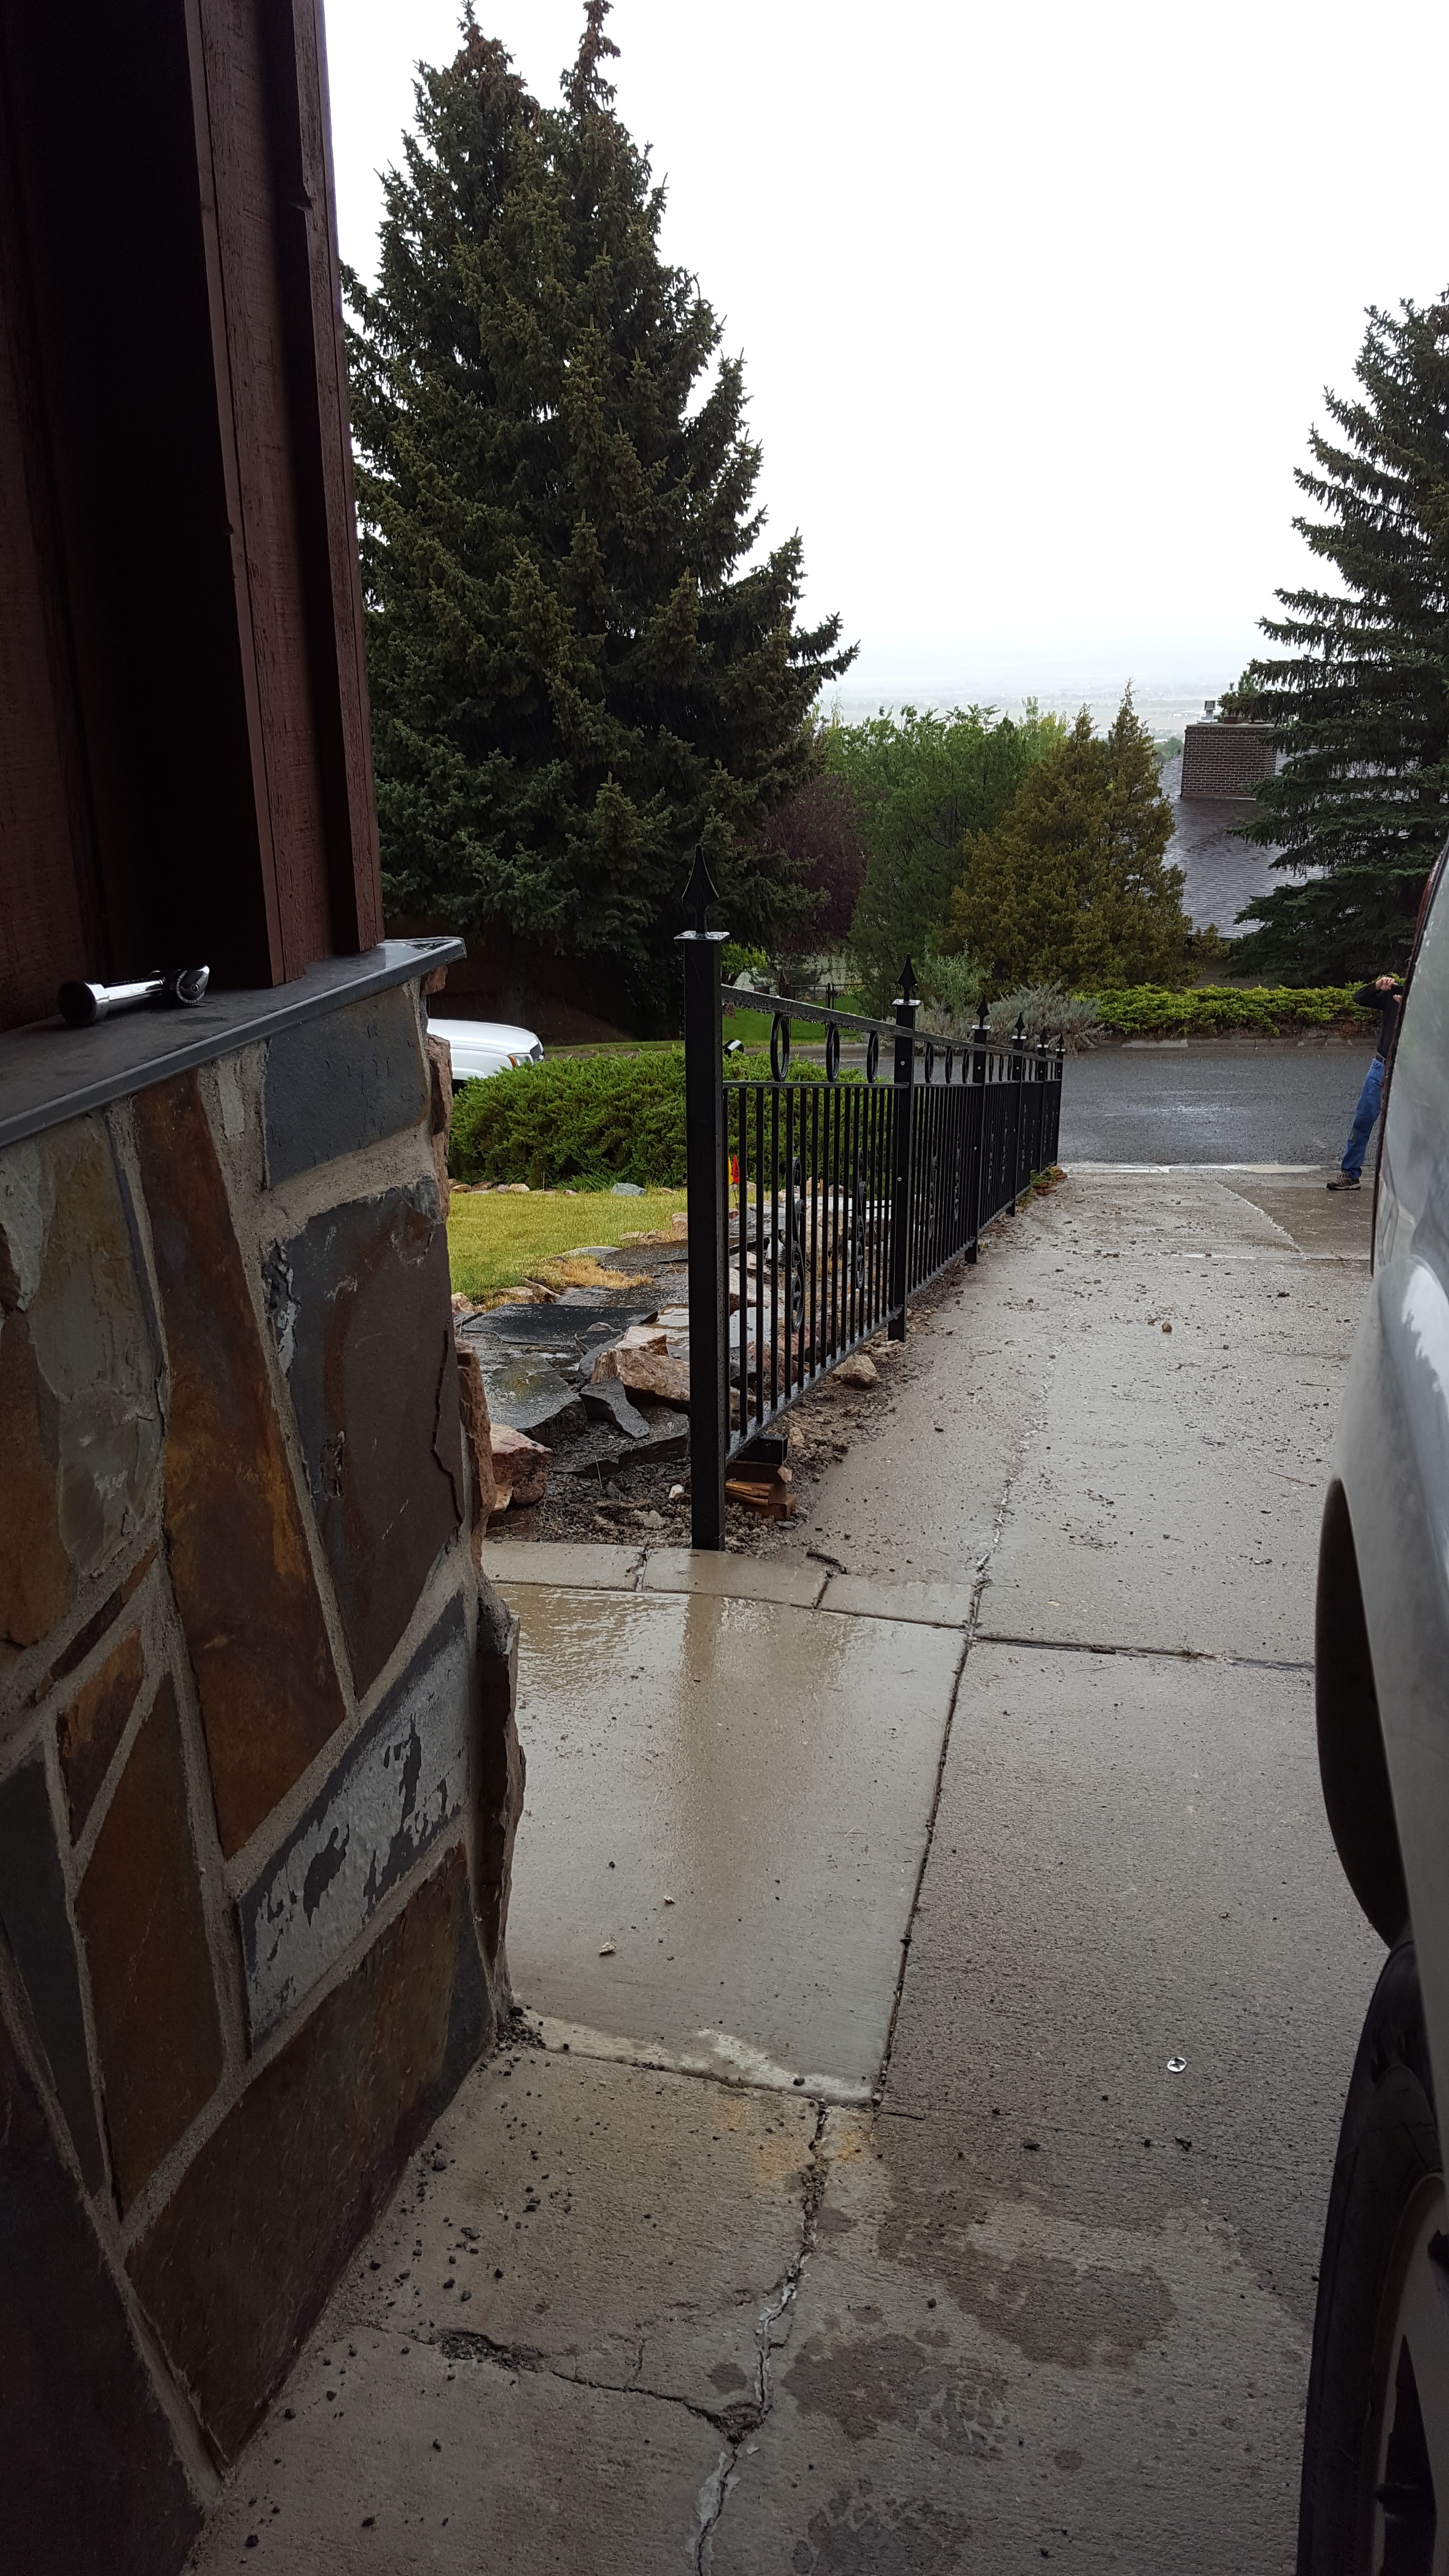
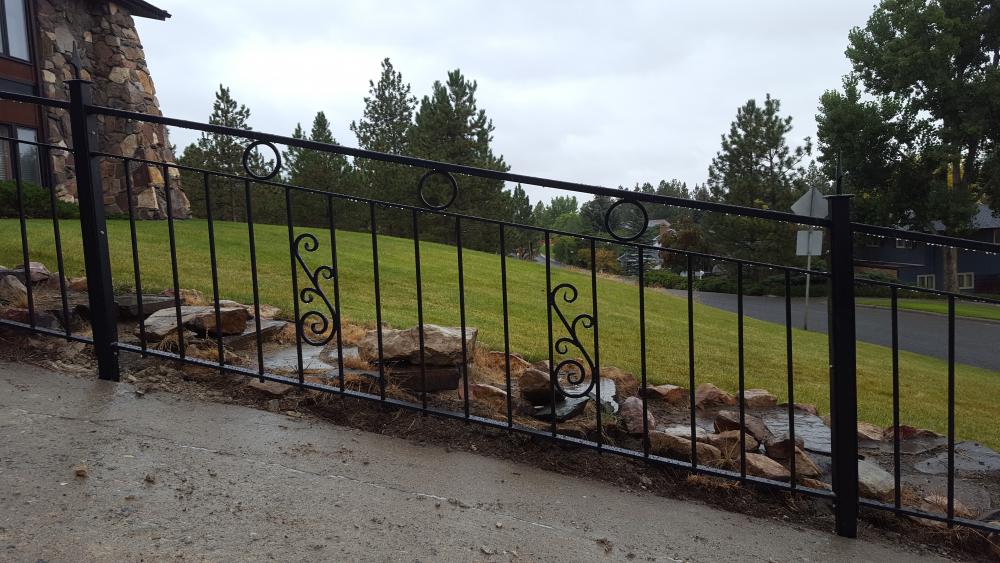
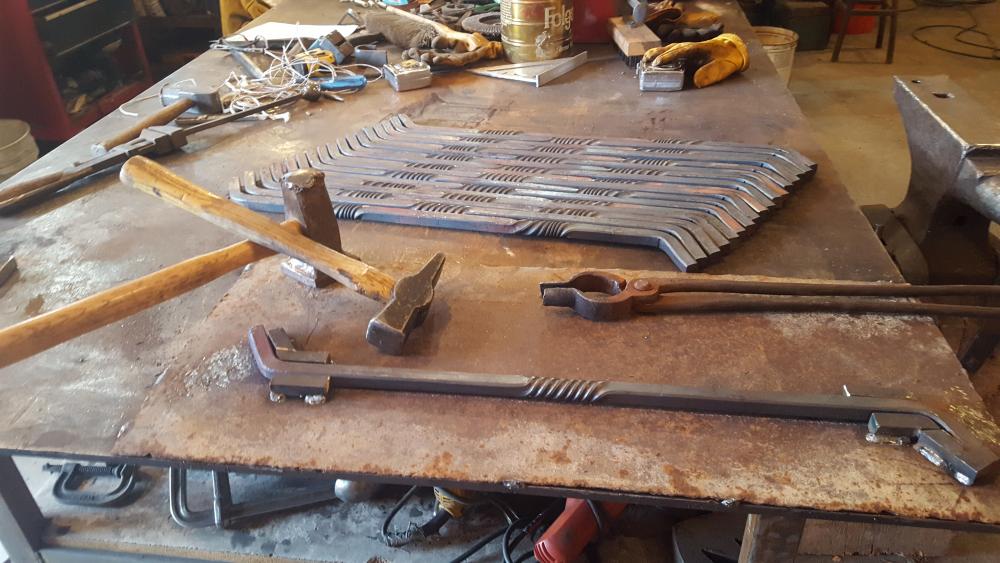
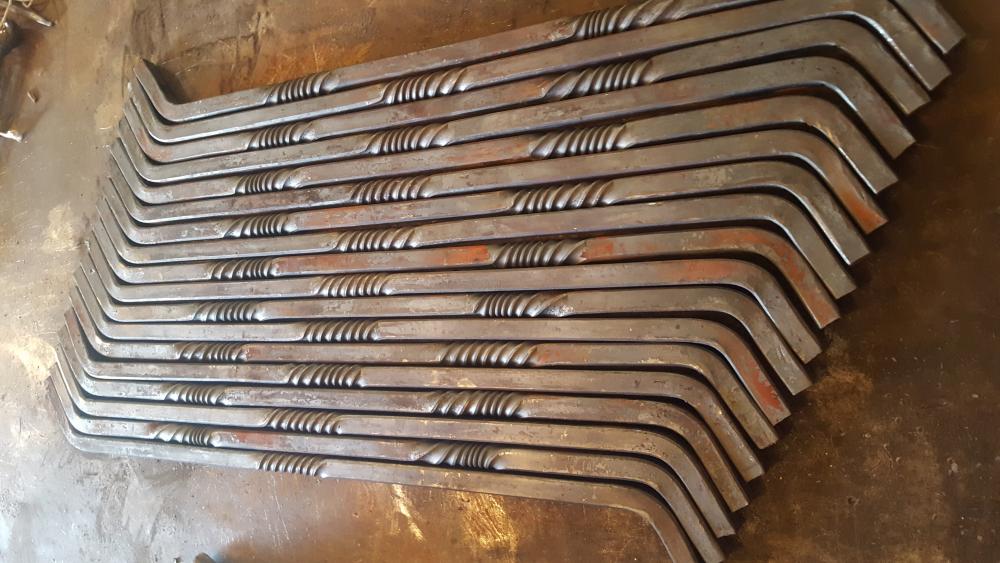
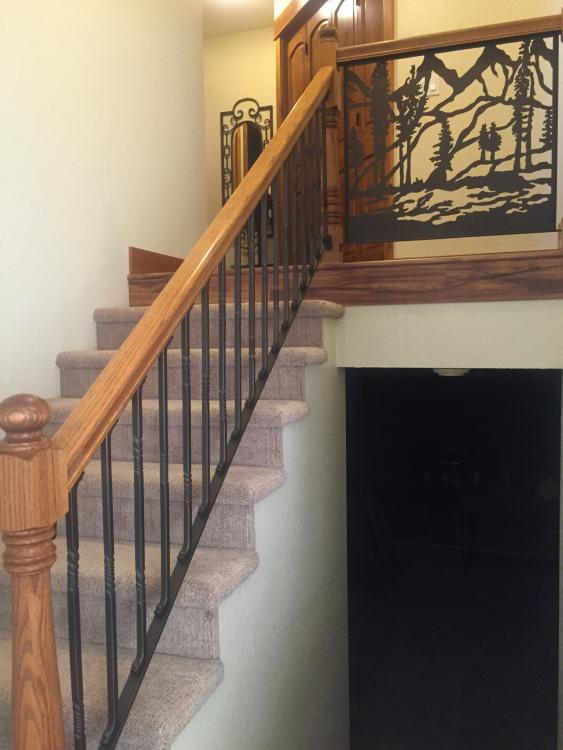
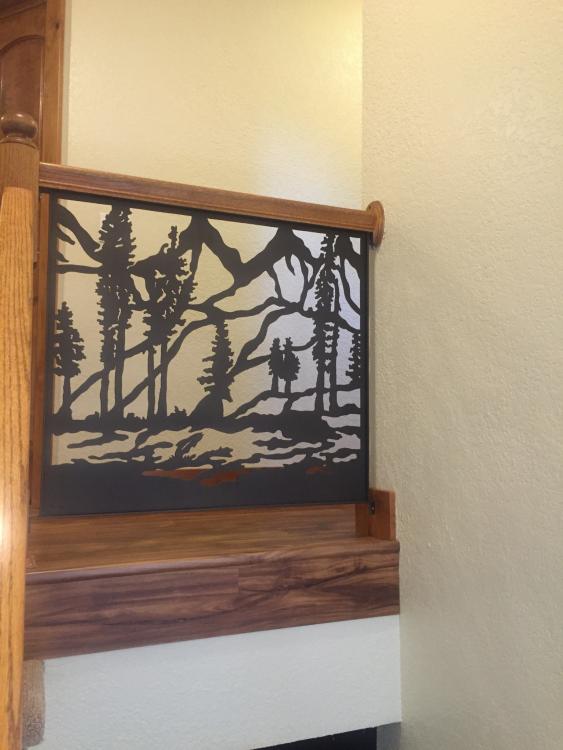
This is 43 feet of fence/handrail. This borders a driveway. The client is 95 years young and walks down to get the paper and mail everyday. He wanted something sturdy to hold on to. The fence is installed at 38 inches high. The run is 512 inches long and dropped 106 inches over that run. The pickets are 6" on center. The top rail is 1" x 2" square tube, 1/2" rings 5 1/2" diameter, second rail is 3/8" x 1 1/2", bottom rail is 1/2" x 1 1/2" channel, pickets are 1/2" tube. Entire works is satin black powder coated with a hammered finish. Fasteners are stainless steel self tapping screws. The scrolls are hand forged and designed to mimic similar scrolls on a deck railing above the car port. All installed on a cool and rainy day! I use Quikcrete for the posts. I dump dry mix in the hole, add water and stir. Do any of you use a similar method? Comments and thoughts are appreciated. JL

-
No worries - I didn't want to have missed something!
-
Kozzy, You peaked my interest. What code violation are you seeing? The triangle piece formed by the bottom rail of the handrail? The way I understand it, as long as a 6 inch ball cannot pass through the opening it is fine. Am I missing something? JL
-
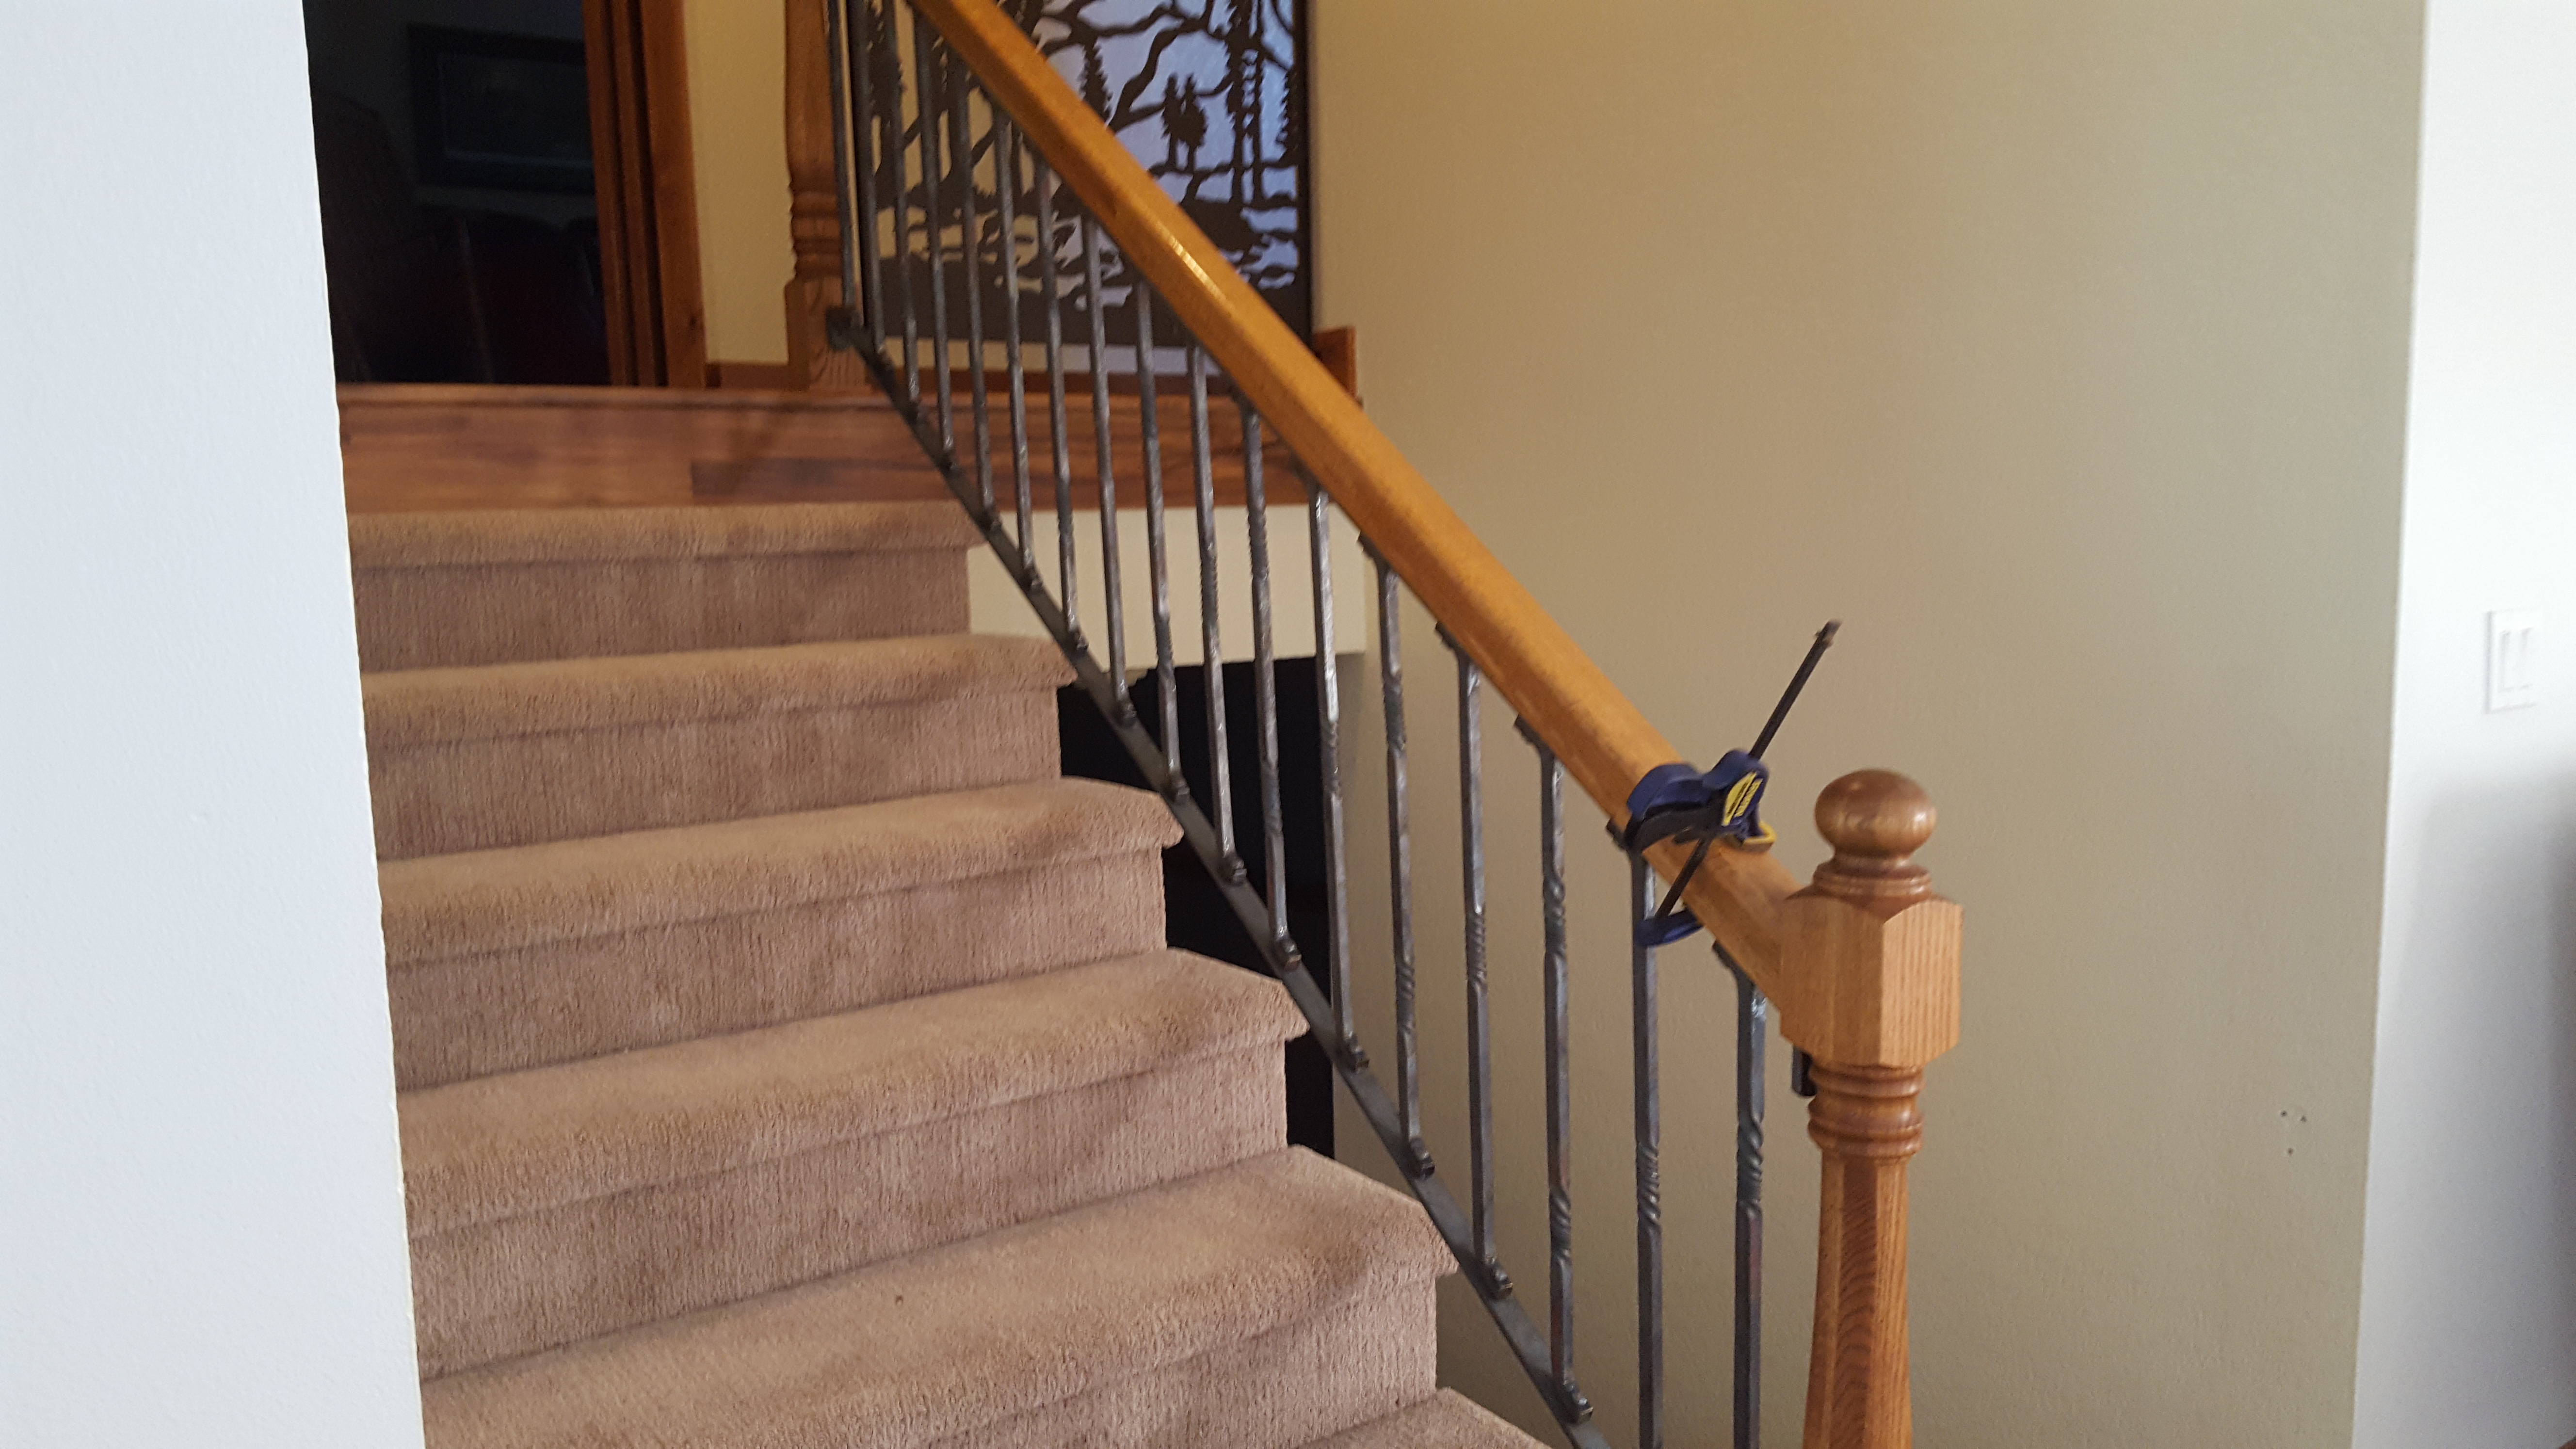
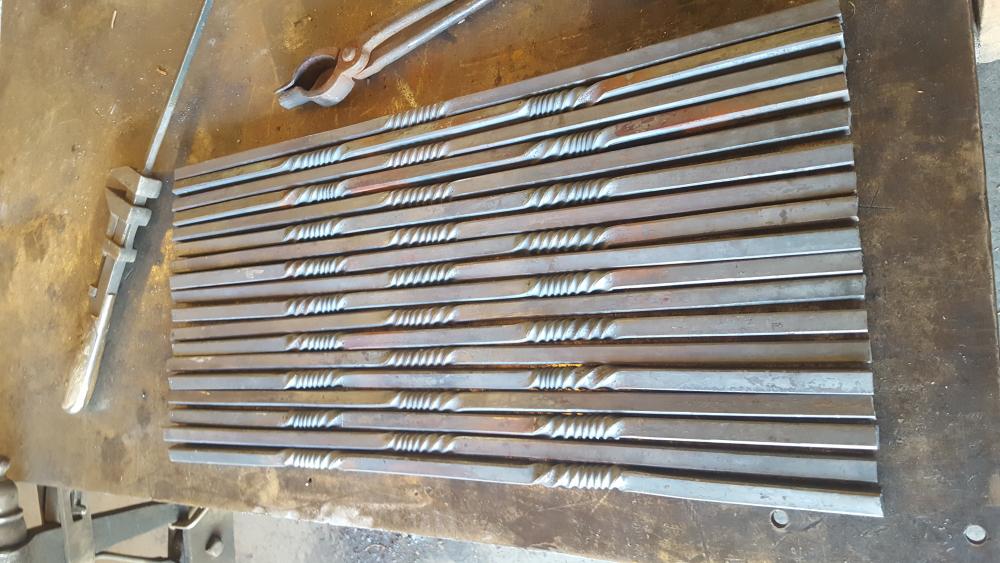
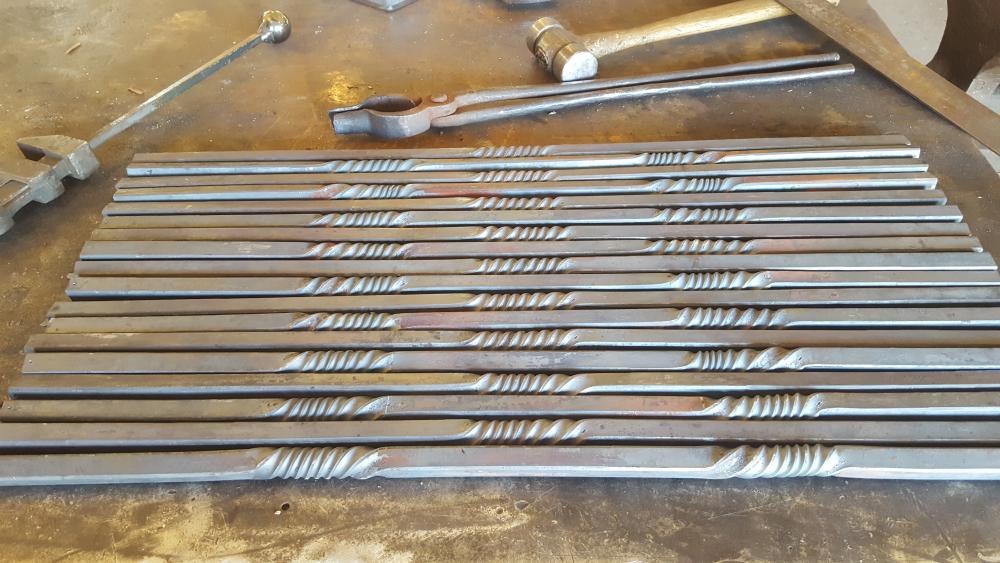
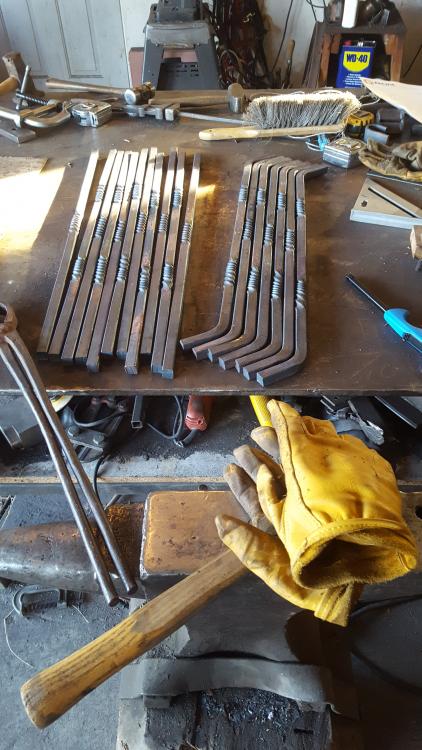
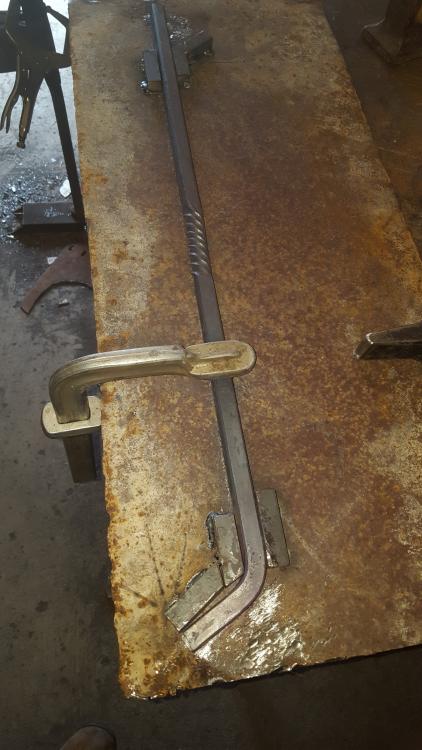
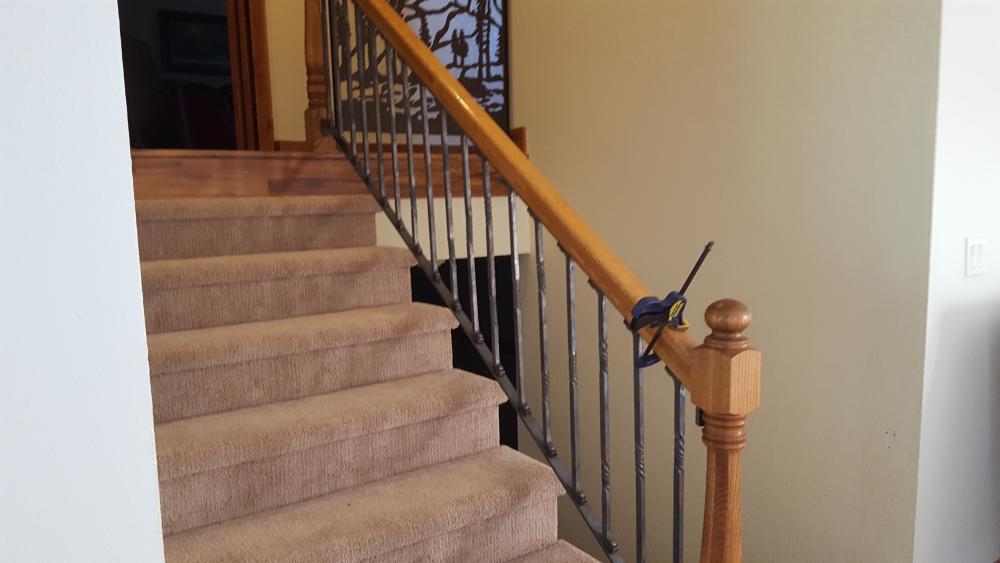
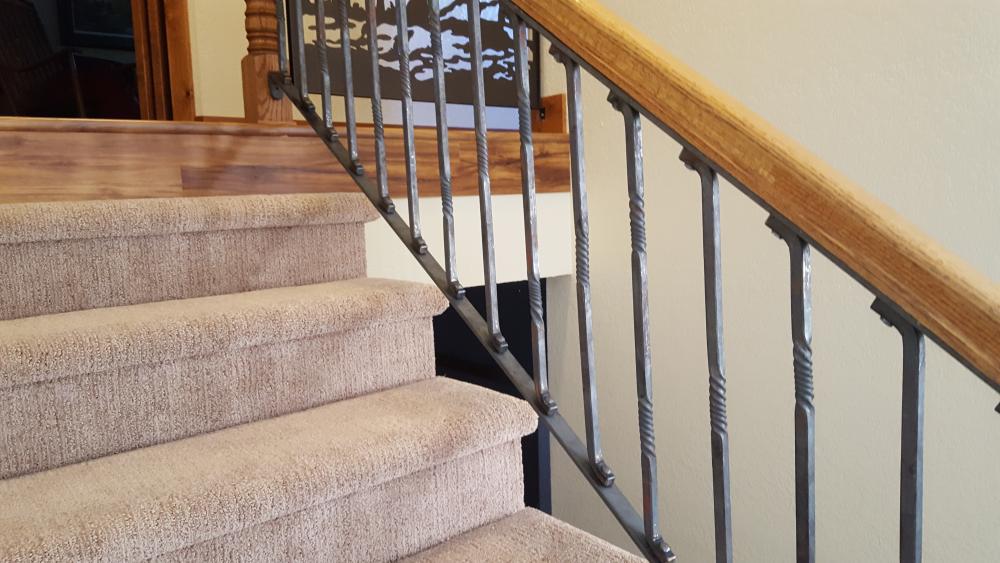
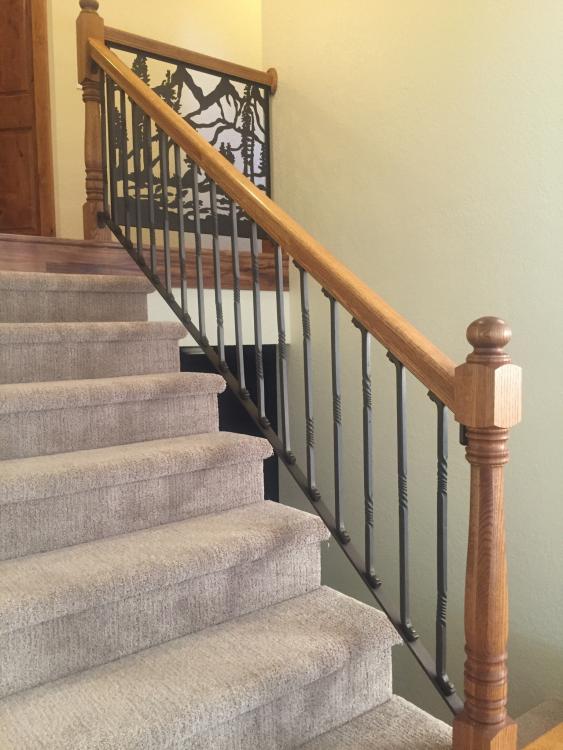
This is a hand rail project I wrapped up last week. The pickets are 5/8" solid bar. I broke the edges and hand twisted. The pickets alternate one twist or two twists. I riveted the pickets to the top and bottom rail, but blind plug welded the bottoms of the rivets. I needed the top to be completely flat to fit into a groove on the wooden hand rail. I also wanted a slight amount of flex so the railing could be slid into place. I had the works powder coated an oil rubbed bronze. Comments welcome and appreciated. John


-
Here are 3 branding irons I made last night. J Lazy L. 1/4 x 2 304 Stainless
-
I build a few branding irons and prefer stainless. It will hold the heat longer than mild. However, I have built a number of irons from mild and they work, just more trips to the fire.
-
-
Actually no - though it would be a good code for that! This was some stuff which had been textured to look like tree bark. It was some stuff I fell into free.
-
I knocked these out last evening. I needed them for some ski gear. They started as 5/8 round textured bar. These are 4" tall, about 3/8" thick and 3/4" wide. Forged under the power hammer and cleaned up on the anvil. Hot waxed with Gilders Paste Wax.

-
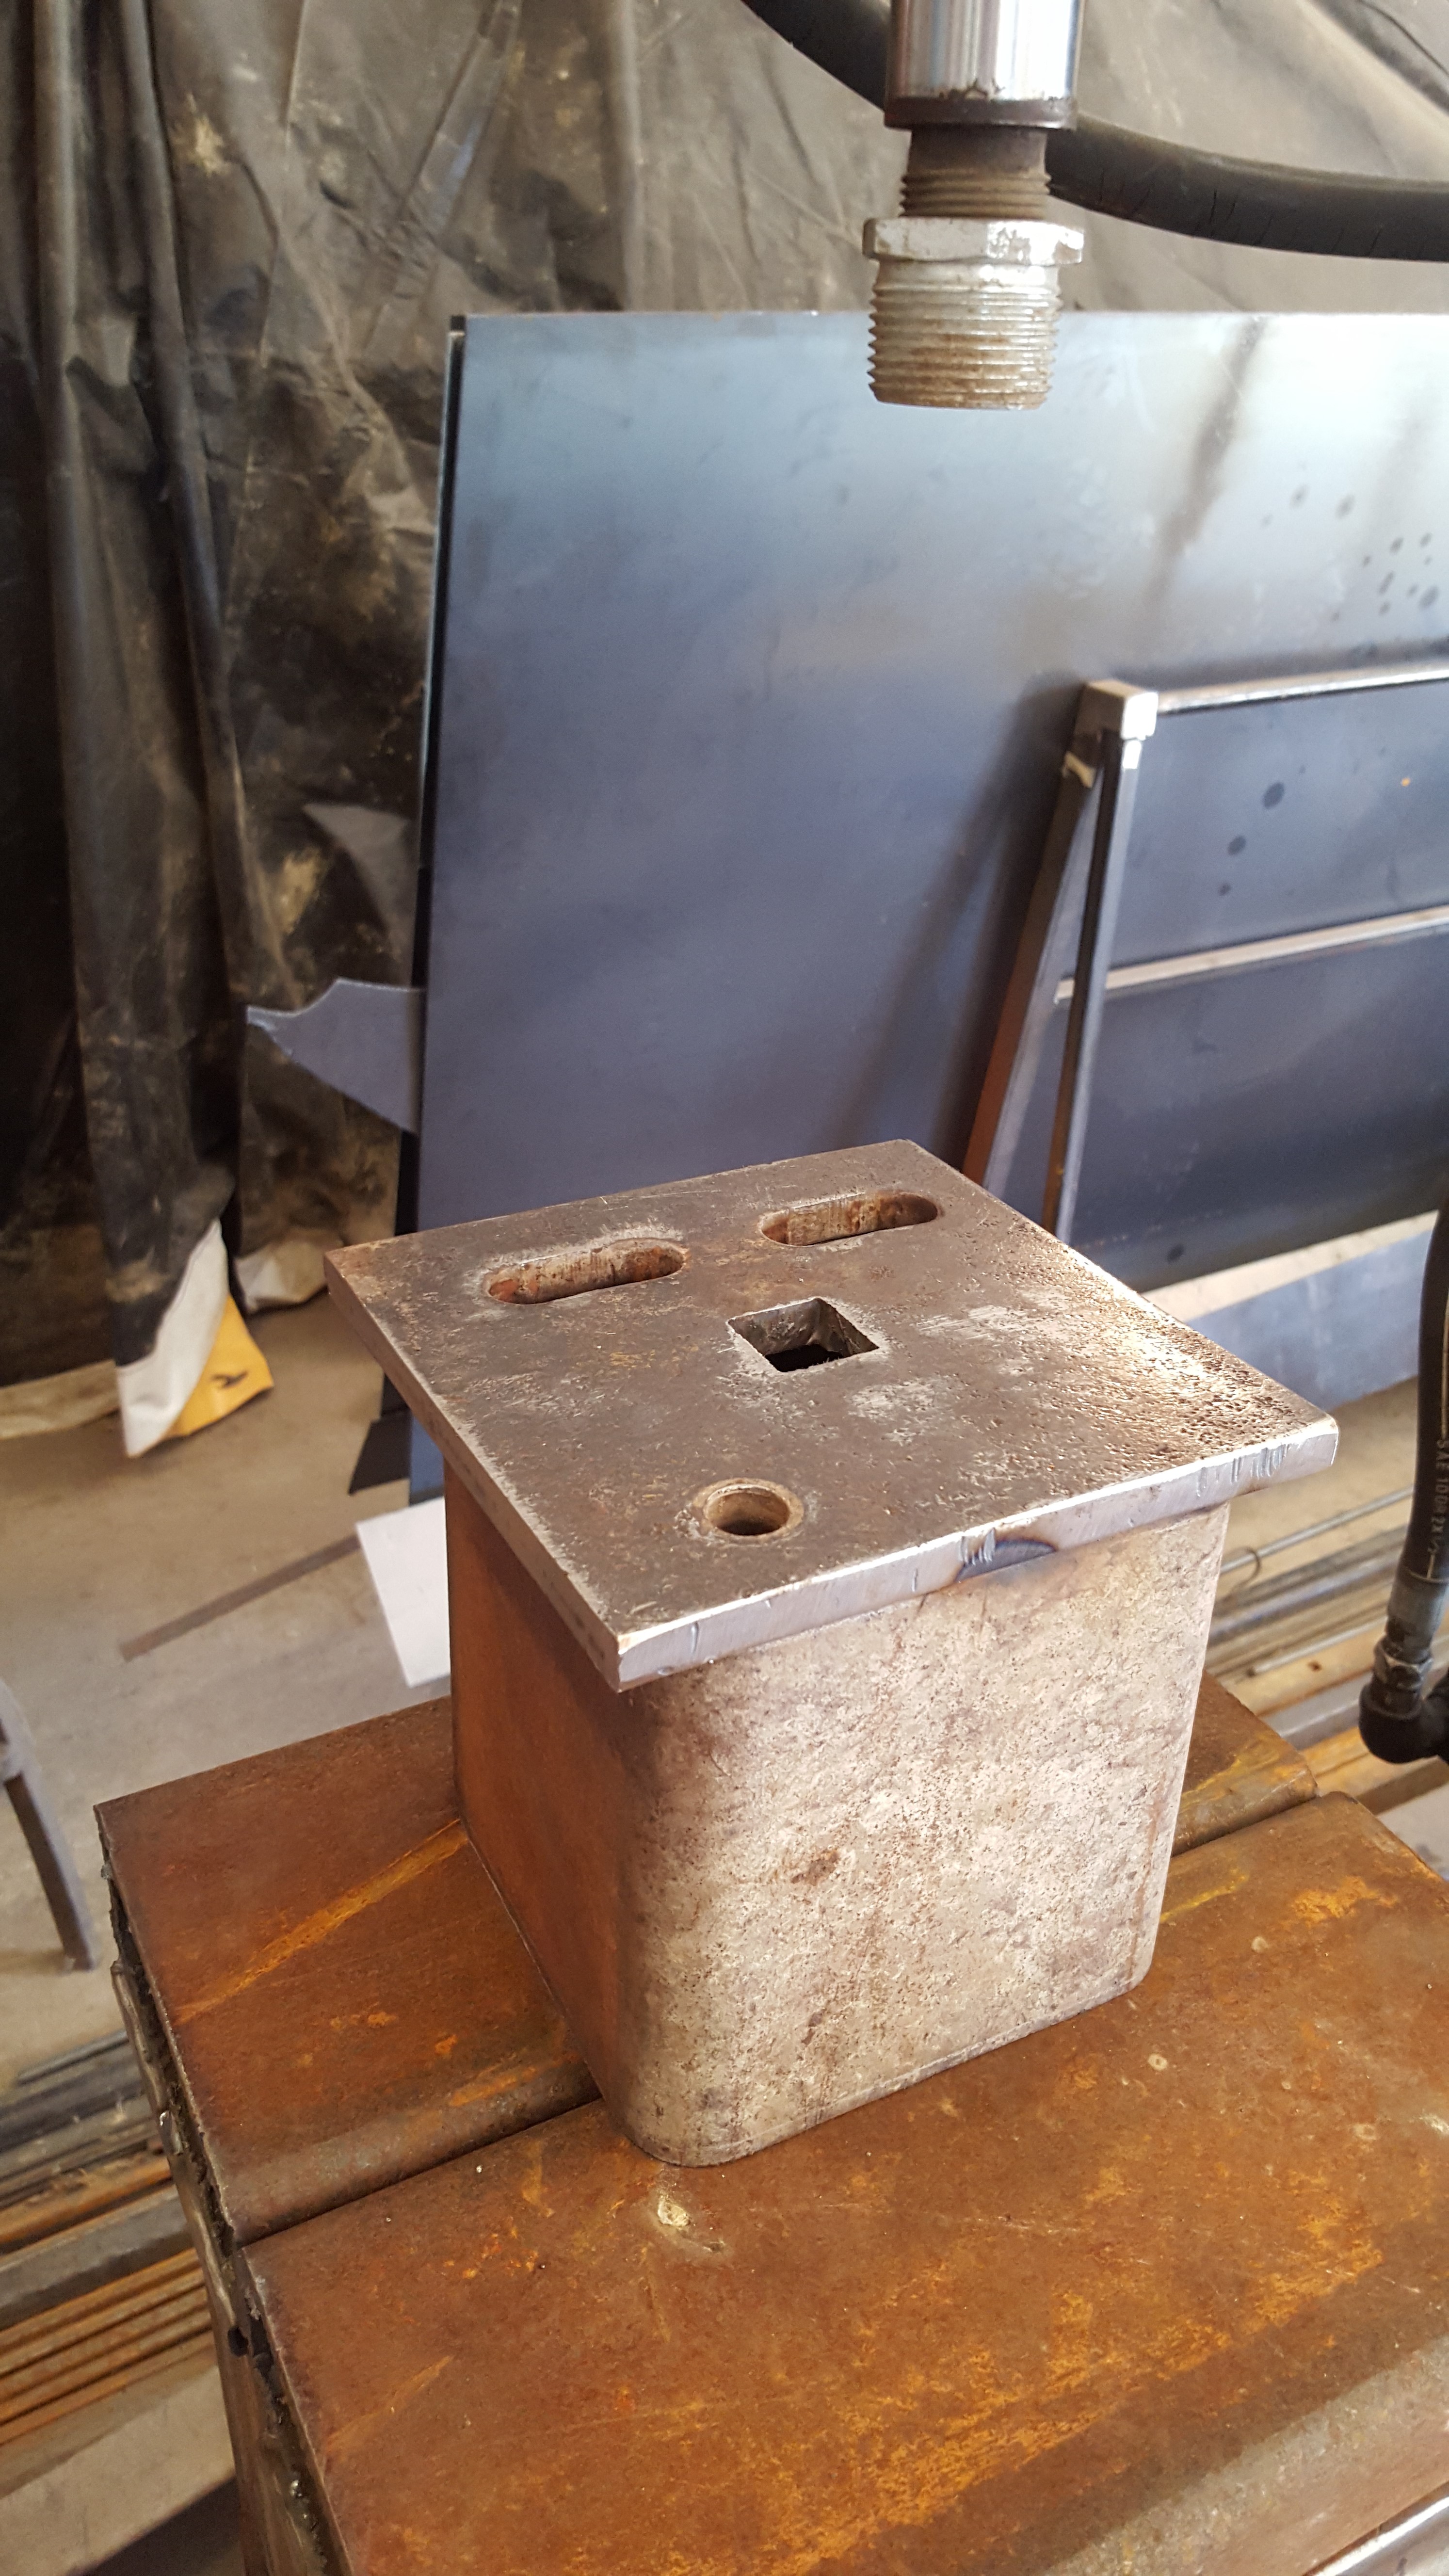
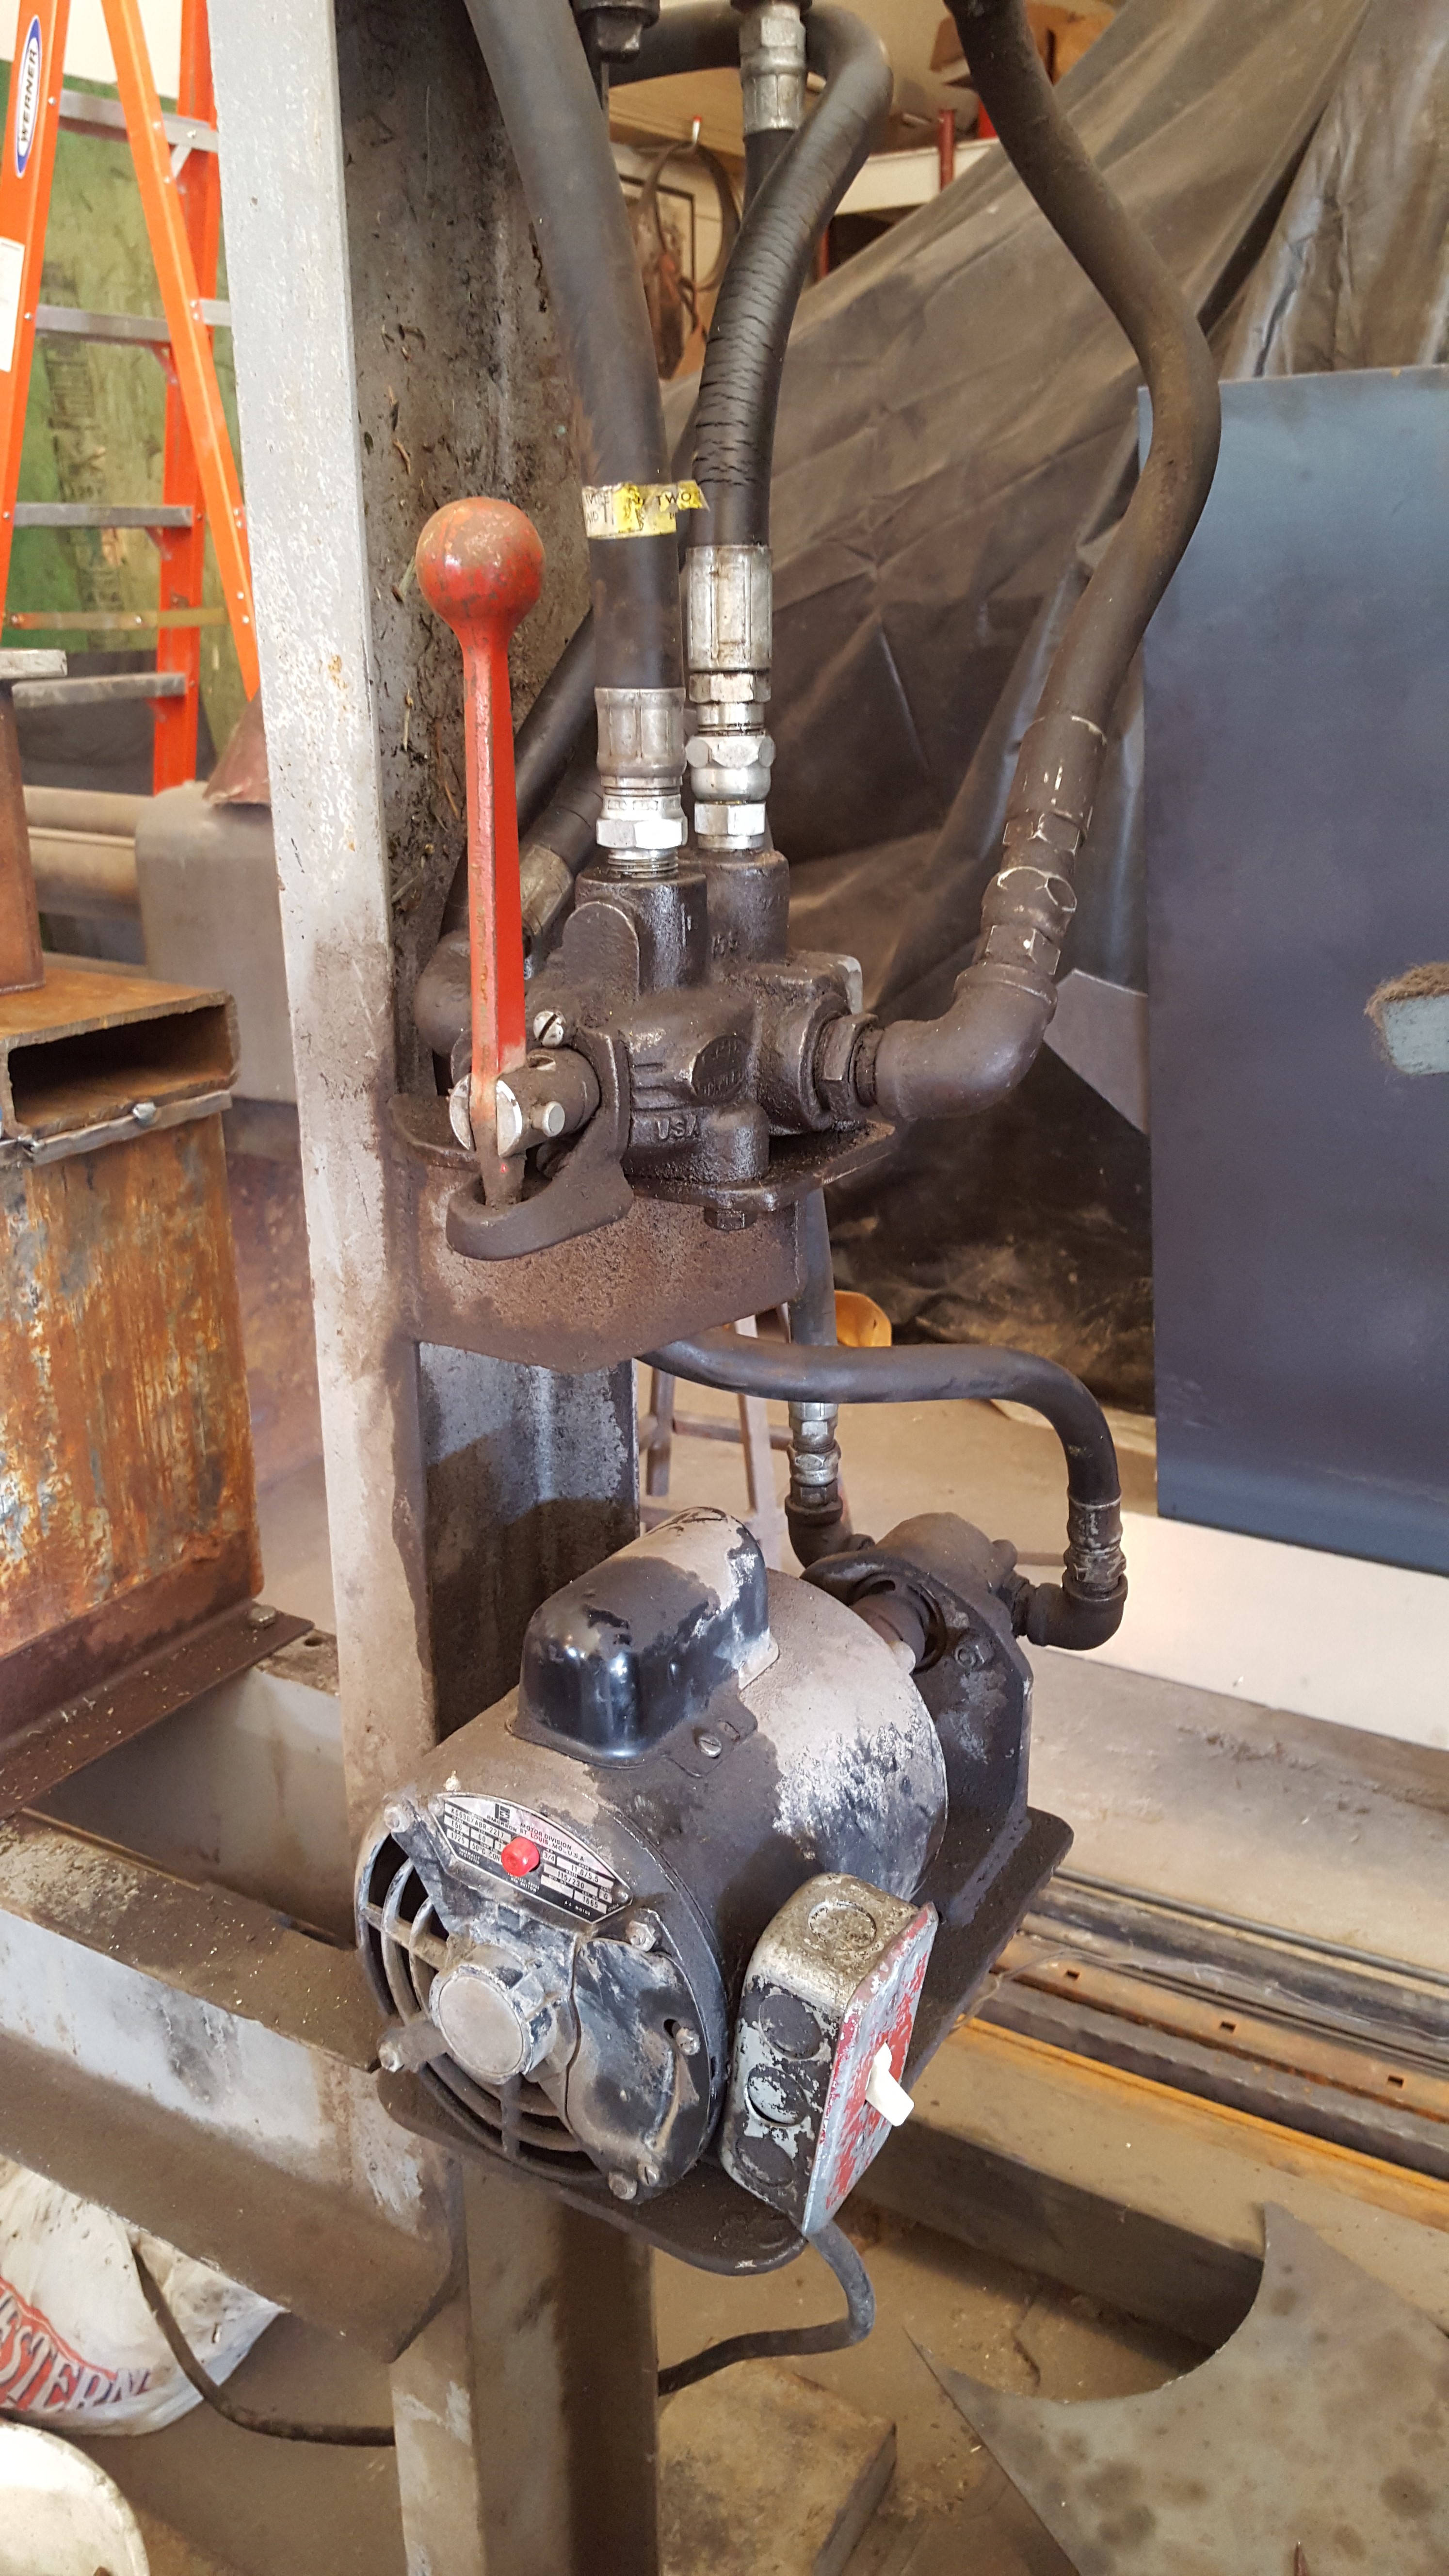
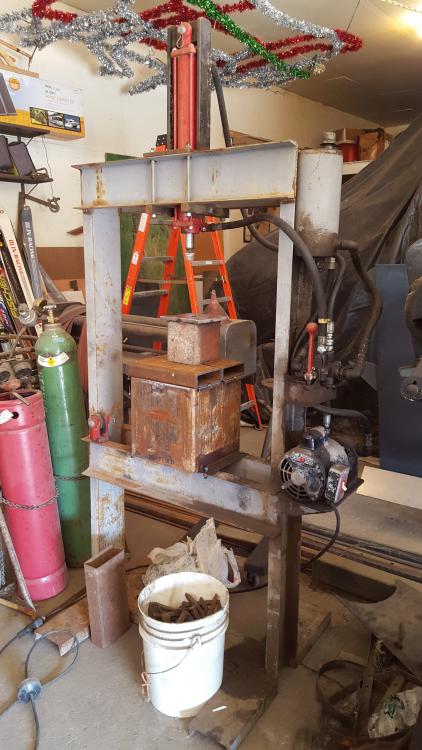
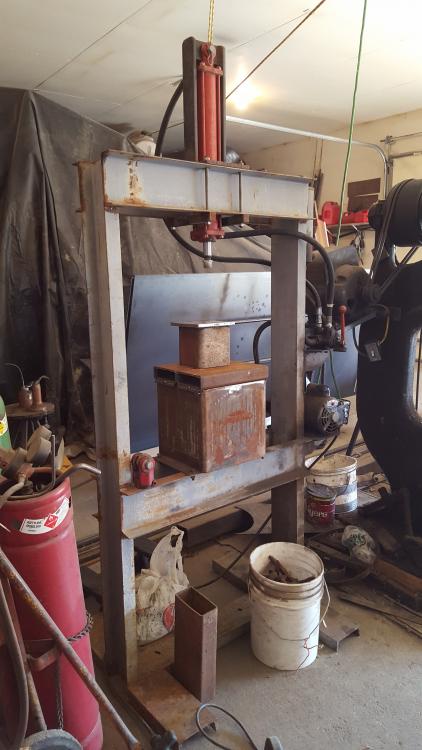
This is a Craiglist find. The cylinder is small and so is the pump, but it was the right price. It is a 110 electric motor. The large square block on the table is a shatter tank for pressing bearings. I don't want the shaft out that far so I put some blocking on top - safety police...I will be adding material so they lock in place and can't slide off. The shatter tank is made from 1/2" plate. The 2 pieces of 2x6 on top is 3/8" wall. The can on top is 1/2" wall 6x6 tube with a 1/2" top plate. Again, I will build pieces to lock all these in place. Question for you press guys, have you placed a gauge on your machines to indicate force? If so, can you share pictures of your gauges? Thanks, John


-
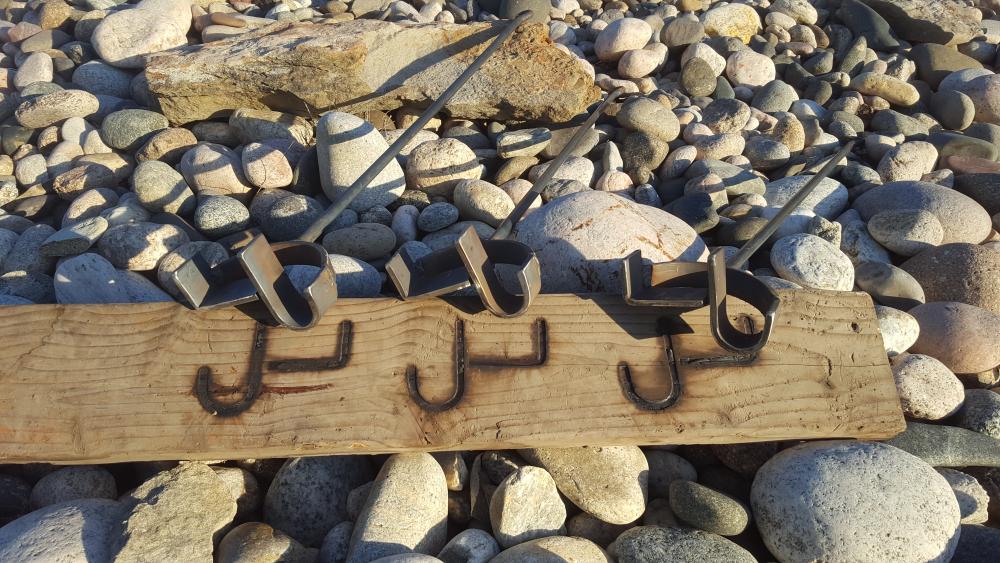
Those are scrapers from a disk. They clean out the inside of the disk as you move. I don't have a clue what grade they would be, but I am sure they are built from tough stuff.
-
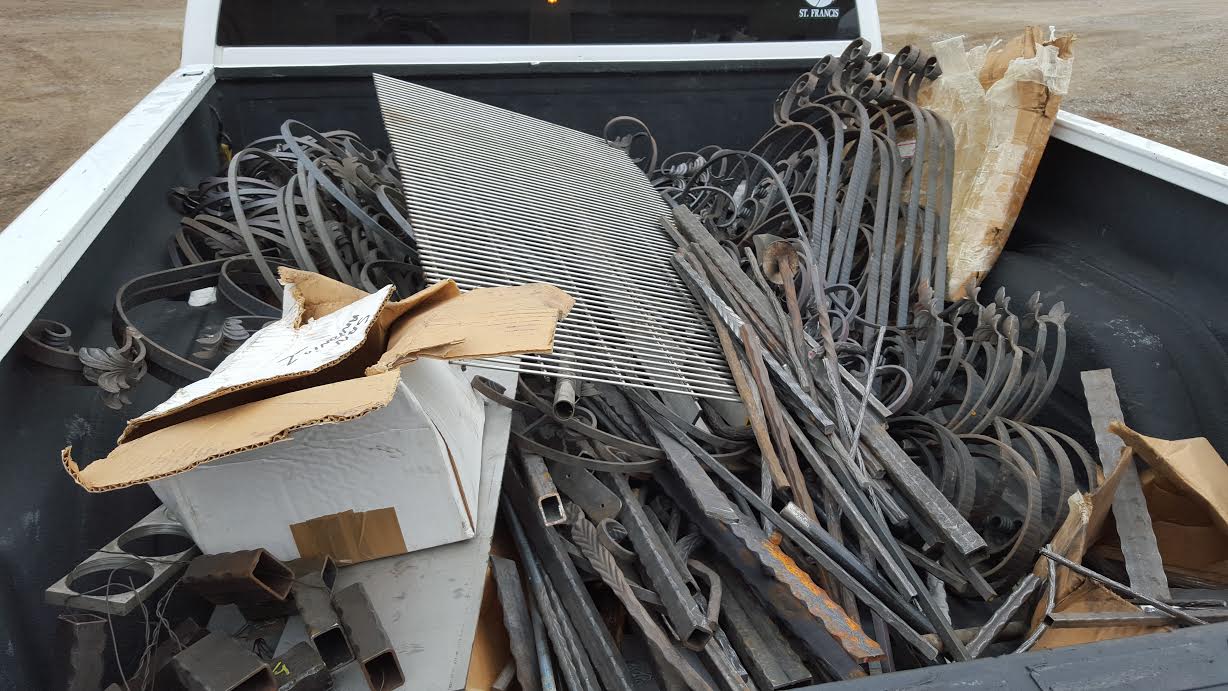
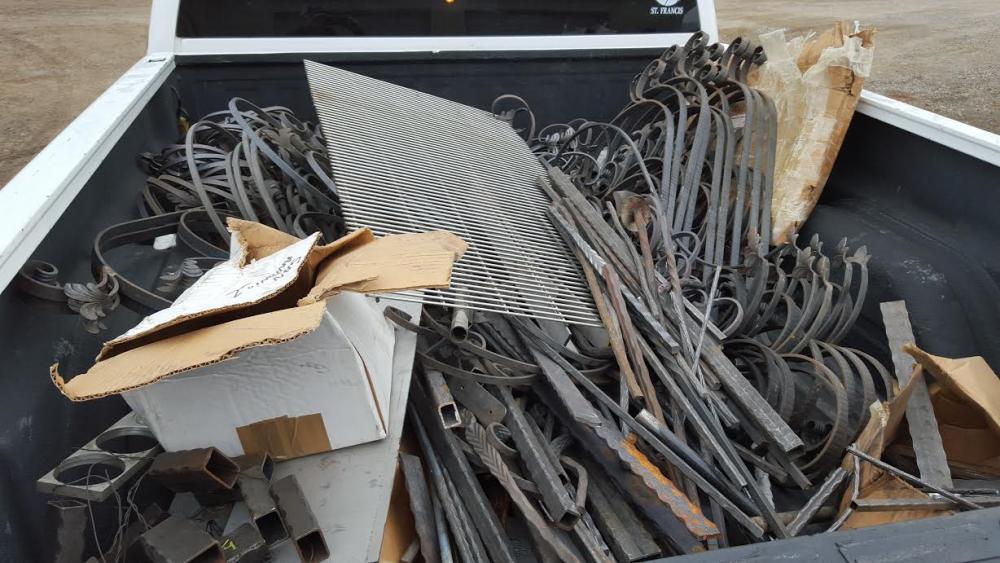
A close friend of mine lost her brother in a tragic motorcycle wreck. He and his father were owners of a welding shop here in Billings. They make a hot asphalt patch machine. He also moonlighted making other things from metal. The father had no use for a great deal of his ornamental iron pieces so they had me come look. I offered a price and they accepted. I went back a few weeks to haul it all away and got this load. When I went to pay the father said it was all taken care of. His daughter had paid because of all the items I have made her through the years. A great deal of these are King Arch Iron pieces, but they can always be re-purposed. A great deal is stainless and some is aluminum. I need to learn to forge aluminum!
-
-
Rigid - no flex, unless HIGHLY overloaded.
-
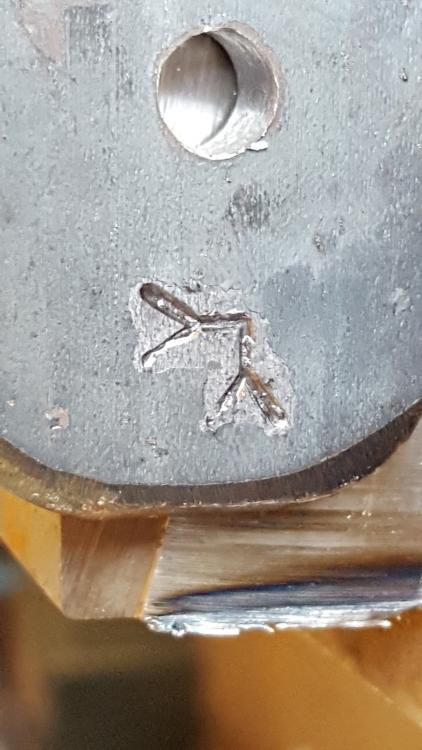
You guys have pretty much been answering your own questions - I have been out in the wilds of North Dakota in the winter...I don't recommend it. I countersunk the back of the bar stock for the rivet and welded it in for extra stability. I know it would have been tight and strong just simply hot set, but I wanted zero wiggle.
-
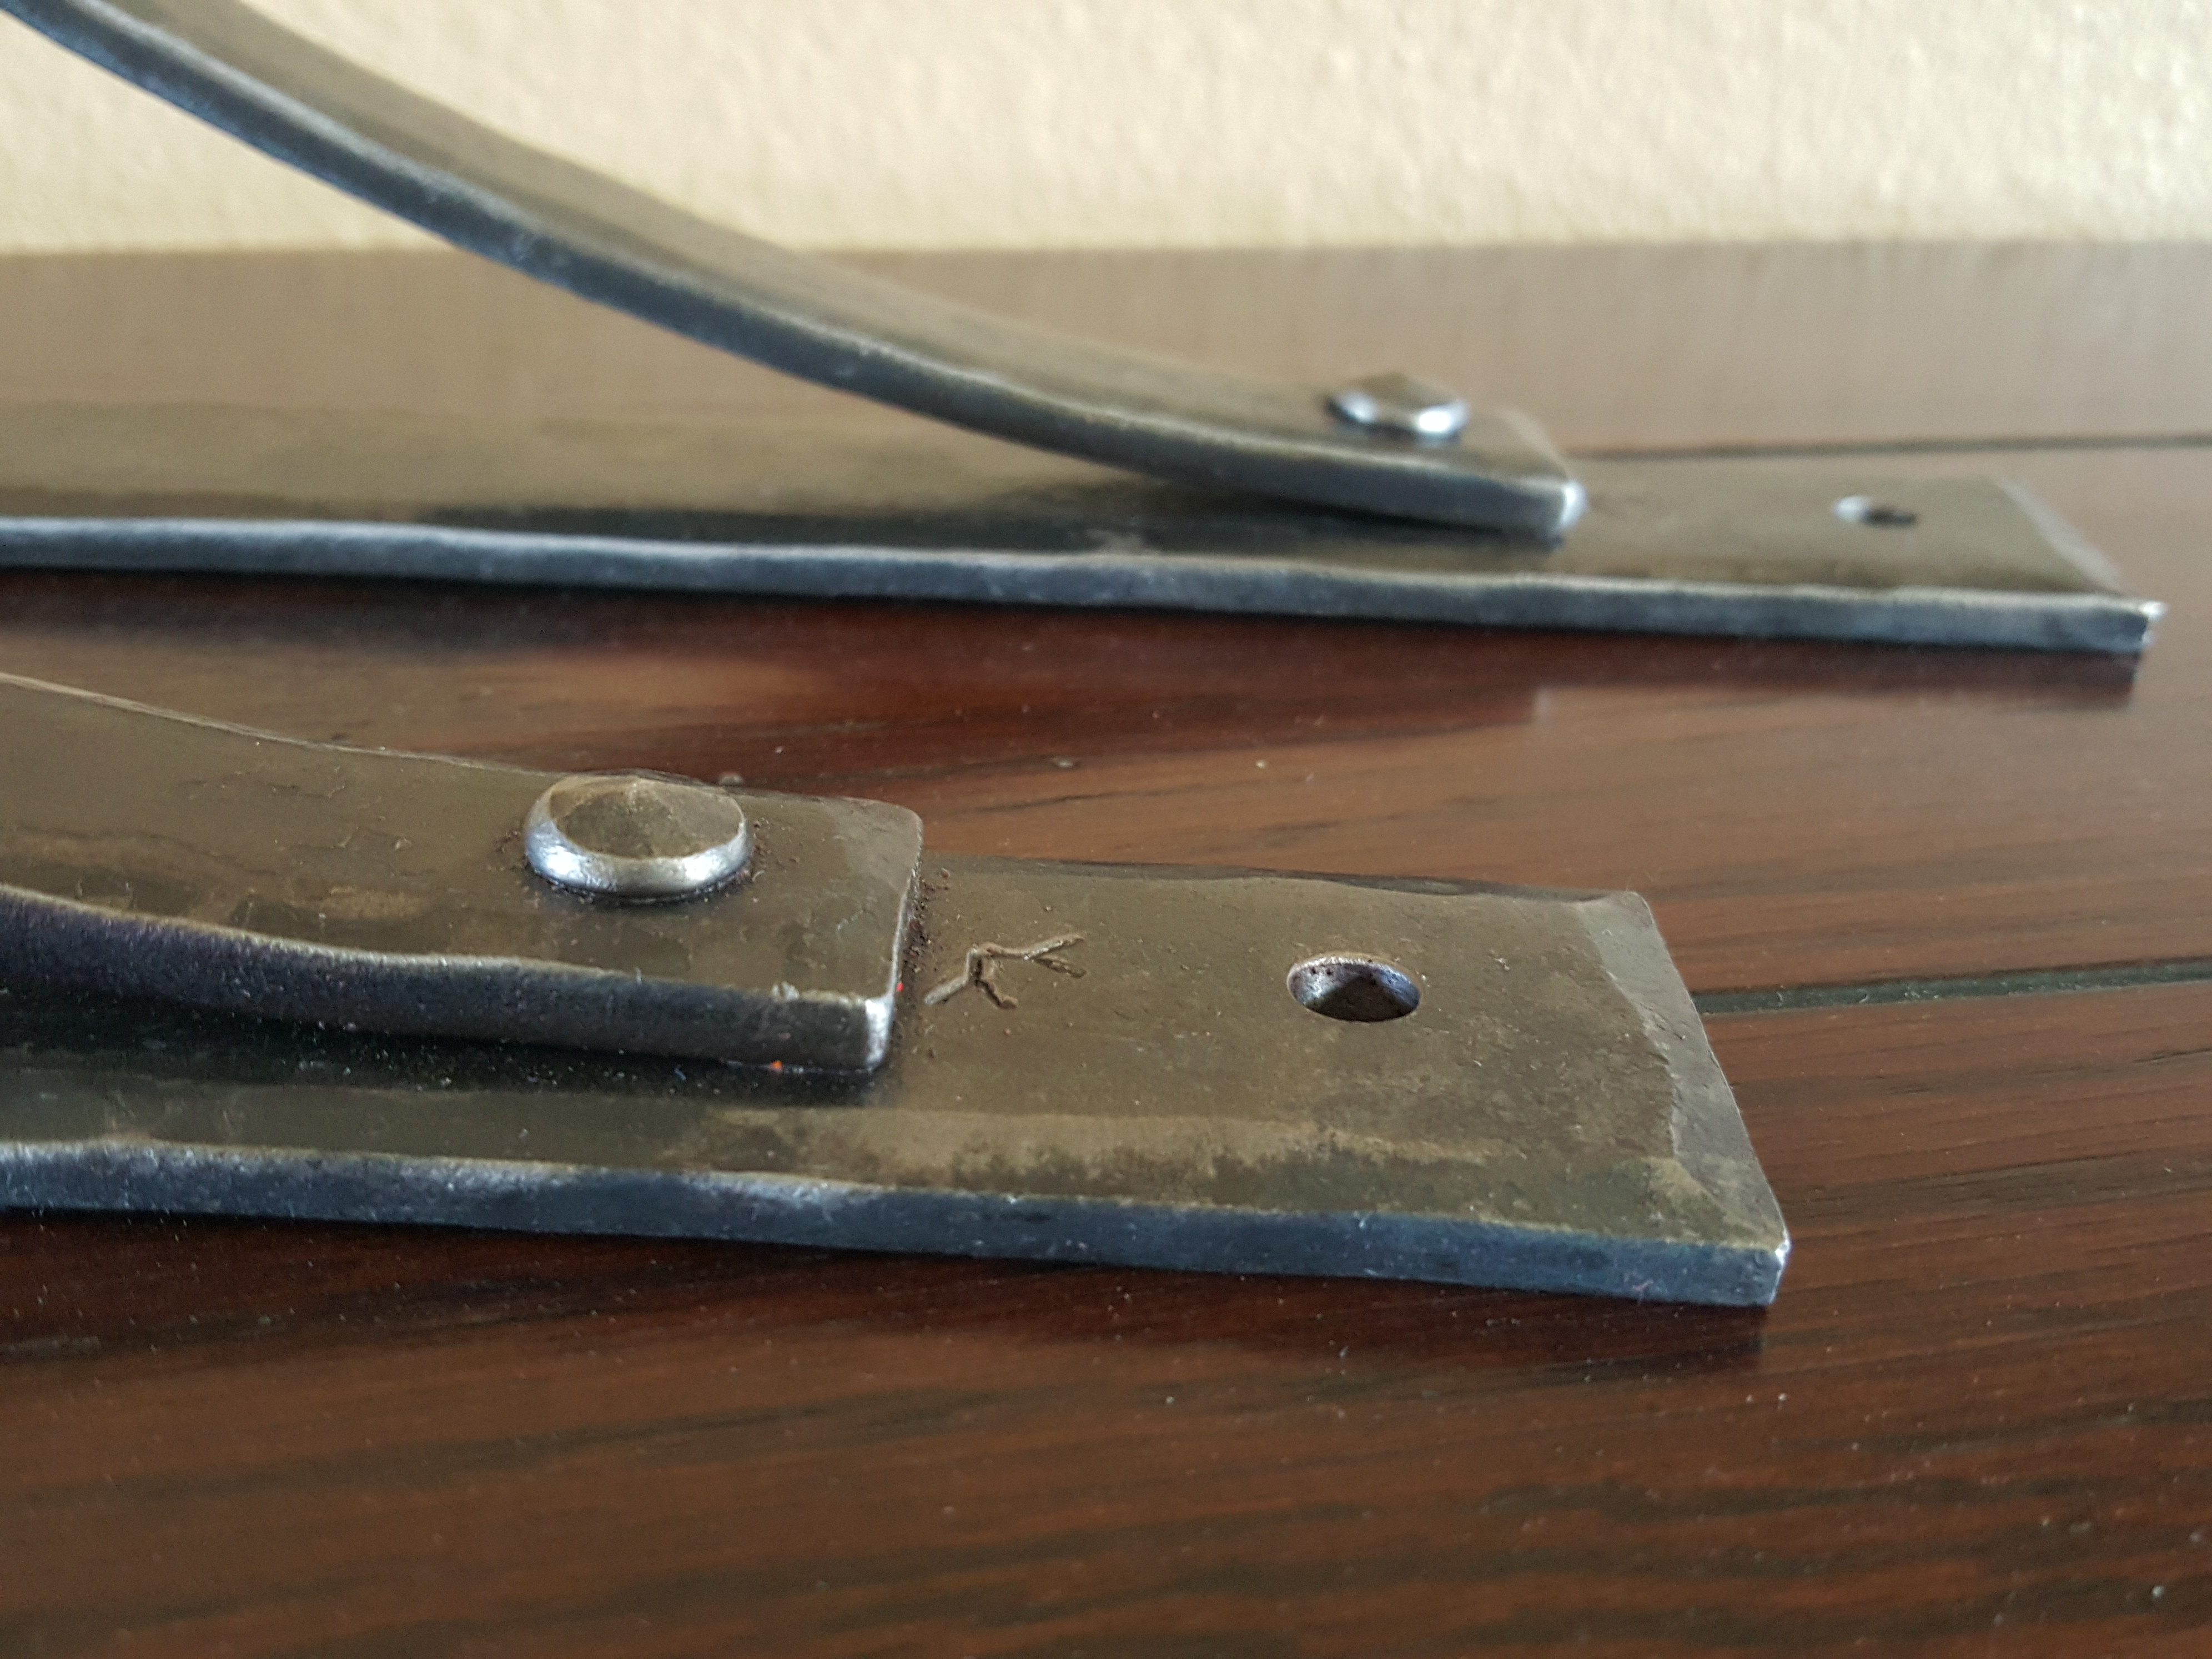
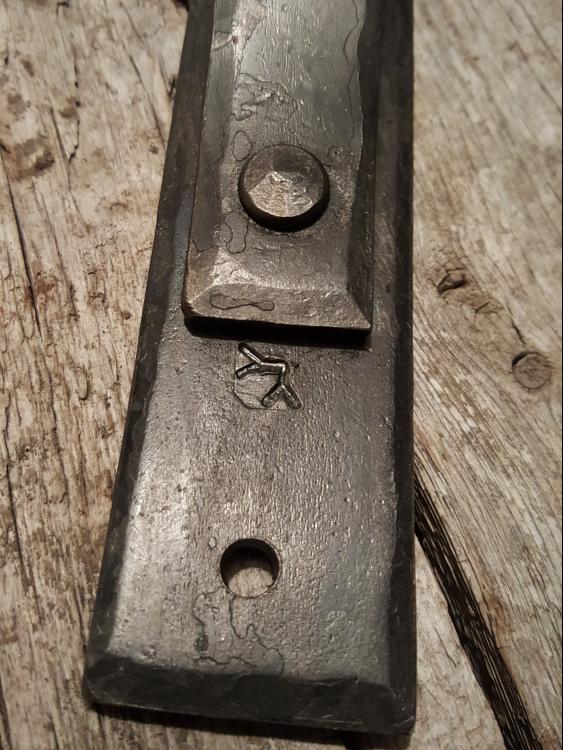
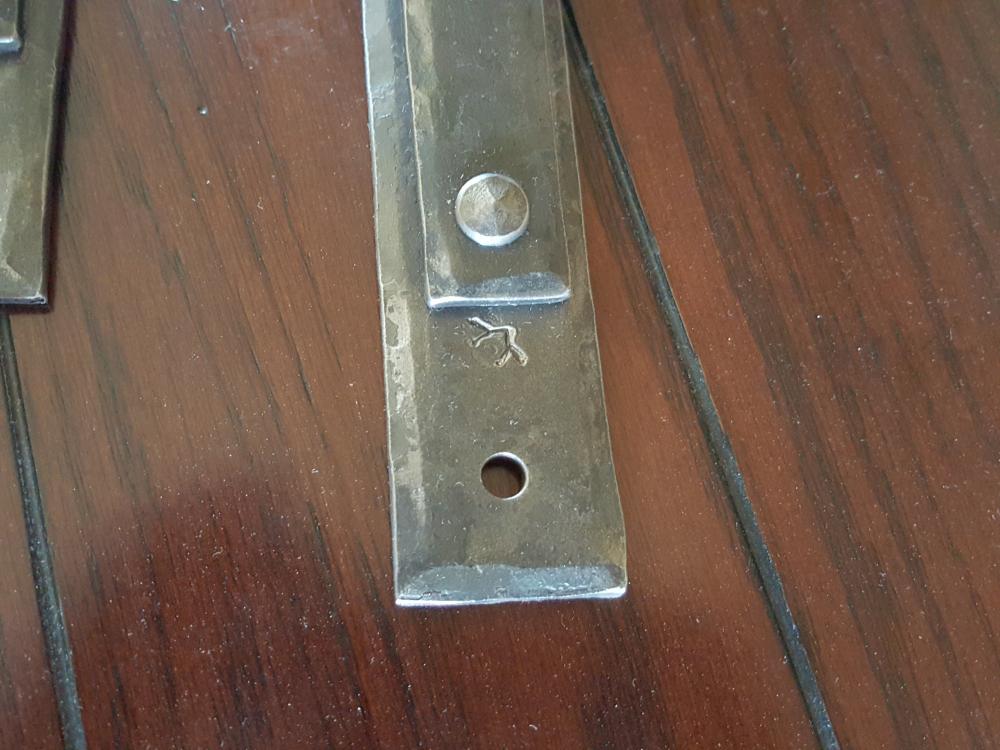
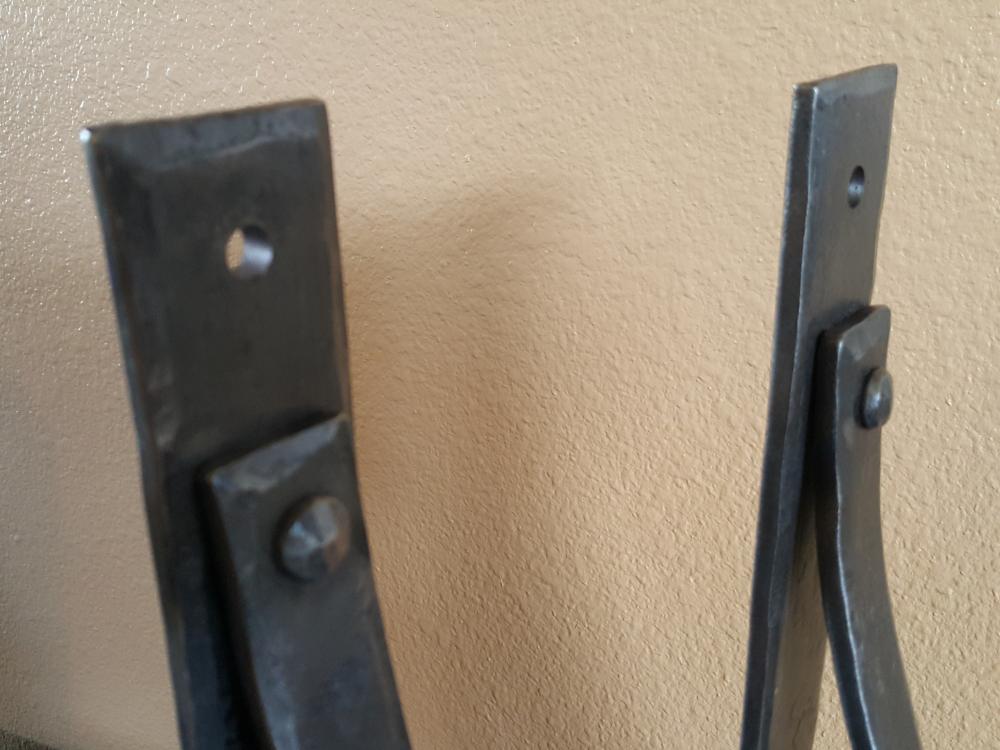
The clients who ordered the first set of brackets came back for more. These are 9 inches on the leg. Made from 1 1/2 x 1/4 and 1 x 1/4. I again fullered the bend point and blind plug welded the rivet, then hot set it. I used Gilders Paste Wax as the finish applied while above black heat...above black heat cause it burnt my finger pretty good! Miss Sims wrote and I paraphrase, The first time you get burnt it hurts, the second time you get burnt it still hurts, they third time you get burnt, yes there will be a third time, it still hurts!"
-
I wrote a long post about family and growing up on a ranch...and it disappeared. Long story short by kids both are in the shop, ride horses and motorcycles, work cows, drive tractors, drive trucks (farm trucks), drive pickups, shoot guns, irrigate, snow ski, water ski - do dangerous stuff over all. My son is 14 and my daughter is 11.
-
This is a sign I installed yesterday. The sign is 6 foot tall and 8 foot wide. This is a 3 layer sign. There is a piece behind the wording at the bottom. All made from 10 gauge. The sign itself weighs over 450 pounds with the legs. The vertical rock is over 12 and a half foot tall. It weighs north of 4000 pounds. We dug a hole to set it in. The butt end measured about 24 x 33. We put in about 600 pounds of concrete around the base. The sign has 4 adjustable legs to allow for the difference in the rock and attachment. I am going to add a support leg yet from the back of the sign down to the ground. This is in a high wind area and I think it will benefit from a bit more support. The sign is on the Arrow Creek Exit just off I-90 East of Billings, MT towards Hardin, MT.

-
Thank you. No budget from the client for a more expensive version! I gave them numerous options and they chose...less expensive. I drew out the curve on the shop table with soapstone and measured the drawing. I cut the pieces for the curve and then forged them to match. I drilled the holes in the end of each curved piece first and then marked the legs to match. I think they will be happy, when they get home from vacation.
-
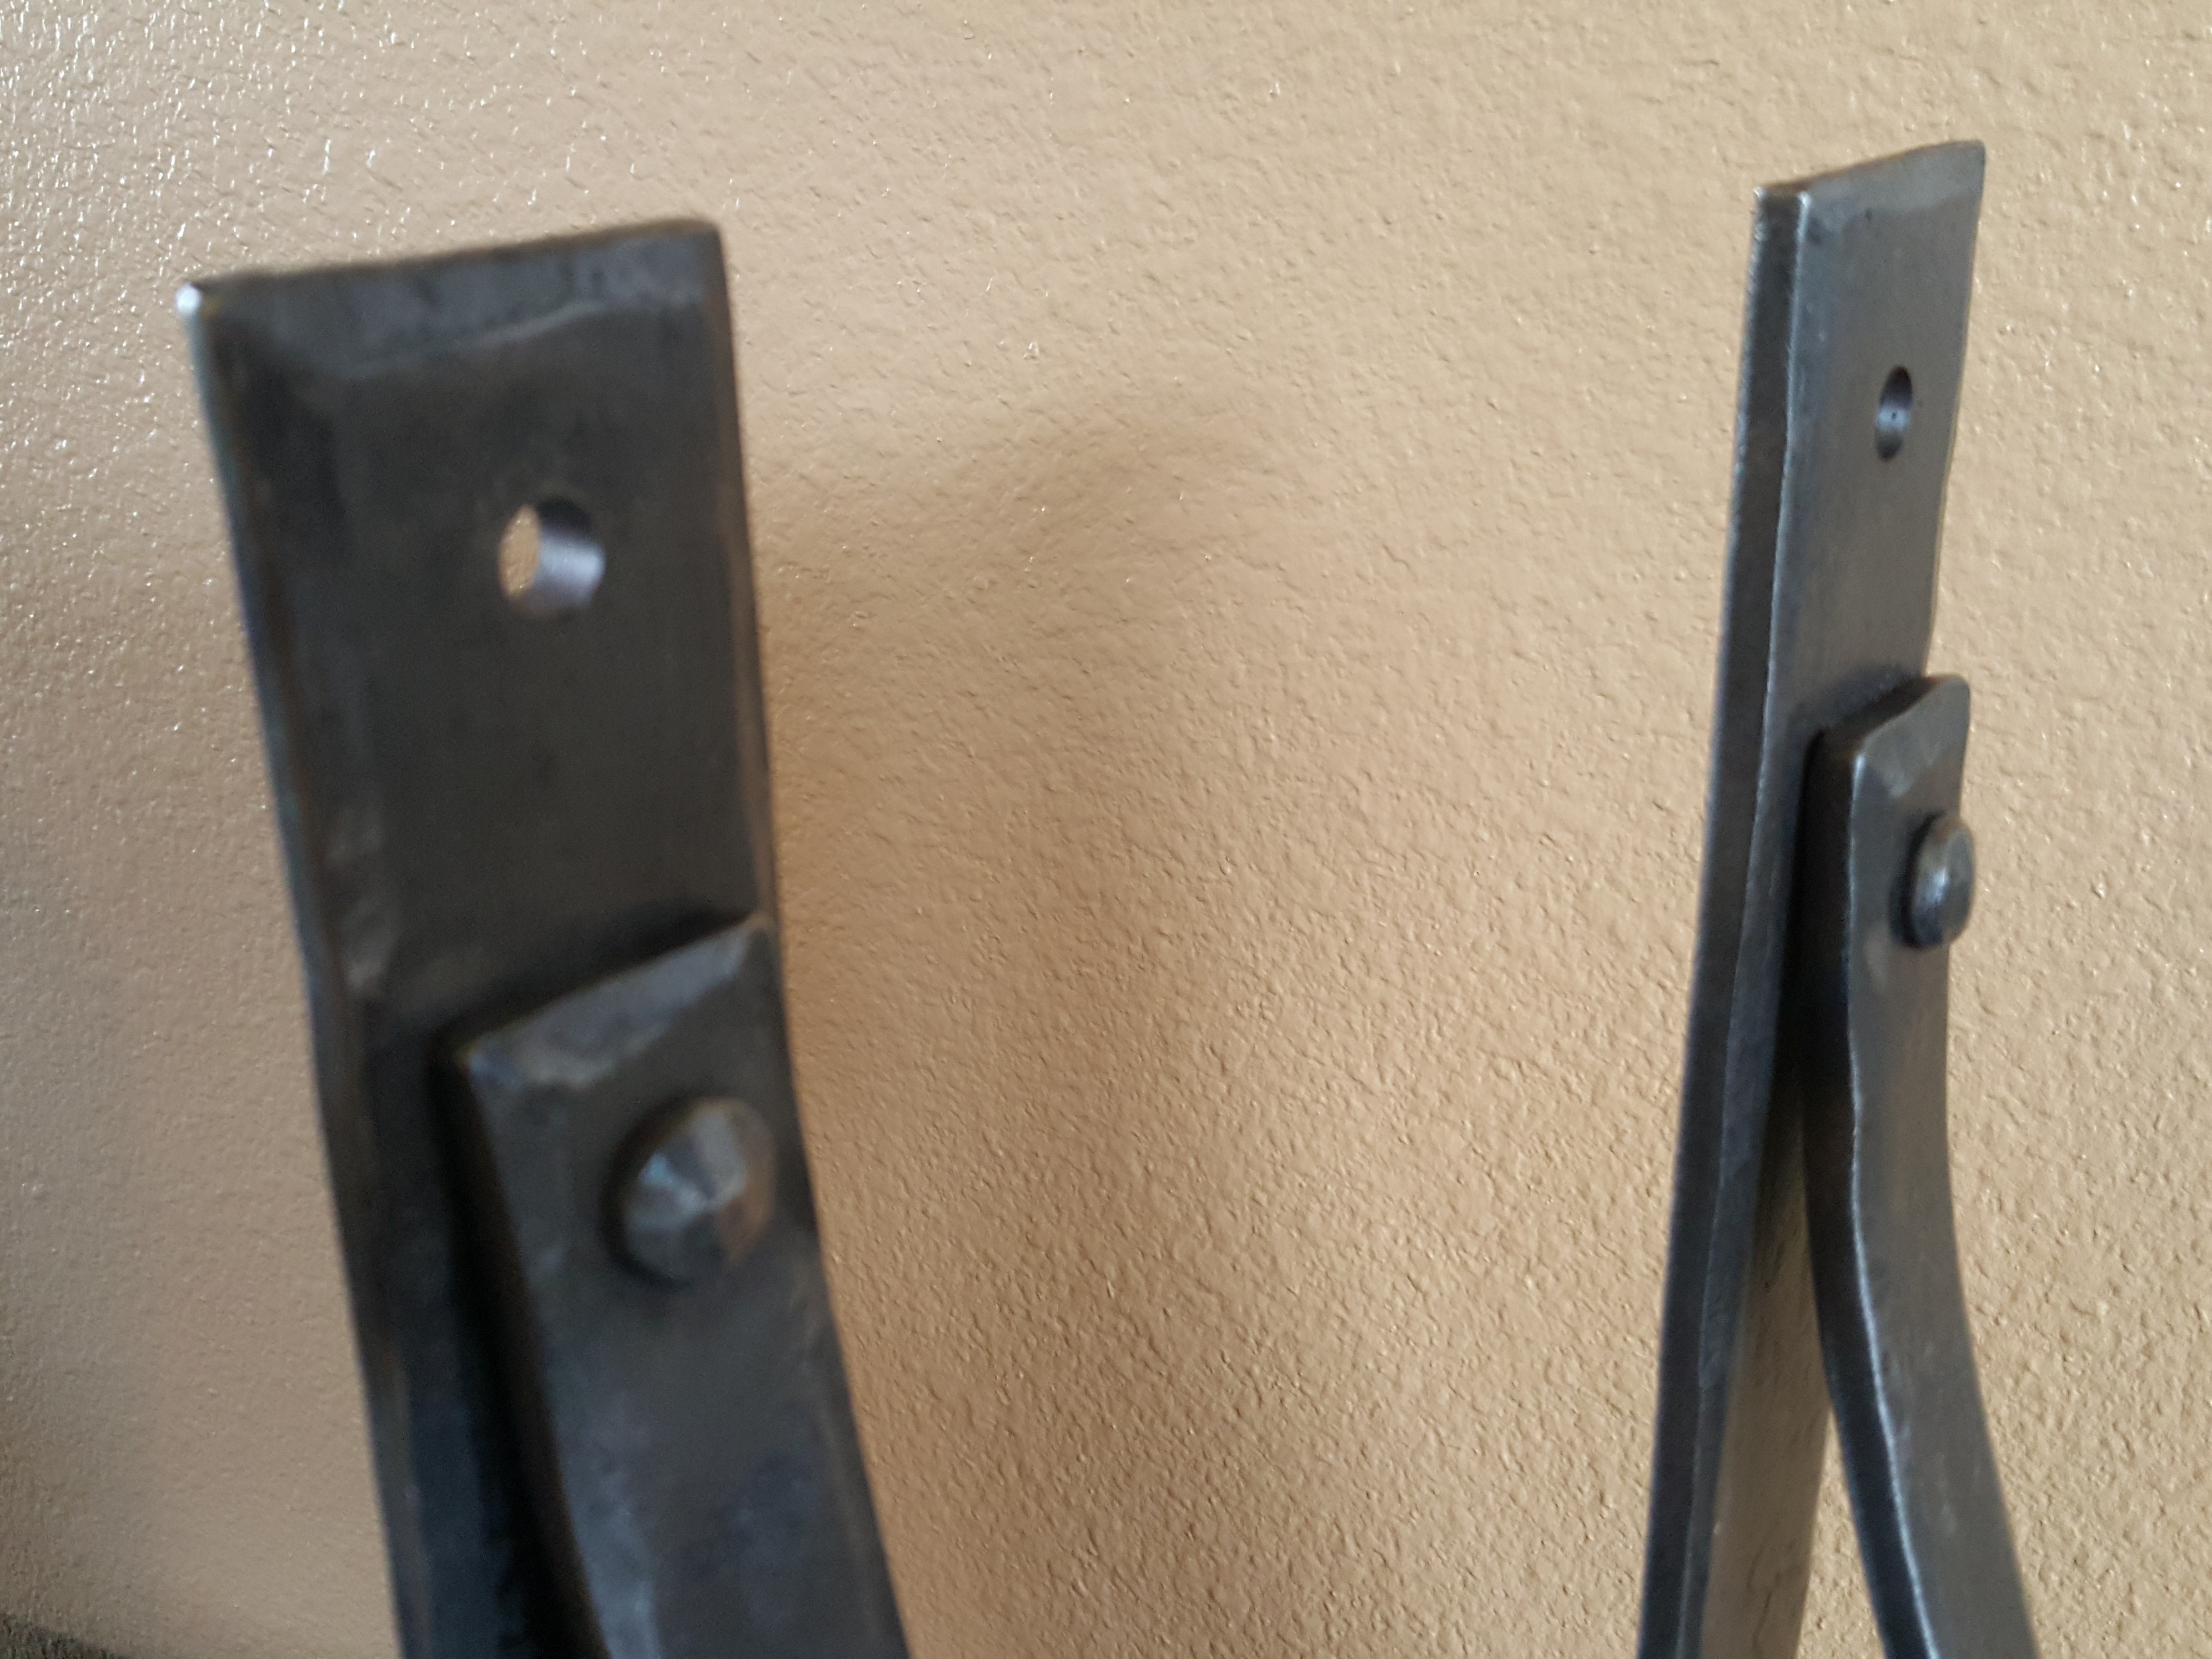
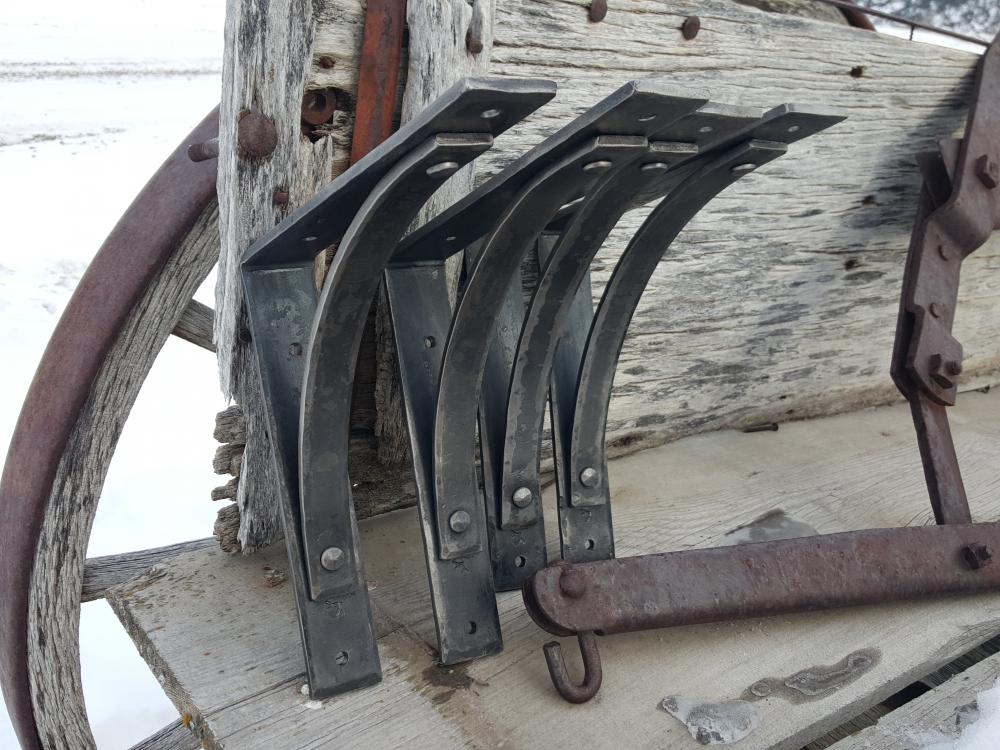
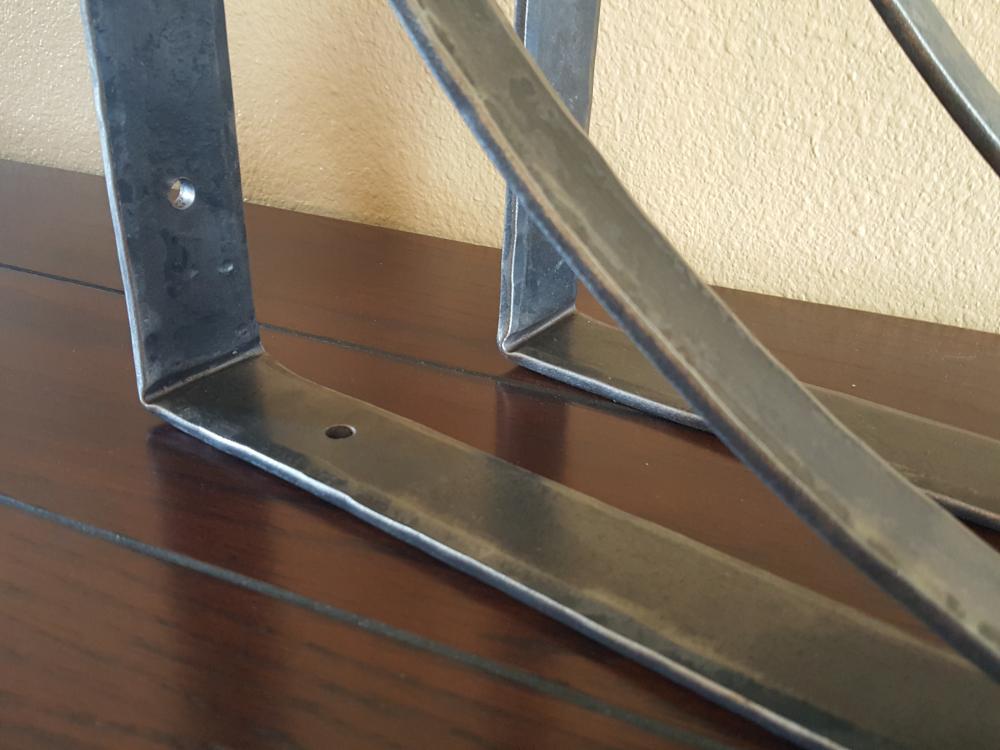
I was commissioned to make these. The legs are 14 inches long. The main straps are 1 1/2 x 1/4, the support curves are 1 x 1/4. The rivets are plug welded on the back and then hot textured to set. I fulled the bend point and forged the edges down. I drilled the holes, no style points for hot punching. Hot waxed and burnished.


-
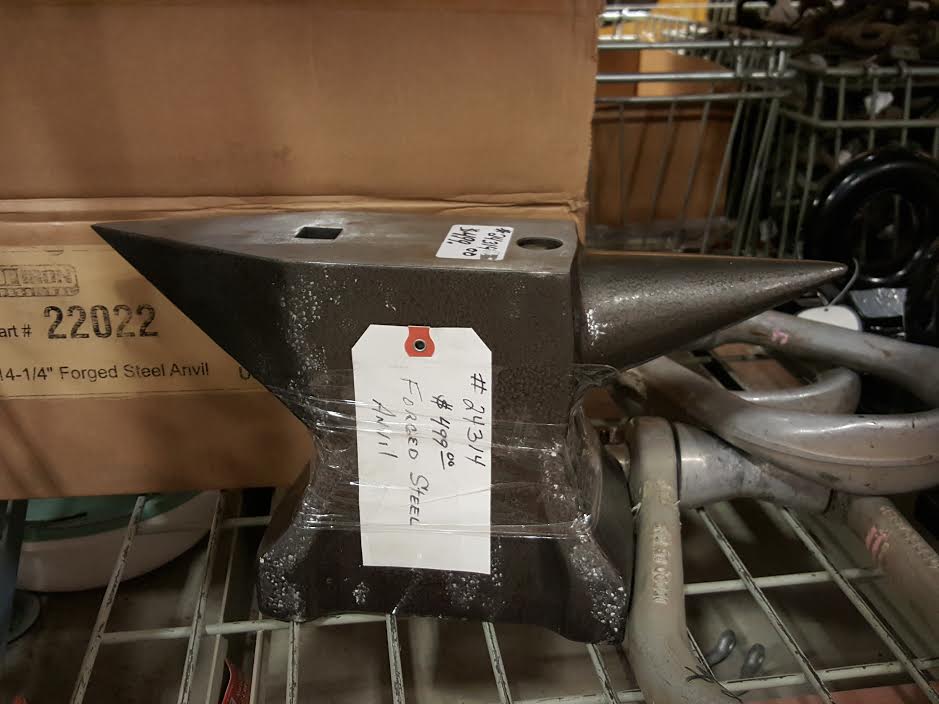
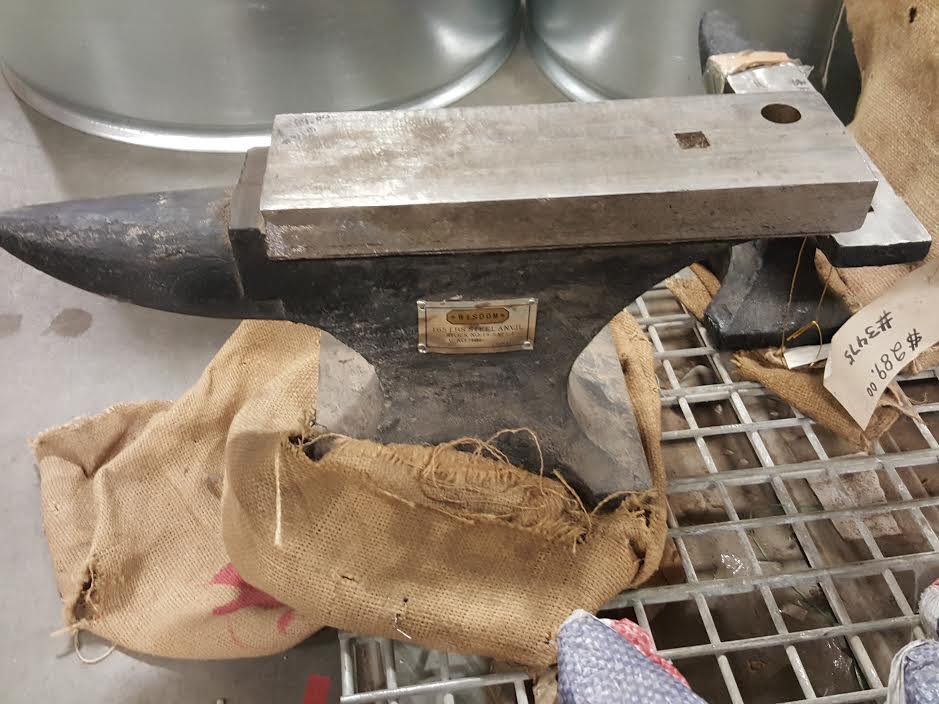
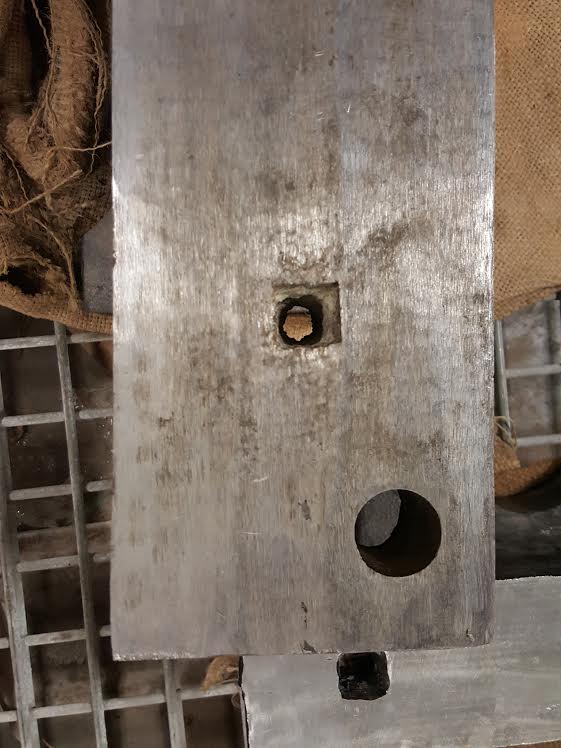
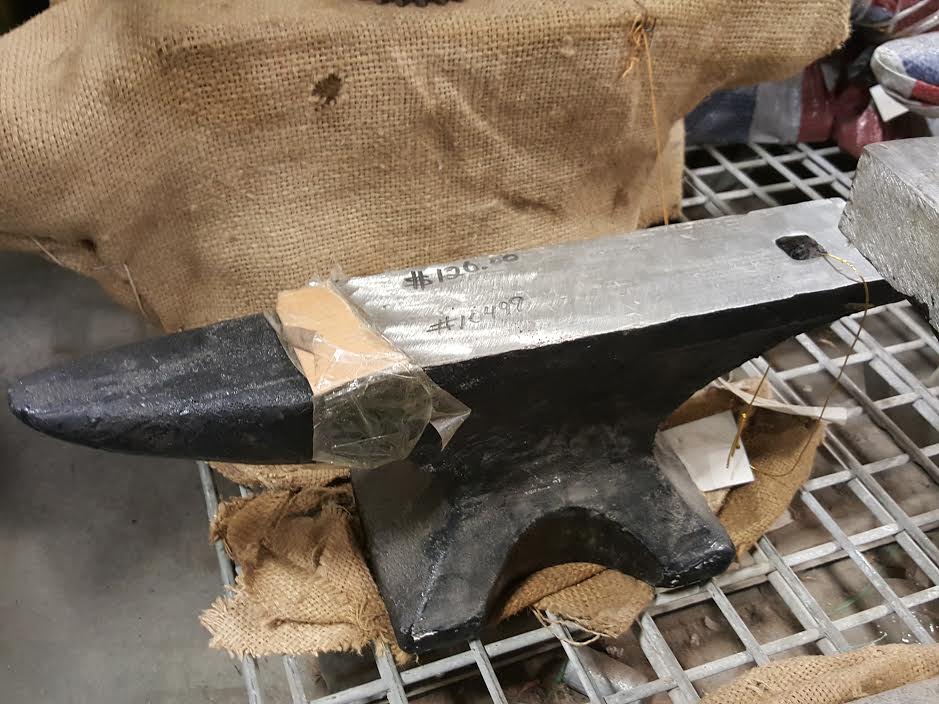
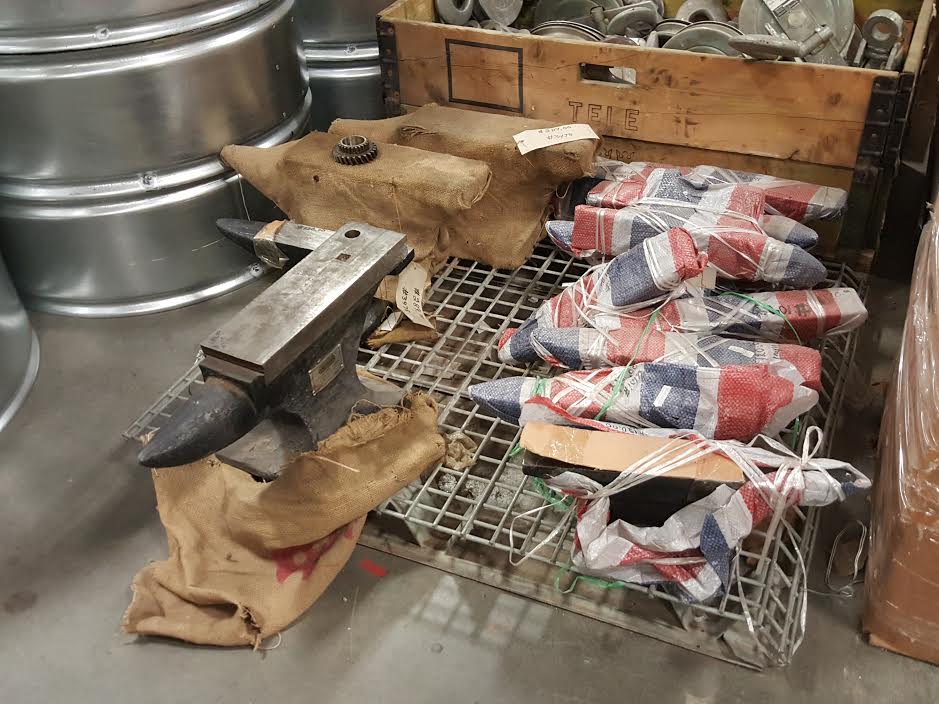
This weekend we traveled to Idaho Falls for a soccer tourney with my daughter - which her team won BTW! There is a large Army/Navy store along I15 south of Idaho Falls. We wondered around a for a bit and found these beauties. The first one now seems to be perfect, though the pritchel and hardy both do not go all the way through. The little one is stupid expensive for the size, I figure it was about 50#. The pallet of "anvils" was way in the back. I didn't have a ball bearing with me and was afraid to hit either with a hammer. The bigger one's hardy was plugged with...something and was maybe 5/8" but the pritchel was about 1". I have never witnessed something like that before. If you are in need of nice doorstop head to the Spud State!


-
something funny is happening with this thread...