Goods
-
Posts
1,148 -
Joined
-
Last visited
Content Type
Profiles
Forums
Articles
Gallery
Downloads
Events
Everything posted by Goods
-

How to create a square flat surface with limited tooling.
Goods replied to Buzzkill's topic in Problem Solving
When I’ve worked on getting something dead flat, I would use both an angle grinder and draw filler. Draw file, lightly grind the spots that are filed. Then beach to filing. This gets me down to the lowest spot faster the filing alone… Just have to be gentle with the grinder to avoid making new low spots! Keep it fun, David -
What did you do in the shop today?
Goods replied to Mark Ling's topic in Blacksmithing, General Discussion
Frosty/All, For the chipping hammer handle, I was starting with a 3/4” square bar upset and forged/filed to fit the eye exactly. I’m not sure if I will rivet the handle in place, or shrink fit it with a steal wedge. (A modification to what Torban did in his video.) The next step on the handle is to draw the neck down. I was thinking an almost diamond cross section 3/8”x3/4”. Then take the grip section almost to octagon and split it for a 4 bar basket twist. (Octagon to eliminate the outside corner and reduce some weight.) I’m a bit worried about a couple things here. First weight. I’m afraid it will end up too heavy. Second, I’ve only ever done forge welded baskets twists and I’m not sure I won’t mangle it trying to make the slits. I get I could grind the slits with a cutoff wheel and finish with a hacksaw, but I would like to try forging it. (I’d really prefer just doing a forge welded basket with a drop tong weld, but I honestly have not had the best luck with drop tong welds, and I want this tool to survive for generations!) Very open to input on this… Keep it fun, David -
What did you do in the shop today?
Goods replied to Mark Ling's topic in Blacksmithing, General Discussion
Thanks Hefty. The forging was fairly clean, but rasp and file work makes a big difference. Keep it fun, David -
What did you do in the shop today?
Goods replied to Mark Ling's topic in Blacksmithing, General Discussion
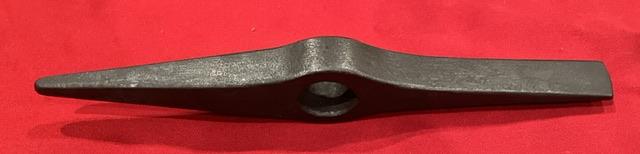
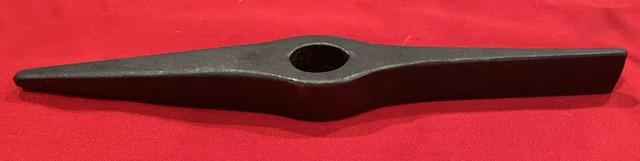
Sound like your class was awesome! Today I got started on a chipping hammer for my nephew. He’s attending a technical college for welding. I’m trying to make this something special for him. I’ve got forging on the head done. It’s normalized and annealed: Plan is to case some lines around all the edges and stamp his name. Also need to forge out the handle. I’ll post more on it as I make progress. (Forged from an oversized railroad clip.) Keep it fun, David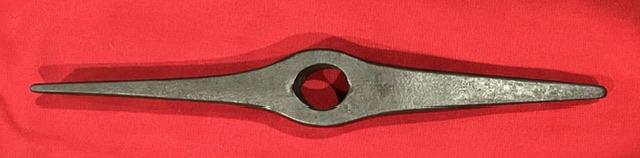
-
I have a feeling you have the equipment to go that route. I don’t, unfortunately . Lots of different options. I really like this one, but again probably the one with close to the most work. The real question is it worth the work to you? (I’m not sure if it would be for me, unless I found the machining side of it fun and fulfilling!) Keep it fun, David
-
For me this is typical due to forging the tip at too low of a temperature. The tip cools quickly as it thins, but it also heats quickly. Don’t forge it below a red heat. Pictures of the issue can be helpful… we always love pictures. Keep it fun, David
-
It took me a while to find the video, but you can find it here: https://m.youtube.com/watch?v=uJjxz3zjoT4 (I hope that worked!) It may be more effort that you what to put into it, but looks pretty slick. Keep it fun, David
-
I saw a yt video of a gentleman making a dovetail fixture setup for his fly press. He locked it in place with a toggle cam. The video was very informative. Unfortunately, I can’t remember the channel unfortunately. (I think JHCC may have posted it on this site previously…) Keep it fun, David
-
What did you do in the shop today?
Goods replied to Mark Ling's topic in Blacksmithing, General Discussion
Frosty, the Fararday cage issue was the same thing that came to my mind… Im very curious about induction forges, but can’t justify the investment now. Maybe after I can’t get good smithing coal any longer. Keep it fun, David -
I agree with the statements above and would also be very surprised if was cast. From having handling holes and what appears to be weld seems below the horn and heal, I would put my money on it being a forged wrought iron anvil with a steel face. (Joey van der Steeg just posted another YouTube video building up an anvil from wrought iron with a steel face, with the aid of a striker, if you curious about the process. Thanks Joey, if you see this!) Keep it fun, David
-
This discussion could get interesting. I would not be surprised that full hardening and furnace tempering is the preferred method these days due to the knowledge required of the workers involved in the process. The easier it is to follow a simple recipe, the more likely you can find and afford the labor. This is a complete guess on my part. The other side of this is that the materials knowledge has grown significantly over the years. I imagine they are getting exactly the performance they require out of the product, be it gears, shafts, stamping dies or anvils. Differential hardening is very common, specially surface hardening. I have lot of parts in my shop that have been surface hardened: linear shafts, stamping die guide posts, large gears (15” dia) and even a couple small gears (3” dia). All of these salvaged for reuse… I have not seen any parts that were fully heated, quenched, and the selectively (?) tempered like what we would do with a heated drift when tempering a hammer head. (I’m not saying it not done in industry, just that I haven’t seen it.) Keep it fun, David
-
Looks fantastic
-
What type of 3D printer? And what material. Filament printers make parts that are fairly weak between the layers, so the threads will probably pull out pretty easily. However, if you are printing it as a lost wax style casting, brass or bronze would be pretty effective. Personally, I really interested in how other have forged the screw and box. I know thread has been a post here on that before, but I never asked for details… Keep it fun, David
-
Quad state September 22-24, 2023
Goods replied to BillyBones's topic in Events, Hammer ins, Where to meet
Purple Bullet, My wife is from south Louisiana, and if you keep taking about bringing Cajun food, I may have a free pass and company for quad state. (On another small world note, her stepfather was a diver…) Keep it fun, David -
A collection of improvised anvils
Goods replied to Charles R. Stevens's topic in Anvils, Swage Blocks, and Mandrels
Oops, should’ve been “handles,” not the only typo though… Got in a hurry after I saw you were responding and didn’t do my normal proofing. At least it wasn’t too juicy of a straight line! -
I believe most file are W2 steel or close to that. W2’s forging temperature range is between 760C and 1038C. (If my google fu is any good…) If you’re reaching 1200C in your forge, you should be good, but it might take a little time for your steel to reach temperature. (I’m used to running a coal fire where the fire is much hotter than the steel needs to be, and one of the challenges there is not to over heat thin sections. But it heat fast.) What refractory did you use? This could end up being a pretty efficient little forge. Any pictures of it running just after lightning and when it’s reached temperature? (If I’m off base, I’m sure someone will correct me!) Keep it fun, David
-
A collection of improvised anvils
Goods replied to Charles R. Stevens's topic in Anvils, Swage Blocks, and Mandrels
Looks like the go through the holes at the top of the I-beam… I like that setup. Two things I would change: have one side of the anvil flush to the stand to allow for longer 90bends, and weld a couple loops on to hold you hands. How loud is it? Is the anvil have good rebound on it? Good use of a big I-beam. Keep it fun, David Typing at the same time… -
What did you do in the shop today?
Goods replied to Mark Ling's topic in Blacksmithing, General Discussion
Beautiful work as always. I can’t imagine how you keep turning out so many projects so quickly! Keep it fun, David -
8” vent is not going to draw very well if at all. 10” would be a minimum. Mine is 10” and I wish I went with 12”. If you’re going to go through the window, try to through at a 45degree angle. Two 45’s and no horizontal section will help with the draw also. I also would avoid putting plywood in the window. Cement board would be a much better choice. Just my two cents, there will probably be others posting with additional good information. Keep it fun, David
-
What did you do in the shop today?
Goods replied to Mark Ling's topic in Blacksmithing, General Discussion
Anvil, the center detail was made with a spring swage I got as a door prize at one of our hammer-ins a few months back. I should make some more. I’ve put this one to good use, and would mind having a variety of types. Keep it fun, David -
Forged Down Under- Australian forging show 1st episode
Goods replied to Candidquality's topic in Knife Making
I like the show, but my biggest problem was the music. Not that the music was bad, but the volume during some sections was just too high. I found myself constantly turning the volume up and down. That may not have been an issue if I was watching from my phone, my I was using the living room TV. Keep it fun, David -
What did you do in the shop today?
Goods replied to Mark Ling's topic in Blacksmithing, General Discussion
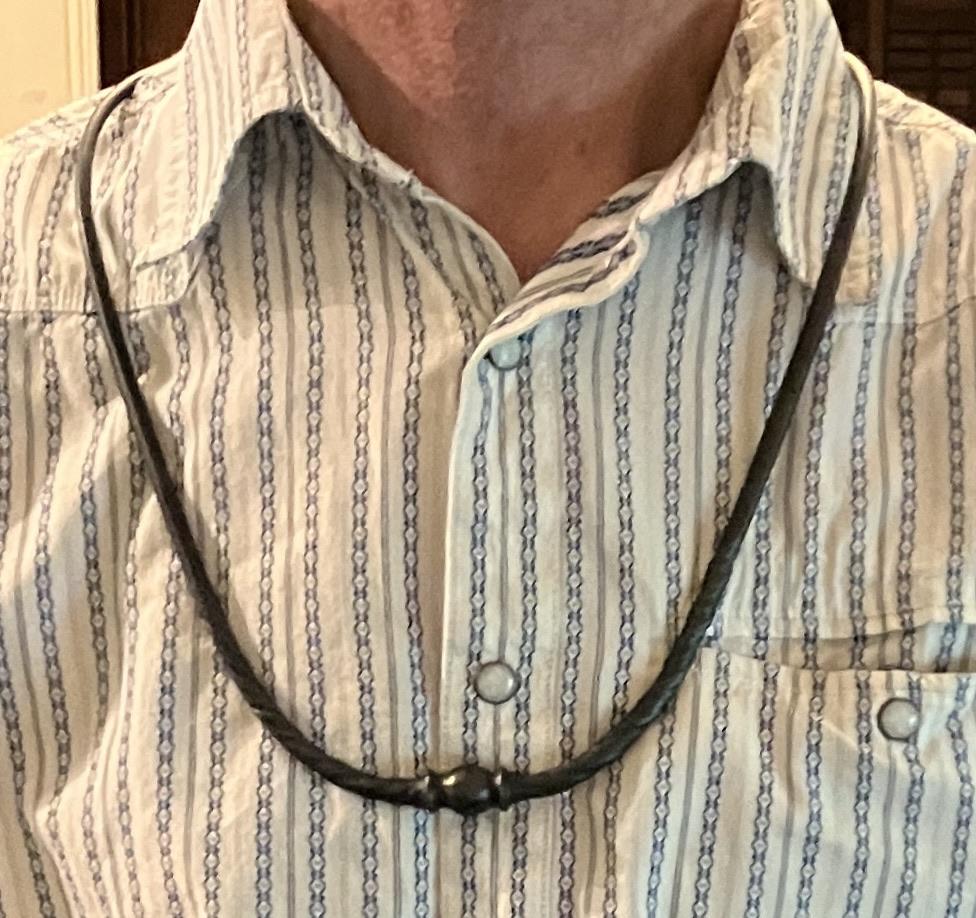
Frosty, I completely miss read your post. (Not that uncommon for me!) A joke clasp would have been perfect for this . I’m now debating whether I really want to part with it. Keep it fun, David -
What did you do in the shop today?
Goods replied to Mark Ling's topic in Blacksmithing, General Discussion
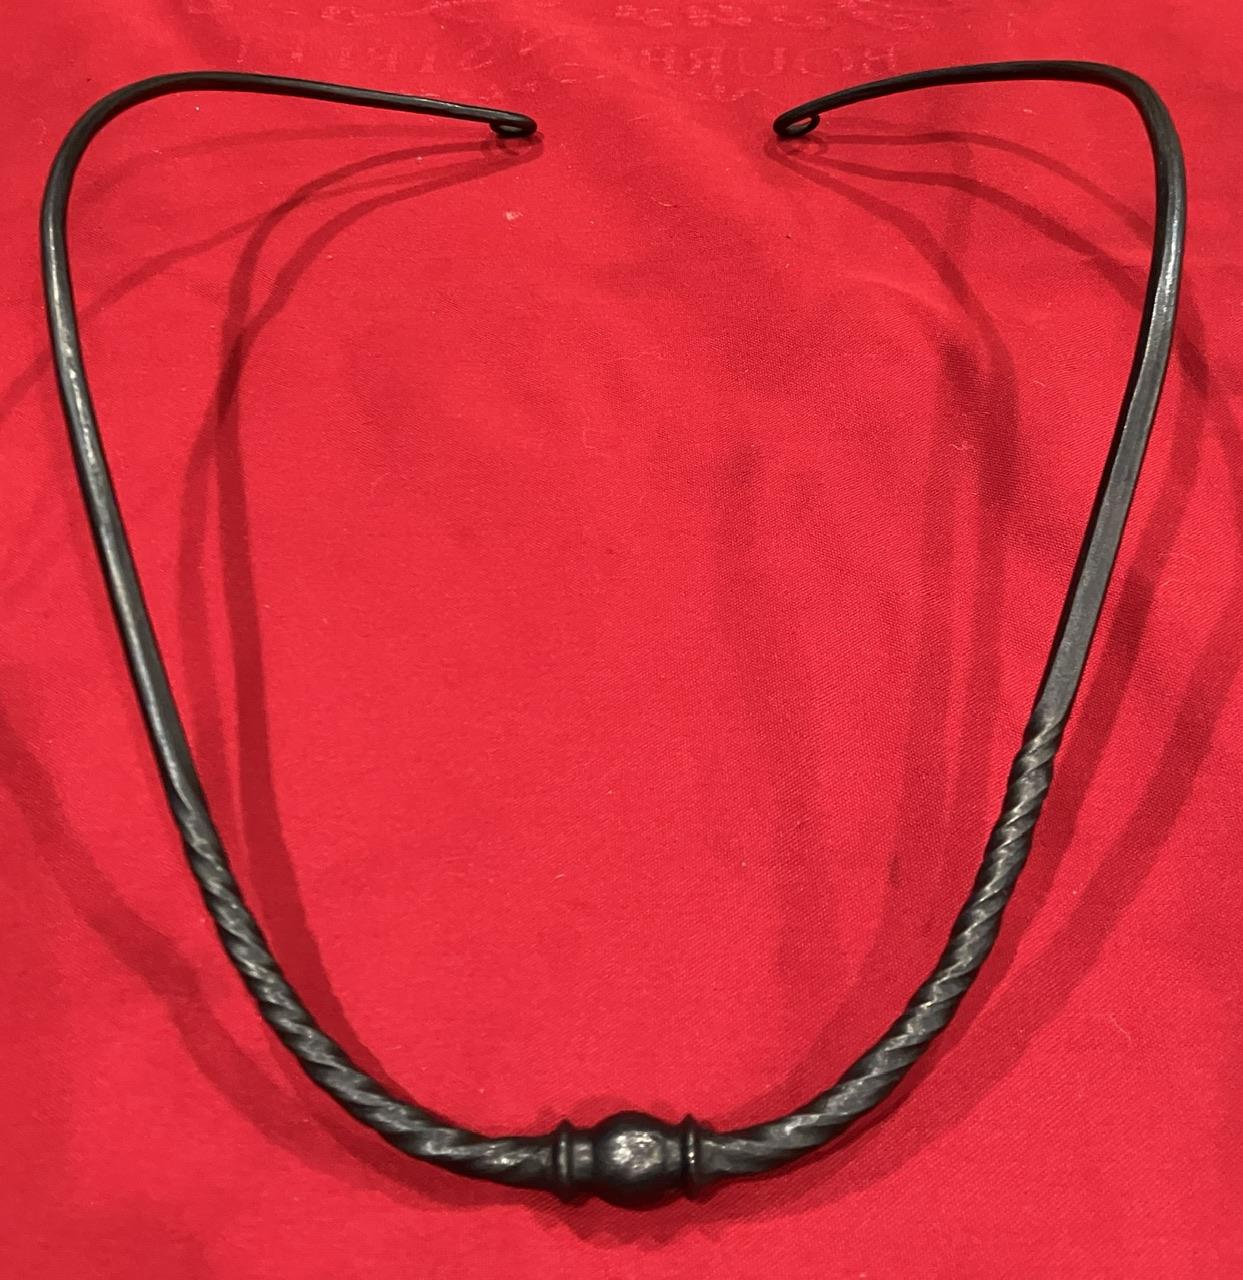
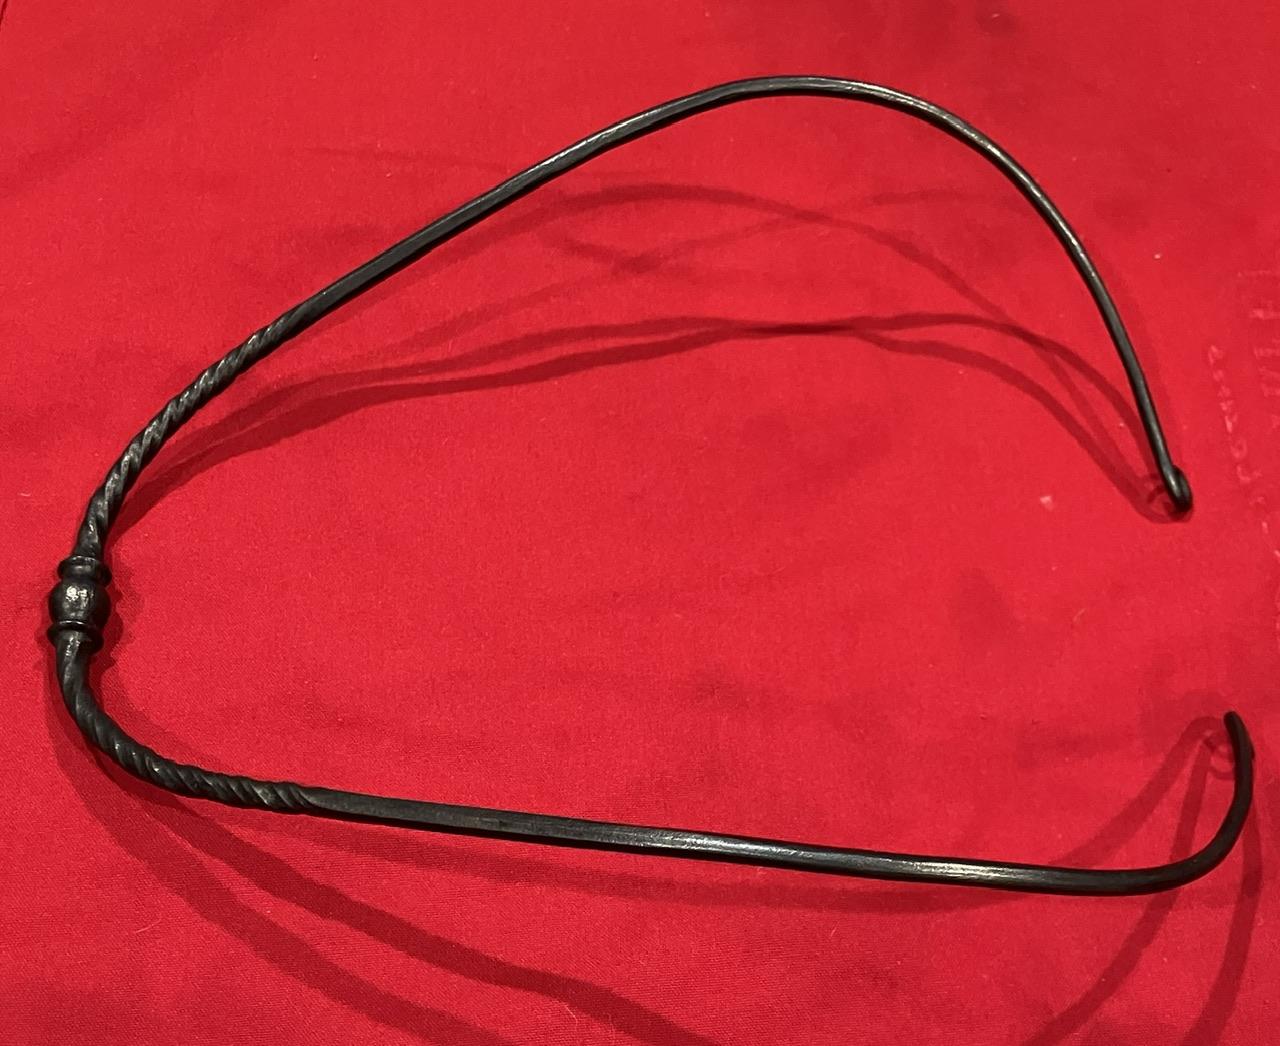
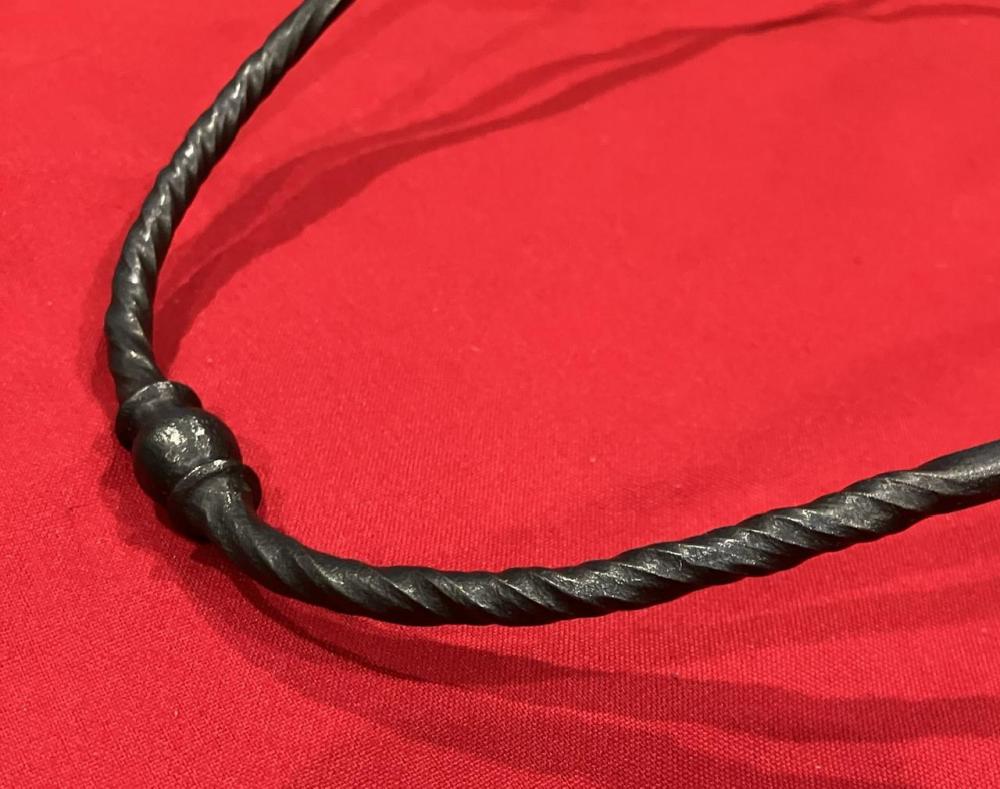
Frosty, I thought about making a clasp for it, but I figured that was jus something the get caught on clothes. The other side of it is that this is normalized 52100, pretty springy. The opening is about 1-1/2” smaller than my neck and I was just flexing it open to put on. Of course you could just put it over one’s head, it’s pretty big. I’ll think more on a clasp. I’ve got a couple ideas rattling around up there and now that my wife has seen it, I will be making more… Keep it fun, David -
What did you do in the shop today?
Goods replied to Mark Ling's topic in Blacksmithing, General Discussion
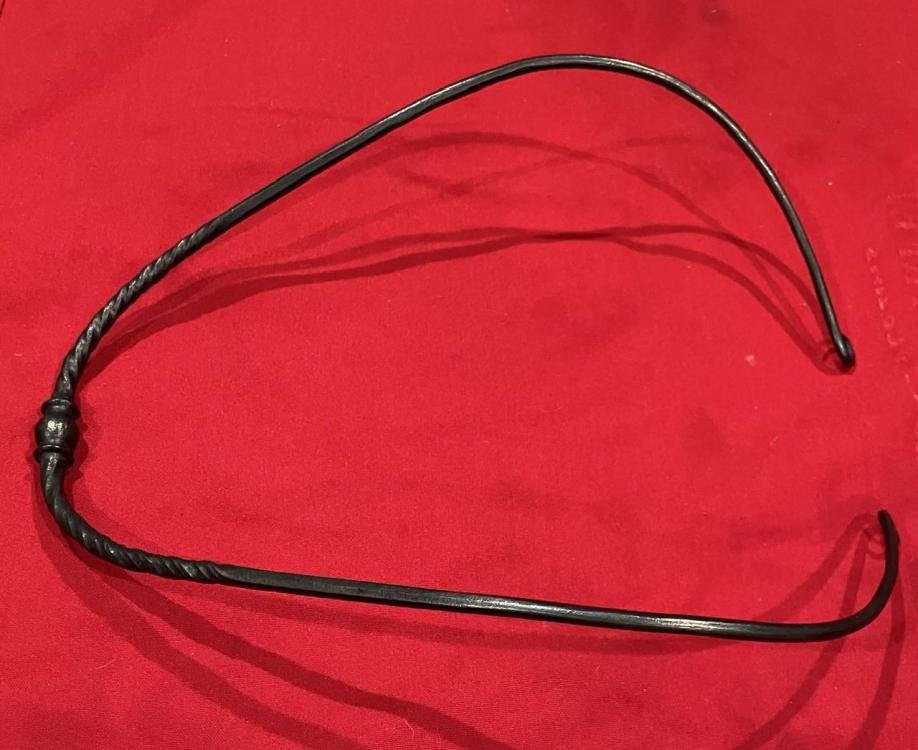
Ok, so in the ”followed me home”thread I said I had a plan for a piece of the ball screw I brought home. Well it’s done: Basically, one of my managers heard me talking to maintenance about the ball screw and told him I wasn’t sure if I wanted to deal with it. The we started joking around and he made a crack about making a necklace out of it. Well I came back it “I’ll make a necklace out of, for you…” Guess what’s going to be on his desk Wednesday morning. Keep it fun, David

-
Most the bearings I’ve kept are in the 1-1/2”~4” ID range. So, usually a good bit of material there.