Goods
-
Posts
1,144 -
Joined
-
Last visited
Content Type
Profiles
Forums
Articles
Gallery
Downloads
Events
Everything posted by Goods
-
I knew I saw something one here somewhere… in an old post it states the “M” mark signifies 100lbs. I’m pretty sure I’ve seen something about the “Z” mark as well, but couldn’t find anything quickly. Someone with access to “Anvils in America” may look it up, if you ask nicely… Keep it fun, David
-

JLP Blacksmith Teaching Center.
Goods replied to jlpservicesinc's topic in Building, Designing a Shop
Yeah, I understand. I was pretty heavy into back in the day. I realized I was pushing too hard and I would get hurt if I didn’t back down. So, I switched to C1, and almost started over. (Only ran one class five after that and only after a couple years.) I switched over just after my first son was born, priorities changed! Play boating in a C1 is an absolute blast. So much torque to throw the little playboat around! (Upper yough in a C1 playboat, not so much fun…) I can’t wait till you have that up and running. It will be nice to see you forging more. Keep at it, almost there, David -
JLP Blacksmith Teaching Center.
Goods replied to jlpservicesinc's topic in Building, Designing a Shop
No that sounds like a plan and I imagine there is some good steep creeks in you area! I haven’t been on the water in maybe 10 years, but I do miss it and for me it’s usually a 6hr drive to good runs. Keep it fun, David -
Honestly, you need to have a chimney specialist in to have it inspected. It is very possible that the previous owners installed a gas fireplace to avoid very expensive repairs, but still have some semblance of a fire place. When we first moved in we had ours inspected. The cost was low and we had good news, but did have some upgrades done. Still haven’t set a fire in it as the fire box itself needs some repairs. (That a whole other story in and of itself…) Keep it fun, David
-
You can always put a round rivet into a square hole and as you form the head it will fill most of the square hole as it collapses. For this you need to heat the rivet in the forge, don’t just use a torch and heat only the side you riveting. Also, you will need to start with a longer length than the standard 1-1/2 ~ 2 time the diameter. This won’t give perfect results, but perfect is not always needed. To prevent rotating, you can also put chisels cuts into the hole that the rivet is formed into. It comes down to how much rotation resistance you need. Keep it fun, David
-
What did you do in the shop today?
Goods replied to Mark Ling's topic in Blacksmithing, General Discussion
I have to get a better welding helmet myself, or at least a new lens for the on I have. It’s too dark and I can barely see the bead, let alone the joint I’m trying to weld. this afternoon, I forged out a long steak flipper for my neighbor as a Christmas gift for his brother. (It good to be kind to your neighbors!): Keep it fun, David
-
What did you do in the shop today?
Goods replied to Mark Ling's topic in Blacksmithing, General Discussion
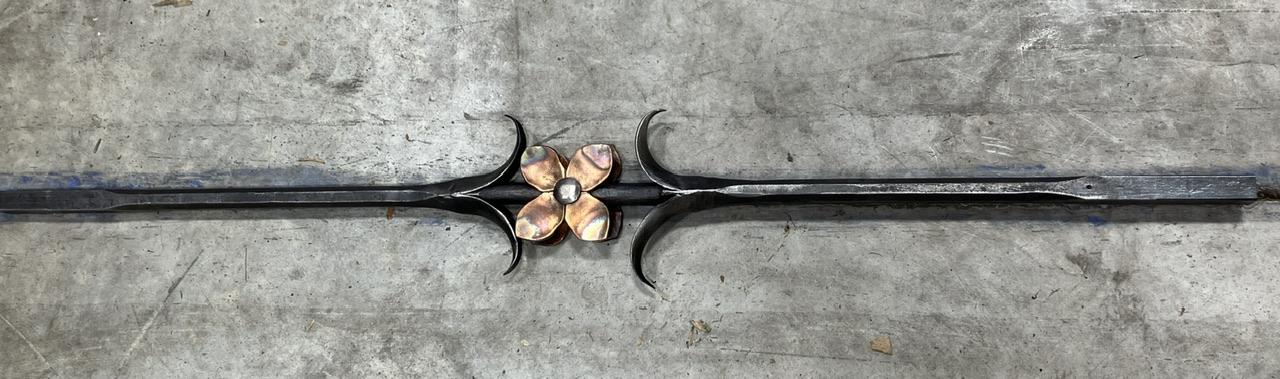
Well it’s finally done! There are definitely things that can be improved on, but there were a lot of firsts in this for me. Definitely a learning experience! Keep it fun, David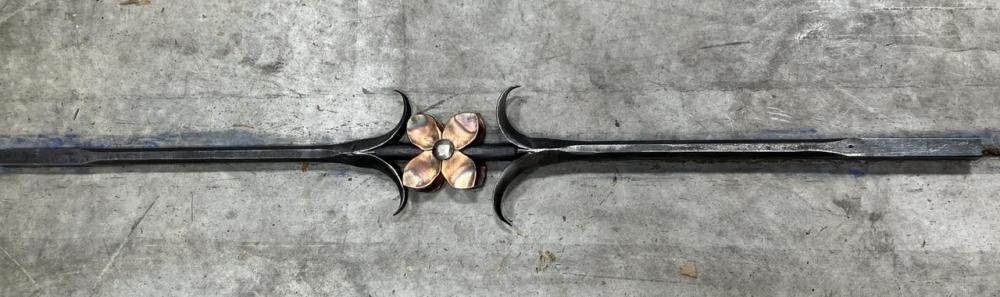
-
I’m not sure how big the plate is, but I would drill a hole towards the edge of the plate to hold just the end of the “acorn” of the leg and weld another plate on top of the pipe to mount the vice bracket. Of course it’s all size and equipment dependent. Keep it fun, David
-
What did you do in the shop today?
Goods replied to Mark Ling's topic in Blacksmithing, General Discussion
Okay, I broke down and did it: Took off work early, hit the welding shop, brought them home, and properly set them up. In a day or two, I’ll try my luck at it… Keep it fun, David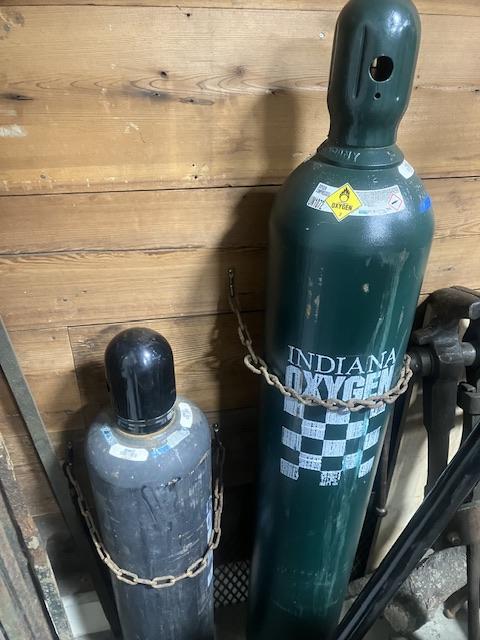
-
What did you do in the shop today?
Goods replied to Mark Ling's topic in Blacksmithing, General Discussion
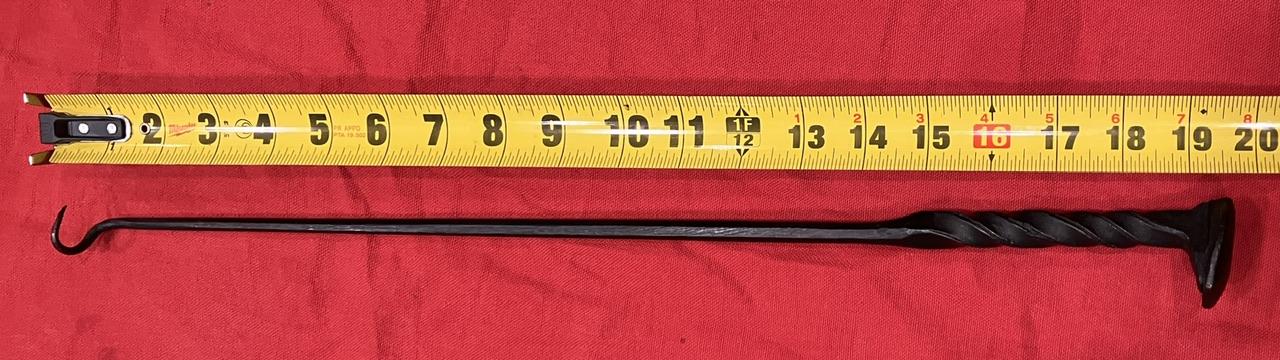
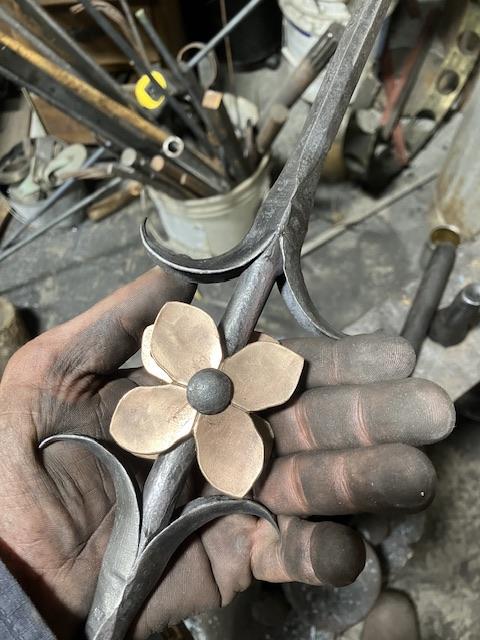
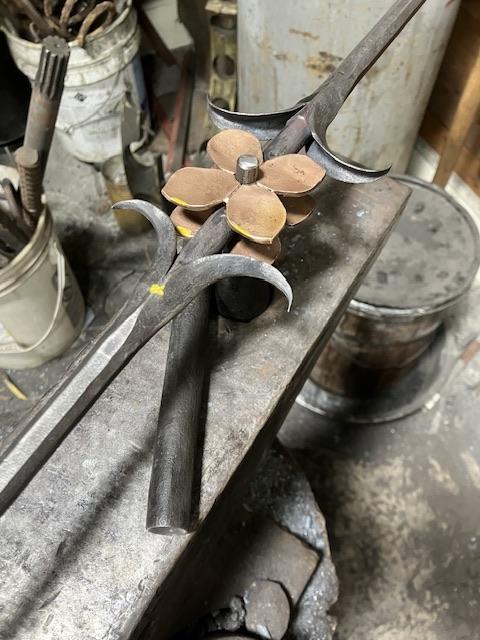
Ok, I’m getting close to the finish line with this picket. I made a rivet set and bolster today out of sucker rod and end: Made the rivet and set it good to one floret: Finally, I did a setup check for the riveting: Now, I have a problem! Looks like I’m going to need a torch to do the final riveting, but I haven’t bought the gas yet. Nor have I developed that skill set. I may have to go to one of the other smiths shops this week to finish it… Keep it fun, David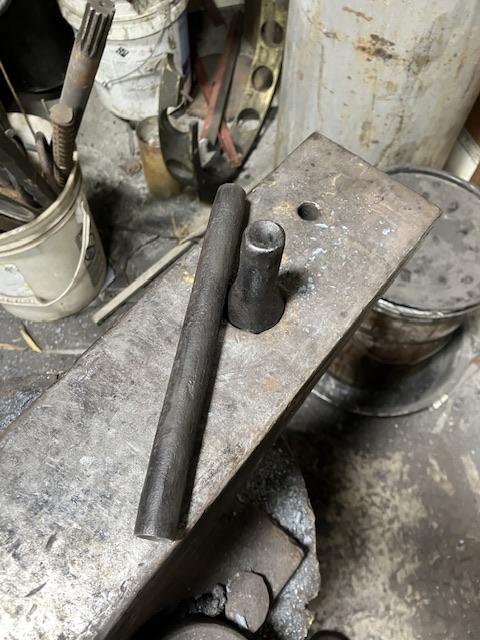
-
Your forget table look easy to move. Put in the corner if that is the most efficient for the majority of your forging. Just move it out when you have a long project that requires it. Keep it fun, David
-
What did you do in the shop today?
Goods replied to Mark Ling's topic in Blacksmithing, General Discussion
Les, that cable knife came out really nice. -
What did you do in the shop today?
Goods replied to Mark Ling's topic in Blacksmithing, General Discussion
I hadn’t considered that. I did make the mistake of stacking them up rotated 45degrees after showing my wife. They look pretty good that way, but I’m not sure I have enough time to make to more with the other work that’s still to be done. Keep it fun, David -
What did you do in the shop today?
Goods replied to Mark Ling's topic in Blacksmithing, General Discussion
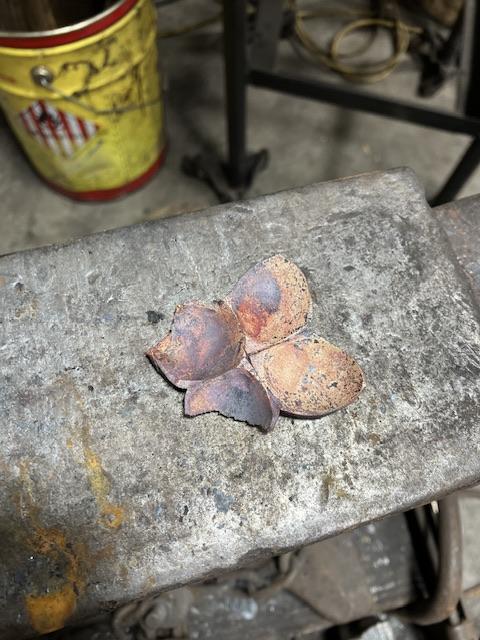
Finally got back in the forge tonight and got the florets done: I like the center form of the one on the left and the petal shape of the other. Best to leave them the way the are at this point! Keep it fun, David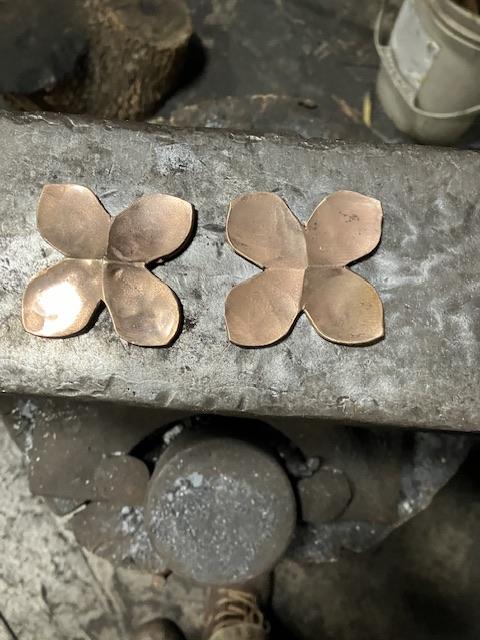
-
What did you do in the shop today?
Goods replied to Mark Ling's topic in Blacksmithing, General Discussion
White Fox, you may be able to judge if the weld is good by tapping on it or dropping it on the anvil from an inch or two. My second WI hammer had a bad weld on the face which looked good. It felt strange to forge with and it sounded odd tapping on the anvil, before it cracked and fell off. Keep it fun, David -
If you drill then cut, you loose some material and the dies don’t make a true round of the drilled size. For round swages, square the blocks up, line them up, put small tack welds on them, drill them to size clamped tightly, then grind the weld back off. Finally, to avoid marring the surface smooth off the transition from the flat face to the swage radius. The larger the transition radius from face to swage the more material that can be move in forging without marring or creating cold shunts. Keep it fun, David
-
What did you do in the shop today?
Goods replied to Mark Ling's topic in Blacksmithing, General Discussion
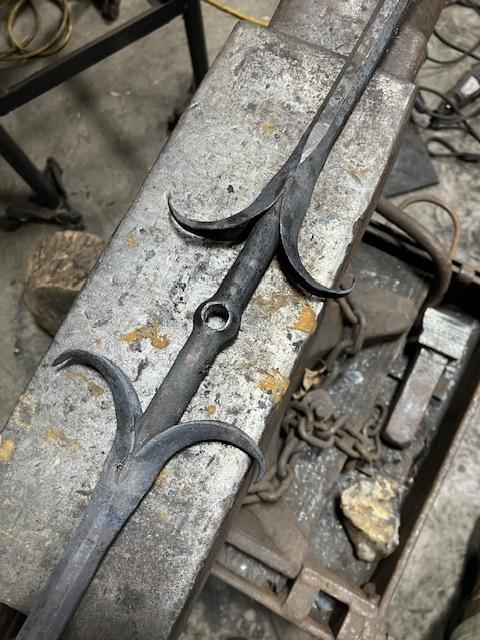
Billybones, it’s a one piece 1/2” square bar with the center 4” forged round, with a 1” section on either side of the round left square and the leaves forge welded on there. Beyond the leaves, I twisted it 135degrees on each end which was forge to octagon till the last 3” on each end. No sockets? Keep it fun, David -
What did you do in the shop today?
Goods replied to Mark Ling's topic in Blacksmithing, General Discussion
Worked on the picket some more today: I almost got the first floret done when work called. I turned the fire off, but didn’t take it out: Lesson learned! Well, maybe the next ones will be mor consistent… I could always forge a hungry caterpillar to add this to another arrangement and make it work . Keep it fun, David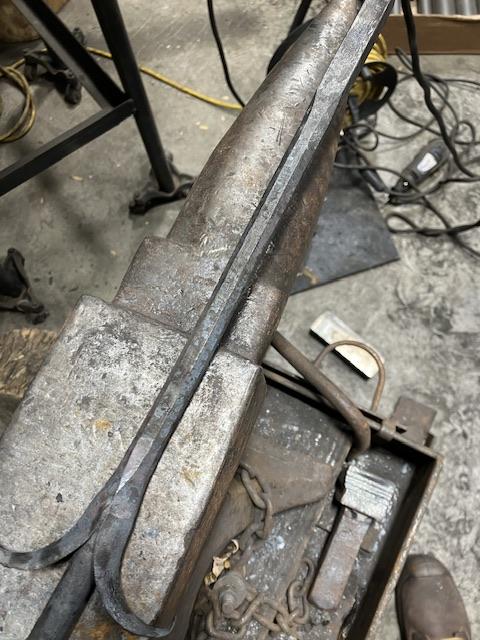
-
What did you do in the shop today?
Goods replied to Mark Ling's topic in Blacksmithing, General Discussion
So many options, so little equipment… no stick welder. I’ve never torch welded, but I have purchased a torch set. I’m going to have to take off work early one of these days to get the tanks. Keep it fun, David -
What did you do in the shop today?
Goods replied to Mark Ling's topic in Blacksmithing, General Discussion
Tim, oh, I with you! Tig would be ideal, mig would probably be ok… if I was any good at it! (For clarification, this was flux core not true mig welding.) The funny thing is, the first welding I learned was Tig welding and I’m still much better with that that true mig or flux core welding. I just have equipment handicaps. Keep it fun? David -
Shainarue, one thing I will definitely recommend is that whatever direction you go on the cheap, make it so that when the time and money comes to improve it, you won’t waste too much of what you put into it now. Especially the time, you can always make more money… As for the fabric walls, I’ve spent a lot of time thinking about that for my own shop. I was looking at canvas drop clothes from HF. The cost was way below what I could buy the raw fabric myself. As for the flame resistance, soak the canvas in a saturated solution of water and Borax (20mule team) and let if air dry. I also heard that adding Boric Acid to the mix resists smoldering, but I haven’t researched that one. Congratulations on the new property (if it works out). Personally, I would not want to be buying right now. Strange market, both high prices and high interest rates. Keep it fun, David
-
What did you do in the shop today?
Goods replied to Mark Ling's topic in Blacksmithing, General Discussion
Tim, the weld itself was not a big issue. I just brought it up to temperature real slow. My issue was two fold. First, the cross section of the leaves was tapered center to edges. Second, the leave we to small to wire up and not have the wire in the weld, so I put a spot of mig weld at the corner. Both of these made it very difficult to bend the scarf in. I also had issue with the parent bar thinning from scaling due the the number of welding heats the blend the weld. I ended up using an isolated heat to upset in the areas (and a lot of file clean up). All lessons learned for future projects. About the swage block, I’ve seen a couple sources for water jet cut swage blocks from mild steel, but they’re still pricey. Hopefully I’ll run across what I want at the “right” price when I’m actually convinced I need one. Keep it fun, David -
What did you do in the shop today?
Goods replied to Mark Ling's topic in Blacksmithing, General Discussion
Tim, is that swage block 2” A36 water jet cut? If so how do you like it? I got the forge welding done on the picket last night: It took way longer and was way trickier than I thought it would be. It’s not as clean as I would like, but it passes… on to the next step, whenever I get another forging session. Keep it fun, David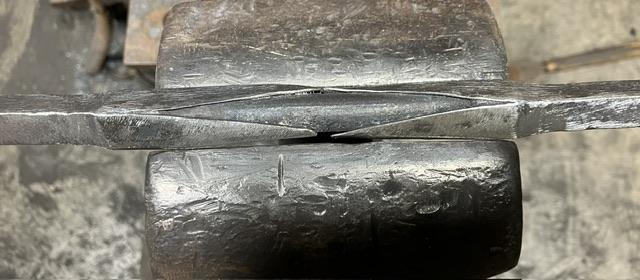
-
What did you do in the shop today?
Goods replied to Mark Ling's topic in Blacksmithing, General Discussion
Alexandr, you’re always a hard act to follow! Beautiful as always! I got some time in the shop today and started on a single picket for a railing. (One of the smiths in our group is redoing his and asked for one for all the smiths, with their own style and touch mark.) I’m maybe half way there: I’m probably over doing it, but I guess that’s my style… I’ve got to clean it up, before I can got to the next step of forge welding. Keep it fun, David
-
I’m assuming you’re using an oxypropane torch? In not, I’m very curious on the setup? Keep it fun, David