

Goods
-
Posts
1,159 -
Joined
-
Last visited
Content Type
Profiles
Forums
Articles
Gallery
Downloads
Events
Everything posted by Goods
-
You may not have to worry about making all the punches and drifts at first. If you start with the smaller size punches, the holes can be drifted larger. If you start with the larger drifts (unless you need perfectly sized holes) you can drive the drift part way up the taper from both sides to get any size form tip to final diameter. Not trying to discourage you from making all of them, that’s half the fun, but if you have other things in mind it doesn’t hurt to mix things up. It’s always nice to have items to share along the way with friends and family. Keep it fun, David
-
Not really. Personally, I’ve got a good layer of topsoil and didn’t want to dig a big hole to get to the clay. I hate digging… long story. For a JABOD, any solid fuel forge really, insulation is not that important. (The typical cast iron fire pot is great, and nowhere near insulated, but I’ve never noticed mine getting hot enough to glow.) If you box is made of wood, you just need enough clay, dirt, etc. to keep the heat from charring it. It doesn’t take that much. If you’re worried about insulation, maybe you could mix perlite into the clay instead of sand. Would cut down on the weight also. That could be a big benefit. David I just noticed you location. I believe there is a pretty strong blacksmith group in you area. It would recommend looking them up. One hour spent with experienced smiths: watching, talking, listening to pointers is well worth the effort. Keep it fun, David
-
I would hydrate it all. That way it will pack in. Otherwise, you’ll have clay mixing with you coal/coke/ charcoal making some massive clinkers. (Don’t forget to mix with sand and limit the water amount. Doing so will limit or completely eliminate shrink cracks as it dries out.) Keep it fun, David
-
The softer material will deform first. So, as long as you saddle is mild steel, you should have nothing to worry about. Keep it fun, David
-
It certainly looks like wrought iron, but much more refined than any that I’ve worked… Keep it fun, David
-

What did you do in the shop today?
Goods replied to Mark Ling's topic in Blacksmithing, General Discussion
Shainarue, are you punching the holes full sized? For a narrow boss like that, I would use a thin slot punch just a little wider than the rivets diameter aligned parallel to the sides of the boss, keeping it as centered as possible. Then, drift to size. This will maximize the material in the side walls. If you use a wider slot punch, you can upset the sides of the boss before drifting to get even more mass around the boss. Keep it fun, David -
What did you do in the shop today?
Goods replied to Mark Ling's topic in Blacksmithing, General Discussion
Worked on a knife a little more today on my day off work: Going to take it to the customer and get his thoughts before proceeding any further. It’s what he asked for, but I think the should be some rocker to the blade. (It really needs to go in a diet also, ~0.190” thick at the spine right now…) Keep it fun, Dacid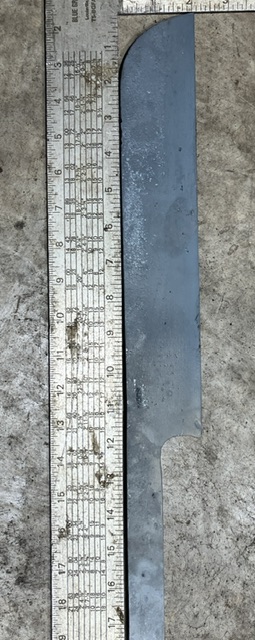
-
Be wary of putting the 1/4” and 5/16” chains in your forge, they look plated with n your picture. They could be very useful and wouldn’t take up a bucket’s worth of space. I guess it all depends on how much you have to move, chain it not that hard to find. Personally, I’d keep the non-plated chain. If you run into a time sensitive project where you need it, finding new chain without plating can be challenging. Keep it fun, David
-
What did you do in the shop today?
Goods replied to Mark Ling's topic in Blacksmithing, General Discussion
Indish, I like the rack. I’ve been planning the same type of rack, but haven’t settled on a location. I’m usually using two grinders at a time. One with a wire wheeled and the other with a stone or cut off wheel and switch back and forth. Most of the work is done in the post vise in front of the forge in my main post vise, so I’ll probably make a bar clipped onto the forge. Not a good place for them to stay, so I guess I’ll find a safer location for a storage rack and make two… Keep it fun, David -
What did you do in the shop today?
Goods replied to Mark Ling's topic in Blacksmithing, General Discussion
John, it took me weeks of rack building, organizing, and hours of running the shop vac to get it that way! (Just don’t look in any draws or cabinets!) If I keep hosting a hammer-in annually, hopefully it will keep me from letting it get out of control… Keep it fun, David -
What did you do in the shop today?
Goods replied to Mark Ling's topic in Blacksmithing, General Discussion
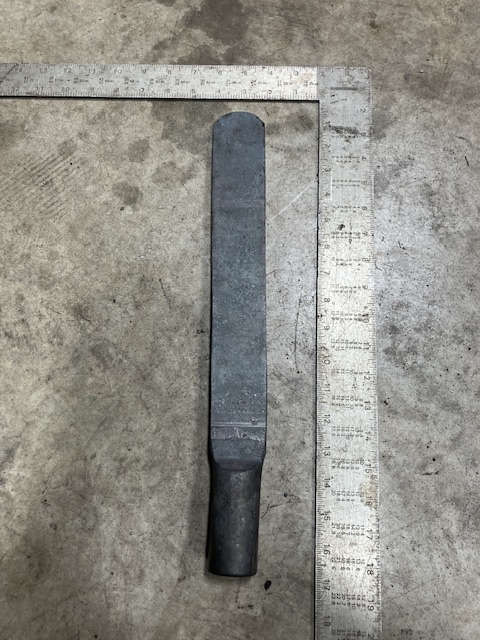
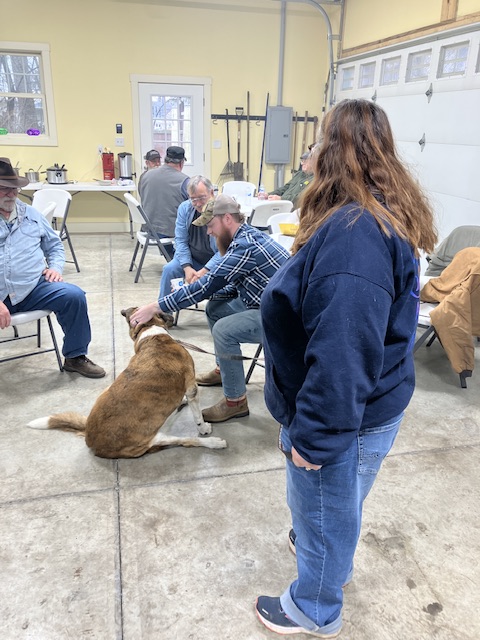
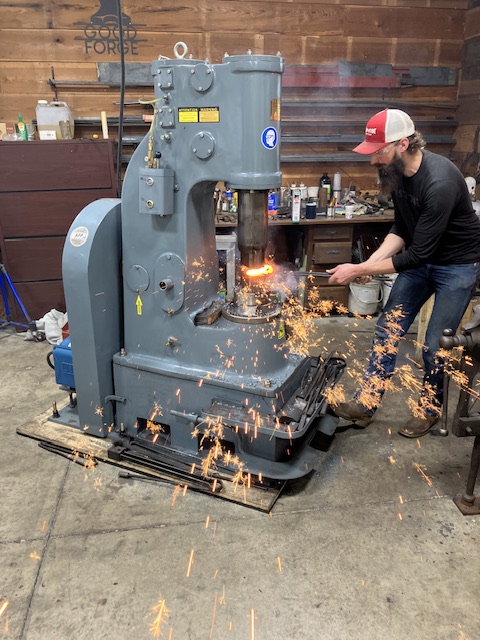
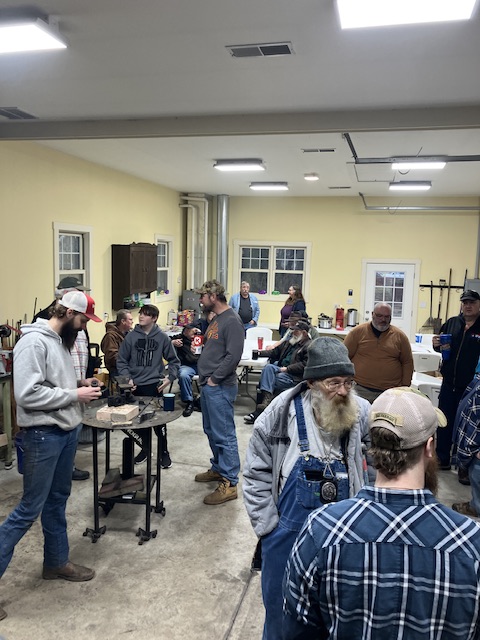
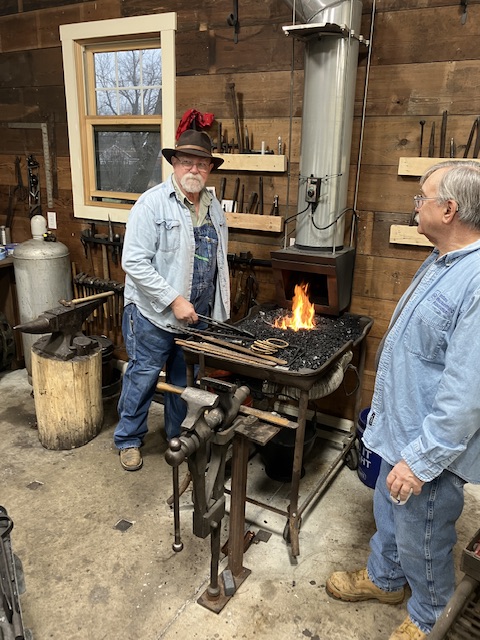
Had our chapter of the IBA’s hammer-in today at my place: (last pic is of Josh, an IFI member, setting a weld on a rasp tomahawk with the power hammer.) Probably hand around 30 in attendance and I’m pretty sure everyone had a good time. I know I enjoyed it, and no one should have left hungry! I started everything off by drawing out a die guide post for a knife on the power hammer: It’s at 1/4”x1-3/4”x~12” of 52100. Then after most everyone left, I started on a 90deg top tool: Still have a lot of work to do on both, but not sure when I’ll have time in the next two months to do anything forging. Keep it fun, David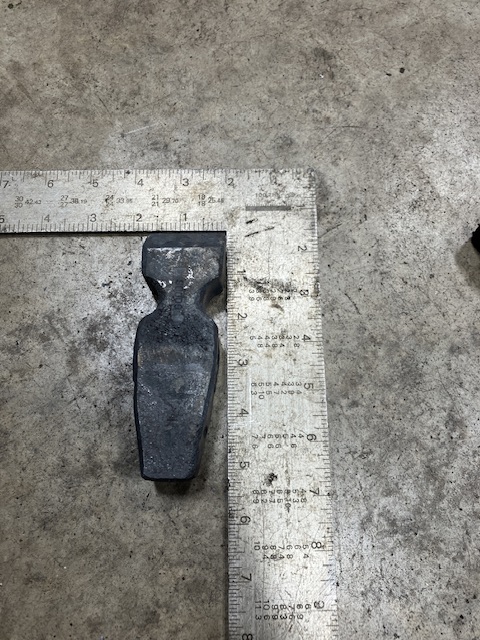

-
New to the community, fairly new to forging.
Goods replied to John Leroy Brown's topic in Introduce Yourself
John, first welcome aboard. Second, don’t give up on the forge yet! They are getting surprisingly good reviews here. Truthfully, if it got that billet up to forge welding heat, it will definitely reach normal forging temperatures. I’m not a gas’s forge guy, but if it’s giving you fits, there are several experts here that can help you get it tuned up. Just ask. Keep it fun, David -
What did you do in the shop today?
Goods replied to Mark Ling's topic in Blacksmithing, General Discussion
Also, once you fire is going, don’t add green coal to the center. Work the coal into the fire from the edge. That way the green coal starts to coke as it’s moved to the center and is already coked before it’s in the heart of the fire. F+B, the PVC pieces were 4” drain pipes couplers. I found them in the outside garden section of a big box store. They were the lowest cost option compared to anything in the plumbing section. It would have been cheaper to buy full length 4” PVC, if I needed to make a lot. The short pre-cut sections of pipe just had to high of a convenience charge. Keep it fun, David -
In our group’s shop, there is an electric blower mounted onto the intake of a hand crank blower. Doubt it’s an original setup, but I couldn’t get a clear view of it to see how it’s connected. Pretty basic I imagine… It works just fine under electric or hand crank and the hand crank can give a little (or big) boost of air if needed when the electric blower is running. Keep it fun, David
-
What did you do in the shop today?
Goods replied to Mark Ling's topic in Blacksmithing, General Discussion
I got some brackets made up today for at least some of my grinder belt: One more step towards organization! Now just have to start actually organizing… Keep it fun, David
-
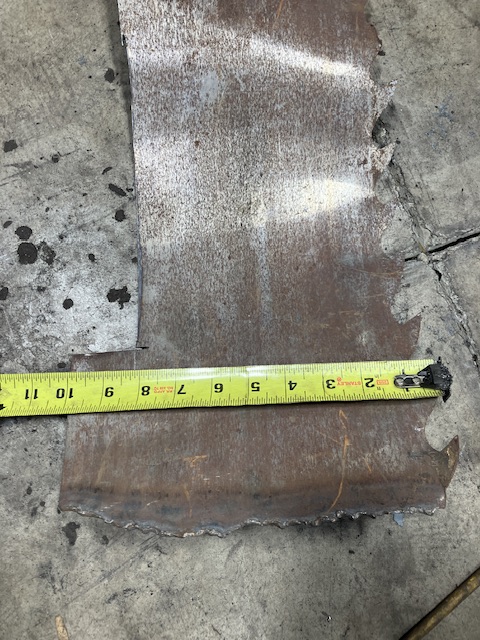
You might check with you local saw mills. They may have large heavy gauge band saw blades that they scrap. I got a short section of one at one of our hammer-ins a few years ago: It’s right at 3/32” thick and probably 15N20. At least it’s high carbon and etches very bright in a billet. Keep it fun, David
-
What did you do in the shop today?
Goods replied to Mark Ling's topic in Blacksmithing, General Discussion
I have a cheap pair of calipers that I use to measure the thickness, lock a half of the measurement, scribe with the caliper points from both edges, the cut between the two scribe lines. (Don’t the the quality guys here that I ever use calipers as scribes!) keep it fun, David -
I’ve been holding off on getting a gas for my setup as well. Eagerly awaiting responses, David
-
What did you do in the shop today?
Goods replied to Mark Ling's topic in Blacksmithing, General Discussion
Lary, I used 12” of 3/8” x 1” of A36 for each reign. (The reigns on my tongs tend to be on the long side. I like to be able to put both hands on the reigns when doing heavy work under the power hammer.) Keep it fun, David -
What did you do in the shop today?
Goods replied to Mark Ling's topic in Blacksmithing, General Discussion
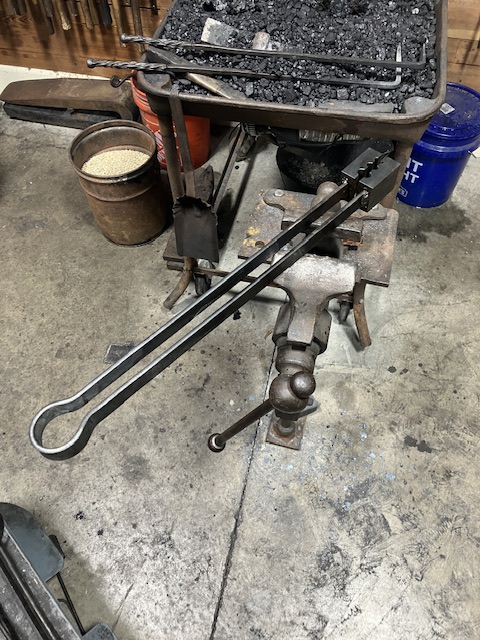
Happy New Year’s all! First project in my forge for 2023: Sized for 1-1/4” square stock. I need to get better at making tongs, they just took ways to long for me to make. Yes, Frosty, I did break the edges on the swage. I’m going to have to take way more of though. At the 3/8” octagon stage, I went straight to the swage and it pretty rough. Keep it fun, David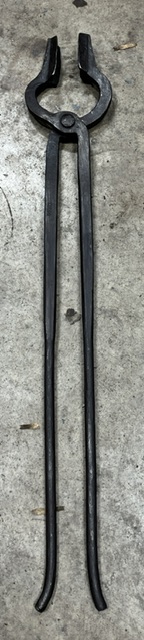
-
Recommendations for repairing an American Star?
Goods replied to MikeyB's topic in Repairing and Modification to Anvils
I believe Star Anvils are similar to Vulcan anvils. Cast iron with a steel face. It looks like most of the steel face is gone or delaminated. Sorry, but that one is pretty much done. $300 would be well spent elsewhere. Trying to repair that properly into a working anvil will likely at least double the cost of the anvil, probably more getting welding rod to match up with the cast iron as a base layer for the repair. Look for a large piece of scrap steel and you’ll be better off. Learn on the improvised anvil, and save up for one that comes along. They show up a lot faster when you’re not looking or some reason. Keep it fun, David -
Carcoal furnace on the cheap
Goods replied to huntmaster99's topic in Smelting, Melting, Foundry, and Casting
You need a volume of air not pressure. See if you can find an electric blower on the cheap. The one I use on my forge is fresh air blower for a gas furnace. Got it for free from a buddy that runs a repair business. I hooked it up to a cheap riostat(sp?) from eBay and very rarely have it above half speed with coal. A hair dryer would work, but you’ll probably need to dump a lot of the flow. Lump charcoal doesn’t take much air to get screaming hot. Keep it fun, David -
What did you do in the shop today?
Goods replied to Mark Ling's topic in Blacksmithing, General Discussion
I forged out a blank 1” x 2” x 6”, cut it half to get two 3” piece. Wire wheeled any scale off then filed everything square. Then tack welded the two halves together, clamped it in the post vise to measure and center punch along the parting line. Move it to my drill vice (clamping parallel to the parting line) and drilled the holes. After they were drilled, ground the welds off and then there was a bunch more filing. Round files to remove the machining lines and flat files to remove the edges of the half rounds to prevent cold shunts. Finally, clamp the halves back up with round stock in the swage for alignment and weld the handle/spring on. Ok, that was probably more information that you were asking for… Keep it fun, David -
What did you do in the shop today?
Goods replied to Mark Ling's topic in Blacksmithing, General Discussion
He did pretty good, the real question is did he enjoy it? I’ve been spending a lot of time in the forge, but mostly cleaning and organizing. Today I got a round spring swage made up: The half inch really pushed my little drill press, even with stepping up by 1/8” increments… All that left is to touch mark it, harder harden and temper. Keep it fun, David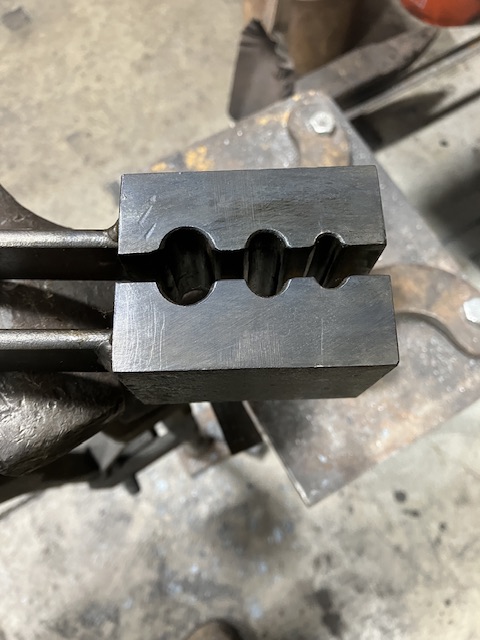
-
Looks pretty good! I usually keep mine pretty sharp, but it’s not really required. As for the scale, on my last heat, I brush it aggressively, and the just use planishing blows to get a better finish. Still a skill that needs more development for myself… Keep it fun? David