

Goods
-
Posts
1,164 -
Joined
-
Last visited
Content Type
Profiles
Forums
Articles
Gallery
Downloads
Events
Everything posted by Goods
-

What did you do in the shop today?
Goods replied to Mark Ling's topic in Blacksmithing, General Discussion
Chimaera, I would expect that to be harden-able based on the spark pattern. Tonight, I hardened and handled the top tool I made almost two months ago. Also, forged out a blank for the next tool. Keep it fun, David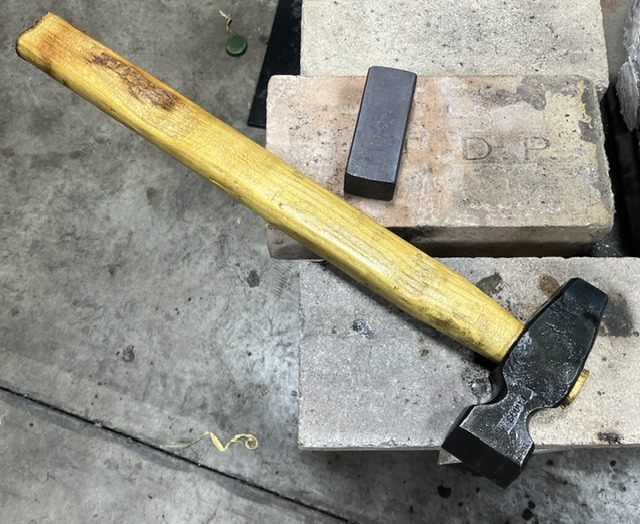
-
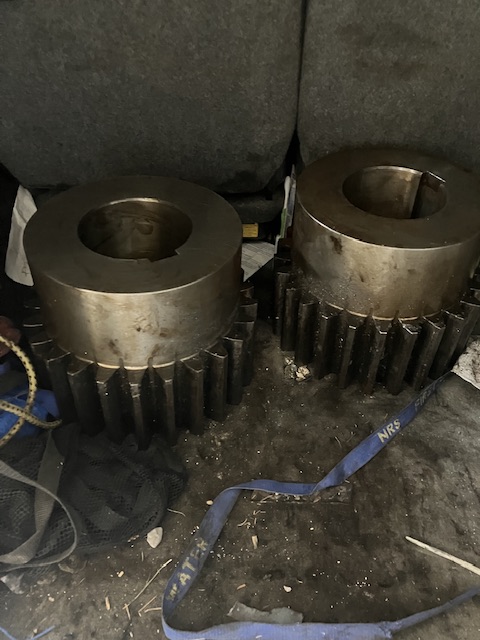
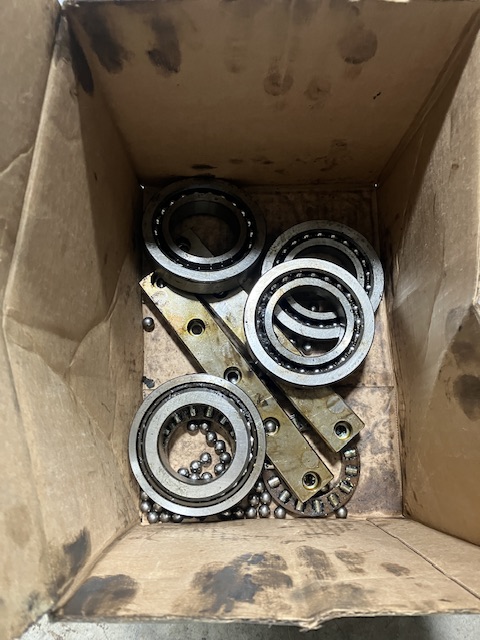
Today’s load: two big gears from a NC hydraulic bender and a box of bearings all from the same machine overhaul. If I got there before they started cleaning up, I could have gotten some more fun stuff… This is all they saved for me. (I don’t know how I could have handled them but the rotating tables were scrapped also. 4’x6’ 6” thick with 4’ diameter 6” thick ring gears bolted to the bottom. I never saw the table bearings… There was plenty of other small pieces though.) Keep it fun, David
-
If it’s too slick, rub it down with beeswax first. That may solve the issue without having to sand it down. If it doesn’t work, only a couple minutes wasted. Keep it fun, David
-
What did you do in the shop today?
Goods replied to Mark Ling's topic in Blacksmithing, General Discussion
Thanks Chimaera! (I ended up sanding back up to 1000 grit, but it’s not a good as it was before I handled it. At least the mark from the stone is gone!) Les, I’m assuming you wet molded the knife sheath. How hard was that to pull off, and is it secure with out being too difficult to draw? I like the look, and have to make sheaths for 3 knives of similar style, but I’m not sure if it’s worth the effort to wet mold them. Keep it fun, David -
What did you do in the shop today?
Goods replied to Mark Ling's topic in Blacksmithing, General Discussion
Well the chef’s knife I was asked to make is/was finished: (Yes, the blade slid across the edge of my fine sharpening stone and the corner of the stone left a pretty good mark.) I did some test cutting with paper and was quite surprised how well it cut, and continued having fun cutting all of the paper I had nearby. Then I used it to prep dinner tonight. I performed very well. Unfortunately, I didn’t clean it right away. We ate first… well, now I have to re-sand the blade. One of the food items etched the blade and left a couple bark spots. Live and learn… (I’m feeling better about making knives now, but I don’t think I’ll ever make a chef’s knife this large again (12”). It was what was requested, but I found it really awkward in use.) Keep it fun, David

-
Leehehe, how did you setup your diffuser? Looks like 1/4” pipe hot fit into 3/4”, but not really sure. What’s the lengths of everything? Inquiring minds want to know? This type of burner could really improve the hot spots in my two burner hell’s forge. It need needs some work, and I rarely use it. But if the hot spots were reduced and with relining, that would probably change… Keep it fun, David
-
What did you do in the shop today?
Goods replied to Mark Ling's topic in Blacksmithing, General Discussion
Old files make really good strikers. Just watch you heat. I had a couple crumble on me for overheating… Keep it fun, David -
Duncan, you’re making me jealous. Good find! Keep it fun, David
-
What did you do in the shop today?
Goods replied to Mark Ling's topic in Blacksmithing, General Discussion
I yesterday, I finished shaping and sanding the handle as well as the first coat of tung oil on the huge chef knife. Today was another coat. I’m planning on at least three coats and with 24hrs between coats, this is taking forever… At this point, I’m pretty nervous about the sharpening. I’ve got a lot of work in this and it’s turning out pretty good, I really don’t want to mess it up! Keep it fun, David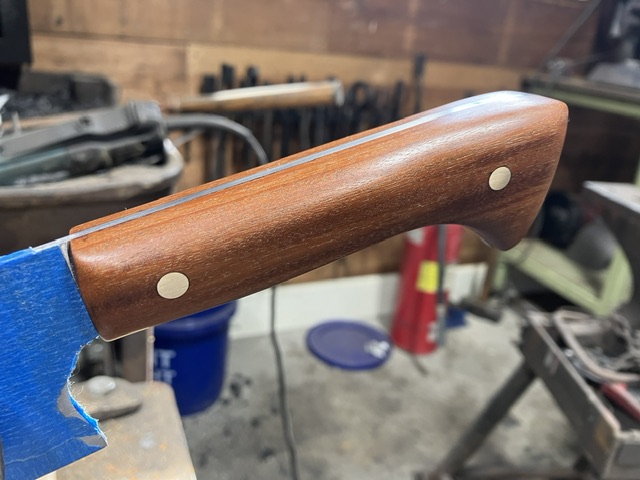
-
What did you do in the shop today?
Goods replied to Mark Ling's topic in Blacksmithing, General Discussion
Does that mean you let the cool very slowly in the forge, or let them air cool outside of the forge while the forge was cooling? If you the them cool in the forge, that is much closer to annealing than normalizing. Annealing would only be needed here if you plan on a lot of filling, drilling or machining. It will leave the tools much too soft. At a minimum bring them back up to a non-magnetic temperature and let them air cool, but personally I would harden and temper them. JHCC’s advice is very sound. Keep it fun, David -
What did you do in the shop today?
Goods replied to Mark Ling's topic in Blacksmithing, General Discussion
I cleaned up the walnut that was gifted to me Friday night, only to find that it looked like Osage Orange. I took a piece with me to our state hammer-in yesterday, and everyone seemed to agree. Unbelievably, the host gifted a big piece of paduk(sp?) to use. Should look good. Today, I got it ready and glued up: I’ll see what it looks like tomorrow! Keep it fun, David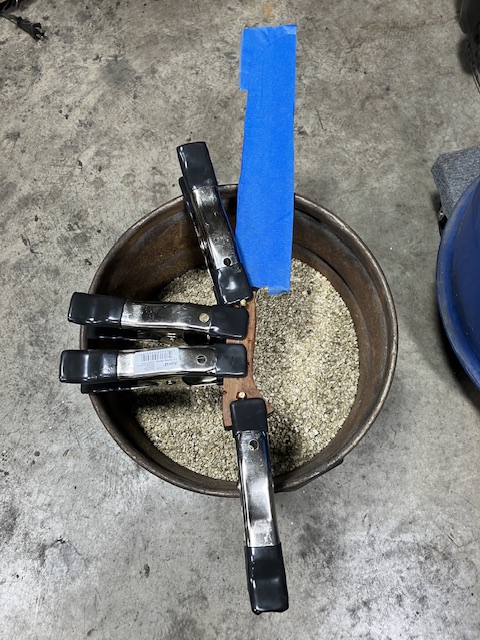
-
Be careful. What type of refractory are you using? I believe most refractory requires moisture to cure, it won’t set dry. I also understand the rigidizer should be heat fired to a dull red, but I’m not sure if it should be dry first or not. My info may not be correct, but make sure what the material you’re using requires before you proceed. Keep it fun, David
-
What did you do in the shop today?
Goods replied to Mark Ling's topic in Blacksmithing, General Discussion
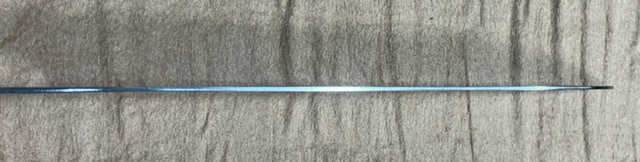
I got the grinding and hand sanding done on the blade I’ve been working on: The edge is at 0.008” and spine is at 0.080”. Tomorrow my epoxy arrives and one of the guys at work is giving me a piece of walnut for the handle. Maybe I’ll get a chance to finish it this weekend. Keep it fun, David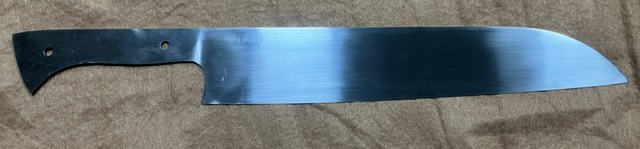
-
I would call it a cam shaft…
-
Templehound, sorry, I read that the first time around, but didn’t remember. Knowing the other work you’ve posted, when I scanned back through I was looking for a material specification and wasn’t expecting it to be in the text. Any reason you wouldn’t use the W2 just for the edge material? Either way, I understand about making another. It’s hard to make just one of something. Keep posting your work. It’s very inspiring! David
-
Identify this ASO or ALO?
Goods replied to The_Zed_Word's topic in Anvils, Swage Blocks, and Mandrels
ASO. It would make a good door stop or yard ornament. (On the other hand, I have a CI anvil sitting on the floor right against my forge, works good enough for upsetting long bars.) Keep it fun, David -
Identify this ASO or ALO?
Goods replied to The_Zed_Word's topic in Anvils, Swage Blocks, and Mandrels
What’s the ring and rebound? Cast iron won’t ring, kind of a dull thud, and the rebound will be 60% or lower. It could be cast steel which would make a very nice “working” anvil….or I could be a cheap CI copy. Keep it fun, David -
Absolutely lovey! I’ve always had an interest in making one and you definitely set a high bar. What material did you use? Keep it fun, David
-
Every time I look at this I see a mad goat… it’s pretty cool no matter what beast you see in it.
-
What did you do in the shop today?
Goods replied to Mark Ling's topic in Blacksmithing, General Discussion
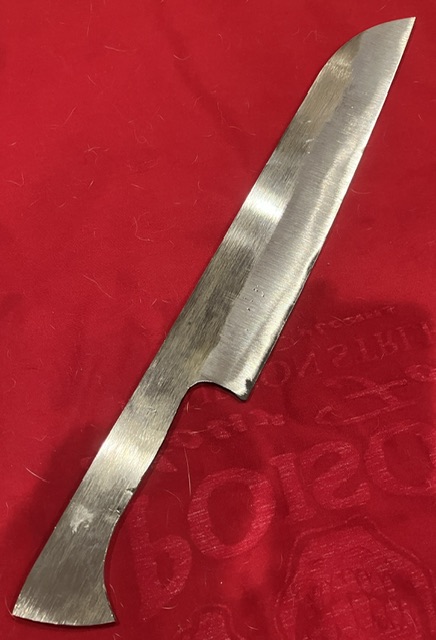
Had a little bit of time in the shop this afternoon worked on a 3/4” v swage and some work on a knife I had shown previously. The v swage was a quick job from a failed hot cut hardy: It’s pretty rough, but it will get the job done. I cut the handle down on the knife, upset it back some, profiled it, and started thinning it down: I’m much happier with the profile and it’s down to 0.150” thickness. I’d like to get it down to 0.125” before heat treatment, but not sure when I’ll get more shop time. Keep it fun, David
-
Where on Earth kind I find this fence bracket!?
Goods replied to Phillip-SC's topic in Problem Solving
If you know someone with a CNC plasma cutter you could have them cut them out pretty quickly. At work when we’re designing up brackets like these we would add cut in the corners. This makes them much easier to bend to shape and make the bend locations very accurate. A large laser cutter is used, and I’m not sure if it’s possible to make that type of quick starts and stops with a cnc plasma cutter cleanly, but if that’s an option, that’s the way I’d go. Keep it fun, David -
Are the sizes/prices similar? They both seem very serviceable. The chipping look pretty minor and it’s hard to judge the pitting on them. If would take a 3/8” to 3/4” bearing for a rebound test and a small hammer for a ring test. Assuming they past the tests (rebound over 7” minimum dropped from 10” and consistent ring) pick the one you prefer. Keep it fun, David
-
I imagine the NJanvilman will be along before too long. He runs the Fisher Norris museum and should be able to provide you some information. (He did write the book after all…)
-
I’m using an Anyang 106 self contained hammer. I absolutely love the hammer, but it’s not good for single hits. (Or at least I’m not good at making single hard hits with it.) Momatt, what are you using? David
-
I start the taper (wedge) with the edges of the dies, then come back with the flatter to smooth it out. For really shallow angle on thinner items, I have used my large flatter offset from the forging to forge in the angle, but I’m not sure that’s best practice. I have two flatters currently. One is maybe 2x3” with about a 3/4” diameter ridge in the top. The other (big one) is about the same size as the dies on the hammer with maybe a 4” radius. Just cut a slab off the side of a large piece of 1050 round stock. I really prefer using the big one, but it doesn’t fit the piece many times. Keep it fun, David