Will W.
Members
-
Joined
-
Last visited
Everything posted by Will W.
-
From the HTS Heat Treaters Guide: It does not sound like a simple alloy to heat treat, but it also does not seem exceedingly difficult. Hope this helps!

-
That came out really nice, Das. That ought to be an attention grabber. Awesome work, well done.
-
A bit of a delayed reply, but here goes. If its just a camp knife, or a shop knife, or an EDC, etc. literally any oil will do, for the most part. You just want an oxygen and moisture barrier. If its a kitchen knife, you obviously want to only use food grade oils. Olive oil, canola oil, peanut oil, etc.
-
Theyre not curmudgeons, theyre jedi! It all makes sense now... I would recommend putting some shape into your tangs. Theyre very square and plain. Put in a finger groove, or a radius into the bottom of the tang (in reference to the pictures, that is) or both, even. It provides a much more comfortable grip. Other than that, looks good so far.
-
I missed out on celebrating my Fishers 100th birthday . I picked it up when it was about 110. When is the next milestone? Dont tell me its two hundred years, cause i seriously doubt ill make it to the year 2105! By the way, beautiful anvil cavpilot.
-
Now that is a very large quarter!
-
Nor did I. One would imagine it would not make a very effective hammer.
-
The nicks in the second one are no big deal. They will present no issue, besides aesthetics. Theyre both in great shape, especially the first one. Which size you should purchase depends on your intended use. If you plan on making hooks, bottle openers, knives, etc. then you can use a smaller anvil than if you plan on making gates and fences (though these are both too small to makes gates on, imo.) I mostly make knives, axes, machetes, etc. and use a 150 lb Fisher, and it is plenty enough for my needs. Hope this helps. Good luck with them.
-
Im glad that im not the only one.
-
Absolutely fantastic work Theo, it looks outstanding. The temper lines are so clean and follow the lines of the blade perfectly. The handle looks incredibly comfortable, and the lanyard scroll on the end adds a nice little blacksmiths signature, if you will. Amazing work overall. Thank you for posting, and congrats.
-
Hello everyone. I know there are topics around here about storing sandpaper, but i couldnt find one about storing sanding belts. I have a large number of belts just sort of sitting around, hanging on nails, etc. Its inefficient and ineffective. Just curious, how do you guys store your sanding belts? Any tips or tricks to storing them, preferably categorized by grit? Thanks.
-
I think a more appropriate version of this question would be Machining vs. Forging. Is it better to stamp a bottle opener out (or grind it, drill it, etc.) or to forge it? Stock removal vs forged blades? Things of that nature are at least comparable. But a similar point can be made even then; each has its place. Machining a carburetor would be immensly easier than forging one. Point is, no one version of almost any type of work is invariably superior to another. Each has its place in its own line of duty.
-
Lyuv I am also glad to hear that you were not serious. That gets my goat when a new person claims to be an expert on any subject. Its insulting to the people who have spent years upon years gathering this information, and then freely dispense such knowledge. That being said, your knife is not rubbish. It came out pretty well for your first pattern welded blade. Know what my first one looked like? Its a pile of half welded scrap thats still sitting in my scrap bin. You made some mistakes, sure, but now you have a baseline to work off of and improve from. But maybe instead of spending the copious amounts of time required to craft pattern welded blades, you should stick to monosteel blades for a while until you develop skills like forging color identification and proper heat treatment. This is not designed to hold you back, it gives you the necessary hands on knowledge to one day produce quality pattern welded blades. No master bladesmith ever started at the top.
-
Oh, thats a good one. Dont forget to post pictures
-
They remind me of Jack Skellingtons hands. Tim Burton presents "The Blacksmith."
-
Thanks for posting. Definitely neat looking items. I really like that claw hammer, interesting that they put langets on it.
-
I cannot tell if youre being serious or not, so im finished with this. Have fun making knives and keep improving, and one day, you may be a master. Good luck to you.
-
Sorry to burst your bubble, but you are far from mastering any of the things you listed. Unless you can make dozens of damascus blades in a row without having any of the several issues you encountered, you are no master. Look at a fellow member here on the forum named JPH if you want to see a true master bladesmith. That being said, your blade looks nice. But i beleive you tempered too cold, especially for a chopper like that.
-
Frustrating, indeed. But i suppose mistakes keep me going, keep me aspiring to, one day, make a perfect knife with 0 flaws (unlikely to ever happen lol!) Thank you for your kind words.
-
That would definitely be interesting, but the knife is already finished and out of my hands, so no changing it now. Yeah, sure. Lets go with that. Lol.
-
This is simply the BEST comment i have seen Ohio, your leaf is really not that terrible. You should see the first knife i tried to make, if you want to talk about terrible lol. But now you have a baseline, something to work from and strive ahead to create things that are more and more beautiful. Good luck to you. And remember, the journey is just as important as the destination. This is the BEST advice i can give (Sorry Thomas, i had to!)
-
Thank you gentleman.
-
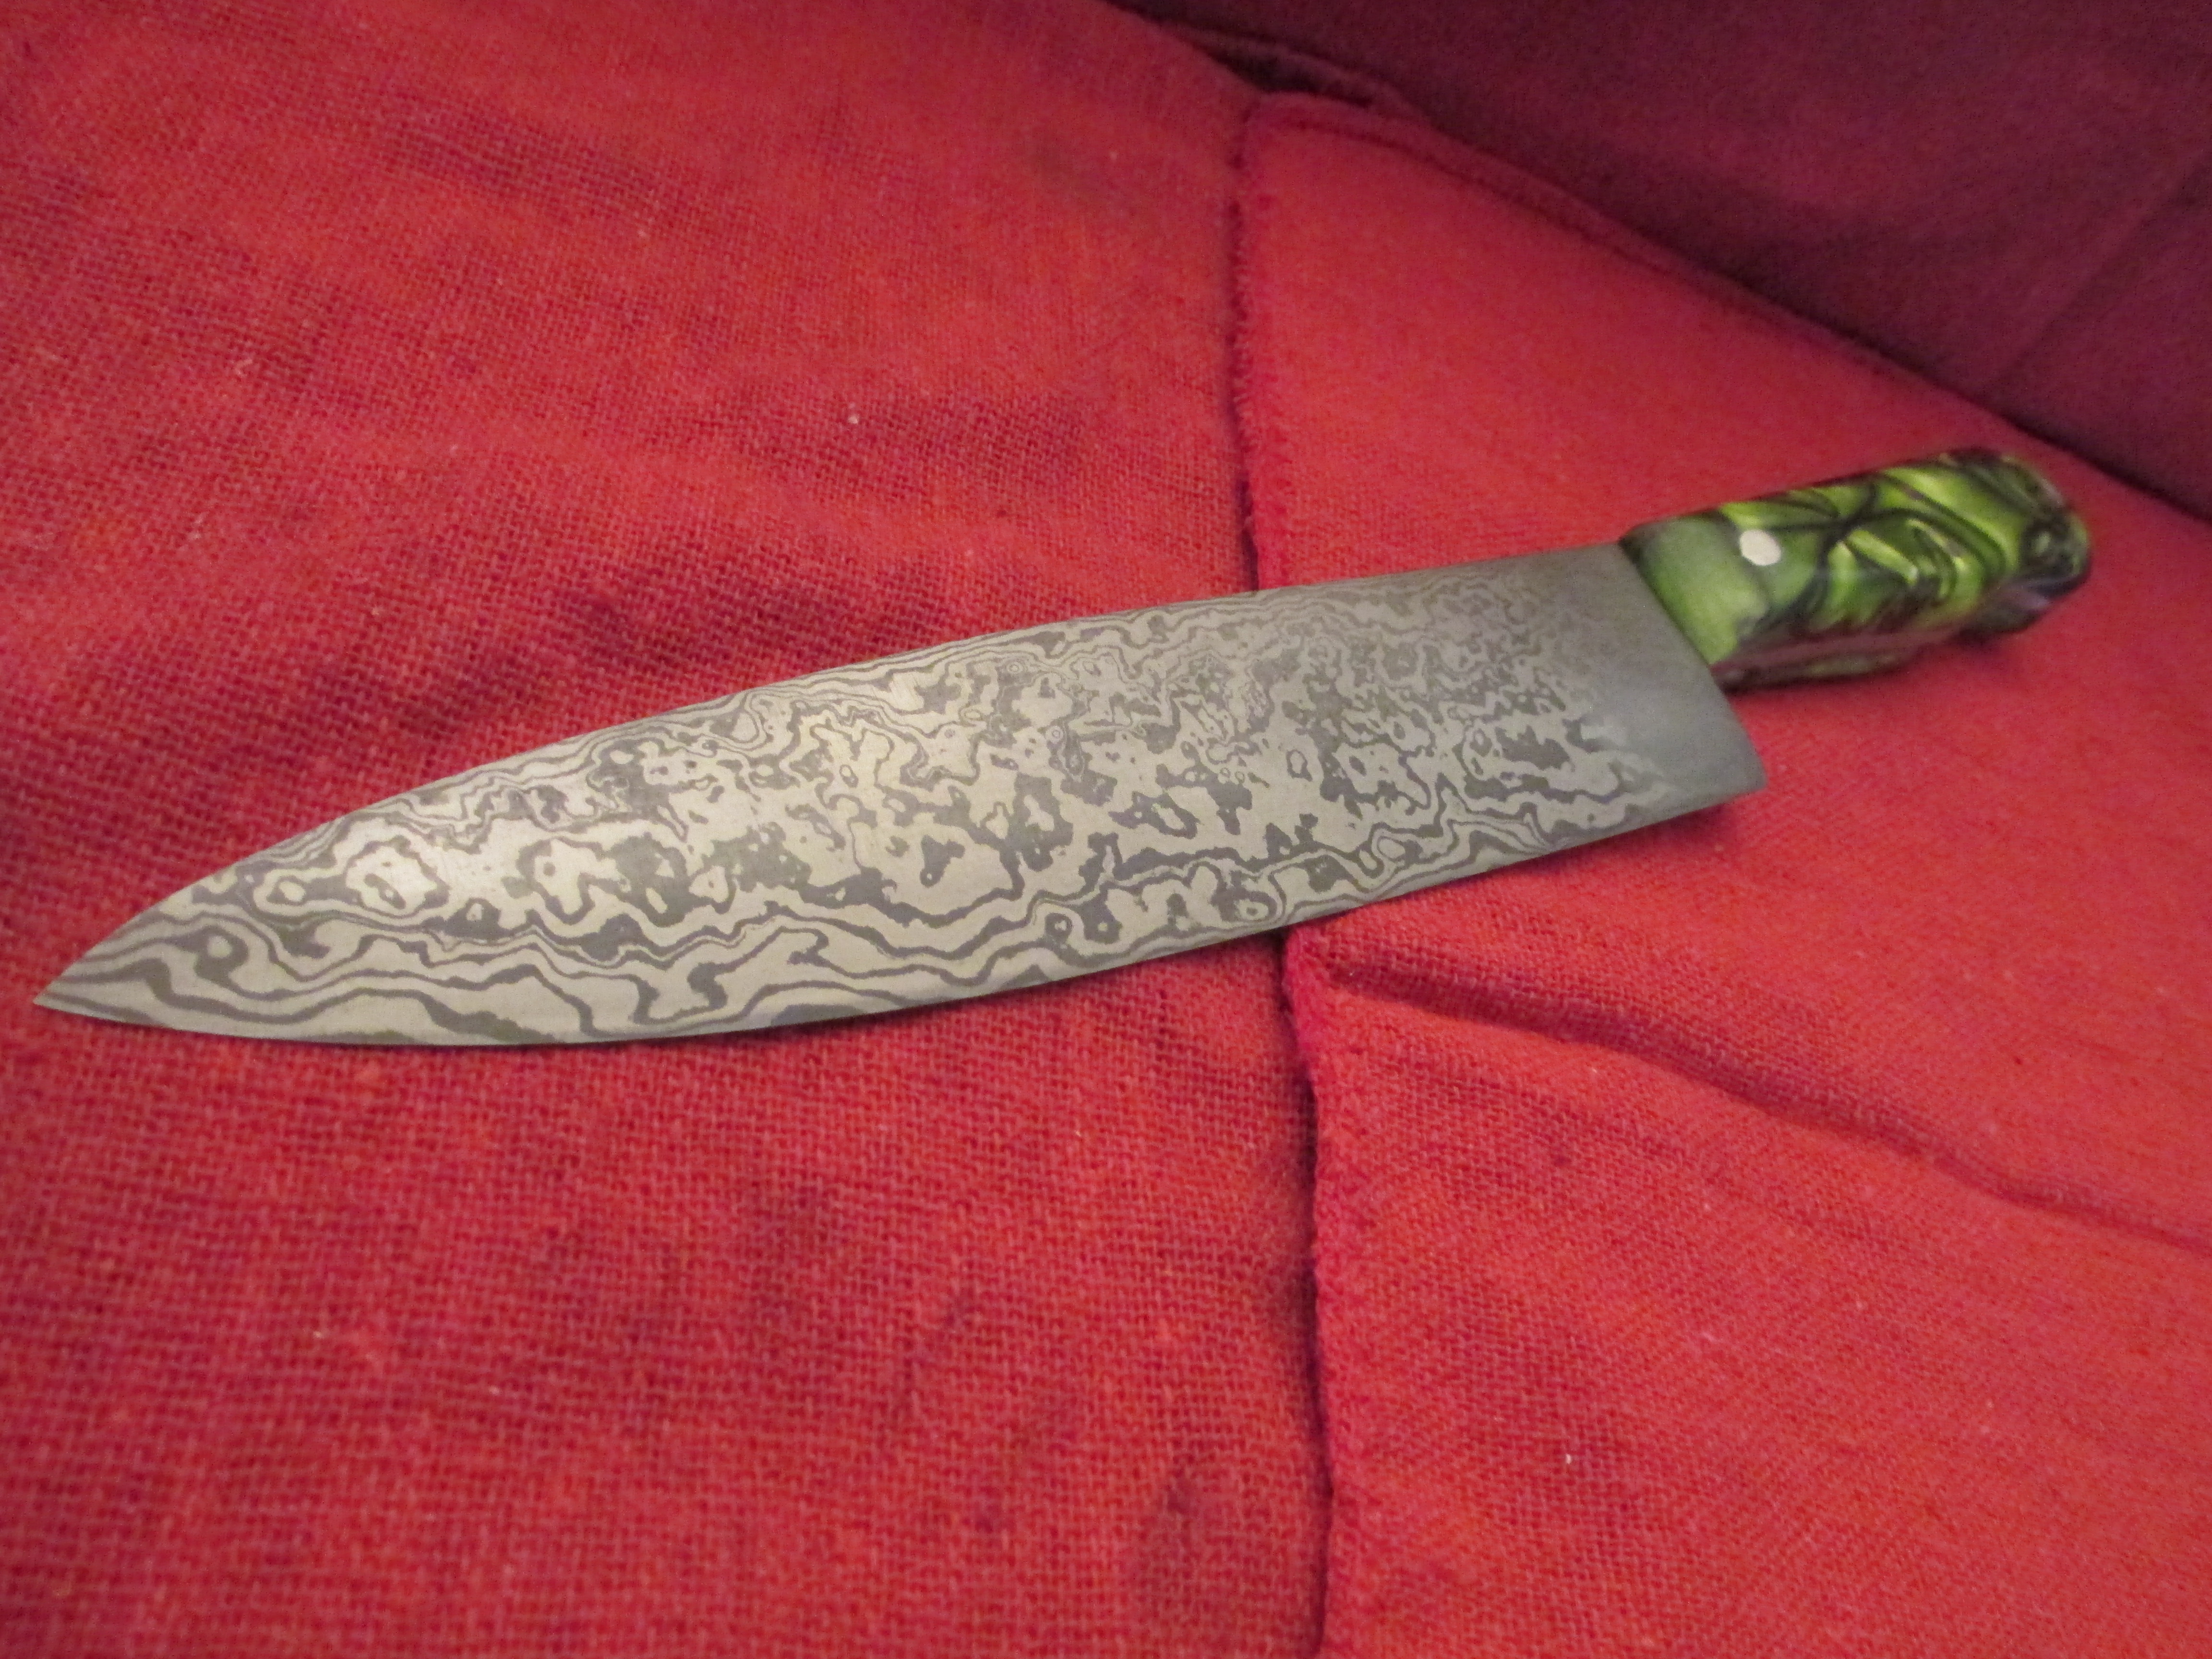
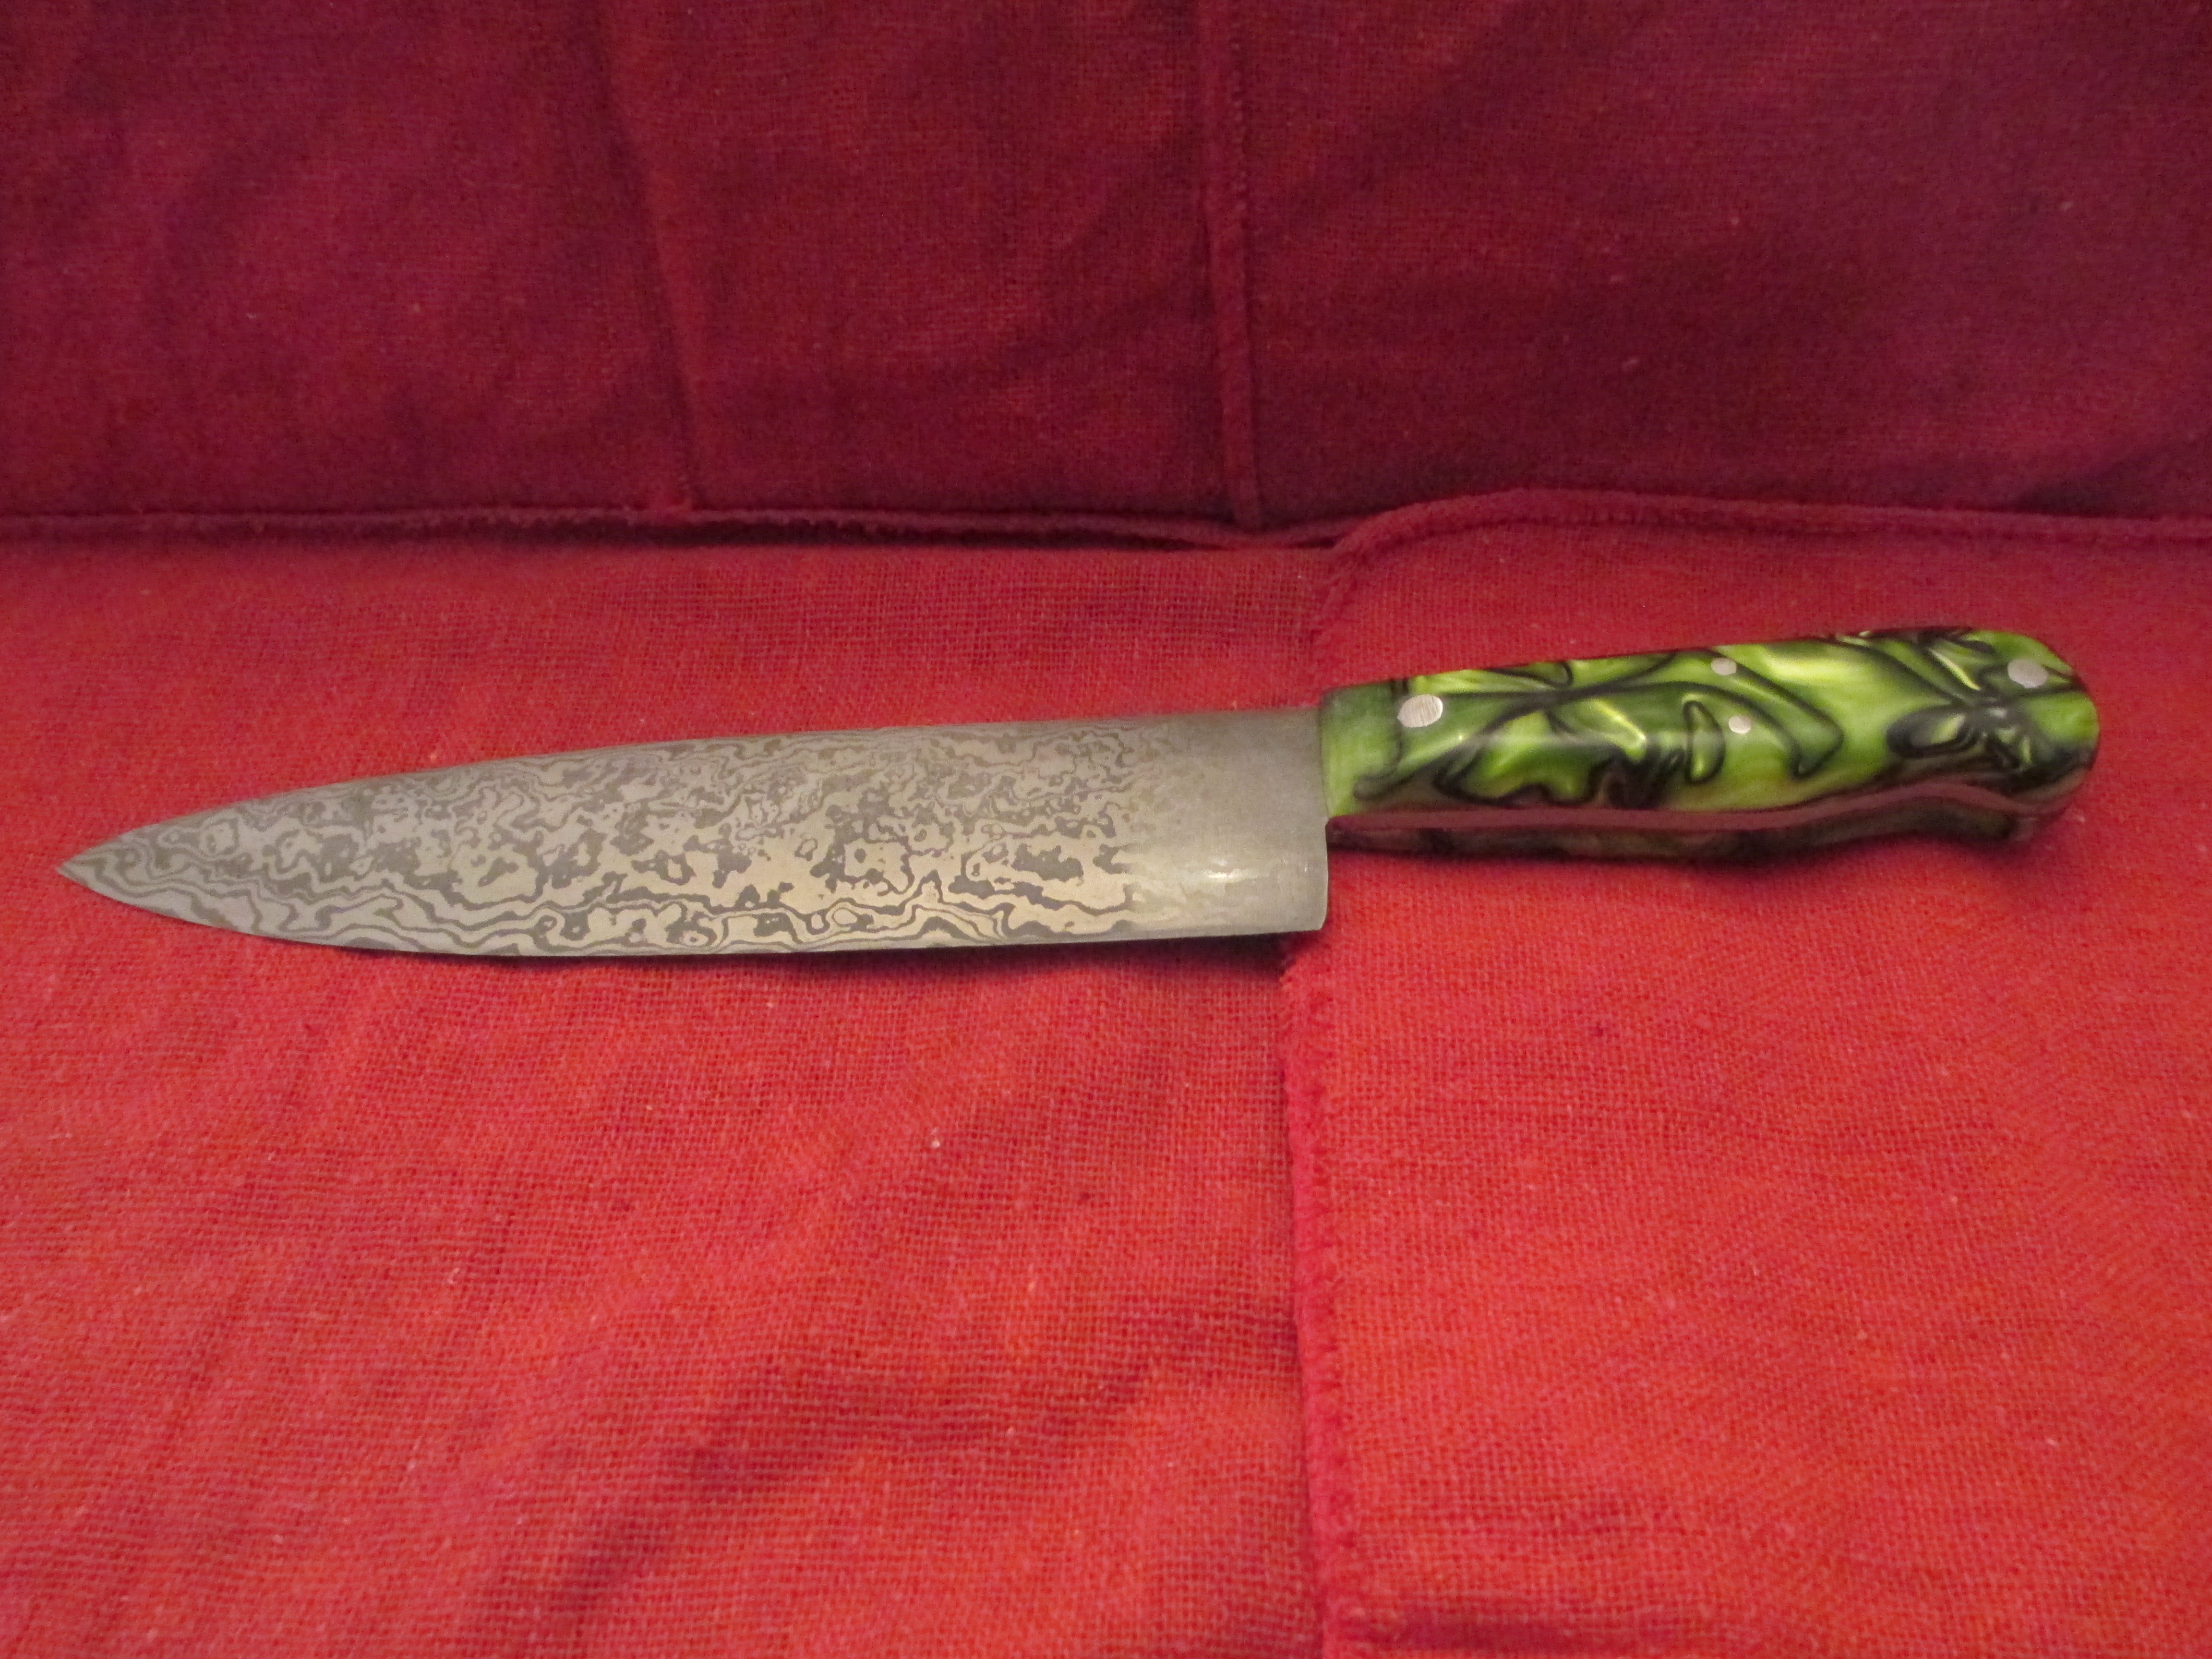
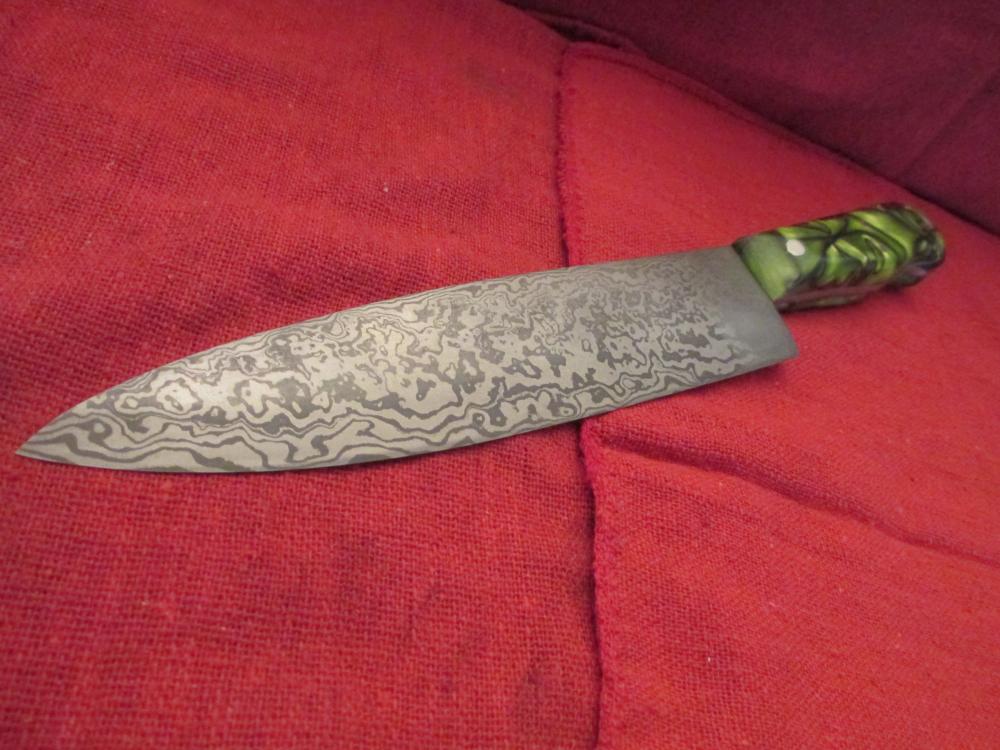
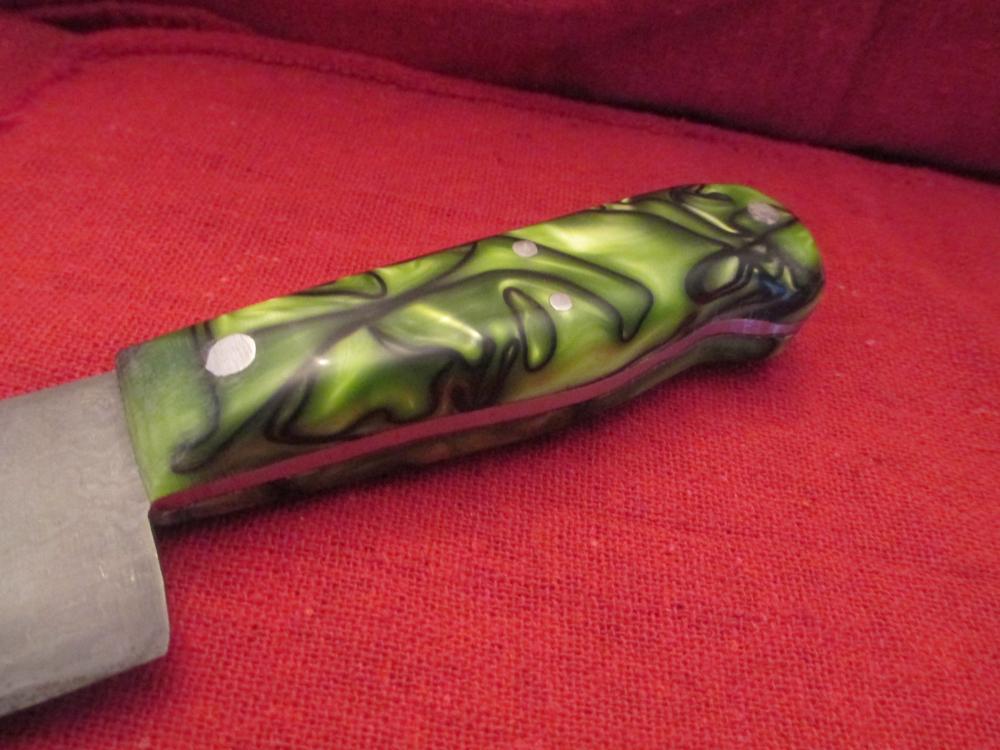
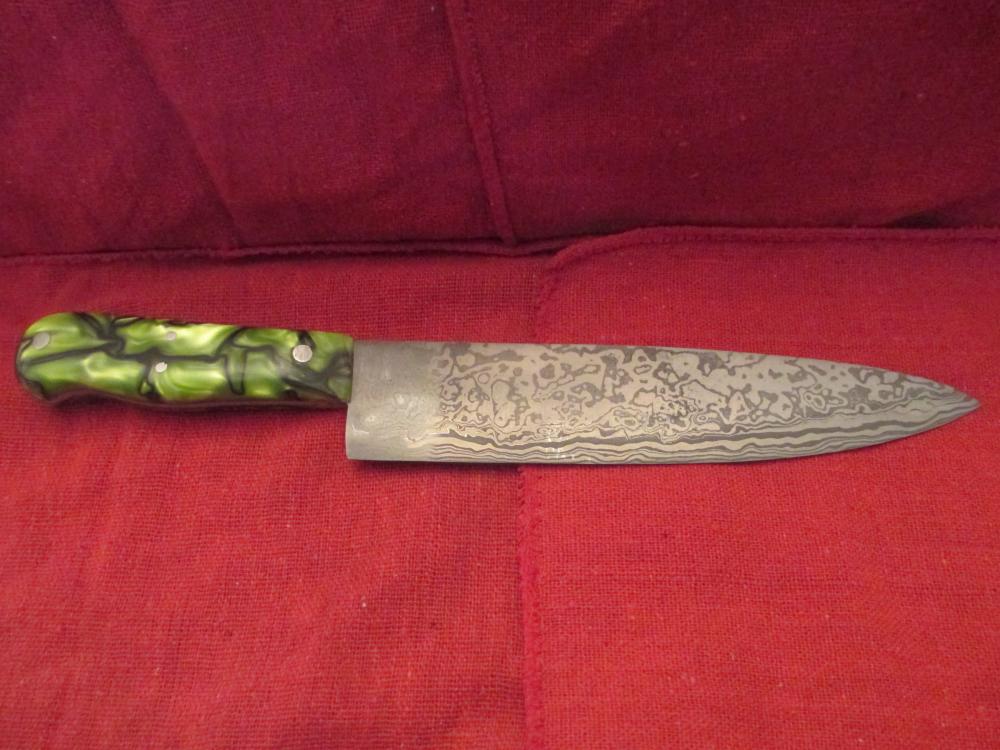
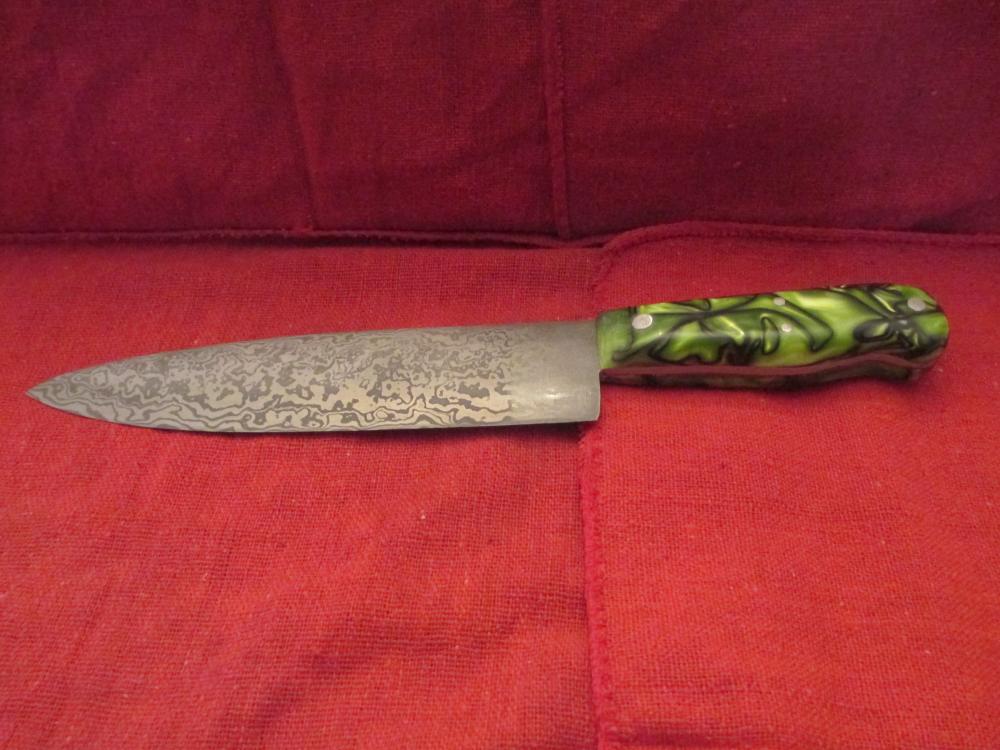
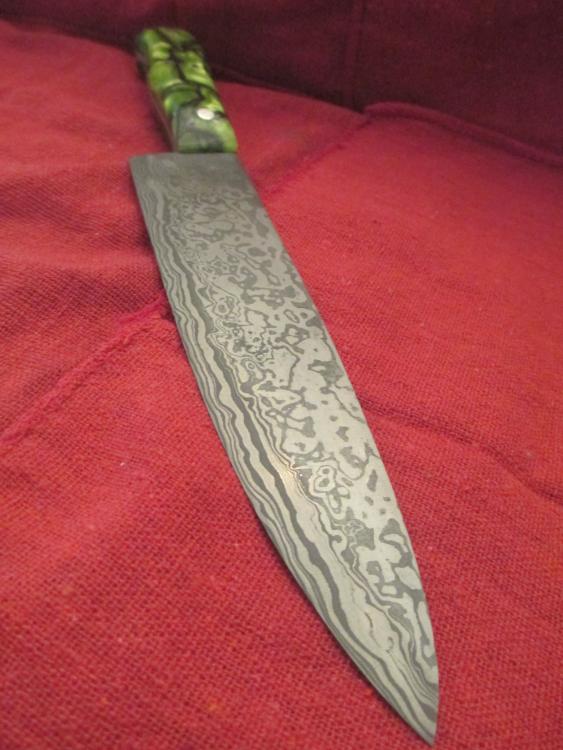
Hello everyone. Despite the numerous problems that occured throughout the process, this blade turned out successful. The customer loved it. Blade is 7 inches long, 11-1/2 inches overall. ~72 layers of O1 and 15N20 with "toxic green" kirinite scales, polished to 2000 grit. Epoxied on and pinned with two 3/16" and two 1/8" 303 stainless pins. The portion of the blade directly in front of the handle did not etch properly. I beleive this to be a heat treat issue (that part may have been colder than the rest of the blade during the quench.) The learning curve hit hard in this particular area. I am disappointed about it, but all in all, i am satisfied with the knife overall. Comments and critique are, as always, welcome and appreciated. Thanks for looking!
-
Holy eye candy!!! Looks outstanding, beautiful work.
-
It seems Foundryman was correct. I just got back from picking up more acid and after etching in the new stuff, the whole pattern is showing again. Somehow, the old acid became contaminated, possibly in my hasty excitement to see the pattern right after heat treat, i didnt clean it properly and that resulted in contamination. I thank everybody for their replies and their help. I will post pics when the blade is finished.