GrumpyBiker
Members
-
Joined
-
Last visited
-
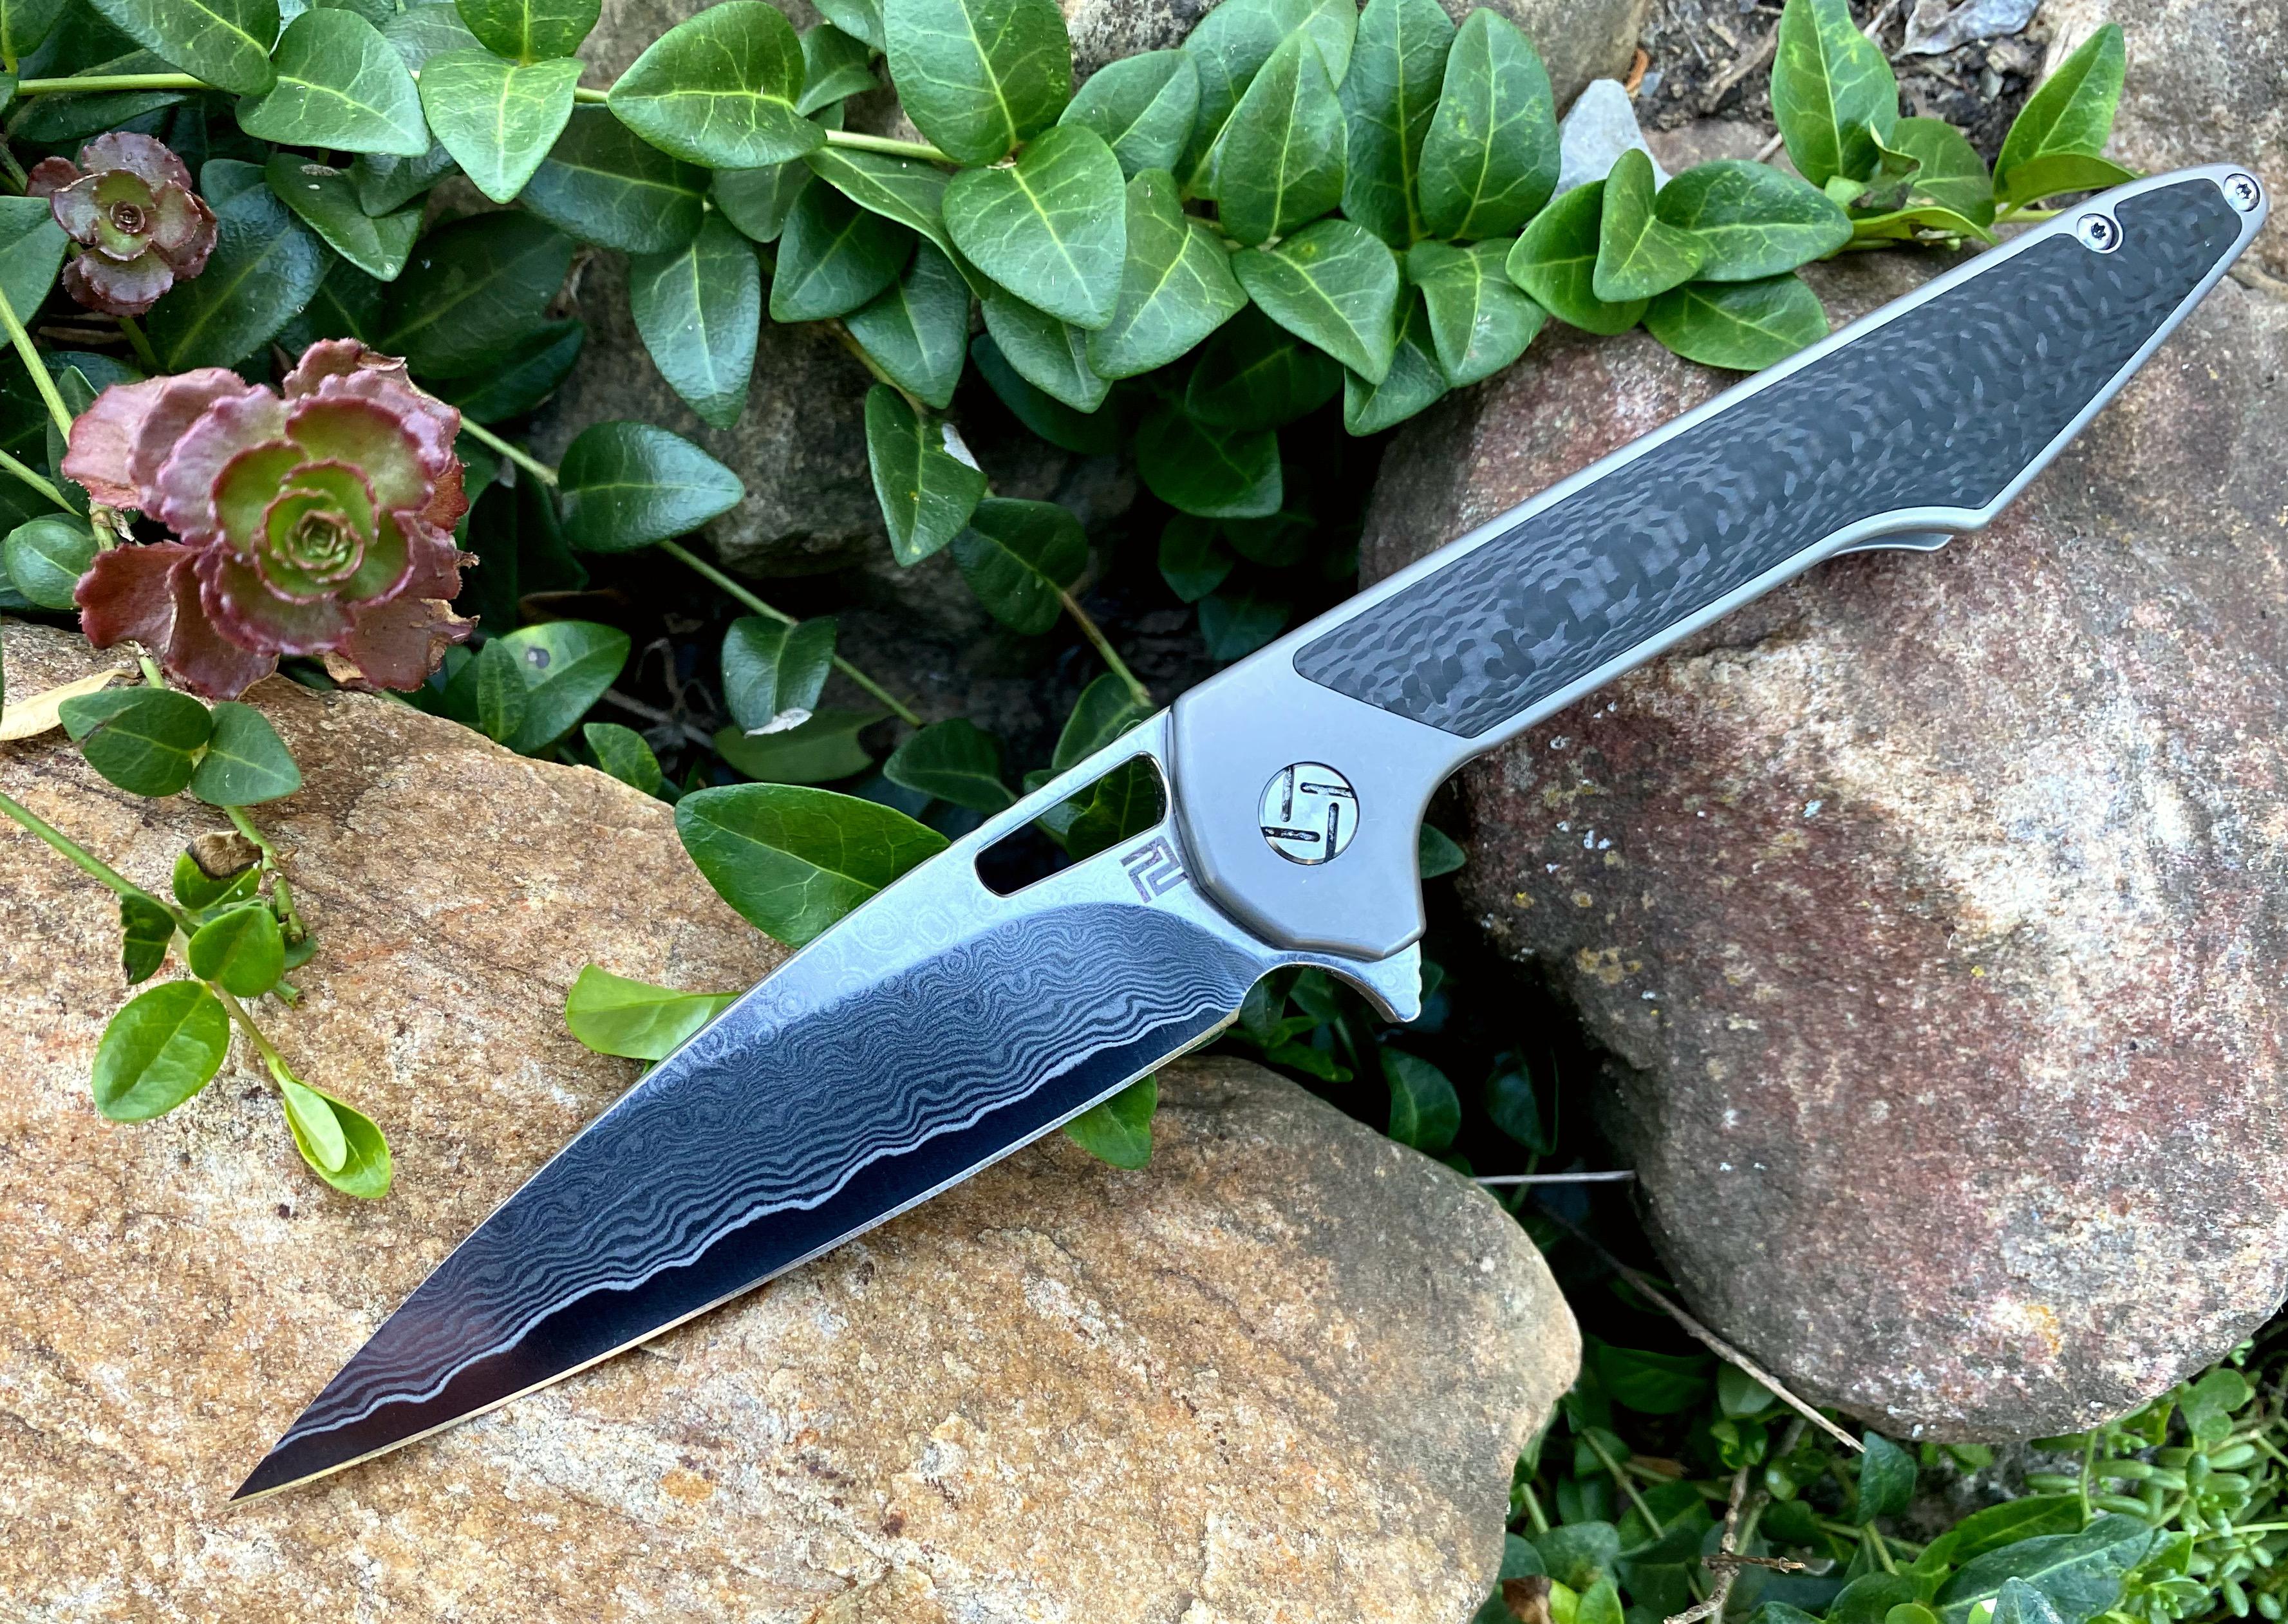
Or , in this case, the previous owner was an idiot. It’s an Artisan Cutlery Archaeo Titanium with carbon fiber inlay & a VG-10 Damascus blade. I don’t know what metal object he ran across but back 1/2 could have been used as a scraper. smh. Otherwise it’s a nice knife & now it’s sharp again. Video didn’t seem to load so I added it to my YouTube page.

-
I have acetone in the shop so I’ll use that. The steel is VG10 Damascus if that matters. The fingernail polish tip is much appreciated.
-
I bought a used Damascus/ Titanium folder For daily carry & it had issues. scratches in the Damascus & a rolled edge. the edge fixed I noticed the etched makers mark coloring 1/2 removed. being a daily carry piece I polish the blade but in doing so I lost (in areas ) some of the lines of the Damascus. I can order some Ferris Chloride and good that route but is it possible to use boiling vinegar to bring back the etching of a polished Damascus blade ? i gave gallons of vinegar on hand. If not no big deal but I thought I’d ask.
-
-
I’d not thought of hand shovel & rake set but that’s a good idea.
-
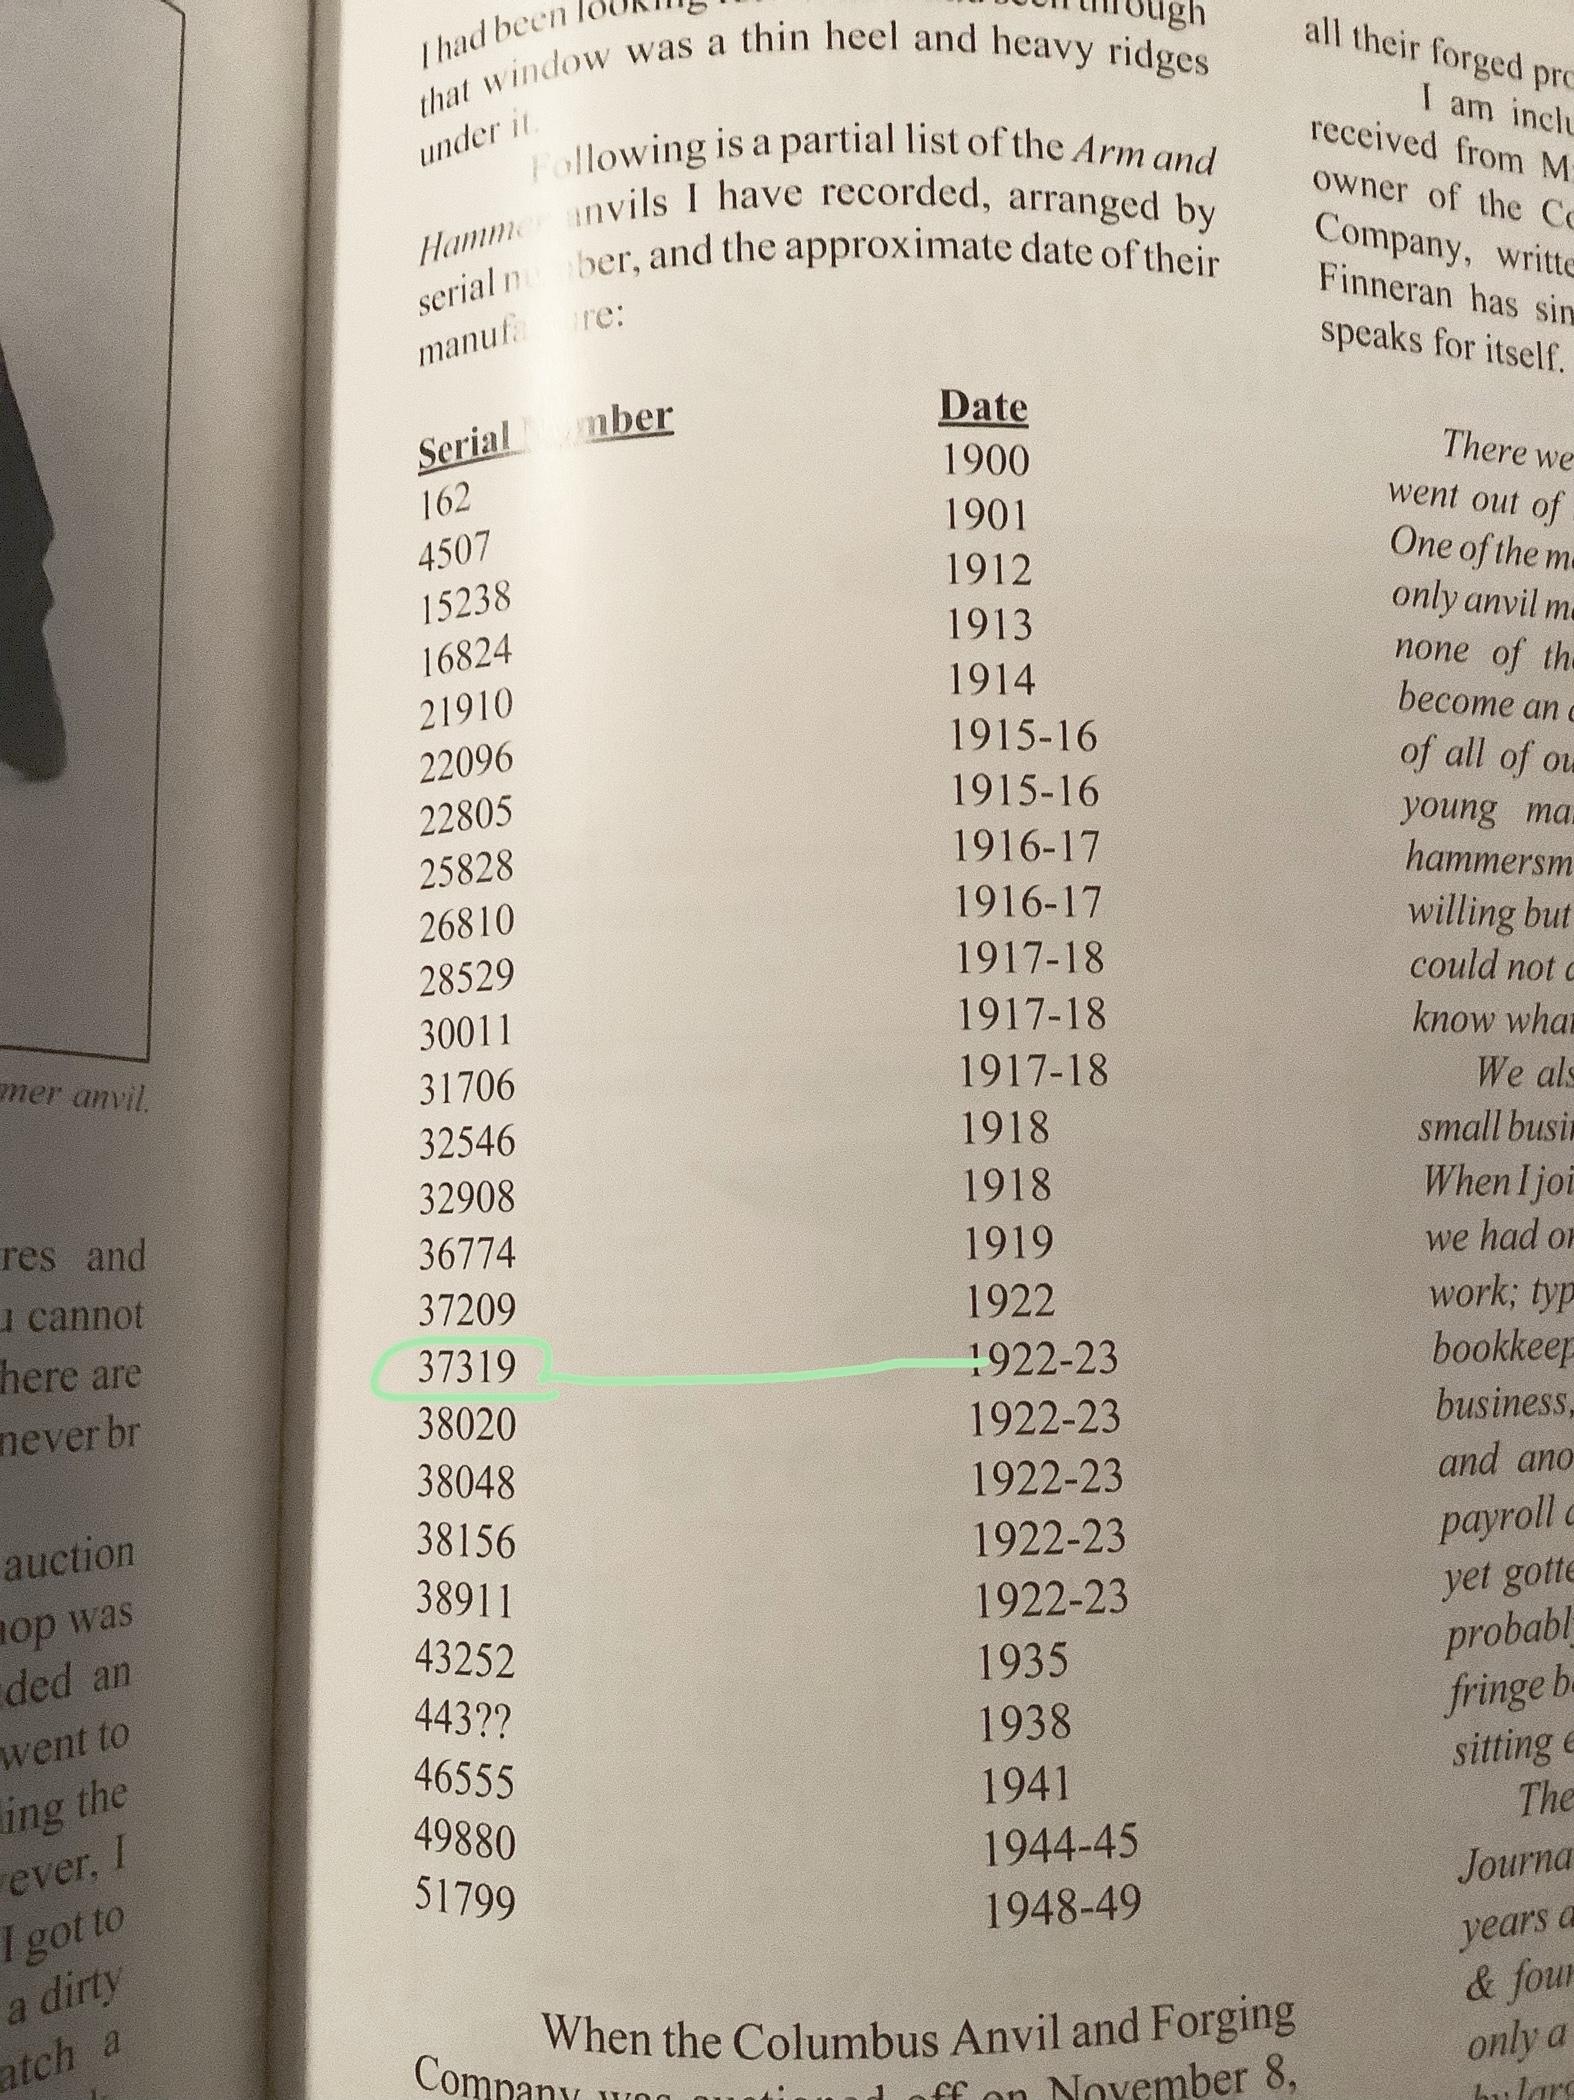
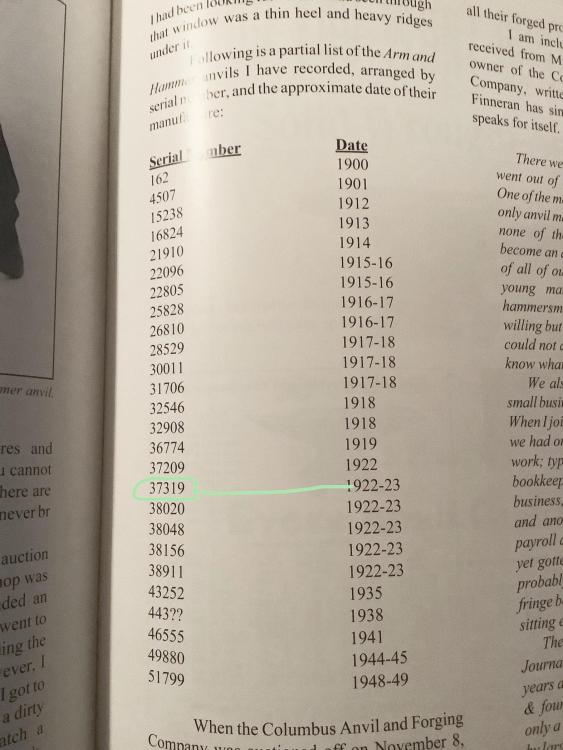
1922-1923
-
I’d not given up just needed to spend time getting better. Learning better hammer control.... still need better hammer control. LoL. but I’m still having fun leaning every time I pick up a hammer & light the forge.
-
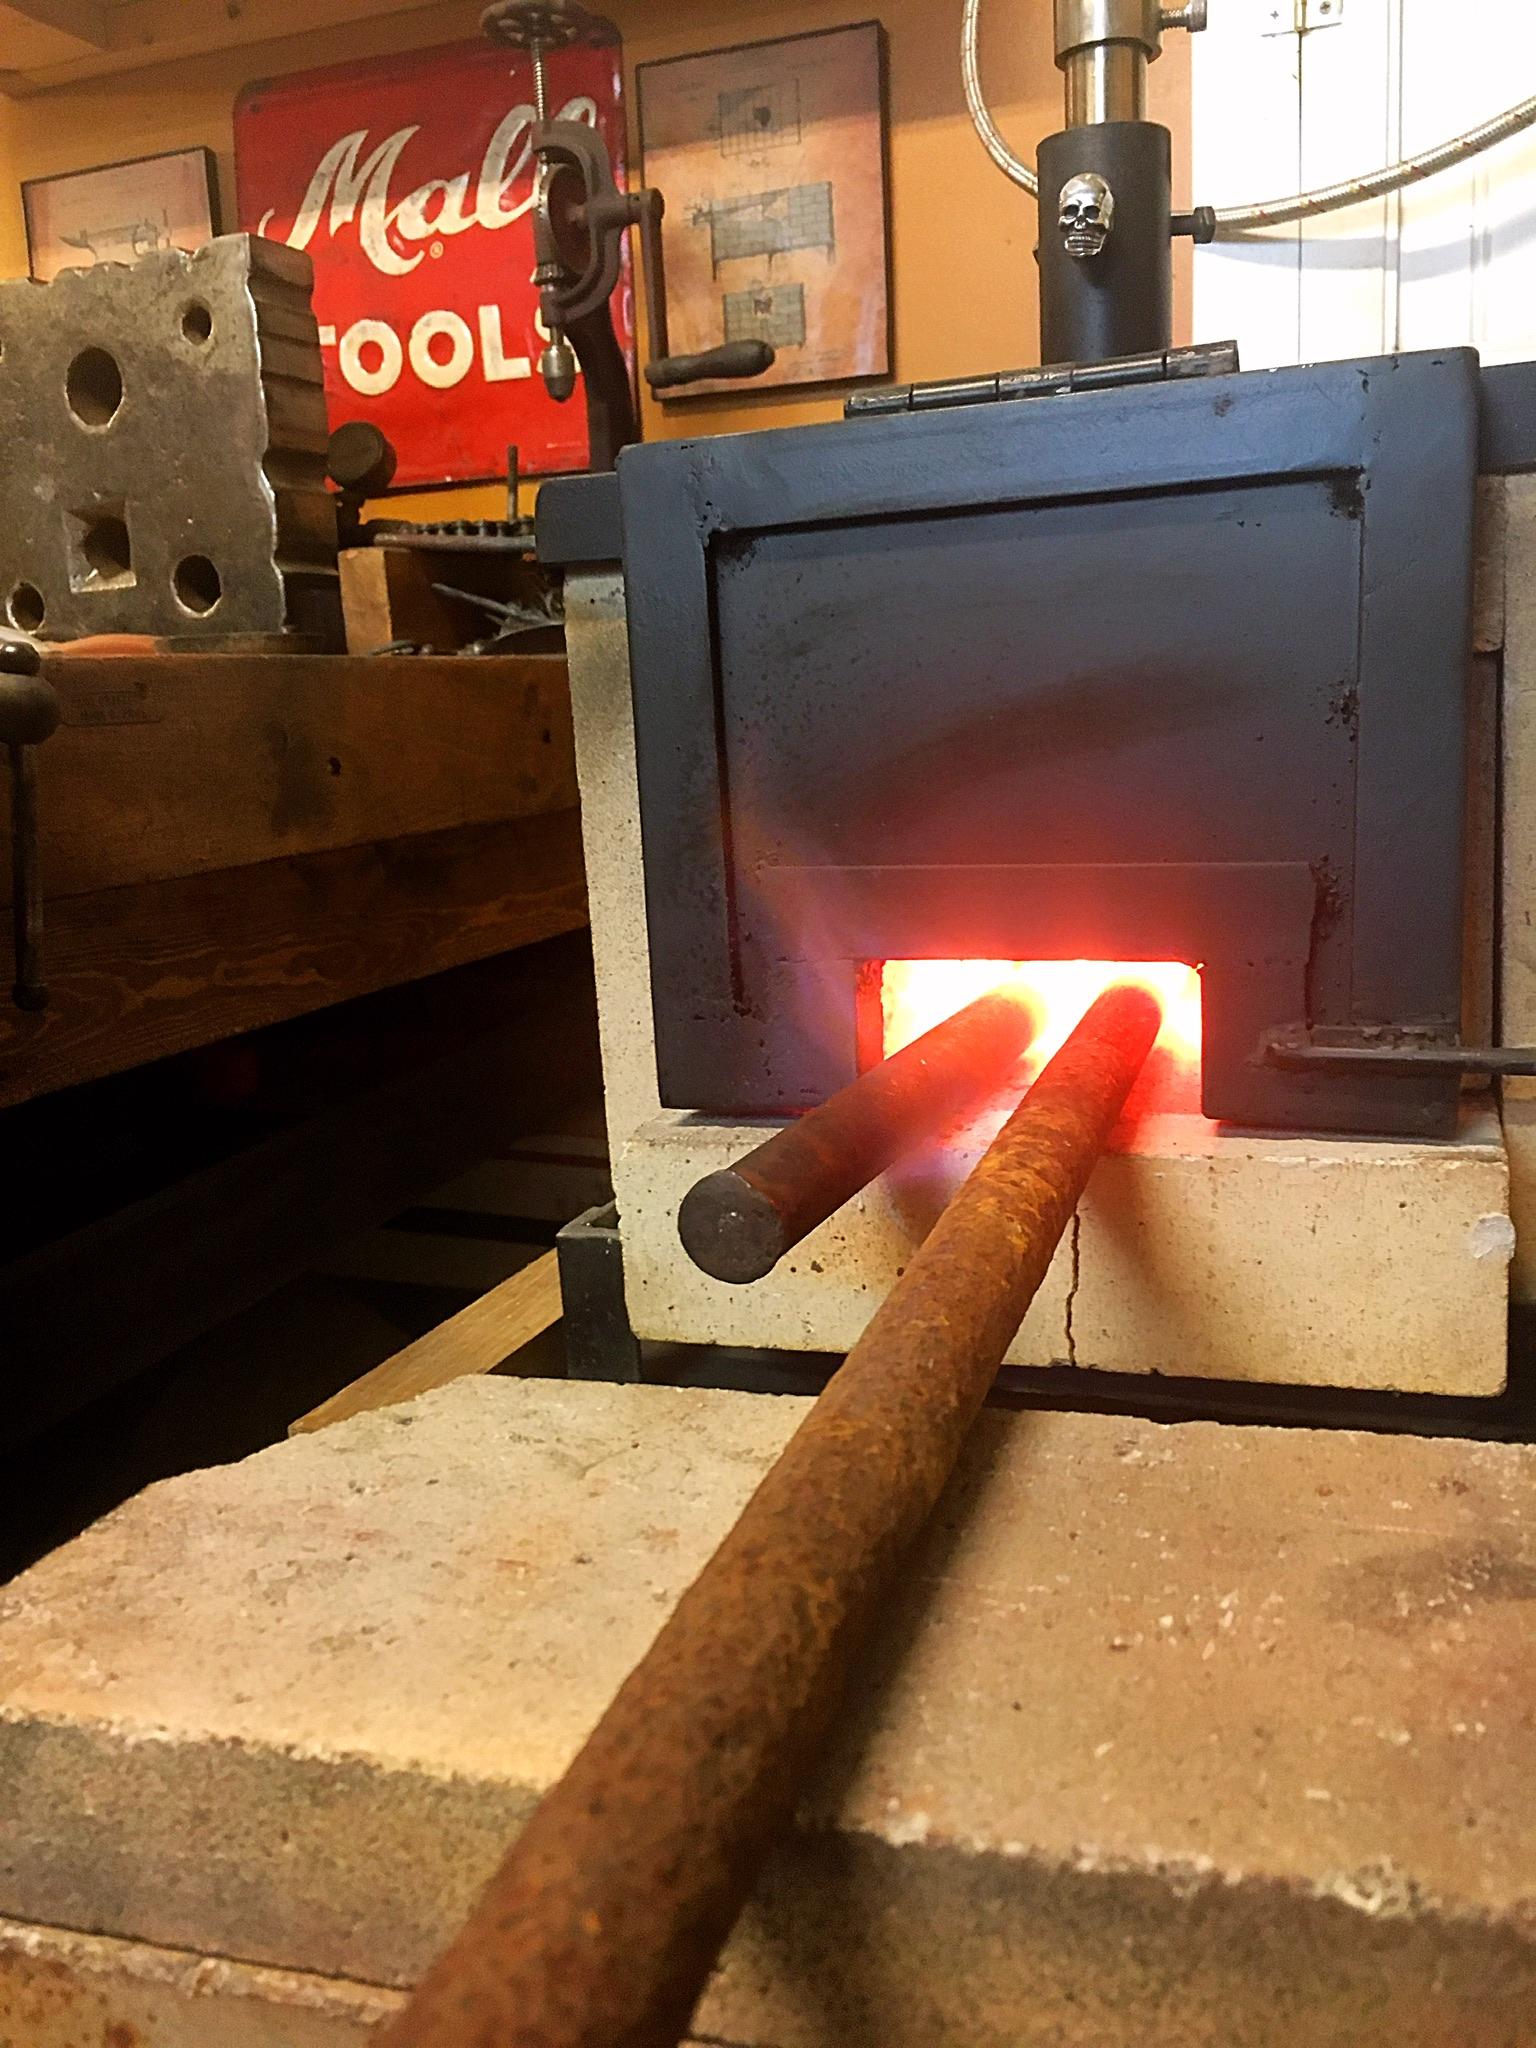
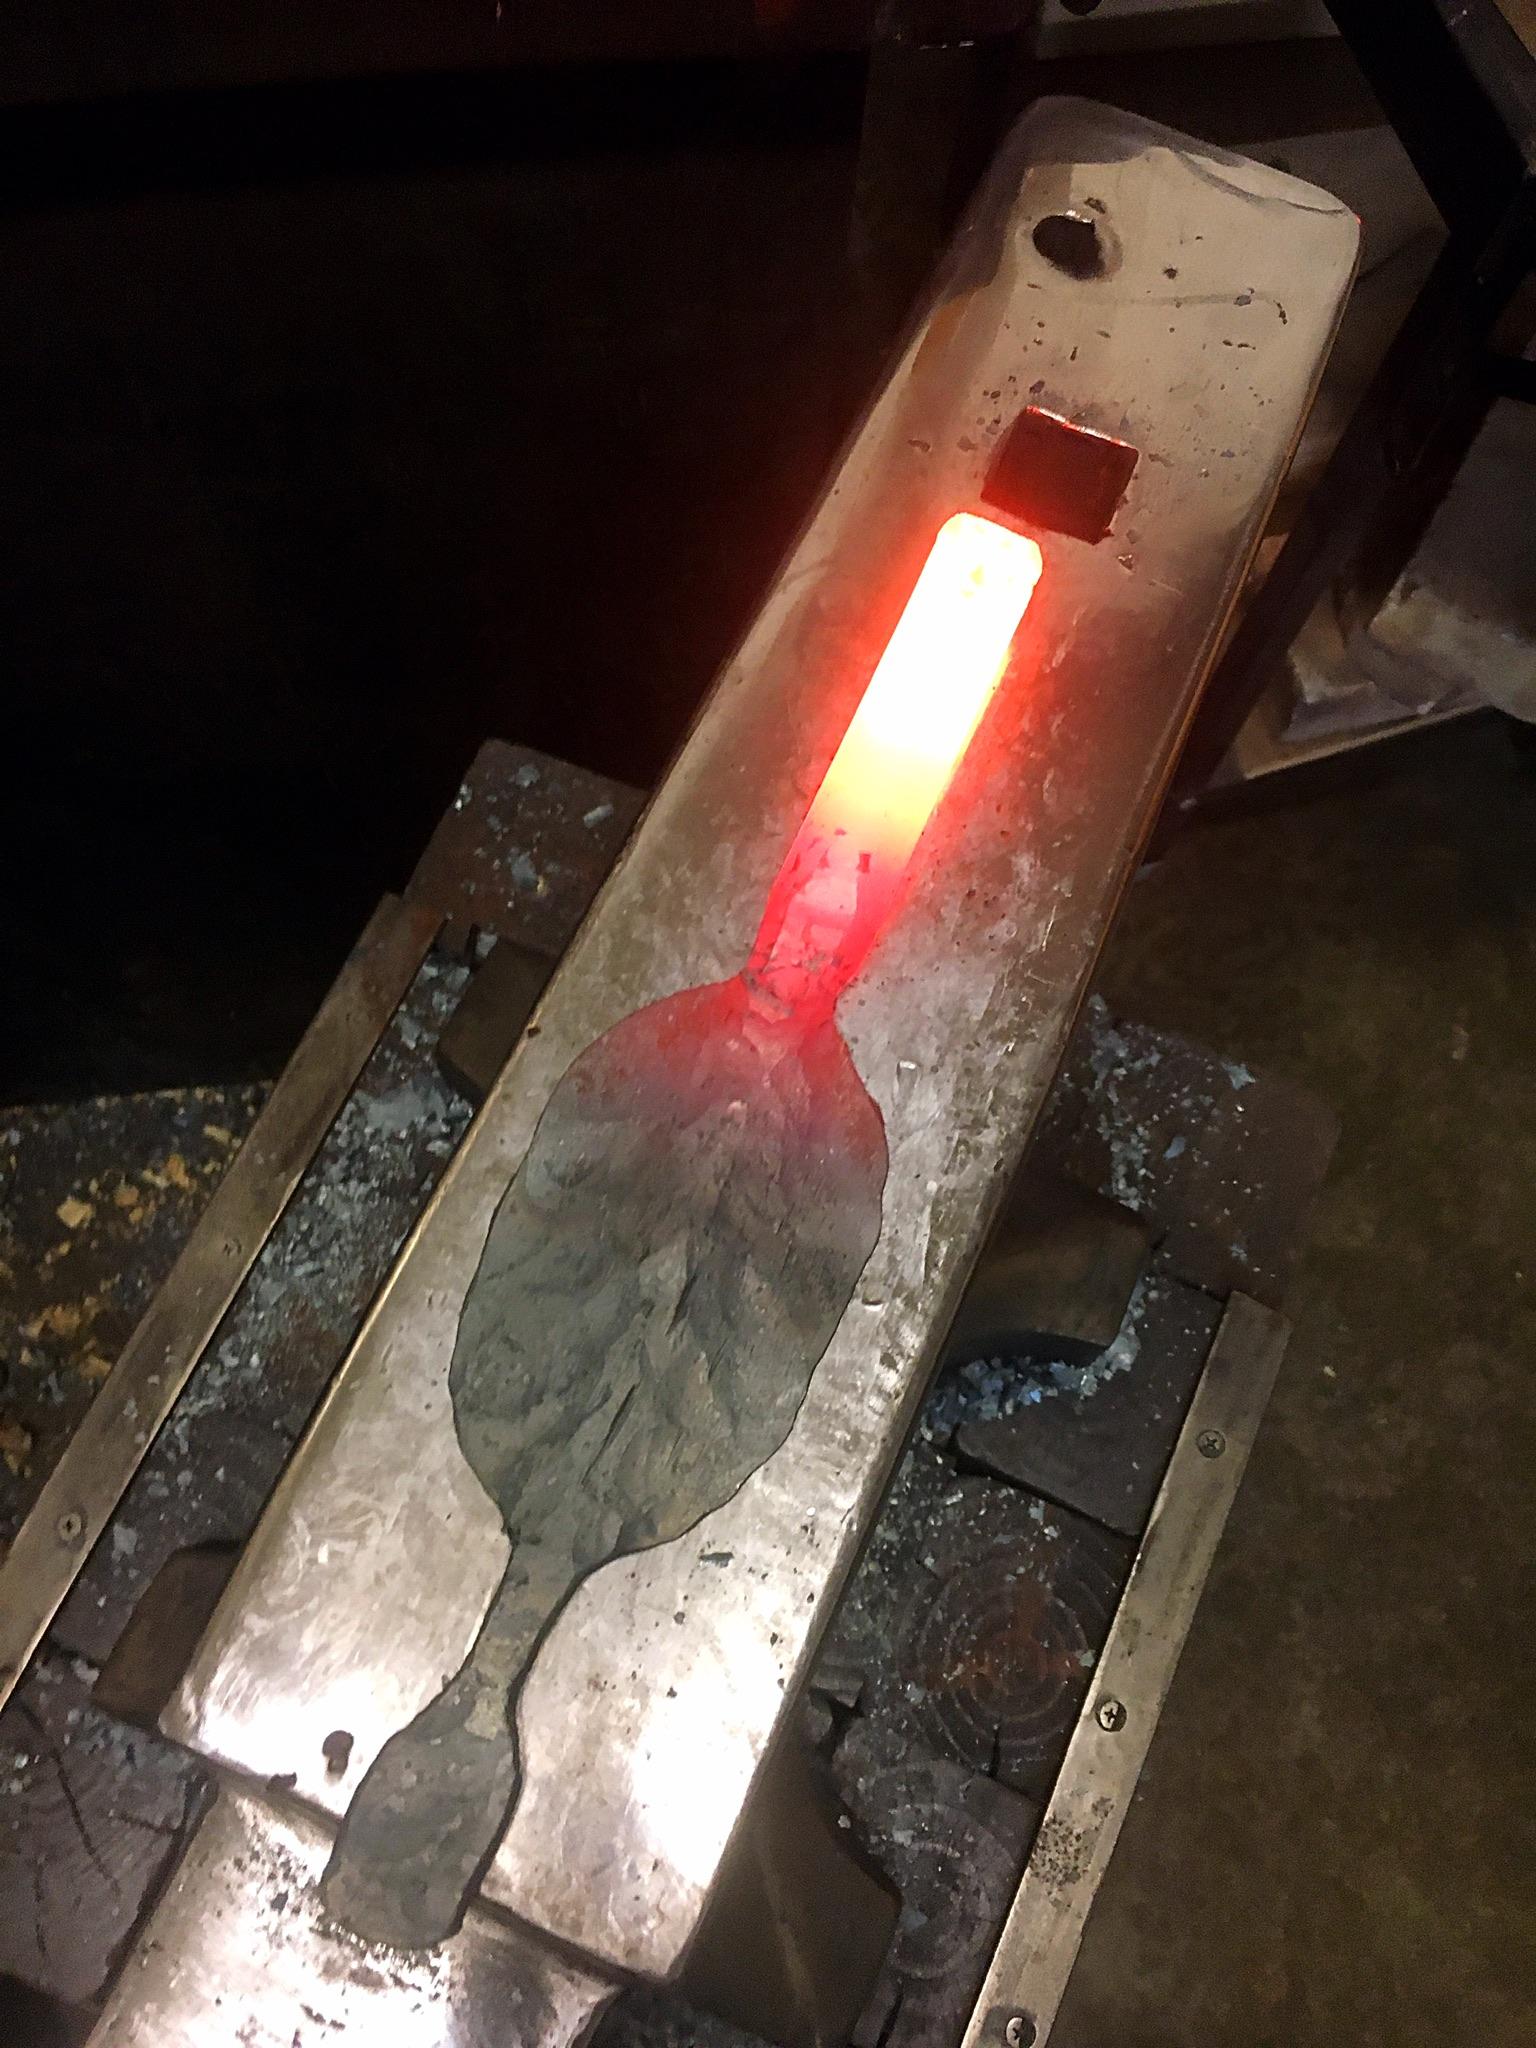
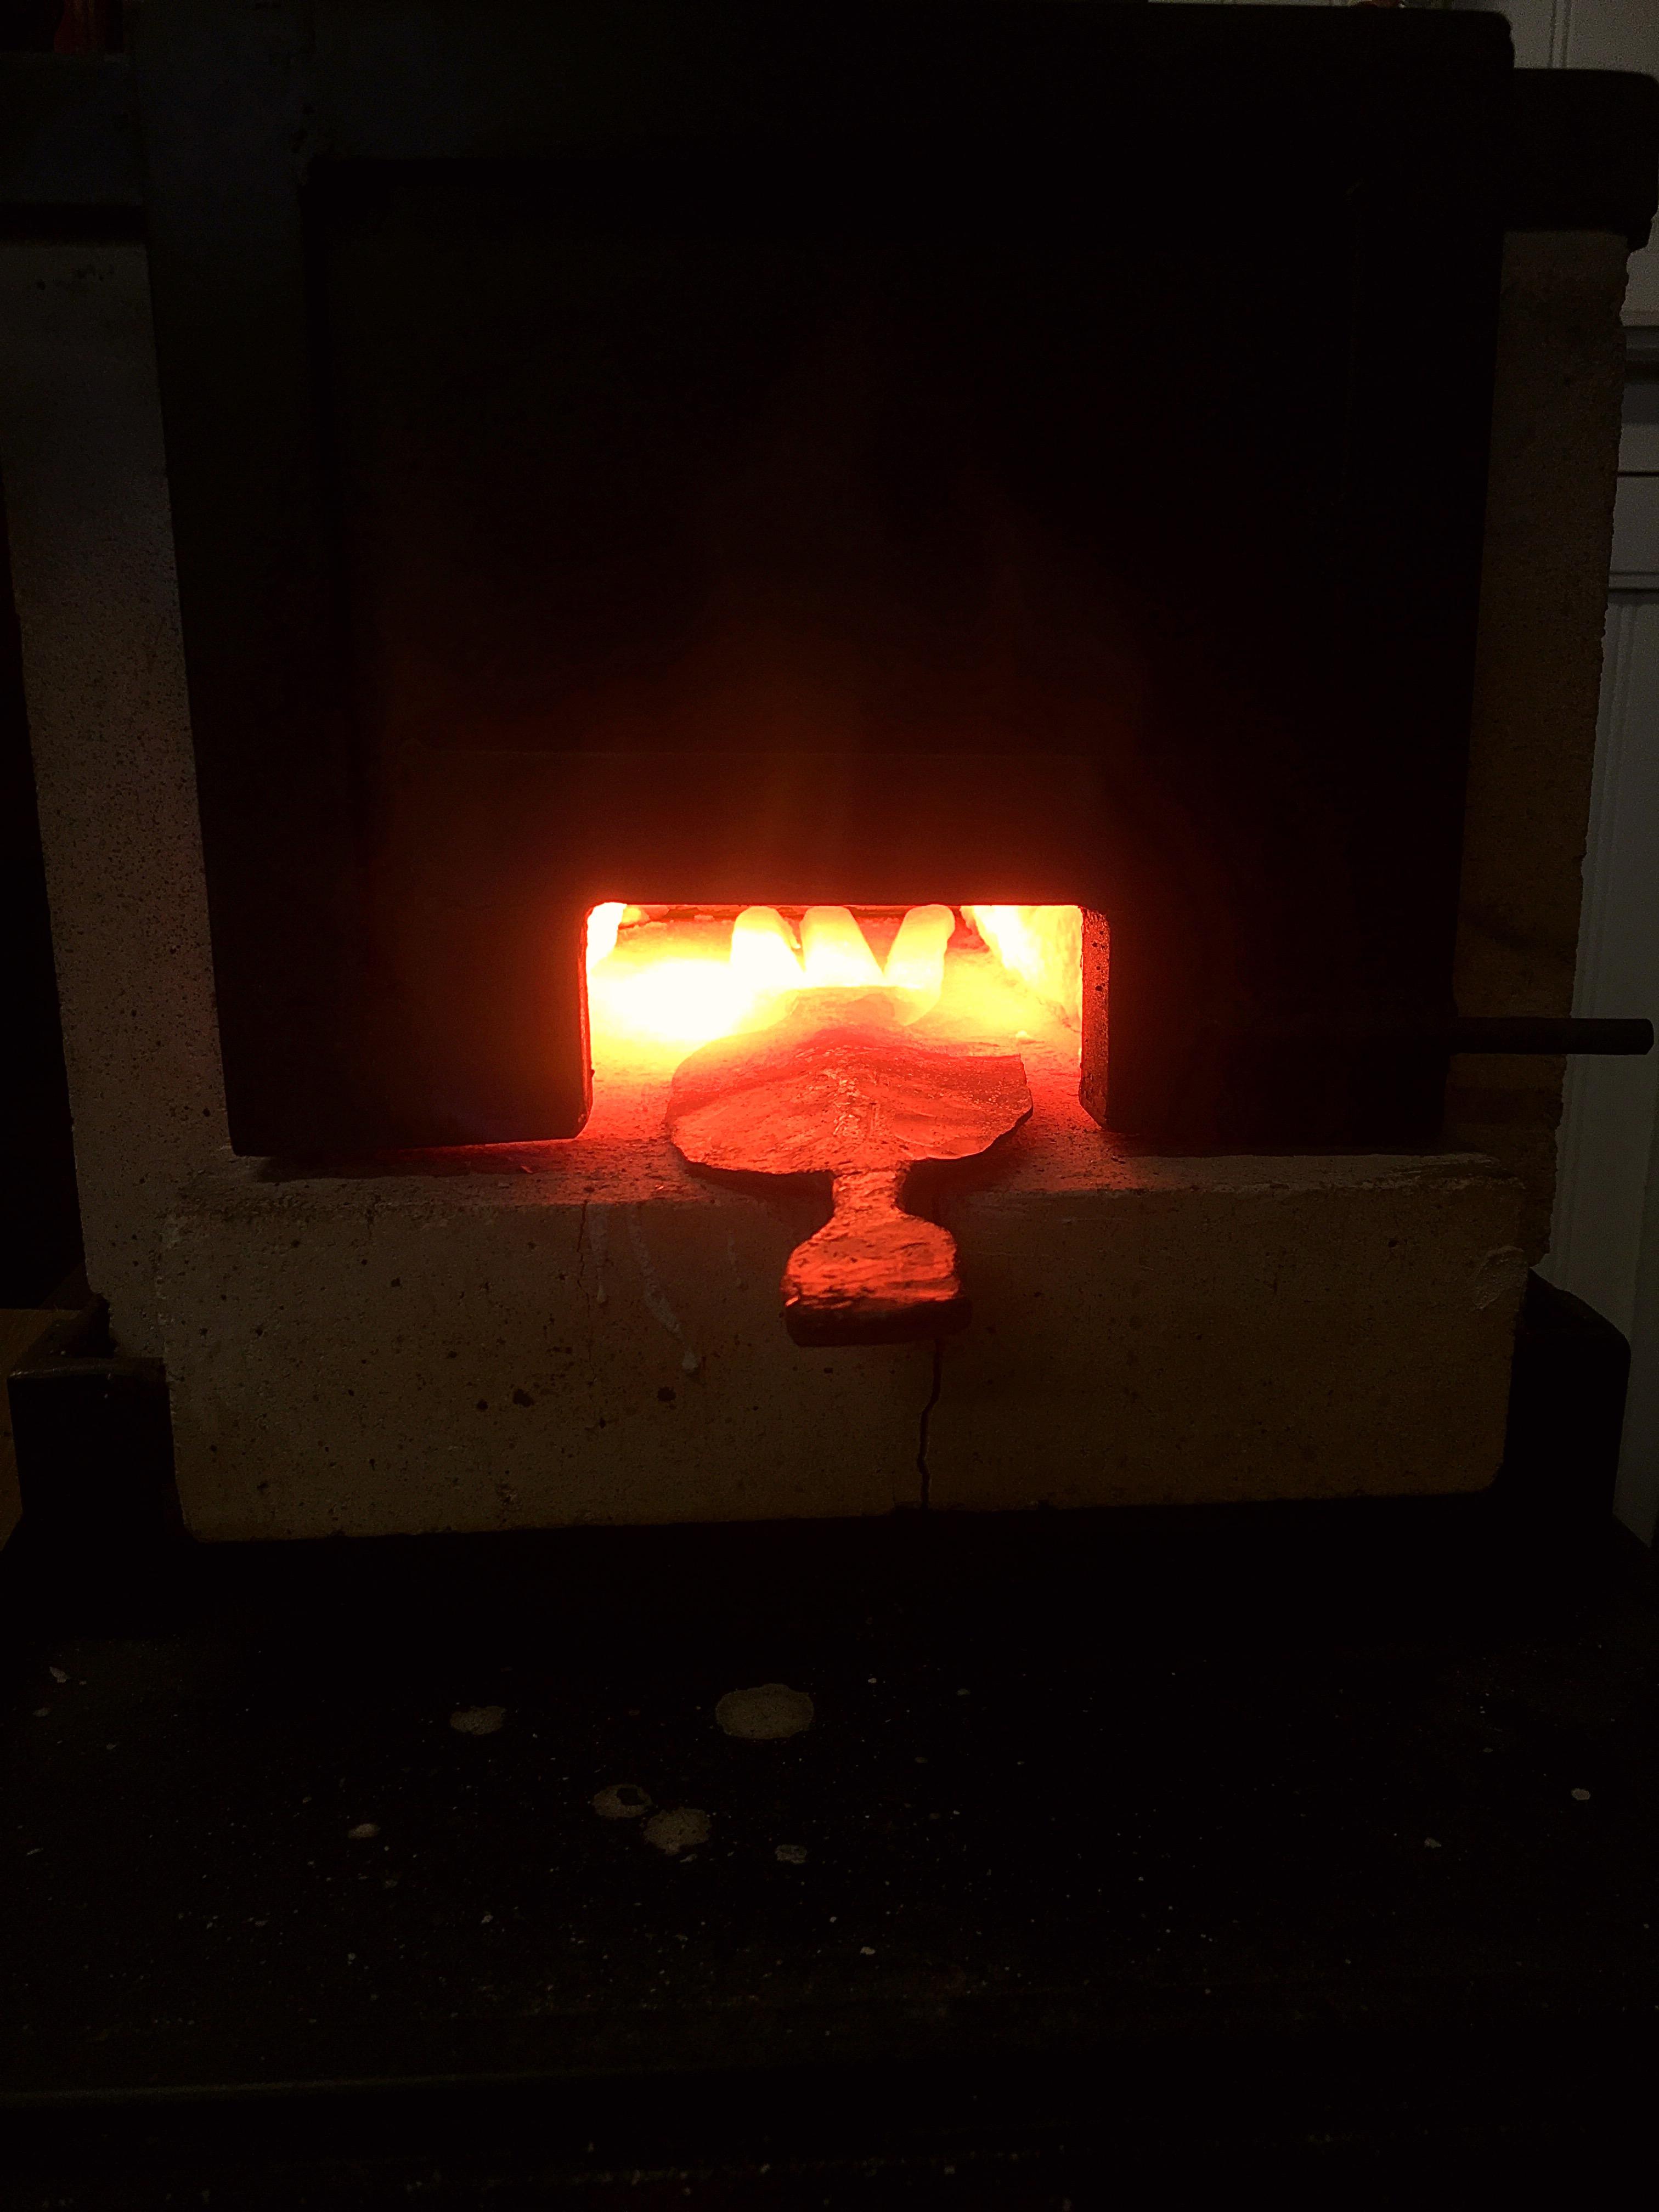
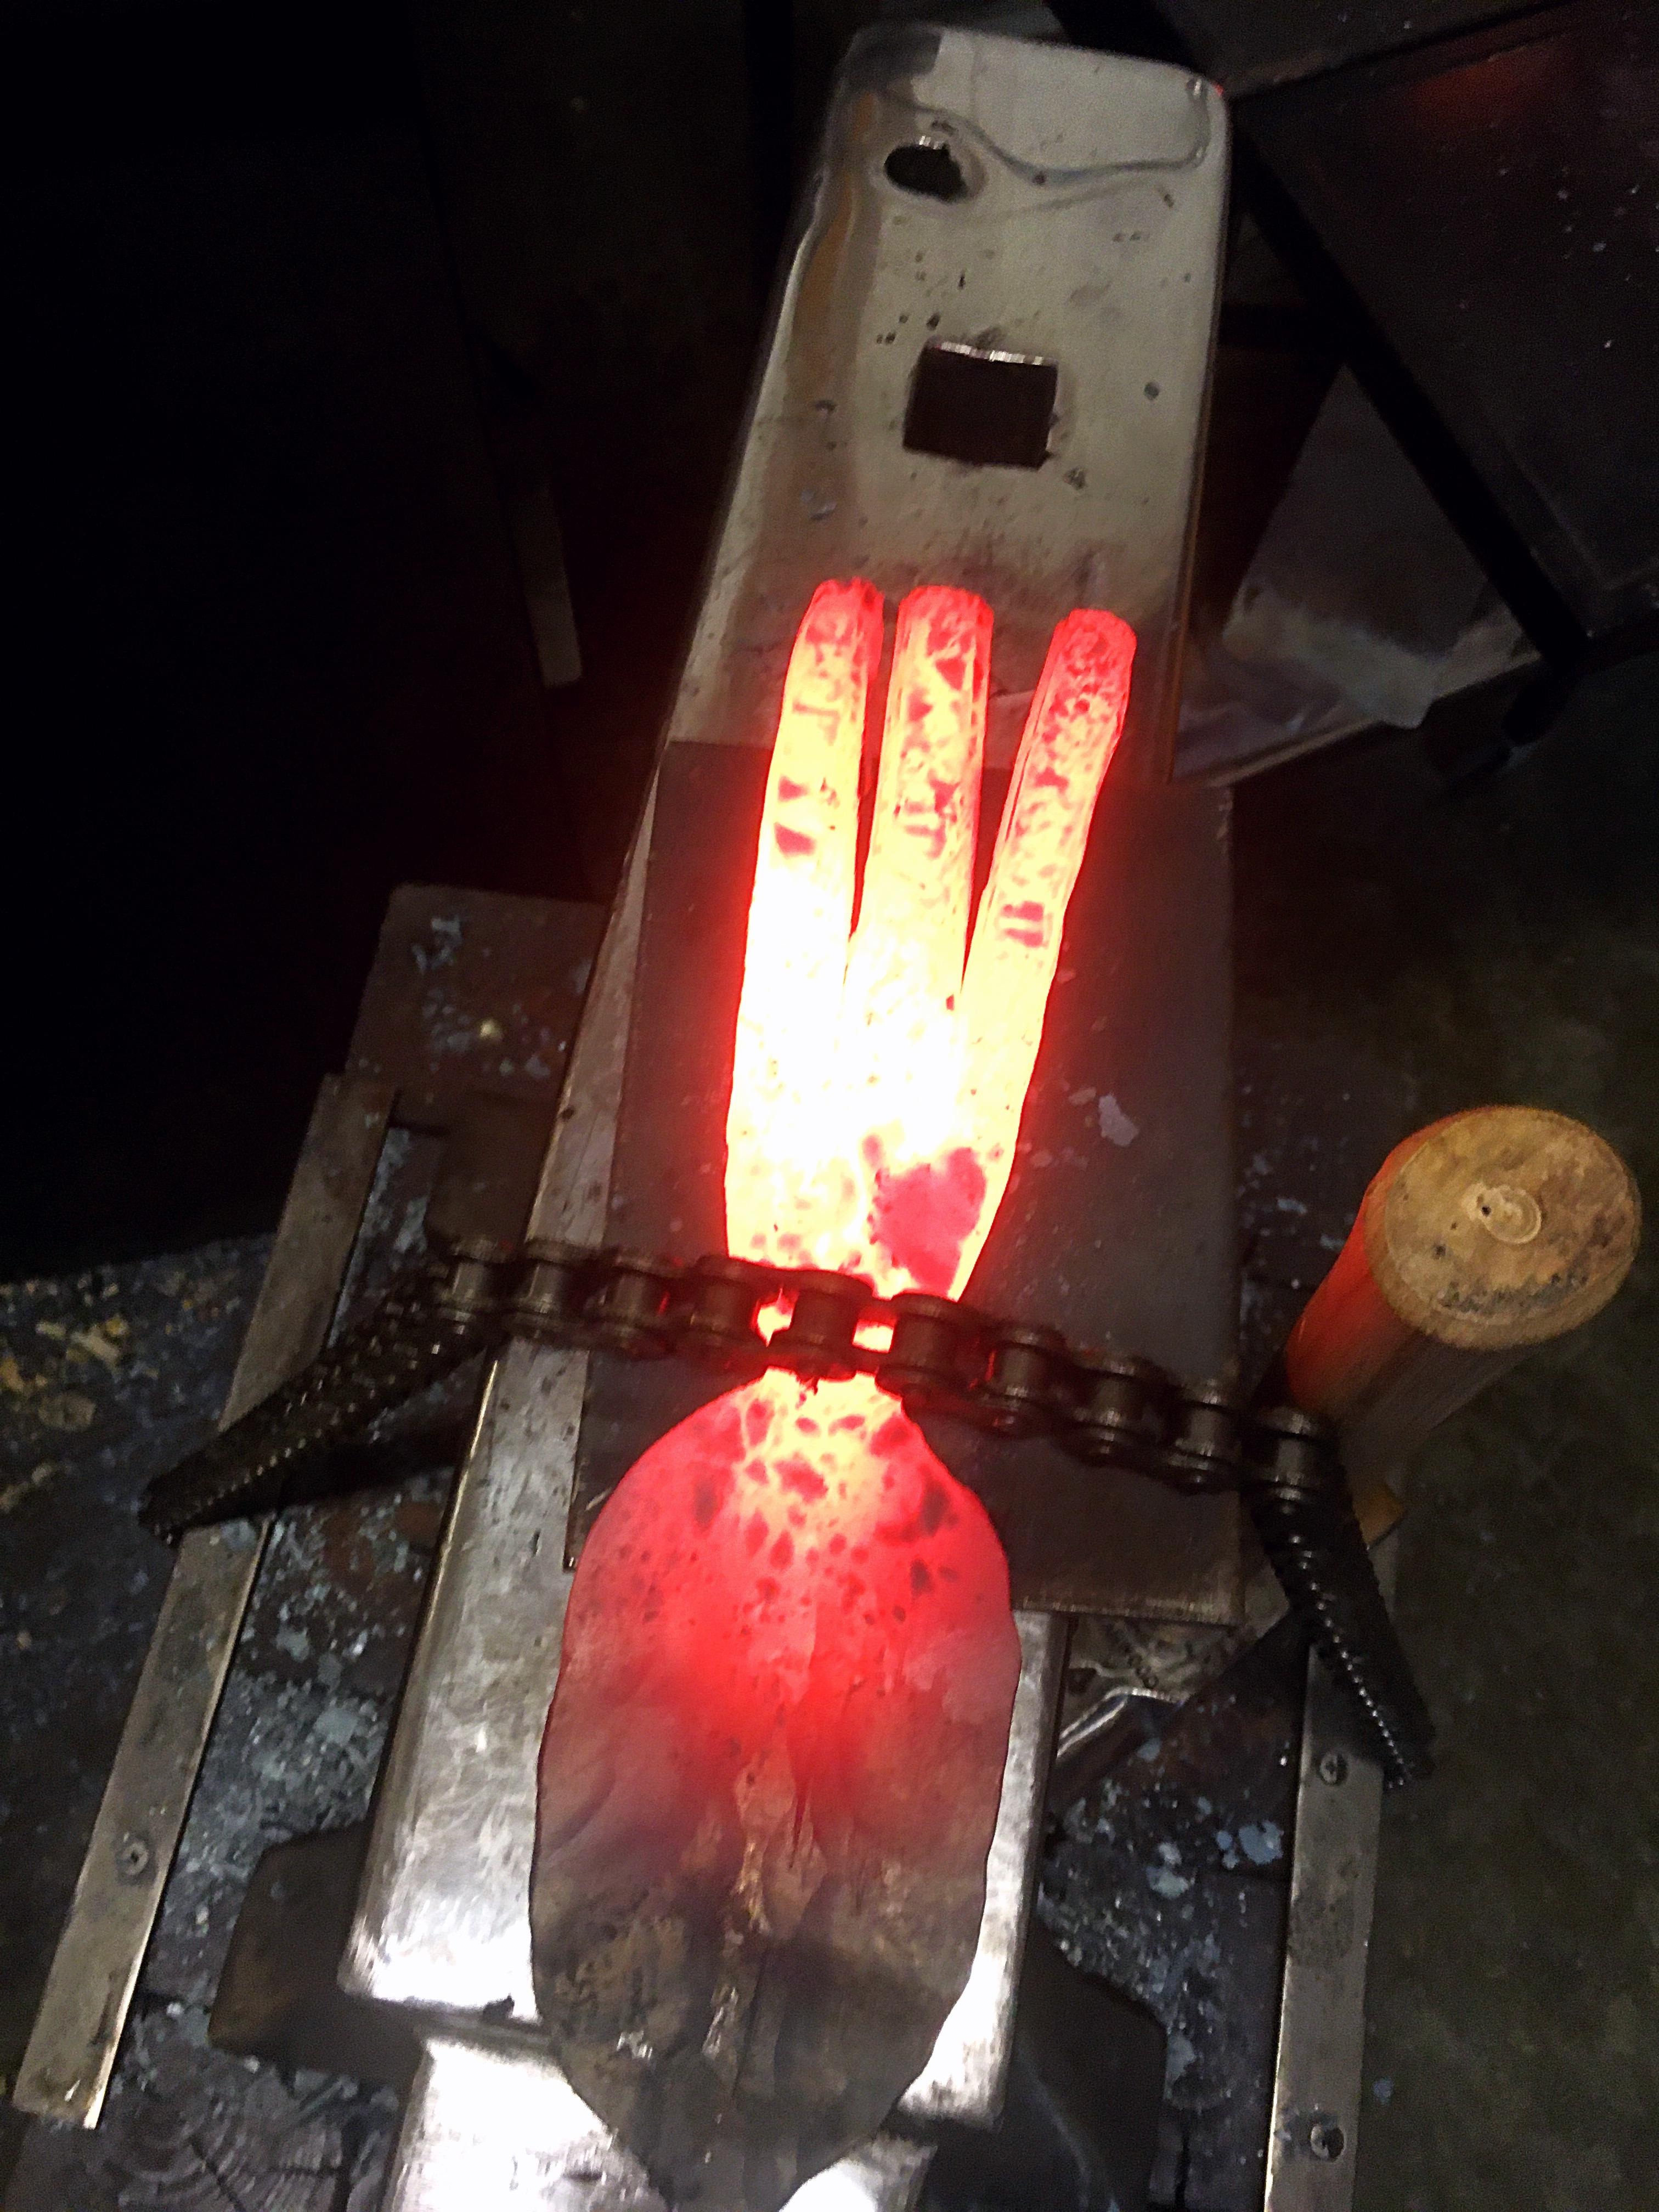
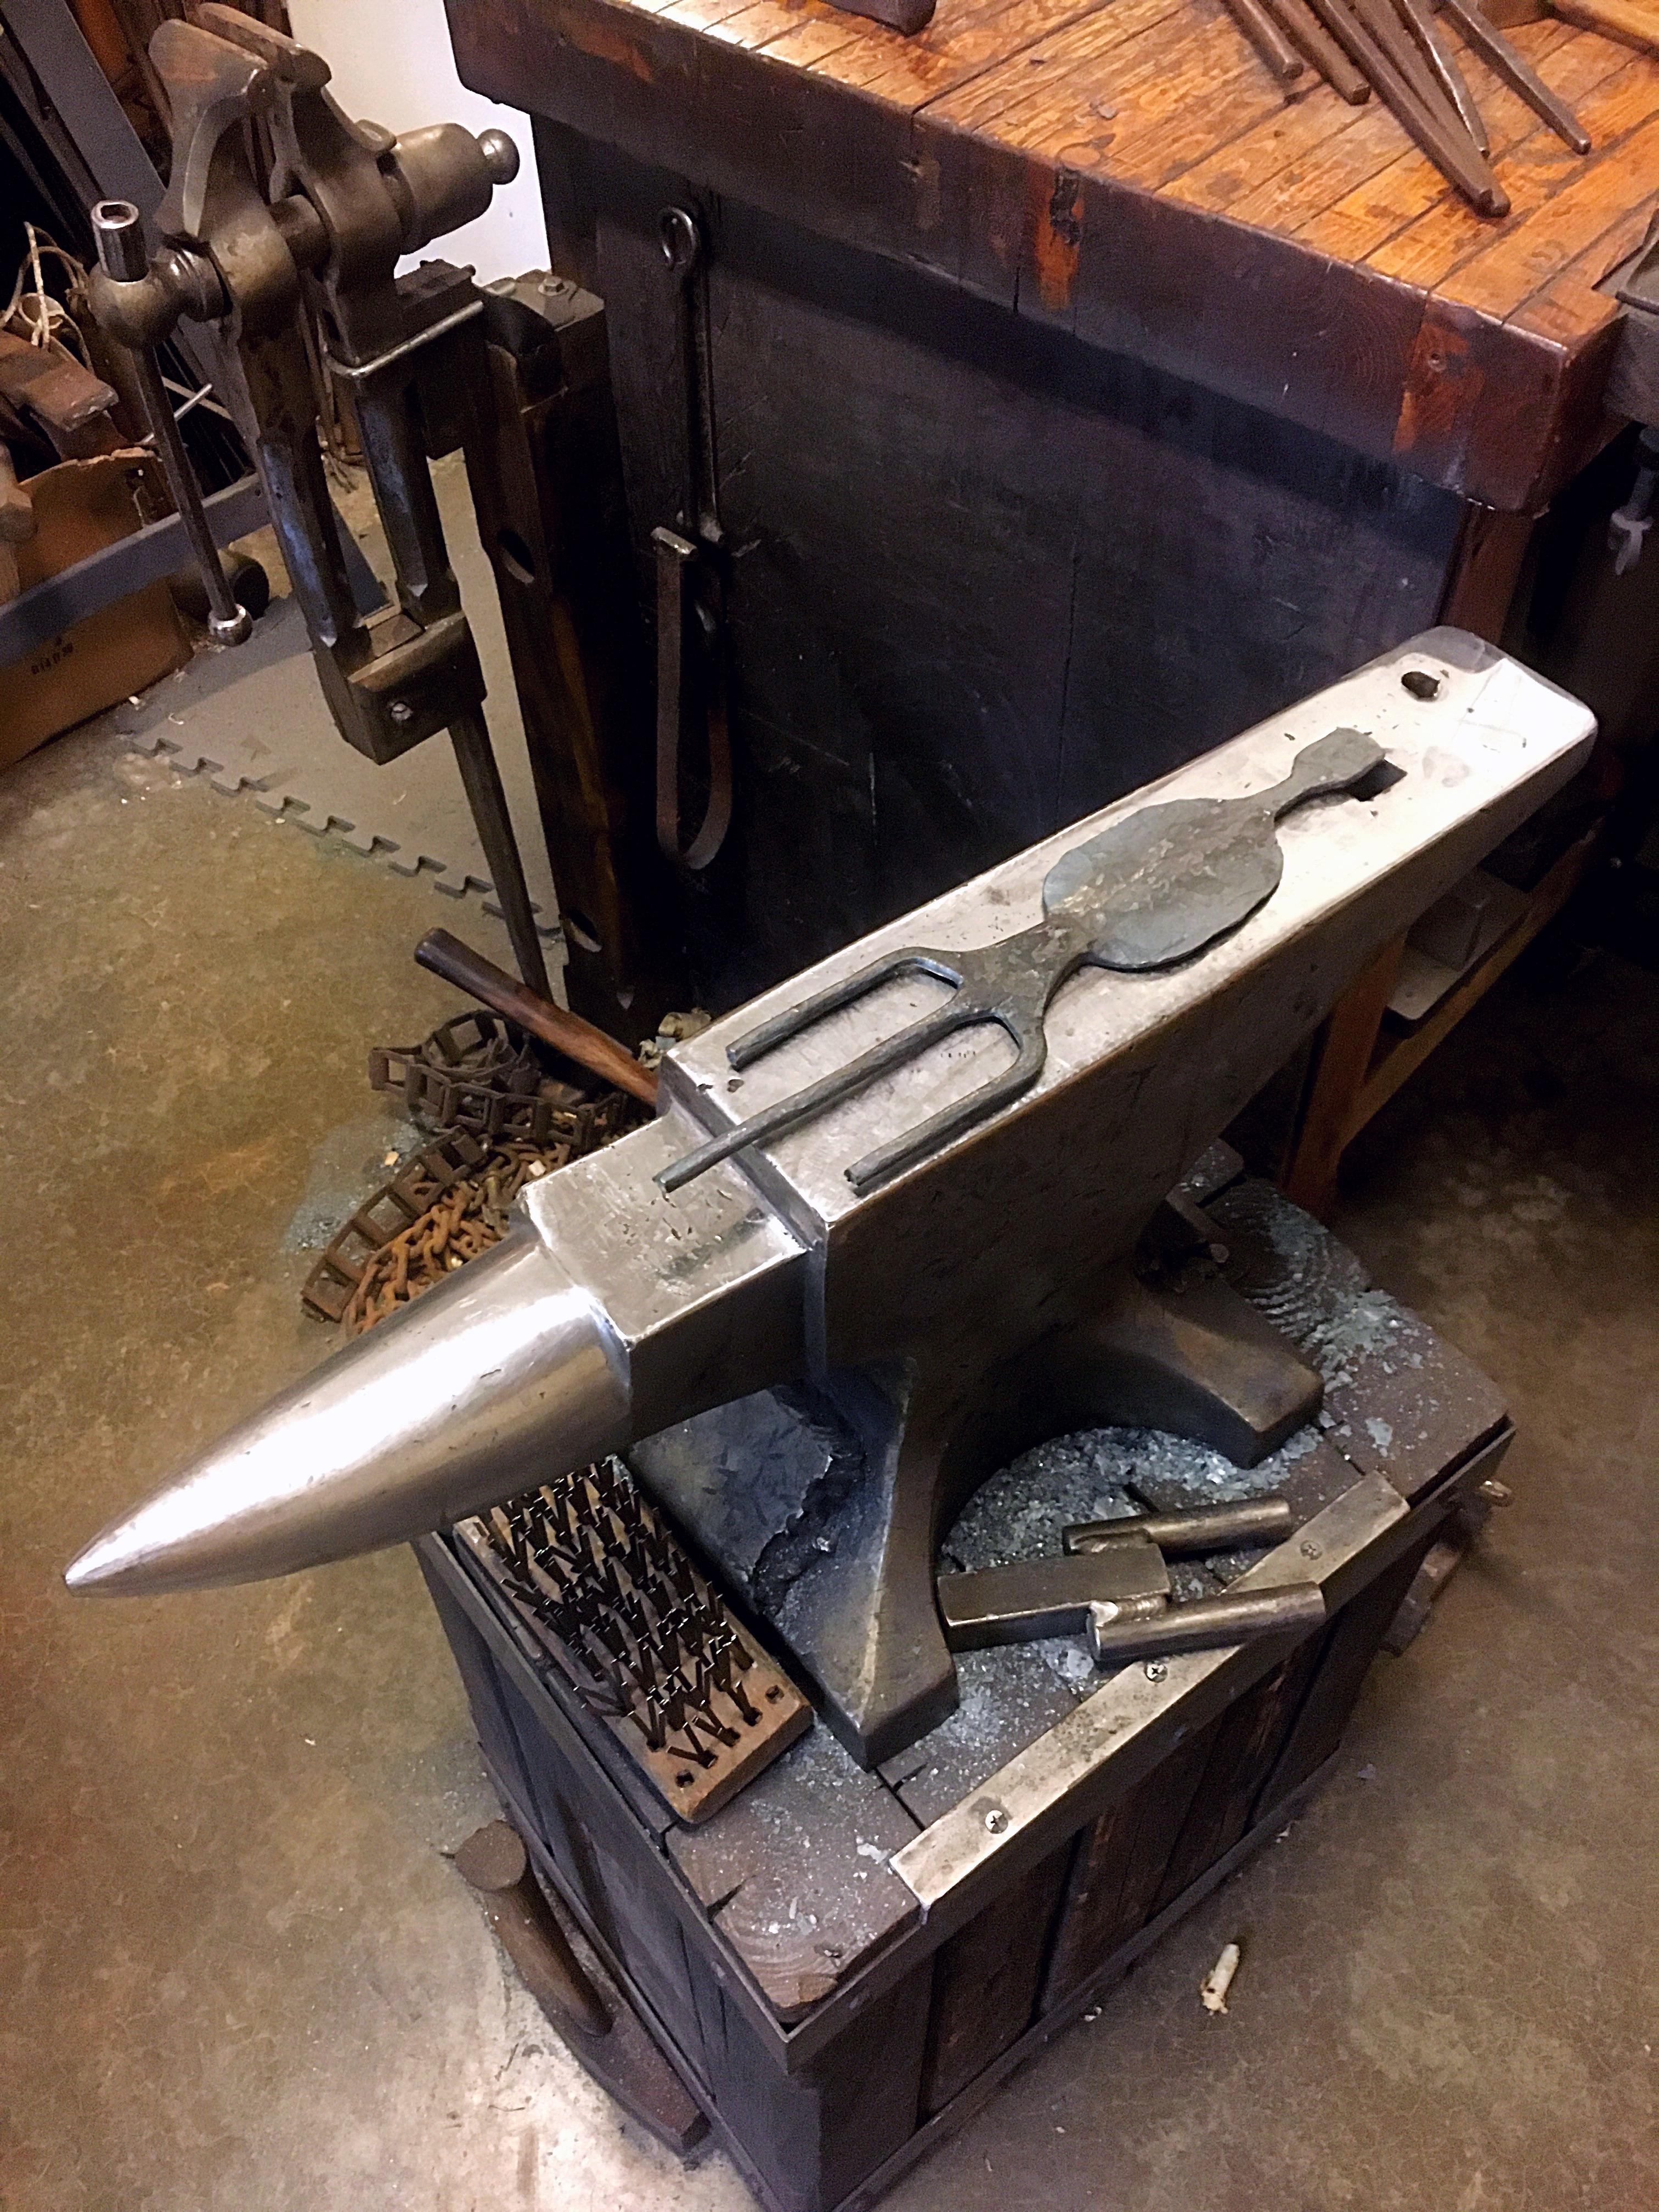
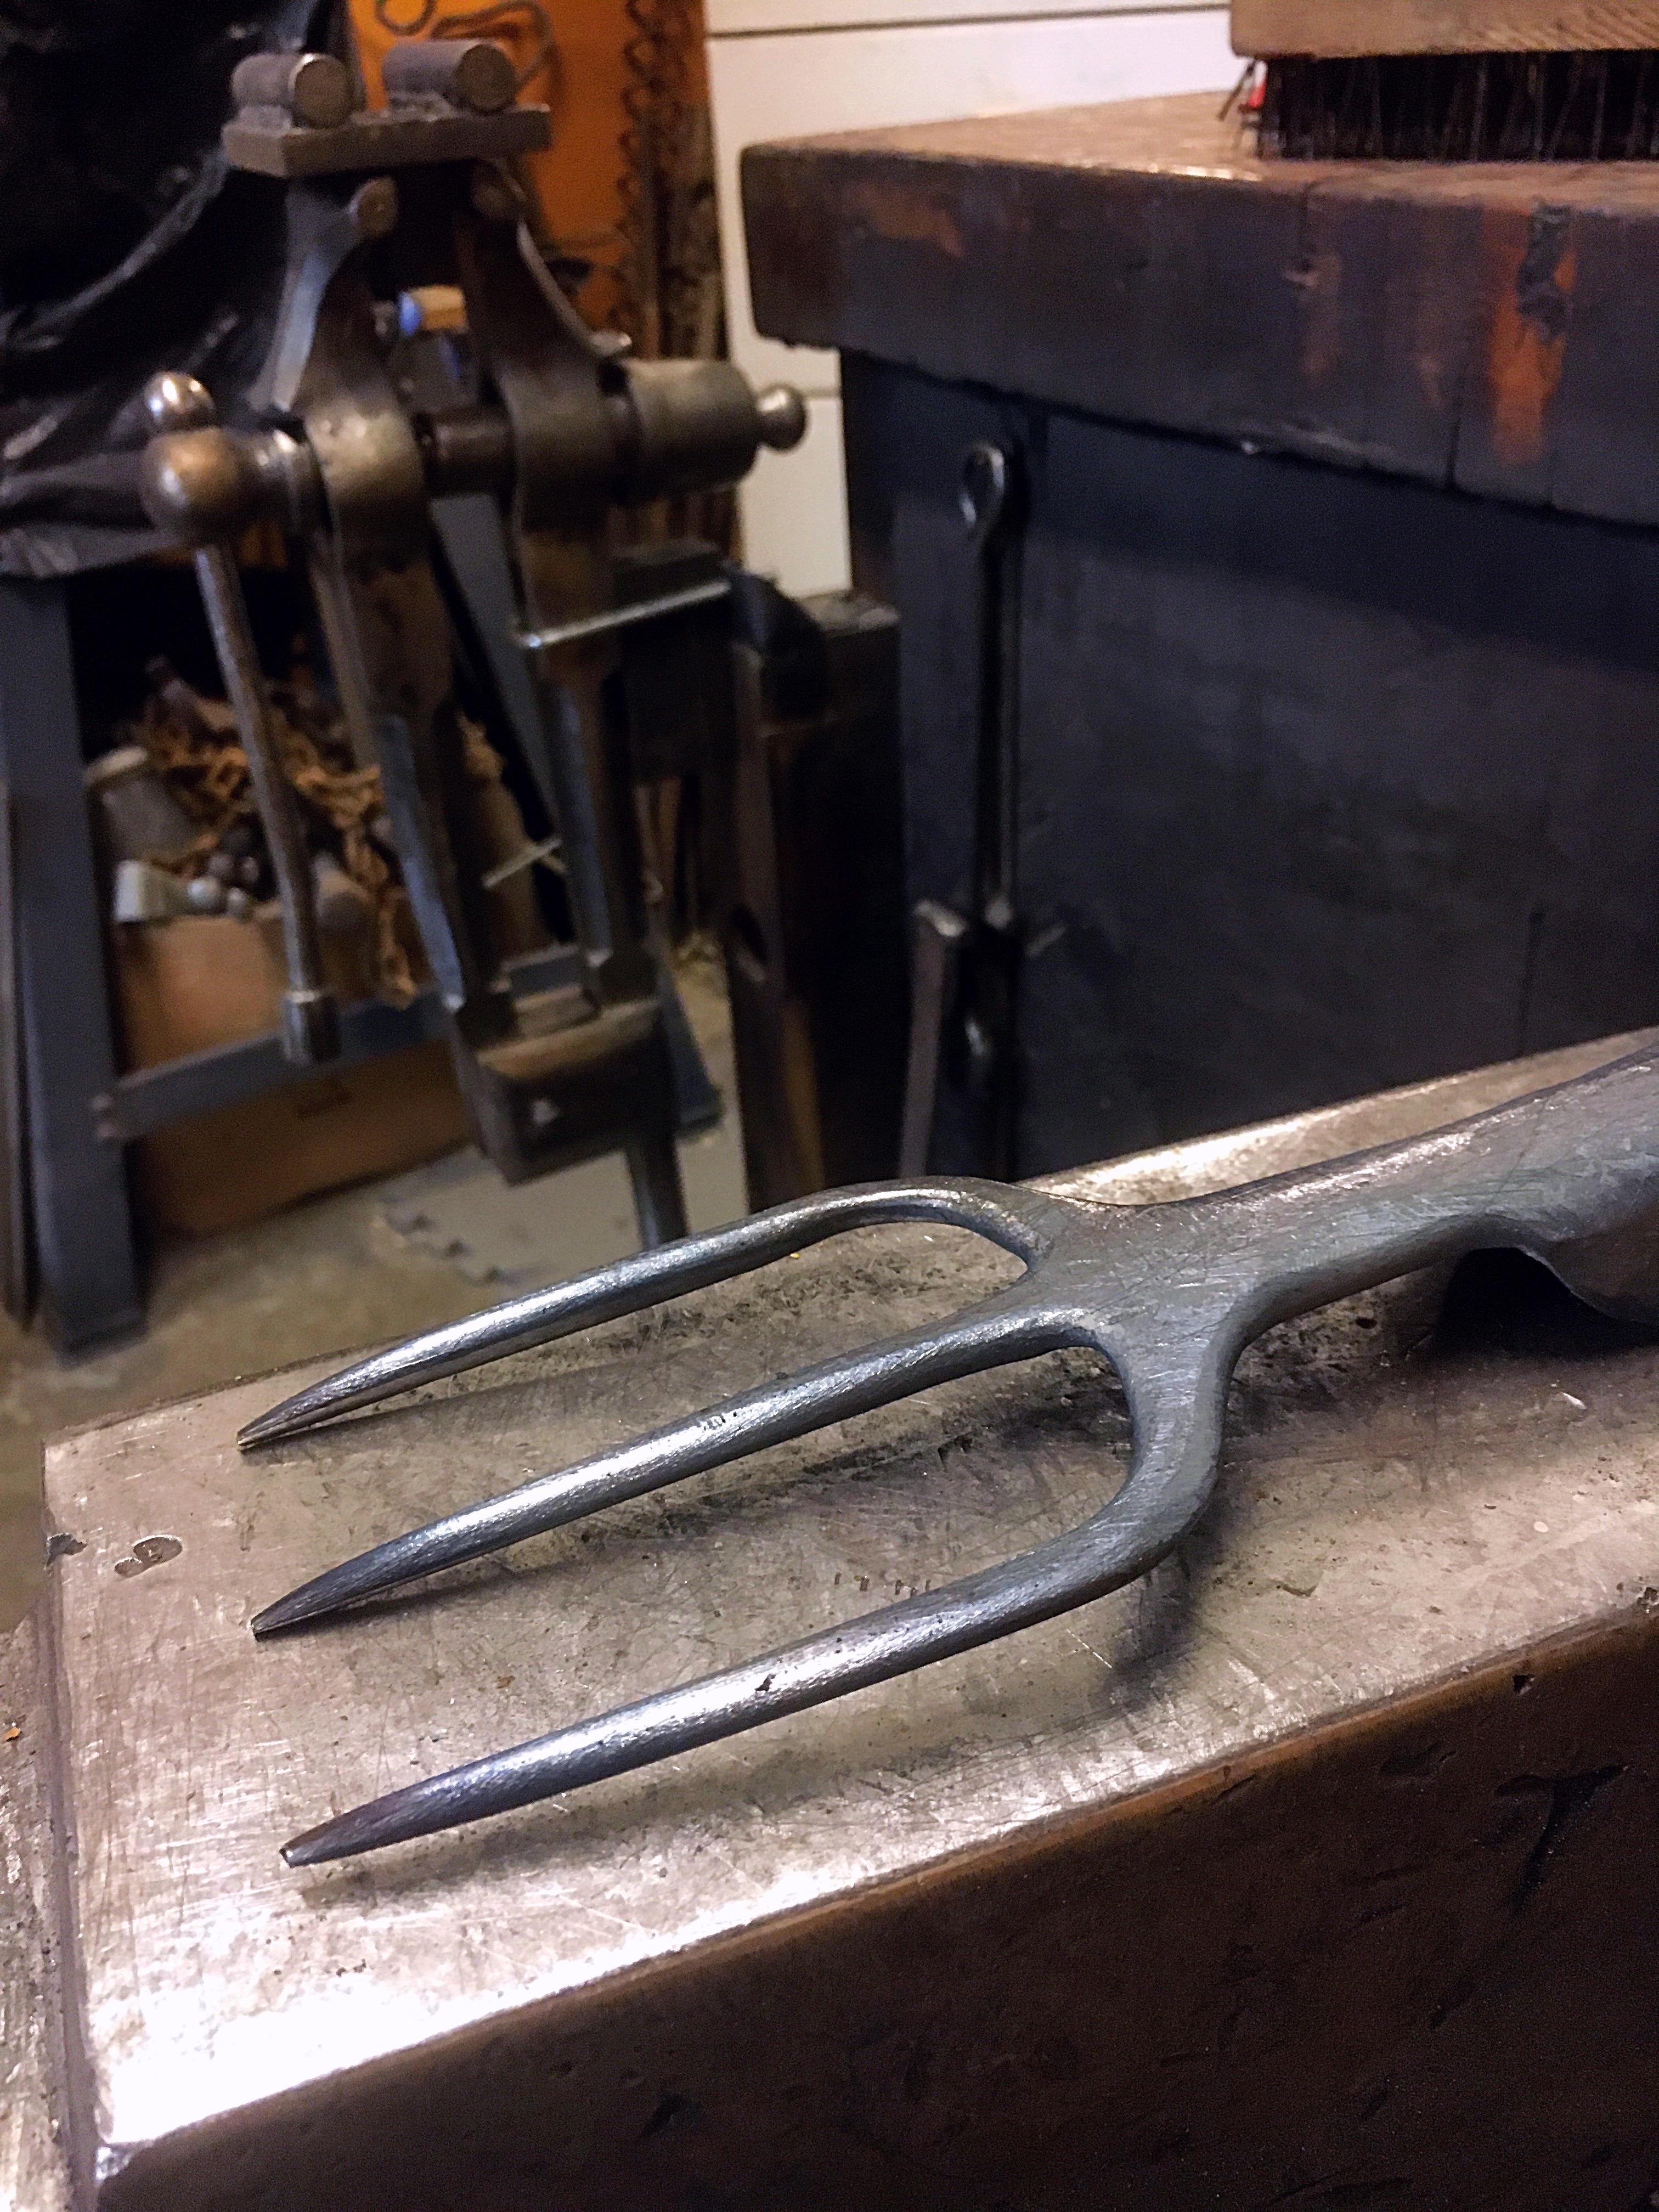
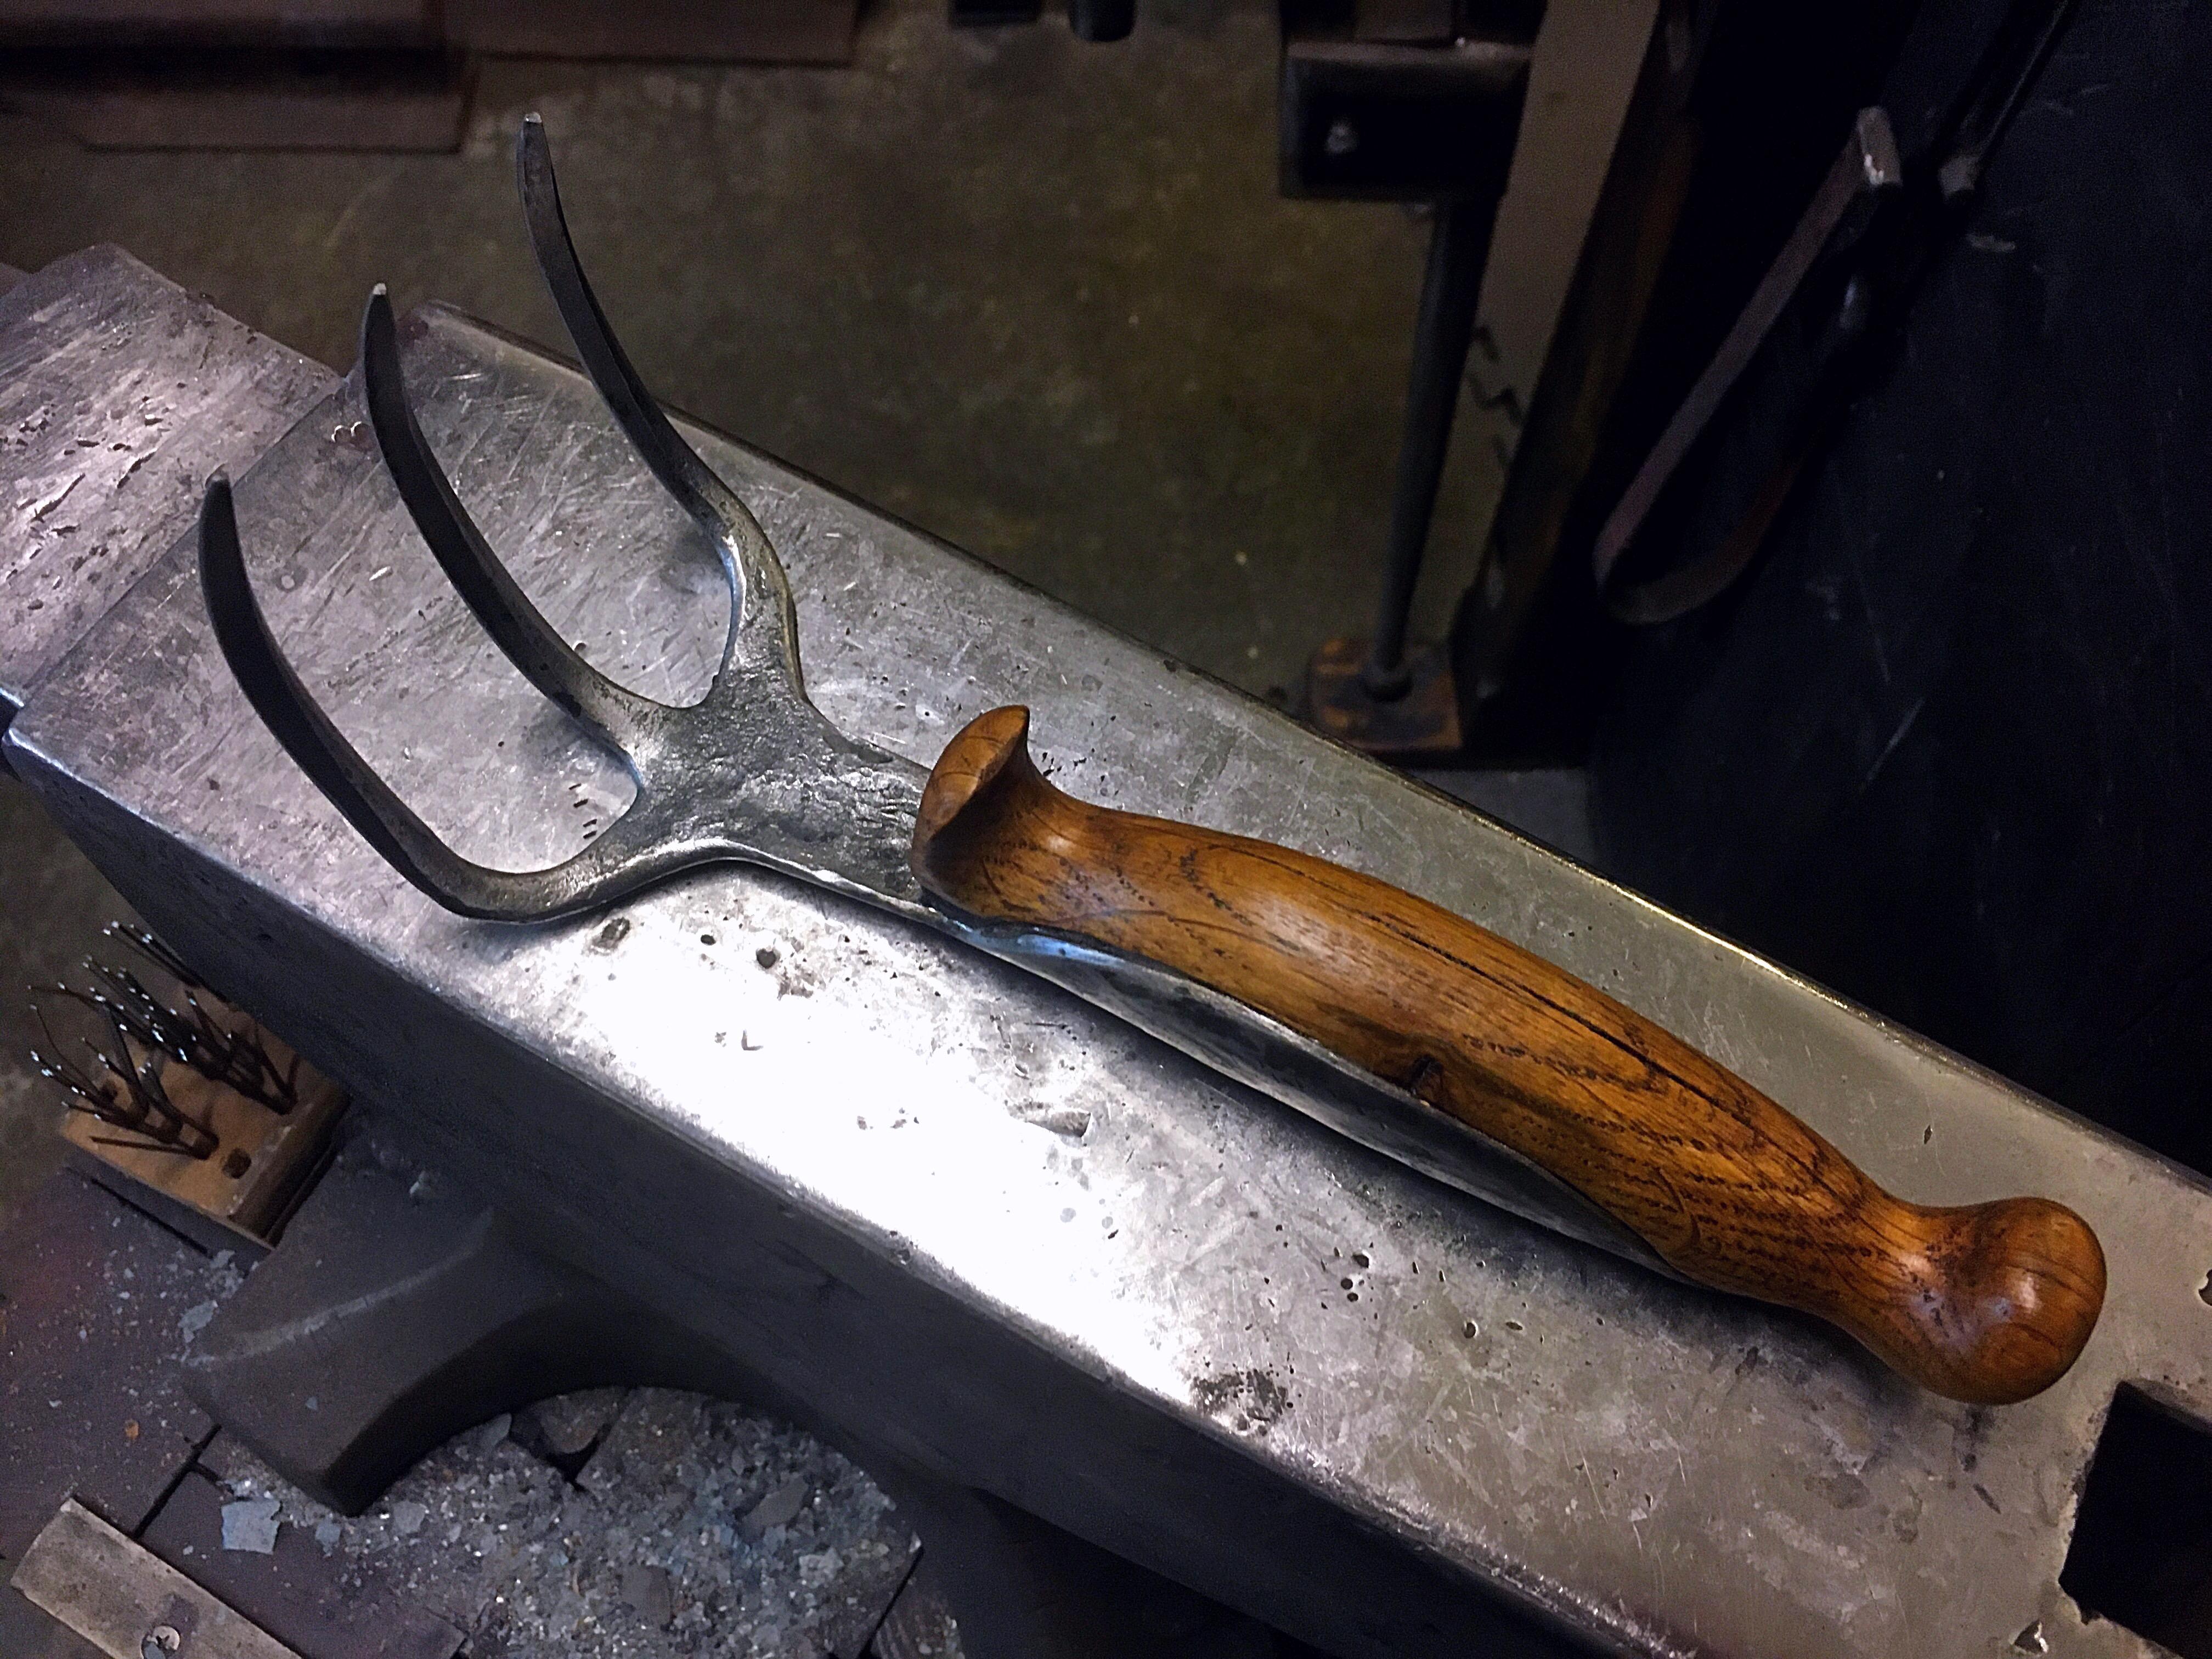
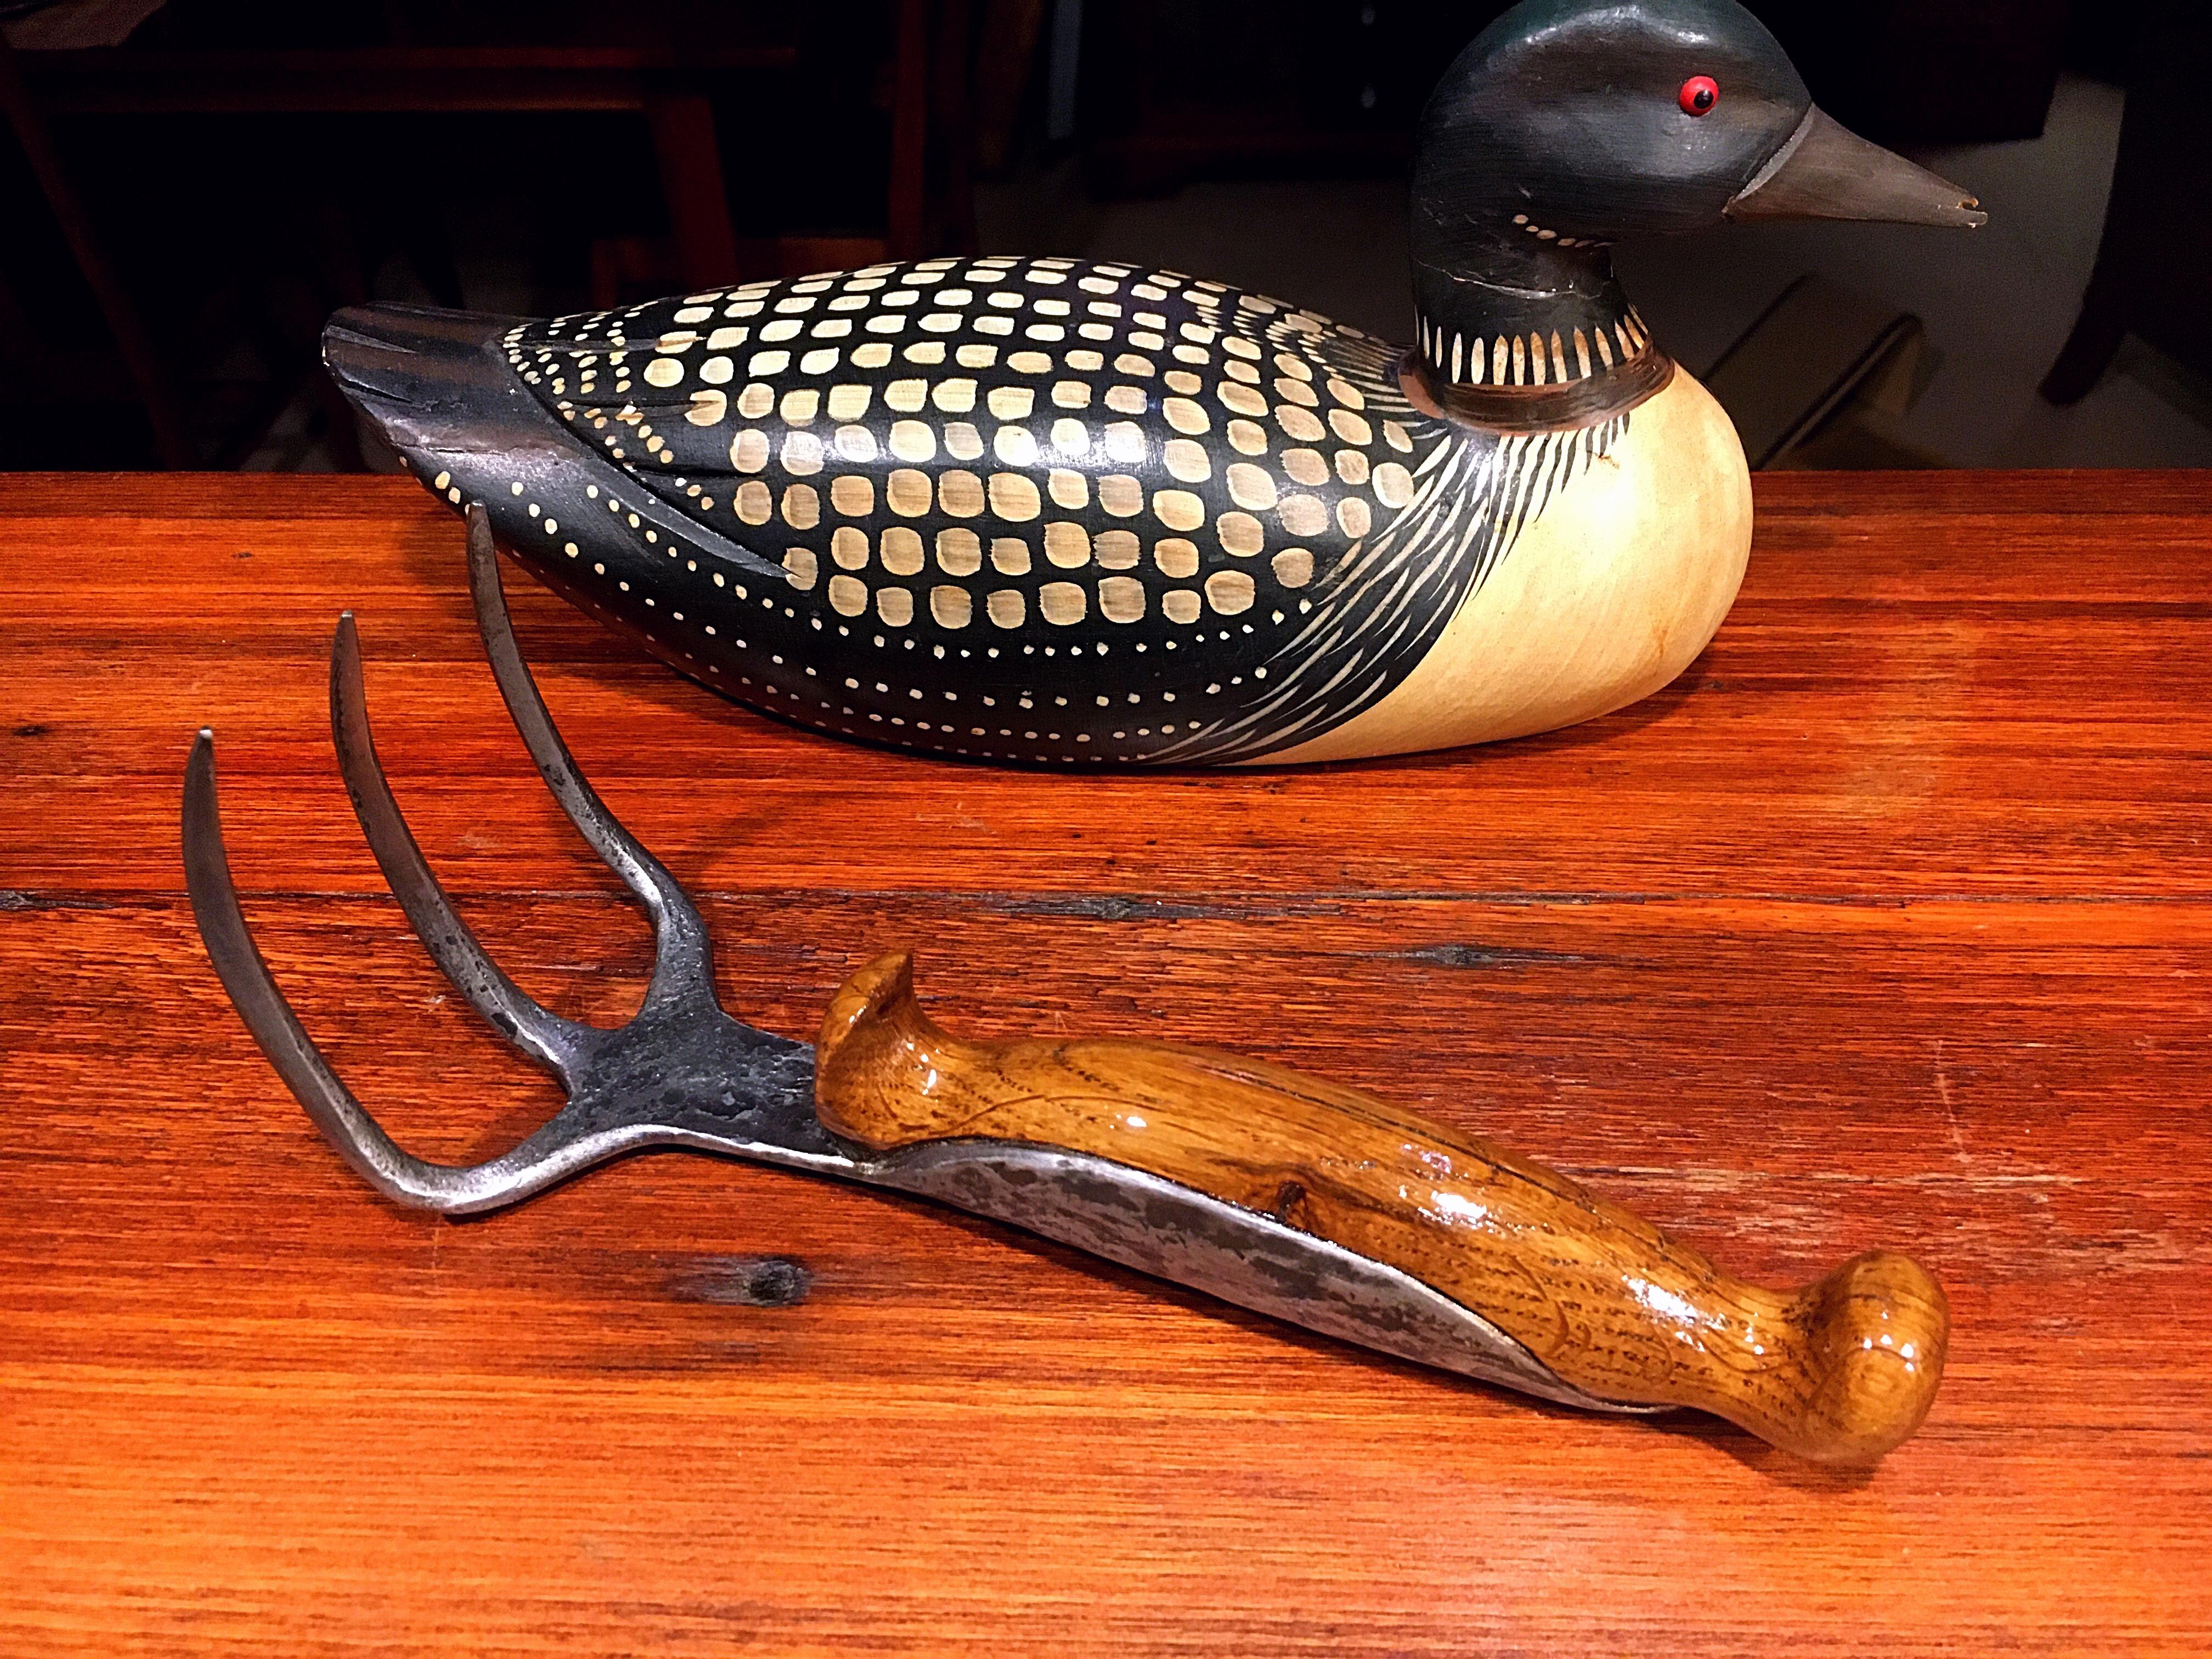
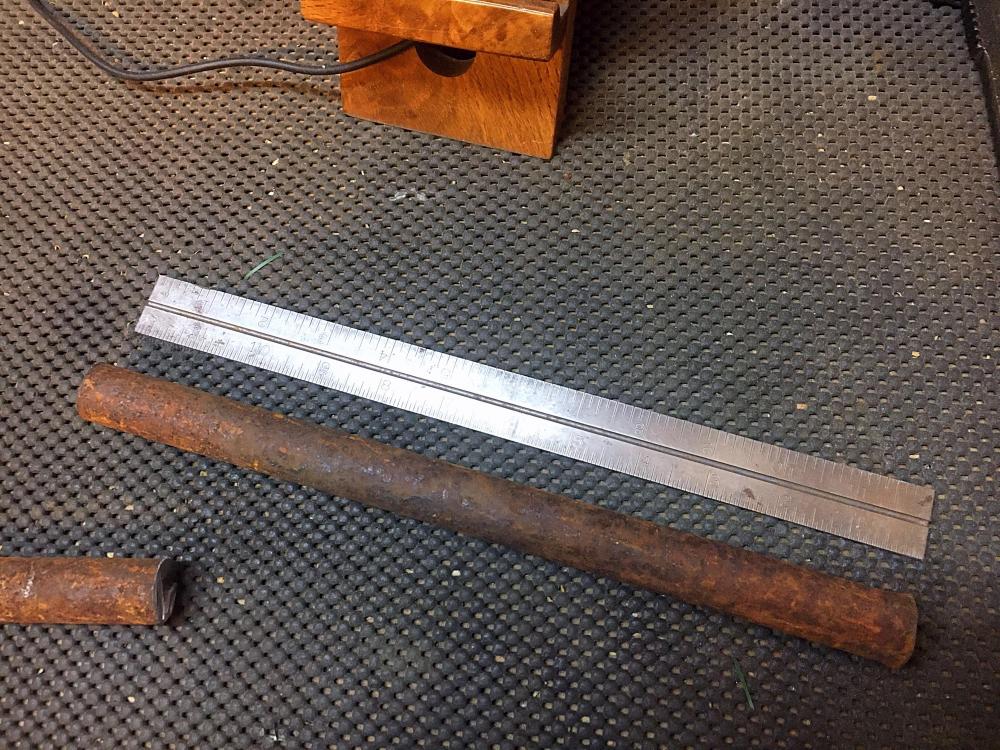
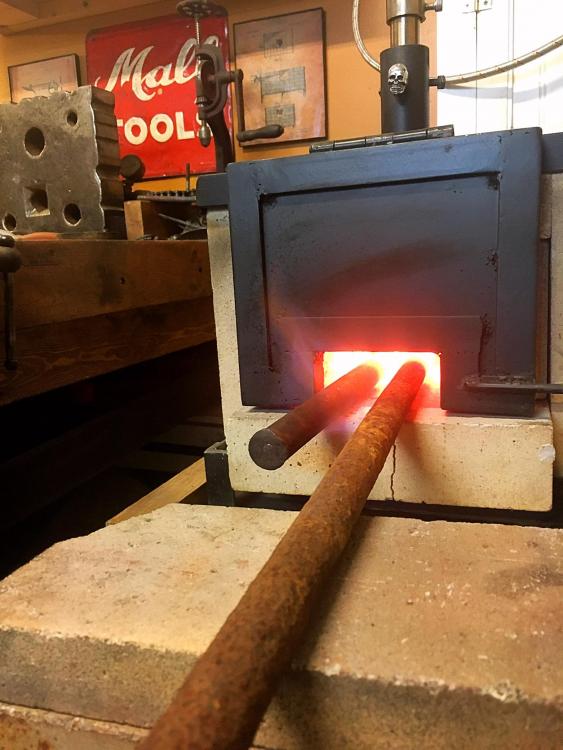
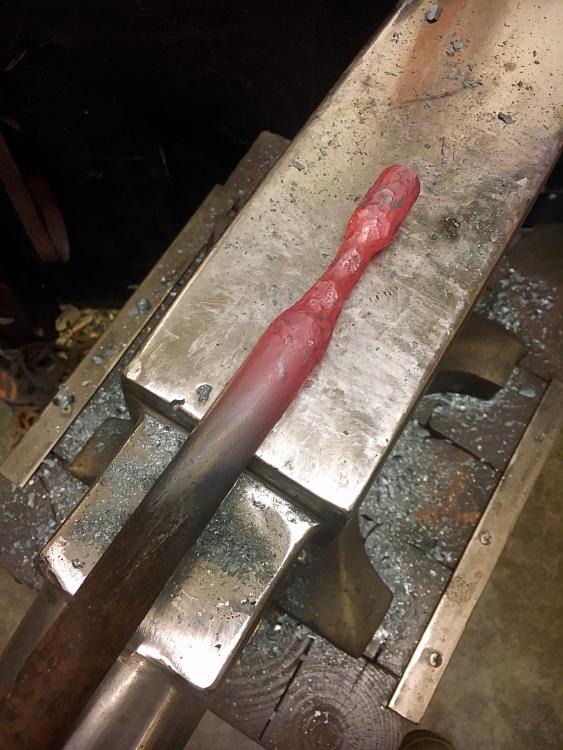
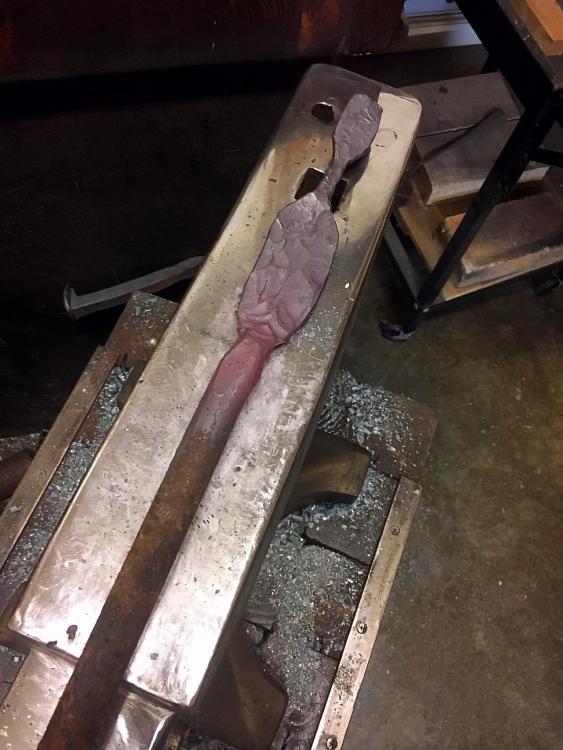
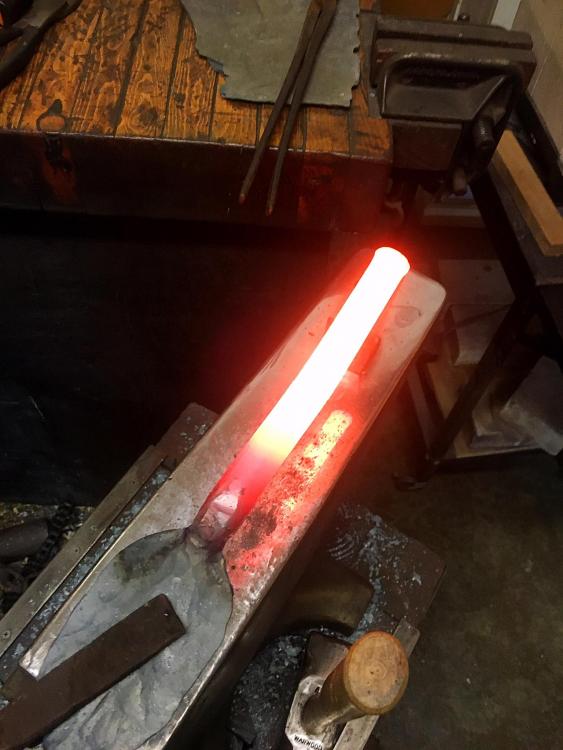
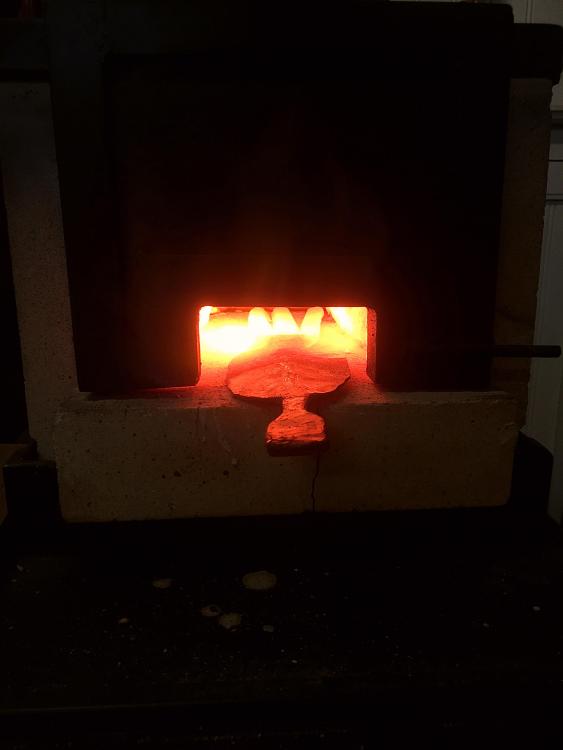
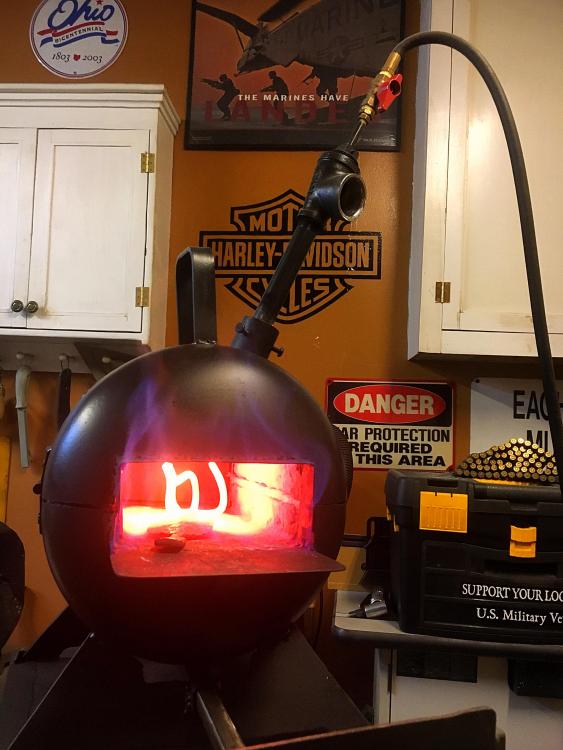
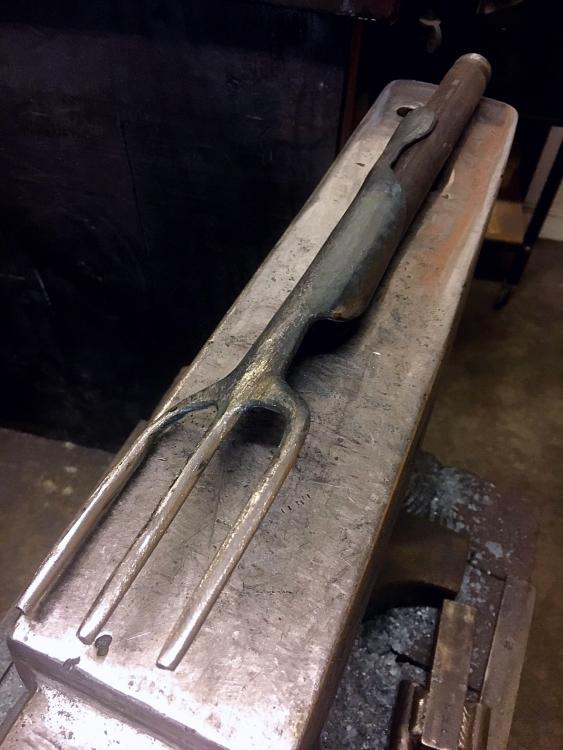
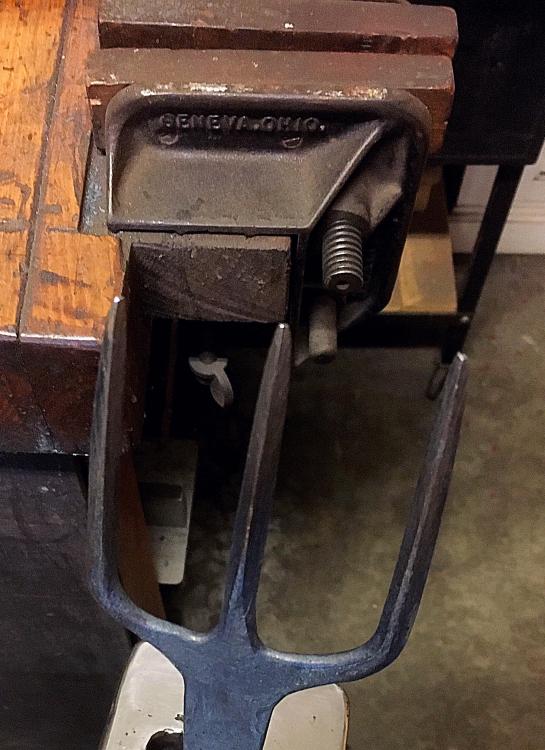
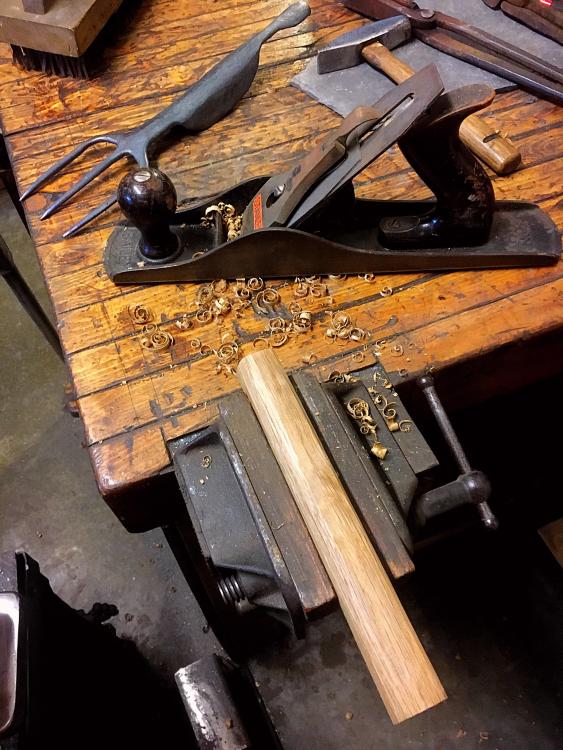
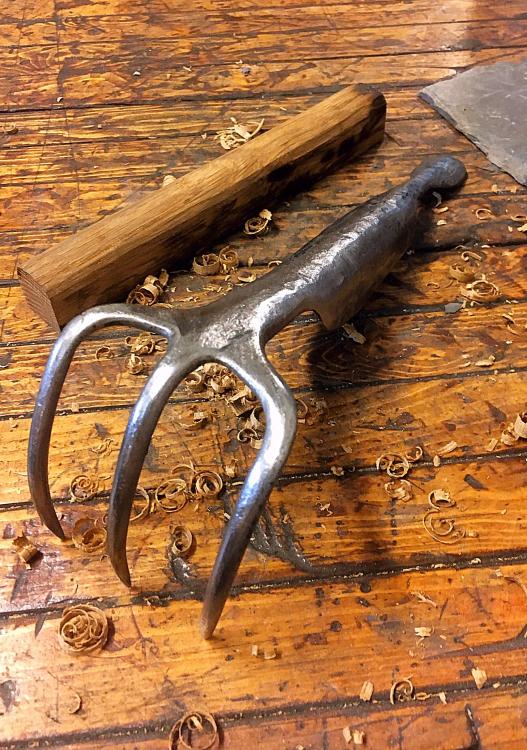
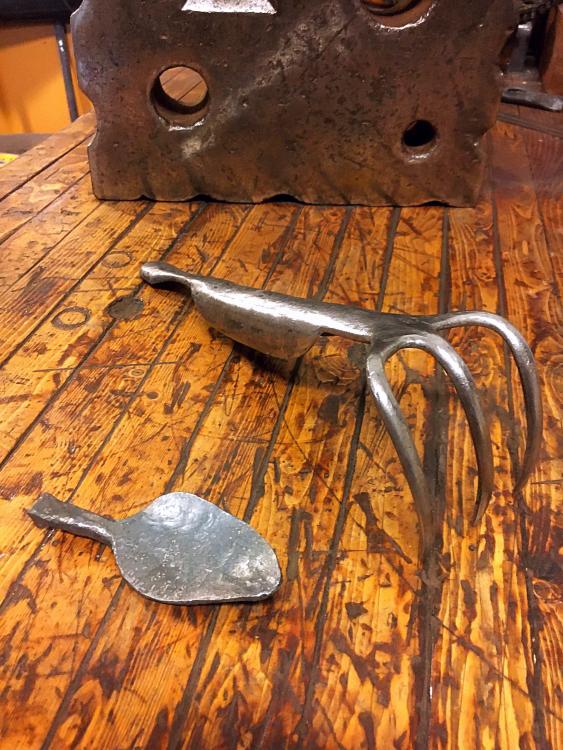
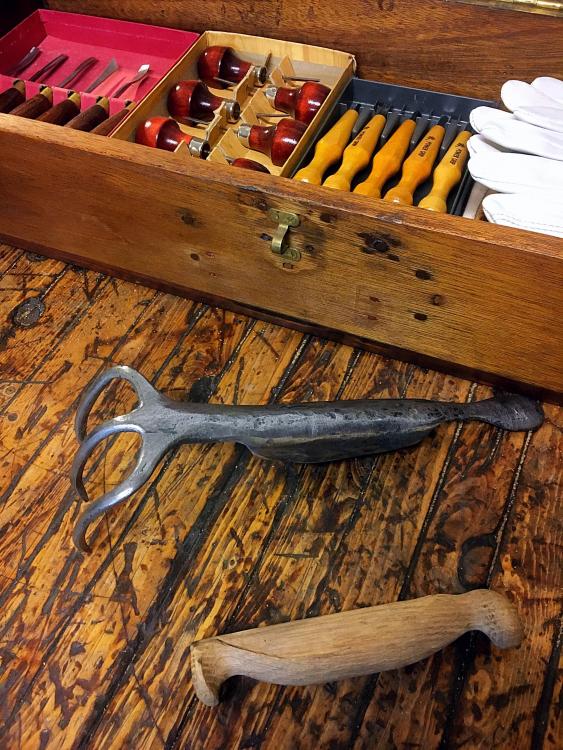
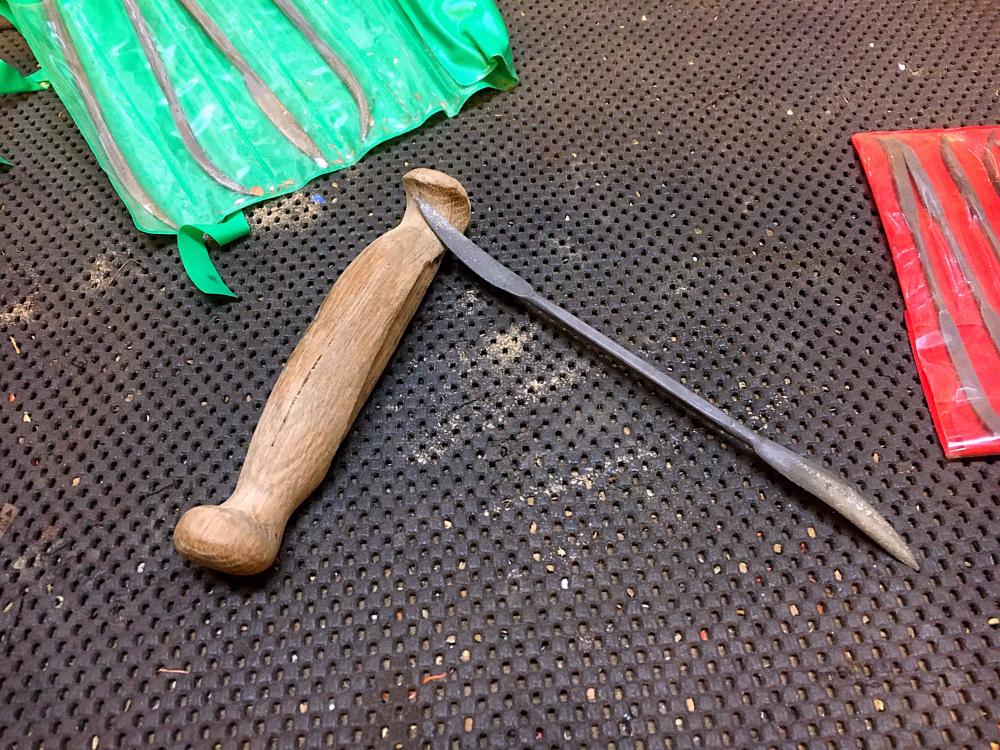
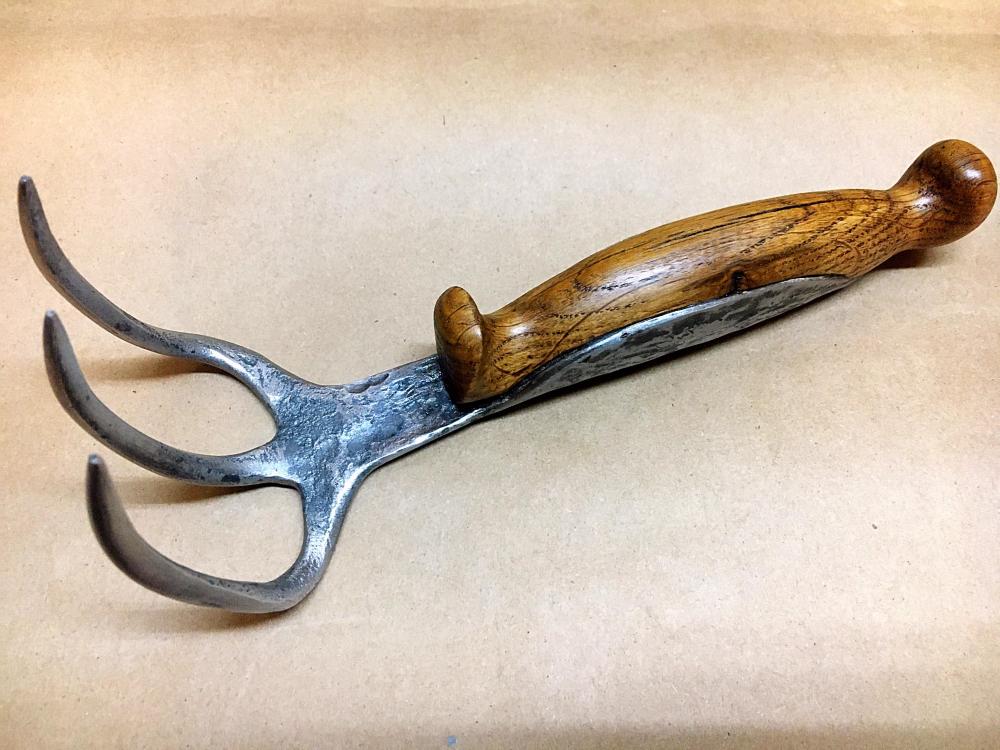
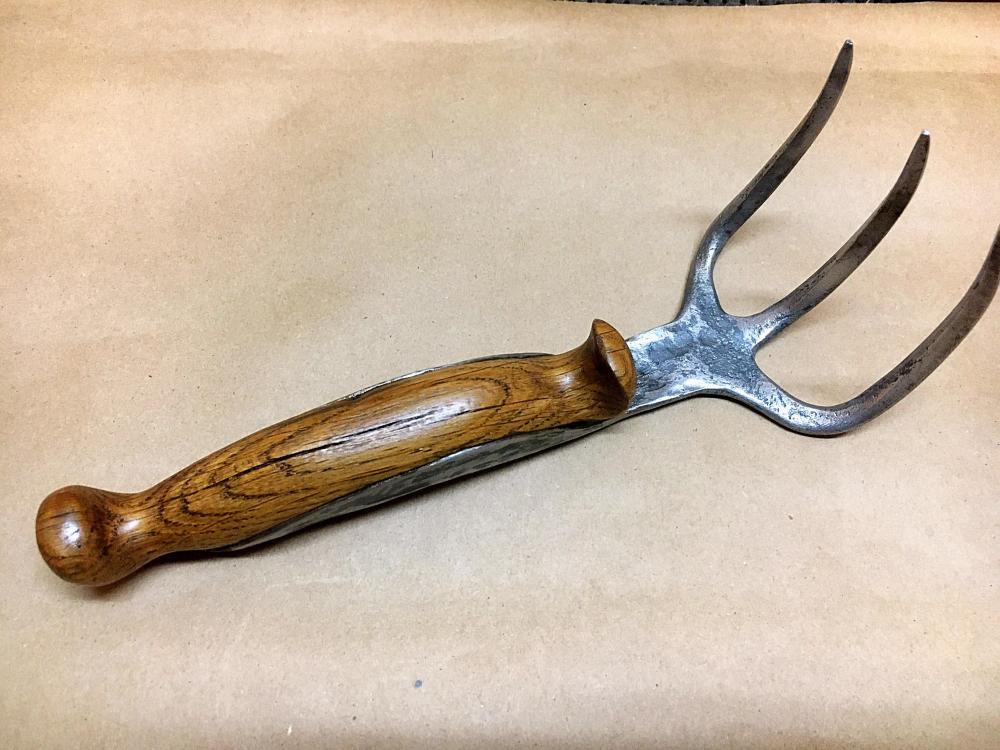
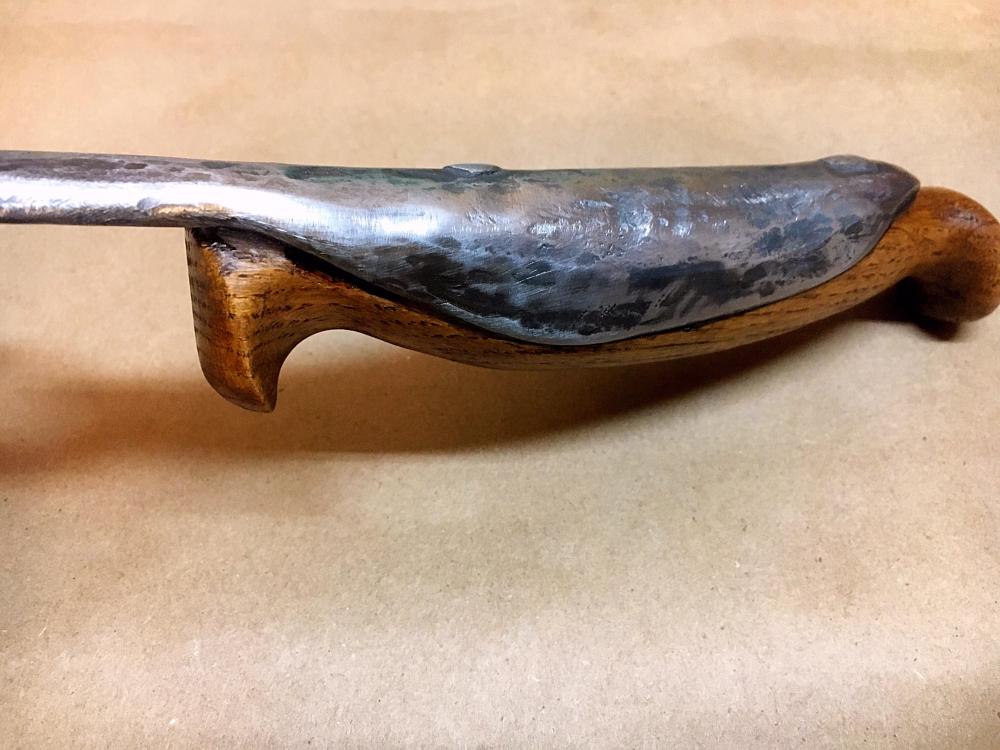
I watched Joey Van Der Steeg make one of these and my wife said “that’s something you could make for me”. I’ve never attempted anything like this before as my propane forges aren’t designed for larger items . I’m now looking at building a two burner side opening forge for these oddly shaped items. I started with 1” round stock and bumbled around trying to figure out how to spread & shape the tines given the confined opening to my forges. In the end it turned out alright. Far from perfect but that matches the maker. Being a woodworker first I had some oak in my small stock bin and shaped a handle narrow enough for my wife’s smaller hands. turned out I didn’t need the tail section of his design so I cut that off & started shaping it into a leaf to be used as a ceiling fan fob in my wife’s green house. I’ve started on a second one to be mated to a long handle . I know knives are all the rage these days but it’s day to day items like this that I’m interested in.


-
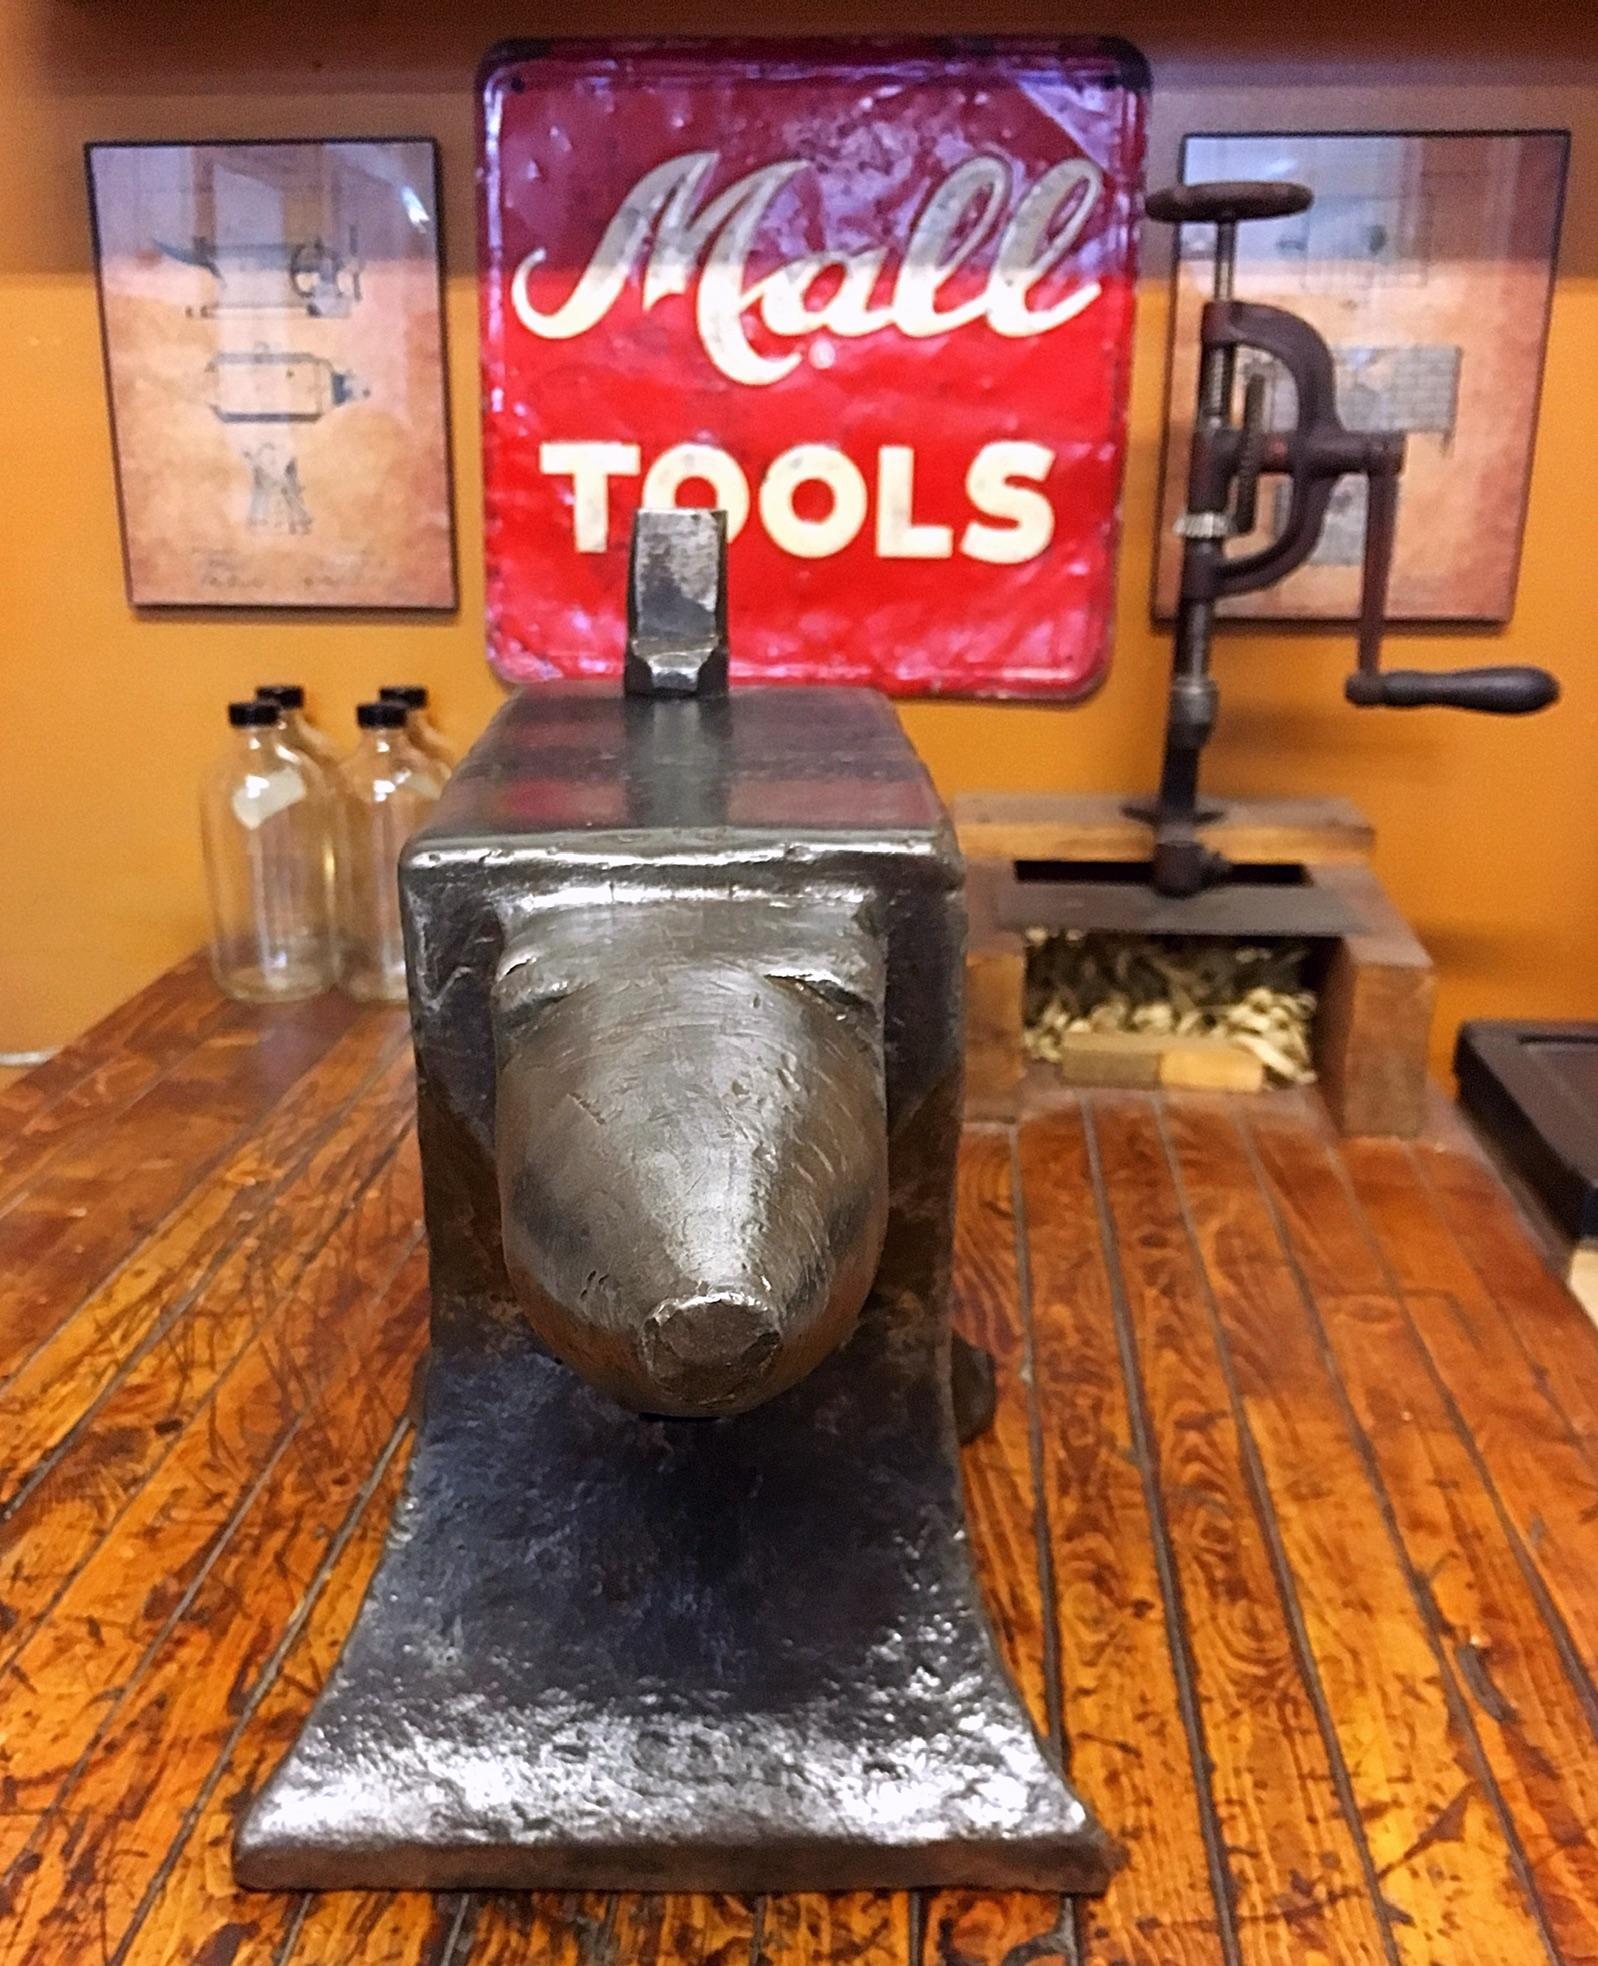
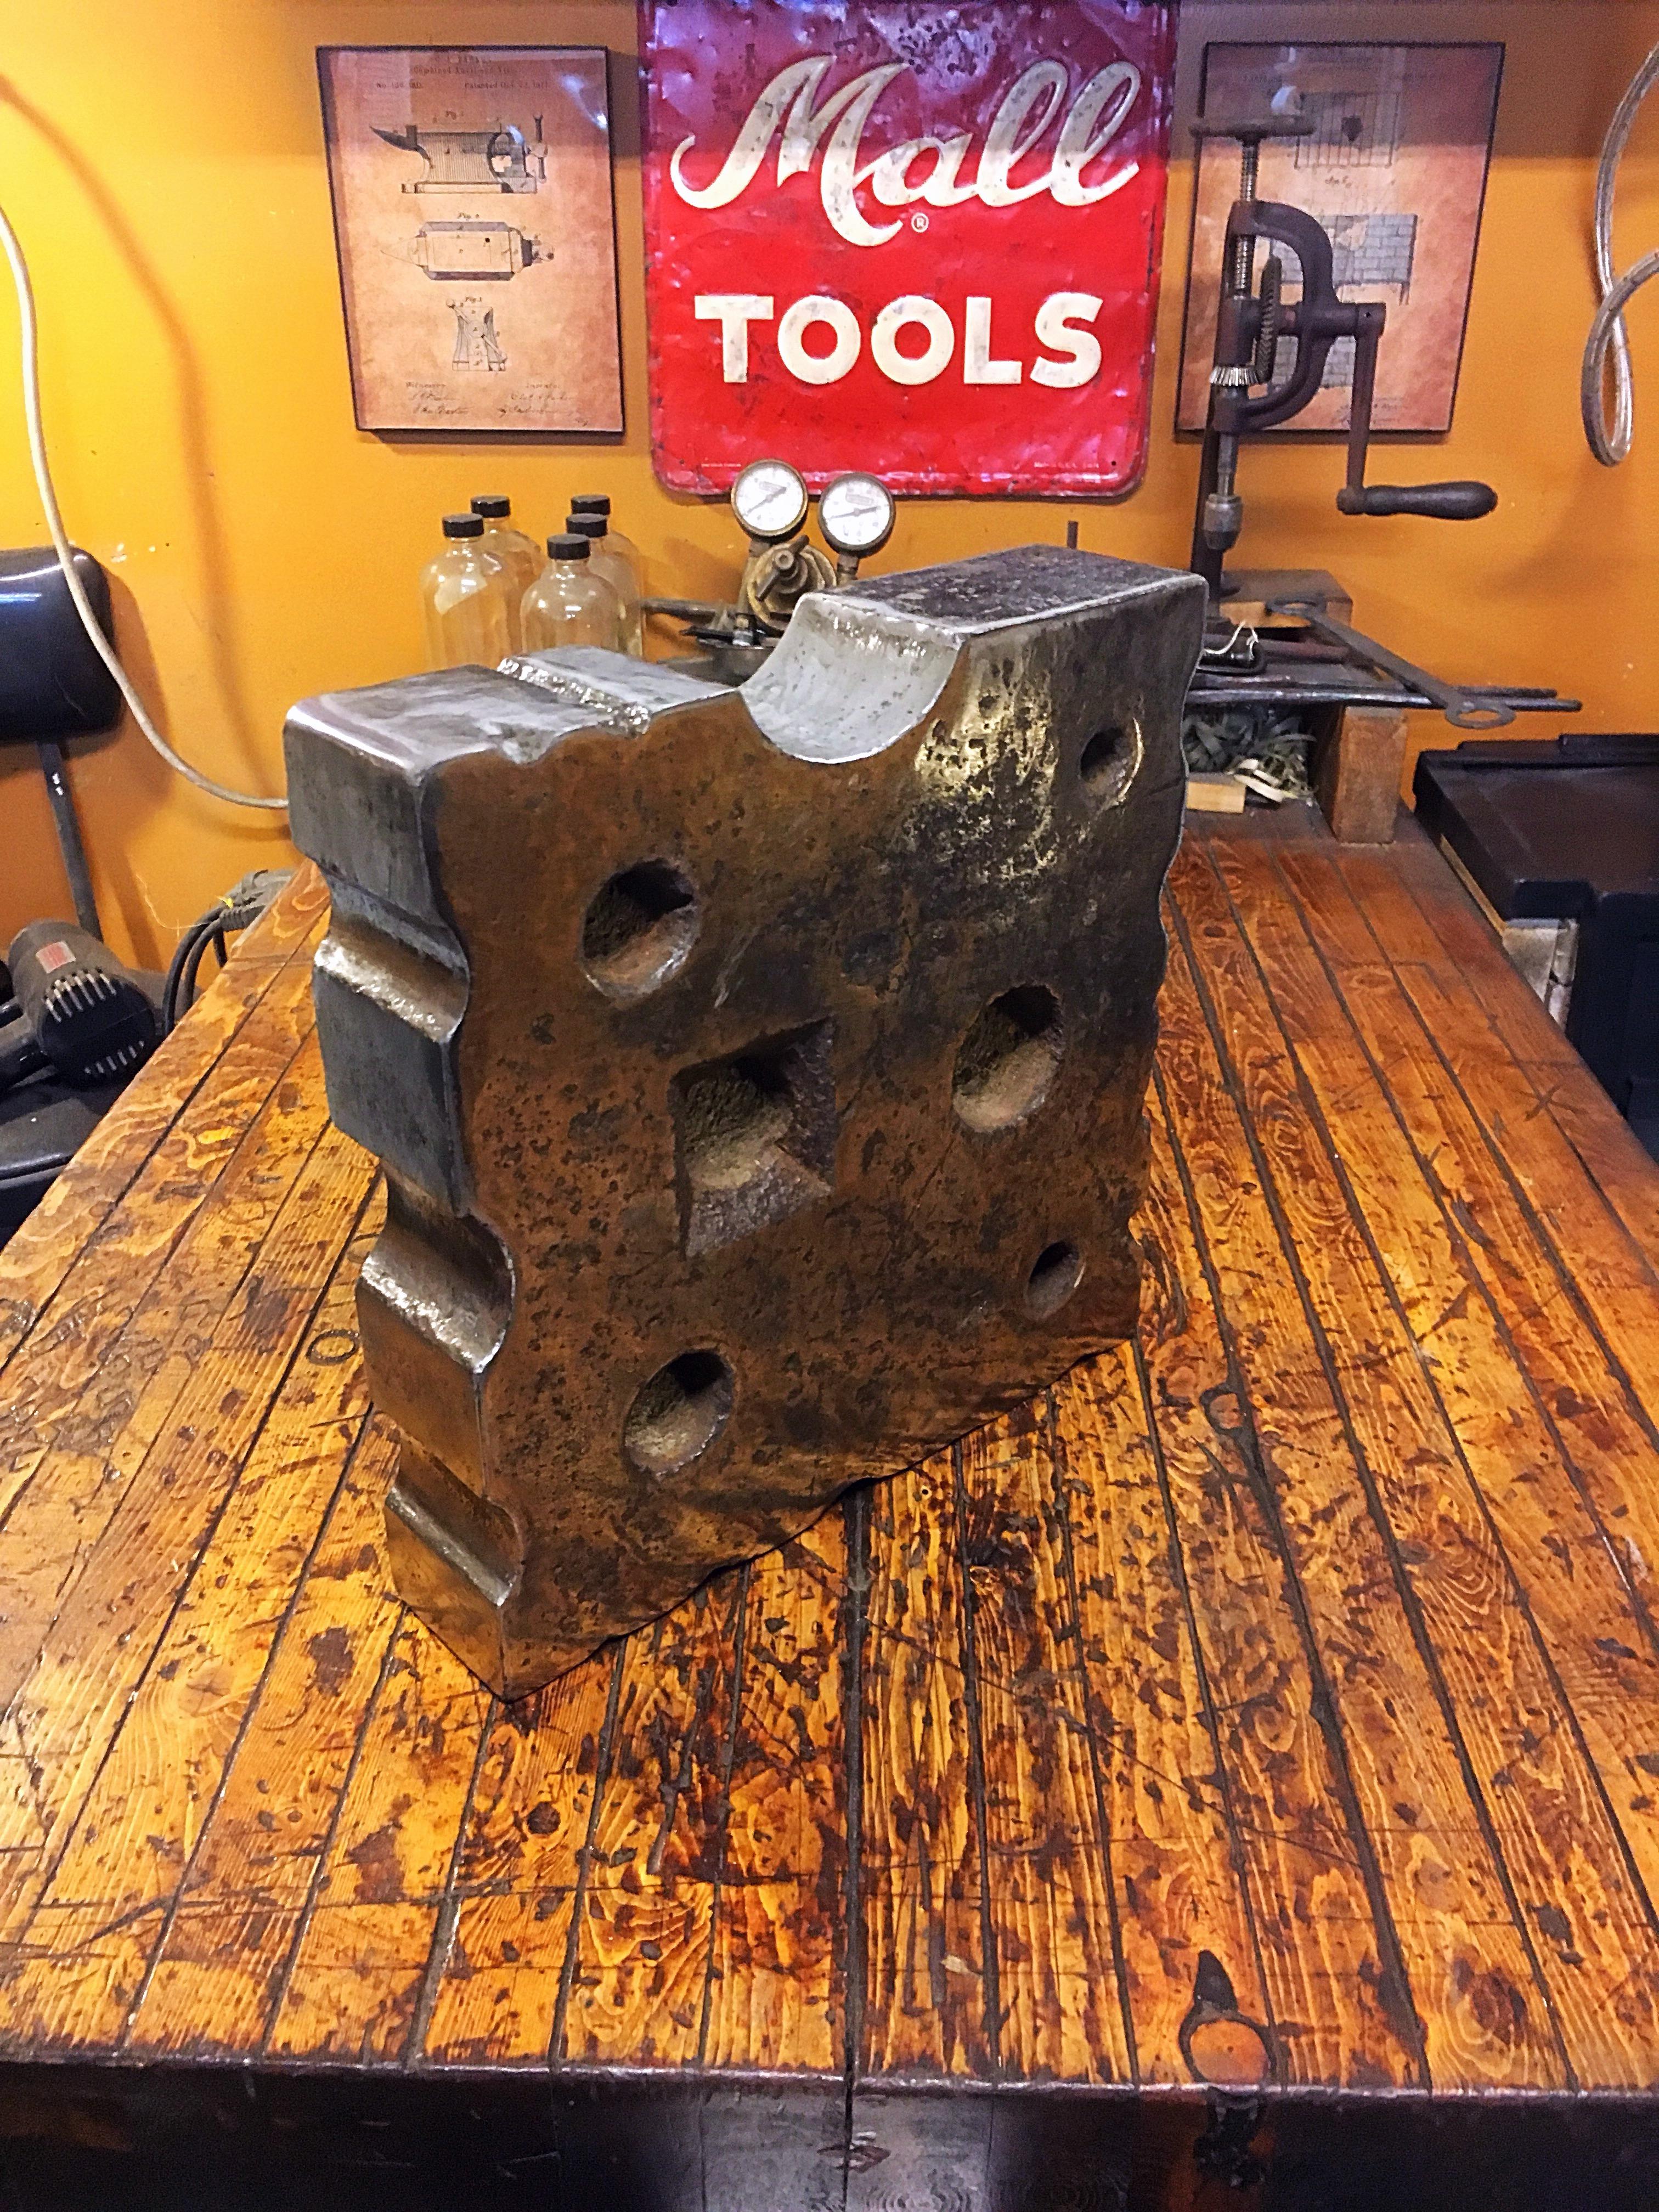
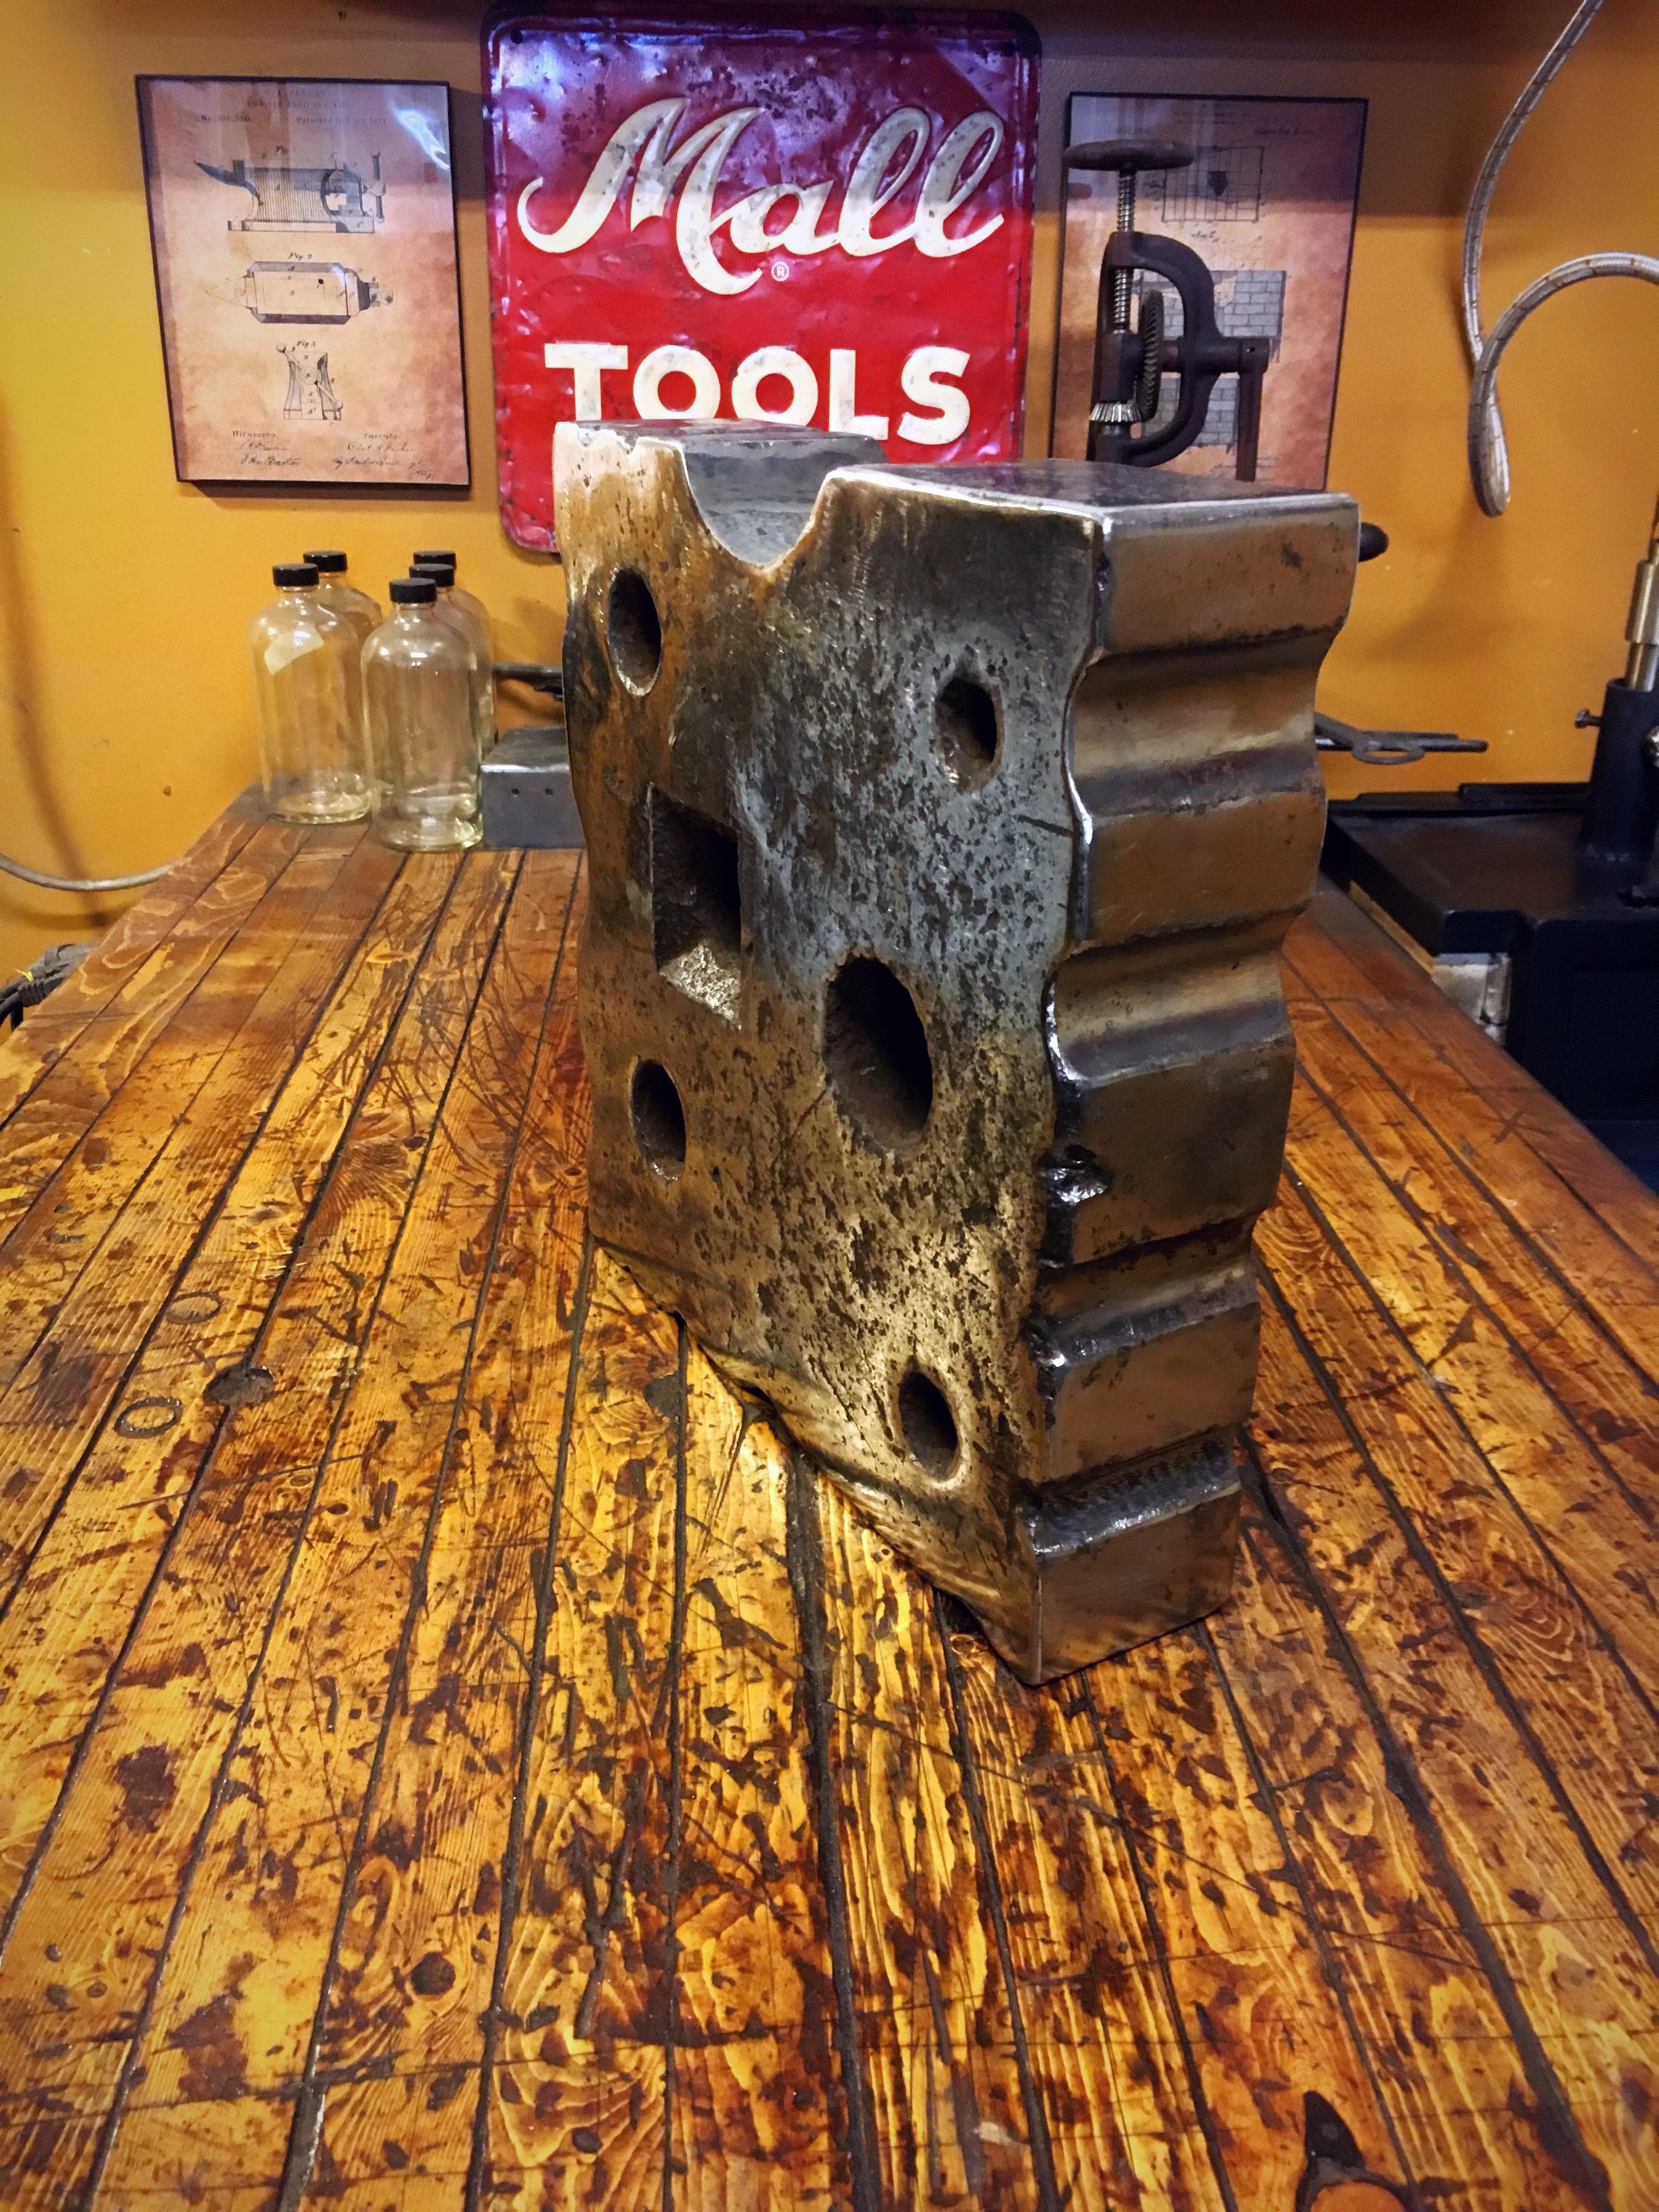
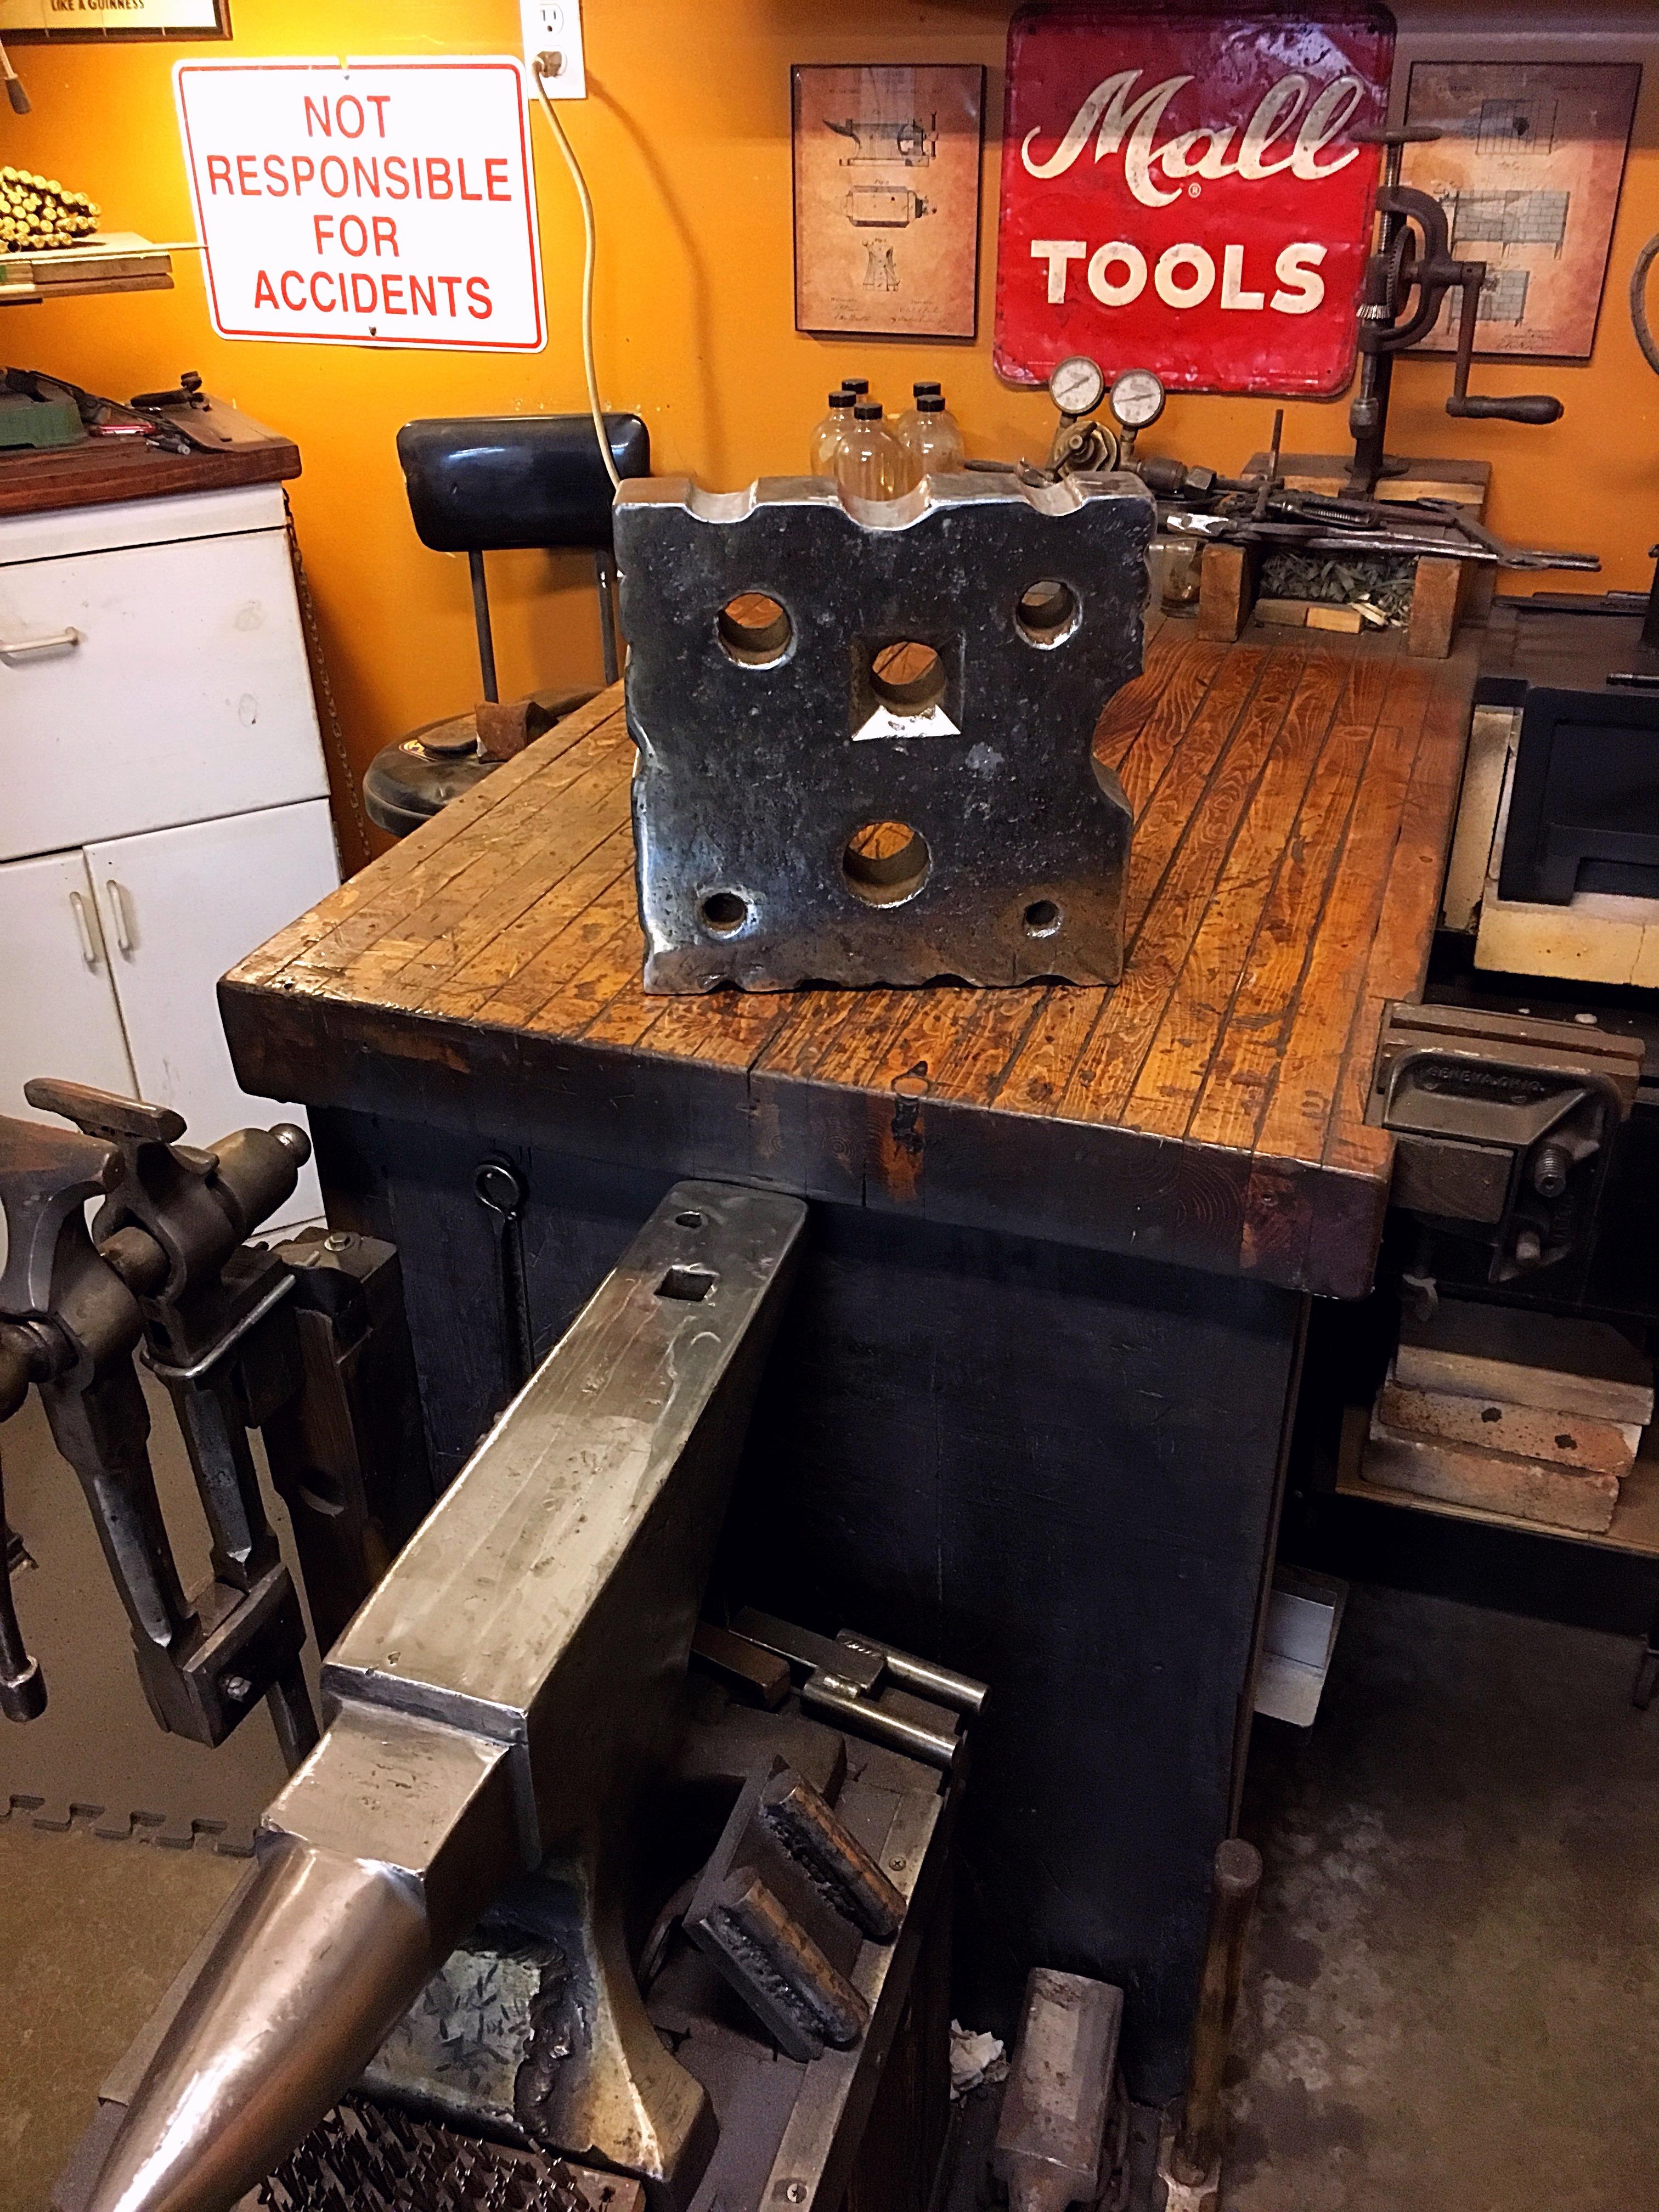
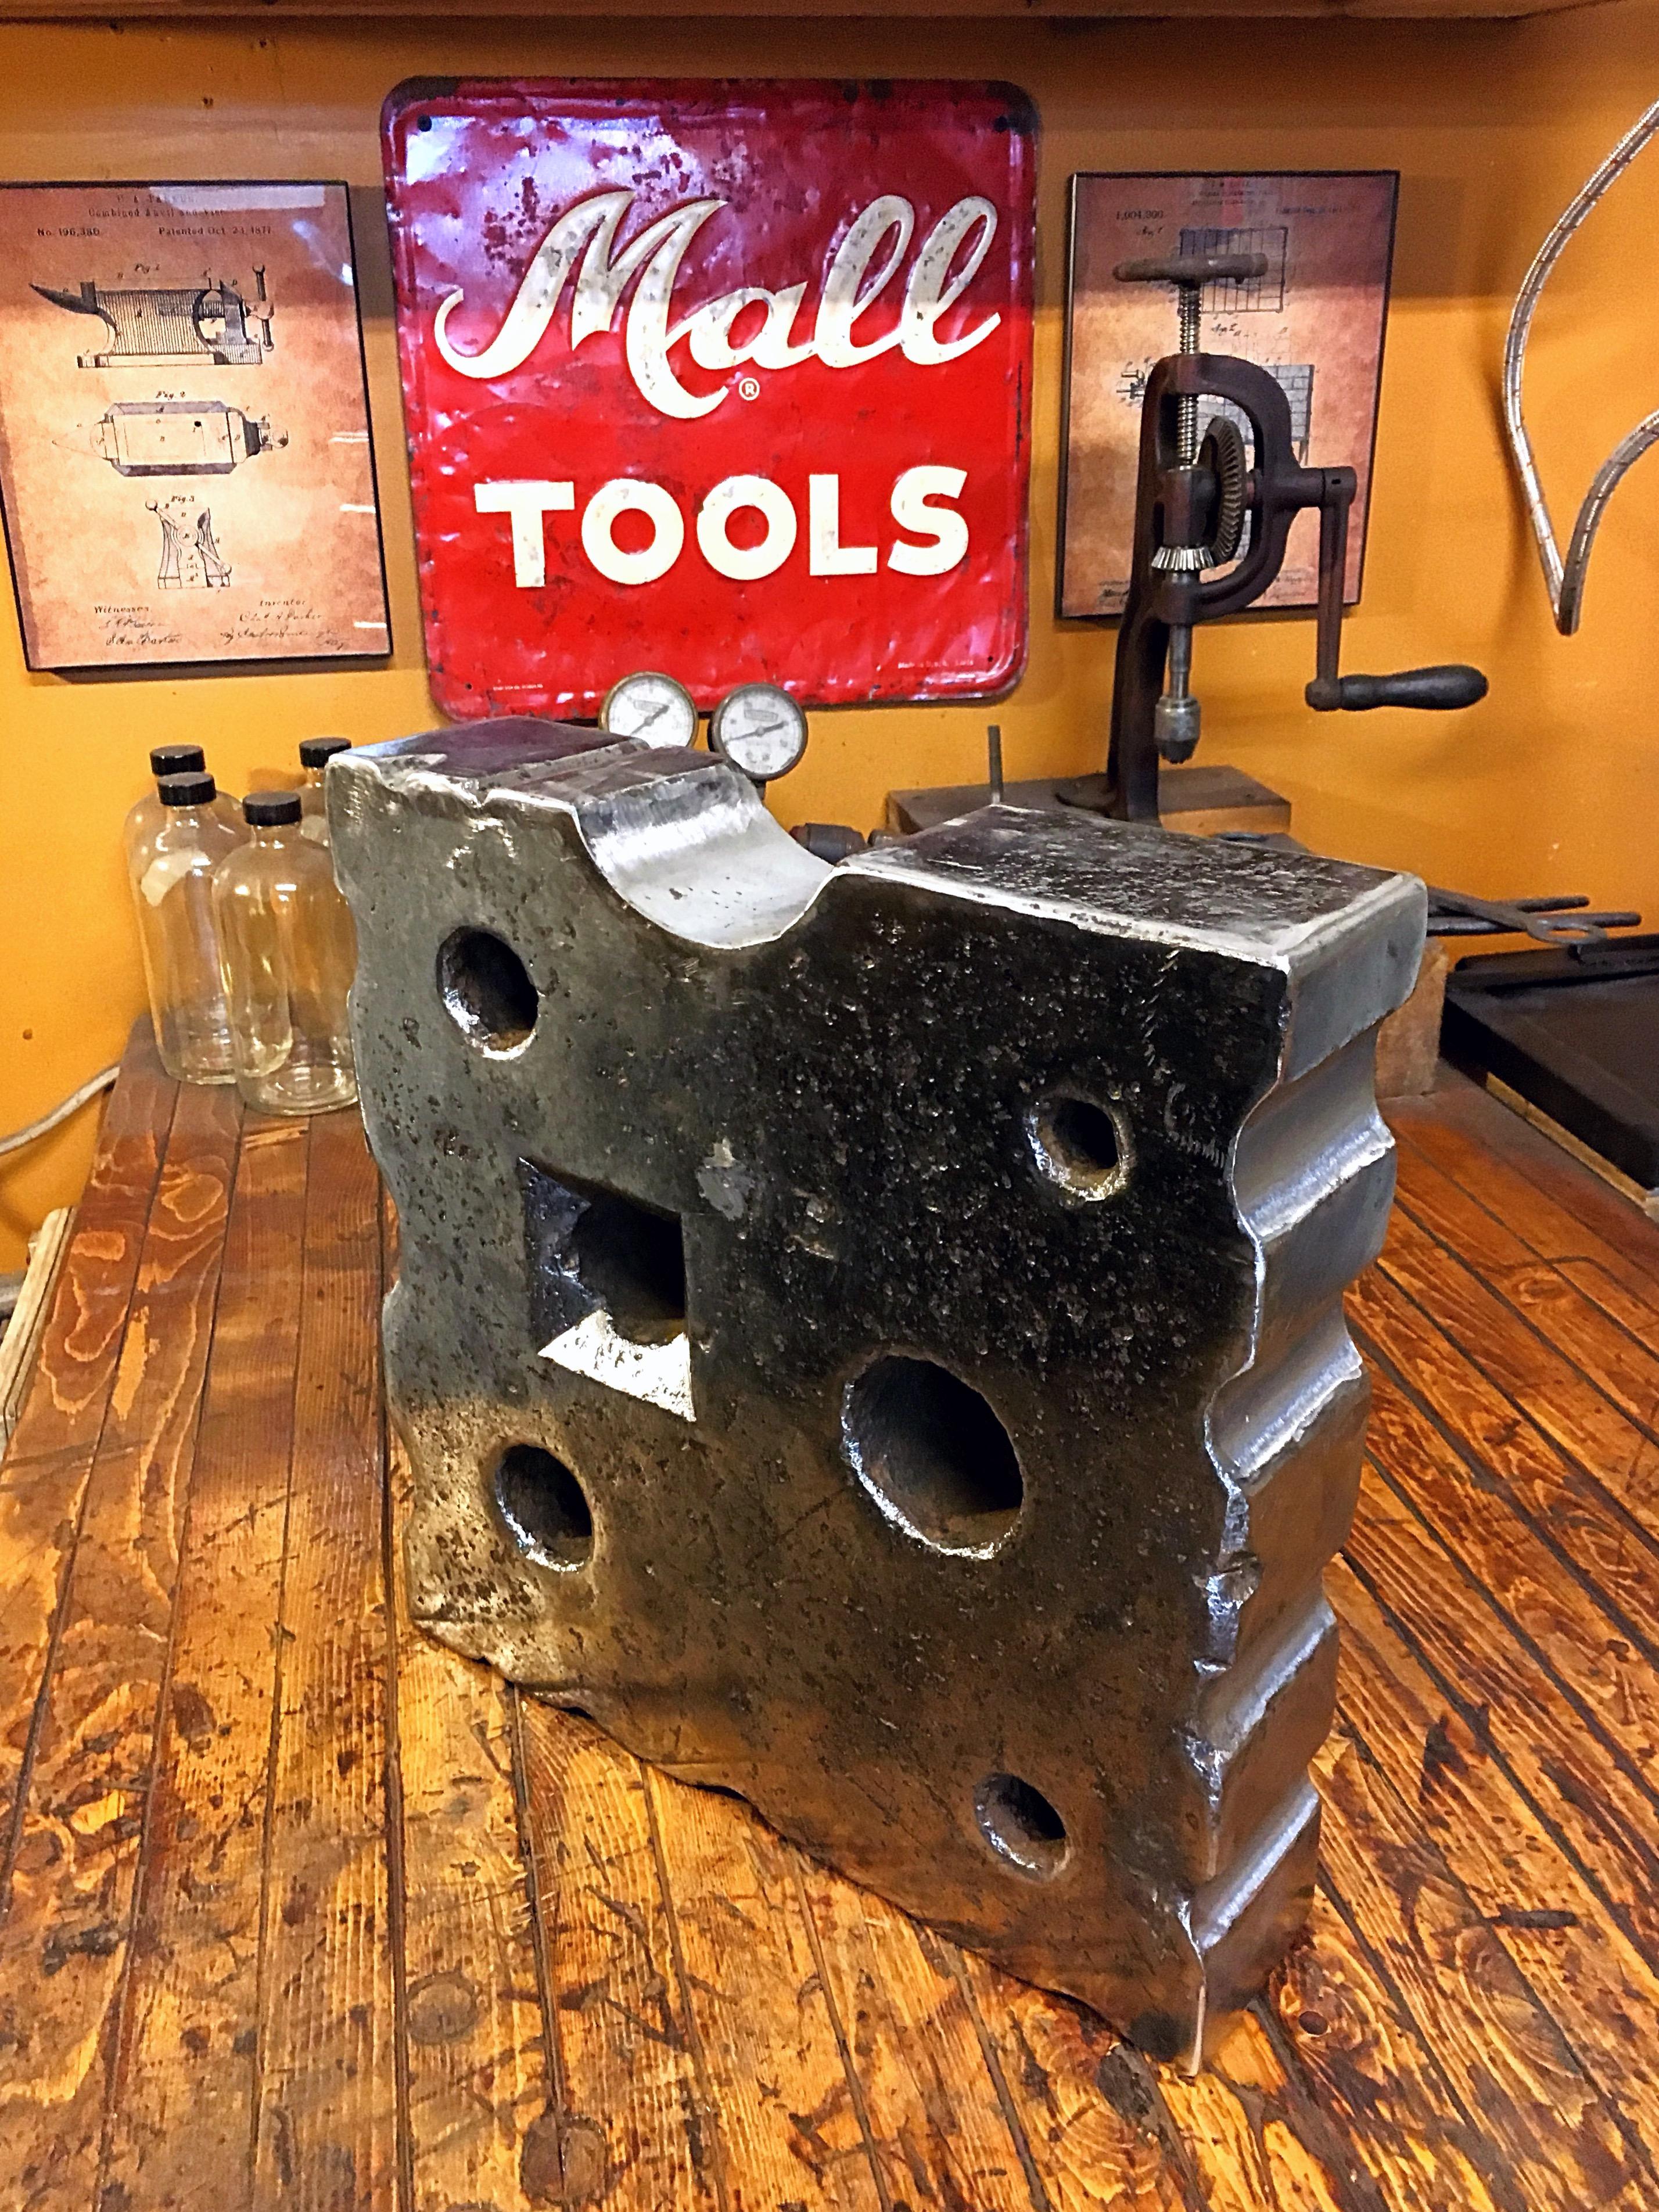
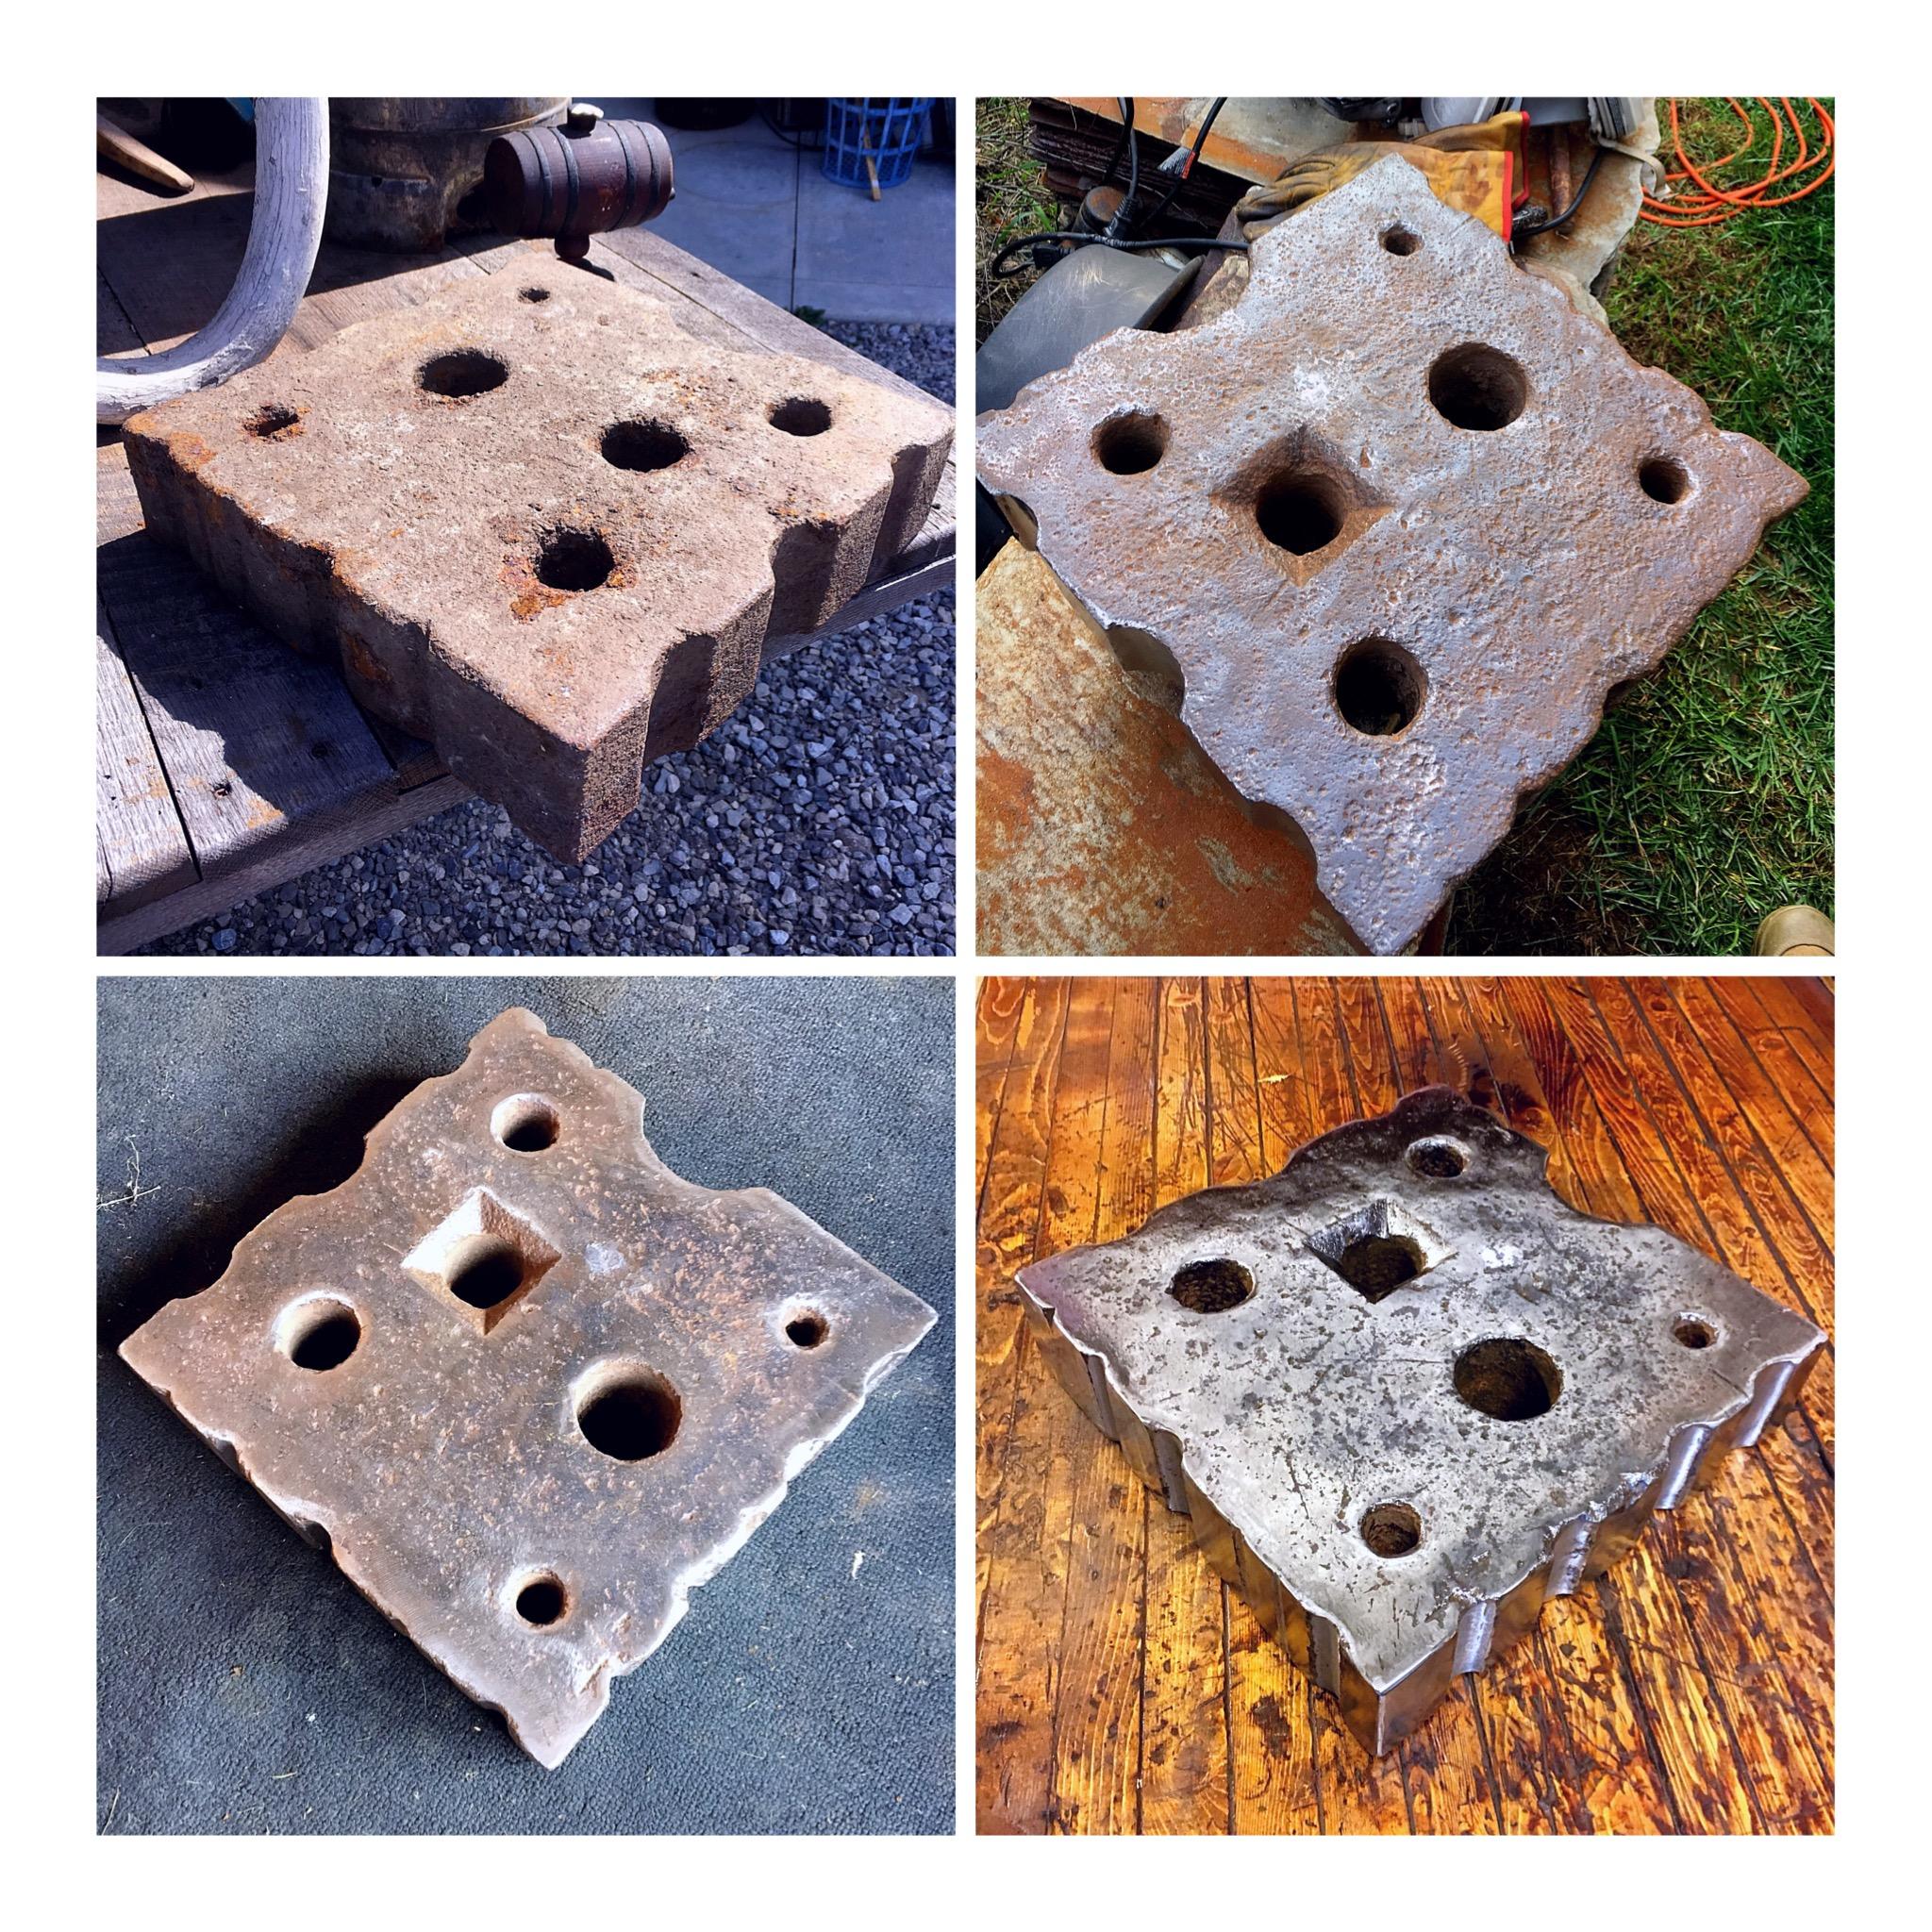
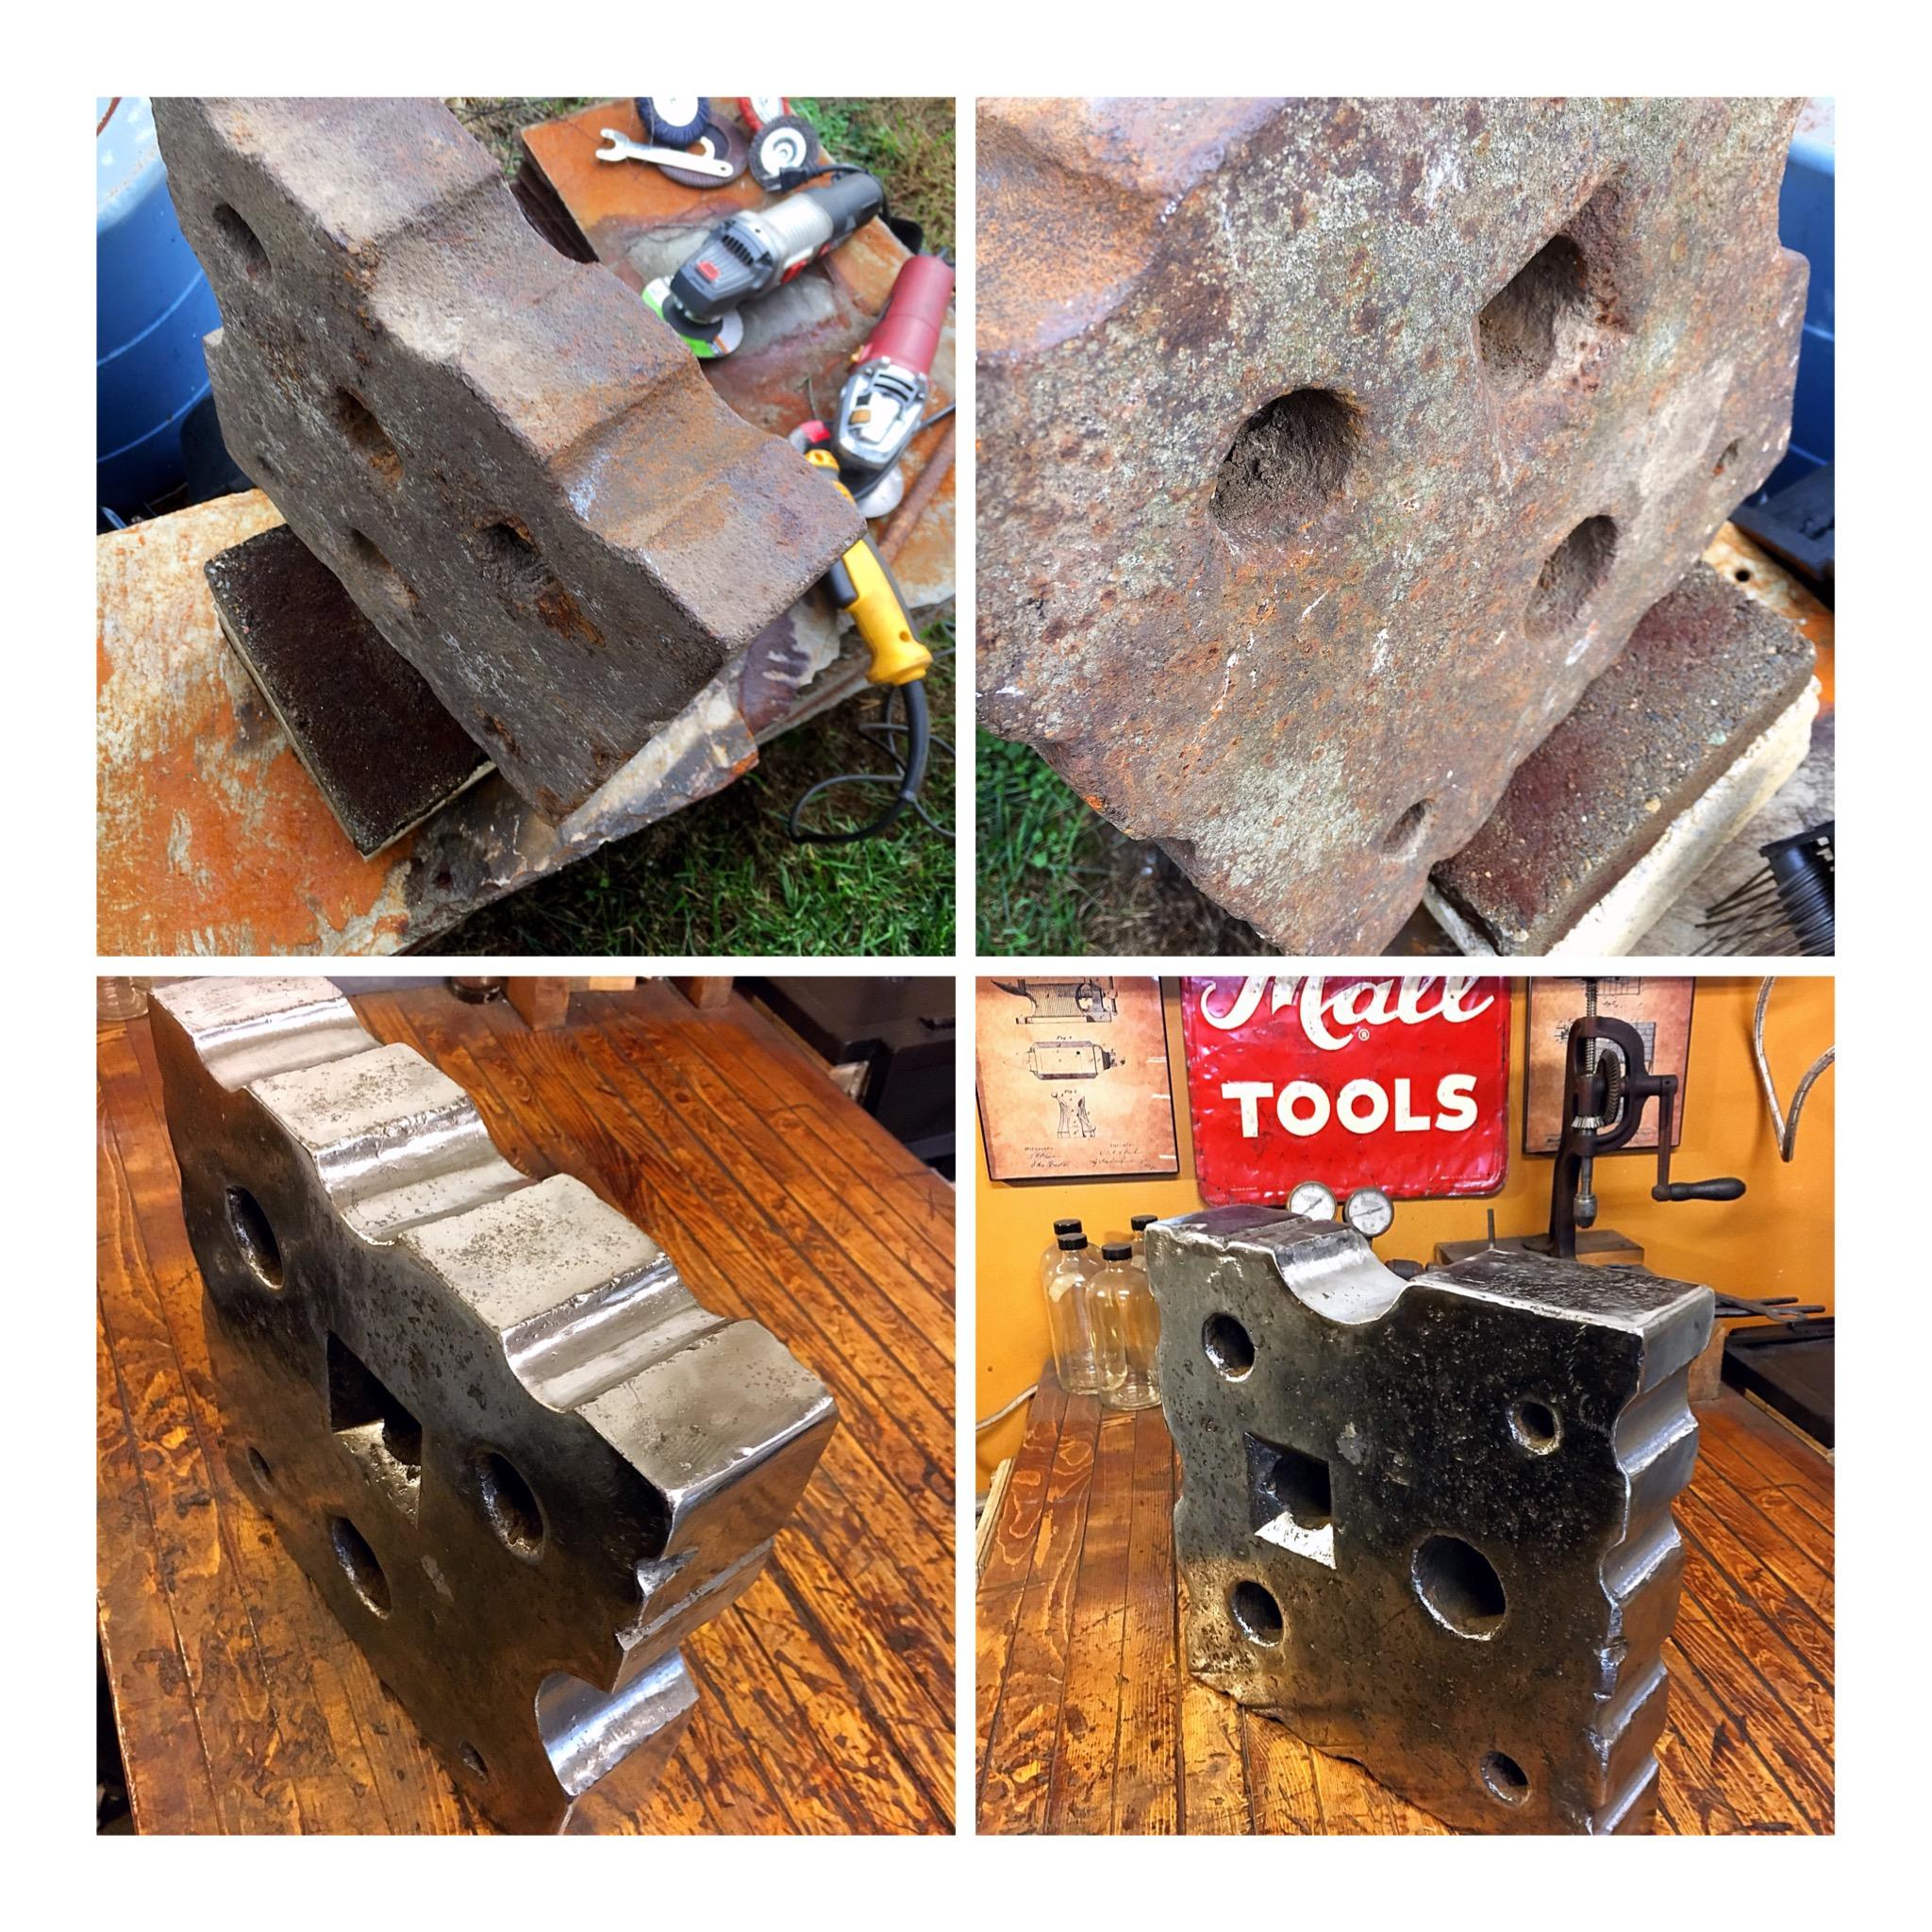
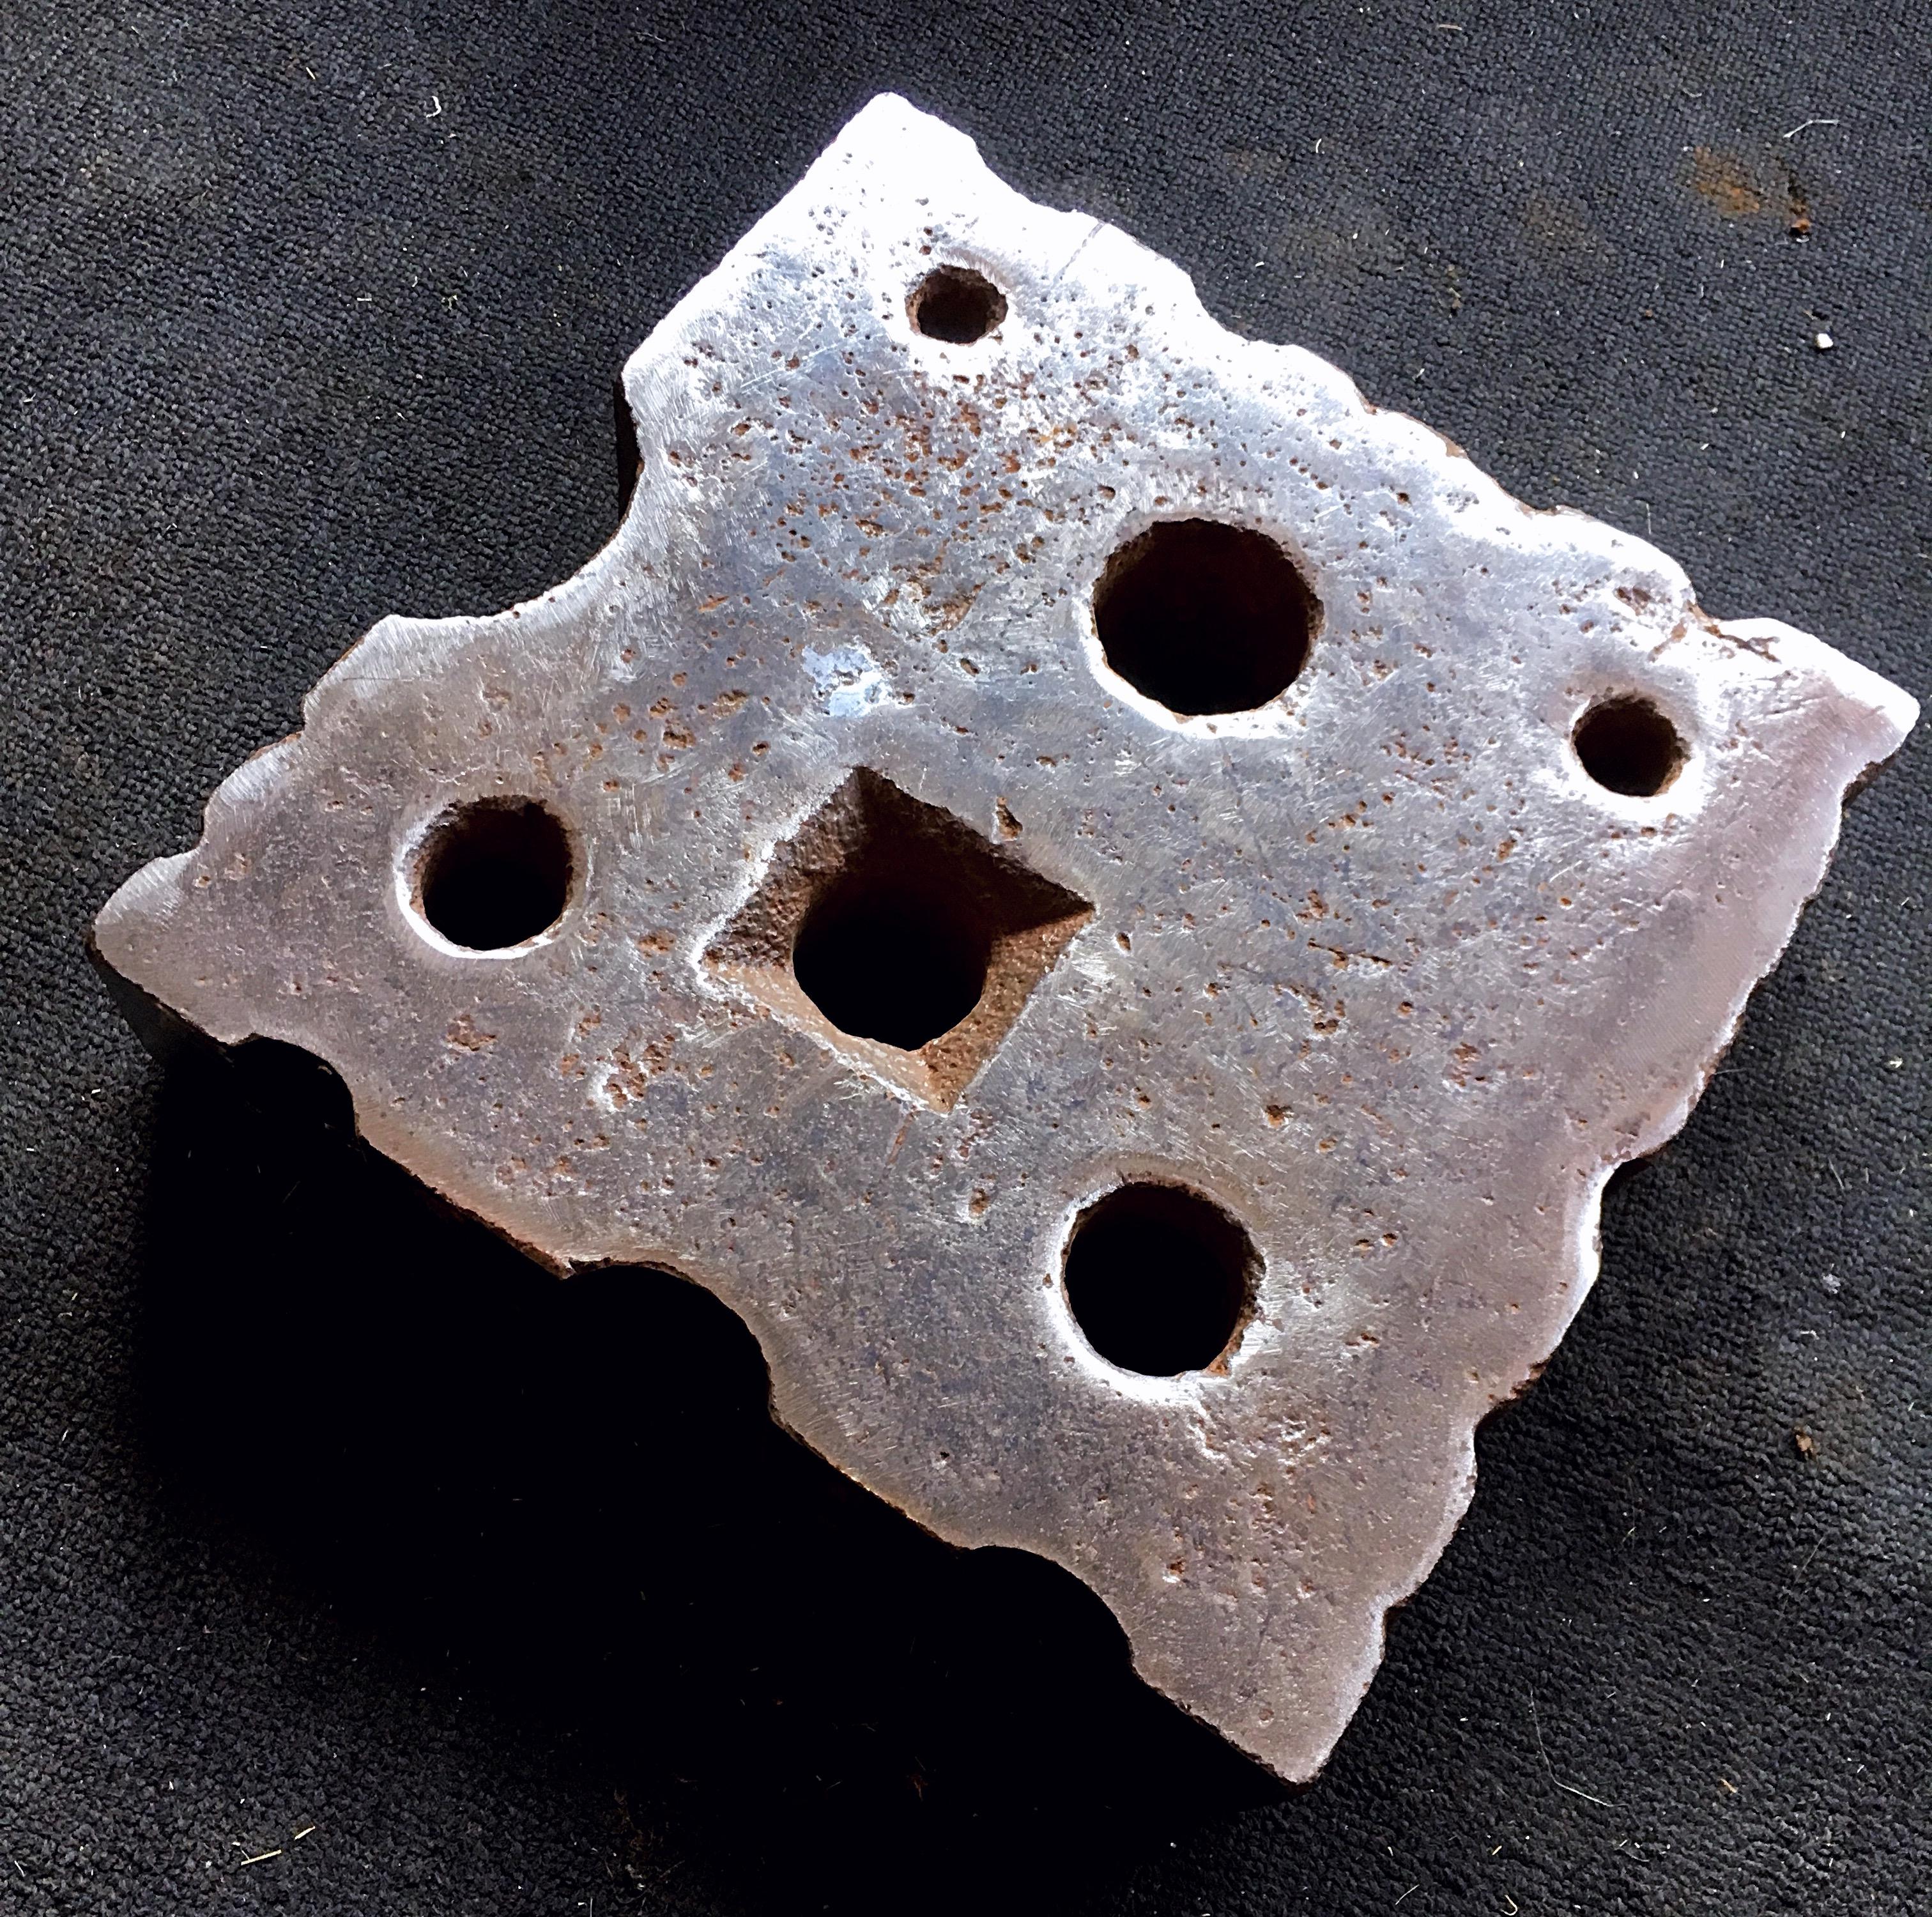
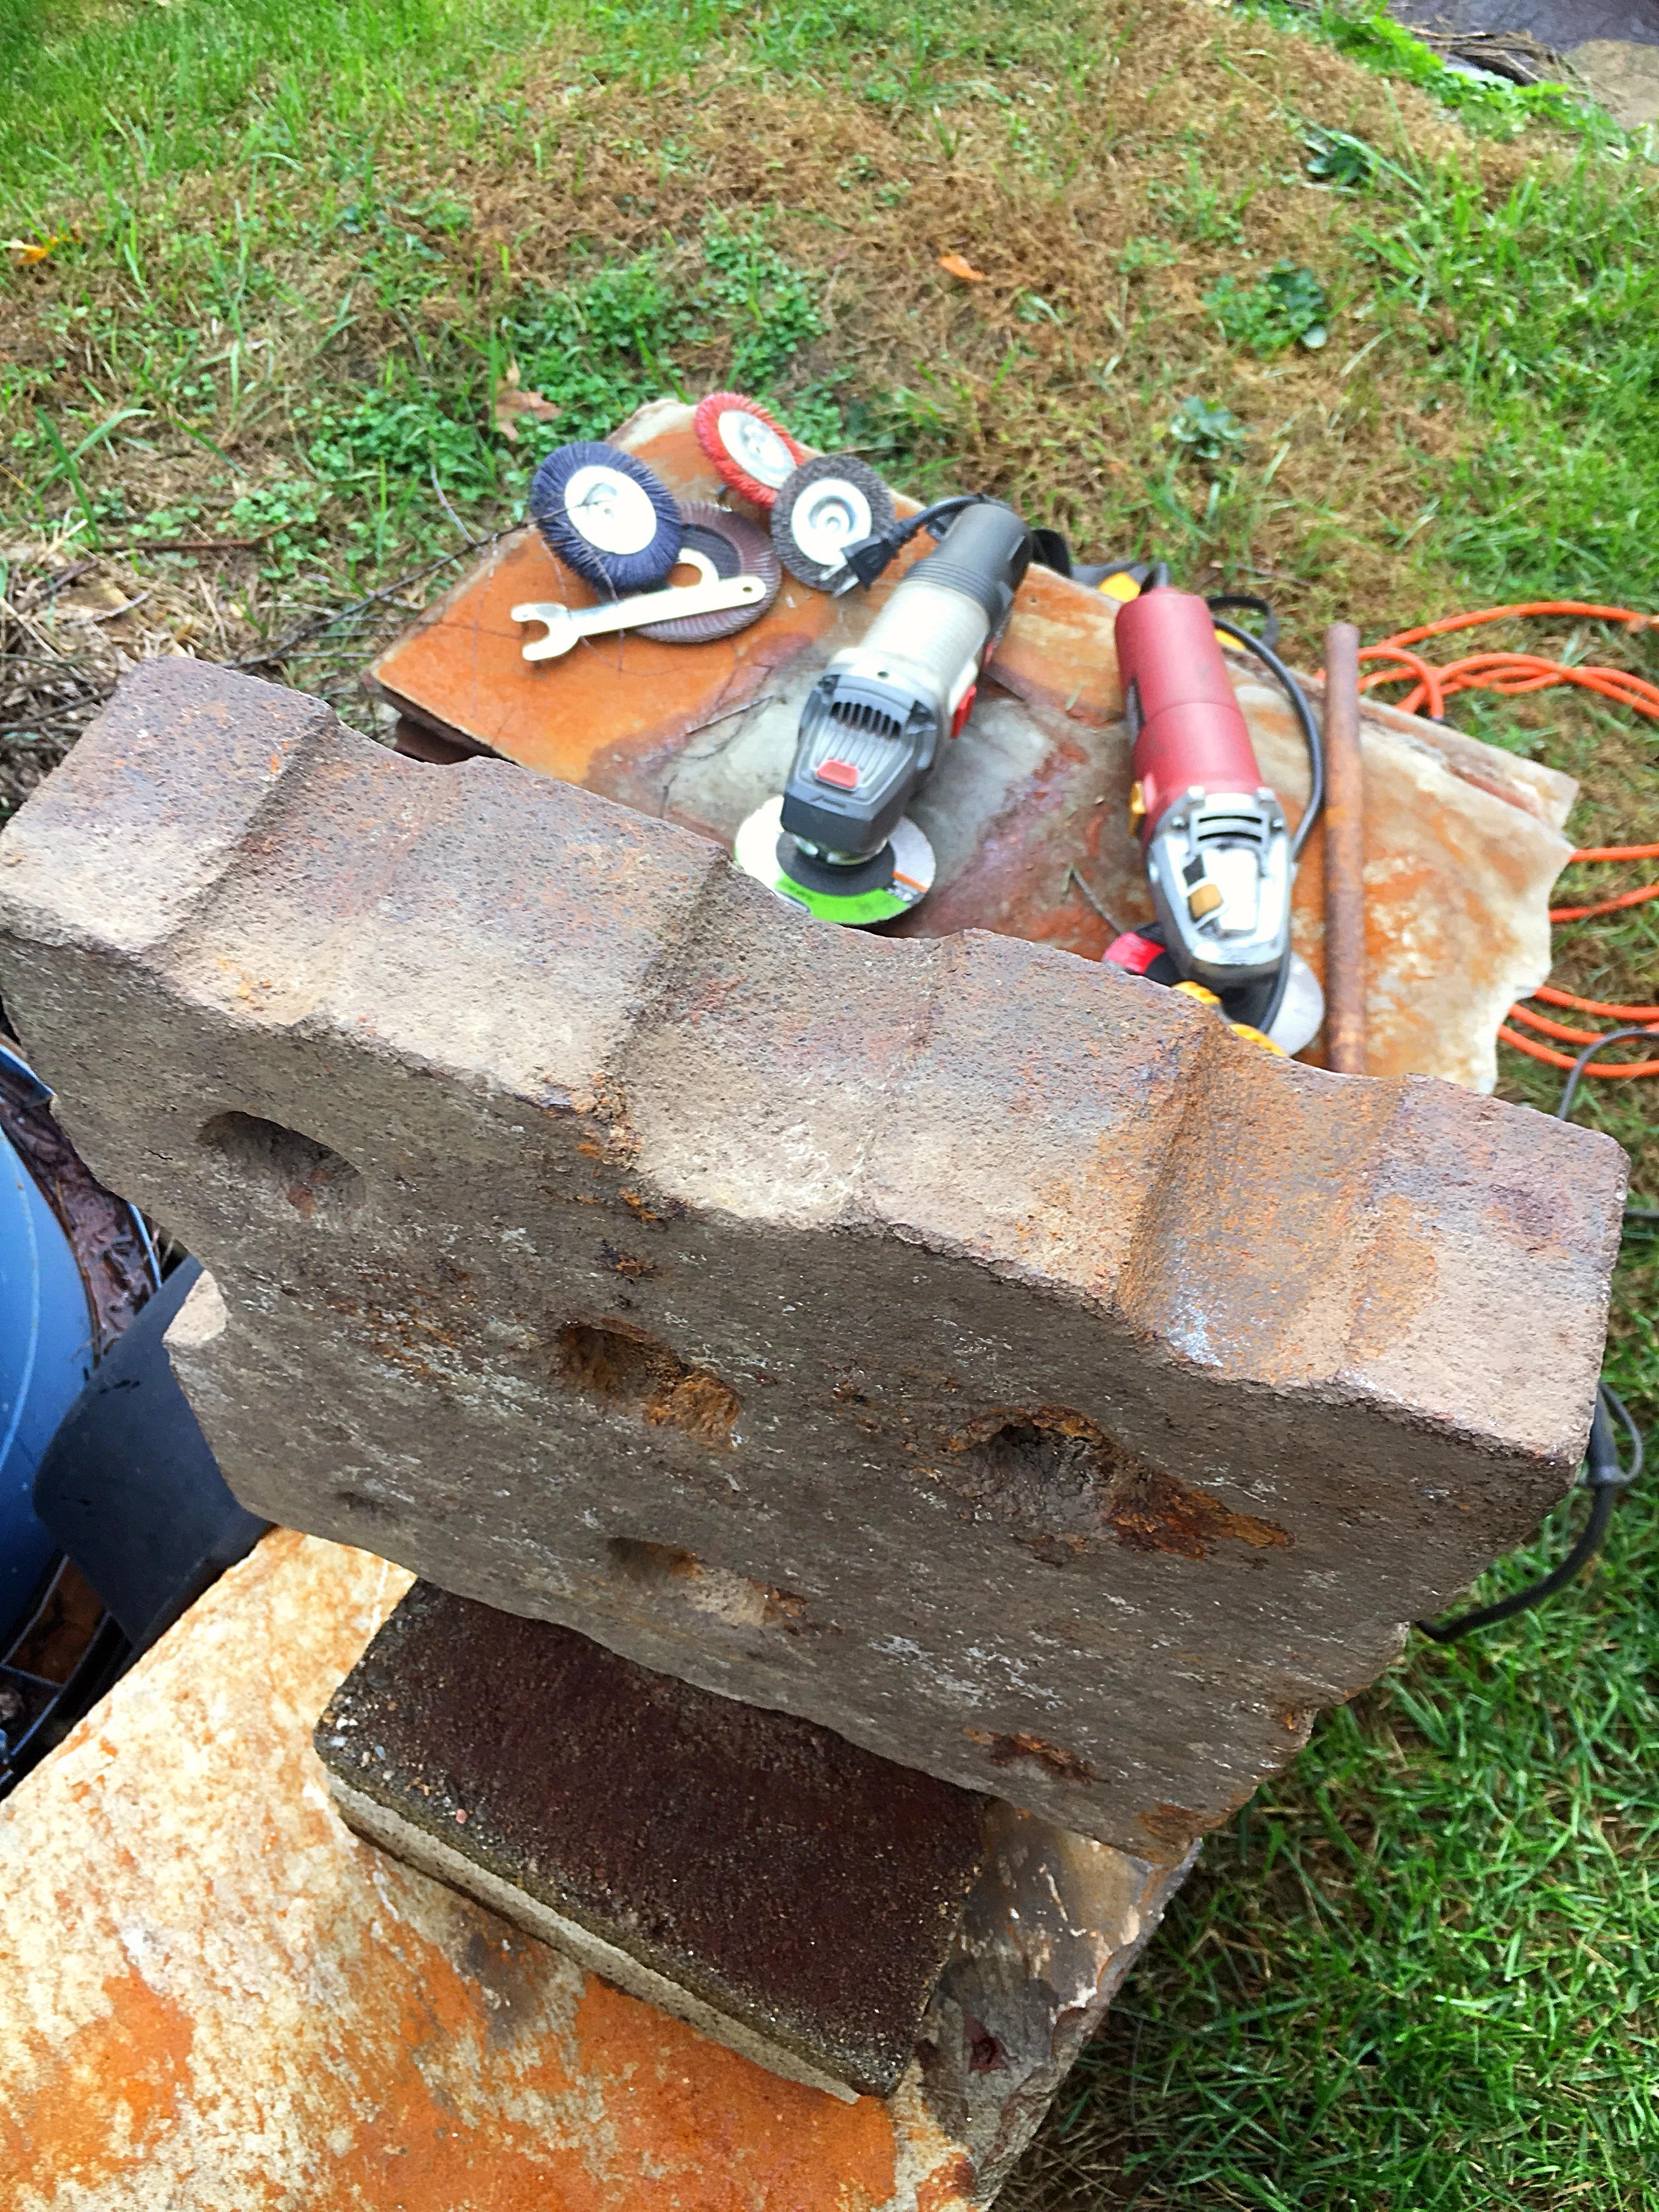
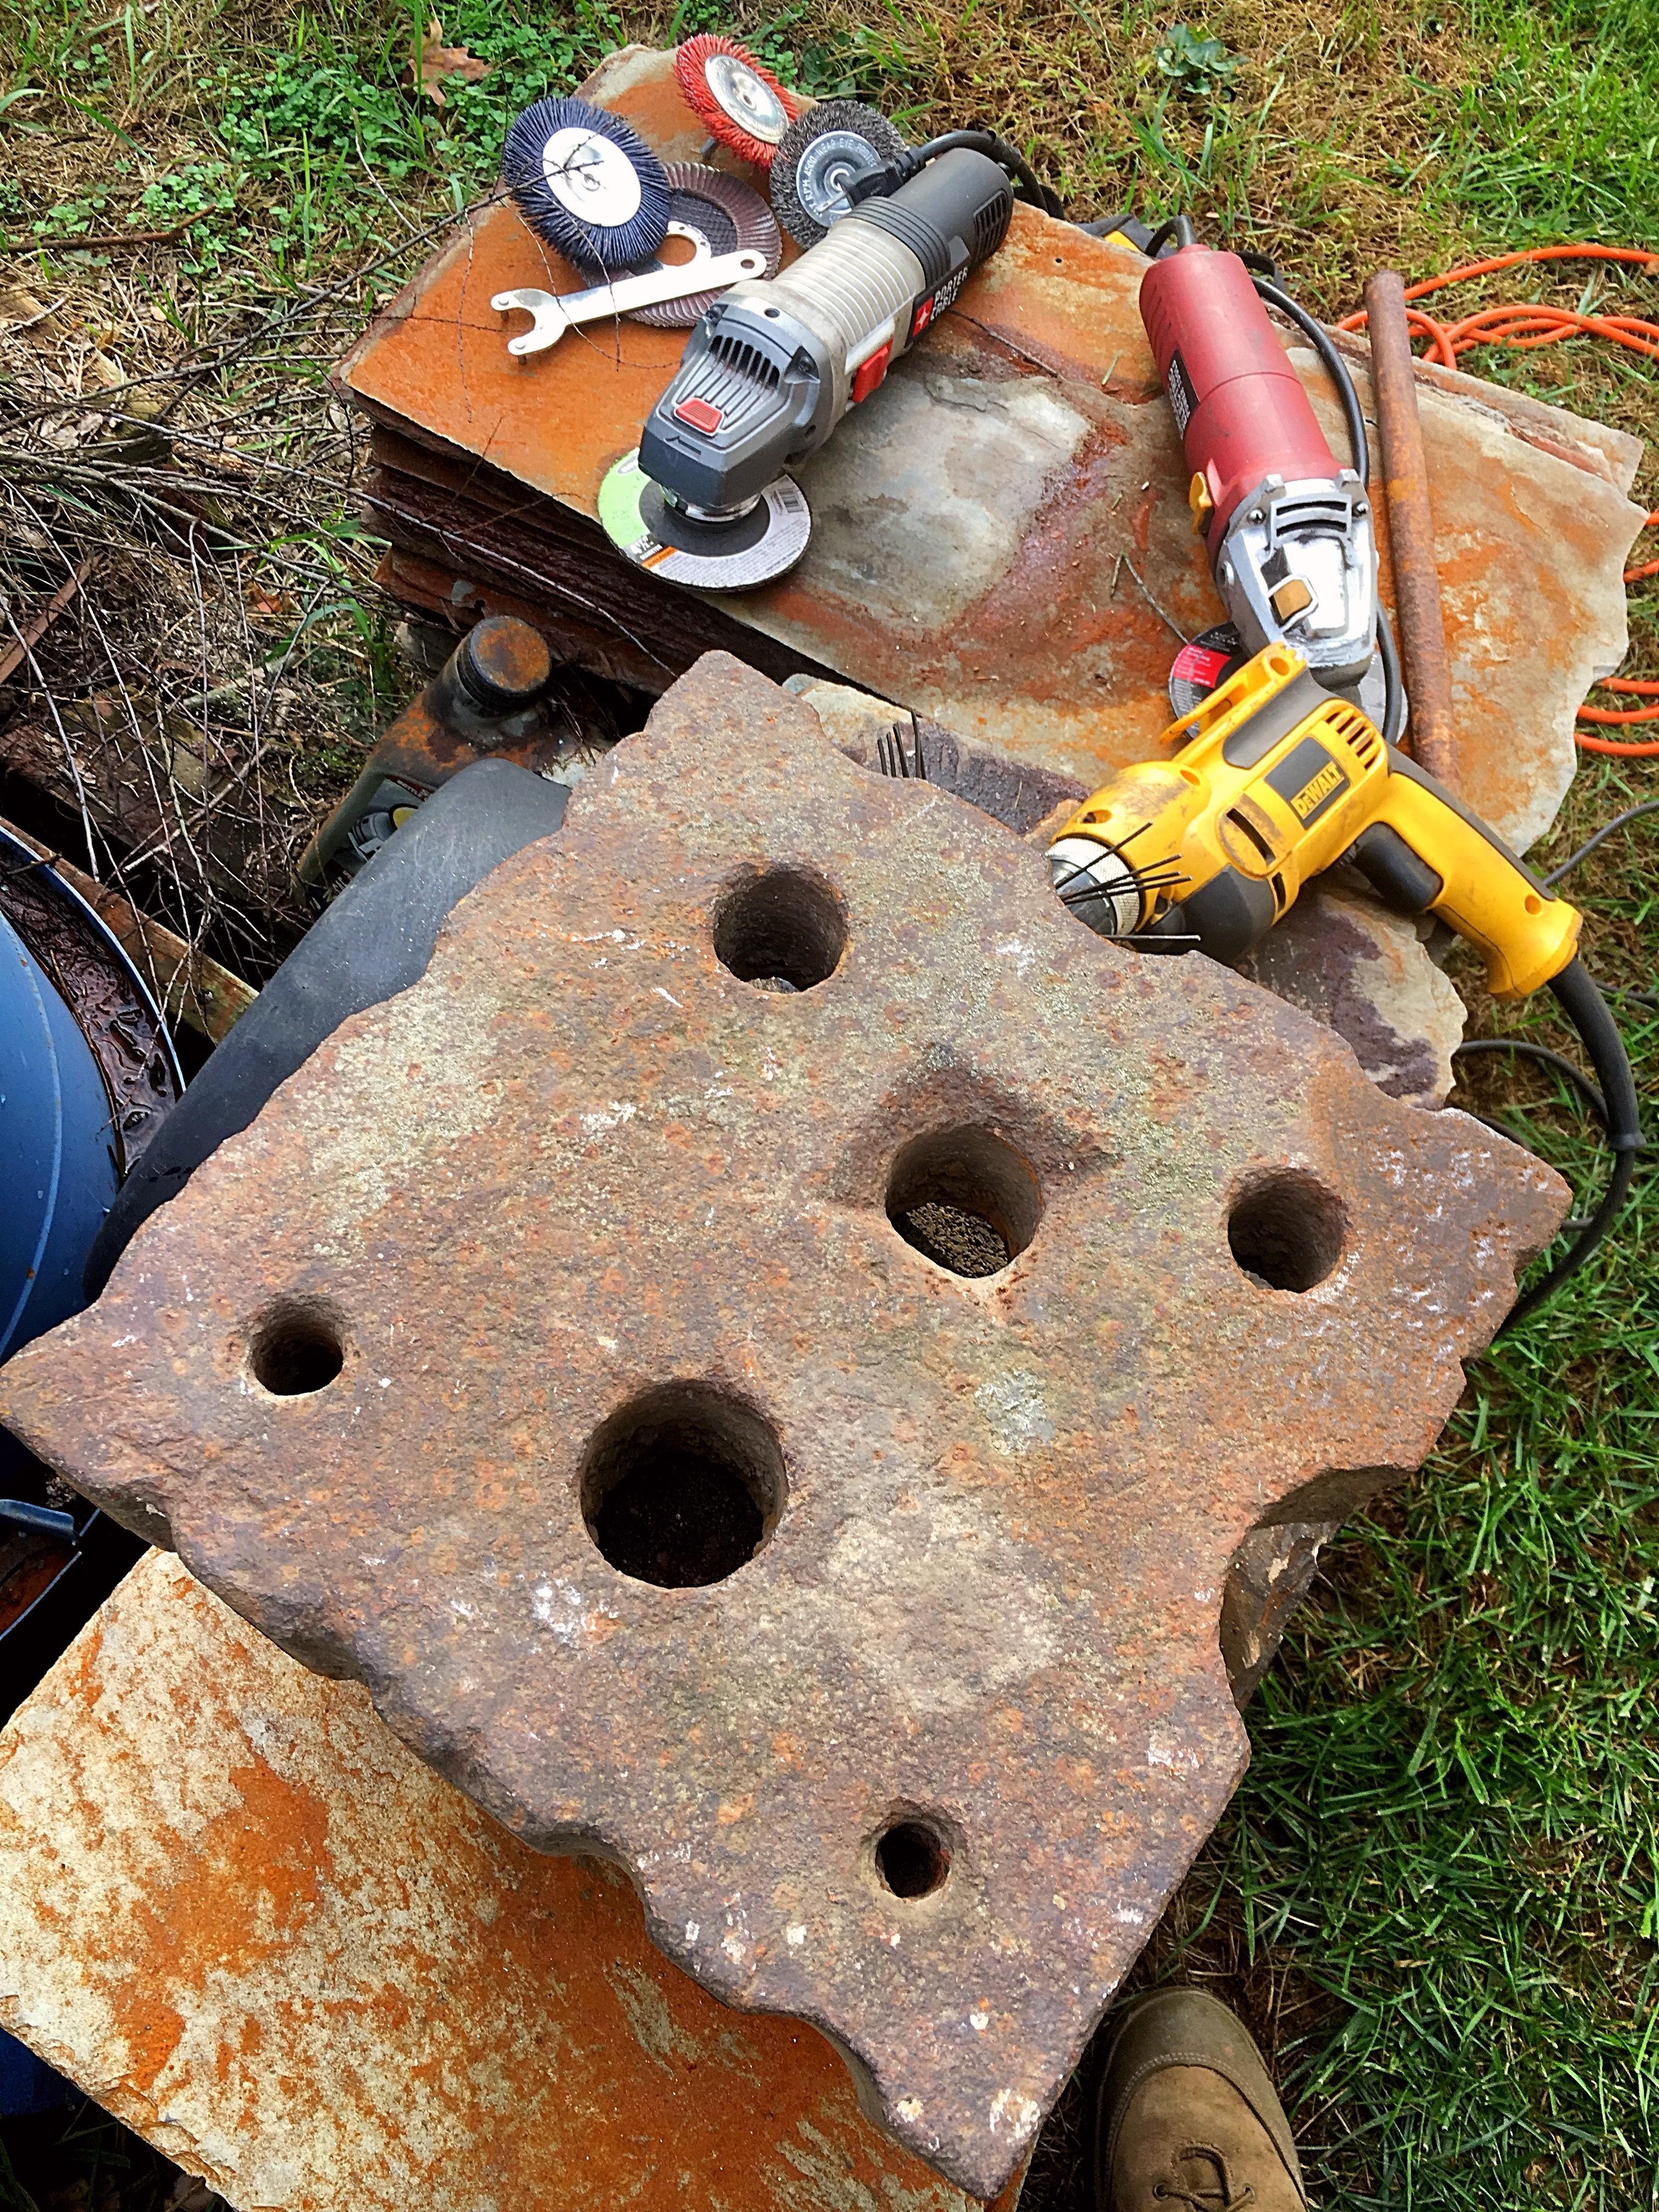
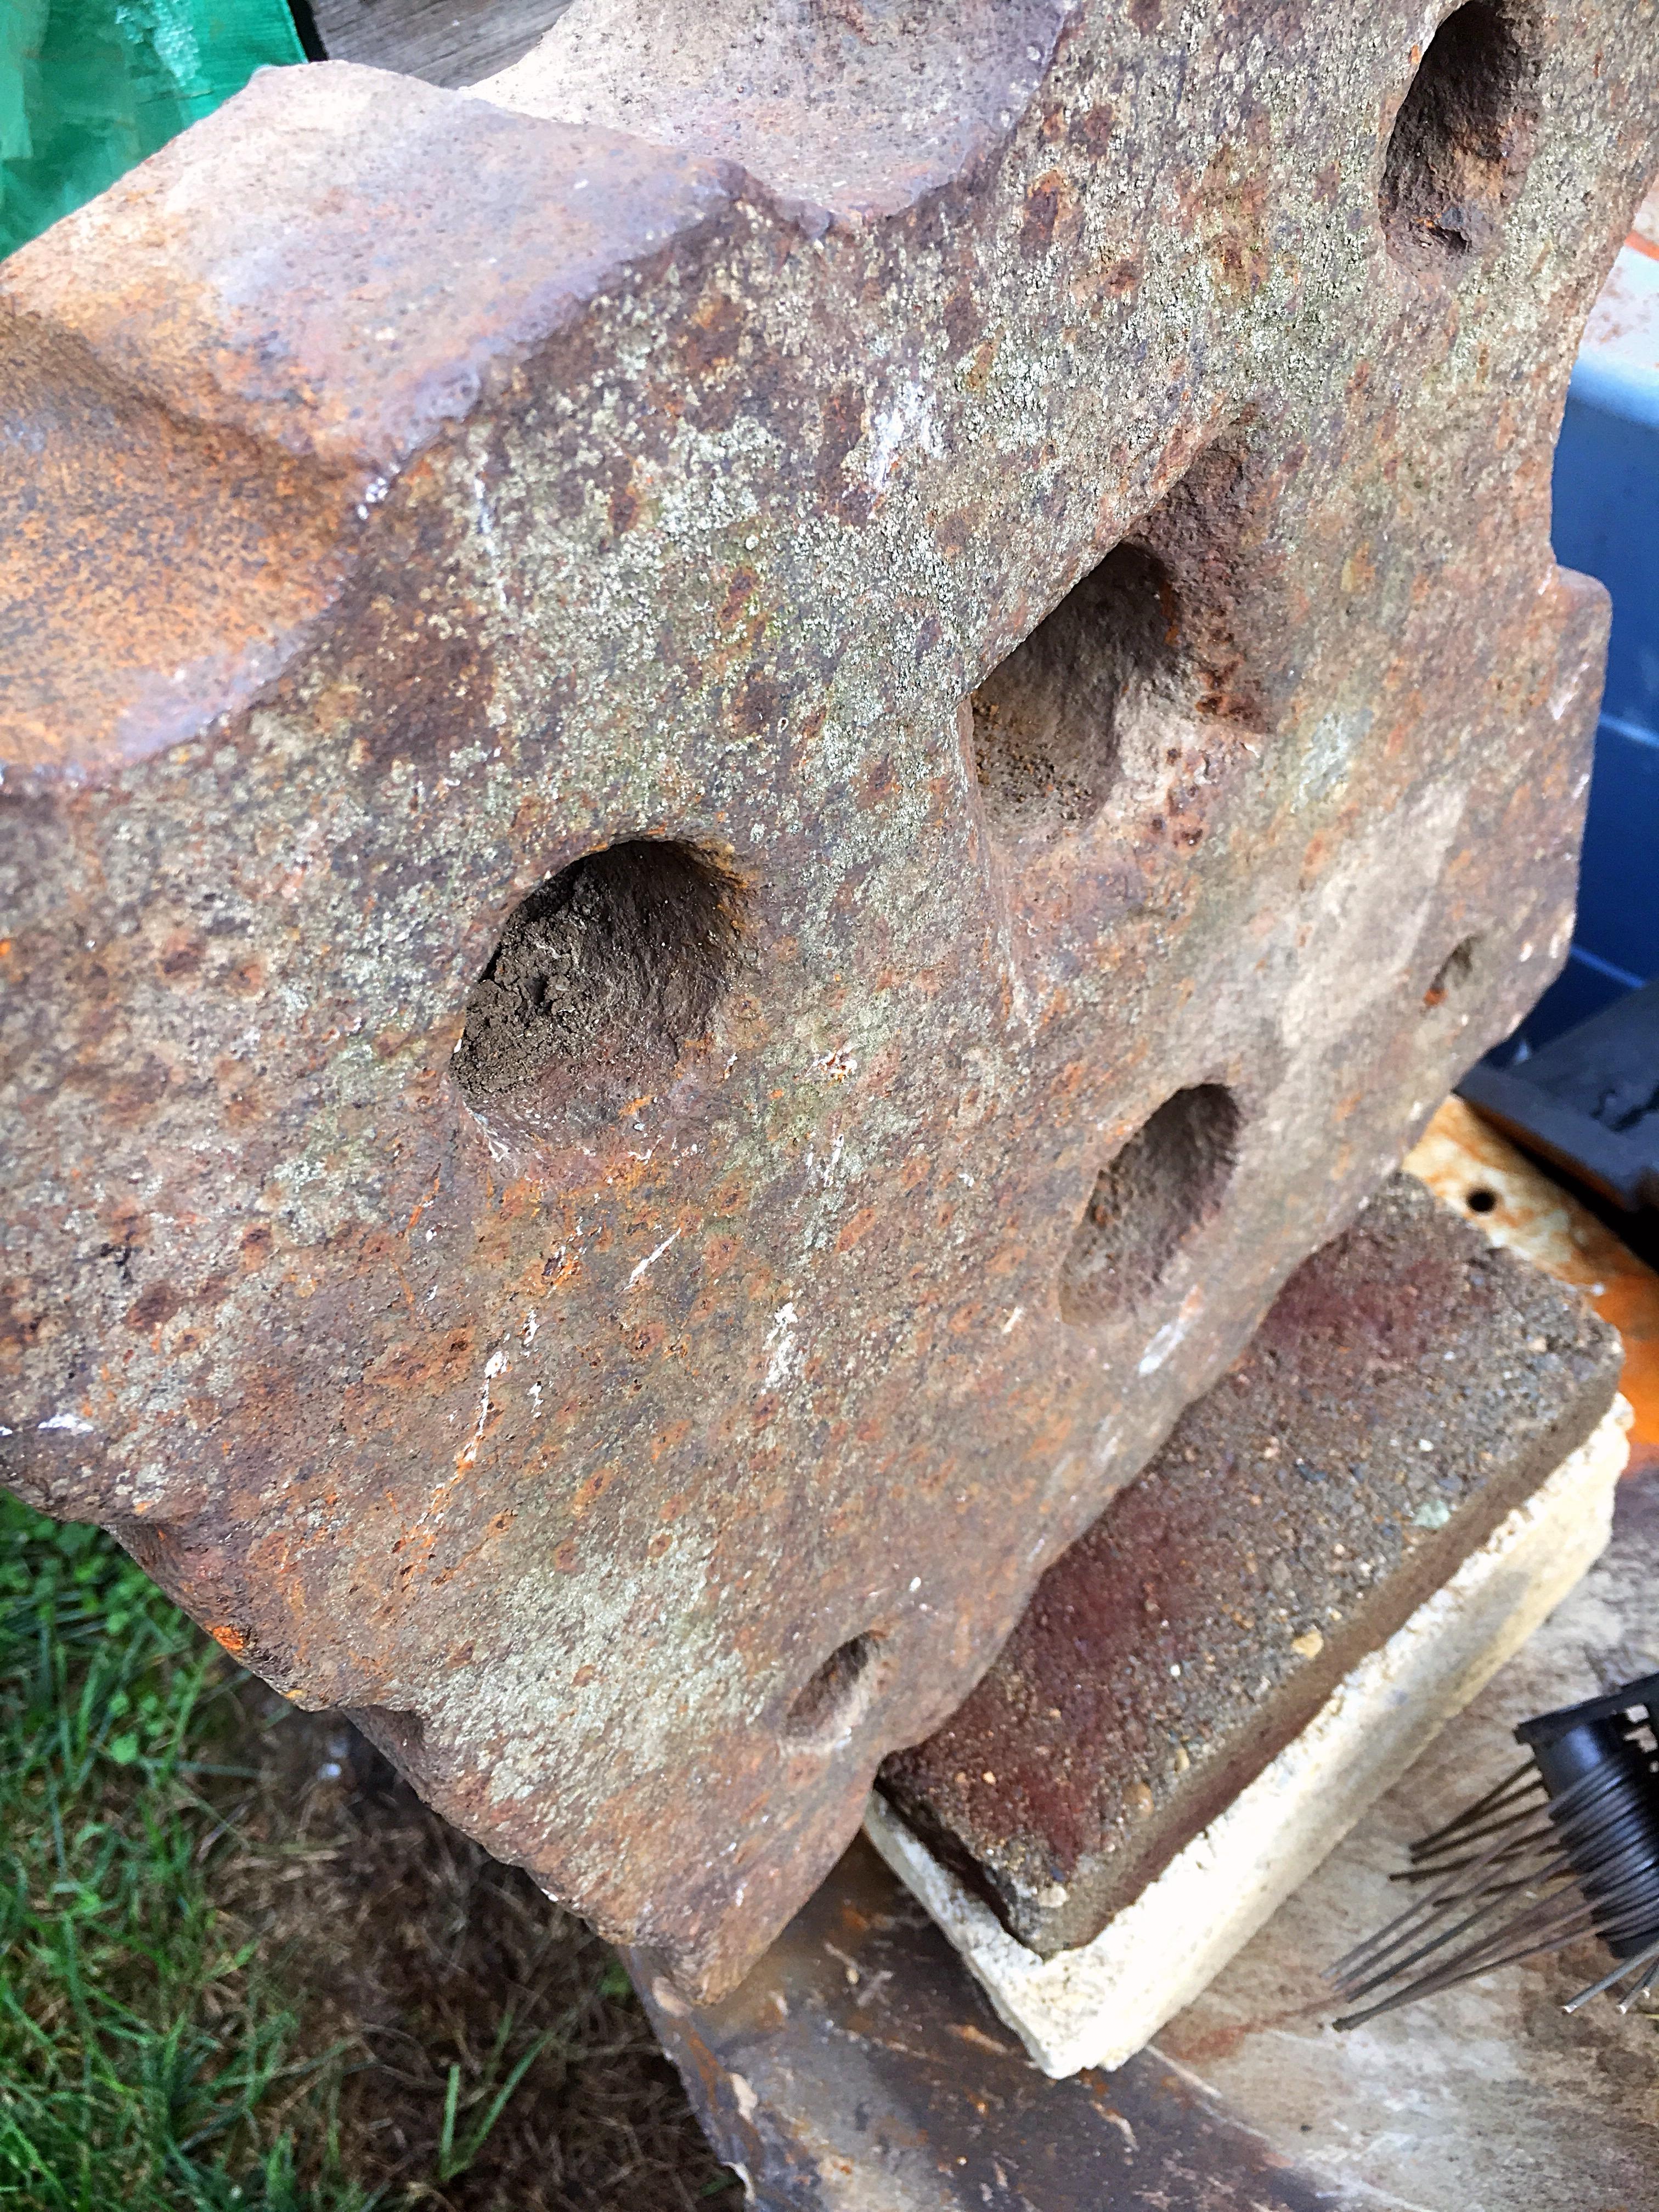
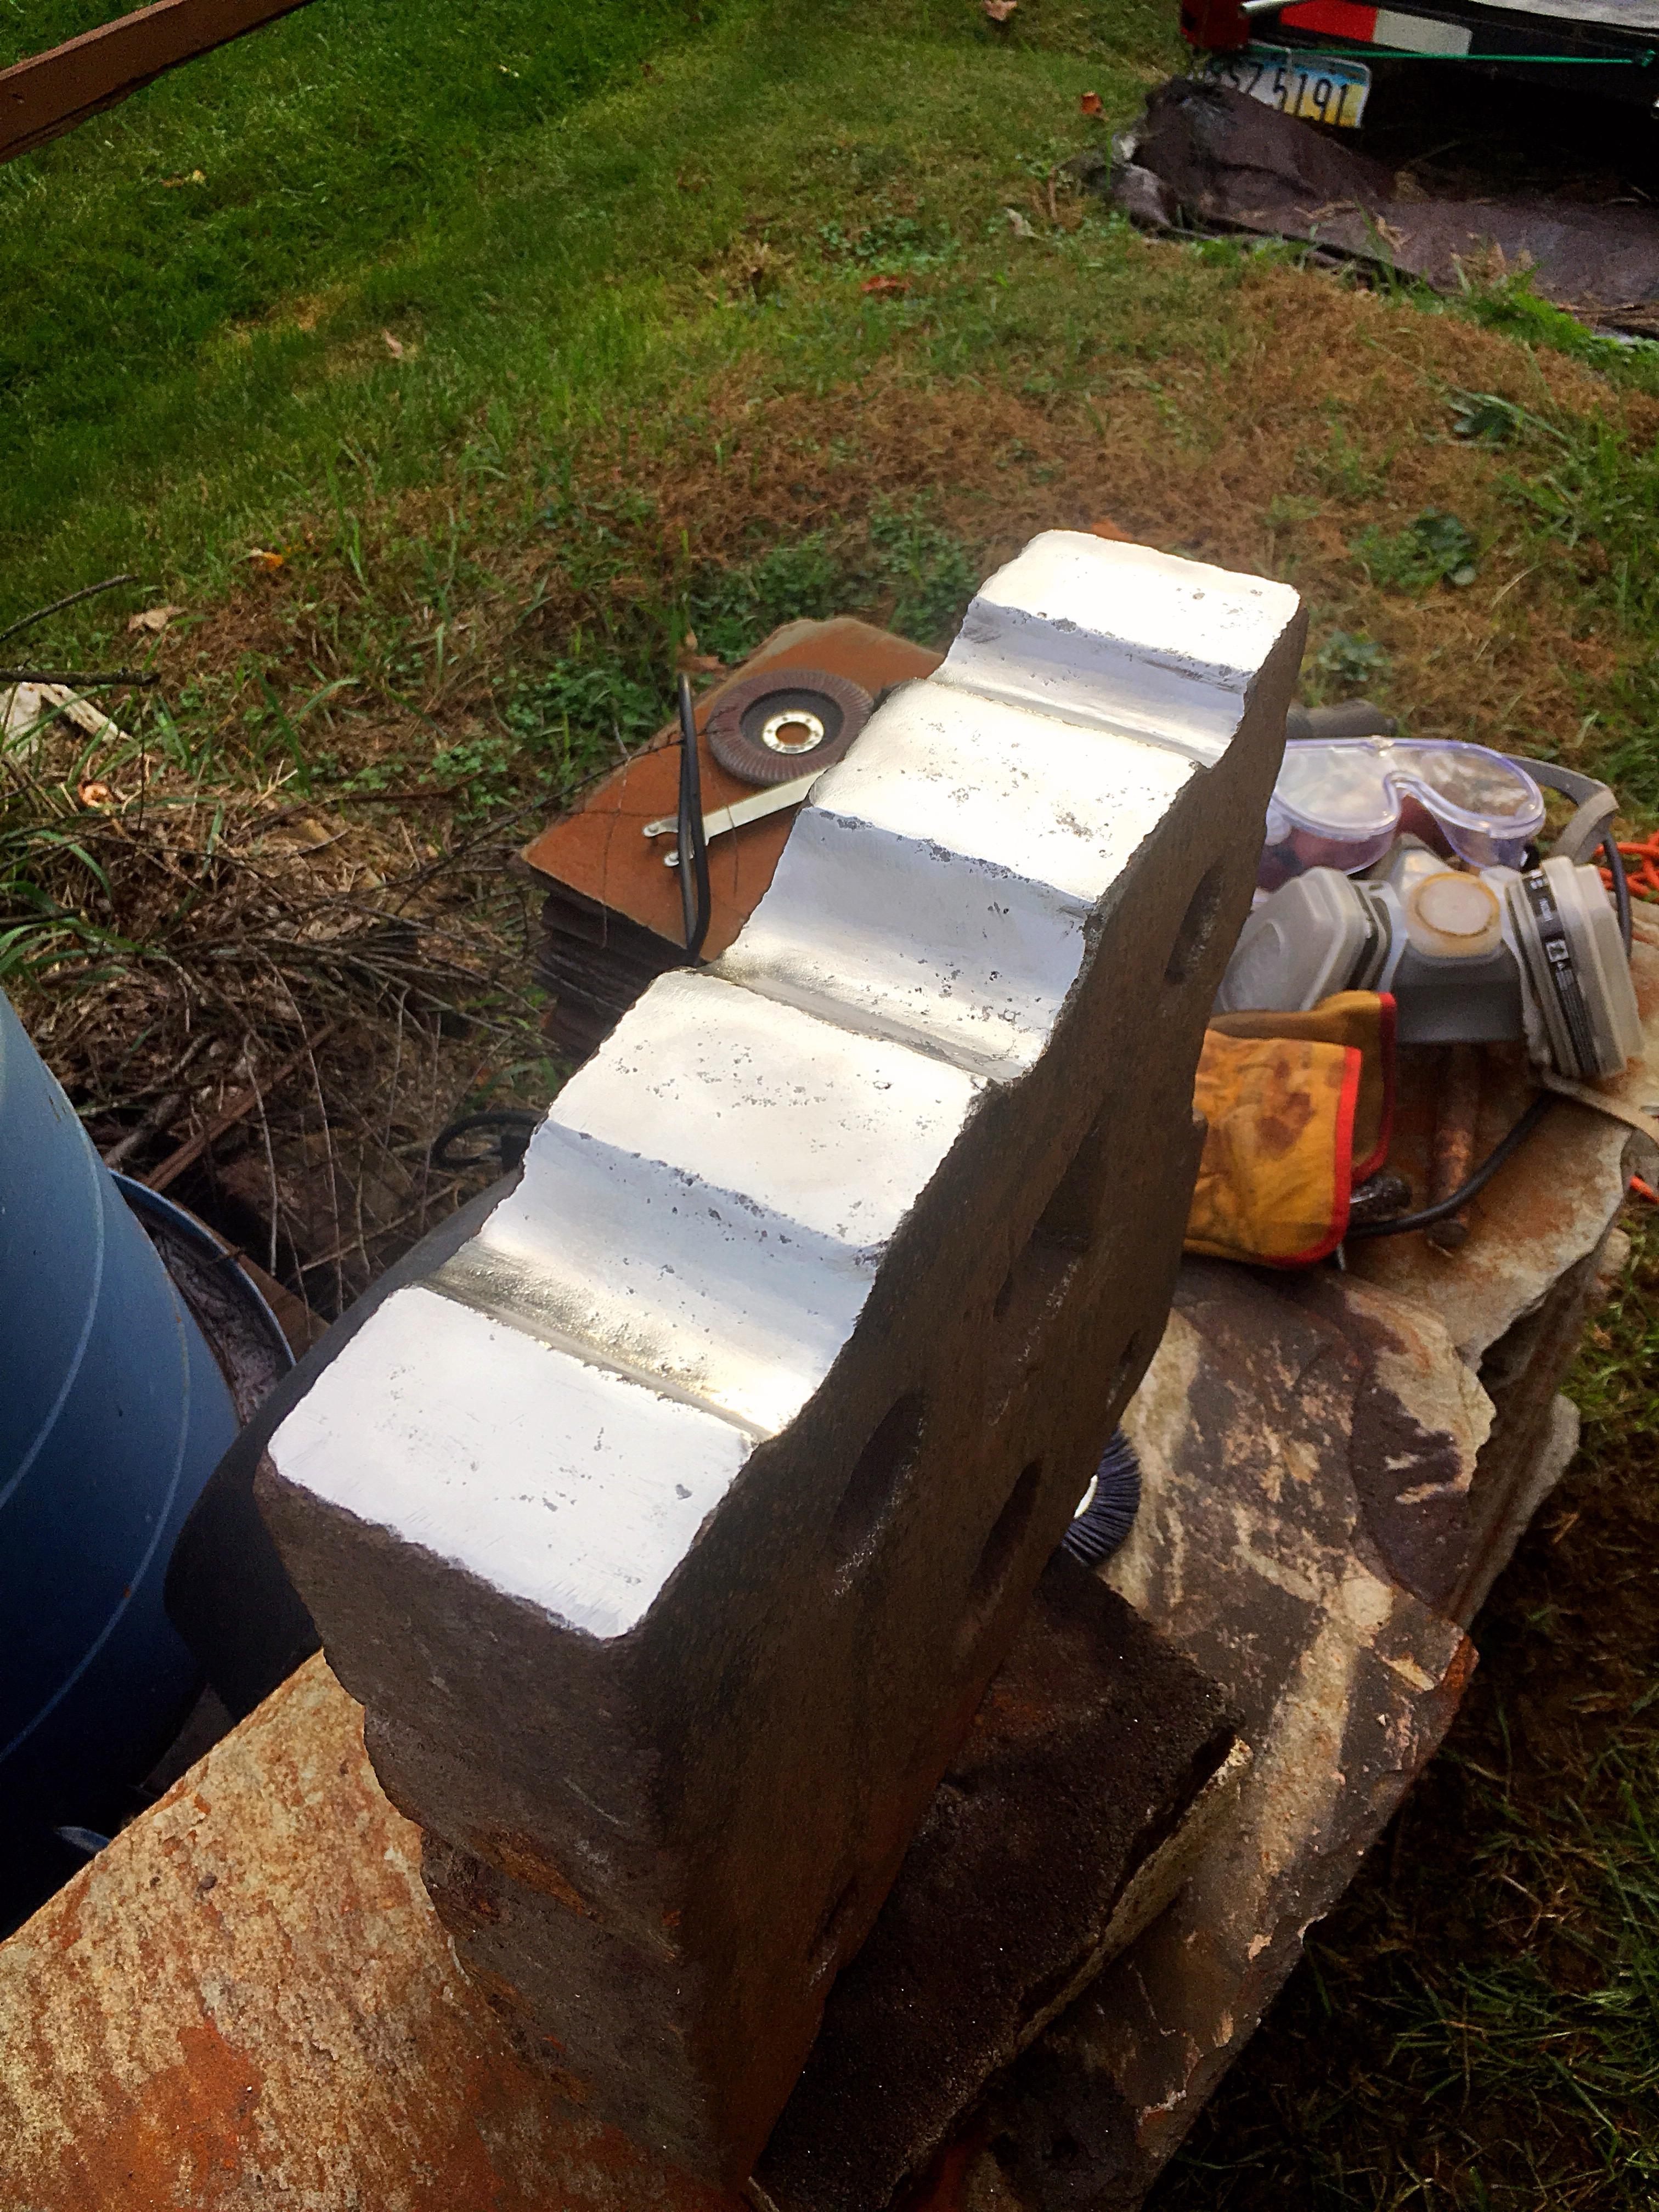
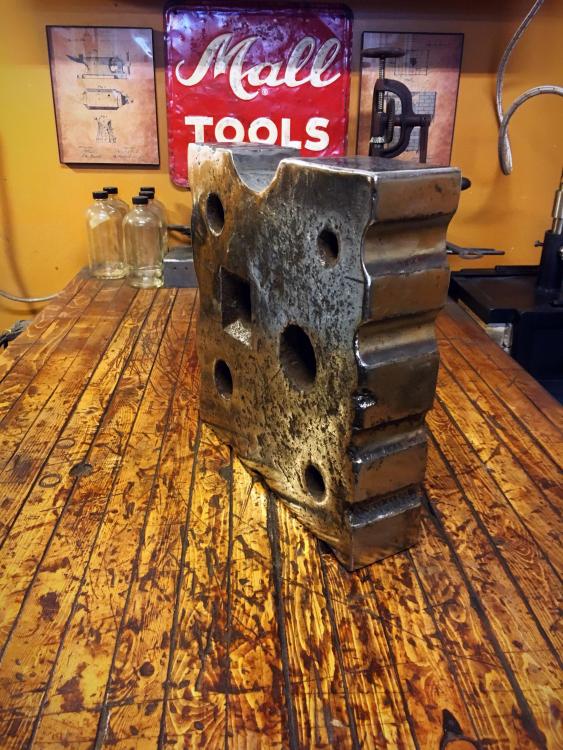
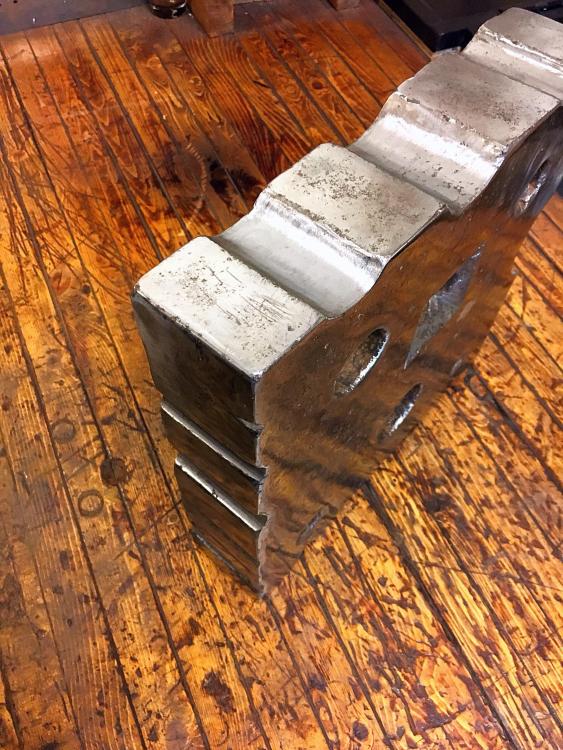
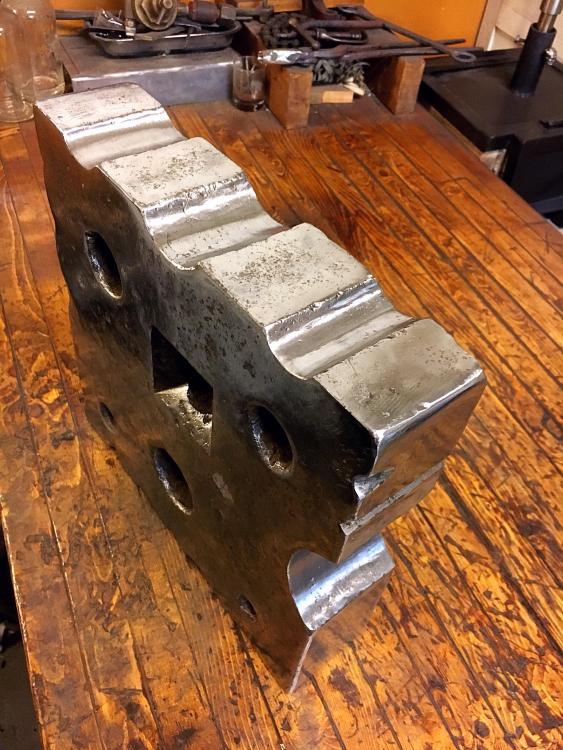
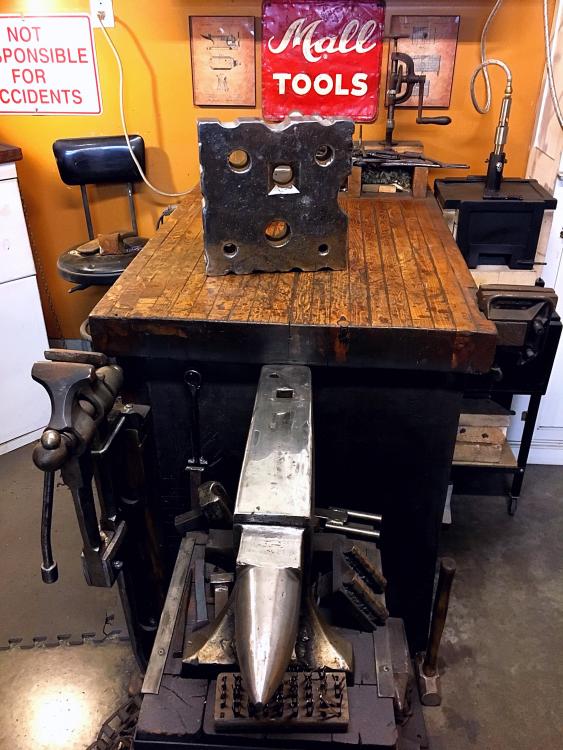
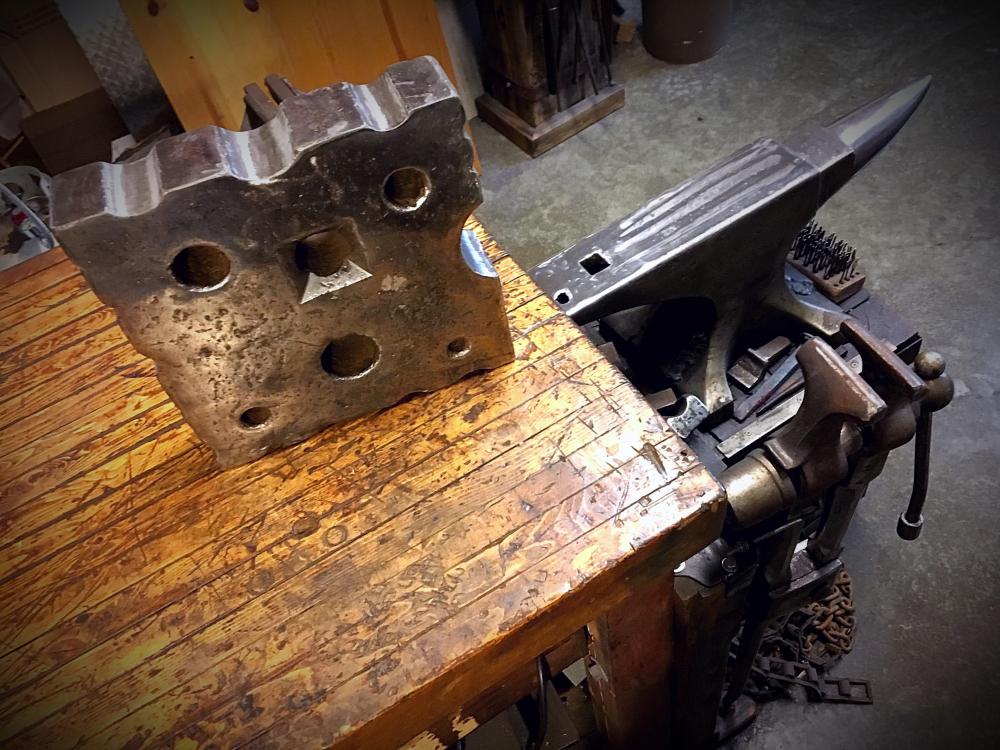
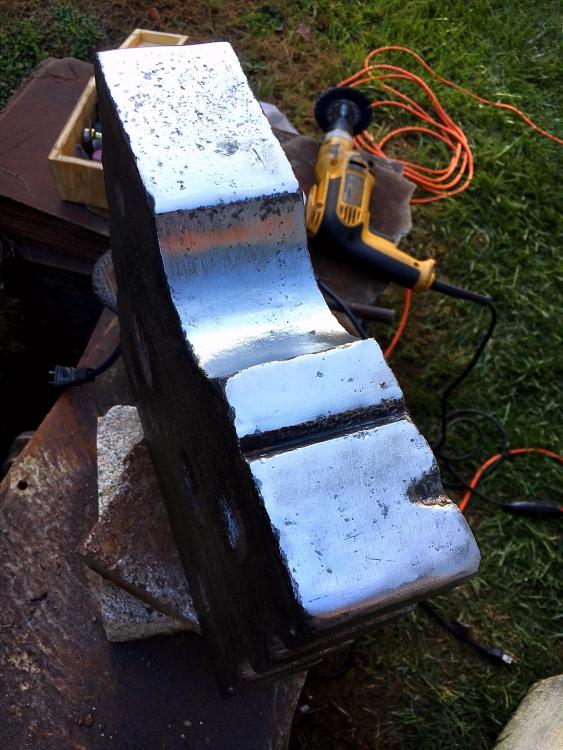
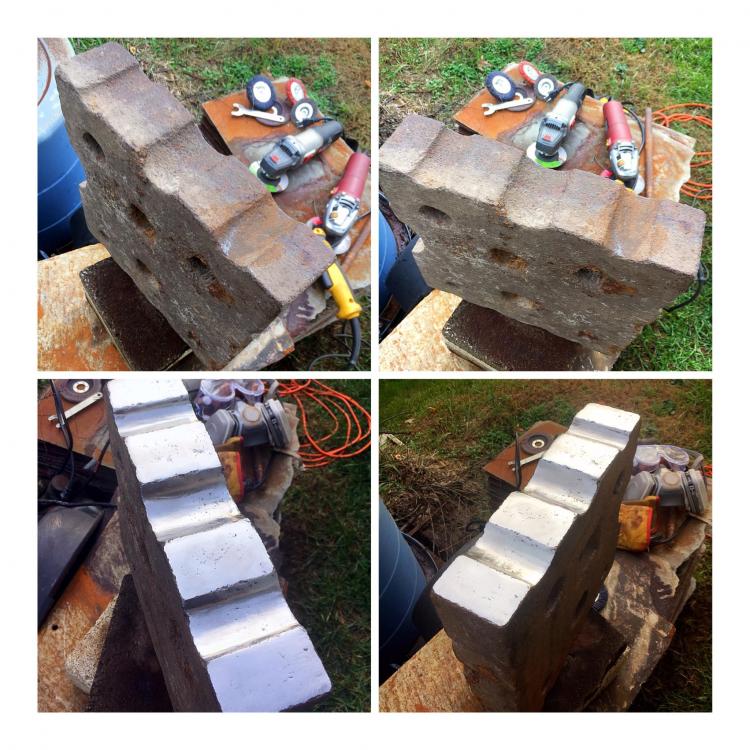
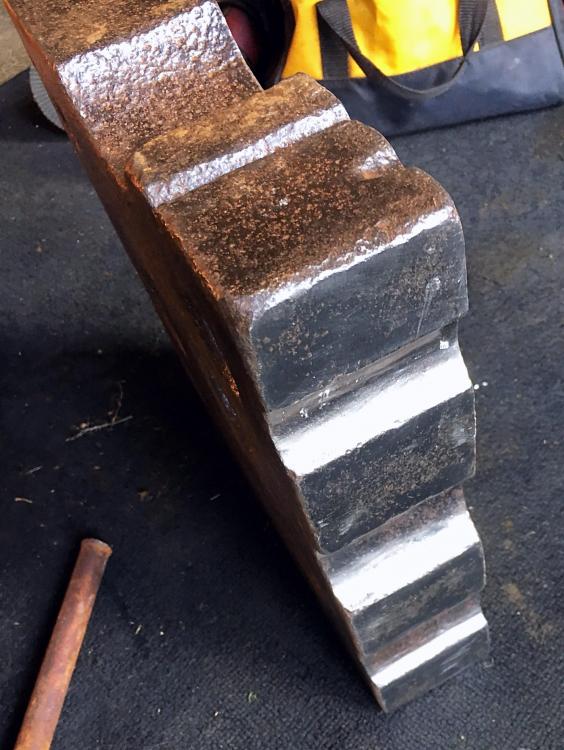
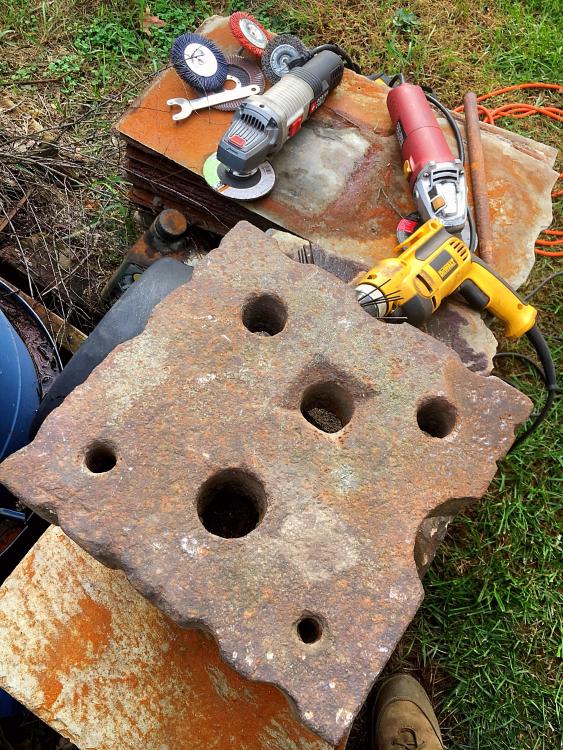
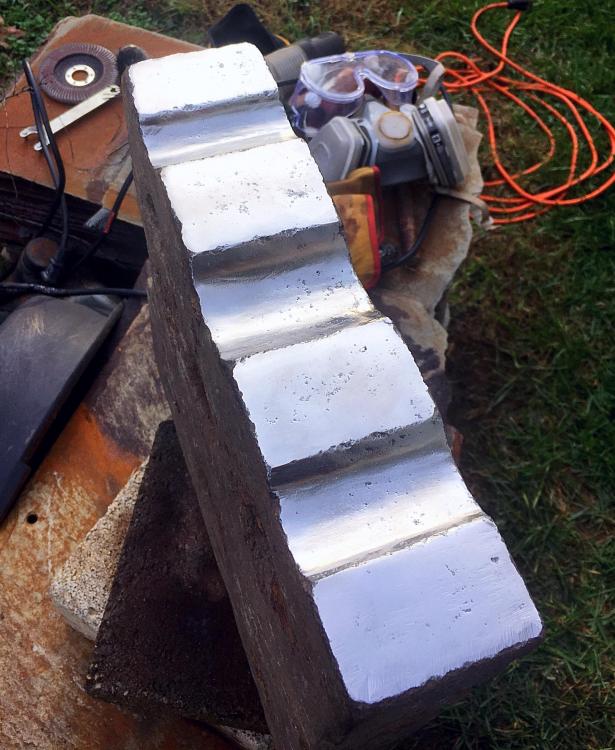
Finished up the cleaning on the swage block . Ready to put it back to work .


-
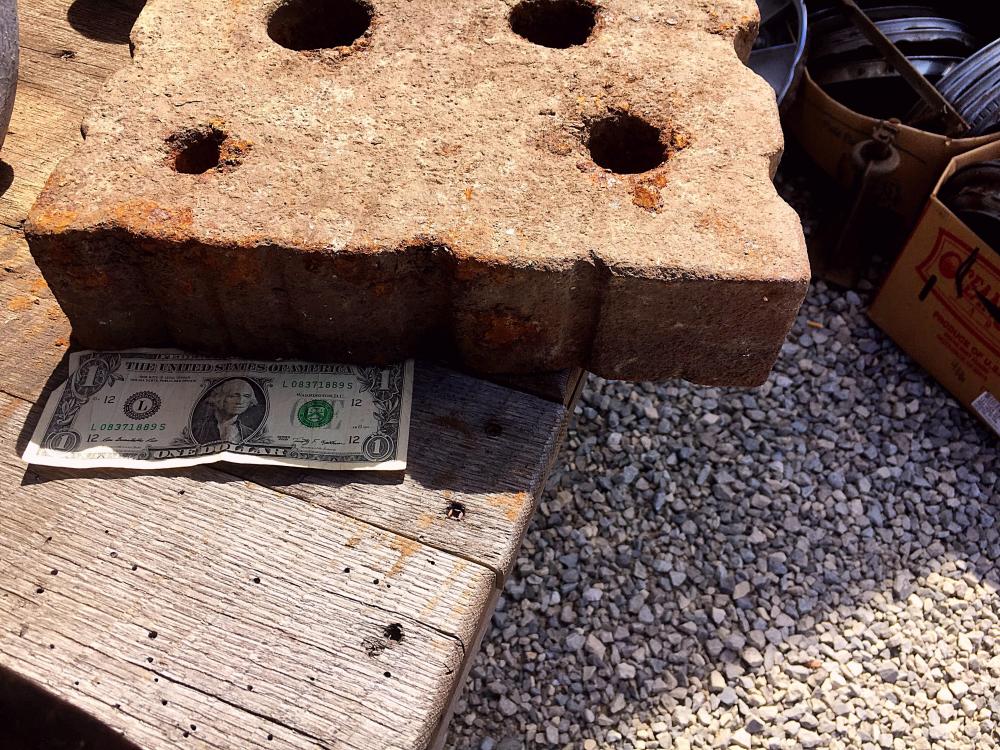
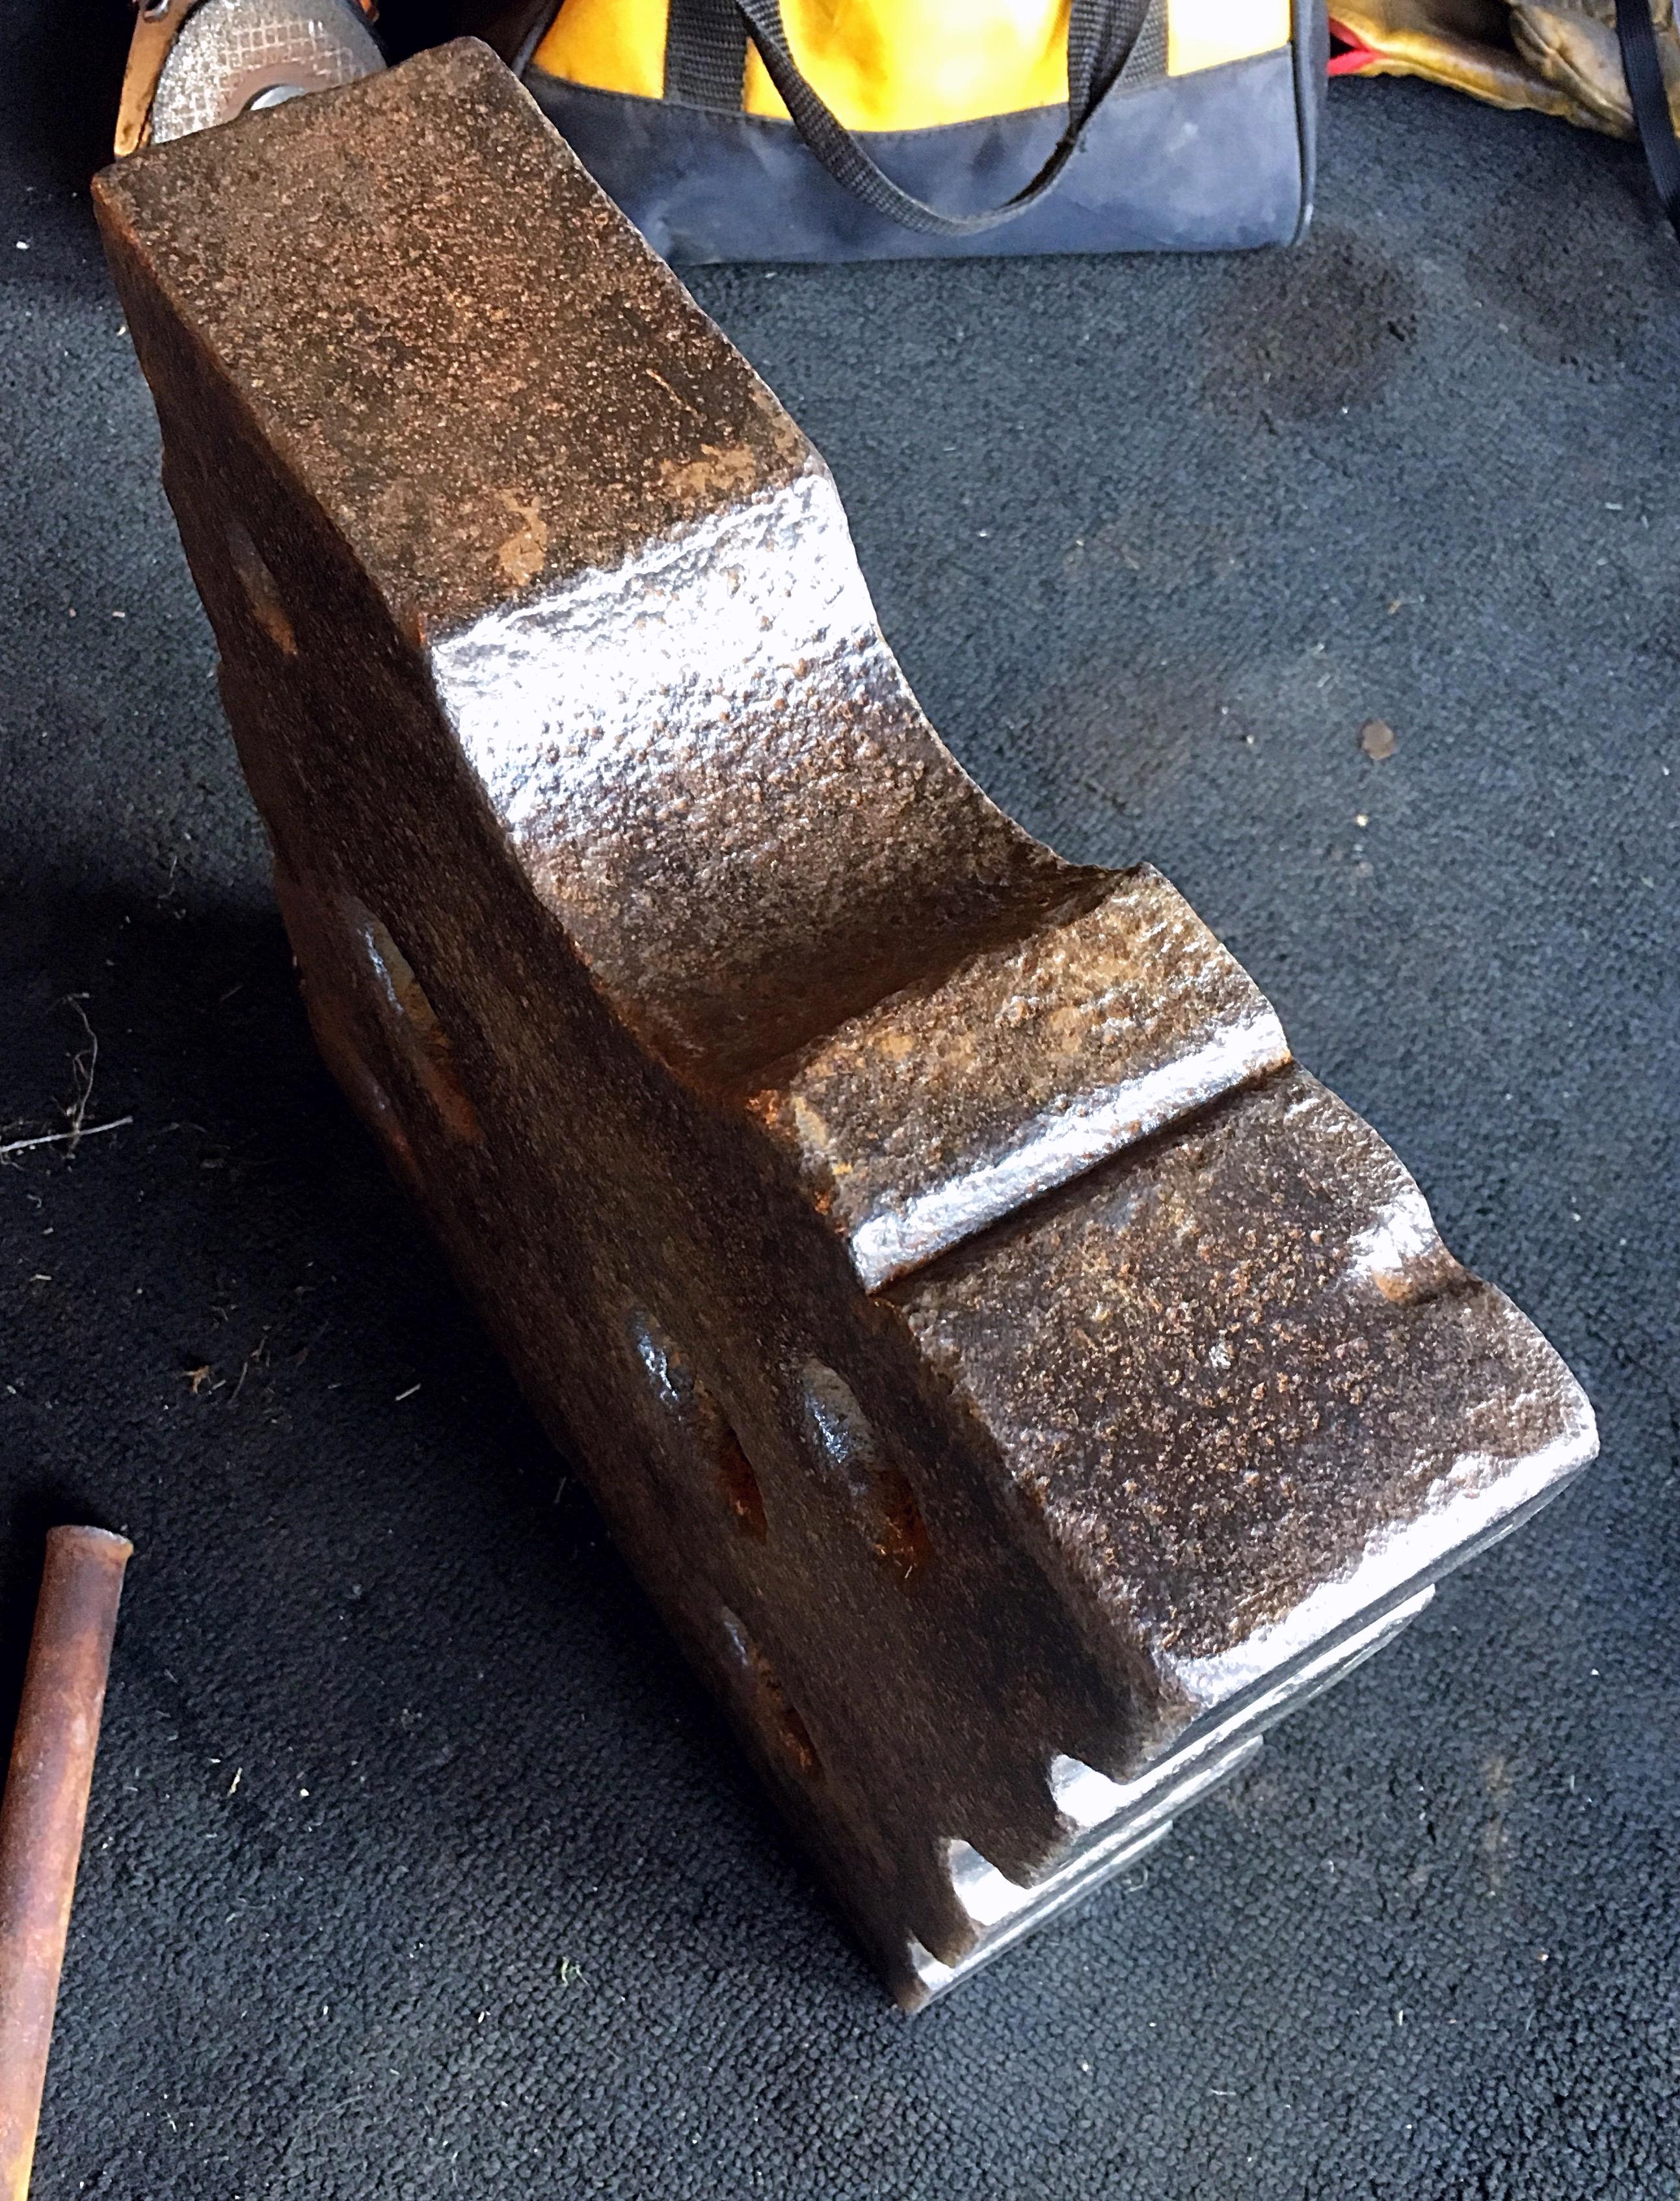
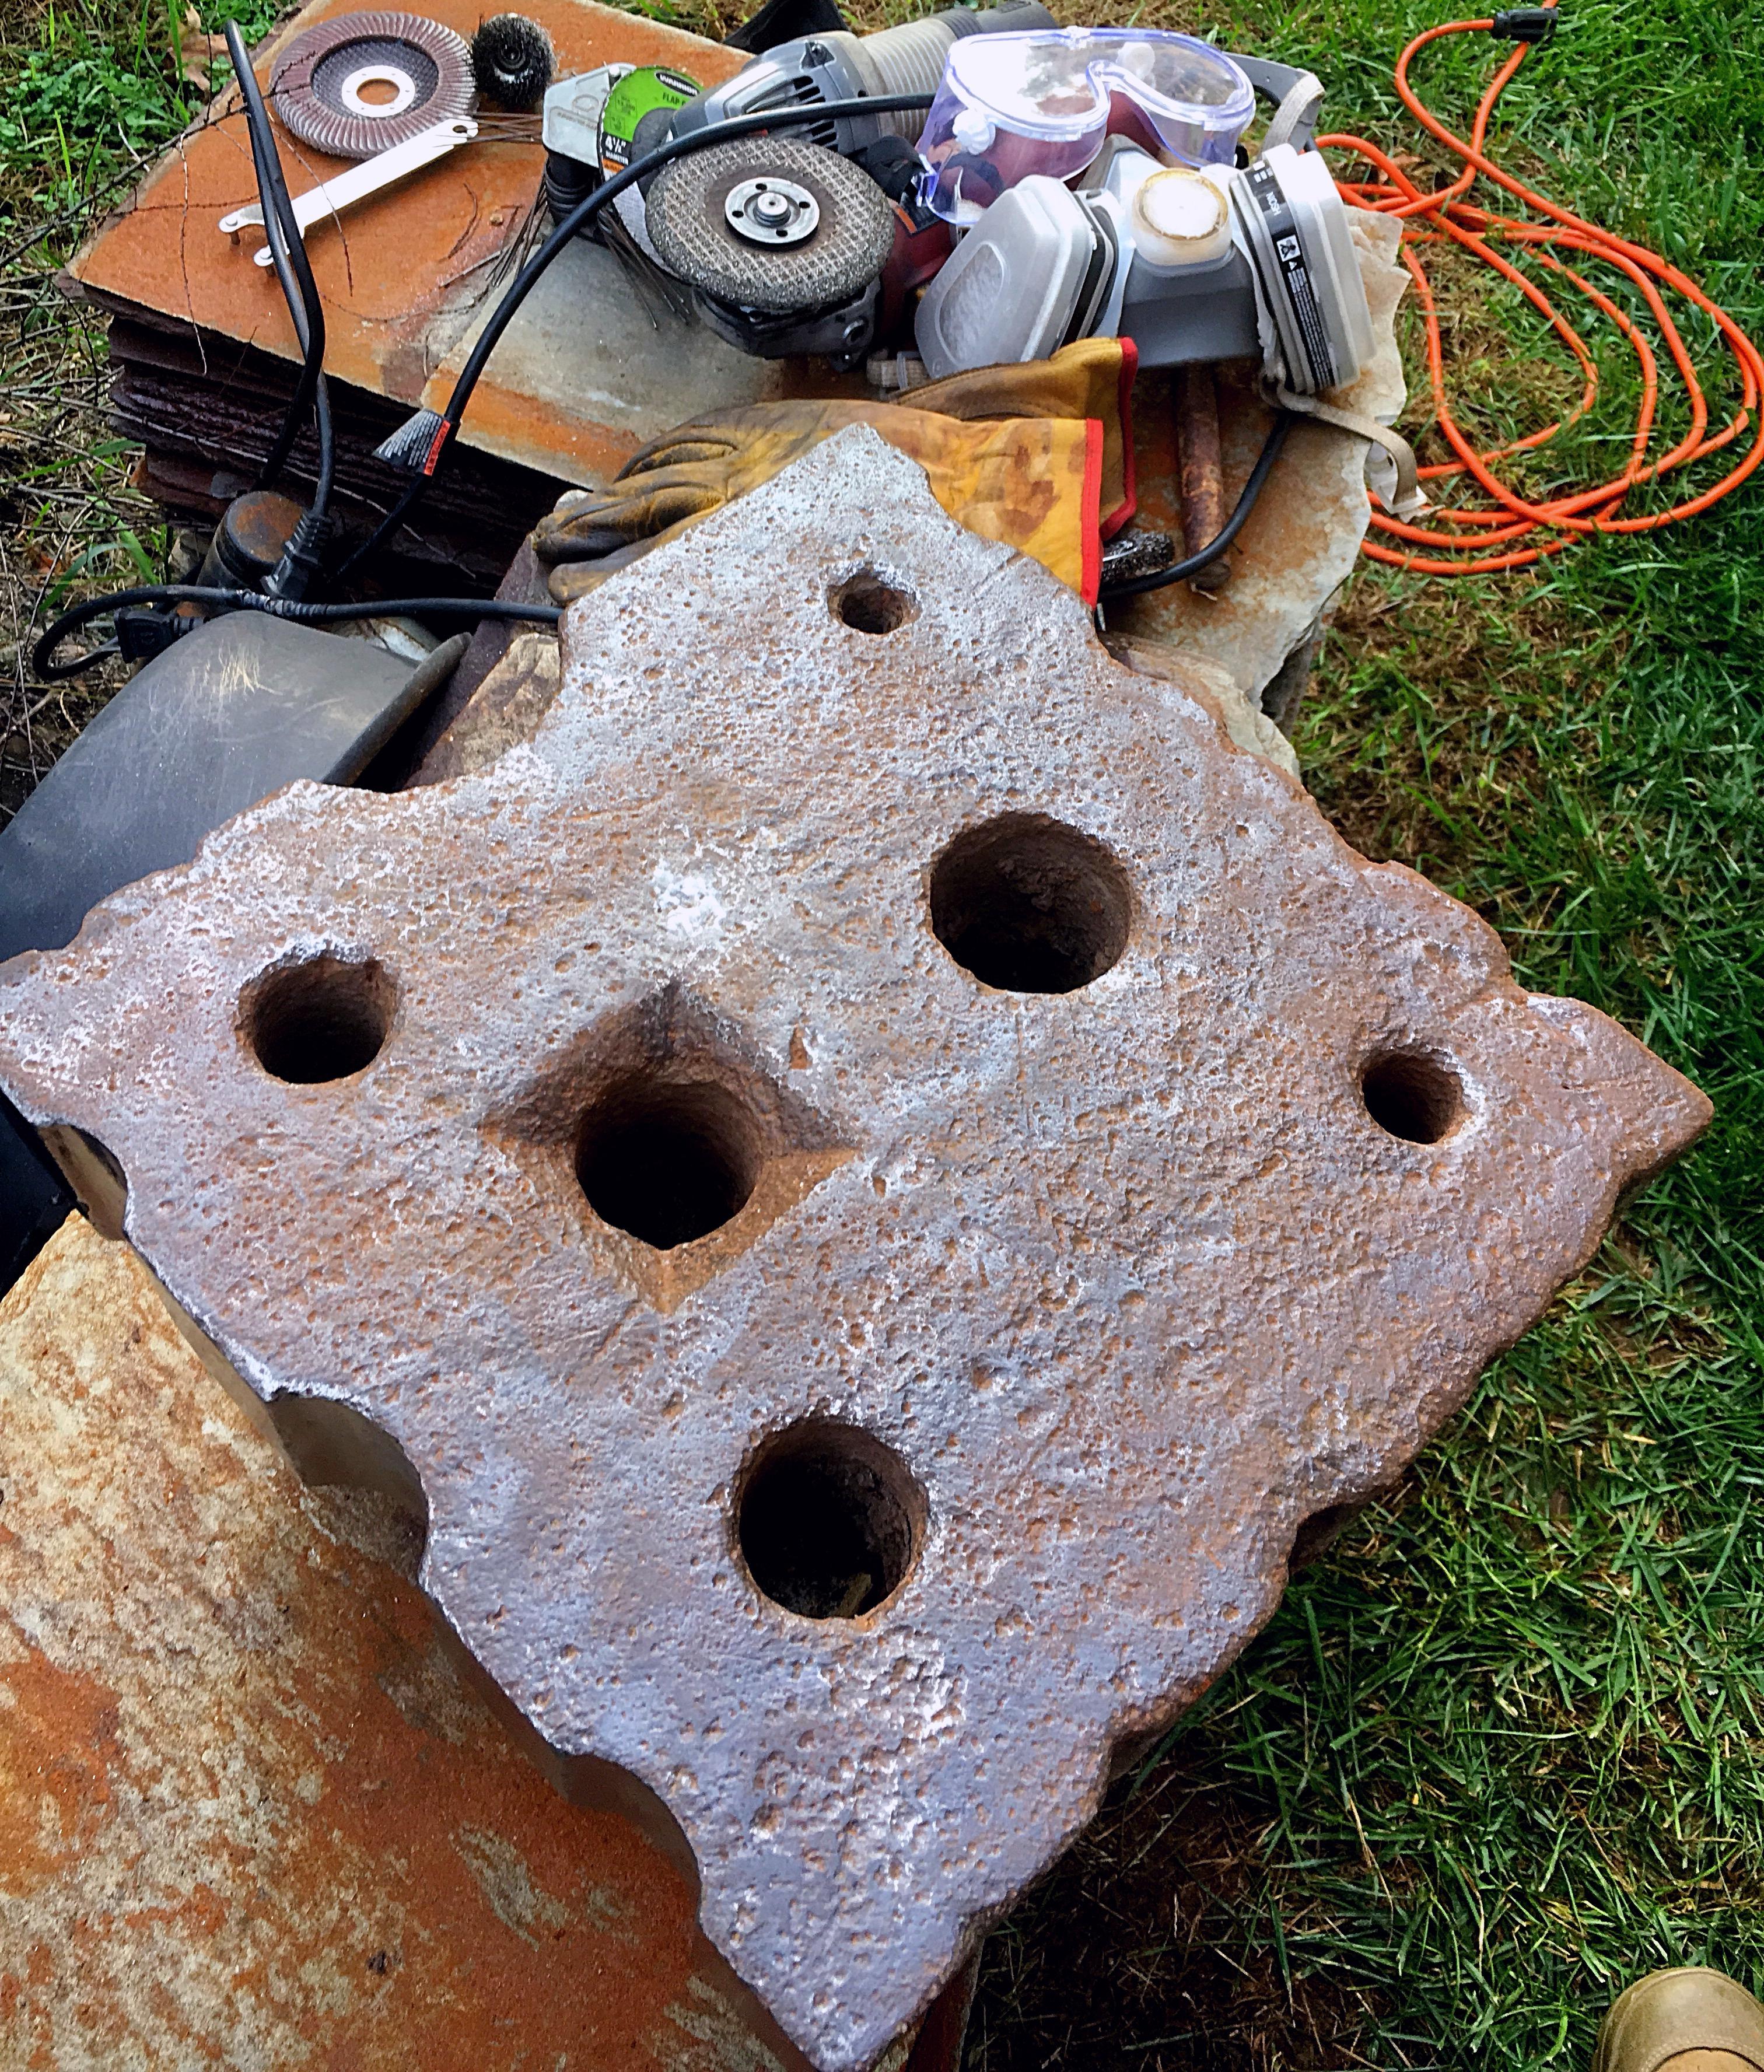
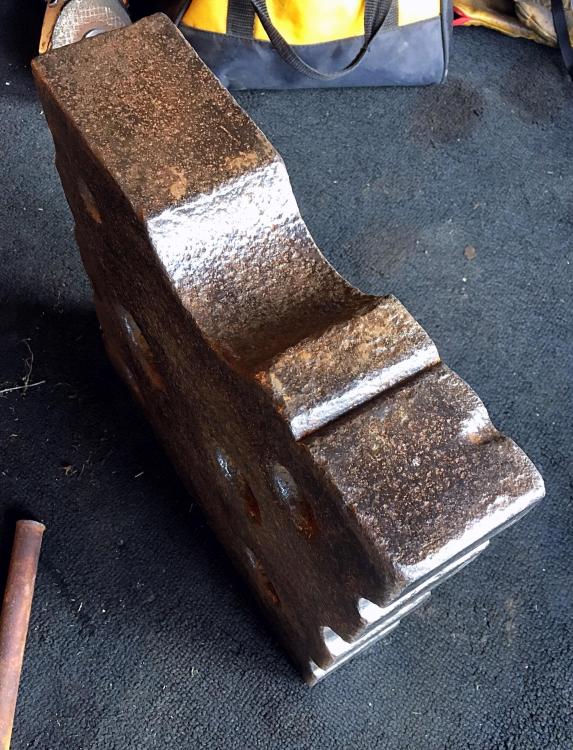
I know but the pitting was so deep , I think I get why it was only $150
-
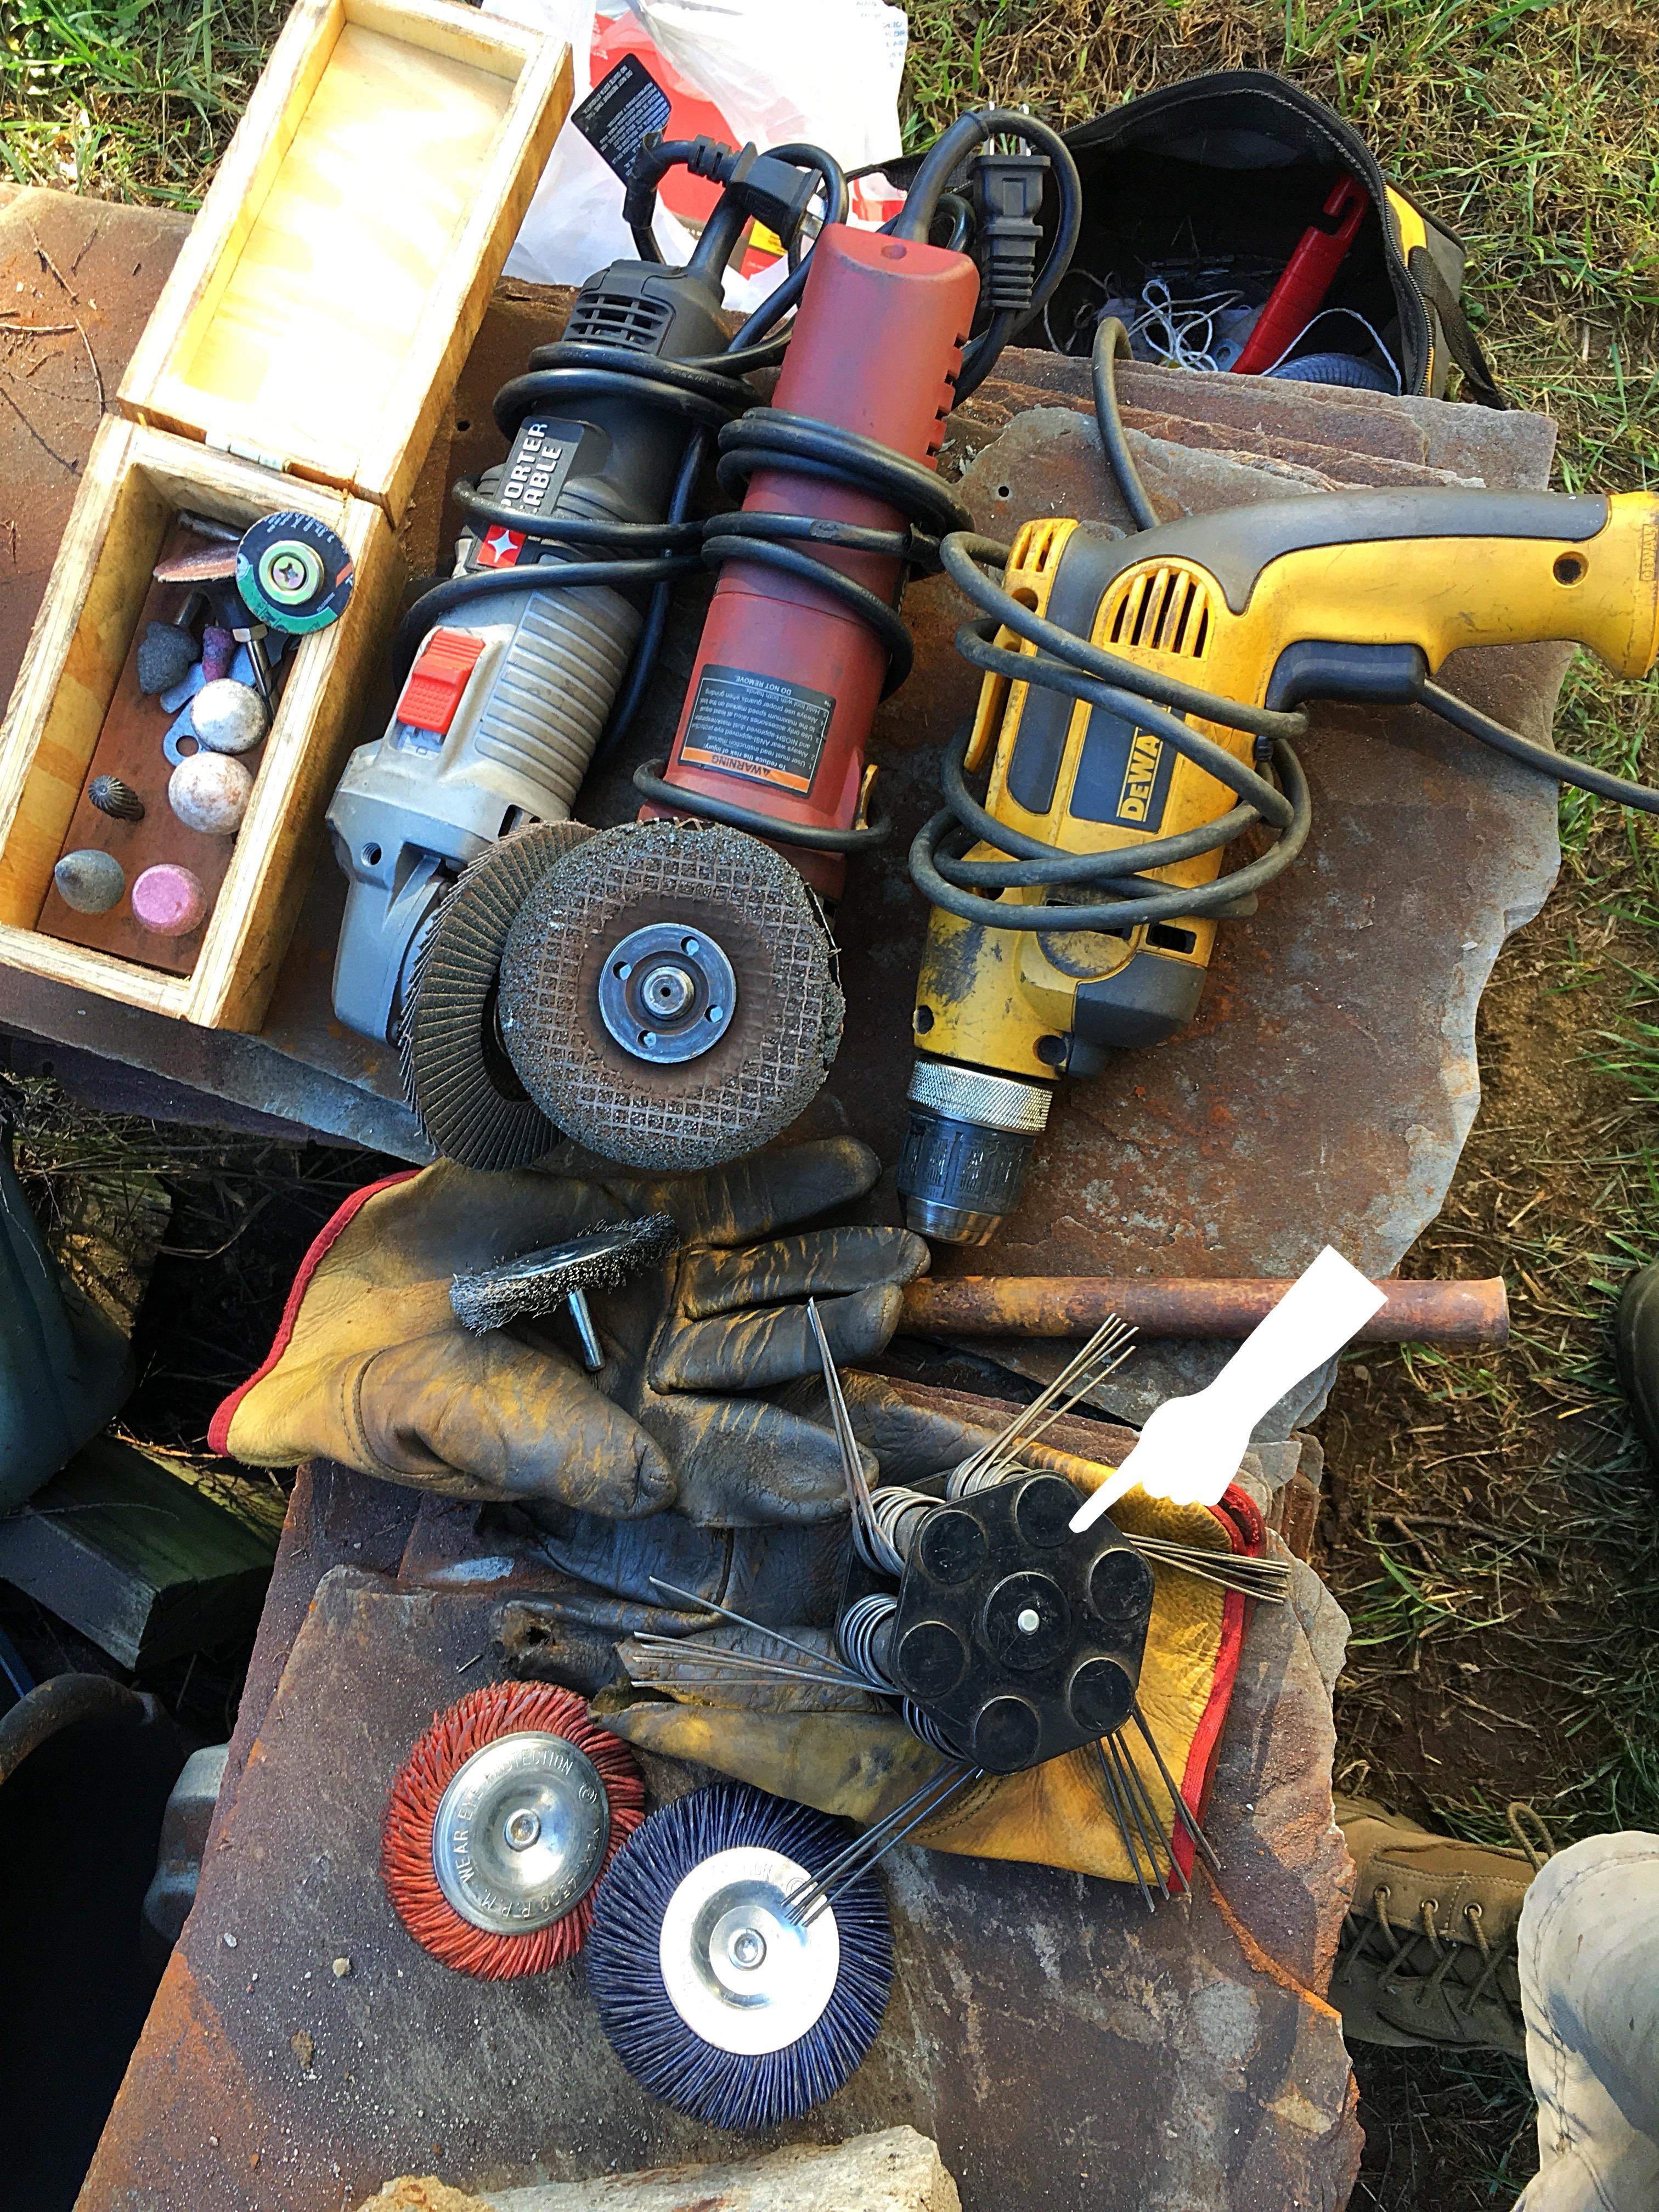
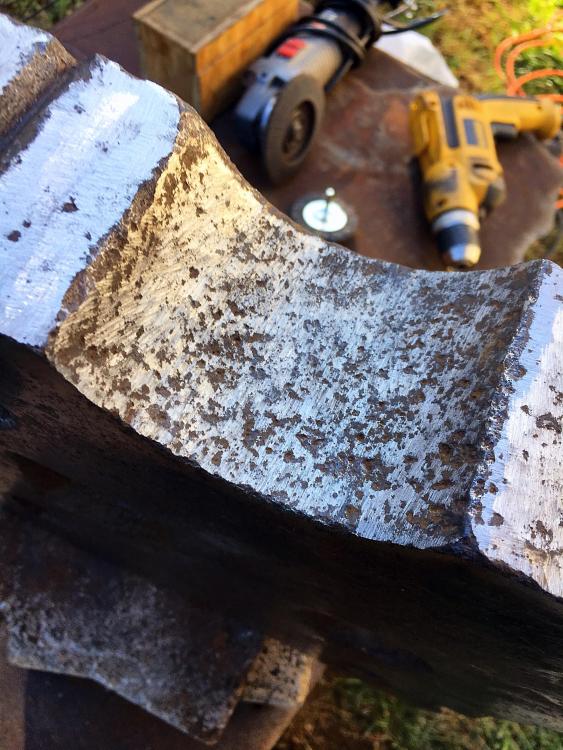
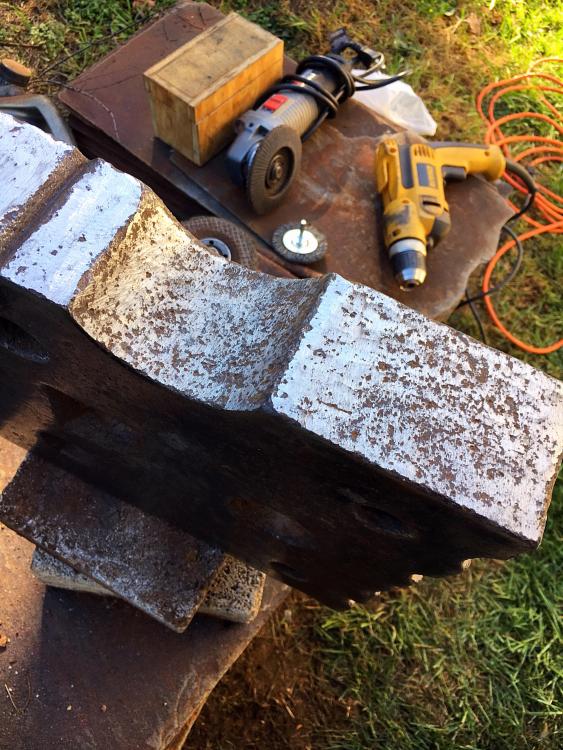
A number of items. I started with the scale / paint removal device used for getting paint off metal. I found it works great for removing the loose dirt & flaking rust. If going for a more polished surface I then go to the angle grinder to get the heavy rust off & remove the tops of the heavily pitted surface. Then move from the grinding disk to the Flap pad sanding disks starting with a 60gr and down to 120gr . If I don’t want a shiny surface I skip the angle grinder completely and go to the fiber wire attachments for the drill. Harbor freight has these, orange is course , blue is fine grit. After that I go to the wire brush attachments in the drill. I use die grinder bits in the drill to reshape the concave parts on the sides. I have 6 hours into it so far. I expect 4-5 more as I prefer to go slow & light. Mistakes are smaller & easier to fix when I don’t try to do it all in a couple hours. This portion is almost don’t.

-
Clean up on the Swage Block I bought last weekend.

-
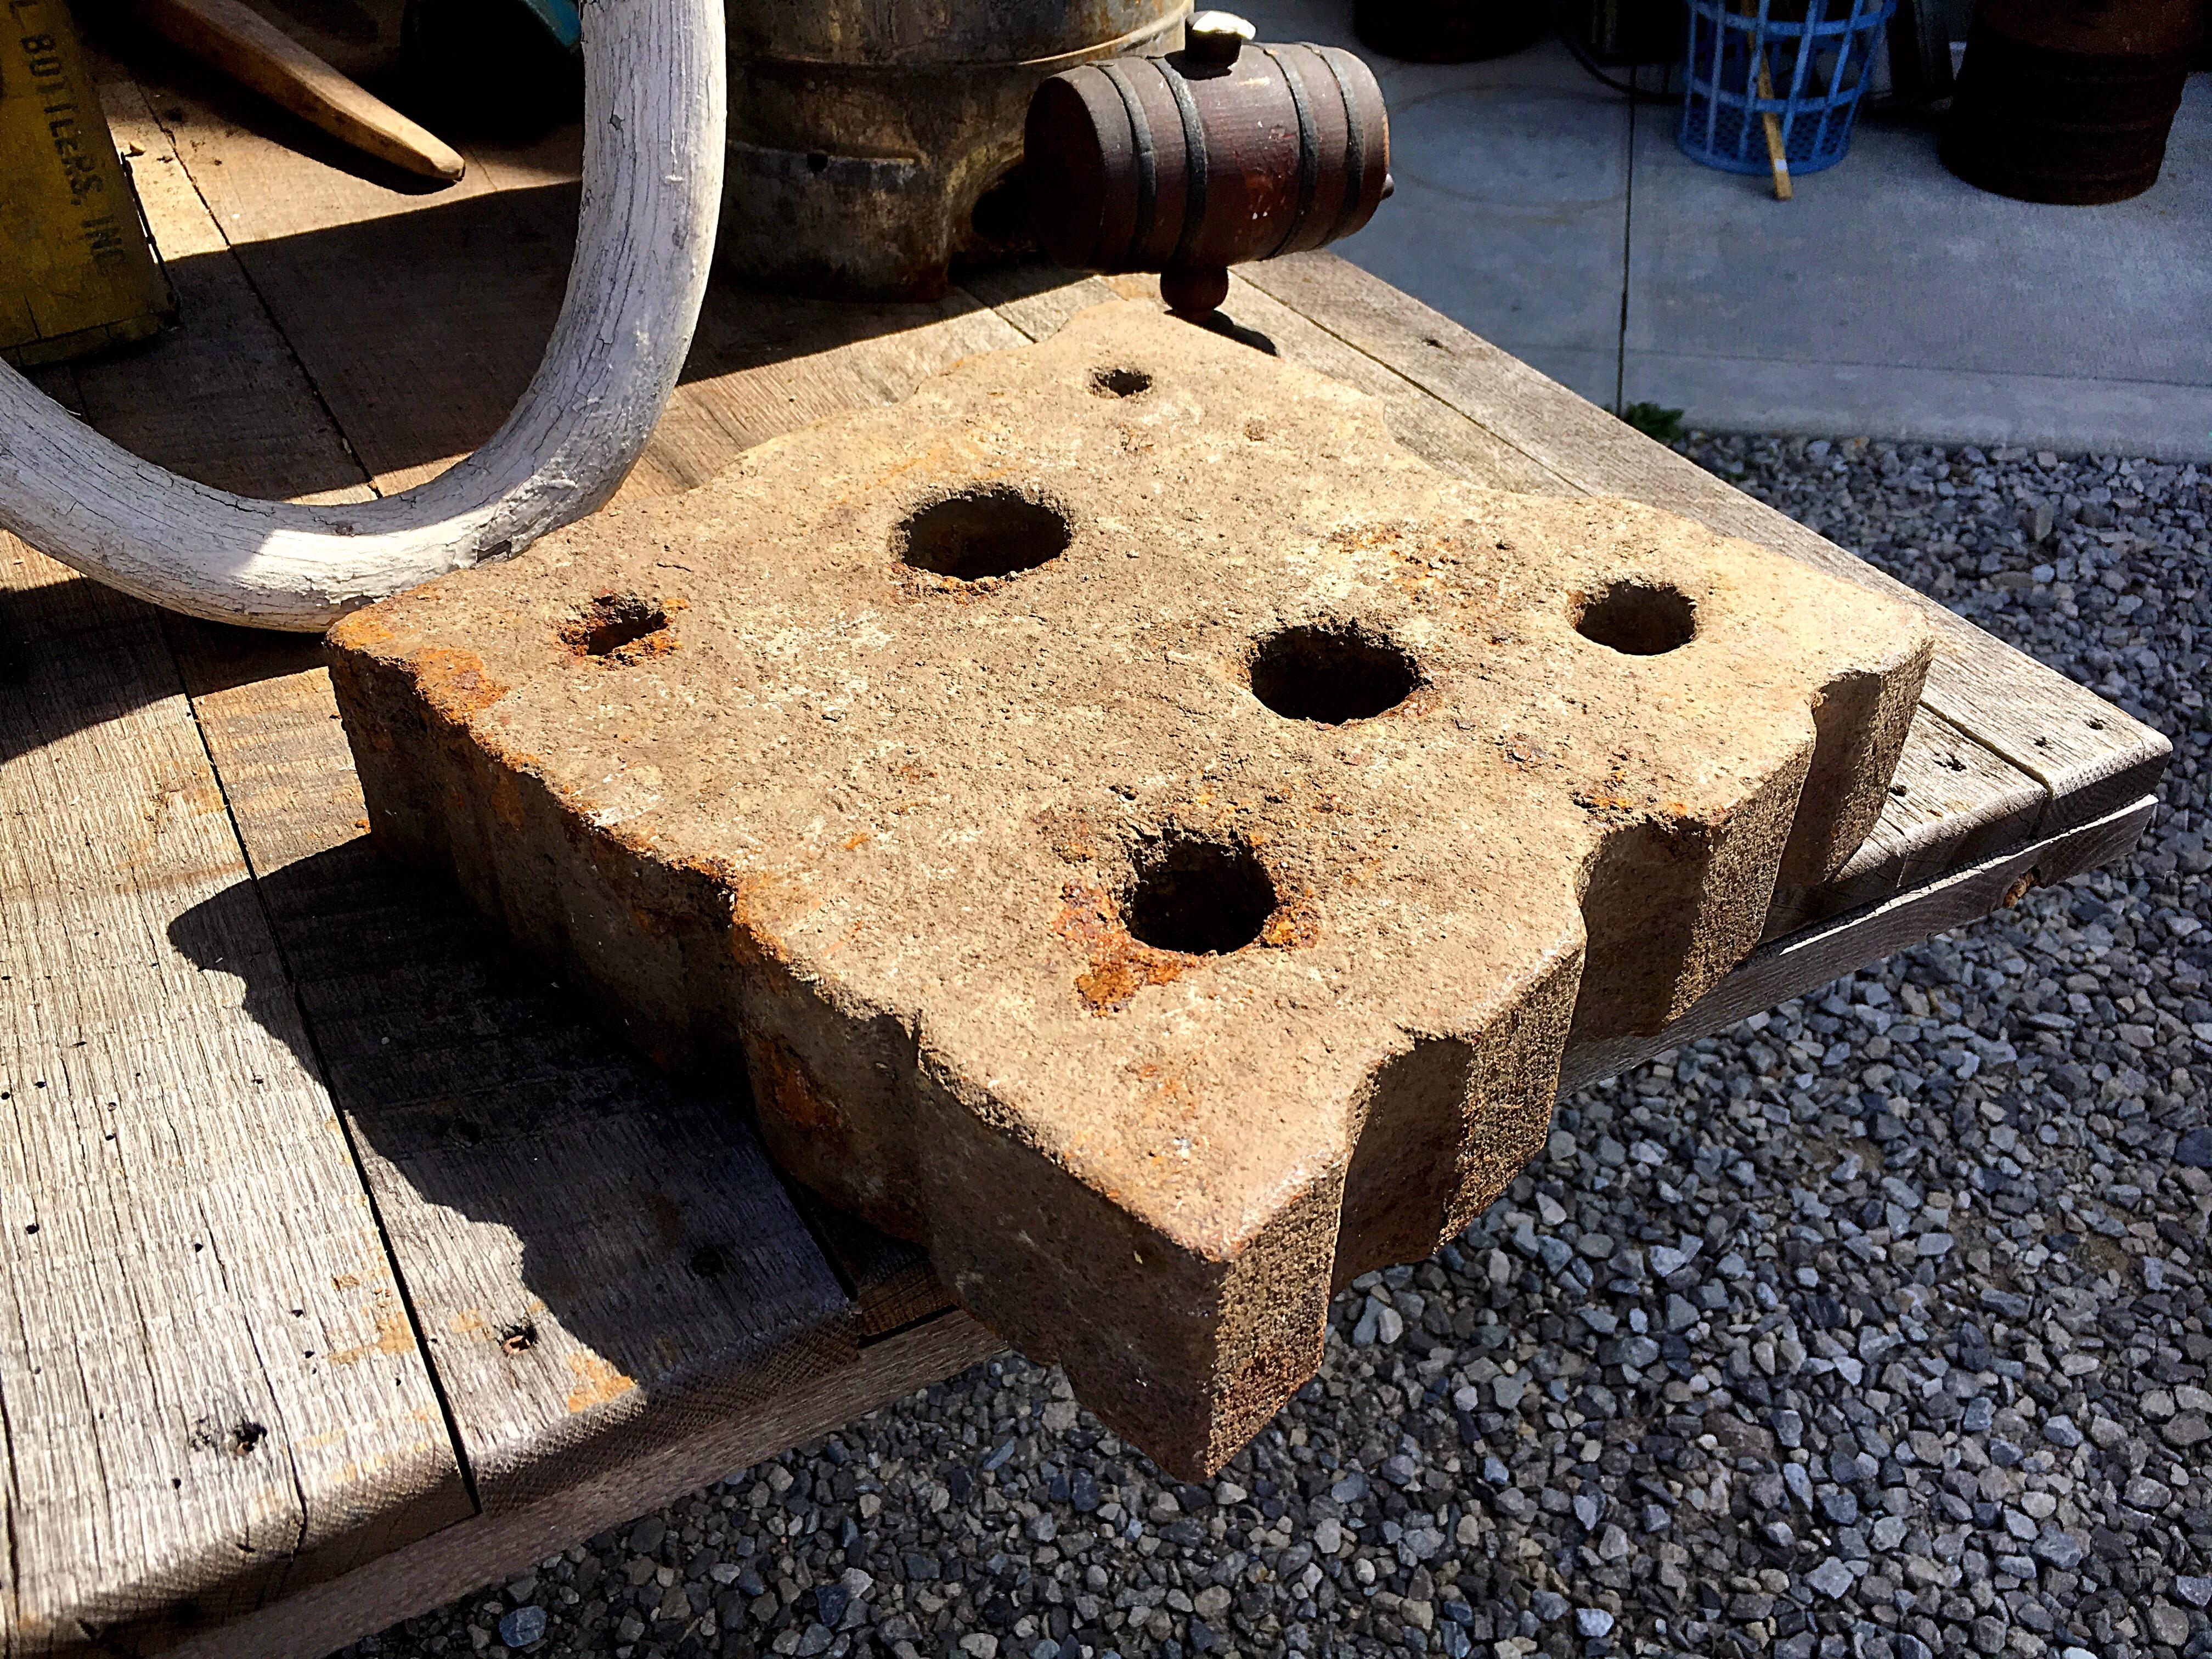
And so the clean up begins


-
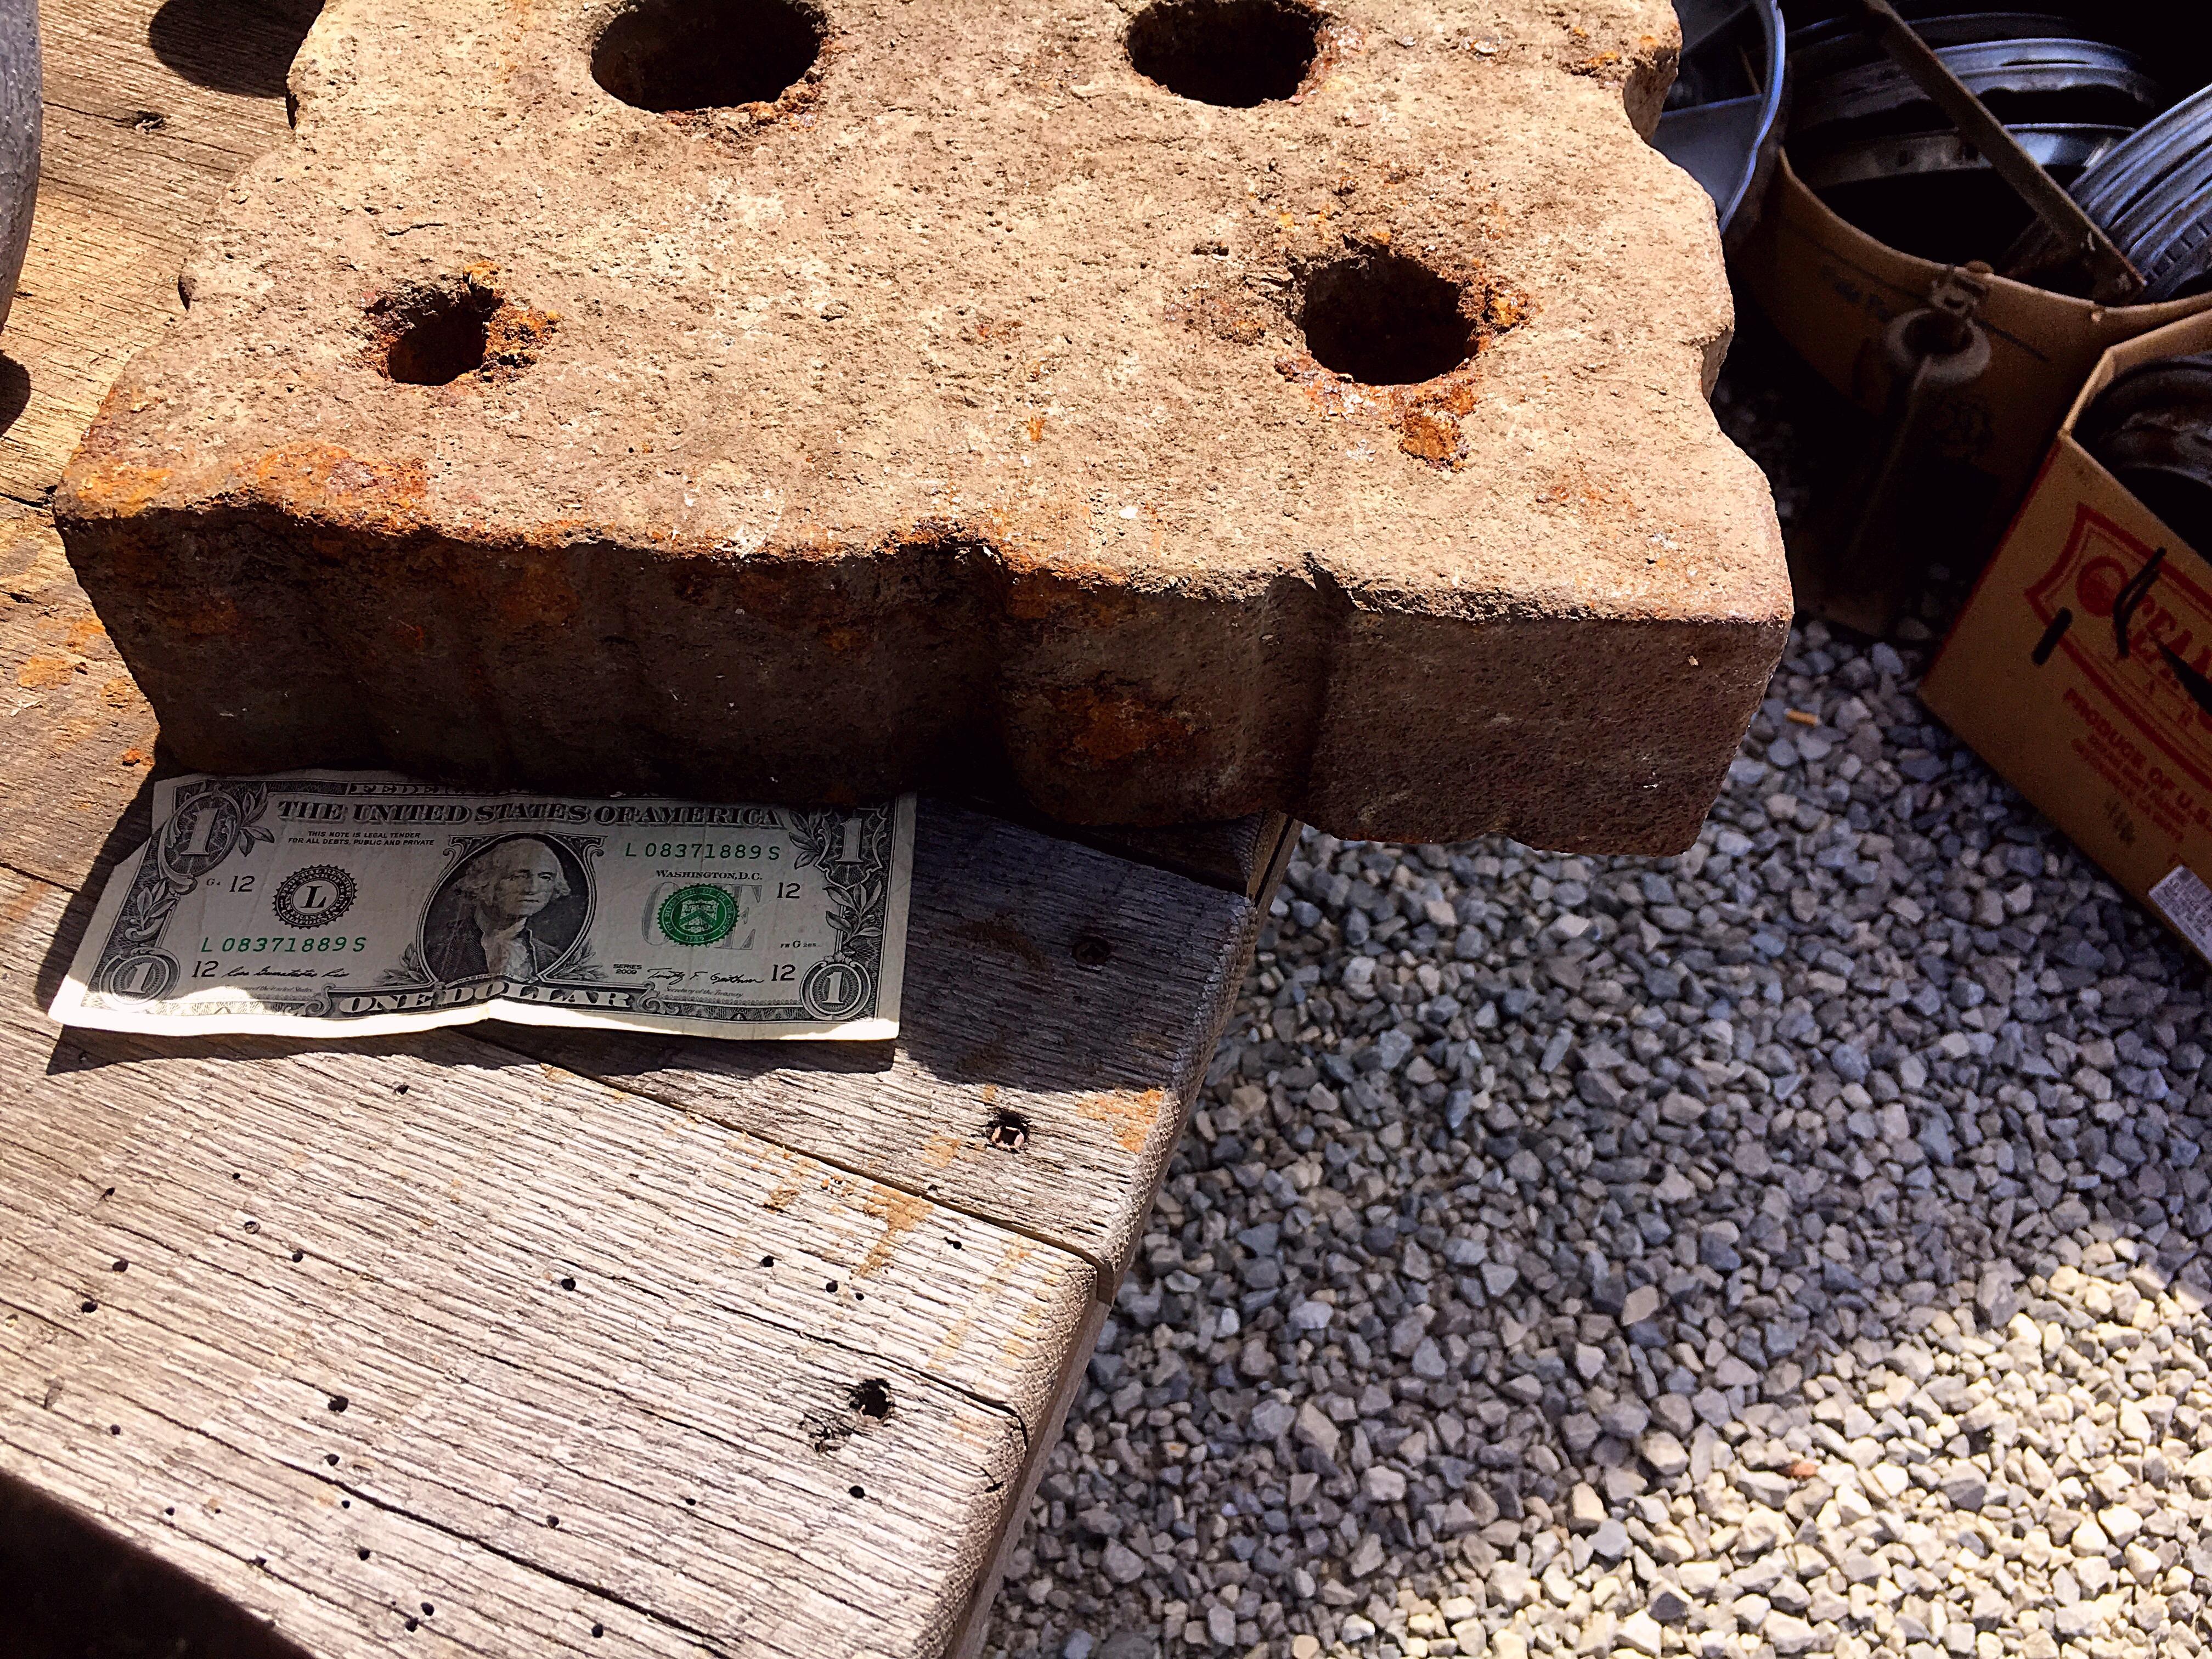
Well it turned out to weight 102lbs. $1.47 per pound. 3”x12”x12”

-
Here it is. I suppose I could do worse for $150