anvil
-
Posts
3,246 -
Joined
-
Last visited
Content Type
Profiles
Forums
Articles
Gallery
Downloads
Events
Everything posted by anvil
-

Common Basic Mistakes That Beginners Should Avoid
anvil replied to JHCC's topic in Blacksmithing, General Discussion
I agree with Glenn, it's not an either/or situation. Do both. -
When drawing out wi, square, octagon, round works for me. For forging temps_ When its yellow, its mellow and when its red it's dead. If it starts to feather, bring it to a light welding heat and weld it back and keep forging
-
Thoughts and prayers!
-
Home made spring hammer
anvil replied to onetreeforge's topic in Power Hammers, Treadle Hammers, Olivers
Very cool! -
How I bid my jobs reflects the $19.95 vs $20.00 psychology with a twist. I do this with my commissions, but had not thought of it when I did crafts fairs. I charge time + material, not to exceed x dollars. Then when I submit my bill, I always come in under that x amount The psychology is that it is the rare person that will actually come in under his/her bid and pass it on to his client. Often times the client will remember this and talk of it to others far more than the actual product!
-
First center punch. Really pleased.
anvil replied to Eventlessbox's topic in Slitters, Punches, Drifts, etc
The hammer end needs to be domed. Is this for hot work or cold? For my preferences it's too long for cold work and too short for hot work. I do like your twist! It's pretty even and a nice touch. -
Good for you! A great learning project. Follow Thomas advice. Just heat treat the edge. Bring about 1-1/2" to critical, then quench about an inch or so in water. Move the axe up and down a bit till cool. Quickly sand/file the bottom ~ 3/4" inch and watch the colors run. Control with water and propane torch to get an even temper line/ area about a half inch or so from the edge. I'd run it to a dark straw.
-
Great idea, Charles, I didn't think about that. It would make a great nail headder!
-
mixed results heat treating 1045
anvil replied to hunterNDN's topic in Heat Treating, general discussion
I too learned to heat treat with a magnet. Lol, like has been said, the loss of magnetism happens just below critical temp. So I always bring it to that point, then just heat it a little more. How much more? Like a good cook,,, just a "pinch" more. I once asked a cook "whats a pinch", and his answer was "about 10 years worth of experience!" Works for me. -
Yup, that's it. Easily found at the scrap yard or from most dirt guys. I also bought it new from my steel supplier by asking for grader blade. It comes in different dimensions. I just normalize my bending forks and scrolling wrenches I oil quenched my draw knives and drew them to a straw. It held a good edge until somebody "borrowed" it to peel some cedar(I'm in the southwest and the bark is full of wind blown sand) and, alas, I got some chipping on the edge. I'm not saying it's a good blade steel because it's designed for toughness, but I was a bit lazy and the bevel is already there for my big draw knives. It works great for my benders and I have bent some pretty heavy stock with their larger handles and a cheater with no breaking.
-
Mine too. It is a bolt on replaceable piece with square holes,,, I think,, . I can't find the pic of a length of mine, but if you want I can run out to the shop and post a pic.
-
Concerning graderblade, Frosty and I had a discuss about this a while back and concluded that there are different kinds of grader blade. The kind commonly found in colorado has no tunsgton carbide in it. This type makes great tools and is forgable and there is no problem doing cold work. I make all my scrolling wrenches and bending forks from it and have made some very satisfactory draw knives from it.
-
Just Getting The Ball Rolling
anvil replied to Mulebrain's topic in Blacksmithing, General Discussion
Looks like you have a great attitude! Hex material is usually some sort of high carbon steel. It's not good to make tongs from this. Once finished, if they get hot and you quench them in water to cool them off, they will get hard and break. What probably happened to you is you forged them at the wrong temp and that caused the break. This is common with high carbon steels. It's far better to use mild steel for tongs. Besides, it's far easier to forge and less expensive if you buy it. -
Pricing my work makes me uneasy
anvil replied to jwilson645's topic in The Business Side of Blacksmithing
Here's your choice. Want the sweet answer or the true answer. You already got the sweet. Here's the truth. You cant possibly "make" money on it. Compare say a master plumber installing a new sink vs a neighbor who has just learned to sweat two pieces of copper pipe and a sleeve. There you are. So here's the good news. Do a full size drawing. Break it down into its component parts. Can you drill holes? Can you set a rivet? Drill a couple holes in the same size stock you are going to use. Rivet them together. Made any scrolls? Make a sample from your drawing. Do this with all details you don't know, or have no experience making. Add up your times. Now when you realize that even far below minimum wage, it's going to cost thousands for this $100 item made by a master craftsman, throw all these figures away and figure out how much your materials are going to cost and use this as your bid. Now charge all the time you put into this project under the heading of "learning" and just plane have a ball doing this project. Never charge a client for your learning time. Enjoy! And I hope you recognize my attempt at humor and realize the absolute logic of how to bid this job. Trust me,,, once you have done a half dozen years of bidding jobs like this,,if you survive, you will actually be on the road to becoming a pretty good smith who can, in fact bid a job that will make you some profit. Contrary to what some may believe,,, learning just ain't cheap! But it's worth it. I call this a "time and material" bid. This means I'm only going to charge you for material and I plan on taking all the danged amount of time it may take to get her done. -
Ive never looked into building a band mill. There's actully two problems. Lifting onto a table and moving the table thru the mill. Ive got an old 10' tall bandsaw with 4' wheels that ive thought of using as a band mill, but both the above problems mean no bueno for me. Ive seen pics and a few vids of the logosol mills but never used them. Last month i brought in (30)-40' ponderosa for my shop project. I'll peel them thru the winter and start next spring. Some will be swedish coped stack logs, others will be turned into timbers and whatever else I need.. I live in the southwest and permits are avalable for these ugly ole cedars. They are tough to cut because their bark is full of grit, but its a beautiful and a very smell good wood. Ive not milled any yet, but am looking forward to doing it. No deadline on the shop,,, just a labor of love, and another go around with stone, iron and log.
-
You didnt say where you got it. A flea market? Antique store? No matter, it has no edge holding ability. Perhaps it went thru a fire. Im not a collector of tools, so the name means little to me. I would assume, for starters that the steel is a high carbon steel and do a complete heat treat. I would also do a spark test to see if the pattern matches any of my known samples. I'd follow the sequence given in many places such as the heat treaters guide and for a half dozen steels listed in Cashen's site amonst a few other sources. I listed that sequence above. Works well for me.
-
No mistakes, just learning experiences.
-
Great post! Keep it going.
-
Ive thought of a portable band mill. They are expensive, at least for me. The other problem is having the equipment to lift logs onto the bed. Not impossible, but that detail has made a band mill out of the question for me.
-
I would normalize once, anneal, harden, temper.
-
JLP Blacksmith Teaching Center.
anvil replied to jlpservicesinc's topic in Building, Designing a Shop
Tough luck, or fate, or however you look at it. You made good progress. -
correct. a right angle bend is stronger if it is upset to get extra material for the outside corner. And if you can do an upset right angle corner you can do any angle corner. This demo is shows a very common esthetically pleasing detail.
-
1075 folded hatchet question
anvil replied to MilwaukeeJon's topic in Axes, Hatchets, Hawks, Choppers, etc
one more thing to consider. Perhaps you are forging it below its forging temp. I don't have the specs for 1085, but I'd suggest not forging below 1500 degrees F -
I've found that with a sharp chain an a good bar that the cut is better than rough cut from a mill. Plenty good for rough cut timbers, siding, heavy planks and beams. The spruce in my pics above were planted by my friends mom and dad in the '30's. We made sure when milling to add enough extra wood to run them thru a planer. His plan is to make something for each family member from the "Founding" tree of many branches. As for ripping chains, I'll add that it's good to start with a skip tooth chain. Some use a 10 degree angle and some set the angle to zero. I think you get a better cut with the latter. The trade off is you remove less material when you set it to 10 degrees. Thus longer life on the chain. And a big yes on saving your dead chains for chainsaw Damascus. You will certainly get your money back in spades.
-
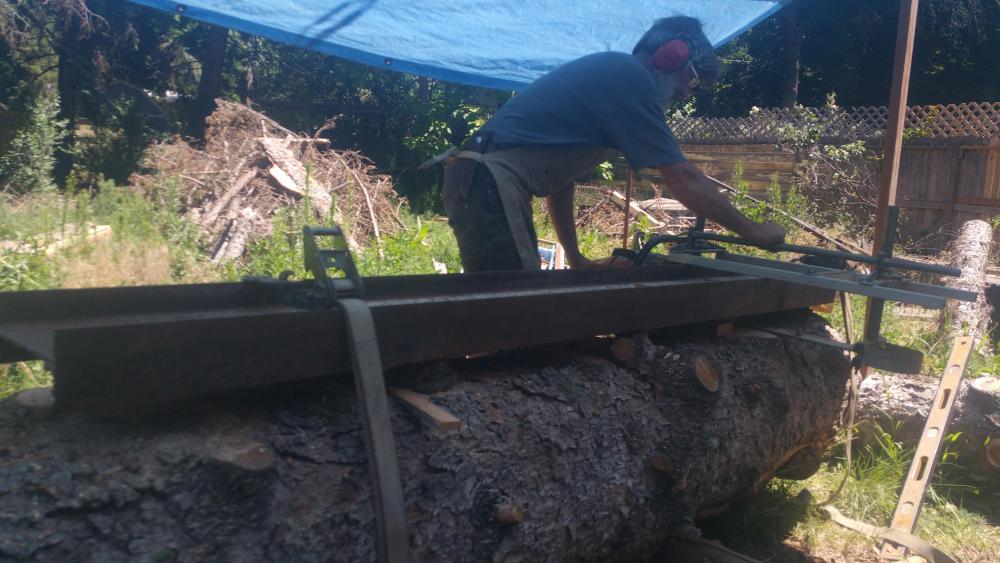
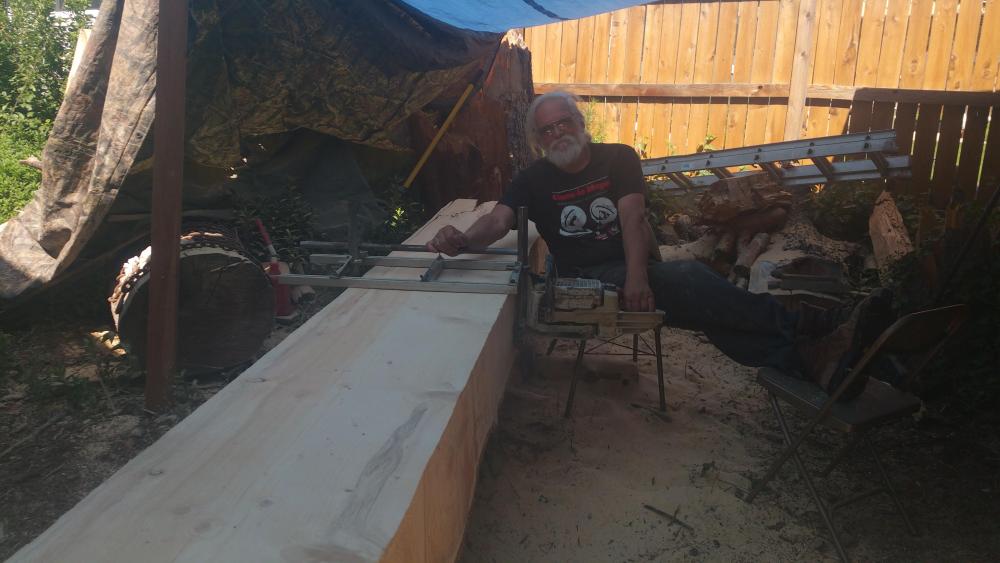
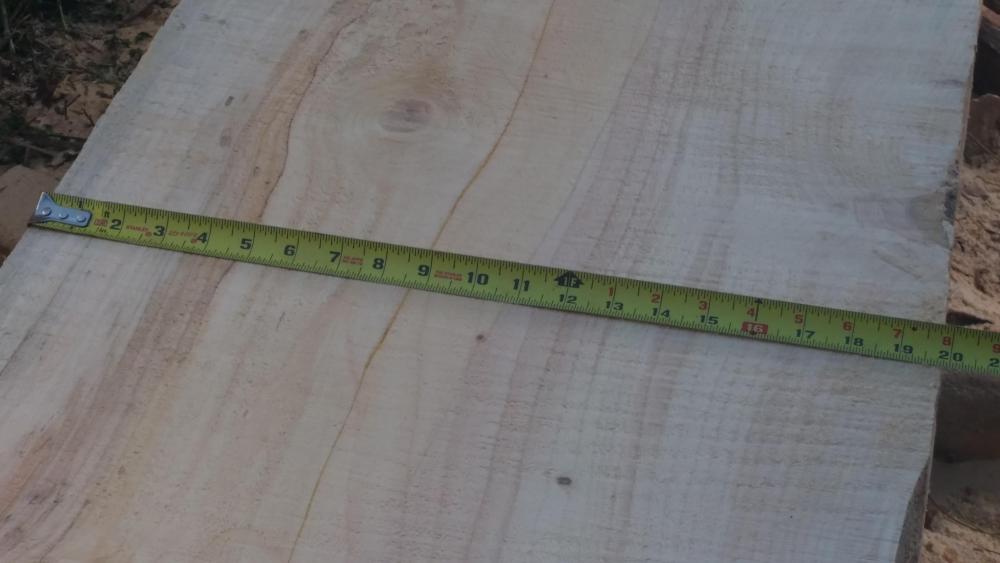
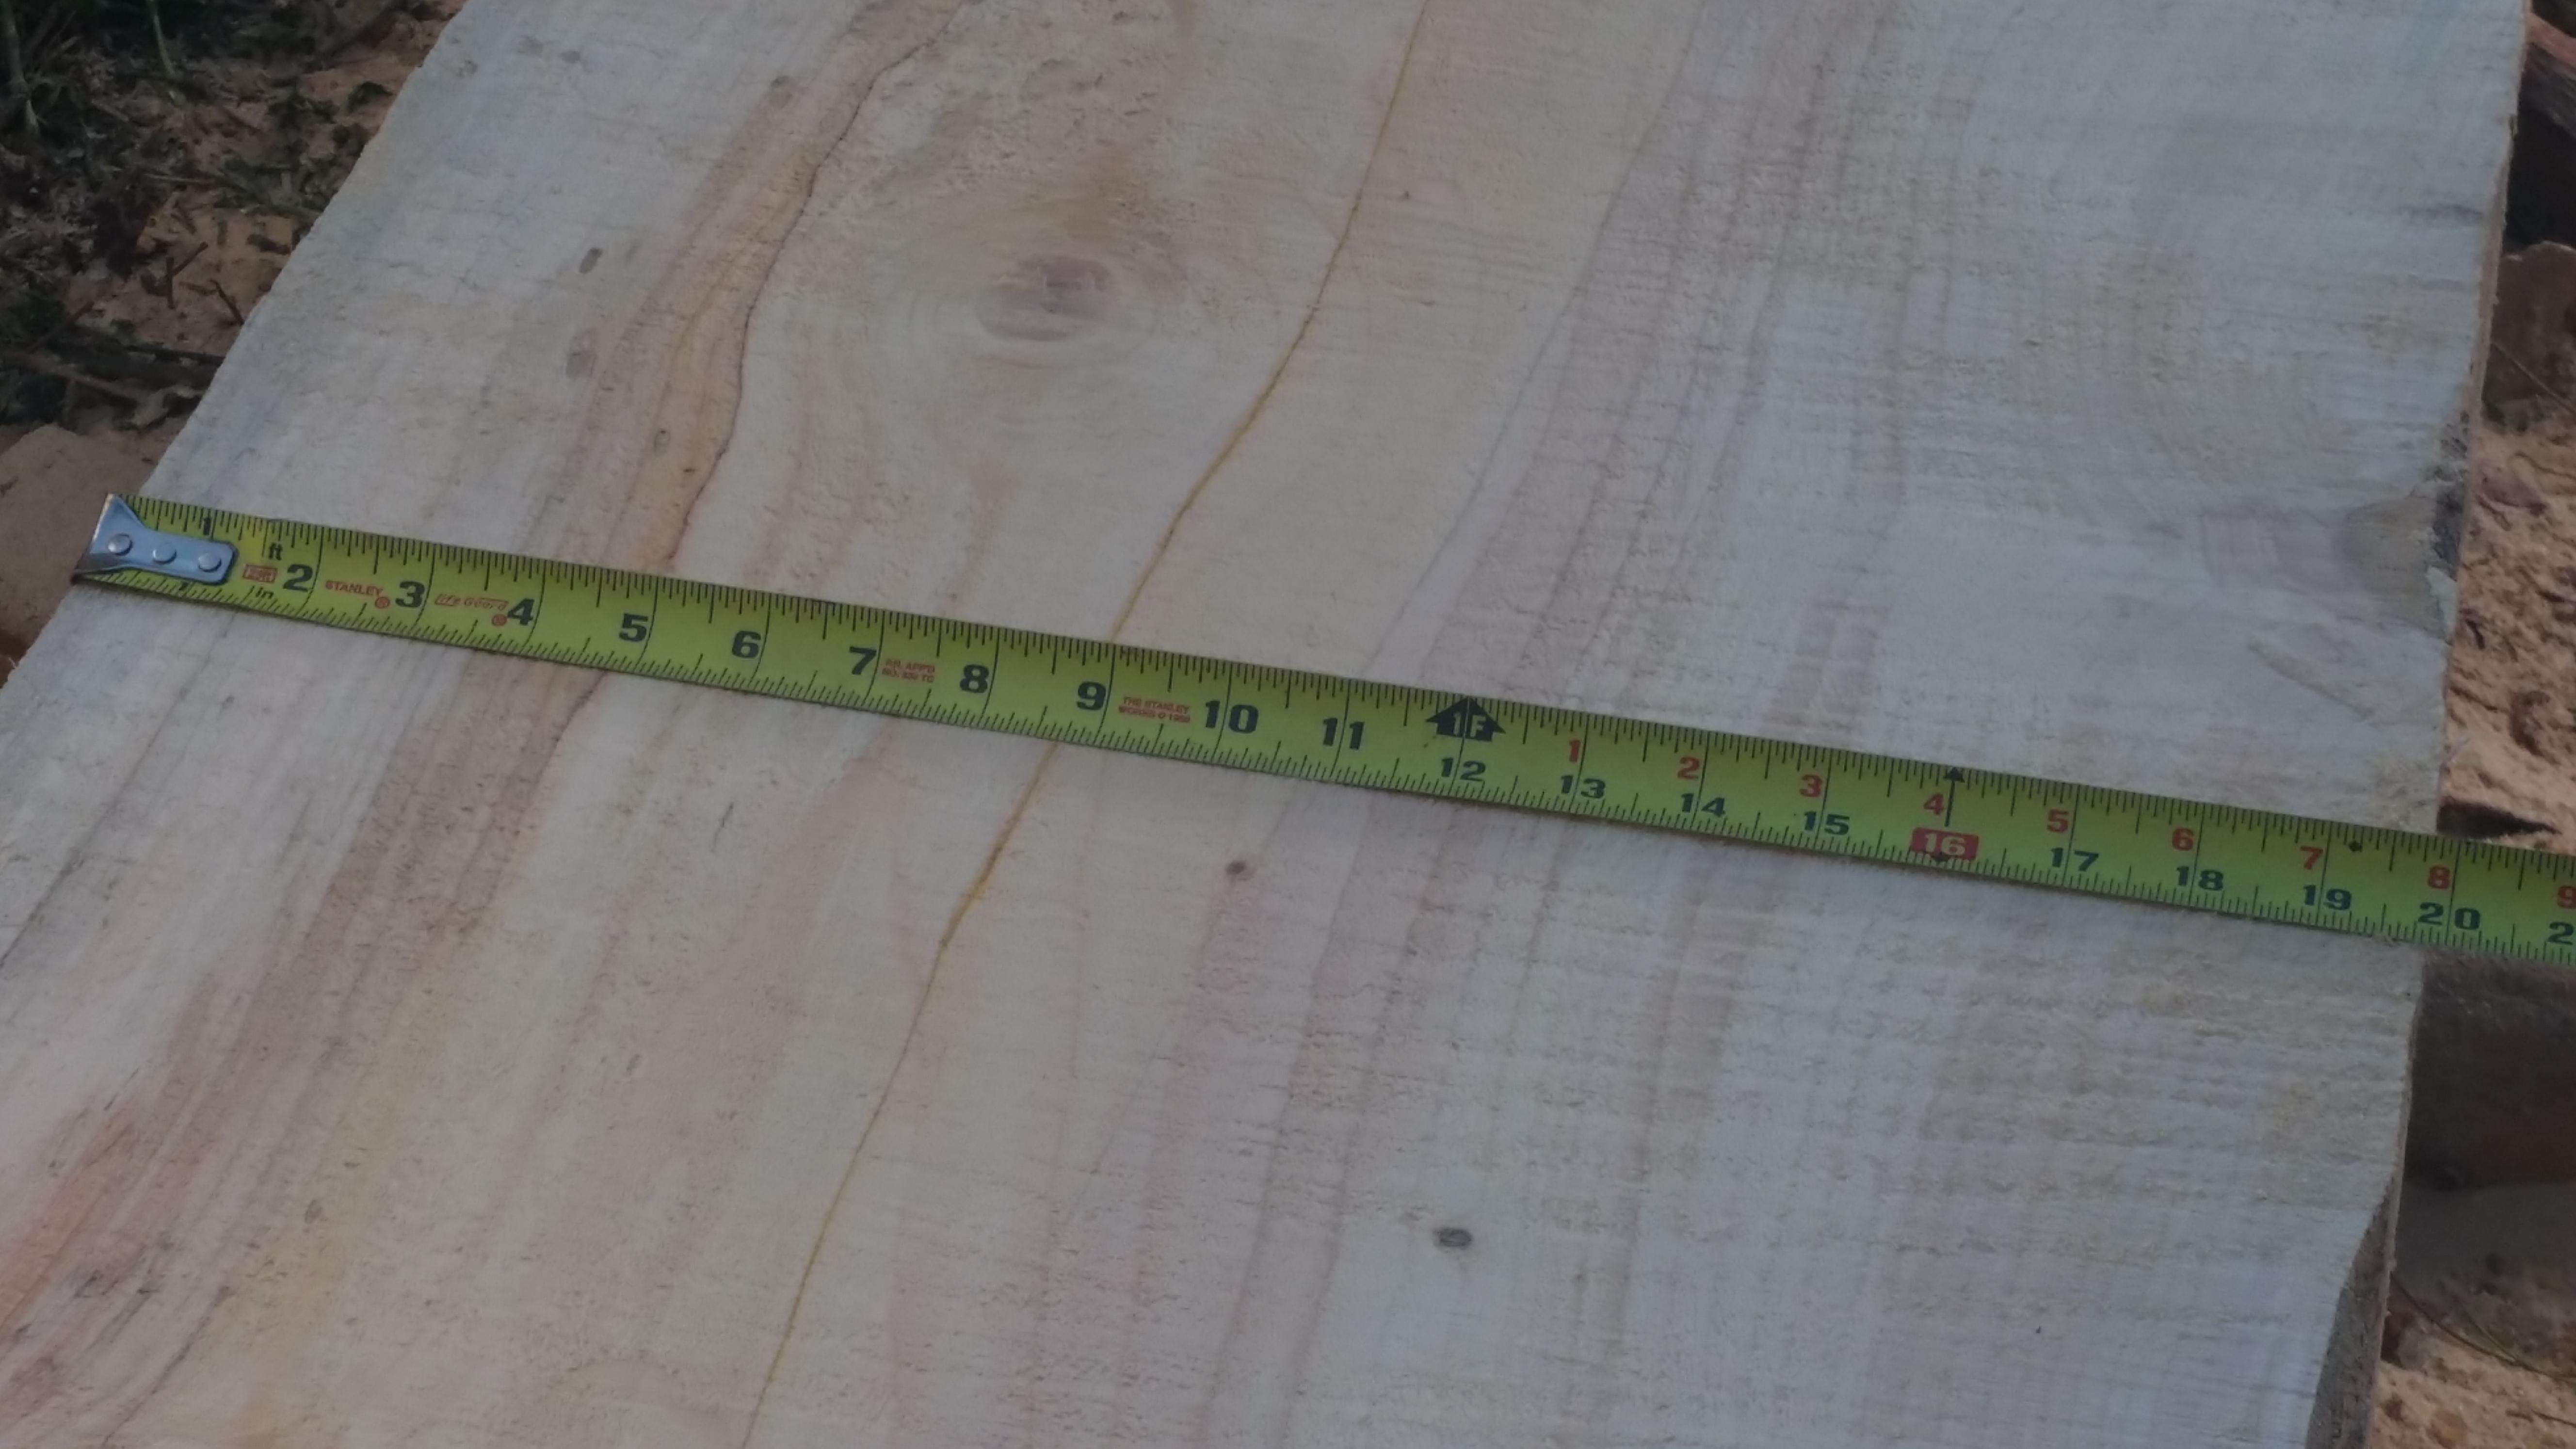
I agree David Budd. I'll add that you must keep your bar in top shape for good cuts. I've used my alaskan mill for decades. I've only milled pine and spruce. My stihil 044 has never had a problem, although a more powerful saw would be great. Here's some pics from a few years ago. the first pic is my friend mark and my setup for the first cut. 2: easy peasy. 3: width of kant. I have 30-40' logs waiting to become my new shop next spring,,,, till done.