slowpoke
Members
-
Joined
-
Last visited
Everything posted by slowpoke
-
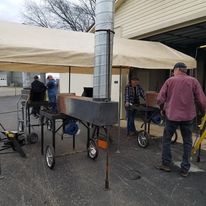
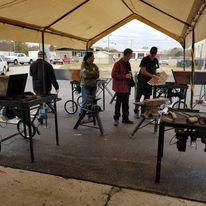
To learn hand eye coordination before I teach a beginner class I recommend that students (at home) drive nails with a 16oz claw hammer. Start off driving the nails straight down, then angle the head from away from you then drive it. This will represent hamming a taper on a bar.Sorry, the angle for the open end of the AACB side draft hood needs to be changed from 85 to 75 degrees. Slowpoke I fixed it for you.Appalachian Area Chapter of Blacksmiths (AACB) has been building and using portable forges with side draft hoods (see photos) since 2013 for training and their conferences. The design allows them to be used from either side of an open shed or tent. The hoods measure 5 ft. long, 12 in. sq. with a 6 ft. tall 10 in. dia. spiral pipe. The forges use electric blowers with butterfly valves that have controls going in each direction allowing the operator to control the air from either side of the forge. The horizontal part of the hood is made from two pieces of 1/8 in. (11 Ga.) steel measuring 2 ft. x 5 ft., bent lengthwise and tacked together to form the five foot duct. Then a 12-in. sq. piece is tacked to one end of the duct, then the seams are welded together. Next, the fire end is cut at an 75 degree angle and plated with three pieces of 1/8 in. x 3 in. flat stock to form a flange to cover the opening, with one inch towards the inside and two inches toward the outside on the sides and top. The bottom of the flange is 1.5 inches and goes only to the outside and goes straight down (nothing to the inside). The hood is a perfect place to store the flue pipe when transporting. The late Lester Beckman who was known for promoting the side draft hood told me that the 3 in. plates lining around the opening is one of the big key things that make the side draft hoods draw so well. To finish, cut a 9.75+ in. diameter opening for the flu pipe near the closed end, make a 1.5 in. flange from 1/8 in. or thinner material, and weld it around the opening. It helps to wrap this flange around the spiral flue pipe material that is recommended as it is much more rigid than regular duct work. You will need to support the vertical spiral flue pipe as well as the five foot horizontal duct. When starting the fire outdoors you will need to put a little amount of burning paper in the hood to just start the draw, then once it warms up just a little it will roar. Side Note: Lester told me that if the flue pipe end of the sq. tube was cut at an angle (45 degrees or so) it would draw better (no square corners). Hope this will help someone out. Slowpoke
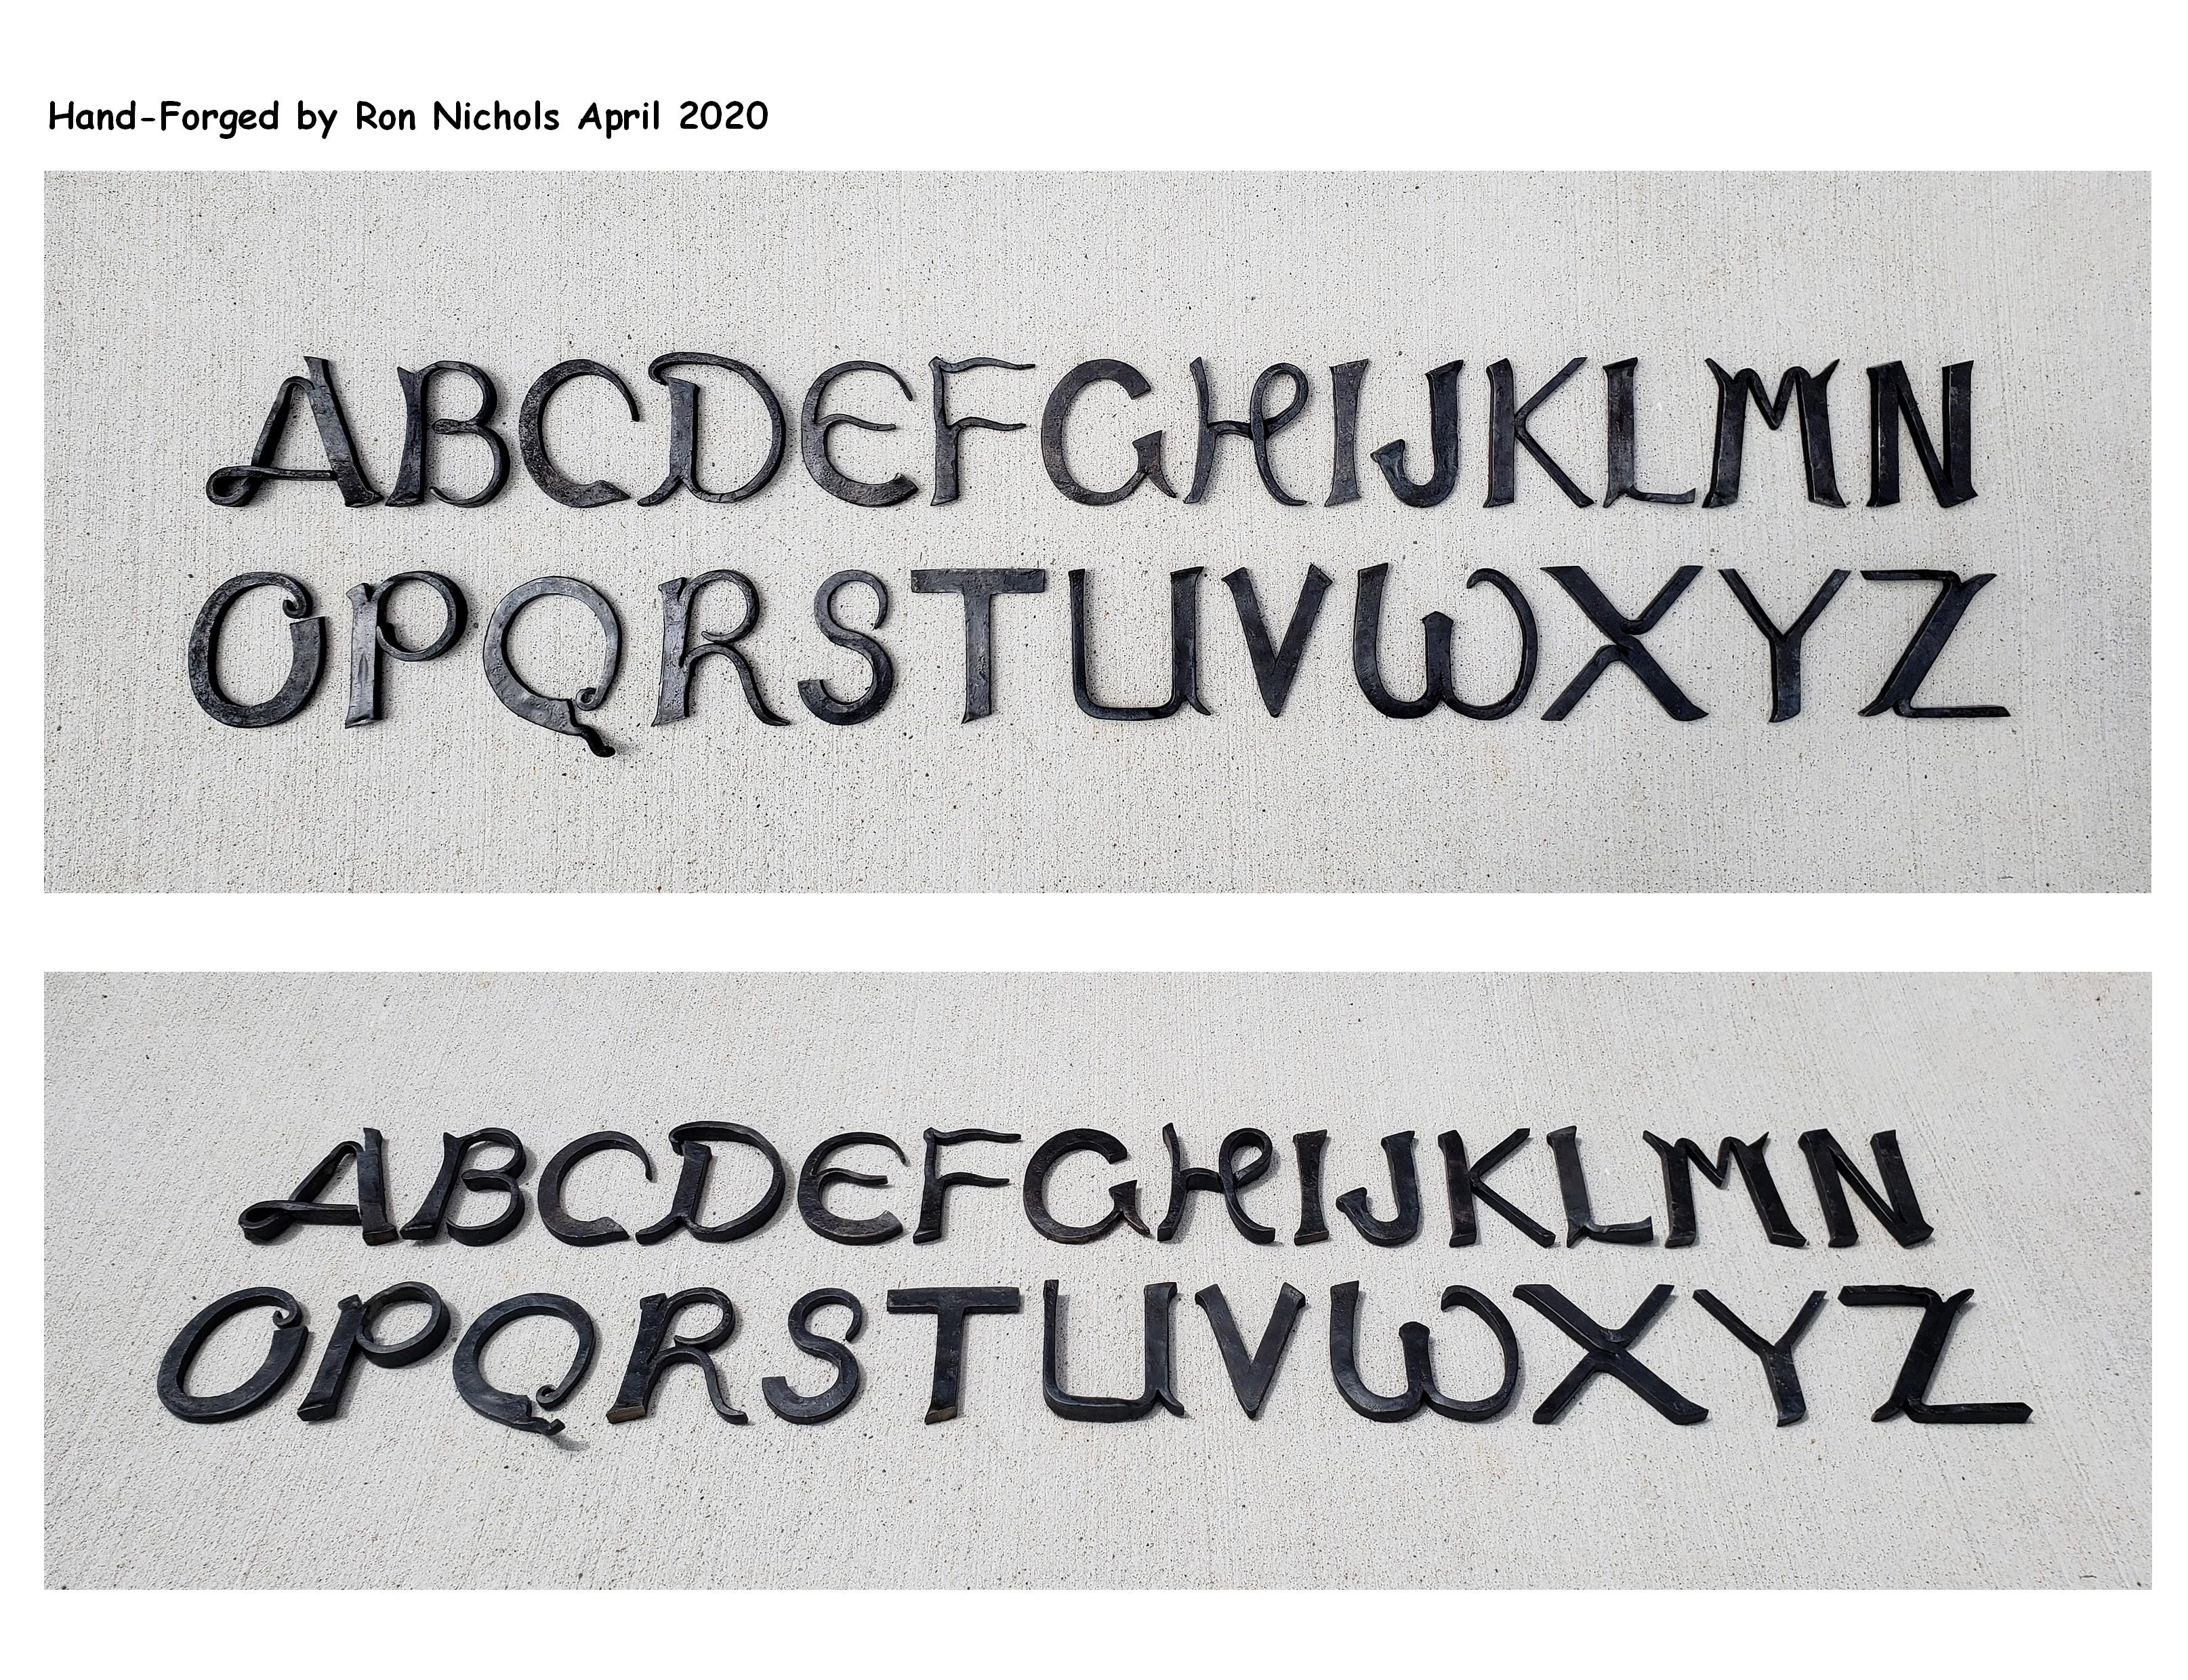
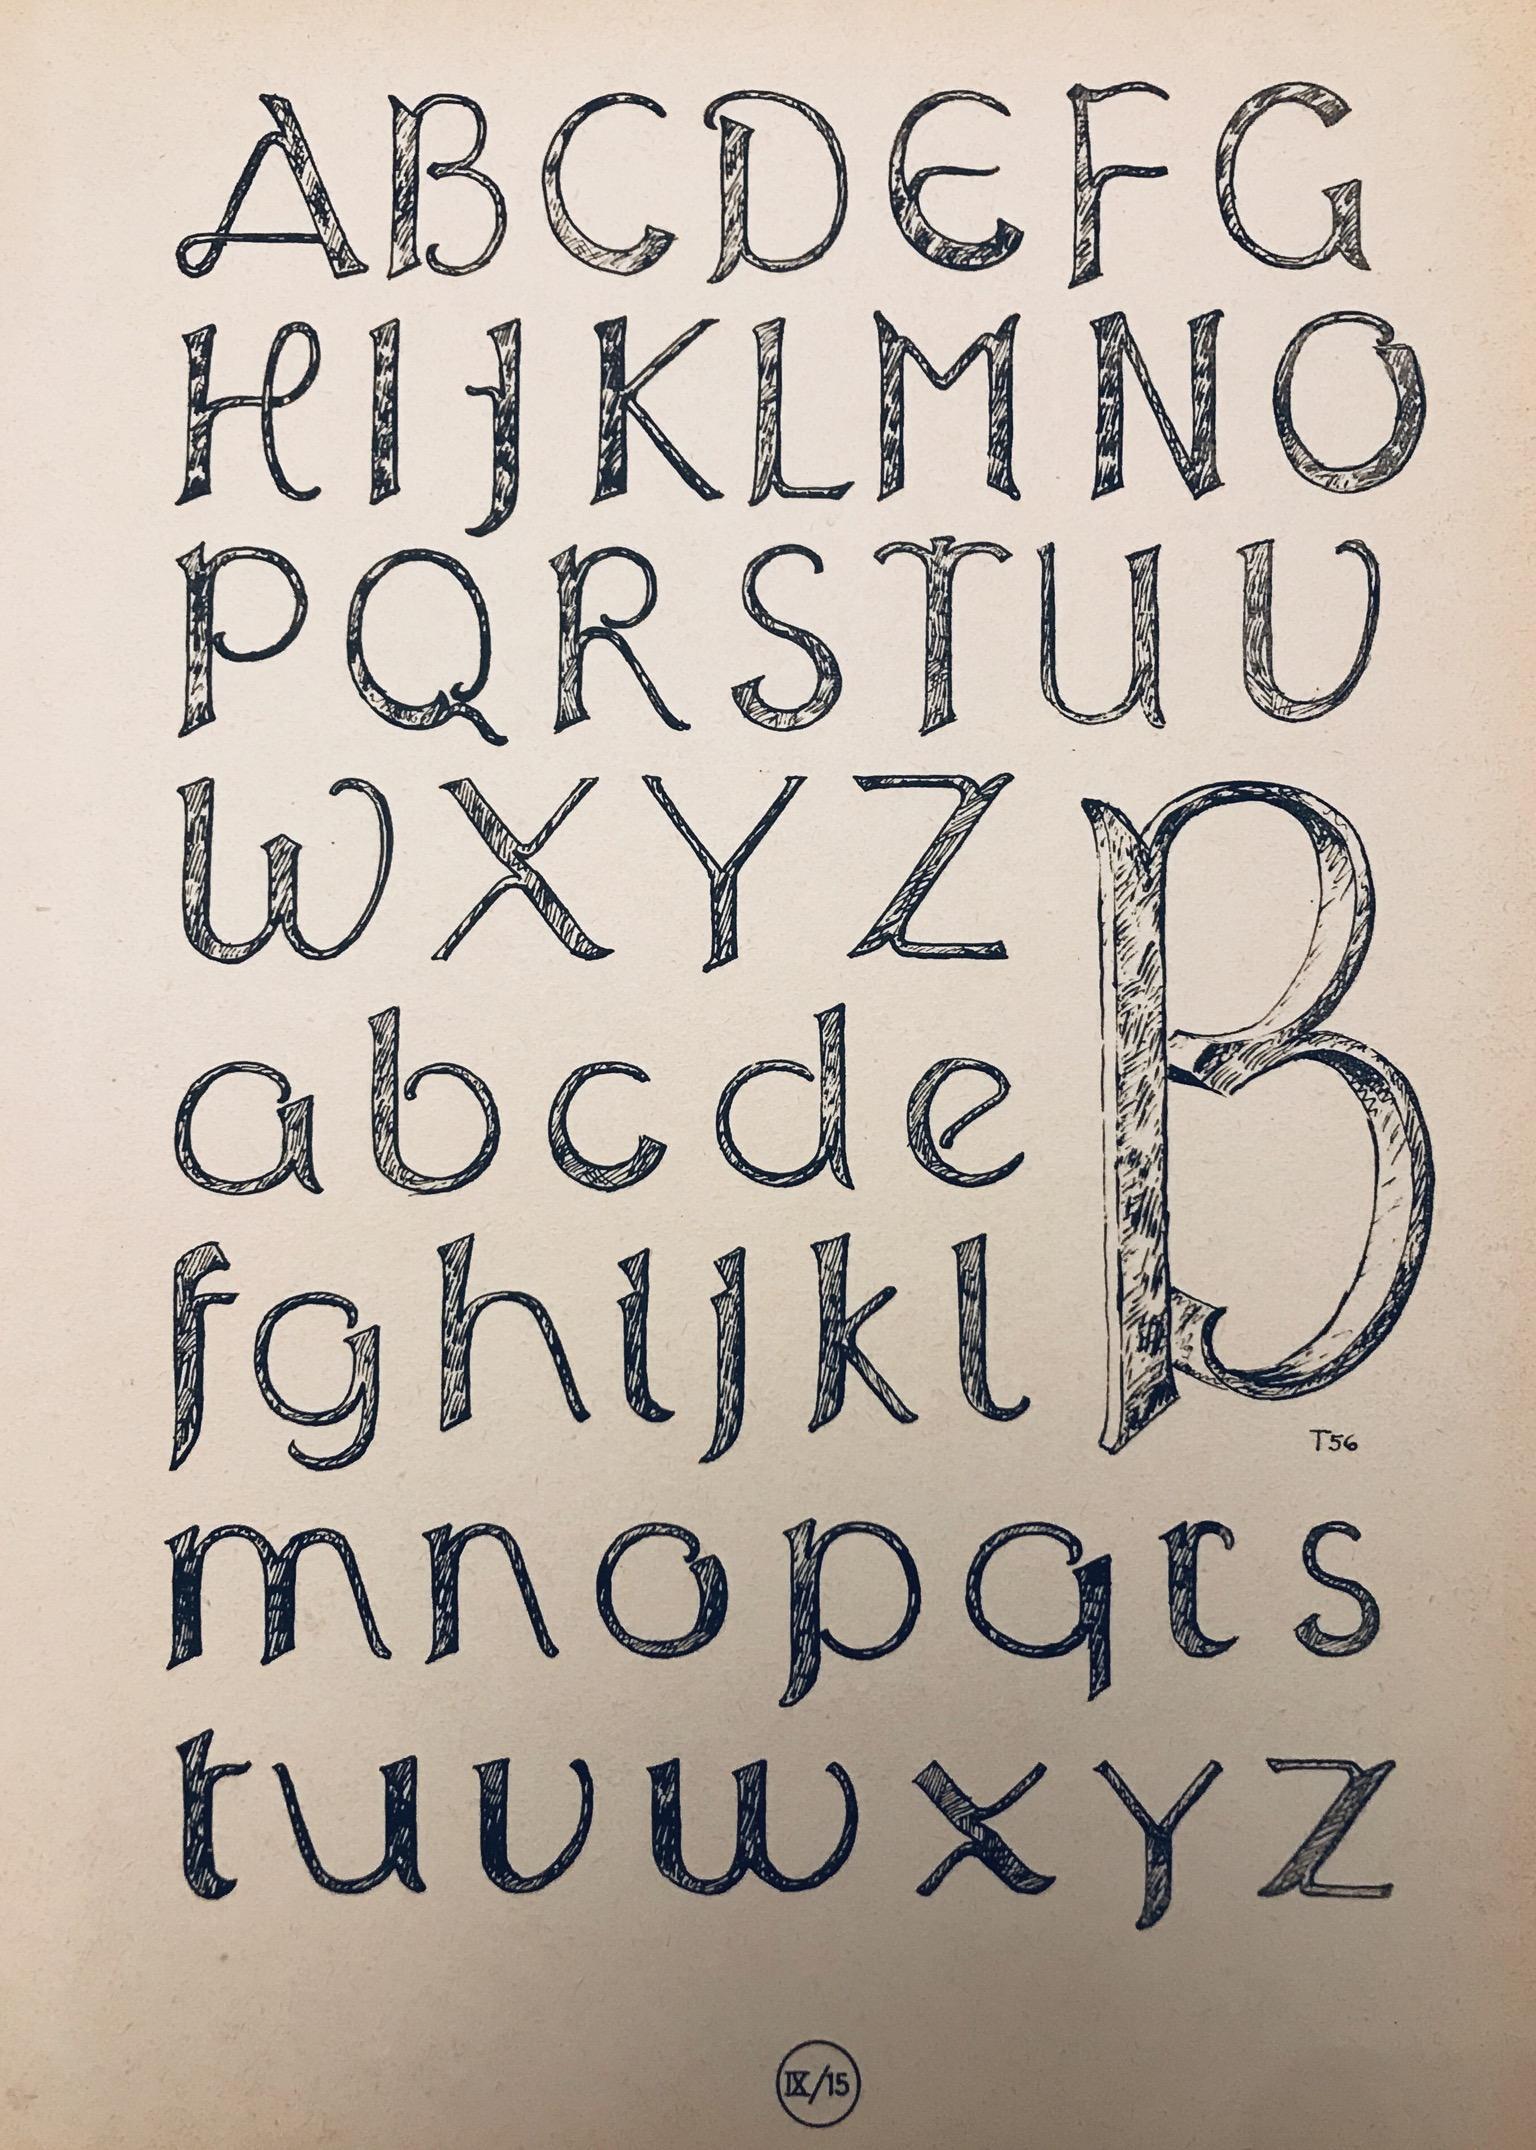
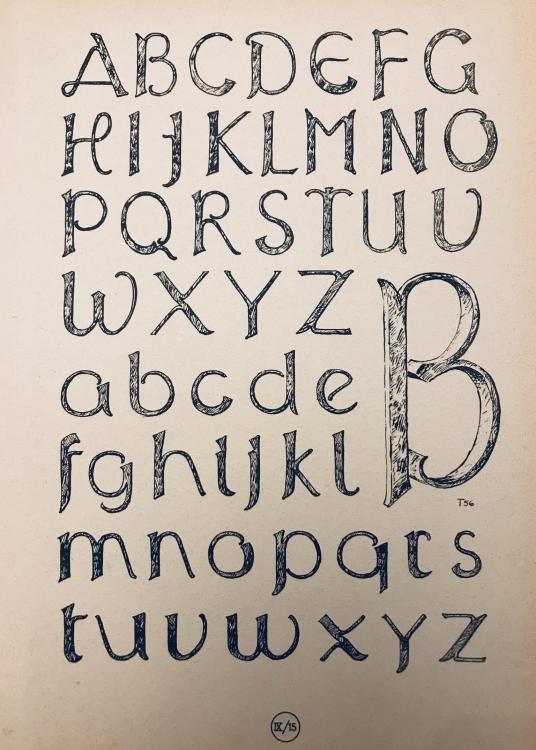
 Frosty, I've been asked to submit a few instructional write-ups along with photos for my area's newsletter from AACB, Appalachian Area Chapter Blacksmiths, and when I do I will submit the info on this forum as well. In the meantime, I enlarged the images so the letters were 3" high. By using dividers and string, I was able to determine almost all of the lengths of material needed. Most of the letters lend themselves to having the ends left long to be cut to size when finishing. The size steel I used for most of the letters was stock reformed to 5/16 - 3/8" to 1/2 - 9/16" (I do not like using mill stock). Most of the letters allow you to use a side set to isolate material to become the thinner parts of the letters on the viewing side (see the large letter B). The part I set down was usually brought to 3/16 - 1/4". I would let it grow to about 1/2" in depth. You may choose to have some deeper, some shallower. Note that the A and the H have overlaps that get forged together by alternating the hits from front to back so the notches are roughly equal. Good luck with the project! JHCC, thanks for the info on the reference materials. Hey - I look forward to seeing YOUR work on that second set! If I can do it, other smiths can too! :-)I have always wanted to forge the letters of the alphabet. One day I ran across an artist’s drawing of letters on Pinterest (which was captioned “I Forge Iron”, but I’ve not been able to find anything about it on that website) and that became my inspiration. A few notes: - Letters are 3 inches tall. - Each letter was forged from one piece of steel. - NO electric or gas welding was involved. - Most slitting was done with a chisel (small cuts were done with hacksaw or bandsaw). - “B” and “W” are forge welded in the center. - “T” was hammered using a slotted heading block, similar to making hand-forged nails. - “X” was the hardest to plan and execute. This exercise was a challenge and a GREAT learning experience!
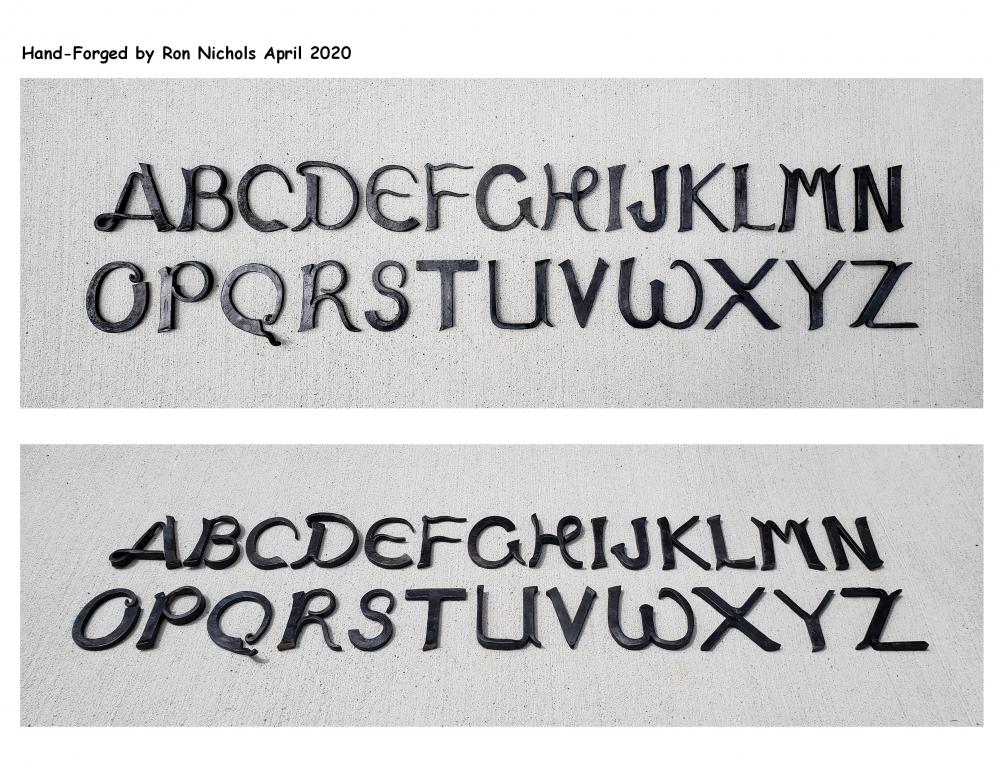
 A good friend and long time user of H13, cooled /quench a H13 tool around 1000-1200 degrees and it went soft. He repeated process and the same thing happened. Heat it up and straighten it, reheat and air cool rapidly. Good luckNovember 4 Friday Night at John C Campbell Folk School there will be a Hammer-in to make items donated for their Blacksmith and Fine Crafts Auction on Nov. 5 2016 1-4 PM. There will also be an AACB/ABANA NC meeting Saturday Morning with a demonstrator and an Iron In the Hat (blacksmith items raffle). JCCFS is located at One Folk School Lane in Brasstown NC.28902, or go to aacblacksmith.org for more AACB events and click on calander. slowpokeI have been told that most steering parts are made from 4140. A oil harden alloy steel. I have made bending forks and top and bottom tools with steer parts for many years. If you are going to weld the forged tie rod stock to a piece of mild steel for a handle/ mounting. Tack weld first then preheat to a faint dull red and finish welding. Have fun SlowpokeWelcome, Blackwolfe, to the world of blacksmithing. As you are already learning, many people are always willing to help. Wayne is a great source of information and a good teacher as well - you are lucky to have him close. The state of Tennessee has a large blacksmith group, Appalachian Area Chapter of Blacksmiths (AACB), with 50 years of history. The AACB group in the Knoxville area is the Clinch River Blacksmith Guild. You can go online to aacblacksmiths.org and find their contact information and view all upcoming events on the calendar. Looking forward to more of your posts on iforgeiron. SlowpokeBacpacker, Everyone is welcome. There will be a demo, a nice meal, a short meeting, then an Iron-in-the-Hat drawing. The Knoxville group is a fine group of very talented individuals. Go online to check the calendar for other AACB events/details at aacblacksmiths.org. Thanks for asking! SlowpokeThese are two ring projects being submitted as part of a larger project to be auctioned off at the Southern Blacksmith Association (SBA) Conference May 14-16, 2015 in Madison, GA. It’s a pretty cool project and I just wanted to share it with everyone. These two rings represent two of the four local forges that were asked to make rings to represent the Appalachian Area Chapter Blacksmiths (AACB). AACB is one of seven SBA Chapters, each of which will submit four rings, totaling 28 in all. All of the ring-builders are busy completing their rings for submission. The rings will be built into seven section of gothic-style panels which could be connected to form a folding freestanding “room divider”. The theme for this project is blacksmithing idioms, and sets of idioms were chosen by each ring designer/builder. For example, one of the idioms for the ring with the ax was “To Have an Ax To Grind”. This ring was built by Dan Pelletier and Keith Herendon and represents Fiddler’s Grove Blacksmith Association (FGBA). The other ring with the anvil was built by Ron Nichols representing Rutherford County Blacksmith Association (RCBA). You can see the completed project at the SBA Conference in May. The demonstrators will be Peter Ross, Jason Knight with Billy Ridgill, and Michael Dillon, so it should be a really good time. Hope to see everyone there!I will be there if have to walk. Slowpoke0f691ab95b34e225936702ff20f30815Adam 9, thanks for the nice compliments about the tool cart. My plans for the cart were in the AACB (Appalachian Area Chapter of Blacksmiths) newsletter several months back. You are welcome to pass along the plans, and I would love to see if anyone recommends any improvements to the cart. It is actually covered on the ends and top with 14-gauge sheet steel, and there is also a divider down the middle separating the shelves from the hammer racks. On top, I keep a regular toolbox with drawers holding chisels and specialty tools. I'm hoping I've attached a picture of mine - maybe it will help some folks. I will also try to post the plans as well. Slowpoke (Ron)Donald, There are 10 AACB members making the Clay Spencer Treasure Chest at my shop this week. Great group of guys! Very nice meeting this past Sat.at the Murfreesboro RCBA forge. Looking forward to the AACB 50 Year Celebration in Lebanon Tn. Check out the new link on the AACB website for information. Slowpoke (Ron)Cut them out of 1/4 in. sq. Cut the top a little longer and draw it out to a long taper and put a eye on the end (with scrolling tongs) to attach a cord. I will use a small two brick gas forge for the opening up. Then I have a treadle torch to heat the tapered end (this a big help). I will cut 125 out in about 3- 4 hrs with my porta band saw with a small table mounted on it using guides and stops. Then about 2-3 hrs to forge out. I also made a putty knife like tool with a S-7 tool steel blade attached to a 5/16 round twisted handle, for opening the cross this also is a big time saver. Then like you I will give them all away.The promoting of young smiths that Brian does across the country is a great asset to the future of the craft of blacksmithing. We at Appalachian Area Chapter Blacksmiths are looking forward to watch him in action with two young smiths, Owen Turner and Josh Hastings, at our upcoming conference (www.appalachianblacksmiths.org) in Murfreesboro TN. These guys are very excited about this opportunity. Brian's teaching skills and patience with young smiths is impeccable and a joy to watch.ANDREW, thanks for the kind words about the AACB Blacksmith Conference. The Conference Chairman, Clint Busbee (BUZZ), has put together an outstanding group of demonstrators. Some AACB members will be doing short demonstrations as well: Dave Smucker, Mike Rose, John Willams, Gary Bowman, Jason Bivens , Broadus Weatherall, and Lonnie Farmer. The number of vendors is growing at a fast pace - Buzz is known for his rapport with all the vendors and tailgaters. The venue for the conference is Cannonsburgh Pioneer Village In downtown Murfreesboro TN, about three blocks from the city square and about 25 mi. southeast of Nashville. Lots of good food and great shopping for the wives! Go online and check out the website - you can register with PayPal or credit card. It'll be a great weekend of fun!! Hope to see you there. http://www,appalachianblacksmiths.org SLOWPOKEWelcome to IFI. There is a lot of good info and people here to help you out. You might try a local group Choo Choo forge they meet at the Tennessee Valley Railroad Station. They have some great talent there. I know that they sell coal to there members and they have a great green coal program. Choo Choo is part of the AACB a Tennessee group www.appalachianblacksmiths.org . Hope to see you some day SlowpokeTennessee Die Supply (TDS) in Nashville good prices, will ship easy to work with. 1800-251-4038I make a hardy sometimes from 1/4x1" flat bar. Bend the bar 180 degrees like a u-bend, and hammer the bar with a 1/2" spacer in the middle. This will give you a 1" square hardy. Cut off to the right length and weld to the top tool, and drive a 3/8"x(___) wedge in the middle - works just fine. On my Smithing Magician tool that I use on different anvils (when demonstrating) I attach a 1/2" all-thread on the end of the hardy stem. Put this through the hardy hole and install a HILL SIDE WASHER (used in assembly of metal buildings) on the under side of the anvil with a 1/2" nut.I have some coal for sale in your area - check your mailbox. Take care. slowpokeHey, Spots, Sorry I'm not going to be able to make it to your hammer-in - sounds really great, though! Just wanted to let you know that our organization, AACB (Appalachian Area Chapter Blacksmiths) is having its annual meeting on Saturday 12/1/12 at the Appalachian Center for Crafts in Smithville TN. Travis Fleming from AL will be doing a demo starting at about 9:00 a.m. & there will be "ladies' programs" at the same time. Then there will be a meal, iron-in-the-hat, and a good auction with a lot of tools. Hope you might be able to join us there - it's always a good time. Good luck with your hammer-in! Slowpoke