Goods
-
Posts
1,159 -
Joined
-
Last visited
Content Type
Profiles
Forums
Articles
Gallery
Downloads
Events
Everything posted by Goods
-

What did you do in the shop today?
Goods replied to Mark Ling's topic in Blacksmithing, General Discussion
Nice hawks Les! Do you mind me asking you starting stock and bit material? Also, did you make the handles? (They look identical to the one I buy from Dunlap Wood Crafts.) Keep it fun, David -
Found these in the bottom of my great-grandfather’s tool chest….
Goods replied to jmalle's topic in Everything Else
I’ve got an old curtain rod in the basement with round rings just like that. Who knows what those were made for. -
What did you do in the shop today?
Goods replied to Mark Ling's topic in Blacksmithing, General Discussion
I like that story board. Nothing terrible difficult for novice, but put together makes a very elegant finished product. It’s great that your challenging you skill level! Just be weary about going back to clean up the ball after it’s drawn out, it get a little unwieldy and difficult to keep every thing in line. Keep it fun, David -
Took a guick picture at lunch: Looks like you right with the dulling. I thought it was 1/4” through before it dulled, but it wasn’t all the way across the top surface yet. Looking at the tine, it’s clean, but appears to have a layer of scale on the surface. I’ll hit it with a flap disk before the next cut. Yes, that Racine looks like a wonderful machine. Sorry I hijacked your thread, it distracts from the good work you’ve done! David
-
I usually collect the sawed chips to use in the flux it mix up. Last night they started as chips and when it seemed like it was taking longer, I noticed the the chips were more like metal dust. If you’re curious, I can get a picture of the cut. It starts out as a shiny cut then quickly changes to a dull surface. Like it was grinding it’s way through. I may need to make a cooling/lubricating system for it. (Not another project!) Keep it fun, David
-
Looks like a type of wire stripper or tool of similar function.
-
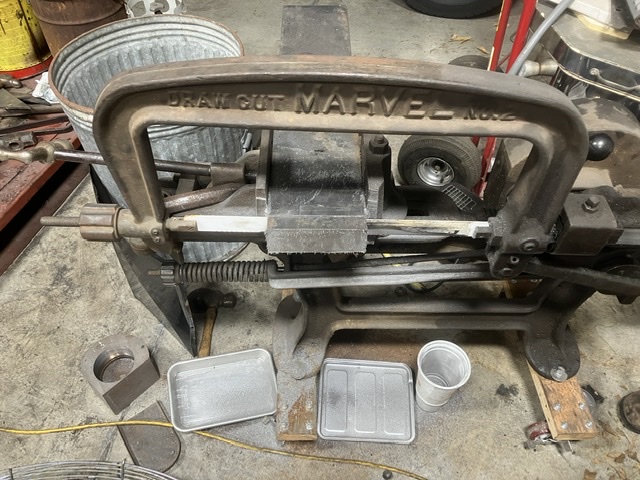
I imagine it will do a better job cutting forklift tine than my marvel: (Not sure if it’s out of adjustment or if the blade is now dull, but it to almost an hour to cut one piece tonight. First couple cuts only to 20min…) Enjoy it and put it to good use! David
-
What did you do in the shop today?
Goods replied to Mark Ling's topic in Blacksmithing, General Discussion
I got 3 more blacksmith knives started: My wife asked for more gifts for associates of her’s. Three knives and one hatchet. Works out great, she gets unique gifts to give and I get more forge time and practice! Keep it fun, David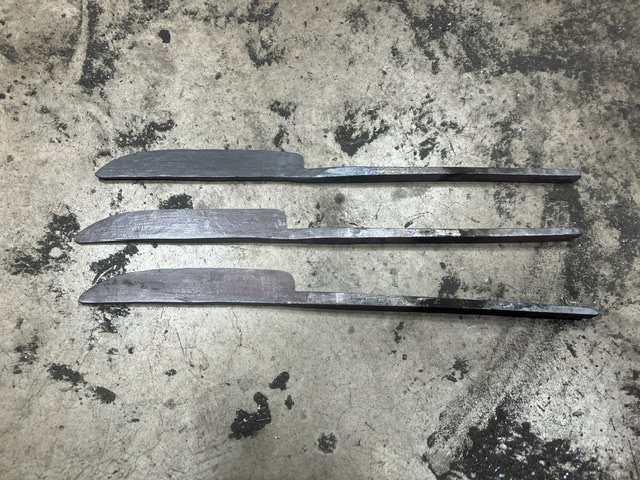
-
Yeah, I understand where you’re coming from. I had to go back and re-read my post, I didn’t even realize that I had used “traditional”.
-
What did you do in the shop today?
Goods replied to Mark Ling's topic in Blacksmithing, General Discussion
Did you upset over the edge of the anvil? Take a look at some of JLP’s finial videos. First, collar welding is actually not terribly difficult. Second, you can see how she upsets and shapes over the edge of the anvil or swage block. Keep it fun, David -
I guess using “traditional” for this was not the best or even correct term. I probably should have used more common today? “Traditional” for who? When? Where? Not very clear… I’ve only made two punched and drifted hatchets. One fully hardenable. The other steeled wrought iron. For the steeled one the bit was pretty short maybe 1/2” scarf with 1/4” exposed bit. For my wrapped hawks, the bit is about 2” deep with the bit exposed 1/4” to 1”. I mainly use the bit thickness to gain width, but you can move the material where you need it. Just down let it get away from you. David
-
You see lap welds like this a lot in particular applications. Carving axes, wood chisels, bowl adzes and other tools that need to have the hard sharp edge all to one side is we’re I’ve seen it the most. Not a really big deal, just something to consider. On a split bit weld, if it’s not perfect you have the material supported on either side and the biggest issue you may have is the bit getting stuck in your target or pieces of the target getting stuck in the scarf as it peels back. Also, one trick is to use the bit to add more material to get the size you need. If it looks like your going to run short on length or width, stop and split and scarf the end. Then you can work out how thick or long you bit needs to be to finish it out. (I’m not trying to be critical, just trying to help out and give options.) Keep it fun, David
-
I’m not sure about quality of the weld itself, but the issue you are seeing is most likely from not tapering the edge of your material enough. With a thick edge on a scarf, that edge gets hammered into the material it’s being welded to, creating what looks like a crack along the weld. It is a weak spot. Mark Aspery has a good video on YouTube (“Forge-Welding: Scarf-Theory “) that explains this very well. On the weld quality side, when you are grinding into it heavily, like in the pictures above, if the weld is bad, often you will see the bad areas over heating and bluing. A bad weld won’t conduct the heat away like a good weld/single piece of steel. Any reason you went with a lap weld as opposed to a traditional split bit weld. I would think a split weld would be much safer unless there is a specific need… (I find them easier also.) Keep it fun, David
-
What did you do in the shop today?
Goods replied to Mark Ling's topic in Blacksmithing, General Discussion
I didn’t stop to take pictures of most of the items I made at the demo this weekend, but I did for this one: A lady stopped by and asked if we could forge a tobacco pipe tamper/scraper. She sketched it up and I said I didn’t want to try and forge it at the festival because I didn’t have the right tools to upset the tamping end properly, but she said she would stop by Sunday (for other reasons). I thought about it that night and first thing in after getting setup started on it. Made with 1/4” round stock with a 1/4” square collar welded on. Then, I squared up the round stock, cut it off the bar, put a scarf on then end, and folded it over and forge weld the end for the mass of the scrapper end. Finally, added some embellished and filed it clean. Total length is about 3”. When she came back she was delighted. (She has been a loyal customer for the other smith I was with, so it didn’t feel right not giving it a go…) That was probably the highlight of a very good demo weekend. (Apparently, I also made the cover of our local newspaper.) Keep it fun, David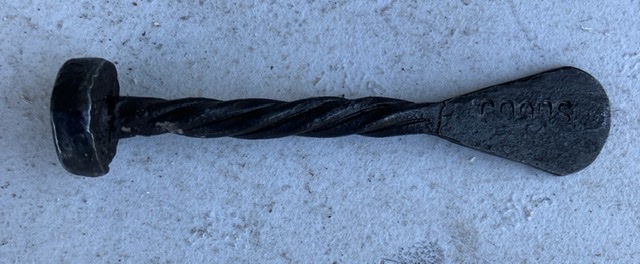
-
That is exactly where I stand George! David
-
What did you do in the shop today?
Goods replied to Mark Ling's topic in Blacksmithing, General Discussion
JLP, it was very good day. Thanks. Keep it fun, David -
What did you do in the shop today?
Goods replied to Mark Ling's topic in Blacksmithing, General Discussion
Alexandr, that’s the nicest umbrella stand I’ve ever seen! Rojo, I’m impressed with that fork. I have a hard enough time getting two prong forks to come out right! Well, today was the first day of my demo at the festival: (I thought I had more pictures…) To my surprise everything I made and brought, with the exception of the candle sticks and S-hooks sold today. Most of it by noon. Got another day to go. It looks like it will be another beautiful day to have fun forging and talking to the spectators. Keep it fun, David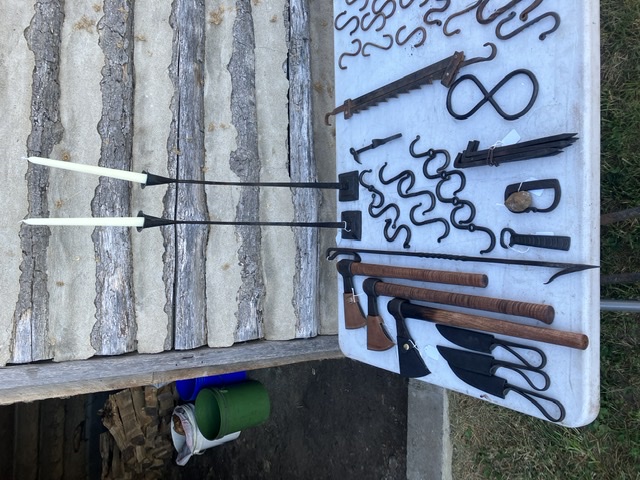
-
I love it the way it is! It has a kind of ethereal look to it. Keep it fun, David
-
Looks like a great purchase! I love my little marvel power hacksaw, but that one looks much more durable! Enjoy it, David
-
Quenching after induction tempering
Goods replied to Sivakumar's topic in Heat Treating, general discussion
Frosty, I’m guessing that the are just surface hardening large parts, then letting them self quench (like what you are think with fire damaged anvils). Then bringing the surface back up to a tempering range and by that time the base material is now too hot to cool down to a reasonable handling temperature. This is all a guess, but from some of the high production industrial processes I’ve seen it kind of make sense. The only that’s messing with me is the “polymer” quench. Bad translation of oil maybe, but who would use oil to cool from 80C? Still some strange inconsistencies… Keep it fun, David -
What did you do in the shop today?
Goods replied to Mark Ling's topic in Blacksmithing, General Discussion
Thanks Les and JLP. Not quite everything I wanted for it, but it’s my best to date! JLP, I probably have eight hours in it. My desire for a perfect item, doesn’t match my skill set just yet! Not that it’s perfect, but I try to do better with each one. Yes, I did use the hammer one these. Using a side set, I got the set down in front of the eye really clean, but not in the exact right spot every time. My large flatter also helped keep it nice and clean. Honestly though, maybe only a 1/3 of the forging was on the hammer and a lot of the was me trying to draw down the eye to 1/4” evenly. I’ve got this image in my head of how I want the eye transition to look (almost like an upset corner), but haven’t got it right just yet. Most of the important forging on these is hand hammer work. I sent more time fiddling with they eye than anything else. Keep it fun, David -
Beginner bladesmith making a DIY Forge. (Not heating fully)
Goods replied to CameronSeiger's topic in Gas Forges
You may also want to order some plistex to coat the soft bricks. That will drive the temperature up even more and add some protection to the bricks. It’s available on this site in reasonable quantities. Keep it fun, David -
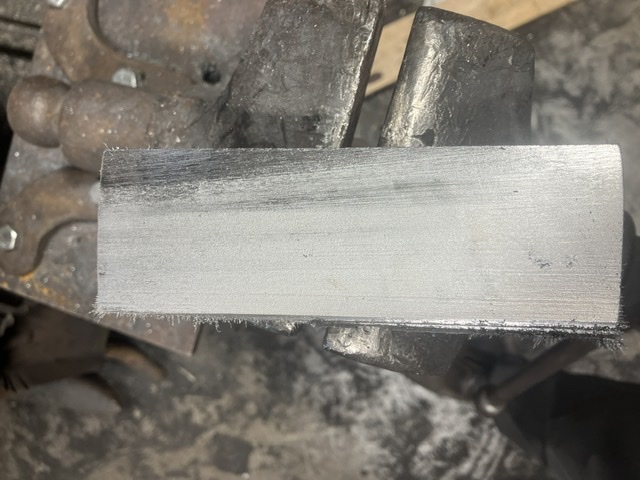
What did you do in the shop today?
Goods replied to Mark Ling's topic in Blacksmithing, General Discussion
Ok, so I got the forging done on the 3rd hawk and it’s now normalizing: I may need to make more, because I kinda want to keep this one… Keep it fun, David
-
What did you do in the shop today?
Goods replied to Mark Ling's topic in Blacksmithing, General Discussion
Dave, no it pretty much due West of me. It’s Fort Vallonia Days in Vallonia, IN: https://fortvalloniadays.com/home.html I’ll be in the fort all day Saturday and Sunday with another smith and some of the other local Smith may stop by and hang out. I’m there to help out (do most of the forging) and don’t need to have inventory to sell, but it’s nice to have some sales to buy coal and steel both of which I’m running low on. Keep it fun, David -
What did you do in the shop today?
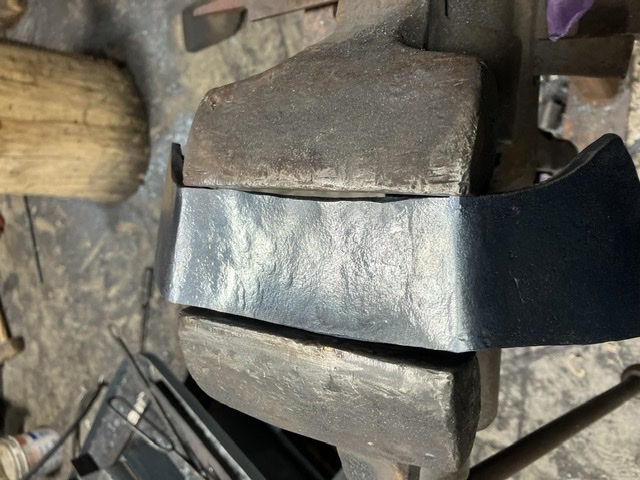
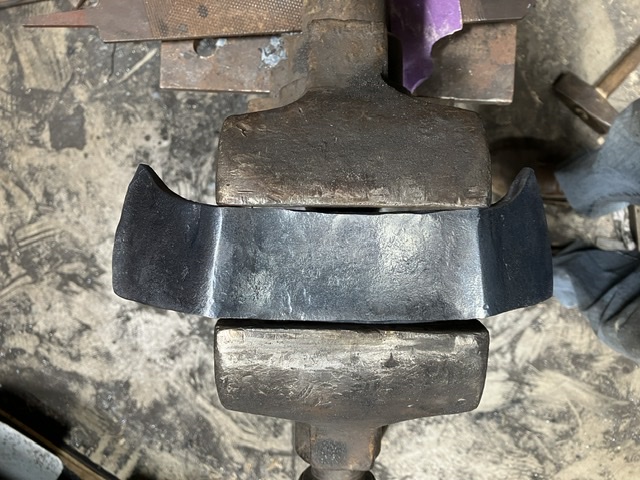
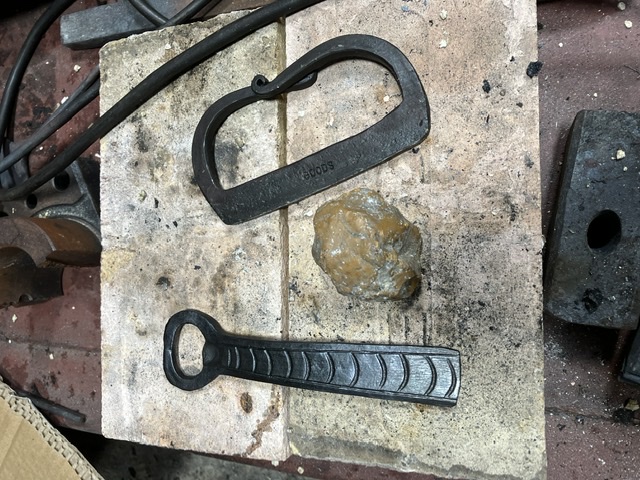
Goods replied to Mark Ling's topic in Blacksmithing, General Discussion
I managed to get the 2nd hawk to turn out and started on the 3rd. I tried the preform on it: In the end, it didn’t help much. 4-1/4” between the welds was short… At our hammer-in today, I worked on the 3rd hawk some more and made my first striker and a bottle opener that I’m pretty happy with: I’ve got a festival/demo next weekend and need to get more of these smaller items made up. (I’ll post pictures of the hawks once I get them finished up, not long now…) Keep it fun, David