

Goods
-
Posts
1,159 -
Joined
-
Last visited
Content Type
Profiles
Forums
Articles
Gallery
Downloads
Events
Everything posted by Goods
-
Real nice work Les! I like it!
-

What did you do in the shop today?
Goods replied to Mark Ling's topic in Blacksmithing, General Discussion
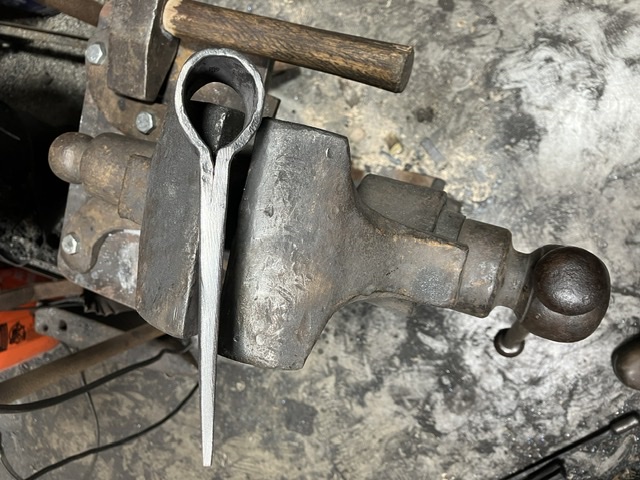
JLP, it depends on what you mean by preforming. I’m using 3/8” stock, so I forge the eye down to 1/4”. Similar to how one would do a wrapped axe. I personally like how it gives a defined point for the weld. (But it does mean I have to get the material measurement for the eye correct!) I’ve also been working on getting the shape developed for thickening the transition point at the front of the eye. Honestly, it’s just a looks/preference thing, but haven’t gotten it to be what I want yet. I just keep flattening it out somewhere in the process. On the other hand, if you mean preforming as putting a little bend in the eye material to setup for the taper of the eye and cupping the same area to compensate for the top and bottom of the eye flaring out when wrapping, then no. I always think about doing that. Then skip over those steps in the “heat” of the moment. I really need to remember that, it would definitely be a time saver on the back end, and I think it will result in a cleaner forging. When I was getting started, I spent a lot of time reviewing your videos, and was quick to review them as you posted new ones. I really appreciate the time you put into those. I rarely missed one of our hammer-in, and I learned a lot from those, but I have learned more of the fine details from you videos. When you have your school up and running, maybe I could swing getting time freed up for actual lessons. Not sure I can really work it out with the travel time included, but it would be great. (I really should plan to visit my sister in Connecticut anyway…) Keep it fun, David -
What did you do in the shop today?
Goods replied to Mark Ling's topic in Blacksmithing, General Discussion
I’ve been using cold rolled 1018 for the body and forge welding in a high carbon bit. Current batch has 1095 for the bit just because it’s what I have that works. I’d rather use 5160 and have a huge leaf spring lay around that would work, if I could ever get it to forge weld. I swear it’s cursed! (Could just just some crazy weld hating alloy…). Somewhere in my pile I’ve got a heavy file that I was using for bits, if I could find that, I’d use it. I’ve got a lot of old files laying around, but I can’t bring myself to sacrificing them, when I could clean them up and put them in service. Don’t know if I’ll ever get around to that though. David -
Ultimate swage block stand?
Goods replied to Machine shop's topic in Stands for Anvils, Swage Blocks, etc
But it’s so pretty! (Was the picture taken right after you finished the paint?) -
I’d either go with the double ending spikes with vertical straps or cut key groves 90degrees to one another and make wooden keys with along with vertical straps. That way if you using a hardie hole bending fork or hitting the side of the anvil to set a bend, all the stress won’t go into the straps. Of course glue may solve that, but what’s a little overkill! Keep it fun, David
-
What did you do in the shop today?
Goods replied to Mark Ling's topic in Blacksmithing, General Discussion
I started on my next hawk tonight. Not real happy with the results. The eye is a bit big, and the weld split while welded the bit in. I never thought the weld would break then. I already set the step in and the weld held then! I think I got the weld to take and some of my hawk handles are a bit oversized, so time will tell. Let see if it survives the final bit of forging, but that will have to wait a couple days. Keep the pictures coming, y’all are inspiring! Keep it fun, David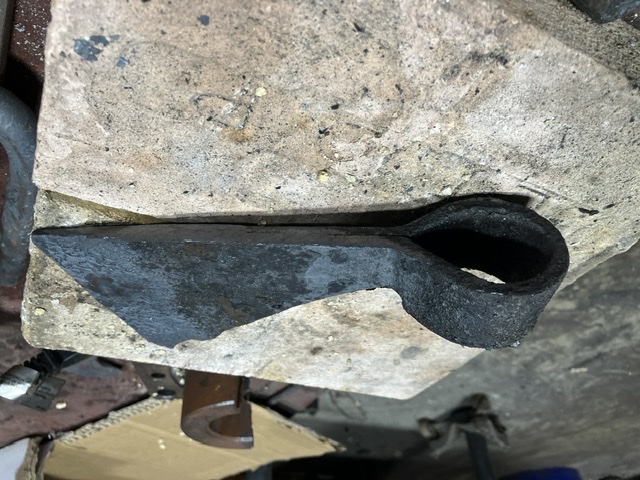
-
You all beat me to it!
-
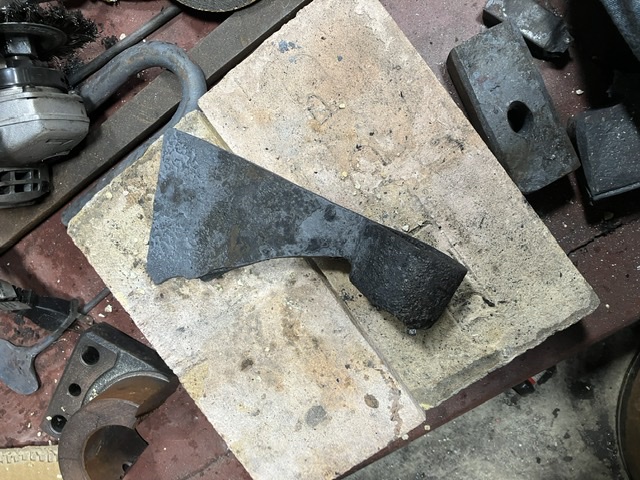
What did you do in the shop today?
Goods replied to Mark Ling's topic in Blacksmithing, General Discussion
I got the first of 3 or 4 hawks wire wheeled tonight. Forged and anealed(sp?) yesterday. I’m going to have to leave a little more material for the eye. I thought I measured it out as 4” and checked before wrapping, but still had to draw out the eye walls quite a bit and popped a little bit of the weld. Should have added 1/4” in length to get to a centerline measurement, but it seemed like more than that. Maybe I’ll try 4-1/4” next time. I’d rather bet short than long. Keep it fun, David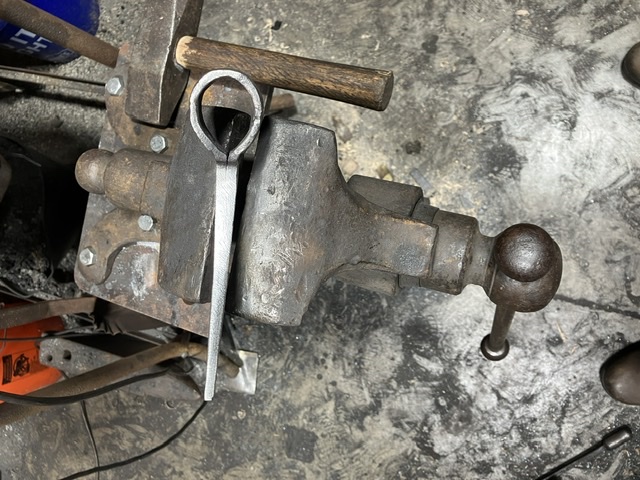
-
What did you do in the shop today?
Goods replied to Mark Ling's topic in Blacksmithing, General Discussion
Dewnmountain, they feel pretty good, but not as nice as a good wooden handle. Shainarue, looks like you had a good first day! Keep it fun, David -
What did you do in the shop today?
Goods replied to Mark Ling's topic in Blacksmithing, General Discussion
Never heard anyone say it was nice and neat… Here is a picture of a set similar to what I use: I usually hold this in a set of tongs. I really should have a custom stamp made. I could use this tool for other marks, but never want to take the time to reset the”type”. If I had one just for a touch mark, I’d be more likely to change this to a date, or material type (for marking tools).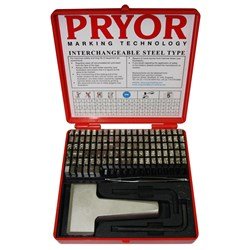
-
What did you do in the shop today?
Goods replied to Mark Ling's topic in Blacksmithing, General Discussion
Ok here’s the picture of the tripod: (Forgive the mess that is my shop.) Also hardened the blacksmith knives and they’re now tempering: Not sure if they got a hard as I would like, I wouldn’t be surprised if there’s quite a bit of decarbonization. Plan on just sharpening them up, leaving them pretty “rustic.” Keep it fun, David

-
Cleave, absolutely a great picture. I love it!
-
I would be worried about the elements in the coal that don’t cook of as it cokes up. I wouldn’t want to filter water with activated carbon that could contain significant levels of heavy metals. Keep it fun, David
-
What did you do in the shop today?
Goods replied to Mark Ling's topic in Blacksmithing, General Discussion
Not sure I can get much more width without upsetting the stock first. I calculated the volume first and 1/2” round and 1/4”x3/4” is close to the same. I’m sure I lost some volume to length increases though, the corners were a bit round in a couple places… My thoughts on heat treatment are one our two normalizations, then quench in oil (canola, it’s what I have), and finally temper in the over for 1hr at 400F. I’ll try to avoid getting the handle portion above magnetic before the question. I’d rather the handle end up normalized than hard. Keep it fun, David -
What did you do in the shop today?
Goods replied to Mark Ling's topic in Blacksmithing, General Discussion
I got three blacksmith knives and a 3pcs tripod forged out yesterday. Then, today did cleanup file work on the knives. I’ll post the tripod once I have a chance to wire brush it up and coat it. Starting stock on the knives was 1/2” coil spring forged down to 1/4”x3/4” the 9” length. I’d prefer wider blades on them, but that will wait till I track down some 5/8” or 3/4” coils springs… Keep it Fun, David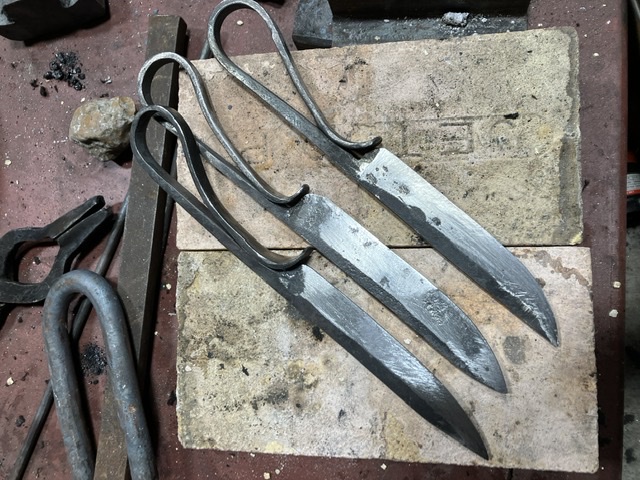
-
A simple test with your current setup may be to plug the air slot up leaving 2~3” open. (Plug it just with wet dirt, it’s just a quick test.) Then pile your coal deep (like Anvil said, 4” below 2” above.) and light it up. Just concentrating the air may help, but you will need more depth of coals to get good and hot. (You want enough coal depth to use all of the oxygen and provide a little insulation from radiating heat.) Your setup reminds me of the “washtub” forge, but every example I’ve seen of that type used a deeper washtub and hole drilled in the pipe, not a slot. How much air does that blower put out? Looks like the ones they used on that knife show on the cable network. I wouldn’t wish those on anyone. If you really crank that, will it blow coals out of the fire? (Not that you really want that, but it give me an idea of it’s output…) In a solid fuel forge, air makes the fire hot, chances are you not getting enough air to the fuel in the right spot. Keep it fun, David
-
What did you do in the shop today?
Goods replied to Mark Ling's topic in Blacksmithing, General Discussion
Nate, I don’t think this is a size issue. Overall you forge is bigger than my rivet forge and it’s easy to burn steel in. Looking at yours, I think you may have combined a few different concepts which aren’t playing well together. If you’re interested in improving it a switching to coke, we can help you refine the design. (I’m pretty lucky. I live in town, but haven’t had anyone complain about the smoke, smell or noise. Even after I added my power hammer into the mix.) Keep it fun, David -
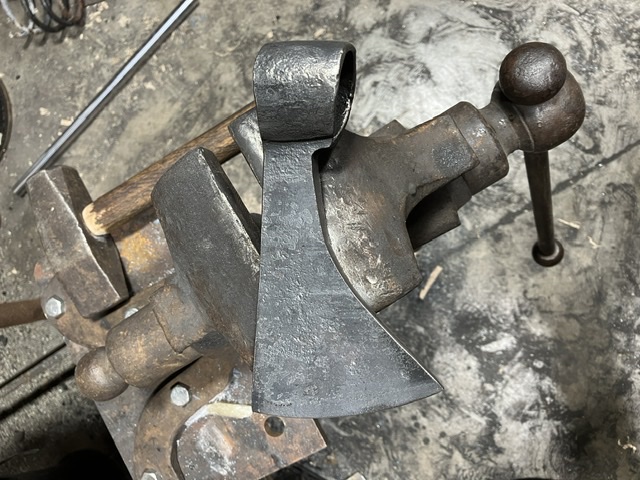
What did you do in the shop today?
Goods replied to Mark Ling's topic in Blacksmithing, General Discussion
I finished up the claw hammer today and a slip cross for my wife to give as gifts. I’m not real happy with the hammer. The claws ended up going a bit wonky, so the slit isn’t a nice even taper. Next one will be better… Keep it fun, David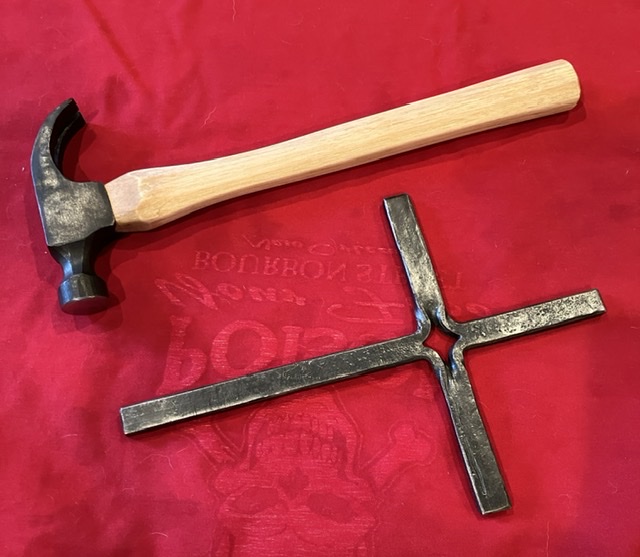
-
African or European?
-
What did you do in the shop today?
Goods replied to Mark Ling's topic in Blacksmithing, General Discussion
Will do. Thanks Glenn! -
What did you do in the shop today?
Goods replied to Mark Ling's topic in Blacksmithing, General Discussion
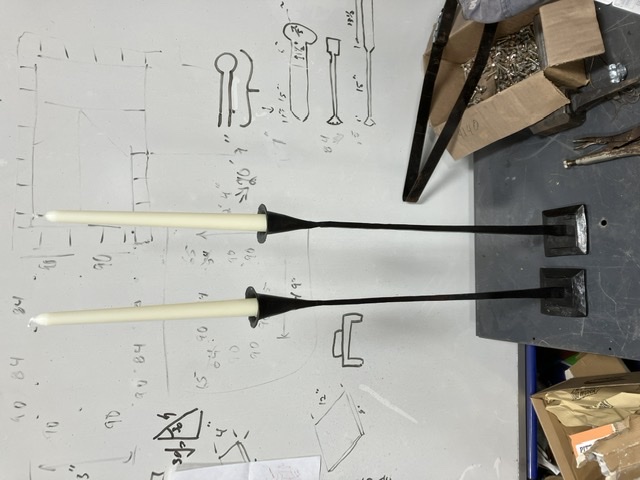
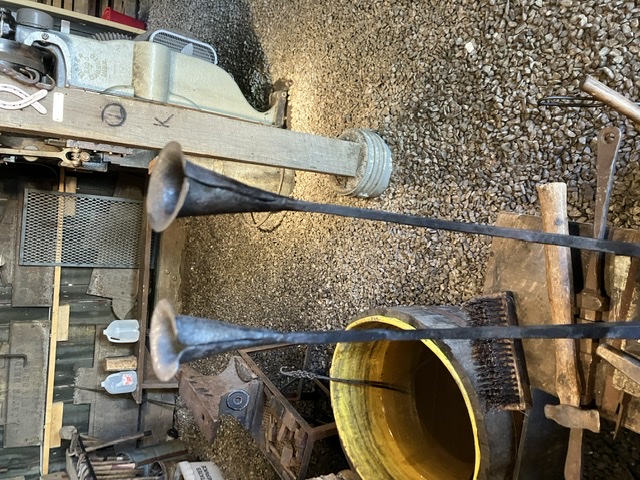
Got the forge work done on my candle holders done today at our hammer in. Then wire wheeled and wax them when I got home to my shop. The about 23” talk. Made from A36, 3/4” square and 3”x3”-1/3” plate. These were definitely a learning experience and something I will continue to work on. Keep it fun, David (Just a question for Glen and his team, is there something I’m doing work the my pictures always end up rotated? I’m posting from an iPhone…)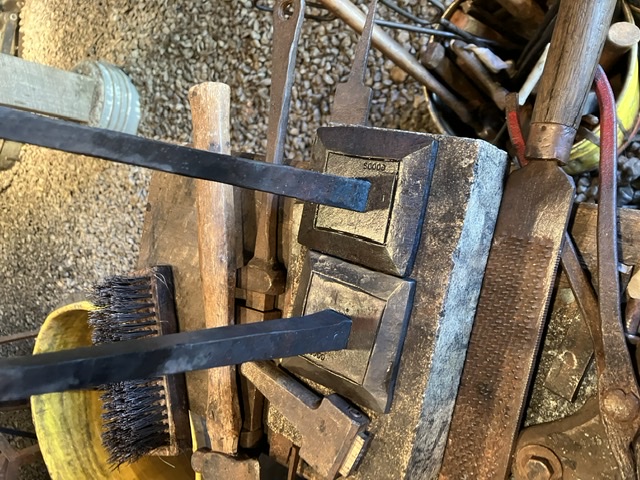
-
Anvils. Does size really matter?
Goods replied to KING's topic in Anvils, Swage Blocks, and Mandrels
Yeah, I was not very impressed with his video. I tried a couple more, but won’t waist time on his channel again. Poor quality, questionable information, and didn’t make up for it with entertainment value… -
How tight are you tolerances on the part and how many do you have to make? I’ve got an idea in my head, but those two factors make a big difference. David (pm me, if you want to talk about my thoughts later tonight.)
-
I thought flashback arresters weren’t required with propane, but very necessary with acetylene. Was I wrong?
-
I wouldn’t be too worried about adding more sand. Over time fly ash will build up and you’ll ever have to start removing it. With coke, you only have to worry about the coke that’s in the air blast burning. Just pile the coke up. If you were burning charcoal, it would be another story all together. As others have said, get a hot fire of kindling, cardboard, newspaper, etc. right where the fire ball needs to be with coke around it. Once it’s good a hot throw you coke on top. (Irondragon, I like the new avatar.) David