LeeHene
Members
-
Joined
-
Last visited
-
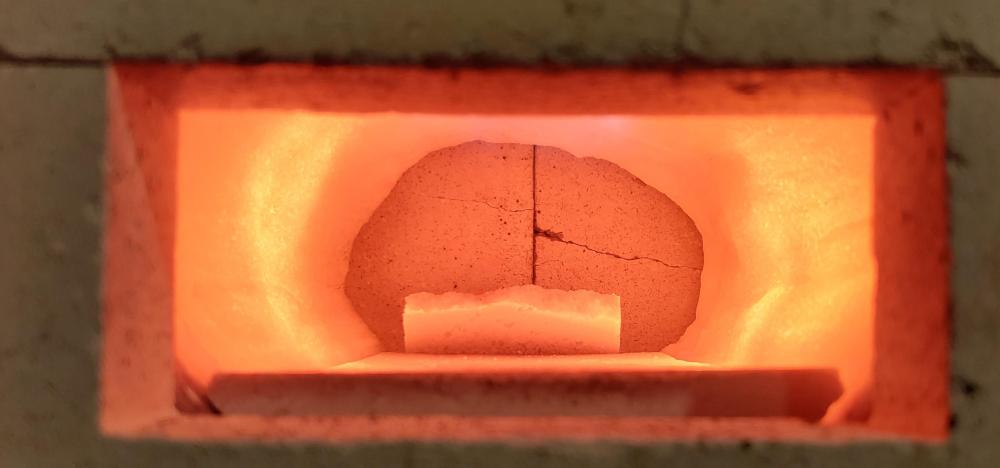
Hey guys! It's been a while since I last checked in. Still enjoying this little forge. I recently added a front door to the frame. I experimented a little before hand and found that it really helps even out internal temperature for heat treat of blades. It's about time to replace the lining.


-
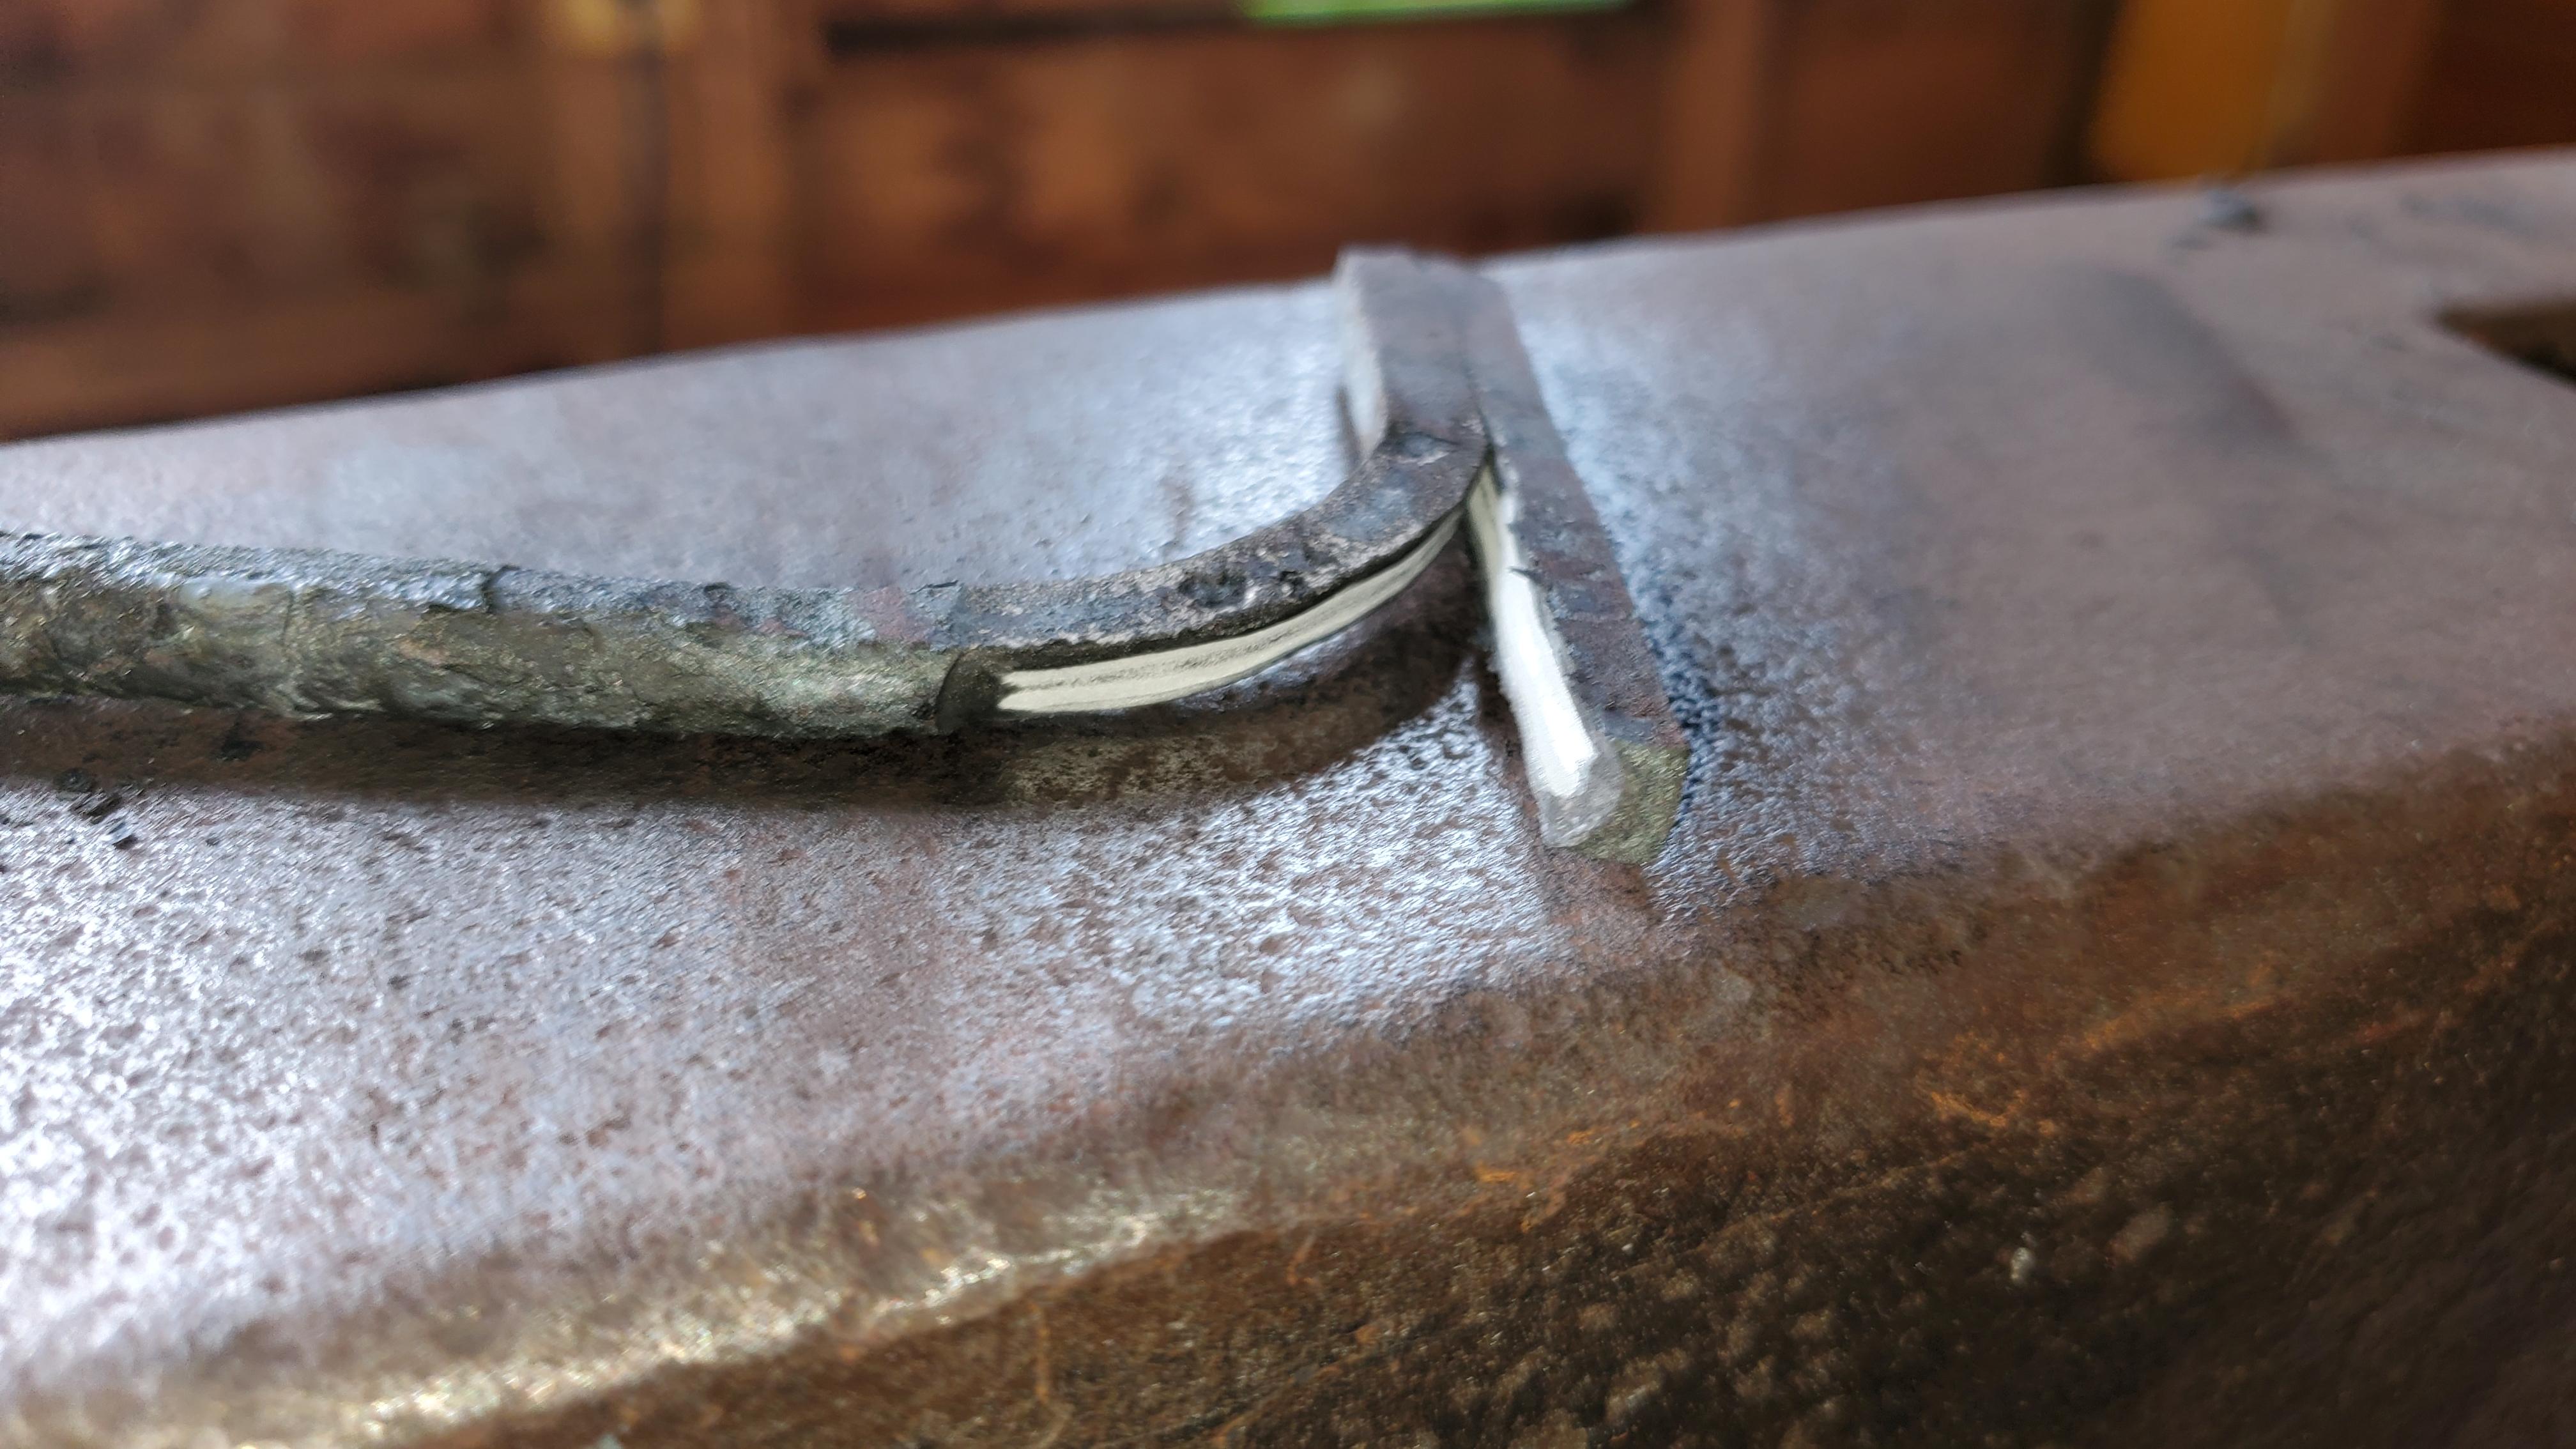
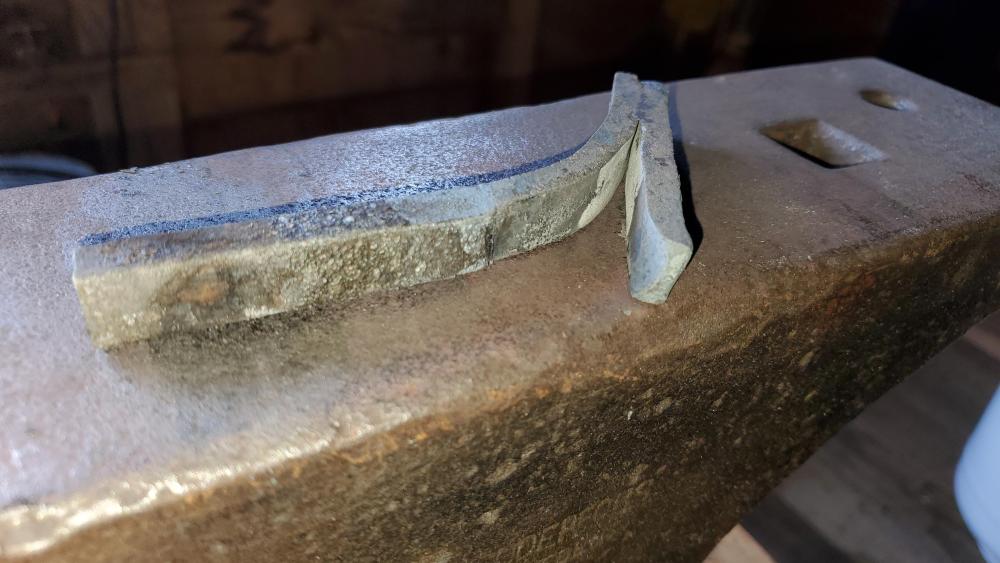
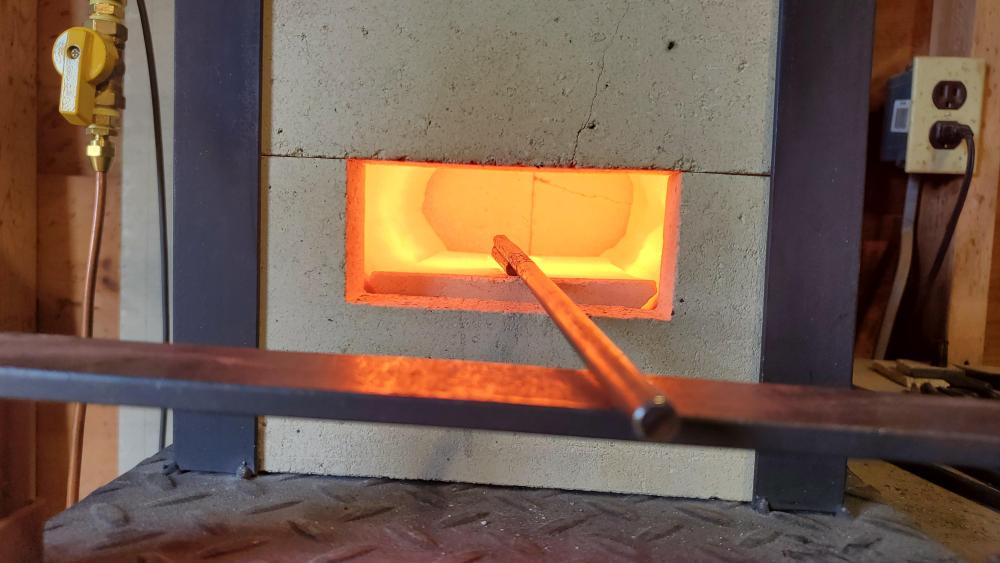
Buzz and Goods, Sorry for the late, reply. I guess I got frustrated enough that I had to step away for a little bit. The steel I'm trying to join is two pieces of 1/2" mild steel square bar. At the moment is just for practice, but in the future I do hope to make fire pokers and little things to someday sell on the side. I did clean the steel good before starting, but I didn't start at one end to work the flux out. Very good point, it makes sense! I really wish there was a group close by that could help me. I do know on fella but he stays so busy we haven't had a chance to get together. Thank you again for the input and encouragement. I work through the weekend but will fire the forge up and try again Monday or Tuesday.
-
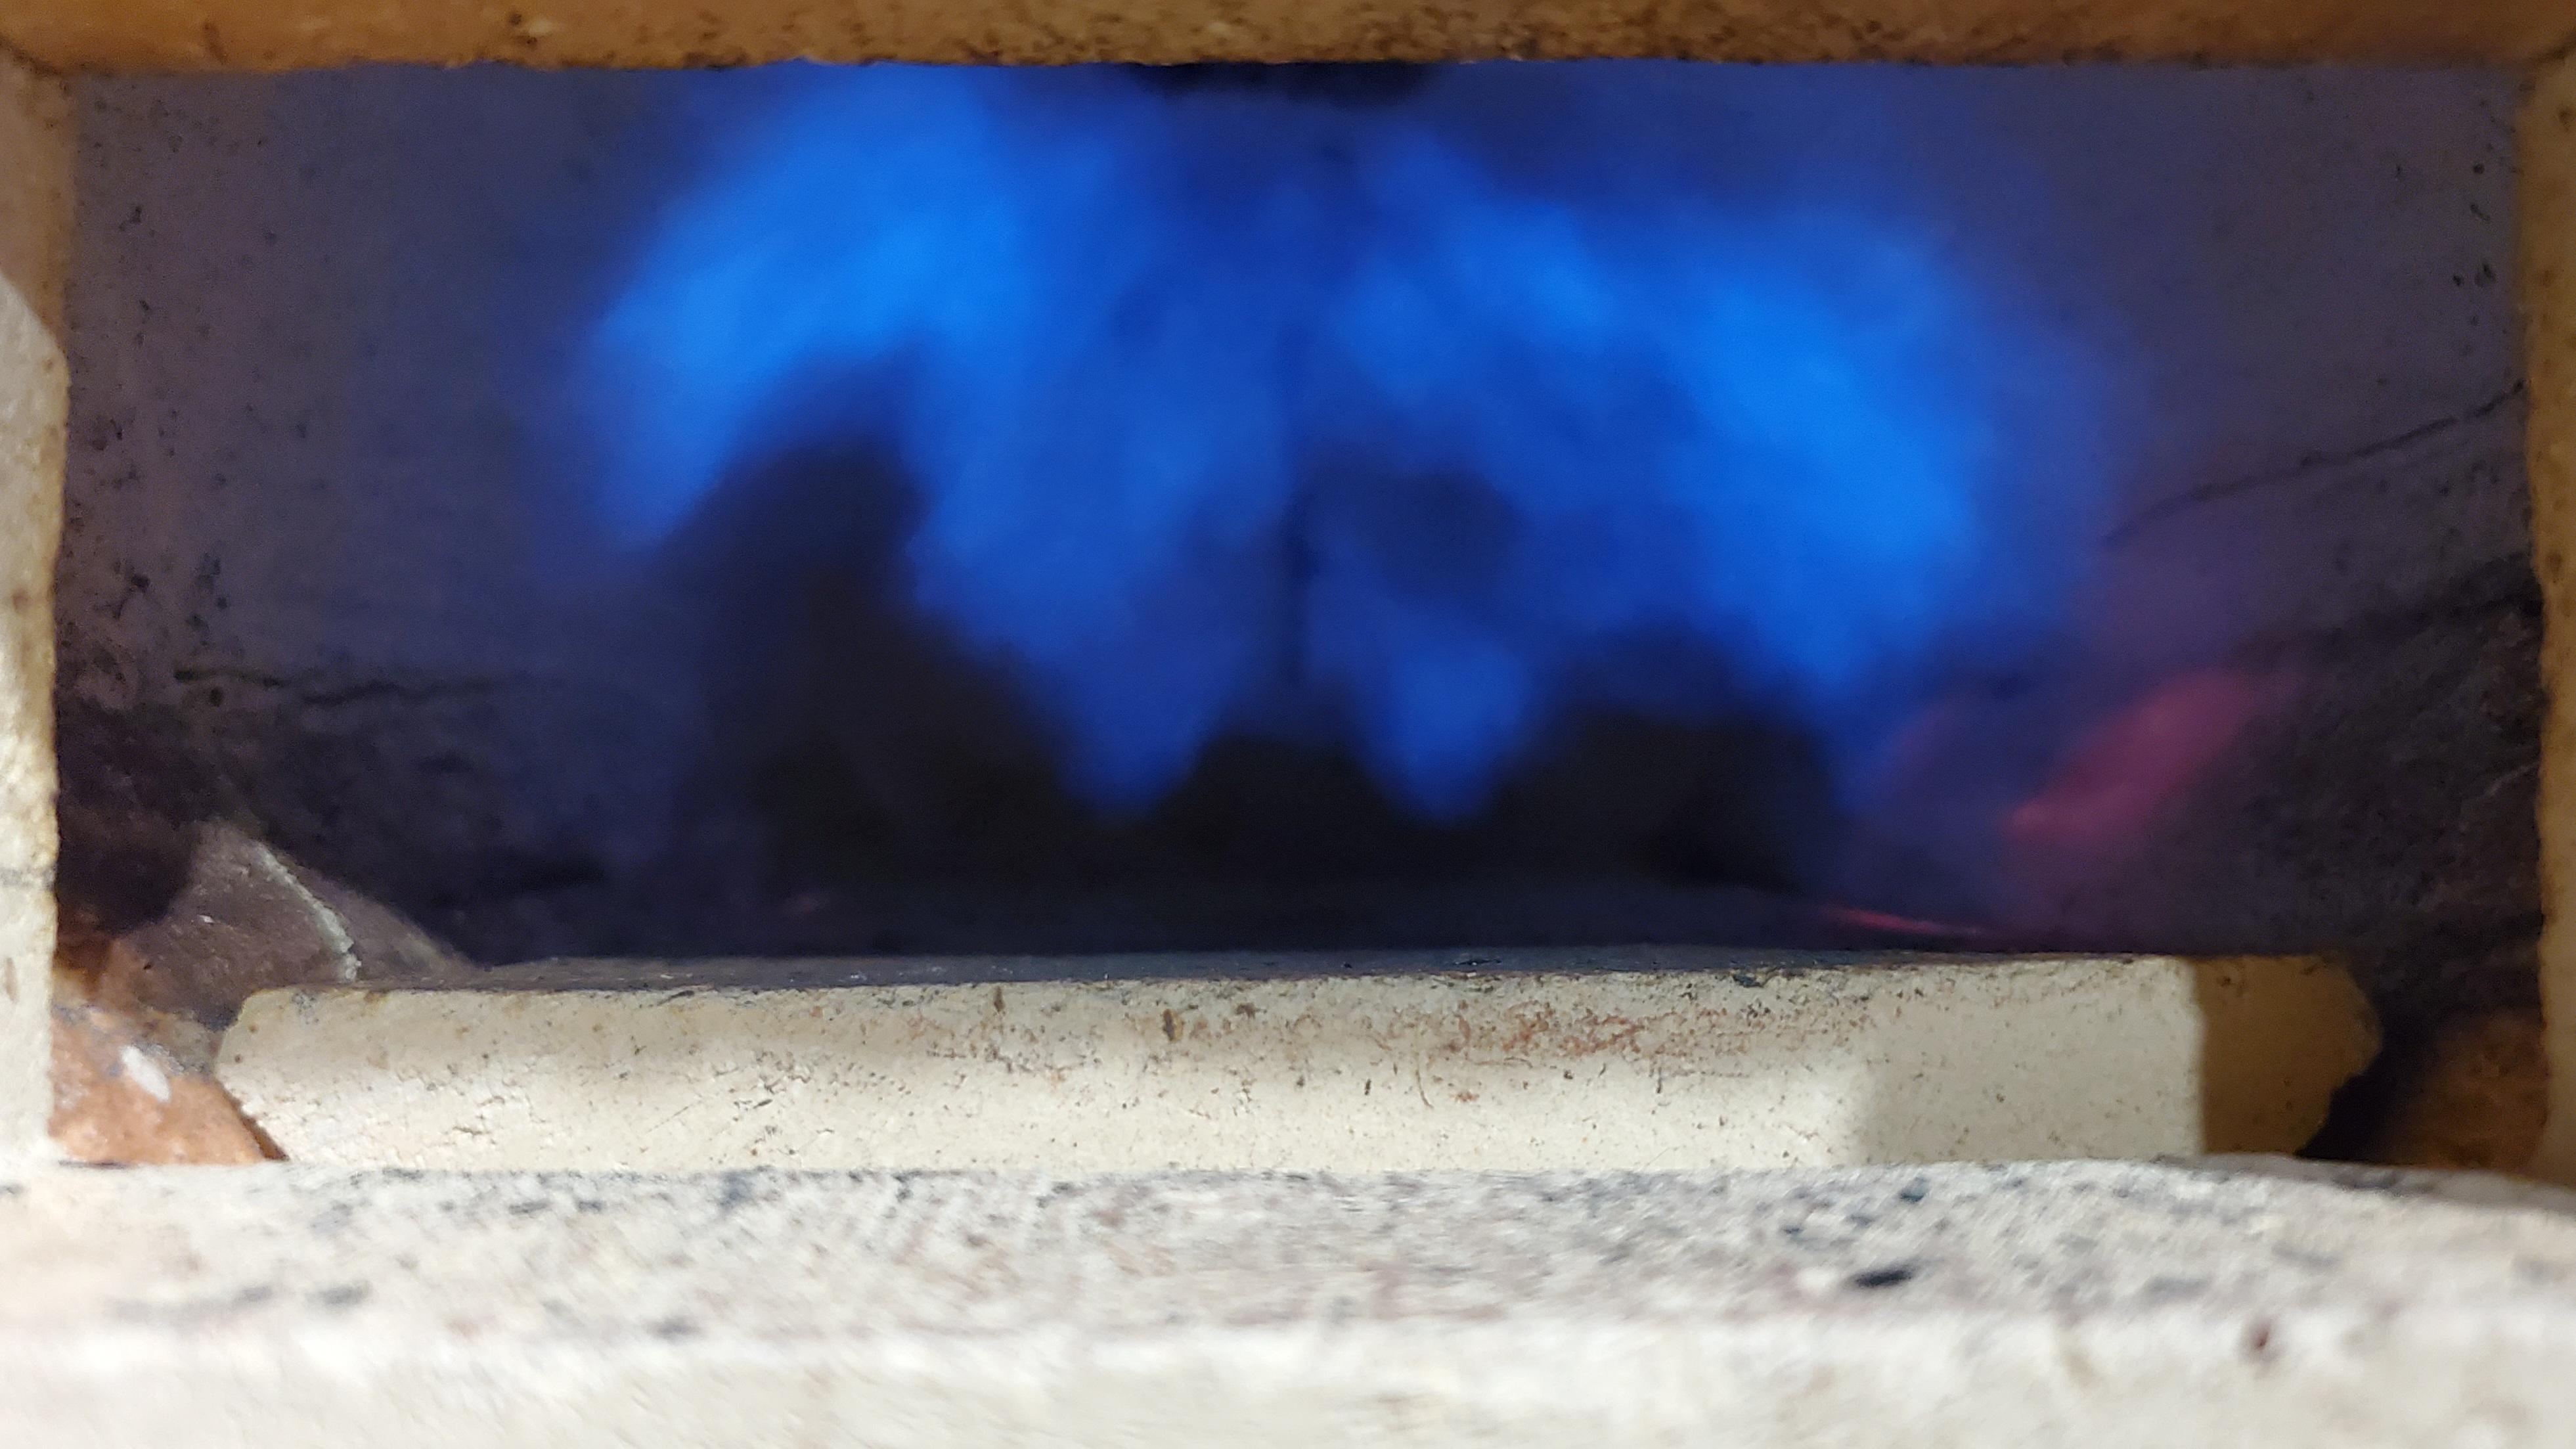
My forge is very, very easy going when it comes to air/fuel ratio to hold a flame, especially once it heats up a little. Could my ratio be off enough that it prevents a good forge weld, even with flux? I know there has to be something simple that I'm missing, but it's about to drive me nuts.
-
-
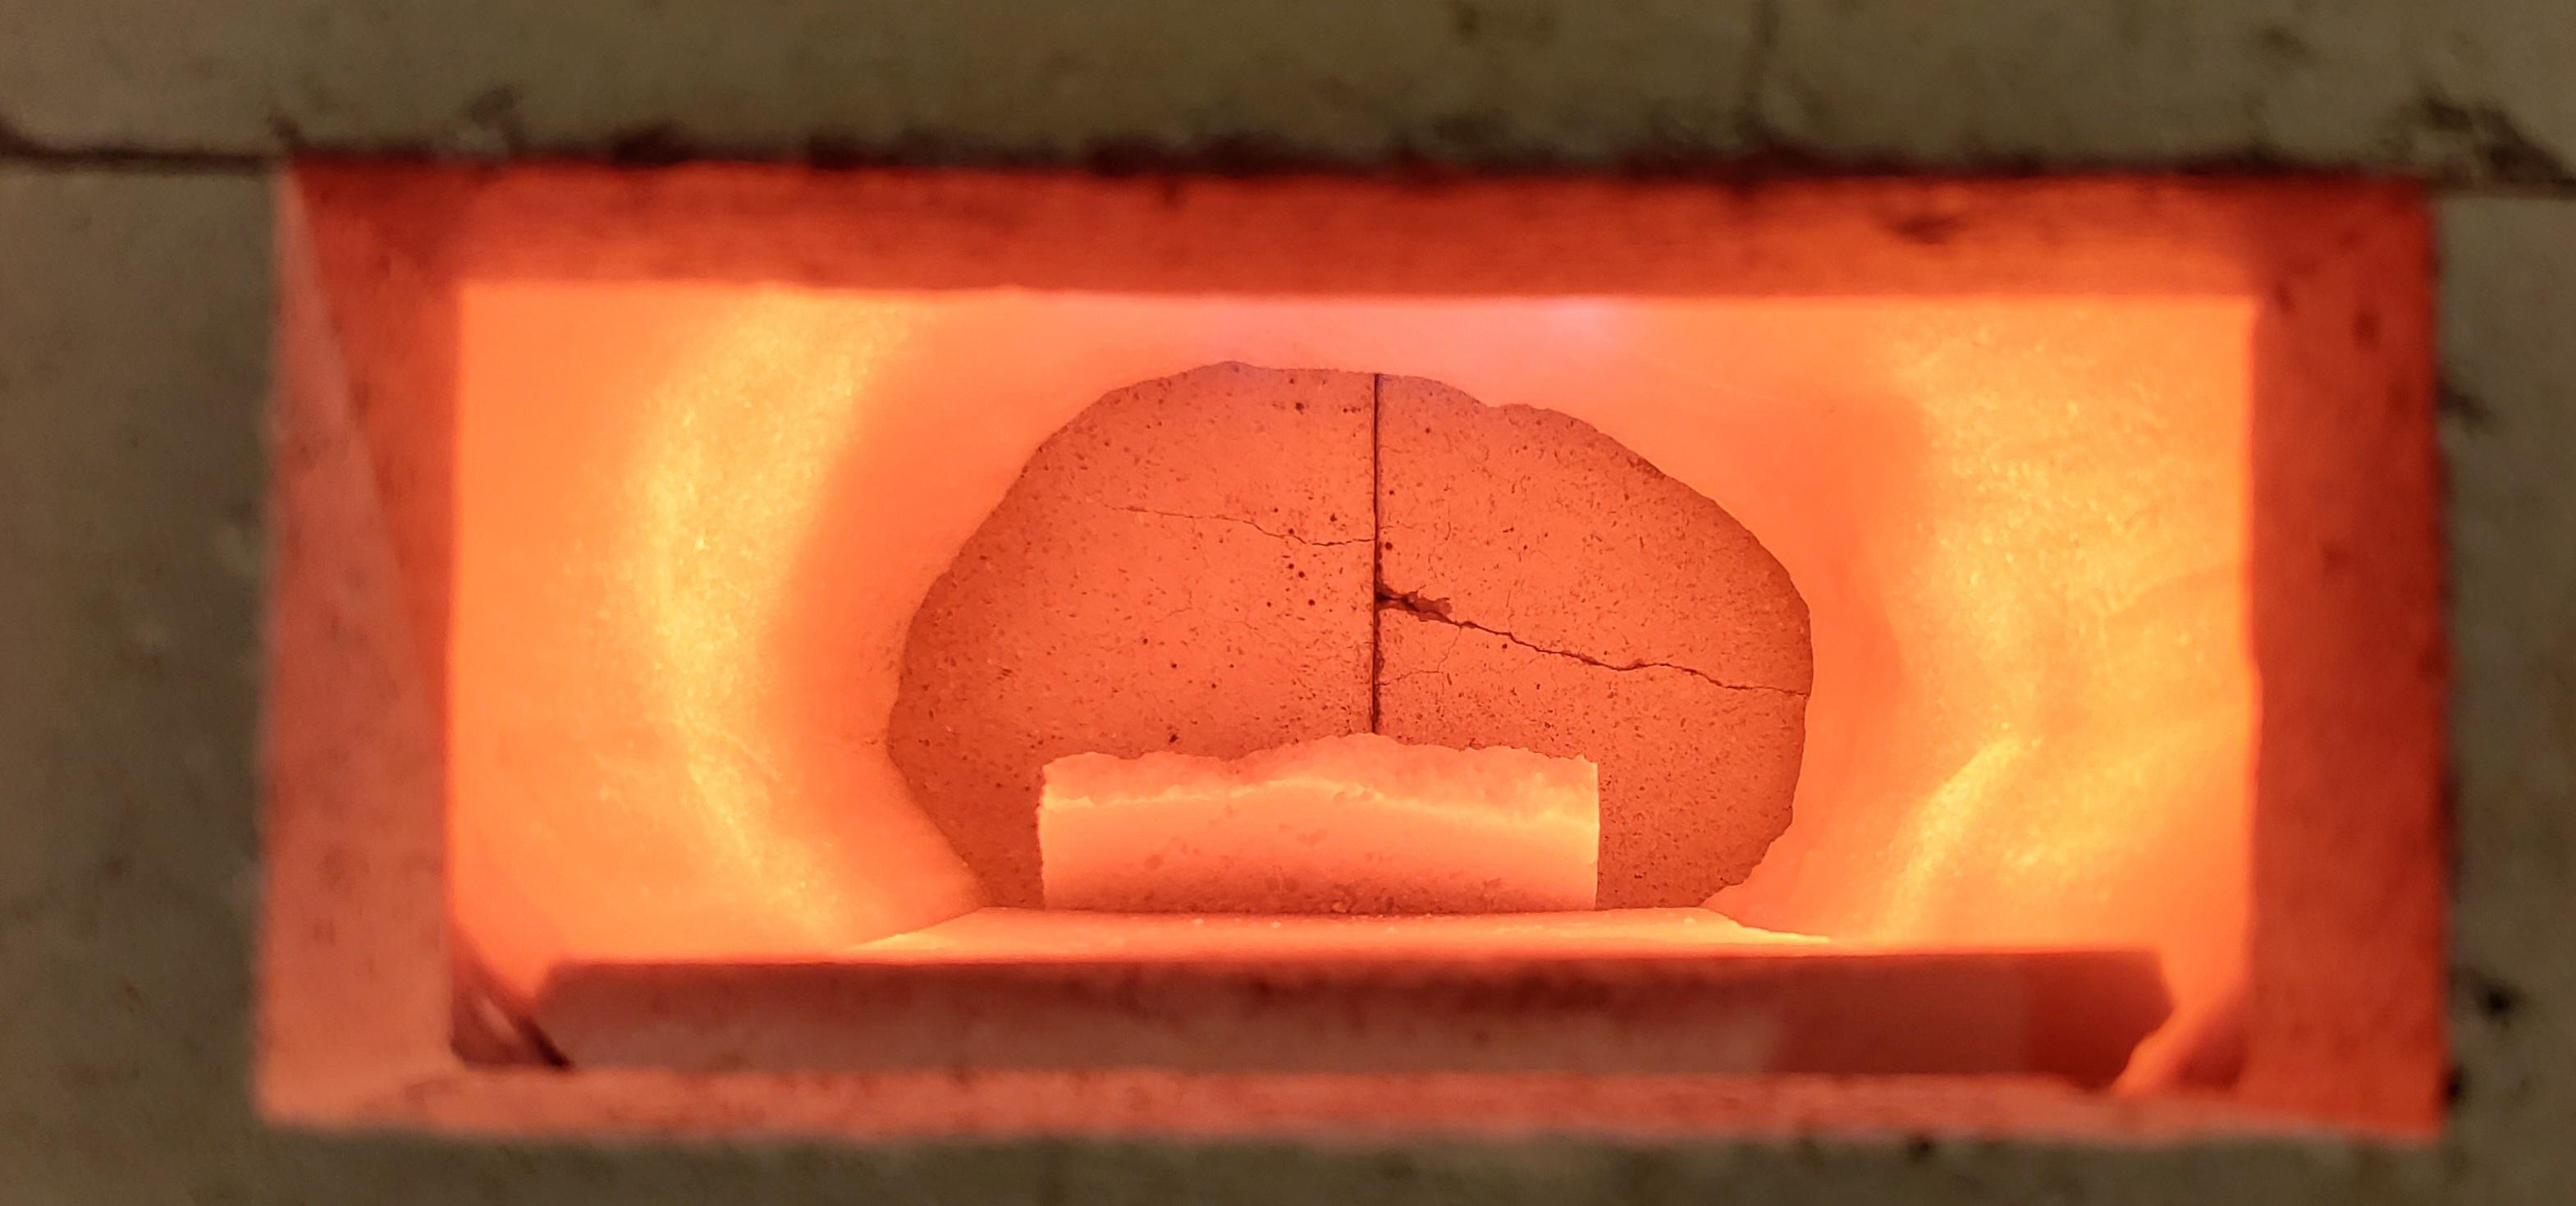
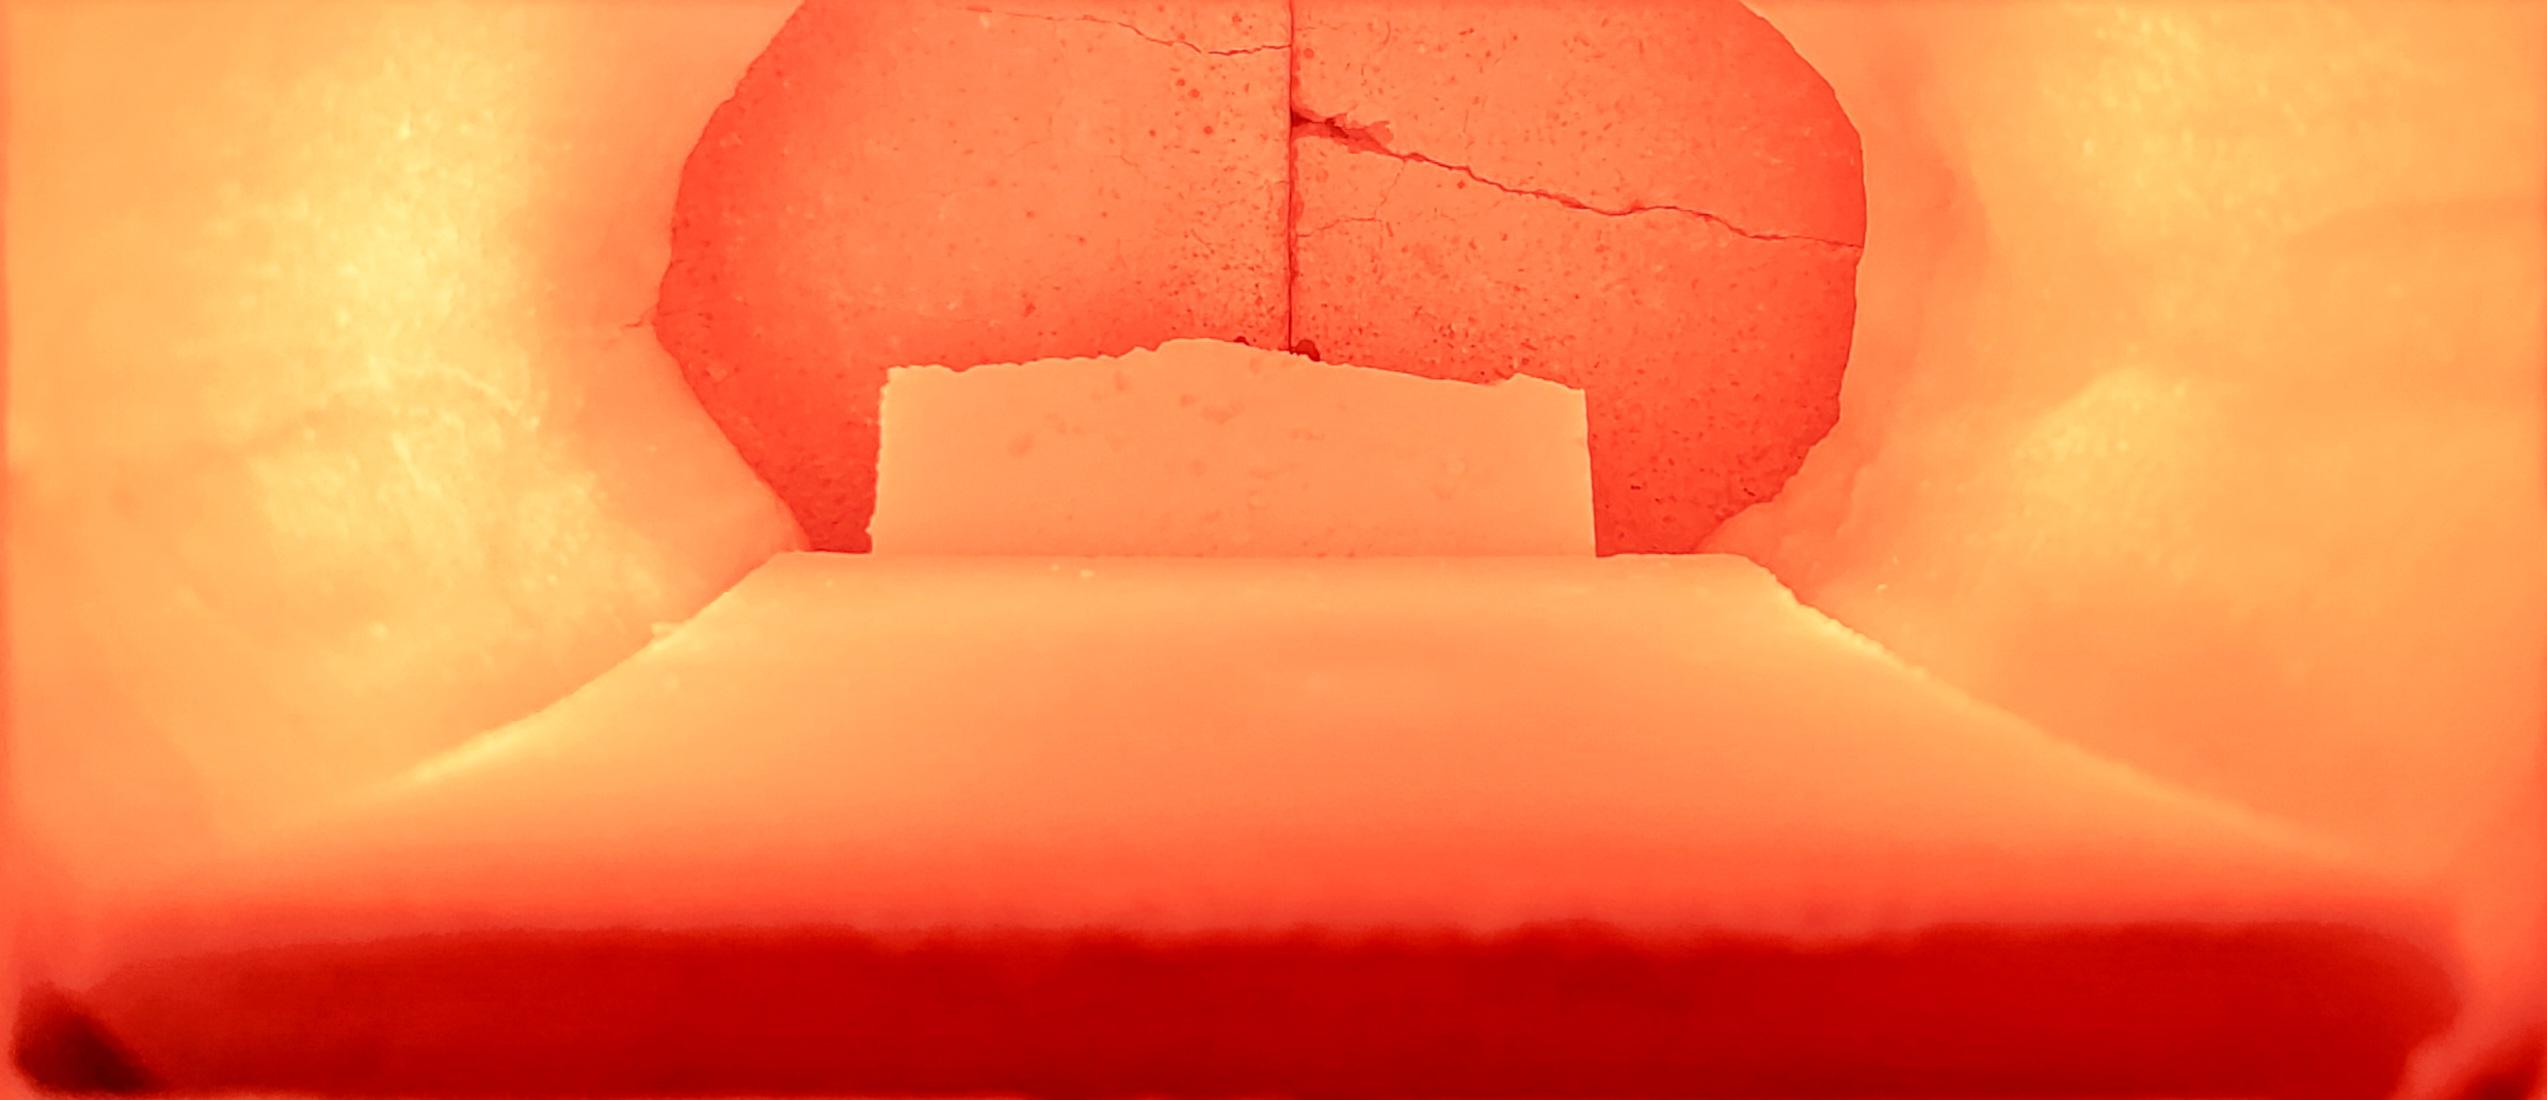
Buzz, excellent information! Thank you, I'll try again with square stock as you recommended. Apparently the forge was hotter than I realized. I turned it back down to my normal operating temp. I could see the color change but the temp reading didn't. *Sorry for the repeated picture in my last post. This forum doesn't always cooperate with my phone.
-
I sanded it down clean and tried again. It still looks like the seam isn't bonding good. My Harbor Freight laser thermometer is reading between 2150⁰ and max. Borax was applied as soon as the steel was hot enough to melt it and reapplied each time before going back in the forge. Around what temp should I be at for mild steel? There are a lot of conflicting opinions out there citing "soak time" and how big your hammer is. It's my understanding that one should be conservative on the first round of hits?


-
Mikey, Thank you for the input. I'll admit I didn't clean them up before putting them in the forge. I was under the impression the heat would remove any oxidization. I'll try it again this weekend. Seemed sooo close to sucess, but no banana.
-
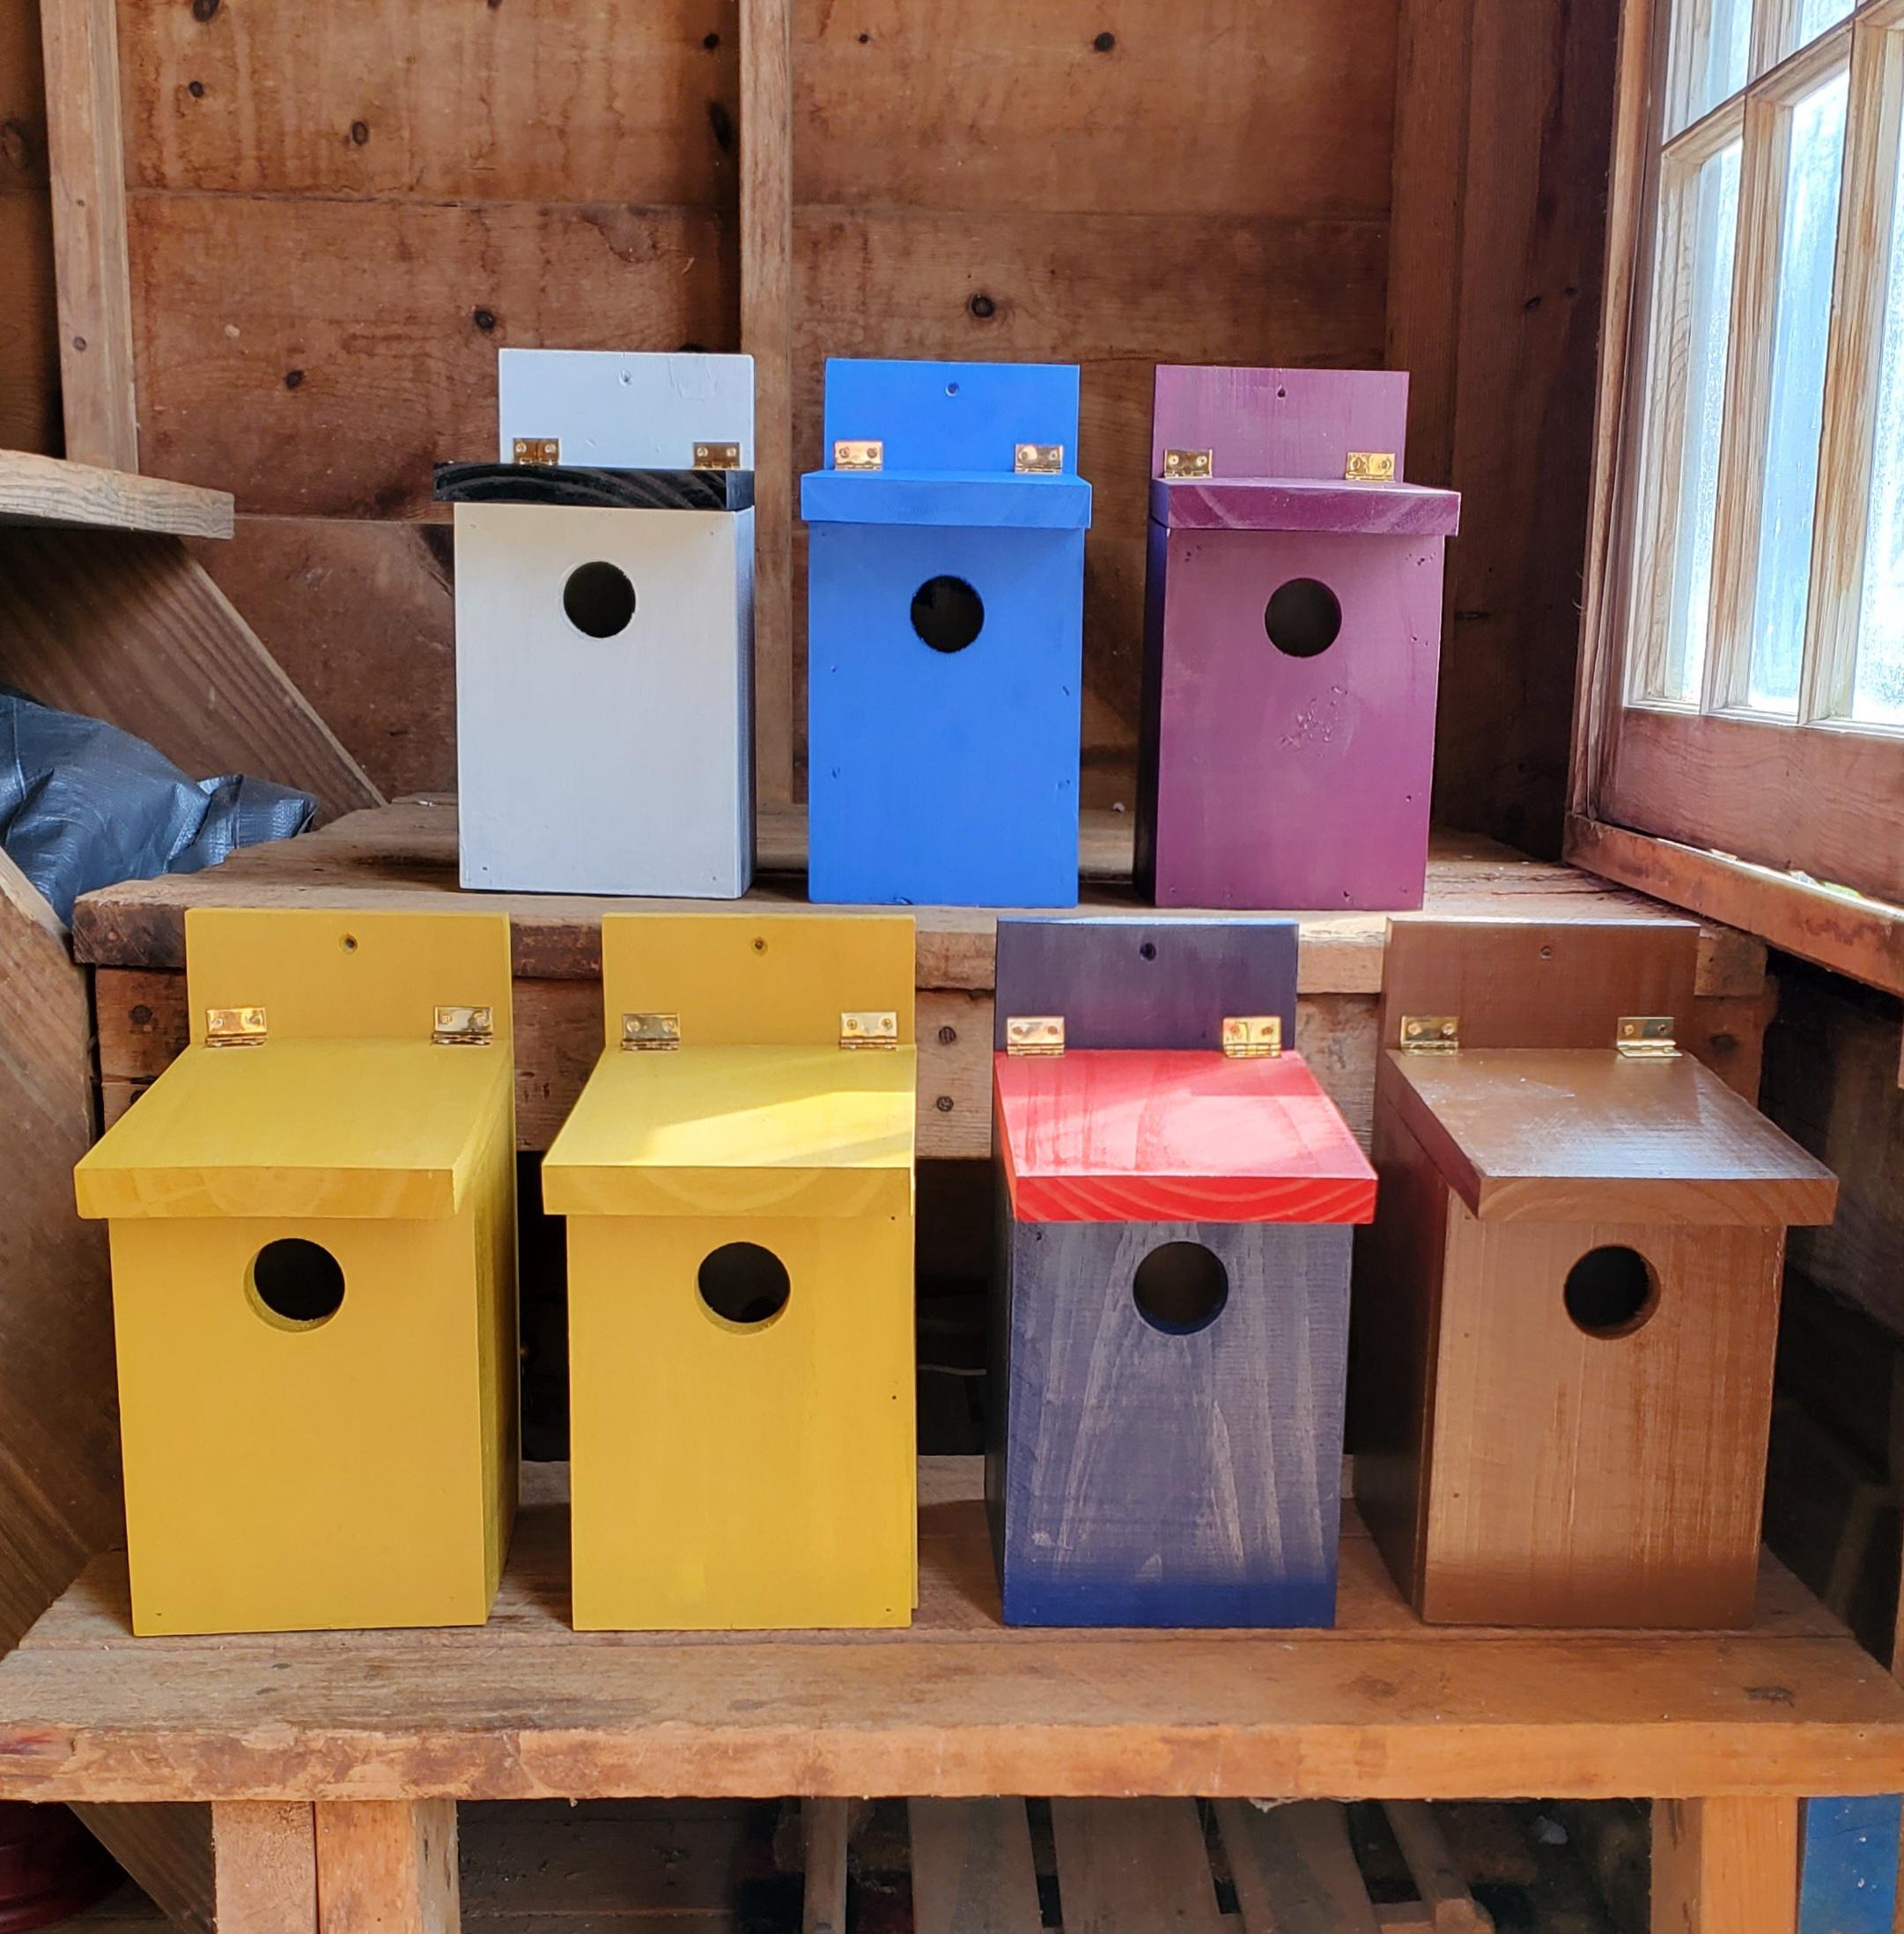
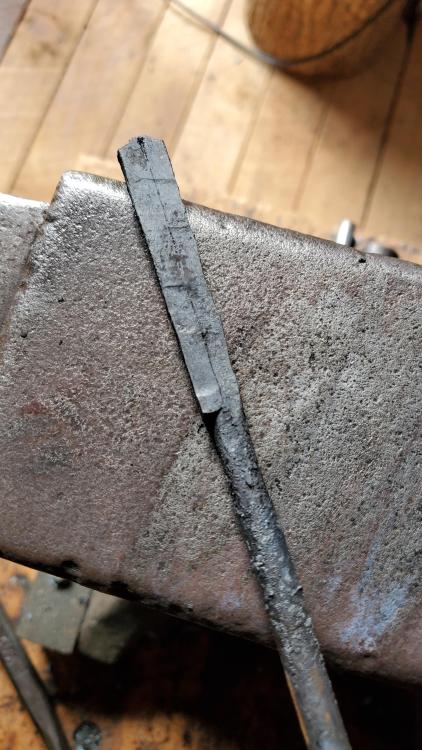
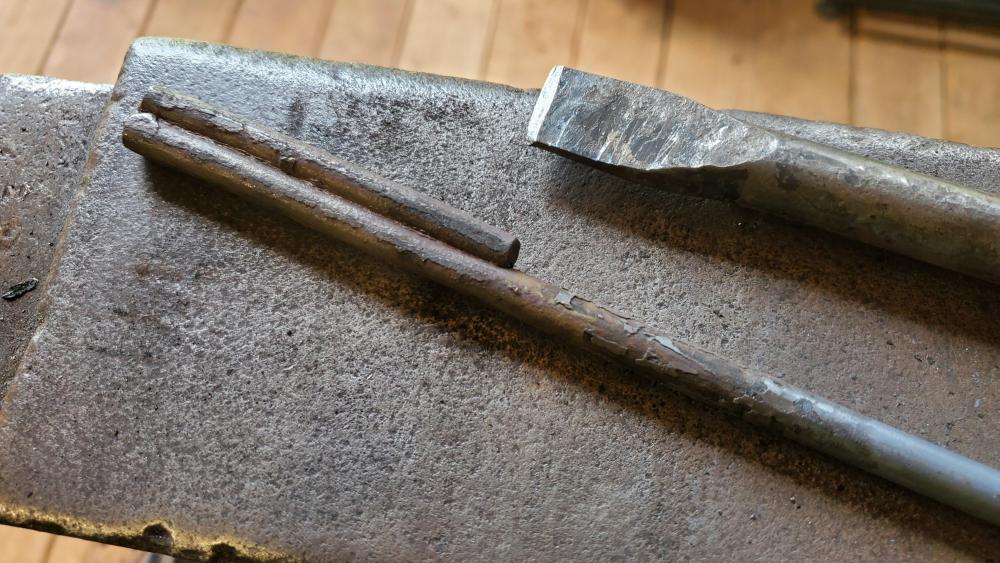
Hey guys it's been a while but birdhouses have finally let up and I got back out to the forge. I finally installed a new blower (same cheap type, just a new one) and it's working much smoother. I noticed how hot it looked and decided to give forge welding a shot. Low and behold, success!!! Nevermind, I got too excited. It split apart as I was trying to form it.
-
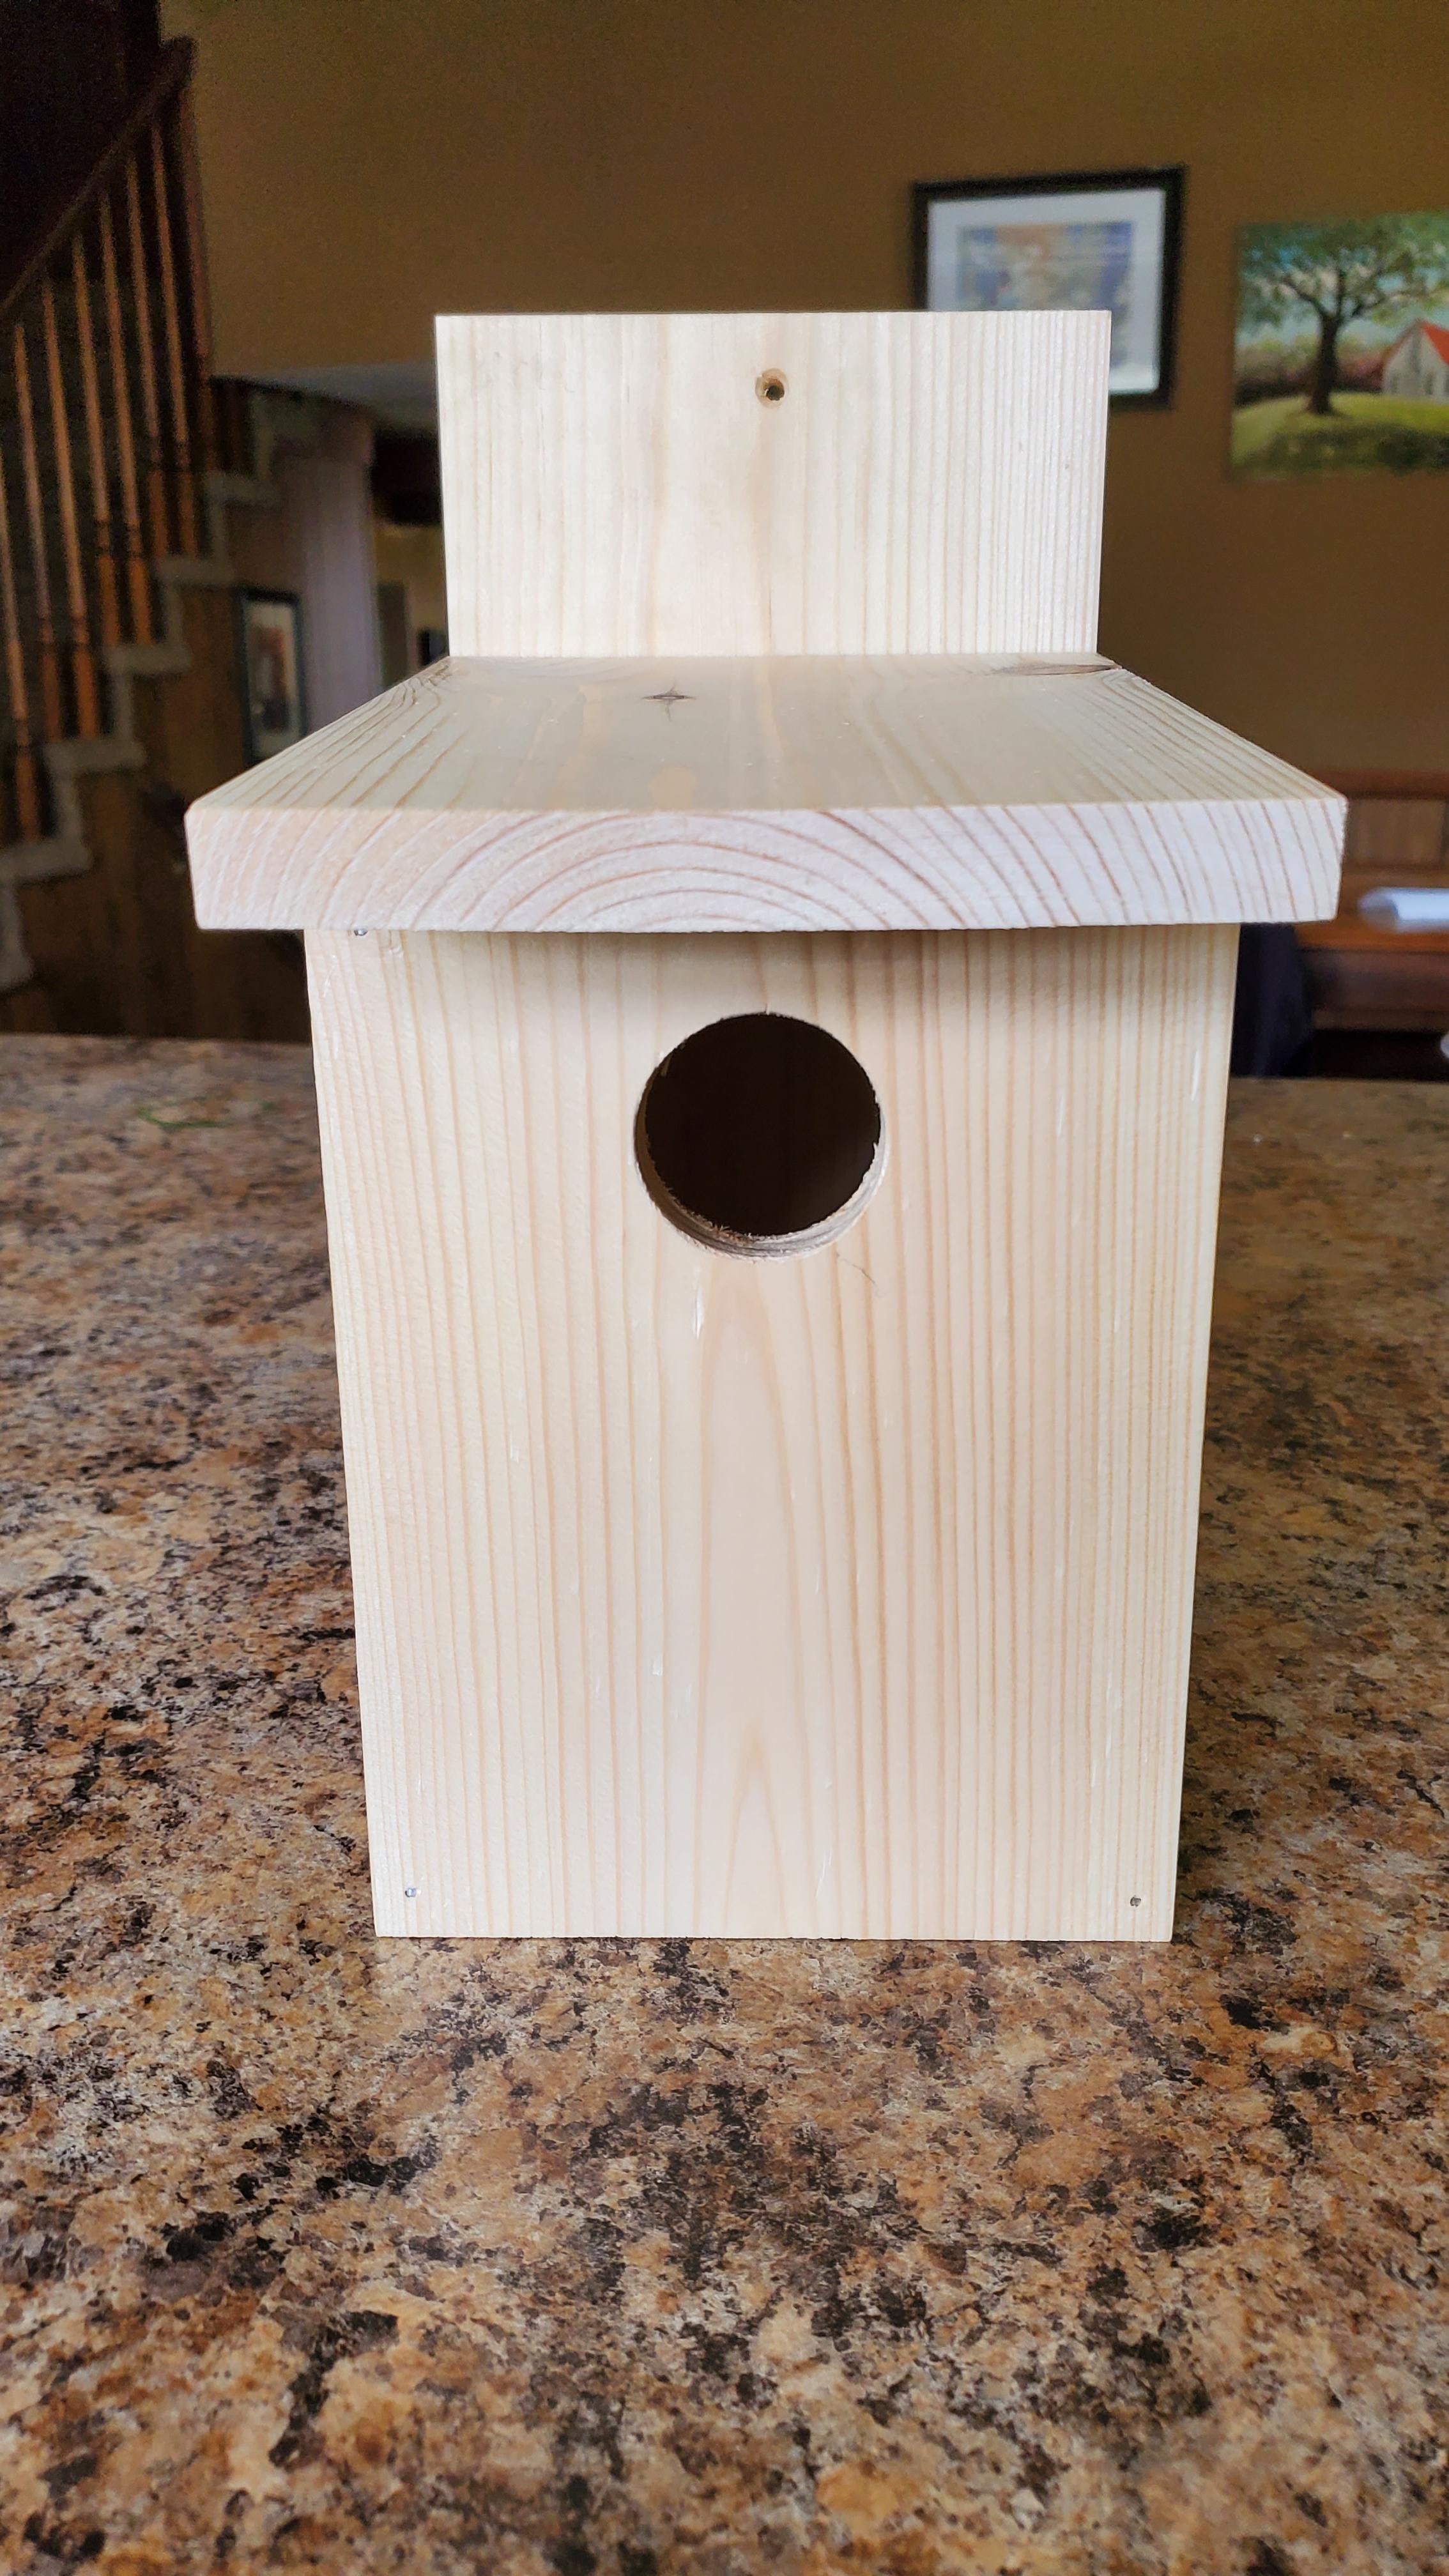
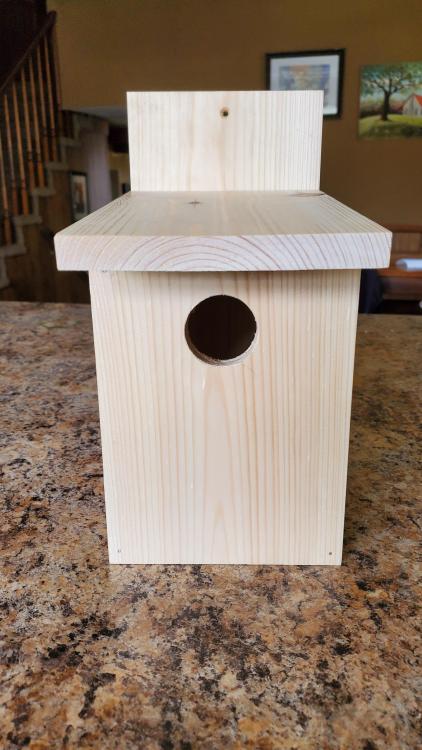
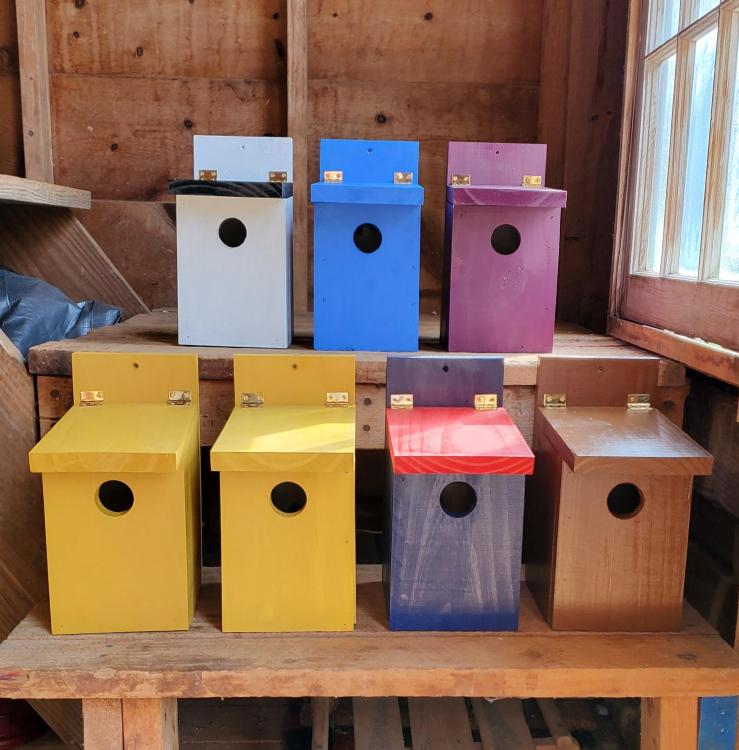
They are sized for bluebirds and similar. Assembled strong and true, held together with Titebond III and trim nails. They are available to be painted any number of different colors, by request. He's been selling them for $25 each. (We are making him cover the cost of material and supplies.)

-
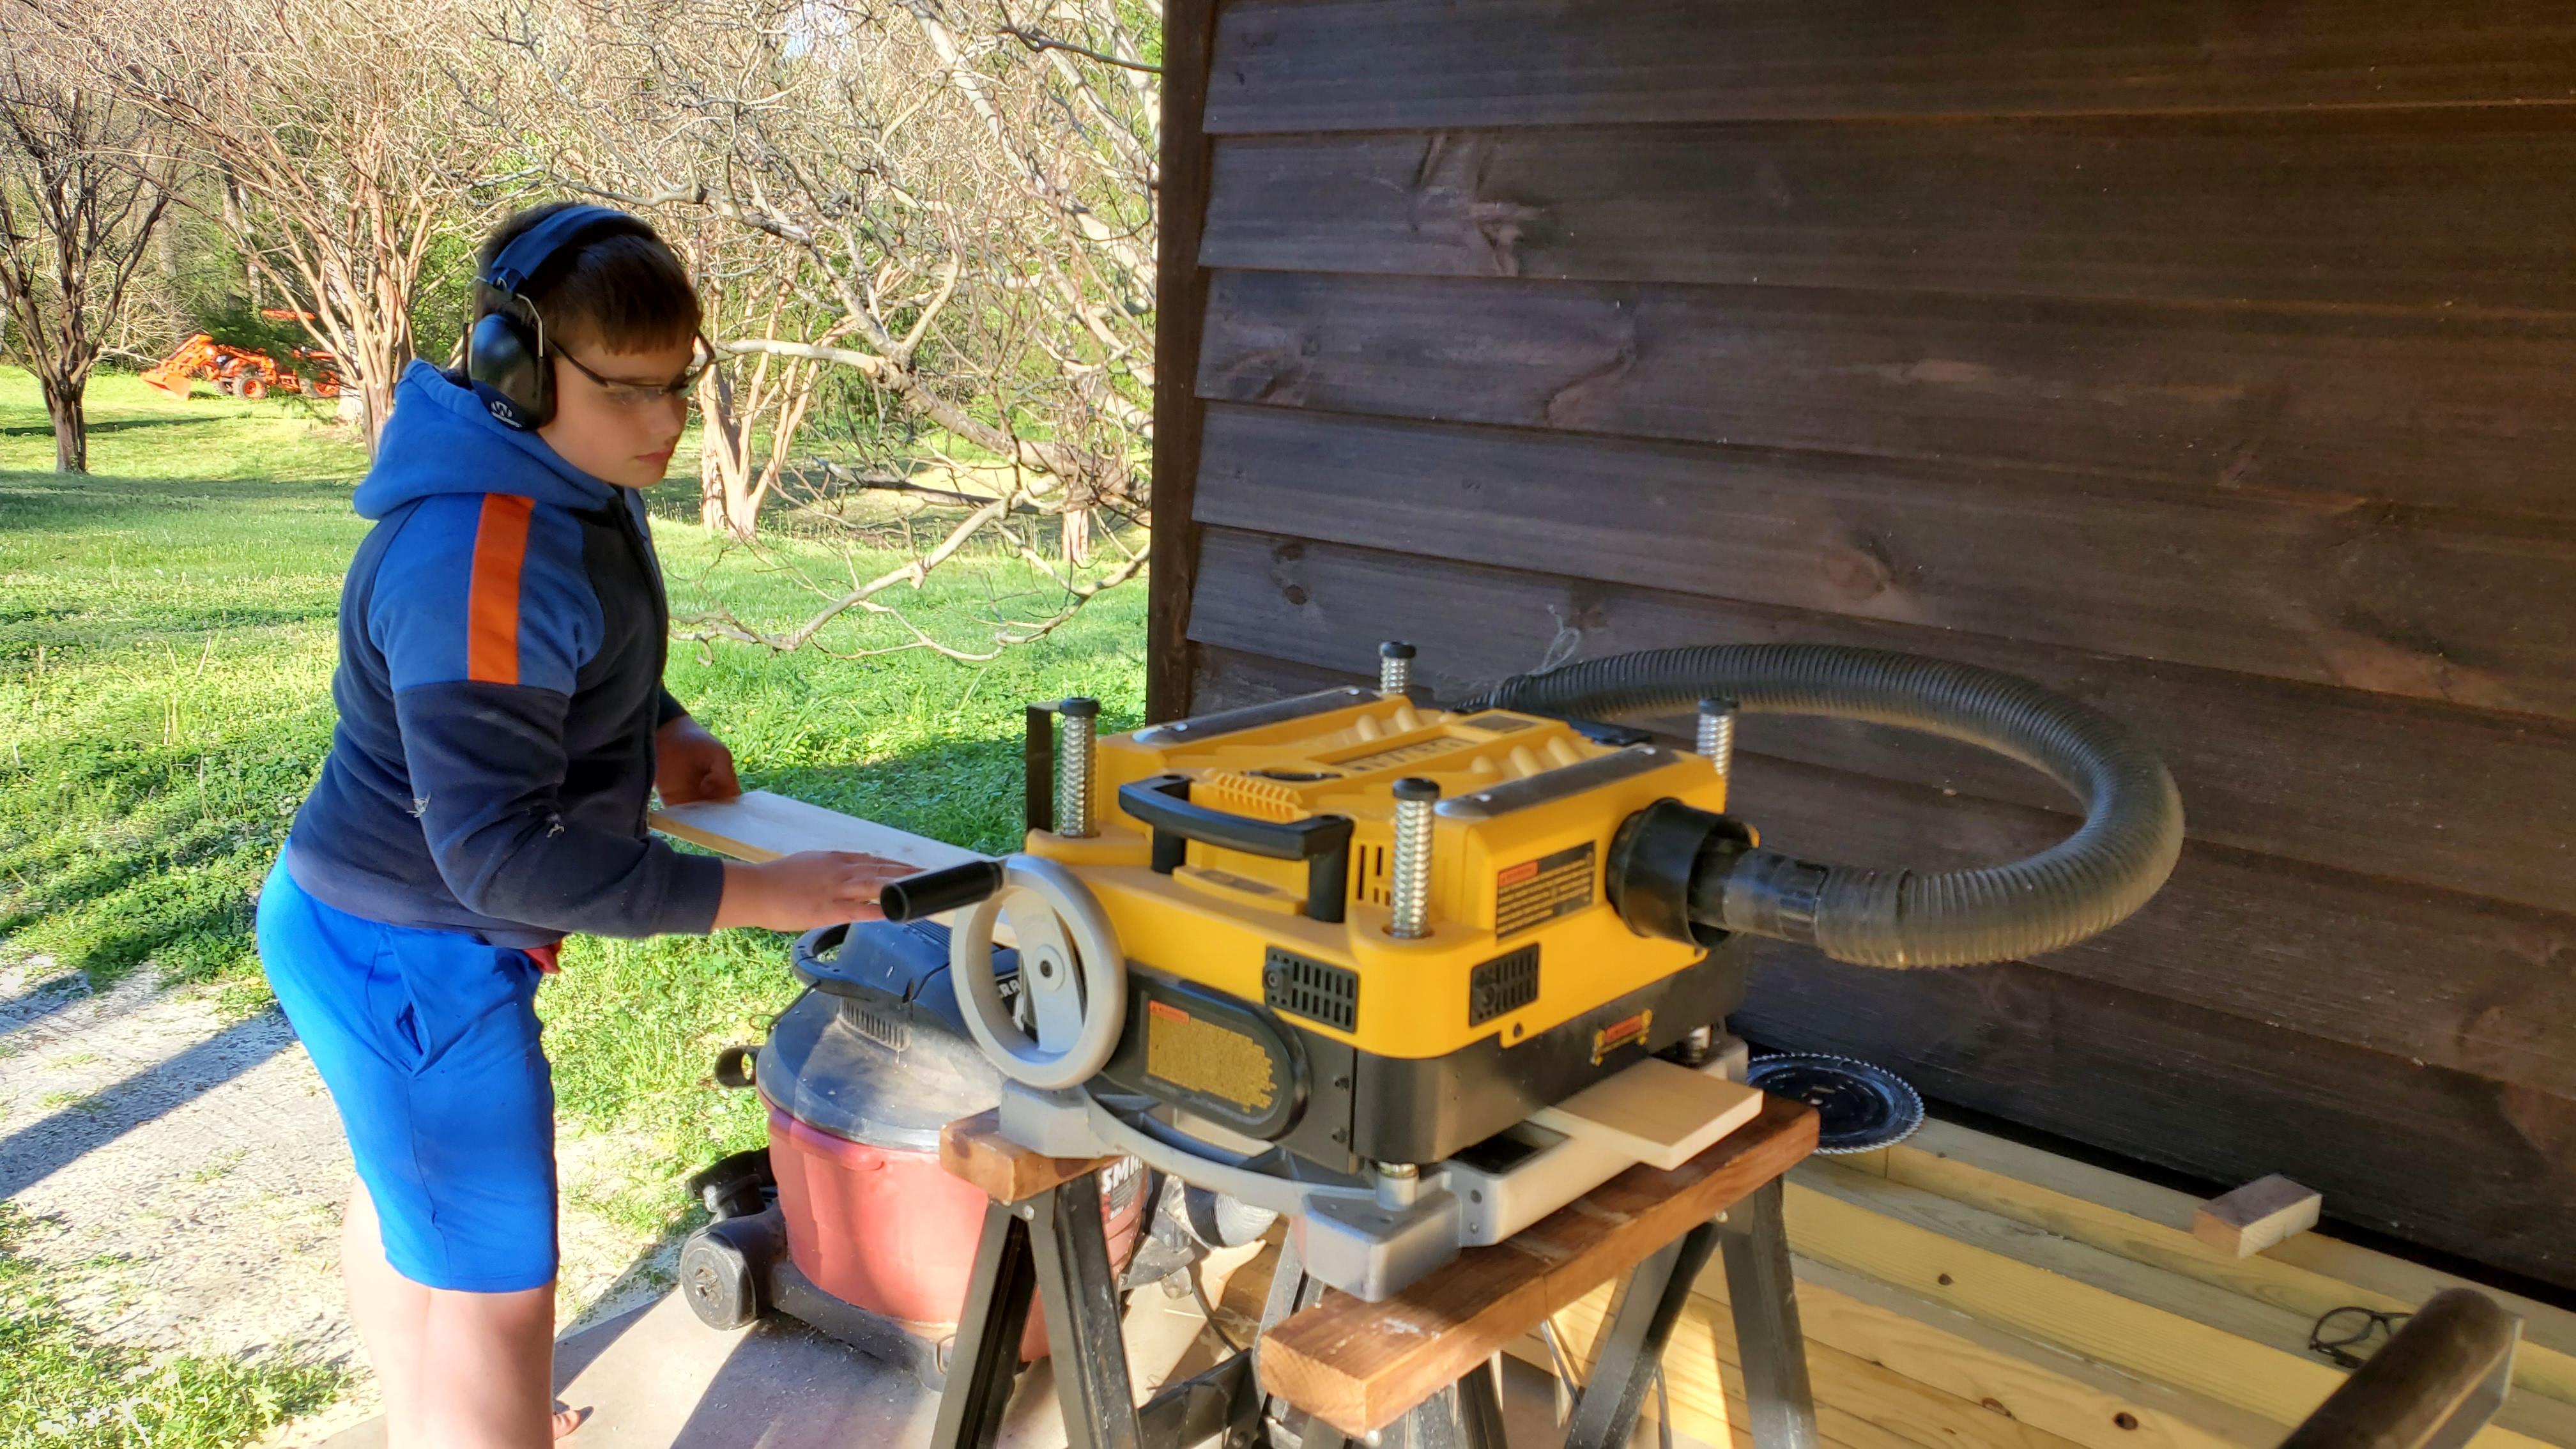
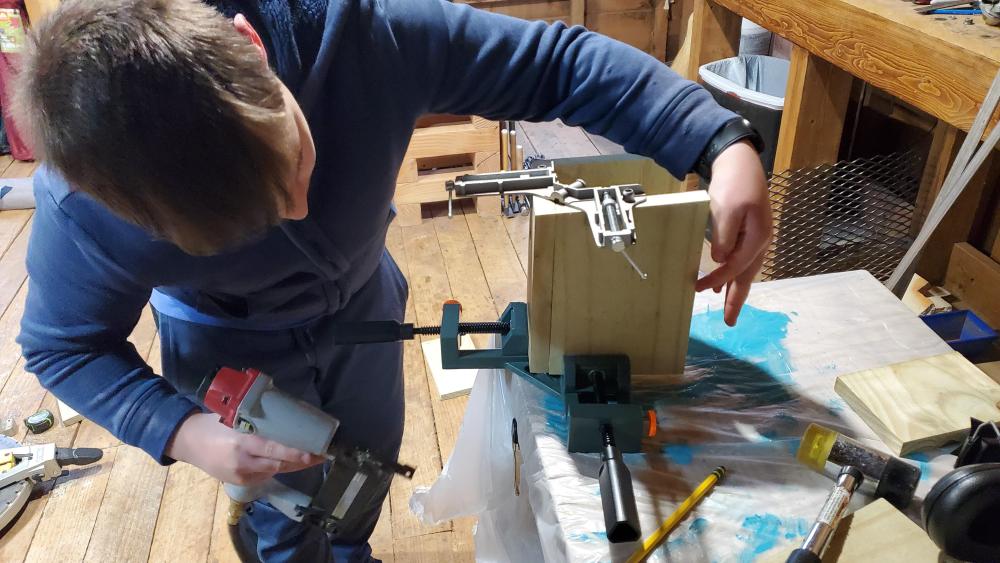
Just an update, I went back to my previous burner that uses a smaller diffuser cone, but I placed the burner further up in the tube. It still sends gas and air down around the walls, but also allows some to evenly spread back to the center. (I think Mikey had suggested trying that a good while back. Works near perfect! (Sorry it's been a little while. My 13 year old boy decided to make money building bird houses. We're up to 28 of em' and still have orders coming in.)

-
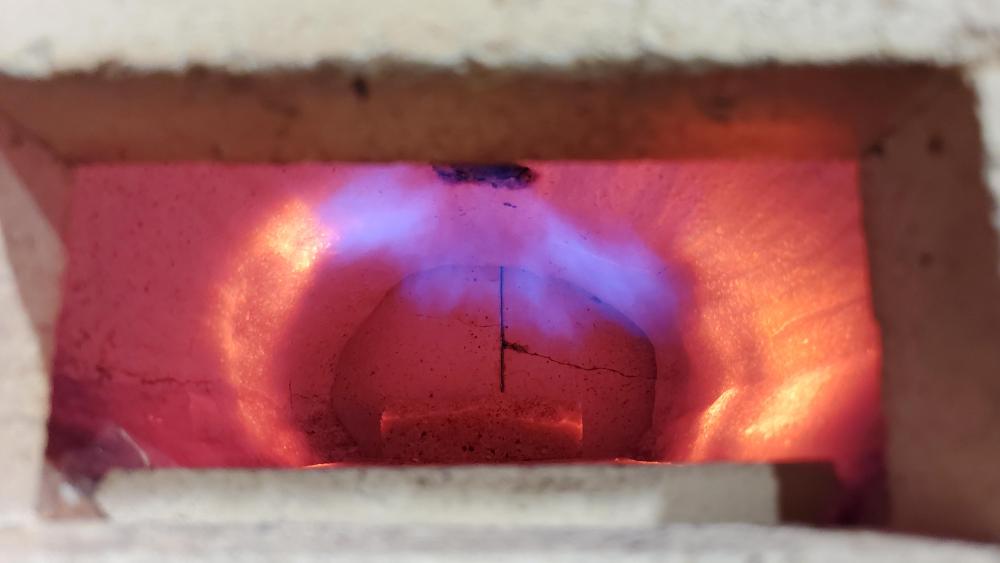
Frosty, Thank you for the idea. To be honest, the shape does look awesome (if I may say so) and it does heat most of the forge very evenly. HOWEVER, at my normal working setting (valve positions marked based on my favorite burner) it still leaves a cooler spot in the center, right where I normally put my work. I've been trying to figure out how to overcome this and was leaning toward going one size down with the bolt head. If I can evenly modify the edge like you mentioned to help pull the flame in, that might just work! Pouring a floor with a smooth transition out of cast-o-light rather than using a cut-down firebrick would probably help some too. I'll still probably make another one. The internal spacer still blocks more flow than I'd prefer. ...I'm really getting nitpicky about it, but I already have a great working burner that's a pair of channel locks away to swap out of something doesn't work.
-
Frosty, sorry my comment about balancing flow with efficiency wasn't more clear. What I meant was due to having a less than stellar blower and a small forge, I'm having to strike a balance of spreading my flame out for the desired even coverage without causing a restriction that creates too much resistance to flow. The only way I can overcome restrictions is by increasing velocity, but that comes at the expense of efficiency because some propane escapes out the front before it has the chance to burn completely. It's not nearly as much of an issue if I'm running the forge at the higher end of the heat range, but for the majority of the work my son and I do with 1/2" or under mild steel, that much heat is not required and eats a lot of propane.
-
I cranked it up a bit. Thd picture doesn't do it justice.

-
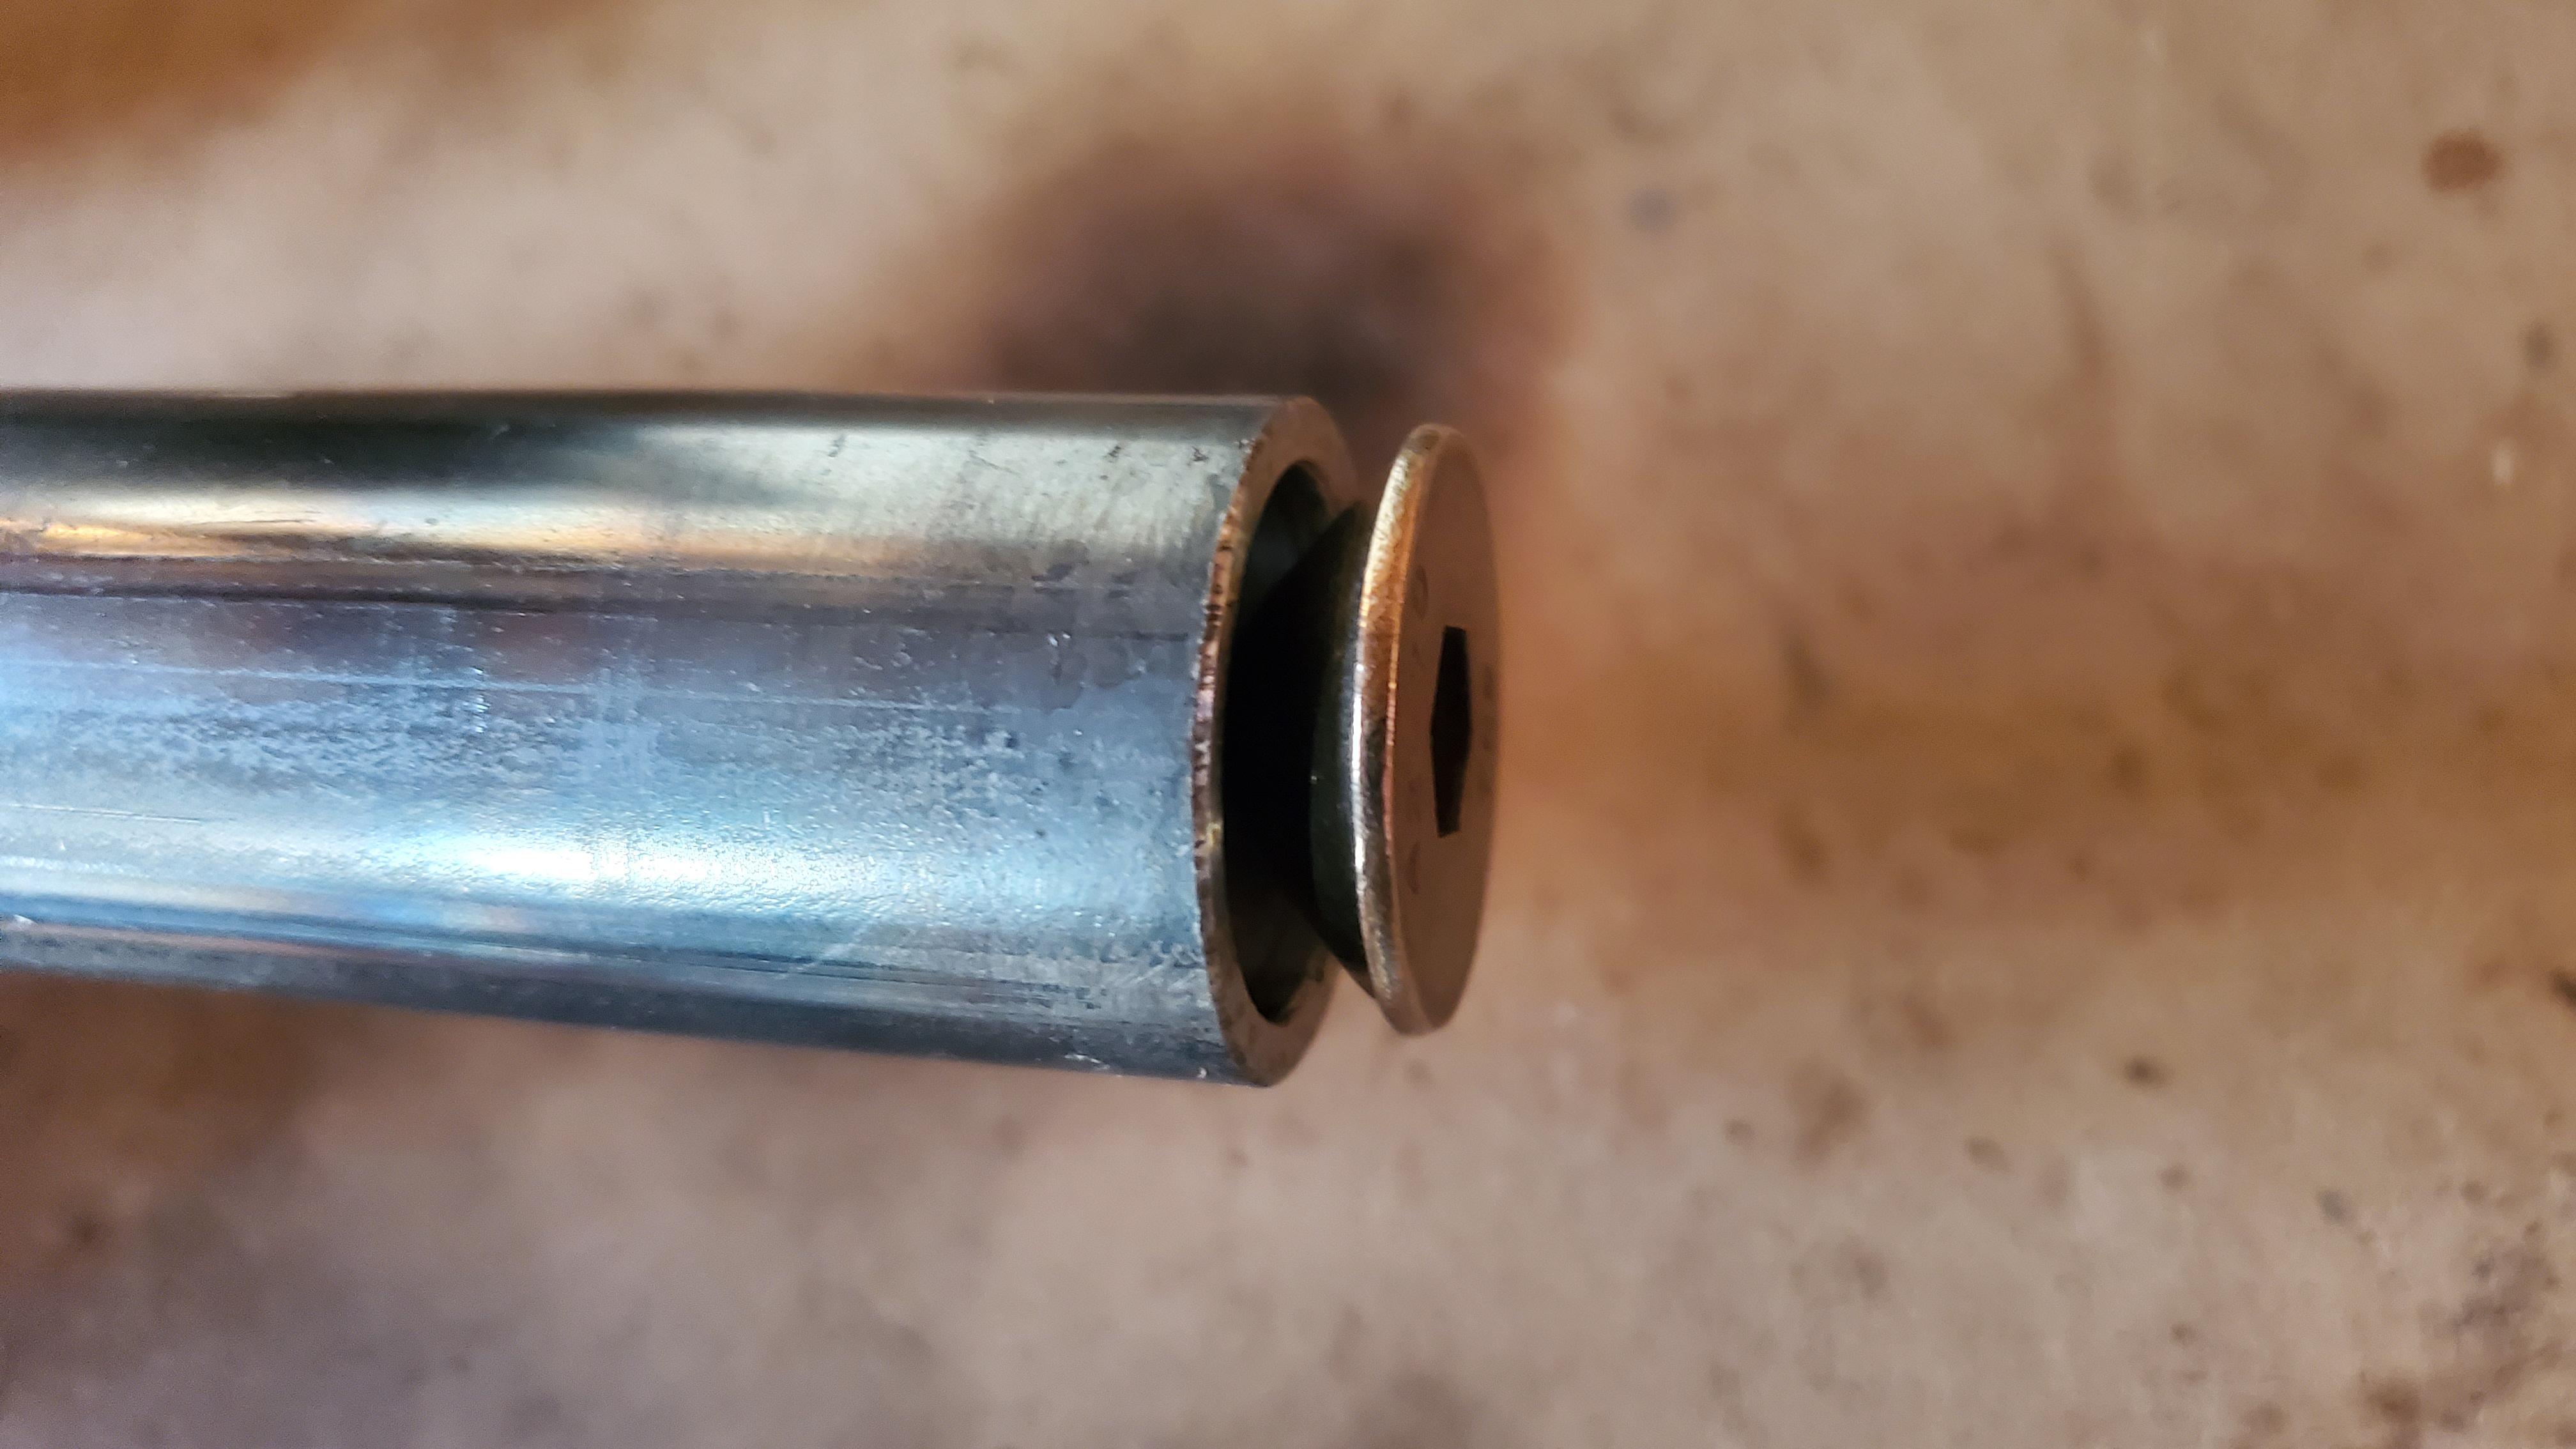
Frosty, These pictures give a better example of how it fits in the burner tube. Mikey, I do agree that simplicity and repurposed parts would be excellent, but I've come to a point with my current forge and blower where nozzle design has to be balanced with efficiency of flow.


-
The insert goes inside of a 3/4 black iron pipe that I cut down to size. I squared the end and trued the inside on a lathe. The spacer for the insert started as a piece of steel round stock that I turned down to just barely fit inside the 3/4 pipe after trueing. While it was still in the lathe I drilled a 5mm hole in the center. I cut the rest of it to shape with a milling machine. The cone of the insert is a 14mm (I think) stainless flathead bolt that I turned down to just a hair over 5mm then pressed into the spacer. I'll try to get a better picture of the assembly tonight after I get home from work.