Frank Turley
Members
-
Joined
-
Last visited
Everything posted by Frank Turley
-
Vise looks like it's straight from Germany.
-
Just a note about Bernhard Heer, co-author of Basic Blacksmithing. He's visited my shop/school a few times during the last year. He is presently in Gallup, New Mexico, USA. During his last visit, we drove to the Center of Contemporary Art in Santa Fe to look a Tom Joyce's latest exhibition. Tom is doing some truly amazing large, forged sculptures. Before Bernhard left for Gallup, he took several photos of me, and said that he was going to make a cast bronze bust of me. We shall see. One of my fave books is "Plain and Ornamental Forging" by Ernst Schwarzkopf. It's written in English.
-
That could be done in 6 days of hustling. The faggot weld is a simple lay-back. The twist and bends are done on a lap welded fire rake, 5/8" square handle to a 1/2" round shank. Tapers, cross peen, shouldering, and angle blows are on decorative scroll ends (centers). I expect a lot from beginners. They only have a few days as compared to the old apprenticeships.
-
I've developed a curriculum for beginners. In sequence, we faggot weld the first morning of the first day; tapers; half face blow shouldering; cross peen spreading; free hand scrolling; using scroll form; fitting scrolls to a design; lap weld (done with helper if need be); textured twist; some bending. This list is OK for starters, but it leaves a host of techniques and methods waiting in the wings.
-
-
Good ideas. Something we've done in the past to hold flat pieces horizontally is to clamp the fixed jaw of the drill press vise in the leg vise, screw handle at the top.
-
I've made Mexican style spurs for a school traveling exhibit in New Mexico. They didn't want the real spurs go around the state in a museum truck, as they might be stolen. A good book on spur making is "How to make Bits and Spurs" by Robert M. Hall, 1985. He says that four metals are used: aluminum; monel; stainless steel; and just plain iron. However, just plain iron, ie., wrought iron, the material, is no longer manufactured. Hall probably means mild steel, having a carbon content of about 20/100ths of 1%. Today, you can also purchase a misnamed "mild steel" called A36 by the steel suppliers, an American Society for Testing Materials number. Carbon content is normally kept below 0.27% and the steel has an addition of manganese. 4140 is a good, strong steel, but it is not necessary for spur making.
-
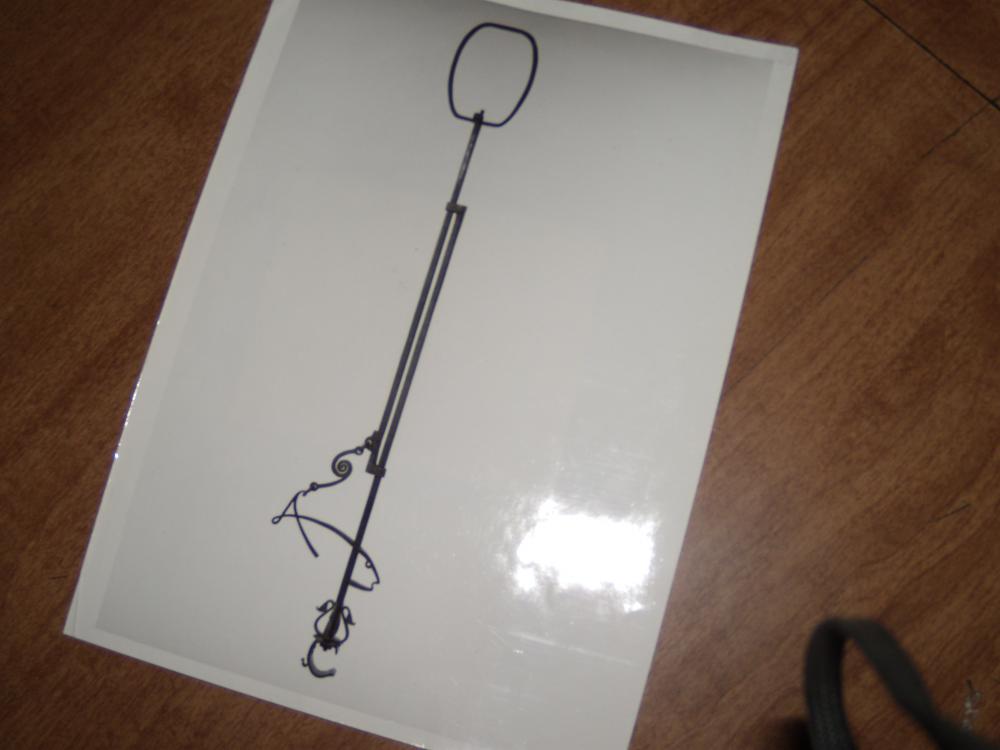
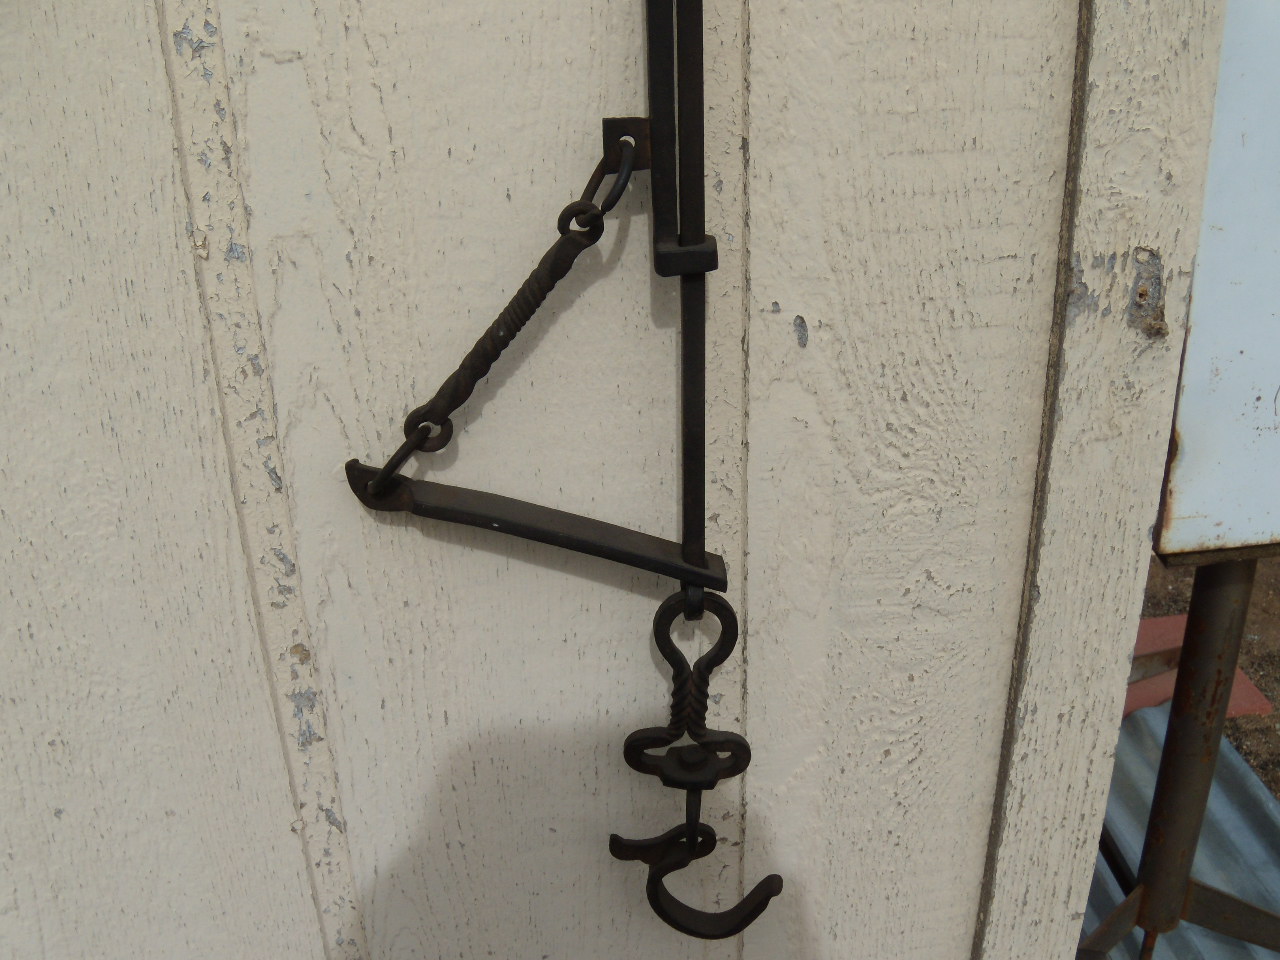
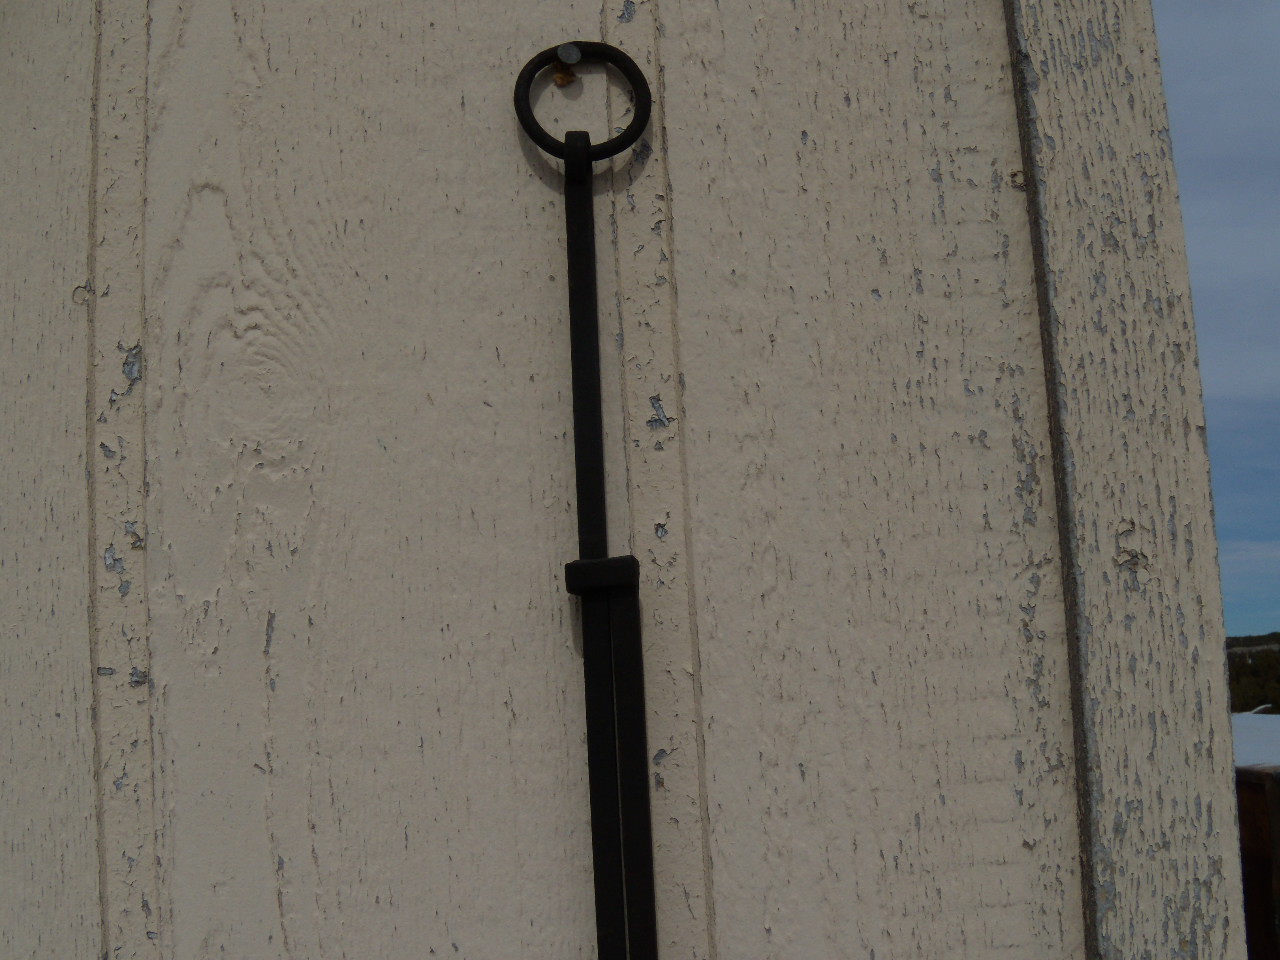
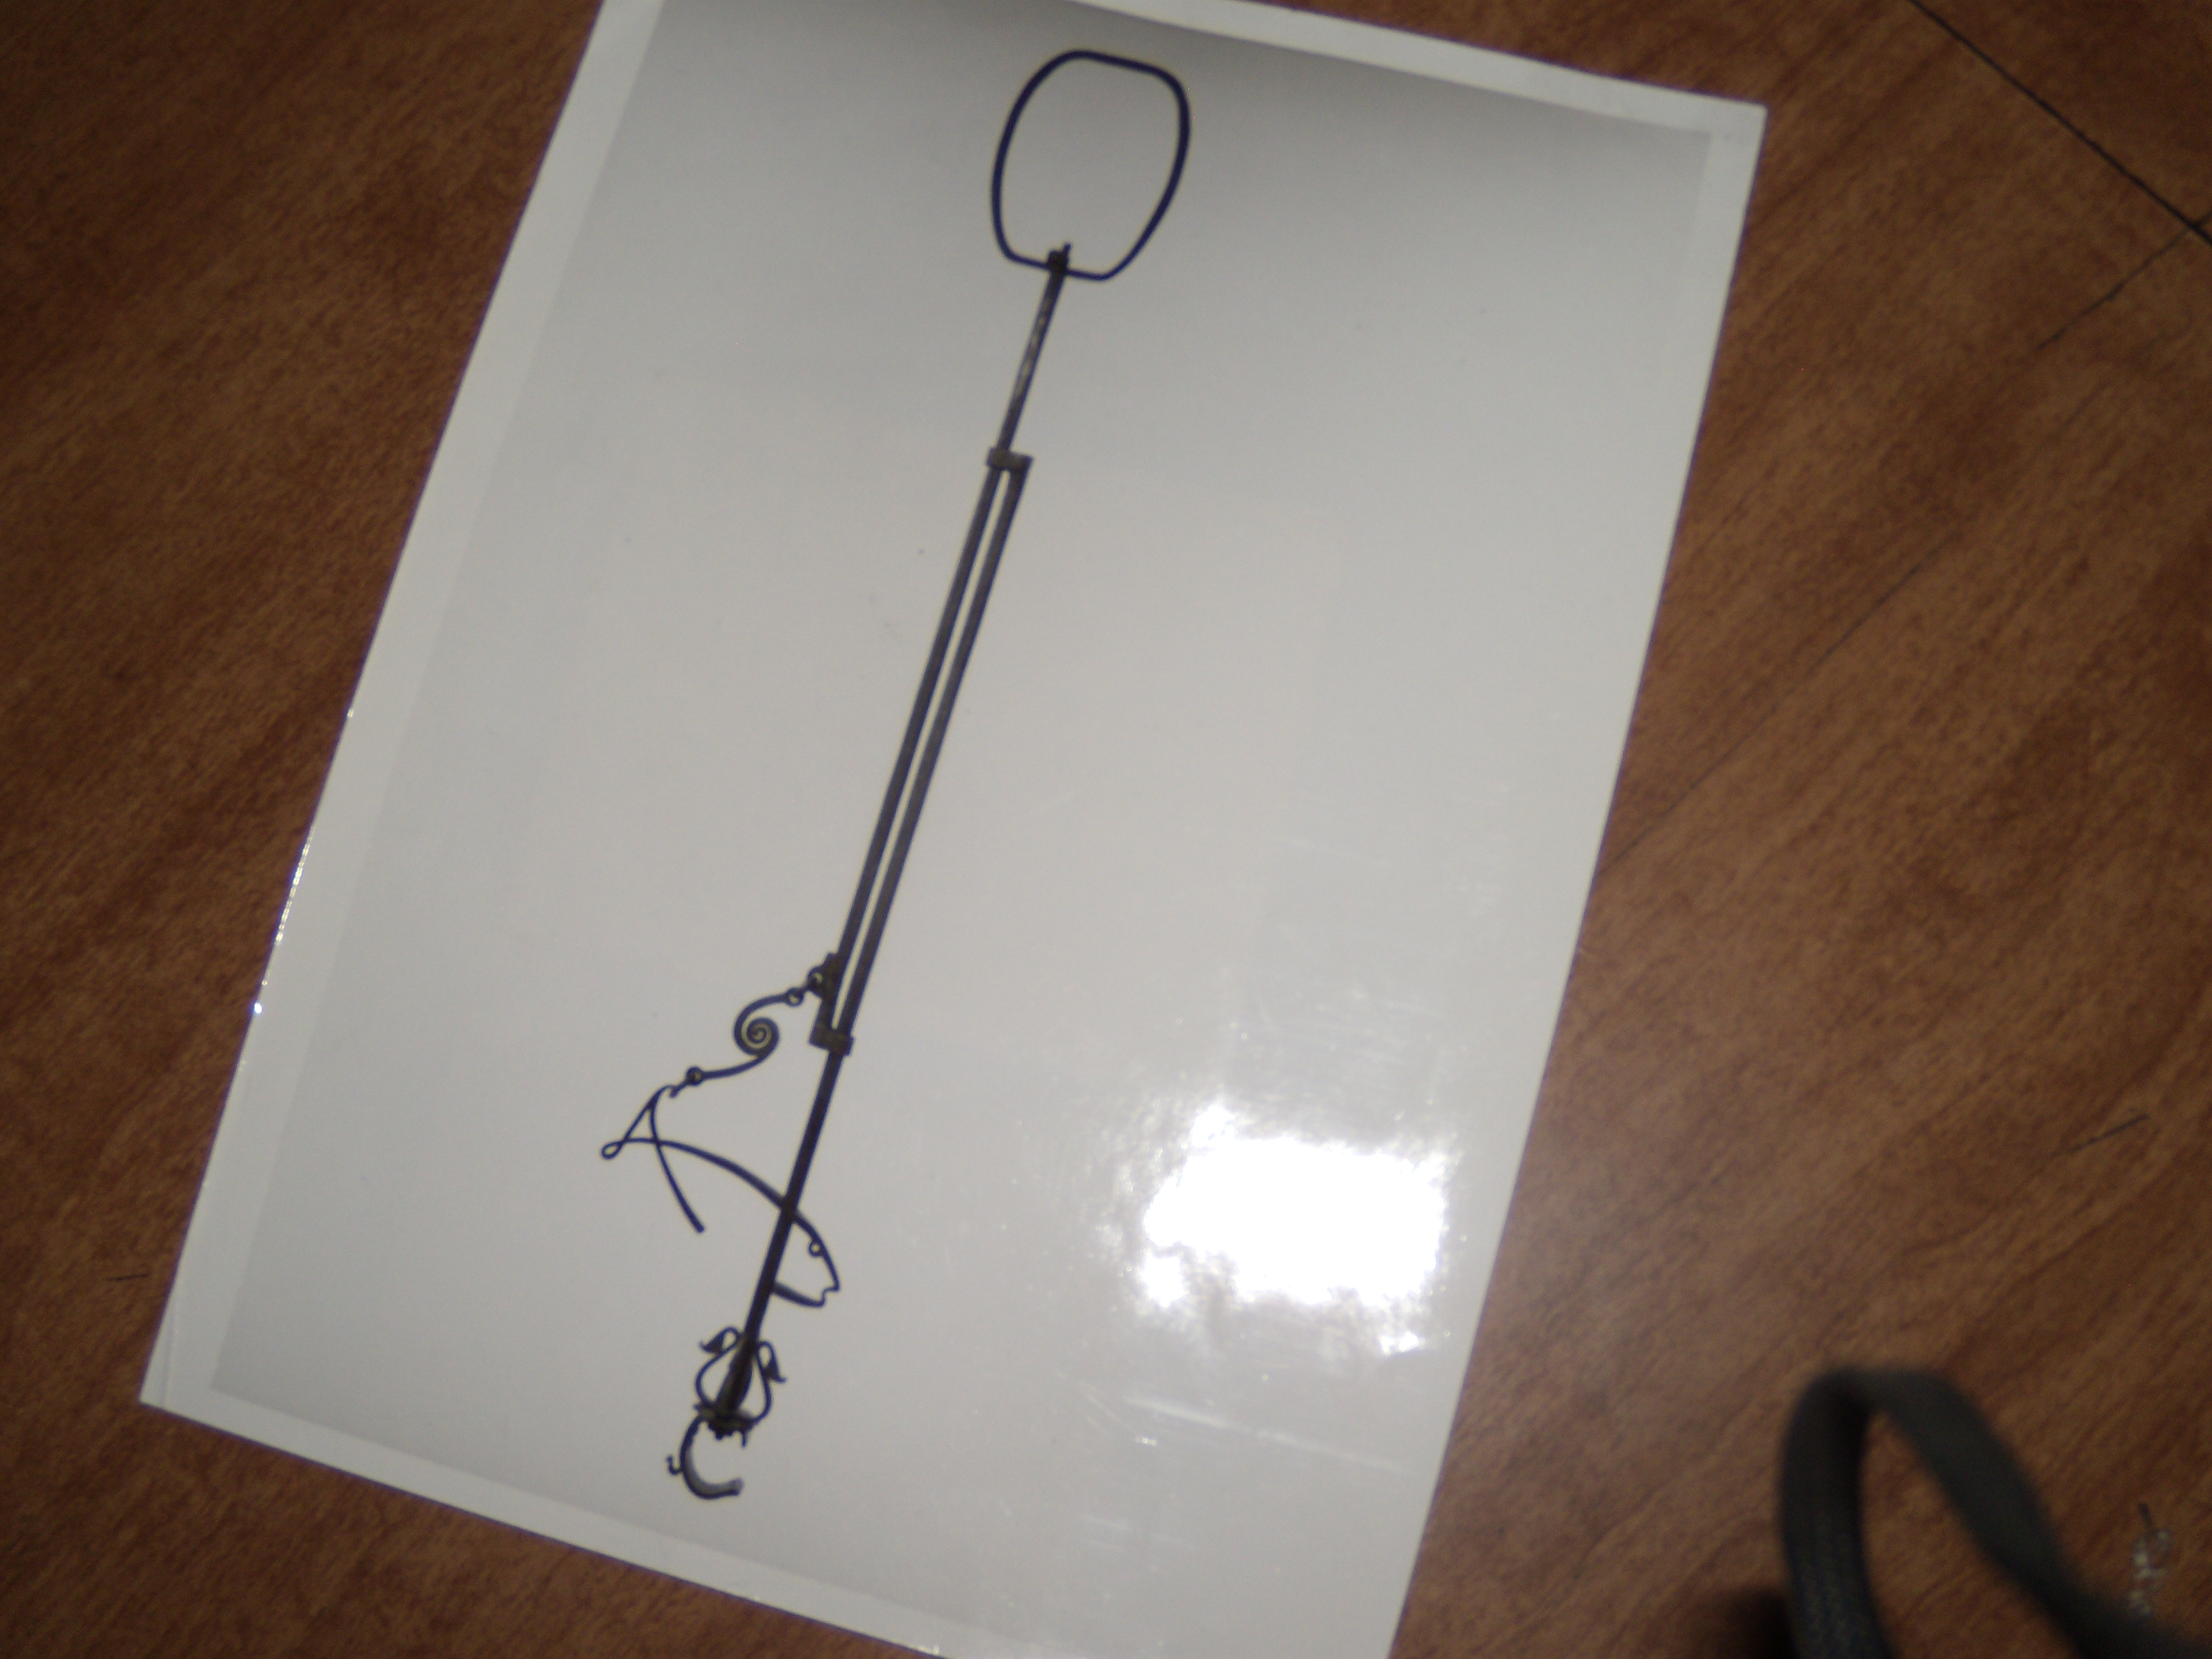
That repair is slick. In the olden days, I used to brand to a slight depth with my shaped fire poker at the top of the crack, if the crack didn't go all the way to the hairline. The "brand" would be parallel to the hairline. I used a wet rag above the hot iron so as not to cause a rodeo. That softened the horn. Then, I'd use my knife to deepen and clean out the area. I think that RTV (room temperature vulcanizing) material was available back then, but I used Bondo auto body solder. I knew it was non yielding, but it seemed to do the job. I used clips either side of the crack.Copy sent for. Thanks, Thomas.With a longer handle, I'd try to dig up some goat-head roots we have around here.http://It looks like a PW to me except I can't explain why the legs are not chamfered.About 10 years ago, I was at a Southwest Antique show in Albuquerque, where they featured Cowboy and Indian stuff. At one table lay a Japanese forged trammel. I pretended ignorance and asked what it was. They said it was a steelyard (pronounced stillyerd), an unequal arm balance. "Does it have the sliding weight?" I asked. And by golly, they did have one! So I bought it at a fair price and it hangs in my shop so I can use it as a "show-and-tell," 10" x 56" in the closed position for the first one that I had shown, the one I forged.
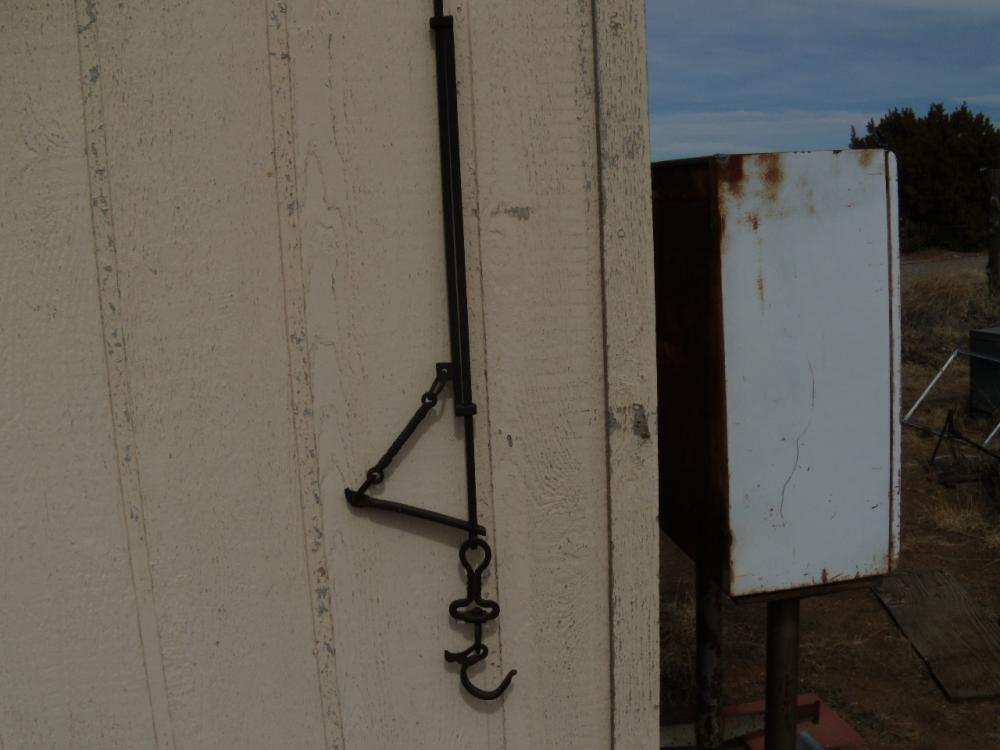
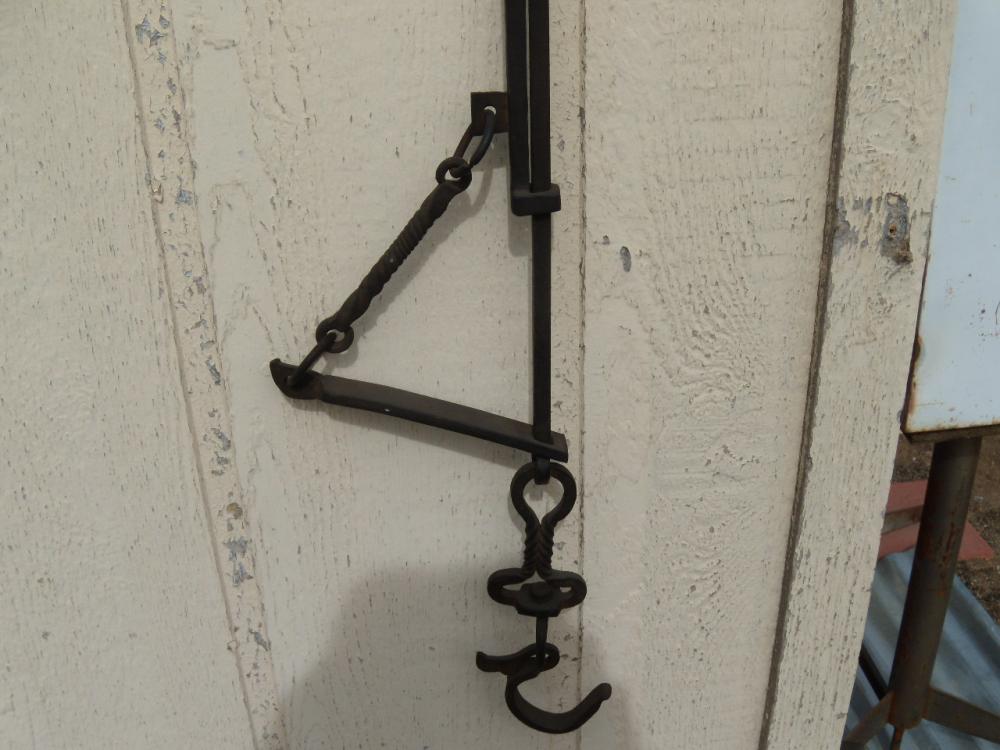
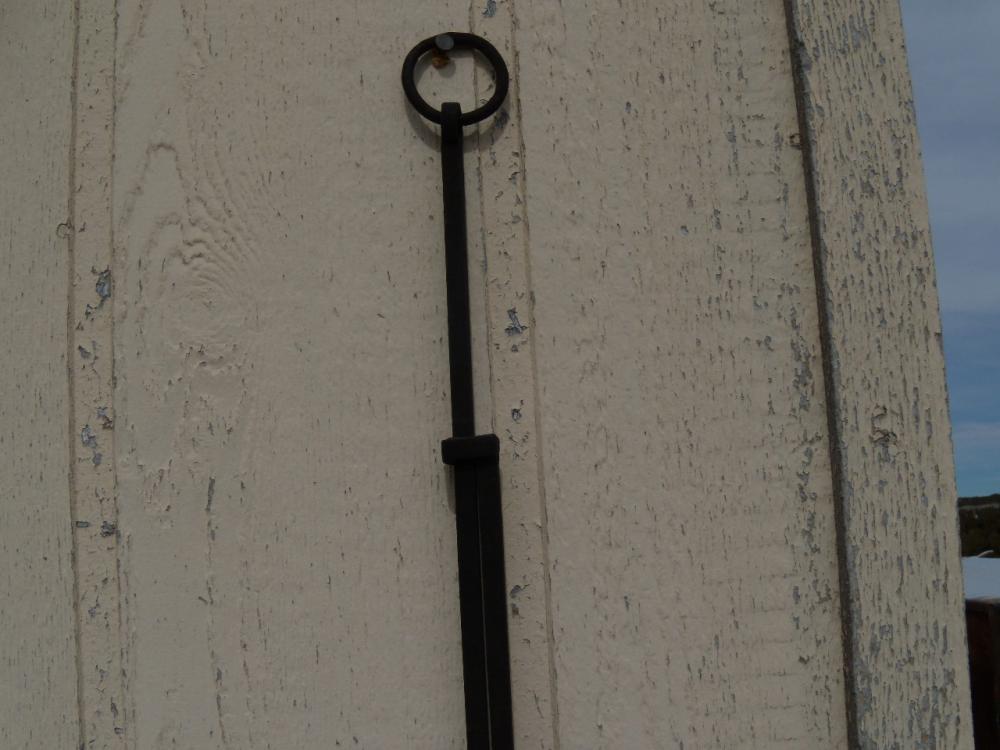 Rooting through my ironwork photos and came across an 'early Turley.' The trammel was made to show at the 1976 ABANA conference held in Carbondale, Illinois. I got the idea from a Japanese trammel that a friend showed me. He acquired it from Gumps in San Francisco. I designed the fish which has a broadened back with a hole through it for the sliding vertical. This makes for a friction stop. I also added the double-running scroll. The pot hook I pretty much copied from the original. The University Galleries at Southern Illinois University acquired the trammel for their permanent collection. You lift the fish's head for height adjustment. Material is wrought iron.
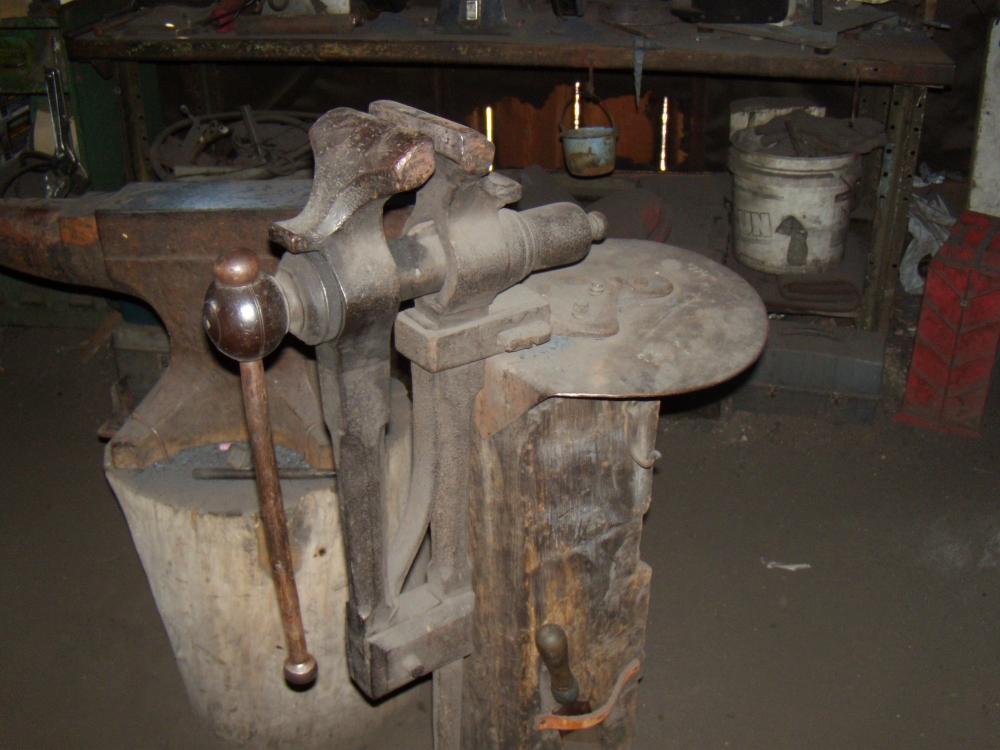
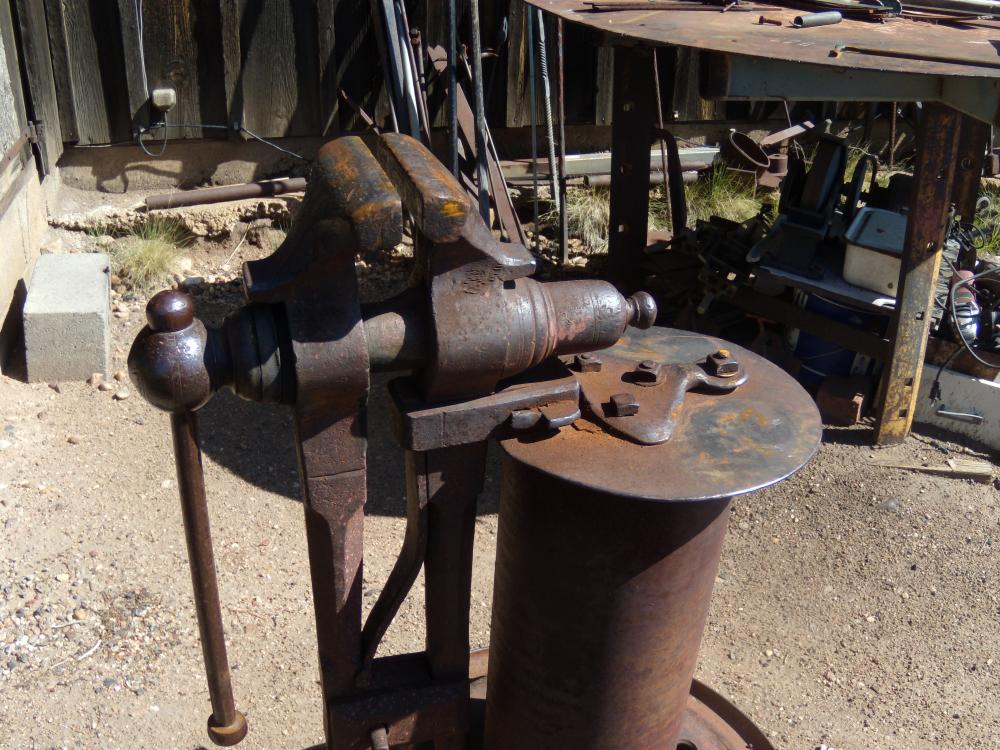
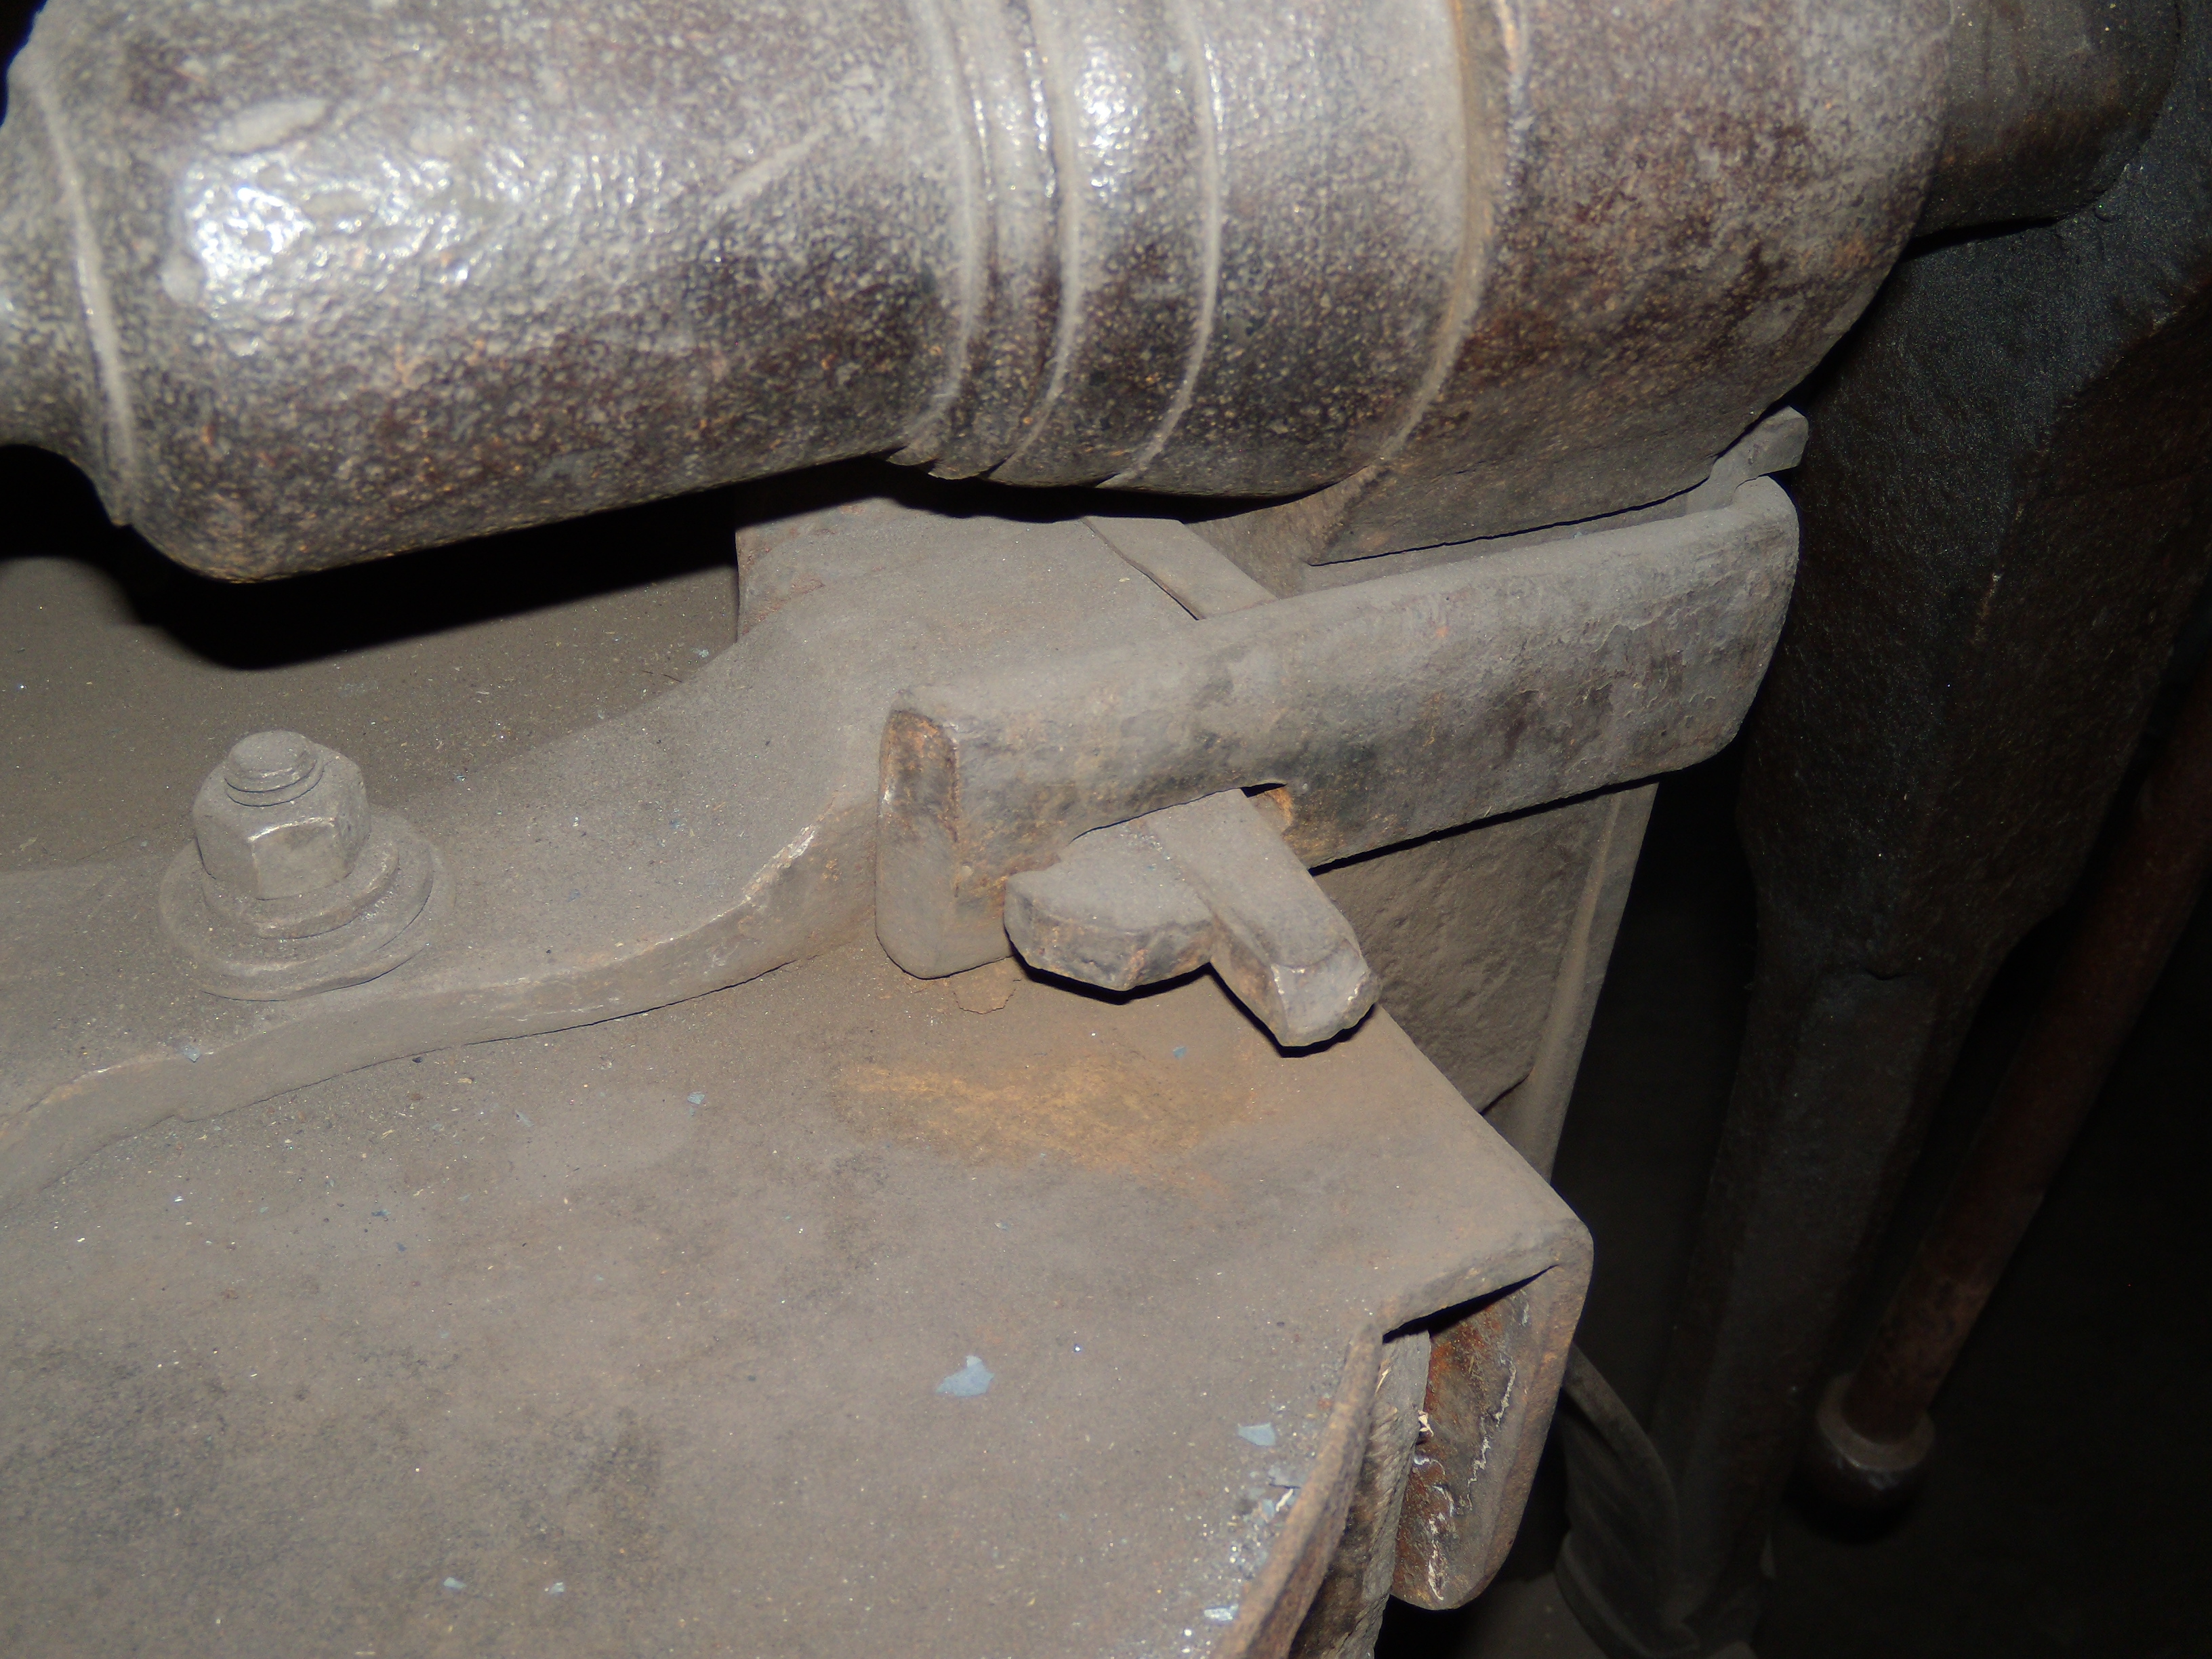
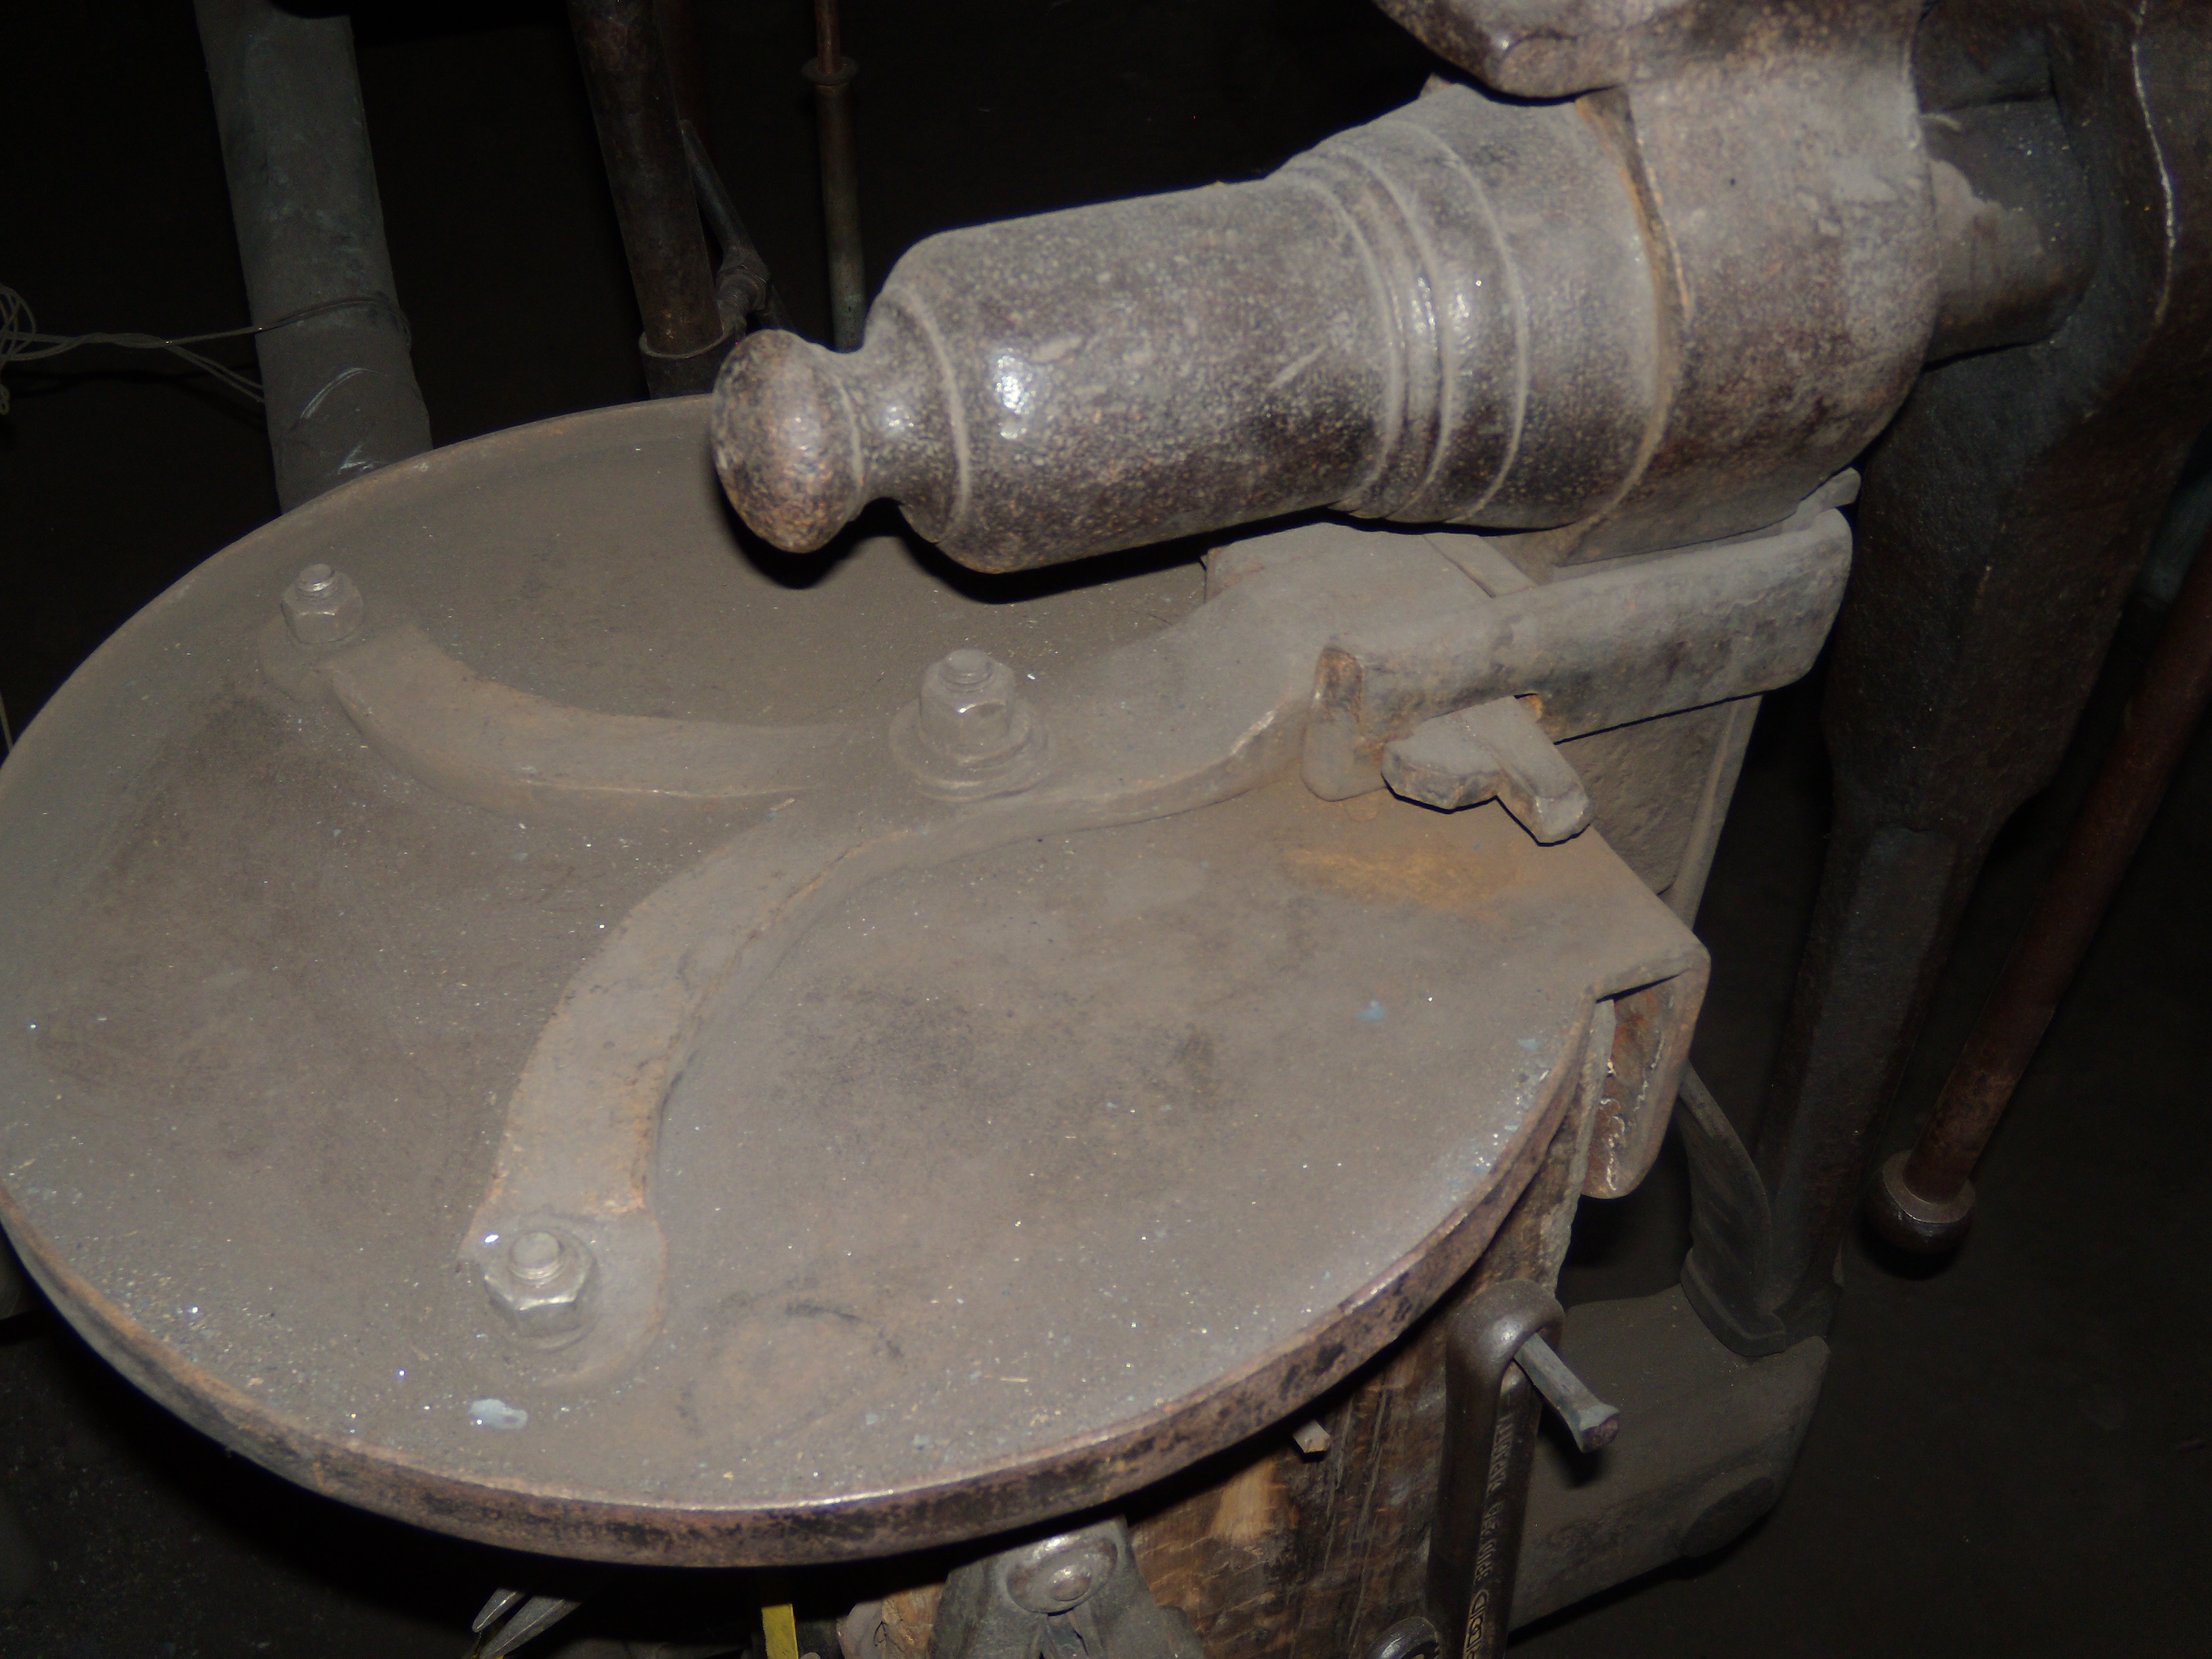
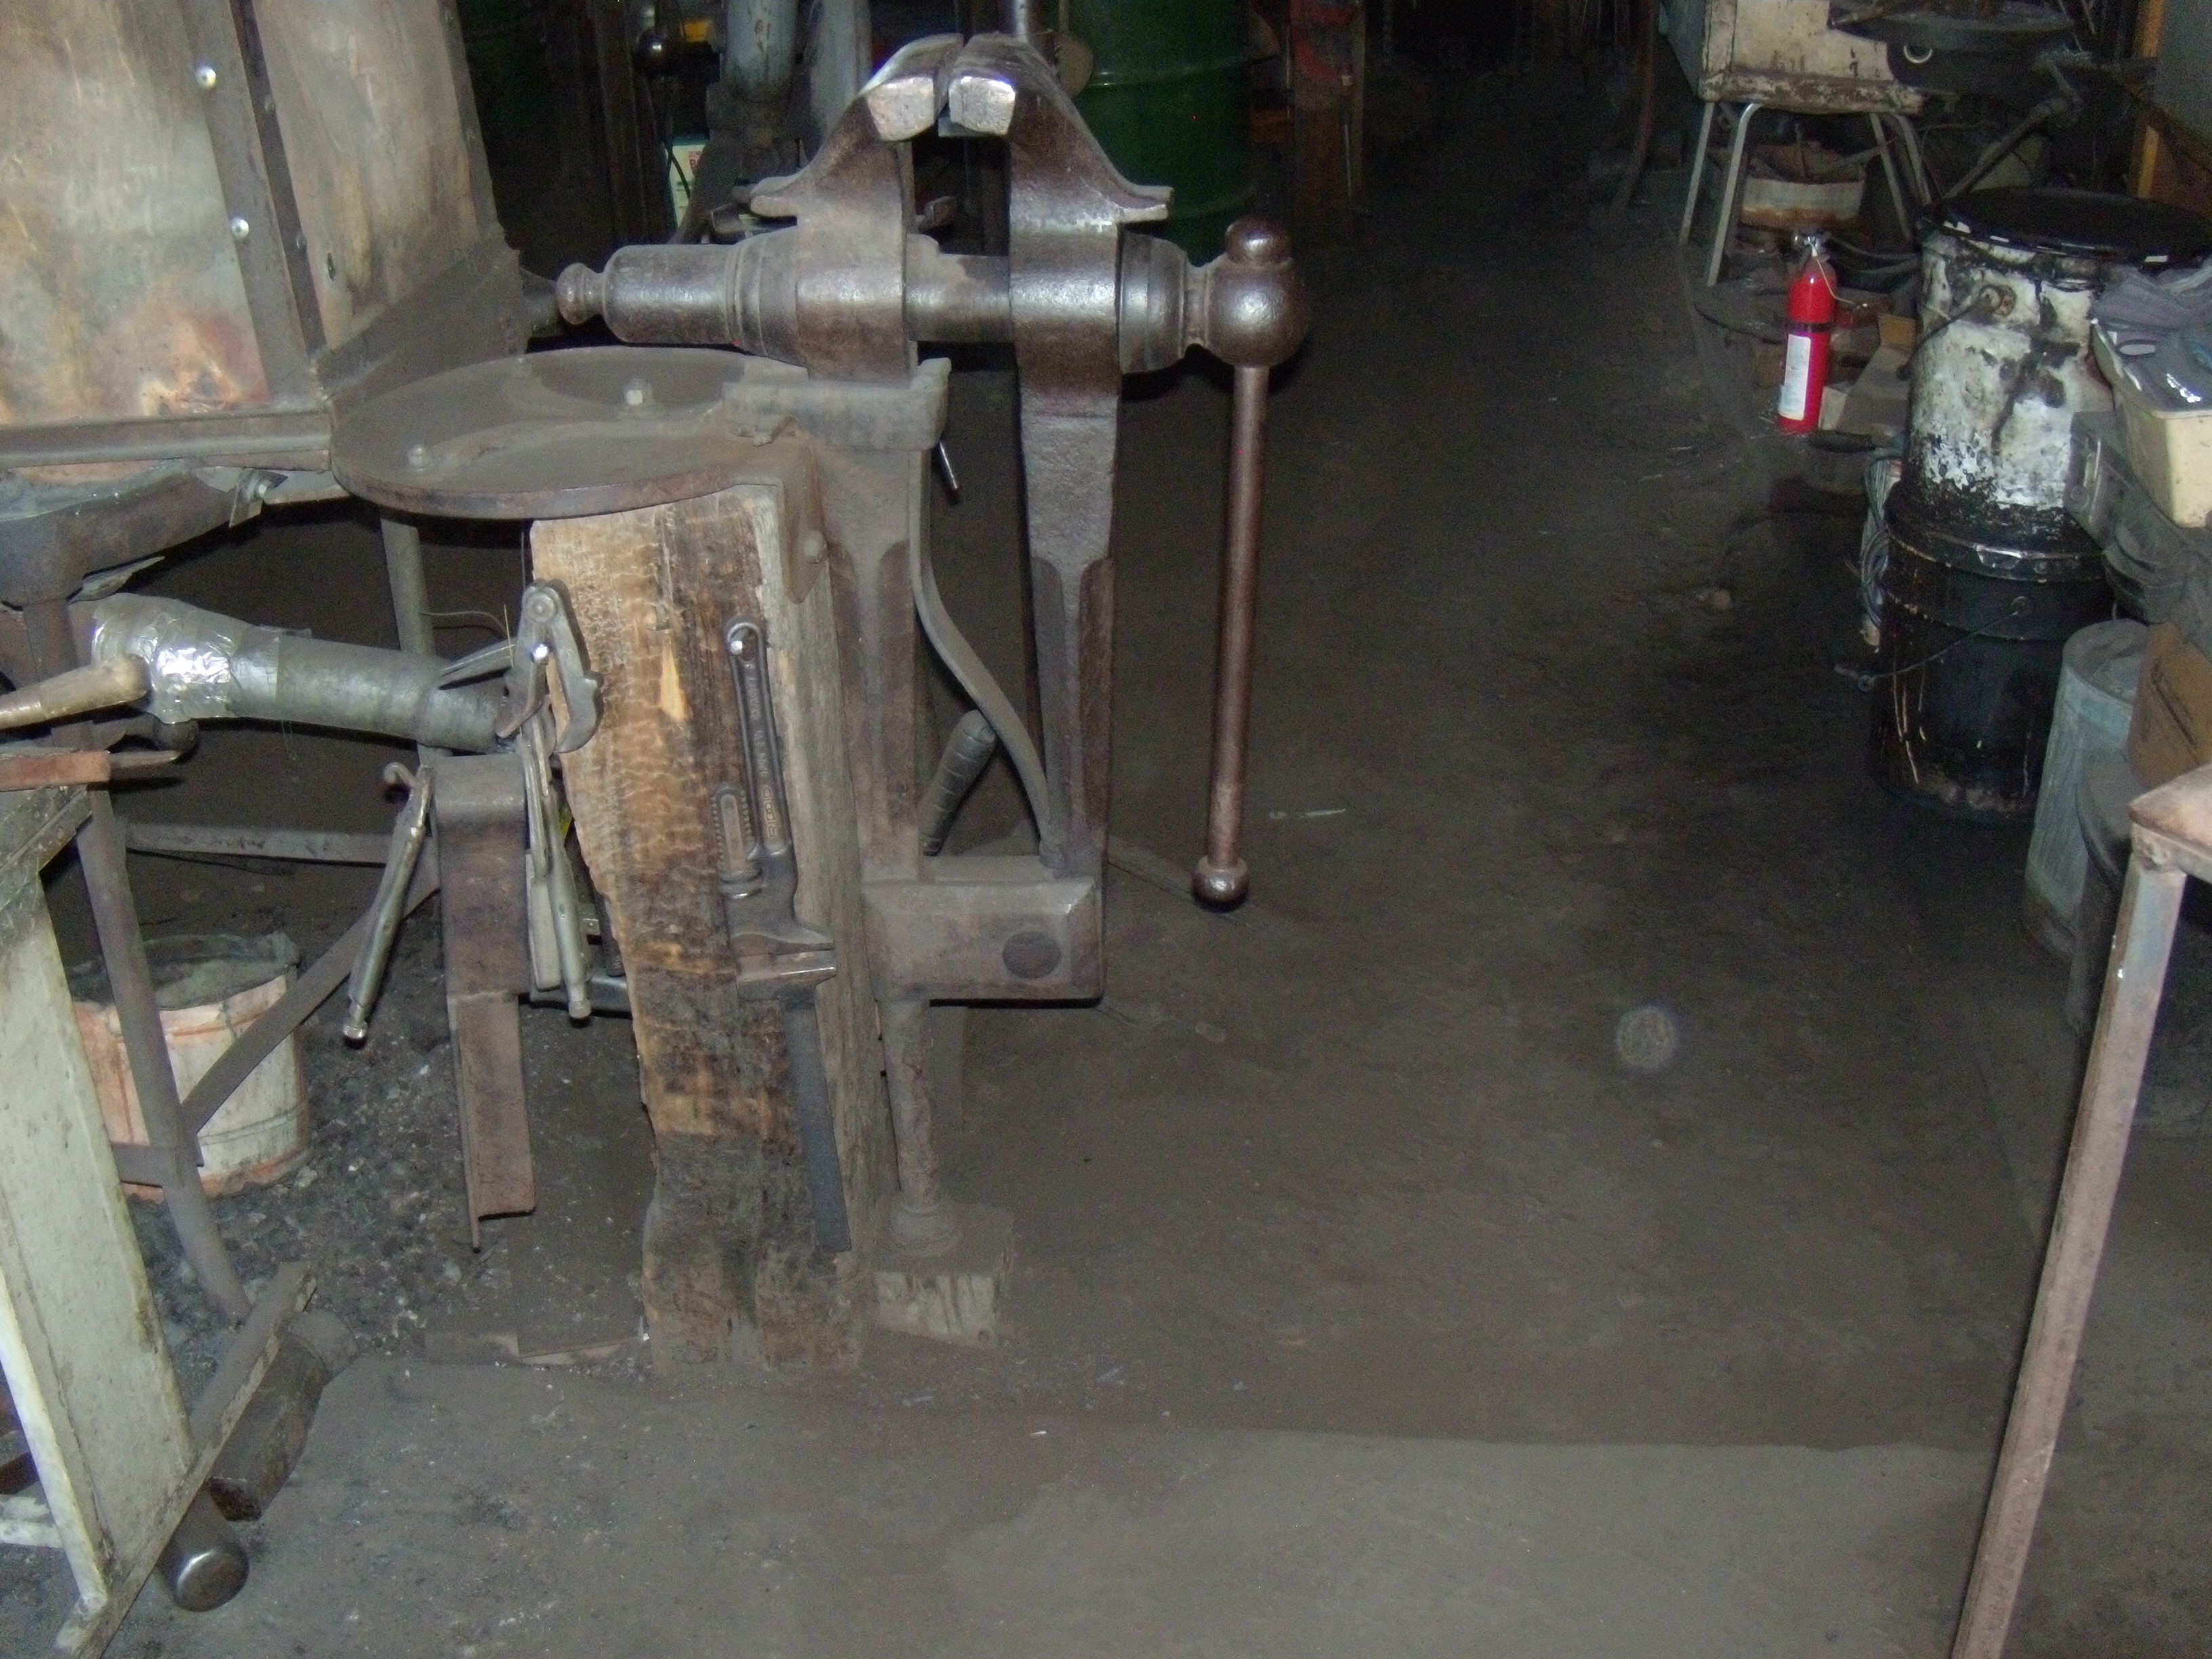
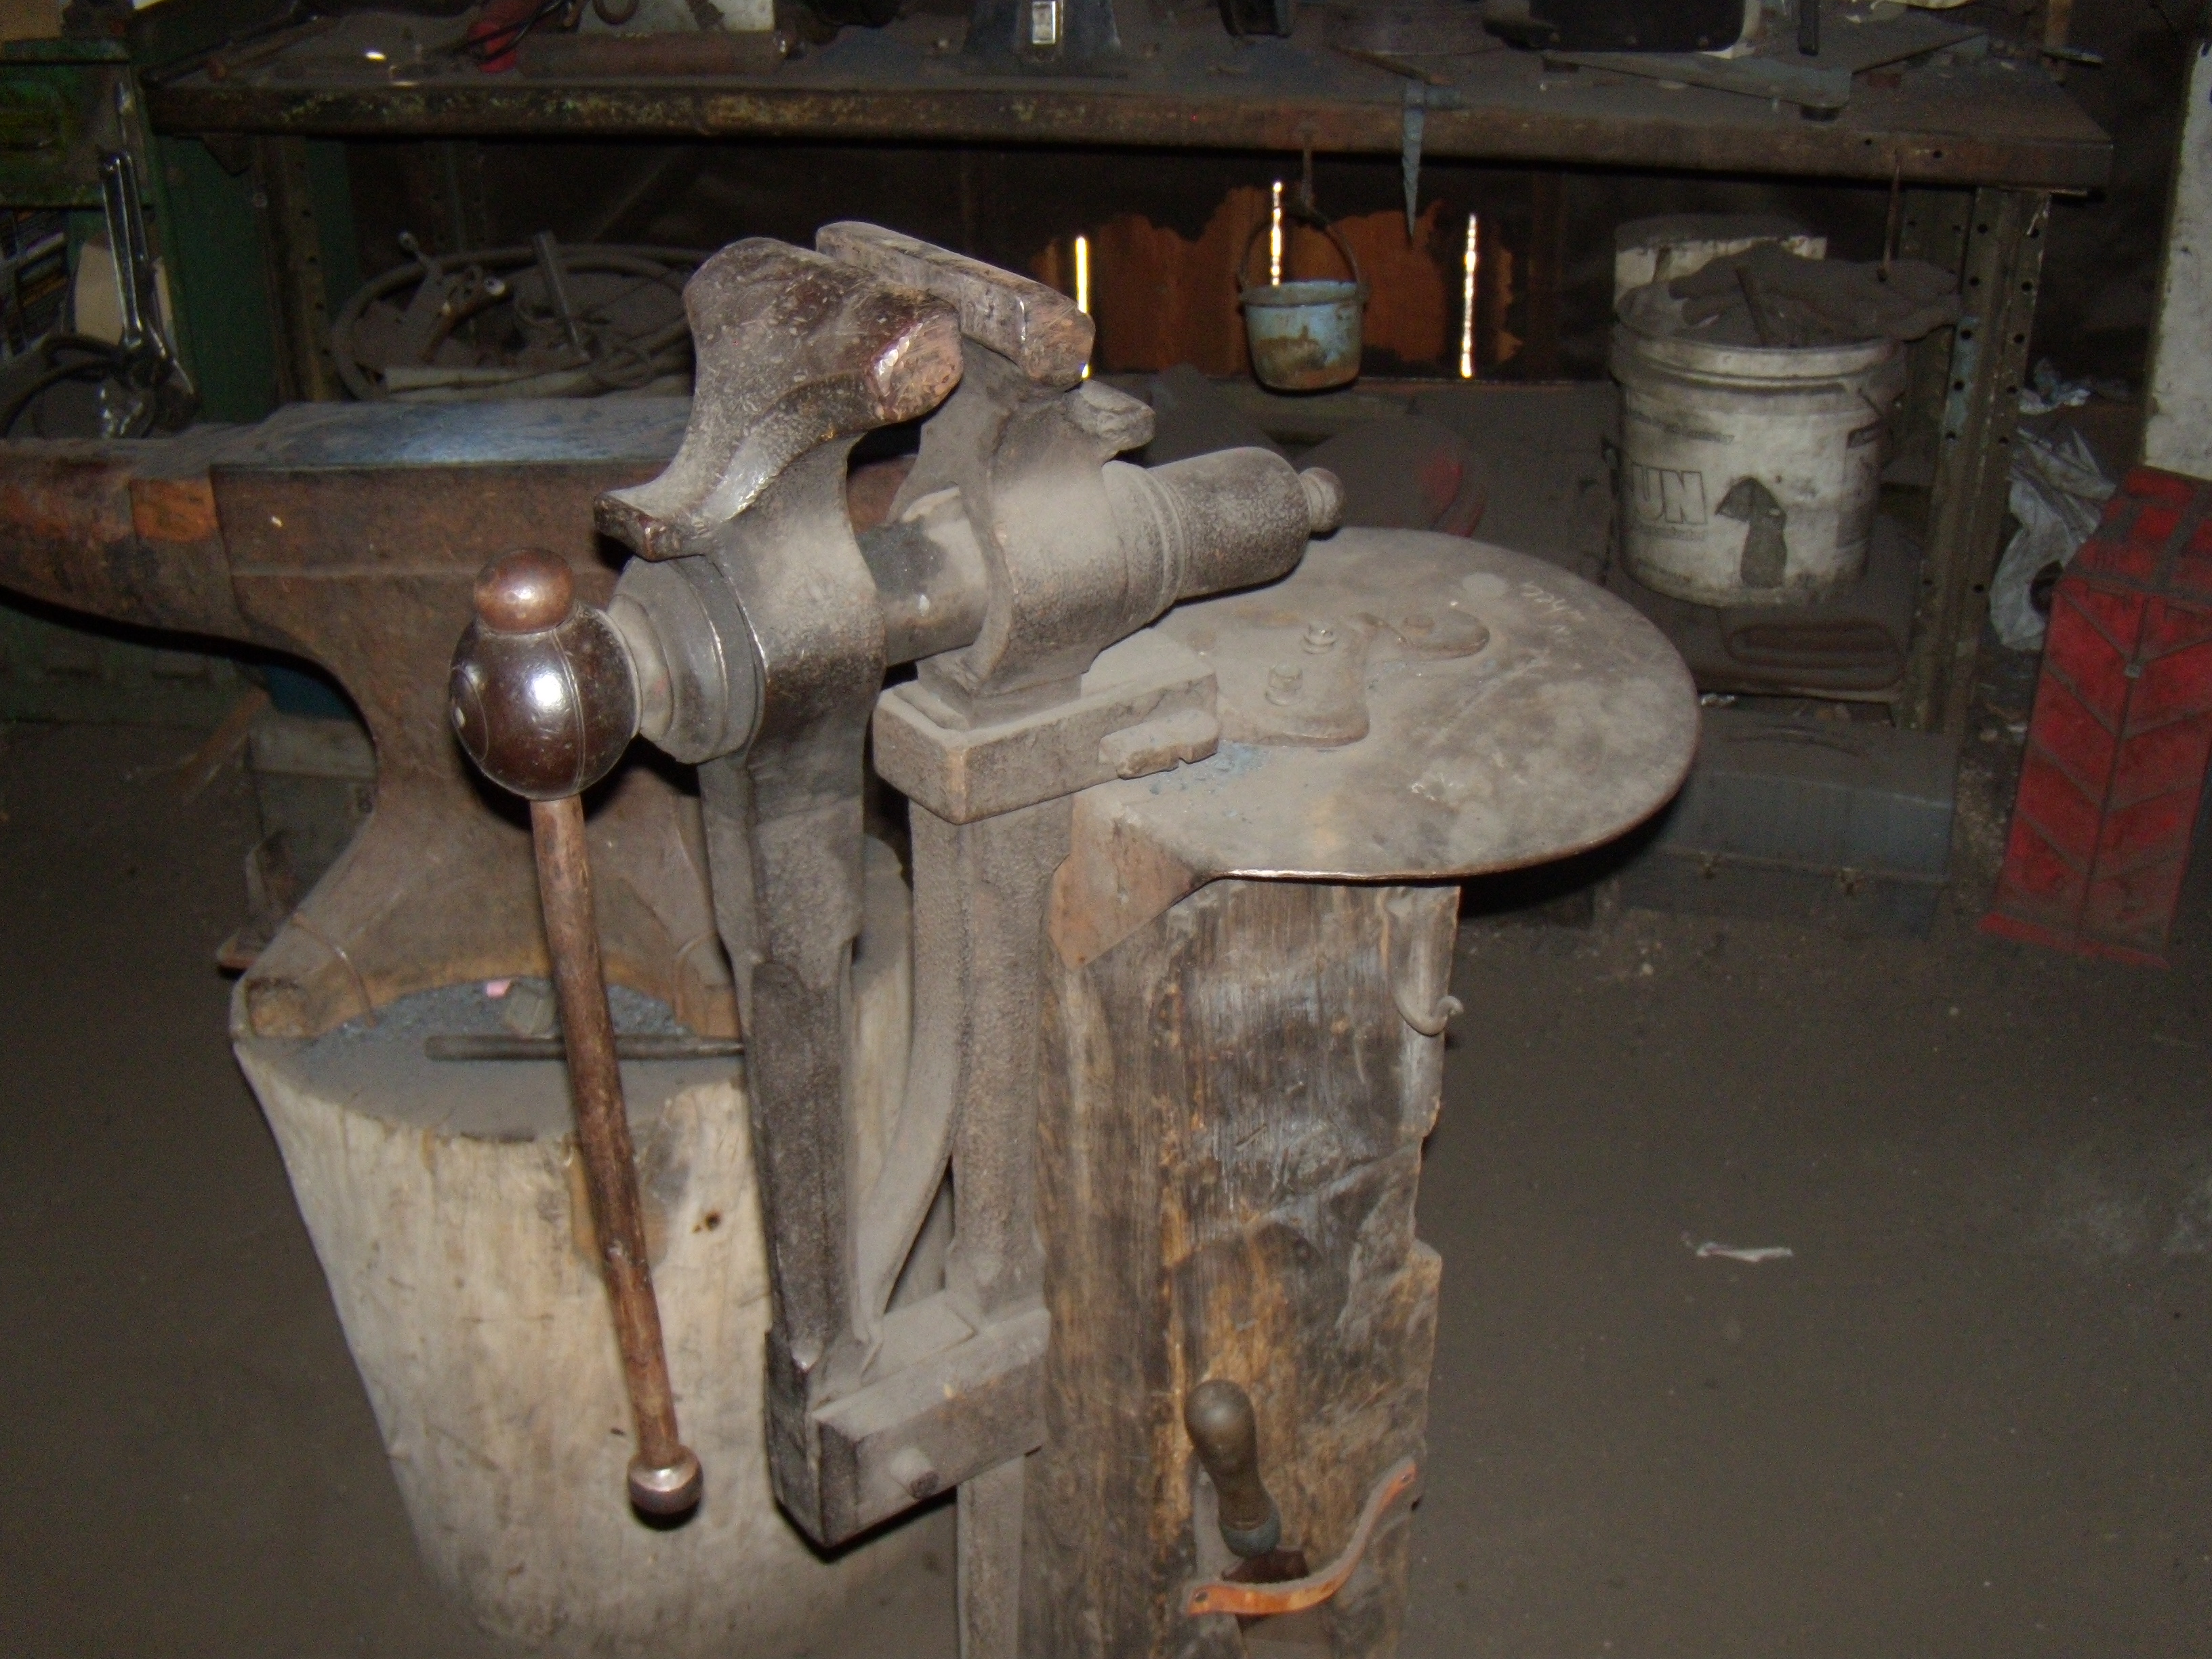
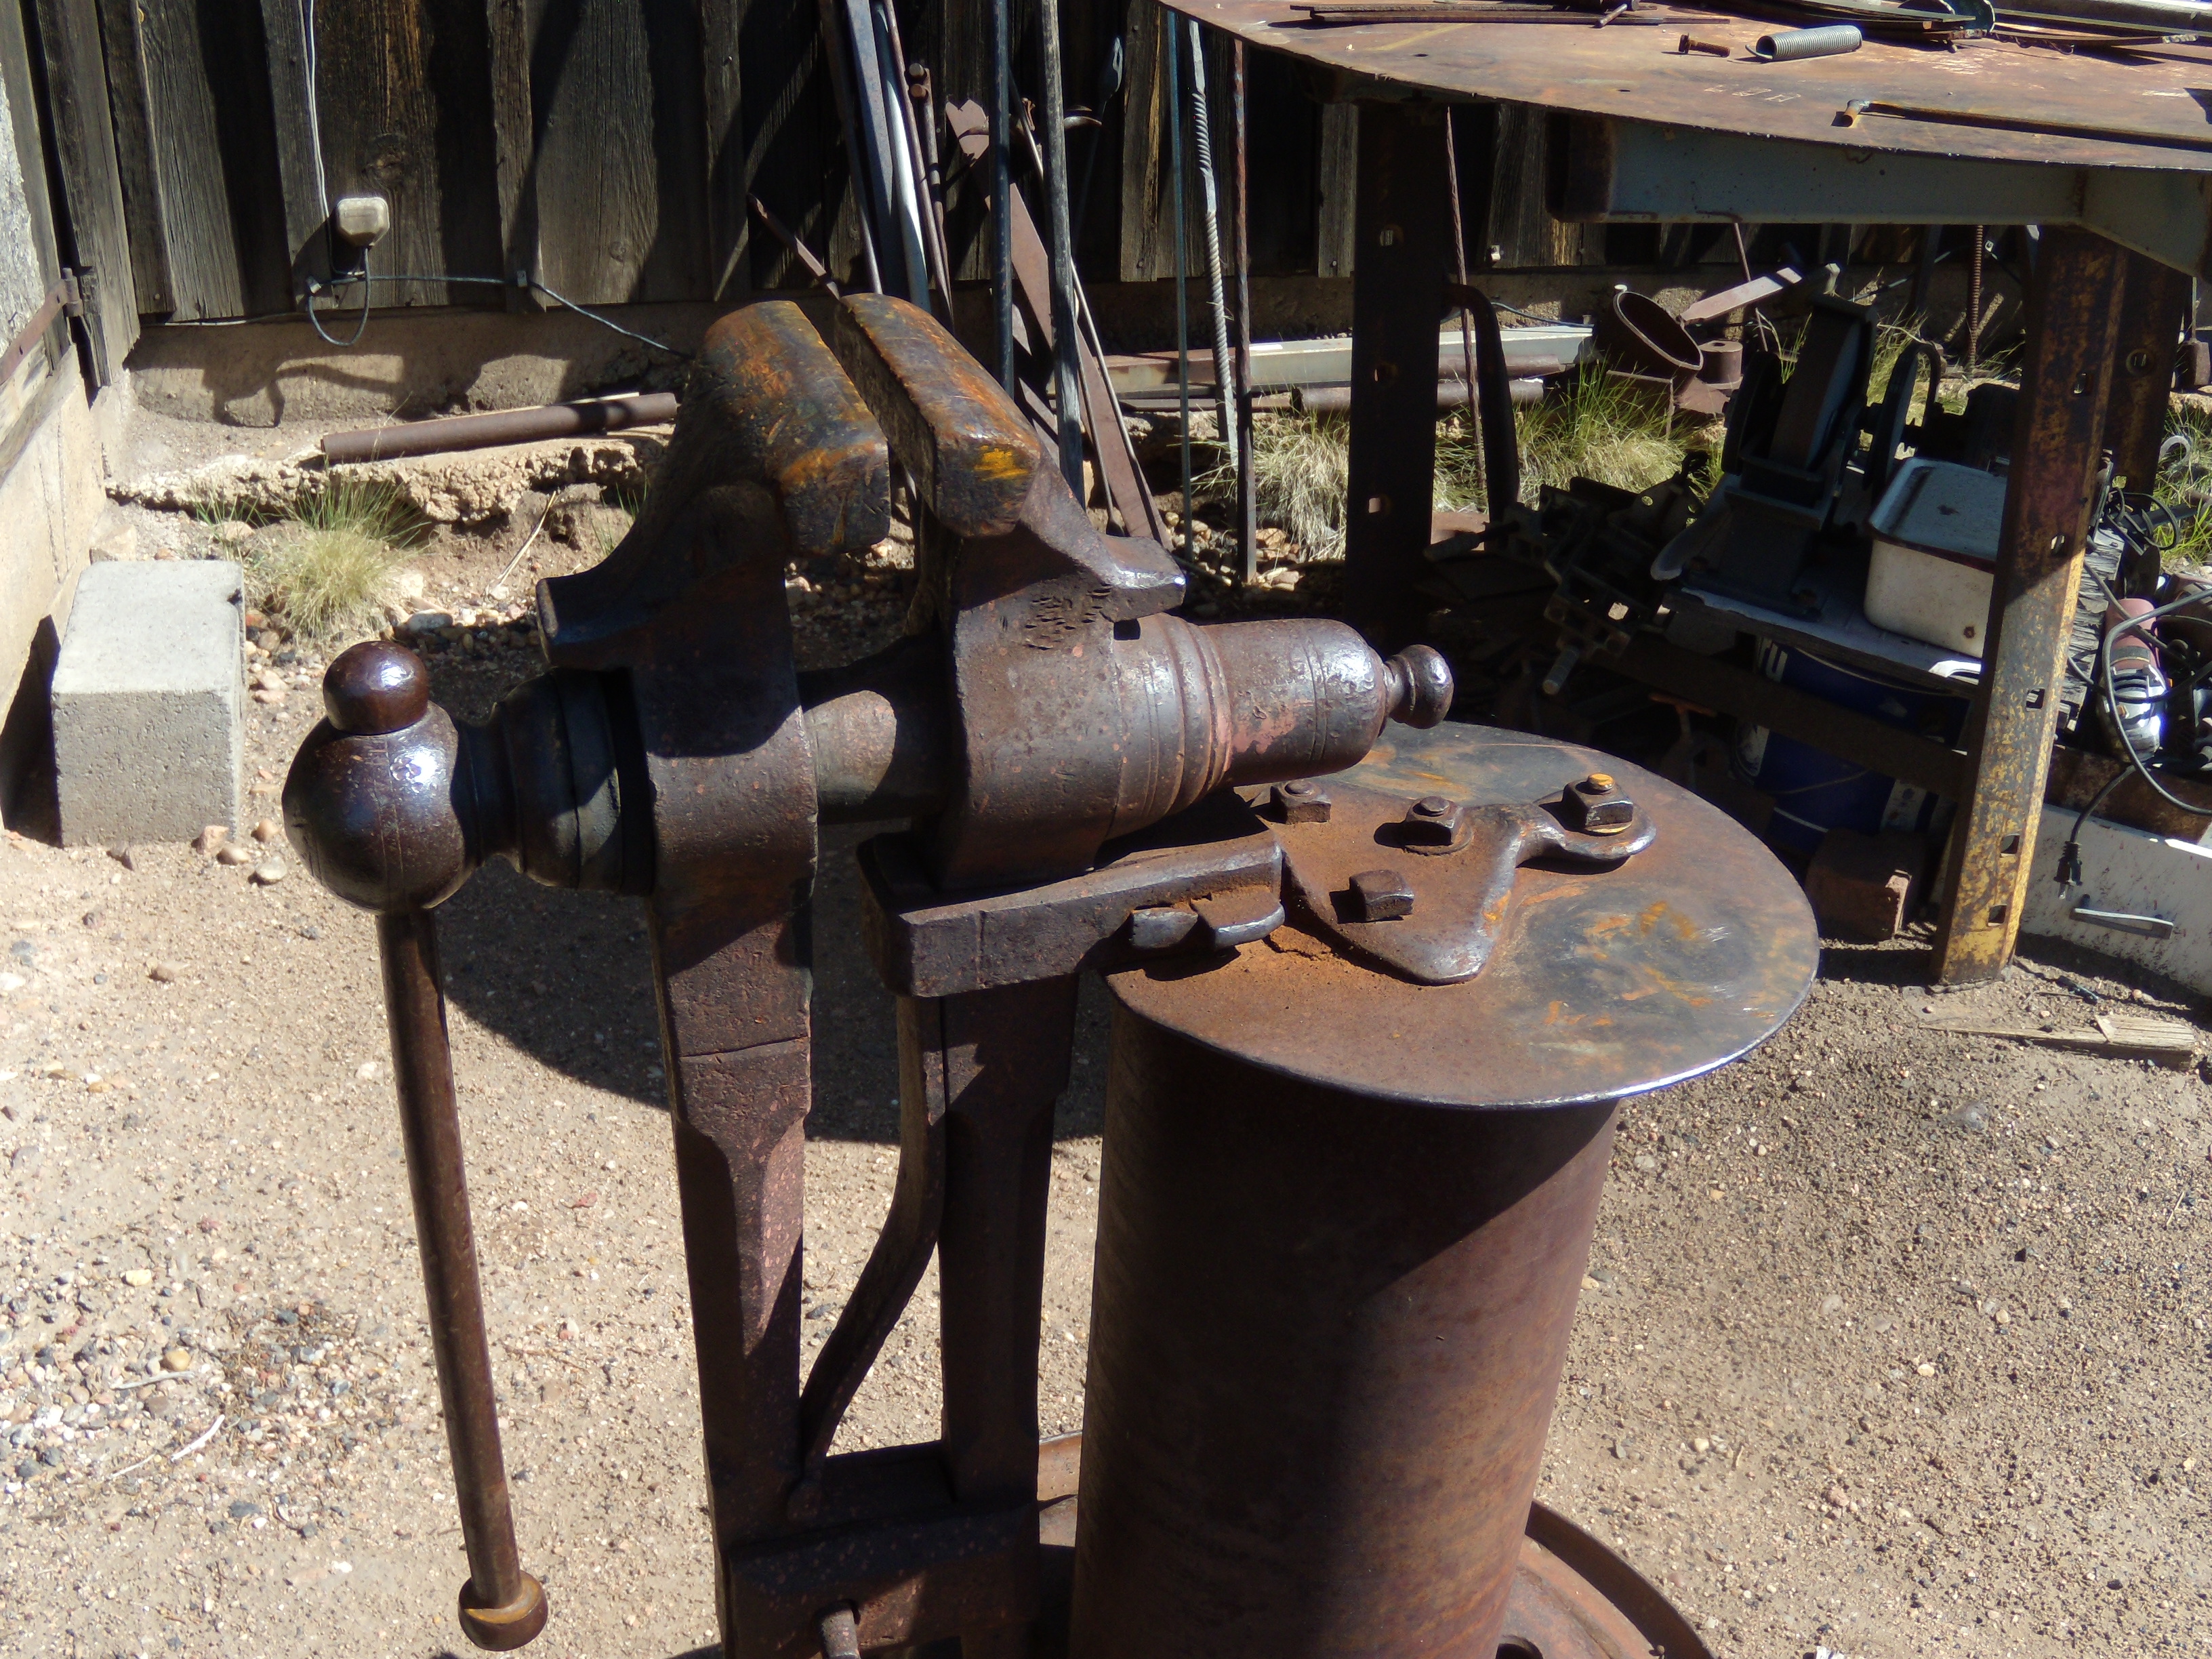
 I've been working like JHCC has his anvil setup as shown in the first picture...since 1963. I like my anvil movable. I have it four feet from center of fire to center of anvil for small work and small, quick forge welds. I move it to five feet for everyday average work, and six feet or more for heavy ironwork. I first learned as a right handed horseshoer, and most of us kept the horn to our left. We were working over the horn a lot, so the tongs and shoe were already in the left hand.Thomas was referring to [personal information removed].The vise has an overall conformation of a Peter Wright, although the lack of any chamfering on the legs I would consider an oddity. The only pieces that might not be period are the pivot bolt and hex nut.Here are photos of my three Peter Wright vises which I have garnered over the years. The first 3 pics show my go-to beautiful vise which I got from evilbay (haha) a few years ago. Its jaws measured 6 7/8" and it had no spring or mounting devices of any kind, but I saw its possibilities and sent for it; I have a little over $200.00 in it. The original PW's had a "manta ray" appearing bracket. I made mine using the old fashioned split-and-splay method which was very common on the old shop made vises. I like to mount my vises each with a tool tray. The fourth picture shows my 5 1/2" vise, and the last picture shows my 5 3/4" vise which is usually kept at an outdoor work station. For the big vise, besides the split bracket, I made the spring, the U shackle with its slots, the gib key, and the wedge. Peter Wright's patent date is 1863 when they went to the solid box. Prior to that, the boxes were composed of forge brazed rings of iron which were later, lathe turned. The female threads consisted of a coil brazed inside of the forge welded portion of the box.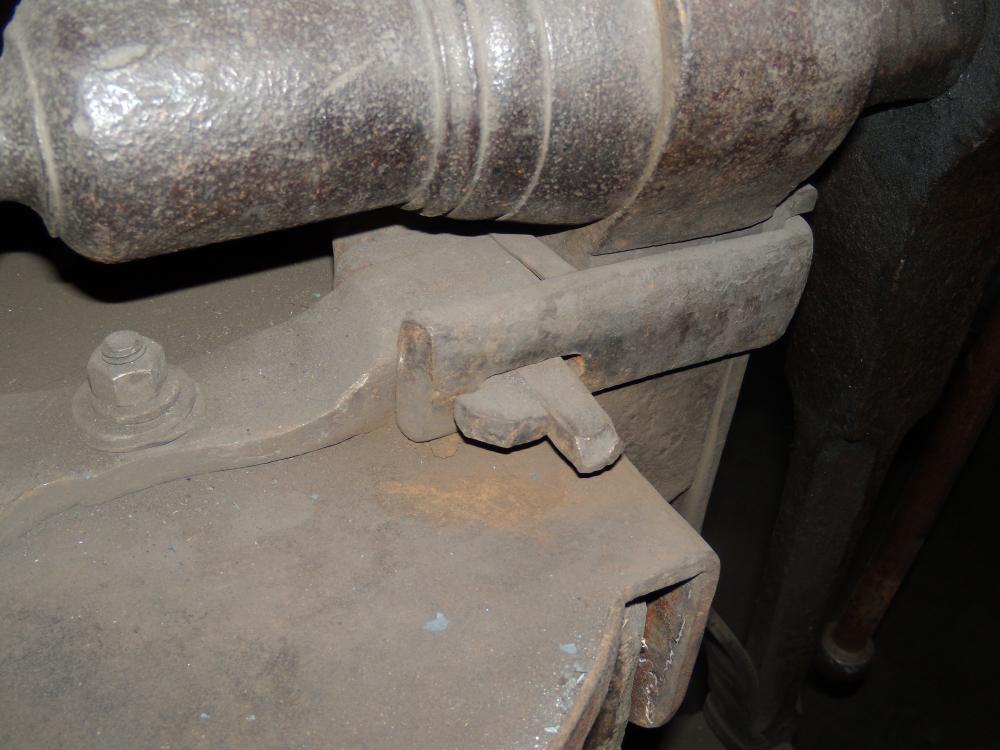
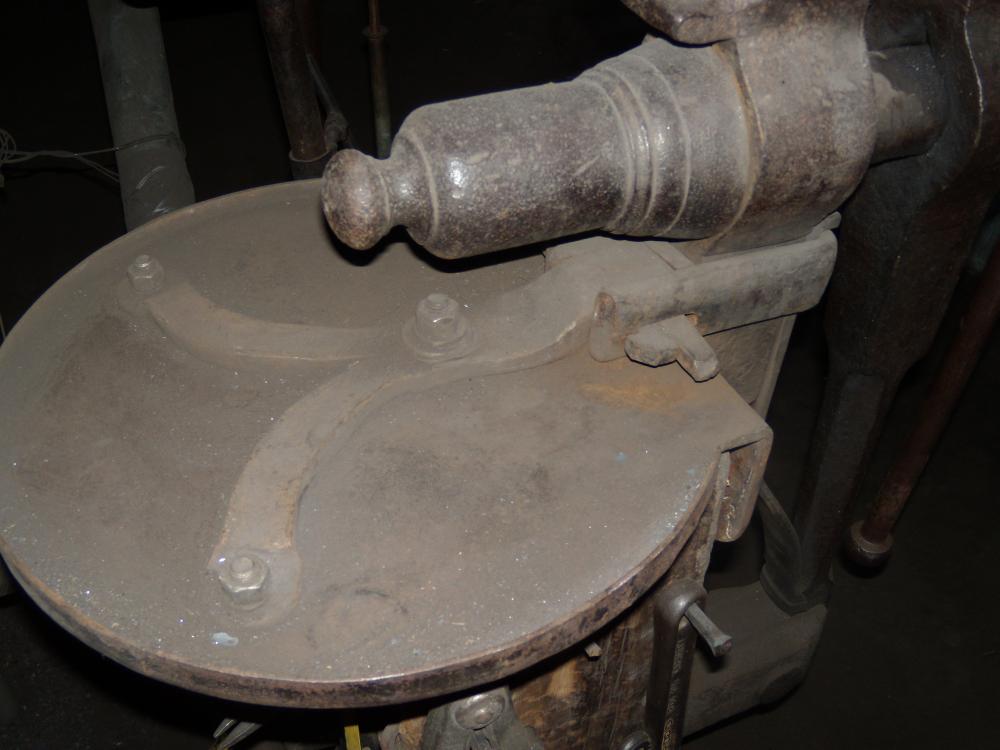
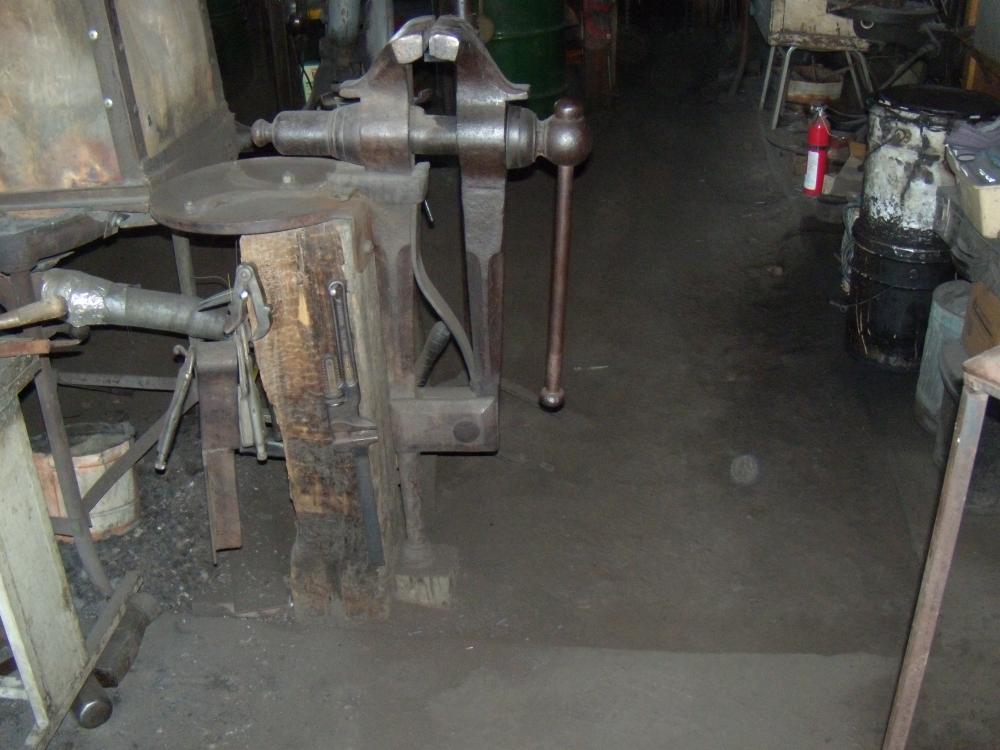
 It's old, it's forged, and it has an early English shape. Maybe George Washington used it (kidding).The wires on a file card face are ducked back a little toward the handle, so I was told to push a file card, not pull it. Pulling it may distort the wires. Verdad?I think the curve toward the bottom of the movable leg is unique. I can't tell how the spring is attached, and the mounting bracket is missing. The older English vises had the spring with a rectangular hole near the top and a matching hole through the fixed leg just below the screw box. The flat bracket had a forged tenon going through both holes, and after insertion, a small hole in the tenon was used for a wedge. This method of bracket and spring attachment predated the later method of using a U-shackle for holding the spring, with a gib key and wedge holding all together. I suspect it was shop made by some enterprising smiths, but maybe not professional vise makers.


Account
Navigation
Search
Configure browser push notifications
Chrome (Android)
- Tap the lock icon next to the address bar.
- Tap Permissions → Notifications.
- Adjust your preference.
Chrome (Desktop)
- Click the padlock icon in the address bar.
- Select Site settings.
- Find Notifications and adjust your preference.
Safari (iOS 16.4+)
- Ensure the site is installed via Add to Home Screen.
- Open Settings App → Notifications.
- Find your app name and adjust your preference.
Safari (macOS)
- Go to Safari → Preferences.
- Click the Websites tab.
- Select Notifications in the sidebar.
- Find this website and adjust your preference.
Edge (Android)
- Tap the lock icon next to the address bar.
- Tap Permissions.
- Find Notifications and adjust your preference.
Edge (Desktop)
- Click the padlock icon in the address bar.
- Click Permissions for this site.
- Find Notifications and adjust your preference.
Firefox (Android)
- Go to Settings → Site permissions.
- Tap Notifications.
- Find this site in the list and adjust your preference.
Firefox (Desktop)
- Open Firefox Settings.
- Search for Notifications.
- Find this site in the list and adjust your preference.