
kubiack
-
Posts
323 -
Joined
-
Last visited
Content Type
Profiles
Forums
Articles
Gallery
Downloads
Events
Everything posted by kubiack
-
78sharpshooter, Thanks for the WC test.
-
If you look at Pine Ridge burners web site they have what appears to be the same blower and it is rated at 2.5" WC. It is also 164 CFM and the picture shows the same manufactures name on the side as the one at Kayne & Sons. I'm also interested in building a ribbon burner and using this blower. I have the 164 CFM from Kayne & Sons on my coal forge and would be willing to take it off and measure the inches water column.
-
This is a pretty good reference for all things filing related, including vise height. http://www.nicholsontool.com/MagentoShare/media/documents/nicholson-guide-to-filing-2014.pdf
-
 Sure. I got the design from the G3 Forgery School of Blacksmithing when I took a class from the Gunters.
 -
The anvil and leg vise will be the two that are the easiest to sell. The power hammer looks to be either home made or a kit so it's anyone's guess at its value. You may find someone interested in the line shaft and other equipment but it is going to be a very small group of buyers who either want or need it. You should check with Balcones Forge or the North Texas Blacksmiths Association.
-
Do you Drift your Ball Peen Hawk?
kubiack replied to forgeaway's topic in Axes, Hatchets, Hawks, Choppers, etc
I leave the hole as is then I can simply re-handle with a stock ball-peen hammer handle. If you want to use something else for a handle then you will need to drift. -
A little off topic to the original question but who is the maker of the wet grinder, show on the bench in your first pic. It does not look that old, is it something you can still buy new? Can you show a more detailed picture with the grinder and motor?
-
How do I GET OUT of blacksmithing? As in quit.
kubiack replied to Glenn's topic in Blacksmithing, General Discussion
The grave is the only way out. -
breaking down stock with limited gear
kubiack replied to Shamus Blargostadt's topic in Blacksmithing, General Discussion
I'm not a fan of the sparks from an abrasive chop saw either but for some things they are the best option. I've ruined a few blades in my power hacksaw when I hit a hard spot in sucker rod or leaf spring. I think cutting anything medium to high carbon and you run the risk of ruining a blade. I have even seen it happen cutting A36 that was quenched in water. Really anything you are unsure of the content and heat treatment is better on the chop saw, hot cut, or torch. One thing I really like about a power hacksaw is you are only going to ruin the fist few teeth and then you can block the stock over and use the rest of the good ones. When you do ruin a whole blade they are not nearly as expensive as a blade for a large band saw. -
breaking down stock with limited gear
kubiack replied to Shamus Blargostadt's topic in Blacksmithing, General Discussion
The Harbor Freight 14" metal chops saws are on sale for $74 right now. In addition you can print off a 20% off coupon from their web site which will get you one for about $55. I'm not a big fan of Harbor Freight stuff but I think their metal cutoff saws are pretty good. I bought one when I was first starting out and it has lasted for many years under intermittent use. If you plan on using it hard they have a pretty cheap free replacement warranty. -
Bump. Did anyone on IFI get this hammer?
-
Reworking T-arm toggle links
kubiack replied to Black Frog's topic in Power Hammers, Treadle Hammers, Olivers
Nice work. Did you have to do any build up on the T part of the link? Does this make 2 hammers for you now or have I missed some posts? -
Thanks for posting. I always enjoy seeing your work and this is just as outstanding as the rest. What sizes are the round and square holes? Is there much taper from the top of the wholes to the bottom? I also have been wanting an industrial swage block and have not been able to find anything acceptable. Where did you buy the steel plate? Nice looking double calipers can you post some more pictures of them?
-
If that Swede was in good condition I think the price is reasonable. A large high quality anvil in good condition for about half of what a new one cost.
-
harbor freight anvil design changes
kubiack replied to Danz409's topic in Anvils, Swage Blocks, and Mandrels
It was more like 5 years ago. I had one and the face was extremely soft if you forged you iron a little to cold or straightened something cold it would dent the face. Any errant hammer blow was certain to leave a mark. When they originally started selling the Russian anvils the hardy was not at a 45 but 90 like a regular anvil. I would agree with the Rashelle on the cast iron one, your money would be better spent finding a large chunk of mild steel or a large fork lift tine. -
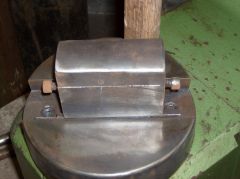
I took a few look at my notes from the demo I watched on Silver/Copper Mokume and saw a few things that might be of interest to you. The first was the alloy of silver that was used was Argentium Silver. Looking up the alloy it is a Stirling Silver with the addition of Germanium as well as the Copper. It is especially noted for its resistance to firescale and tarnish and increased ductability. The demonstrator said that it weld better than any of the other Silver alloys that he had tried. Perhaps the increased ductability help to keep the layers from delaminating. Second he wet sanded the sheets prior to clamping in tork plates. Once a layers was wet sanded and rinsed it was placed in a bowl of distilled water - I think it was distilled water - to keep any oxidation from happening while the rest of the sheets were cleaned. Here is a picture of the billet before it was cut up to make rings:

-
Spencer Inline Vs Swing-arm
kubiack replied to kubiack's topic in Power Hammers, Treadle Hammers, Olivers
As far as using top dies in a swing arm I have used a guillotine tool in a treadle hammer. While not quite as versatile as mounting them in the ram I think it would cover most of my needs. -
I’d like to hear a little discussion about the merits of both of these hammers. The swing-arm type I’m referring to is the one with the adjustable height head. I’m going to build one sometime in the future so I have been pondering on this a bit lately but would like to hear from any one who has used either or both. Most of the builds I remember in the last few years have been for the inline type with the explanation that you do not have to make any adjustment to the hammer to when you switch out tooling. However I have talked to two professionals who said the very much prefer the swing-arm type. The reason begin that they hit faster and harder and so they can get more work done in the same amount of time. If I recall correctly the linkage in the inline design is less efficient in converting movement of the treadle into movement of head and thus take more time and energy to accelerate the head than the swing-arm design. Also the return stroke on the inline is longer which adds to the cycle time of a blow. One think to bear in mind is that a professional usually runs items in batches and will build their processes and tooling accordingly. Therefore the cycle time of the hammer becomes the limiting factor. A hobbyist will normally be making a one off item and using what ever tooling is at hand so adjustments to the hammer may become the limiting factor. I have used both types, but only for a short time each, and my experiences matches the above. It seemed that the inline felt heavy was hard to get moving and would wear you out if you had to use it a lot. Where as the swing-arm hammer was much snappier and just required less energy to use. To me the only time the inline is of a real advantage is when you using tall tooling such as a punch or drift and you needed to switch the blow from the tool to the stock mid heat and can not afford the time to adjust the hammer. If any one has experience with either hammer or both and would like to comment please do so.
-
Peddinghaus, the drop forged steel anvil
kubiack replied to TechnicusJoe's topic in Anvil Reviews by brand
Did you buy your anvil new, if so when? I'm curious about its age since yours has square edges. Mine came from the factory with a chamfer around the entire face, no square edges anywhere. -
Clay Spencer Inline Treadle Hammer Review
kubiack replied to DuEulear's topic in Power Hammers, Treadle Hammers, Olivers
If you want to use solid fuel in the mean time until you move try using coke instead of coal. I use coke in my forge and there is not any smoke and it's pretty much orderless. I don't think you would have any problems with your neighbors if you are using coke. -
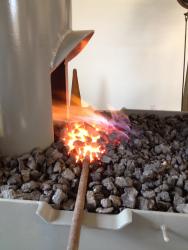
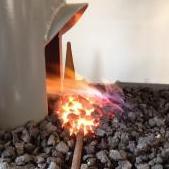
One of the demos at the NTBA's Hammerfest a few years back was making a copper and silver mokume billet using charcoal in a solid fuel forge. The process did not use any solder on the pieces. The billet stack was put under pressure in a small hand powered hydraulic press and then clamped together so it was under pressure when it went into the fire. If I remember the actual heating/welding process went something like this. Build up a medium/large charcoal fire. Put the stack in heart of the fire. Adjust the air so the billet is very hot but not burning. Keep watch until you are sure you have the air adjusted to the point you are not going to burn up the billet. Relax and wait until the fire is just about burned out without adding any more fuel. I think it took a 30-45 minutes. Remove the billet and work cold annealing in a gas forge as needed. I remember that the guy normally used an electric kiln and said this one welded as good or better than what he was doing in the kiln. I've not read the book you are talking about but this process certainly did not take 8-10 to obtain a weld. I watched the guy draw the billet out cold, pattern it, and size it for jump rings. If your interested I think I could find the guys name and contact info, I belie it is in my notes from the event.
-
If it were me I would just go to one of the main supplies and get a few sizes of V-Bit tongs, a German pattern hammer, and a book that showed the basic techniques and tool making. Your going to be around $150 but you will be able to get started is a safe manner without using substandard equipment. While you can certainly make a set of tongs they are not the best first project. V-Bit tongs can hold round, square, and flat stock and if you get a few in the sizes of stock you will use the most you won't have to worry about making tongs until you have a few projects under your belt. If you tried making a set you would not think the $35-$45 for a new pair is really much money.
-
 Are you using the cap-head screws just as set screws? How well does it hold the die tops? Do the tops ever work loose? I had thought about doing something similar with pins in the die tops and cap-head bolts coming in from the sides of the bottom die. However I was worried about the tops coming loose and my idea of a fix was going to be to ream a taper hole in the pins and then turn a taper on the end of the cap-head screw so it snugs the tops down as you tighten the screws. However it would make for more work when making a new set of tops.
 -
Did anyone on here buy the 25# Little Giant hammer today at the auction in Plains TX? If so you outbid me for the hammer. I could not make the auction but sent my Dad to bid for me. I asked who ended up with it but he did not ask. I just though I'd say hello to any other blacksmiths in the West Texas/Eastern New Mexico area. Who ever bought the hammer is going to have a little bit if a project getting it back up and running. I gave it a good once over a few weeks ago and it need new main bearing, clutch bearing, clutch blocks, and pitman bearing. All of the pivots need at lease over sized pins and possibly rebored. I could not tell anything on the ram guides without taking it apart but based on the ware the rest of the hammer showed I bet they are going to need shimmed or better yet plained. The treadle linkage look mangled and will have to be rebuilt.
-
I have an Incandescent Ironworks swage block, it is a nice casting and finished well. I have not used it much but have been happy with it the few times I have. This block has several interesting shapes which I have not seen on any other blocks. If you want to make eating utensils this is a good block as it has depressions for 2 different size for tines and 2 different size spoons. The spoon depressions are oval shaped for table spoons. It also has the standard ladle depression.
