VaughnT
Members
-
Joined
-
Last visited
Everything posted by VaughnT
-
I do have a square block for the hardy hole and have been thinking about making a larger saddle. It's a whole lot easier than finding someone with the right experience to weld up the edges. Honestly, until seeing this thread, I wasn't even sure if welding up a Fisher was realistically possible.
-
That's some fine work. I hadn't thought of using a bolt and wing nut to hold the tools tight to the anvil.
-
Glad to see I'm not the only big guy using his belly as a tool! Folks are surprised at just how repeatable you can make a bend when you know your belly well!
-
That's amazing work. I'm looking forward to seeing the finished product. My fisher has some bad chipping on the edges that are too deep to grind to a radius, and that makes things troublesome when doing certain movements. Never thought about building up the edges simply because I didn't want to mess with cast iron. Hurry up and post more!
-
Get that big bucket of duplex nails, Aus. Not only do they make for good swords for the kids (and you're quickly run through a 15kg bucket of them!), but the double head makes for a really neat rivet. I use small nails for rivet stock all the time, cold peening them over on the back side. With the duplex head left as-is, it really spruces up your design and folks wonder how you managed it.
-
It sure is. I get my 12" nails from Ace hardware because they're they only place I've found that deals in non-galvanized nails. I used to got Lowe's and Home Depot when I needed some, but stripping the galvanizing off was a bear of a job. You can also get the same shank diameter in 8" and 10" nails. Sometimes the 12" is too long and I hate cutting off the ends.... so buying the shorter versions is a good option.
-
Hands should be dirty and scarred. No shame in that - it's a sign of having actually accomplished something.
-
Probably my favorite "episode" so far..... While there's not much call for wagon parts nowadays, I could easily see that clip being used to hold together a forge or anvil stand that you take to demonstrations. Or, refine it a little bit and turn it into a corkscrew. Maybe use it as a decorative element in a table, gate, railing..... Five minutes of good TV!
-
"in blacksmith" HA! Perfect way of putting it! I usually keep the sound down real low since I can't understand the talk, but never felt like I was missing something because, like you say, I'm fluent in blacksmith.
-
I haven't been able to find any decent plans on making a bender like that, but there are a few folks that have adapted the Hossfeld idea. The big issue I have with doing a scroll like that is that I haven't found a way to not have the straight end on the inside of the curl. Straight ends are, in my view, the most horrible thing you can put on a scroll, but they're necessary on a bender like this because you need something to grab.
-
From the same wonderful folks that brought us the Notre Dame hinges..... I really enjoy seeing how all the parts and pieces come together, and it's amazing easy to break down the entire wagon so it could fit on a ship or such. The part that boggles my mind is that they call this a "peasant" wagon. While I certainly appreciate the decorative work, I would never have thought a peasant could afford all that nice ironwork. The little details really stand out, and it's nice to see traditional skills being applied in a functional way. Two things that caught my eye... The hardened and tempered cold chisel hardy; never really thought about making one, but now I want one! And the mild steel they're using - seeing how neatly it breaks makes me wonder what the alloy is and how it's different from the mild steel we use here in the States. A couple hours of good blacksmithing entertainment..... https://www.youtube.com/watch?v=KcQ9LQbflIc&index=27&list=PLQaWhntNNy3Qi3gMjnY9P31uKa8fruvFF
-
Don't forget to use post-production like iPhoto to tweak the colors and such. I take all my photos with a Canon G10 camera that's been around awhile. I don't use a light box, but my bright lights are 8' above the table top I usually shoot on. I do need to build a light box, or I might just by a cheapie version. Post-production like iPhoto is great for tweaking the settings and experimenting with different looks. I generally will adjust the sharpness first, then move to saturation and exposure. The big thing, imo, is not to switch things up all the time. If you're doing product photos, develop one look and stick with it. If you keep trying to change things up, you can't develop a simple pattern that works for 90% of what you're photographing. Being able to do the same thing over and over makes it easy to zip through the post-production process.
-
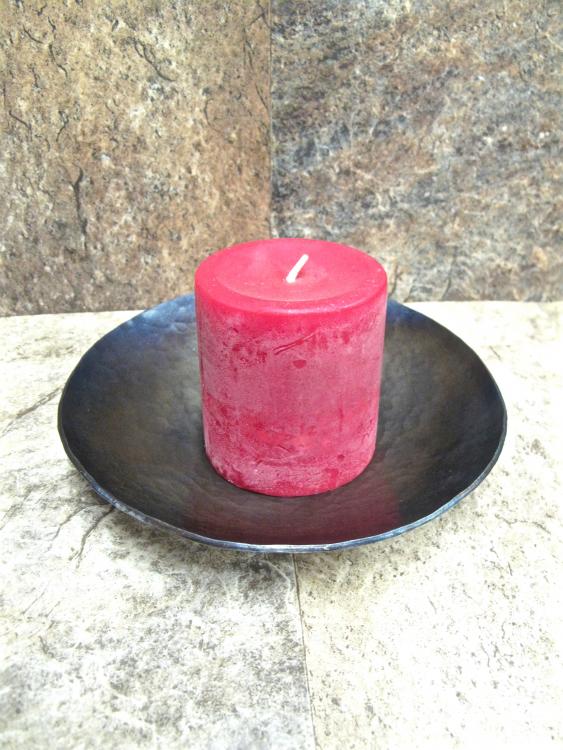
Lately, I've been on a bowl kick. I've been doing small bowls so far, with the largest being around 9.5" across, but have recently found a fellow that has larger disks for a decent price. I'm not sure if I'm ready to try my hand at dishing something 18" in diameter, but I could use a good gong in the shop! The best part is that they're practical and relatively easy to make.
-
I didn't make that bracket. It's just one of many images I grabbed of the internet for future reference. That file's come in real handy with threads like this! I would think it's fair to say the back piece is 1/4"x2", with a bit of 1" coming off for the hanger bar. Could be 7/8" or 3/4", too. It's really hard to say because you don't have much to go by in the pic. Just goes to show how things look when perspective plays tricks on you! Putting the twist in the main arm and tapering the end really makes the whole thing look a lot thinner and more delicate than you'd expect. When designing your bracket, you need to watch out for how the metal will act when under load - especially with wind. In all of those designs in the illustration, notice how the main curl element is riveted to the vertical piece at a relatively low point? The curl portion nearest the wall will have a ton of flex, allowing the horizontal piece to move up and down or side to side as the wind blows. This stresses the joints and can cause failure rather quickly. In the photo, you can see how it's almost a straight line from the uppermost rivet down through the curly portions to where it's all riveted to the horizontal arm. This provides the maximum amount of strength possible in that design.
-
Just because nobody is likely to see it doesn't mean you shouldn't do something as dressy as possible. As you noted, this is a great opportunity for you to stretch your creative wings. One of the things I've always tried to keep in mind isn't so much what's included, but how it's included in the design. Scrolls are fun and relatively easy to make, but there are other things that can be put in there that will add to the overall look without adding too much to the aggravation of building. In this hanger, it's neat and clean, but has an element of refinement that's pleasing. None of the individual details are too difficult to do even if you don't have a lot of tools or knowledge. Proportions are everything. You need to remember that the higher up the bracket is, the smaller all the individual parts will look. It might look stout and ungainly when you have it in hand, but put it up 10' in the air, and all of a sudden it'll look kind of wispy and thin. Found this online and think it's a good guide for some of the proportions. Of course, I'd add a whole lot more gingerbread to the bracket just because I could.....
-
There's a youtube vid where I guy built a DaVinci-style cam hammer. Pretty simple mechanism but looked to be horribly inefficient.
-
Yea, you can make them work. That doesn't mean they're efficient or your better served by them rather than a large chunk of steel. The i-beam design simply doesn't have the physics in its favor when laid flat to hammer on. If you must use one, you're best served by standing it on end. That's all I'm saying. If you had stood yours on end, you would have found it far better a performer than it was laying flat.
-
Looks like a variation of the bridge anvils I've seen, though I've never seen one with a base so large. Could it be a mooring cleat or some type of bollard to block traffic? Well, it could have been pressed into that service, but I have a hard time believing it was designed for such a thing. The edges are too square to be roped to; they'd abrade the rope far too quickly and companies certainly would have kept that in mind when designing the thing. All the bollards I've seen are usually far taller so they're more visible from the cab of a vehicle. While that would certainly stop a vehicle from passing, it's a pretty expensive way to go about it when you could just backfill a large pipe with some cement. The bottom looks like those pieces were added on later to form t-grooves. Why? I have no idea. If the "legs" on the bottom were simply to give it bite when sunk into a cement pad.... well why? And why don't they go all the way across? Those are some pretty thick pieces and the t-groove design wouldn't be necessary when you consider the overall weight of the thing. Seems mighty complex a build for something that you'd be hard pressed to move even if it was sitting on top of the cement. Would the t-grooves make enough of a difference to warrant being added to the mold forms?
-
-
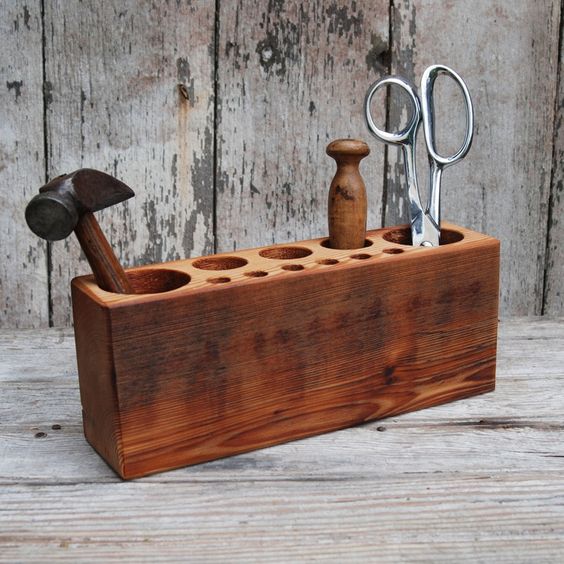
Glad that you found something of merit in my loquaciousness. Each show is different. That's why I don't take much from the lack of sales you report - and you shouldn't either. It was a great venue to learn the ropes at, and you did. Some shows will be better, and some items will always sell better. Heavier items require the potential buyer to consider if they want to lug it around to the rest of the show or walk it out to the car. You should still have them available, but don't feel bad if they don't sell like hotcakes. Women control the money. Every marketing study I've ever read says that women in the US make 70% of the purchasing decisions - so you need to focus on appealing to their sensibilities. Neat, clean, professional set up, with small items that are cute, fun, happy, or whatever other word women use to describe stuff as we just sit there shaking our heads. Your dinner triangles are nice, but they're heavy and a woman will see that right off the bat. As much as she likes it, will she want to jam it into her purse? Does she have a man handy that she can have carry it? Or are you providing a nice little bag to put it in so she can tote it around with relative ease? If you do have a bag, is it a recycled grocery bag... or something new and pretty with your company logo on it? The latter wins every time. If you do use grocery bags in the beginning, at least stow them in one of those neat tubes so they look good hanging from your awning's leg and folks expect them to be wrinkled, etc. On your anvil stand.... great story and something sure to make a person smile when you tell it. Honoring your daughter like that is a great thing.... and a great selling point - if you tell folks the story. When I first saw the brands, I was thinking it didn't look very "professional" and your story confirmed my thinking, but explained it in a way that made you look really good. Think of me as one of your customers taking a first glance at your stage. Only after you've told me how the brands got there does my impression change. It's not a big issue, but it does serve to illustrate how the little things can catch someone's eye and give them an impression. Folks are always asking me if I'm a truck driver, and the first dozen times I marveled at how they figured out I have a CDL-A. Then it hit me: old, fat, white, beard, ball cap, boots.... yea, I guess I do look like the stereotypical truck driver. Developing the look of your stage takes time. Little things can make a big difference - even if it's just making sure that any nails or bolts in view are hand-forged, square-headed, and not shiny new chrome. Something as simple as painting your forge stand with brass and copper highlights will make it stand out. Because it's so far away from the customer, they won't know that it's not actually made from brass and copper, but their eye will be caught by the bright color and the brightness will help illuminate that dark area in the photos. It adds visual interest and a sense of uniqueness to your shop. Moving your tools from the forge stand to the anvil block will do likewise. Something as simple as a 2x4 that's been drilled with holes will add a bit of "otherness" to your anvil block and move the "blacksmithy" stuff closer to the audience so they can better appreciate it. Quick to make, it keeps all your punches and chisels right there on the front of the anvil stand so the customers can see them, and see you grab them when you're doing something. It gives them more of a connection with what's going on. Back ages ago when I worked in the greenhouse industry, we had to go to trade shows every year and every year there was one impressive company there. They stick in my mind not because they were good at their job (which they were), but because they had every single person wearing bright orange everything. Their business cards, hats, overalls, shirts, socks, brochures, bags...... everything was fluorescent orange. They created a very memorable look that stood out from everyone else that was wearing the ubiquitous khaki and green like you'd expect from people that worked with dirt and plants for a living. And all these years later, I still remember them. That was my first real lesson in marketing and putting on a show.
-
Arkie and Michael are right, all that fish-lipping is caused by insufficient heat and/or too light a hammer blow. You can't use a light hammer to draw down heavy stock because it doesn't have the weight necessary and your arm can only power it so much. The result is the outside layers moving faster than the center layers, which makes the fish lips. Check out Brent Bailey's youtube video on making a 3-pound cross peen hammer. He uses an 8-pound hammer to do the major moving! As the end of the shank going into the hardy hole, it's a nonissue because it's not actually part of the working area.
-
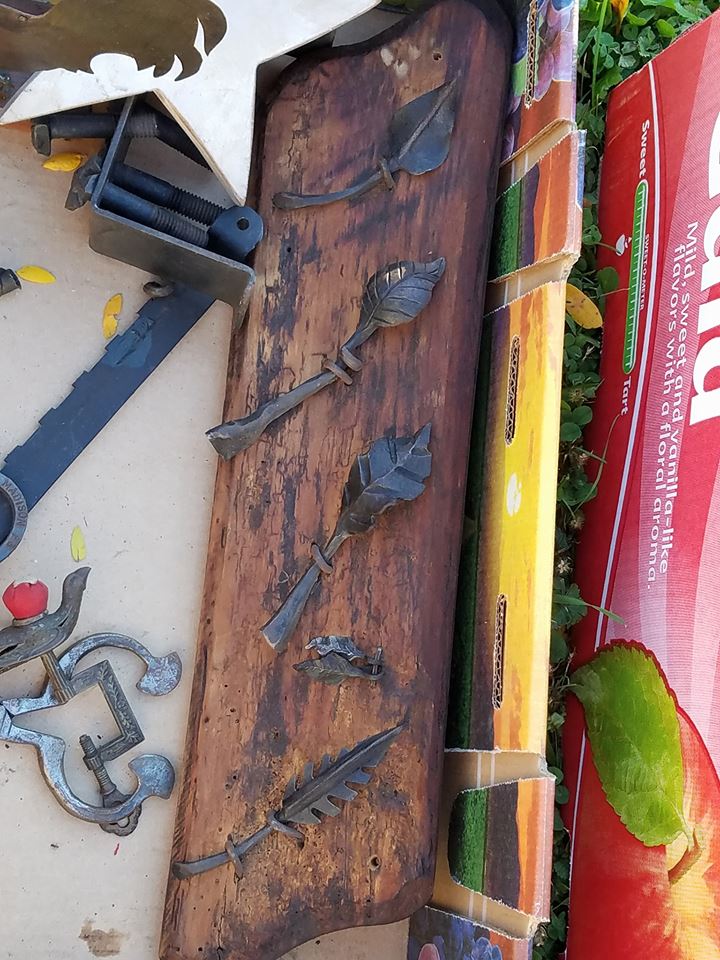
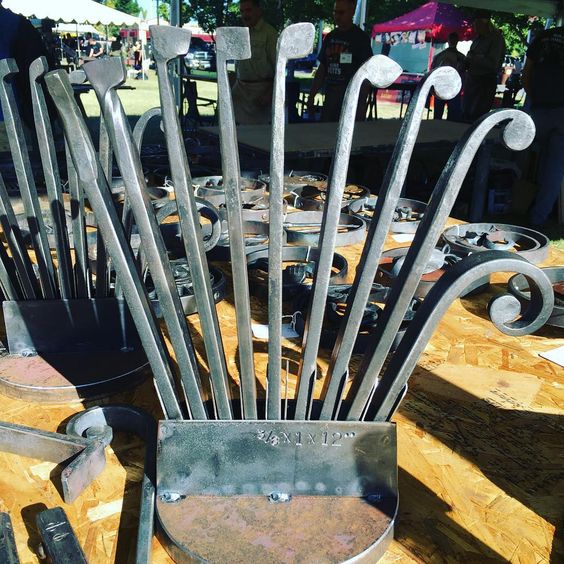
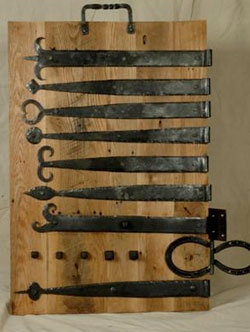
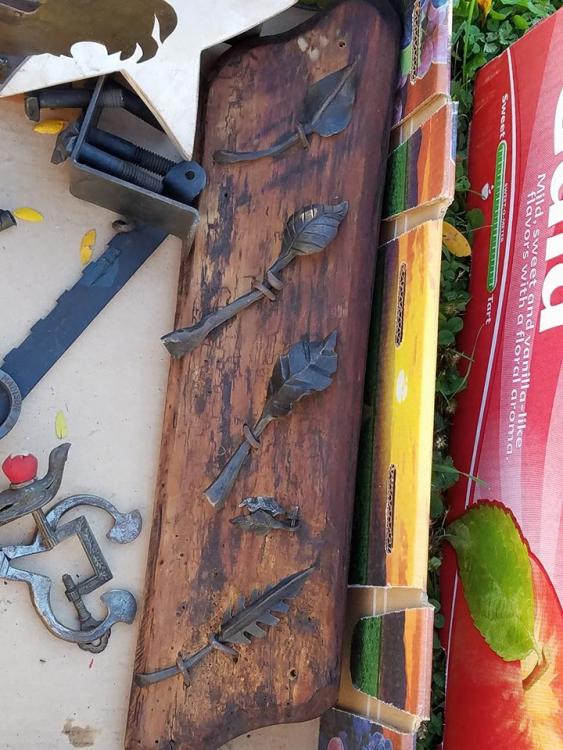
Congratulations on your first show. They can be quite daunting until you get a few under your belt and have a system laid out for yourself. Seems like I was always learning and adapting to what came up. Things to consider..... You're right that the shows can keep you busy. One rule of thumb is that you can either do a demonstration, or you can sell to customers. You can't do both. There's no way to know how many people wanted to buy something from you, but didn't want to bother you because you looked busy at the anvil. Or how many wanted to see you make something, but you were too busy with making change for a customer. Pick one thing and do that. If you want to sell items, bring a wife or girlfriend to handle the sales. Whoever's doing sales doesn't have to be an experienced smith - just good with people and money. A kid can make change if you can find one that doesn't have their nose stuck in their phone. Presentation is everything. Folks love a show and a good show keeps them there longer. The longer they're there, the better the chances of making a sale. Maybe not today, but a good show will stick in their mind and they'll remember you when they want something nice for a housewarming gift or birthday present. Part of presentation is how you and your setup look. You did great with your "business casual" approach. Smart and classy, but not something that'd be out of place in a modern metalworking shop. Blue-collar, but with a hint of uppercrust, maybe. The only thing I'd change is the lack of an apron. Maybe it's just my bad luck talking, but that white/grey shirt wouldn't have lasted five minutes with me and then I'd be walking around the rest of the time with a shirt all smudged and burned. A nice apron might be warm to wear, but it looks the part and saves on shirt expenses. I always preferred an apron that didn't look cheap and chintzy like those $10 ones you get at Harbor Freight. Folks can tell quality even if they can't put their finger on exactly what might be wrong. They expect your apron to be dirty because they realize it's a blacksmith's apron, but cheap and chintzy will stick in their mind. Something home-made, or something like what Moonshine Leather turns out... something with a hint of class is a good thing. It tells folks that you're successful. Your set up is your stage. You're performing on it and you want it to say something about you. You're right that a coal forge seems to go better with the spectators. If you can get one with a chimney that gets the smoke a good 10' up, great. A nice hood that keeps the sun's glare out of your fire also creates a black void that folks can better see the fire in - people love fire! With a chimney to get the smoke up over peoples' heads, you're less likely to have complaints or people moving on to get away from the stuff. Little things like the way you decorate your anvil stump make a difference. Burning the wood gives it a sense of age, but random branding with the same iron looks a little rushed and fake, for lack of a better word. If the brands were in a nice pattern, that would be different. I'd also recommend drilling some holes in the wood so you can stick some chisels, fullers and other top tools into it. Even if you're not using them, it will make the whole stage look more "blacksmithy". To minimize weight when you're loading up the kit, you can use hidden pegs to join the two pieces of wood. Simply life the top block off the pegs when you want to load up. Your bucket does the job, but it would look infinitely better if you stashed it inside an old galvanized bucket or wooden keg. Again, function takes a back seat to looks because it's something that makes the customers enjoy the experience. The covering doesn't have to even have a bottom to it just as long as it hides the fact that you've got an ugly plastic bucket for a quench tank. You don't want to go overboard with the kitsch, though. The "industrial" look is really popular, and you're running a propane forge, so you can play off that idea. You could roll a bit of sheet metal into a cylinder and slip it over the bucket so it looks more like a piece of heavy pipe or ductwork from a factory. Give it a touch of potassium permanganate to age it slightly, or some distressed paint, and you're golden. Fleshing out your display out will give customers more options. It's a way of saying, "Hey, I don't have time right now, but I'd love to show you what else I can do." Storyboards are the best way to add visual interest to your stage. And you never know, someone might want to buy the thing just because they think it's neat art. I found this online and thought it was a great way to demonstrate how making a penny end scroll... but I could very easily see someone wanting them as decorator pieces! Put something like this out there and I bet someone is going to ask if you can make them one while they wait! Better be ready for it. Since making door hinges is too large a project for the setting, create a storyboard that shows customers what hinges look like. Not only does it take up visual space, but storyboards like this are easy to make when you're practicing things. Make a different finial every day or every week between now and the next show, then put them on some old barn lumber. It gives the customer something to think about. As for pricing, don't sell cheap just to make sales. Shows are hard work and I firmly believe demonstrators should get a cut of the ticket sales, but don't sell your work cheap just so you can say you made a few bucks. The best thing you can do is go in knowing that you're going to lose money on the deal. That's just how it seems to work out until you've built up your clientele and have something of a local reputation. Price your stuff competitively. The "perceived value" of that price tag tells the customer that you're a serious craftsman. Selling a $40 bottle opener for $10 just so you can see it go out the door is doing yourself a disservice. If you give a good show, folks are going to want to buy the product. The sizzle sells the steak. Kinda running on at the mouth a bit, I know. I used to really enjoy doing demonstrations and getting the crowd riled up a bit. Oh, and giving those kids a free nail sword is something they'll remember for a very long time. Every happy kid had an appreciative parent behind them, and don't think that didn't count for something. That's the kind of stuff the parents wiill remember!
-
Those are absolutely dreamy and well worth saving. If the faces aren't too pitted, you could certainly sand them down a bit and make some nice welding tables or layout benches. You really can't have too many heavy benches in the shop. If room is tight, I'd get rid of any wood benches, or anything cheap and flimsy, so I could make room for those two. The big one would get put on heavy casters so it could be rolled out of the way when I needed open floor space (something I wish I had done with mine). The small one would be on casters and at the same height as the big one so they could be paired up when needed.
-
That rod you got.... safe. If the welder's weren't wearing respirators or funny clothes, you can bet it was just some mild steel. At $12 per stick, you got a nice little haul of free metal, and 5/8" is a great size for all sorts of projects. Track anvils will work half-way decent if your turn them up on end so you're hammering on the cross-sectional face. Laid flat like normal and they're almost useless and you'd be far better served with a solid chunk of steel. You want a heavy anvil, but only if the weight/mass is right under where your hammer is hitting. Otherwise, the weight doesn't really do you any good. This is why you don't see people welding their anvils to the side of a battleship and claiming they have the world's only million-pound anvil. A sledge hammer head makes a great anvil because all the mass is right there under the hammer. Way better than a railroad track.
-
As Mark notes, the twisted version was used in the past. I think the tapered wire design became prominent simply because it was easier to manufacture. I have a hard enough time making "standard" corkscrews!