VaughnT
Members
-
Joined
-
Last visited
Everything posted by VaughnT
-
1: Your anvil is just a junky cast iron job without a tool steel face. Better than beating on concrete, but not by much. 2: Your anvil stand is seriously detracting from the functionality of the anvil. You need a stout stand, even if you want it to be mobile. Stool legs are way not good. 3: Making tongs is not a good project to learn on. Tongs are a critical component in the forging process. Good tongs are light, balanced and grip the metal securely -- something newbies rarely have the ability to achieve. You are far far far better served by shelling out the bucks for good tongs from a reputable maker because that will allow you to maximize your time at the forge, learning the basics rather than fighting with the steel. 4: If you want a good 1st Project - make a set of shelf brackets for the house. Two simple 90º bends in some 1"x1/4" bar stock, supported by a nice s-curve or scroll in the same material, held together with some rivets.... and you've learned some valuable skills while producing something that the whole family can see and enjoy. And making them isn't nearly as easy as typing it out! You'll have a tremendous sense of achievement every time you look at that shelf, and the rest of the family will get a kick out of pointing it out to friends that drop by. The only real downside is that once the wife sees it, she'll add a hundred new things to the Honey Do list. 5: Get with the local ABANA chapter. All the talk on the internet pales in value when compared to first-hand experience.
-
I buy a 20' stick of 1/8"x6" for the same money you're getting that 4140 for. Unless you need the high carbon content for a blade, I can't see any reason to use HC steel. If you are making a blade (and who isn't trying to make swords these days!?!), you'd be far better off shelling out the bucks for new steel in the size you need.
-
You're exactly right. The big problem with the scroll jig in the OP is that the company marketing them is simply using finished scrolls made by a machine. The finished scroll looks good, but using that scroll as a jig to make new scrolls always leaves the end product looking rather ungainly for exactly the reason you noted. It's a great idea for the company making, but a lousy idea for the customer wanting some scroll jigs.
-
I'd love to know how you're registering the twists to get the standoffs to line up nice and square to the door. That's always been my biggest problem when doing twisted handles. It usually takes me a solid day of cussing and spitting to get the handles so they sit flat on the door.
-
The problem with rebar hasn't changed. Even if it is "good stuff" by some internet smith's estimation.... you don't know how qualified that smith is or where they've gotten their information. And that's aside from the fact that you don't know how best to heat treat the stuff. Now, a hammer made from mild steel is a handy thing to have in a shop and you would do well to make one for yourself as practical exercise. If you're interested in making working tools that are worth the time and money invested, you're much better off using steels that are of a known alloy. Even something like sucker rod is easy to deduce since so much information is available on the internet regarding it's chemical composition. You're not saving money or time buy trying to use mystery alloys. Online retailers sell short lengths of 1045 and 4140 for a very reasonable sum.
-
Don't feel too bad about using that form and not getting good results. I'm pretty sure that I bought the same one and it's an utter disaster. All the company is doing is buying machine-made scrolls and welding a bar to the underside so you can clamp it in the vise. The results, if you do everything right, is that you end up with what looks like a machine-made scroll. Ugly as sin and not at all sized so it looks right with the size of the bar you're using. As mentioned above, cooling off the very end of the bar, after you've made the initial hook, will give it the stiffness needed to not deform as you pull the rest of the bar around the scroll. It's not a perfect way of overcoming the flat end of the scroll jig, but it does help a great deal and does away with the need for a clamp. I'll take a photo of mine in operation when I get back out to the shop.
-
In an apartment, with limited funds, seems like you're tailor-made for a copy of this book! There's more to blacksmithing than hot fires and big anvils. Those things are nice, but you can do a ton of work with old soup cans and strips of thin steel! Best of all, the lessons can be scaled up so when you do get a gig in a big shop, you'll have some idea of how the components go together. Hope you can land a job overseas. I'd love to travel over to Europe for a year or two just to study in an area filled with old ironwork and people who still appreciate it.
-
Excellent build. Best of all, it looks like it was made by someone with talent and an eye for details. That will pay dividends when customers see it, even if it's only in pictures. I really don't see where you could put a tool rack that won't be in the way of something else, or inconvenient to use. If you install some nice flat-top fenders over the big wheels, not only would it sexy the whole thing up, but you could mount a rack to them much like gear was attached to the USGI Jeep fenders back in the day. Personally, I'd keep it neat and clean. A swing-out work support is perfectly acceptable, but I think you'd be better served with a stand-alone tool rack rather than cluttering up the forge with more stuff.
-
Tongs are not a beginner's project. If you try to force the issue, you can expect a lot of frustration. Buy tongs new from people that make them for a living. Not only do you get to support a fellow craftsman aching for a sale, but you get a quality product that holds your stock securely. The latter makes for far better use of your limited forging time. If you want to learn the trade, start with the basics. Make a hundred scrolls of the same size. Make a hundred tapers of the same size. Repetition builds skill if you're doing things right and paying attention to the details.
-
Thank you, Frosty. I haven't tried it yet.... mostly because I haven't had the need for a punch. It does sound like it would make for an interesting project, though, and I might have to give it a whirl just to see how it turns out. Next up on the list of things to do is more "practical", but I'm keeping a tight lid on it just because I can. I think folks will like it, though, and find it useful for their shops.
-
They'll work fine, I'm sure. I was going to use lead, but thought the copper might be a hair better because it isn't as soft. Be sure to post some photos when you get a few practice pieces done. I'm looking forward to seeing your work. I'm glad that you found value in the post. I wasn't sure what to call it, so I just called it what came to mind first. That's a great idea. I hadn't even considered tin as a possibility.
-
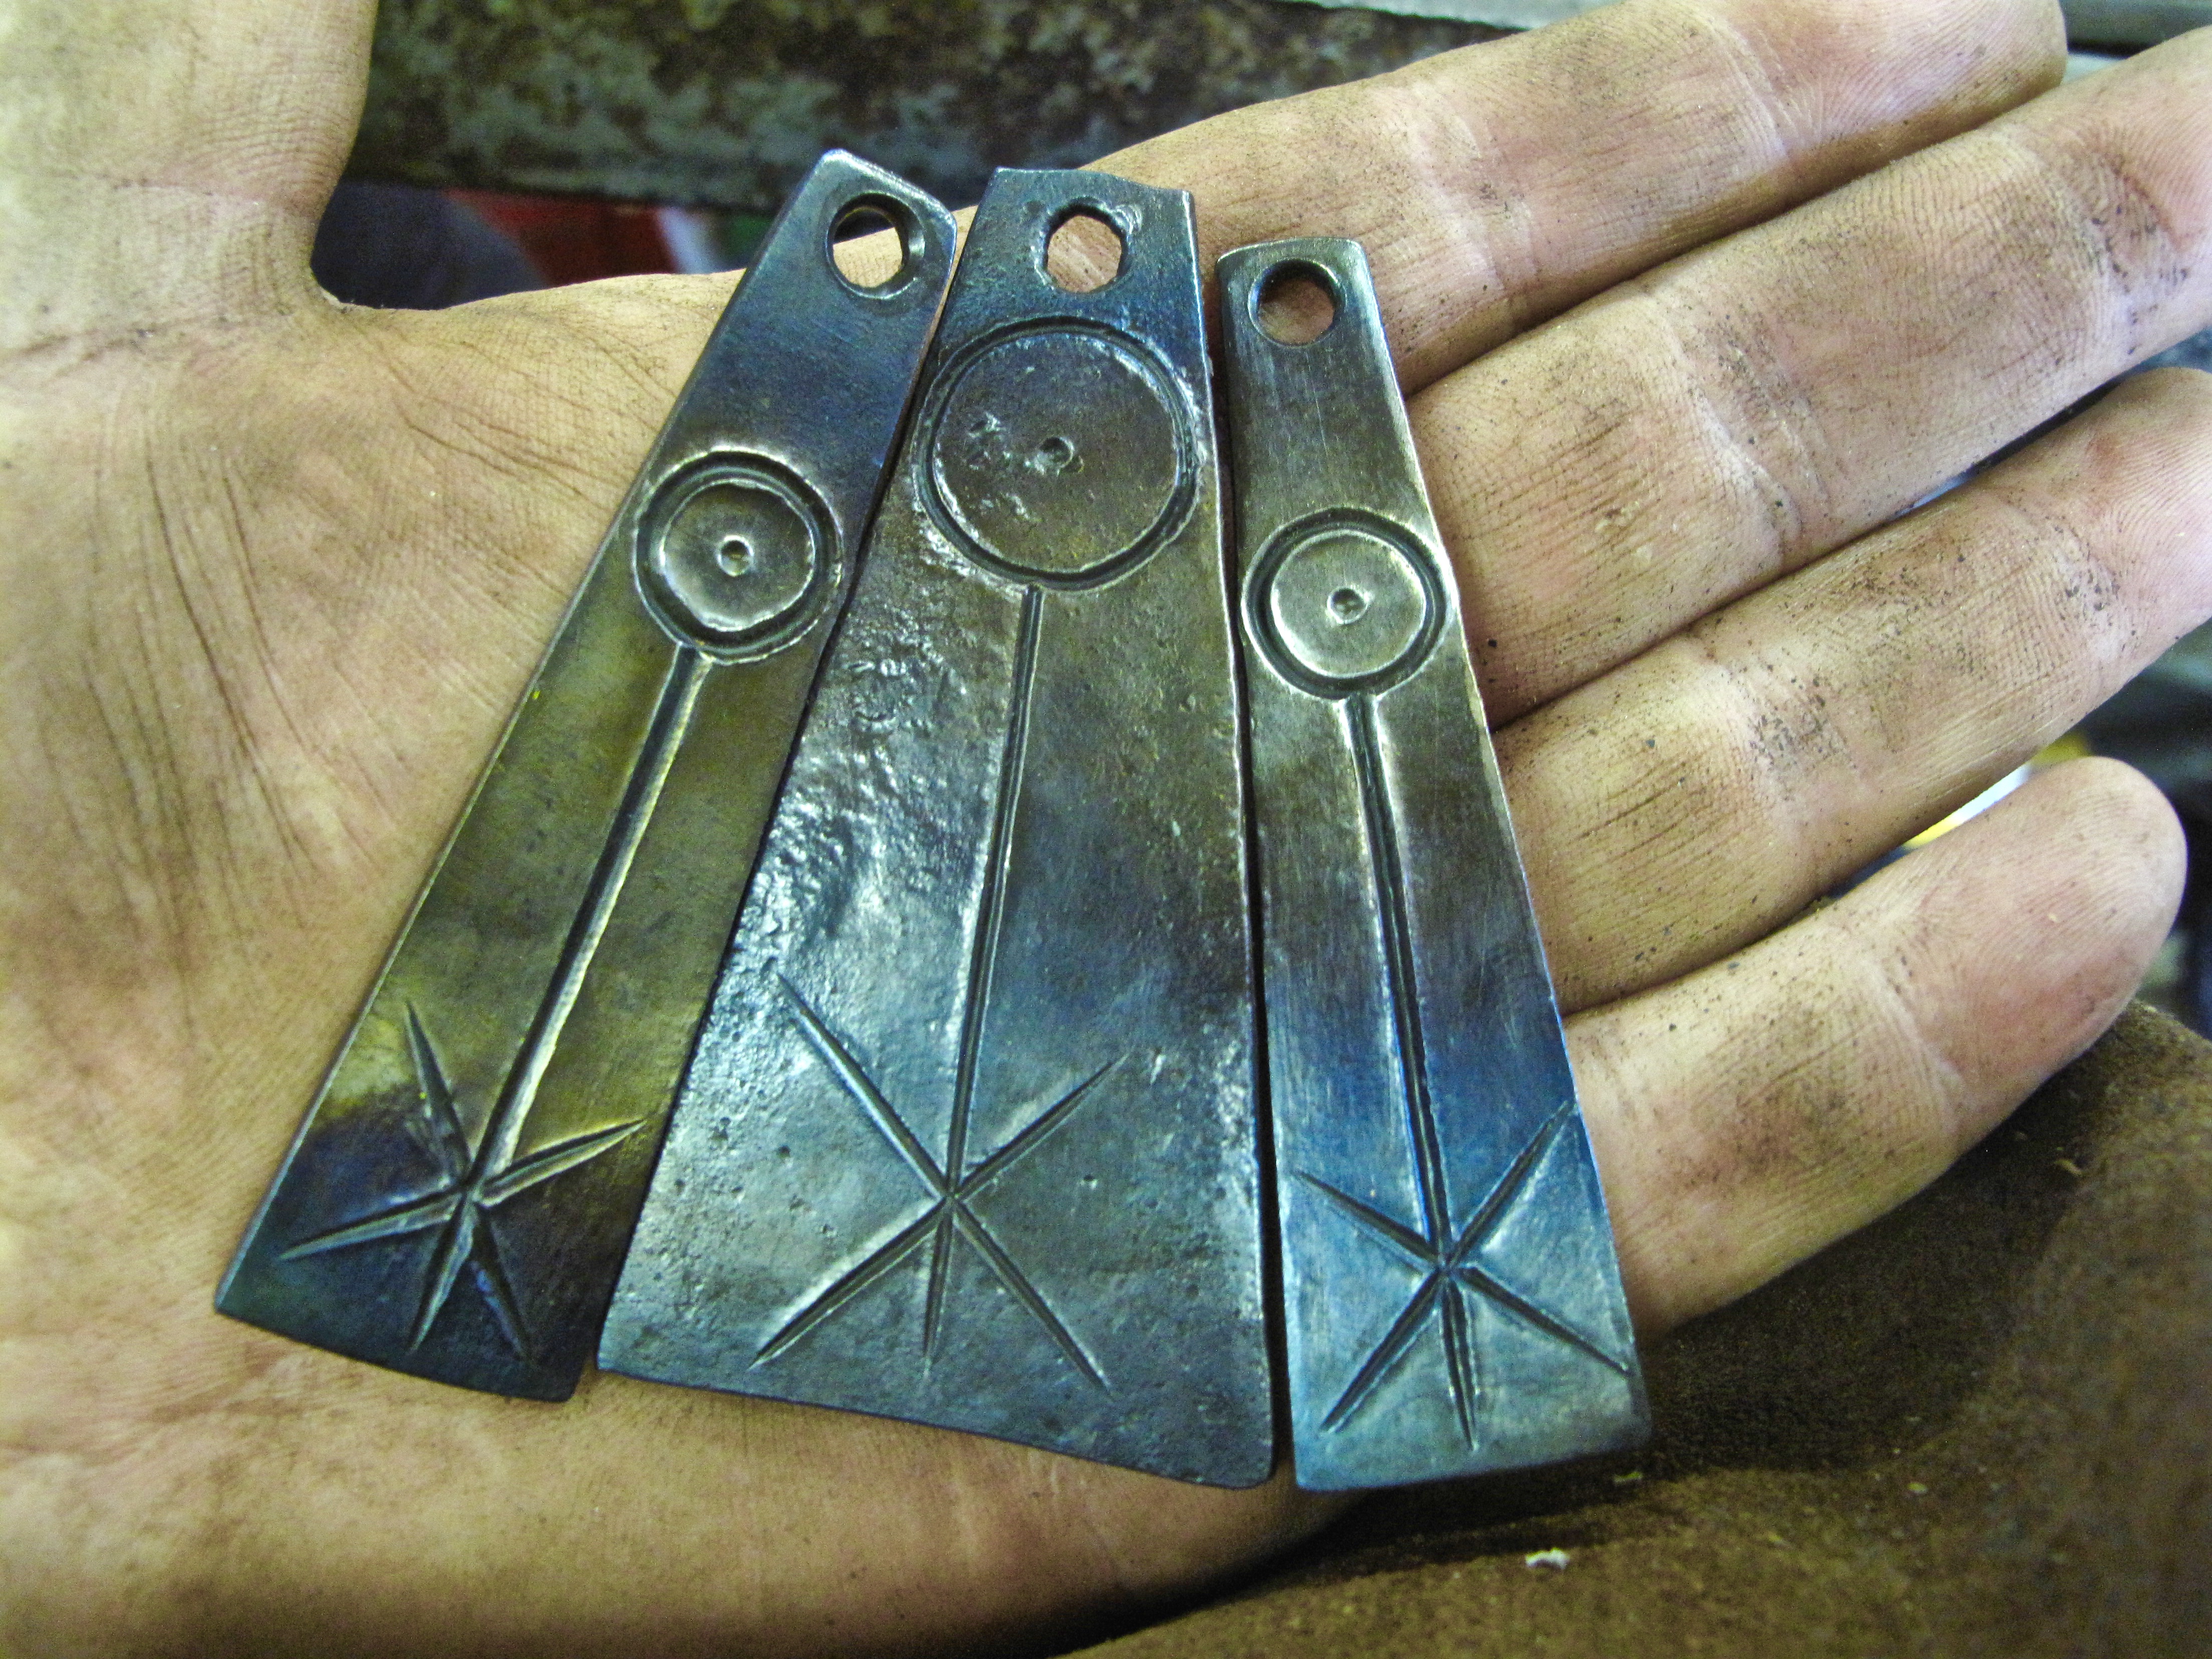
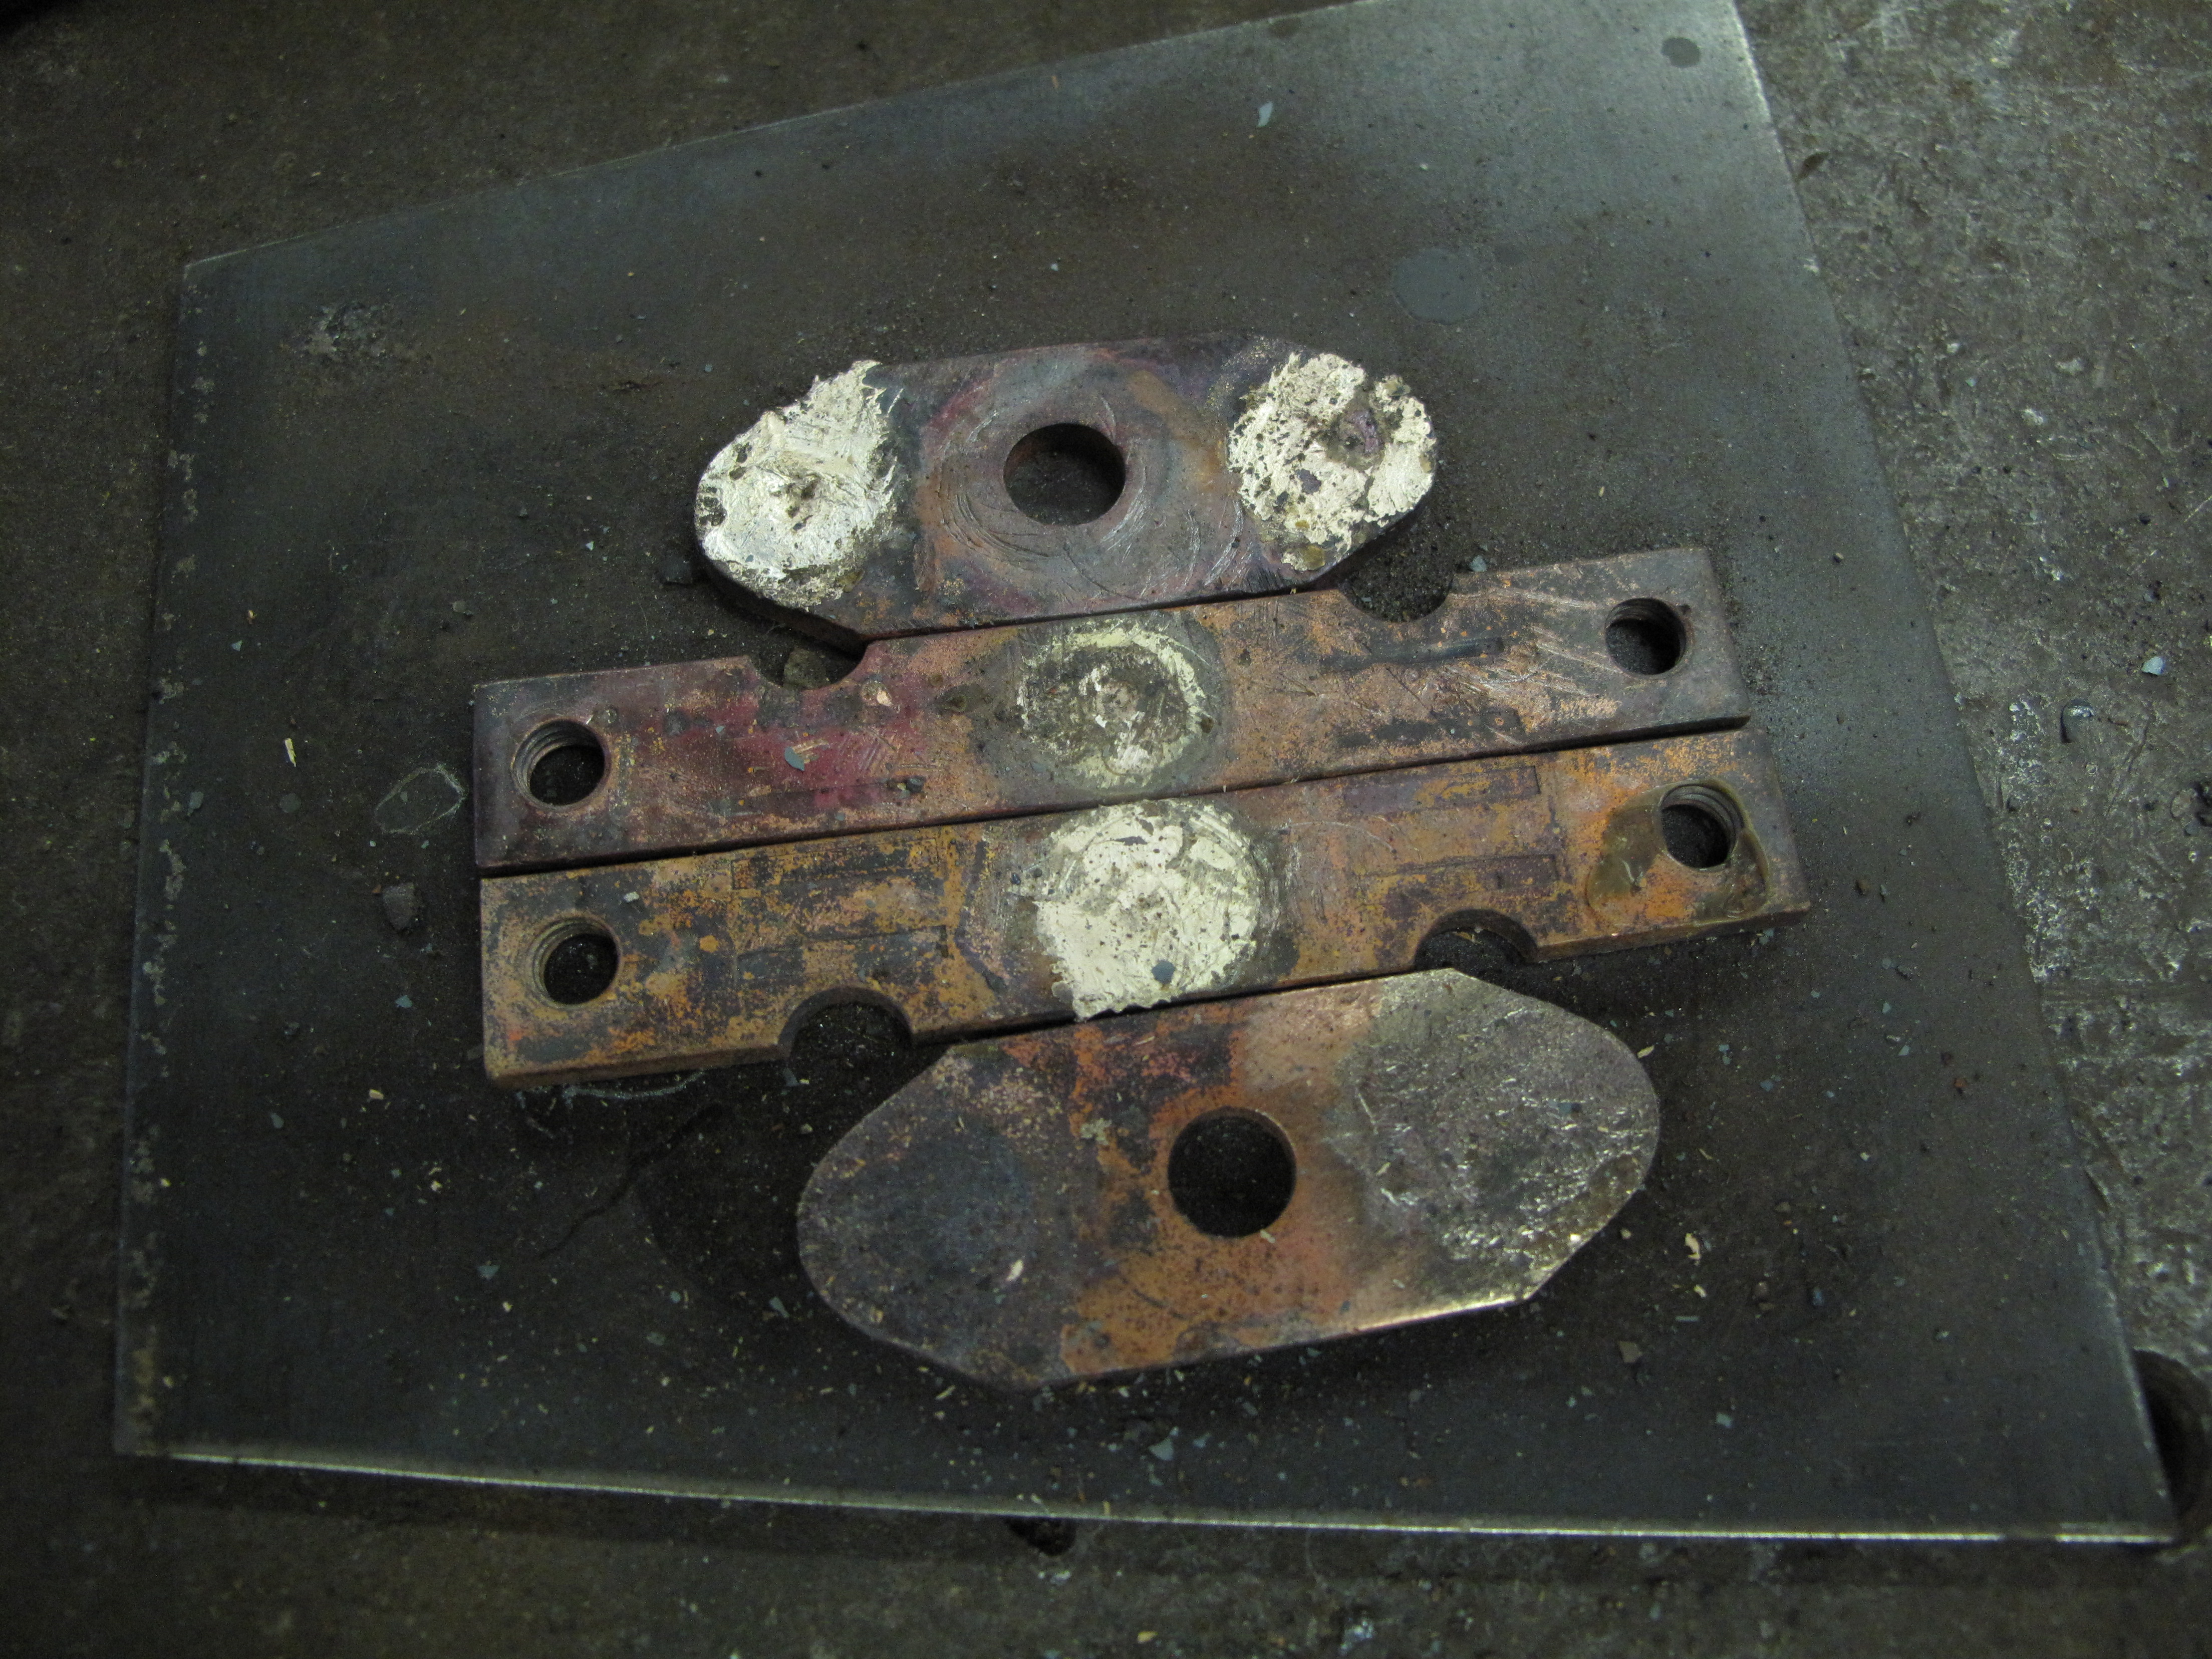
That's correct. If you hammer on top of even mild steel, the ridges will collapse. This doesn't look bad necessarily as it adds to the rustic hand-hewn look, but it does tend to conflict with the sharp image on the second side. All depends on what kind of look you're going for. The pitch might work for this application, but I really don't have any experience with it and wonder if it might be too soft and make carving the second image a bit more difficult. Copper gives a good bit of resistance while being soft enough for the ridges to sink into without deformation.
-
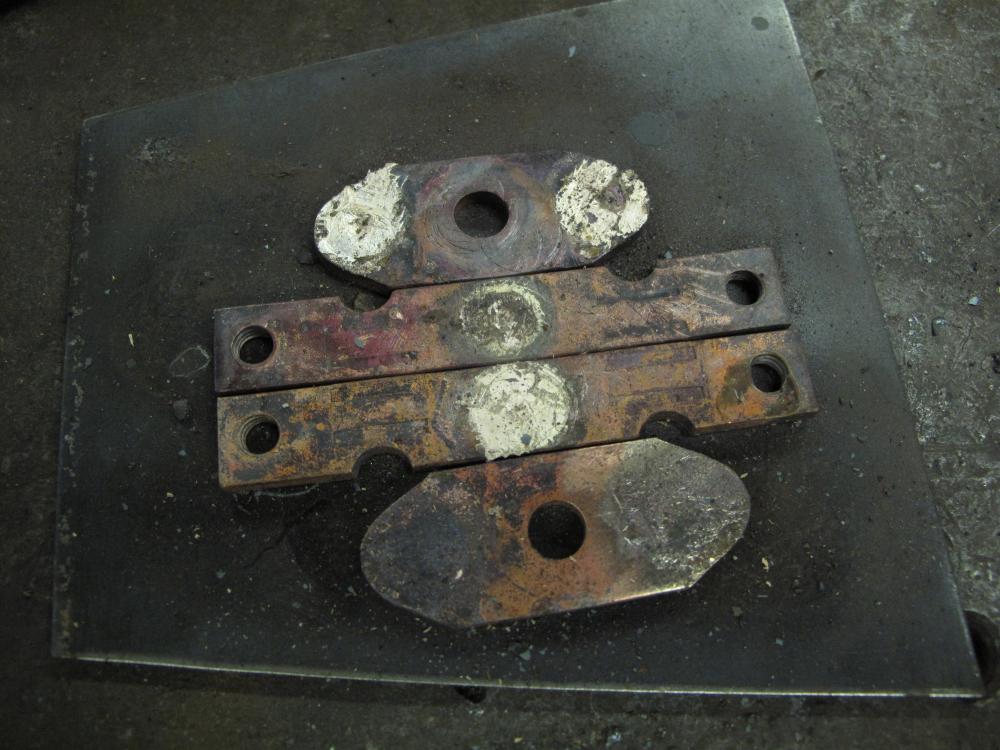
I had a customer request a double-sided pendant. I've done quite a few of them in the past, but always disapproved of how the ridges in the design would collapse when you carved the second face. A lot of people use pitch bowls, but I haven't invested in one yet. I keep saying I will, but never seen to have the funds available. So, I decided to make my own soft face using some old copper bus bars. It's a simple construction not meant to last long at all. I cleaned the surfaces with lacquer thinner and a wire brush to get a reasonable bond. Then a squirt of spray-on adhesive. Worked like a charm and the first design looks as fresh and crisp as it did when first carved. Proof, again, that being a pack rat can be advantageous!


-
Repetition is the key to mastering a fundamental movement. I'd start with a bar of 1/2" square stock and draw the end to a nice taper about 4" long. Cut that taper off, throw it in a bucket, and start on a new taper. By the time you have the bucket full of tapers, you should be pretty good at making a taper. And when you look at them, you should see a marked improvement between the first and last. Then take those tapers and put a flat on the big end. Make it as nice as you can, rounded evenly. Go through each taper, cleaning them up if necessary, and putting the set down and flat bean end on them. Again, by the time you get through the bucketful, you should see a tremendous change in your ability. Then it's a matter of putting a hole in the bean end for a screw, scrolling the finial and curling the body to make a wall hook. Do you need a bucketful of wall hooks? Well, yea, but that's not the point. Doing a repetitive exercise, always focusing on making every hammer blow count, drives the lesson home. If you jump from project to project, always biting off more than you can chew, you don't learn. You get frustrated and angry because you're not seeing results you think you should be getting. Get a good set of tongs that will hold the stock securely, and set up a with a 20' stick of 1/2" square bar. By the time you finish, doing each step in a mass-production style of work, you'll have a bunch of nice wall hooks that you can sell or give away as presents. Then you start on something else like making s-hooks that you can scale up and down, changing the size a little, to combine into some really nice art pieces for around the house.
-
That's some gorgeous work, Aus. Wrought or not, you've really nailed the design. The ram heads are spectacular.
-
Steel away, my friend! I started with about 6" of shaft and drew it out to a smooth taper about 9" long. By the time I curled it around, I wound right back up at 6" OAL. I thought about trying it on one of those Dog Head spikes you sent me, but I'm saving those for a special occasion.
-
Found a few old, heavily pitted railroad spikes in the pile of bits and bobs. While I don't much like working with the things, I have to admit that it was refreshing to do something simple. I didn't do too much hammering up around the head so you get to see a nice transition from the heavy pitting to the smooth taper. OAL is just over 6".

-
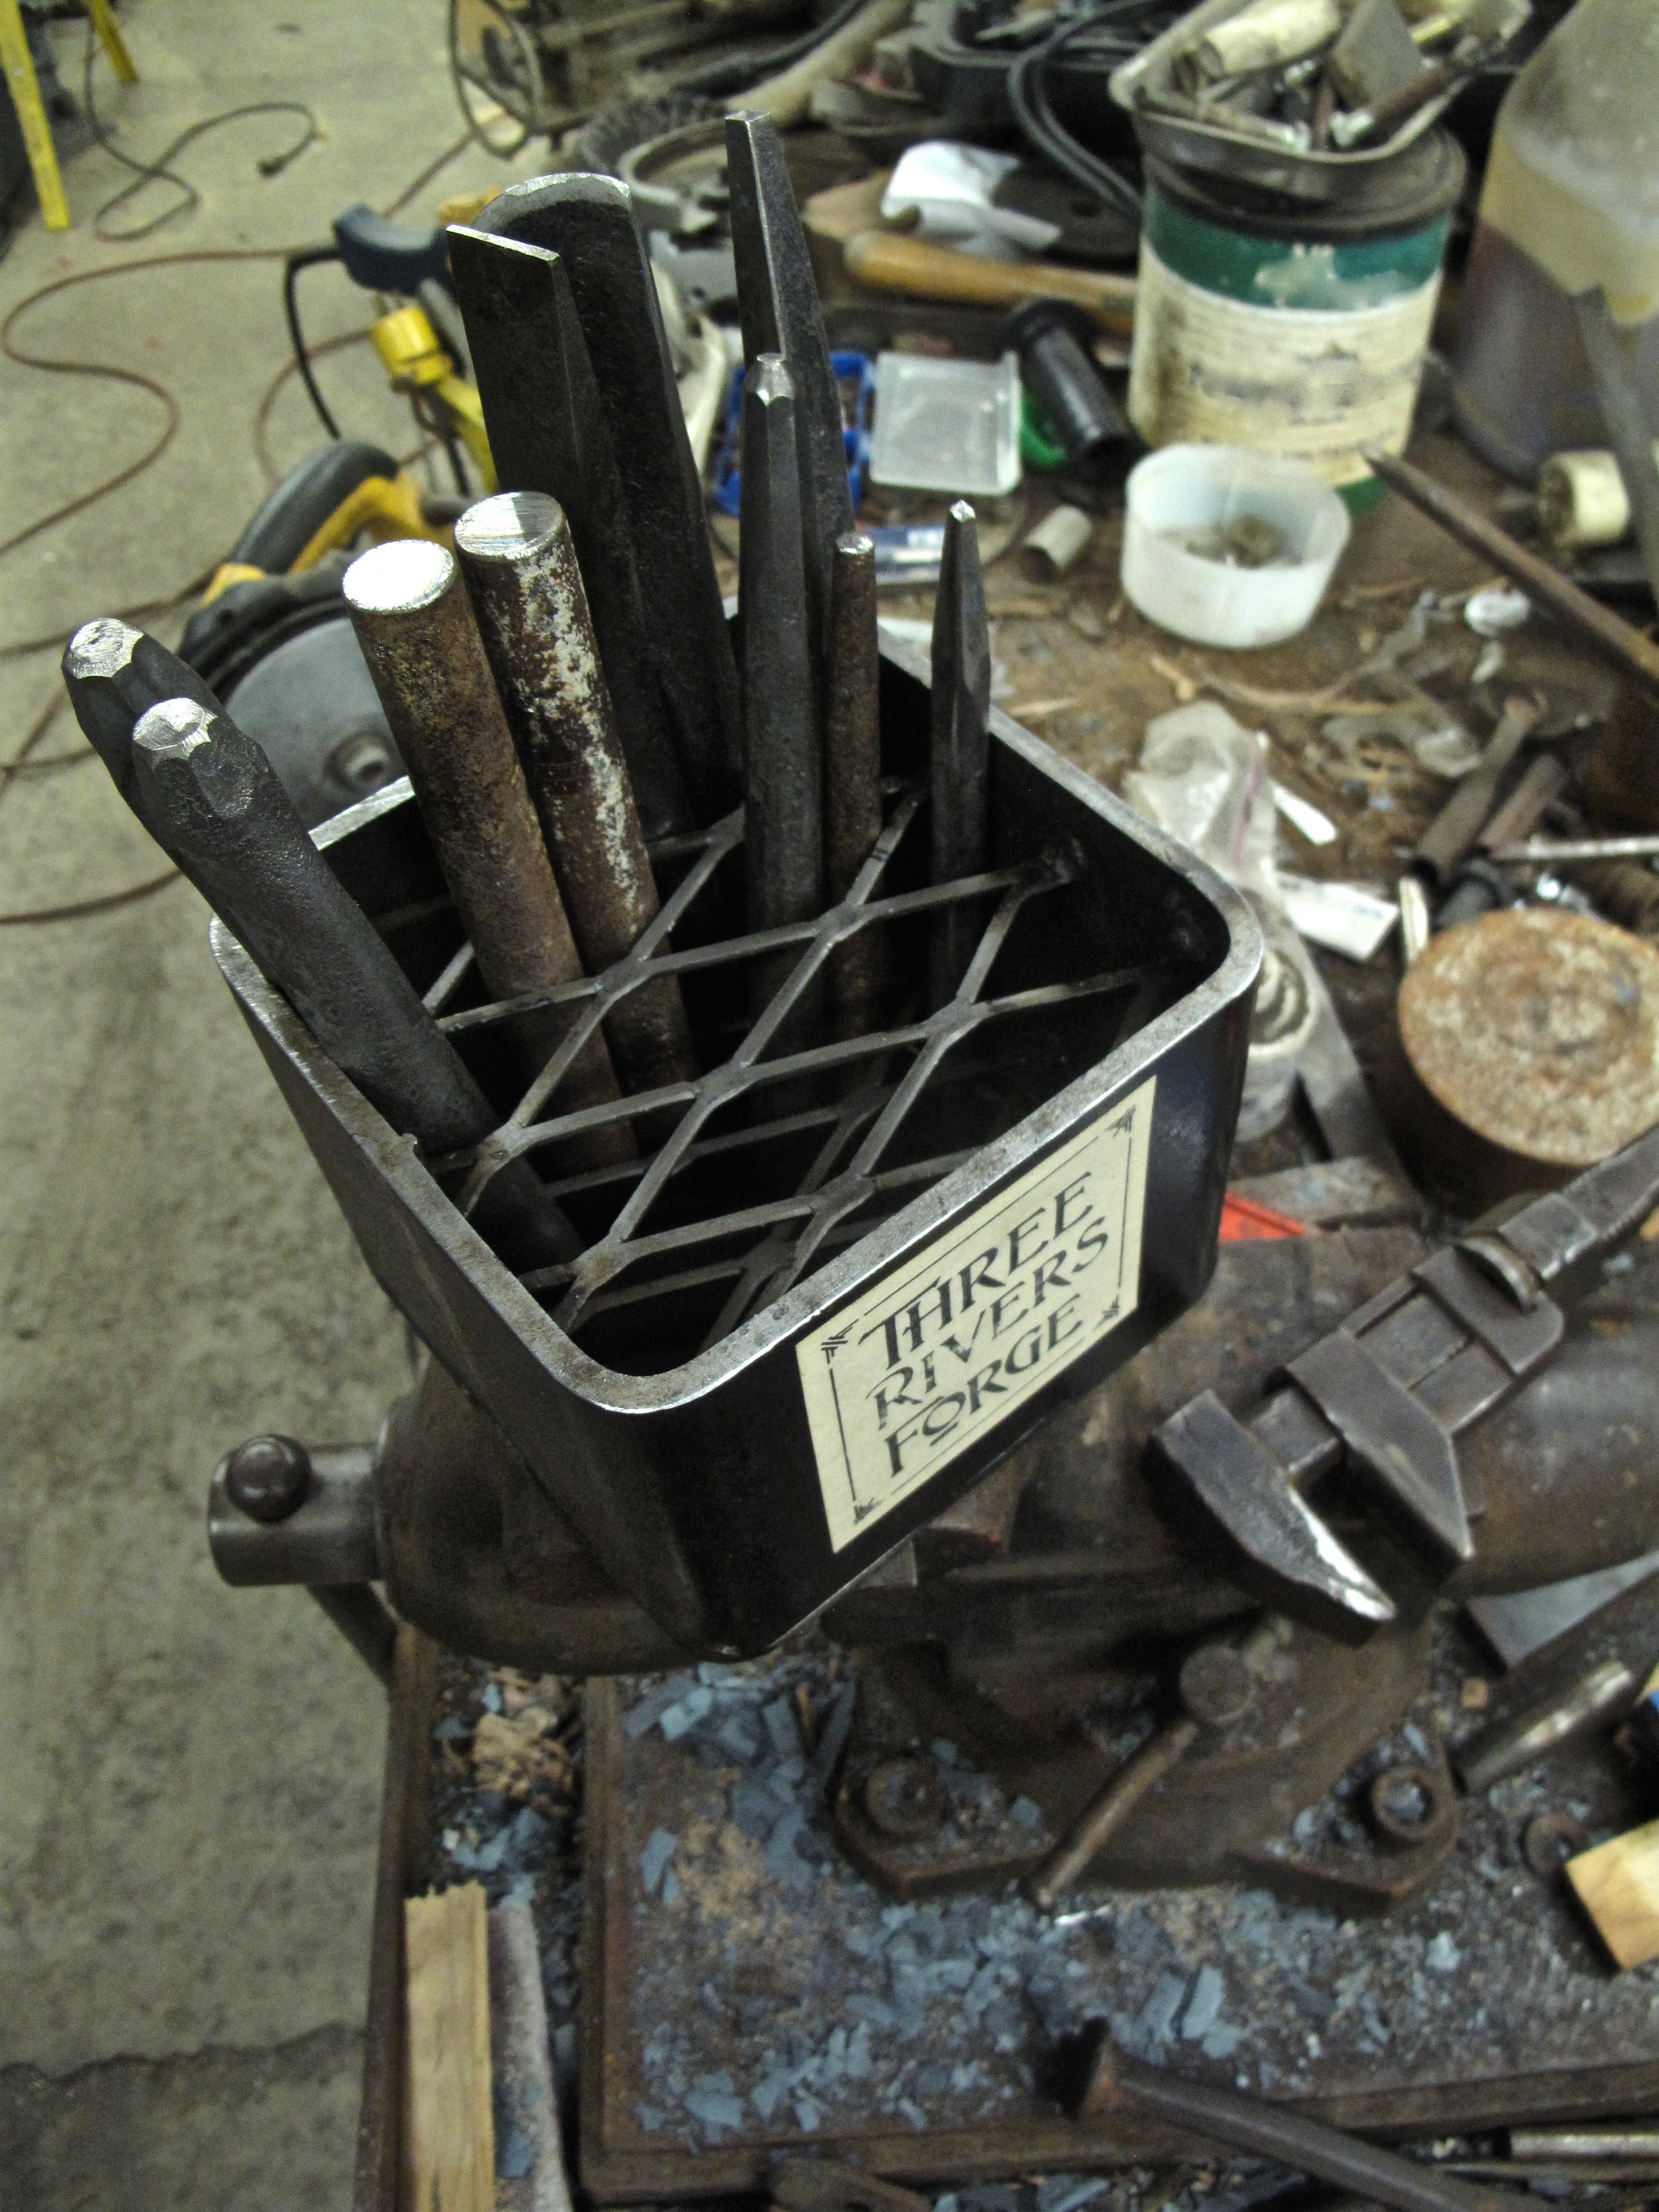
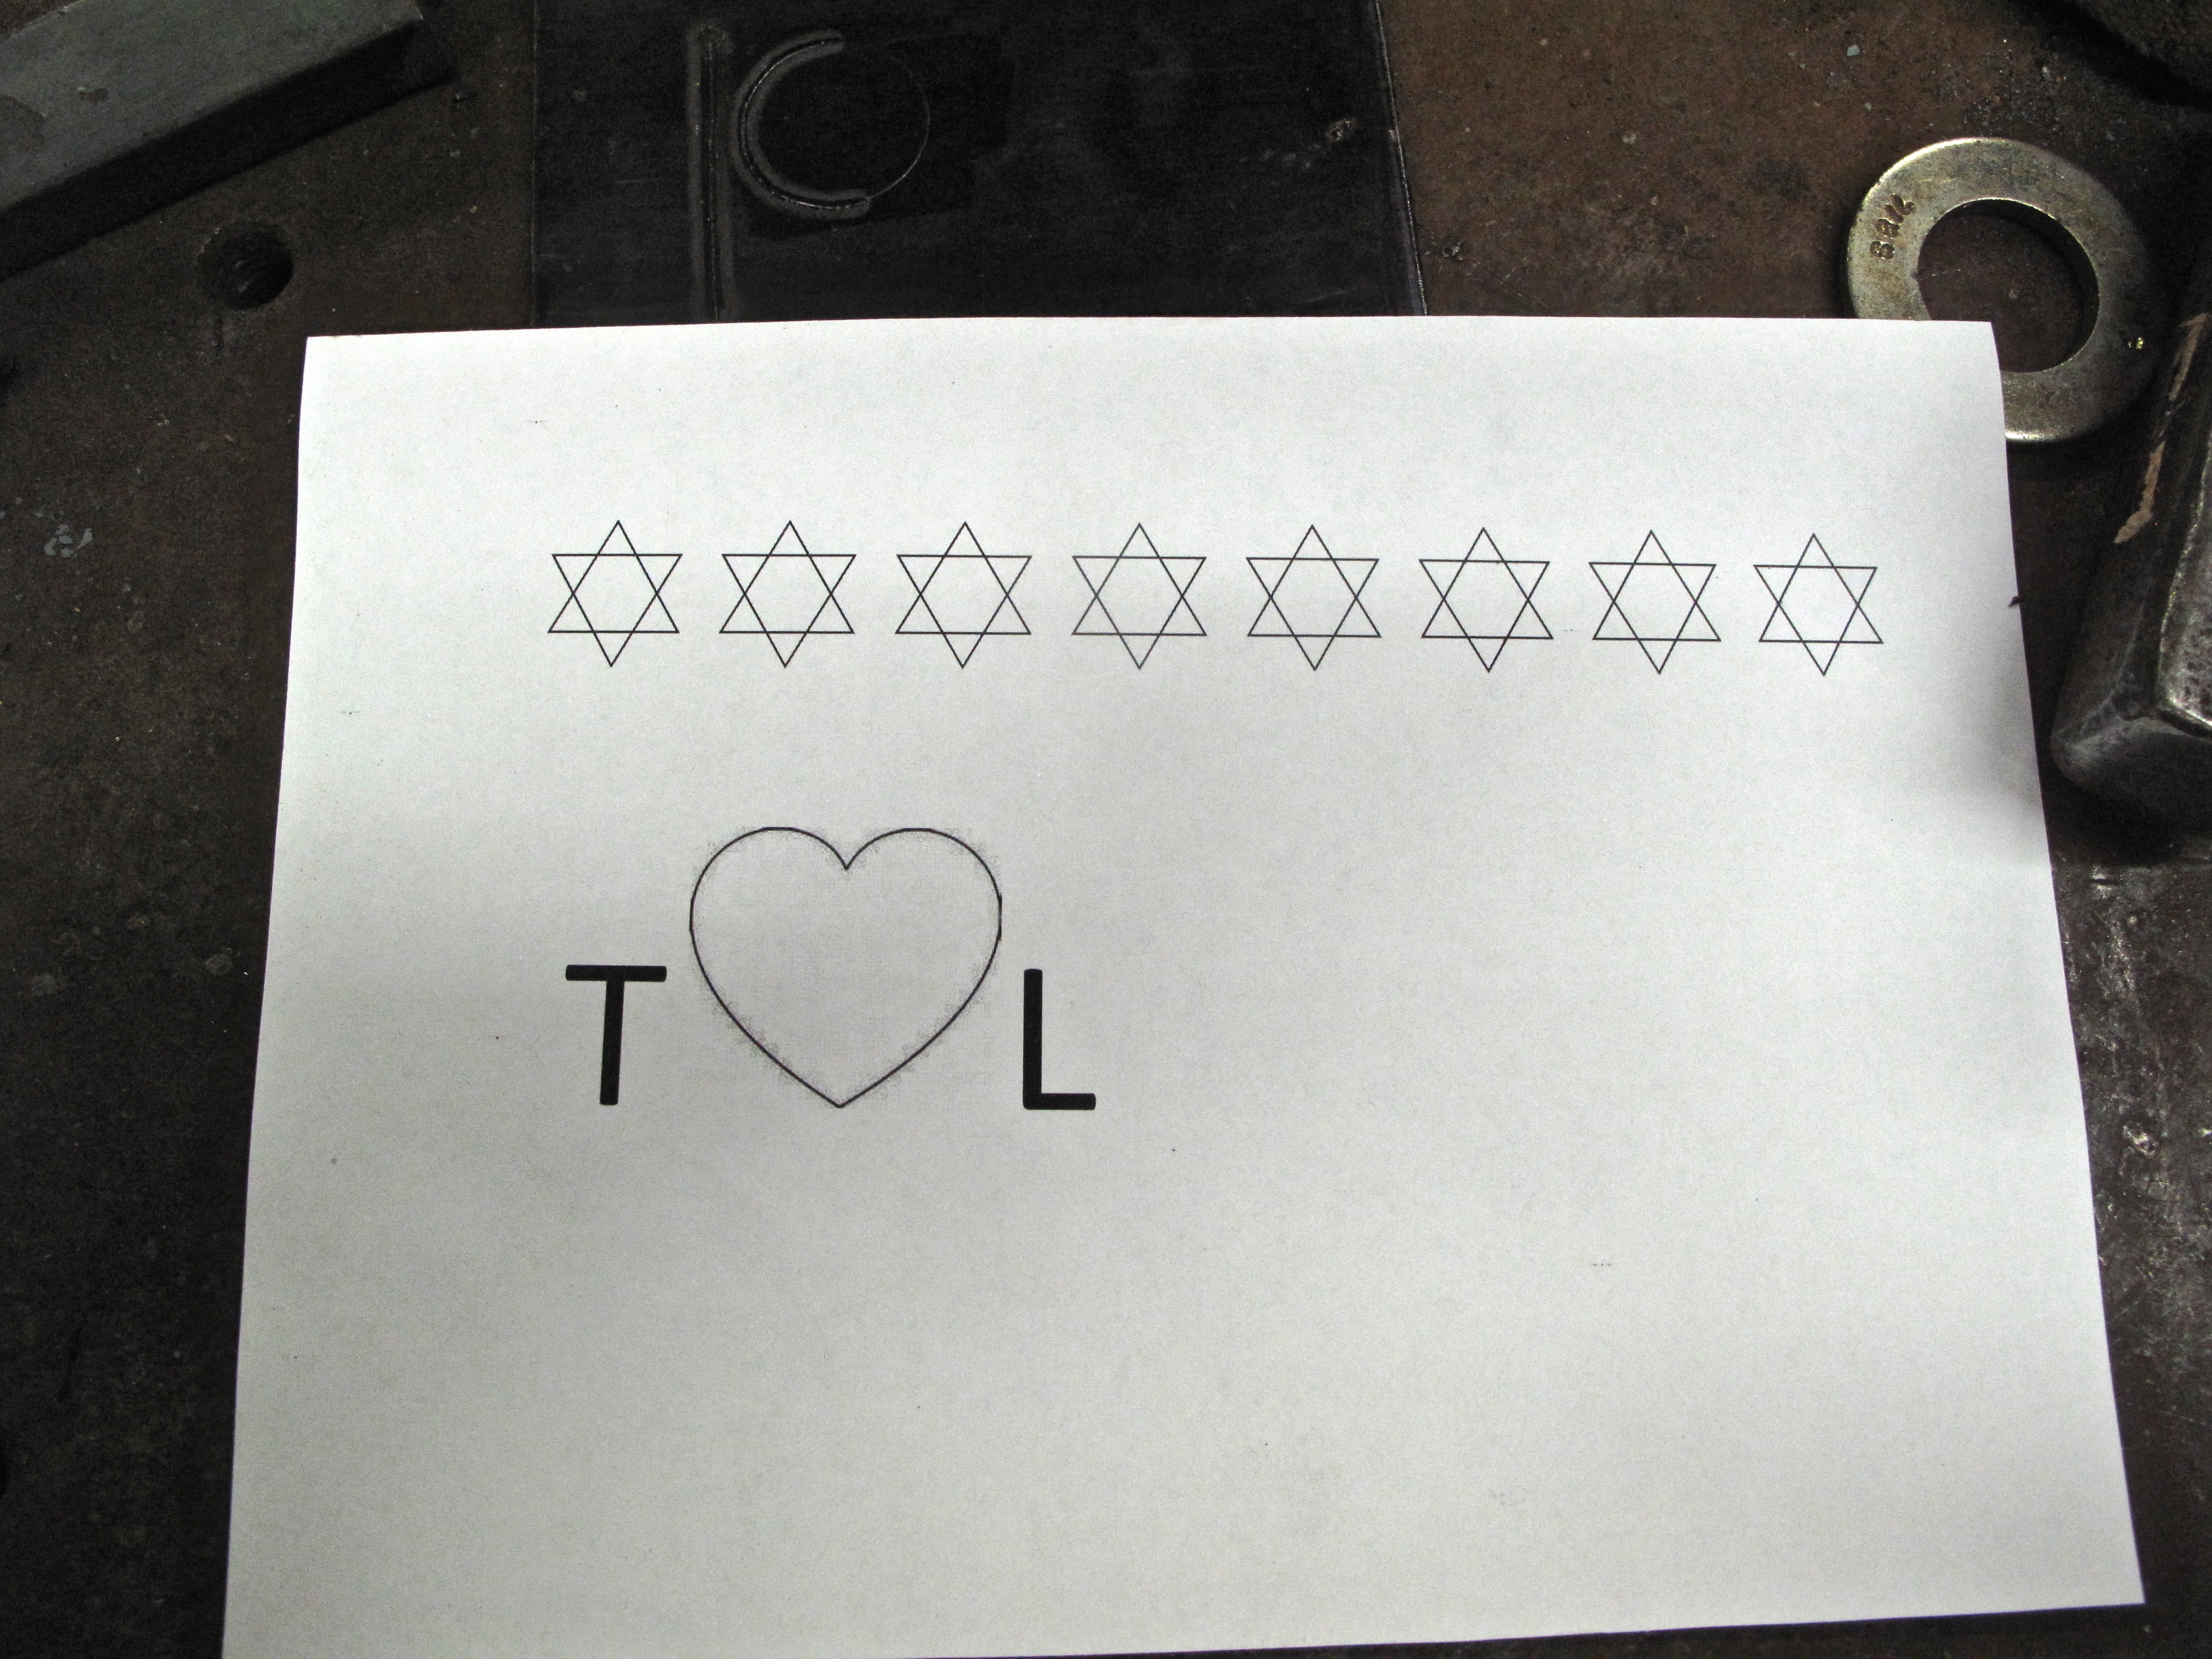
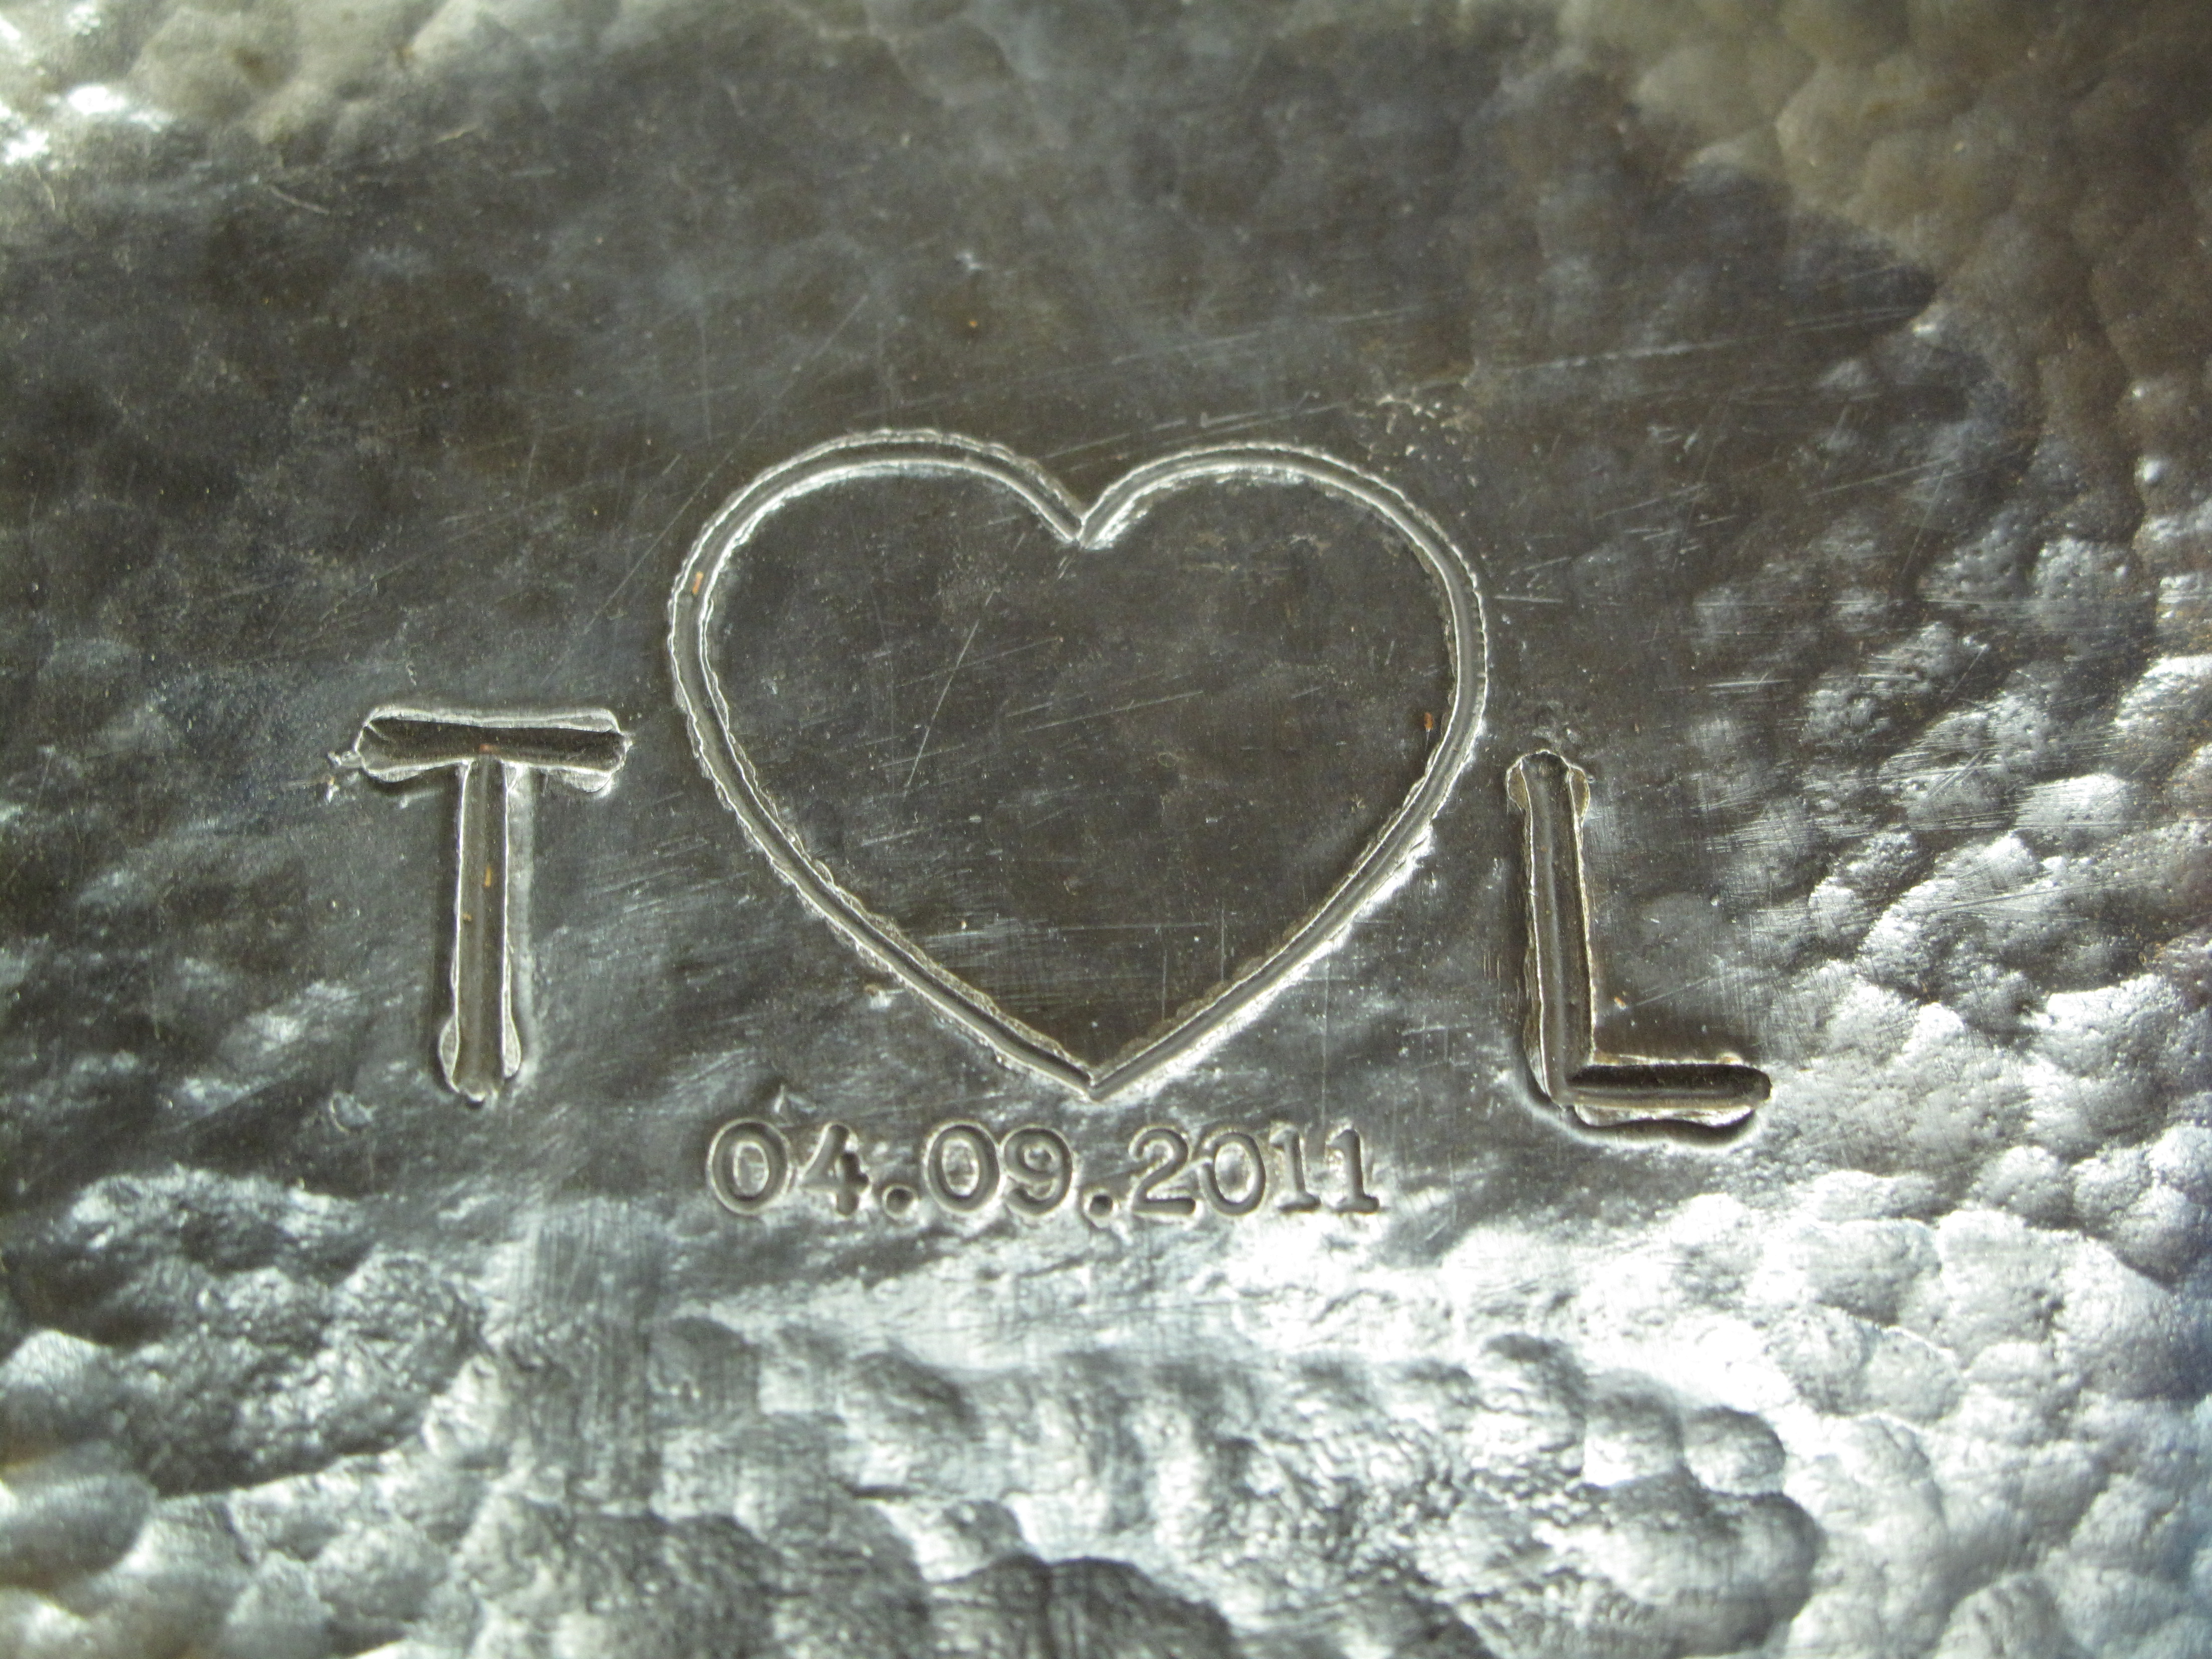
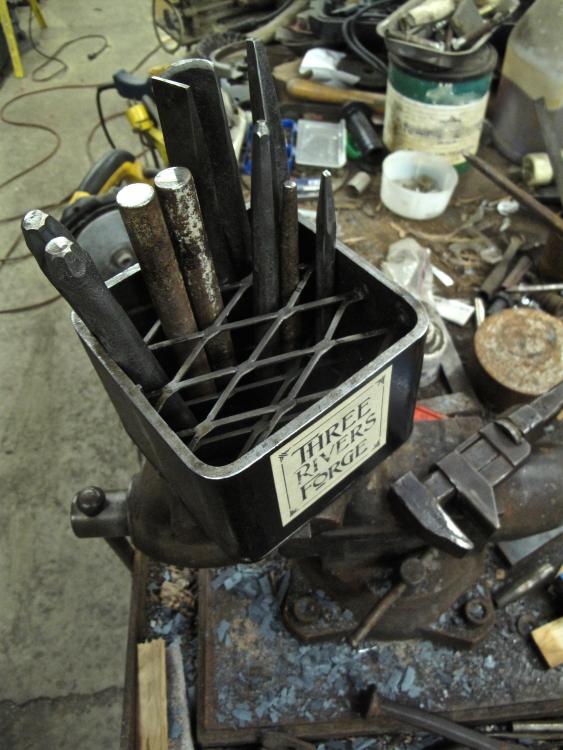
I thought I posted a pic of the finished chisel/punch holder. Maybe I put it in a different thread. Maybe I just forgot. Anyhow, it's done and it works great. My packrat-itis finally paid off and I was able to make the bottom of the organizer with projects I had scrapped, but saved "just in case"! I saved the main piece as well as the parts cut free, so it was just a matter of tacking them back together and, boom, instant bottom with convenient gaps for dirt to fall through! I almost screwed up and put the bottom on before welding in the expanded metal. That would have been embarrassing, but I caught myself at the last minute. With two layers of the EM, the tools stand tall and proud, with plenty of room for 3/4" bars side-by-side. I made the "sticker" by stamping a design on some paper and then gluing it to the body. A top coat of polyurethane should keep it looking decent for awhile! In the future, I'll probably put some kind of bail or handle on it. That'll wait until the Muse strikes and I have a bit of creative inspiration. Overall, very happy with how it turned out. It took an hour to make and will certainly outlast me. I like to imagine someone buying it at a flea market or yard sale in a few years, wondering who made it and what it was used for!

-
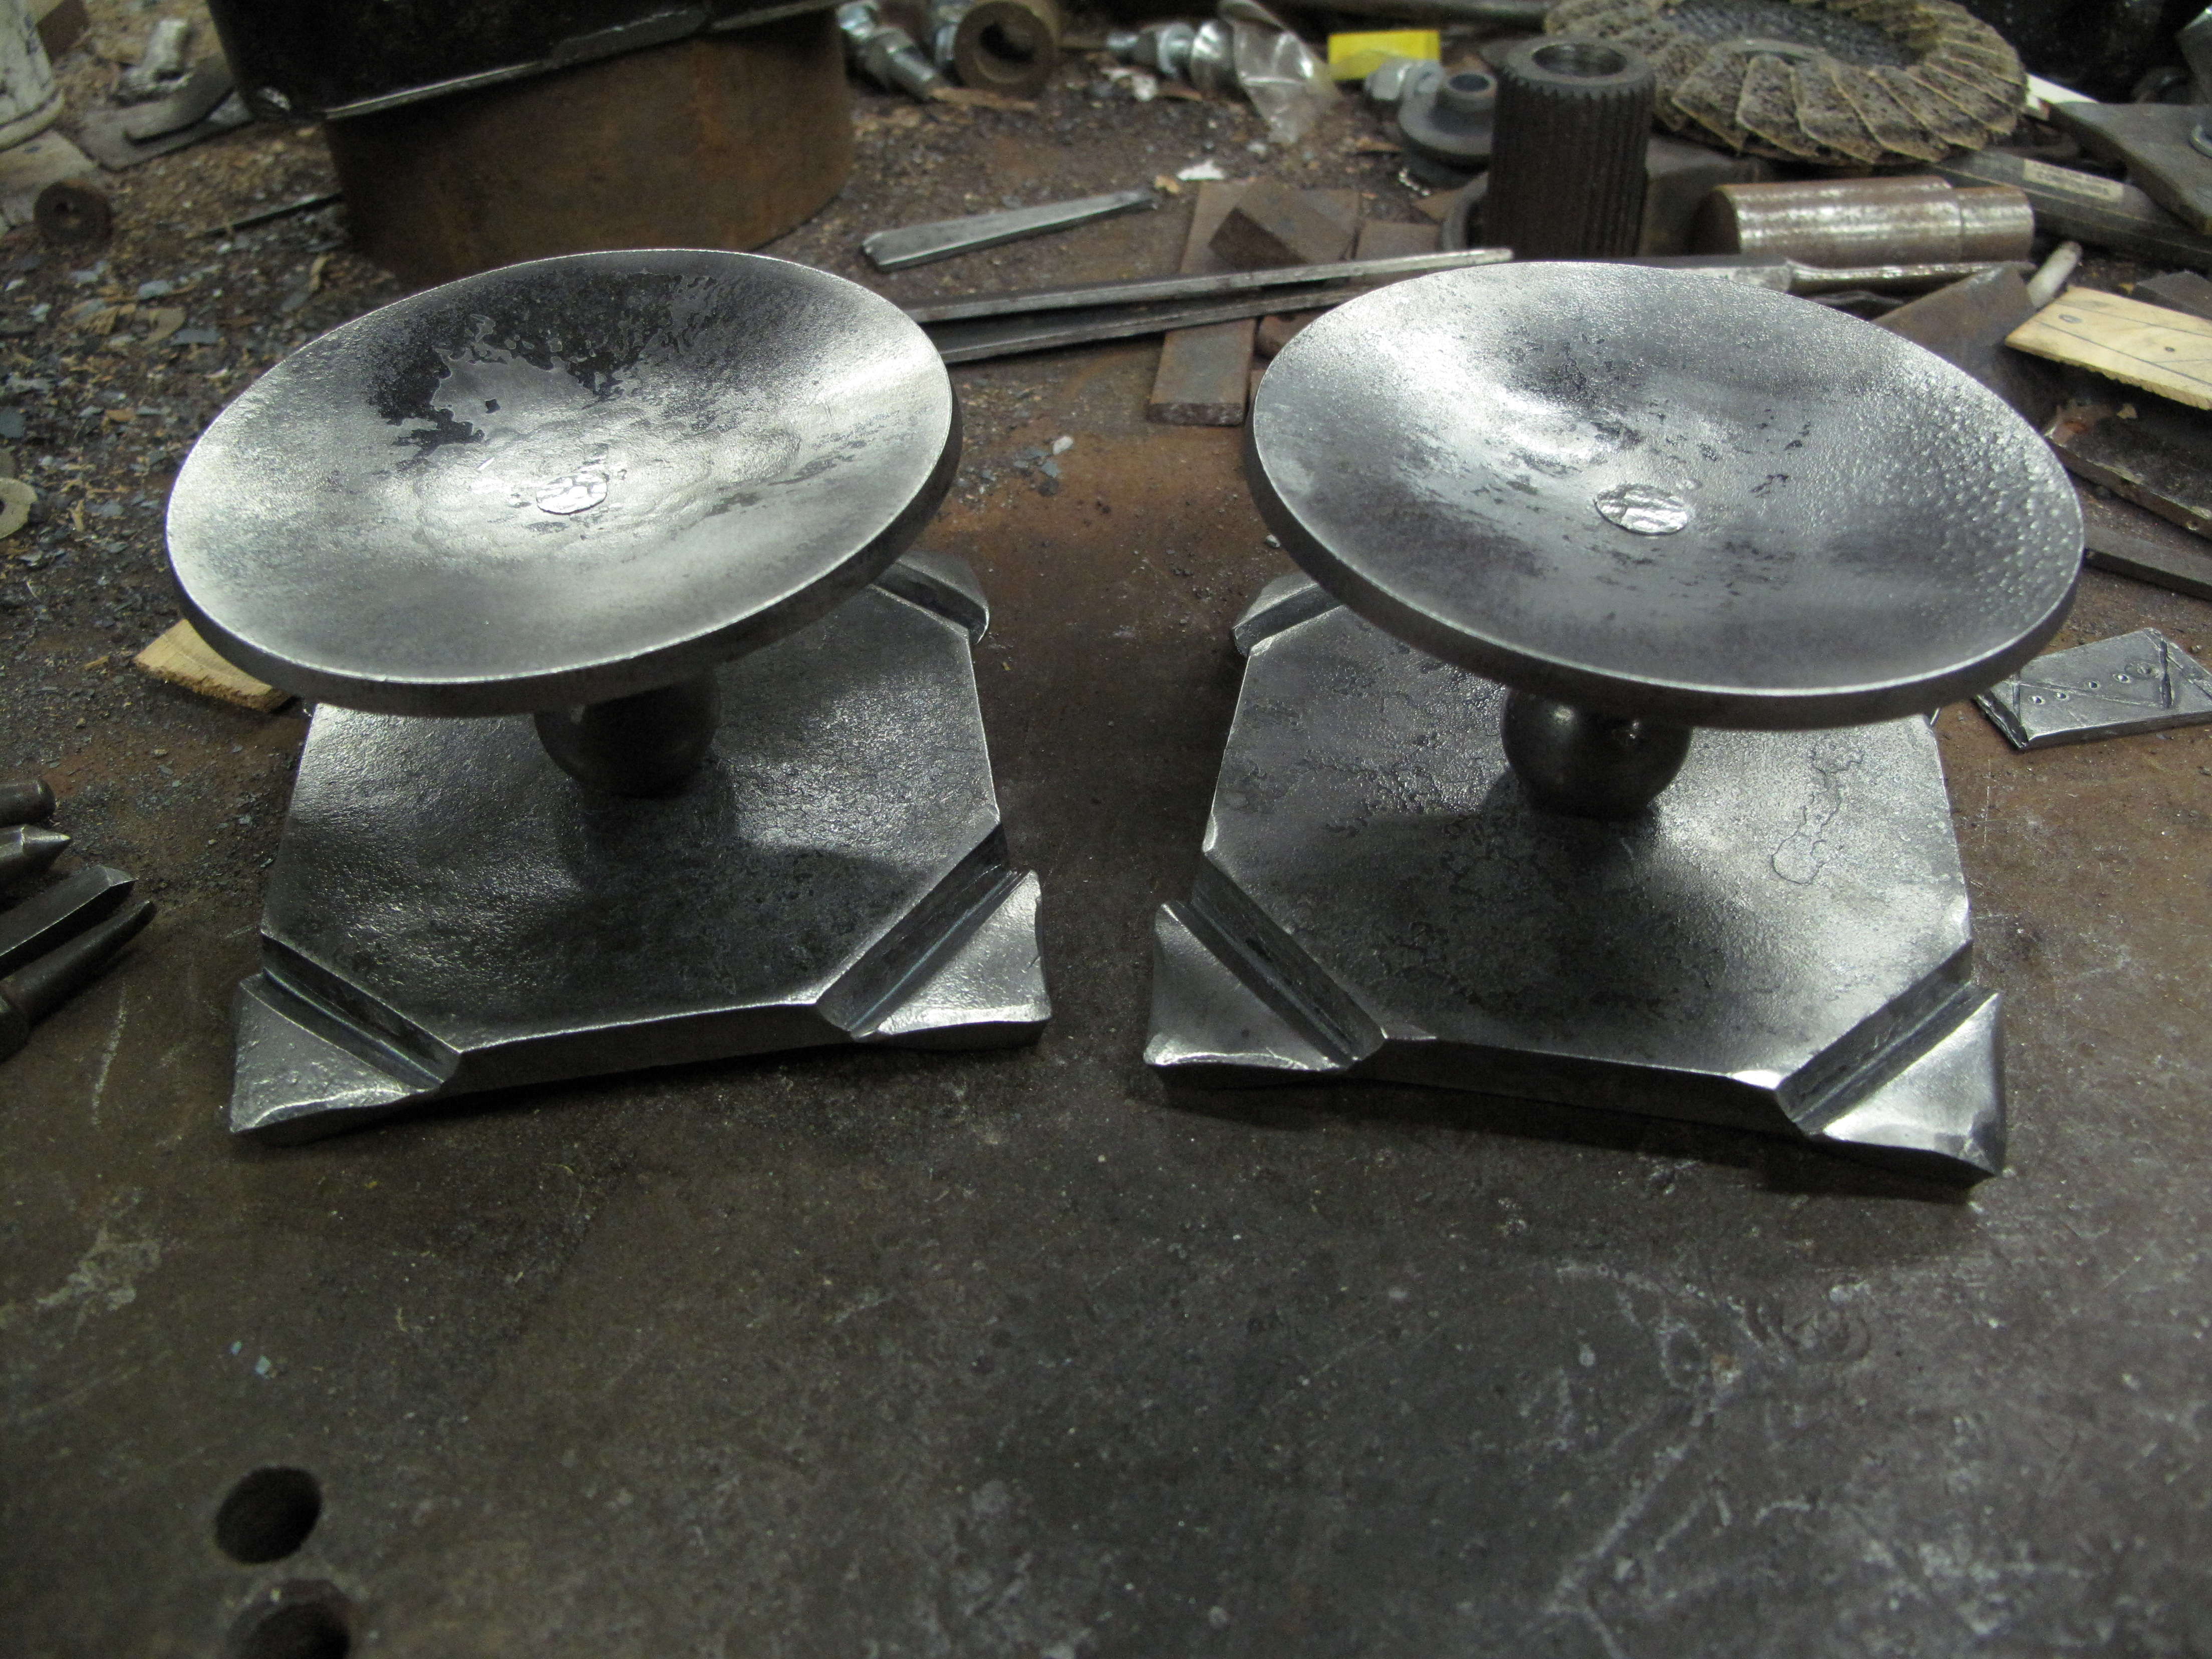
Got my chisel holder finished and two candle holders put together.


-
I don't think that'd work unless you have really nice smooth metal. With textured metal, you'd only get the high points ironed on. I simply print out the design, use spray glue to hold it on..... and then chisel right through it.
-
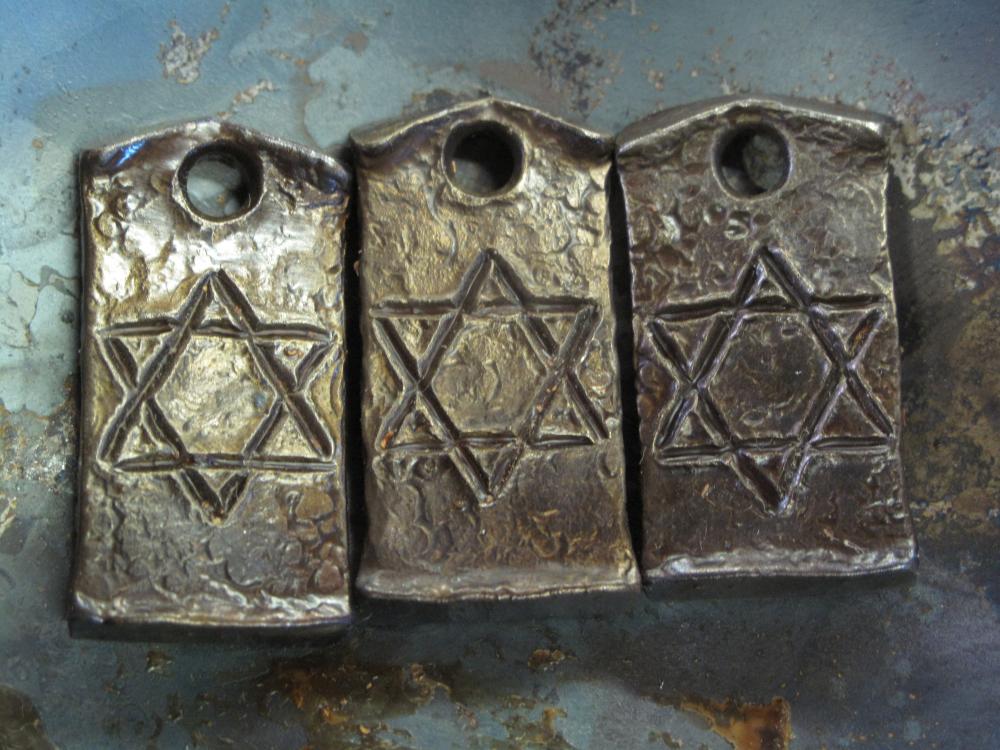
That's exactly what I do. You can free-hand a lot of things because you're not trying to be perfect with the stuff - this doesn't look like fine English engraving on a fancy double rifle, after all. When you need something lined up right, especially if you're making several of them, printing it out on paper and then gluing that to the metal is a great option. You'll still get little variations because it's hand-worked, but the overall results will be more uniform and professional in appearance.

-
Thank you. I'm glad you're finding value in it and look forward to seeing examples of designs you try.
-
That really is some beautiful work!
-
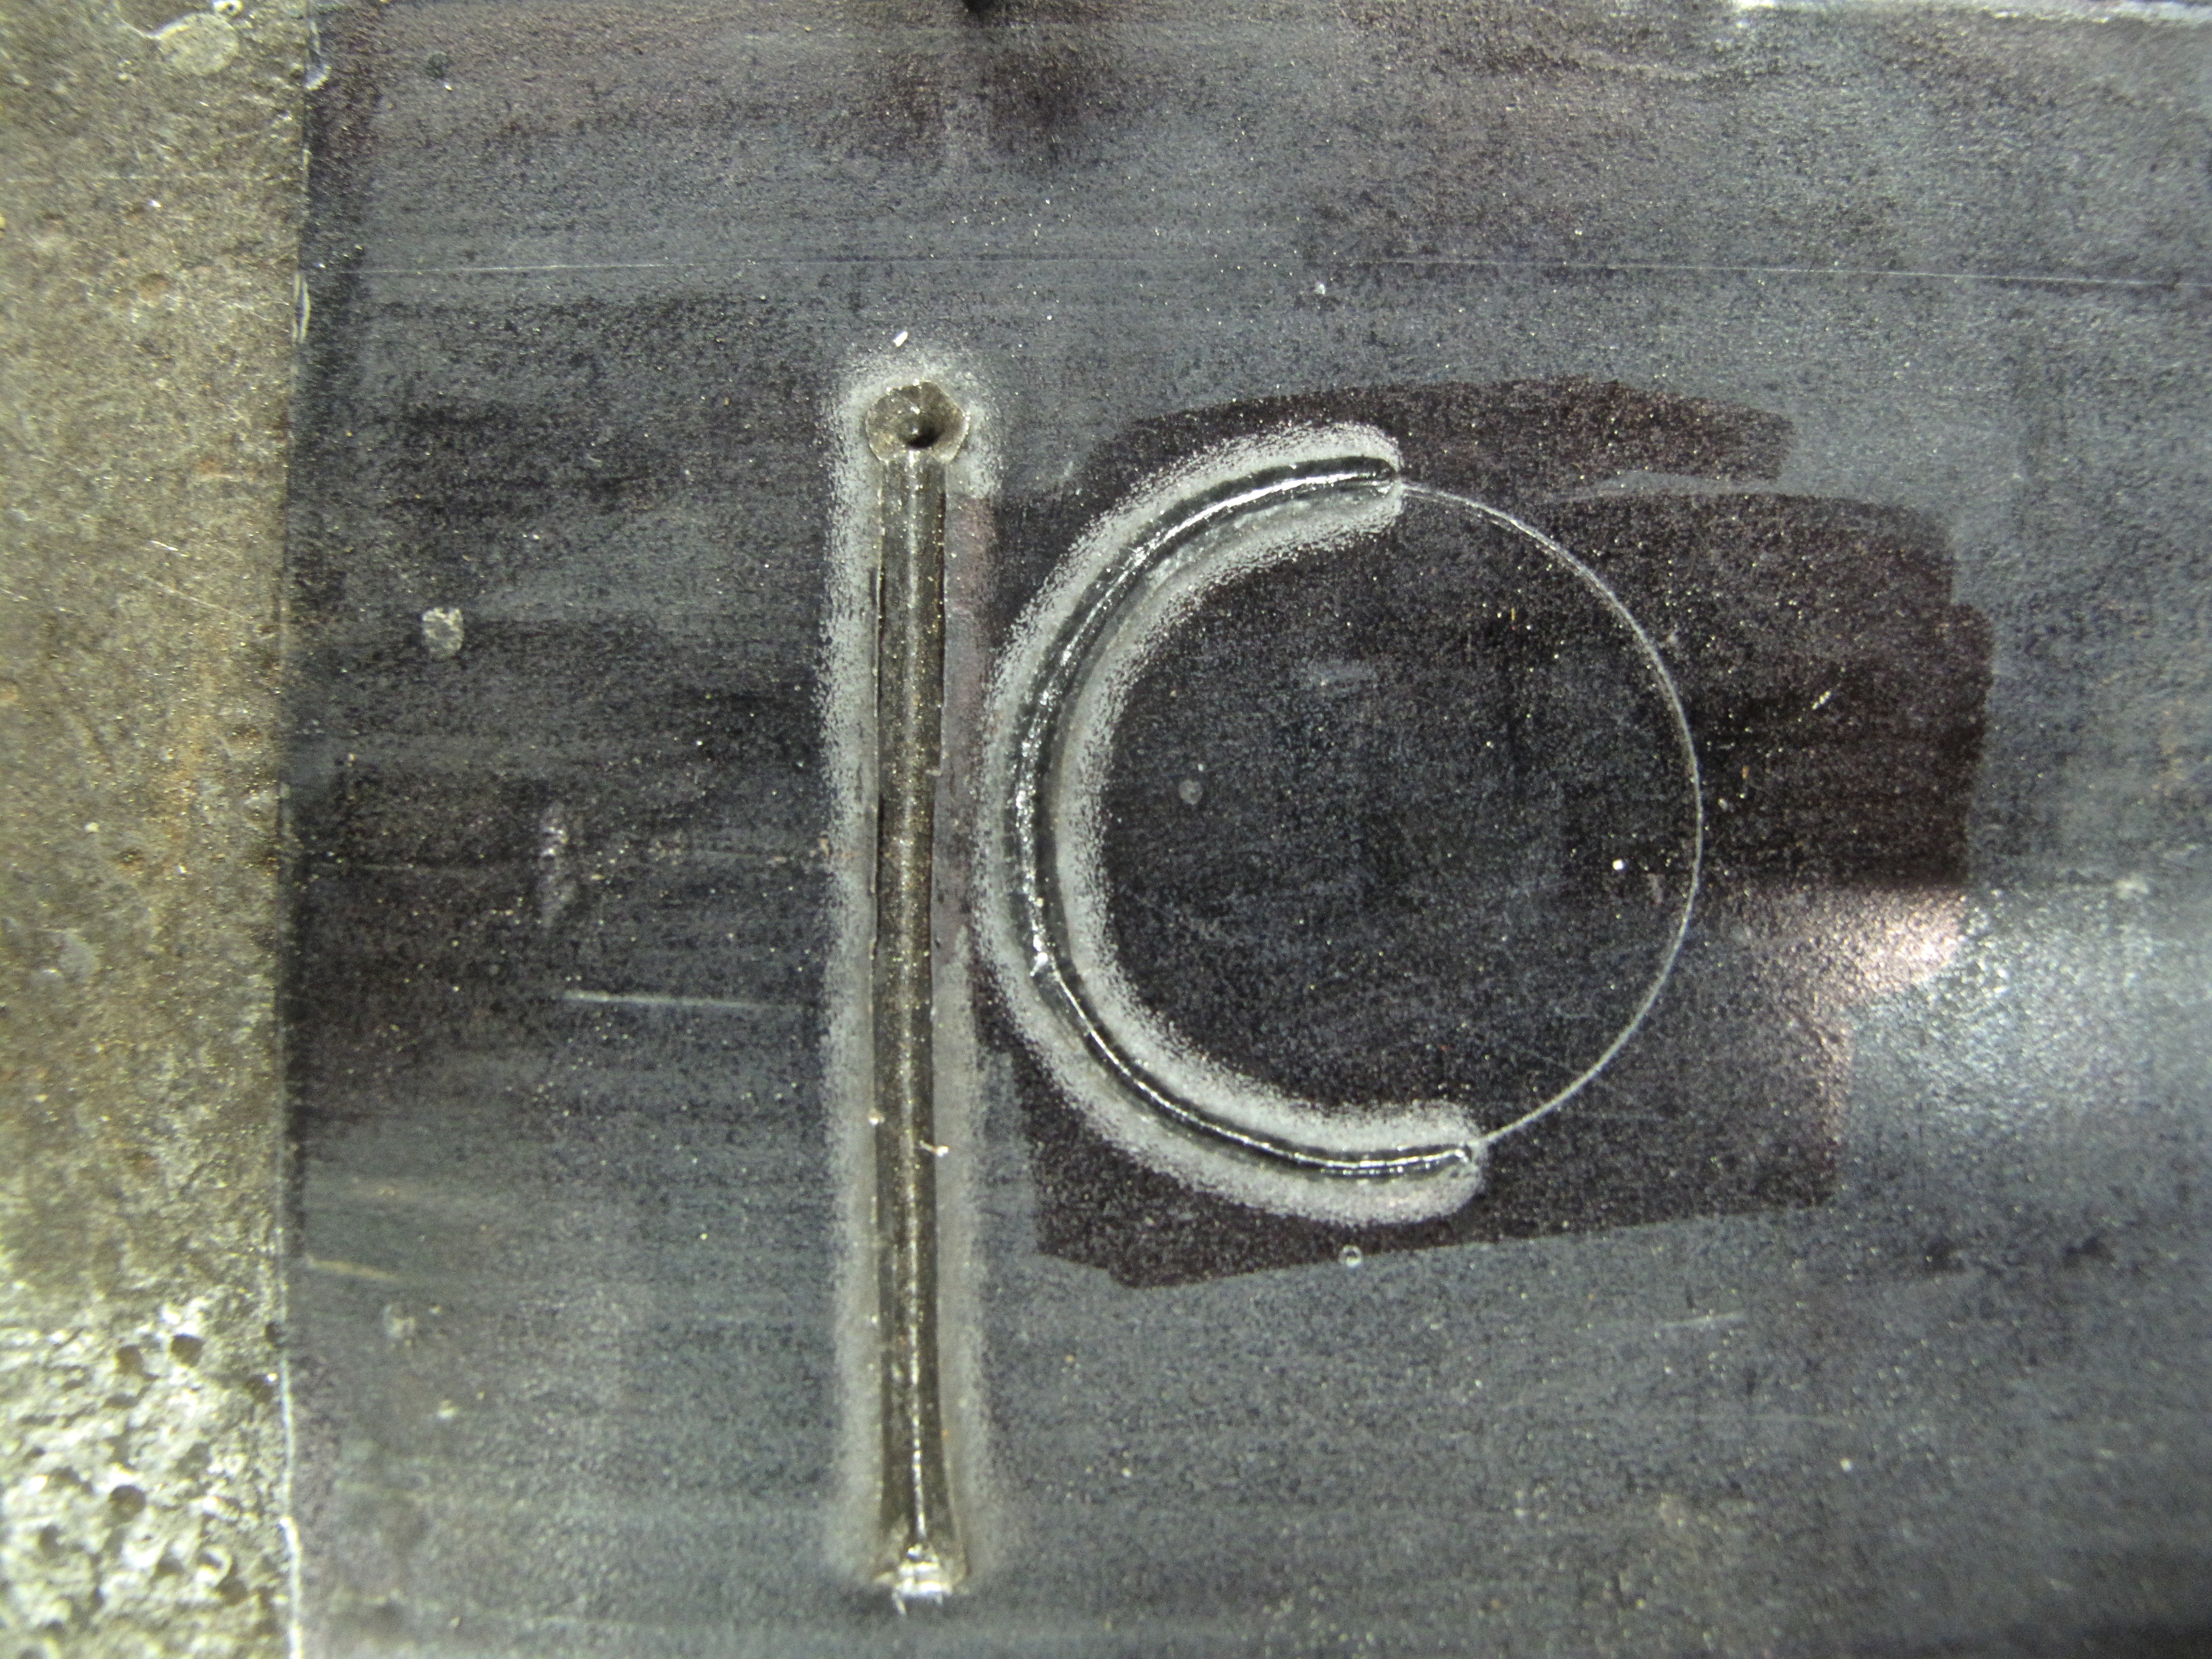
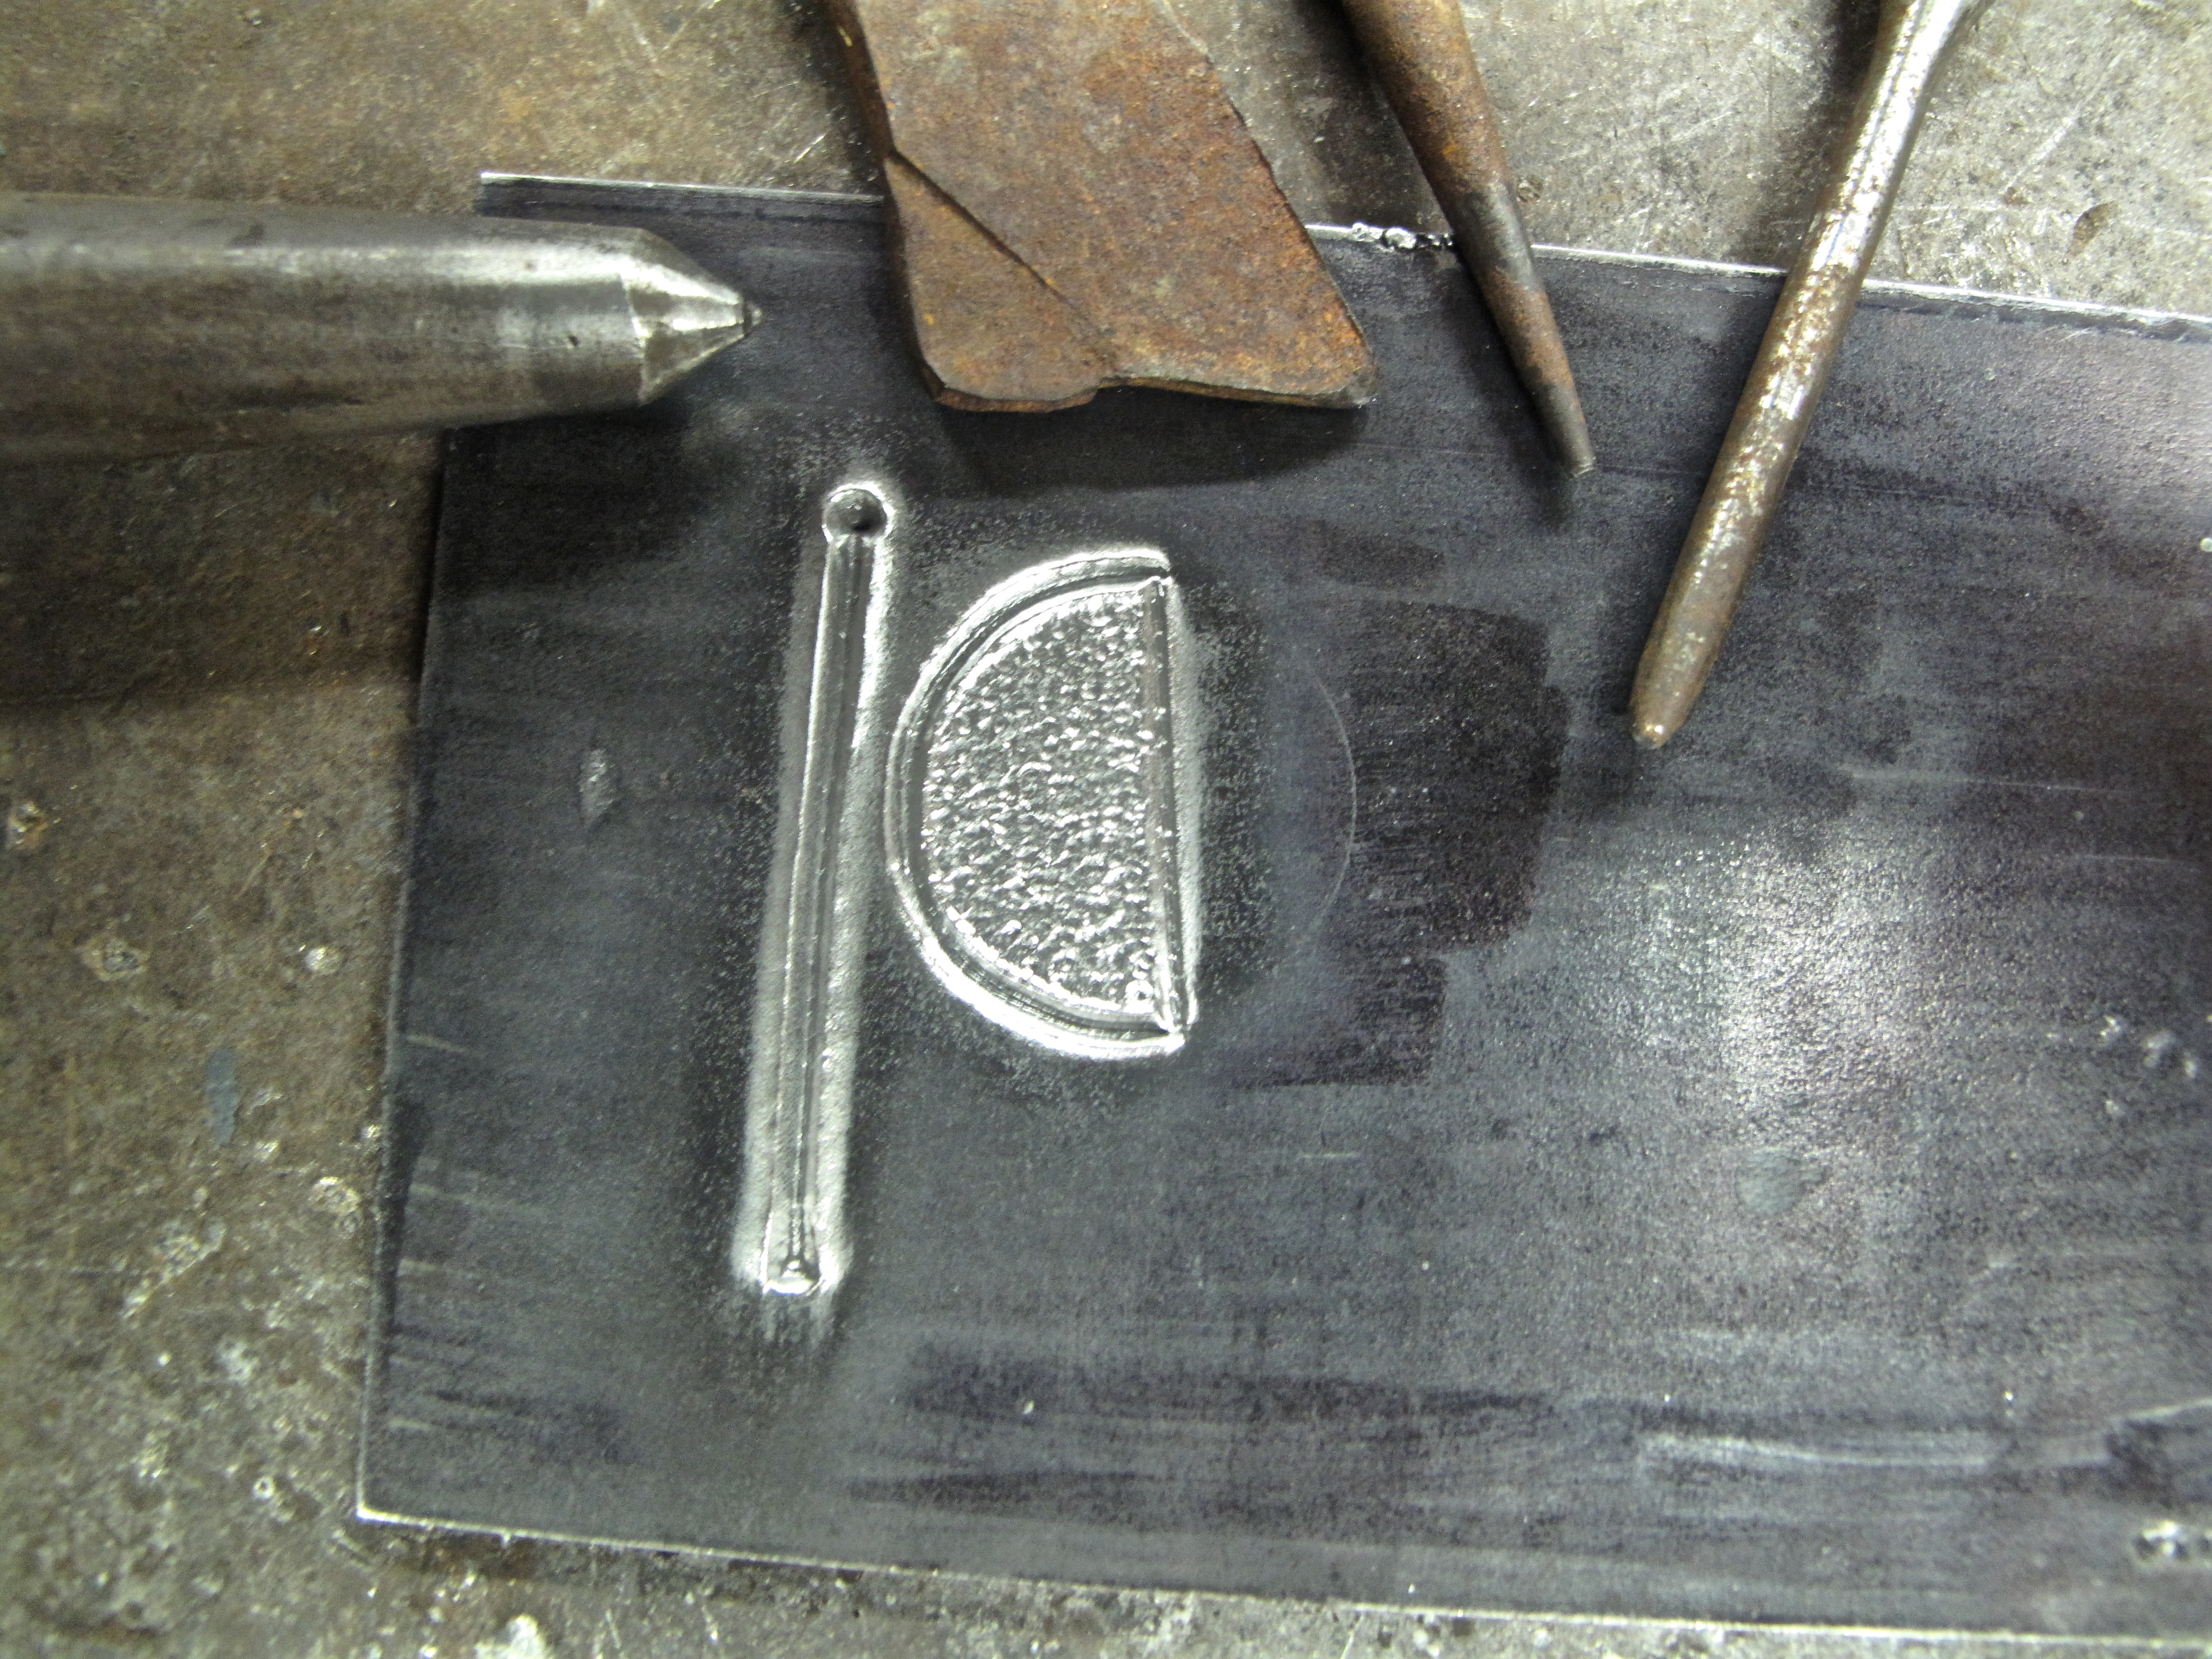
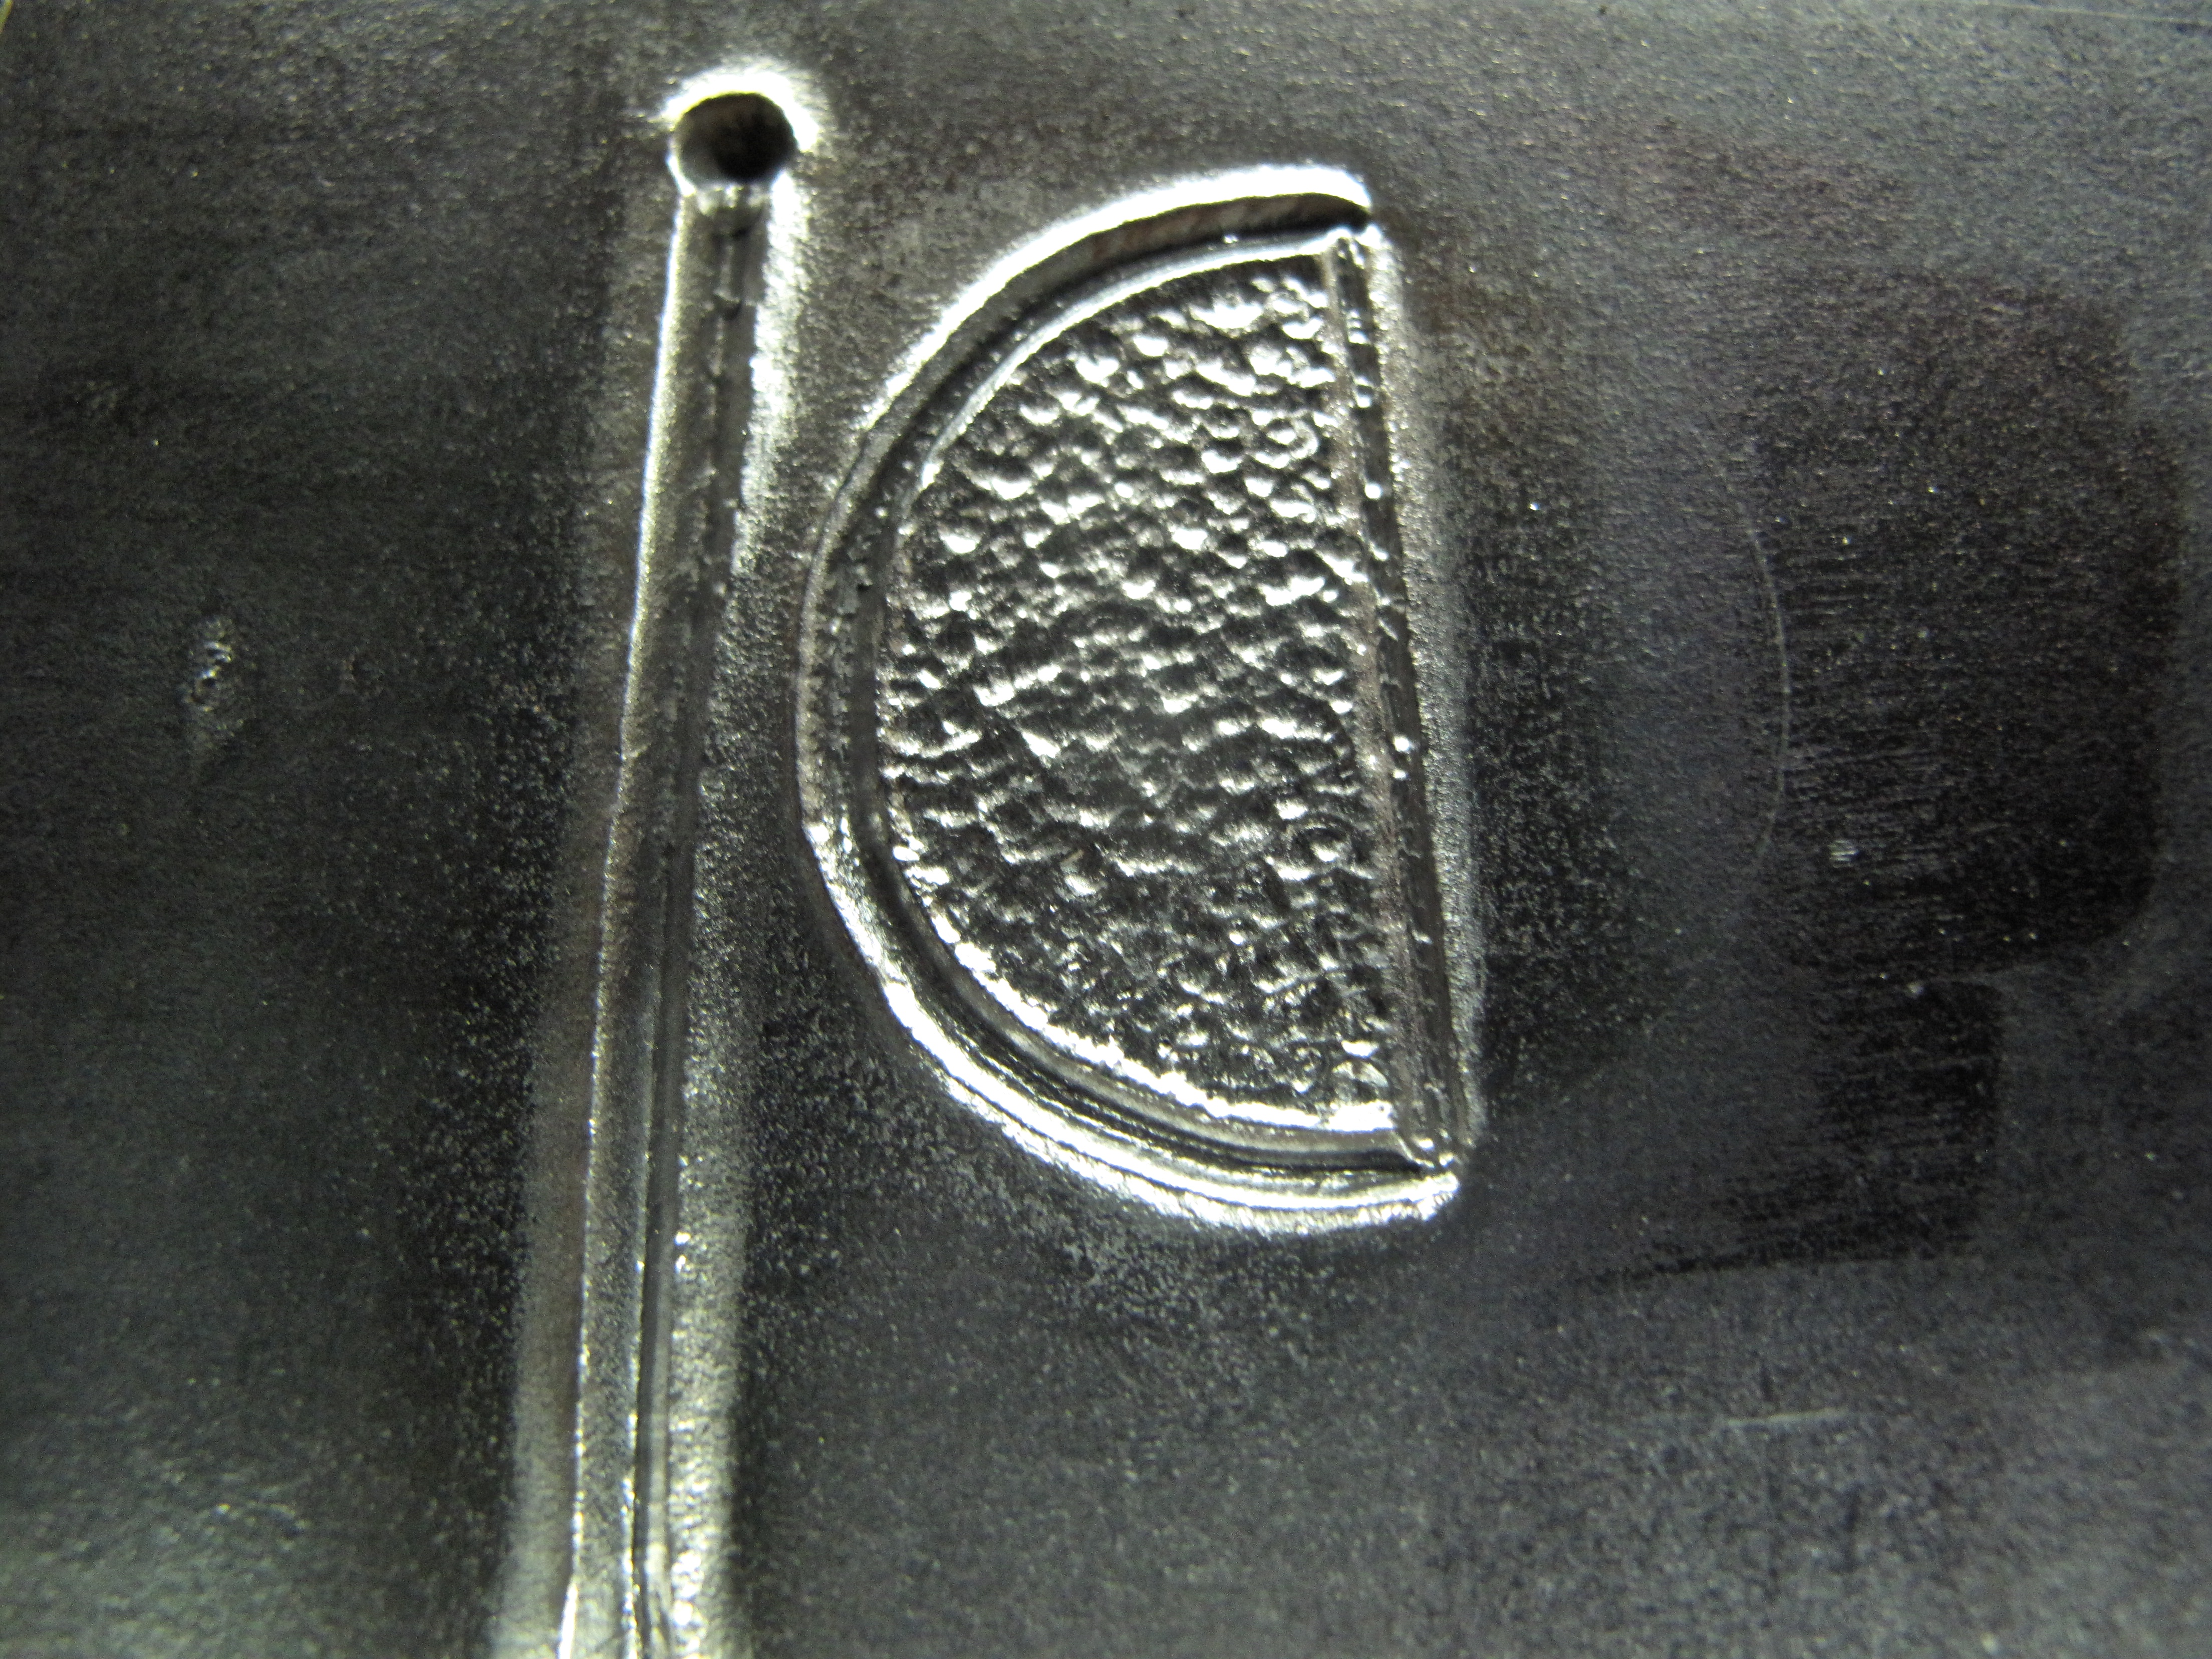
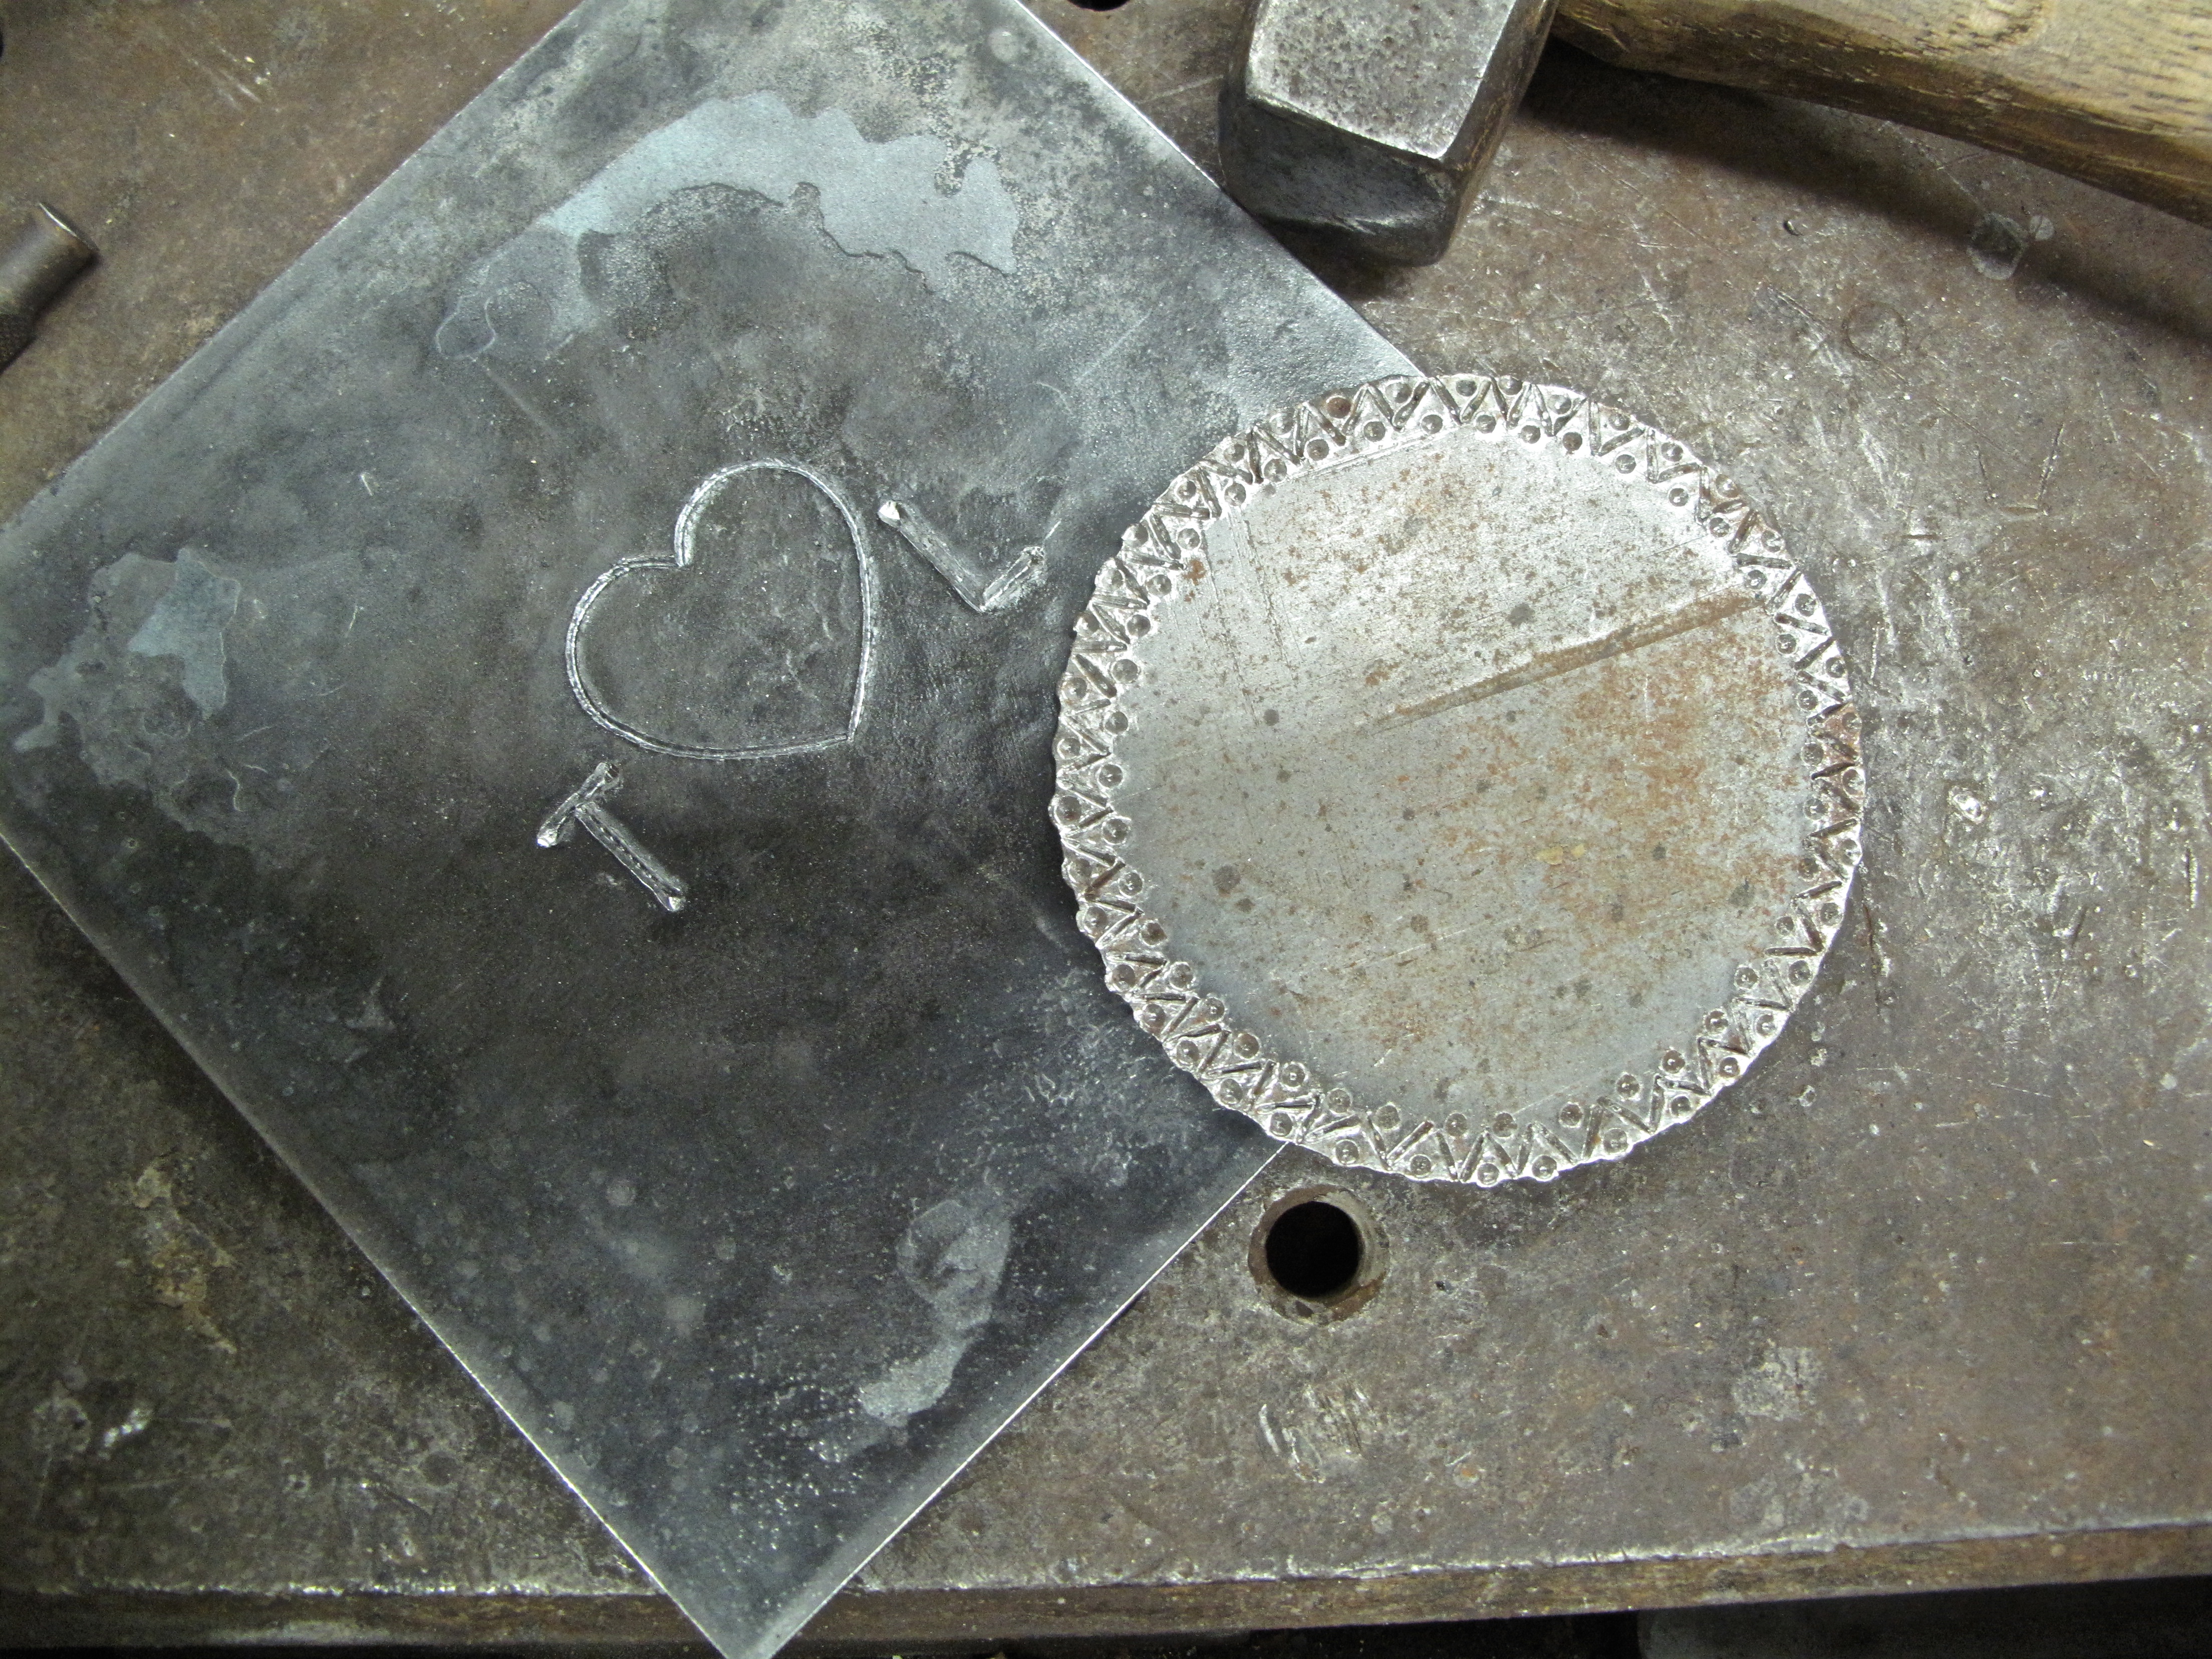
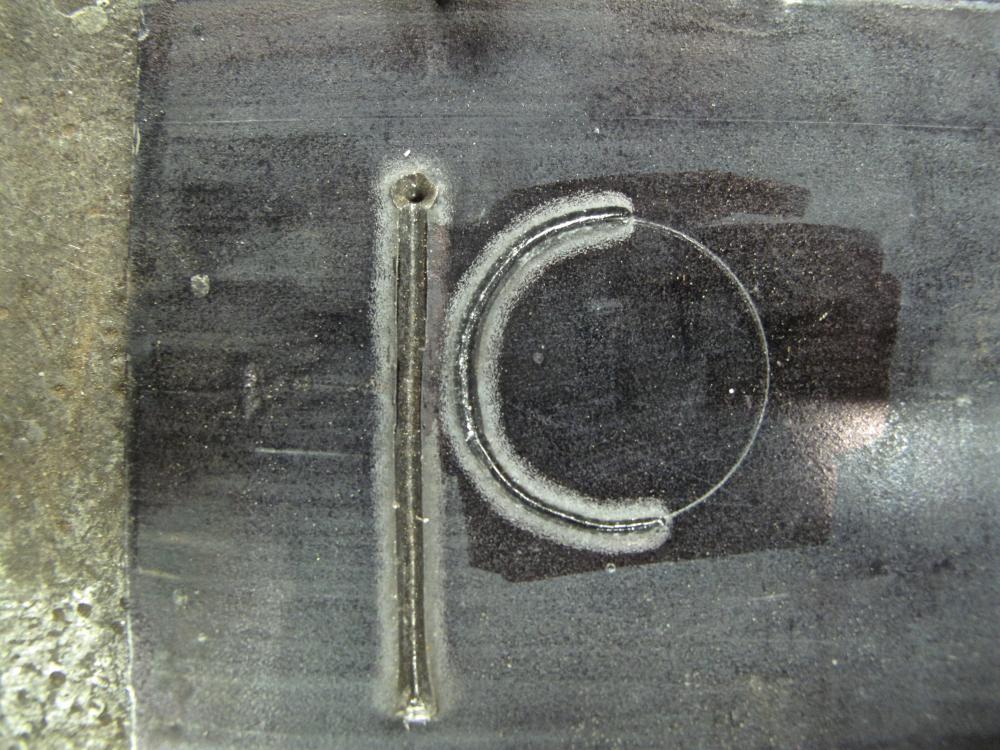
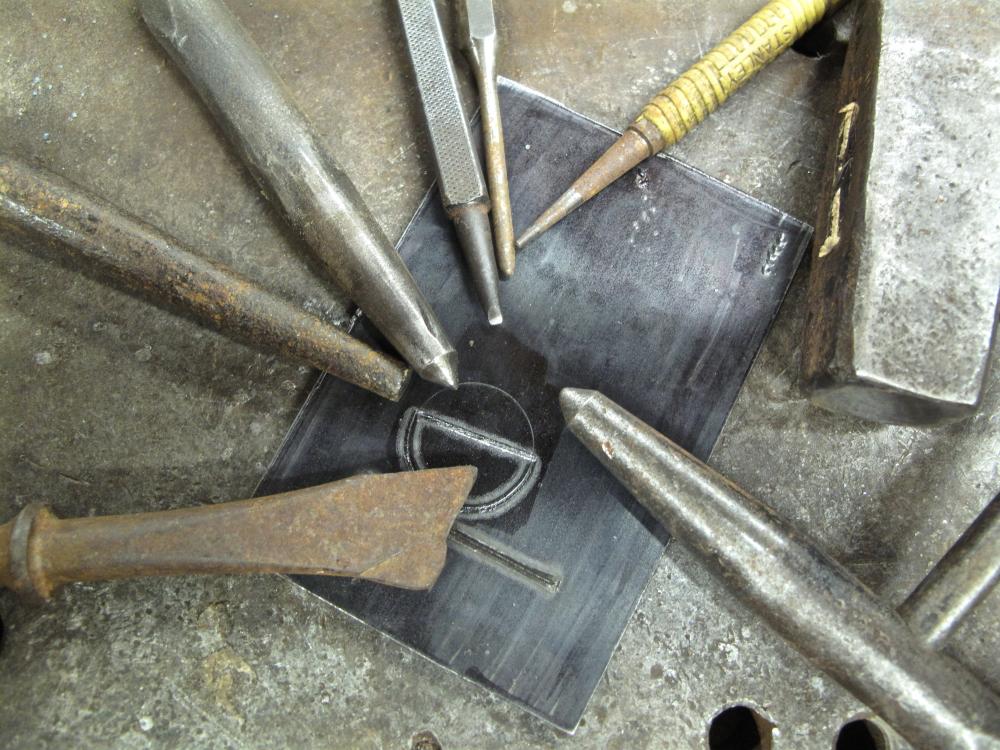
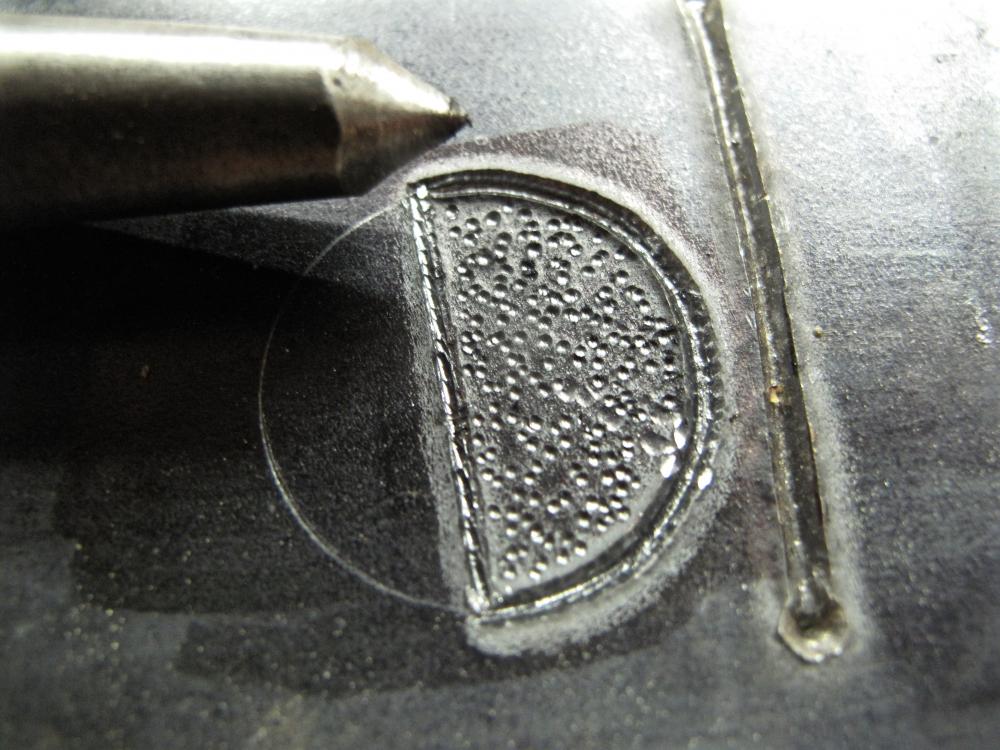
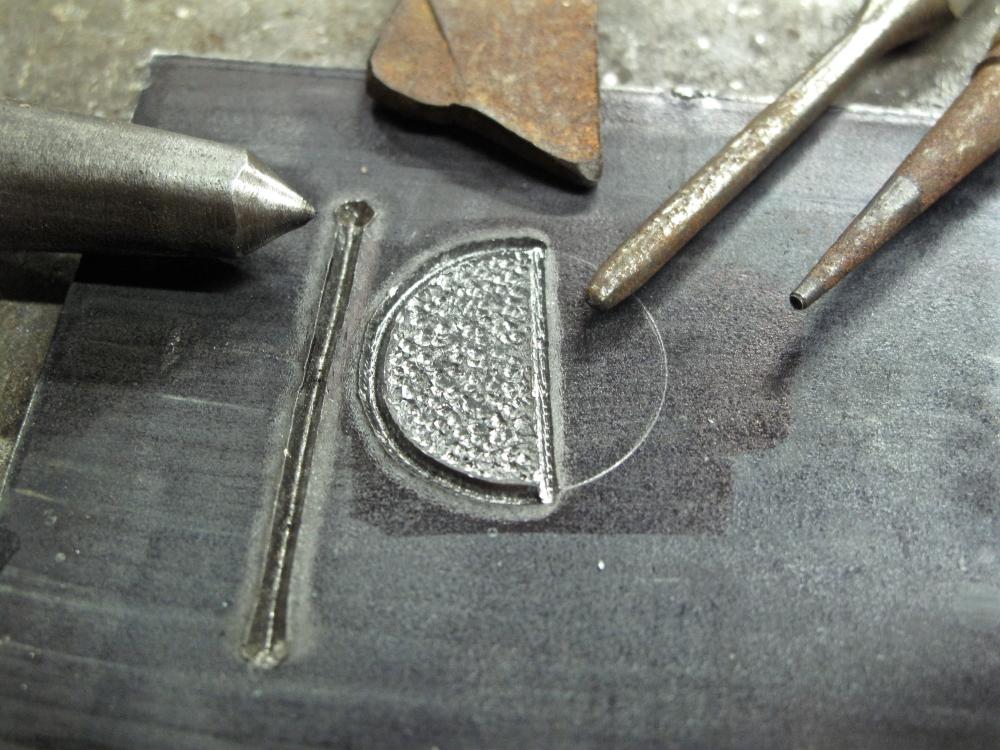
As I mentioned earlier, it you want a broader curve, you need to work with a short-edged chisel that has a more obtuse angle. In the images, you can see that the line grows in apparent width, better matching the straight line, and gets a bit more smooth in the curve. At the 8 o'clock position, you can see the transition between the thicker line and thinner. If you like, you can clean up the transition, smoothing it out, and add that to your repertoire. There are a lot of times when changing the line thickness can add a lot to a design. Taken all the way around, the thicker line provides a nice visual match for the straight line. It's just a matter of going over it several times, from both directions, to smooth everything out. The Textured Field......... Here, we start with selecting our tools. I use whatever comes to hand. It really is that simple. You're trying to create a texture that's random, so tools that have random shapes on the working end help towards that end. In this case, I'm starting with my center punch. It's controllable, and the sharp point punches through any mill scale or other crud on the metal's surface. The first pass leaves you looking rather cheesy and unattractive, but this is just the start. Light taps, rapidly like a tattoo gun, makes quick work of it. From there, I switch to round nose, flat nose, and the oddball shape that started life as some kind of airgun chisel. We're just going over the field randomly, putting dots and dents wherever it pleases. Be sure to cover the area evenly with each tool, and don't be afraid of overlapping previous dings. Random is your friend. For the grand finale, we take the piece over to the wire wheel and give it a thorough scrubbing. The bristles on the wire wheel will strip off the sharp corners and ridges, smoothing and blending everything out. Now it looks good and feels good to the fingers. With a few chisels and your center punch, you can do a lot to dress up the steel. Experiment. Try different grinds on your chisels. Enjoy, and as the wise Mr. Coke would say, "Make beautiful things."


-
Honestly, I don't know how you'd get better than that. You're spot on when you say that it's nothing more than patience, attention to detail and understanding the basic principles. Everything boils down to those three things and you did a great job of illustrating just how great a work you can build if you just take it one bite at a time.