VaughnT
Members
-
Joined
-
Last visited
Everything posted by VaughnT
-
That'd be a neat idea if I could see how to incorporate them into the basic cart design. With the hammers and tong reins hanging down the sides, there's not much room for fold-out anything on the bottom of the cart. As for going on the top deck, I just can't see the need for that much enclosed storage. It's not like this is going to be riding in the back of a truck, after all. It might go 10' in its entire life!
-
Some good ideas, gents. Much to think about! Looking at my stockpile of expanded metal, I have two pieces that are 2'x4'. I have two more pieces that I could tack together to make a third deck on the cart, but I'm starting to wonder if I need three levels. With the casters being as tall as they are, there's only about 25" of room left for the cart body if I want the top of the cart to be level with the face of the anvil. Seems to me the bottom two levels would be dark, cramped, etc. If I make the decks 2'x3' or 18"x30", I think I'd have plenty of room on the bottom deck for my guillotine, anvil vise, bickerns and swages, headache ball, etc. Of all the big tools, the anvil vise is that gets used most often and it's not so large that I couldn't keep it on the top deck. With the hammers and tongs hanging on the perimeter ring, the top deck would only have the tools I'm using for the job at hand. Even if I weld in a nice selection of tin cans or square tubing for organizing hand-held chisels, that still isn't a lot of room lost. Just a rough estimate, but I'd think that both the vise and punch organizer would take up less than half the top deck. Another question I have to ponder on is whether or not I want the top deck to be made form expanded metal or solid sheet. The expanded metal gives you a dust-free work surface, but I can definitely see small things slipping through since the openings are 1-1/2"x3/4". I have plenty of old shelving that I could cut up for the project so that's not an issue. So, do I go with three decks or stick with two for right now (top and bottom) and fill in the middle later down the road if I feel like it's needed? Do I cut up both of the piece of expanded metal to make the decks, or do I keep one whole (saved for a future project) and use one of the old shelves I have to make the top deck? Or would it be better to make the top deck out of expanded metal so light can shine through to the sheet metal lower deck? Ugh! Many ways to go....
-
Some time back, I saw this photo and decided I'd rather like to have something similar in my shop. And since this is such a great place for problem-solving and general ingenuity, I'm hoping you will all chime in with thoughts on the basic design and suggestions for things you might want to try. What experiences have you had with your tool organization? So far, the parameters are: 1: Rectangular rather than square since the cut-offs of expanded metal I have can be utilized more fully and it will maximize the functionality of the cart. 2: The tong/hammer ring will only cover three sides. I can't see having tools hanging all the way blocking access to the shelves. 3: Definitely three decks on the cart. Part of the reason for this build is to get all of the little anvil tools in one place that's relatively easy to organize and keep track of. 4: Top edge to be level with the face of the anvil so I can theoretically use it as a support for longer items. Never needed such, but why not? 5: Angle Iron frame (maybe 1"x1"x1/8") since I already have some on hand that needs to be used for something. 6: Expanded metal grating for the shelves so dirt and scale can fall through rather than build up. For the wheels, I'm pretty set on these -- cast iron body with a poly tire that'll roll smooth on the concrete floor. The pipe stem will be easy enough to weld in place and looks stout. A wall-mounted tool rack isn't an option right now, and I like being able to get every blessed bit of anvil tooling into one place. My current tool rack/tray is working, but it's overloaded and I spend an inordinate amount of time digging through the pile for small stuff. While it's great for holding the hammers and tongs, a lot of the them are rarely used and could live on one of the cart's decks. Thoughts? See any flaws? Have any issues creep up on your tool organization? Things you'd like to have done differently?

-
Stand it on end and get to hammering. This isn't rocket science and you're skill level is a long long way from worrying about a bigger, better, fancier anvil. What you've got will work wonderfully as an anvil and is head and shoulders better than the anvils used in ancient days. Now, it's just a matter of you taking the time to learn, focusing on the little details and executing the fundamentals to the best of your ability.
-
I'm always amazed at the joinery they did back in the day. I can't remember the last time I forge welded a T joint.
-
Top notch work! I really appreciate the tutorial.
-
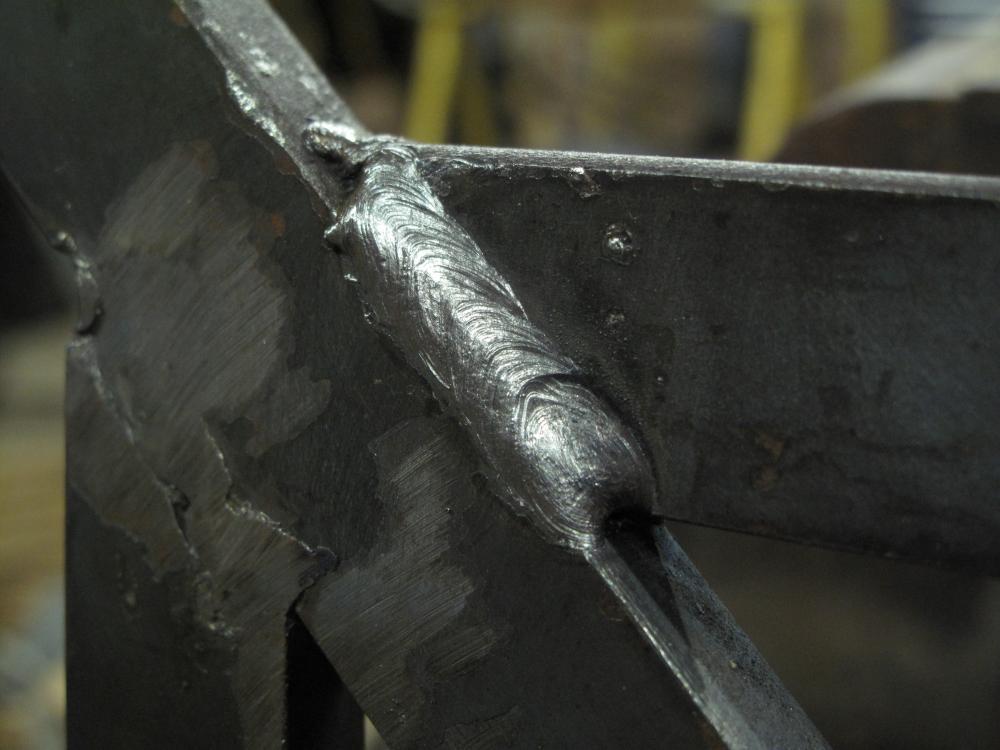
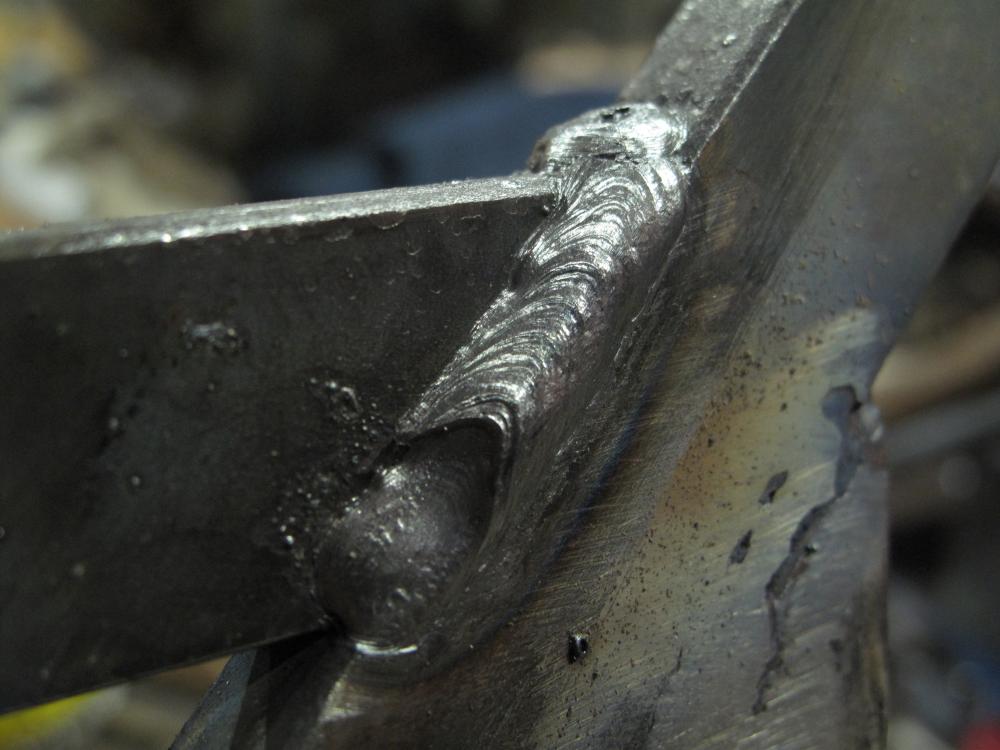
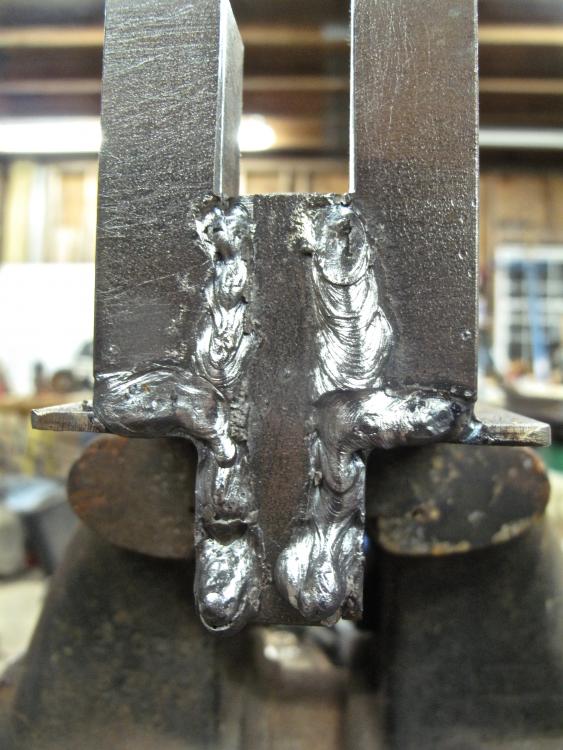
My last bit of welding was a vertical up that looked just a hair unprofessional. I've tried to keep my stuff flat when I weld, but every once in awhile life throws you a curveball. Got a big job in and needed to do some more vertical welding just because, well, I figured it'd be easier to weld and grind than to clean off my table. The framework is going to be covered in expanded metal so grinding the welds is necessary and I wasn't too worried about ugliness. With 1/8" 7018, the vertical ups sucked every bit as bad as I was thinking they'd be. On the last two braces, though, I used a 1/8" 7014 rod that I found in the pile. No idea how old it was or why it was with the 7018 rods, but I figured I'd give it a go. And instead of doing a vertical up, I did a vertical down. Seemed to me that biggest problem with the vertical ups was the hot puddle drooping. With the vertical down, I dragged the rod, keeping it pointed slightly uphill. Made all the difference in the world! My machine was set at 131 amps and the sound was as perfectly beautiful as I've ever heard. Bacon sizzling in the pan doesn't begin to describe how smooth it was. Of the 8 short vertical down beads I had to run, these were the two worst. Couldn't be more happy, and now I'm wondering if I need to use 7014 more often. It's cheaper than the 7018 at Tractor supply, so.... Got just a little thumbprint at the end of this one!
-
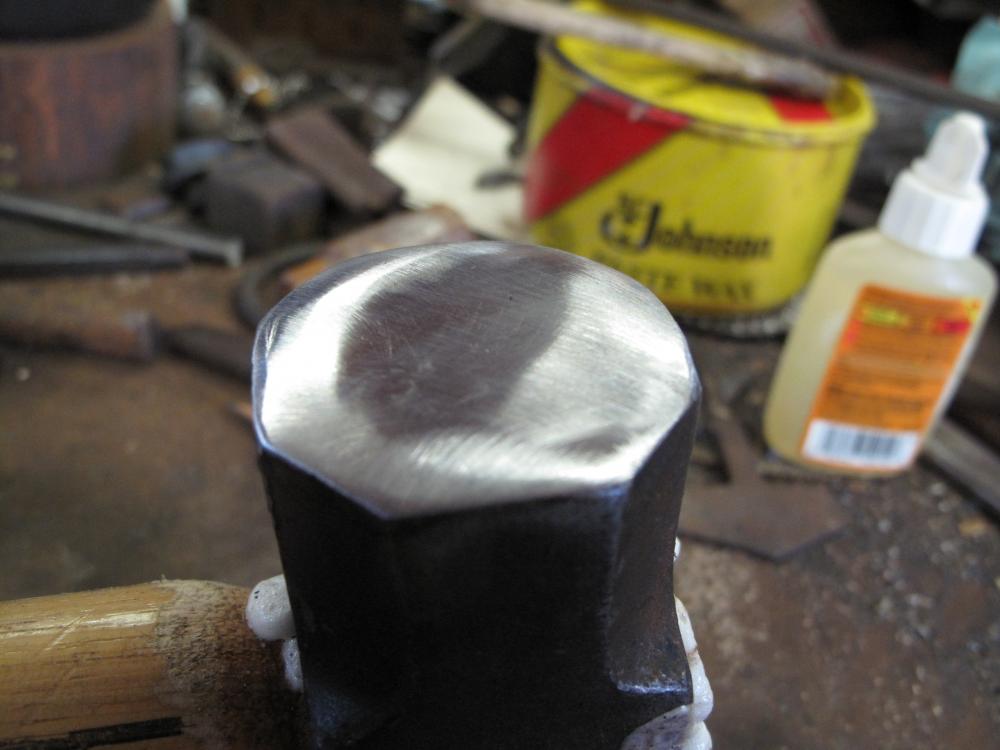
I like gorilla glue because it swells to fill the little voids between the wood and metal. It might not help things, in the grand scheme of things, but it makes me feel better. With the glue in there holding the wedges and head to the handle, I can say that I've done everything in my power to get a good bond. Once the glue has had 24hrs to firm up, I'll get that nasty polyurethane off the wood and give it a nice rub with some thinned down oil.
-
So far, today has been tool repair day. I spent a few hours yesterday making a handle for my 3# cross-peen and thought I'd take some time to re-dress the faces. This is probably my favorite hammer for general work, so it gets used a lot! Now I just have to wait for the glue to dry and I can start shaping the handle a bit. I prefer beefy handles so there won't be much shaping to this one.

-
Played around with squaring up some 5/16" round bar. I tried some stick handles on them and didn't really like the look. I can see how some folks might like the look, but since the glue I tried only turned to rubber and wouldn't actually hold the pieces together, I'm searching for a different look.

-
Very slick idea. How'd you stick it to the wall?
-
Always wanted to make something on a genuine viking anvil stone...... http://www.hurstwic.org/history/articles/manufacturing/text/bog_iron.htm
-
I see this all the time.... and I lay a good bit of the blame at the feet of experienced smiths that always say the newbies should make their own tongs because it's such a great learning experience. I usually don't even comment on those posts anymore. I figure if someone can't bother researching on their own, and "expert" smiths are going to counsel making tools when the person can't even make a decent s-hook, well, who am I to get in the middle of that mess? Seems to me folks are terrified of offending anyone and will offer kudos and other positive affirmations instead of calling a spade a spade. I can't count the number of times I've seen someone post a picture of absolute garbage.... and everyone in the audience applauds, cheering them on, telling them how good it is for their level of experience, etc. Any excuse to not come across as saying something even remotely "impolite". And that stuff stays on the internet forever. Other people do research and see that junk is applauded and even expected, and that posting pictures of the mangled mess will get them all kinds of pats on the back. So, the cycle repeats, building and building.
-
Take that handle to the wire wheel on your bench grinder and give it a thorough going over to even out the surface and remove any polyurethane coating that might be on it. Then paint the bare wood with some boiled linseed oil that's been thinned down a lot with paint thinner or mineral spirits. This will allow the oil to soak into the wood real easy and makes for a fast-drying finish that looks incredibly good with forged iron tools. All of my tools get the thinned BLO treatment, and they look like tools you'd expect in a smith's shop!
-
LIkewise, friend. That is a truly stellar design! I don't know what's better, the joint or how you spooned the hooks so they won't rub on a jacket lining! Really impressive all the way around!
-
-
Finished her and have her twin still to be put together. A single rivet ties everything tight.
-
I would definitely use the ammo can as a quench tank. The sealing lid is great for containing the oil. I use a small one and it's never failed me yet. The biggest problem with all these "I can use this" forges is that they greatly limit your design. Why bother with an automatic limiter right from the outset? Why make a forge that can only be used for knife blades when you know, sure as the sun rises, that you're going to be interested in doing other stuff. Your wife/girlfriend is going to ask you to make something. You'll get the idea to make your mom something nice for christmas. It's just going to happen. Get used to the notion because you can't escape it. With some sheet metal and self-tapping screws, you can easily make a shell that's big enough to give you plenty of room for a scroll of decent size. No welding needed. Then you line it with some koawool, paint that with the refractory, install a nice T-Rex burner..... easy as pie.
-
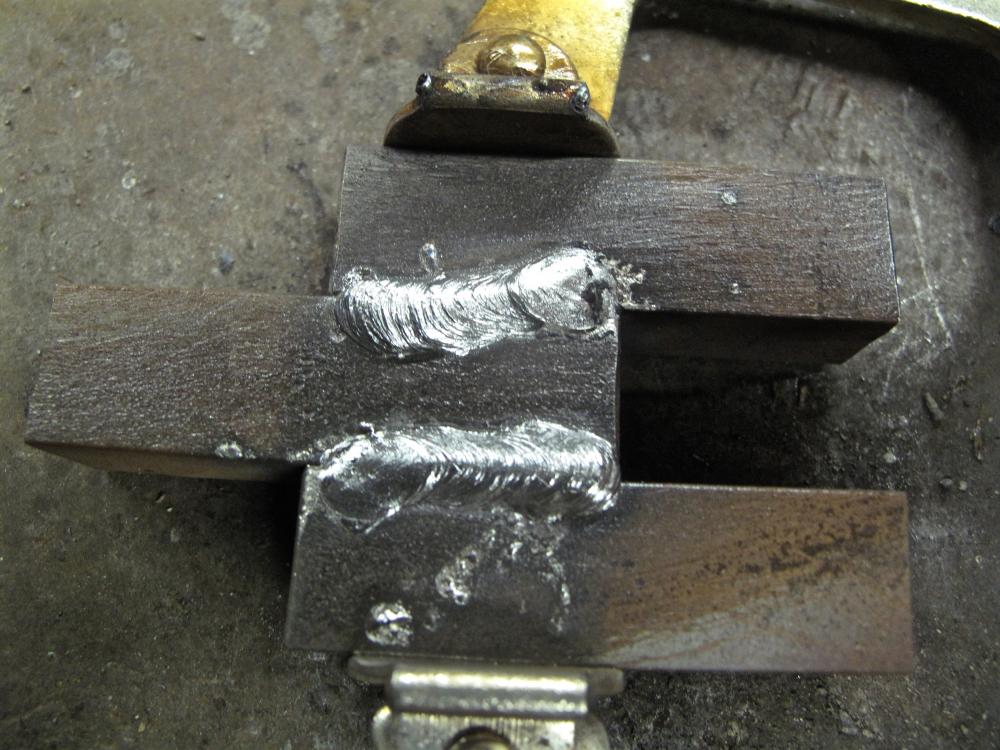
Tried my hand at some vertical up last night. It didn't go anything like what you see in the videos you see on the internet! Laying flat on the table wasn't so bad, but still far from what I'd like to see. Both are with 1/8 7018 and the machine set at 125. The vertical up is one 1/8" wall angle iron and 3/4" square bar. I was having a heck of a time with the rod sticking as I first tried to strike the arc. Real bear of a time getting everything just right, and on the V-up, as soon as the arc got started halfway decent, the metal was running like a river. I tried pointing the rod upwards to push the puddle ahead a bit, but, well, you can see how masterful my work came out. I was kind of proud that I managed to make a right turn and continue the bead to the end. Aggravating no matter which direction I look at it. But, I've got a grinder and some new disks that will get it looking halfway respectable.
-
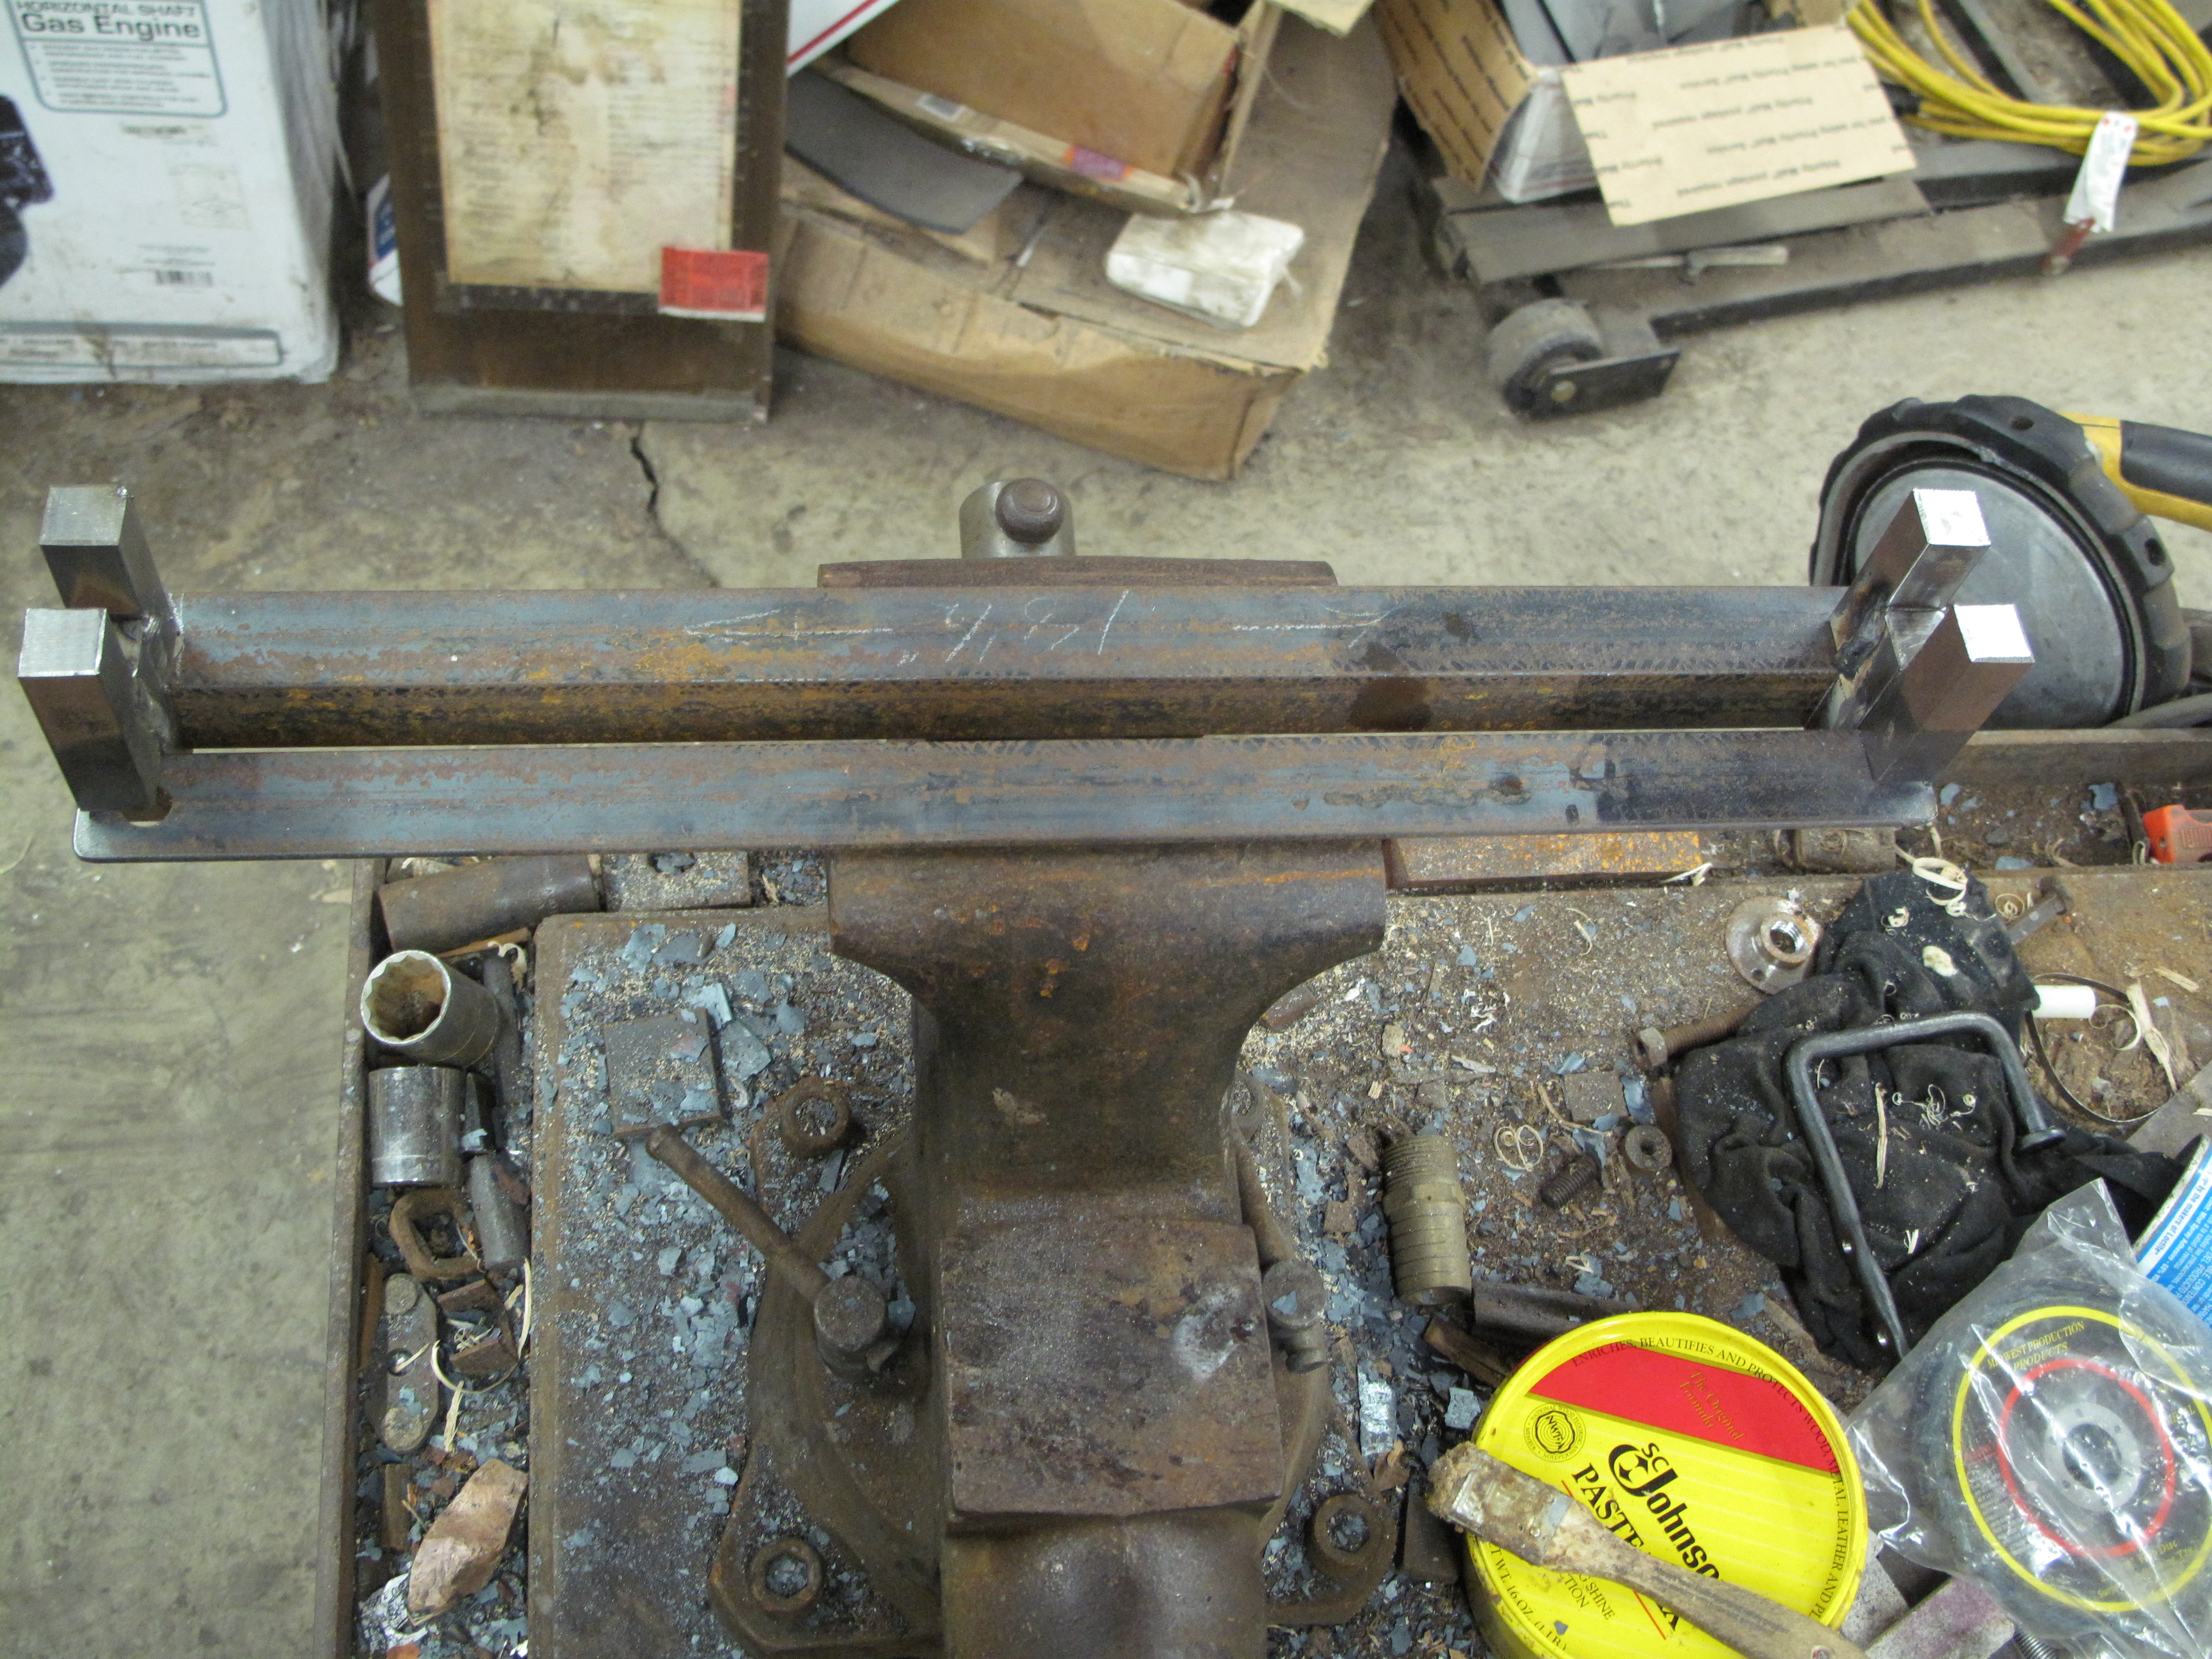
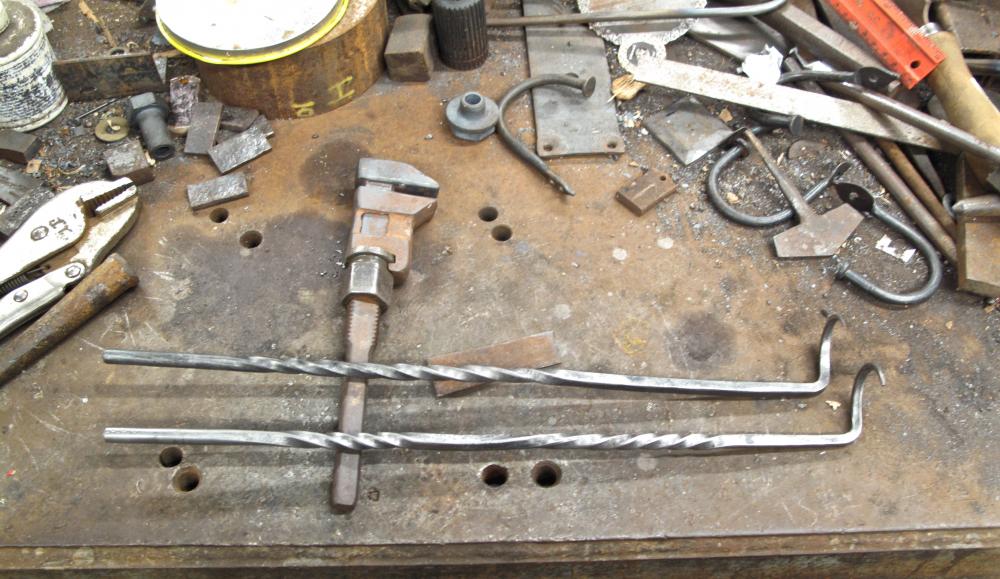
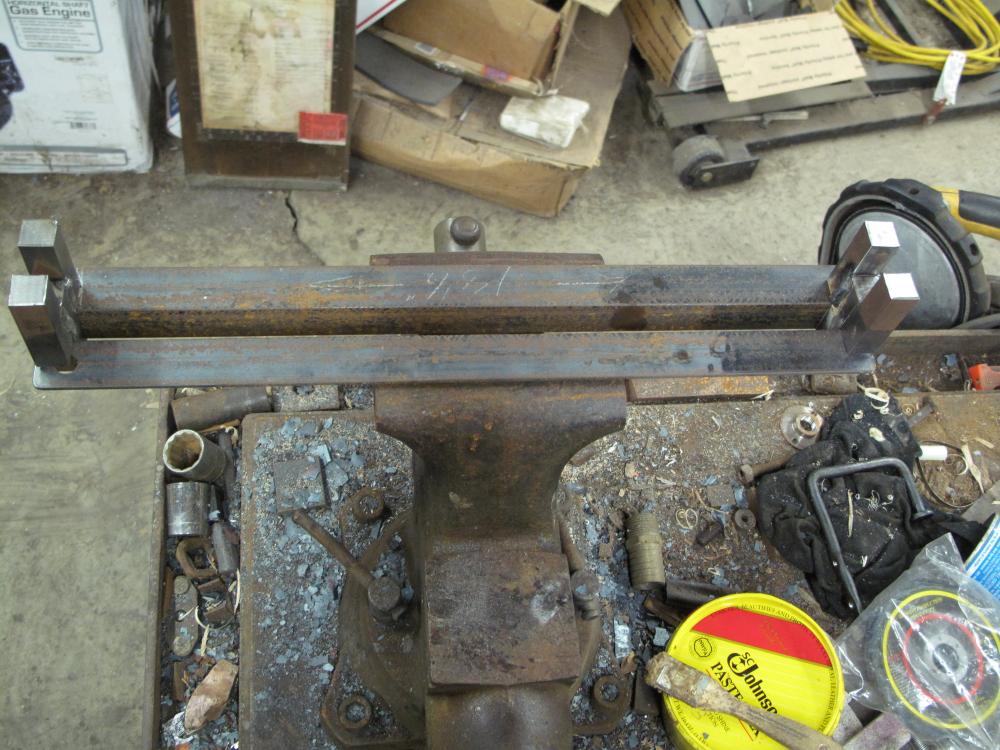
Reverse-twisting jig for 3/4" bar. The one upright slides freely so you can adjust for different projects.
-
Stopped by the Ace hardware and picked up two dozen more nails. Now I'll be able to keep pace with all you guys!
-
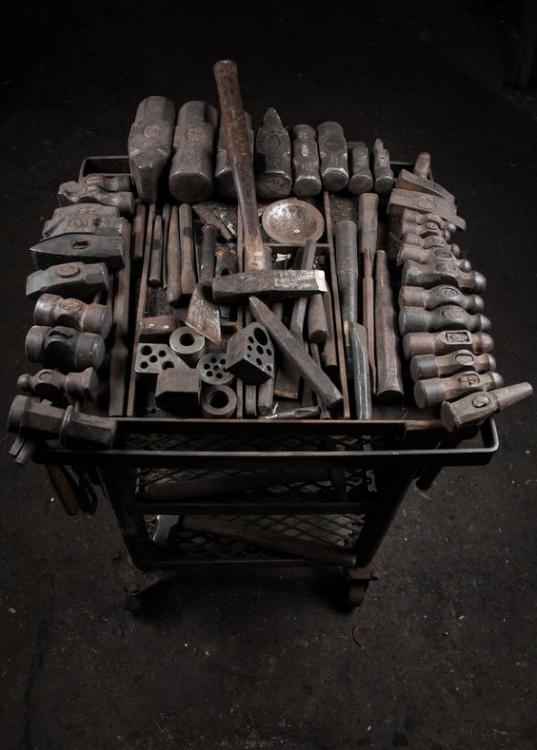
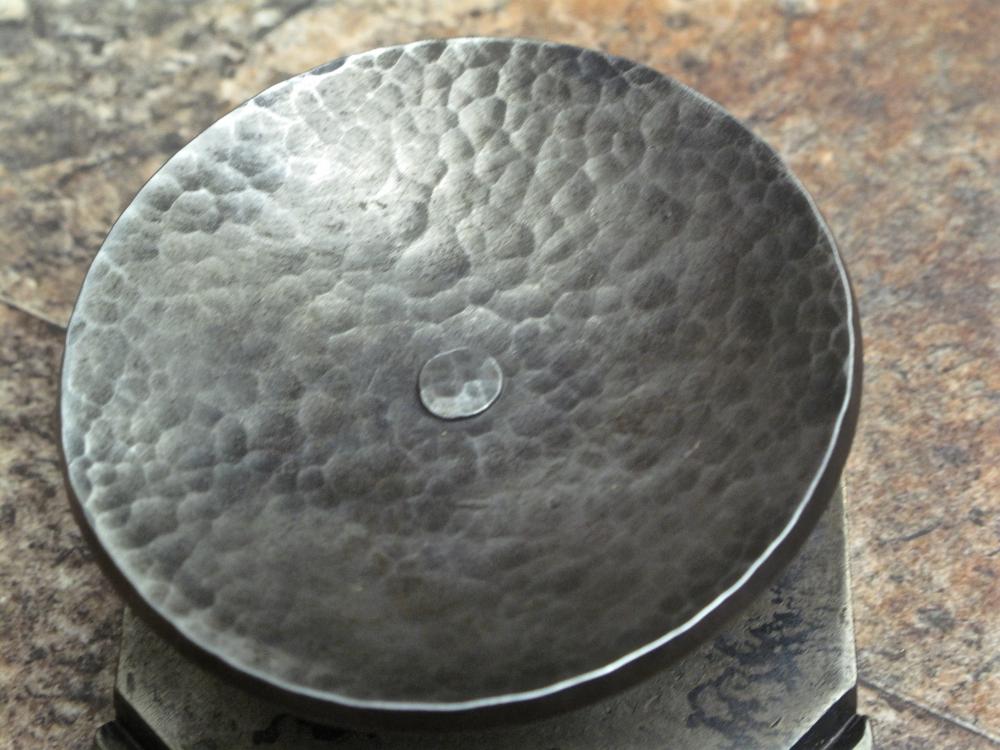
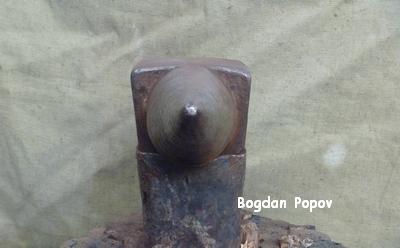
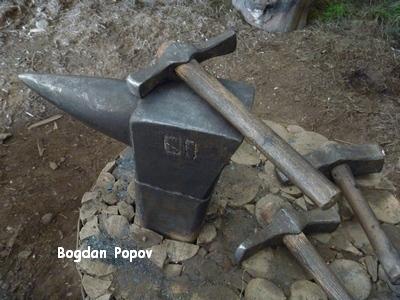
I would dearly love to have some of those! I've been looking for just such a thing to make into a traveling anvil. Personally, I would have stood the hammer on end like a Mjolnir and used the big face much like a Popov anvil you see here at the 23:09 mark - https://www.youtube.com/watch?v=kyLjZ8N9_dc&t=36s The face is domed, but it's like a squished ball with a flat spot in the middle. Very practical design and it has the look that's just perfect for doing demos where folks expect you to be doing it the "old fashioned way".
-
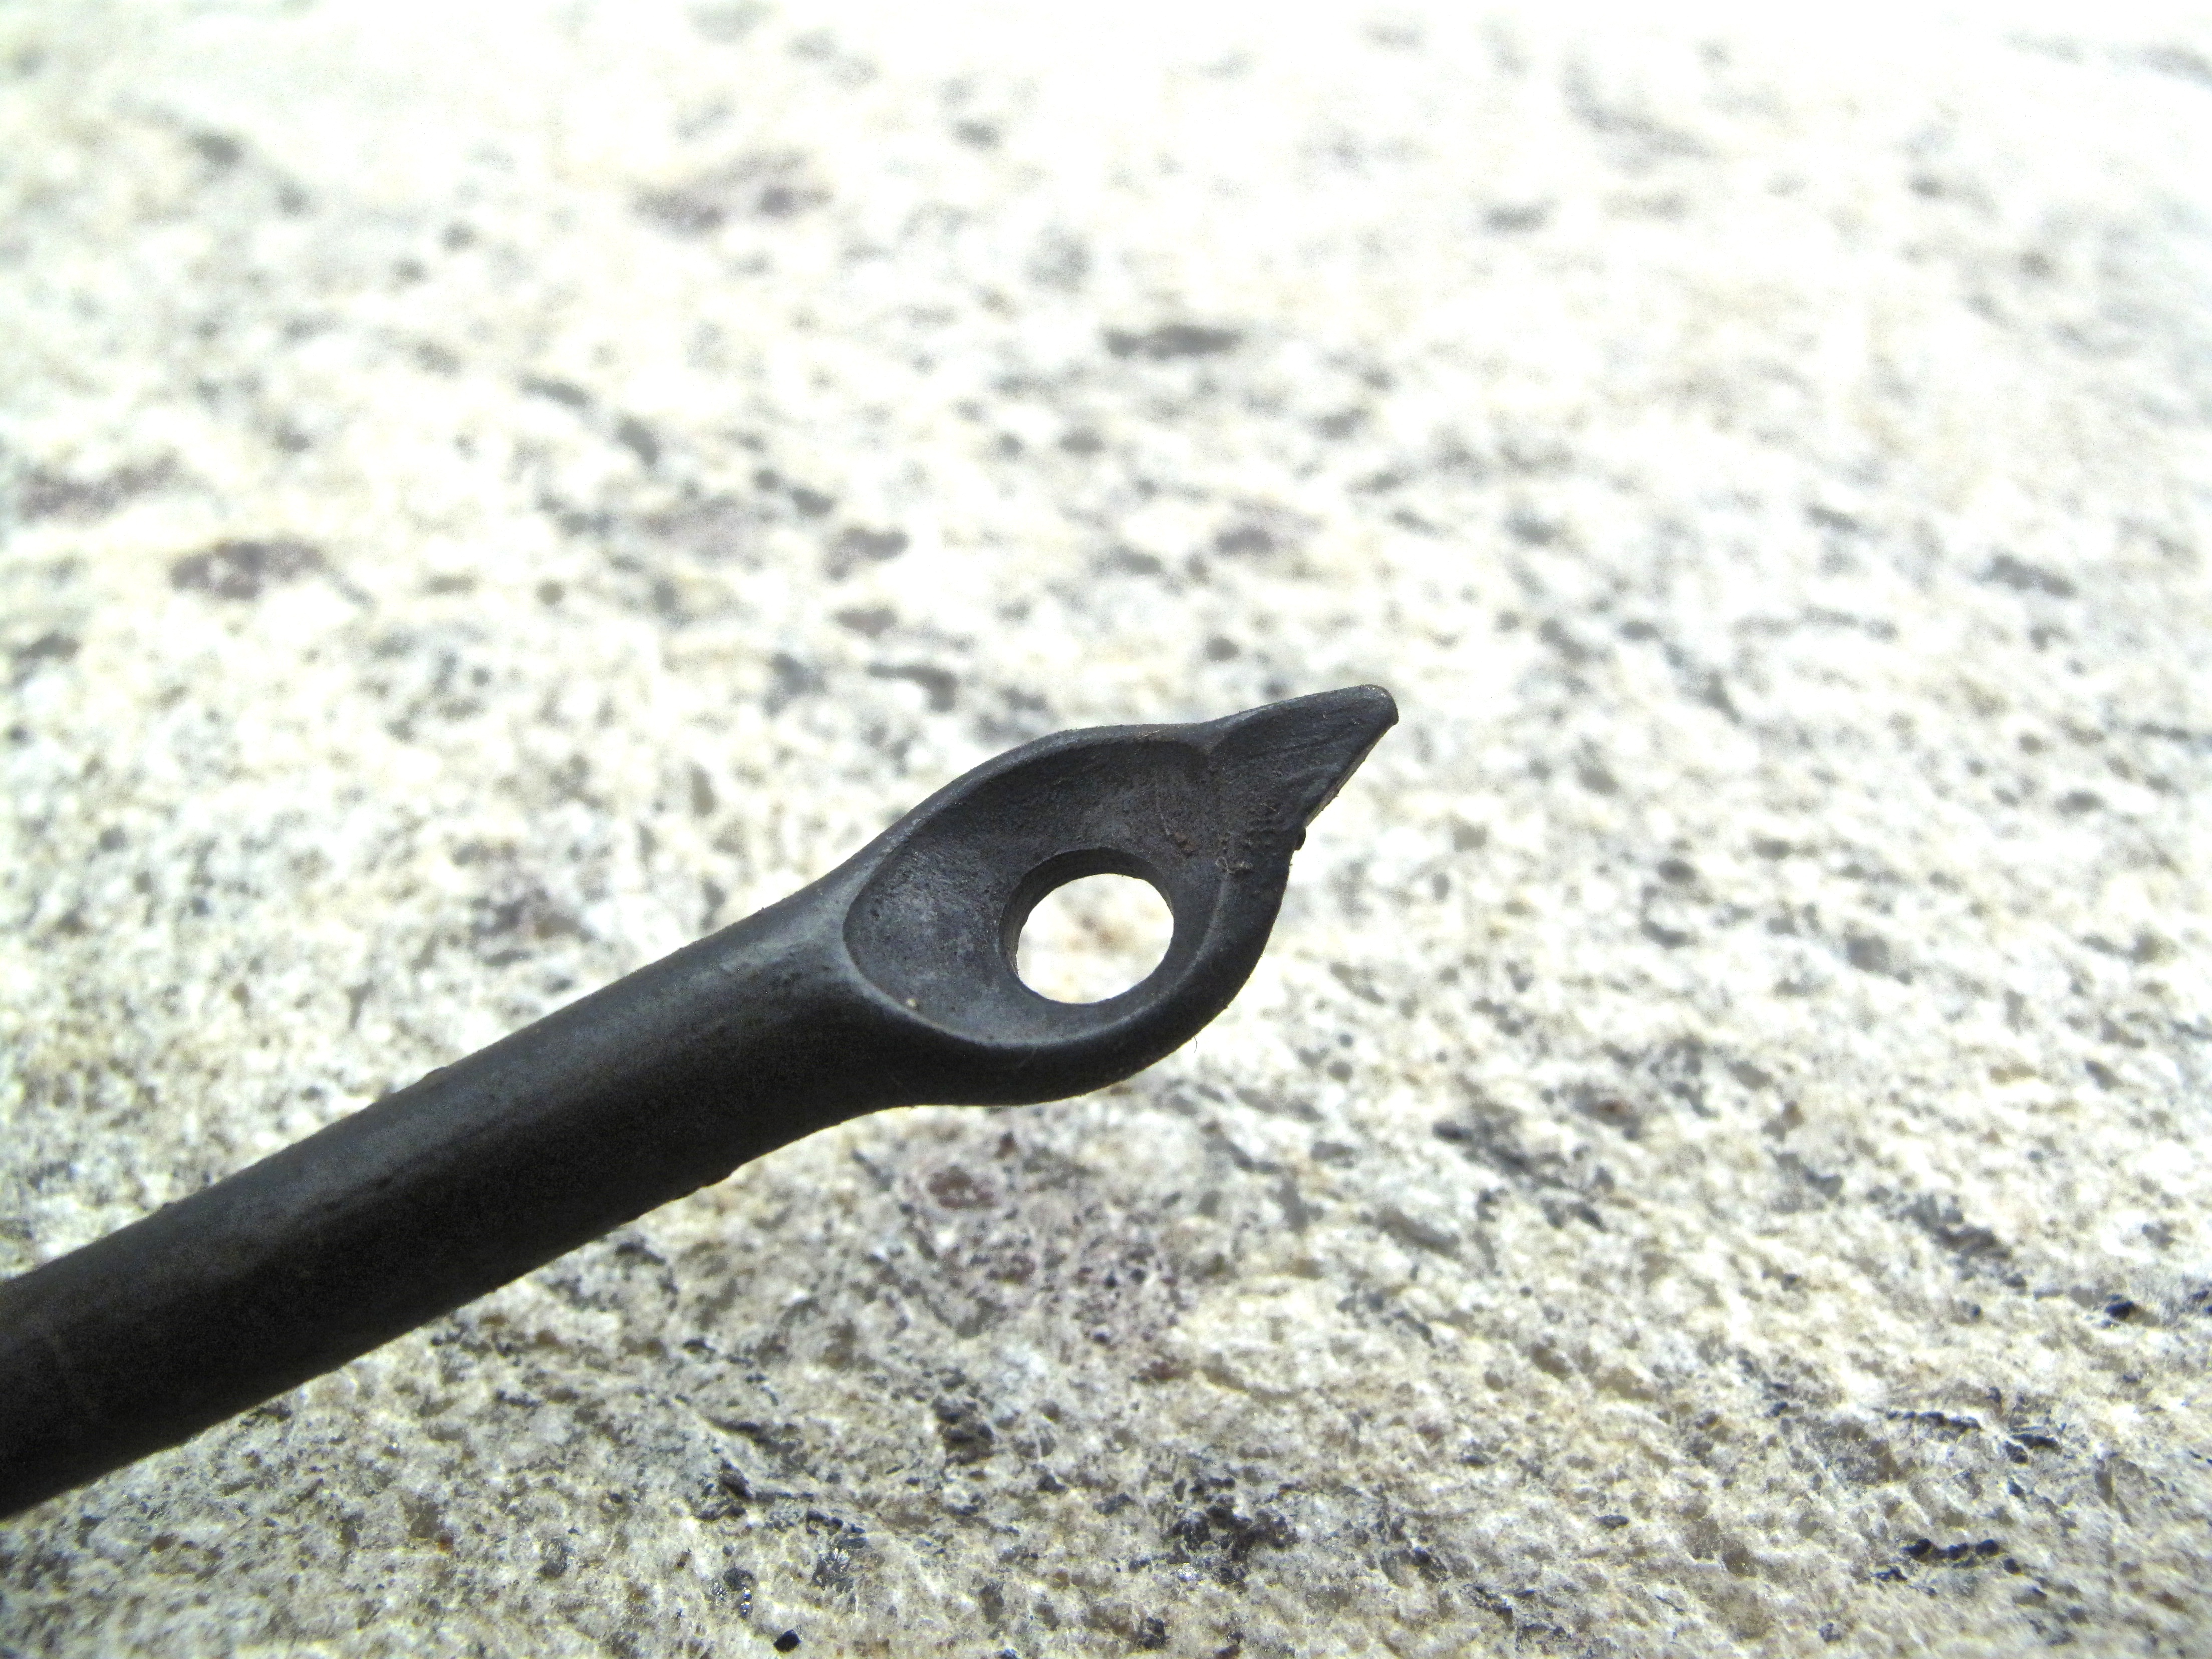
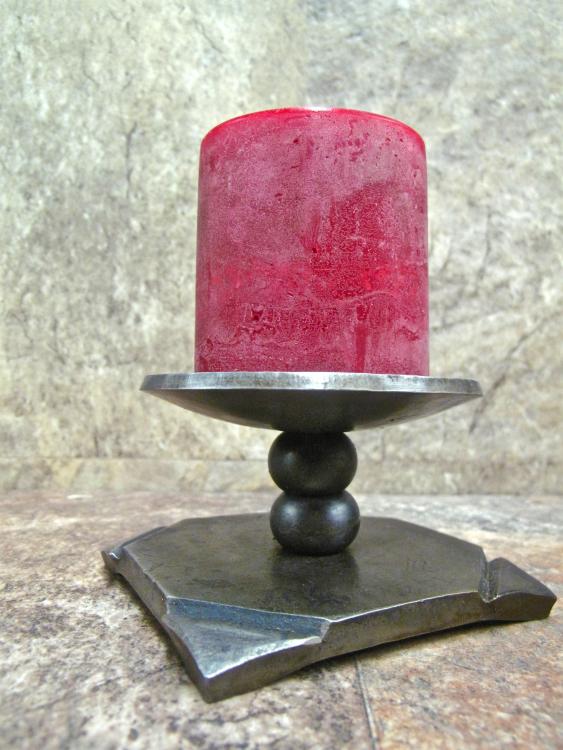
One thing I noticed is that you're flattening the area where you put the holes. This is good for punching the hole through, but also detracts a hair from the possibilities. I've been forging in a divot with a 1/2" round-nose punch, then doing the through-hole for the screw. With the divot there, you get a bit more visual interest in the piece and a dome-head screw looks really nice in them. Even with a phillips-head screw, it sits below the surface in a way that makes it look like a knot or bud. Of course, I throw all the screws in the fire and darken them first. Bronze would look great by itself, standing out a bit from the waxed steel. Also, since Australia doesn't have the big nails, it might be better to save at least one so you have a before-n-after type set up. It'd make a really neat storyboard to show folks how much you can get out of a single nail. You might consider making your own "nails" by upsetting the end of a 13" piece of 3/8" stock. As you're already doing things to the pointed end, it might be nice to do a flower-bud on the head of the nail. I'll forge one out later today and post some pics. They're easy as snot to make and go really good if you're going to do leaves on the other end.

-
I had the same problem till I stopped in at an Ace Hardware. They didn't have the 12" in stock, but they were happy to order the non-galvy "bright finish" for me. And when I showed them what I was doing with them..... they said they'd order a bunch just to keep them in stock for me! http://www.acehardware.com/product/index.jsp?productId=30652636 I use their 6", 8", 10" and 12" bright finish nails for making hooks. The 12" version gives you plenty of room to play with, but sometimes you just want the hook to look like the nail it began life as.
-
That's actually the type of cut-off I learned on. The idea was that the lugs, as you note, keep you from dinging the cutting area but also serves to keep your metal from flying around because you accidentally cut too far. They work great because you can set the depth to whatever you like and know you'll always have just the right amount of meat left to twist the bar free.