June 25, 20178 yr i have seen many threads on the subject of beginners projects and the question seems to come up from time to time. Many good ideas are suggested yet what surprises me is the inordinate number of new members wanting to forge knives. What is it with new blacksmith enthusiasts and knifes? is there a TV series over there that encourages this activity? Are knifes particularly expensive? Not only is forging a knife a difficult project and I am not even getting to swords ... it involves so much more non forging work that it is hardly a best newby project if at all, after considering the other side issues involving knives. Then you get the ubiquitous "learn by forging your own tools". Another no no for someone barely able to make a barbecue fork. So, what would you consider a project that will provide a learning journey for a blacksmith enthusiast? From what I see at blacksmith gathering in OZ, most new people forge barbeque utensils, fire minding stuff, camping gear, hooks etc. What was your first time ever project? 50 years ago, at age 15 I started working with an Italian blacksmith. He made ornamental stuff like gates, beds, railings, window grills etc. with lots of scrolls. My job was preparing the scrolls start. I did the fishtail end with a cross peen hammer and started the center of the scroll so that it would hook on the jig. I did that day in day out. One day I decided I wanted to make something for myself and asked the master what he suggested. Premoli ... that was his name, knowing I had some woodworking skills and a carpentry shop to exercise it belonging to my father, told me to make a chest in wood and bring it over to make all the hardware for it in his shop. I thought it was a good idea and asked what size should I make it ... in my mind I was picturing a large pirate chest. He told me ... make it 8" long by 6" wide and 5" high .... boy was I disappointed. A miniature chest! And in wood! However I made the chest in cedar, and when it was the time to make the hardware he gave me miniature chisels, some sheet metal, drew a sketch of hinges, lock, straps and handles, and after work, I could do bit by bit sitting at the anvil cutting all the little bits, then clean them up with a miniature file, make the square head nails, and all the rest. After many weeks the project started to take form and for the first time I had started a project I could master and finish. Wasn't forging, and could hardly be called blacksmithing, but was a form of artistic metal work that gave me a lesson in patience, (little) hammer control, general aesthetics, filing, shaping and self esteem. I remember as if it was yesterday the master asking me what was I going to do with it. I said I will give it as a gift to my wife ... I was 16 then. Did I give it to my wife? yes I did 10 years later, and she kept her little bit of jewelry in it for another 10 years or so until a burglar raided our home and took it with him. Perhaps it is time that I sit at the anvil once more and take another lesson in humility and make another miniature chest to replace the lost one and give it to her ... may be this time all metal.
June 25, 20178 yr First thing I wanted to make was one of BlackFrog's WI bottle openers. Got it stinking hot and it still delaminated while punching, I think I may have heated too quickly. I think programs like forged in fire and certain other more historical programs are to blame for new starters unhealthy obsession with blades. Personally I think changing the stock you have into a shape that's better for you to work with is a good lesson in control and it establishes good habits. Fire tending is another really important thing, tedious for a new starter but important.
June 25, 20178 yr Here in Israel we have very few, if any, shows that feature bladesmithing. And yet, it IS a passion that obsesses me. I"m a newbie, and so far I resisted that craving, but as soon as I"ll finish building that belt grinder, I"ll let the beast loose. Moreover, all around me - the first thing people ask when I tell them about my blacksmithing, is "so your making knifes?". TV is NOT the main factor. And no. knifes are not expensive (at least not the crap that I"m able to produce). Blacksmithing is a hobby for me. There is nothing practical that I need to make. Just stuff to enjoy. So unless there is a specific chalange or need, and I just ponder "what do I FEEL like making?", knife will alway beat candlestick, coat hanger or even bottle opener. I guess I"ll grow out of it after few knifes. But I know that guests to my smithy will alway be excited about it.
June 25, 20178 yr Yes the TV shows are a big influence right now; however even 20 to 30 years ago the first project most folks with a Y chromosome wanted to make was a knife. When I teach a "get your feet wet class" at the local University I have them start with a S hook---tapering, bending, twisting. Then they do two nails: tapering with a more even surface required and to a certain dimension, upsetting and learning about speed as the small stock cools fast. Lastly they forge a chile pepper from ungalvanized pipe: Tapering, keeping from crushing the hollow center, necking down and drawing out the stem. This is given as either a morning or afternoon session. Note that the S hook is the item that takes the least CONTROL when hammering. It shows them that they can do it and then they start learning about hammer control... Meanwhile a "knifemaking club has started up do to the TV shows and they use the other forge at the Fine Arts Metals studio. I have yet to see one of them make a blade that was worth anything and have seen a LOT of blades destroyed because they don't know the BASICS! Funny when one of their Metallurgy Professor's' son did a project for his school on forging. The Metallurgy Professor called me and asked me to show him how to do it, as he knew that his skillset didn't include hand forging of steel...
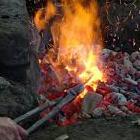
June 25, 20178 yr The first thing my mentor taught me was how to build and maintain a coal fire. From there I graduated to making simple tools, chisels, punches, drifts and such how to heat treat and temper them. I still have some of those early examples and have to smile when I pick them up. Sadly he passed away too soon and I was "on my own" and I'm still learning.
June 29, 20178 yr Marc, you're right about the knives. Just about every kid that comes by my forge asks about making knives and swords. I think a lot of them have been hooked on some internet game called Minecraft. If I have newbies who want to make something - the old twisted 6mm square bar S hook is a good starter. It has a few basic skills - drawing to a point, rounding from square, scrolling a small hook, bending the larger hooks, making a centred twist etc. One of my earliest projects was the ram's head. I still have the first couple and look back on them now with horror, after having done hundreds over the last few years. I think a mistake a lot of beginners make is that they are too ambitious too early. Knives and tools are not beginner projects. Also, the choice of stock is a factor in early disappointments. Rebar is tough stuff, stainless is hard work, car parts are an unknown and wrought is not for beginners. I've made countless bottle openers, but I still can't make one from wrought. I advise beginners to spent a dollar or two and go buy some 10mm mild square bar before trying other stuff.
June 29, 20178 yr Our local club has an open forge night once a week where the public is welcome to come in and try their hand at blacksmithing. We've recently changed the curriculum for the newbies and it seems to be working out very well. The first project is an S-hook with different ends, rat tail and beaver tail. The second project is a letter opener, made to specific sizes and design. It builds on the skills learned from the hook plus adds drawing out for the blade width. The third project is a keychain hanger; three small J-hooks, all different ends, riveted to a flat stock backer plate with multiple textures and end treatments. We've found this to be very helpful in getting the new students exposed to many different techniques while building up their confidence and giving them usable completed projects. It usually takes them 3 to 4 evenings to complete all three projects, some a little less and some much longer.
June 29, 20178 yr Aus is the wrought iron bottle opener problem with the punched and drifted hole? Wrought iron doesn't like that. Old books show such things more likely to be done by drawing out a length close to finished size and bending it around and forge welding it in place. (and then you can etc the piece for the WI wood grain look...)
June 29, 20178 yr Thomas is sure right! I can't see drifting wrought iron ending well! I'd think you should be able to punch it though, and then you ought to be able to use a cone or anvil tip to draw the ring diameter out. A possible alternative to Thomas suggestion.
June 29, 20178 yr I have drifted a couple of hammer heads that were made out of wrought iron with forge welded steel faces. Even at larger stock sizes it can be a real chore keeping the material hot enough not to split along the "grain". On the other hand, when it is at the right heat it works like a dream. Kind of have a love/hate relationship with wrought...
June 29, 20178 yr On 25/06/2017 at 7:16 AM, Marc1 said: Then you get the ubiquitous "learn by forging your own tools". Another no no for someone barely able to make a barbecue fork. So, what would you consider a project that will provide a learning journey for a blacksmith enthusiast? From what I see at blacksmith gathering in OZ, most new people forge barbeque utensils, fire minding stuff, camping gear, hooks etc. Well I must be due a good wrist slap, the first forged item I made was a hot punch from a legth of rebar. Still use it today, How was I to know I wasn't capable of making a tool!
June 29, 20178 yr 4 hours ago, ThomasPowers said: Aus is the wrought iron bottle opener problem with the punched and drifted hole? Wrought iron doesn't like that. Old books show such things more likely to be done by drawing out a length close to finished size and bending it around and forge welding it in place. (and then you can etc the piece for the WI wood grain look...) Hmm, might have to give the WI bottle openers another chance. I have managed to punch WI since, but it's extremely time consuming when you can just draw out and weld like you said; or even leave the end open like a tin opener!
December 30, 20196 yr My first attempt at forging anything, was heating, and beating on a piece of re bar, just to see how to heat and move it. At the end of the day, I had burned up many pounds of charcoal, several inches/feet of material, and wound up with serviceable tongs. Not nice, and well finished by any wild stretch of the imagination, but usable.
January 12, 20206 yr I just started forging a couple of weeks ago and started with a Forge a Railroad Knife class. It was very accessible and fun. I've since joined the community forge in my area and spent a few hours last week just making a couple of leaves which let me practice some skills and start building some arm strength. This week I'll probably try making some scrolls. I'm definitely hooked
January 12, 20206 yr First things I made at my first class were nails. Lots of nails. Then leaves, several of them. Then a flower. Then, a horse head bottle opener. At that point, we were allowed to do what we wanted so I made a fire poker, a wall hook, and another opener. Very enjoyable, and highly educational! Had some great teachers in Jeff and Allen Lee.
January 12, 20206 yr The first thing I forged when I went on my first course was a scroll / snail key ring. I thought it was a great first project. 6mm round bar, draw out and taper both ends, coil it in to as tight a scroll as you can (I took great pride in not having gaps in mine) then a reverse loop on the end to form the head that goes on your keys. It's been on my keys ever since. It's a great first project because it only takes a hour to make, has a few different skills and every time I pick up my keys in the last few years I remember making it. That was the first hour of the course, after we all made a dragon coat rack. 25mm flat bar, isolated a head off the edge of the anvil, split it to form a mouth, punched an eye, drew out and tapered the tail, bent the whole thing in to a more sinuous shape, made 3 hooks, punched holes in them and the dragon and riveted them in place. That sits by my door with the dogs lead hanging on it.
January 15, 20206 yr I liked the spiral idea so tried it yesterday. Definitely tougher that I originally thought. My 2nd attempt is the one with the tighter spirals. Great practice idea.
January 15, 20206 yr I have a tool to help make them---it's a flat plate with a piece of angle iron or a sq bar welded across the bottom and a hole a little larger than the wire size drilled right next to the outside leg of the angleiron. Put it in your postvise, heat the wire and make a 90 deg bend in the end, reheat, drop the bent in in the hole and close the vise to trap it between the dependent angle/bar and run around the vise scrolling it. When cool, reheat and repeat. I also freehand them using light hammers. You can help pull them tight by flipping one over and pulling it against the side of the anvil and with pressure on the straight wire tap it a bit on the wound part against the side of the anvil. I've done spiral ended pins for my mortise and tenon post and beam tent frame and even pillar candle holders with the part held by the vise trimmed as a spike to mount the candle on and then the loose end bent up and over to make the handle. I found that the heavy wire used to ship rebar bundles with makes a great thing to recycle. Very soft under the hammer and often free. (Not rebar tie wire, shipping wire from places that don't use banding.)
January 15, 20206 yr I don't remember who posted it, but a few years ago one of our members posted a way to get tight spirals just using the jaws of the post vise. I think he was making small candle holders at the time, but the same principle applies.
January 16, 20206 yr You can draw a short taper on the end of the rod and turn it for the center of the scroll, then you heat the stock and clamp the scroll's center in the vise and bend the standing end over it. When you get to the vise loosen it, rotate the scroll in the vise, tighten, bend it down, loosen rotate, repeat. One trick to making this a really fast method is rotating the scroll till the standing end (the part you're holding) is almost in the vise jaws on the far side of the scroll this way you get the most turned onto the existing scroll. The larger the scroll the more stock gets turned and faster it goes. When you close the vise on what you just turned they flatten it all nicely so it's flat and even. I hope I've muddied things sufficiently, if not let me know. Frosty The Lucky.
January 16, 20206 yr I do mine with a hammer and anvil and the final loop is formed with a pair of long nosed pliers. The best way I have found of tightening the spiral is hooking it over the horn and a few taps with the hammer. Probably not the most efficient way but I'm still learning to move the metal.
January 18, 20206 yr On 6/25/2017 at 12:16 AM, Marc1 said: I remember as if it was yesterday What a treasured memory! It made my day. Thanks for sharing.
January 18, 20206 yr Author Thank you Anvil .. I had forgotten that post. As for the spiral, best way is with a jig like Thomas and others have mentioned to avoid hammer marks on the face of the spiral.
January 18, 20206 yr I do mine like Dax, hammer & anvil although I use the edge of the anvil to taper and make the first tight scroll. Then the step to get the first several coils. After that I move to the vise to make it larger (more coils) and a rawhide or wood mallet to keep it aligned on the anvil.
Join the conversation
You can post now and register later. If you have an account, sign in now to post with your account.