Alan Evans
Members
-
Joined
-
Last visited
Everything posted by Alan Evans
-
Is it just me that cannot see Glenn's photo? I am not connecting in the text only mode that others over here in the UK are suffering. All the other images on this page are showing up. Alan
-
-
I think Bob Engnath's work is n times better. Alan
-
When I idly looked at images on Google, the hooped channel looked IH-ish. Alan I was riding around on the bale sledge with my little chums. When the driver stopped to pull the string and release the gate he set off with a jerk, I lost my seat and went out with the bales, clobbered by the gate as it passed over me...ouch. How do we ever survive childhood? Alan
-
That pattern of spreader is very similar to a Massey Harris one I had as a toy a few years ago in my youth. Alan
-
It would not be out the window faster than me! That reminds me of a homemade poster we had in one disreputable student house... "If we had some chips, we could have sausage and chips... ....if we had some sausages". Alan
-
I think you should keep taking the tablets. Alan
-
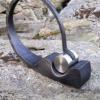
That is a very elegant blade, one of the most interesting I have seen...I feel an homage fish knife coming on, to be completed in time for the 25. December. I can figure some dimensions from the cork or have you cut that down at all? Ø 21mm x 46mm (Ø 0.83" x 1.8") is a cork I have here. How do you find it in use? Is there anything about it you would alter? The two different radii at the blade ends are gorgeous! Alan
-
I was talking about a dog-fight not dogma...or would that be gauche of me to state? Alan Or even forgetting Hickory Dickory doxterous... Probably better to forget it on second thoughts. Alan
-
The old ones are the best! Alan
-
certainly no offence taken! I meant it all in a clever clogs way...sinister and dexter being latin right and left...trying to get it in as many times as possible! I am left handed and left eyed but I hammer right handed, fairly ambidexterous and have a word fascination but not dyslexia. A crazy mixed up kid me... Alan
-
Inferior? Sinister turn this thread has taken. You have to be doubly dexterous to survive as a left hander in this right handed world. Interesting that left handed fighter pilots on both sides of the second world war had a higher percentage survival rate than the right handed majority. The left handed / spatial relationship link gave them an intuitive advantage in a dog fight. The down side was that the also often associated dyslexia probably prevented some of the hopefuls from qualifying as pilots... Alan
-
I think you may be right about the Spaniel...I have Springers, my sister has Cockers, some friends have Sprockers. I would say yours is more of a Sprocket. Typically defined by sharp hearing and a key sense of smell. Alan
-
Well yes, you can flatten the weld down with the grinder of course, but the thread is not about how to remove the weld....the question the OP posed was how best to further refine the process and remove the angle grinder marks in order to match the unground surface. Alan
-
As usual it depends what you are wanting to upset and how many you envisage doing. I have never had to do enough to warrant a specific vice. For small section up to 25mm (1") I found the most efficient way was to hold the piece horizontally in the smooth jawed leg vice and heat with the oxy-acetylene rose bud which controlled the upset very precisely...no energy and time wasted straightening up. The largest section I have upset was 100mm (4") square and those were suspended on two cranes and swung like a battering ram against the face of the 3cwt hammer anvil. Horses for courses. If you laid a leg vice on the bench and hung the jaws over the edge it would make a very simple upsetting clamp if you wanted to swing vertically. A bespoke upsetting vice seems like a lot of investment for not much advantage over "making do" and still you are limited to hand power. If you are envisaging batch processing a lot of upsets commercially I would be looking at a powered system. Either under a power hammer or hydraulic press. Alan
-
Helpful. Any chance of elaborating? Alan
-
I found using graphite halves the tonnage required to push a punch and drift through...makes the job go a lot easier all round... I mix flake graphite with Renaissance wax or with Molyslip Metal Lubricant both of which hold the graphite on the surface of the punch. The Renaissance wax smells nicer when it is burning off, but the white spirit in it evaporates and means the pot needs thinning down now and then, the Molyslip Metal Lubricant seems to stay liquid for months. If you intend to do any finishing with paint or lacquer do not use silicone based lubricants in your workshop. Silicone has a a smaller molecule than industrial thinners...nothing can get under it to lift it, making it virtually impossible to remove in order to prevent orange peel finish surfaces. Alan
-
Well I have punched two zillion holes and always use a bolster. Either a fixed or sliding bolster under the press....actually it is true I am usually using a slot punch and drift rather than a round punch for a rivet. But the process does depend on drifting through over an appropriate sized hole for the size of the punch/drift in order to prevent the problem the OP has of dragging the sides into the pritchel hole. I agree when you are using a punch that is the same size as the required hole and the material is thick enough to shear the slug clean working over the face of the anvil is fine, you are supporting the sides of the hole. I am mostly trying to get more spread so slot and drift. With offset jaw tongs I usually do them under the power hammer so they are punched on their backs and then flipped over onto a bolster which raises the offset jaw above the bottom pallet. Alan
-
Make a bolster plate with a series of hole diameters to suit the size of punch and support the sides of the hole. If you are knocking out a Ø6mm (1/4") slug and your finished drifted hole is an Ø8mm (Ø5/16") hole...don't use a Ø20mm (Ø3/4") pritchel hole as a bolster....do the maths as they say....or math as you say I have seen the guy at Vaughan's making tongs on a little 1cwt Alldays hammer, he just used a hex nut as a bolster to take the slug. The advantage of a circular or hex bolster block over a bolster plate with a lot of holes, is that it is easy to centre it under the hole....especially when punching little holes for things like tong rivets. Alan
-
Is that "swords into ploughshares" or the other way around? Alan
-
-
Follow the white rabbit to the blacksmiths course and the rural craft centre, and you shall behold this page http://www.hlcollege.ac.uk/Downloads/craftpublications.html The PDFs there should give you every thing you need to know about blacksmithing, let alone thatching wheelwrighting and saddlery. Happy reading! Alan ps if you still have problems, yes... pm your email and I will send them.
-
Its the light duty bit I was concerned about...last week I was cutting a thread on a bit of Ø20mm 316L stainless using a die stock and the lathe in slow mo. I was really having to lean on the chuck key to prevent the stainless from slipping in the chuck with the load. Shiny hard material, small diameter, high torque operation, self-centring four jaw chuck...all things contributed...but it is not the only time I have had to heave on the key to the maximum of my strength. You alone know exactly the use you have in mind for it so a lock nut may well be adequate...but you have created a problem that needs solving rather than designed the piece to avoid that problem in the first place! I had to replace the drive wheel on a trommel for the community composting scheme recently. It was a rubber tyred wheel direct driven by the motor spindle. I had to push out the roller bearing it came with and replace it with a solid sleeve...Ø50mm (Ø2") OD and Ø25mm (Ø1") ID. I keyed the wheel to the sleeve and the sleeve to the axle by drilling along the joints and tapping for grub screws/drive keys. Much stronger than a pinch bolt at right angles to the axle. Alan
-
I assumed that and thought it was a good joke and wanted to join in. Many a true word spoken in jest...becoming familiar with the psychology of various machines is a very real thing. I definitely had to rethink the way I forged when I started using the longer stroked air hammers with flat dies and tooling instead of the direct forging hammers. Alan
-
KISS? Consider making it the conventional way. Design for its mechanical function rather than ease of construction. Avoiding filing the square drive accurately by using the 1/2" square is not the best starting point. Use a heavier piece for the key or upset your half inch bar and put a hole through it to take the brass, or roll an eye on the end of the 1/2" to take the brass...That way the mechanical advantage is how it needs to be. The rotary drive is taken through a solid construction. Your solution, as pretty as it is, is trying to impart torque by locking an ordinarily rotating system...not sensible engineering. You might be able to lock it sufficiently with a lock nut, but as soon as you try using it you are likely to impart more torque through it than was used to lock the nut so it will never be solid. From where you are now...in order of least work first:- You could silver solder or braze it. You could drill down through the threads and put in a roll pin or grub screw to act as woodruff key. You could file the hole in the brass square and fit and rivet the steel into it. You do not need to make the brass hole square...just one corner would be easier, and round off three corners on the steel tenon. Alan