j.w.s.
-
Posts
642 -
Joined
-
Last visited
Content Type
Profiles
Forums
Articles
Gallery
Downloads
Events
Everything posted by j.w.s.
-
Ribbon burners have a soft spot in my heart, probably my favorite performance wise. So what's your plenum volume? J
-
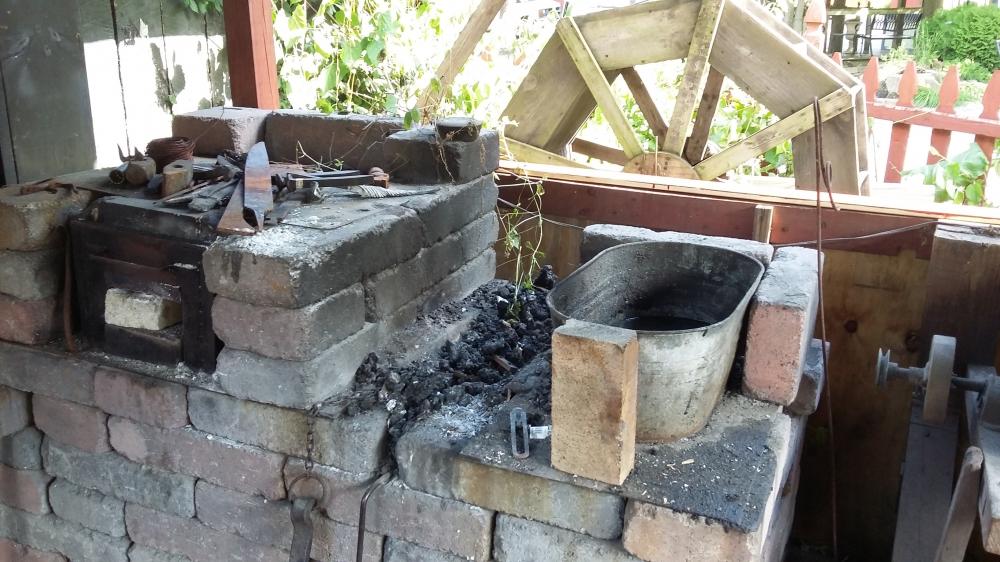
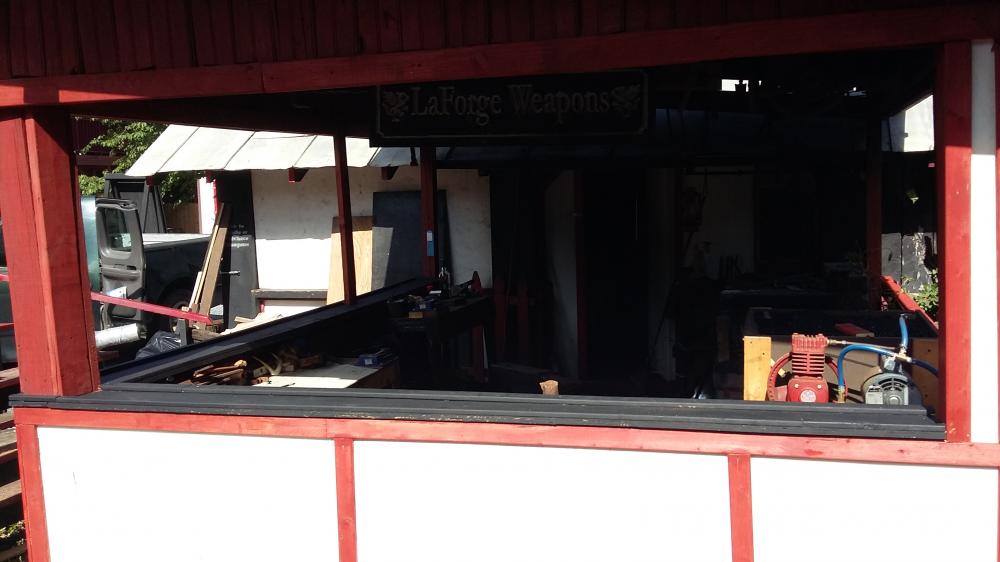
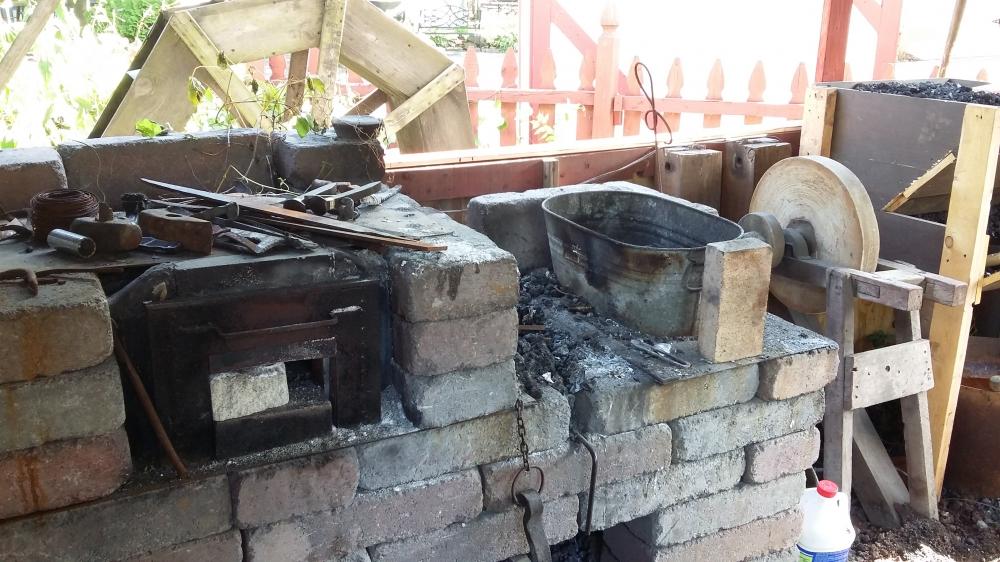
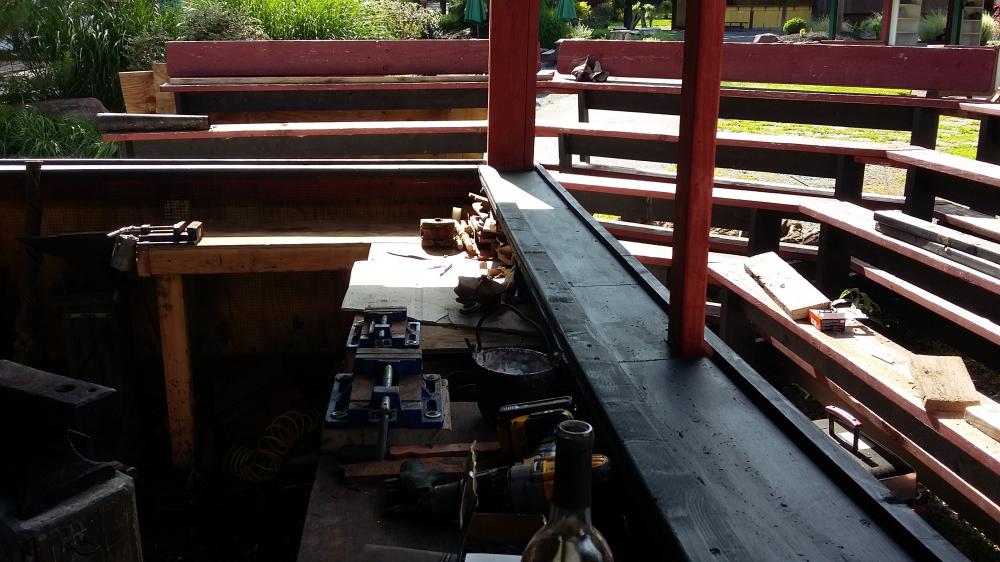
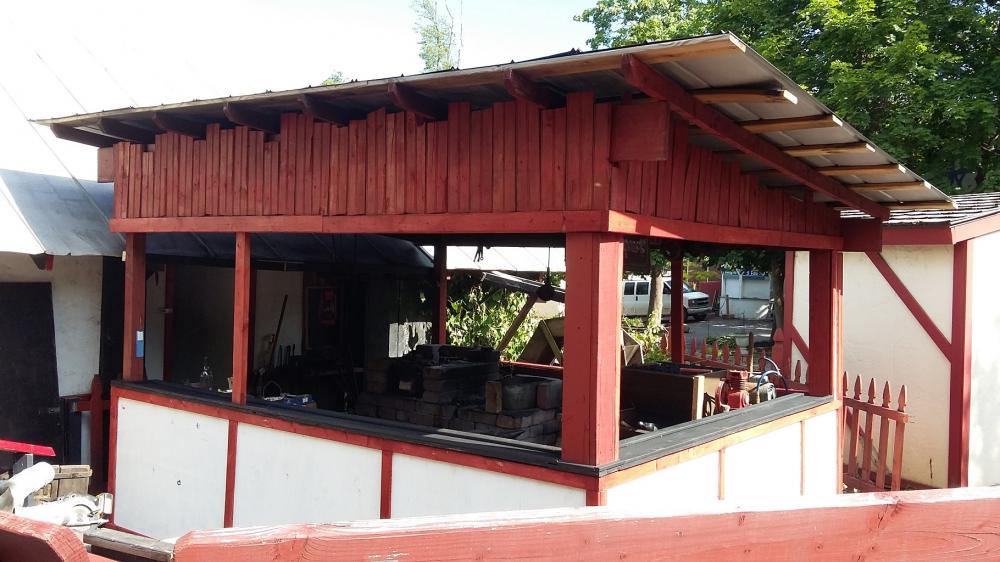
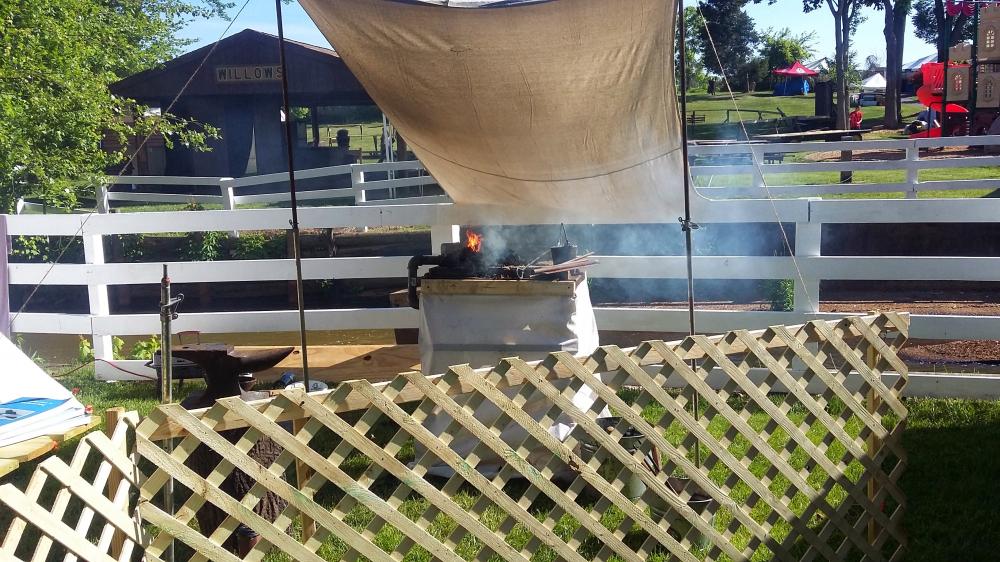
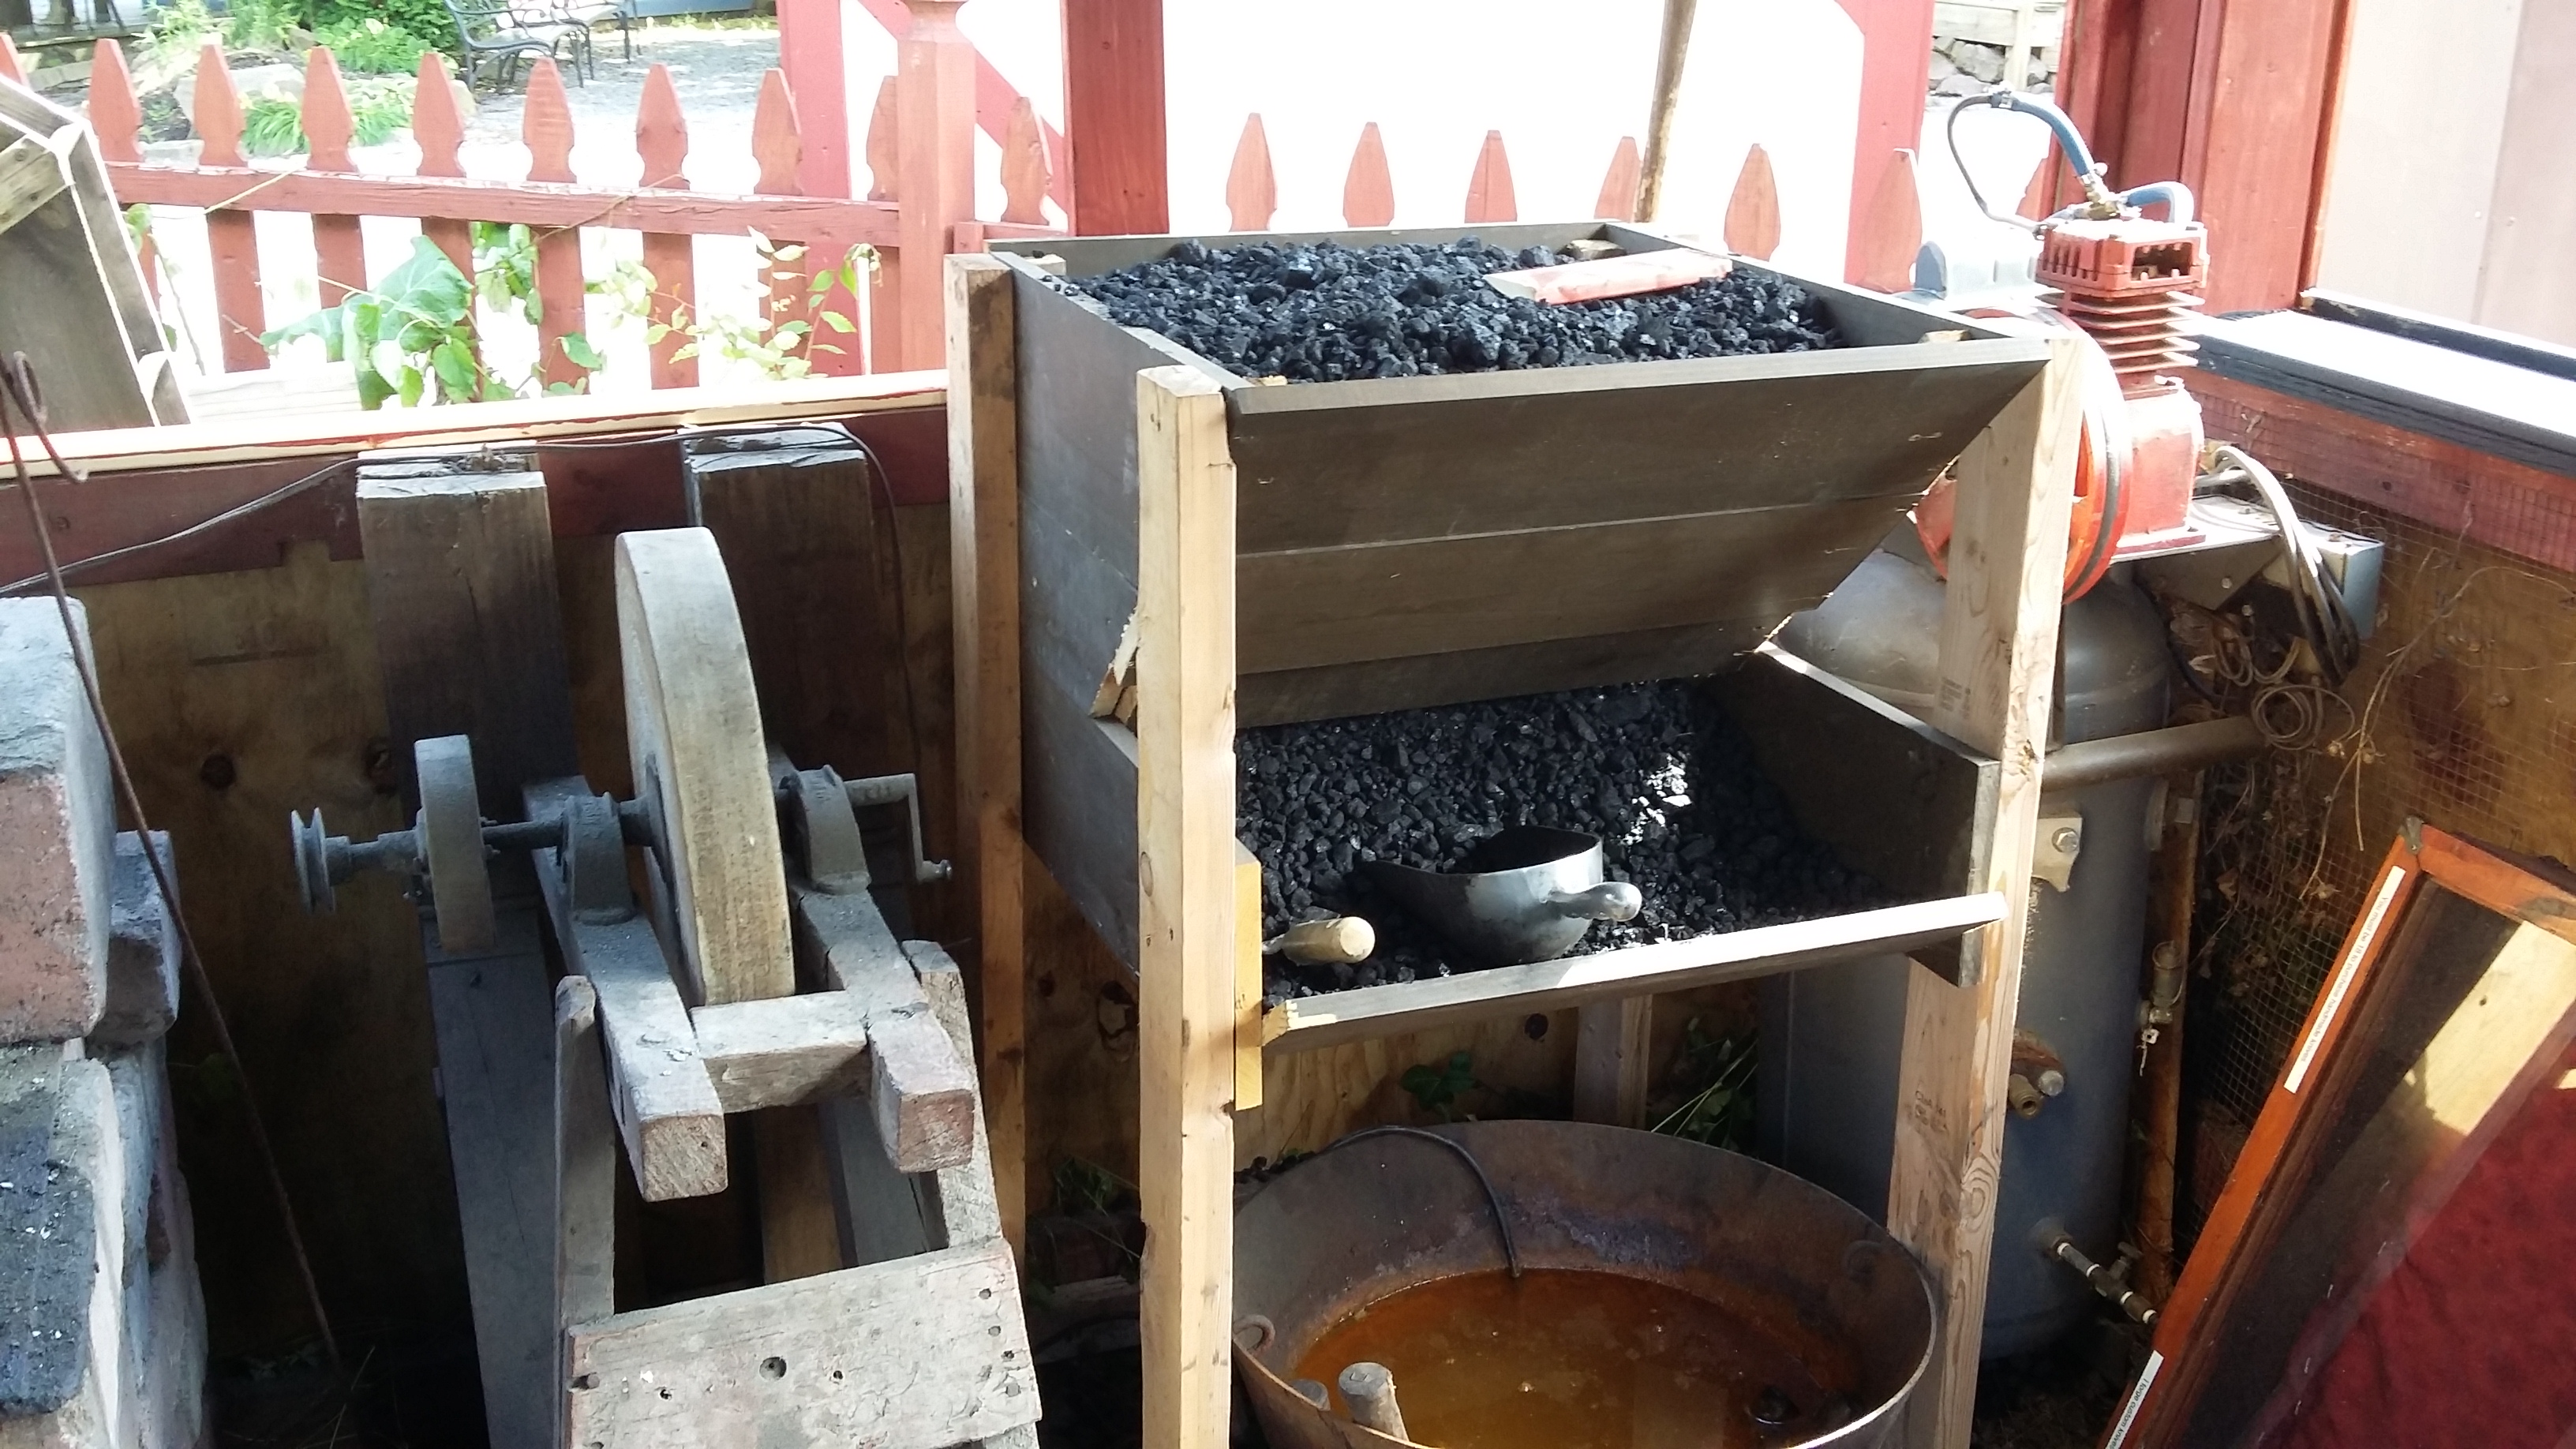
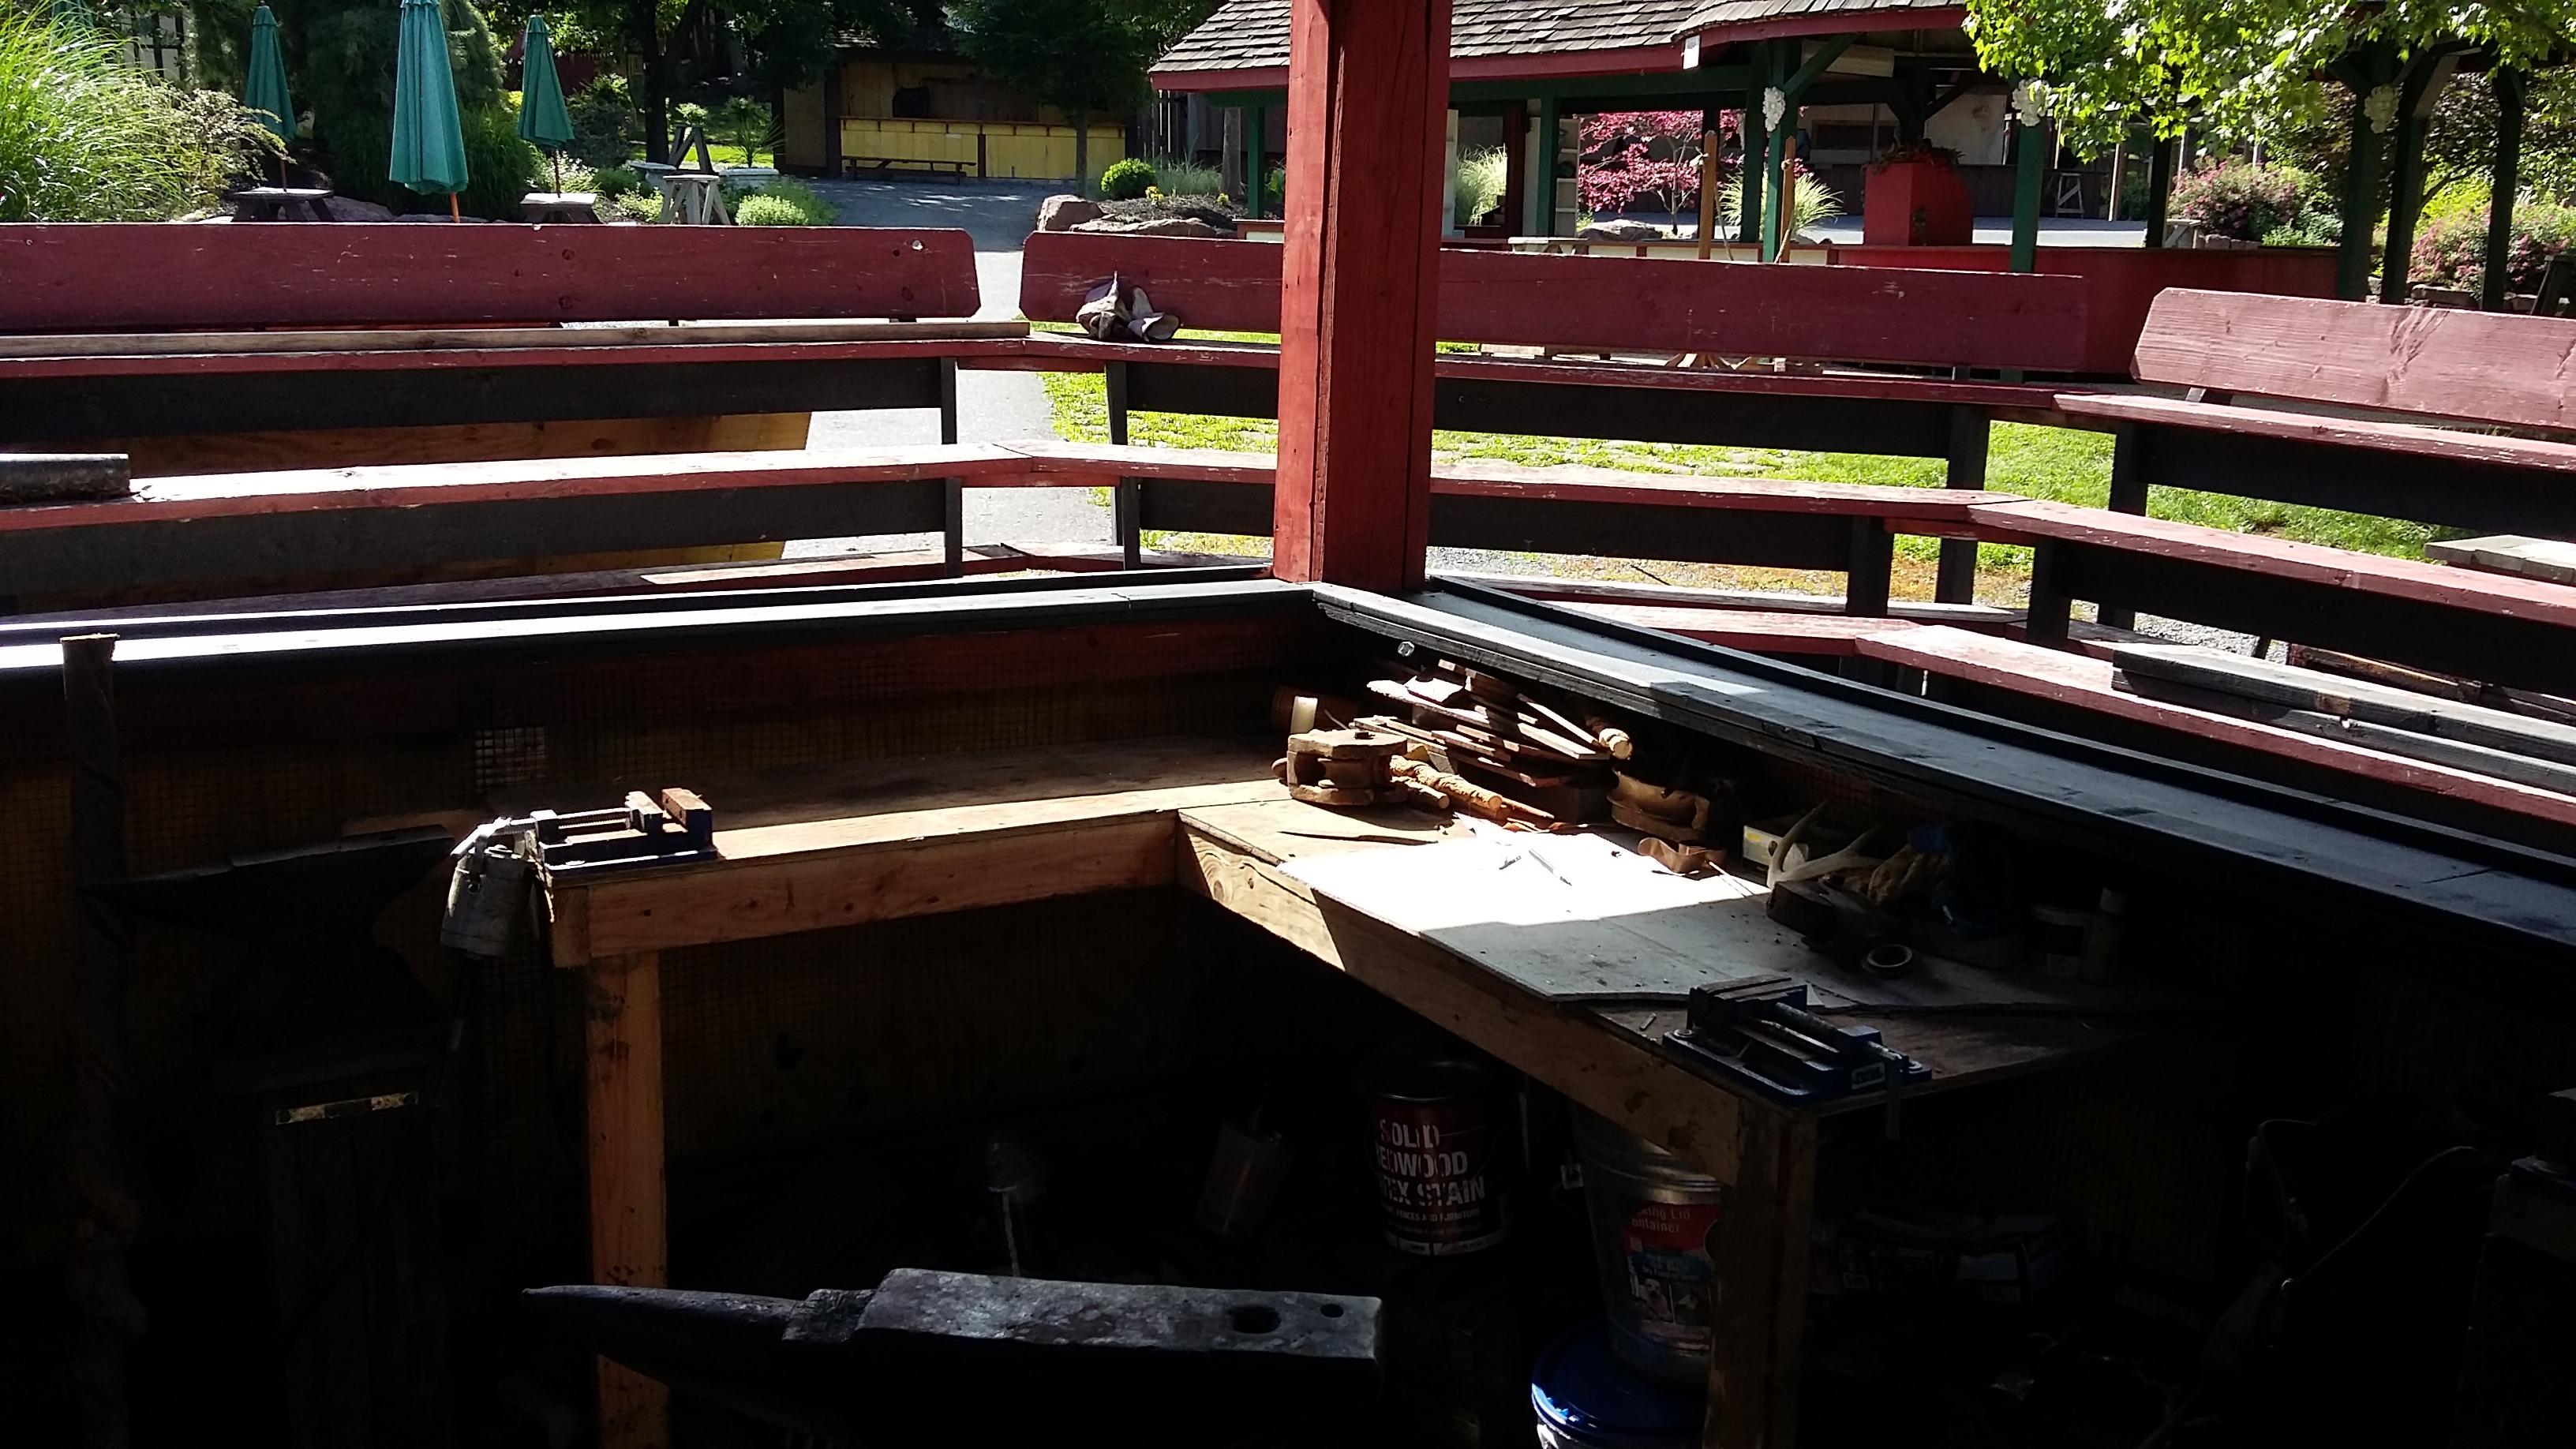
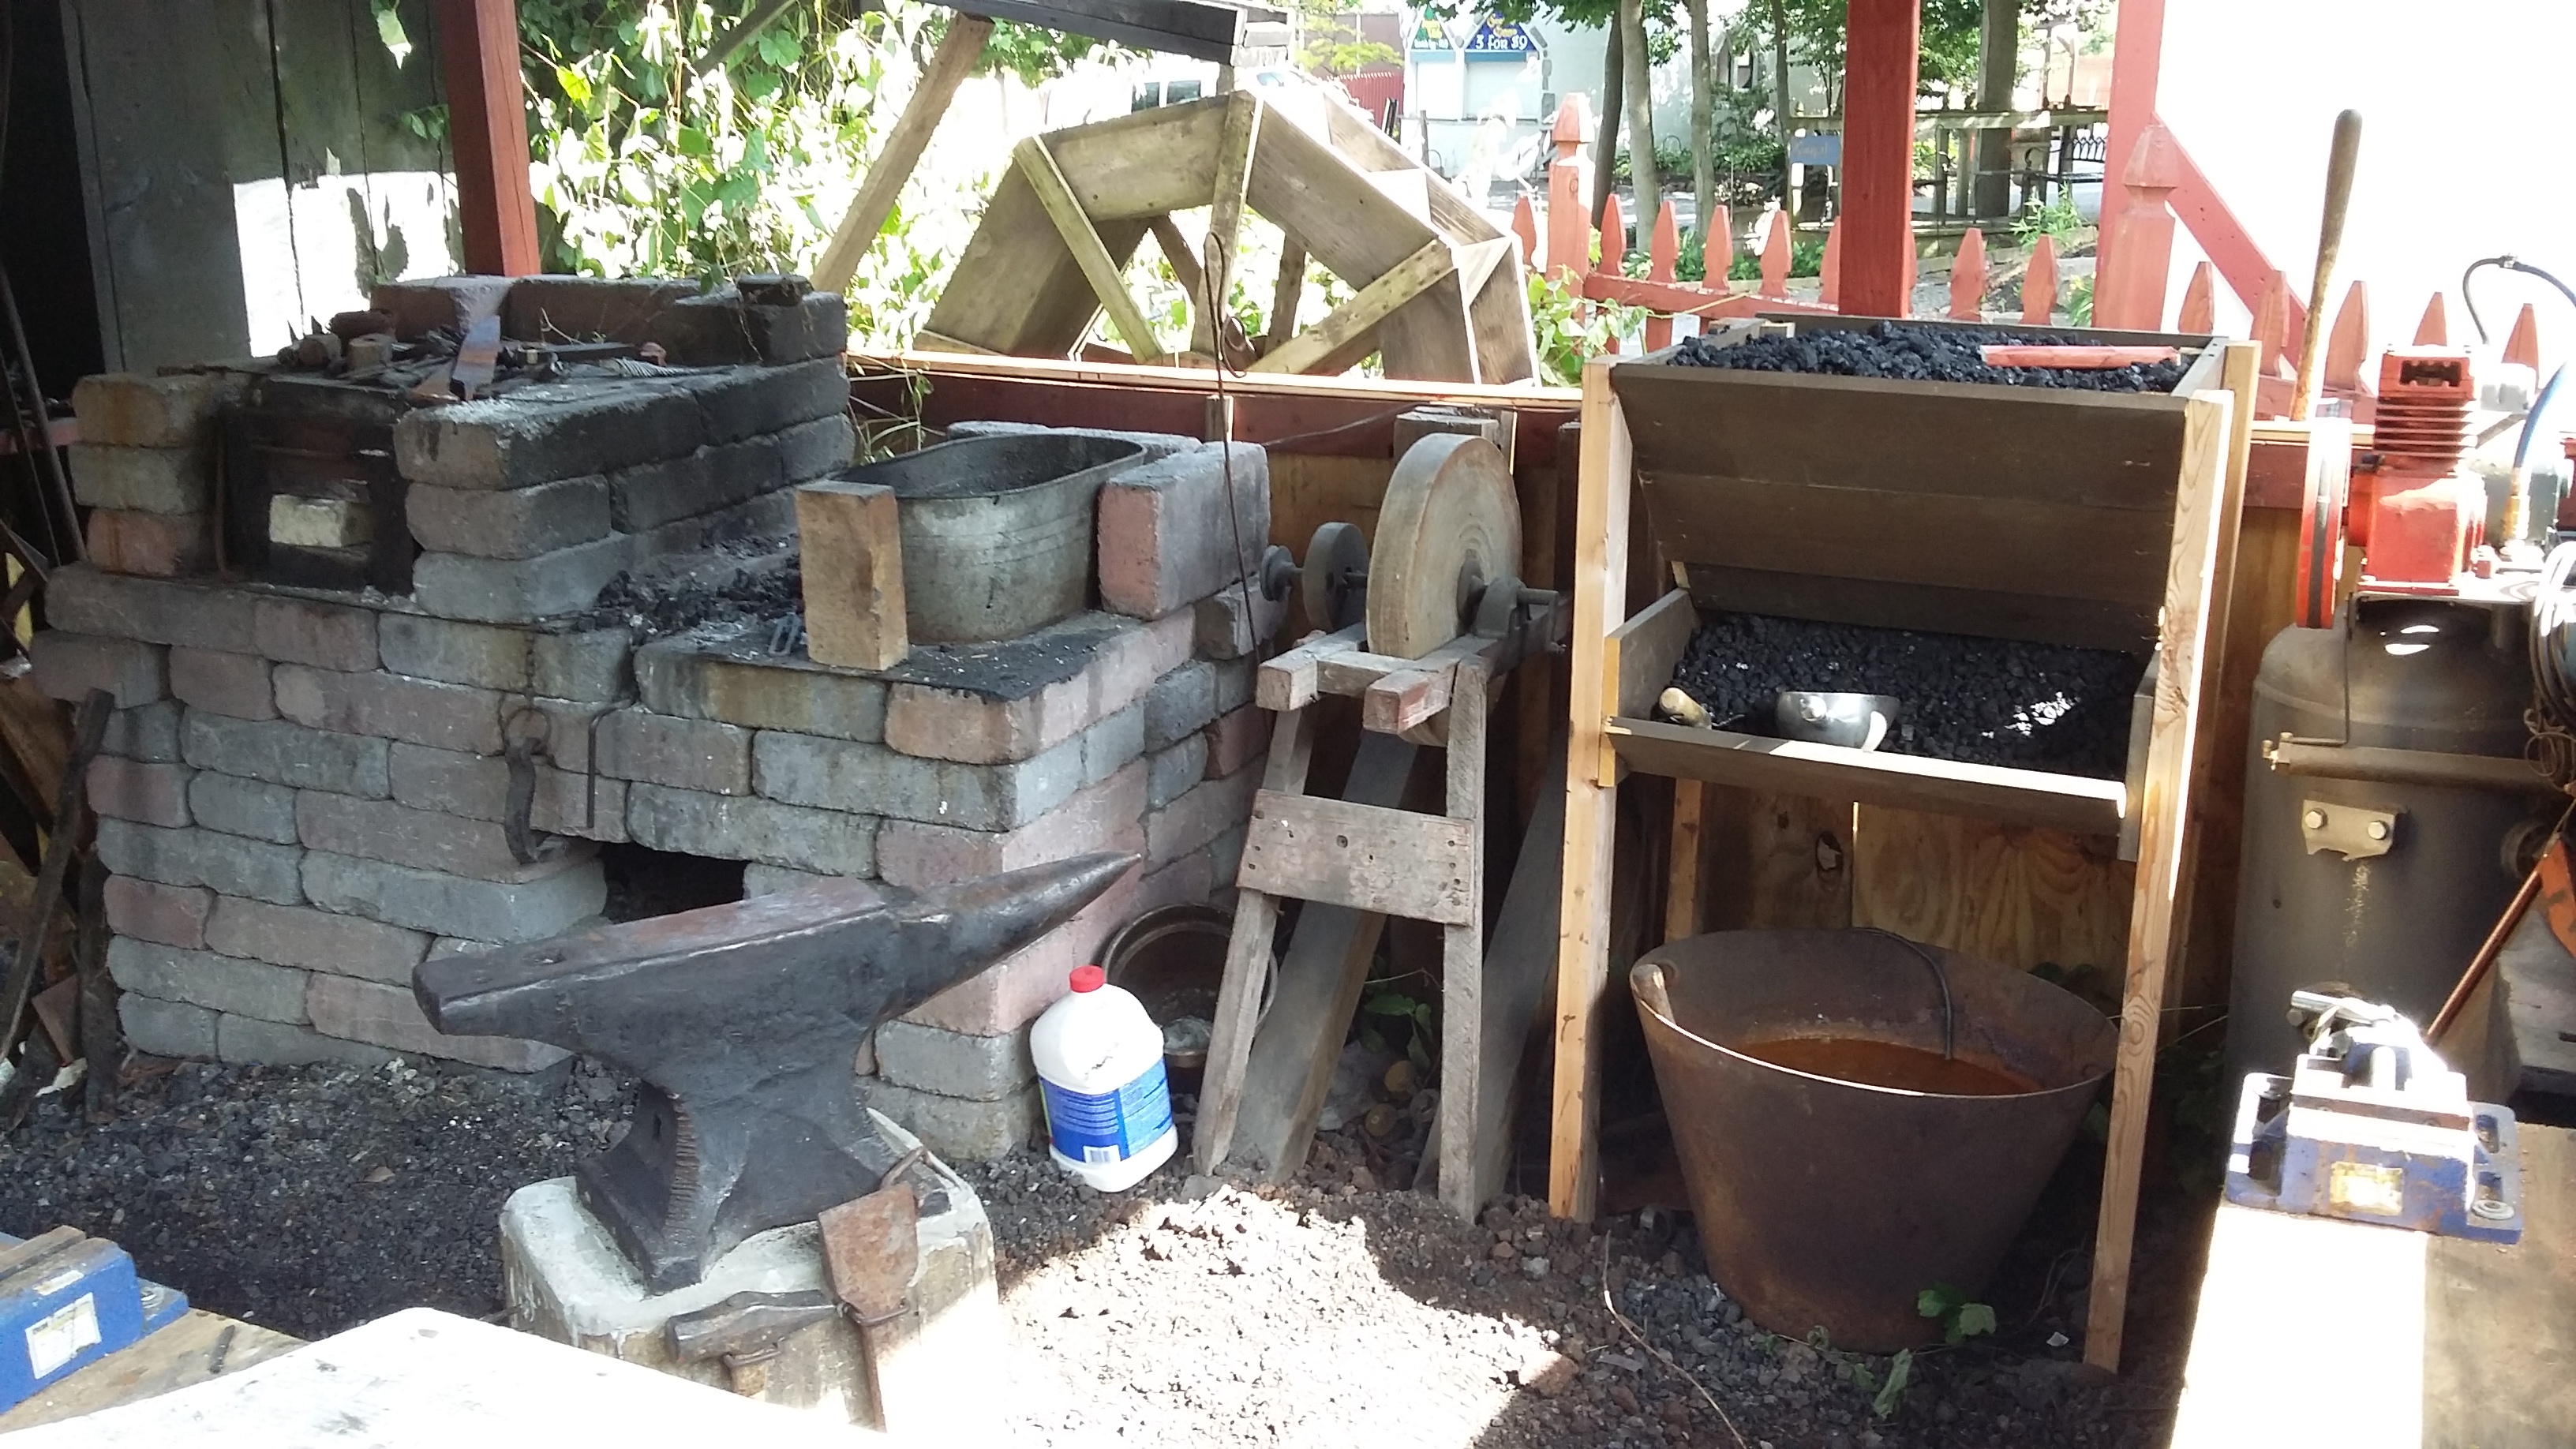
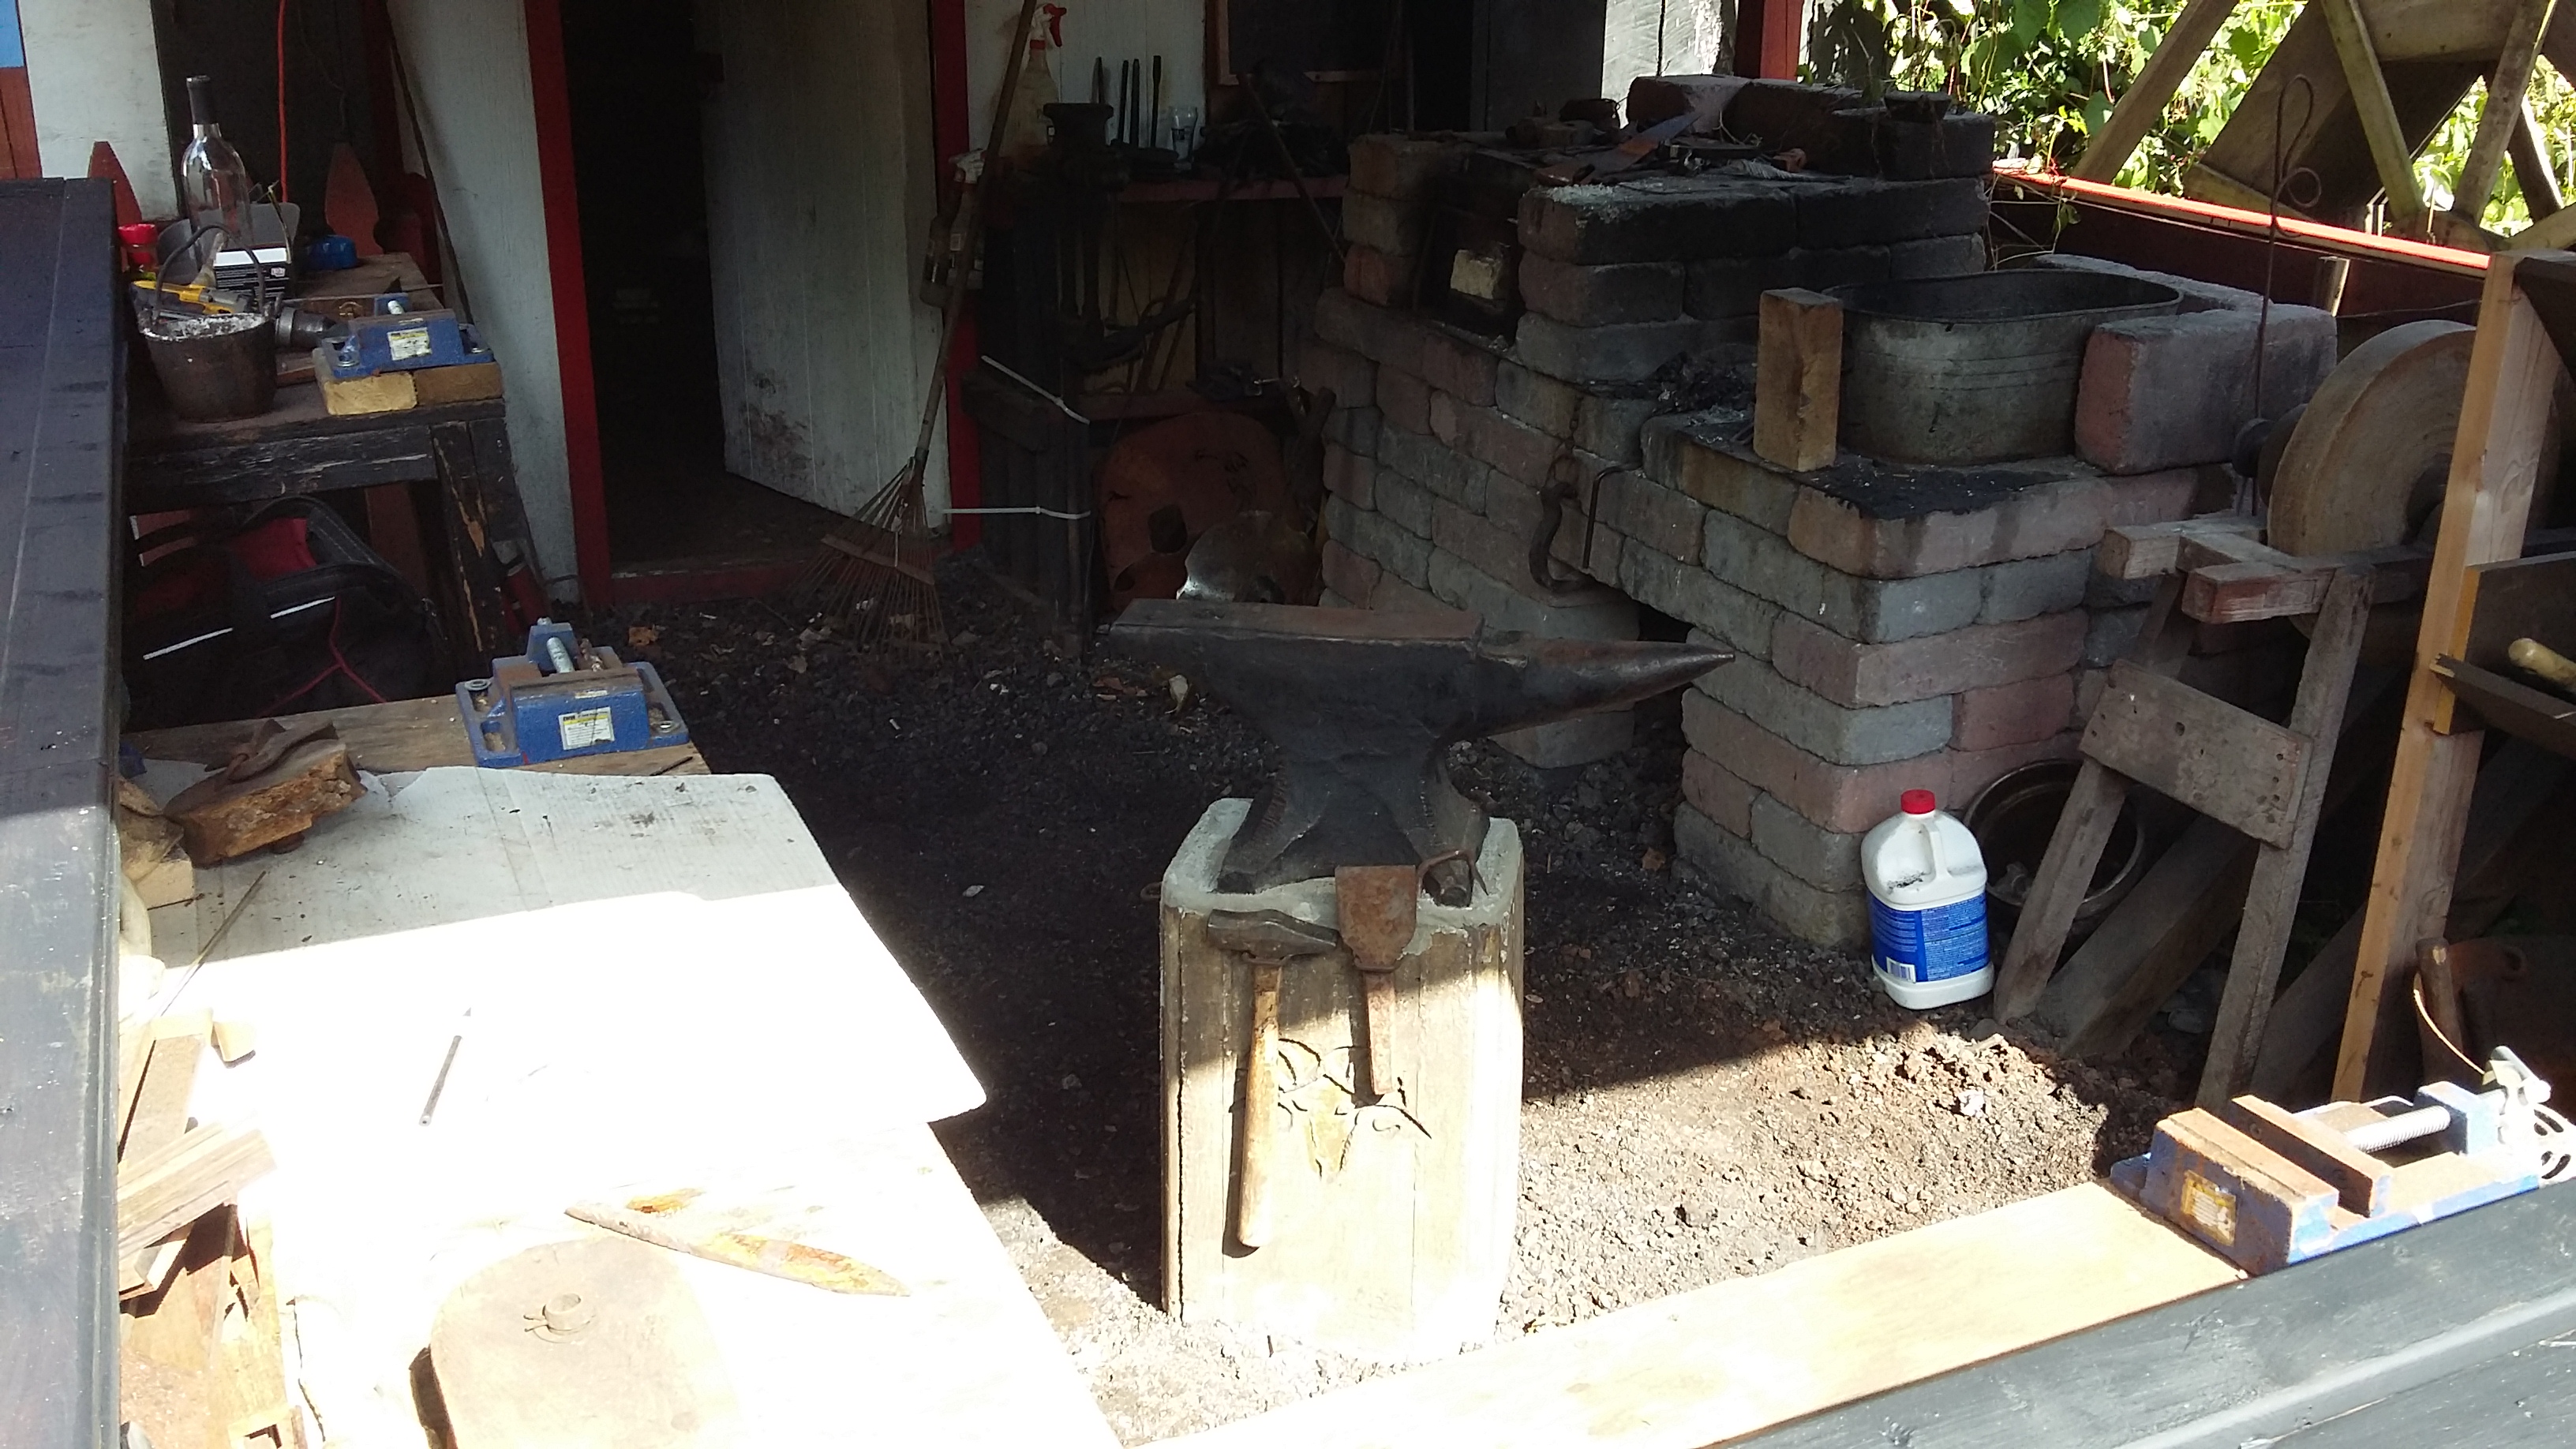
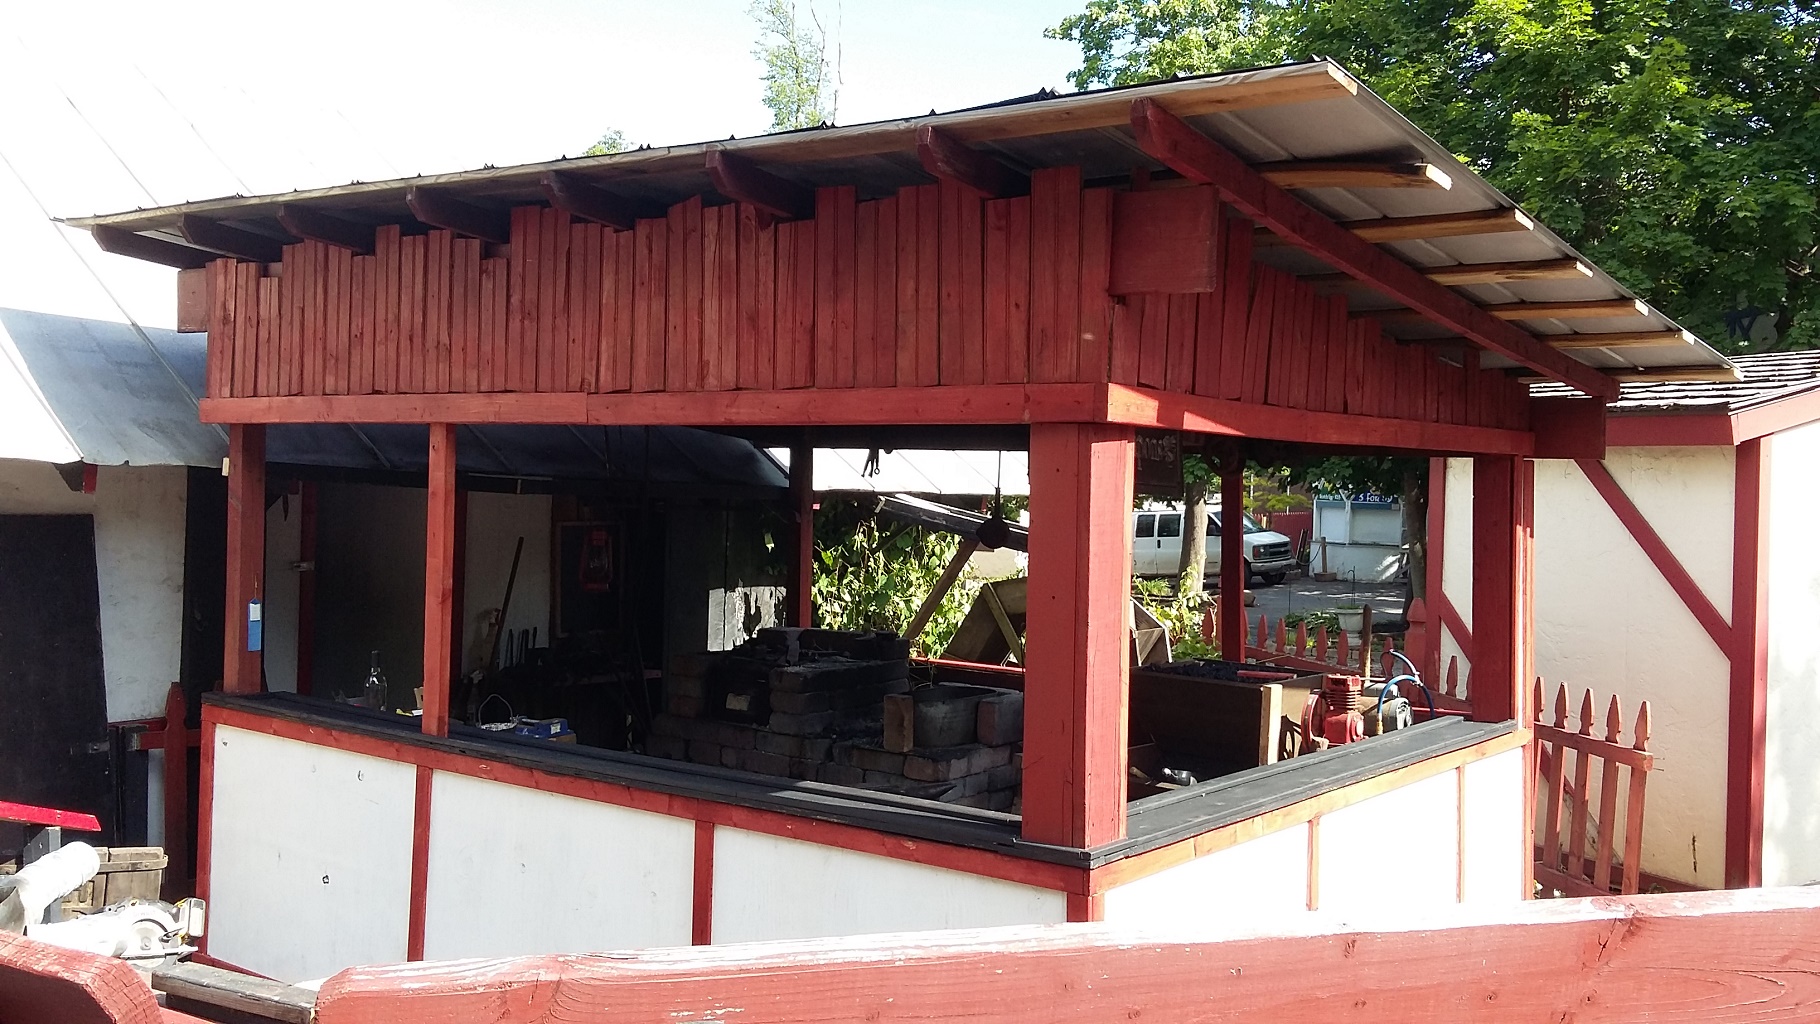
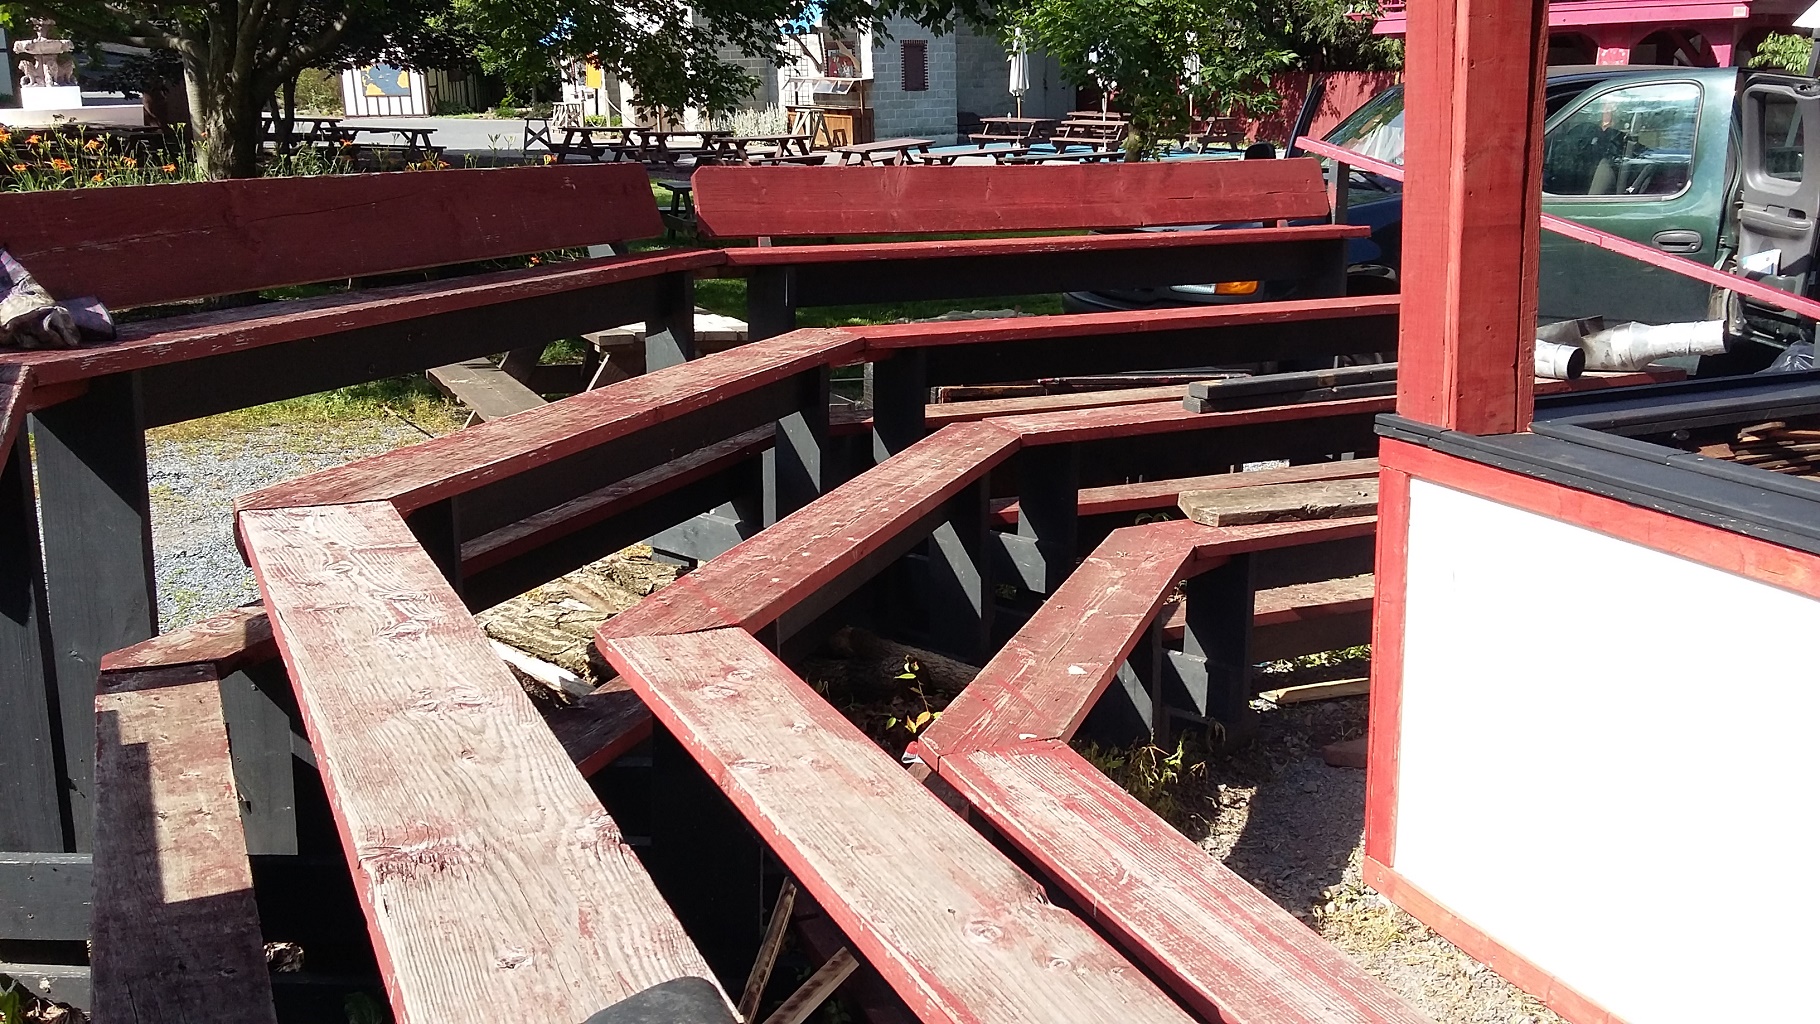
I've been cleaning up, repainting and tweaking my demonstration area at the Pennsylvania Renaissance Faire over the past few days and I still have more to do, Now, we've had this building for 27 years and I've been smithing in it for 20 now.. it's changed a lot over the years and the following pictures are all what I've managed to build myself over the past 6 or so years. Next big project is clearing all the grape vine from my fish pond (under the water wheel) and building a hood/chimney for the forges. During the off season this is one of the areas I enclose and teach classes in. -J A shot of my gas forge, coal forge and small quench tank. This is the coal bin I built a few weeks ago, it holds about 250lbs. An overall shot of my working area - the air compressor doesn't actually belong here and it'll be gone before the Renaissance Faire begins in August but I use it for a few tools. A look from the outside in. Workbench and a view looking out at the bleachers. A shot of the newly installed anvil pillar courtesy of Randy McDaniel. Yesterday I fit my anvil and recast the top just to level it out a bit. Today I added this narrow counter top as a display for knives. I'll probably cover it in fabric and some nice pieces of timber to make a display. Also a shot of my second workbench. Here's the stadium style bleachers that wrap around my demo area, yeah, they're in need of a new coat of stain. I think they comfortably hold about 75 people but I typically get almost double that for demo's 3 times a day, they just pack in along the sides and back. And this is the outside shot of my demo area looking over the bleachers.


-
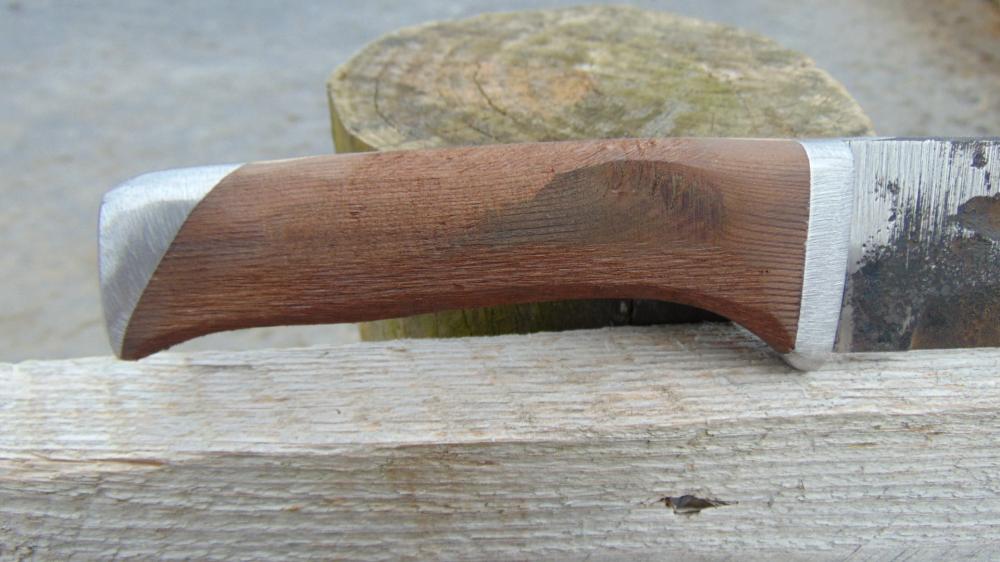
Hey, don't go dragging me into this! lol, yeah, I happen to like that style of blade for a non-bolstered knife, but I still hammer mine out! If it wasn't for you young whipper-snappers asking 1,001 questions when ya could just have listened to what I told ya in the first place, I'd have more time to pay attention to what I'm hammering! lol - I do like that blade the best though.. -J
-
First Blacksmithing Class - Peter's Valley
j.w.s. replied to LibrariaNPC's topic in Blacksmithing, General Discussion
Anthony, you're doing just fine,.. and you're one of the better students I've had, at least you know how to take notes.. lol -J -
and a lot more expensive by the pound, lol. the stuff I'm using is lead free and comes in a 6lb ingot. J
-
Another quick shot of a piece I roughed out yesterday.. J
-
Why is my steel cracking, and how do i fix it
j.w.s. replied to The Young forge's topic in Blacksmithing, General Discussion
That's a good place to start. I always recommend to new blacksmiths to always buy quality steel and stick with the same grade.. the learning curve is so much better when you can narrow down cause and effect. Scrap steel has way too many past life unknowns, be it stresses, fractures, previous abuse etc. Another huge factor is what you're quenching in and the temperature of that medium. 120F oil is going to treat steel differently 70F. J -
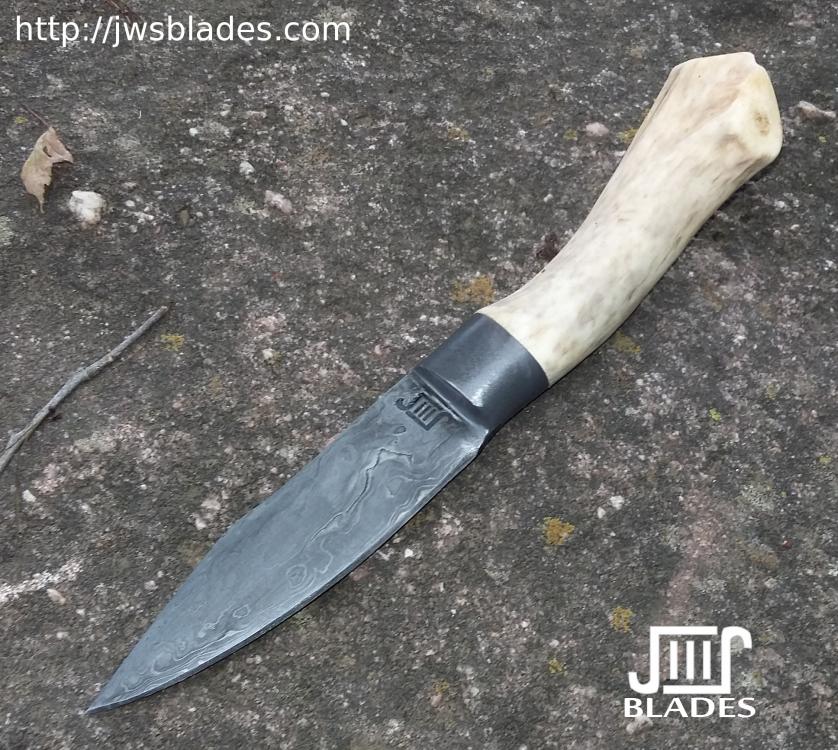
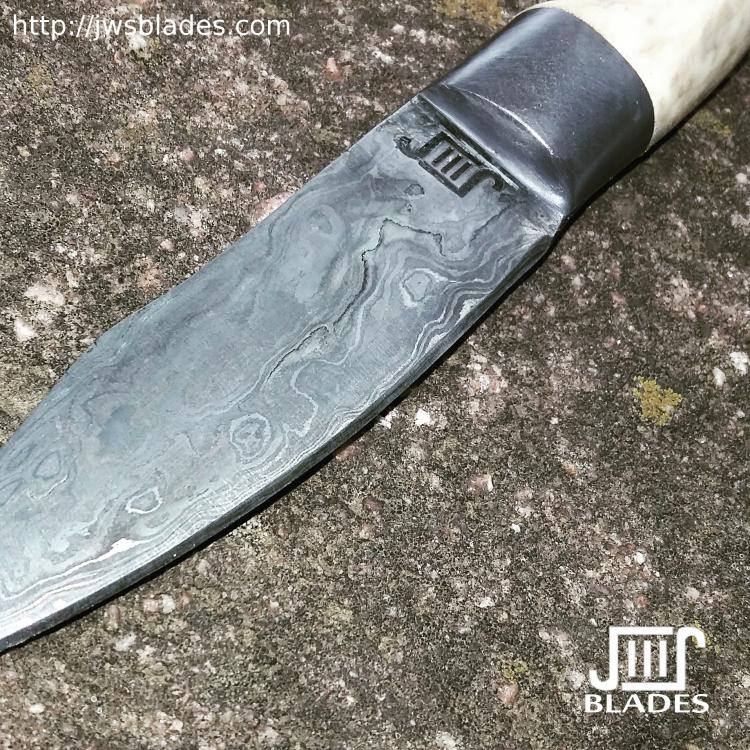
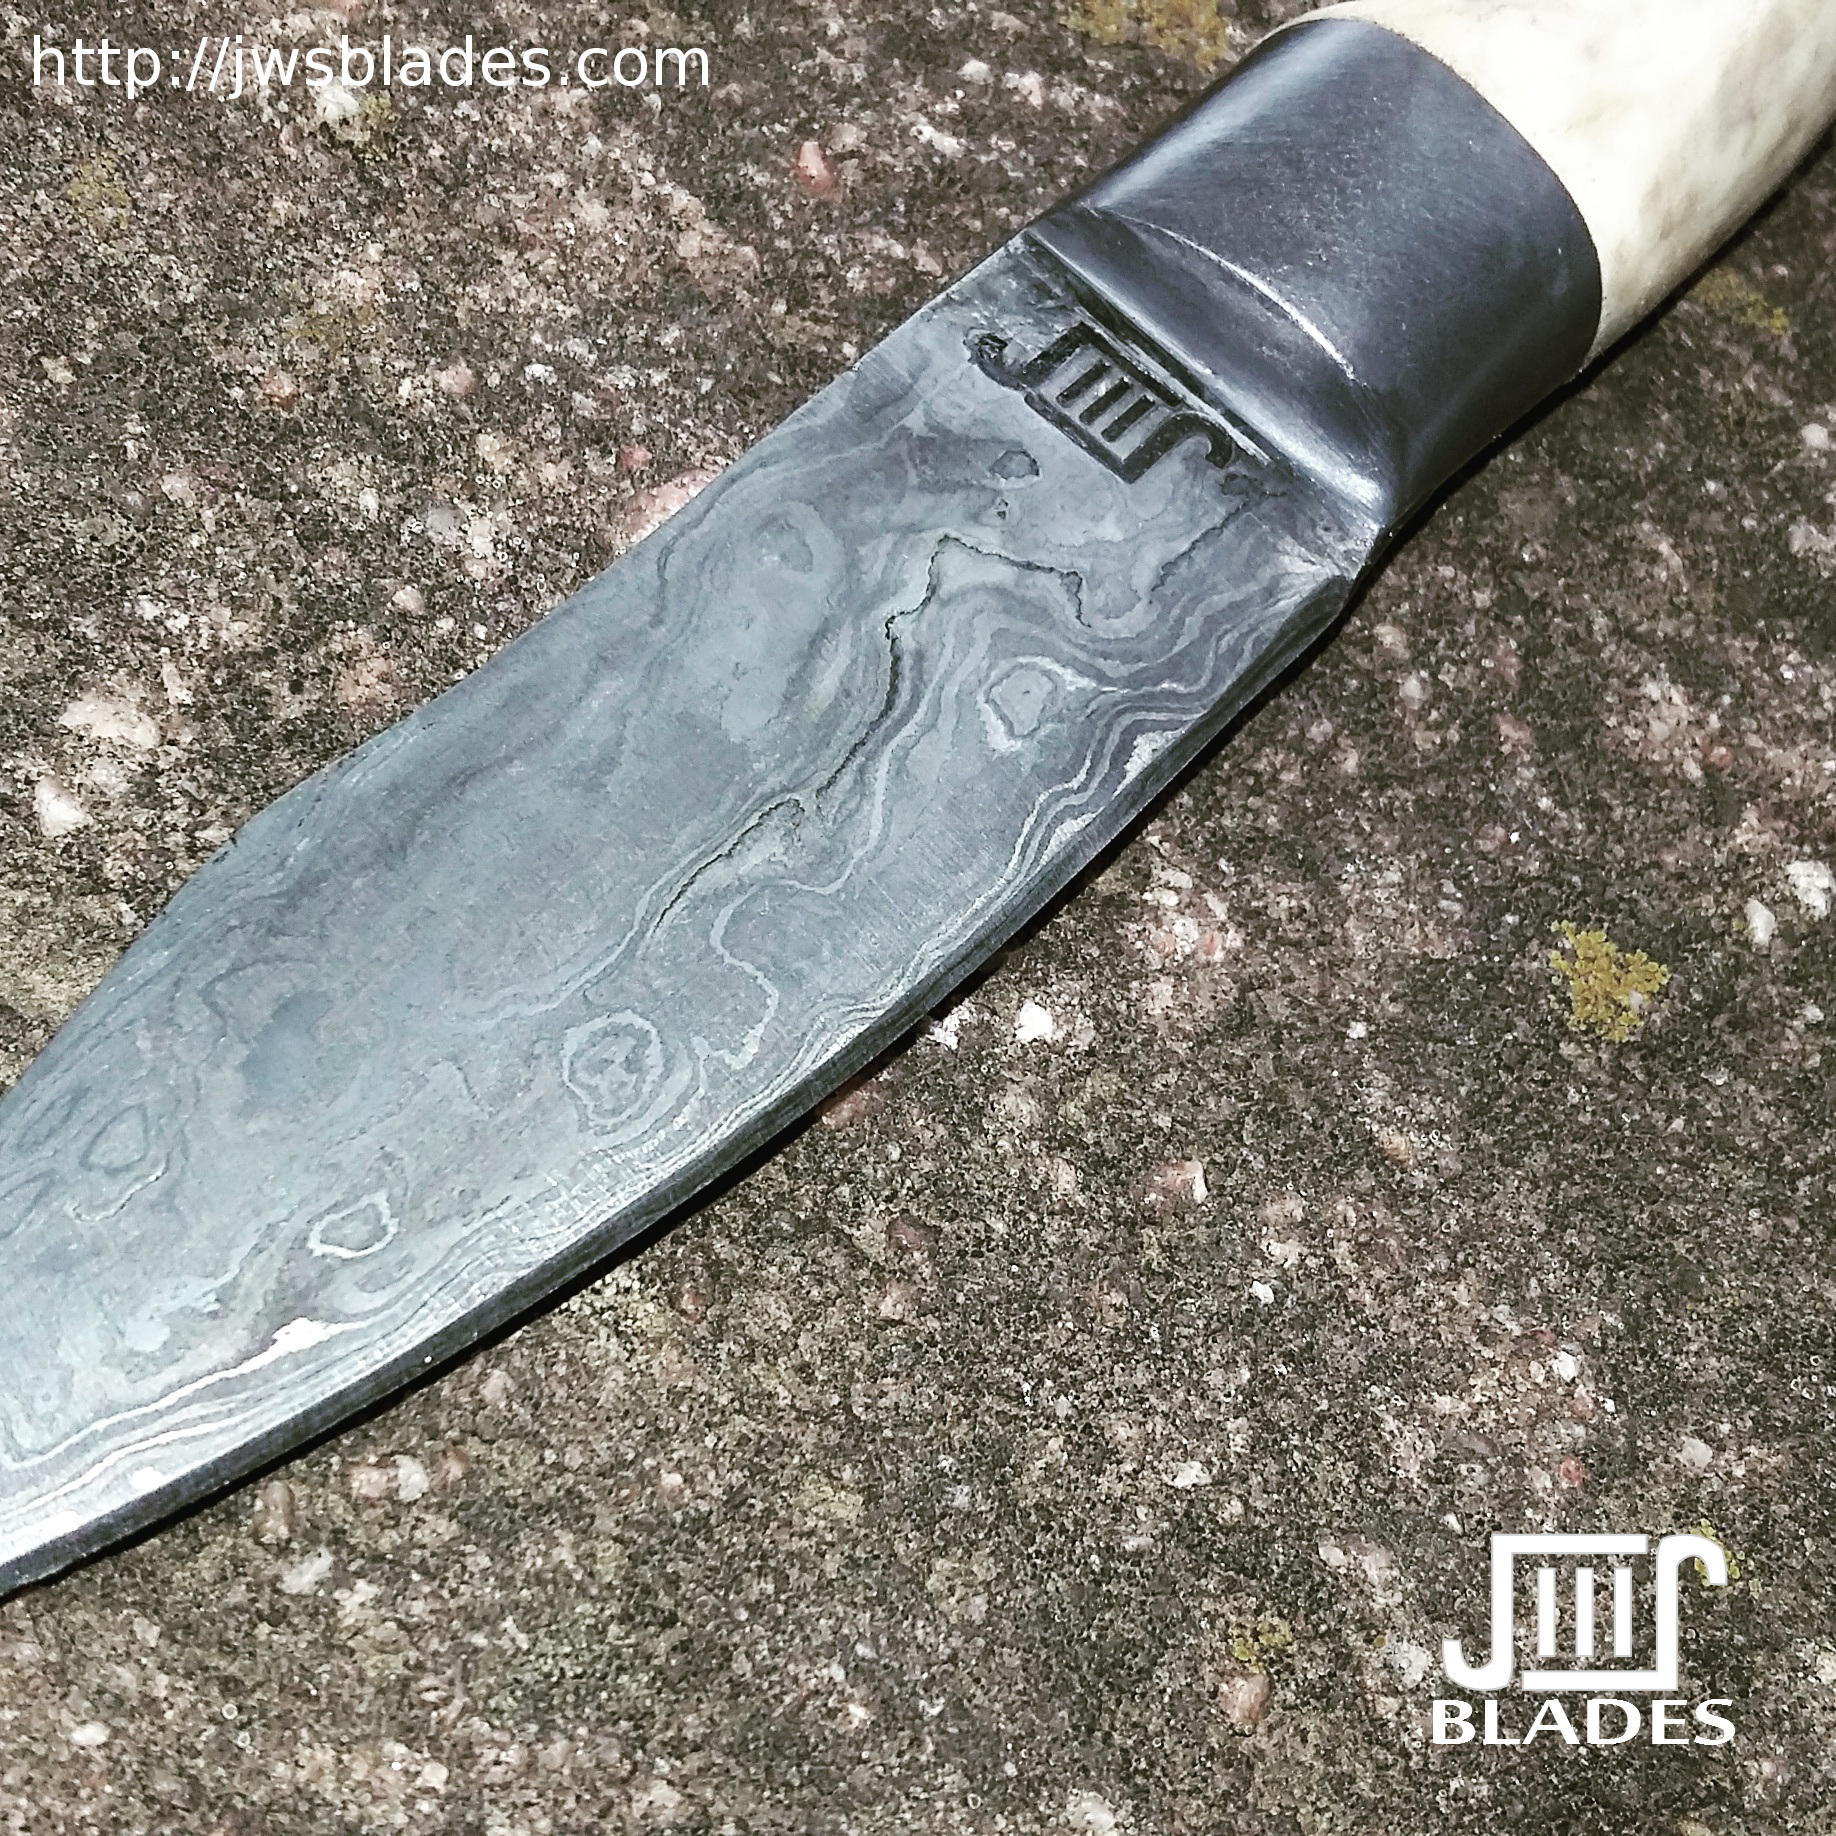
Here's a quick sgain dubh I did today, the blade isn't by far my best work, but this was just playing around with things I wouldn't mind losing and it wasn't an exercise in blade work but rather some quick casting. It's been a long time since I've done this, but I found a 16lb ingot of pewter (Lead free, iirc, just Tin, Antimony and Copper) under my work bench when doing some needed cleaning. I ran to the local foundry supply store and bought some sampling ladles because they only carry large crucibles but sampling ladles work well for this application. I cut an oz or so off and threw the whole ladle in my heat treat oven for the melt at 765F. Made a simple mold directly on my handle from some scrap cardboard and a little masking tape and poured. Here's the finished piece. The blade is an old damascus piece I also found under my work bench that I probably forged 4 or more years ago, so I figured if I hadn't missed it in all this time I wouldn't mind if I screwed it up. Here's the finished results. I had forgotten how much I liked this method. No epoxy, no fiber spacers, no soldering, nice clean lines and a solid fit. I'm currently refining the process a bit and this will probably be the subject of my next video that I plan on shooting sometime next week, so I guess this is a preview. -J
-
19, Waipahu, Hawaii: Looking to Start
j.w.s. replied to Clover9493's topic in Blacksmithing, General Discussion
http://en.wikipedia.org/wiki/Bamboo_charcoal - I'm certain it grows in Hawaii and a quick Google search shows it's not terribly difficult to make. On the plus side it's apparently environmentally friendly. ?? Propane is expensive on the island if I recall correctly and should making a waste oil burner be a little much for a new guy I think this might not be unreasonable as an entry approach to getting started. J -
I got overly cautious about the flashing this past winter when I threw a thermocouple, 6 feet up the pipe from my coal stove, in my flue and started seeing temperature peaks over 980F. Laser was still reading in the high 200's for the pipe itself. I made a custom flashing with my plasma cutter and lined it with 1" kaowool. Used high temp sealant to weatherproof it. My building is old timber and I just didn't want to take the chance. Maybe if my curiosity didn't get in the way and made me put that thermocouple in there I would have been fine without doing the extra work. Like Frosty said though, there's information out there in books about the proper way to do it. J
-
Tugboat Tow Wire Metallurgy Help
j.w.s. replied to tdriack's topic in Heat Treating Knives, Blades etc
Can you find the manufacturer? I buy mine direct from MacWhyte and the guys in the lab are more than happy to take a phone call to discuss the metallurgy behind their wire rope.. Stay away from the sales departments, they often just want to know how many spools you want to order and when you start asking about carbon/element contents they deflect by asking about your intended application - which in all fairness is their job, but how many customers ask how much manganese is in wire rope? Most customers want to know they can sling 20 tons or that it'll pull 200,000 lbs in x conditions at y distance and salesmen are loaded with info like that, but not necessarily the why behind it. Otherwise I think it's worth the welding practice and I sell a few knives a week made from cable. J -
Just remember, when building a forge, if you do it wrong you've actually built a bomb. J
-
I live out here in Amish country.. my closest post office opens at 7:30, closes for an hour at noon for lunch and locks the front door at 4. As far as I know there's only 2 employees and the lady that works the counter is super friendly and more than helpful - i hope she never retires. J
-
Under 35lbs the USPS doesn't really care about box weight anymore. They advertise a few flat rate boxes of their own, but there's also flat rate for your own boxes as long as you stay within their overall dimensions, but it helps to have a friendly postal clerk who can explain it all to you because it doesn't always make sense. I shipped a large war hammer out to a customer for the same as their large flat right price even though it was clearly longer than their box, but because it wasn't as tall or as wide, it still came to about the same overall area that they bill from. J
-
Kaowool rigidizer works wonderfully but don't buy too much as it has an unopened shelf life of about 6 months. also, keep in mind that it relies on firing to actually make it rigid, prior to that when dry I'd just consider it stiff. I use a spray bottle to apply it, but you can also just dip the wool in the bucket for better saturation. J
-
I've got a cnc plasma table and a company that sells 1/4 aluminum sheet right down the road, I can handle this. -J
-
Good to know.. I just don't happen to have at 25x18 aluminum sheet pans lying around, but I'll save that idea for the next time I'm in a pinch! J
-
I don't know about a wooden box with this particular setup. Day 1, I was running it hard and caught the table on fire underneath. Lol that's through 1 9/16" brick, 3/16th sheet and being raised 1/2" above the wood table using drywall screws as risers. talk about a surprise! I flipped the table, put out the fire and left the whole thing upside down and placed the forge on the 2x3 legs of the table - then all was right with the world! I wanted a better insulating brick but the particular home depot I found in jersey had 0 fireplace supplies - not even refractory cement patch! Now that I'm back at home I'll cut some 3k brick down to the right thickness and re line it Saturday morning. I suppose a layer of kaowool (ive got a lot of scrap pieces) and clay would work just as well. J
-
Not improper.. perhaps I should say next time I'll take my time and think out the build a little more before just jumping around welding this n that, brazing that there and reducing the end in the forge to about so.. nope, she works beautifully, welding heat is easy to attain.. and I can now see how a little more planning would make this my go to coal forge. J
-
Lol, thanks guys.. again, I had an hour until I needed to be on the road and this was just salvaging parts I already had around the shop. While I've never built a side blast before I understand the principles and for less than 40 minutes of work this is what I came up with.. it does indeed work well and has convinced me that I need to build a proper one soon because I really like it. It's also a great example of how to build a forge with scrap metal just laying around. There's also a space between the two bricks hugging the Tue that was partially filed in with sand to create a channel to direct the air flow. And Frosty, i had a lititle fun but after 20 years of working this particular genre of show I definitely a little more green in my pocket to totally smile, lol, we'll see how the next two weekend's go and get back to you. J
-
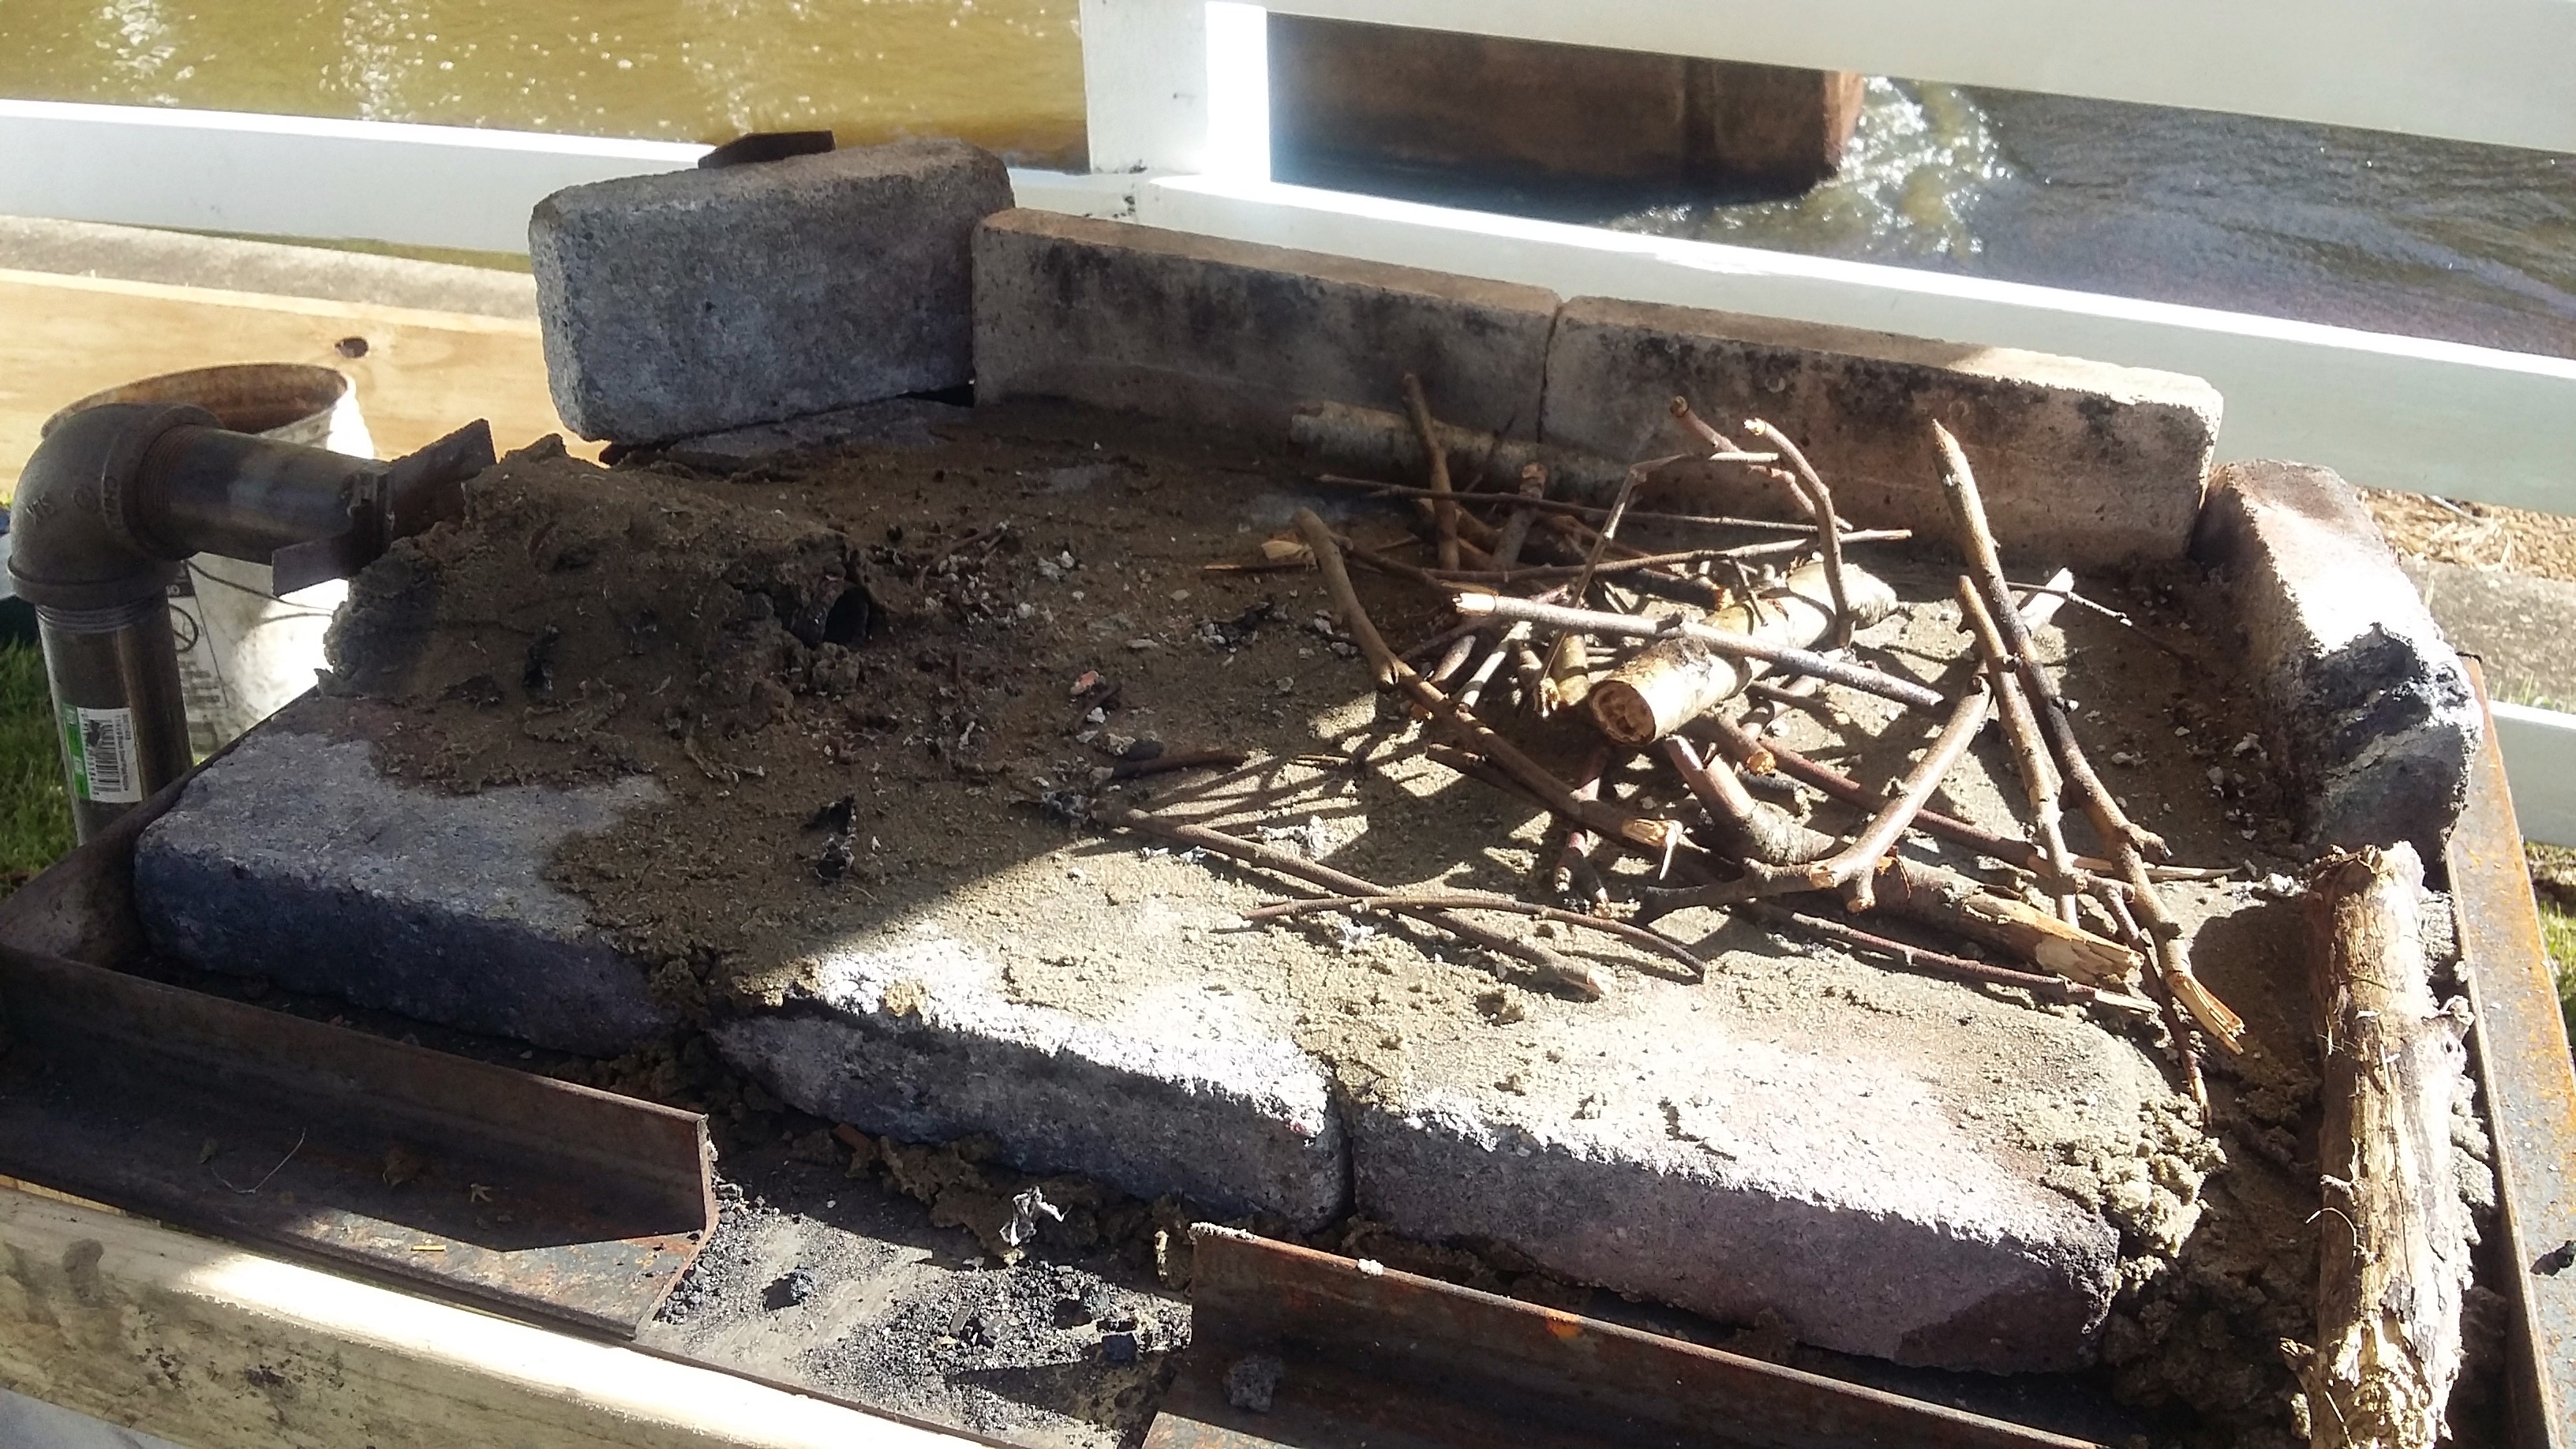
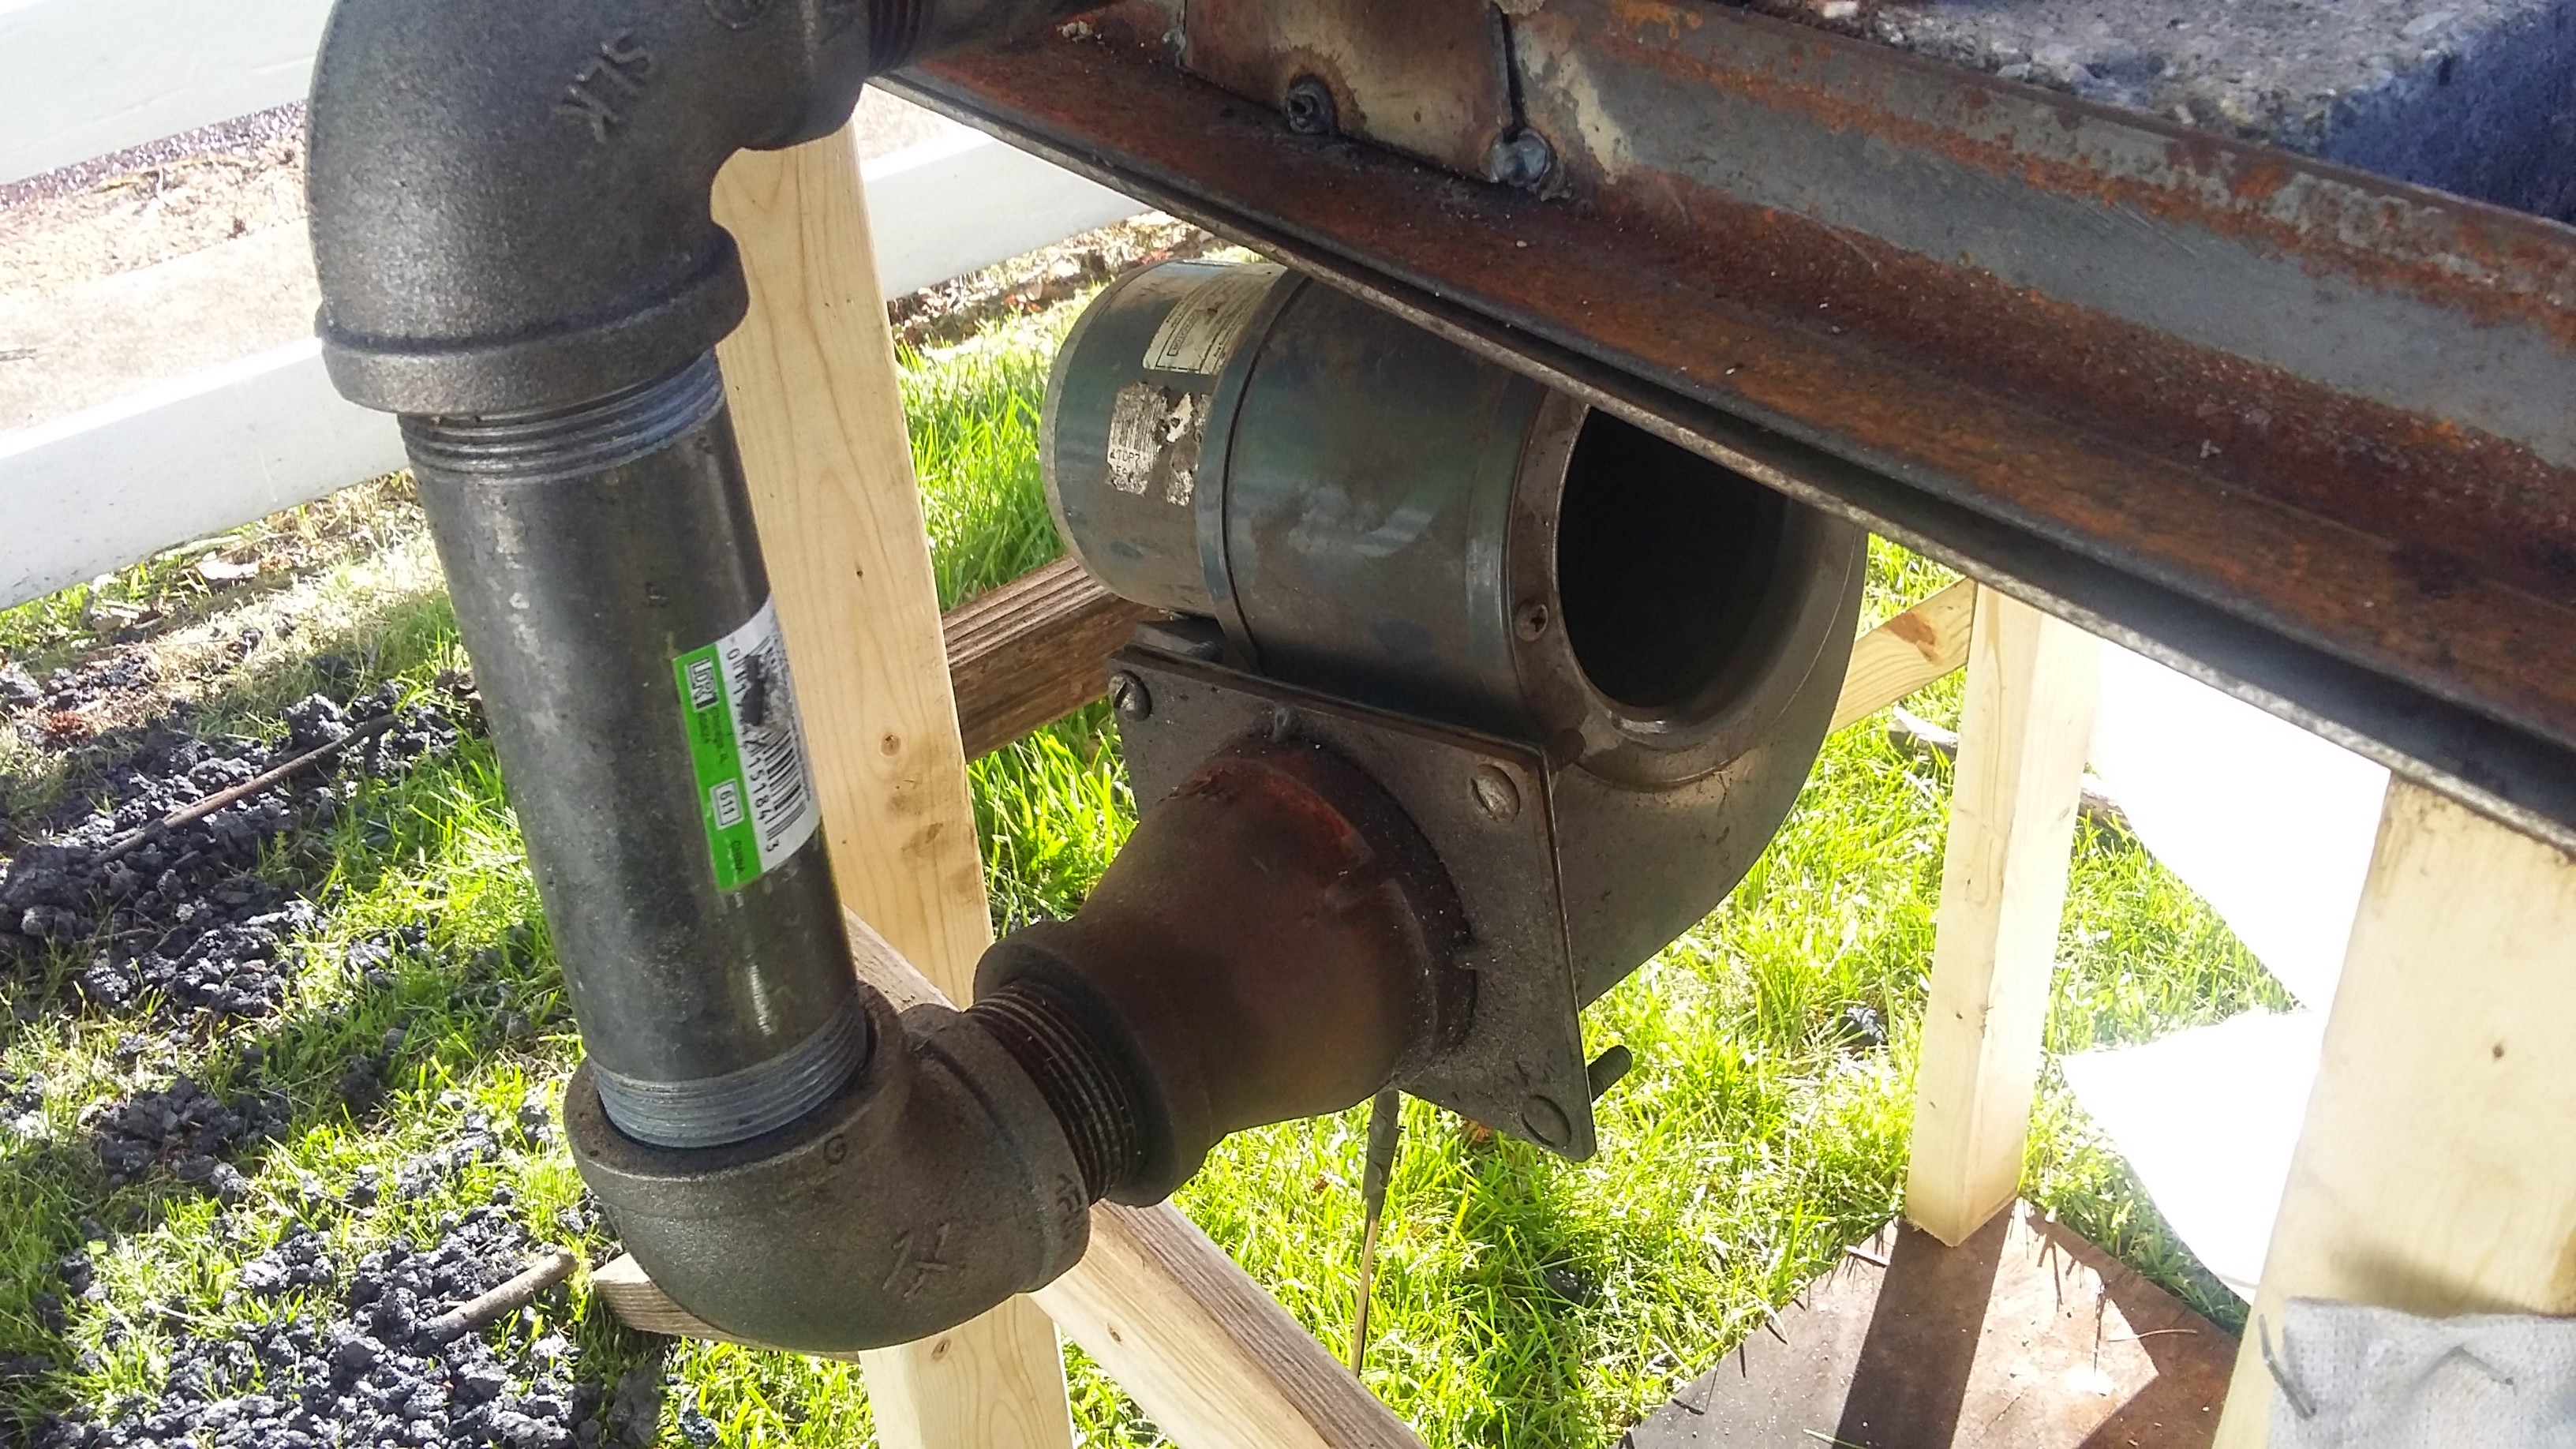
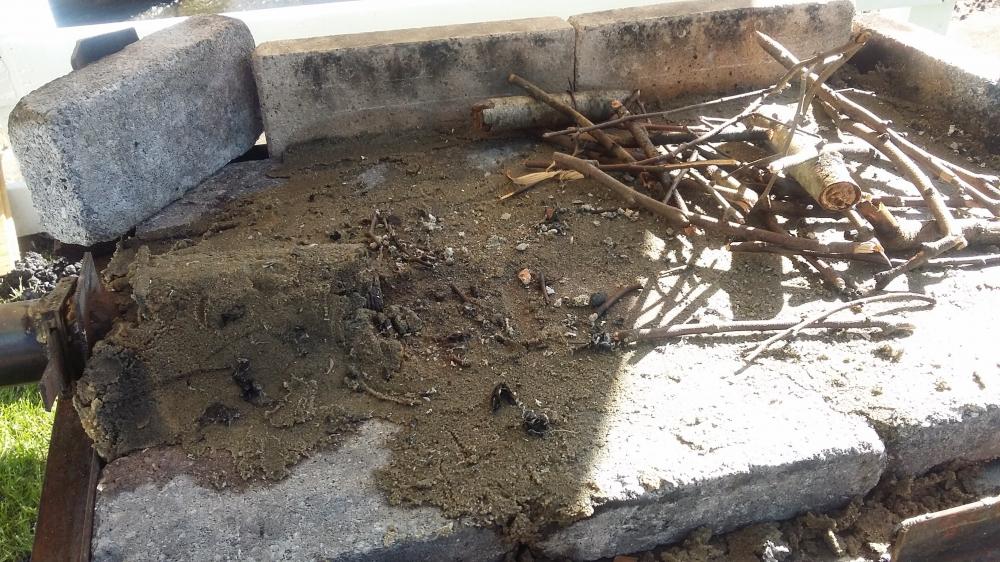
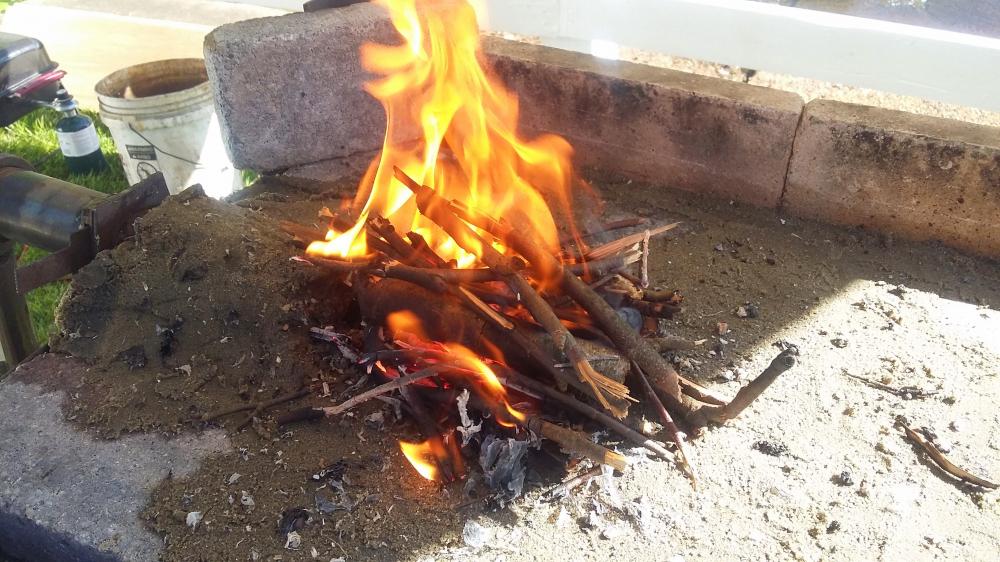
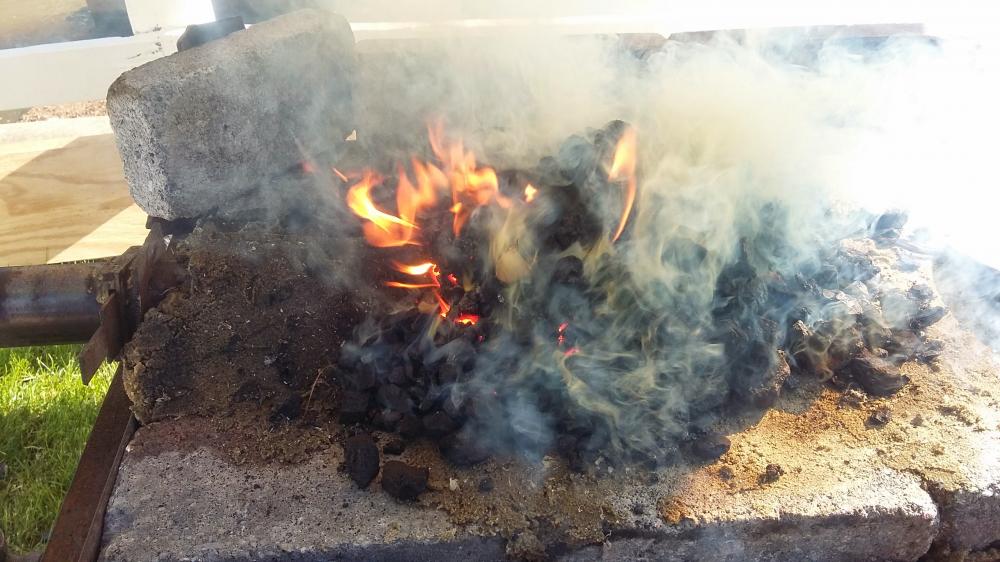
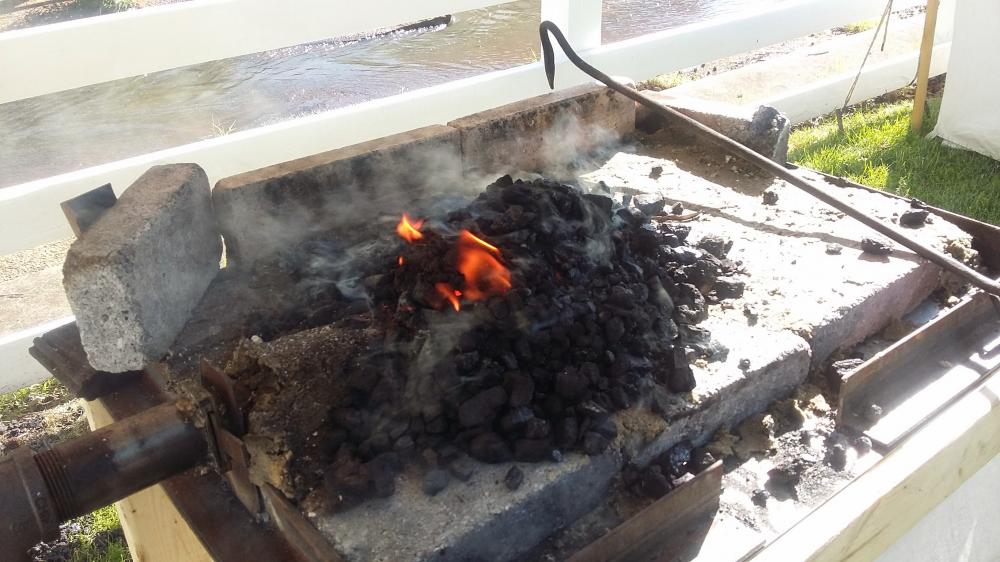
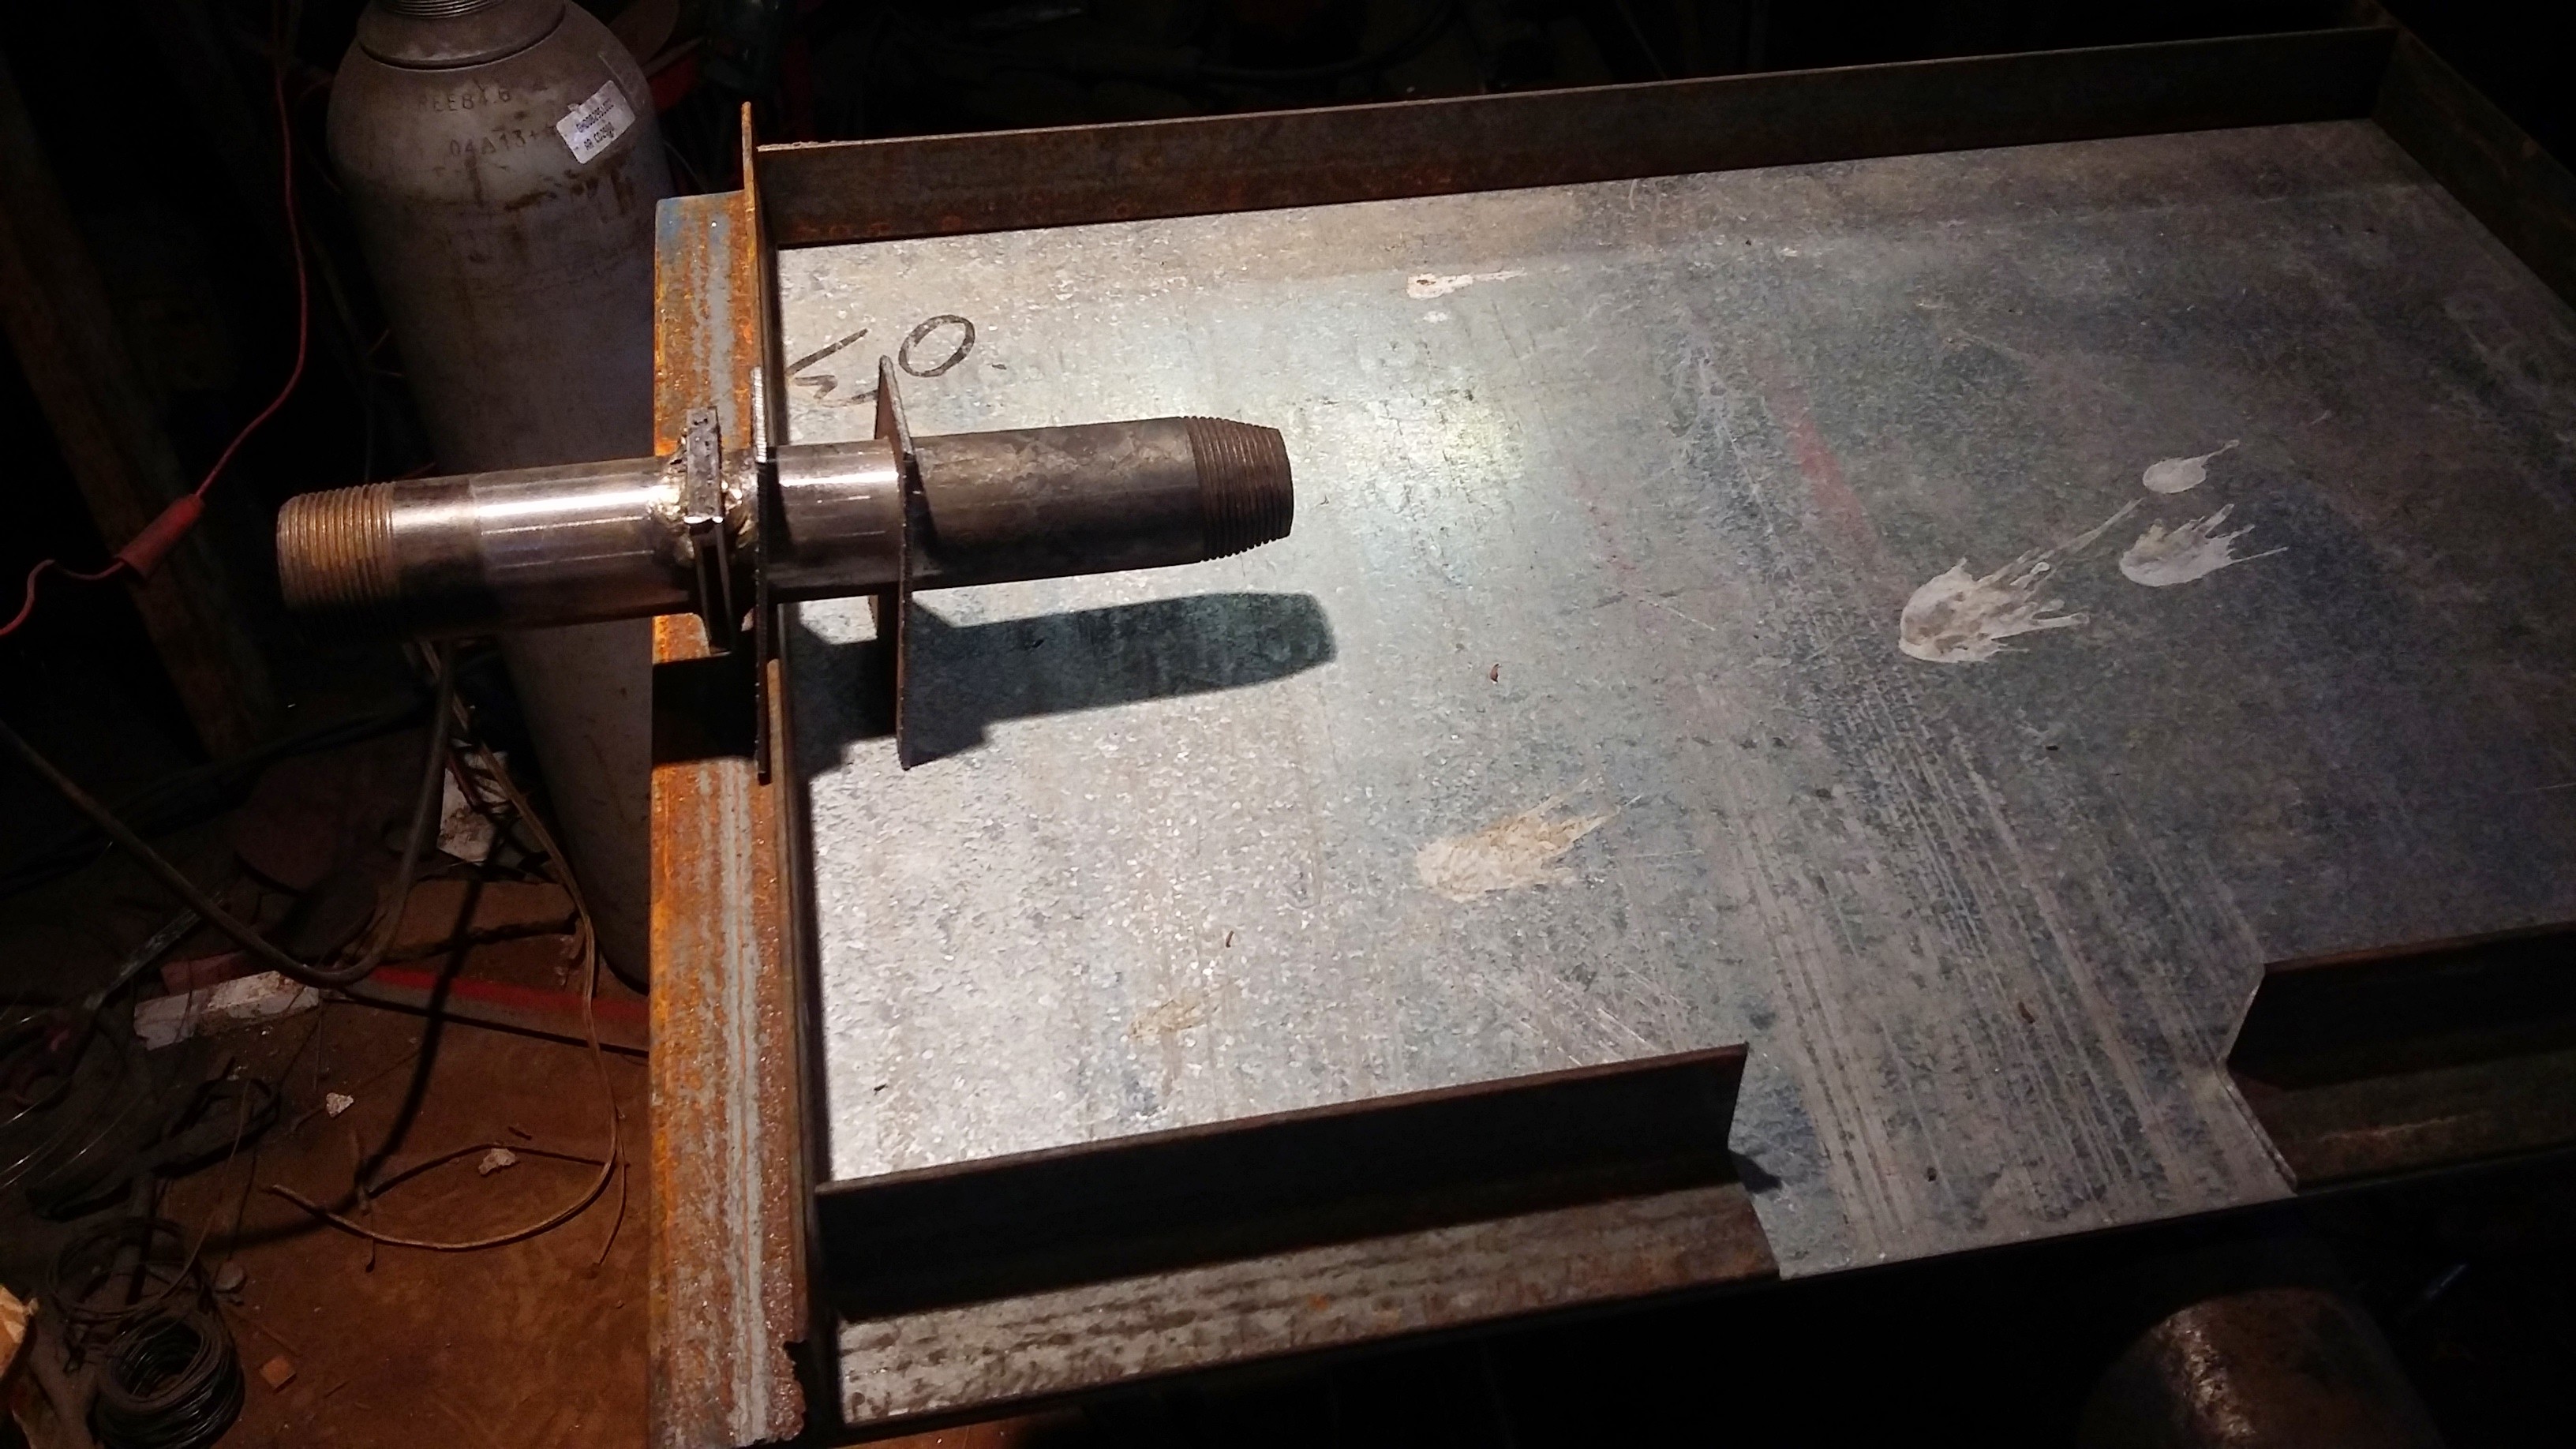
I just wanted to share a simple construction project I built on Friday for some demonstrations I was doing over the weekend at the New Jersey Renaissance Faire. I'd been a little too busy with finishing up stock and thought I had a small portable coal forge ready to go, but it turns out as I was packing that my memory is not what it used to be and several key pieces had been removed and utilized in other building projects since it was last used a year a go. Anyway, I threw together a sideblast forge in about 35 minutes using just some scrap laying around the shop, some black iron pipe, a blower, some bricks and a little bit of sand. I've never built one of these before and I was absolutely shocked at how well this worked right out of the gate once I started paying attention to how the fire needed to be managed compared to my other bottom tuyere forges I've built and used in the past; of course if I had tested it before I drove it out to Jersey and fired it up for the first time, I wouldn't have been as shocked - but at the very least, I was right, it definitely looked like it would work. For the tue, I simply took a piece of 1.250" pipe and forged a nipple on the one end down to about 0.875". Welded some scrap together to make a damper, brazed it in line, cut a few pieces of angle iron to define the bed and two more support pieces that got welded to the base to hold the pipe and blower assembly. It's definitely inspired me to design a one for my demonstration forge at the Pennsylvania Renaissance Faire this year, something a little more permanent and probably with a water jacket for cooling. I'd only ever used a sideblast once before at a friends shop and that was only for a few minutes, but I'd really starting to appreciate the design and I think it allows for better management of fuel. Anyway, enough talk, here's some pictures: -J

.thumb.jpg.3e736df1f6e8c2d898deeeecc9d4090a.jpg)


-
Come on out and say hello at NJRF! We have just 2 weekend's left. I'm demonstrating knife making down in the central area of grounds and there's a new smith near the entrance demonstrating some metal art and household forgings. Of course there's knights, wine, wenches, thieving gypsies, pirates and bacon wrapped turkey legs as well! In addition to demonstrating I'm always more than willing to talk about blacksmithing, bladesmithing, alchemy and problem solving for hours on end plus I've got a few copies of Steve Sells book on hand for those who have been thinking of picking it up! I'd love to meet more of the IFI crowd in person, hope to see you there! For more info go to http://njrenfaire.com -J
-
How do I make a hardy Hole in a home made anvil?
j.w.s. replied to markknx's topic in Anvils, Swage Blocks, and Mandrels
Broaching would be the correct way, but I like Frosty's idea.. it's a RR track, don't waste your effort, unless you really want the challenge. J -
I'd tear it apart tomorrow and tell you how it "actually" works, because now you've made me really want to know, but I kinda need the pump to be in working condition for the next 4 weeks, now in july I have 2 weeks of down time scheduled -- so maybe.. lol J
-
I'm not sure the mechanics of my tank, it's professionally built by a hydraulics company so I'll assume they did their homework. J


.jpg.e409e7e9dcfff5aa3d85216d6e5d90d2.jpg)