j.w.s.
Members
-
Joined
-
Last visited
Everything posted by j.w.s.
-
Stock up on things like aluminum and red metal rounds to start. I have a 9x19 and keep on thinking I’d have more fun with a taig. Start slow, be ready for excitement, dismiss disappointment and just push it safely to its limits! Then show off, obviously. Lol -J
-
Looks good Gav, I like the use of brass for the ways, almost went that way but I have such a difficult time using brass in the shop for anything other than knife fittings. On the build I just did (bow spring hammer post), I just shimmed it on two sides using the ultra high density plastic stuff and a piece of annealed 15n20 - I figure my tup is made of A2, it’s going to be pretty darn wear resistant anyway. So far the steel on steel is working well and the plastic doesn’t appear to be wearing but it’s all lithium greased daily before I fire it up every day. Nice build, keep the picture coming! -J
-
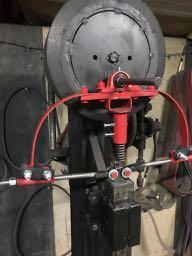
Did a big change in design last night - just thought the spring set up was sloppy. Here's the new concept, and wow, what a change! The idea here was a set of springs made of 1095, just a slight bow to them and essentially the same heat treat as the main springs made of 1075. The speed is great, very little loss. -J
-
Very possible according to some of the old timers. I was warned years ago that putting copper in the forge (or a penny) will stop your ability to ever forge weld in it again. Guess what brass is made from? Copper and Zinc - the zinc might also be a problem. Of course it could all be poppy-cock as well! Rich Hale made a post about it once. It's probably more possible that something is off-gassing, a little residual material probably invisible to the eyes. Whatever is off gassing, and it could be lots of different elements with the cordite, brass, copper, zinc, etc, could just be dirtying up the material you're trying to weld. I don't know that I'd be running out to reline it right away though, bring it up to welding temp and let it burn for a half hour before putting in your billet next time, might be all it needs. Forge welding is relatively easy, but that doesn't mean it won't be temperamental. -J Try standing off to the side, look at the dragons breath coming out, you might notice a color to the flame you're not used to seeing - if you do, look up that flame color online and what elements burn with it, could tell you if there's something in there you don't want.
-
While doing my hammer tinkering project I had to drop in on the old machinist down the block to get him to turn a drive shaft for me from 4142. Whenever I drop in on Jake it's an experience. Stories, information, tool talk, etc. He was a machinist for Hershey for 30 years and has had his own shop now for just about as long, the old guy sure is busy - I know my phone doesn't ring that often! Inevitably while he's punching numbers into the old black and white VGA CRT attached to one of his lathes or mills, he'll start talking and asking questions. He asked me about quenching and I explained my processes, Parks 50, high temp salts, low temp salts, etc etc. He's no metallurgist but enjoys the conversation. So he started describing their hardening process they used at the Candy Cartel (Hershey) and asking me if I knew anything about it. I figured I'd query some of you older guys, maybe you'll know or have an idea and next time I stop down at the shop I'll pass it along, I'm sure it'll make him happy if I get anywhere close. So here's what he described: He said they had a large tub with an electric warmer they had to turn on when they were heat treating (thought it was set for 120F), he remembers that he occasionally had to "make" the quench oil using a few different buckets, there was a distinct smell and on the sides of the tank there would form what he called yellow "icicles" they would break or peel off. I had some thoughts right away and then he said that he thought he remembered two of the ingredients were [raw?] linseed oil and what he thought was fish oil, but there may have been something else they put it as well. They used a lot of W1, Atlantic 33, 41xx and a few other manufacturer specific names I can't remember off the top of my head. Any how, it's always interesting to me to hear how things used to be done (possibly still are in some places). I worked for a time out of high school for the foundations museum, maintaining and restoring exhibits and I know some of the crazy and eccentric things that have been stored in safe places, heck our hand scrub in the shop was a powdered cocoa butter soap made by Hershey in the 30's as a way of dealing with all the extra cocoa butter on hand - we had barrels of the stuff, so it wouldn't surprise me if they had a few barrels of sperm whale oil tucked away either. lol Probably not, but still wouldn't be a shocker. Any thoughts? -J
-
I'd braze it with nickel silver, that melts at 1670F-ish I believe. Home Depot carries 2 in black iron and they will cut and thread for you as well, it's around $45 for 10 feet, never hurts to have the extra sitting around the shop for various other projects in the future.. I was just looking for some to make some holders for my pin stock rods that are too long for my pigeon hole shelf, could have sworn I had 4 or 5 feet, haven't tripped over it yet but this is how I'll end up with 8 feet of it lying around this summer! -J
-
"We definitely have toilet paper rolls, but I don't actually recall seeing concrete tube formers, though I'm probably just not looking." I definitely didn't mean that in a negative way, I actually meant that your toilet paper rolls might be a little less wasteful than ours here in the states, like those fancy ones without the hard tube of cardboard in the middle.. God knows we Americans love anything we can throw in a landfill! lol And I didn't understand what the purpose was so I'll apologize for that as well. As far as improving the insulation of your refractory, or making it more porous, see if you can find vermiculite in a gardening shop, it's a natural insulation and can be mixed with refractory cement easily. -J
-
Doesn't look too shabby, most definitely serviceable. There's probably a very caked over set screw or hole for one somewhere on that clinker breaker. I'd probably give it a quick sandblast to see if it could be revealed, but you might have some luck with scrubbing it down with some oil and a wire brush.The way it moves, I'd probably be set on eventually replacing that rod, customizing it for the table etc, then while you have it taken apart, you can clean up the other parts. Who knows what it might reveal? As far as an air gate, go to a home improvement store, you might get lucky and find an aluminum one in their HVAC section although it will inevitably be sized for any size pipe except for what you need or it'll be made out of plastic, but at the very least it might give you some ideas on how to design and fabricate one on your own that will work for your purpose. -J
-
Had about 30 minutes to run down to the shop today and shoot a quick video. It's not perfect, but my 5 year old did her best to help with the creative processing in post. I'm actually shocked at how well she follows a final cut pro timeline! Now that I've gotten it all battened down, I've got a buddy coming over on Thursday to help stress test the hammer, obviously we'll christen it with some Irish whiskey before we begin for good luck. -J
-
I have a Johnson 900ss which is a larger volume than what you're looking at, I can do a 16lb crucible no problem. It runs at 240,000 Btu's - You've got a 20lb propane bottle, you'll need at least 2" of refractory, preferably 2.5"-3" for efficiency. Even at 2", that's going to leave you just 8" x about 6" (been a while since I measured a tank) for an inside chamber, it needs air flow around the crucible plus enough wiggle room to grab the crucible with tongs.. Yeah, a camp stove isn't going to cook this job, you'd be lucky to bake a potato in it, maybe melt lead. I'd want a minimum 40,000 Btu's for the volume (1000btu/lb of aluminum minimum and most casting furnaces run magnitudes more), it can always be dialed back but you can't get more if it's not available. There's a lot more to heat in a crucible furnace than just the air inside it, an easy-bake oven it is not. Oh, and you need 743c (1370f) for casting aluminum, not 600. Your burner should come in off the side, offset to swirl around the crucible not aimed directly at it, no reason for an opening at the bottom. The lid should be removable, I'd do a rotational hinge with just a steel rod and a piece of pipe. Just a small opening, 3" or so, is all you need in the top for off-gassing. Lastly, no reason to 3d print your interior form, just go to a home improvement store and pick up a cardboard concrete tube form for the appropriate size for your internals (they're used for casting concrete footers for decks etc). Cast the bottom, once set, I would cut your burner opening in the tank, probably about the same size as a toilet paper cardboard roll insert. I'd take the tp roll insert and attach it to the form at the correct orientation for the burner with masking tape, once it's perfect, cover it all with vaseline as a release. Put it in the tank and cast around it. It'll cost pennies and take minutes as opposed to printing it. I did this entire procedure about 15 years back with a 40lb propane tank that I still have as a backup 3 burner forced air forge. Not to shoot down the idea, it can definitely be done, but the numbers and methods need to be adjusted in my opinion. -J I just realized you're in Japan, so a Home Depot is out, but a home center store like Viva Home should carry the concrete forms. Also, those cardboard tubes we American's are used to in the center of toilet paper rolls might not be that popular in Japan, but I'm sure you can find or make a 40mm cardboard tube for the burner opening, or even just 3d print it - definitely quicker than doing the entire interior!
-
Ted, I've seen your hammer in operation before (yeah, I'm at least one of your 51 views) - I know you've got your own reasons for converting so I won't ask the why question but I will say that your original cam design seemed to work pretty well. I've never been a fan of the Rusty style hammers just because of their foot print in the shop, but you did a nice job on it. Could have doubled the weight of the build and braced it up a bit more to stop some of the play though from what I remember on one of your earlier videos. Did you take one or two down, I thought there were a few more earlier versions? Either way have fun with the build. You're definitely adding some complications to the mix with the relays, I hope it works out to your liking! Personally I just finished taking a bull inspired pneumatic I made a few years back and converted it to a mechanical hammer, so we're heading in opposite directions on the line. Good luck, I look forward. to seeing some more videos in operation. -J ps, can't see the video up above there but I assume that's the latest on on youtube.
-
Around here there's quite a few electric motor shops, with all the farms it makes sense but even they are dwindling as places like tractor supply sell farm duty motors relatively cheap vs having to drop it off and wait for the repair. Personally I'd do the "shake test" - shake it and listen for something loose, the "spin test" - turn the shaft by hand and feel for it to grab at a certain point, and lastly the "oh, what the heck test" - unplug it, disconnect the capacitor(s), grab a beer, a sheet of paper for making notes, pop out the 4 long screws that probably hold it all together and carefully disassemble it on a clean work bench. It could be something relatively simple that needs to be addressed. It might not be, but you'll probably learn some things in the process and it sounds like you're going to take it to a professional anyway, you might find out you don't have to but worst case is that the professionals will be able to put it all back in working order if you can't. -J
-
I know you're in high school but you're going to have to come to a few real world choices and understandings. As Steve said, mystery steel is always a mystery. To elaborate: I have a company that makes X widget and we've been using steel E for a typical production run, although when we first started, we did some in A, B, C and D (and they all made it out to customers) until we settled on E for our application. Then one day we found a one time super deal from a supplier on steel F, definitely not the same as E but we can make it perform the same way in widget X's application because our widget doesn't need to worry about things like wear resistance or edge retention. Etc etc.. this is scenario happens often. I can make killer high performance springs out of both 4140 and 1095, but I can't make a decent knife out of 4140 and I wouldn't use 1095 for a roll cage in a race car. So you can see the sausage, you just aren't going to know how it's made. Companies have a reason to keep their materials a secret. Firstly, they can change it up for any reason they wish. Secondly, it stops their competitors from copying them outright. Now, instead of making something lame like knives or pattern welded steel, why not learn the forging techniques behind everything? Sounds like you've got some scrap that's just a mystery, so learn how to draw, taper, punch an eye, make tongs, try your hand at some useful hooks, there's a ton of stuff your future shop will need and the first thing on that list is actual skills at blacksmithing, not mystery steel guessing or a laughable attempt at Damascus because you don't know what you're actually doing with a hammer. I'm not saying any of this to put you down or dissuade you from trying, but in life first we hold our heads up, then we learn how to sit, then crawl, toddle, walk, run --- after all that, if we've got the skill for it, then we jump the hurdles. There's no difference with blacksmithing. There's plenty of kids that have gotten mom or dad to help them in designing a charcoal or coal forge that won't burn down the property (if it does, you'll be glad you asked for help because they'll share the blame lol) done it very well and without costing an arm and a leg. When you understand how it's made because you built it, you'll understand better how to fix it when it breaks. Learn how to use it, improvise an anvil, start pounding out some metal. Worry about the gas forges and and fancy stuff later down the road. It's a long road anyway with some great scenery, take your time and enjoy the journey. -J
-
I personally wouldn't put plastic anywhere near it just because of heat issues and the fact that the air and fuel mix pre-plenum. All of the ribbon burners I've made have used square tubing for the plenums, but bending a box could probably be the easier way to go about it if you have the tools for it. Everyone I've made has been a blower on a reostat to black iron pipe, then a 45 degree elbow with the propane injection nozzle aimed down towards the plenum in the direction of air flow. From there I have done them with and without baffles inside the plenum. I seem to recall many years ago a talk on making crayon burners that had a formula on number of 23/64th (if you leave the paper on, 5/16th's without? It's been a while) holes in the burner vs volume of plenum and air flow/pressure. Frosty might have been part of it, so maybe he'll jump in here. I know he's got a huge thread that I lost track of/not caught up on that is dealing with a naturally aspirated ribbon burner design - he definitely knows more on the subject than I do. I did find a post I made in 2013 on the subject but the pictures are long gone. -J
-
Yes Matt, that would be my video. I've actually got a follow-up in the works. It's been rather popular on youtube in the 5 years since I made it. Whenever I get that illusive "free" time and when in-person local shopping isn't a major hassle I'll revisit it with an updated version! -J
-
It probably wouldn't hurt like you said, but it probably won't do too much over the long term either. The volume of the plenum and the thickness of the refractory orifice would be where I would look if it's getting too hot in the first place. While the ITC may do something initially, it's still part of the burner situated very close to the firing chamber, by nature it's going to get a fair share of residual heat. When I did my old bottom blast ribbon burner a few years back I cast the ribbon at 3.6250" thick with Vesuvius 3000F refractory cement and I'd like to say the plenum itself was another 3.5"x3.5"x8" - it still had some issues if I ran it for more than 2 hours straight at forging temps. Also look at the fuel injection volume vs air, if it gets too hot inside the plenum without enough air to cool it down you can get ignition inside the plenum itself, so over engineering it in the first place isn't a bad idea. -J
-
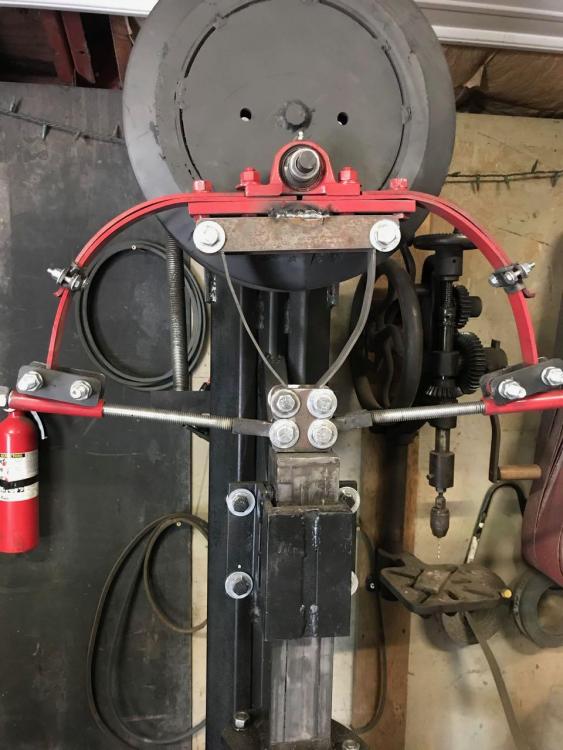
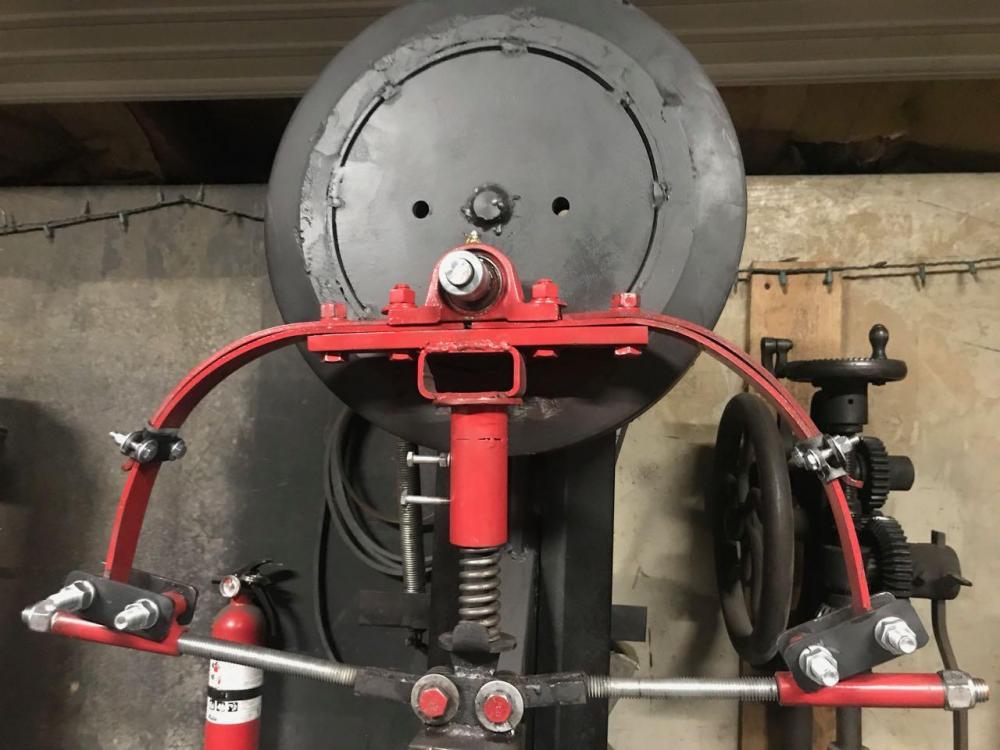
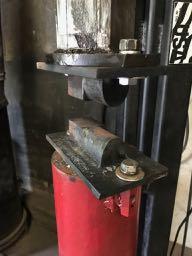
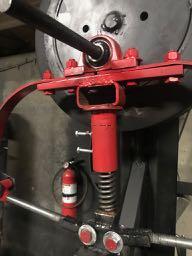
I made one more revision to the hammer last night before leaving the shop. I needed to address something that has been nagging at me, adding a second layer/laminate of springs. I don't notice any change in overall performance but I do feel better in the event of a failure of the primary tines. Again I chose to use 1075, shaping it very close to the form of the primary and used the exact same hardening and tempering procedures - I don't think I need any more stiffness in the overall spring or the upward travel I'd probably get from it. I just wanted an added safeguard in case the primary fails. My thought is that the second layer should limit the potential hazards to the operator and anyone else in the shop should the primary break in use. There's also four bolts on the top of the hammer that hold down the 206 pillow blocks that I want to change out tomorrow, upgrade them to grade 8 because of the shock they get and I want to change the nuts over to ny-locks. Other than those small details I can't think of anything else that I need or want to change. Very content with the build as is and really happy with how she performs. If the little one gives me opportunity at some point tomorrow or Wednesday, I'd like to make a more detailed video of the hammer itself, otherwise I'll wait until she's back at her moms for the weekend. Hope someone found this post entertaining and/or informative, it's been a blast for me working on this build - while I make knives and teach people for a living, I have always preferred building new toys for the shop! lol -J


-
A quick video I shot with the new combo dies today with a little slow-motion so I could analyze the motion of the springs. The stock being forged is 1.25"x0.5". I don't think the results are too shabby for what is essentially a 35lb junk yard hammer. -J
-
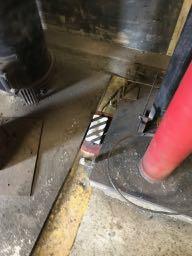
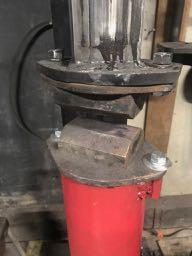
Here's the combination dies I whipped up today, I later trimmed them down because I know that I don't get along very well with sharp 90 degree angles when I walk by things in the shop and also the foot switch that powers everything. -J
-
If you have faith in your heat treating abilities its not a huge deal, you don't want to however get 150k cycles in only to have a spring snap from repetitive stress! I made mine from 1075/80 from Admiral, only because I've got a few hundred lbs sitting around and had a problem to solve - the tempering was a bit tricky as far as being more precise. I quenched from 1525F after a 10 minute soak, tempered for an hour at 700F, naturally cooled to room temp, then a second cycle at 800F for half an hour. I'm obviously caring more about the overall modulus of elasticity over hardness at this point. I have molten salts as well and may have been able to quench at 650F/15min in the salts but didn't feel like the hassle of switching between low temp and the high temp salts I already have in the kiln. Resistance is the key though, the drop from base center will matter a lot too, however it's better to have perfectly heat treated springs that will take the extra flex to cover the travel to center than it is to have moderately heat treated springs that have too radius in them. I hope that made sense. -J
-
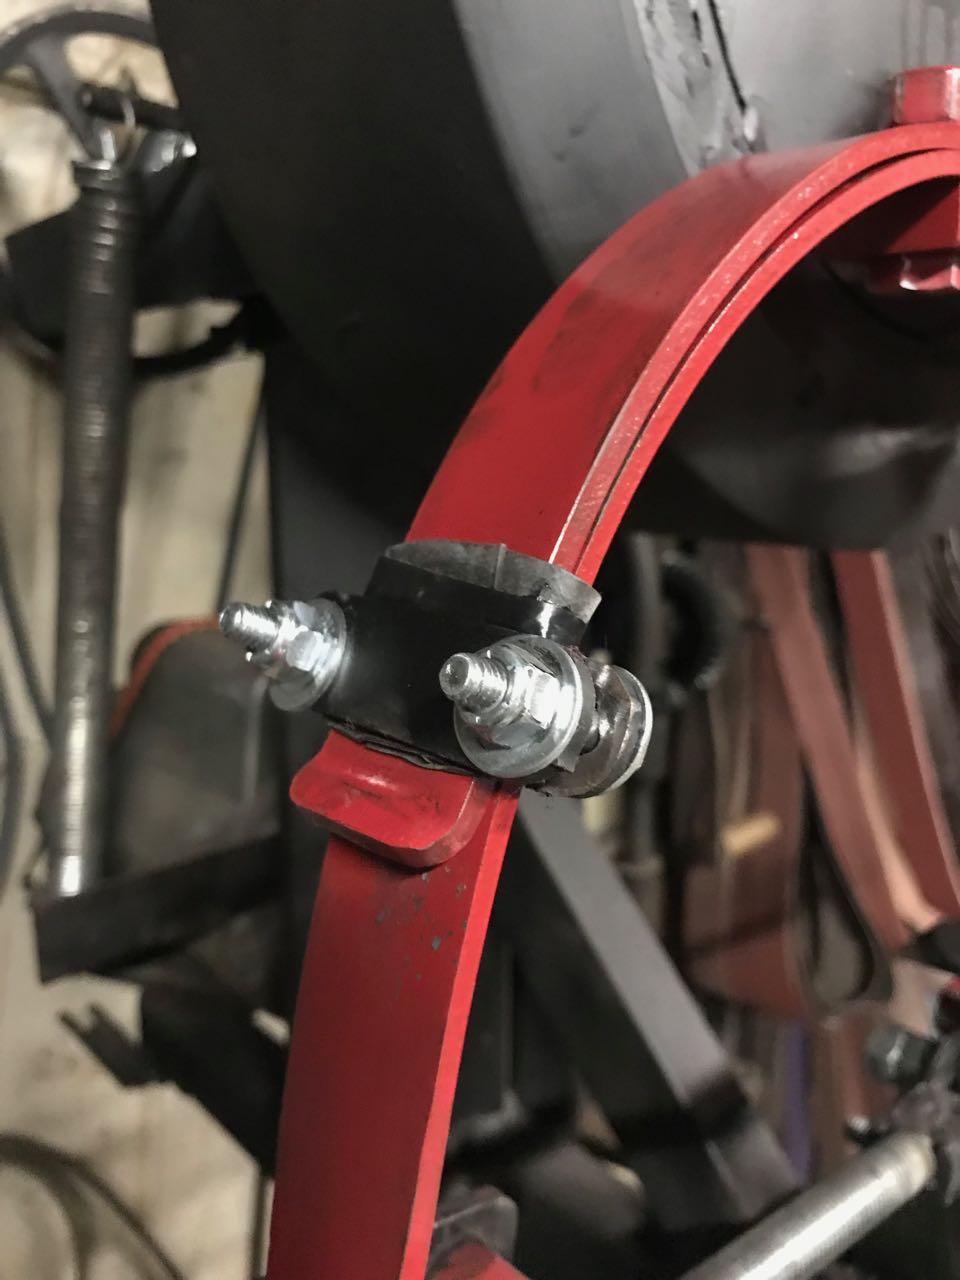
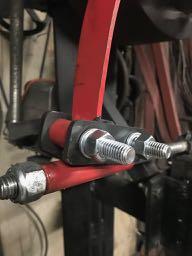
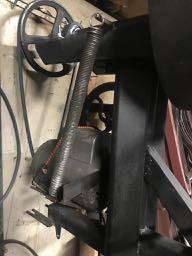
I would say 5"+/-, my distance to center from the offset arm is 2.5" and I know there's some "whipping" (for lack of a technical term) going on there as well, just to be safe. I had considered a leather strap like on some of the Japanese style hammers but opted for 3/4" threaded rod for an easier adjustment of the stroke throw. -J
-
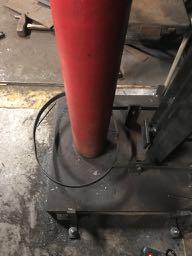
Just a cushion to limit upward travel. It doesn't happen often, but it keeps the hammer in a consistent cycle at high speeds. While it'd be cool to add force to the downward stroke, physics just doesn't allow that. It takes energy to stop the initial travel and any gain would be completely lost plus the addition of the resisting force to compress the spring in the first place. Technically, it actually takes away from the potential performance of the hammer but at the same time makes the performance consistent. It's a fair tradeoff in my books. -J
-
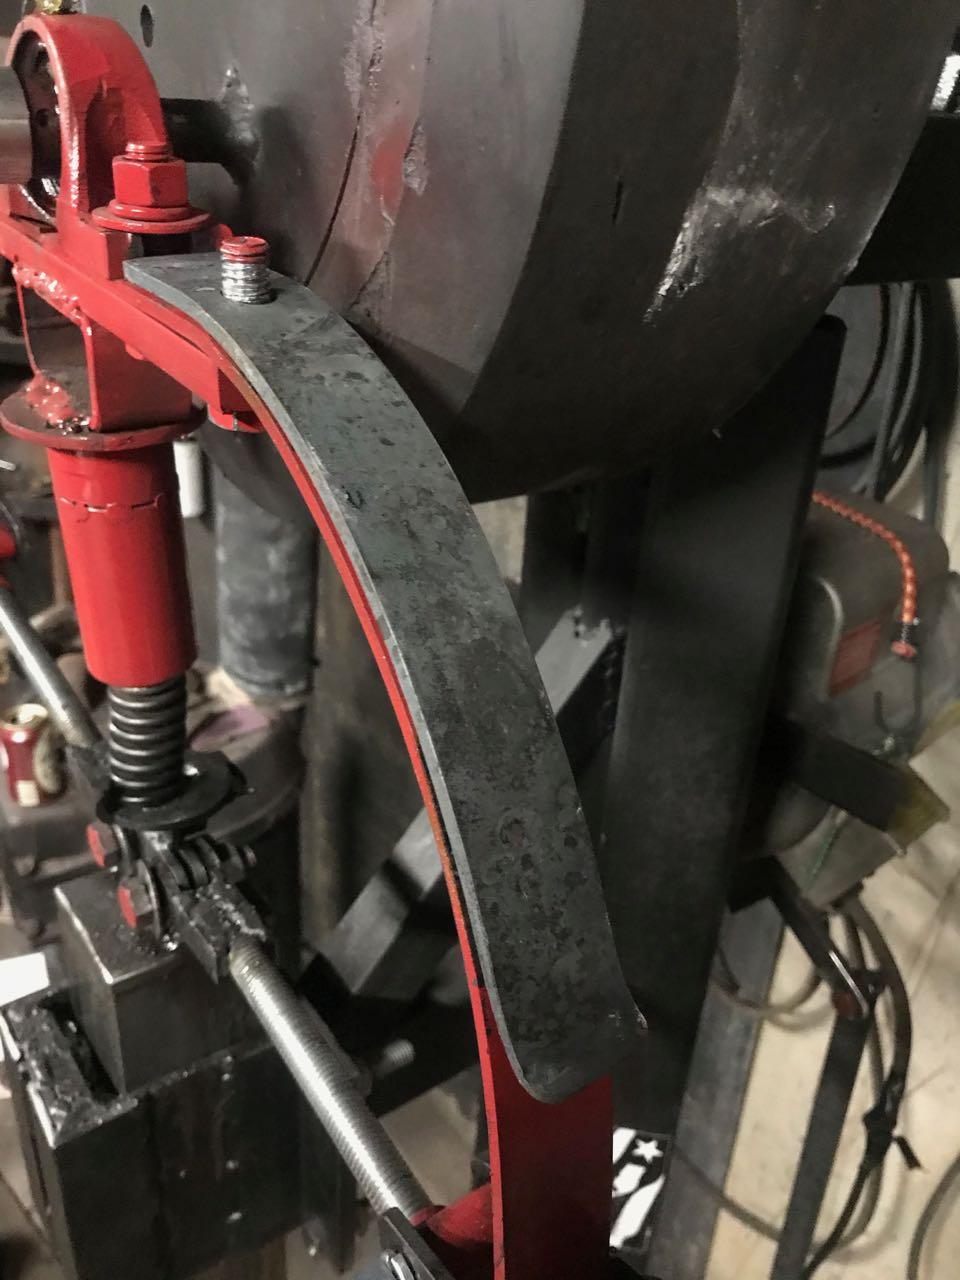
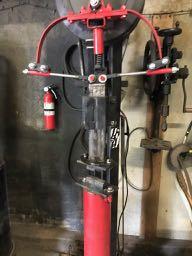
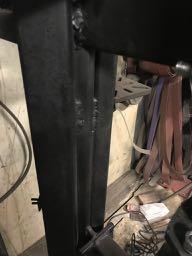
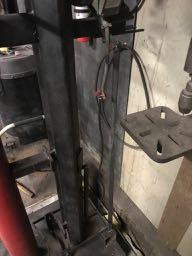
So this adjustable spring mechanism was the solution to my stalling problem and I'm happy to say it works! I've got to pick up a 0.75" shaft collar in the morning to keep the tup spring from drifting out on the offset shaft, other than that she's running fine. I did a few minor adjustments today which I knew I would but other than that, it was just some simple fabrication. Once I get the shaft collar in place I can trim some things down and tidy up the entire project. I've got a set of combination dies in the works as well - I''ve never been a huge fan of them, but I'm less of a fan of changing dies and I think in a class situation they might actually work better. I've got a bunch of Atlantic 33 square on hand so I'm sure there'll be some other fun dies to come! That's it for today, once I get everything dialed in I'll be sure to shoot a video. -J
-
Sure, now you tell me! lol -J
-
Not much else to do right now Thomas, might as well have a go at it, right? -J