MC Hammer
Members
-
Joined
-
Last visited
Everything posted by MC Hammer
-
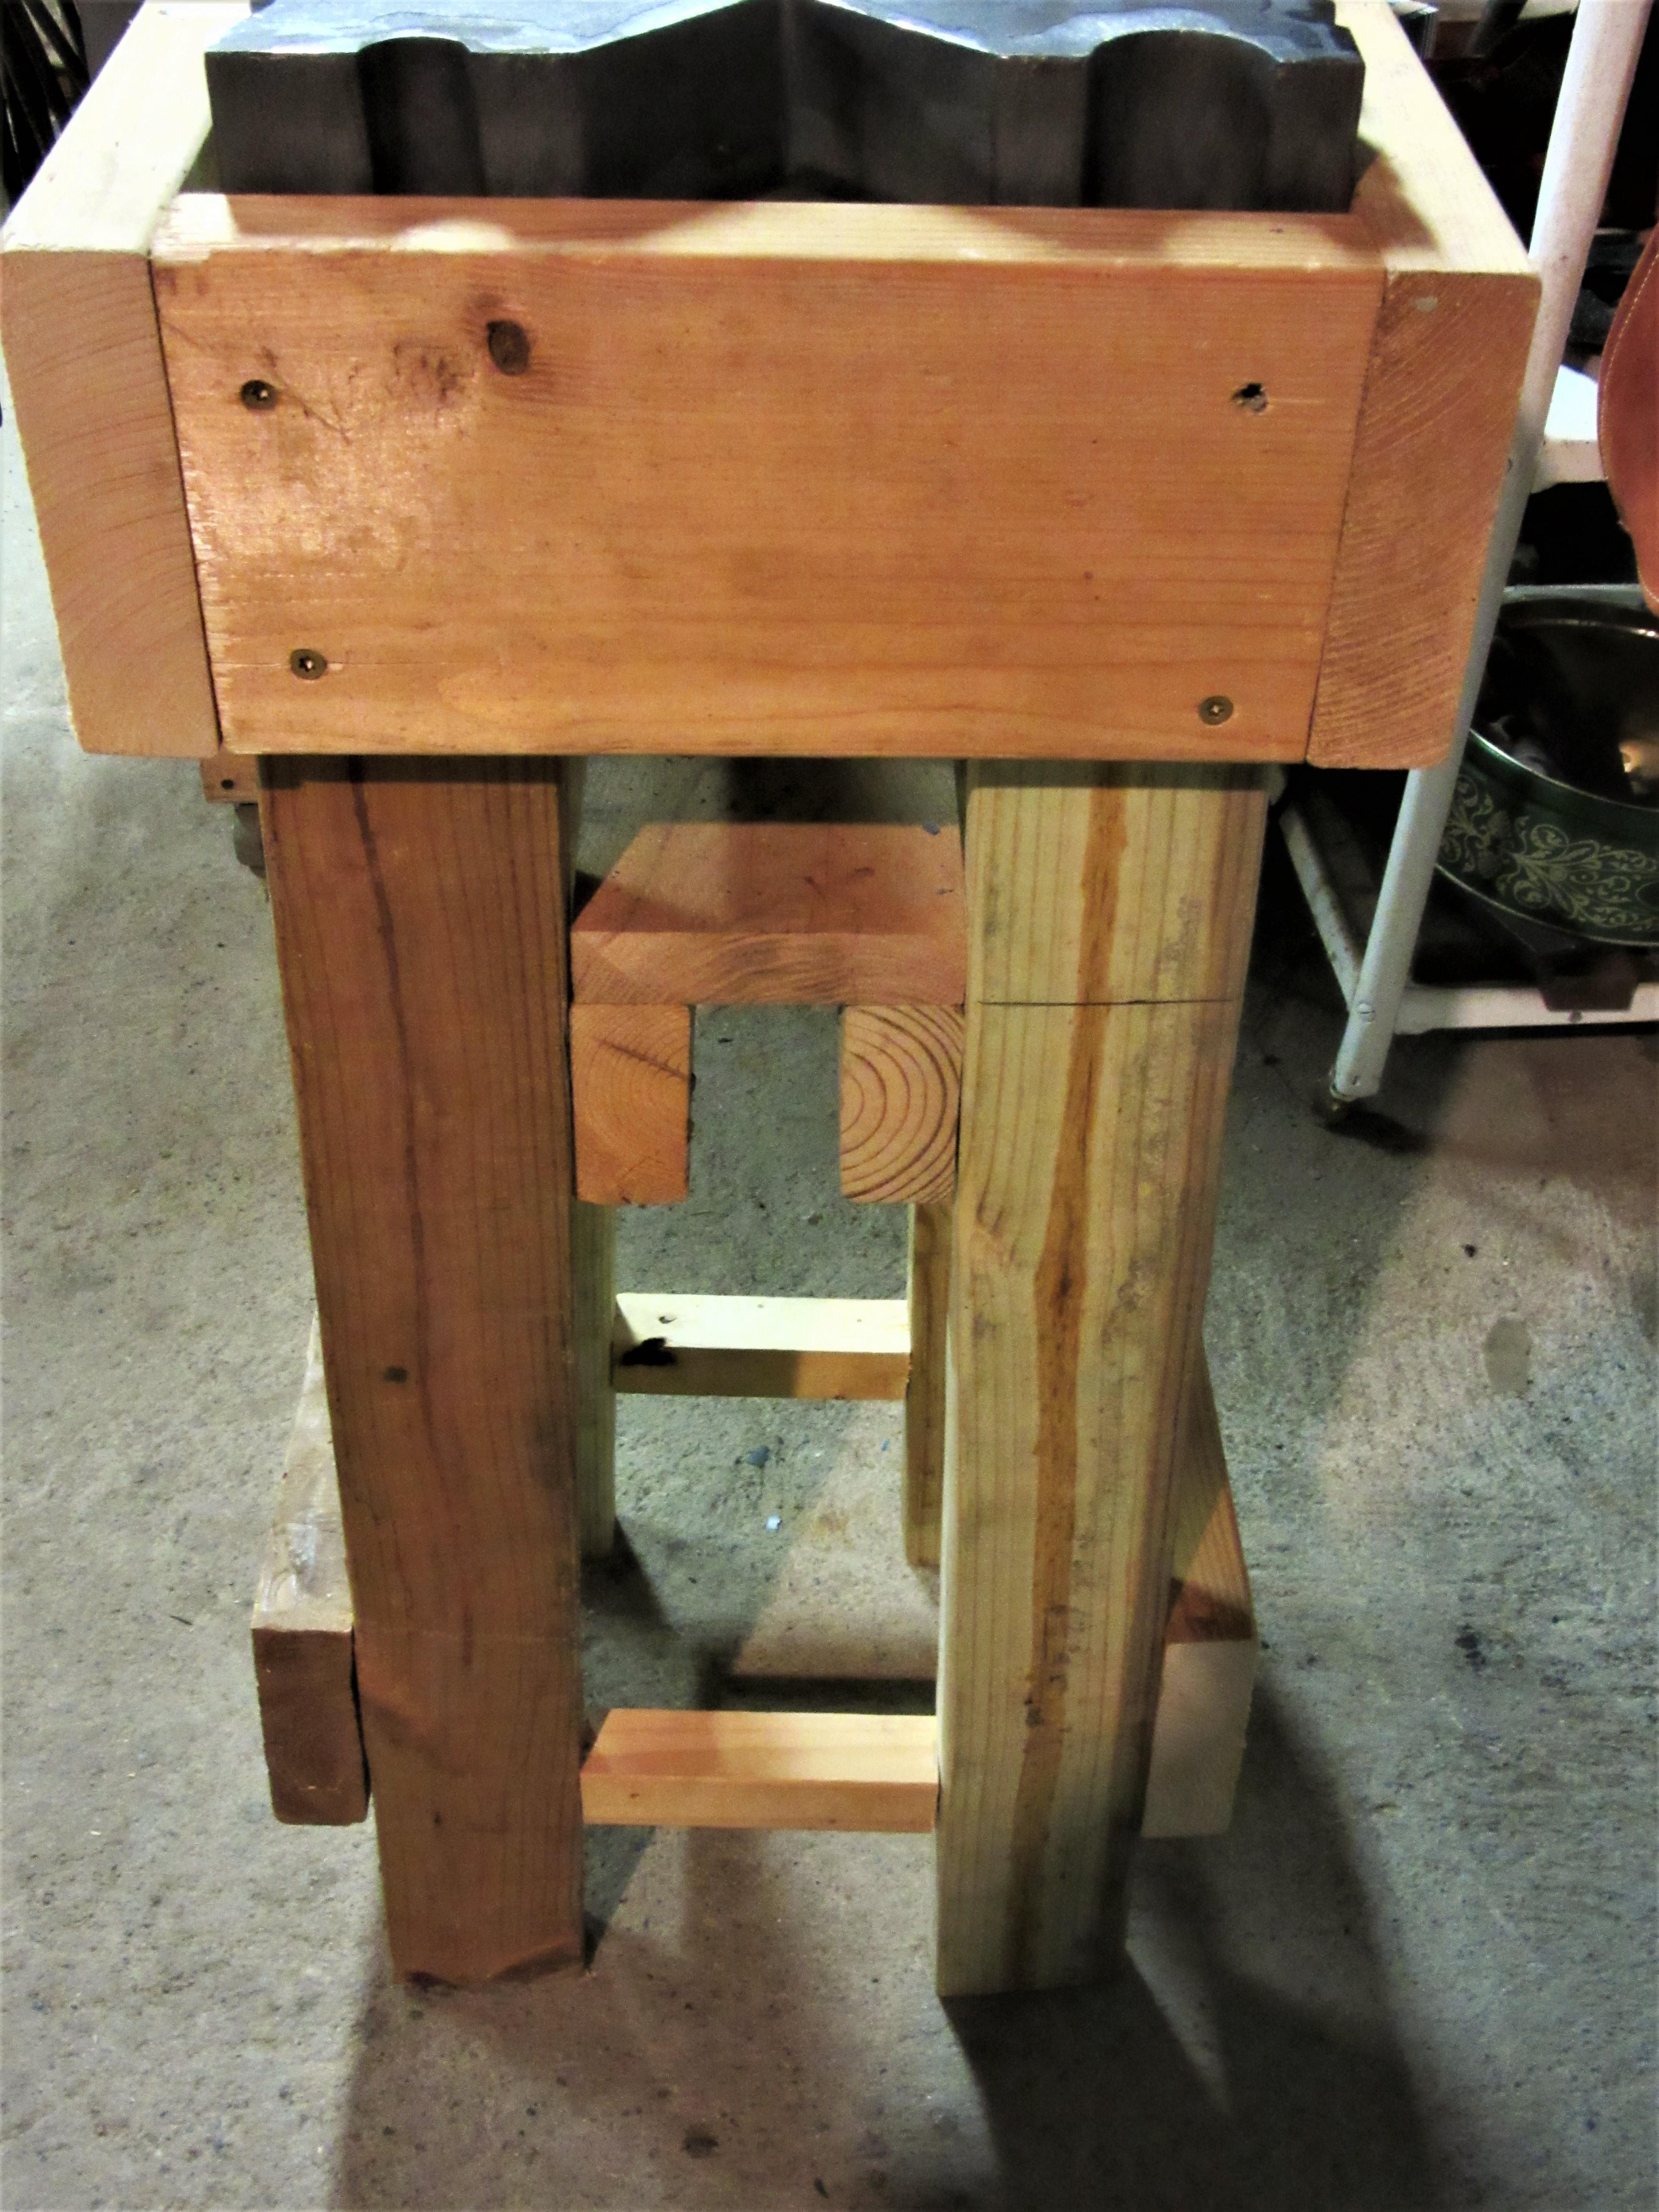
That was funny! You know, it does look like water bed boards I've never really liked the burned look for artificial aging. I do it on tomahawk handles around where the hole is because all the old ones I've handled had that discoloration due to being in contact with the iron all those hundreds of years. I've just always thought it looked like it was burnt on wood things like that. What I was going for was something that didn't look like it was fresh lumber and out of place next to my old stuff. I got what I wanted and it looks like it fits in my shop now.
-
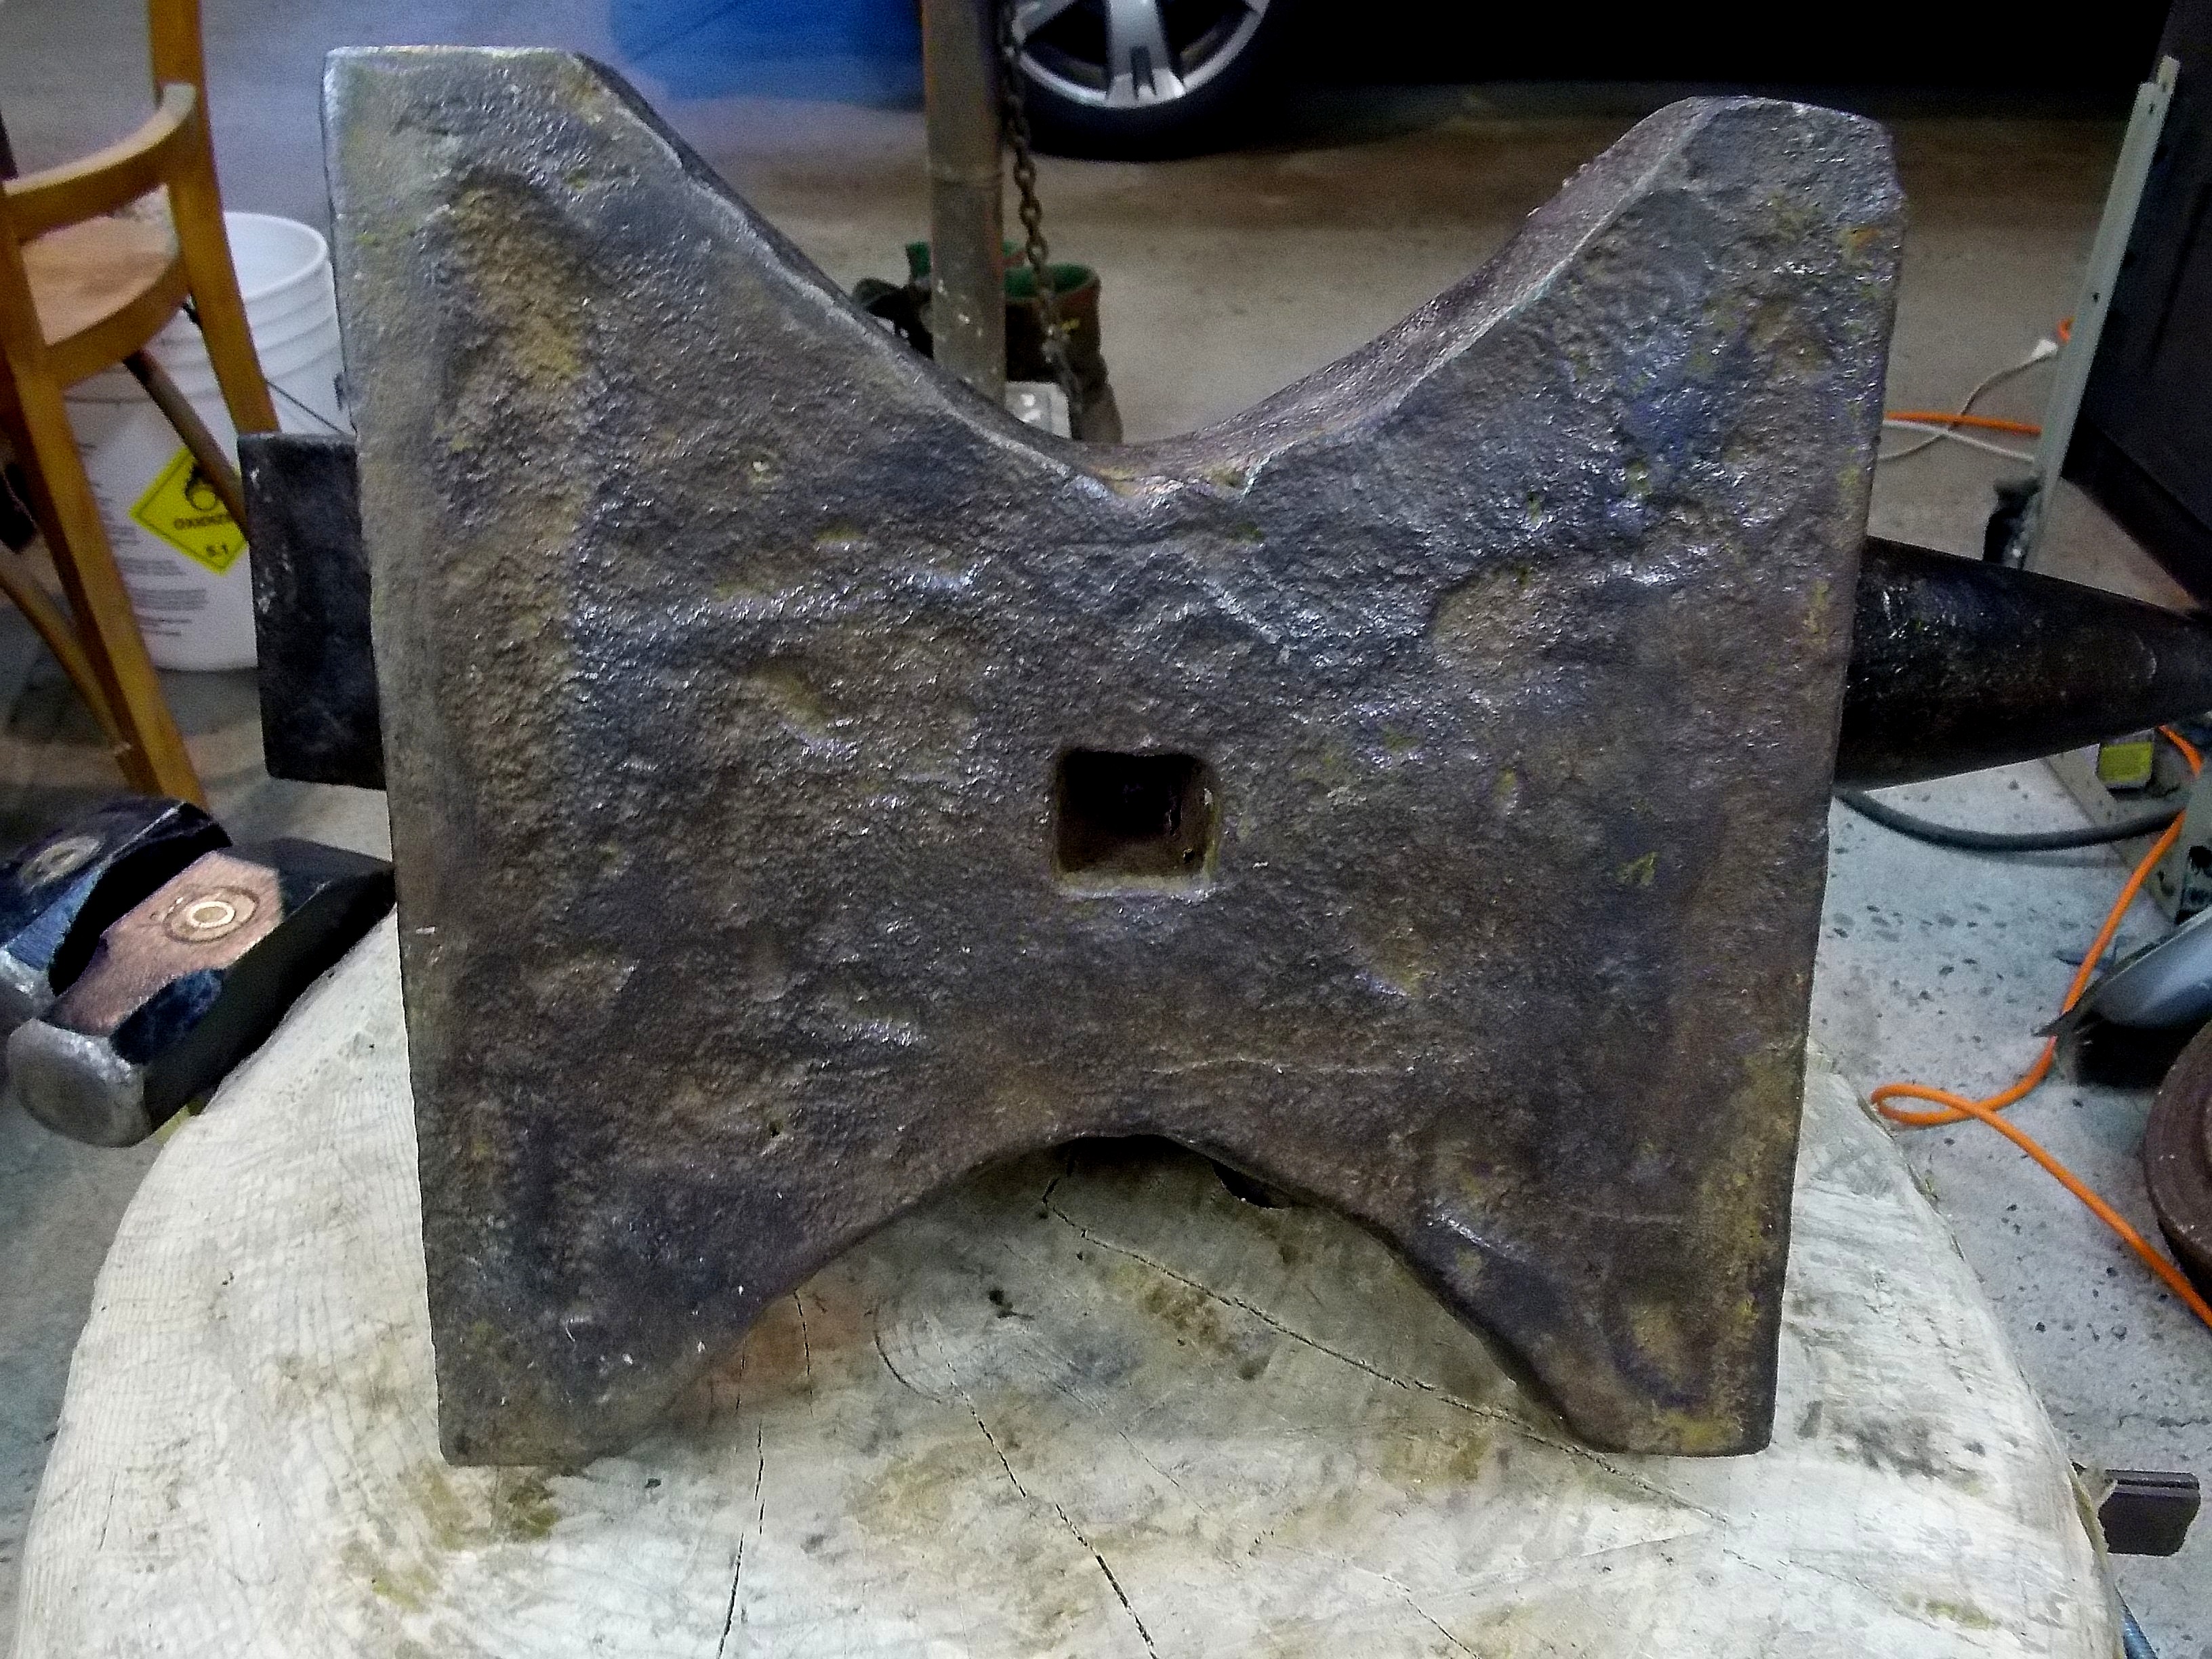
My experience with shellac is that it loses its flammability once dry and will burn only as much as anything else such as just a plain old wood stand without shellac.. Are you saying to torch off the shellac finish? I actually did take and angle grinder and knock the sharp edges off the swage block and then I did some rasping to profile them a bit so that there's a radius on them and they don't leave marks on the things I'm working.
-
Quite a handy idea. I hadn't thought about the double bit axe either. I bet you could also do a pipe tomahawk with the same method and a longer area that is upset. Thanks for sharing!
-
Hmmm, I never considered upsetting the leaf spring like that to give me a spot to punch and drift a hole. As most of us know, 5160 doesn't like to forge weld on its self so this is a great idea. I just stopped by my favorite spring steel shop on Friday and he gave me some new 5160 drops that I'd planned on cutting and using to forge weld into mild steel bits. Now you gave me another idea. The drops are from huge truck leaf springs so there's plenty of material there to upset and work.
-
I believe Trenton made the Acme anvils.
-
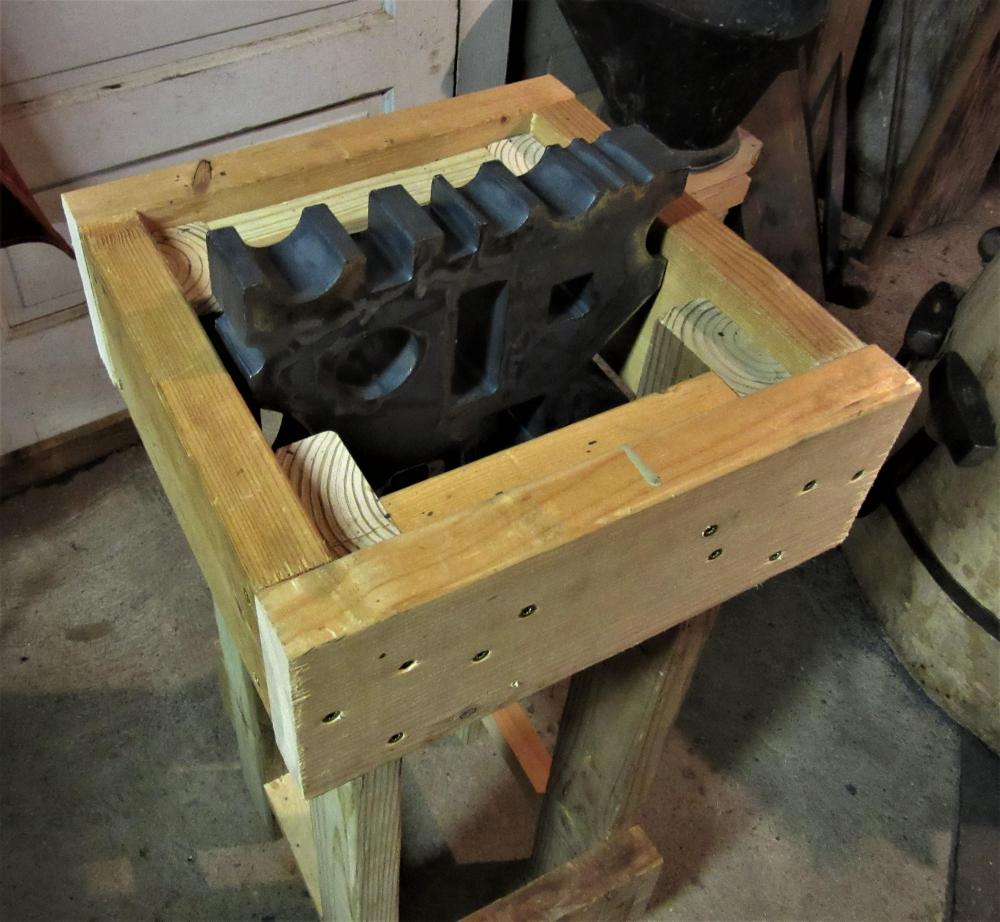
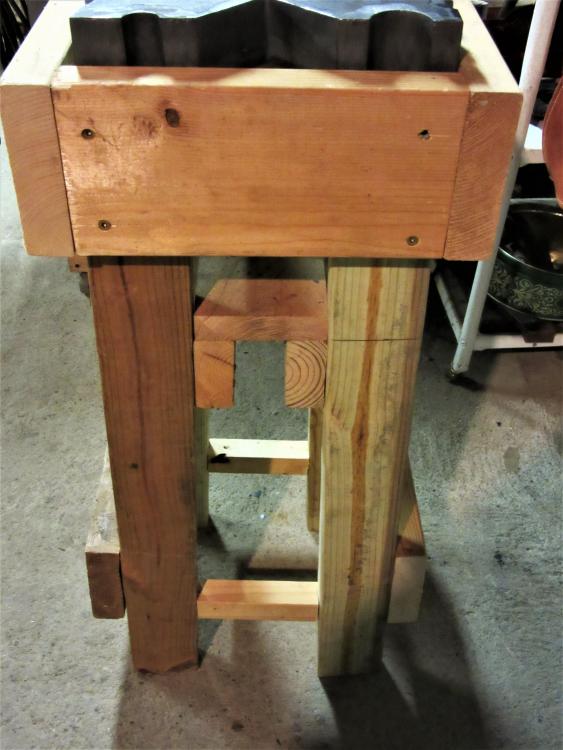
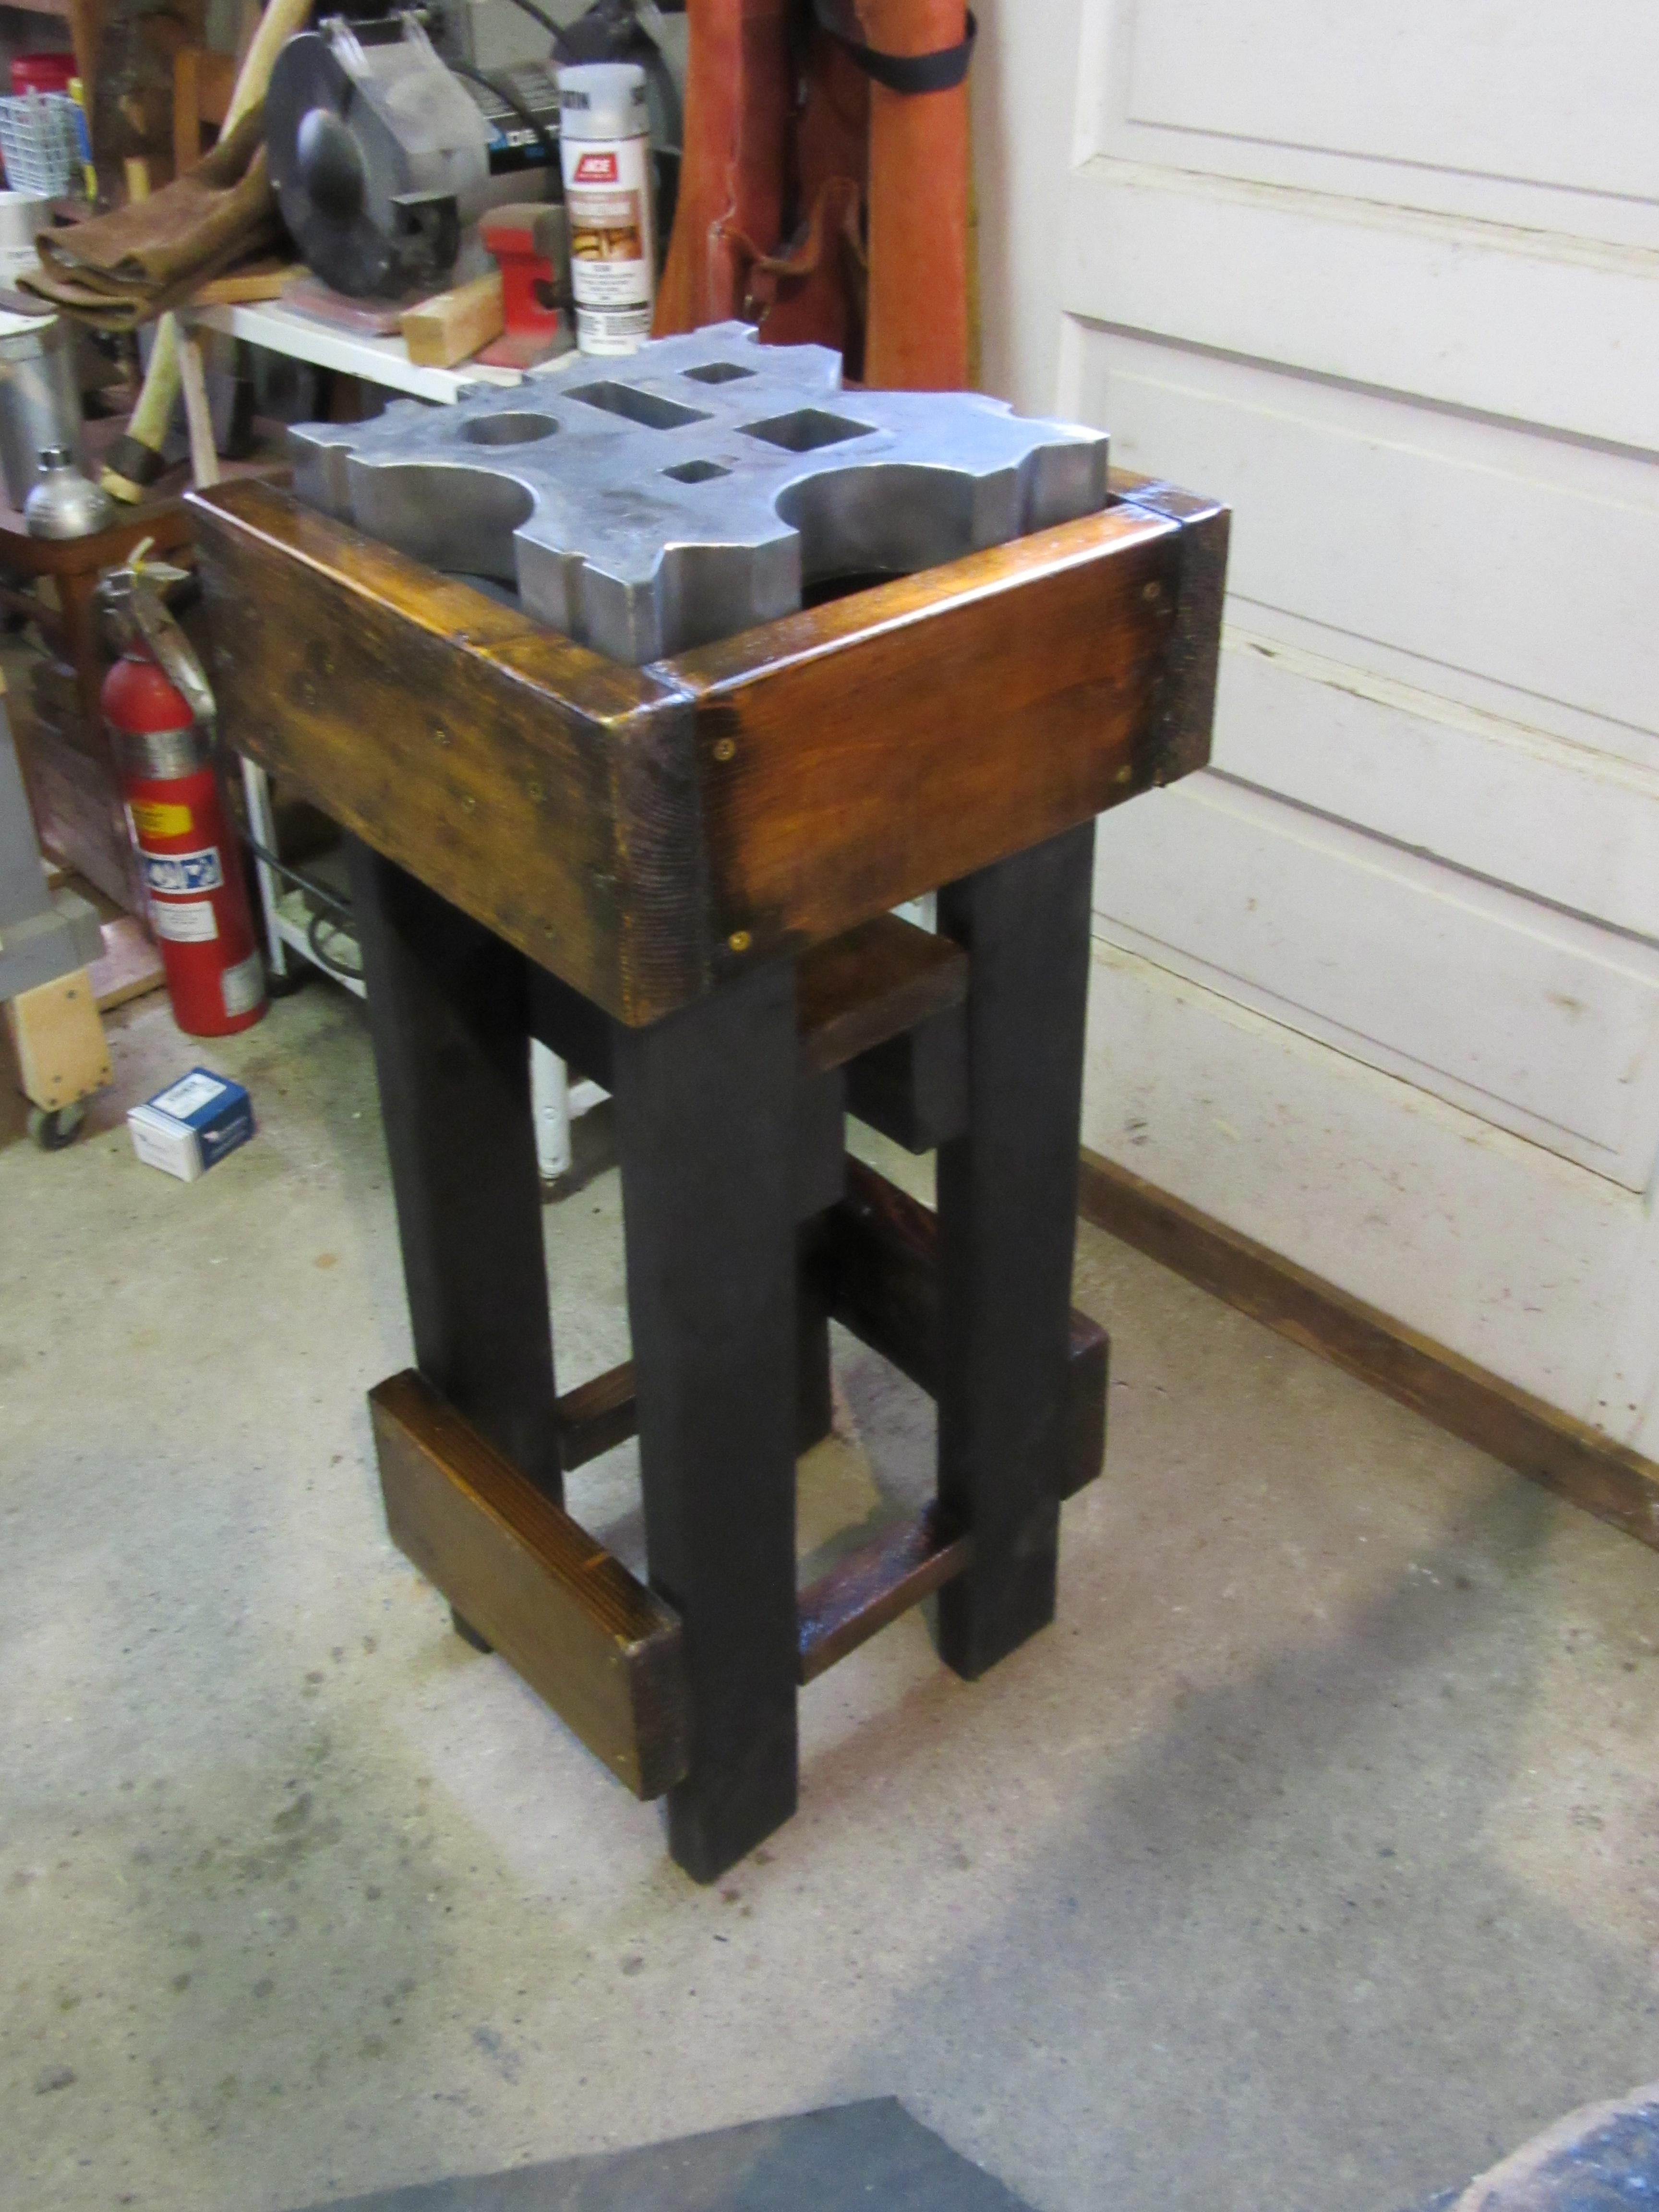
Here's my finished stand. I gave it an antique look so it didn't look glaringly new in my shop full of old tools. I didn't spend a super amount of time on it, but I was happy on how it turned out. The great thing about shellac is that when the finish gets marred or dented I can just apply a new layer to it.

-
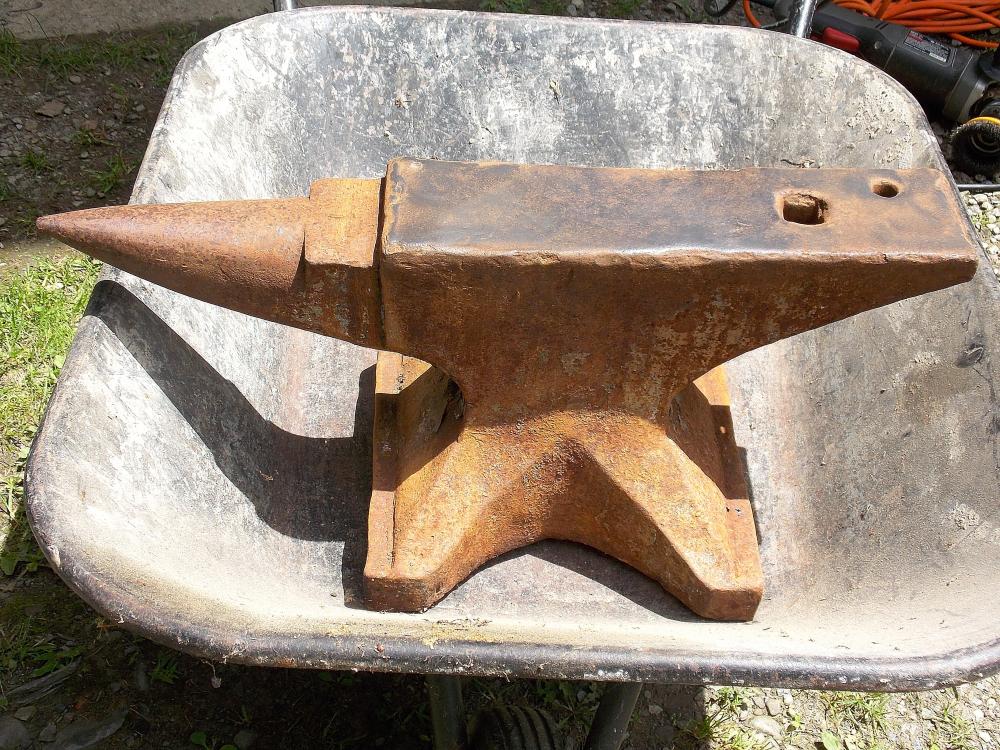
The weight stamp on mine was not visible until I wire wheeled it. The seller estimated it was 150 pounds so when I found it was 179 pounds I was thrilled as it bumped my price per pound down below $2. The 3 is a mystery for me as I've never heard of the German Trenton having anything stamped on the non-logo side at the logo level. Mine as a number stamped on one of the feet that I presume is the worker who made it or some time of order number or inspection number. Some have them and some don't. Oh, and wear safety glasses when you use the wire wheel on the angle grinder. I've had the wires come off and stick right in my cheek or arms. It's be a bad day if one stuck in an unprotected eye.
-
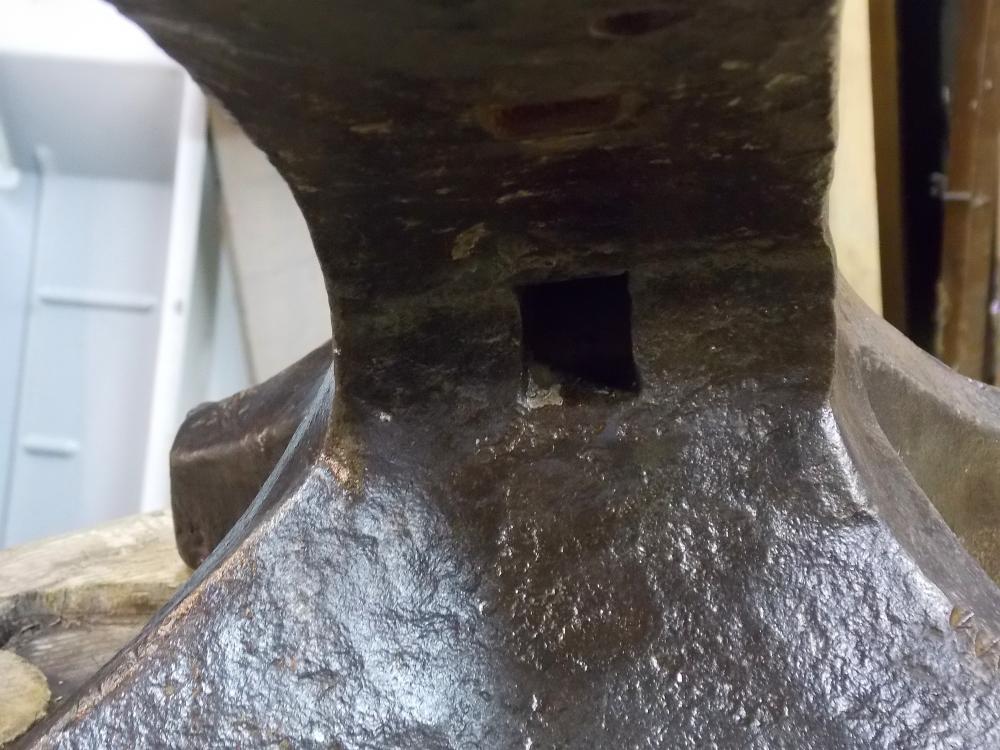
My take on it is that there is a lot of sway in the area that the holes were drilled in. That tells me the holes were put in after a long history of generations of use. The holes are essentially right in the sweet spot. Indians used to drill holes in their pottery to stop cracks and it's an old metal worker's trick too. If I had to guess, I would say they were drilled to stop it from cracking or as a specialized use for inserting posts for bending jigs. There's plenty of left over face plate for smithing toward the back.
-
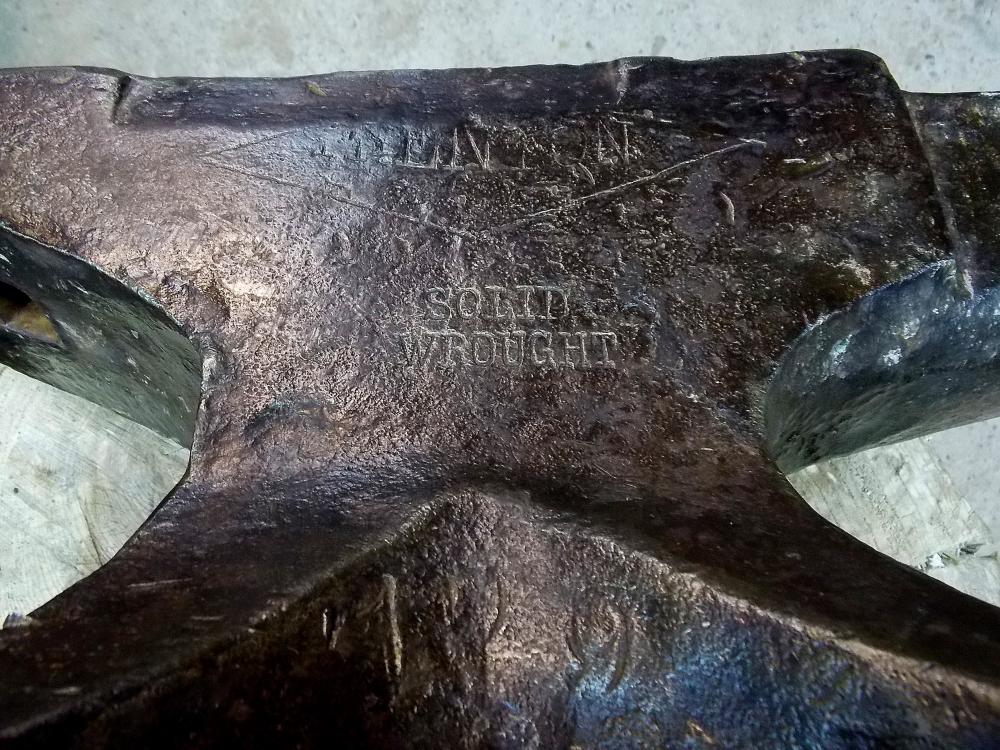
That flat bottom is a dead give away for a German Trenton. Here's a picture of the bottom of my German Trenton for comparison. Here's a similar picture of mine like the ones you took above: Did you look in between the feet on the Trenton logo side for the weight stamped in pounds? It could also say "Solid Wrought" under the Trenton logo as well. That's sometime in a circle or straight stamped like mine. Some of the later ones were stamped "Germany" there as well or under the horn. Definitely pick up that new wire wheel for the angle grinder. Most all of the rust you still have on it will come off and it will look much nicer. You'll be surprised.

-
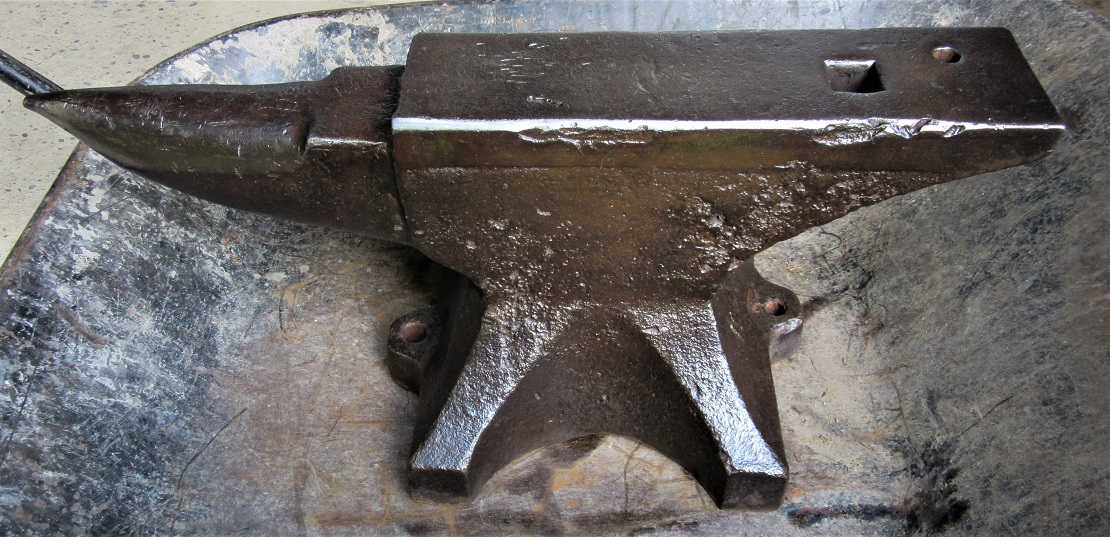
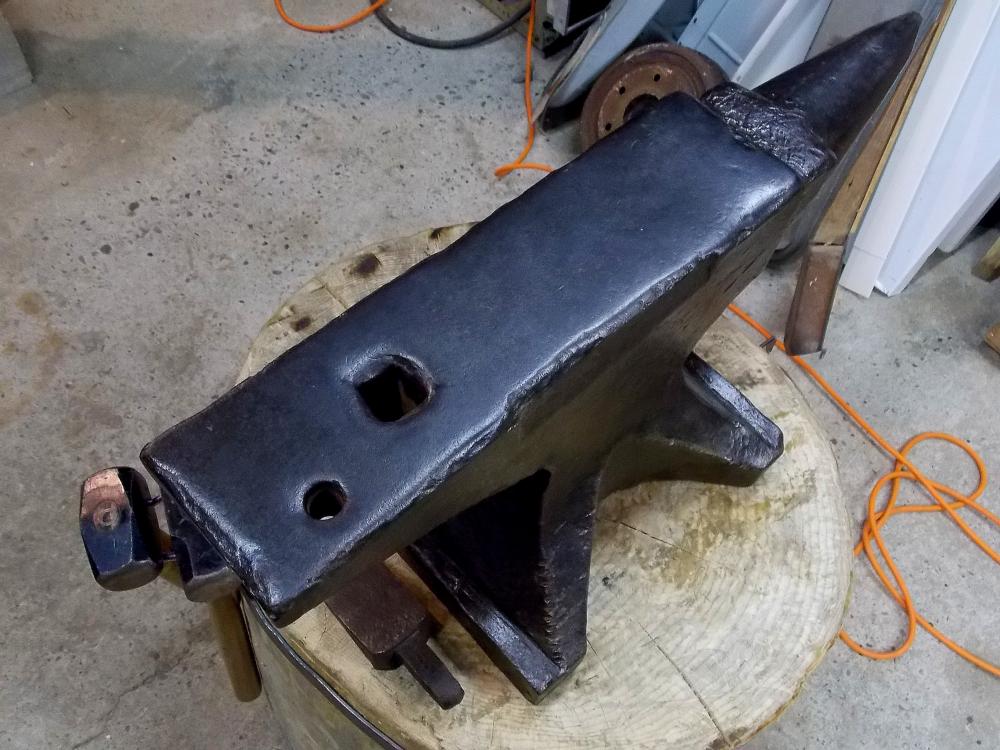
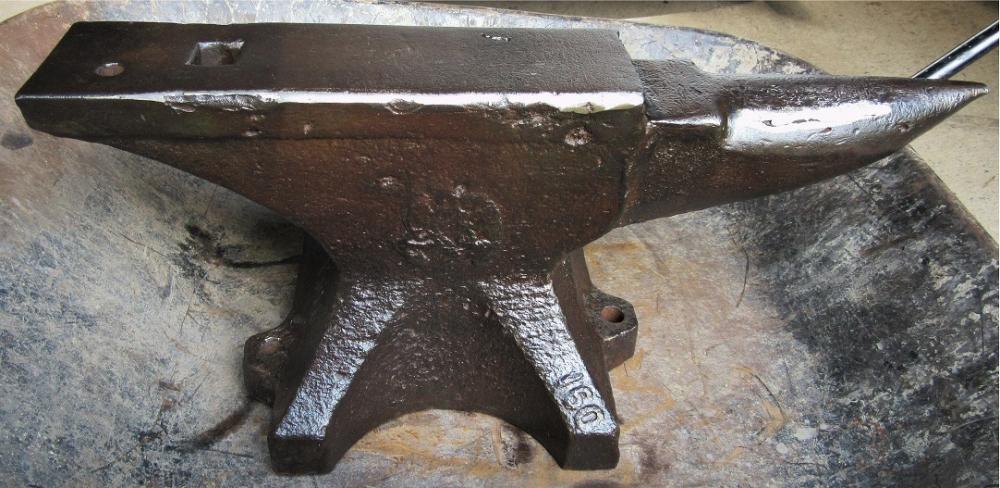
I would agree with the German Trenton ID. German Trenton's were imported into the country by Herman Boker. They date from between 1860 - 1890. There's some debate on rather the bases were made by Peter Wright or Henry Wright, but it could just be the Germans copied the feet on the base. Under the Trenton logo and in between the feet the weight should be stamped in pounds. Here's a picture of my German Trenton for reference. Mine is 179 pounds. Your German Trenton seems to be in great shape. Wash the whole anvil in soap and water, dry it, and take a wire wheel on an angle grinder to remove the rust off. Don't press hard on the grinder. All you want to do is remove the rust and leave the nice patina on it. It shouldn't look silver when you are done, but a chocolate brown like mine above. When done with the wire wheel, wash it again with soap and water, dry it, and oil it. I use new 5W 30 motor oil and it works just fine. Use will polish the face on it so don't grind or sand the face anymore because it's metal you can't put back on. The German Trenton's are a rare Trenton to find. I've only seen a few in my travels so far. Here's what mine looked like prior to the wire wheel clean up.....look familiar?
.thumb.JPG.a4c94a8f6f51a74b72fa59e06225e93a.JPG)
-
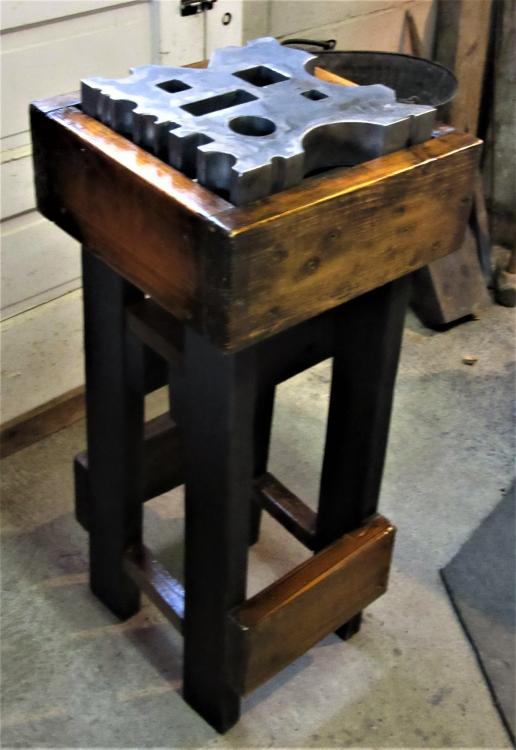
My personal opinion is that you'll be glad you went with the 4 inch thick plate. I just bought a 2 inch thick swage and I wonder how much heavy abuse it could take. I don't plan on doing anything that heavy on it, but certainly if you are making THE swage block you'll have for your entire life a 4 inch would be the way to go. Go big or go home
-
Haywire, don't take your cookies and leave. All here can contribute something and we'd love to see you keep reading and posting. You have to have a thick skin on here. It's worth hanging around as there are a lot of knowledgeable folks on here that will help you learn.
-
I got the paint and stuff for the stand so when it's all done I'll post some pictures.
-
Yeah, you may need a CNC machine to cut them out. The one I just bought off Etsy (see my post in this section) was done with a CNC machine. My 11 x11 x 2 swage block only cost $130 shipping included! That may be cheaper than you having all that work done. I can give you a link if you send me PM. Photo removed since its already been posted in another thread
-
Great score Steve. It never hurts to keep asking. She looks like a nice one. I think the 2 pritchel holes are a farrier specific use.
-
I think a lot will depend on how much you use it and how hard you pound on it. If you used a heavy 4 pound hammer or even a sledge I'm not sure how long it would last. Then again, such a small swage block isn't make for that really. I think with things like this you need to see how they perform years down the road. A solid steel swage block will last hundreds of years and probably a lot longer than that. I hope it works well for you.
-
That looks pretty good. When I was looking at your diagram I was thinking the lower right corner would be a great place for a depression to do bowls and spoons, etc. then I read your post and saw that you had planned on that already.
-
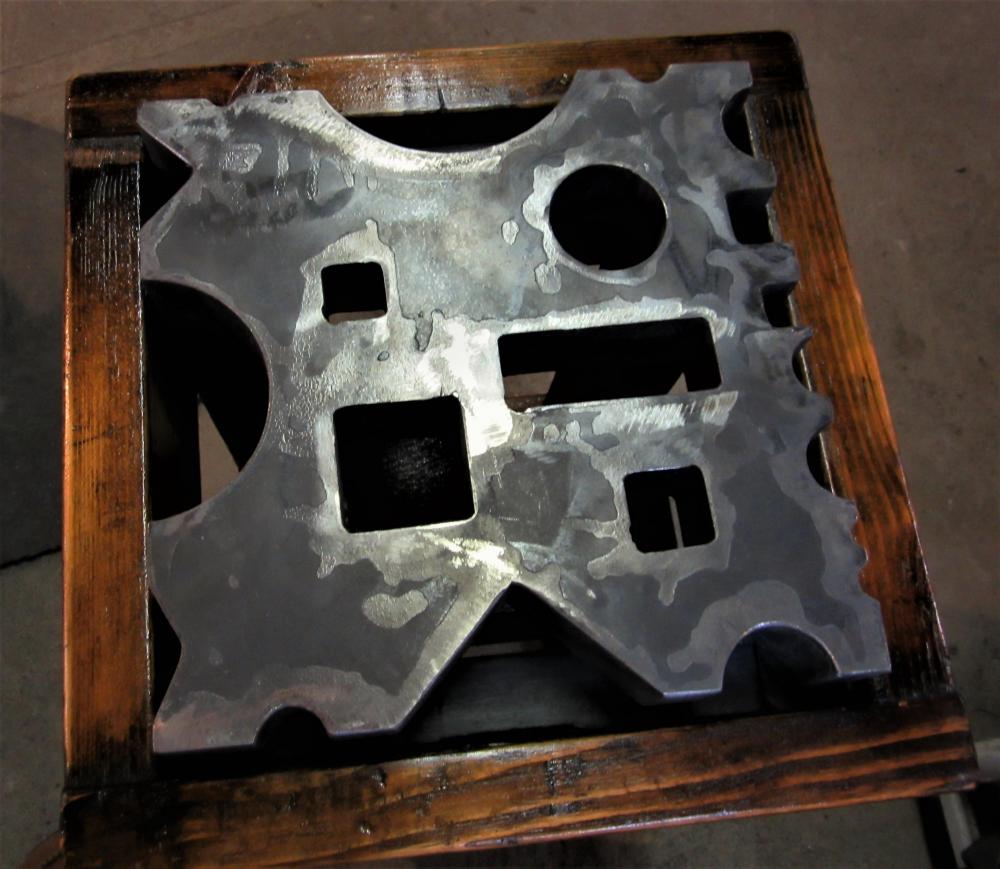
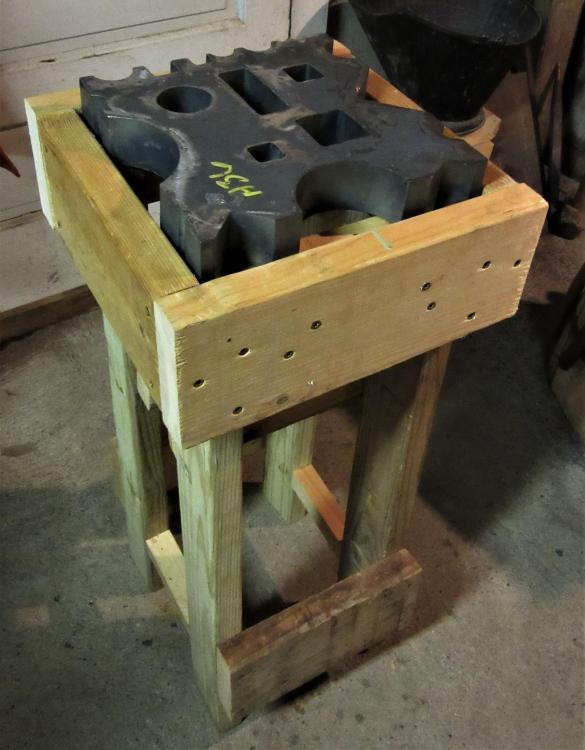
Like most on here, I've coveted a swage block for a while, but I just couldn't justify the prices they are commanding both old and new. I could see many, many times I could have used one and wished I'd had one. I was turned onto a guy on Etsy selling 11 x 11 x 2 inch thick A36 swage blocks for $110. I couldn't buy one fast enough. I won't leave a link because this forum frowns on that sort of thing, but if you search you'll find it just like I did. This size isn't for everyone, and I don't plan on doing any heavy sledge work on it. For me, a guy who'd never likely afford a big swage block, this was the perfect answer. I made the stand out of scrap wood I had hanging around, including a couple 2x4's I found on the side of the highway. The shelf supporting it while standing on its side has an inch thick piece of oak that the swage block sits on. I made the top shelf 11 1/4 x 11 1/4 just to give me room to get in and flip it. I plan on painting the stand and shelac'ing on certain areas with the idea of making it look like it's got some age. The swage block needs the edges knocked down a bit and a good wire wheeling with the angle grinder.

-
-
I used an antique barrel cart when I was moving my anvil in and out of the garage. A couple of ratchet straps and it wheels right out. I was wheeling out a 179 pound anvil and nothing out there on the market could handle that weight without bending the axle in the two-wheel market without spending more than I spent on the anvil. If I might suggest something, just pick a spot that you can afford to permanently lose the space and leave it there. With your back and leg issues I think you'd be better off leaving it in one place. Sacrifice the space in order to care for your situation with your back. I think you'll build something only to find you get tired of moving it out and back all the time and end up doing what I suggest anyways. Sometimes the simplest solution is the best in these situations. Good luck!
-
Please post pictures of your anvil in present condition so that we can have a look at it before you start trying to "fix" it. Here are pictures of anvils I use all the time that are less than perfect but perfectly serviceable just as they are. Repairing these anvils would be a huge mistake. Above is my main anvil and the face is in what I would call very good shape. The edges are a bit beat up, but a very good and serviceable anvil Below is a Fisher anvil. Notice the torch mark on the face and other bits of face damage. It works just fine and some of the chisel marks and pits will polish out under heavy use. I find I can work around all the damage on these anvils without issues. There's a lot of chisel marks on the horn that I've found do transfer to my work so I may have to redress the horn with a little grinding and polishing. This conclusion was only reached after forging on it for a while. I was making a shoe horn on it the other day and had a heck of a time keeping it clean on that horn. Please post photos of your anvil so we can see the damage and assess. It may be really bad and we may agree with you or it may be in serviceable condition as is. As others have said before me, you could completely ruin the anvil trying to "fix" it.

-
DD, I'm partial to 100% clear silicone calking. What I did is routered out the shape of my anvil base on my anvil stand (wood stump) and then siliconed it on. Routering helps to keep the anvil in place until the silicone dries, otherwise you need to watch the anvil to be sure it doesn't slide right off or brace it in some way to prevent it from doing it. Routering isn't needed, but I think it helps establish a place for the silicone to bed-up. You will be very surprised at home much the ring is deadened. I was. My Trenton went from a "Ping" to a "thud-ing". Just make sure you use enough. A layer that is too thin will help a little but not as much as a nice bed of silicone. Let us know how it goes.
-
As a collector of Indian artifacts I've been confronted with similar situations. I had a guy show me a rare point that his grandmother found and he had kicking around in a sock in his dresser. I'm sure a nice crisp $100 bill would have taken it and he would have thought he just fleeced me, but I leveled with him and told him the value of it and also told him that if he ever wanted to give it away I would be honored to add it to my collection. I think the honest thing to do is let someone know about the value and let them decide. Often their eyes turn green with dollar signs and they sell it and are ever so happy that you informed them. I guess at the end of the day I've always wanted to sleep at night knowing I did the right thing. Mind you that's friends and family. If I find something valuable at a junk shop or antique store, mum's the word because they should know the value of the things they are selling. I figure if I overpay for something out of the same shop they won't be telling me
-
That's the other side of the coin for sure. You aren't wrong to use an anvil that old, but it is an important artifact. The buzz could come at a cost by way of damage. A good middle ground would be to get another anvil and work out your mistakes on it / develop your skills and then occasionally use the old lady to connect with your family past. Can't wait to see pictures of it all cleaned up! Put the price right out of your mind. You'd regret selling a piece of your family history. You are the latest in your family to be the caretaker of that anvil, you wouldn't want to be the one remembered for selling it for cash. I'm not really sure it's worth $4K without tying it to something historically important. If I were you, I'd do some genealogy research of your family. The census data will show you who the blacksmith in your family was and then you can find out where his shop was. I located the last blacksmith shop in my small town and all that is there is a foundation, but if it were my relative it would be neat to stand there.
-
My 2 cents comes from experience. If someone gives you an anvil, turning around and selling it is not good etiquette. He's being generous. Yes it will be yours when you fulfill your end of the bargain but when he asks you about it in 6 months and you tell him you sold it, it will leave a bad taste in his mouth. Keep it for many years before thinking about selling it. My cousin gave me an anvil for $50 because it went through a garage fire. Turns out after I cleaned it up, the face still seems plenty hard. I don't need another 160 # anvil and thought about selling it for a brief moment but then realized it would be the wrong thing to do. I'm glad I kept it. I love having 2 anvils. I generally set that anvil up with the hardy tool I'm using and use my main anvil to hammer on. I agree with others. I've been forging for a few years now and just made my first knife this year. It wasn't that I couldn't make a knife, but I wanted to learn the skills I needed to be successful at it. I think just about anyone can forge a knife shaped object, but you have to know how to quench it and temper it correctly. You want to give this guy some quality knives so he feels he got a good deal. Remember, if you take the anvil first, those knives will be hanging over your head every time you forge. I'd shake hands on the deal and work like mad to get my skills up to the level they need to be to make some simple but effective knives. The real work is in the grinding, finishing and putting a correct handle on it. You could make a great blade that looks terrible in the end because of a botched handle job.


.JPG.bae9cf56833b76b82b9355421aac6c34.JPG)