MC Hammer
Members
-
Joined
-
Last visited
Everything posted by MC Hammer
-
Anvil makes a good point about keeping track of how you make things. I have a bench book that I write down this stuff in. You write the stock size, length you cut, and the method you used to make it. If you do this, you don't have to struggle to remember when you have to make it again. I'll also watch videos on YouTube from excellent blacksmiths and write down the methods and stock sizes they use & sketch the final product. This is great because you can stop the video, take notes, then start it again. This takes some guess work out of things.
-
Jim's right. I'm making 4 hooks for a coat rack and have a long 4 foot piece of stock that I've marked out and will be hanging onto the stock and drawing it out. It's way easier, you just can't hold the last little piece because it will be too hot usually. Say you have to square a piece of round stock and draw out both ends, it's easier with a long piece of stock.
-
Very true Anvil! Good info JLP
-
Me personally, I don't want that wedge having any lubrication. When I pound mine in I use my wooden mallet and pound it in until it won't go any further. I cut long wedges so that I can then take it to the belt grinder and grind it off smooth. Then the Swell-Lock is applied until it won't absorb anymore. I want that friction between the wedge and the wood - nice tight fit.
-
I had a similar experience with the 70 lb anvil I started with. I had it on a bigger stump and that helped but it still is a small anvil. I was at a festival last weekend and a blacksmith there had a little Peter Wright anvil that I'm guessing was 80 lbs soaking wet. He was only doing small decorative work on it. I would think your 40 lb Badger would need to doing work like that as well. If you are trying to take 1 inch stock and work it down on a 40 lb anvil it will be a challenge I imagine. My opinion is that even you think you have a small anvil perfectly secured, I think it moves around a lot and you just can't perceive it unless you are watching someone else forge on it.
-
Nice job on the first hook! Taking on a twist was bold for a first go at it. You may want to heat the hook end up again, straighten it out, and draw it out a bit more so the hook is bigger and scrolls upward. If you have a fine needle tip you can scroll the very end of the hook to form a little scroll to add a decorative touch. Google hooks to see examples. Be proud of the fact that there aren't many people walking down the streets that can do what you did. Pound that baby into something and start using it. I find it satisfying to make useful things around the shop and house.
-
I'll try the water quench and see what happens Anvil.
-
I've not used glue with my wooden wedges, but it seems like a great idea. I've also heard the round pipe-like wedges work really well because they push the wood out evenly in all directions. Trust me, the Swell-Lock works really well. I'm thinking I'll have to add a few drops a year because of the effects of heat from forging, but that's easy maintenance. I've even added the Swell-Lock to handles someone else put metal wedges & square nails in and it had tightened them up without trouble.
-
I'd keep shopping unless I could pick it up for less than $100. Imagine a used car lot selling you a car missing the rear-end from the tire on back and wanting nearly new prices Let's say the face is good and hard. If it started out at 114# a decent price is $3 per # so that would have been a $342 anvil. You only have 2/3 there so I'd want to reduce that by at least 1/3 and start my negotiation at $228. That's even too much, but the seller can't really argue with the fact that there's only 2/3 of an anvil there. If it were me, I'd respectfully point out the missing 1/3 and offer $100. The seller will probably counter at $200, so that's when you offer $125. You might just take it home for $150 or you can just walk away. I would not pay $350 for it.
-
Ted, I think you will invest a lot of money and time in building this concrete anvil stand only to have to go searching for a stump in the near future. For hundreds of years blacksmiths used wooden stumps because they worked and were relatively cheap. Don't over-think things. Start simple with a stump and if that doesn't work build something else. There are plenty of posts here talking about cracks in their garage floors from power hammers on concrete. You can put a lot of rebar in your anvil stand and you'll just eventually crack and chip away the concrete down to the top rebar pieces. You are trying to "build the better mouse trap" when you could use the "mouse trap" that works and has worked for a looooooong time. I am impressed with your out of the box thinking, but some things just work..........like wooden stumps and metal anvil stands. Tons of them in use. Your 200 lb anvil is not a monster and I'm sure there are some on this forum that have a 200 lb anvil mounted to a stump or metal stand. My anvil is 179 lbs and it sits perfectly on a wooden stump secured with Z clips and lag bolts. It doesn't move and in the end, I can modify it however I want. Please don't read any emotion into this email, I'm just not understanding why you'd want to go through all that engineering to build a concrete anvil stand when it's much easier to use tried and true stands that have been working well and performing well for generations.
-
I use a hardwood wedge. I've found oak to work well on a hickory handle. Then I use a product called Swel-lock to swell the handle and keep it tight. Metal wedges are hard to remove whereas a wooden wedge can be drilled out and replaced much easier.
-
I once had a water leak at one of my old houses and called my helpful insurance agent who'd been faithfully cashing my insurance payment checks for the last 8 years without fail. The adjuster came and the damage was around $5,000. He got done and looked at me and told me he'd cancel my policy if I made another claim at that amount. Gee, I thought that's what insurance was for, to cover unforeseen loses Silly me. To bring this back around to blacksmithing, I can just imagine how fast they'd deny a claim and cancel your policy if something happened with a forge.
-
Interesting Thomas. I wonder if he got the first nickname "Sparky"
-
Thank you Steve. I spoke with a few others off the thread and they hint toward my soak time and maybe to try a water quench. I'll be testing anything else I use for strikers in the future.
-
I heard from an experienced blacksmith here that he rebuilds his with elk hide leather only and that it is the best. That would be a lot of money compared to cow hide, but apparently the elk hide is much more suitable for some reason. He built this replica Revolutionary War portable forge and bellows on wagon wheels and everything. Works great and is what he takes to all his demos around here.
-
Looks like a curmudgeon chewed on that thing T-Rex chew toy?
-
I think you can get away with a basement shop if you have coal, but propane seems like a bad idea. I think for me the issue is insurance. If someone operates a forge in their basement and a fire results, I'm pretty sure the insurance company won't cover the loss and will probably drop you from coverage knowing you have a forge in your basement. I personally would love to have my forge in my basement. I have the perfect set-up for it with a nice chimney right there to vent everything out, but it's too risky with my gas forge.
-
Steve - I used hay rake tines that I got at the scrap yard. My understanding is that they are likely 5160 or 1095 from what I've researched, but I really have no way of knowing since they are scrap yard finds. I would have done a test piece, but I really figured that I just needed to get the striking surface hard and it would spark nicely with a sharp piece of flint. I did spark test it before making them and it sparks like high carbon steel similar to 5160 with lots of bright sparklers. Frosty - There's some scratching of the surface and I do get some orangish/yellow sparks, just not many. In my ignorance, I didn't know you could get strikers too hard. The first one I got to cherry red and quenched but it didn't even spark, so I did it again at orange heat and it does spark but not abundantly. Do either of you think I might just need to grind off a little more of the striking surface due to loss of carbon?
-
I made 4 flint and steel strikers from hay rake tines. After heating to non magnetic plus (orange heat), I quenched the striker part in canola oil letting the top arms & scrolls cool to black heat before quenching the whole thing until cool enough to hold. A file skates off the striker surface just as well as one I'd purchased years ago. I next hit the striking edge lightly with my belt sander to remove the decarbonized layer. 2 spark ok and two do not spark well at all. My flint is good and sharp and sparks well with the striker I purchased. Any ideas what I did wrong? I'm thinking maybe I need to try again and normalize them all twice before quenching and this time try a water quench?? I need some suggestions on this one. I'd love to hear from those that regularly make steel strikers out of hay rake tines to hear their process.
-
Late to this thread, but if I were the OP I'd try to find a jeweler that would let me help make the ring under his or her guidance. That way you get the special gift sentiment while an experienced jeweler can watch over your should to be sure it's done right and the stone is set securely. There are plenty of blacksmiths here who've walked people through making a knife as a one time thing.
-
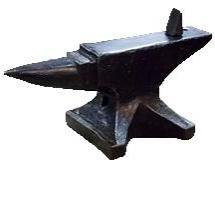
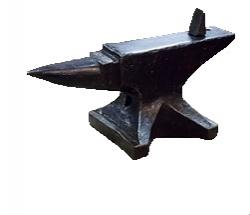
I think maybe he meant weld attached? Looking at the photos again it looks like someone welded around the hardy hole, edges and heal edges. Not uncommon, but if done incorrectly it could be a problem with all of it chipping away. It's tough to tell not seeing it in person and there are far better experts on here than I am that's for sure.
-
Nice anvil!
-
Don't be too quick to jetison the mason's hammer. I found a beauty at my favorite junk shop. I put a good and rounded radius to the striking surface and then ground the straight peen down to an excellent radius for fullering stock. It's becoming my go to hammer for square stock and fullering. You have to get rid of all the square edges and the sharp peen. The square face draws out stock differently, but it agrees with me/my swing and is a good weight for those tasks. I'd keep all the chisels and punches. I buy all of them I can find a garage sales. You can always make them into what you need because, well......you are a blacksmith I'd keep all of it until you get further down the road where you know you won't use it. I bought a pair of tongs that I though I'd use - haven't used them once yet so I'll probably sell them on ebay to get some cash to buy something I do need.
-
That's a good bit of wisdom Frosty. I just did a group of 4 flint and steel strikers - my first ones - and found I wasn't entirely happy with how they turned out. I wanted them to be nearly identical and realized that I need to make a couple dozen more before I learn the skills necessary to have the finish I want to see in the end. I also learned I need to make a jig because part of the problem was getting them to look alike but yet fit in the metal boxes I'd bought for them. This got me to thinking a lot about this very subject. Frosty touched on something that makes sense. I see a lot of smiths getting into the hobby and making a large variety of things with marginal results. It seems that mastering one thing before moving on to another is not in practice. So I can make acceptable steel strikers, but with more time and learning I'll figure it all out and be able to make excellent strikers......then I move on to the next thing. If I take good notes on my findings in my bench book, I'll know what to do the next time I need to make strikers. I've always felt I need to do something until I can do it with excellence, which speaks to finish and this topic.
-
Milling will show kind of a swirled type of markings I believe from the pictures I've seen of others. Perhaps someone here can find a picture of a face that has been milled and post it. Good idea to take it to your meeting and have others inspect it in person. I'm sure they'll know more once they see it. If it has been milled, I hope that not too much was taken off it so you have a fair amount of hard steel face plate left. It's not uncommon for people to get them milled. When I bought my first anvil I sent a picture to my farrier friend who immediately suggested I get the face milled and the edges squared up. Luckily, I'd been lurking here for a while and knew that was a bad idea for the longevity of the anvil. I know that when I was new to this whole thing I didn't realize how thin the face plate of an anvil actually was, so when you take off X amount of steel it equates to 1/3 of the steel plate or more just to get it level and square.