MC Hammer
Members
-
Joined
-
Last visited
Everything posted by MC Hammer
-
What's the profile of the blade looking from tip to end? I'm in the wet shaving community and those blades are really tough to grind correctly in order for them to shave right. Just curious as to how you approached the grind and edge profile.
-
#20 Not taking time to plan out your forging project, tools and set-up. You should have the tools you need for the project you plan to do all laid-out on a table or a bench or somewhere before you even light your forge. Doing this saves an incredible amount of time that you'd be wasting looking for that pair of tongs or that hammer and having to lose heats because of it. Drawing out your project with a soapstone pen or chalk on a piece of metal also allows you to compare your forged piece to the final desired project without worrying you will burn or melt something. I do all my measurements before hand and draw it out or at least have markings for length. #21 Overpaying for an anvil or tools. Don't be in a hurry to fill up a shop full of tools. You think you need 18 pairs of tongs so you buy any pair you see and pay top dollar or you pay $9 a pound for an anvil. This just drives the price of said equipment higher and higher. Be wise with investing your money, and if you have a ton of money use some restraint knowing that every time you pay top dollar or over top dollar that the next tool you purchase will just be even more. #22 Thinking you have to buy brand new tools. New anvils will always be way more than an old used anvil. You do not need crisp edges and a perfectly unblemished face on the anvil to forge great things. You don't need to spend $40 or more on a pair of anvils when you can buy used pairs for under $10 each. This is an expensive craft to start into, but if you are patient you can accumulate the basics for less than the price of a brand new anvil alone. Then get to work learning how to use the old tools and you will be making your own tools like chisels, punches, and hardy tools. Each tool you make is just saving you the amount of money you would have paid if bought new.
-
I guess I wash out feeling that one anvil is sufficient, but 2 anvils is better. As I accumulate more hardy tools, I like having a second anvil to just use for the hardies. I really get having 3 anvils if you do demos. You need a smaller traveling anvil to do that. So: Hobbyists 1-2 anvils, 3 if you do demos Full-time or Long time smith as many as needed Newbies 1 is sufficient for starting out Collectors as many as your floor joists or concrete floor will support I personally would hate to see an anvil not get used.
-
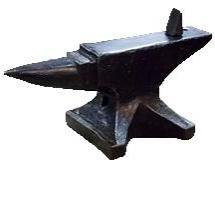
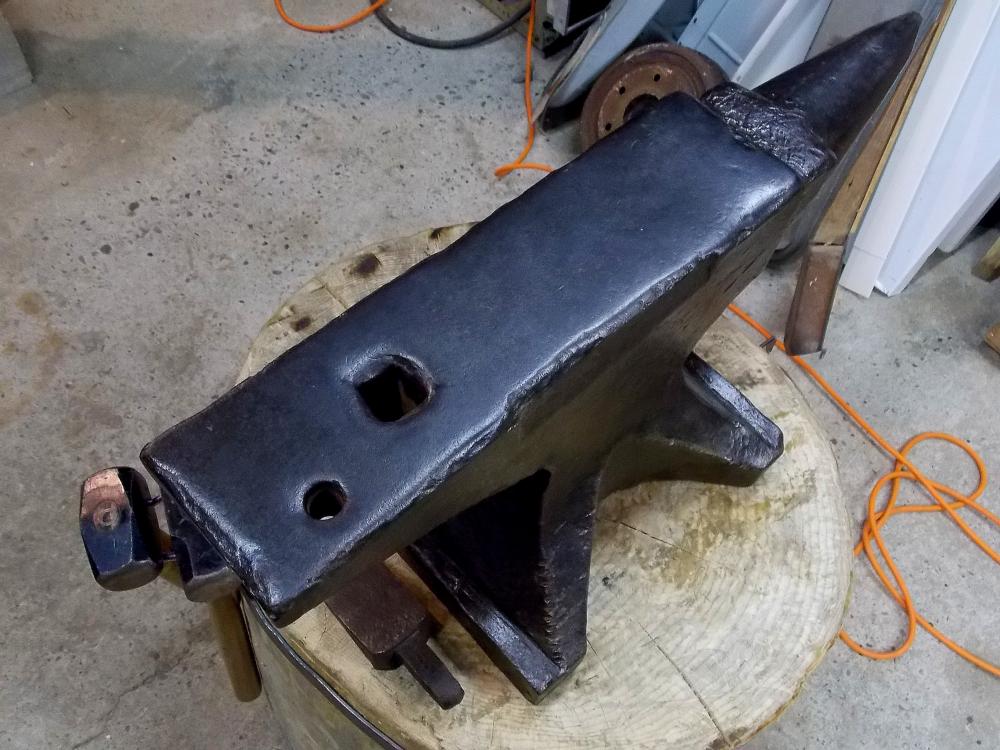
Right on Chelonian. Can't agree more. For perspective, this is the anvil I'm using as my main forging anvil. Lots of imperfections the don't affect any of my forging whatsoever. Here's my second anvil which I consider in decent shape as well I plan on doing nothing with the faces or edges of these anvils. You don't need a perfect anvil in every way for it to be perfectly usable.

-
Please do not "fill in" any of the pits. That anvil is is great shape. If you try to fill anything in you will likely take a great anvil and make it a poor one. Use it as is. Take a look around the forum and see what others are using for anvils and you'll realize that is quite a gift you just received. You are just the latest caretaker of that anvil and none of the smiths before you saw a need to fix the imperfections so keep with that wisdom.
-
I fall into that catagory of never really hearing about this. I must admit, I've seen the thread but though it was just about wearing safety glasses which I do faithfully until I exit the shop after hanging up my apron. I think the million dollar question is how many smiths on this forum actually where IR eye protection while forging? Many experienced smiths have chimed in, but do they actually mitigate this or just take their chances?
-
Thanks Irondragon, that's some useful information. I've never heard of this. Why are we not seeing more blacksmiths using IR protective eye wear?
-
Chelonian, Thanks for posting that info. I'm not questioning you I just wanted to make sure I wasn't missing anything. I guess the question of the hour would be if hot metal produces IR light or any spectrum that can't be visually detected? That I didn't see in any of the links you posted. I'm tending to believe that it doesn't or the blacksmiths of old would have experienced blindness or eye damage doing it day in and day out with many smithies being dark. This kind of reminds me of the silicosis threat to flintknappers (I'm a flintknapper). The old Brandon English gunflint knappers died in their 30's because of this disease. They knapped thousands of gun flints weekly in small enclosed shop areas without any ventilation and it killed them. For sure there's a danger in breathing in any form of silica and you should mitigate that if you can as much as you can but if you are not knapping daily it probably won't have a life altering impact on your lungs. I think this is probably the case with forging and the IR issue you cite here. If you are a full-time blacksmith forging in a completely dark shop 6 days a week, maybe it's a problem. I could be wrong and perhaps others have more information to add that would be helpful. Anyone here using IR eye protection while forging?
-
Also get in the habit of planning out what you will be doing. If it's making hooks, lay out the metal stock you want to use and either mark the stock material by measuring each length or cut the stock material to length. Pick your tongs out, sizing the them to the stock ahead of time, and select the hammers you will be using. Take a moment to set your vise or post vise to the diameter of the stock material as well. If you start with all this prep work it just makes things go easier because you don't have to think which tool you need, etc. Once you pull the hot metal out of the forge you are losing heat so every second you waste trying to select tools or crank down a vise to the right size is wasted time you can't forge the metal. Getting that piece of advice out of the way, start with hooks. Look around your house and shop looking for things that need hooks and make them. I can't tell you the satisfaction I have when I walk through my house and see the things being used that I forged. Yes, hooks can be boring but they teach you valuable skills you will use elsewhere. I just made my first knife a few weeks ago. I thought it went pretty well and I'm betting it was because of all the other things I've made taught me valuable basic skills. Don't jump too quick into knives and the stuff people think is "cool". You could stunt your growth as a blacksmith. Enjoy the journey as you make your way along the road. I sure don't regret it.
-
I've never heard of anyone's vision being impaired by staring into the forge fire or the hot metal. I keep my shop with low light because I like to see even the slightest hint of color. I used to forge outside and man what a difference. Can you share what you've discovered as far as damage to the eyes regarding these things? I don't know anyone who uses tinted glasses to forge with. I'm truly interested in what you've read about this. Thanks.
-
Looks like a great start. Keep us posted on the progress!
-
I hope it's still there when you go back. The scrap yard I visit has trucks coming and going daily so if you don't grab it, it will be gone. There are ways of tucking things away, but that's not good etiquette and could get you bounced out of a scrap yard. If in doubt, I'd ask the yard manager if you can set it aside and come back the next day for it. If you keep your promise he'll probably let you do that every so often. Heck yes, see if they have a torch at the yard. My yard does and the guys there have no problem cutting leaf spring assemblies apart so I can get the flat leaf springs I want. They all think it's cool that I am a blacksmith so they are always willing to help. I just don't abuse it and stay out of their way.
-
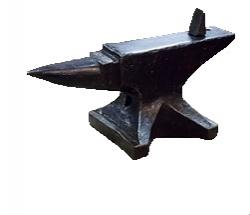
I"d say this is an old English anvil. There are several makers from England during that time period but it is similar to the Mouse Hole anvils which can range from 1600's to the something like 1911 I think. Take a better picture of the sides so we can see any marks or letterings.
-
You may want to explain why they are not suitable for blades Thomas. Most would think you could make a decent knife out of a lawn mower blade. I probably wouldn't make a blade out of one, but I"m sure there are those out there that are curious and would like to hear from your years of experience on this.
-
I've used exclusively scrap materials to forge things out of and it can be a little frustrating when you have something that's higher carbon than you realized, but I've had nothing but success with the scrap stuff. I've used purchased mild steel and love it, but you can't beat scrap prices. I just made my first knife from a coil spring and I was happy with how it turned out. The quench went well and the tempering was easy enough in the kitchen oven. I made a couple of punches from the coil spring as well that turned out great. I tempered them with the residual heat left in the punch. I do normalize the coil springs cuts 3 times before starting to work on it though. That was recommended to me to relieve any built up stresses that may be in there due to being a spring on a car or truck or whatever. I also always cut sections out of them and never try to straighten out a large coil spring. I think you can put micro stresses and cracks in it trying to unroll it. I think this happens when the spring starts to cool off and you are ranking on it not realizing it's probably too cool to take that stress. Taking an angle grinder and cutting out a small piece is way easier. I think if you are a knifemaker you almost have to buy your steel or if you are a full time blacksmith you'll want to buy most of your steel as well. Neither of those types have the time to wander a scrap yard when they have orders waiting to be filled. If you are a hobby smith, I say go for the scrap and have fun with minimal amount invested.
-
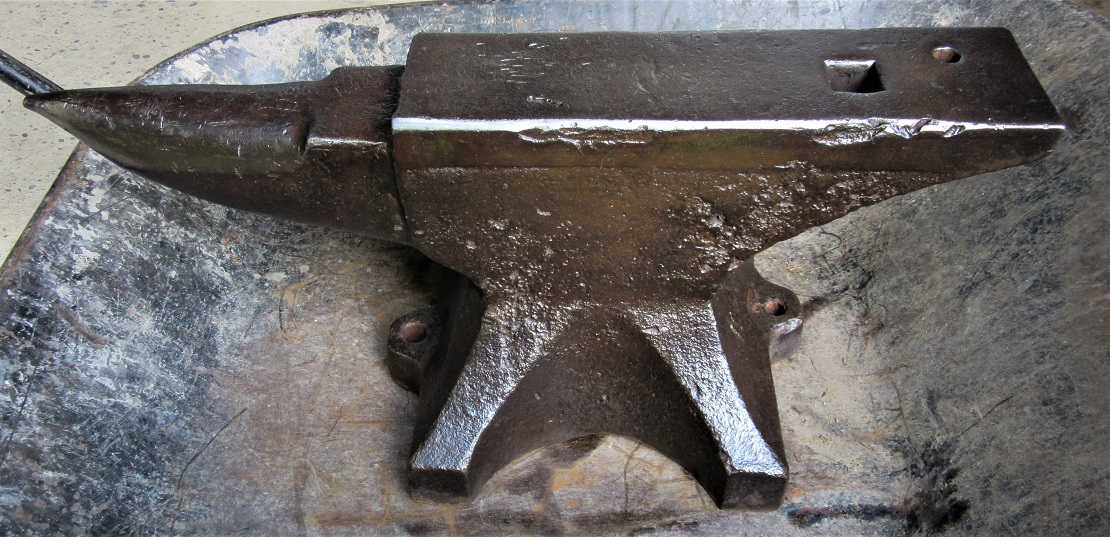
That doesn't look like a real Ridgid/Peddinghaus based on the pictures. I have a piece of mild steel that gets 50% rebound drops with a 1 inch ball bearing and it doesn't leave any dents. I'm thinking it's a knock-off and I'm glad you are pursuing this. Don't give up, you paid good money and deserve to get what you invested in. You said originally that 165 pound anvil was big enough and that you couldn't handle anything larger. Please know that a good shop anvil size is at the 150 lb range, so you have plenty of anvil there. I have a 160 pound Fisher and a 179 pound Trenton and that is plenty enough anvil for me for a lifetime. I'm not looking for anything heavier.
-
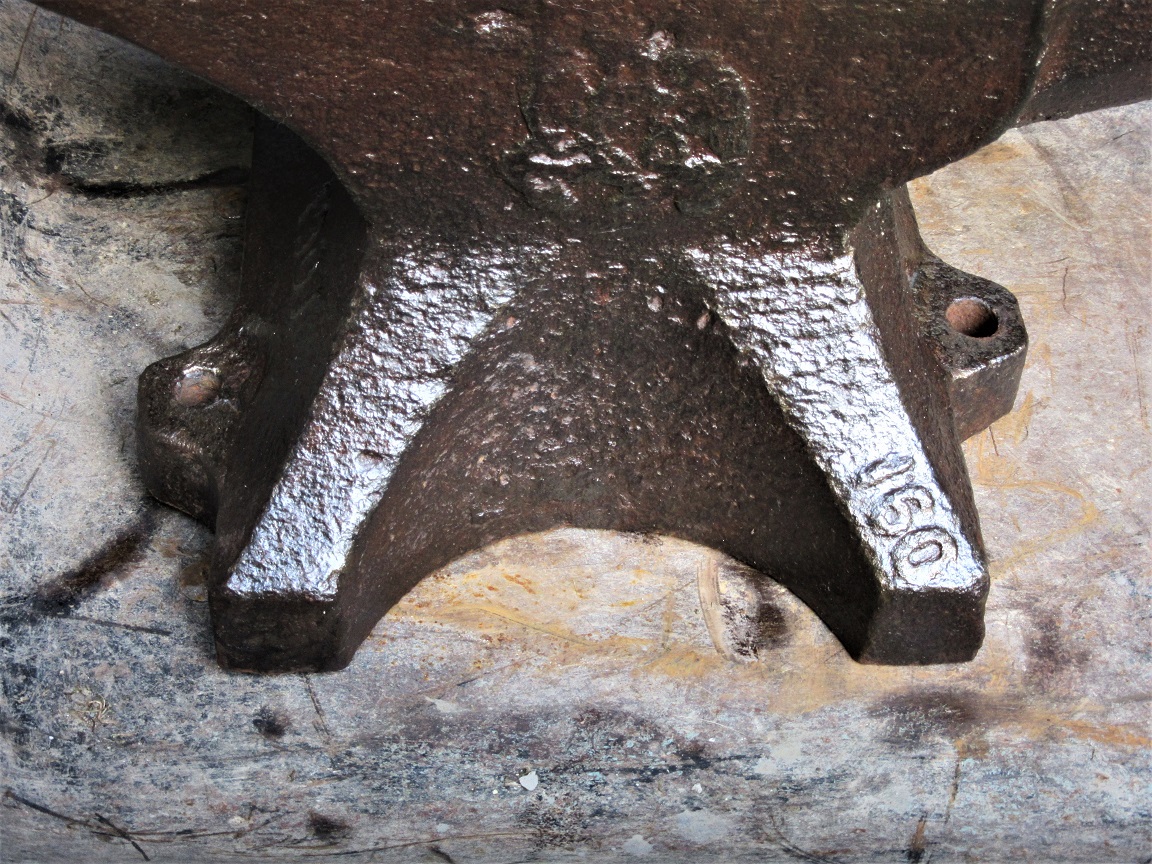
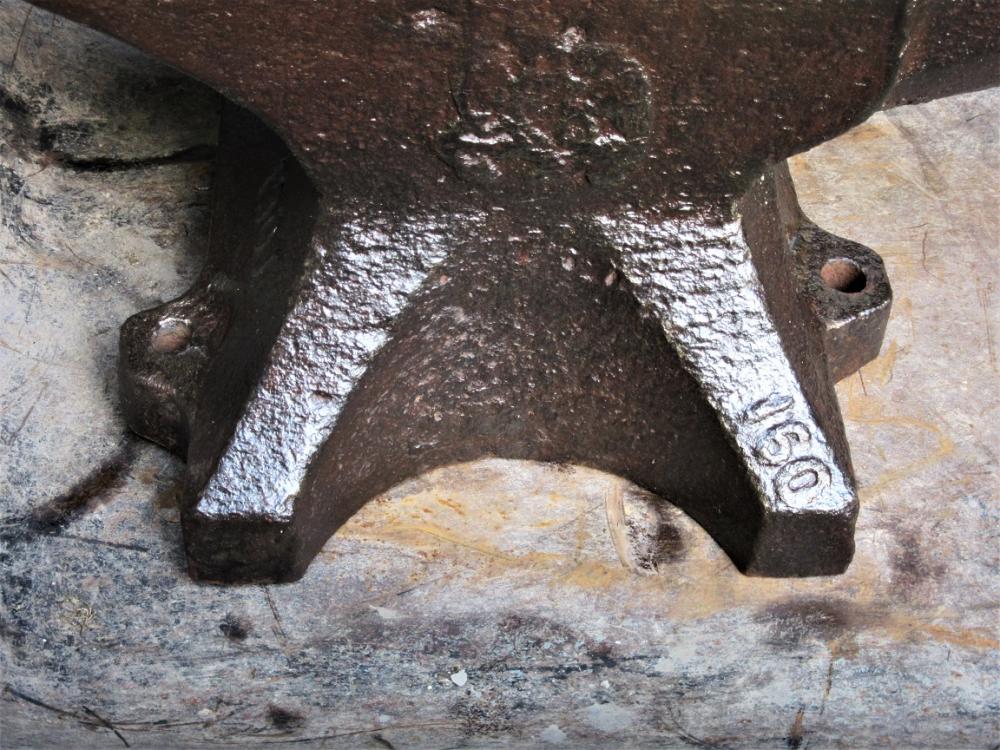
The weight of Fisher's is on that front foot that has a strap going over it on the logo side. Looks like 180 something there. It's raised so take a wire brush and brush it. I didn't find my weight until I brushed it. Here's a picture of where the weight stamp is: Your Fisher is better defined than mine. Too bad the heal is missing, but it's still usable.
-
I give you credit for creativity, just be very careful. It looks like a lot of your critical parts are not made of durable materials or super strong welds. I'd hate to see you get hurt with an experiment. Maybe a video posted with it running would give those with more experience and idea of how well it works.
-
It's a start and someday you will have something better and you will look back and smile. Just keep looking to upgrade. Your next acquisition should be to find a solid square piece of steel and then so on until you find an anvil. Don't feel bad and don't apologize, you are doing the best you can with what resources you have. With that said, I did notice a HUGE difference when I got a better anvil and better tools. I couldn't believe the rebound difference. There's a lot of debate on this subject, but I noticed quickly that forging became more successful and easier with the improved tooling. Now I'm at the point where I can make tools I need which is a huge plus. I just made a couple of punches the other day because I didn't have those sizes.
-
I think there's certain things that should never be worn like the SEAL insignia and Ranger Tab and others like it. Those folks had to pass a rigorous selection process to earn it. Unit patches, same thing as many of them are personal to the guys in that particular unit. Wearing a patch because it has an anvil on it say on a hat or something honors those folks so long as you are not trying to steal valor and claim you are part of that command or organization.
-
I just saw this in the army times. The Future's Command has developed this patch for their uniforms and BDU's. Pretty cool and I think I will be getting one of these when they become available.
-
Latticino - I love your story on that stand and it seems very believable. I'd say that stand is a one of a kind for sure, but then again aren't all stands? I'd love to have that stand. OP better chain and lock the stand to something
-
I love that stand! That's got to be the coolest stand I've ever seen. Like others have said, don't grind or mill the surface of that nice anvil. I had one that was pretty rough and I just used water and a carborundum stone to lightly abrade the surface to bring it back to where it needed to be. I doubt I lost any measurable steel from the face and using water and good old hand power I didn't risk heating the surface up at all. There are some things that can't be fixed not even with 10 years of solid forging, but the more you forge hot metal on it the smoother the surface of the face will get.
-
My thinking is to use the scrap stuff when first starting out. Make some knives and things to use around the house. Test them all out and write down what you figure out. A coil spring is a lot of steel so heating a test piece and quenching it will tell you a lot about it - write it down and label that coil spring. I have huge, long and old truck leaf springs that were given to me. There's a ton of steel there. If I do a test piece and record what works and what doesn't I'll have that info. If you have money falling out of your pockets, don't mess with the scrap. You might as well buy steel from a local supplier. If you plan on making knives to sell to others as a business, you also want new steel. It saves a lot of time to pull new 5160 out of your stock shelves than to mess around testing a piece you got out of a scrap yard. For those like me that don't have the money to invest in new steel, I use the scrap but I'm also not running a business selling knives or edged anything to customers.
-
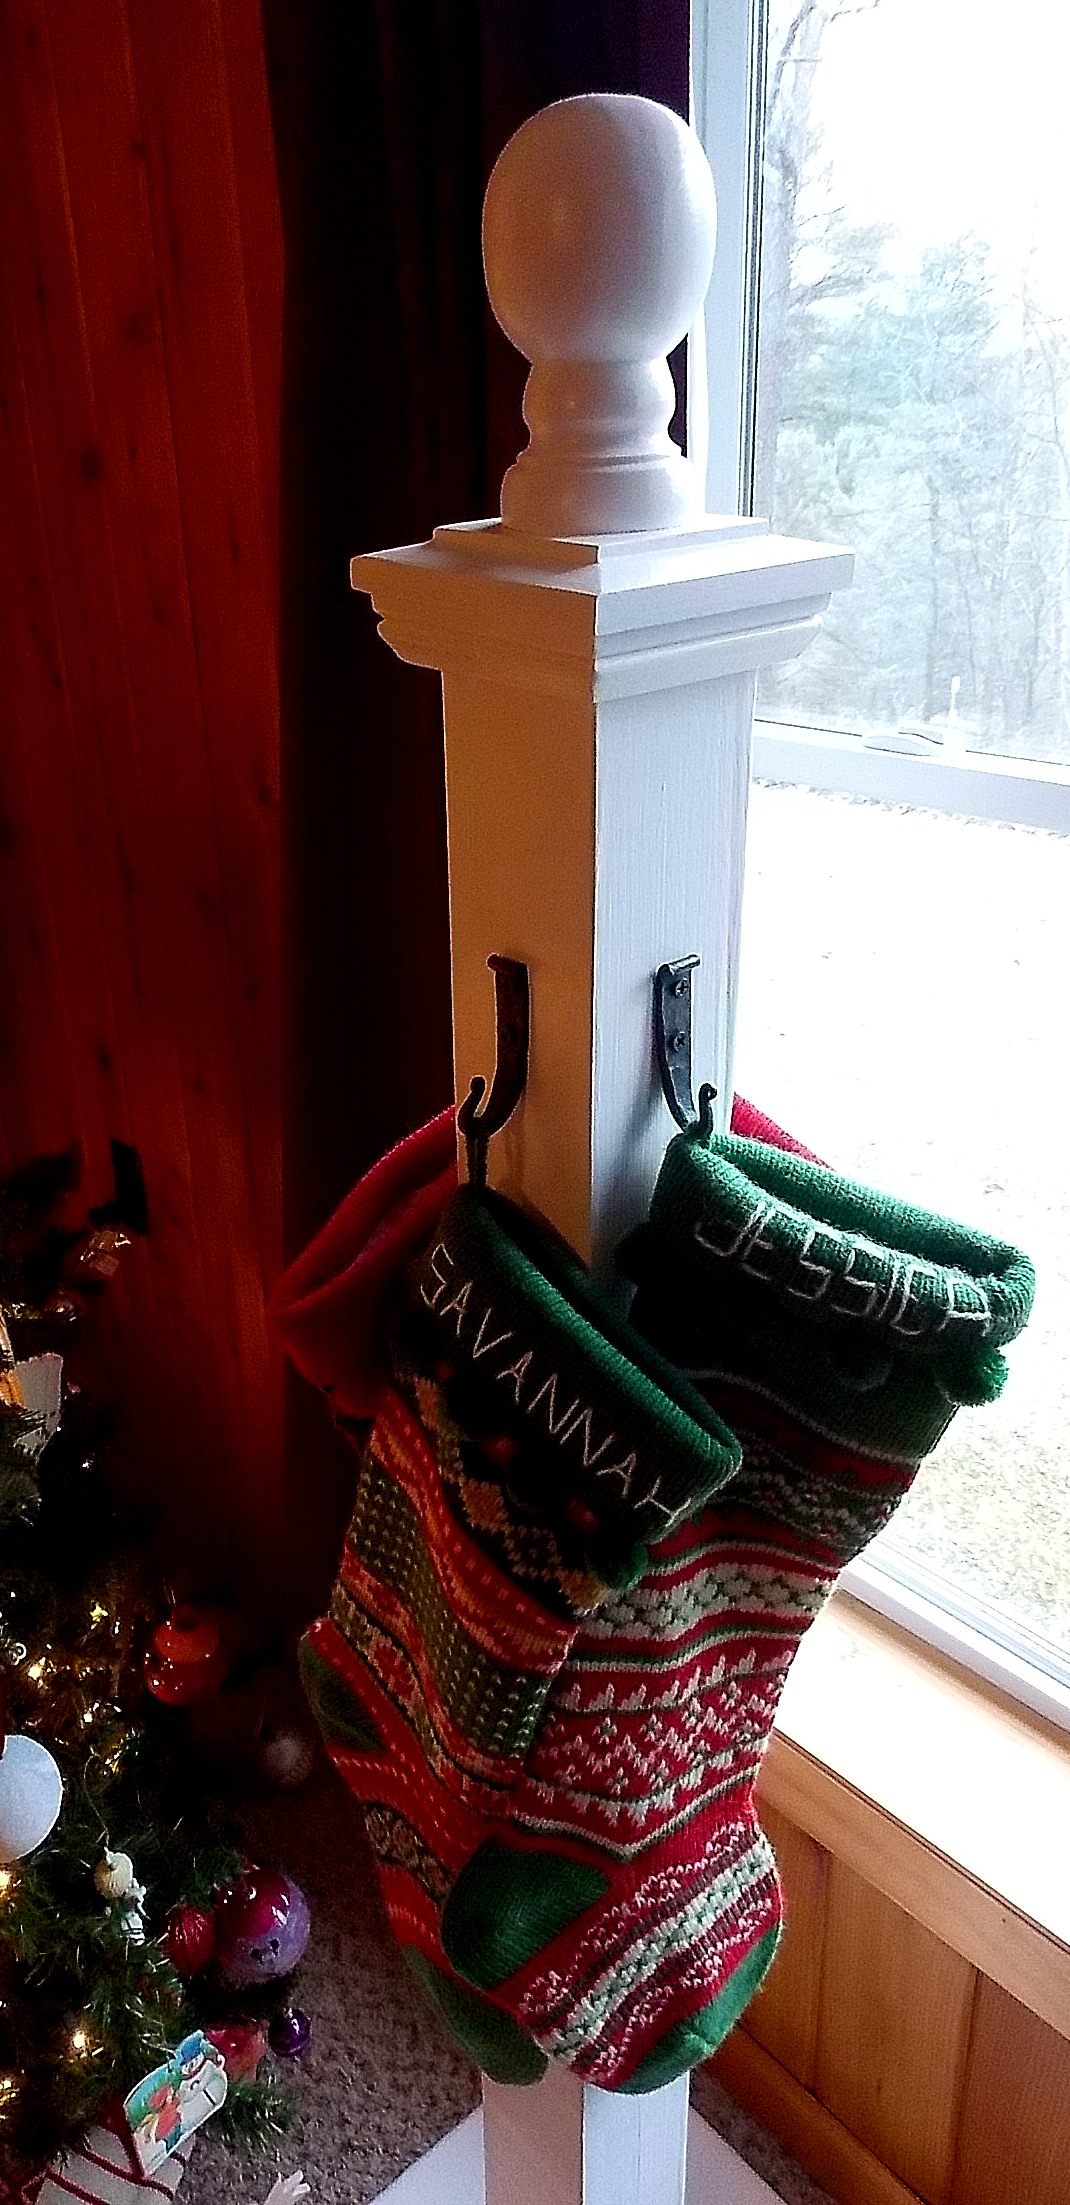
Here's what I made to hold stockings. If you do hooks, make sure you take into account them hanging full of goodies. That's why you'll see my hook bottoms slanted outward. The wood parts can be found at any big box hardware store. I think the whole thing cost me $25 to make.