jlpservicesinc
-
Posts
5,801 -
Joined
-
Last visited
Content Type
Profiles
Forums
Articles
Gallery
Downloads
Events
Everything posted by jlpservicesinc
-

Gold minners pickaxe ?
jlpservicesinc replied to scottyp74's topic in Blacksmithing, General Discussion
I'm always jealous of you guys down in Oil, mining, drilling areas.. It seems like they scrap more stuff or just leave it on the sides of the roads.. -
Gold minners pickaxe ?
jlpservicesinc replied to scottyp74's topic in Blacksmithing, General Discussion
Yup. Use what the customer asks for.. If you have empirical knowledge of a particular reason why a certain steel would work better than share this with the person and explain why the other choice would be better.. 5160 in my mind and experience would not be a good choice as you need a toughness without shattering/fracturing. If you temper 5160 to the softness needed it would be to soft to hold a point.. But hey, I've seen stuff work for no reason.. If the guy is mining.. 5160 works great as wedges though.. Also a lot of the old time picks were wrought iron with steel points welded on.. Just out of curiosity why a new design? In the way back they used to sell steels that were specified for hand drills for rock.. I have a few of these.. Basically you heat it up, resharpen it, take a hardening heat.. Throw it in the water and it's good to go. No tempering at all.. The steel works great for rock drills but sucks for hot punches as the heat even if if never allowed to get cherry red just softens them to uselessness. -
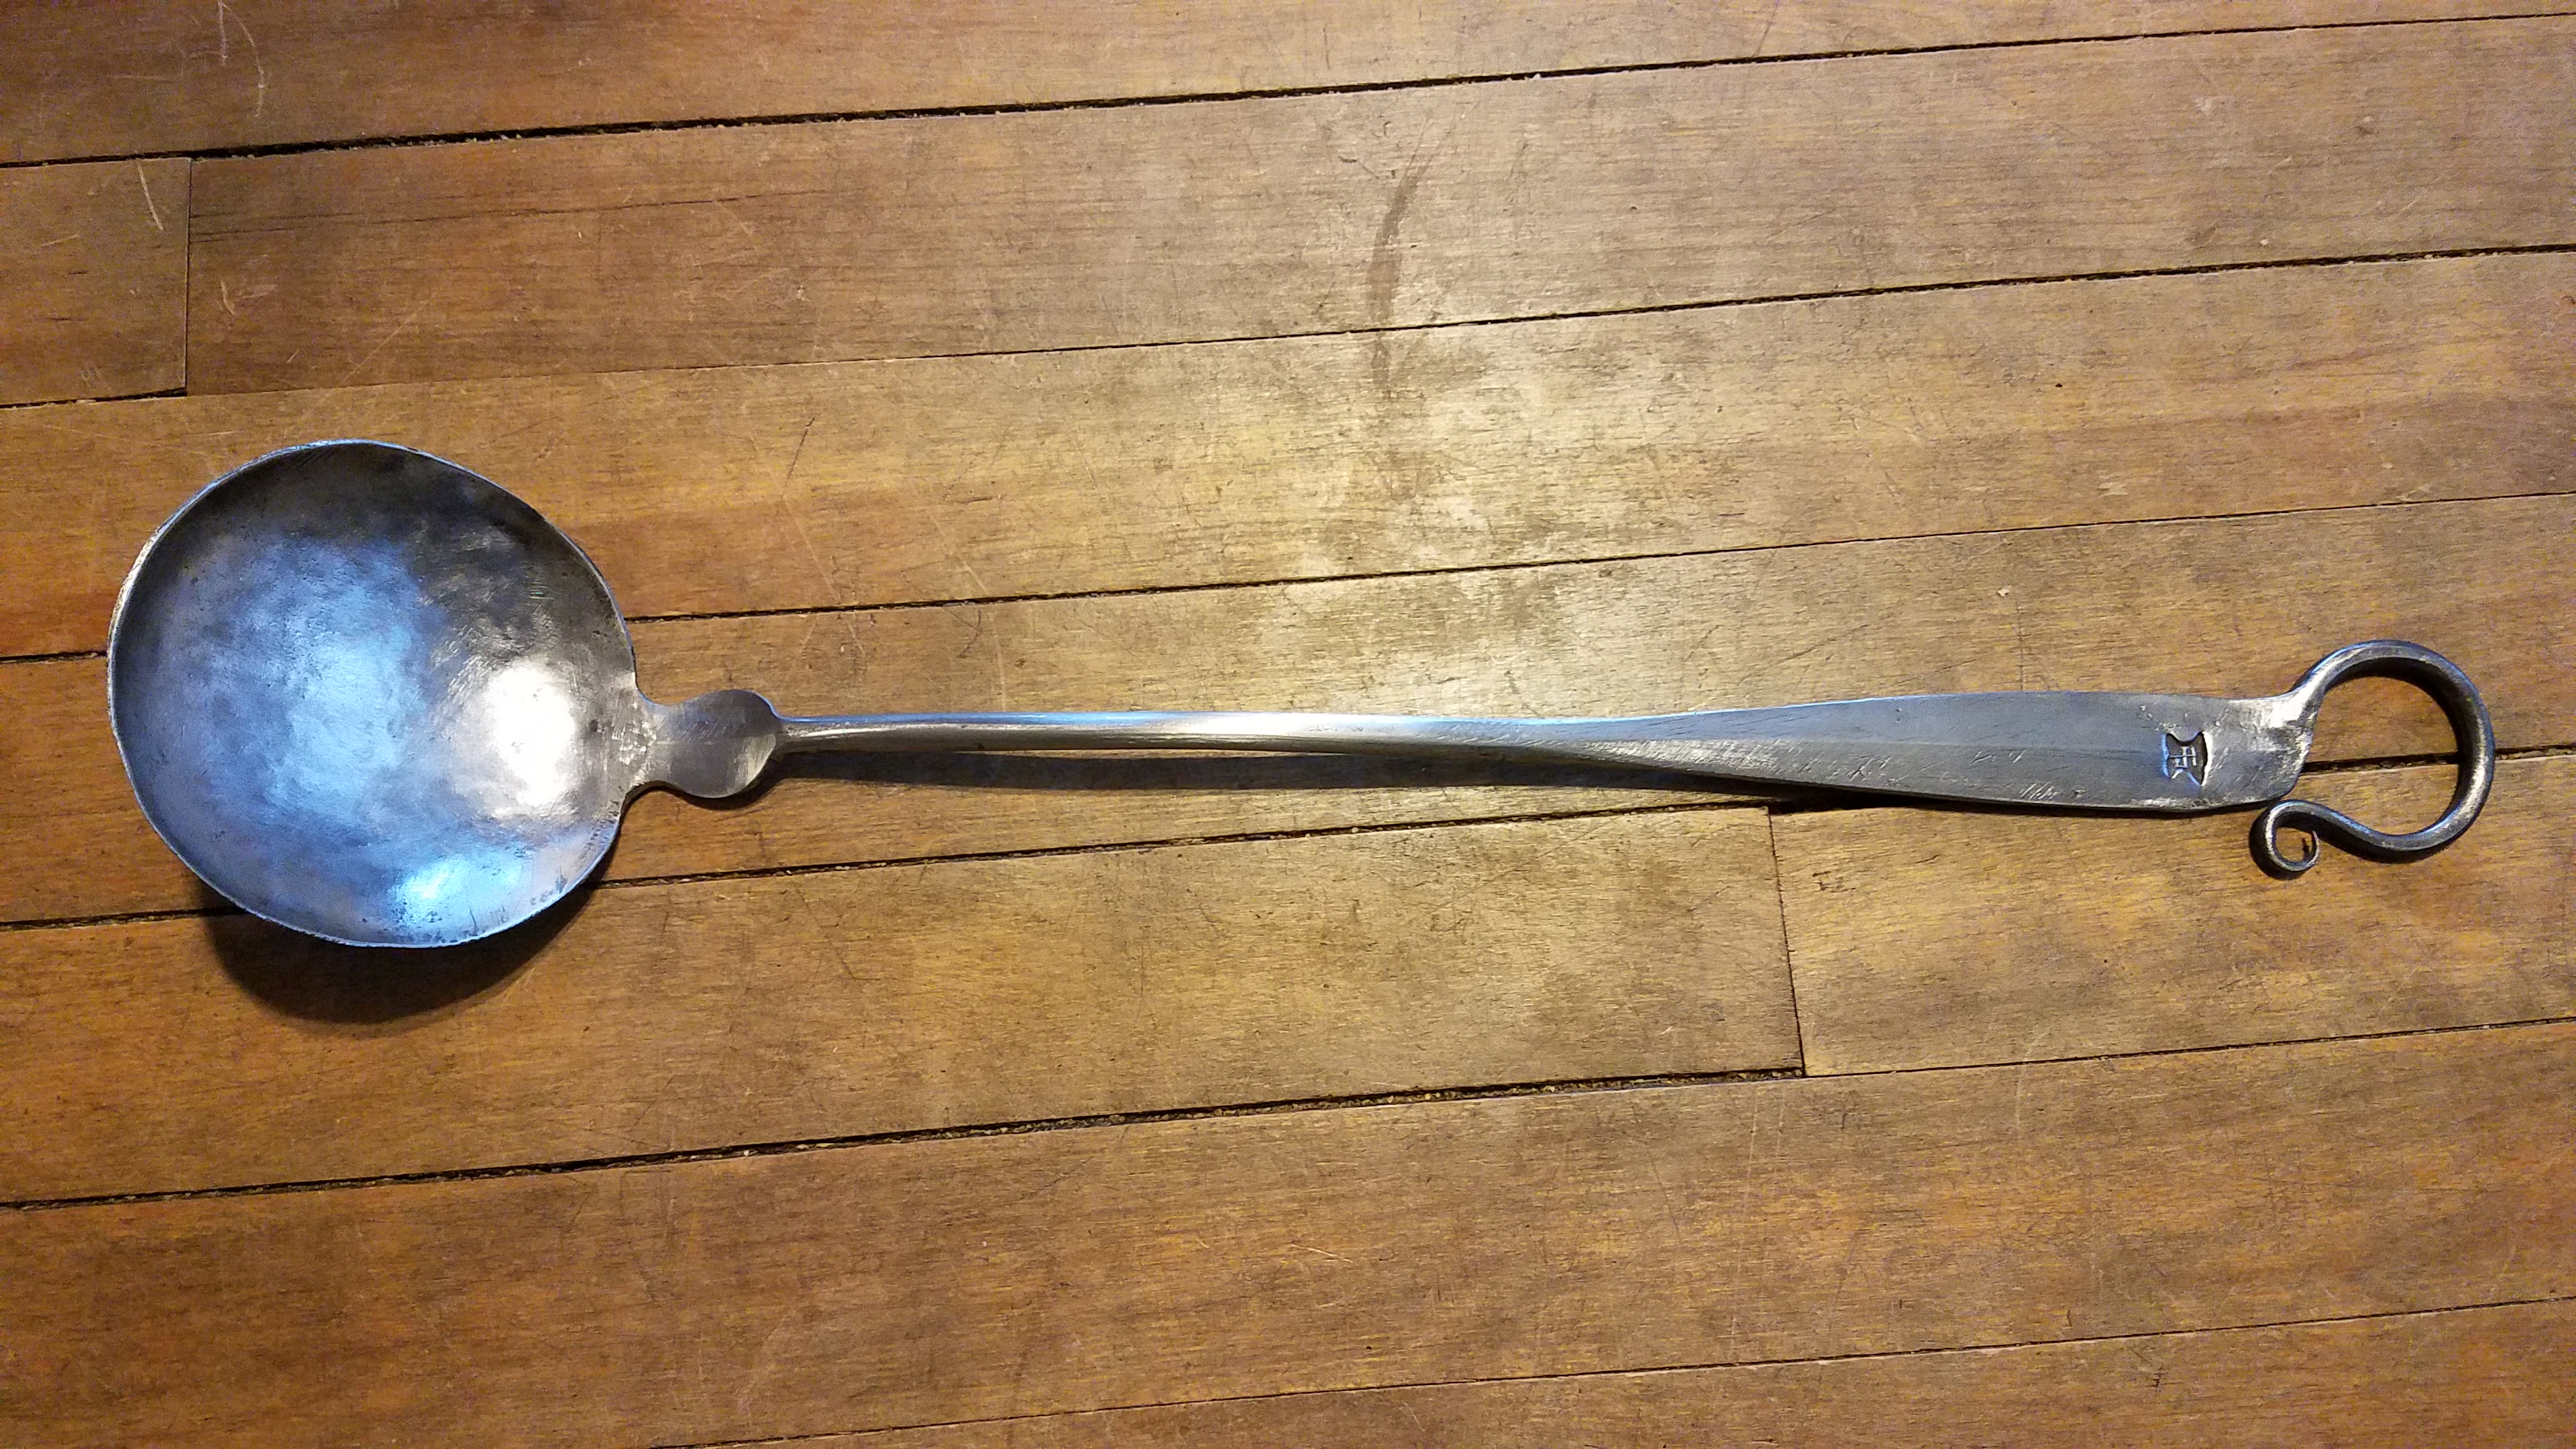
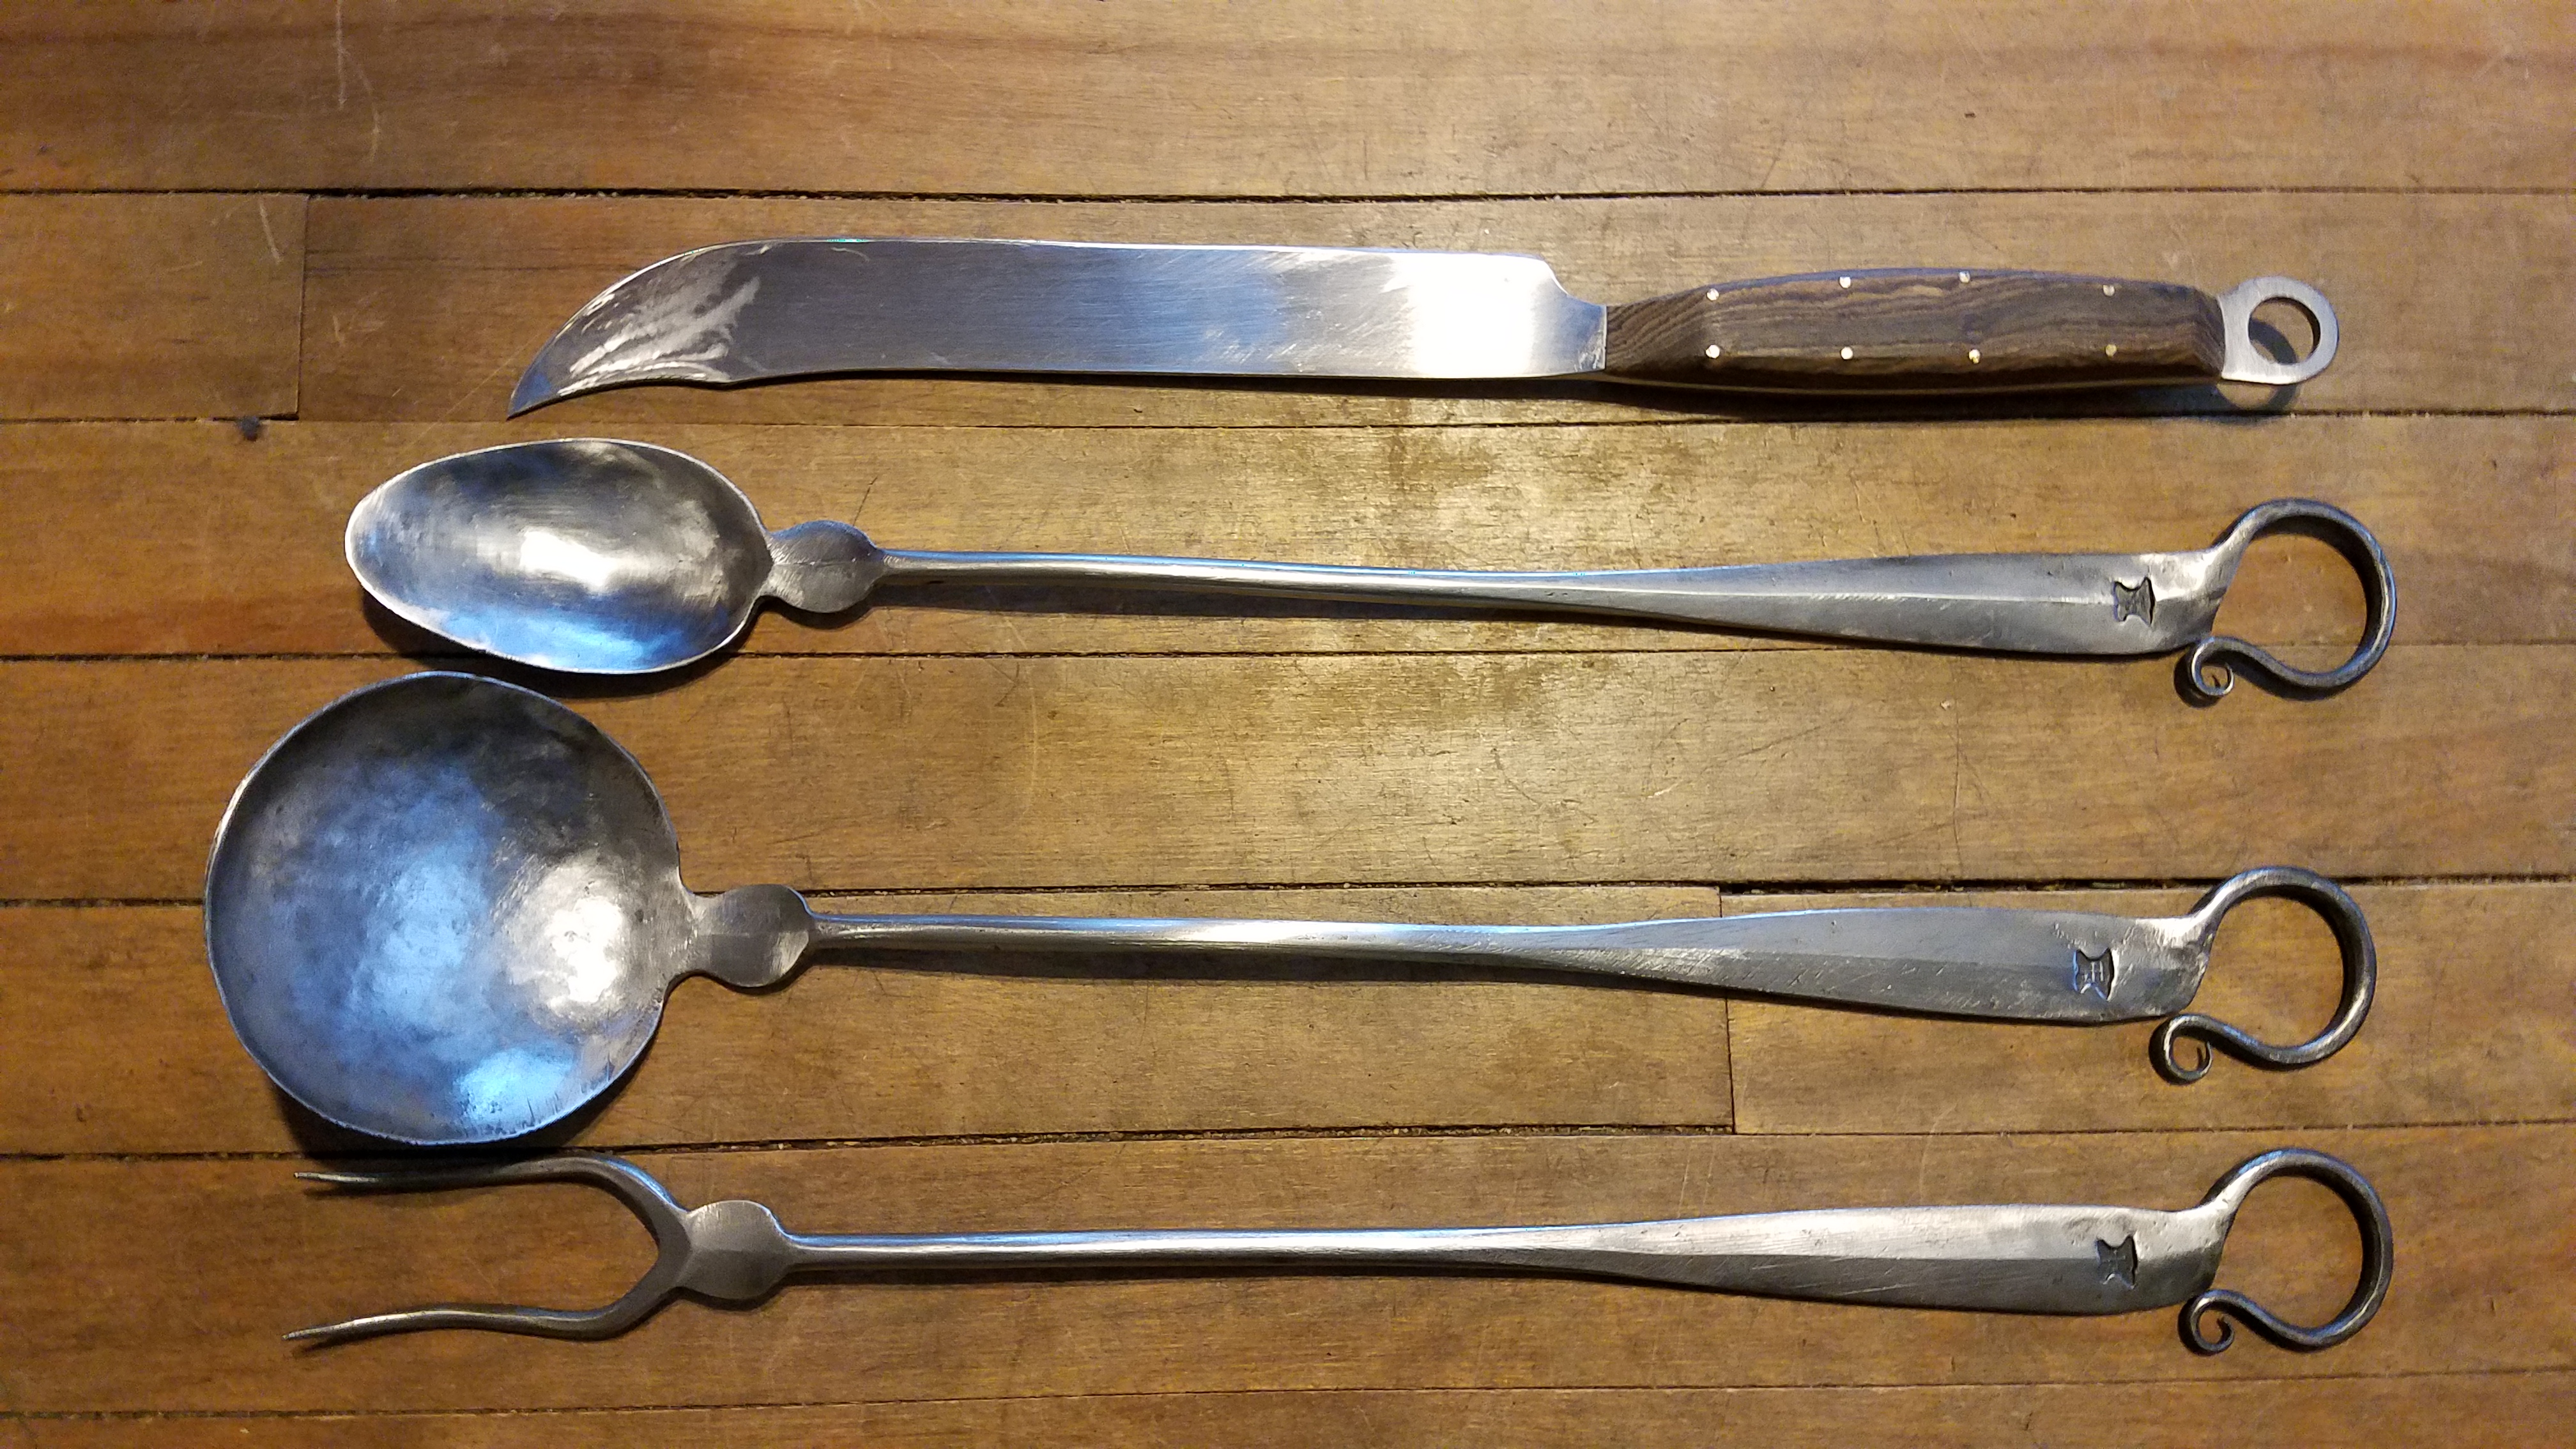
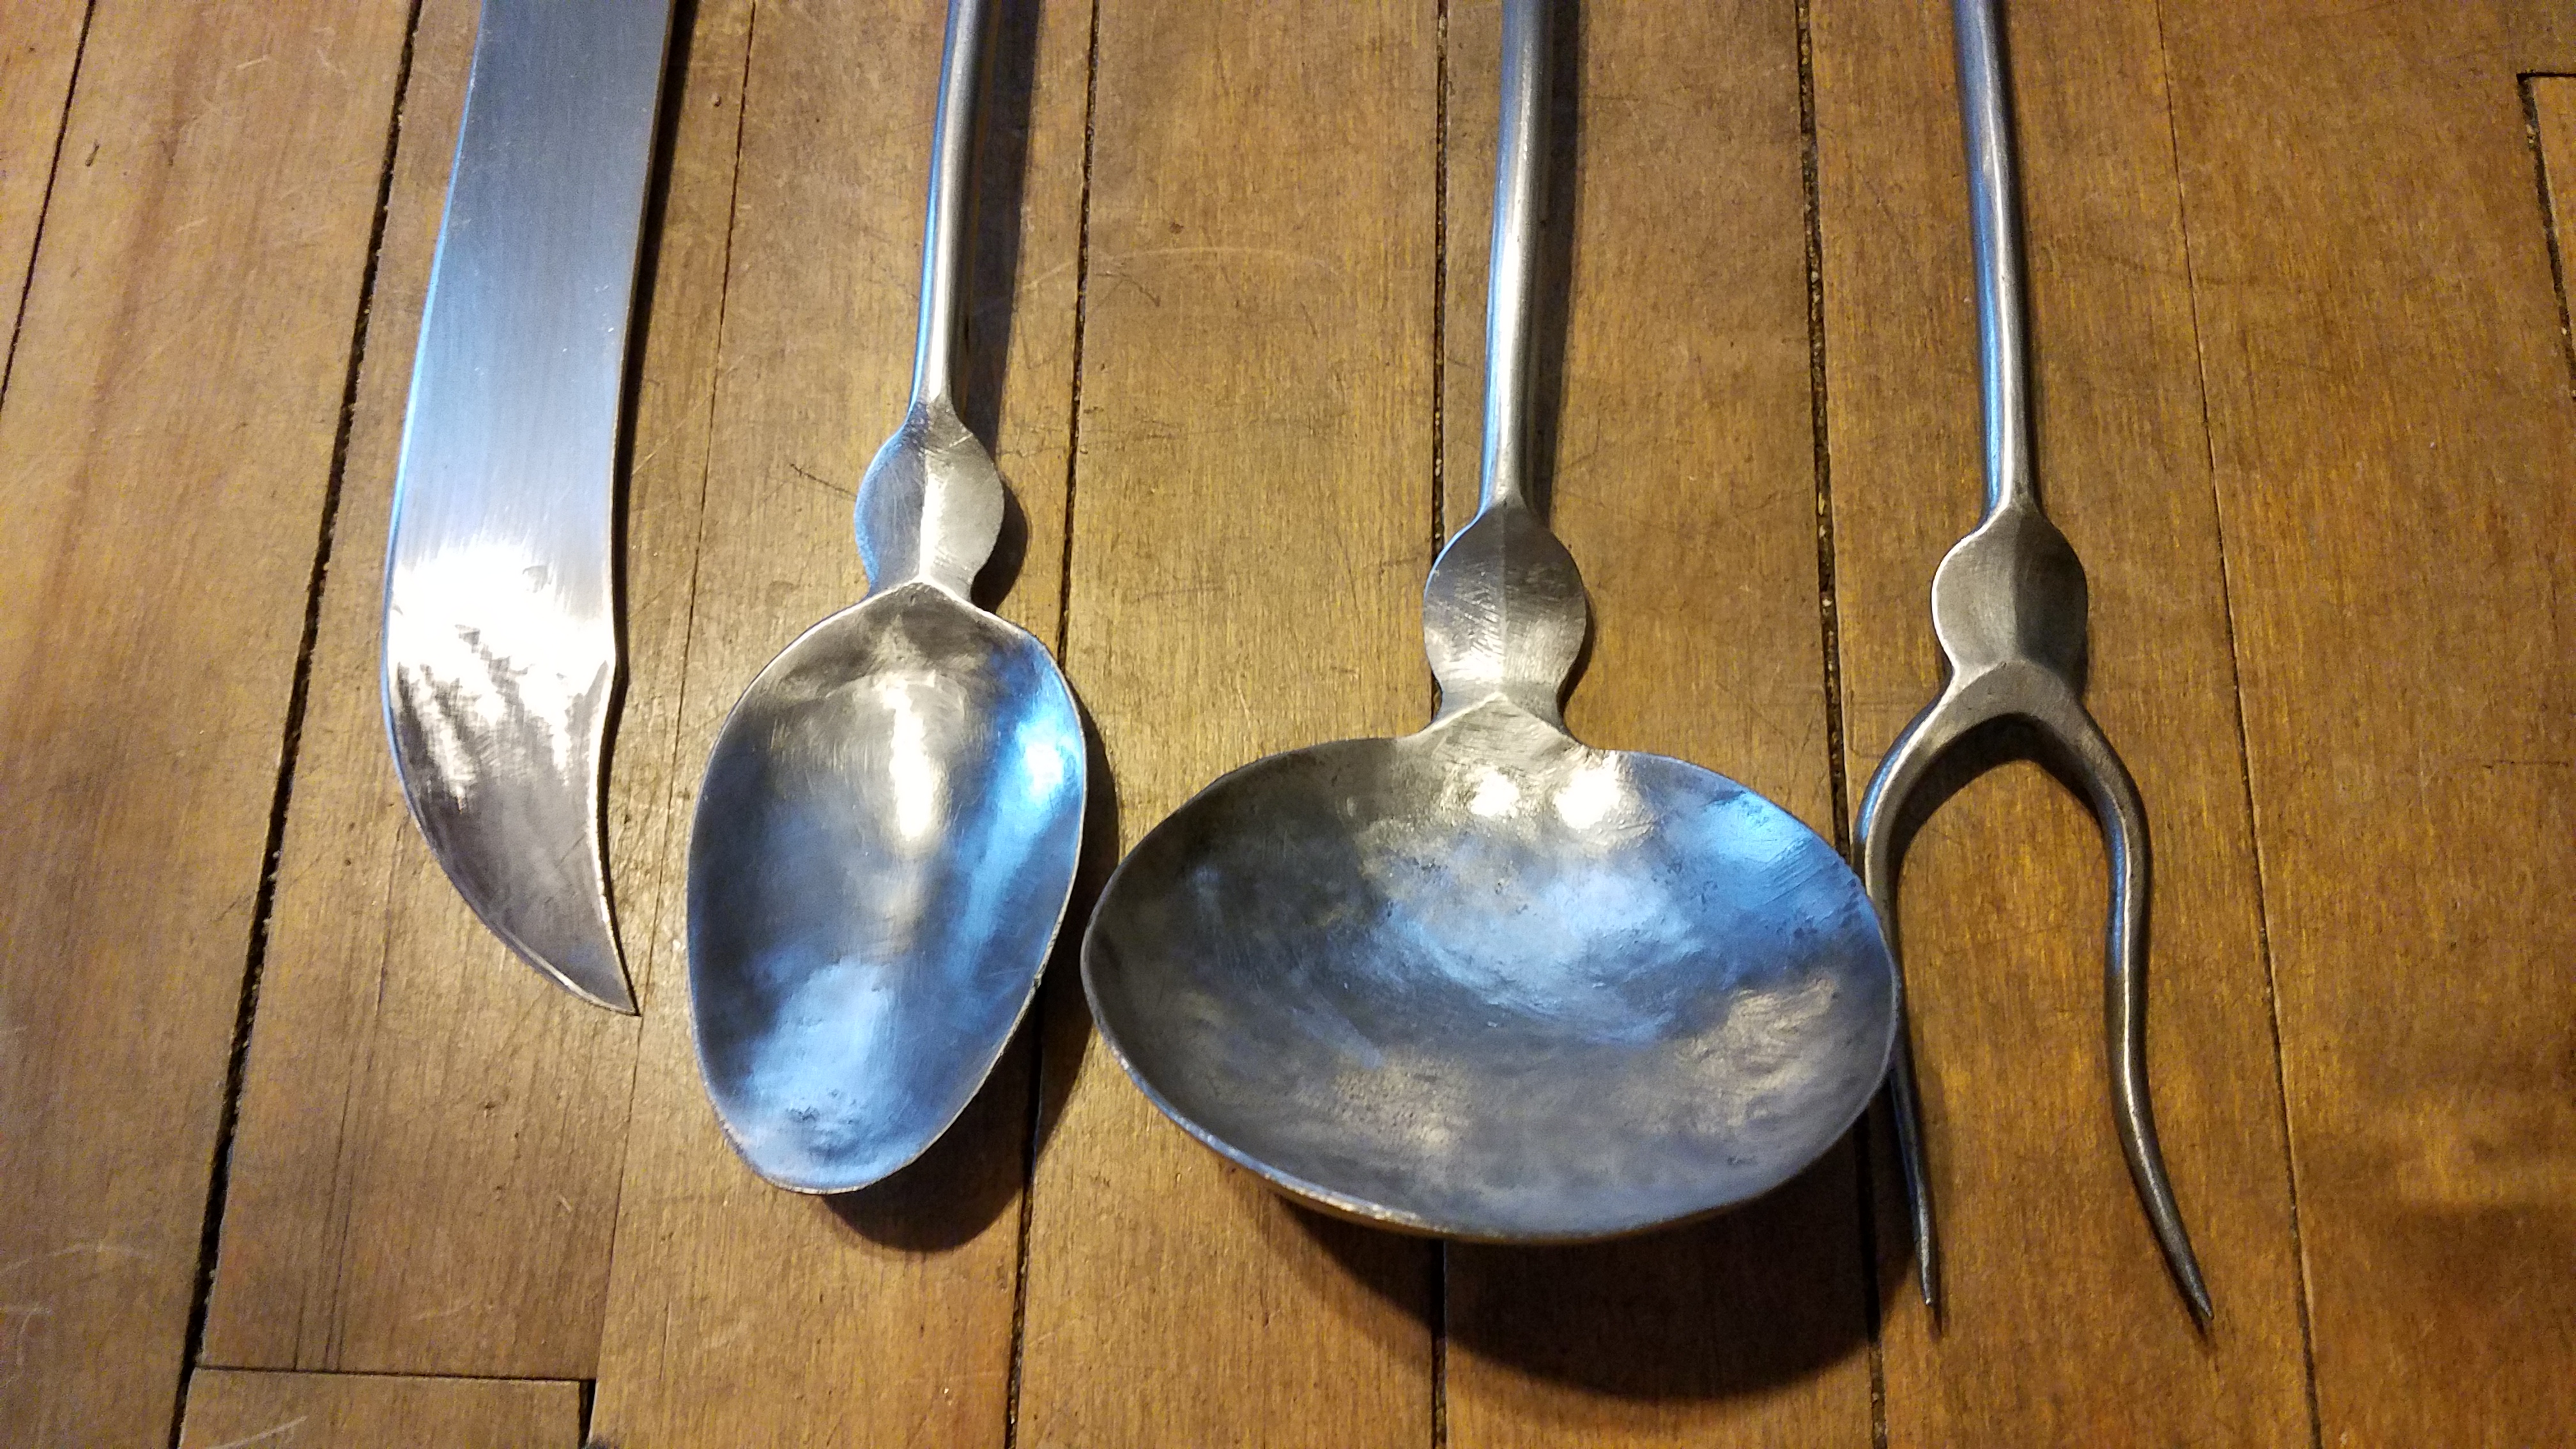
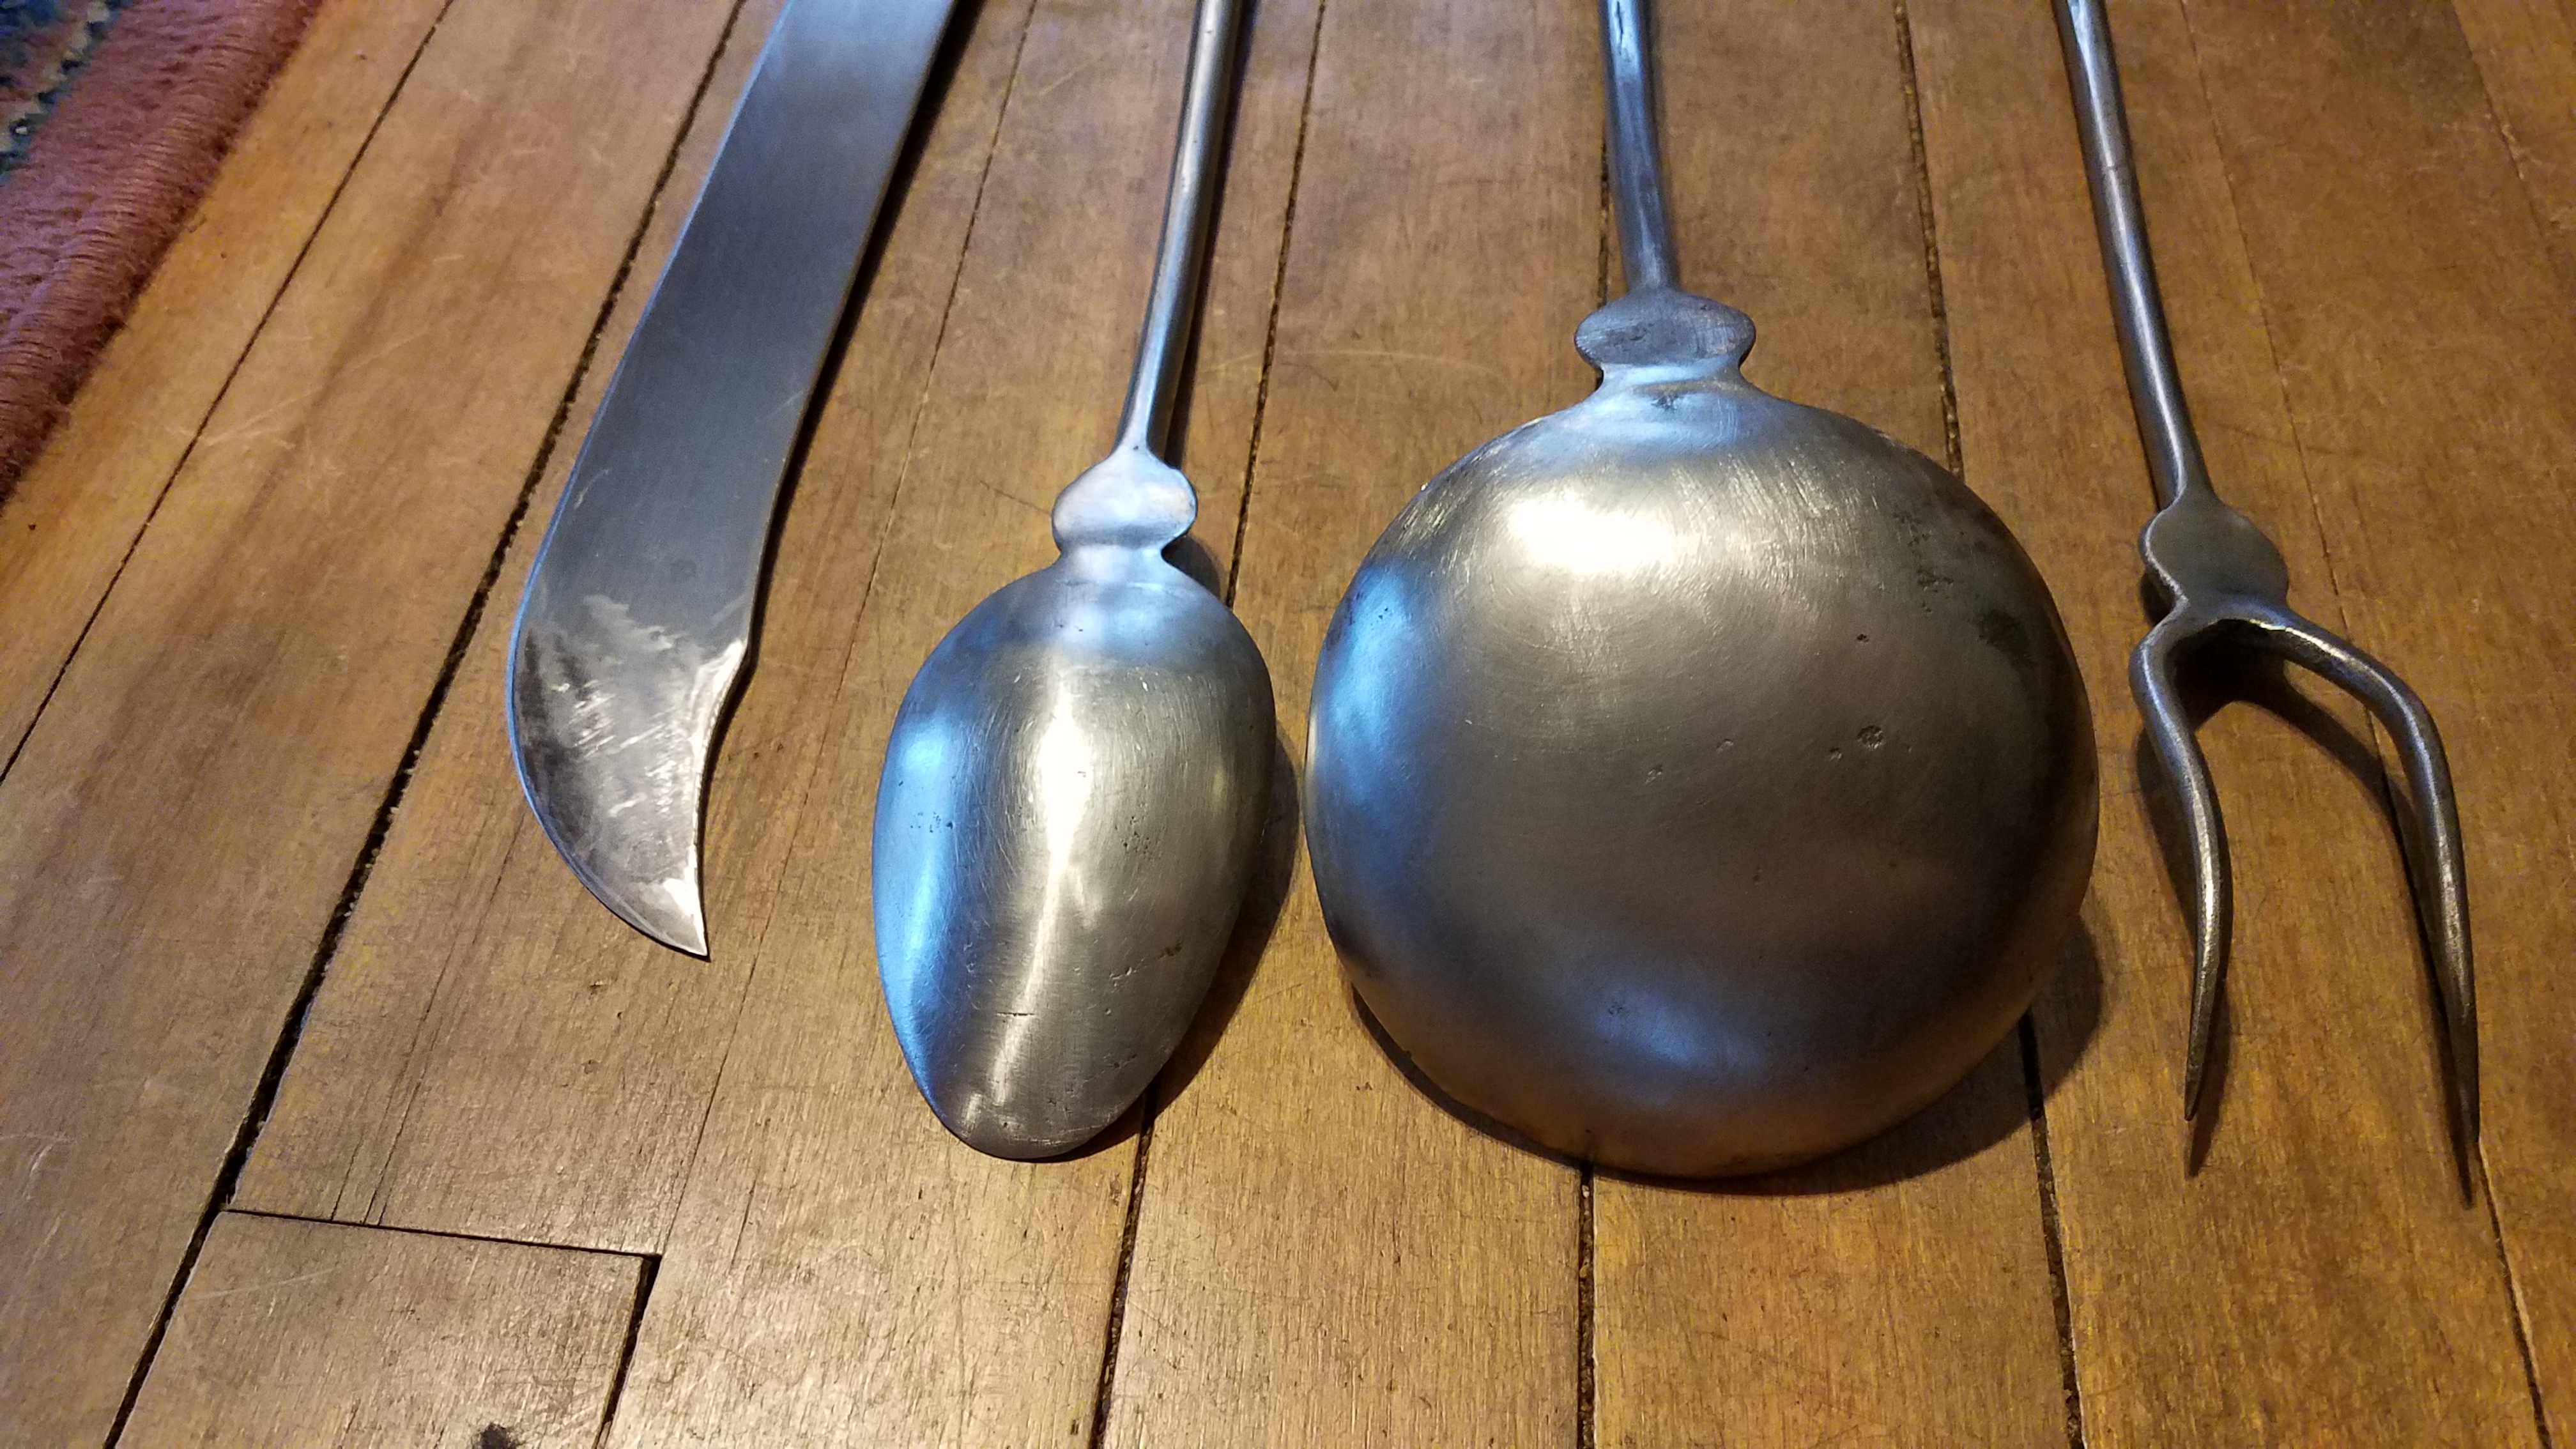
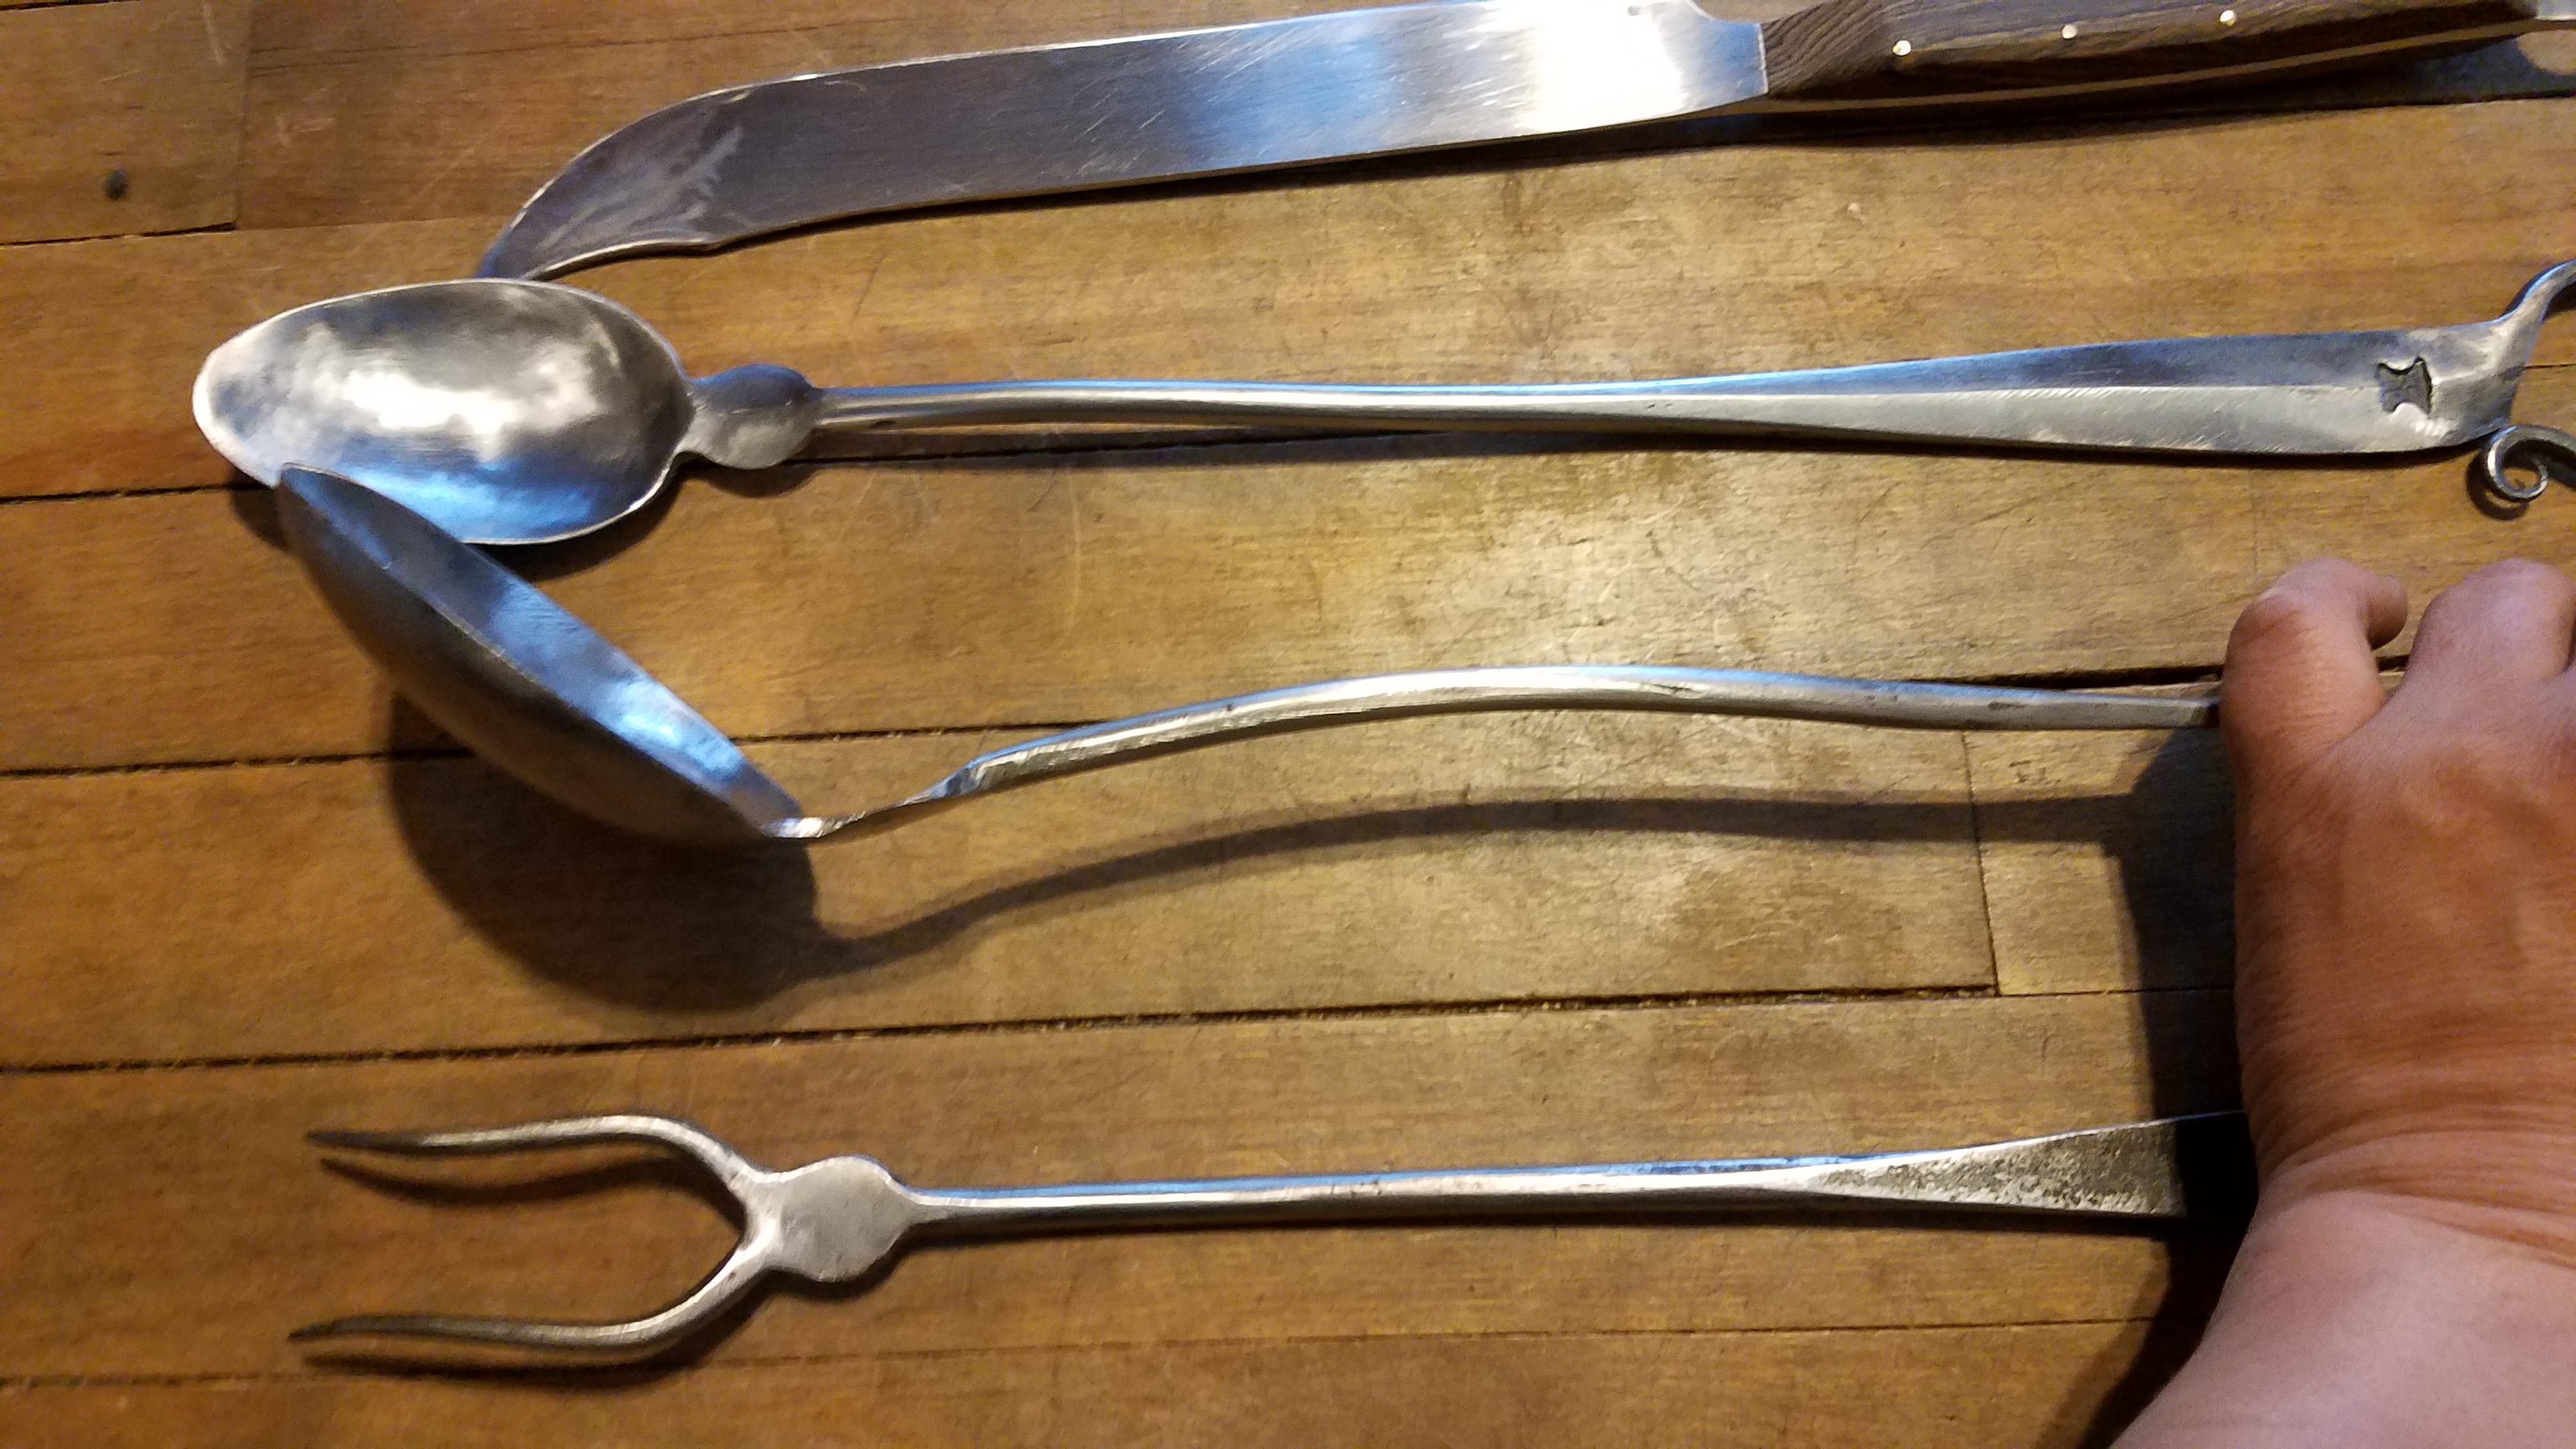
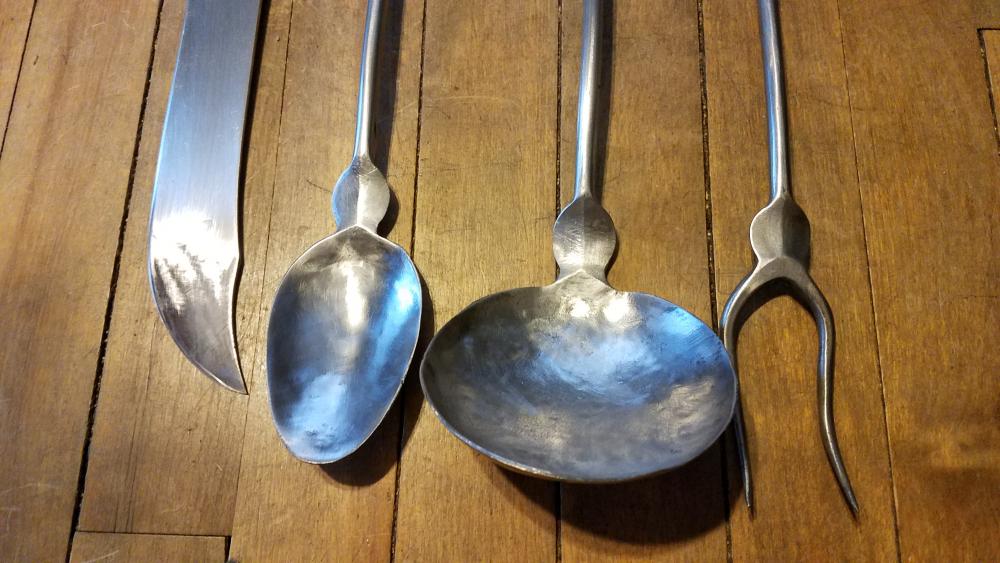
Yes, there is one on each piece.. The Ladle one will probably be sometime towards the end of the week. Takes me about 3-4days for edit the raw footage and add the titles and such.. Thanks...
-
German Anvil Marker Identification
jlpservicesinc replied to Klammer's topic in Anvils, Swage Blocks, and Mandrels
Sure is a beauty.. One of these days I'll have one in my stable just like that.. Congrats.. -
Today I forged out the Ladle for the last piece in the Colonial kitchen set for the "How to" Series.. All that is left now is the holder and to edit the video for the "How to".. Here are the pictures..


-
Tools that pay the bills and feed the mouths...
jlpservicesinc replied to templehound's topic in Folding Knives
Yes, very nice work.. -
Where's the collection? Open to public?
-
It's craftsman like that, who keep me wanting to be a better smith.. Great video.. And WoW, what a find on that anvil.. Treasure it.. It would be the only HB cutler anvils I have ever seen..
-
CV joint from a car as a hardie dishing tool..
-
Giddy up.. Here is my 1st thumblatch..

-
What did you do in the shop today?
jlpservicesinc replied to Mark Ling's topic in Blacksmithing, General Discussion
Dang Littleblacksmith.. You are killing it.. You are progressing super fast.. Keep up the great work.. Glad you got something out of the hinge video.. -
Very nice handles.. Love seeing the little lady helping out.. Not enough of us girls getting dirty..
-
I'm confused.. What are you actually trying to make? A fuller, a bottom set, or a cut off hardie?
-
Yup, use mild steel.. Save that for other projects.. I will be putting out a "How to" video on figuring out mystery metal and how to use it but it's not going to be ready till mid summer.. Ideally you need to figure out what metal it is before you use it.. without testing it myself and not knowing what temp you forged/bent it at from your description, I'd guess it's an air hardening steel.. Looks like a spring from an old hay rake..
-
What kind of steel is this?
jlpservicesinc replied to setlab's topic in Blacksmithing, General Discussion
Not in quite a few years.. -
Width vs. Length of Bar
jlpservicesinc replied to ForgeNub's topic in Blacksmithing, General Discussion
The new video " how to" on forging a colonial style knife has the information you are looking for.. I use both the peen of a hammer and the face to do directional forging. Ideally when you make a knife you should keep in mind what the finished knife should look like.. forge to the general shape then do the largest percentage of metal moving ending up with the finished product.. Anytime you want to make a thin section thicker (upset) it's a bear and a skill up on the list of ones to master well.. and moving the metal only in one direction, ( to where you want it to be).(direction forging) is another one.. The video is here.. https://youtu.be/TZU_Sl8oTew -
Seeking Apprenticeship
jlpservicesinc replied to Rick.H's topic in Blacksmithing, General Discussion
all good points. Frosty. it's also part of the learning processes.. Once you have developed a skill set , moving around to other shops even if it's just for room and board will open many a door as well as learning that there is exactly 1million 2hundred and 95 thousand ways to make or do the same thing.. As you progress you can decide for yourself which methods you like the best or are the most productive.. at that point you will own your own shop and people will be walking into your shop asking for a job.. I hate to sound like this but unless you get lucky enough to be at a larger event and ask every person if they are looking for help or place an advert in ABANA's rag working full time and also working when you have free time at the get togethers and forge in's will expedite the process.. Having a reliable car , money for gas, goes a long way to finding steady employment and like said.. Unless you get lucky or work really hard at finding the ideal shop it can be hit or miss and it can be job dependent.. They may need help for only a week or 2 or a month.. Usually with very little pay if any.. But you are young and now is the time because as you get older sleeping on the floor gets tougher.. -
Heat treating M2 HSS..the wrong way?
jlpservicesinc replied to Kozzy's topic in Heat Treating, general discussion
I bought a full section of HSS for using as guides for my 3613 bandsaw.. I ended up going with a ball bearing setup for the guides vs the blocks. 5/8"X3/4" I ended up using the HSS for hot punches and hot work chisels.. It works very well.. Ideally the items with thinner shanks don't like to be used as prybars.. but as long as the the shock in in line with the shank they work very well though abusive to hammer faces as even in their soft state are still very hard so the striking ends need to be well rounded.. Hardening media is air, oil or salts.. I find even left thing is the While being forged it likes to only be worked within a given range yellow to orange. Higher and it falls apart, colder well, When it says hot hardness it means red hardness.. I damaged one of my hammers trying to forge in a blip on a tire iron I was making this was before I realized I had grabbed the wrong bar.. While the specs say depending on the kind/type the hardening can be complicated but as forged the stuff is pretty hard.. A hardie made from this stuff would be pretty amazing I'd just hate to hit it with one of my good hammers.. Even left as forged and left to cool pretty slowly by the side of the fire it's probably 60HRc.. -
Last weeks scrap haul
jlpservicesinc replied to Eli Taylor's topic in Blacksmithing, General Discussion
After i use them as hot rasps they go in the scrap pile.. I used to have about 200 of them.. Last scrapper that came through took them home with him.. -
Last weeks scrap haul
jlpservicesinc replied to Eli Taylor's topic in Blacksmithing, General Discussion
I really like the booty, great finds.. Sounds like a great yard.. -
Mission Impossible W/Pictures
jlpservicesinc replied to SReynolds's topic in Blacksmithing, General Discussion
Your best scroll tool is one you make.. Ideally learn the proper shape for the scroll and then design your own scroll tool.. -
Nice work.. coming along at a good clip.. You like that design of tong? Any particular reason? Mild steel or carbon?
-
steps.. each segment snapped off.. The really large course grain stuff just usually snaps off first hit.. Snap shot 6 has the correct grain size like pic 8 and is shiny like the picture that shows the cut bar.. picture 7 this segment would not snap off despite 3 hard hits.. it actually dented the face of the hammer.. So either 6 or 7 would be about right depending on what the steel was going to be used for.. By the way this is Air hardening steel..
.png.1103cdef8cc16e783edd9e814c21de13.png)
.png.06c02ca05f93e1cb41cbd03e2638fa0c.png)
.png.e60a5b115a143a437020ee2ba92dc56b.png)
.png.651676d5c57052be0a60c578f87deda9.png)
.png.18edf1829765ff9ee2902e8f2d2587e7.png)
.png.6dbb691a90aa4b3b466c4bc084bf88a8.png)
.png.91c002f05ee81a2d89c3ccb651ffa25d.png)
.png.8a467c9e64c5f220ceba64f9eb8e759f.png)
-
While I have over the years made many a knife, sword, axe, hammer, and even files in my early days of experimentation.. The only time I have found a grain in metal as distorted or as enlarged as in the pictures from that link was when the metal was over heated or quenched a way to high temperature.. To think this was the grain structure in a knife that was sold is beyond my belief but anything is possible.. I've worked with tons of mystery metal and if I need to know the qualities of the metal I do test strips.. ( I will be producing a video on how to identify mystery metals and then use signs to get to a proper or close heat treatment with proper temper).. I don't want to do a whole dissertation right now, but ideally forge it to about 1/8 thick and about 3/4" wide x 6 or even 7" long.. Next notch it while hot, say orange heat at 5/8 or 3/4" spacing. Now take a hardening heat slightly above transition temperature on the end with the temperature going from slightly above transition to slightly below it over the length of the test strip. Make note of where each temperature was before you put into quench.. Throw the whole heated area (orange to no color) thing into what ever media you want to use as your quench of course moving it around.. (there is more to this to figure out if it's air hardening, or oil or water hardening steel).. Leave in media till it is completely cold to the touch.. If done correctly there will be clean spots of metal free of scale where the steel contracted and the scale fell off.. Check the piece from the end that had no color to the orange end for hardness.. Take note of where the hardness start's.. Now over the anvil with the once (pre quench) orange side over the far side, knock off the first segment.. This will have a huge grain formation.. Continue doing this for each segment till you get to where the snapped off section end grain if very fine (do you remember what color it was before quench).. Go look at the "Skinner knife video" it has a perfect grain structure where the bar is cut off.. This same grain structure is what you are looking for in the snapped off section.. So, you will snap off each section till you get to a point where the last few sections will not snap off but will still be hard.. To hard to file.. This is just about the right temperature for hardening.. If you made note of where the temperature was during quench it will be easy to replicate with that material time and time again for the quench media used.. The next test is the temper test and this involves a similar process which I won't go into here nor will I cover A, O or W and helping to figure them out.. Just have to wait for the video.
-
I Forged A Left Handed Diagonal Peen Hammer.
jlpservicesinc replied to UV Metal Arts's topic in Hand Hammers
yup, nice job..