
JHCC
-
Posts
19,404 -
Joined
-
Last visited
Content Type
Profiles
Forums
Articles
Gallery
Downloads
Events
Everything posted by JHCC
-
Same stuff, but bigger. I've used that in the past, but I like the rice coal a lot better.
-
It's always good to check in the spring; sometimes an individual store with put the winter merchandise on sale if they've overstocked and need the warehouse space. I got a few bags a couple of years ago for about 1/2 off.
-
Well, the simple answer is: don't make them in the first place! Overlapping hammer blows delivered with even, consistent force will give you a smoother surface to start with, although some grinding is inevitable.
-
The swinging pipe and control rope are genius. Nicely done! One thing to consider would be sticking the galvy pipe in a container of vinegar to dissolve off any remaining zinc. Neutralize with baking soda when you're done.
-
About six bucks for a forty pound bag. If you go online, the TSC website will let you know if it's in stock at your local store, although since it's a seasonal item, its location (even whether or not it's on display) will probably change. The thing about anthracite is that it needs pretty constant air. If you shut the blast off with charcoal or bituminous, it will keep going on its own, but anthracite will go out fairly quickly. Thus, a mechanical blower will generally work better than a manual.
-

What did you do in the shop today?
JHCC replied to Mark Ling's topic in Blacksmithing, General Discussion
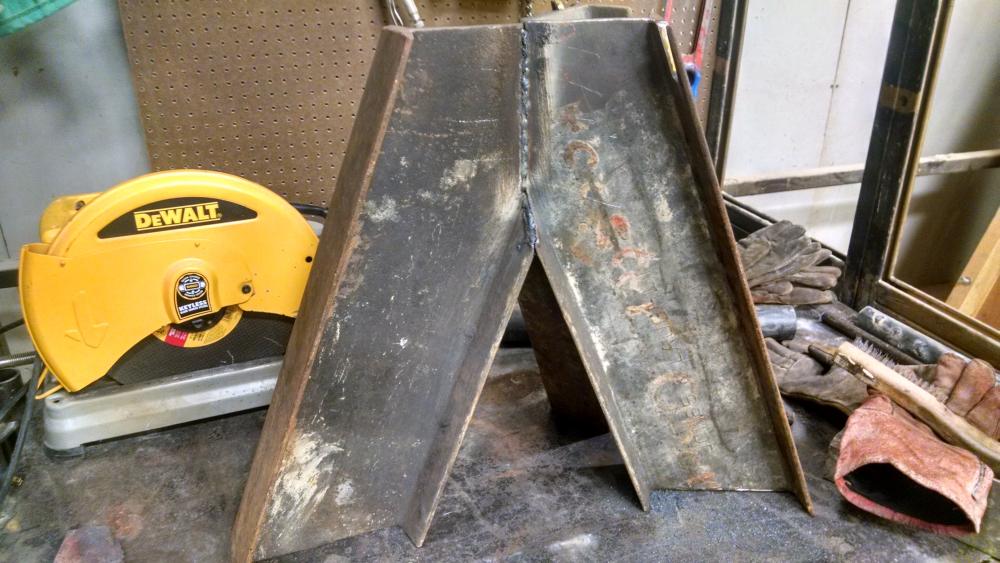
Made a scoop for the dog food. Also reforged a big cold chisel from the flea market into a big punch.
-
Borax like substance that can get rid of the gunk?
JHCC replied to Work With Nature's topic in Fluxes used in blacksmithing
David, unless you're replying to something specific, there's usually no need to quote an entire comment. It clogs up the forum and slows things down for those of us with slow internet connections. -
Can someone identify this anvil.
JHCC replied to Vincent Heid's topic in Anvils, Swage Blocks, and Mandrels
Blacksmith's inquisitiveness? -
That looks like a great solution. Well done. (Oh, and I don't actually own a welder -- I just have occasional access to one.)
-
That's true -- especially when a hot piece of steel touches the stump.
-
Welcome to IFI! Plenty of folks here use softwood anvil stands, mostly from built up from construction lumber scrap. The most important things are: (1) that the total height of anvil + stand is correct, 2) that your anvil is mounted securely to the stand, and (3) that the stand sit solidly on the ground. Worst case scenario, your cedar stump ends up as practice for your live oak stump. If you're going to have an outdoor shop in Florida, rot-resistance is good.
-
I'm one of those people who uses rice coal from Tractors Supply Company, which is cheap and widely available. However, it is anthracite (hard coal) rather than the bituminous (soft coal) most blacksmiths prefer, so you have to make some adjustments to how you manage your fire. There are a lot of good threads in the solid fuel forges section of the forum that discuss fuel types and sources in much greater detail, and I'd recommend you look those over.
-
No, that's about right. As for earlier forms of the technology, my own hypothesis is that the Antikythera was preserved by being lost, and that other examples of similar ancient technology ended up getting melted down and used for other things.
-
Yup.
-
Can someone identify this anvil.
JHCC replied to Vincent Heid's topic in Anvils, Swage Blocks, and Mandrels
No, that doesn't work either. -
Unless you're curling, in which case, you're okay.
-
If you have access to some structural steel and a welder, make a flared tripod, something like the central structure of my stand: Weld that around the pipe Glenn suggests, and you're good to go.
-
Drilling a hole that long and that big through a stump would be time-consuming. I would suggest the following: 1. Determine the total height you want. For most smithing, that's going to be about the height of your wrist when you're standing comfortably. (You will see many recommendations for the height of your knuckles, but that's a good height for when you have a helper swinging a sledge hammer.) 2. Subtract the length of your anvil from the total height. This gives you the height of your base. 3. Get a block of hard wood with the grain running vertically, and cut it to this height. 4. Build a wooden frame that will hold your anvil vertically on top of the base block. Make it wide enough at the base to be stable, but not so wide that you can't get in close. Make sure that it's strong enough that repeated hammering won't make it come apart. This is just a suggestion, of course. Look at what you have around you, and get creative!
-
Can someone identify this anvil.
JHCC replied to Vincent Heid's topic in Anvils, Swage Blocks, and Mandrels
Oh, anvil love is definitely a thing. I met mine when I was 15 and she was about 150, and we've been together ever since. "Bowling Alley Wax" is made by Johnson; another good paste wax is the "Special Dark" from Minwax. Apply after a long smithing session, when the anvil is nice and warm! -
Restoring an austrian style anvil
JHCC replied to Obert's topic in Repairing and Modification to Anvils
Well, it's nice to see that the more vigorous language of some of our members didn't scare you off. Look on the bright side, George: at least he's not planning to shoe horses. -
Restoring an austrian style anvil
JHCC replied to Obert's topic in Repairing and Modification to Anvils
Not a great analogy: mechanical sanding and polyurethane varnish would radically change the playing characteristics and possibly compromise the structural integrity of a Strad. It would certainly affect its market value as an antique, which is (let's face it) more dependent on the Stradivarius name than it is on the quality of the instrument or its sound, but most of us are looking at our anvils as tools rather than as collectibles anyway. A better example (drawing here from my experiences in the violin repair shop) would be the guy I saw removing the top from a cello to make some repairs. We would do this all the time, and it usually involved carefully working the seam apart with a thin knife. Well, this guy (a friend of my boss, visiting for the day) just took the knife and hammered it around the edge of the instrument with a hard mallet, slicing chunks off the underside of the top and slivers off the edges of the sides. Was it ruined? No: I spent a lot of time over the next several months carefully removing those chunks and slivers and gluing them back where they belonged, and in the end, it was just fine. Not as good as it would have been if the guy hadn't gotten over-enthusiastic, but perfectly functional nonetheless. -
Begginner needs some help.
JHCC replied to Nitroheadache's topic in Blacksmithing, General Discussion
No, why do you ask? -
No problem about sitting down (most smiths in Africa and Asia work sitting down), but you still need to stabilize your anvil at a comfortable height.
-
Begginner needs some help.
JHCC replied to Nitroheadache's topic in Blacksmithing, General Discussion
It's possible, and certainly enough of a risk that you want to think twice about doing it (especially if you have an older wrought iron anvil welded up from smaller chunks). A lot of people use what's called a "striking anvil" or a "portable hole", which is a fairly beefy chunk of steel with a hardy hole in it, usually set at a lower height that's more suitable for sledgehammer work. As for forging a fuller, take a look at Mark Aspery's video about making a swage. Everything up to about the two-minute mark is the same as what you'd do for making a fuller; the only difference is that from that point on, you'll be forging a wedge shape rather than flattening it further and putting in a groove. -
Welcome aboard! If you put your location in your profile settings, it will be a lot easier for your neighbors to find you. Check out the pages for the regional organizations and meets. You're not in my neck of the woods, but we've got a lot of Texans here who will be glad to help.

