customcutter
-
Posts
46 -
Joined
-
Last visited
-
Yes, the chokes are 4" at present. I figure I can cut 1 of them down, for the stepped flame nozzles. I want to try tapering the chokes, and see how that goes before cutting any parts shorter though. Today I tried milling the slots in the burner tube. Man is 316 a pain, talk about something work hardening. I started out with a titanium coated 3/8 bit with a mist coolant, and went to a carbide bit dry. I'm not a machinist, but I need to do a little research before trying the second burner. I fried both bits. I patched the forge early this morning, and it came out reasonably well. I put a 100 watt bulb in it and turned it upside down to heat for tonight. We'll see how it looks tomorrow after Chruch. Maybe a real heat lamp tomorrow. I need to get some IR reflector ordered.
-
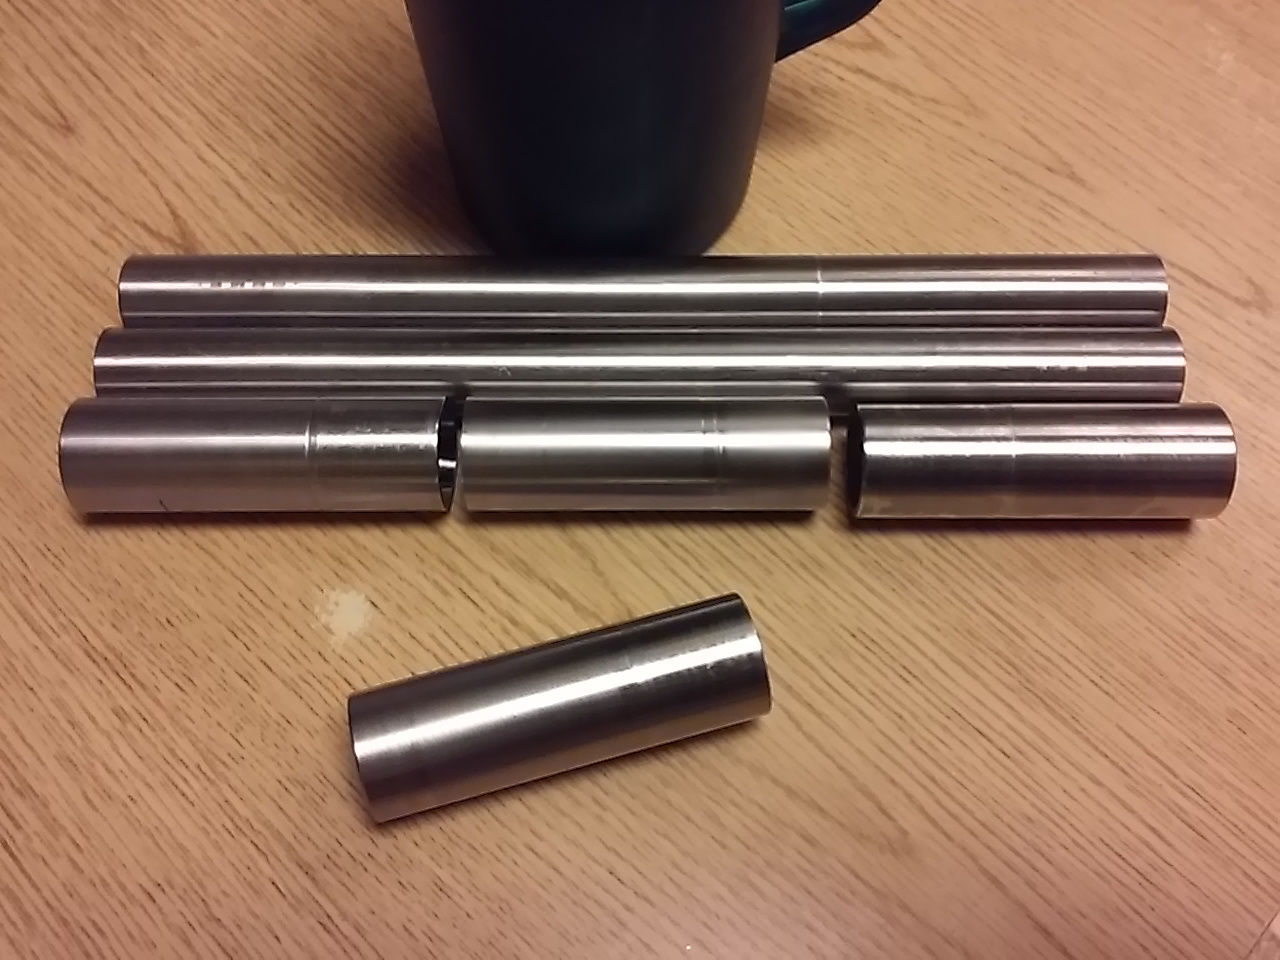
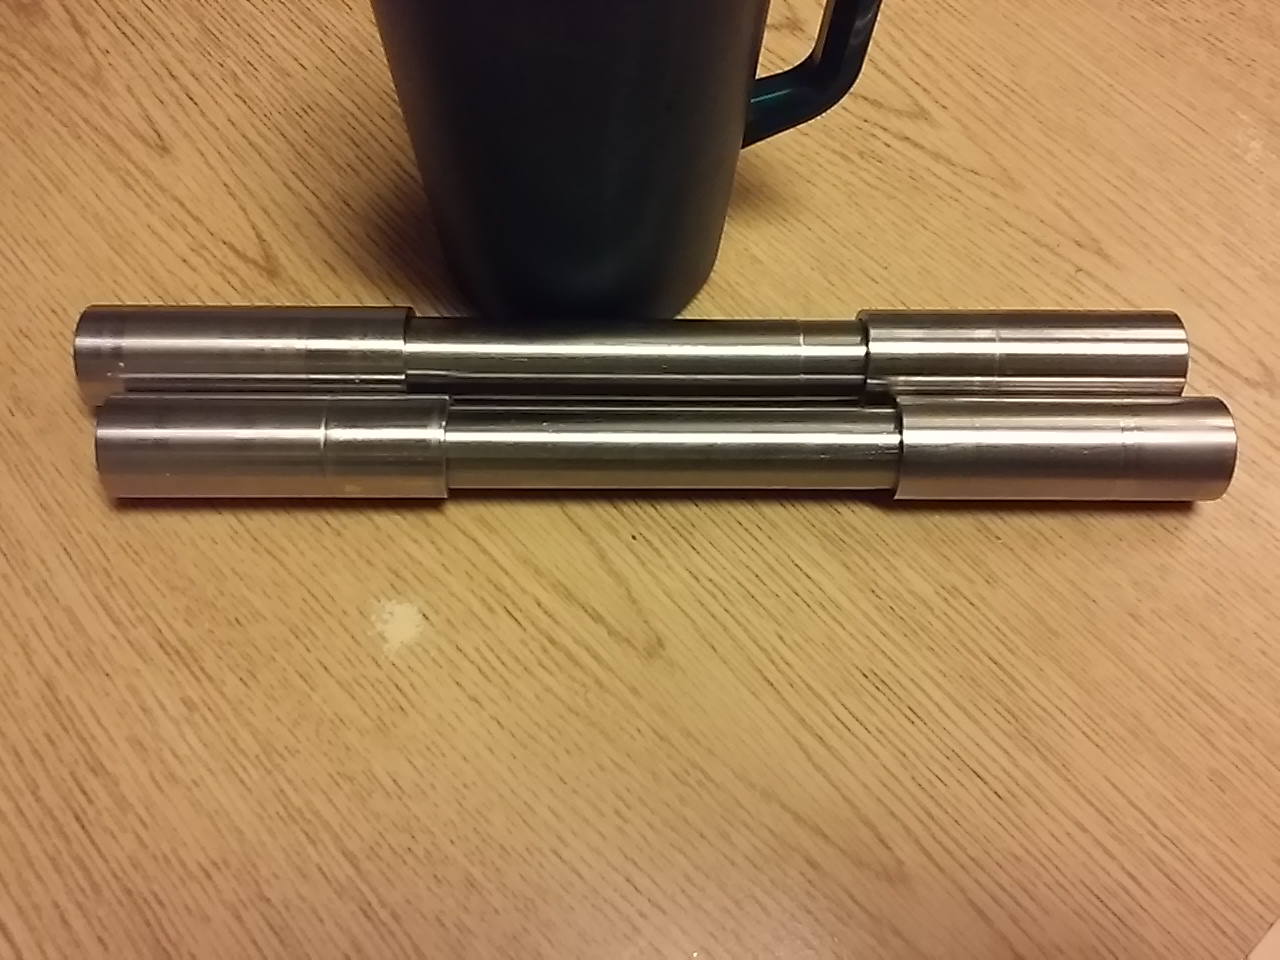
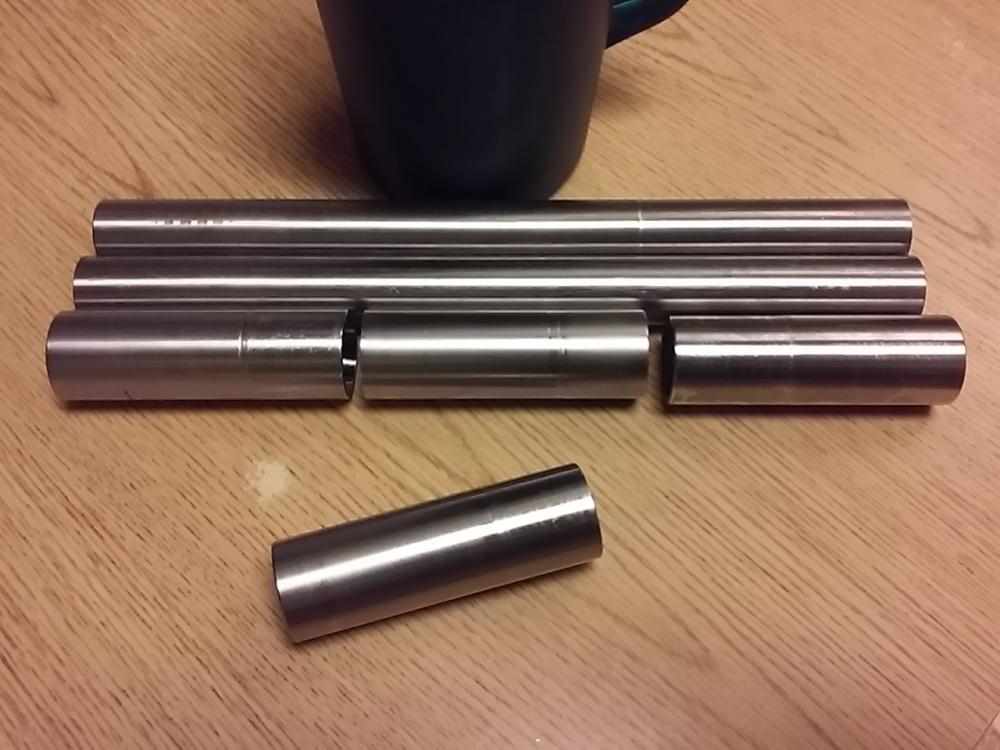
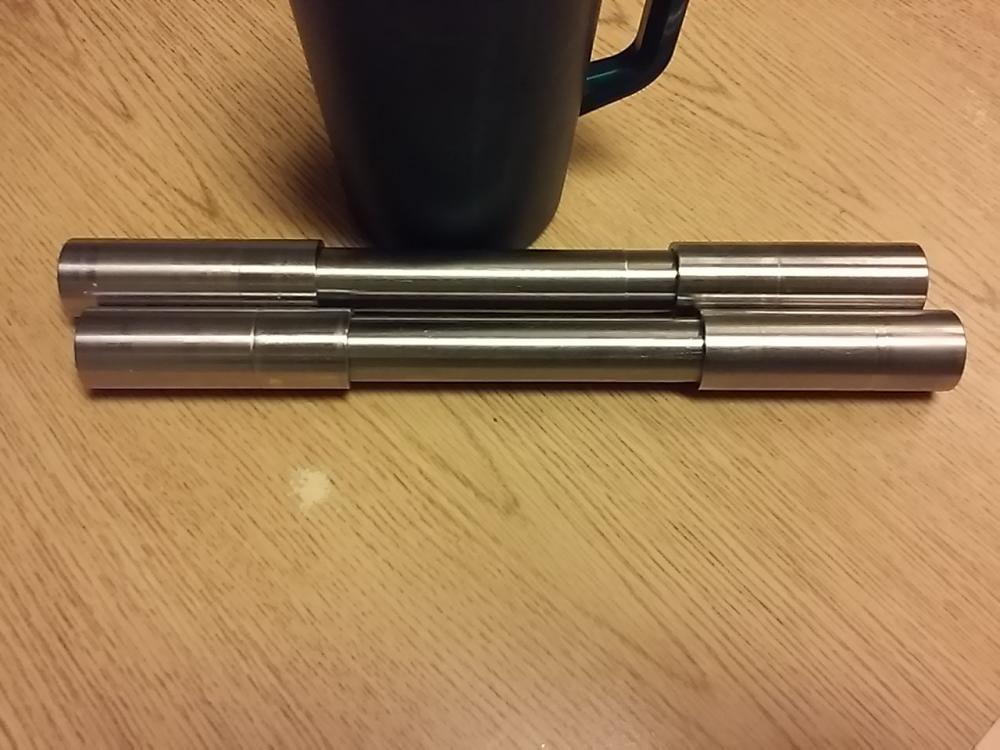
While planning my next steps to take on lining the forge, I decided to get started on my burners. Half a day in the garage with the lathe and some 3/4 & 1" stainless 316 scraps i picked up the other day and this is the results. Lots of machining left to do, but this is a start.
-
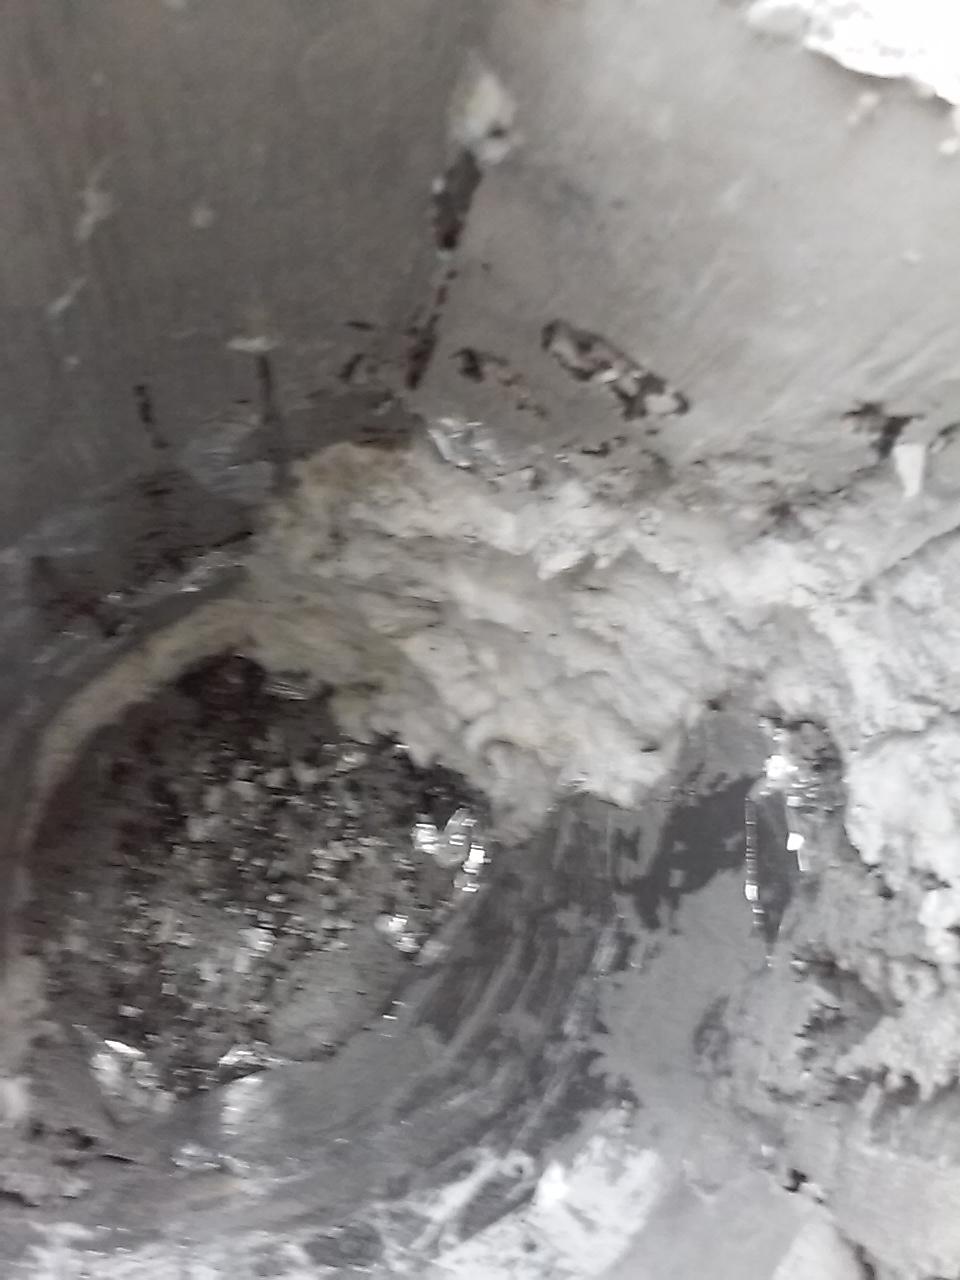
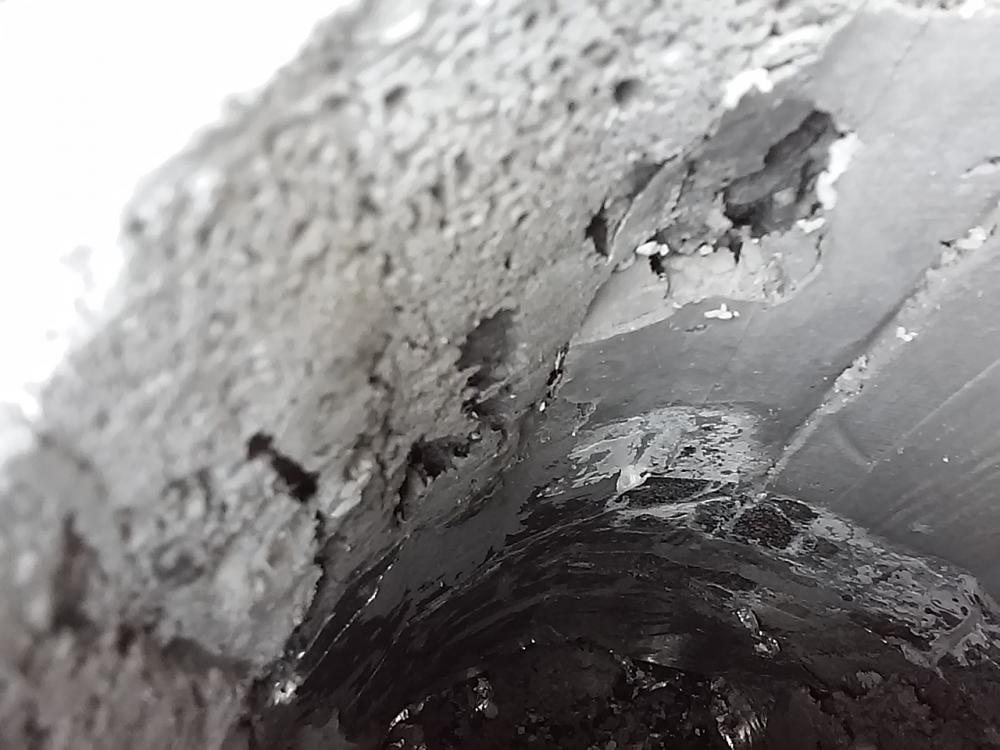
Thanks for the replies everyone. The mizzou I bought is a gunnable type, The directions for regular mizzou are not to exceed 11% by weight, and recommends 5 pints per 55lb bag. I hope my attempt to pour cast with it is not a total failure. I think it can be saved, but I won't be using this method again. I have complete voids where no mizzou flowed next to the inswool and I have lots of visible air pockets. Despite 15 to 20 minutes of probing with 2 different sized rods. Also the cardboard I inserted to cast around was nice and round when I put it in, but somehow became semicircular, with one very sharp corner. I'm going to mix another 5 to10lbs and try to patch what I have for now. That will still leave about 15 lbs for the freon forge. One other word of caution, don't use Al foil instead of plastic wrap. Most of it came out fine, but now I have to deal with getting the rest out before I can try to patch it.


-
Michael, thanks for the response. When I first came to the site, like I said I did a lot of reading before asking questions. I've been on the site long enough to see some of the questions that are asked without any searching, or information that might allow someone to answer. I can certainly understand the frustration that leads to. I try to search for the answers before asking, and all I've found and read about the flame direction said to introduce it on a tangent, directed toward the back of the forge. So that's what I'm trying to do, I know most of the older forges were square, so it's hard to get a flame swirl around inside of a box. Like you say there are a lot of choices to be made. I'm trying to make better ones, so that my forge and burners are as efficient as I can make them.
-
Thanks, yes I have 3 friends in the HVAC business. 2 techs and 1 actually owns his own business. I have reached out to them, but they don't have any empties on hand at this time.
-
I apologize if I have offended you. I would gladly pony up $20 for a copy. I have actively searched in several used book stores for a copy of your book, but have not found one. Used books on Amazon are still approaching $100 as of this morning. I don't know your health condition, but it sounds as if you are in poor health, I hope and pray that it improves. I will try not to bother you with trivial questions. thanks, Ken
-
Sorry, I don't have a copy of the book. The only downloads I've seen require joining a book club, which I am not apt to do. When I first found this site, I read about half of Burners 101, then NARB, back to finish Burners 101, then Forges 101. At almost 63 my memory isn't what it used to be, also trying to learn about something that I have absolutely no knowledge of puts beginners at a great disadvantage when you and Frosty are describing things. When you say to aim the flame approx 1/3 of the way in from the kiln shelf edge, I would assume that you mean on the same side of the forge as the burners are located on based on my background and how hydrosizers and cyclone seperators work. However, every picture I see shows a burner mounted top dead center aimed at the work, or they are mounted slightly off center pointed directly across the forge. Both flames are impacting the floor or wall straight on, no where near what would produce a circular or cyclonic flame IMHO. Maybe I just haven't seen the right picture yet? Here is a link to a diagram of a cyclone seperator. The type we used were for seperating solids from liquids in phosphate mining. https://blogofchemicalengineering.wordpress.com/2015/09/26/cyclone-separators-design-calculation-wiki-mini-for-chem/ thanks, Ken
-
Sorry, I'll try to take some using the tablet on the freon bottle build, from the beginning. Just a comedy of errors on this one, starting with too small a hole. Maybe I'll finish up with some pics from here, but it was nasty cutting that tank with the inswool already installed. Definitely changed my mind about cutting my torch holes with the plasma cutter. I'll have to run to Lowes tomorrow to pick up a hole saw. Any problem using a carbide tipped for the metal and cutting through the refractory? I'm thinking 2" or is that too big? thanks, Ken
-
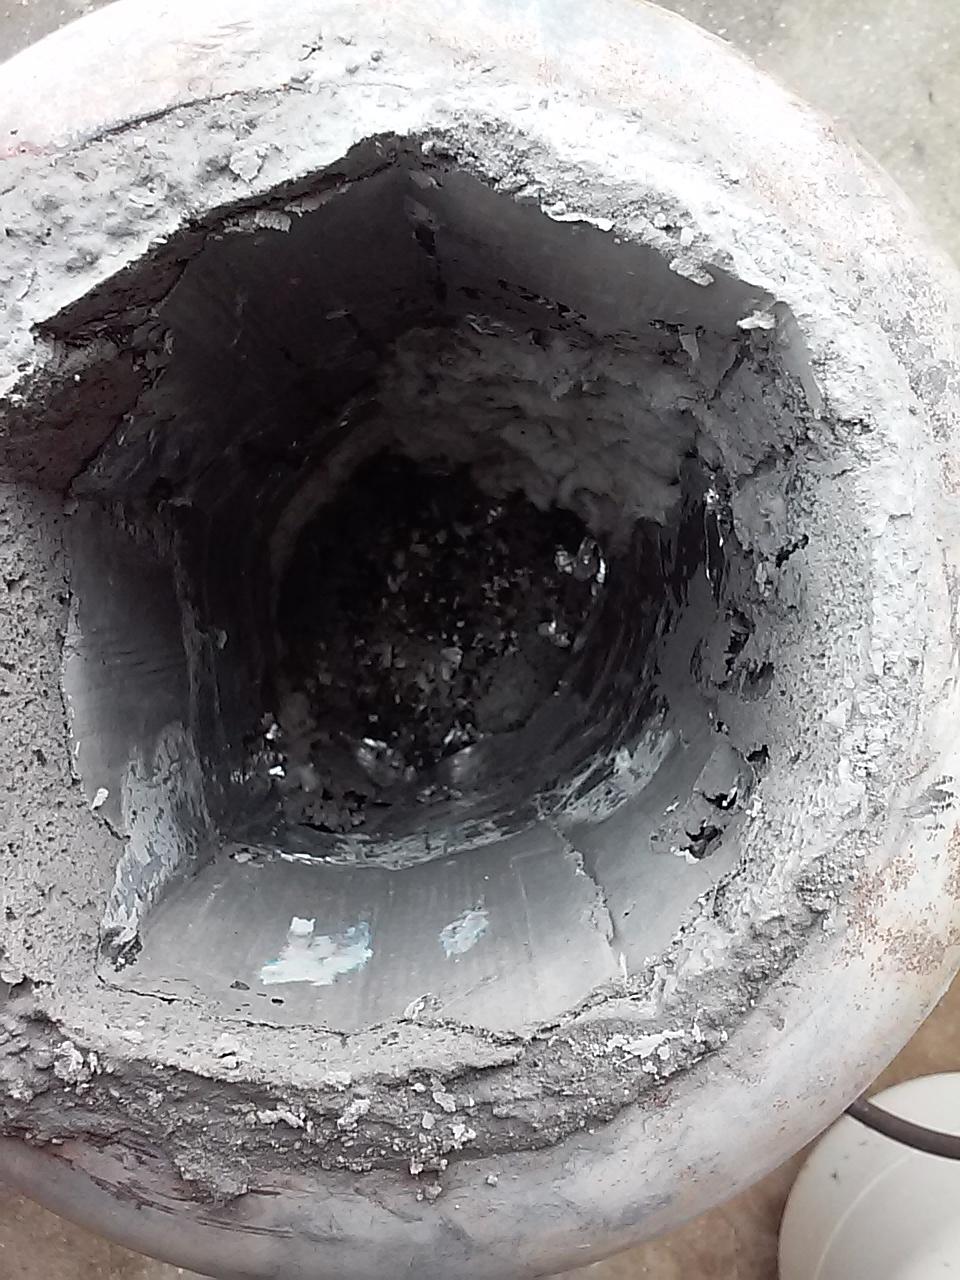
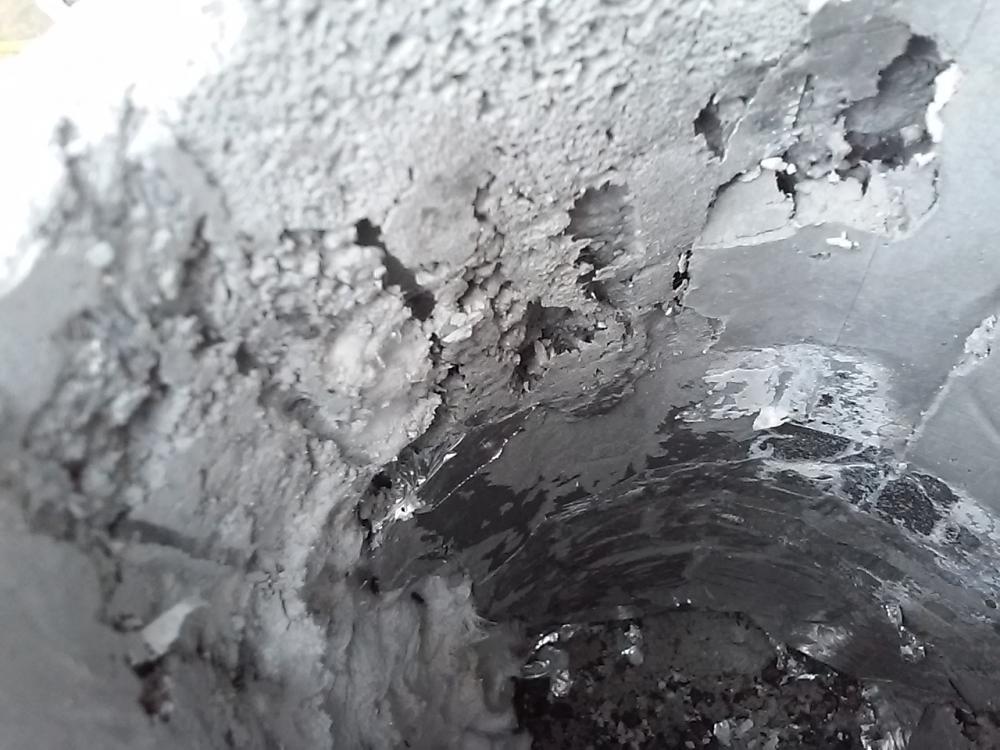
I've been trying to locate a freon bottle so that I could make both forges at the same time. I didn't want to mix up Mizzou and have too much left, if I could use it in a second build, but that hasn't happened so I decided to go ahead with the 30# propane tank build. I started out by marking the semi-circle around the carrying handle and cutting the tack welds off with a 4.5" grinder. Then I used my plasma cutter to cut through the tank around the semi-circle (it was full of water and standing upright, so no fumes could fill the tank). I cut straight across the open end of the semi-circle, thinking I would use that to build a shelf area later. It got interesting when I tried to cut my 1" inswool and insert it through the hole. It didn't fit, so being hard headed, and not cutting the hole out larger and circular, I decided to cut the inswool into 2 pieces. I got that installed and intalled a second layer of 1" inswool for 2" thickness, and off set the gaps. I forgot to rigidize the first layer, so I made up a little over 1/2 gallon of colloidal silica and sprayed the liner real well with my pump up sprayer. Not having a burner built yet I realized I had a turkey fryer with a high pressure valve, turned the tank upside down on it and began to cook it off for several hours, just to make sure that I had driven off all the water and rigidized the silica. Yesterday, I looked several places for a 6" sonic tube (cement form tube) to place in my forge so that I could cast the Mizzou around it into the inswool. No luck there, so I decided to use a 4" dryer vent and wrap it with cardboard until I got up to the 6" desired. I tried fitting that into the forge this morning and it would barely fit if I used a putty knife to hold the inswool back while trying to insert the tube. I decided there was no way I was going to be able to insert the tube and then pour the Mizzou down past the inswool. So I decided to use the plasma cutter to cut another 1/2" out all the way around the forge entrance. Boy what a mess, I used the shop vac to clean a lot of it out of the inswool, and had to pick a lot out by hand. Take it from me, go ahead and cut a nice 8" hole when you start, you will fight a lot less demons along the way. I decided to re-rigidize the liner. Then per Frosty's instructions I covered the outside of my liner tube with aluminum foil, I didn't have any plastic wrap, to keep it from drawing too much moisture off of the Mizzou and affecting it's thermal qualities. I was barely able to squeeze a transmission fluid funnel (long skinny) down between the tube and the inswool. I mixed up approximately half of my 55# bag of mizzou, to peanut butter consistency and place a layer about 1/2" think on the back, with the tank standing up. I then mixed it to a very thick soup and tried to pour it down the funnel using a 1/2" rod trying push it through and it would not go. I cut about 2" off the end of the funnel till I got a 3/4" opening and it still wanted to plug, so I finally added a little more water. Finally it was able to flow as long as I would fill the funnel and ram rod it down the hole with the rod. I know my tube got off center at the back, so I may have to address that issue, as it may only be about 1/4" thick on the bottom. I tried to use the 1/2" rod and an 1/8 rod to poke down through it to release any air bubbles, hopefully I got all of the larger ones out. Now to let it set for at least 24 hours or longer before pulling the tube. I know this is a long post, but I hope it helps someone else. Ken
-
Naturally Aspirated Ribbon Burner. Photo heavy.
customcutter replied to Frosty's topic in Ribbon Burners
Thanks for the reply. I also did a search to see if it was possible to tig weld Ti to SS, not even close. It fractures when cooling. It could be done if you welded to vanadium as an intermediary material between the two supposedly. I used the turkey fryer burner this morning to dry the inswool in the forge I'm building and it was amazing how much I'm starting to understand what's going on with the flame, now that I've been reading on the forum here. Two weeks ago your statement about flame front and velocity wouldn't have made any sense to me. Now after watching and playing with the burner this morning I know that as the burner was warming up I could keep cutting back on the fuel and maintain the flame on the burner. It actually took quite a bit of adjusting before I could get it to lite and stay lit. Way too much fuel and air from when I was last melting lead with it. -
Naturally Aspirated Ribbon Burner. Photo heavy.
customcutter replied to Frosty's topic in Ribbon Burners
This was one of the first threads I read when I found IFI, and I still haven't gotten ribbon burners out of my mind. I'm new to all of this so I'm try to pose a question, that hopefully advances the process of ribbon burners and their construction. All of the ribbon burners are made with refractory materials. I've been wondering if they could be made of pipe. I know that regular black pipe melts at too low of a temperature, stainless steel melts at around 2700*, but I have some titanium 1 1/2" that should be good to about 3000*. Will it burn up anyway? It's only 1 1/2" dia, is that a large enough plenum for a 3/4" NA burner? Any thought on how long to make it and how many or what size holes to put in it? I was thinking 1 row of holes straight down, and 2 other rows off to the side about 30*. What do you think Frosty? -
I guess I will beings you mentioned it. I was planning on starting at 3" from TDC about 1:30-2:00 position and aiming at the center of the floor but toward the rear at about 5-10* trying to start the swirling action to keep the flames in the forge. Is this about right?
-
I'm using Mizzou for a refractory. Will a bi-metal hole saw cut through the Mizzou if cast about 1/2" thick. I haven't cut through the inswool yet for the burners and would like to cast it without the holes for obvious reasons. Maybe I should try to carve a 1 1/2" dia piece of styrofoam and go ahead and cut the inswool? What have others tried for this procedure, I would rather cast than trowel in 2 or 3 sections due to gravity pulling it off the walls.
-
Don't worry Mikey. I intend to cut my holes with a plasma cutter and weld the inserts in place so they will be at a tangent.
-
Thanks Frosty, I'll wrap it with plastic wrap for sure. Should have a few Sunday papers around, don't take it on a daily basis.